Tag

Grilled Chicken

Browsing

Grilled Chicken with Peach Preserves and Chili Garlic Sauce

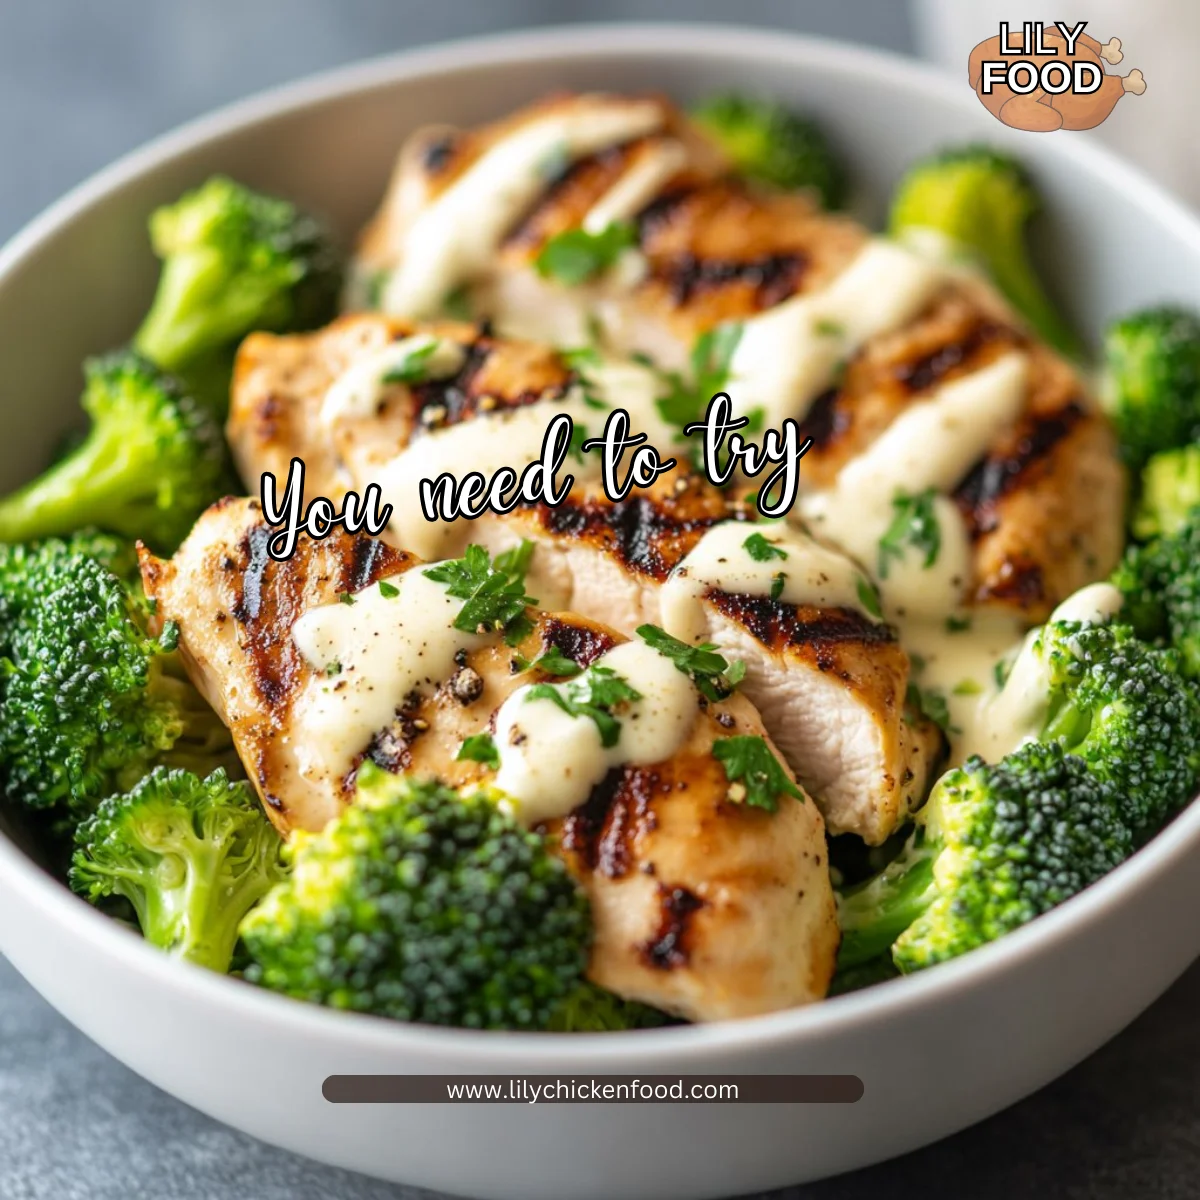
The kitchen smells like summer. Sweet peaches and a little garlic lift through the air as the grill hums outside. Pots clink and my family laughs at the table, ready to taste something simple and special.

I tested this grilled chicken with peach preserves and chili garlic sauce on busy weeknights and relaxed weekends. It sings at the table whether you have little ones or a hungry group of neighbors. If you like quick yet impressive grill recipes, you might also enjoy my grilled Asian chicken skewers with honey garlic sauce. Try them next time for a different flavor night.

Why this works

Grilled Chicken with Peach Preserves and Chili Garlic Sauce

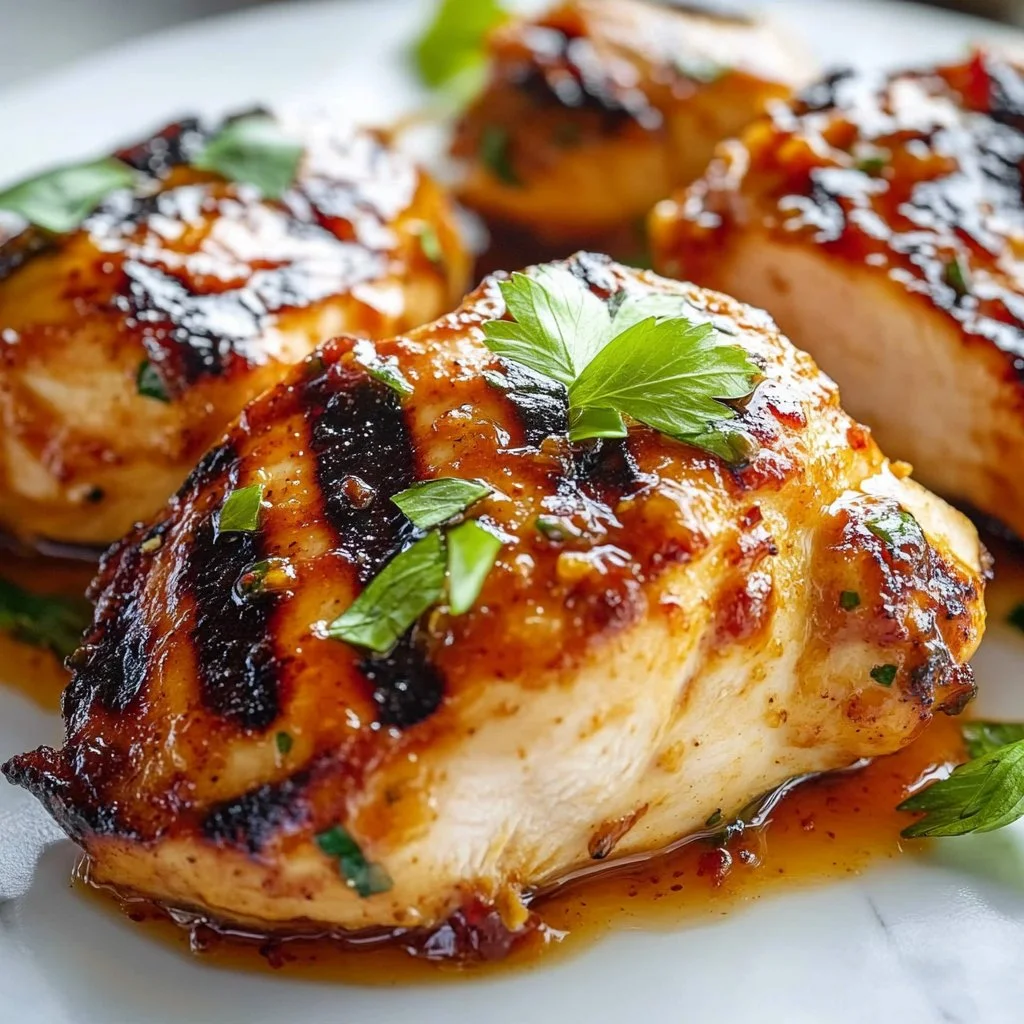
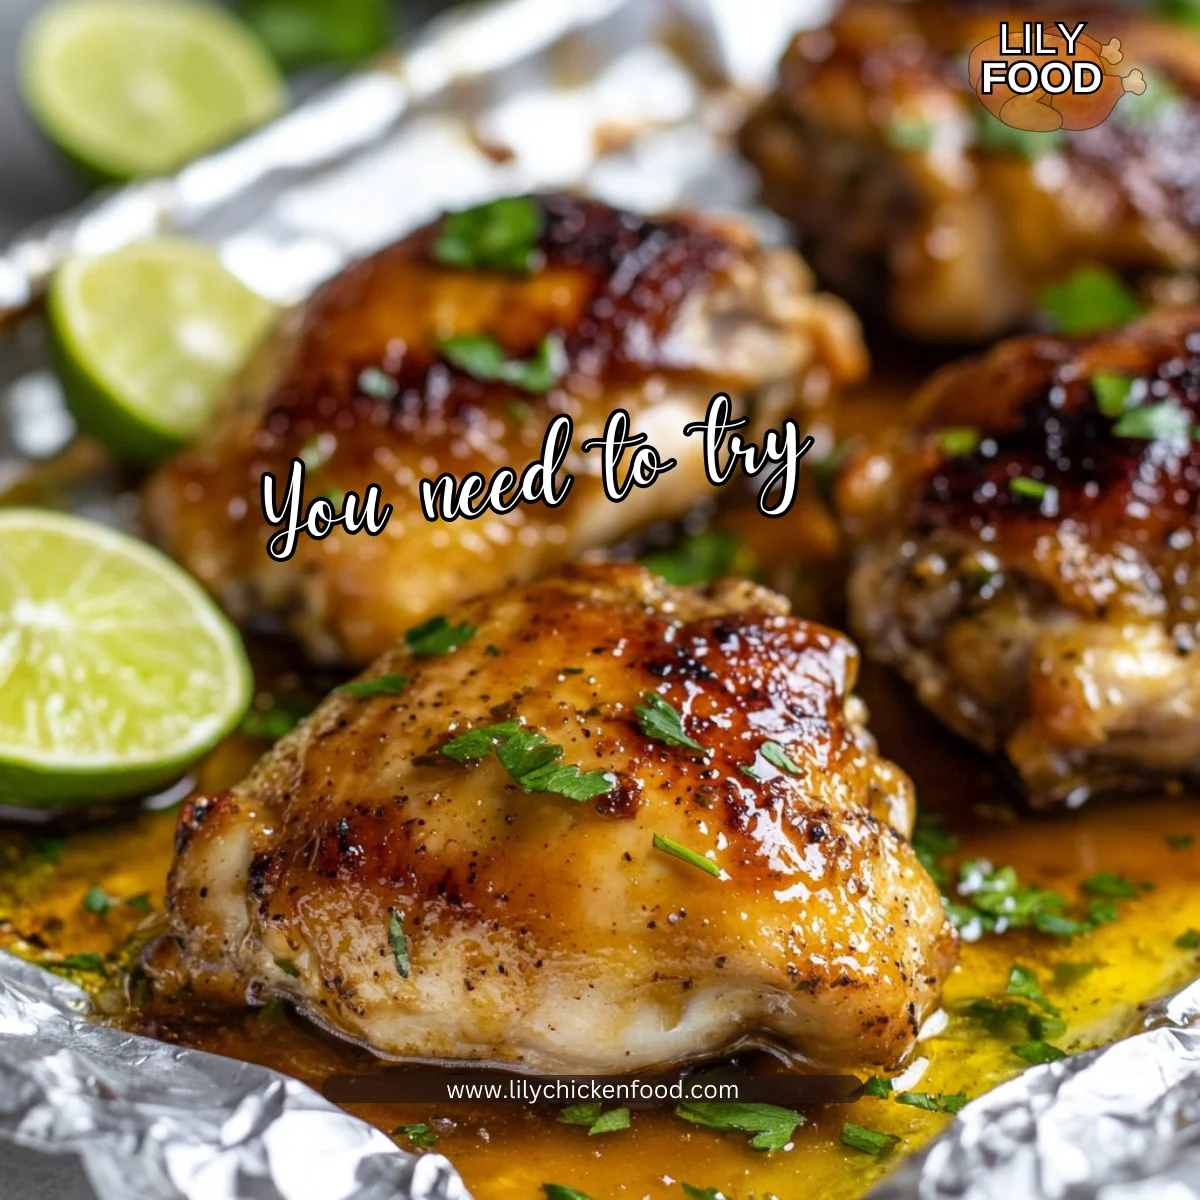
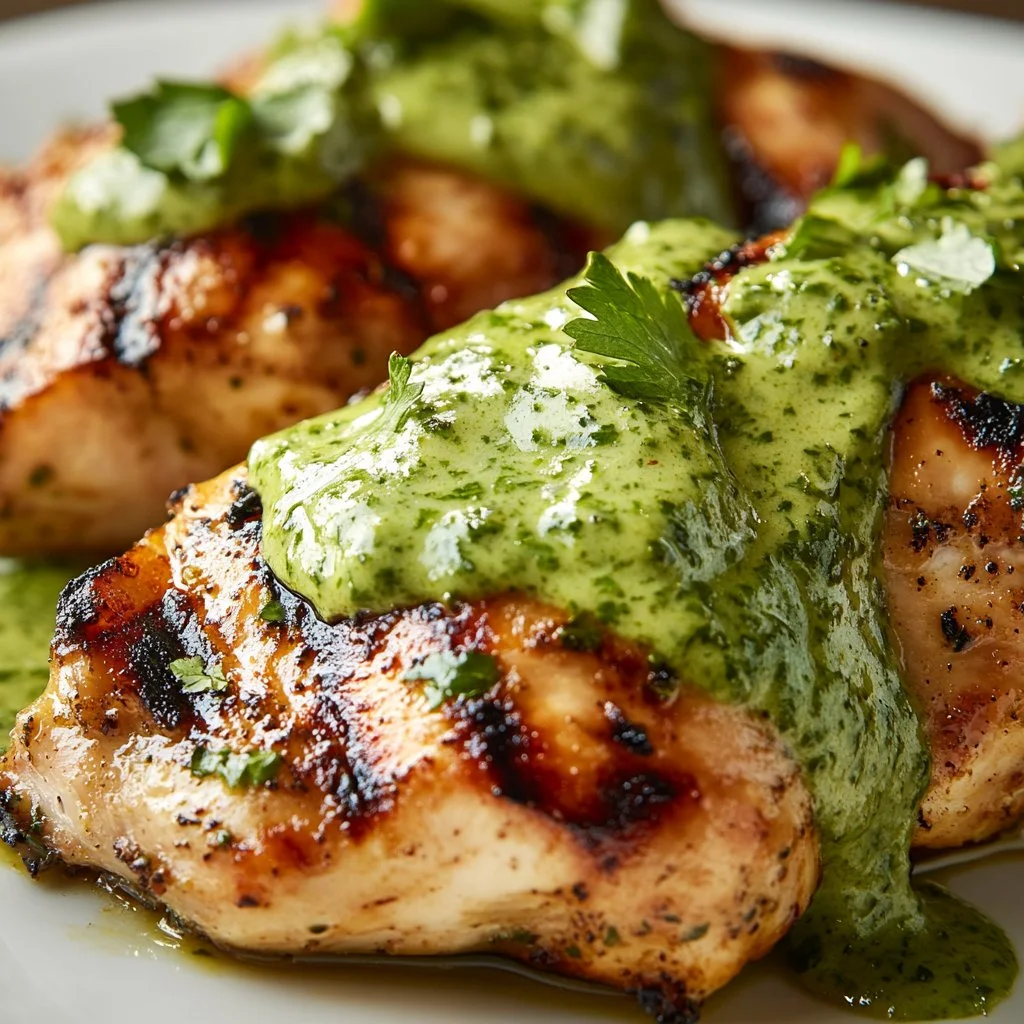
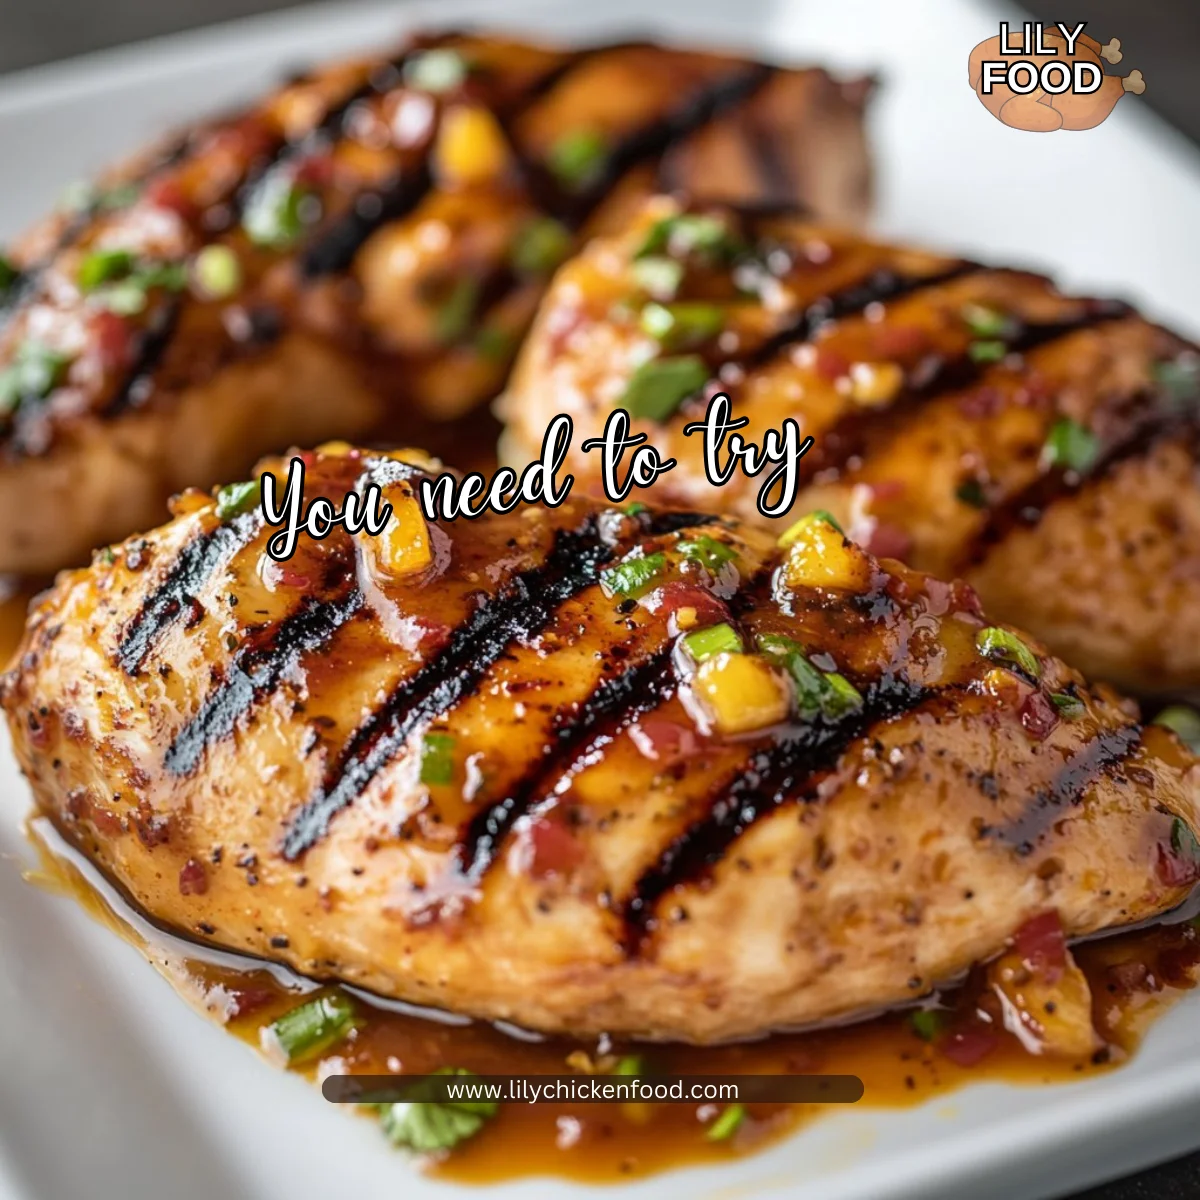
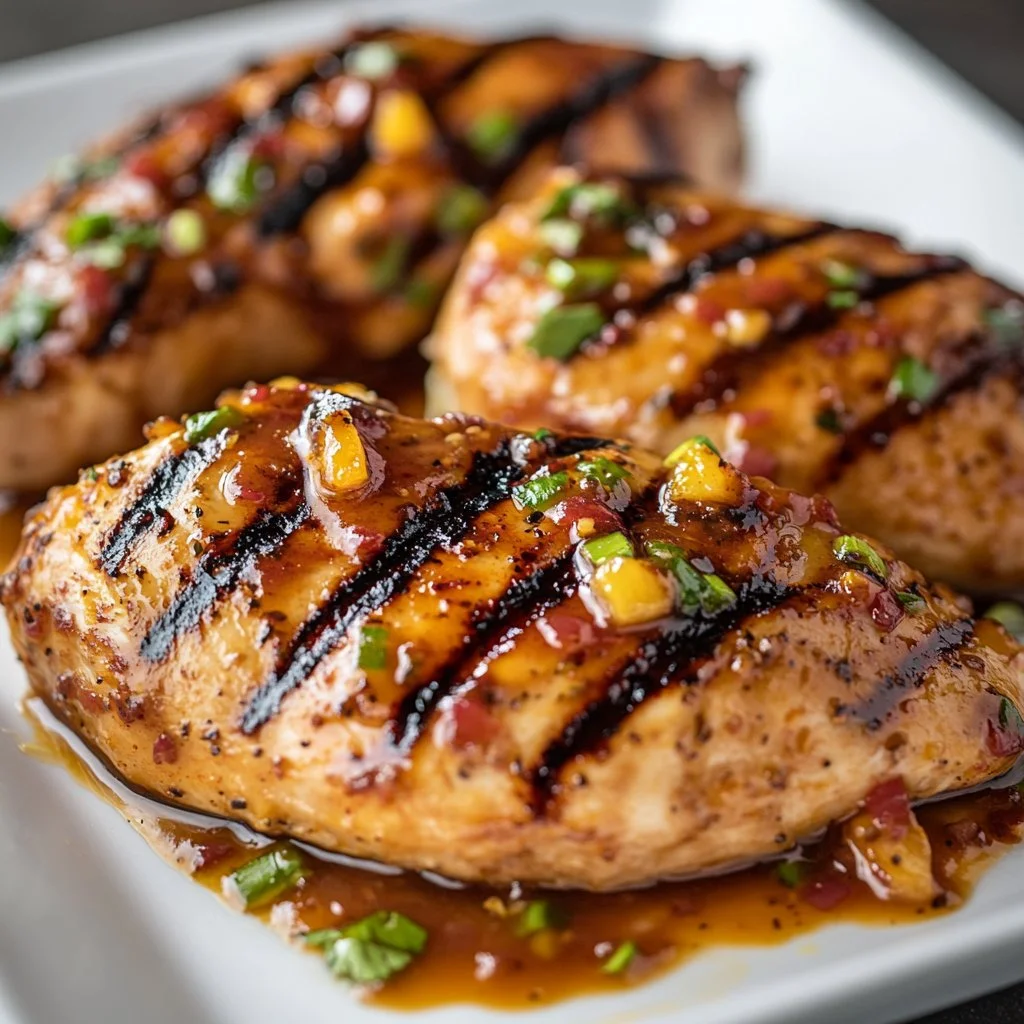
This dish blends sweet and spicy in a way kids and grownups can both enjoy. The peach preserves caramelize on the grill and the chili garlic sauce adds a bright, savory kick. That balance keeps the chicken moist and exciting.

The method is fast and forgiving. You do not need hours to marinate. This makes it a perfect weeknight recipe for busy families. I leaned on what I learned making other family-friendly bowls, like my lemon chili grilled chicken bowls with fresh cucumber salad, and found those same timing tricks help here too. Serve with a simple salad for a complete meal.

This recipe saves time while tasting special. You can prep the sauce in minutes and finish on the grill in under 20 minutes. That makes it ideal when you want comfort without a long night in the kitchen.

Process Overview

“This is where the magic happens—when the aroma fills the kitchen.”

Start by mixing the preserves and chili garlic sauce. Then heat the grill so you get a good sear. The plan is quick: sear, cook through, glaze in the last minute. The glaze caramelizes without burning if you add it right at the end.

I use the same timing sense I follow when I make chicken kofta with creamy garlic yogurt sauce; it helps me judge when to glaze and when to rest so the meat stays juicy. That recipe taught me the value of a short rest after grilling.

Ingredients

  • 4 boneless chicken breasts
    • Lily’s tip: Choose uniform thickness for even cooking. If one breast is much thicker, slice it in half or pound it gently to a consistent thickness.
  • 1/4 cup peach preserves
    • Lily’s tip: Use high-quality preserves with real fruit pieces when possible. The texture adds a lovely interest when the glaze caramelizes.
  • 2 tablespoons chili garlic sauce
    • Lily’s tip: Taste your chili garlic sauce first. If it is very spicy, start with 1 tablespoon and add more to taste.
  • Salt and pepper to taste
    • Lily’s tip: Season both sides. A light sprinkle of salt before grilling helps the crust form and enhances flavor.
  • Olive oil for grilling
    • Lily’s tip: Lightly brush the chicken and the grill grates with oil to prevent sticking and to get a clean sear.

If you like bold Mediterranean flavors, you can use the same pantry spirit as in my chicken shawarma with garlic sauce. The seasoning simplicity will feel familiar. See that recipe for another effortless family favorite.

Directions

  1. Preheat the grill to medium-high heat.
    • Encouraging note: A hot grill gives you a quick sear and those beautiful grill marks that make a simple dish feel festive. Let the grill heat for 10 minutes if you can.
  2. In a small bowl, mix together peach preserves and chili garlic sauce.
    • Encouraging note: Stir until smooth. Taste a little of the mixture and adjust for sweetness or heat. This is your chance to make the glaze sing.
  3. Season the chicken breasts with salt and pepper.
    • Encouraging note: Keep it simple. Even a small amount of seasoning on both sides lifts the whole dish and makes every bite flavorful.
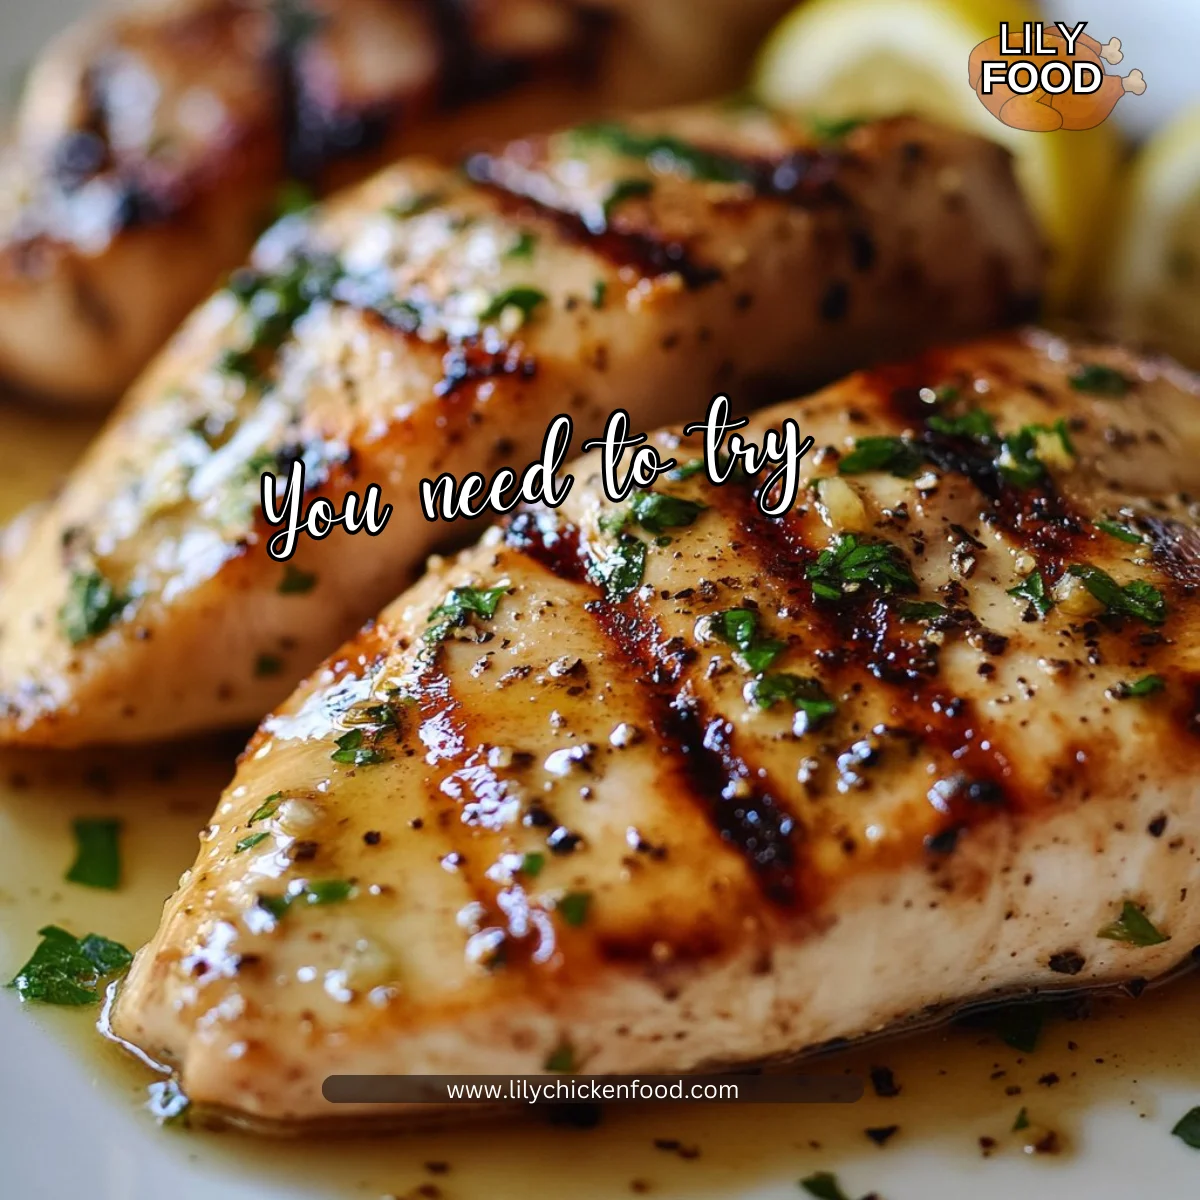
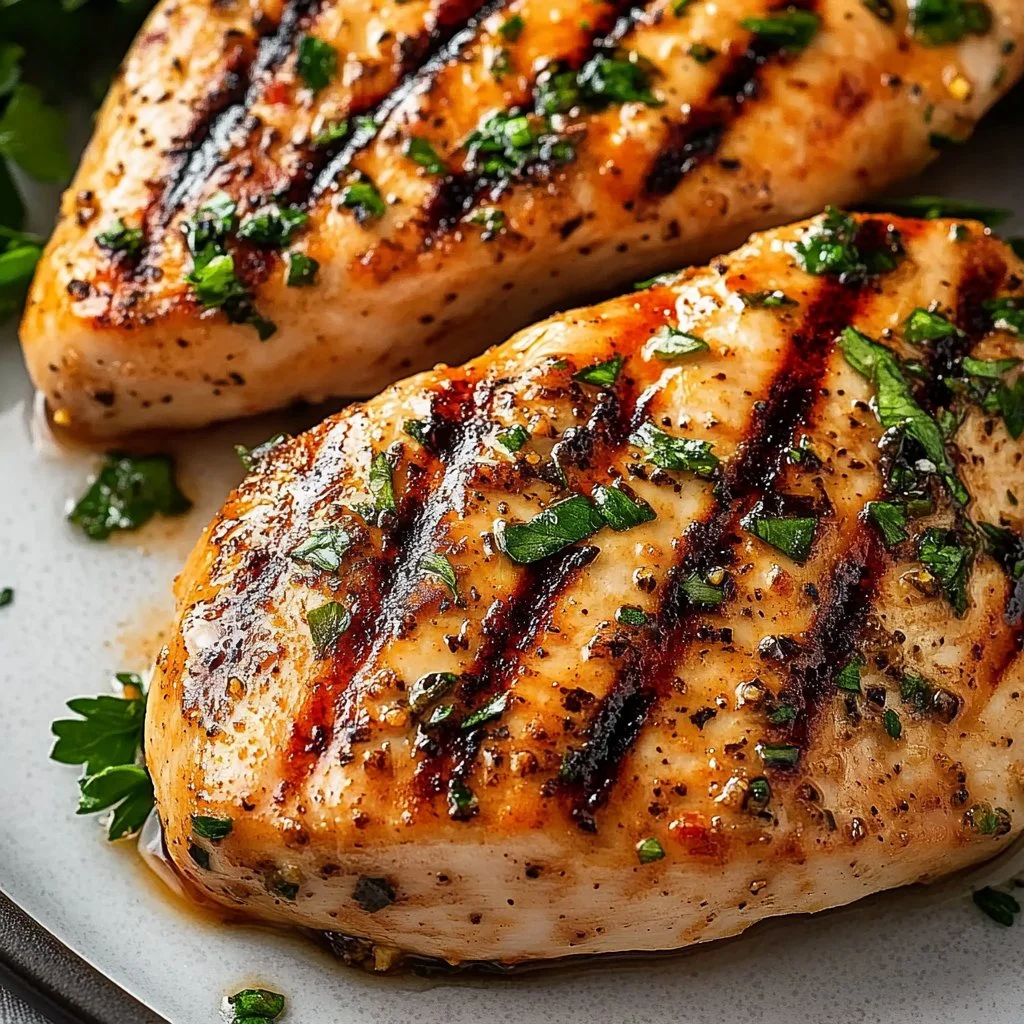
  4. Brush the chicken with olive oil and grill for about 5-7 minutes on each side or until fully cooked.
    • Encouraging note: Watch the chicken closely. Flip once and try to avoid pressing down. Check for an internal temperature of 165°F to ensure safe, juicy meat.
  5. During the last minute of grilling, brush the peach and chili mixture onto the chicken.
    • Encouraging note: Add the glaze at the end so it caramelizes but does not burn. You can brush a second light layer after removing from the grill for extra shine.
  6. Remove from grill and let rest for a few minutes before serving.
    • Encouraging note: Resting keeps the juices in the meat. While it rests, finish any sides and get the family to the table.

These steps are friendly to new cooks and comforting to seasoned grillers. If you are nervous about timing, use a reliable meat thermometer. I often rely on the same quick-check habits I use when I make my garlic herb chicken with mashed potatoes and glazed carrots for weeknight dinners. Pairing a simple starch makes this an easy family meal.

Serving

Grilled Chicken with Peach Preserves and Chili Garlic Sauce

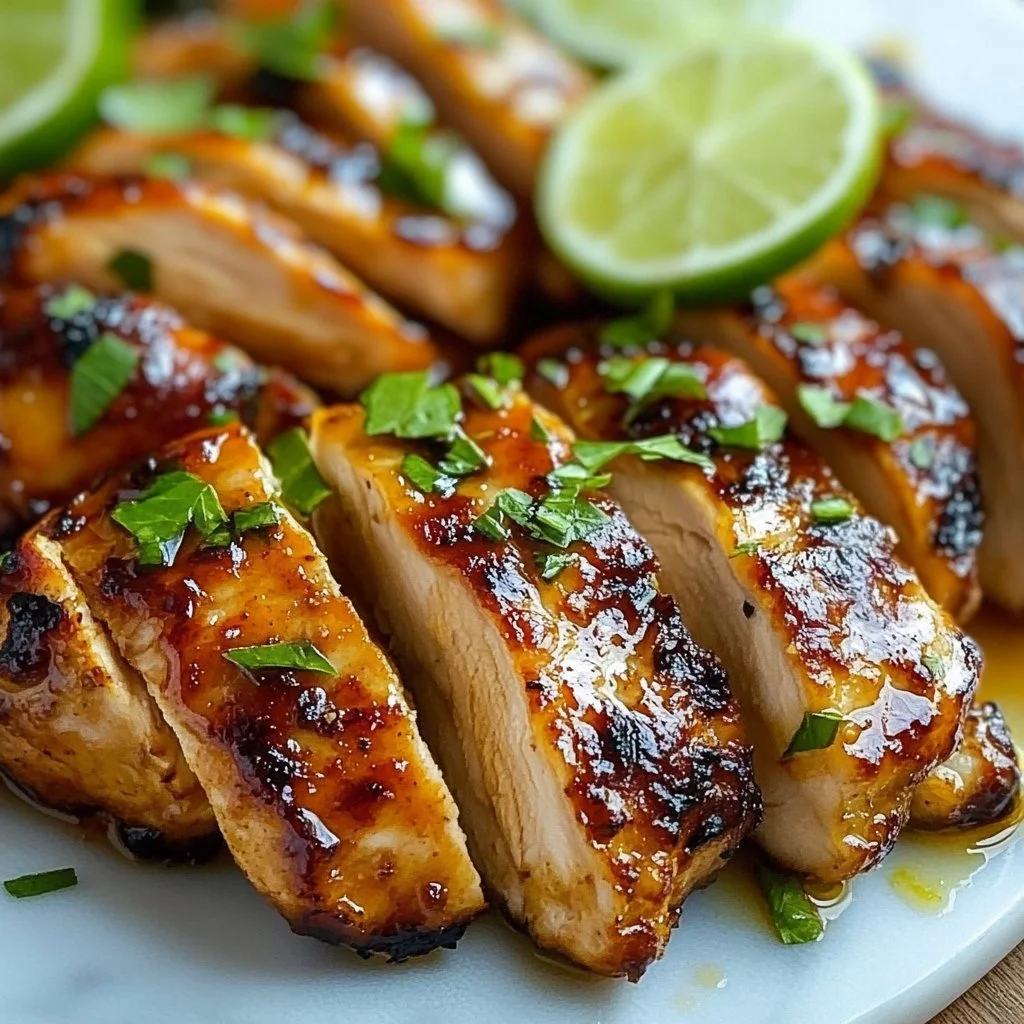
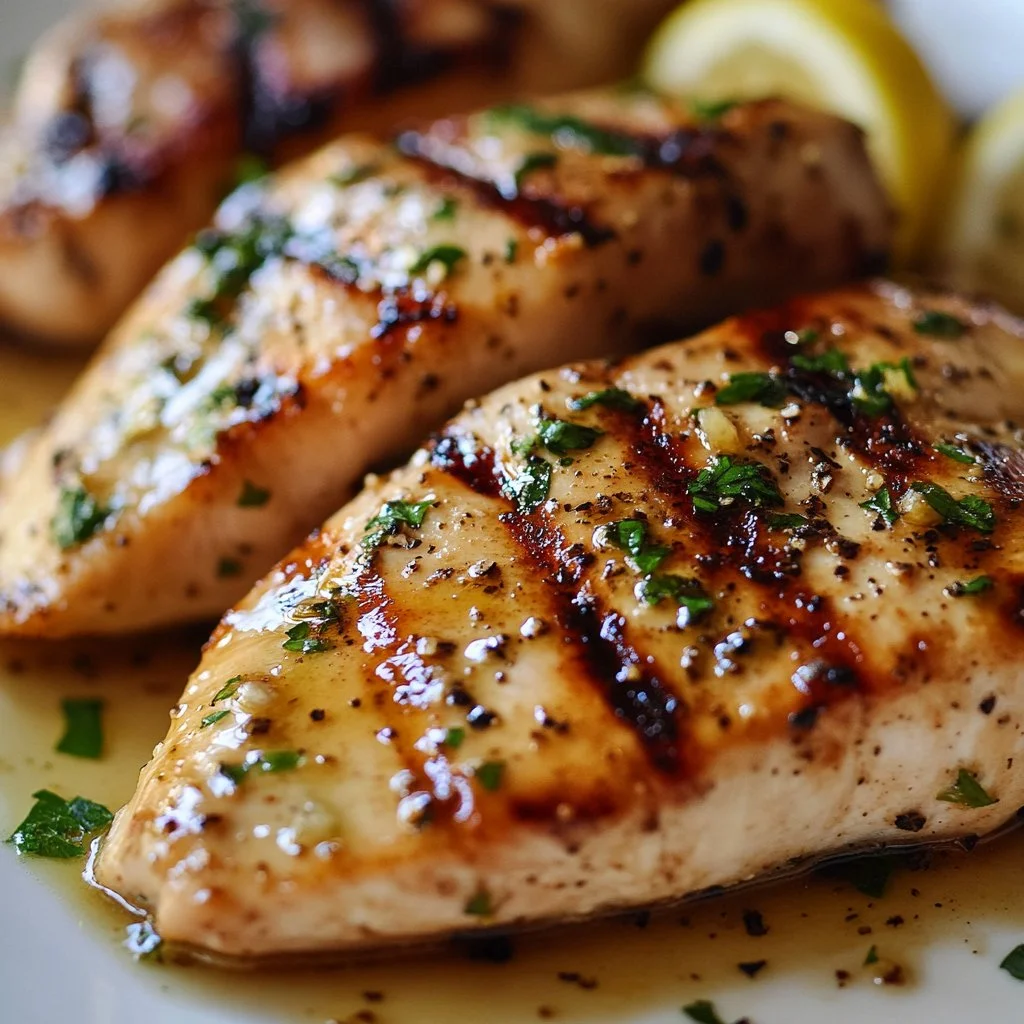
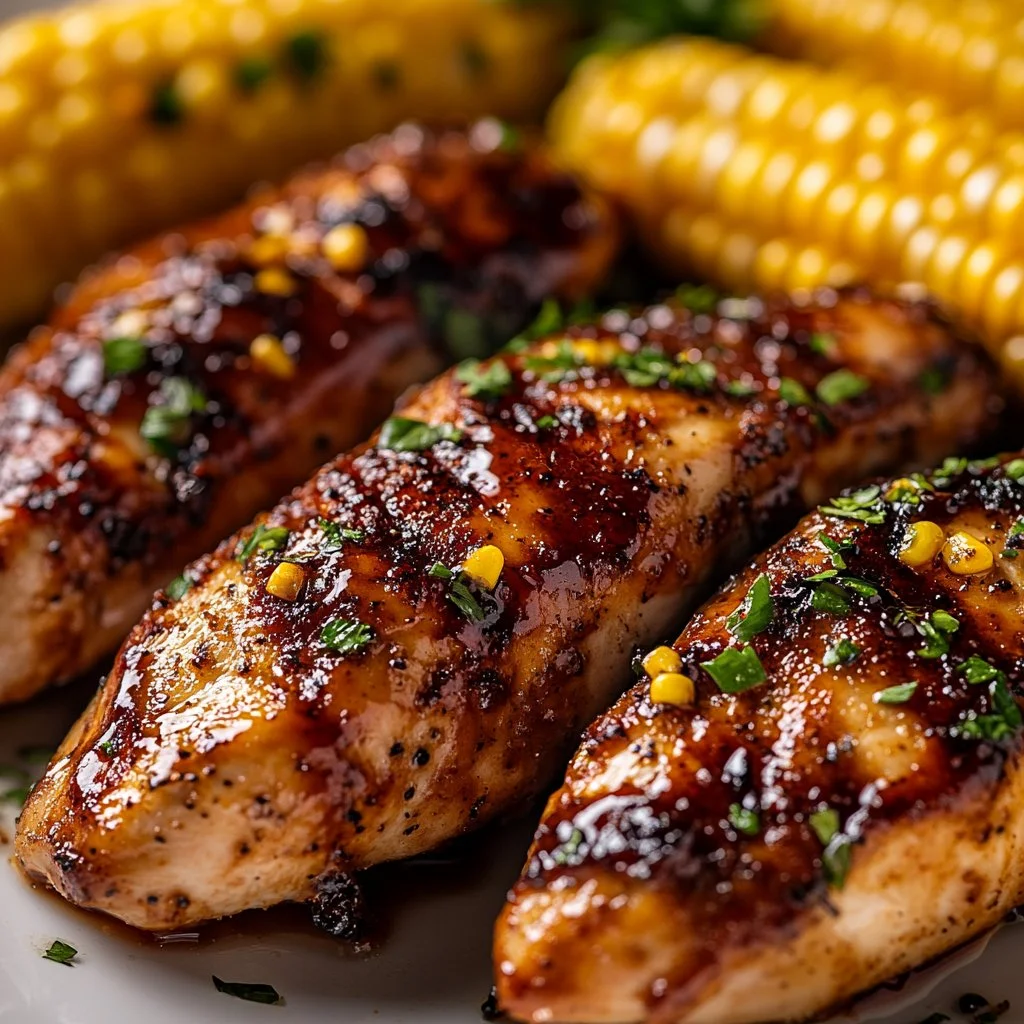
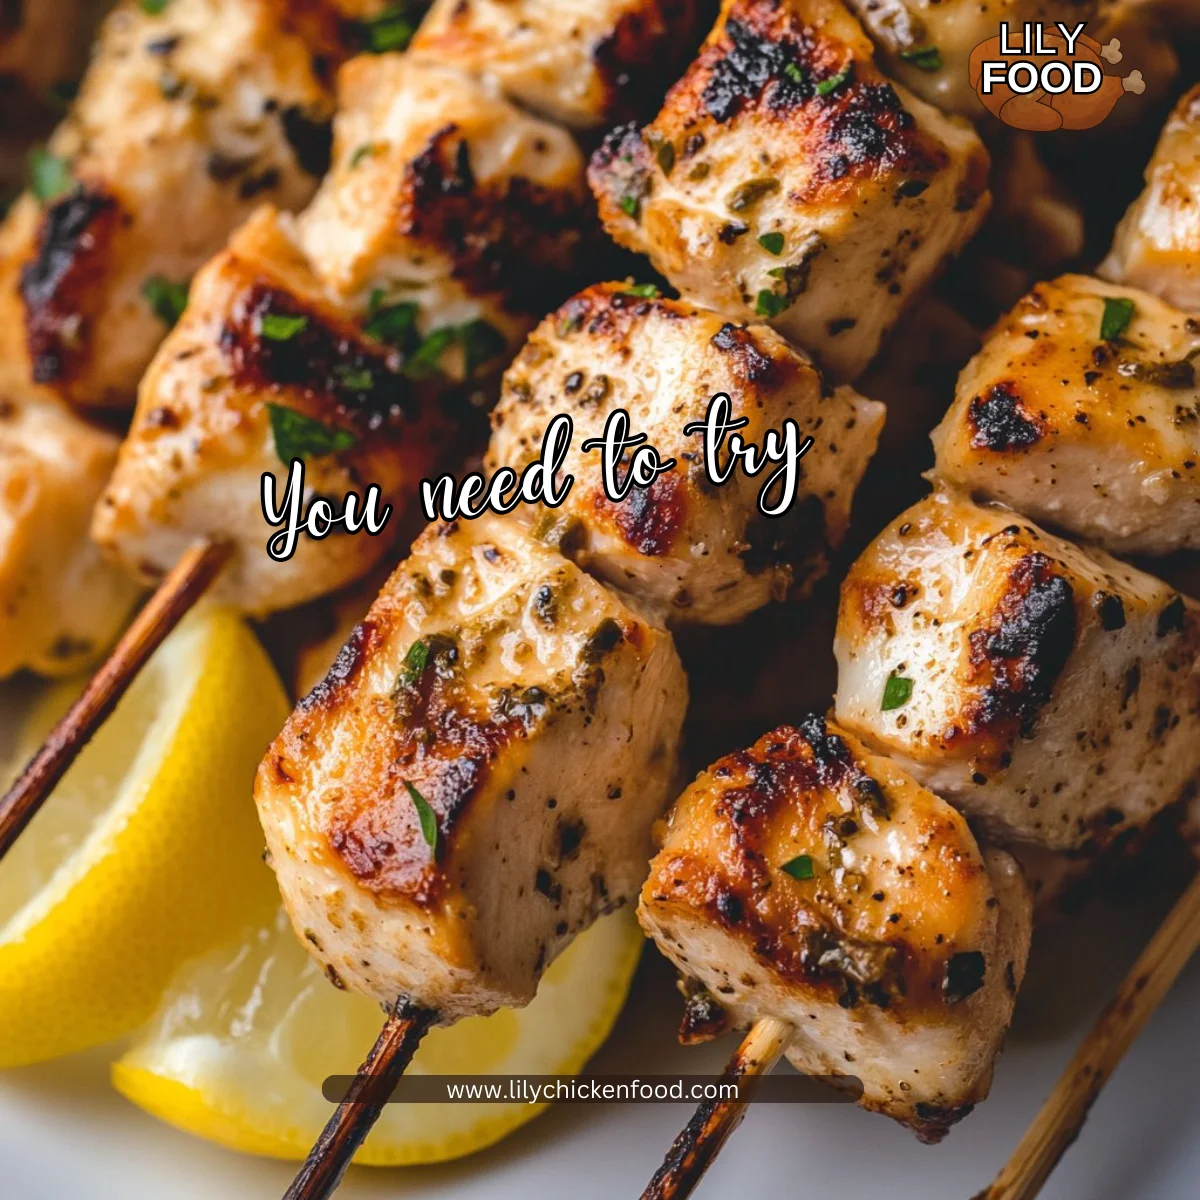
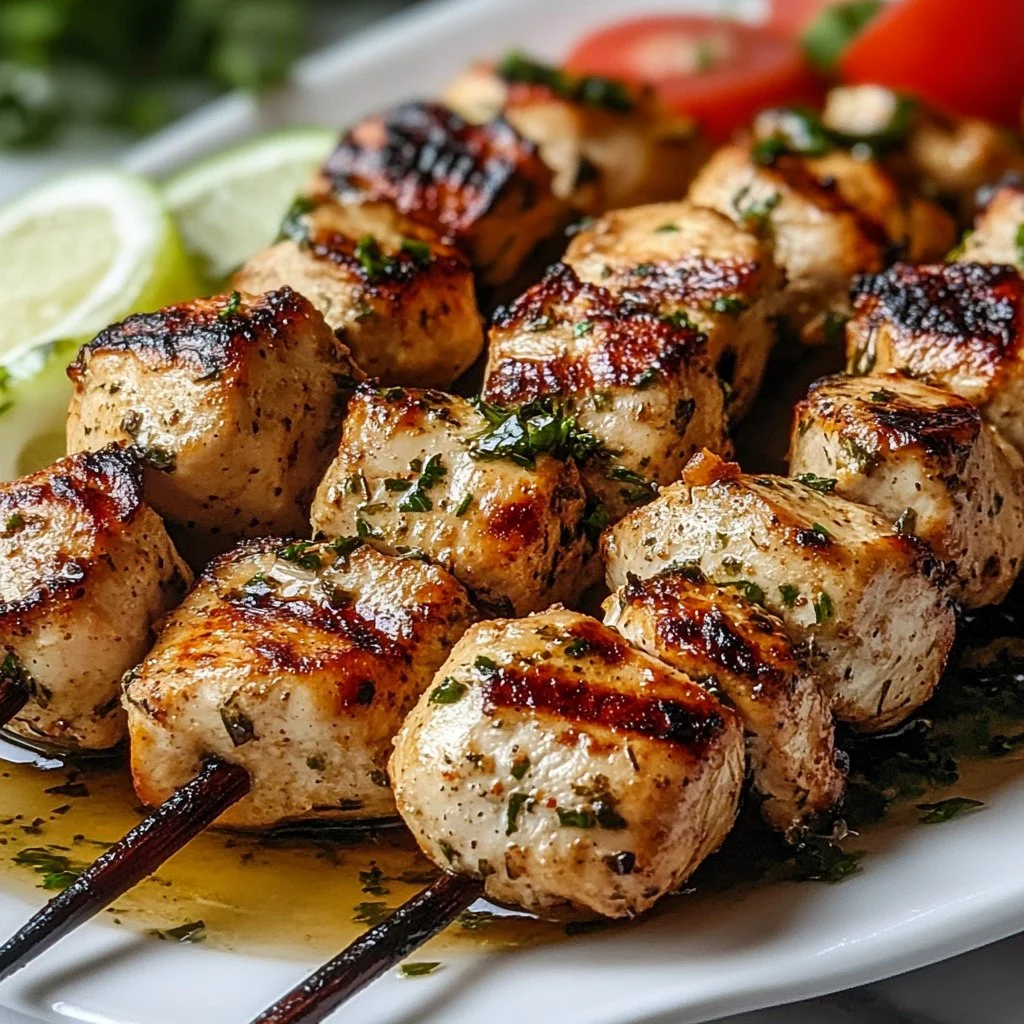
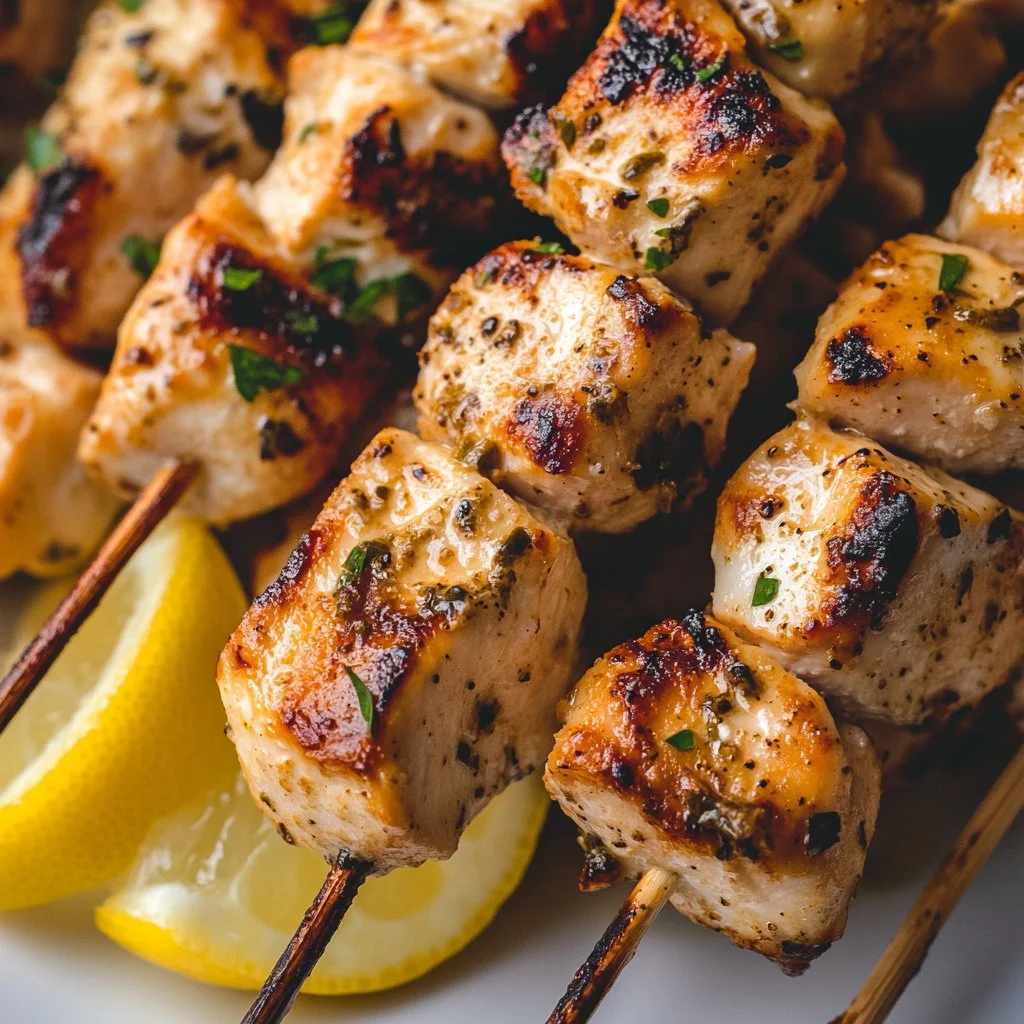
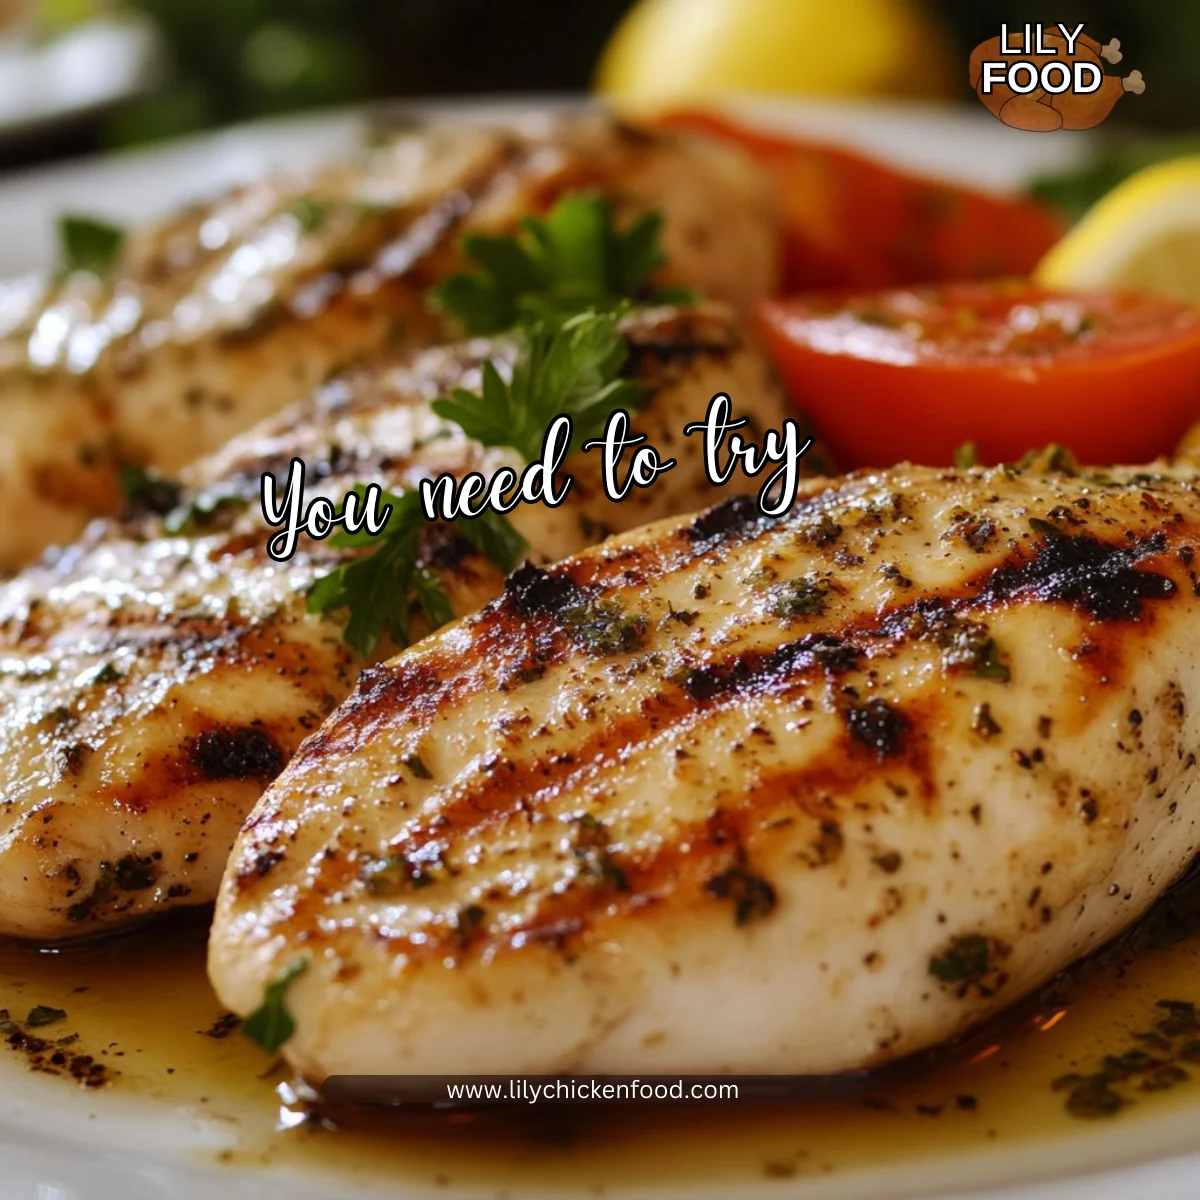
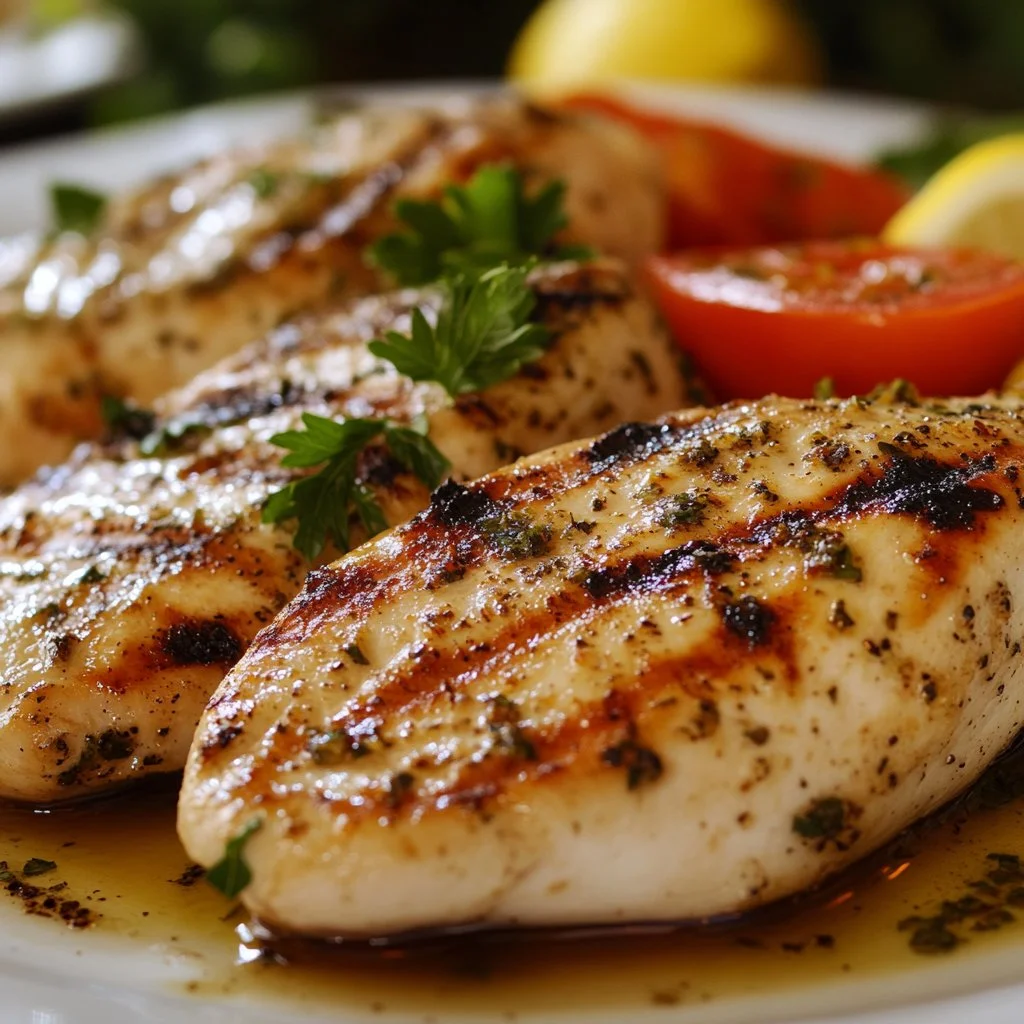
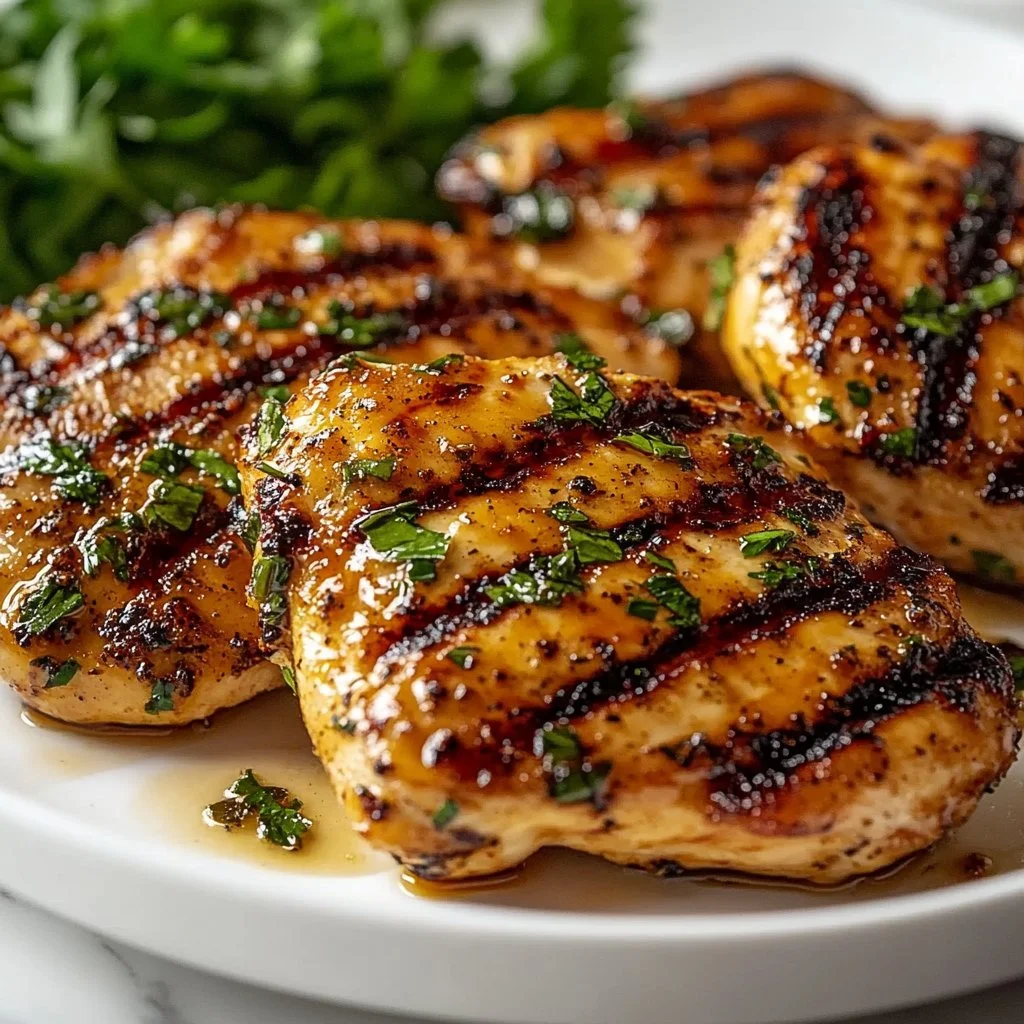
Serve this grilled chicken family-style on a large platter. Slice the breasts after resting and arrange them so the glaze shows on top. Add lemon wedges and a sprinkle of chopped parsley for color.

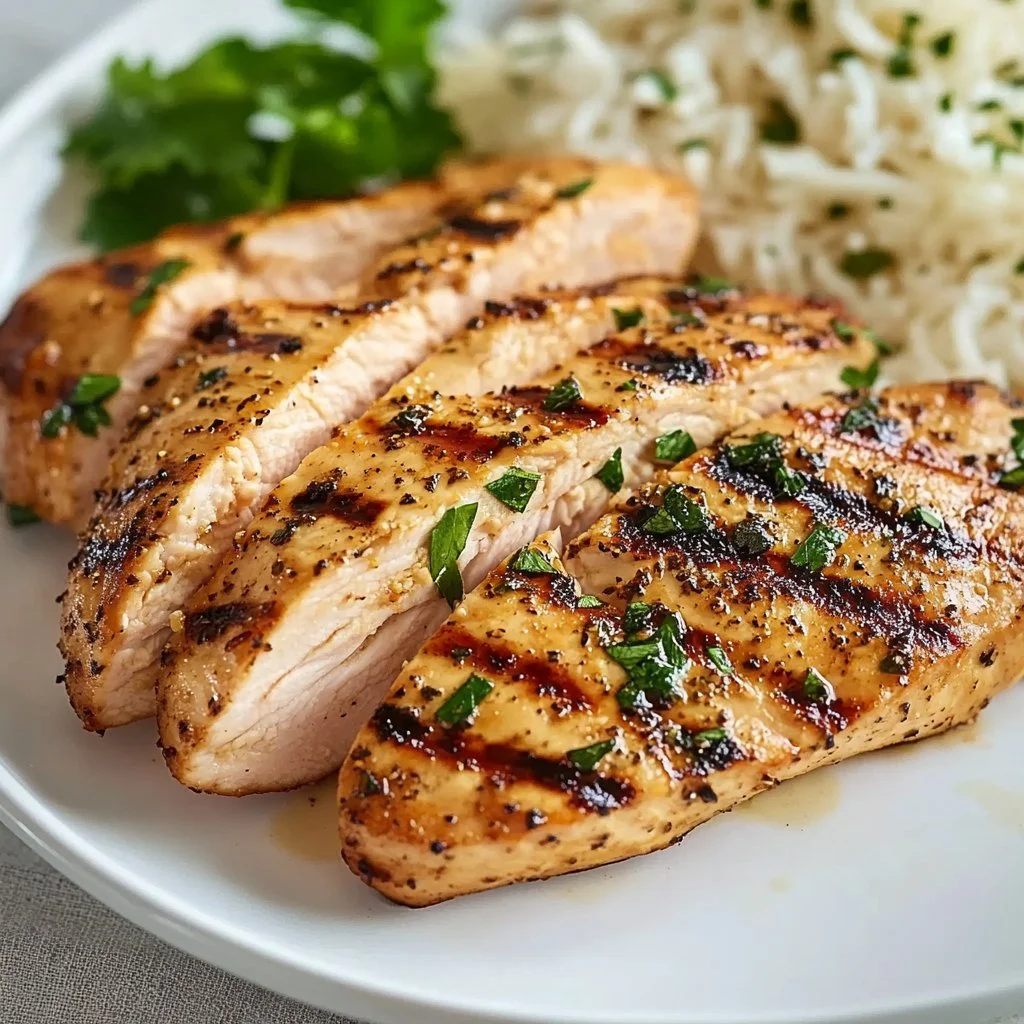
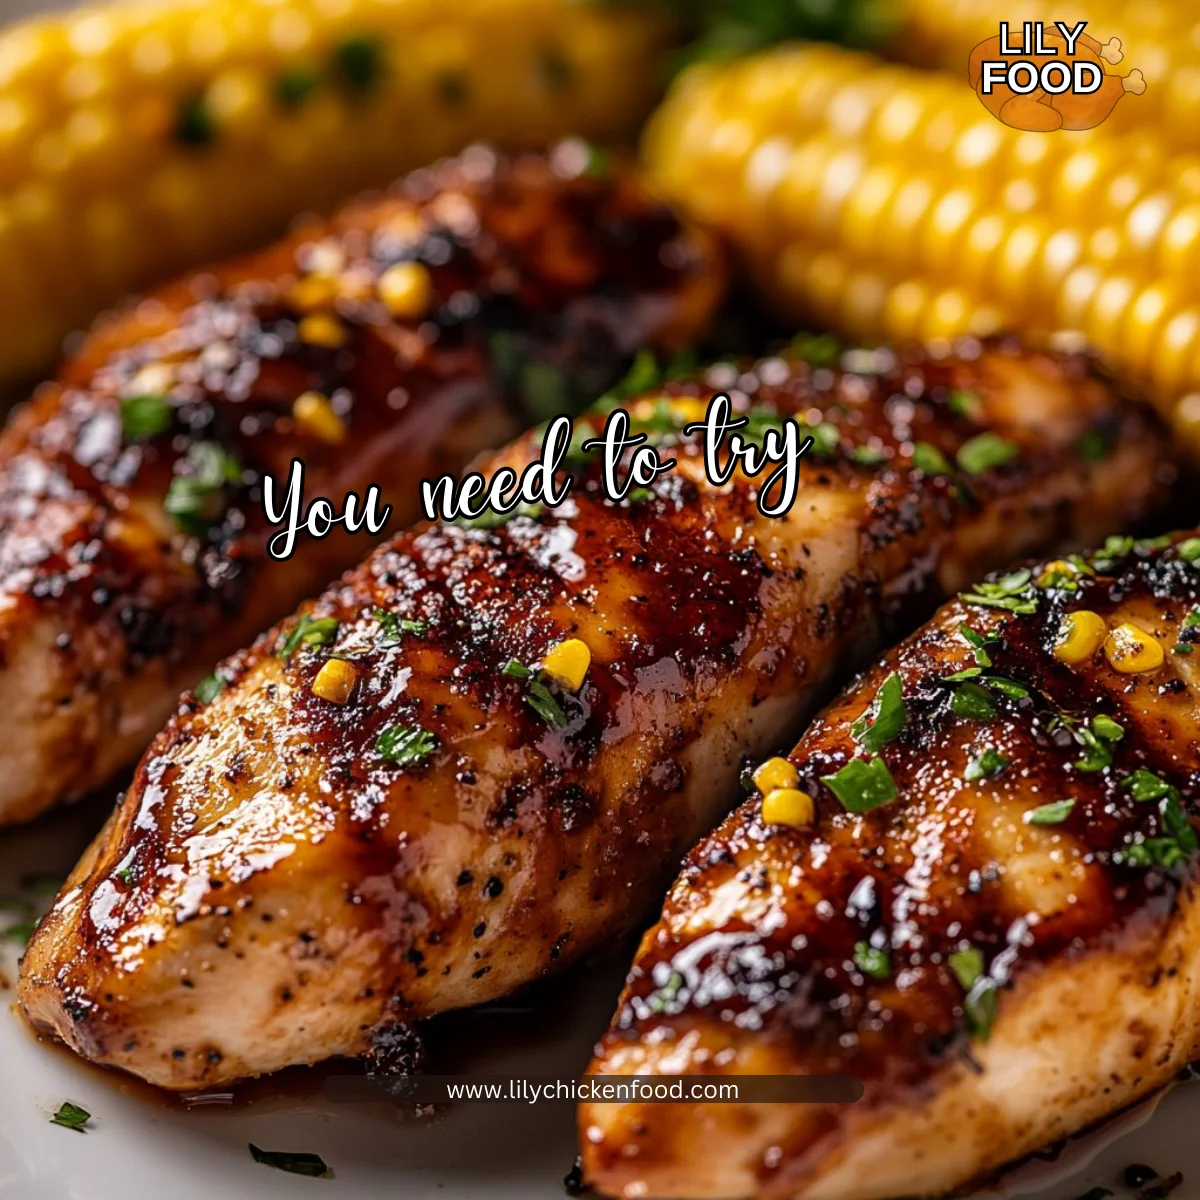
For sides, think simple: a green salad, grilled corn, or mashed potatoes. The sweet and spicy glaze pairs well with creamy and crisp textures. Let family members help themselves so dinner feels warm and communal. This is one of those recipes that invites conversation and smiles around the table.

Serving suggestions

  • Serve with a crisp green salad and vinaigrette for a lighter meal.
  • Add roasted sweet potatoes or grilled vegetables for a heartier plate.
  • Offer warm tortillas or rice for a playful night where everyone builds their own plate.

Storage

Store leftover chicken in an airtight container in the refrigerator. It will keep well for up to 3 days.

To reheat, place slices in an oven-safe dish, cover with foil, and warm at 325°F until heated through, about 10 to 12 minutes depending on thickness. For a quick reheat, microwave slices on medium power for 60 to 90 seconds, checking to avoid overcooking.

If you want to freeze, slice the chicken and place it in a freezer bag with a little of the glaze to prevent drying. Freeze for up to 2 months. Thaw overnight in the refrigerator before reheating gently.

Kitchen Notes

  • Use a meat thermometer to check for 165°F internal temperature. It takes the guesswork out of cooking chicken safely.
  • If your grill runs hot, move the chicken to indirect heat after searing to finish cooking without burning.
  • Make the glaze ahead and keep it in the fridge for up to 3 days. Warm it briefly before using.
  • For less sugar, swap half the peach preserves for unsweetened peach puree and adjust sweetness.
  • Clean and oil the grill grates well to prevent sticking and keep those lovely grill marks.

Variations

  • For picky eaters: Make a mild glaze by using 1 tablespoon chili garlic sauce and adding 1 tablespoon honey. Children often love the caramelized sweetness without too much heat.
  • For low-sugar diets: Use a reduced-sugar peach jam or make a quick peach puree with fresh peaches and a squeeze of lemon, skipping added sugar.
  • For a glaze boost: Stir in 1 teaspoon soy sauce or 1 teaspoon rice vinegar to add depth.
  • For a gluten-free option: This recipe is naturally gluten-free with the basic ingredients. If you add soy sauce, choose tamari or a gluten-free soy sauce.
  • For a smoky flavor without a grill: Use a grill pan on the stove and add a drop or two of liquid smoke to the glaze for a hint of smoke.

FAQ

Q: Can I use chicken thighs instead of breasts?
A: Yes. Thighs are forgiving and stay juicy. Grill them a little longer, and check that the internal temperature reaches 165°F.

Q: How sweet will the final dish be?
A: The peach preserves bring sweetness, balanced by the heat from the chili garlic sauce. Adjust the ratio to make it sweeter or spicier to match your family’s taste.

Q: Can I make this on a gas grill and charcoal grill?
A: Yes to both. Gas grills heat quickly and offer steady control. Charcoal adds more smoky flavor. Watch timing closely with charcoal because temperatures can vary.

Q: Is the chili garlic sauce spicy for kids?
A: Some brands are spicy. Taste yours first and start with 1 tablespoon if you have little ones. You can always serve extra sauce on the side for adults.

Q: Any tips to prevent the glaze from burning?
A: Brush glaze on during the last minute only. If flames flare up, move the chicken to indirect heat until the glaze sets.

Conclusion

I hope this grilled chicken with peach preserves and chili garlic sauce becomes a go-to for your family. It brings bright, homey flavors with minimal fuss, and it shines when the family gathers around the table.

If you want another take on peach and chili flavors, I love the detailed method in Grilled Peach Chicken with Chili Garlic Sauce – Averie Cooks for inspiration. For a sweet chili peach glaze with a barbecue twist, see this version at Barbecue Chicken with Sweet Chili Peach Glaze – Taste And See.

Thanks for cooking with me. Come back soon for more warm, family-tested recipes from my kitchen.

Grilled Chicken with Peach Preserves and Chili Garlic Sauce

Prep Time 15 minutes
Cook Time 15 minutes
Total Time 30 minutes
Servings 4 servings
Calories 300
A quick and delicious grilled chicken recipe that combines sweet peach preserves and spicy chili garlic sauce for a flavorful, family-friendly meal.

Ingredients

Chicken Ingredients

  • 4 pieces boneless chicken breasts (Choose uniform thickness for even cooking.)
  • 1/4 cup peach preserves (Use high-quality preserves with real fruit pieces.)
  • 2 tablespoons chili garlic sauce (Taste first; adjust amount based on spice preference.)
  • to taste Salt and pepper (Season both sides to enhance flavor.)
  • for grilling Olive oil (Brush on chicken and grill to prevent sticking.)

Instructions 

Preparation

  • Preheat the grill to medium-high heat.
  • In a small bowl, mix together peach preserves and chili garlic sauce until smooth. Taste and adjust for sweetness or heat.
  • Season the chicken breasts with salt and pepper.
  • Brush the chicken with olive oil.

Cooking

  • Grill the chicken for about 5-7 minutes on each side or until fully cooked, checking for an internal temperature of 165°F.
  • During the last minute of grilling, brush the peach and chili mixture onto the chicken.
  • Remove from the grill and let the chicken rest for a few minutes before serving.

Notes

Serve family-style with lemon wedges and a sprinkle of parsley. Pair with a green salad or grilled vegetables for a complete meal.
Calories: 300kcal
Course: Dinner, Main Course
Cuisine: American, Grilling
Keyword: Chili Garlic Sauce, Grilled Chicken, Peach Preserves

Honey Lime Chicken

I can smell honey warming in the pan as I step into the kitchen. The lime brightens the air. The sizzle of garlic hitting warm oil makes the whole house feel like home.

This Honey Lime Chicken is one of those recipes that sounds fancy but is simple enough for a busy weeknight. My kids ask for it again and again, and I love that it comes together with little fuss. If you enjoy bold weeknight flavors, you might also like my other baked chicken favorite for family dinners that pairs well with mashed potatoes.

Why this works

Honey Lime Chicken

This recipe balances sweet, tangy, and a touch of heat. The honey caramelizes on the skin while lime cuts the richness. Garlic and soy sauce give it a familiar savory base that kids and adults both enjoy.

It saves time without sacrificing flavor. You can mix the marinade in one bowl and use a single baking sheet for easy cleanup. That makes it perfect for busy weeknights or casual family gatherings.

If you like smoky undertones, this method also translates well to the grill. For a grilled version with similar family-friendly appeal, try my easy skewer method for summer cookouts that keeps things simple and juicy.

Process Overview

“This is where the magic happens—when the aroma fills the kitchen.”

The process is straightforward. You rub garlic on the chicken, toss it with a quick honey lime marinade, bake until tender, and finish under the broiler for crisp skin. The whole routine is hands-on for just a few minutes and then mostly hands-off while the oven does its work.

I always tell families to use that oven time to set the table, steam a side, or get the kids to wash up. The result is a warm meal and a relaxed finish.

Ingredients

  1. 1 lb (500g) chicken thighs, deboned, skin-on
    Lily’s tip: Skin-on thighs get wonderfully crisp under the broiler. If you prefer less fat, trim excess skin but keep a little for flavor.

  2. 3 cloves garlic, minced
    Lily’s tip: Rub one clove across the chicken first for an extra garlic boost. Fresh garlic makes the sauce bright and aromatic.

  3. 2 tablespoons honey
    Lily’s tip: Use runny honey for easy mixing. If your honey is thick, warm it briefly to make mixing easier.

  4. 1.5 tablespoon soy sauce
    Lily’s tip: Regular soy sauce works well. For lower sodium, use a reduced-sodium variety but taste and adjust salt.

  5. 2 tablespoons lime juice
    Lily’s tip: Freshly squeezed lime juice gives a bright, clean acidity you cannot get from bottled juice.

  6. 3 dashes cayenne pepper
    Lily’s tip: Start light. You can always add more after cooking if your family likes heat.

  7. 1 big pinch salt
    Lily’s tip: Salt balances the sweetness. Use kosher salt for a cleaner flavor.

  8. Parsley, chopped, for garnish
    Lily’s tip: Fresh parsley adds a pop of color and freshness. Cilantro can be swapped in for a different herb note.

  9. Lime wedges, for serving
    Lily’s tip: A squeeze of lime at the end wakes up the whole dish. Keep wedges ready on the table for everyone to adjust to taste.

If you ever have leftovers, try shredding the cold chicken into a salad for lunch the next day. For a bright salad idea using citrus and crunchy greens, see my light chicken salad suggestion that turns leftovers into a quick meal.

Directions

  1. Preheat the oven to 400°F (207°C).
    Encouraging note: A hot oven helps the skin get crispy, so don’t skip preheating.

  2. Rub the minced garlic on the chicken thighs with your hands.
    Encouraging note: This step smells amazing. The garlic presses into the meat and flavors it deeply.

  3. Add honey, soy sauce, lime juice, cayenne pepper, and salt to the chicken. Stir to combine well.
    Encouraging note: Make sure every piece is coated. Taste a tiny bit of the mix if you like to fine-tune the balance.

  4. Transfer the chicken and the honey mixture to a baking sheet lined with aluminum foil. Cover the chicken with aluminum foil to prevent burning.
    Encouraging note: Lining the sheet makes cleanup fast. Covering keeps the sauce from scorching while the thighs cook through.

    Pro tip: Double the marinade if you want it to be more “saucy.” This makes great leftovers and extra sauce for rice.

  5. Bake the chicken for 20 minutes, or until cooked. If the sauce pools at the bottom of the foil, spoon and brush the sauce over the chicken.
    Encouraging note: Use a meat thermometer if you want precision. Chicken thighs are safe at 165°F. Basting keeps flavors concentrated.

  6. Broil the chicken for 1 minute or until the chicken skin is charred.
    Encouraging note: Watch closely during broiling. One minute can be enough, and that quick char gives beautiful color and texture.

  7. Remove from heat, garnish with parsley. Squeeze the lime wedges over the chicken before serving.
    Encouraging note: A final squeeze of lime brightens every bite. Let the chicken rest two minutes before serving so juices settle.

If you prefer a grilled finish, you can transfer the sauced thighs to a hot grill for a couple of minutes per side. For more grilling techniques and skewers that work well with honey-based sauces, see my step-by-step skewers guide for grilling tips that keep chicken juicy.

Serving

Honey Lime Chicken

Serve this Honey Lime Chicken family-style right from the baking sheet or on a large platter. Place lime wedges and extra chopped parsley on the side so everyone can add their favorite touch.

I love pairing this with simple sides: steamed rice, roasted vegetables, or a bright green salad. For a heartier meal, roasted garlic potatoes are a great match. If you want a ready-for-weeknight pairing, try my garlic parmesan potato idea for comfort and crunch that complements honey-forward chicken.

Lay out bowls of sides and let the family serve themselves. Kids often enjoy placing a lime wedge on their own plate. That small ritual makes dinner feel special.

Storage

Refrigerator: Place cooled chicken in an airtight container. Eat within 3 to 4 days. The sauce soaks into the meat overnight and tastes even better the next day.

Freezer: If you want to freeze, wrap portions tightly and freeze for up to 2 months. Thaw in the fridge overnight before reheating.

Reheating: Reheat covered in a 350°F oven until warmed through, about 10 to 15 minutes depending on portion size. For crisp skin, finish with 1 minute under the broiler.

Leftovers idea: Shred cooled chicken and warm briefly in a skillet with a splash of water or broth and an extra squeeze of lime. It makes a great filling for tacos, bowls, or salads.

Kitchen Notes

  • Use parchment or foil on your baking sheet for quick cleanup and less scrubbing.
  • If you do not have a broiler, increase oven temperature to 425°F for the last 5 minutes to help crisp the skin.
  • Let the chicken rest 2 minutes before slicing to keep it juicy.
  • Taste the marinade before adding salt. Soy sauce can be salty; adjust accordingly.
  • If you prefer milder garlic, sauté the minced garlic gently before adding to the sauce for a softer flavor.

Variations

  • For picky eaters: Reduce cayenne to 1 dash and offer lime wedges on the side. Serve with a mild starch like plain rice or buttered noodles.
  • Low-sodium option: Use reduced-sodium soy sauce and taste before adding extra salt. Increase lime to keep brightness.
  • Gluten-free: Use tamari instead of soy sauce and confirm your honey is pure and uncontaminated.
  • Paleo-friendly: Replace soy sauce with coconut aminos and keep the honey or substitute a bit of maple syrup if desired.
  • Quick stovetop finish: If you prefer, cook thighs skin-side down in a hot skillet for 6 to 8 minutes, flip, and finish in a 400°F oven for 8 to 10 minutes.

FAQ

Can I use chicken breasts instead of thighs?

Yes. Chicken breasts will cook faster and can dry out more easily. Reduce baking time and watch closely. Consider brining breasts briefly or using a meat thermometer to avoid overcooking.

Is this recipe safe for small children?

Yes. Reduce or omit the cayenne for young children. The honey and lime flavors are mild and generally kid-friendly.

How do I make the sauce thicker?

Simmer the sauce in a small saucepan for a few minutes before adding to the chicken. This reduces water and concentrates the flavors for a thicker glaze.

Can I marinate the chicken ahead of time?

Absolutely. Marinate up to 4 hours in the refrigerator for extra flavor. For best texture, do not marinate much longer than that as the lime can begin to break down the meat.

What can I serve with this for a quick weeknight meal?

Serve with steamed rice, roasted broccoli, or a simple green salad. A warm grain like quinoa or farro also pairs nicely.

Conclusion

Thank you for cooking with me today. I hope this recipe becomes a go-to for your weeknight dinners and family gatherings. If you want a version with more bold, fresh flavors, you might enjoy this similar take with cilantro and honey on chicken thighs that inspired my sauce technique Honey Lime Chicken Thighs – Julia’s Album. For another family favorite that balances sweet and tangy in a simple pan-baked dish, take a look at this easy honey lime recipe Honey Lime Chicken Recipe – Fountain Avenue Kitchen.

Happy cooking, and remember that the best dishes are the ones shared around the table.

Honey Lime Chicken

Prep Time 10 minutes
Cook Time 25 minutes
Total Time 35 minutes
Servings 4 servings
Calories 350
A simple yet flavorful dish that combines sweet honey, tangy lime, and savory garlic, perfect for busy weeknights.

Ingredients

Main Ingredients

  • 1 lb chicken thighs, deboned, skin-on (Skin-on thighs get wonderfully crisp under the broiler.)
  • 3 cloves garlic, minced (Rub one clove across the chicken for an extra garlic boost.)
  • 2 tablespoons honey (Use runny honey for easy mixing.)
  • 1.5 tablespoons soy sauce (Regular soy sauce works well; use reduced-sodium for lower sodium.)
  • 2 tablespoons lime juice (Freshly squeezed gives a bright acidity.)
  • 3 dashes cayenne pepper (Start light; add more after cooking if desired.)
  • 1 big pinch salt (Salt balances the sweetness.)
  • parsley, chopped, for garnish (Fresh parsley adds a pop of color and freshness.)
  • lime wedges, for serving (A squeeze of lime wakes up the dish.)

Instructions 

Preparation

  • Preheat the oven to 400°F (207°C).
  • Rub the minced garlic on the chicken thighs.
  • Add honey, soy sauce, lime juice, cayenne pepper, and salt to the chicken. Stir to combine well.

Cooking

  • Transfer the chicken and honey mixture to a baking sheet lined with aluminum foil. Cover with aluminum foil.
  • Bake for 20 minutes or until cooked through.
  • Broil the chicken for 1 minute or until the skin is charred.
  • Remove from heat, garnish with parsley, and squeeze lime wedges over the chicken before serving.

Notes

For leftovers, shred the cold chicken into a salad. Store in the refrigerator for 3-4 days or freeze for up to 2 months.
Calories: 350kcal
Course: Dinner, Main Course
Cuisine: American
Keyword: Chicken Recipes, Easy Dinner, Family-Friendly, Honey Lime Chicken, Weeknight Meal

Grilled Chicken Breast

I can still hear the sizzle. The lemon and garlic hit the air, and the kitchen smells like home. When the grill starts to sing, the family drifts in, drawn by the promise of something simple and perfect for dinner.

I have learned a few tricks over the years from cooking for my family every night. If you want a shortcut for busy evenings, try these grilled chicken breasts alongside my favorite recipe for air fryer chicken breasts. They pair beautifully and keep dinner varied.

Why this works

Grilled Chicken Breast

This recipe balances flavor and speed. The marinade is simple but bright, and it does not need hours to work. That makes it ideal for weeknights and for families that like reliable meals without fuss.

The chicken cooks quickly on a hot grill. A short sear locks juices in and gives you a golden crust. Children and adults both love the mild lemon-garlic flavor, and it pairs easily with many side dishes.

If you are collecting easy family favorites, this method fits into meal planning and leftovers. For more ideas that keep weeknights easy, see my list of deliciously easy chicken breast recipes that the whole family will accept.

Process Overview

“This is where the magic happens—when the aroma fills the kitchen.”

Start with a simple marinade and give the chicken a little time to rest. Heat the grill to medium-high so you get a strong sear. Flip once and use an instant-read thermometer to check for 165°F. Let the breasts rest before slicing to keep them juicy.

If you like skewers or small pieces for picky eaters, you might enjoy my approach to Asian chicken skewers, which follow some of the same grilling rules.

Ingredients

  • 4 chicken breasts
    Tip: Choose even-sized breasts or pound them gently to a uniform thickness. That helps them cook evenly and avoids dry edges.

  • 1/4 cup olive oil
    Tip: Good extra virgin olive oil adds flavor, but you can use regular olive oil for higher heat stability when grilling.

  • 2 tablespoons lemon juice
    Tip: Fresh lemon juice brightens the marinade. Bottle lemon juice works in a pinch, but fresh gives a cleaner flavor.

  • 2 cloves garlic, minced
    Tip: Mince garlic finely so it infuses the oil. For a milder garlic note, grate it with a microplane.

  • 1 teaspoon dried oregano
    Tip: Dried oregano is concentrated. Use fresh oregano if you have it, but increase the amount by about three times.

  • Salt and pepper to taste
    Tip: Season generously. Salt brings the flavors forward and helps the meat hold moisture while it cooks.

Personal note: I like to taste the marinade before adding chicken. If the lemon feels too sharp, add a pinch of sugar or a little more oil to balance it. For a deeper savory note, a splash of soy sauce or a dab of mustard works well.

For a different baked flavor profile, my balsamic baked chicken breast recipe uses similar seasoning ideas but changes the cooking method.

Directions

  1. In a bowl, whisk together olive oil, lemon juice, garlic, oregano, salt, and pepper.
    Note: Whisk until the mixture looks a little emulsified. Taste a small drop and adjust salt or lemon. You are building flavor, and this step is forgiving.

  2. Add the chicken breasts to the marinade and let it sit for at least 30 minutes.
    Note: If you have more time, 2 hours is fine in the fridge. Even 30 minutes gives the chicken a lift. Pat the chicken dry before grilling to get a good sear.

  3. Preheat the grill to medium-high heat.
    Note: Aim for a grill surface temperature around 400°F to 450°F. Clean grates and a light oiling prevent sticking. Use tongs and a spatula for safe handling.

  4. Grill the chicken for 6-7 minutes on each side or until fully cooked (internal temperature reaches 165°F).
    Note: Resist flipping too often. One flip gives a clean sear. Use an instant-read thermometer in the thickest part to confirm 165°F. If a thinner area reaches temp sooner, remove it earlier.

  5. Remove from the grill and let rest for a few minutes before serving.
    Note: Resting for 5 minutes lets the juices redistribute. Slice across the grain for tender pieces. This step is simple but essential for juicy chicken.

A friendly tip: If you are short on time, you can marinate while you preheat the grill and prep sides. The whole process moves quickly once everything is ready.

For a creamy finish or to pair with mashed sides, try serving it with flavors similar to my creamy garlic parmesan chicken. The textures and flavors complement each other.

Serving

Grilled Chicken Breast

Serve family-style on a large platter. Arrange the sliced breasts in a single layer and drizzle any resting juices or a little extra olive oil on top. Garnish with lemon wedges and a sprinkle of chopped parsley.

This chicken works with many sides. Try a simple green salad, roasted vegetables, or quick couscous. For a complete comfort meal, place the platter in the middle of the table and let everyone help themselves.

For picky eaters, slice the chicken thinly and place it next to a few dipping options. Mild ranch, plain yogurt, or a squeeze of lemon can make it more appealing to younger palates.

Storage

Refrigerator: Store leftover grilled chicken in an airtight container for up to 4 days. Slice before storing to make reheating faster and more even.

Freezer: For longer storage, wrap the cooled chicken tightly and freeze for up to 3 months. Thaw overnight in the fridge before reheating.

Reheating: Reheat gently to avoid drying. Use a low oven at 300°F for 10 to 15 minutes, or reheat slices in a skillet over medium-low heat with a splash of chicken broth or water. Microwaves work in a pinch; cover the chicken and reheat in 30 second bursts to keep moisture.

Tip: Use leftover chicken cold in salads and sandwiches. It tastes fresh and saves time when school lunches or quick dinners are needed.

Kitchen Notes

  • Shortcut: Pound breasts to even thickness to cut cooking time and ensure even doneness.
  • Equipment: An instant-read thermometer removes guesswork and prevents overcooking.
  • Time saver: Marinate in a sealable bag to get full flavor with less cleanup.
  • Safety: Always wash hands and surfaces after handling raw chicken.
  • Double duty: Cook extra for meal prep. Use leftovers in wraps, salads, or quick pasta for the week.

Variations

  • For picky eaters: Slice the breasts into thin strips before grilling and serve with a mild dipping sauce. Small pieces cook quickly and usually get easier acceptance from children.
  • Low-carb option: Serve over mixed greens with avocado and a drizzle of vinaigrette instead of starchy sides.
  • Paleo or Whole30: Use the same marinade but confirm your oil and seasonings fit the plan. Skip any added sugars or non-compliant sauces.
  • Herb-forward: Swap oregano for fresh rosemary and thyme for a more aromatic profile.
  • Spicy twist: Add 1/2 teaspoon of smoked paprika and a pinch of red pepper flakes for heat.

These small changes keep the core method while meeting different diet needs in your home.

FAQ

Q: How do I know the chicken is cooked without a thermometer?
A: Look for clear juices and firm texture. Slice the thickest part; it should be white with no pink. I still recommend an instant-read thermometer for safety and consistency.

Q: Can I use bone-in chicken breasts instead?
A: Yes, but plan for a longer cook time. Bone-in pieces take more time to reach 165°F. Use indirect heat after searing to finish them evenly.

Q: Is it safe to marinate overnight?
A: Yes. Overnight marinating is safe in the refrigerator and can deepen flavor. Avoid marinating at room temperature.

Q: Can I grill this on a stovetop grill pan?
A: Absolutely. Preheat the pan and follow the same timing. You may need slightly more time and should watch for hot spots.

Q: What sides pair best for a family meal?
A: Simple sides like roasted potatoes, steamed green beans, or a big salad work well. The goal is to keep it easy so you can enjoy time with your family.

Conclusion

I hope this grilled chicken becomes one of your go-to recipes for busy nights and relaxed weekend meals. If you want another tested technique from a chef, take a look at Once Upon a Chef’s guide to perfectly grilled chicken breasts for extra tips on timing and seasoning.

For a flavor-forward take that many home cooks love, check out this Delish recipe for the best grilled chicken breast to compare seasonings and methods.

Thanks for cooking with me. Enjoy that first bite when the kitchen fills with that lemon-garlic scent and everyone comes running.

Grilled Lemon Garlic Chicken Breasts

Prep Time 30 minutes
Cook Time 15 minutes
Total Time 45 minutes
Servings 4 servings
Calories 250
A quick and flavorful grilled chicken recipe that features a bright lemon-garlic marinade, perfect for busy weeknight dinners.

Ingredients

For the Marinade

  • 1/4 cup olive oil (Good extra virgin olive oil adds flavor.)
  • 2 tablespoons lemon juice (Fresh lemon juice brightens the marinade.)
  • 2 cloves garlic, minced (Mince finely for better infusion.)
  • 1 teaspoon dried oregano (Use fresh oregano if available, increasing the amount.)
  • to taste salt and pepper (Season generously.)

Main Ingredients

  • 4 pieces chicken breasts (Choose even-sized breasts or pound to an even thickness.)

Instructions 

Marinade Preparation

  • In a bowl, whisk together olive oil, lemon juice, garlic, oregano, salt, and pepper.
  • Add the chicken breasts to the marinade and let it sit for at least 30 minutes, or up to 2 hours in the fridge.

Grilling

  • Preheat the grill to medium-high heat (around 400°F to 450°F).
  • Grill the chicken for 6-7 minutes on each side or until fully cooked (internal temperature reaches 165°F).
  • Remove from the grill and let rest for a few minutes before serving.

Serving

  • Serve family-style on a large platter with sliced breasts and any resting juices or extra olive oil on top, garnished with lemon wedges.

Notes

Store leftovers in an airtight container for up to 4 days. Can be frozen for up to 3 months.
Calories: 250kcal
Course: Dinner, Main Course
Cuisine: American
Keyword: Easy Chicken Recipe, Family Recipe, Grilled Chicken, Lemon Garlic Chicken, Quick Dinner

Blackstone BBQ Chicken and Corn

As the sun dips low in the sky, the savory aroma of grilled chicken begins to fill the air. The background hum of sizzling on the griddle mingles with laughter and chatter. You can almost feel the warmth of togetherness wrapping around your family, as you gather for a delicious meal. Today, we’re diving into a delightful recipe that’s perfect for your next family gathering: Blackstone BBQ Chicken and Corn.

Why This Works

Blackstone BBQ Chicken and Corn

This recipe is a winner for busy families. It combines tender, juicy chicken with sweet, fresh corn. The best part? You can whip it up in under thirty minutes! Everyone will love the smoky BBQ flavor. With just a few simple steps, you can have a hearty meal that appeals to both kids and adults.

When time is tight after a long day, recipes like this become essential. Everything cooks perfectly on the griddle, saving you from juggling multiple pots and pans. Plus, the clean-up is easy, making room for more quality time with your loved ones.

Process Overview

“This is where the magic happens—when the aroma fills the kitchen.”

When you prepare Blackstone BBQ Chicken and Corn, you’re not just cooking—you’re creating an experience. The sound of chicken sizzling on the hot griddle, paired with the sweet aroma of corn caramelizing, fills your home with warmth and comfort. This is a meal that brings everyone together.

Ingredients

  • 1 1/2 pounds chicken breasts (or boneless, skinless chicken thighs)
  • 1 tablespoon Worcestershire sauce
  • 3 to 4 cloves garlic (finely minced)
  • Kosher salt
  • Pepper
  • BBQ seasoning blend
  • 2 tablespoons melted butter
  • 4 ears corn on the cob (shucked)
  • Cooking oil of choice
  • Optional: BBQ sauce

Tips for BBQ Sauce

I always recommend making your BBQ sauce at home with a few simple ingredients like ketchup, brown sugar, and apple cider vinegar. It’s a fun cooking project that adds a personal touch to your meal. You can also buy your favorite brand and have it on hand for those busy evenings!

Directions

  1. Start by dicing the chicken into bite-sized pieces and putting them in a bowl.
    Make sure the pieces are evenly cut for consistent cooking.

  2. Add the Worcestershire sauce, minced garlic, kosher salt, pepper, and BBQ seasoning to the chicken. Toss until it is well coated.
    If you have time, marinate it for at least an hour. This really amps up the flavor!

  3. While the chicken marinates, brush melted butter on the corn. Season all sides with kosher salt, pepper, and BBQ seasoning.
    The butter not only adds flavor but also helps the seasonings stick better.

  4. Preheat the griddle to medium heat for several minutes. Add a bit of cooking oil and then place the seasoned corn on the cob and chicken on the griddle.
    Listen closely to that beautiful sizzle. It means you’re on the right track!

  5. Cook on the griddle for 9 to 11 minutes total, turning the corn and flipping the chicken a few times to get that perfect char.
    Here’s a tip: If the chicken finishes cooking before the corn, just remove it and let the corn continue until it’s tender.

  6. If you have a melting dome, use it for the corn to speed up cooking a bit.
    It’s a great way to get that sweet corn cooked to perfection without drying it out.

  7. Serve with BBQ sauce for dipping if desired.
    Everyone loves a good dip!

Serving

Blackstone BBQ Chicken and Corn

Now it’s time to serve your delicious meal family-style. Transfer the chicken and corn to a large platter or directly to the table. Gathering around a big plate will create a warm and inviting atmosphere.

Don’t forget to include a small bowl of BBQ sauce for those who love that extra burst of flavor. Let everyone dig in and enjoy the laughter and stories that naturally flow during mealtime.

Storage

If you have leftovers, they can be stored in an airtight container in the refrigerator for up to three days. To reheat, place the chicken and corn in a skillet over medium heat. Heat until warmed through. Avoid microwaving, as it can lead to soggy corn and dry chicken.

For longer storage, you can freeze the cooked chicken and corn in freezer-safe bags. It’s a great way to have a quick meal ready to go when life gets busy.

Kitchen Notes

  • You can marinate the chicken the night before and keep it in the refrigerator for a quick meal the next day.
  • Double the ingredients for a larger gathering. It’s easy to cook more in batches!
  • If using frozen corn, make sure it’s thawed and drained before seasoning.
  • Try different BBQ seasoning blends for a unique taste each time.
  • Always check chicken with a meat thermometer to ensure it reaches an internal temperature of 165°F.

Variations

Every family has different taste preferences. Here are a few tweaks for picky eaters or dietary needs:

  • Gluten-Free: Ensure your BBQ seasoning is gluten-free.
  • Vegetarian: Substitute the chicken with portobello mushrooms or cauliflower steaks. They absorb flavors beautifully!
  • Spicy: Add some cayenne pepper or your favorite hot sauce to the marinade.
  • Mexican Flare: Toss in some taco seasoning instead of BBQ seasoning for a fun twist.
  • Grilled Veggies: Add bell peppers or zucchini to the griddle for extra nutrition and color.

FAQ

1. Can I use frozen chicken?
Yes, but it’s best to thaw it first for even cooking. Thawing overnight in the refrigerator is ideal.

2. What if I don’t have a griddle?
You can use a large skillet or even an outdoor grill for cooking the chicken and corn.

3. How do I know when the chicken is done?
Check that it reaches an internal temperature of 165°F. A meat thermometer makes this easy.

4. Can I substitute the corn?
Absolutely! You can use frozen corn or even asparagus for a seasonal option.

5. Is this recipe suitable for meal prep?
Yes! Prepare and portion it for easy weekday meals. Just follow storage guidelines for maximum freshness.

Conclusion

Cooking should be a joyful experience, not just a task. Blackstone BBQ Chicken and Corn is a recipe that brings everyone to the table, creating memories through shared meals. As you enjoy the fruits of your labor, remember that good food nourishes not just the body but also the soul. So gather your family, enjoy the flavors, and embrace those precious moments that come with each bite. Happy cooking!

Blackstone BBQ Chicken and Corn

Prep Time 15 minutes
Cook Time 15 minutes
Total Time 30 minutes
Servings 4 servings
Calories 400
A delectable recipe that combines tender, juicy chicken with sweet corn, perfect for family gatherings and ready in under thirty minutes.

Ingredients

Chicken

  • 1.5 pounds chicken breasts (or boneless, skinless chicken thighs)
  • 1 tablespoon Worcestershire sauce
  • 3-4 cloves garlic (finely minced)
  • Kosher salt (To taste)
  • Pepper (To taste)
  • BBQ seasoning blend
  • 2 tablespoons melted butter

Corn

  • 4 ears corn on the cob (shucked)

Others

  • Cooking oil of choice (For greasing the griddle)
  • Optional: BBQ sauce (For dipping)

Instructions 

Preparation

  • Dice the chicken into bite-sized pieces and place them in a bowl.
  • Add Worcestershire sauce, minced garlic, kosher salt, pepper, and BBQ seasoning to the chicken. Toss until well coated. Marinate for at least an hour if time allows.
  • While the chicken marinates, brush melted butter on the corn and season with kosher salt, pepper, and BBQ seasoning.

Cooking

  • Preheat the griddle to medium heat. Add a bit of cooking oil, then place the seasoned corn and chicken on the griddle.
  • Cook for 9 to 11 minutes total, turning the corn and flipping the chicken a few times. If the chicken finishes cooking first, remove it and let the corn cook until tender.
  • If using a melting dome, cover the corn to speed up the cooking process.

Serving

  • Transfer the chicken and corn to a large platter. Serve with a small bowl of BBQ sauce for dipping.

Notes

Leftovers can be stored in an airtight container in the refrigerator for up to three days. To reheat, use a skillet over medium heat to warm through. For longer storage, freeze in airtight bags.
Calories: 400kcal
Course: Dinner, Main Course
Cuisine: American
Keyword: BBQ Chicken, Easy Recipe, Family Meal, Griddled Corn, Quick Dinner

Grilled Chicken Broccoli Bowls with Creamy Garlic Sauce

I can smell the garlic and lemon as the grill warms up. The kitchen hums with quiet activity. Pots clink, the grill sizzles, and my family drifts in, curious and hungry.

This Grilled Chicken Broccoli Bowls with Creamy Garlic Sauce recipe is one of those weeknight heroes I turn to again and again. It is quick, bright, and fills the house with comfort. If you like bold garlic flavor and simple, wholesome ingredients, you will love this one. I often pair it with my Chicken Kofta with Creamy Garlic Yogurt Sauce for a full-week menu rotation my kids enjoy.

Why this works

Grilled Chicken Broccoli Bowls with Creamy Garlic Sauce

This bowl balances fast cooking and family favorites. Chicken grills quickly and gets a lovely char while the broccoli softens but keeps a little bite. The creamy garlic sauce ties everything together without heavy cream or long prep time.

It is also a time saver. You can grill both protein and veg at once and whisk the sauce in five minutes. That means more dinner time at the table and less time over the stove. If you want a similar quick weeknight grill idea, try my Easy Grilled Asian Chicken Skewers with Honey Garlic Sauce for variety.

This recipe is forgiving, so it works well for families with varied appetites. Reduce the sauce if someone prefers drier bowls, or double it when kids ask for extra dipping.

Process Overview

“This is where the magic happens—when the aroma fills the kitchen.”

Start by heating the grill so you get a consistent sear on the chicken. While it preheats, you can mince garlic and whisk the sauce. Grill the florets on the same grate so they soak up that grilled flavor.

I often use a digital thermometer to check doneness. It takes away the guesswork and keeps everyone safe. For other grilled chicken techniques that work well with a quick sauce, see my Parmesan Crusted Chicken with Creamy Garlic Sauce post.

Ingredients

  • 2 chicken breasts
    Lily’s tip: Use boneless, skinless breasts that are about the same thickness. Pound them gently if one is much thicker so they cook evenly.

  • 2 cups broccoli florets
    Lily’s tip: Cut broccoli into uniform pieces. If you prefer a softer texture for little kids, steam for a minute before grilling.

  • 1 tablespoon olive oil
    Lily’s tip: Brush both the chicken and broccoli lightly. The oil helps prevent sticking and promotes browning.

  • 2 cloves garlic, minced
    Lily’s tip: Fresh garlic gives the best punch. If you are short on time, use a garlic press or finely grate it for more even distribution.

  • 1/2 cup plain Greek yogurt
    Lily’s tip: Full-fat Greek yogurt creates the creamiest sauce. If you need a lighter option, use low-fat Greek yogurt and reduce the lemon by a little for balance.

  • 1 tablespoon lemon juice
    Lily’s tip: Freshly squeezed lemon brightens the sauce. Start with one tablespoon and taste. Add more if you like a tangier finish.

  • Salt and pepper to taste
    Lily’s tip: Season in layers. Lightly salt before grilling and adjust the final seasoning in the sauce. A pinch more pepper wakes up the garlic.

  • Optional: olive oil spray for the grill or nonstick spray for the grate
    Lily’s tip: Use a folded paper towel dipped in oil to wipe grates with tongs for a safe, even oiling.

For a flavor twist, I sometimes add a teaspoon of smoked paprika to the chicken or a tablespoon of chopped parsley to the sauce. For more grilled chicken flavor ideas, check my post about Peruvian Grilled Chicken with Creamy Green Sauce.

Directions

  1. Preheat your grill to medium-high heat.
    Encouraging note: Give the grill time to heat so you get a nice sear. If you are indoors, you can use a grill pan or a heavy skillet and follow the same timing.

  2. Season the chicken breasts with olive oil, salt, and pepper. Grill the chicken for 6-7 minutes on each side or until cooked through.
    Encouraging note: Keep calm and resist flipping too often. Let the chicken form a crust before turning. Use a thermometer to confirm 165°F internal temperature.

  3. In the last few minutes of grilling, add the broccoli florets to the grill and cook until tender.
    Encouraging note: Toss them gently every 2 minutes so they char evenly. If florets char too quickly, move them to a cooler part of the grate.

  4. In a bowl, mix the Greek yogurt, minced garlic, lemon juice, salt, and pepper to make the creamy garlic sauce.
    Encouraging note: Taste and adjust. If the sauce feels too thick, stir in 1 teaspoon of water at a time. You can make this sauce ahead and it will keep well in the fridge.

  5. Slice the grilled chicken and serve in bowls with grilled broccoli and drizzle with the creamy garlic sauce.
    Encouraging note: Layer bowls with rice or quinoa if you want a heartier meal. Let everyone drizzle their sauce to their liking so picky eaters can control their portions.

If something goes sideways, remember this recipe is forgiving. Slightly overcooked broccoli still tastes good when dipped in the sauce. Leftover sauce can be a lunch dressing or sandwich spread.

Storage

Grilled Chicken Broccoli Bowls with Creamy Garlic Sauce

Keep leftovers in airtight containers in the fridge. The chicken and broccoli will stay good for up to 3 days. Store the creamy garlic sauce separately to preserve texture.

Reheating tips: Warm gently in a skillet over medium-low heat with a splash of water to keep the chicken moist. Avoid microwaving the sauce directly on high; instead, stir it well and add a teaspoon of water if it thickened in the fridge.

For meal prep: Portion grilled chicken, broccoli, and sauce into containers for easy grab-and-go dinners. The bowls reheat well in 3-minute increments, checked and stirred between cycles.

For longer storage: Freeze cooked chicken for up to 3 months. Thaw overnight in the refrigerator and reheat gently.

Kitchen Notes

  • Use a meat thermometer and aim for 165°F. This ensures safe, juicy chicken.
  • Trim excess fat from breasts so they cook evenly.
  • If your grill has hot spots, move items around to avoid burning.
  • Make the sauce up to 2 days ahead to save time the night you serve.
  • Double the sauce if you plan to use it as a dip for veggies or pita.

These shortcuts keep dinner simple without sacrificing flavor. I reach for them on busy school nights.

Variations

  • Kid-Friendly: Slice chicken into strips before cooking and serve sauce on the side for dipping.
  • Low-Carb: Serve over cauliflower rice or a bed of greens instead of grains.
  • Gluten-Free: This recipe is naturally gluten-free. Check labels on yogurt if sensitive.
  • Dairy-Free: Swap Greek yogurt for a dairy-free coconut or almond yogurt and add 1 teaspoon of olive oil for richness. Taste and adjust lemon.
  • Extra Veggies: Add bell peppers or sliced zucchini to the grill for color and nutrients.

Small swaps make this recipe work for many diets without extra fuss. For a spice-forward change, season the chicken with a paprika-cumin blend.

FAQ

Q1: Can I use chicken thighs instead of breasts?

Yes. Boneless, skinless thighs stay very moist and take about the same time on a hot grill. Monitor with a thermometer and pull them at 165°F. Thighs have more fat, so expect a bit more flare-ups on the grill.

Q2: How can I prevent the broccoli from sticking to the grill?

Toss the broccoli with olive oil and spread it out so pieces do not overlap. Make sure the grill is clean and hot. Wiping the grates with a little oil on a paper towel before cooking helps.

Q3: Can I make the creamy garlic sauce without garlic for toddlers?

Yes. For little ones, reduce the garlic to 1 small clove or replace it with a pinch of onion powder for a milder taste. You can also blend the sauce for a smoother texture if that helps.

Q4: Is Greek yogurt safe to leave out while grilling?

No. Dairy should not sit at room temperature for more than two hours. Keep the sauce chilled until you are ready to serve and return any leftovers to the refrigerator promptly.

Q5: What side dishes go well with these bowls?

Simple sides work best. Try steamed rice, quinoa, or a green salad. For a Mediterranean twist, add chopped tomatoes, cucumbers, and a sprinkle of feta. For more pairing ideas, my Chicken Shawarma with Garlic Sauce post has salad and grain suggestions that pair well with grilled chicken bowls.

Conclusion

I hope these Grilled Chicken Broccoli Bowls with Creamy Garlic Sauce become a family favorite at your table. The grill gives quick, smoky flavor, the broccoli adds bright green goodness, and the yogurt-based sauce brings everything together without heaviness. If you would like visual guidance or a second source for the recipe, you can compare notes with this version from Grilled Chicken & Broccoli Bowls with Creamy Garlic Sauce and an alternative write-up at Grilled Chicken & Broccoli Bowls with Creamy Garlic Sauce.

Thank you for cooking with me. Gather the family, let the grill roar a little, and enjoy a simple, nourishing meal together.

Grilled Chicken Broccoli Bowls with Creamy Garlic Sauce

Prep Time 10 minutes
Cook Time 20 minutes
Total Time 30 minutes
Servings 4 servings
Calories 350
This quick and bright recipe features grilled chicken and broccoli drizzled with a creamy garlic sauce, making it a perfect weeknight meal.

Ingredients

For the Chicken and Broccoli

  • 2 pieces chicken breasts (Use boneless, skinless breasts of similar thickness.)
  • 2 cups broccoli florets (Cut into uniform pieces.)
  • 1 tablespoon olive oil (To brush on chicken and broccoli.)
  • 2 cloves garlic, minced (Fresh garlic for the best flavor.)

For the Creamy Garlic Sauce

  • 1/2 cup plain Greek yogurt (Full-fat for creaminess; low-fat for a lighter option.)
  • 1 tablespoon lemon juice (Freshly squeezed for brightness.)
  • to taste salt and pepper (Season in layers.)

Instructions 

Preparation

  • Preheat your grill to medium-high heat.
  • Season the chicken breasts with olive oil, salt, and pepper.
  • Grill the chicken for 6-7 minutes on each side or until cooked through.
  • In the last few minutes of grilling, add the broccoli florets to the grill and cook until tender.
  • In a bowl, mix the Greek yogurt, minced garlic, lemon juice, salt, and pepper to make the creamy garlic sauce.
  • Slice the grilled chicken and serve in bowls with grilled broccoli, drizzling the creamy garlic sauce on top.

Notes

Storage: Keep leftovers in airtight containers in the fridge for up to 3 days. The creamy garlic sauce can be made ahead and refrigerated.
Calories: 350kcal
Course: Dinner, Main Course
Cuisine: American, Mediterranean
Keyword: Broccoli Bowls, Creamy Garlic Sauce, Grilled Chicken, Healthy Meal, Weeknight Dinner

Authentic Greek Chicken Souvlaki Marinade

The kitchen comes alive with the smell of marinated chicken sizzling on the grill. It’s a melody of sounds; the pops of the grill, the gentle chatter of my family, and the sizzling chicken that tells us dinner is almost ready. There’s something undeniably special about preparing a meal that brings everyone together, and this Authentic Greek Chicken Souvlaki Marinade is a family favorite that’s sure to delight.

Why this works

Authentic Greek Chicken Souvlaki Marinade

One of the reasons this marinade works so well is its balance of flavors. The tanginess of the yogurt and lemon harmonizes beautifully with the earthy spices. It’s a simple mix of ingredients that are often already in my kitchen, making it a time-saver too. Marinades are a great way to enhance the natural flavor of chicken while also making dinner easy to prepare.

This recipe is not just about eating; it’s about creating memories. Spending time as a family, sharing stories, and enjoying a meal together makes everything more special. Perfect for busy nights or weekends, this marinade allows you to prep ahead so that on the grill night, all you have to do is cook and enjoy.

Process Overview

“This is where the magic happens—when the aroma fills the kitchen.”

Once you’ve prepped the marinade, the real fun begins. The moment the chicken hits the grill, you can practically taste the adventure each bite holds. This marinade isn’t just a preparatory step; it’s where flavors come alive and fill your home with aromas that beckon everyone to the table.

Ingredients

Here’s what you’ll need for the Authentic Greek Chicken Souvlaki Marinade:

  • 1 cup plain Greek yogurt

    • Tip: Opt for full-fat yogurt for creamier texture and better flavor absorption.
  • 1/4 cup olive oil

    • Tip: Choose a robust olive oil for richer taste.
  • 3 tablespoons red wine vinegar

    • Tip: This adds a necessary tang. Use good quality vinegar, as it makes a difference.
  • 3 cloves garlic, minced

    • Tip: Fresh garlic gives the best flavor. Don’t substitute with garlic powder here!
  • 1 tablespoon dried oregano

    • Tip: Try using Greek oregano if you can find it for authentic flavor.
  • 1 teaspoon dried thyme

    • Tip: Ensure the thyme is fresh for the best taste; if it’s been in your cupboard for over a year, consider a new jar.
  • 1 teaspoon ground cumin

    • Tip: Toasted cumin adds an extra depth of flavor if you have the time.
  • 1 teaspoon ground coriander

    • Tip: Like cumin, toasted coriander will boost your marinade.
  • 1 teaspoon salt

    • Tip: Make sure to adjust according to your taste; if you’re using kosher salt, use a bit more.
  • 1/2 teaspoon black pepper

    • Tip: Freshly ground is always better than pre-ground spices.
  • Juice of 1 lemon

    • Tip: Roll the lemon on the counter before cutting it to get more juice.
  • Zest of 1 lemon

    • Tip: Use a microplane for the best zest without the bitter pith.
  • 2 pounds boneless, skinless chicken breast or thighs, cut into 1-inch cubes

    • Tip: Thighs will give you juicier results, but breasts are also great for a leaner option.

Directions

  1. In a large mixing bowl, combine the Greek yogurt, olive oil, and red wine vinegar. Whisk together until smooth.

    • This creamy base is pivotal for tenderizing the chicken. Make sure it’s well mixed!
  2. Add the minced garlic, dried oregano, dried thyme, ground cumin, ground coriander, salt, black pepper, lemon juice, and lemon zest to the bowl. Mix well until all ingredients are fully incorporated.

    • Take a moment to breathe in those delicious aromas as you mix. It’s going to be fantastic!
  3. Place the cubed chicken into the marinade, ensuring each piece is evenly coated. If necessary, use your hands or a spatula to mix well.

    • Don’t be shy! Get in there and make sure every bit of chicken is coated for maximum flavor.
  4. Cover the bowl with plastic wrap or transfer the marinated chicken into a zip-lock bag. Refrigerate for at least 2 hours, preferably overnight for maximum flavor.

    • This step is crucial. It allows the flavors to meld beautifully!
  5. When ready to cook, preheat the grill or a grill pan over medium-high heat. Thread the marinated chicken onto skewers, leaving a little space between each piece for even cooking.

    • Don’t rush this step—spacing is key to getting that perfect char.
  6. Grill the skewers for about 10-12 minutes, turning occasionally until the chicken is golden brown and cooked through (internal temperature of 165°F).

    • Keep handy a meat thermometer to ensure perfect doneness and avoid overcooking!
  7. Remove the skewers from the grill and let them rest for a few minutes before serving.

    • Resting the chicken allows the juices to redistribute—this is essential for juicy, tender meat.

Serving

Authentic Greek Chicken Souvlaki Marinade

When it comes time to serve, arrange the chicken skewers on a large platter. I love to present them family-style, allowing everyone to help themselves. Pair the souvlaki with a fresh Greek salad, warm pita bread, and a side of tzatziki sauce for dipping. Your family will adore gathering around the table to share this meal.

Storage

If you have leftovers (which is rare in my household), you can store them in an airtight container in the fridge for up to three days. To reheat, simply warm them in a skillet over low heat or in the microwave until just heated through. Avoid overheating as it can dry out the chicken.

Kitchen Notes

  • Shortcut ingredients: Use store-bought tzatziki to save time.
  • Marinate longer: For extra flavor, let chicken marinate for up to 24 hours.
  • Make ahead: Marinade in bulk and freeze half for future meals.
  • Grill marks: For optimal grill marks, don’t move the chicken too much while cooking.
  • Protein variation: This marinade is also excellent for shrimp or vegetables.

Variations

If you have picky eaters or dietary restrictions in your family, these tweaks can work well:

  • For kids: Reduce garlic and spices for milder flavor.
  • Gluten-free: Pair with gluten-free pita or cauliflower rice.
  • Vegetarian: Use firm tofu or mushrooms marinated with the same ingredients.
  • Spicy option: Add a pinch of cayenne pepper for heat.
  • Low-carb: Serve with lettuce wraps instead of bread.

FAQ

  1. Can I use any type of chicken?
    Yes, both chicken breasts and thighs work well for this recipe. Thighs are juicier, but breasts are also great.

  2. How long can I keep the marinade?
    The marinade can be stored in the fridge for up to one week. Just make sure to keep it sealed.

  3. Is it safe to marinate chicken at room temperature?
    No, always marinate chicken in the refrigerator to prevent bacteria growth.

  4. Can I bake the chicken instead of grilling?
    Absolutely! Bake them at 400°F (200°C) for about 20-25 minutes, or until cooked through.

  5. What can I serve with chicken souvlaki?
    Traditional sides include Greek salads, roasted vegetables, or rice.

As the meal comes to a close, take a moment to appreciate the flavors and the laughter shared around the table. Cooking, especially something as heartfelt as this Authentic Greek Chicken Souvlaki Marinade, fuels not just our bellies but our bonds as well. Your kitchen is more than a place for cooking; it’s a space where love is served. Enjoy every bite!

Authentic Greek Chicken Souvlaki

Prep Time 30 minutes
Cook Time 12 minutes
Total Time 2 hours
Servings 4 servings
Calories 300
This marinade enhances the natural flavor of chicken, creating juicy and flavorful skewers perfect for any family dinner.

Ingredients

For the Marinade

  • 1 cup plain Greek yogurt (Opt for full-fat yogurt for creamier texture and better flavor absorption.)
  • 1/4 cup olive oil (Choose a robust olive oil for richer taste.)
  • 3 tablespoons red wine vinegar (This adds a necessary tang. Use good quality vinegar, as it makes a difference.)
  • 3 cloves garlic, minced (Fresh garlic gives the best flavor. Don't substitute with garlic powder here!)
  • 1 tablespoon dried oregano (Try using Greek oregano for authentic flavor.)
  • 1 teaspoon dried thyme (Ensure the thyme is fresh for the best taste.)
  • 1 teaspoon ground cumin (Toasted cumin adds an extra depth of flavor if you have the time.)
  • 1 teaspoon ground coriander (Toasted coriander will boost your marinade.)
  • 1 teaspoon salt (Adjust according to your taste.)
  • 1/2 teaspoon black pepper (Freshly ground is always better than pre-ground spices.)
  • 1 large lemon, juiced and zested (Roll the lemon on the counter before cutting it to get more juice.)
  • 2 pounds boneless, skinless chicken breast or thighs, cut into 1-inch cubes (Thighs will give you juicier results.)

Instructions 

Preparation

  • In a large mixing bowl, combine the Greek yogurt, olive oil, and red wine vinegar. Whisk together until smooth.
  • Add the minced garlic, dried oregano, dried thyme, ground cumin, ground coriander, salt, black pepper, lemon juice, and lemon zest to the bowl. Mix well until all ingredients are fully incorporated.
  • Place the cubed chicken into the marinade, ensuring each piece is evenly coated.
  • Cover the bowl with plastic wrap or transfer the marinated chicken into a zip-lock bag. Refrigerate for at least 2 hours, preferably overnight.

Cooking

  • When ready to cook, preheat the grill or a grill pan over medium-high heat.
  • Thread the marinated chicken onto skewers, leaving a little space between each piece.
  • Grill the skewers for about 10-12 minutes, turning occasionally until the chicken is golden brown and cooked through.
  • Remove the skewers from the grill and let them rest for a few minutes before serving.

Notes

Serve with a fresh Greek salad, warm pita bread, and tzatziki sauce for dipping. For extra flavor, let chicken marinate for up to 24 hours.
Calories: 300kcal
Course: Dinner, Main Course
Cuisine: Greek, Mediterranean
Keyword: Chicken Souvlaki, Family Meal, Greek Marinade, Grilled Chicken, Quick Dinner

Peruvian Grilled Chicken with Creamy Green Sauce | Chicken dishes recipes, Peruvian recipes, Chicken recipes

Peruvian Grilled Chicken with Creamy Green Sauce wakes up the kitchen the minute the marinade hits the pan. I love the smell of garlic, cumin, and lime as they sizzle. The sound of the grill adds the kind of background rhythm that makes any weekday feel like a celebration.

This recipe is a family favorite in my house. It is bright, simple, and forgiving. If you are new to grilling or feeding a picky crew, you will find this dish both comforting and exciting.

I keep a living version of this post on my site for quick reference, especially when I’m cooking for company: Peruvian grilled chicken recipe page.

Why this works

Peruvian Grilled Chicken with Creamy Green Sauce | Chicken dishes recipes, Peruvian recipes, Chicken recipes

Peruvian grilled chicken blends bold flavors with straightforward technique. The marinade tenderizes the meat while the green sauce gives a cooling, creamy contrast. That balance makes it perfect for a busy family night.

This dish saves time because you can marinate ahead and grill quickly. I often toss a tray into the fridge in the morning and grill at dinner time. If your family likes bold sauces, try pairing this with my chicken kofta with creamy garlic yogurt sauce for another weeknight option.

It scales well for a crowd. Roast a few extra drumsticks and you have leftovers that reheat beautifully.

Process Overview

“This is where the magic happens—when the aroma fills the kitchen.”

You will marinate, grill, and blend a bright sauce. Marinating for at least one hour helps flavor penetrate the chicken. Grill over medium-high heat until the skin is crisp and the inside hits 165°F.

If you prefer a different grilling style, my method for quick skewers is a good reference: easy grilled Asian chicken skewers with honey garlic sauce. The timing tips there are handy when you want fast, even cooking.

I recommend prepping the sauce while the chicken rests after grilling. The resting time locks in juices and gives you a calm moment to finish the table.

Ingredients

Below is a clear, family-tested list with my personal tips for each item. These tips come from years of cooking and feeding my children and friends.

  • 4 lbs bone-in, skin-on chicken pieces (thighs and drumsticks). Tip: I prefer dark meat for juiciness. If you use breasts, reduce grill time and check temperature early.
  • 1/2 Cup olive oil. Tip: Choose a mild olive oil for a cleaner flavor.
  • 1/3 Cup fresh lime juice (about 2 limes). Tip: Fresh juice brightens the marinade; bottled juice lacks the same lift.
  • 6 garlic cloves, smashed. Tip: Smash then finely mince for even distribution.
  • 1 tablespoon ground cumin. Tip: Toast briefly in a dry pan for 30 seconds to deepen flavor if you have a minute.
  • 1 tablespoon smoked paprika. Tip: Smoked paprika adds warmth without heat. Use sweet paprika if you want less smokiness.
  • 2 teaspoons kosher salt. Tip: Use measured salt, then taste the sauce and adjust if needed.
  • 1 teaspoon black pepper. Tip: Freshly ground gives the best aroma.
  • 2 tablespoons chopped fresh oregano or 1 teaspoon dried. Tip: I keep oregano in a little jar in my fridge when I buy fresh; it lasts longer that way.

For the creamy green sauce

  • 1 Cup packed fresh cilantro leaves, stems trimmed. Tip: Cilantro is the bright core of this sauce. If you need to swap, parsley works but the flavor shifts.
  • 1 small jalapeño, seeds removed for mild heat. Tip: Leave a few seeds if you like a kick.
  • 1/2 Cup mayonnaise. Tip: Use a good-quality mayo for creaminess. For a lighter version see Variations.
  • 1/4 Cup sour cream or Greek yogurt. Tip: Greek yogurt adds tang and cuts richness.
  • 2 tablespoons fresh lime juice. Tip: Add after blending and taste for balance.
  • 2 garlic cloves. Tip: Roast a clove for a mellow hint if children are sensitive to raw garlic.
  • 1/4 Cup olive oil. Tip: Emulsify slowly into the blender for silky texture.
  • Salt and black pepper to taste.

If you like a more indulgent version, try this approach for a crispier crust: Parmesan crusted chicken with creamy garlic sauce offers a different but complementary family favorite.

Directions

  1. Mix the marinade. In a bowl, whisk olive oil, lime juice, garlic, cumin, smoked paprika, oregano, salt, and pepper. Note: Smelling the mix should make you smile. That aroma is the promise of dinner.

  2. Marinate the chicken. Place chicken in a large zip-top bag or shallow dish. Pour marinade over, massaging it into the skin. Refrigerate for at least 1 hour and up to 8 hours. Encouragement: Even 1 hour will give wonderful flavor. Overnight is okay but 8 hours is ideal.

  3. Prepare the grill. Heat your grill to medium-high, about 400°F. Clean and oil the grates. Note: A hot clean grate gives you those lovely grill marks and fewer sticking problems.

  4. Grill the chicken. Remove chicken from the marinade, letting excess drip off. Place skin-side down. Grill 6 to 8 minutes per side for thighs and drumsticks, flipping once, until the internal temperature reads 165°F near the bone. Encouragement: Flip gently and let the grill do the work. Patience pays off with crispy skin.

  5. Rest the chicken. Transfer to a plate and tent loosely with foil for 5 to 8 minutes. Note: Resting keeps chicken juicy. This is also the time to blend the sauce.

  6. Make the creamy green sauce. In a blender, combine cilantro, jalapeño, mayonnaise, sour cream, lime juice, garlic, and olive oil. Blend until smooth. Taste and season with salt and pepper. Encouragement: A quick blend makes the sauce bright and silky. Add a splash of water if it’s too thick.

  7. Serve. Spoon the creamy green sauce over the chicken or place it in a bowl for dipping. Tip: Offer extra lime wedges for squeezing at the table. If your family loves layered Mexican flavors, this chicken pairs well with my chicken enchiladas with sour cream sauce on nights when you want more variety.

You did it. This is the moment to gather everyone, bring plates to the table, and enjoy the reward of simple, flavorful cooking.

Serving

Peruvian Grilled Chicken with Creamy Green Sauce | Chicken dishes recipes, Peruvian recipes, Chicken recipes

Serve this Peruvian grilled chicken family-style on a large platter. Arrange the pieces skin-side up so the grill marks are visible. Spoon a generous amount of creamy green sauce down the center and let everyone help themselves.

Sides that please a crowd include roasted potatoes, a simple green salad, and steamed rice. I like to put out bowls of sliced avocados and warm tortillas so kids can build their own plates.

For a festive touch, scatter chopped cilantro and a few lime halves across the platter. Encourage family members to squeeze fresh lime over their pieces for the last burst of brightness.

Storage

Fridge: Store leftover chicken in an airtight container in the refrigerator for up to 3 days. Place the sauce in a separate sealed jar for up to 4 days.

Freeze: You can freeze cooked chicken for up to 3 months. Wrap pieces tightly in foil and place in a freezer bag. Label with the date.

Reheat: To reheat gently, preheat oven to 350°F and warm chicken on a baking sheet for 10 to 15 minutes until heated through. For crisp skin, place under the broiler for 1 to 2 minutes, watching closely. Reheat the sauce in a small bowl at room temperature or very briefly in the microwave, stirring often.

Safety tip: Always reheat to an internal temperature of 165°F when serving leftovers to children and older adults.

Kitchen Notes

  • Use a meat thermometer for reliability. It takes the guesswork out of doneness.
  • Trim excess fat from chicken pieces for less flare-up on the grill.
  • If you do not have a grill, cook on an indoor grill pan or roast at 425°F for 25 to 35 minutes, turning once.
  • Prep the sauce in the morning and keep chilled until serving to save time.
  • Double the sauce if you like extra for dipping or drizzling.

Variations

  • Kid-friendly mild version: Remove the seeds from the jalapeño and use half the amount. Substitute Greek yogurt for part of the mayonnaise to lighten the flavor.
  • Dairy-free: Use vegan mayonnaise and coconut yogurt or more olive oil instead of sour cream.
  • Spicy lovers: Keep the jalapeño seeds or add a small serrano pepper to the sauce.
  • Quick stovetop: Sear the chicken in a cast-iron skillet over medium-high heat for a charred crust, then finish in a 400°F oven for 15 to 20 minutes.
  • Herb swap: Replace half the cilantro with parsley for a different green flavor that some picky eaters prefer.

FAQ

Q: Can I use boneless chicken breasts?
A: Yes. Reduce the grilling time and watch the internal temperature closely. Breasts cook faster. Aim for 160°F and rest to reach 165°F.

Q: How long can I marinate the chicken?
A: Marinate for at least 1 hour and up to 8 hours. Acidic marinades can start to change texture if left much longer than 8 hours.

Q: Is the sauce freezer-safe?
A: I do not recommend freezing the sauce. Creamy sauces with dairy separate when frozen and thawed. Keep it in the refrigerator up to 4 days for best quality.

Q: Can I make the sauce without a blender?
A: Yes. Chop the cilantro and jalapeño very finely, mince the garlic, and whisk everything vigorously. It will be chunkier but still tasty.

Q: What side dishes pair best with this chicken?
A: Simple sides work best. Rice, roasted vegetables, a crisp salad, or warm tortillas all pair nicely and keep the meal family-friendly.

Conclusion

I hope this Peruvian grilled chicken with creamy green sauce brings warmth and joy to your table. It is one of those recipes that looks and tastes like effort but comes together with simple steps and honest ingredients. If you want to compare versions or see another take on this classic, I often read the plating notes in the Platings + Pairings Peruvian Chicken with Green Sauce article for plating ideas. For a slightly different creamy twist, I also enjoy reviewing the techniques in the Half Baked Harvest Peruvian Chicken with Creamy Green Sauce post.

Thank you for cooking with me. Gather the family, pass the sauce, and make a little extra for tomorrow.

Peruvian Grilled Chicken with Creamy Green Sauce

Prep Time 1 hour
Cook Time 20 minutes
Total Time 1 hour 20 minutes
Servings 6 servings
Calories 400
A bright and flavorful grilled chicken dish marinated with garlic, cumin, and lime, served with a creamy green sauce that's perfect for family meals.

Ingredients

For the marinade

  • 4 lbs bone-in, skin-on chicken pieces (thighs and drumsticks) (Prefer dark meat for juiciness.)
  • 1/2 Cup olive oil (Choose a mild olive oil for a cleaner flavor.)
  • 1/3 Cup fresh lime juice (about 2 limes) (Fresh juice brightens the marinade.)
  • 6 cloves garlic, smashed (Smash then finely mince for even distribution.)
  • 1 tablespoon ground cumin (Toast briefly in a dry pan for deeper flavor.)
  • 1 tablespoon smoked paprika (Adds warmth without heat.)
  • 2 teaspoons kosher salt (Use measured salt, then adjust as needed.)
  • 1 teaspoon black pepper (Freshly ground for the best aroma.)
  • 2 tablespoons chopped fresh oregano (Or 1 teaspoon dried.)

For the creamy green sauce

  • 1 Cup packed fresh cilantro leaves, stems trimmed (Cilantro is the bright core of this sauce.)
  • 1 small jalapeño, seeds removed (Leave a few seeds for mild heat.)
  • 1/2 Cup mayonnaise (Use a good-quality mayo for creaminess.)
  • 1/4 Cup sour cream or Greek yogurt (Greek yogurt adds tang.)
  • 2 tablespoons fresh lime juice (Add after blending and taste for balance.)
  • 2 cloves garlic (Roast for a mellow hint if sensitive to raw garlic.)
  • 1/4 Cup olive oil (Emulsify slowly for silky texture.)
  • to taste salt and black pepper

Instructions 

Preparation

  • Mix the marinade by whisking olive oil, lime juice, garlic, cumin, smoked paprika, oregano, salt, and pepper in a bowl.
  • Marinate the chicken in a zip-top bag or shallow dish for at least 1 hour, ideally up to 8 hours.
  • Prepare the grill by heating it to medium-high (about 400°F) and cleaning the grates.

Grilling

  • Remove chicken from the marinade, letting excess drip off, and grill skin-side down for 6 to 8 minutes per side until the internal temperature reaches 165°F.
  • Rest the chicken for 5 to 8 minutes tented with foil before making the sauce.

Making the Sauce

  • In a blender, combine cilantro, jalapeño, mayonnaise, sour cream, lime juice, garlic, and olive oil. Blend until smooth.
  • Taste and season with salt and pepper as needed.

Serving

  • Serve the chicken on a large platter with the creamy green sauce either spooned over it or in a bowl for dipping.

Notes

Store leftovers in an airtight container for up to 3 days and sauce separately for up to 4 days. Can freeze cooked chicken for up to 3 months.
Calories: 400kcal
Course: Dinner, Main Course
Cuisine: Latin American, Peruvian
Keyword: Creamy sauce, Easy Dinner, Family Recipe, Grilled Chicken, Marinade

Grilled Chicken Breast

There’s something magical about the smell of grilled chicken wafting through the kitchen. As the sizzle fills the air, you can almost hear the happy chatter of family gathering around the table. This is more than just a meal; it’s a moment spent together, sharing stories and creating memories. Grilling chicken breasts is a simple yet delicious way to bring everyone together for dinner while making your kitchen smell delightful.

Why This Works

Grilled Chicken Breast

Grilled chicken breasts are a family favorite for many reasons. They are quick to prepare, perfect for busy weeknights or relaxed weekend gatherings. Not only do they cook in less time than some other protein options, but they also absorb flavors beautifully from marinades.

This recipe highlights the ease of preparation which makes it a lifesaver for parents and anyone trying to juggle a million things. You can prep the marinade, let the chicken soak up all the flavors, and enjoy the time to do something else while the grill does the work. It’s a win-win that brings both deliciousness and convenience.

Process Overview

“This is where the magic happens—when the aroma fills the kitchen.”

The process of making grilled chicken breast is straightforward. You will marinate the chicken, allowing it to soak in all those delicious flavors. Then, grilling it for just the right amount of time will give you juicy, tender chicken that your family will love. It’s easy, and when you follow these steps, you’ll see just how rewarding it can be.

Ingredients

To make the best grilled chicken breast, you will need the following ingredients:

  • 4 boneless, skinless chicken breasts
  • 1/4 cup olive oil
  • 2 tablespoons lemon juice
  • 2 cloves garlic, minced
  • 1 teaspoon dried oregano
  • 1 teaspoon salt
  • 1/2 teaspoon black pepper

Here are some personal tips from my kitchen to yours:

  • Chicken Breasts: Look for chicken that’s free-range or organic if you can. It often has better flavor and texture.
  • Olive Oil: A good-quality extra-virgin olive oil makes a difference. It adds richness that enhances the overall taste.
  • Lemon Juice: Freshly squeezed lemon juice gives the best flavor. It brightens up the marinade beautifully.
  • Garlic: Don’t skip the garlic. It adds depth and a welcoming warmth that makes the dish special.
  • Dried Oregano: Fresh herbs can be substituted, but dried oregano is super convenient and still packs plenty of flavor.

Directions

  1. In a bowl, whisk together olive oil, lemon juice, garlic, oregano, salt, and pepper to create the marinade. Take your time with this step. The more you mix, the more your flavors blend.

  2. Place chicken breasts in the marinade, ensuring they are well coated. Cover and refrigerate for at least 1 hour, or overnight for the best flavor. The longer it marinates, the more delicious the chicken will be.

  3. Preheat the grill to medium-high heat. This step is crucial for achieving those perfect grill marks and an even cook.

  4. Remove chicken from the marinade and discard the excess marinade. Make sure to shake off any extra liquid so your chicken can sear nicely.

  5. Grill the chicken for 6-7 minutes on each side, or until fully cooked and the internal temperature reaches 165°F (75°C). Use a meat thermometer to be sure—it’s a simple tool that can prevent dry chicken.

  6. Let the chicken rest for a few minutes before slicing. Serving it hot allows all those juices to redistribute, keeping it tender and juicy.

Serving

Grilled Chicken Breast

When it comes to serving grilled chicken, I recommend a family-style approach. Serve the sliced chicken on a large platter, alongside sides like grilled vegetables, a fresh garden salad, or fluffy rice.

You can also offer a few condiments, like BBQ sauce or a yogurt sauce, to give everyone a choice. Placing everything on the table encourages conversation and sharing, making mealtime more fun for everyone.

Storage

If you happen to have leftovers, don’t worry. Grilled chicken stores quite well. Place the cooled chicken in an airtight container and store it in the fridge for up to 3-4 days.

Reheat slices gently in the microwave, or chop them up and toss them into a salad or wrap for an easy lunch. It’s perfect for meal prep!

Kitchen Notes

  • Keep a meat thermometer handy to check for doneness.
  • If short on time, you can marinate the chicken for just 30 minutes, though more marinating time yields better flavor.
  • For extra flavor, add other spices or herbs to your marinade, like thyme or paprika.
  • Slice the chicken against the grain after grilling for more tender bites.
  • Feel free to double the recipe for larger gatherings.

Variations

Cooking for picky eaters or different diets? Here are a few tweaks:

  • Spicy: Add red pepper flakes to the marinade for a kick.
  • Herb Lovers: Substitute the oregano with fresh rosemary or thyme for a different flavor profile.
  • Honey Mustard: Swap half of the olive oil for honey mustard for a sweet and tangy twist.
  • Vegetarian Option: Use tofu or portobello mushrooms marinated in the same mixture for a delicious plant-based alternative.

FAQ

1. How do I know when the chicken is done?
Using a meat thermometer is best. It should read 165°F (75°C) at the thickest part.

2. Can I grill chicken without a grill?
Yes, you can use a grill pan on the stove or bake in the oven. Just adjust cooking times accordingly.

3. How do I keep my chicken juicy?
Marinating is key. It imparts flavor and moisture, plus letting the meat rest after grilling makes it even juicier.

4. Can I freeze the marinated chicken?
Absolutely! Marinade the chicken, then place it in a freezer bag. Freeze for up to 2 months. Thaw before grilling.

5. What sides pair well with grilled chicken?
Grilled vegetables, mashed potatoes, or a light pasta salad complement grilled chicken beautifully.

As you gather around the table with your loved ones, remember that grilling chicken breast is more than just cooking; it’s about sharing moments and flavors. I hope this easy recipe brings warmth to your kitchen and smiles to your family’s faces. Enjoy every bite as you create memories that last long after the last piece of chicken has been served. Happy grilling!

Grilled Chicken Breasts

Prep Time 10 minutes
Cook Time 15 minutes
Total Time 25 minutes
Servings 4 servings
Calories 250
Quick and delicious, these grilled chicken breasts are marinated for maximum flavor and grilled to perfection, making them a family favorite for any occasion.

Ingredients

Chicken and Marinade

  • 4 pieces boneless, skinless chicken breasts (Look for free-range or organic chicken for better flavor.)
  • 1/4 cup olive oil (Use high-quality extra-virgin olive oil.)
  • 2 tablespoons lemon juice (Freshly squeezed gives the best flavor.)
  • 2 cloves garlic, minced (Adds depth and warmth to the dish.)
  • 1 teaspoon dried oregano (Can substitute with fresh herbs.)
  • 1 teaspoon salt
  • 1/2 teaspoon black pepper

Instructions 

Preparation

  • In a bowl, whisk together olive oil, lemon juice, garlic, oregano, salt, and pepper to create the marinade.
  • Place chicken breasts in the marinade, ensuring they are well coated. Cover and refrigerate for at least 1 hour, or overnight for the best flavor.

Grilling

  • Preheat the grill to medium-high heat.
  • Remove chicken from the marinade and discard the excess marinade. Shake off any extra liquid.
  • Grill the chicken for 6-7 minutes on each side, or until fully cooked and the internal temperature reaches 165°F (75°C).
  • Let the chicken rest for a few minutes before slicing.

Notes

Serve with sides like grilled vegetables, salad, or rice. Leftovers can be stored in an airtight container in the fridge for up to 3-4 days.
Calories: 250kcal
Course: Dinner, Main Course
Cuisine: American
Keyword: Chicken Breast, Easy Dinner, Family Recipe, Grilled Chicken, Marinated Chicken

Easy Grilled Chicken

The kitchen is alive with the sound of sizzling as the chicken hits the grill. The savory aroma fills the air, making everyone gather around. You can almost feel the family spirit as you work together to create a favorite meal. Easy grilled chicken is more than just a recipe; it’s a family tradition. It opens doors for laughter and togetherness while satisfying hearty appetites.

Why This Works

Easy Grilled Chicken

This easy grilled chicken recipe is perfect for busy families. It’s quick, flavorful, and keeps everyone happy. The brining process ensures that the chicken stays juicy and tender, while the spices give it that deliciously robust flavor. You can whip it up in no time, making it ideal for a weeknight dinner or weekend barbecue.

Time-saving is important for any busy household. Preparing the brine takes just a few minutes. While the chicken is soaking, you can toss together a simple salad, boil some corn, or prepare your favorite sides. This method also gives you extra time to spend with your loved ones. Imagine the joy of gathering around the dinner table, enjoying the fruits of your labor, and sharing stories together.

Process Overview

“This is where the magic happens—when the aroma fills the kitchen.”

Brining the chicken is the key to achieving juicy grilled perfection. You’ll start by mixing the brine ingredients, soaking the chicken, and then simply grilling it to get perfectly charred flavors. The steps are straightforward, making this recipe as simple as it is satisfying.

Ingredients

  • 4 boneless chicken breasts (or 8 thighs) – Choose skinless for a healthier version.
  • 4 cups warm water (for brine) – The warmth helps dissolve the salt and sugar faster.
  • 1/4 cup kosher salt (for brine) – This is essential for flavor and moisture.
  • 2 tbsp brown sugar (for brine) – Adds a slight sweetness that balances the salt.
  • 2 cloves garlic, smashed (for brine) – Infuses a lovely aroma and flavor.
  • 2 tbsp olive oil (coats chicken) – Keeps the chicken moist and helps spices stick.
  • 1 tsp salt (seasoning) – Enhances the overall flavor.
  • 1/2 tsp black pepper (seasoning) – For a bit of warmth without overpowering the dish.
  • 1 tsp garlic powder (seasoning) – Amplifies the garlic flavor for a fuller taste.
  • 1 tsp paprika (adds color) – Makes your chicken look as good as it tastes.
  • 1/2 tsp dried oregano (herbal note) – A hint of earthiness without being overwhelming.
  • 1/4 tsp cayenne pepper (optional heat) – Gives a little kick for those who like it spicy.

Lily’s Tips:

  • When brining, ensure the chicken is fully submerged for maximum flavor. You can weigh it down with a plate if needed.
  • Use a meat thermometer to avoid overcooking; chicken is safe at 165°F.
  • Leftover brine can be discarded. It’s used solely for flavoring the chicken.
  • Don’t skip the resting step; it makes a big difference in juiciness.
  • For crispy skin, grill with the skin side down first if using thighs.

Directions

  1. Dissolve the salt and brown sugar in warm water with the smashed garlic to create the brine. This step is crucial for infusing flavor.

  2. Submerge the chicken in the brine for 30 minutes to ensure the meat stays juicy. While it’s soaking, take a few minutes to prep your sides.

  3. Pat the chicken completely dry and rub it thoroughly with the mixed spices. This will ensure every bite is packed with flavor.

  4. Preheat the grill to medium-high heat and oil the grates well to prevent sticking. A well-oiled grill means easy flipping.

  5. Grill the chicken for 7 minutes without moving it to create perfect grill marks. You’re building that wonderful char.

  6. Flip and cook for 6 minutes until the internal temperature reaches 165°F. The chicken should be firm and no longer pink inside.

  7. Rest the chicken under foil for 5 minutes so the juices redistribute before slicing. This is when all the flavors come together beautifully.

Serving

Easy Grilled Chicken

To serve your easy grilled chicken family-style, arrange the pieces on a large platter. It makes for a lovely presentation and invites everyone to dig in. Pair it with seasonal vegetables, steamed rice, or a fresh garden salad to make a complete meal. Encourage everyone to serve themselves, fostering that communal spirit.

Encourage your family to share their favorite sides. You could even have a mini potluck where everyone brings something to add to the table.

Storage

If you have leftovers, it’s best to refrigerate them within two hours of cooking. Store the chicken in an airtight container. It can be kept in the fridge for up to four days. When reheating, a microwave or oven works well, though a pan on the stove will keep it nice and juicy. Just add a little water before covering it to retain moisture.

Kitchen Notes

  • Prep Ahead: You can brine the chicken the night before for an even more flavorful meal.
  • Grill Marks: Resist the urge to flip too soon; patience is key for those beautiful grill marks.
  • Spice Mix: Customize the spice rub based on your family’s preferences.
  • One-Pan Meal: Throw some veggies on the grill alongside the chicken for a complete dinner in one go.
  • Batch Cooking: Double the recipe to have leftovers to use throughout the week in salads, wraps, or sandwiches.

Variations

Are you serving picky eaters? Consider these tweaks:

  • BBQ Sauce: Brush some favorite BBQ sauce on the chicken in the last minutes of grilling for a sweet and smoky flavor.
  • Marinade Instead of Brine: You can swap the brine for a simple marinade using lemon juice, herbs, and olive oil if that’s what your family prefers.
  • Herb-Infused: Experiment with fresh herbs instead of dried oregano for a fresher flavor.
  • Spice Levels: Adjust the cayenne pepper according to your family’s heat tolerance.
  • Gluten-Free: All ingredients listed are naturally gluten-free, making this a great option for those with gluten sensitivities.

FAQ

Q: Do I really need to brine the chicken?
A: While it’s not mandatory, brining significantly enhances juiciness and flavor.

Q: Can I use frozen chicken?
A: Yes, but make sure to thaw it completely before brining.

Q: How long can I marinate the chicken?
A: If you’re using a marinade, marinating for 2-4 hours is optimal.

Q: What if I don’t have a grill?
A: You can use a grill pan or bake it in the oven at 425°F for about 20-25 minutes.

Q: Can I freeze the grilled chicken?
A: Absolutely! Just make sure to wrap it tightly and use it within three months.

Enjoy this easy grilled chicken recipe with your loved ones, knowing you have put in the effort to create something delicious and wholesome. Families grow closer around home-cooked meals, and recipes like this offer not just nourishment, but love and warmth. Whether it’s a weeknight dinner or a weekend barbecue, this recipe is sure to please. Happy grilling!

Easy Grilled Chicken

Prep Time 5 minutes
Cook Time 18 minutes
Total Time 30 minutes
Servings 4 servings
Calories 320
This easy grilled chicken recipe is a family favorite that combines juicy, brined chicken with flavorful spices, perfect for weeknight dinners or weekend barbecues.

Ingredients

For the Brine

  • 4 cups warm water (The warmth helps dissolve the salt and sugar faster.)
  • 1/4 cup kosher salt (Essential for flavor and moisture.)
  • 2 tbsp brown sugar (Adds sweetness that balances the salt.)
  • 2 cloves garlic, smashed (Infuses a lovely aroma and flavor.)

For the Chicken

  • 4 pieces boneless chicken breasts (or 8 thighs) (Choose skinless for a healthier version.)
  • 2 tbsp olive oil (Keeps the chicken moist and helps spices stick.)
  • 1 tsp salt (Enhances the overall flavor.)
  • 1/2 tsp black pepper (Adds warmth without overpowering the dish.)
  • 1 tsp garlic powder (Amplifies the garlic flavor for a fuller taste.)
  • 1 tsp paprika (Adds color to the chicken.)
  • 1/2 tsp dried oregano (Provides a hint of earthiness.)
  • 1/4 tsp cayenne pepper (Optional heat for those who like it spicy.)

Instructions 

Preparation

  • Dissolve the salt and brown sugar in warm water with the smashed garlic to create the brine.
  • Submerge the chicken in the brine for 30 minutes.
  • Pat the chicken dry and rub it with the mixed spices.

Grilling

  • Preheat the grill to medium-high heat and oil the grates well.
  • Grill the chicken for 7 minutes without moving it to create grill marks.
  • Flip and cook for 6 minutes until the internal temperature reaches 165°F.
  • Rest the chicken under foil for 5 minutes before slicing.

Notes

For crispy skin, grill with the skin side down first if using thighs. You can brine the chicken the night before for better flavor. Store leftovers in the fridge for up to 4 days.
Calories: 320kcal
Course: Dinner, Main Course
Cuisine: American, Grilling
Keyword: BBQ Chicken, Easy Recipe, Family Dinner, Grilled Chicken, Healthy Meal

Hot Honey Grilled Chicken Skewers

There’s something magical about the sound of sizzling chicken on a grill. The warm, smoky aroma fills the kitchen, drawing everyone in. You can almost hear the laughter and chatter of family and friends as you gather around for a meal. Hot Honey Grilled Chicken Skewers are not just a dish; they are an invitation to connect, share, and create lasting memories. This recipe is easy, delicious, and perfect for busy weeknights or weekend gatherings alike.

Why This Works

Hot Honey Grilled Chicken Skewers

Hot Honey Grilled Chicken Skewers have become a favorite in our household. The combination of succulent chicken marinated in sweet and spicy hot honey makes for a dish that everyone loves.

One of my favorite aspects of this recipe is how quickly it comes together. With just a short marination time, you can have dinner on the table in less than an hour. It’s family-friendly and perfect for any occasion. Plus, grilling adds a beautiful char that elevates the flavors, making mealtime special without extra fuss.

Process Overview

“This is where the magic happens—when the aroma fills the kitchen.”

This recipe is straightforward yet delightfully flavorful. You will start by preparing a simple marinade using hot honey and spices. After marinating the chicken, the grilling part is quick and easy. Before you know it, you’ll be serving succulent skewers that will impress your loved ones.

Ingredients

Here’s what you’ll need to make these delicious skewers:

  • 1 lb chicken breast, cut into cubes. Choose fresh, high-quality chicken for the best flavor.
  • 1/4 cup hot honey. This provides a perfect balance of sweetness and heat. If you can’t find hot honey, you can mix regular honey with a dash of hot sauce.
  • 2 tbsp olive oil. This helps to keep the chicken moist while grilling.
  • 1 tsp garlic powder. It adds depth and enhances the chicken’s flavor.
  • 1 tsp paprika. This brings a nice touch of smokiness and color.
  • Salt and pepper to taste. Seasoning is key for an enjoyable dish.
  • Skewers (soaked in water if wooden). Soaking prevents the skewers from burning on the grill.

Lily’s Personal Tips

  • When cutting the chicken, aim for even cubes to ensure they cook uniformly.
  • Use high-quality ingredients. Fresh herbs or homemade hot honey can make a big difference.
  • Be sure to soak your wooden skewers for at least 30 minutes before grilling. This keeps them from catching fire and helps them hold together.
  • You can substitute the chicken with shrimp or even vegetables if preferred.
  • Prepare extra skewers to reheat or save for lunch the next day!

Directions

Follow these simple steps to create your Hot Honey Grilled Chicken Skewers:

  1. In a bowl, combine the hot honey, olive oil, garlic powder, paprika, salt, and pepper. Give it a good whisk to blend well. This is your marinade.
  2. Add the chicken cubes to the marinade and let them sit for at least 30 minutes. This marinating time allows the flavors to really seep into the chicken.
  3. Preheat your grill to medium-high heat. It should be hot enough to give a nice sear.
  4. Thread the marinated chicken onto the skewers. Make sure to leave a little space between each piece for even cooking.
  5. Grill the skewers for about 10-12 minutes, turning occasionally. You’ll know they’re done when the chicken is nice and charred and has reached an internal temperature of 165°F.
  6. Serve hot and enjoy! These skewers are perfect right off the grill.

Serving

Hot Honey Grilled Chicken Skewers

When it comes to serving your Hot Honey Grilled Chicken Skewers, family-style is the way to go. Place the skewers on a large platter and let everyone help themselves. Pair them with a fresh salad, a side of grilled vegetables, or fluffy rice. The smoky sweetness of the chicken pairs well with crisp, refreshing sides.

Encourage your family and friends to mix and match their favorites. You can even provide dipping sauces, such as ranch or extra hot honey, for a fun twist. Sharing a delicious meal brings everyone together, creating an atmosphere of warmth and joy.

Storage

If you have any leftovers, store them in an airtight container in the refrigerator for up to 3 days. Reheat the skewers on a grill or in the oven at 350°F until heated through. Avoid using the microwave, as it can make the chicken rubbery.

For best results, enjoy them fresh, but they also make a tasty addition to salads or wraps the next day.

Kitchen Notes

Here are five shortcuts to make your cooking experience smoother:

  • Make Your Marinade in Advance: Prepare the marinade the night before and soak the chicken overnight. This enhances the flavors even more.
  • Prep Your Ingredients Early: Chop your chicken and vegetables ahead of time to make the process quicker.
  • Use Store-Bought Skewers: For a fuss-free option, use pre-made skewers from your grocery store.
  • Marinate in a Ziplock Bag: This method saves on dishes and allows for even marination.
  • Utilize a Meat Thermometer: This ensures your chicken is perfectly cooked every time.

Variations

If you have picky eaters or are accommodating different diets, here are a few variations you can try:

  • Vegetable Skewers: Use bell peppers, zucchini, and mushrooms for a vegetarian option. Toss them in the same marinade to keep the flavor profile consistent.
  • Different Proteins: Swap out chicken for shrimp or firm tofu. Adjust grilling times accordingly.
  • Low-Sugar Option: Use a sugar-free hot honey or make your own sweetener by mixing honey with a sugar substitute.
  • Gluten-Free Sauce: Always check labels for gluten content if you are avoiding it in your meals.
  • Add More Heat: For those who enjoy spicier flavors, toss in some chopped fresh jalapeños or sprinkle crushed red pepper flakes onto the skewers before grilling.

FAQ

1. Can I use frozen chicken for this recipe?

Yes, just ensure the chicken is thoroughly thawed before marinating for the best results.

2. How do I know when my chicken is cooked?

The internal temperature should reach 165°F. A meat thermometer is the best way to check.

3. Can I use this marinade for other proteins?

Absolutely! This marinade works well with shrimp, pork, or even tofu.

4. How long can I marinate the chicken?

For optimal flavor, try to marinate for at least 30 minutes, but it can go up to 24 hours in the refrigerator for extra depth.

5. Can these skewers be cooked in the oven?

Yes, you can bake the skewers in the oven at 400°F for about 15-20 minutes, turning halfway through.

In conclusion, Hot Honey Grilled Chicken Skewers are more than just a delicious meal; they are a wonderful way to gather your loved ones around the table. The sweet and spicy flavors create a memorable experience that you will want to share over and over again. Enjoy the process of grilling, savor the deliciousness, and most importantly, enjoy the time spent with family. Happy cooking!

Hot Honey Grilled Chicken Skewers

Prep Time 30 minutes
Cook Time 12 minutes
Total Time 42 minutes
Servings 4 servings
Calories 250
Delicious and easy-to-make skewers of chicken marinated in sweet and spicy hot honey, perfect for family gatherings or weeknight meals.

Ingredients

For the marinade

  • 1 lb chicken breast, cut into cubes (Choose fresh, high-quality chicken for the best flavor.)
  • 1/4 cup hot honey (Mix regular honey with a dash of hot sauce if hot honey is unavailable.)
  • 2 tbsp olive oil (Helps keep the chicken moist while grilling.)
  • 1 tsp garlic powder (Adds depth to the flavor.)
  • 1 tsp paprika (Brings smokiness and color.)
  • to taste salt and pepper (Seasoning is key for enjoyment.)

Other ingredients

  • 1 pack skewers (Soak in water if wooden to prevent burning on the grill.)

Instructions 

Preparation

  • In a bowl, combine the hot honey, olive oil, garlic powder, paprika, salt, and pepper. Whisk to blend well.
  • Add the chicken cubes to the marinade and let sit for at least 30 minutes.

Grilling

  • Preheat your grill to medium-high heat.
  • Thread the marinated chicken onto the skewers, leaving a little space between each piece.
  • Grill the skewers for about 10-12 minutes, turning occasionally until the chicken is charred and has reached an internal temperature of 165°F.
  • Serve hot and enjoy!

Notes

For storage, keep leftovers in an airtight container in the refrigerator for up to 3 days. Enjoy fresh, but leftovers can be added to salads or wraps. Marinade can be made in advance for enhanced flavor.
Calories: 250kcal
Course: Dinner, Main Course
Cuisine: American, Barbecue
Keyword: Family Meal, Grilled Chicken, Hot Honey, Quick Dinner, Skewers