Category

Quick & Easy Chicken

Category

This post contains affiliate links. As an Amazon Associate, I earn from qualifying purchases. This comes at no extra cost to you.

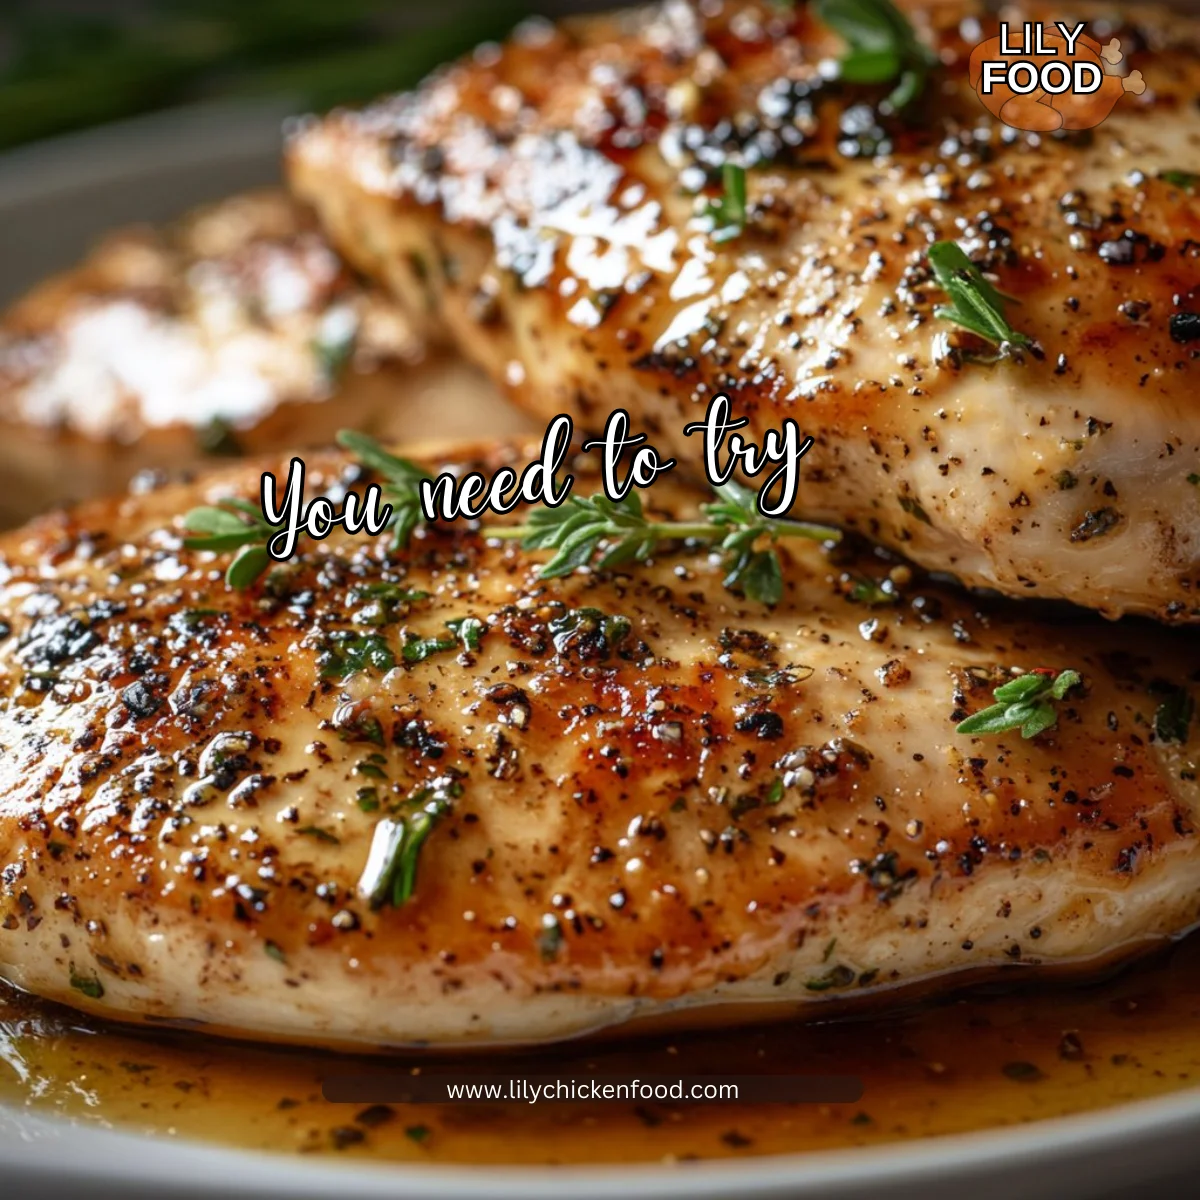
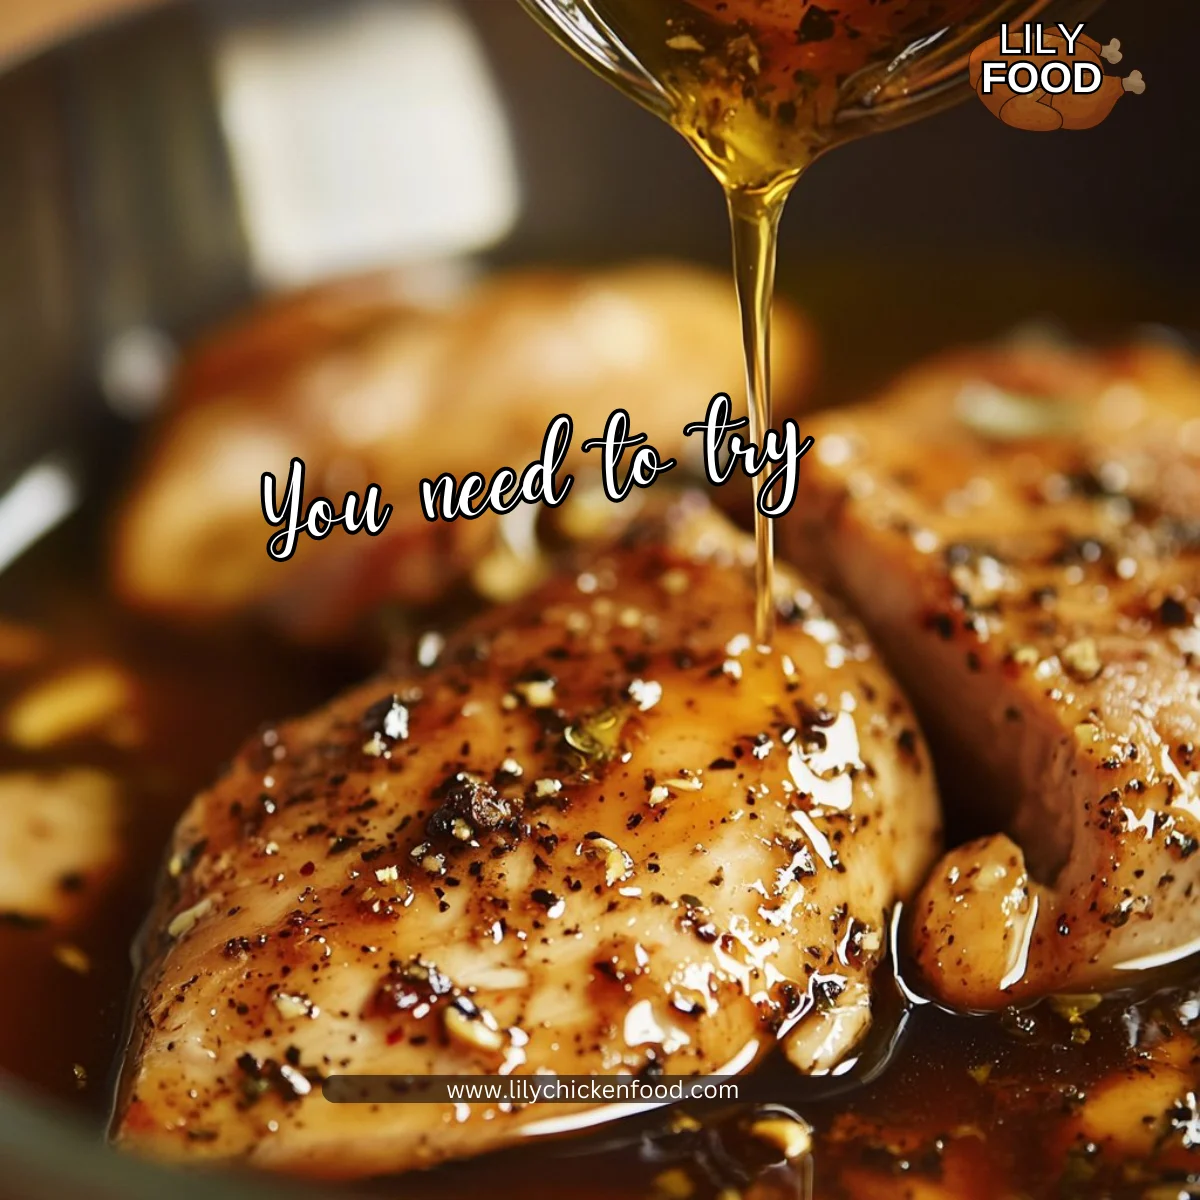
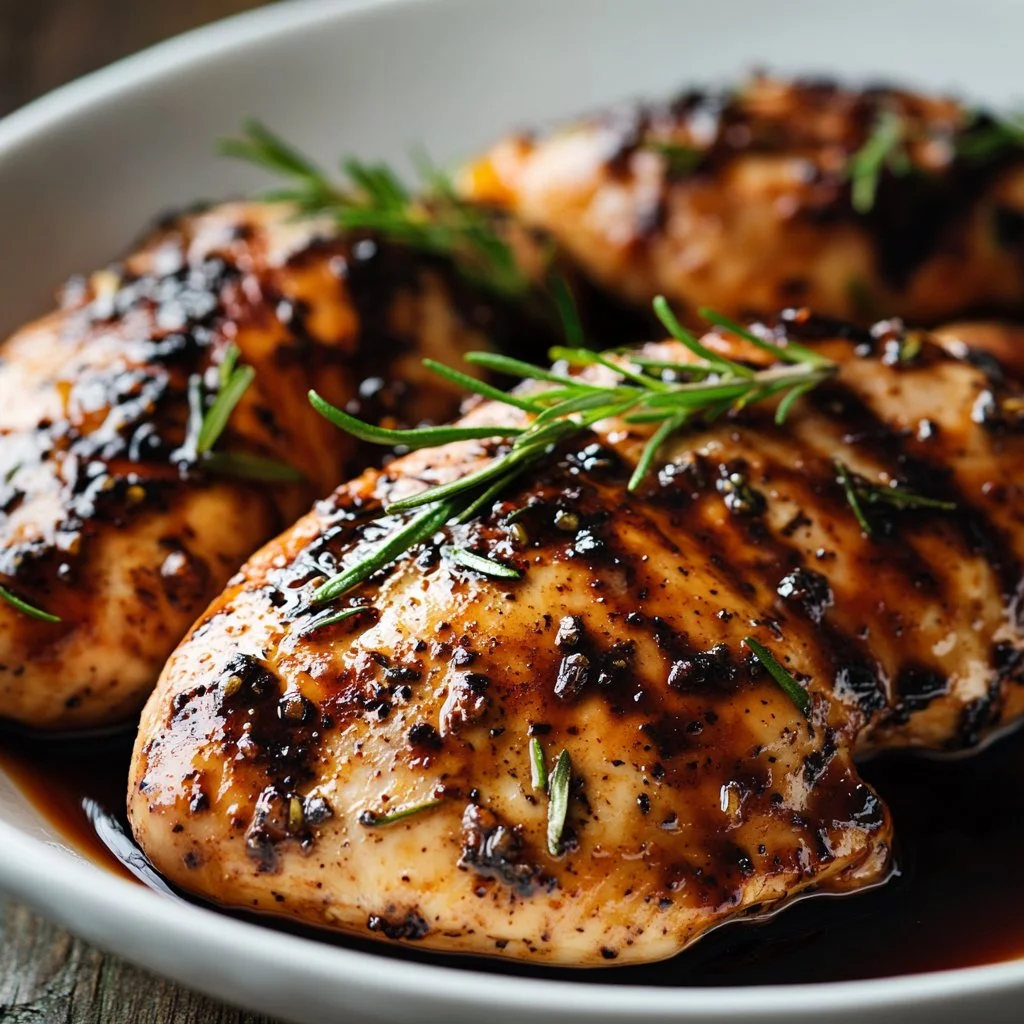
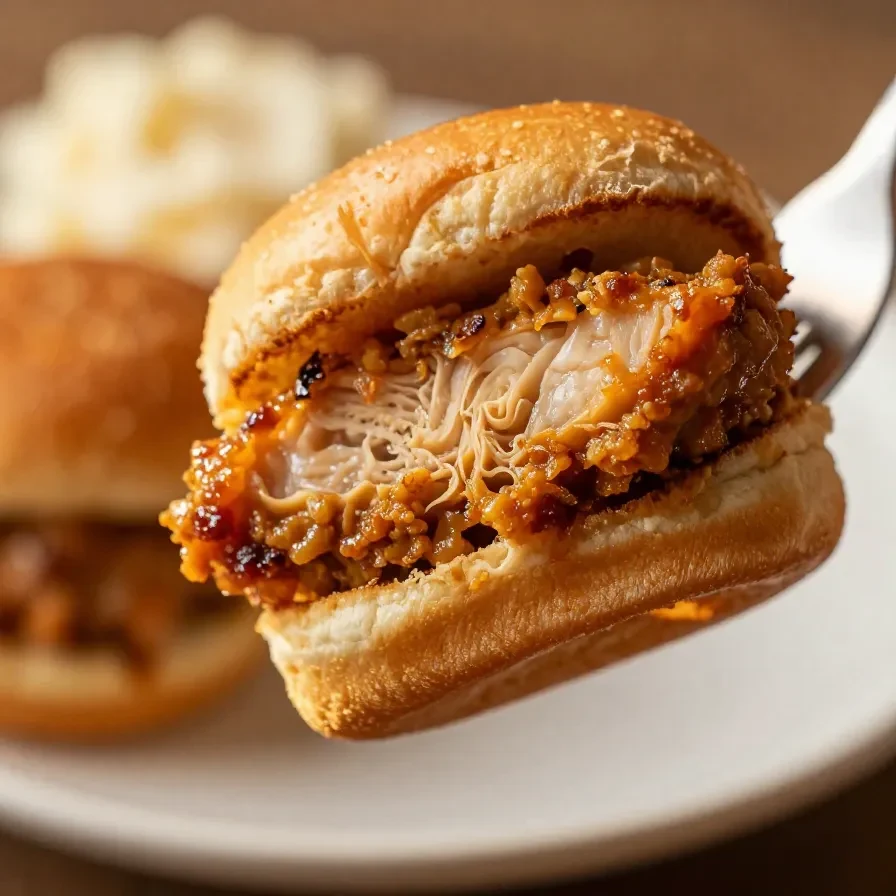
Buffalo Chicken Sliders bring bold flavors to your plate with tender shredded chicken tossed in tangy buffalo sauce, topped with crisp lettuce, creamy dressing, and melted cheddar cheese. Nestled between soft slider buns, the combination of textures and the spicy aroma make these sliders perfect for game day or casual gatherings. Ready in under 30 minutes, this no-fuss recipe is a crowd favorite for any occasion.

Table of Contents

Why This Buffalo Chicken Sliders Recipe Works

  • Perfect for fast dinners: These sliders require just 15 minutes of prep and 12 minutes of baking, making them ideal for busy weeknights.
  • Spicy yet customizable: The buffalo sauce delivers bold heat, but you can adjust the spice level to suit your preferences.
  • Great for gatherings: With eight sliders per batch, this recipe ensures plenty to share with friends and family during game days.
  • Bursting with flavor: Each layer — from the creamy ranch spread to the melted cheddar — combines for a satisfying bite every time.

Everything You Need for Buffalo Chicken Sliders

The halal buffalo sauce is the key to the sliders’ signature tangy heat, while melted cheddar cheese adds a comforting richness. Using halal-certified ingredients ensures the dish is suitable for a wide range of guests.

How To Make Buffalo Chicken Sliders Step by Step

  1. Preheat your oven to 350°F (175°C).
  2. In a large mixing bowl, combine the shredded halal chicken breast with buffalo sauce, garlic powder, onion powder, salt, and pepper. Stir until the chicken is evenly coated.
  3. In a small bowl, mix the mayonnaise and halal ranch dressing to create a creamy spread.
  4. Slice the slider buns in half horizontally. Place the bottom halves on a baking tray lined with parchment paper.
  5. Spread a generous layer of the mayonnaise-ranch mixture onto the bottom halves of the buns.
  6. Top each bun with a portion of the buffalo chicken mixture, followed by shredded lettuce, sliced red onions, and shredded halal cheddar cheese.
  7. Cover with the top halves of the slider buns.
  8. Brush the tops of the buns with melted unsalted butter for added flavor and a golden finish.
  9. Place the tray in the oven and bake for 10-12 minutes, or until the cheese is melted and the buns are slightly toasted.
  10. Remove from the oven and serve the sliders warm.
Close-up of buffalo chicken sliders with melted cheese served on a wooden tray.

How To Store, Reheat, and Make Ahead

Refrigerate leftover sliders in an airtight container for up to 3 days. To freeze, wrap each slider individually in plastic wrap and store in a freezer-safe bag for up to 1 month. Reheat in the oven at 300°F (150°C) for best results—this keeps the buns from becoming soggy while warming the filling evenly.

KitchenAid Artisan Stand Mixer 5 Quart

Kitchen ApplianceKitchenAid Artisan Stand Mixer 5 Quart

Ideal for mixing sauces and spreads effortlessly — perfect for this recipe.

View on Amazon →

Nordic Ware Baking Sheet

Essential CookwareNordic Ware Baking Sheet

Durable and reliable for baking sliders evenly in the oven.

View on Amazon →

Looking for something similar? Try our pineapple chicken kabobs.

For more ideas, check out our grilled greek chicken kabobs.

You might also enjoy our greek chicken kabobs.

Common Mistakes to Avoid with Buffalo Chicken Sliders

  • Skipping the butter glaze: This step adds flavor and ensures the buns toast beautifully in the oven.
  • Using cold chicken: Make sure the shredded chicken is at room temperature so it absorbs the buffalo sauce evenly.
  • Overloading toppings: Too many toppings can make the sliders messy and difficult to handle; stick to the recommended amounts.

Serving Ideas for Buffalo Chicken Sliders

  • Serve with celery sticks and halal ranch dip: A classic pairing that complements the buffalo sauce’s heat.
  • Add crispy sweet potato fries: They’re a sweet, hearty side that balances the spice.
  • Pair with a cold beer or mocktail: The refreshing beverage contrasts the sliders’ bold flavors beautifully.
  • Include a light green salad: It provides a fresh, crisp counterpart to the richness of the dish.

Expert Tips To Elevate Your Buffalo Chicken Sliders

  • Toast the buns lightly before assembling: This step adds extra texture and prevents soggy bottoms.
  • Use freshly shredded cheddar cheese: It melts better and adds a creamier texture than pre-shredded options.
  • Make the chicken mixture a day ahead: This allows the flavors to deepen and saves time on game day.
  • Brush buns with garlic butter: Infusing the butter with a touch of minced garlic elevates the flavor profile.

Buffalo Chicken Sliders

Prep Time 15 minutes
Cook Time 12 minutes
Total Time 27 minutes
Servings 8 sliders
Calories 320
Delicious and spicy buffalo chicken sliders, perfect for a quick meal or party appetizer.

Ingredients

Instructions 

  • Preheat your oven to 350°F (175°C).
  • In a large mixing bowl, combine the shredded halal chicken breast with buffalo sauce, garlic powder, onion powder, salt, and pepper. Stir until the chicken is evenly coated.
  • In a small bowl, mix the mayonnaise and halal ranch dressing to create a creamy spread.
  • Slice the slider buns in half horizontally. Place the bottom halves on a baking tray lined with parchment paper.
  • Spread a generous layer of the mayonnaise-ranch mixture onto the bottom halves of the buns.
  • Top each bun with a portion of the buffalo chicken mixture, followed by shredded lettuce, sliced red onions, and shredded halal cheddar cheese.
  • Cover with the top halves of the slider buns.
  • Brush the tops of the buns with melted unsalted butter for added flavor and a golden finish.
  • Place the tray in the oven and bake for 10-12 minutes, or until the cheese is melted and the buns are slightly toasted.
  • Remove from the oven and serve the sliders warm.

Notes

You can substitute halal cheddar cheese with any other halal cheese of your choice. Adjust the buffalo sauce quantity for desired spice level.
Calories: 320kcal
Cost: $15
Course: Appetizer, Main Course
Cuisine: American
Keyword: Buffalo Chicken, halal, Sliders
Close-up of buffalo chicken sliders with melted cheese served on a wooden tray.

Loved this recipe? Save it to your favorite Pinterest board so you can easily find it later! ✨

Baked Chicken Kabobs Recipe

I can still smell it now. The citrus and garlic hit the air as soon as I open the bowl. The kitchen clock ticks, pans clink, and little feet echo down the hallway. Those sounds mean supper is coming together, and everyone leans in a little closer.

I love recipes that let the kitchen feel alive without keeping me there all night. These baked chicken kabobs deliver bright flavor, tender meat, and colorful veggies. They are simple enough for a weeknight and special enough to serve to friends. If you need fast, family-friendly chicken ideas, you might also enjoy my recipe for 30-minute oven-baked chicken thighs, which pairs well with these kabobs for a heartier meal.

Why this works

Baked Chicken Kabobs Recipe

This recipe focuses on balance. The lemon and olive oil tenderize the chicken while the garlic and spices add a warm, familiar flavor kids and grownups both accept. Roasting the skewers on a single baking sheet saves time and keeps cleanup easy, which matters when life is busy.

Threading chicken and vegetables together does more than look pretty. The veggies release moisture and flavor into the meat as they roast. That means juicy bites without constant attention. For another simple, flavorful poultry approach to weeknights, try my baked lemon butter chicken for a different citrus-saturated twist.

Process Overview

“This is where the magic happens—when the aroma fills the kitchen.”

We marinate, thread, and roast. The marinade is straightforward and forgiving. Marinating for as little as 20 minutes gives a nice lift, but you can let it sit longer for deeper flavor. Baking on a hot sheet helps the pieces brown without drying.

This is the kind of recipe where you set the oven, let the oven do the work, and spend quality time with the family while food cooks. If you like crisp edges and bold color, you can finish the skewers under the broiler for a couple of minutes.

Ingredients

  • 600 g chicken breast, cut into chunks
    Lily’s tip: Use even-sized pieces for steady cooking. If your family prefers dark meat, swap in thighs and reduce the baking time slightly.

  • 1 red bell pepper, cut into chunks
    Lily’s tip: Red peppers add sweetness. If picky eaters avoid red, use orange or yellow for the same sweetness.

  • 1 green bell pepper, cut into chunks
    Lily’s tip: Green peppers give a little tang. Remove the seeds and membranes carefully for little hands.

  • 1 red onion, cut into chunks
    Lily’s tip: Red onion roasts sweetly. Soak slices in cold water briefly to tame raw bite for children.

  • 1 zucchini, sliced
    Lily’s tip: Slice zucchini slightly thicker so it does not turn to mush while baking.

  • 3 tbsp olive oil
    Lily’s tip: Use good olive oil for flavor. You only need enough to coat ingredients and carry the spices.

  • 2 tbsp lemon juice
    Lily’s tip: Fresh lemon juice brightens the dish. Bottled will work in a pinch, but fresh is best.

  • 3 cloves garlic, minced
    Lily’s tip: Press the garlic or mince finely so little ones don’t get sharp bites. Roasted garlic becomes mellow and sweet.

  • 1 tsp paprika
    Lily’s tip: Smoked paprika adds depth if you like a subtle smoky note.

  • 1 tsp dried oregano
    Lily’s tip: Dried oregano holds up well in the oven. If you have fresh, add a few chopped leaves after baking.

  • 1/2 tsp cumin
    Lily’s tip: Cumin gives warm, earthy flavor. Use less if you want a milder profile for kids.

  • Salt and black pepper, to taste
    Lily’s tip: Season lightly before marinating and adjust after cooking. Kids often prefer less salt, so keep a pinch separate for their plates.

For a fun family-friendly twist, mix the marinade into a bowl and let everyone dunk and thread their own skewers. It becomes dinner and an activity in one. If you want a creamier finish or a cooling sauce, check the flavors in my bang bang chicken bowl for inspiration.

Directions

  1. Preheat oven to 200°C (400°F). Line a baking sheet with foil or parchment paper.
    Encouraging note: This step is quick and sets you up for a smooth finish. While the oven warms, gather your skewers and chop your veggies.

<, p id=”instruction-step-2″>2. In a bowl, whisk together all marinade ingredients.,
Encouraging note: Whisk until the oil and lemon blend. You will smell the garlic and lemon right away.

, p id=”instruction-step-3″>3. Add chicken to the marinade and toss to coat. Marinate for at least 20 minutes if possible.,
Encouraging note: If time allows, marinate for up to 2 hours in the fridge. Even a short soak makes the chicken taste brighter.

, p id=”instruction-step-4″>4. Thread chicken and vegetables onto skewers.,
Encouraging note: Alternate chicken and veggies so each skewer has color and flavor. If using wooden skewers, soak them in water for 20 minutes first.

, p id=”instruction-step-5″>5. Arrange skewers on the prepared baking sheet.,
Encouraging note: Give each skewer a little space so hot air circulates. This helps the edges brown and keeps the chicken juicy.

, p id=”instruction-step-6″>6. Bake for 25–30 minutes, turning once, until chicken is cooked through and lightly golden.,
Encouraging note: Check for doneness with a meat thermometer at 165°F. Turning halfway ensures even color and prevents sticking.

, id=”instruction-step-7″>7. Broil for 2–3 minutes at the end for extra color if desired.,
Encouraging note: Watch the broiler closely so the edges brown without burning. This step is optional but gives restaurant-style finish.

, =”instruction-step-8″>8. Remove from oven and rest 5 minutes before serving.
Encouraging note: Resting lets juices redistribute. It is a great moment to set the table, pour drinks, and call everyone to the table.

These steps are forgiving. If you need to pause, you can marinate the chicken overnight or prepare the skewers ahead and bake them later. For a complete family meal, serve these with rice, a crisp salad, or warm pita.

Serving

Baked Chicken Kabobs Recipe

Serve these kabobs family-style on a large platter. Let everyone pull a skewer and build their plate. Offer lemon wedges, yogurt sauce, or a drizzle of tahini on the side for dipping. Bowls of rice or couscous pair beautifully and soak up the juices.

For a kid-friendly set up, slice the chicken off the skewers and place on small plates with carrot sticks and cucumber rounds. If you like sliders or hand-held options, remember my playful bang bang chicken sliders idea for a casual assembly that kids adore.

Storage

Refrigerating: Store leftover kabob pieces in an airtight container for up to 3 days. Keep vegetables and chicken together if you plan to reheat on a sheet pan.

Freezing: Cooked chicken freezes well. Remove vegetables that turn watery and freeze the chicken in a flat bag for up to 2 months. Thaw in the refrigerator overnight before reheating.

Reheating: Reheat in a 350°F oven for 8–12 minutes until warmed through. Place on a baking sheet and cover lightly with foil to prevent drying. You can also reheat in a skillet over medium heat with a splash of olive oil for quick crisping.

Meal prep tip: Make an extra batch of marinade and toss uncooked chicken in it to freeze for a fast meal later. When ready, thaw and bake as directed.

Kitchen Notes

  • Use metal or soaked wooden skewers. Soaked wooden skewers cut down on any chance of burning under the broiler.
  • Cut everything to similar sizes. This keeps cooking times even and avoids overcooked veggies.
  • Double the batch for a crowd. Leftovers reheat well and make great wraps.
  • Swap vegetables seasonally. Cherry tomatoes, mushrooms, or small potatoes work with the same timing if you par-cook denser vegetables.
  • Keep a simple yogurt dip on hand. Plain yogurt mixed with lemon, garlic, and a pinch of salt makes a fast family favorite.

Variations

  • For picky eaters: Keep chicken and a few plain veggie pieces separate on skewers. Serve with a small bowl of plain yogurt or ketchup for dipping.
  • Low-carb option: Serve over a bed of greens instead of rice. Add extra cucumbers and tomatoes for crunch.
  • Mediterranean style: Add a sprinkle of feta and chopped parsley after baking. Swap oregano for fresh basil if you prefer.
  • Spicy version: Add 1/4 tsp cayenne or a drizzle of hot sauce to the marinade for grown-up heat.
  • Gluten-free and dairy-free: This recipe is naturally gluten-free and can be kept dairy-free by using olive oil and lemon. For related tips, you might find inspiration in a gluten-free kabob variation that focuses on bold flavors and simple swaps.

FAQ

Q: Can I use frozen chicken?
A: Thaw completely before cutting and marinating. Frozen chicken can release extra water and dilute the marinade.

Q: How do I prevent vegetables from becoming soggy?
A: Cut them a bit thicker and give denser veggies a short par-cook. Keep zucchini slices larger so they hold shape.

Q: Can I cook these on the grill instead?
A: Yes. Grill over medium heat for about 10–12 minutes, turning occasionally, until the chicken reaches 165°F. Grilling gives great char and smoky flavor.

Q: Are wooden skewers safe in the oven?
A: Yes, if soaked first. Soak for at least 20 minutes to reduce burning. For safety, place them perpendicular to the oven rack so pointed ends do not touch the heating element.

Q: What side dishes pair well with these kabobs?
A: Simple sides like rice pilaf, a green salad, warm pita, or roasted potatoes all work. For a tangy contrast, a cucumber-yogurt salad brightens the whole plate.

Conclusion

I hope this baked chicken kabobs recipe becomes one of your go-to family meals. They are easy to prepare, forgiving, and full of flavor that kids and adults usually enjoy. If you want a gluten-free, dairy-free take with similar oven-baked convenience, see this helpful guide at Baked Chicken Kabobs in the Oven – Gluten-Free and Dairy-Free. For another oven-baked kabob perspective and tips on broiling for color, take a look at Baked Chicken Kabobs in the Oven – The Dizzy Cook.

Happy cooking, friends. Invite the family to help thread the skewers and enjoy the simple joy of a shared meal.

Baked Chicken Kabobs

Prep Time 30 minutes
Cook Time 30 minutes
Total Time 1 hour
Servings 4 servings
Calories 250
Enjoy vibrant flavors and tender meat with these easy-to-make baked chicken kabobs, perfect for family dinners or gathering with friends.

Ingredients

Main Ingredients

  • 600 g chicken breast, cut into chunks (Use even-sized pieces for steady cooking.)
  • 1 red bell pepper, cut into chunks (Red peppers add sweetness.)
  • 1 green bell pepper, cut into chunks (Remove seeds and membranes carefully.)
  • 1 red onion, cut into chunks (Red onion roasts sweetly.)
  • 1 zucchini, sliced (Slice zucchini slightly thicker.)

Marinade Ingredients

  • 3 tbsp olive oil (Use good quality olive oil for flavor.)
  • 2 tbsp lemon juice (Fresh lemon juice brightens the dish.)
  • 3 cloves garlic, minced (Press or mince finely for mild bites.)
  • 1 tsp paprika (Smoked paprika adds depth.)
  • 1 tsp dried oregano (Add fresh herbs after baking for a twist.)
  • 1/2 tsp cumin (Use less for a milder profile.)
  • Salt and black pepper, to taste (Season lightly before marinating.)

Instructions 

Preparation

  • Preheat oven to 200°C (400°F). Line a baking sheet with foil or parchment paper.
  • In a bowl, whisk together all marinade ingredients until smooth.
  • Add chicken to the marinade and toss to coat. Marinate for at least 20 minutes, or up to 2 hours.
  • Thread chicken and vegetables onto skewers, alternating for color and flavor.
  • Arrange skewers on the prepared baking sheet, leaving space between each skewer.

Cooking

  • Bake for 25–30 minutes, turning once, until chicken is cooked through and lightly golden.
  • Broil for 2–3 minutes for extra color if desired.
  • Remove from oven and rest for 5 minutes before serving.

Notes

Serve kabobs family-style and offer dips like yogurt sauce or tahini. Leftovers can be stored in an airtight container for up to 3 days.
Calories: 250kcal
Course: Dinner, Main Course
Cuisine: Mediterranean
Keyword: Baked Chicken Kabobs, Chicken Skewers, Easy Chicken Recipe, Family Dinner, Oven-Baked Kabobs

Cowboy Butter Chicken Linguine

The kitchen smelled like warm butter and garlic as I walked in. The pan hissed softly on the stove. The sound felt like a promise that dinner would be both simple and special tonight.

This Cowboy Butter Chicken Linguine is one of those weeknight meals that fills the house with comfort. It is fast enough for a busy evening and tasty enough to make everyone ask for seconds. If you like cozy dinners that come together quickly, you will love this one.

I often make a variation of this dish when I need something that pleases the whole family. If you want another lemony pasta with a twist, try my recipe for Cowboy Butter Lemon Bowtie Chicken with Broccoli the next time you cook.

Why this works

Cowboy Butter Chicken Linguine

This recipe hits a sweet spot between quick and comforting. The butter and Dijon create a rich, tangy sauce that clings to every strand of linguine. The cooked chicken makes it a satisfying, protein-rich meal for everyone at the table.

Making this for family means less time prepping and more time together. You can use leftover rotisserie chicken or quickly pan-sear chicken for fresh flavor. Either way, dinner is on the table fast.

If you need a grilled option for summer, this technique pairs well with skewers. Try a similar seasoning on Grilled Chicken Skewers with Cowboy Butter for outdoor meals.

Process Overview

“This is where the magic happens—when the aroma fills the kitchen.”

Start by boiling the pasta while you build the sauce. The timing is forgiving, and the sauce comes together in minutes. Keep your garlic gentle in the pan so it adds flavor without burning.

Once the butter, mustard, and lemon join, you will see how simple ingredients lift a dish. Add the chicken last so it stays tender and warm. If you want a baked version with the same flavors, I have a tried method in my Baked Lemon Butter Chicken post.

Ingredients

  • 12 oz linguine
    Tip: Use a good brand for firm texture. Stir occasionally so it does not stick.

  • 2 cups chicken, cooked and sliced
    Tip: Rotisserie chicken makes this a time saver. Slice or shred into bite-sized pieces.

  • 1/2 cup unsalted butter
    Tip: Unsalted gives you control over seasoning. Use high quality butter for best flavor.

  • 4 cloves garlic, minced
    Tip: Mince finely so it melts into the sauce. Add later if you prefer a milder garlic presence.

  • 2 tbsp Dijon mustard
    Tip: Dijon adds tang and depth. If your family prefers less heat, start with 1 tablespoon and taste.

  • 1 lemon, juiced
    Tip: Fresh lemon brightens the sauce. Add a little more if you want extra zing.

  • 1/4 cup fresh herbs, such as parsley and thyme, chopped
    Tip: Fresh herbs lift the dish. Parsley is kid-friendly while thyme adds a subtle savory note.

  • Salt to taste
    Tip: Add in small amounts and taste as you go. The butter may reduce how much you need.

  • Pepper to taste
    Tip: Freshly ground black pepper gives warmth. Add a pinch earlier for deeper flavor.

Personal tip for measuring: Keep the chicken and linguine amounts flexible for your family size. This base serves about 3 to 4 people as a main course.

I also like to have a small bowl of grated Parmesan ready for the table. It adds a creamy finishing touch that many kids enjoy.

For a similar pasta build, refer to my post on Garlic Butter Chicken and Bowtie Pasta if you want another simple skillet method.

Directions

  1. Cook the linguine according to package instructions, then drain.
    Encouragement: Cook to al dente so the pasta holds up under the sauce. Reserve a half cup of pasta water if you need to loosen the sauce.

  2. In a large pan, melt the butter over medium heat.
    Encouragement: Watch carefully so the butter does not brown. Gentle heat keeps the sauce smooth.

  3. Add the minced garlic and sauté until fragrant.
    Encouragement: This happens quickly. Stir so the garlic softens without burning and fills the kitchen with a lovely scent.

  4. Stir in the Dijon mustard and lemon juice, mixing well.
    Encouragement: The sauce will smell bright and tangy. Taste and adjust mustard or lemon a little at a time.

  5. Add the cooked chicken and let it warm through.
    Encouragement: Keep the heat moderate to avoid drying the chicken. This step only needs a few minutes.

  6. Toss in the cooked linguine and fresh herbs.
    Encouragement: Toss gently so every strand gets sauced. If needed, add a splash of reserved pasta water to make the sauce silky.

  7. Season with salt and pepper to taste, and serve immediately.
    Encouragement: Taste before you plate. A final squeeze of lemon or sprinkle of herbs brings it to life.

If your family prefers a cheesy finish, sprinkle Parmesan at the end and serve with lemon wedges for extra brightness.

Serving

Cowboy Butter Chicken Linguine

Serve this dish family-style on a warm platter. Let everyone help themselves so plates look full and inviting. A simple green salad and crusty bread make great companions.

For picky eaters, offer the sauce on the side so they can control how much flavor they try. Kids often love the butter and garlic notes. Adults will appreciate the balance of lemon and Dijon.

If you want to make the meal feel extra special, set a small bowl of extra herbs and grated cheese in the center of the table. That way everyone customizes their plate and we all eat a little differently while enjoying the same meal.

Storage

Store leftover Cowboy Butter Chicken Linguine in an airtight container in the fridge for up to 3 days. Cool it to room temperature before sealing.

To reheat, warm gently in a skillet over low heat. Add a splash of water or chicken broth to loosen the sauce and keep the pasta moist. You can also reheat in the microwave in short intervals, stirring between each to heat evenly.

If you have more than 3 days worth of leftovers, freeze in a freezer-safe container for up to 2 months. Thaw overnight in the fridge and reheat gently on the stove.

Avoid overcooking when reheating. The chicken can dry out and the pasta can become mushy if heated too quickly.

Kitchen Notes

  • Make it a one-pan job by cooking chicken breasts or thighs in the pan first, then using the same pan for the sauce. This saves time and dishes.
  • Use rotisserie chicken to cut prep time in half. It is an easy shortcut that keeps flavor high.
  • Mince garlic or use a garlic press for even, fast flavor release. Fresh garlic beats jarred for taste.
  • Save a bit of pasta water to adjust sauce thickness. Starchy water helps the sauce cling to pasta.
  • Double the recipe for leftovers or to feed a crowd. Leftovers reheat well for school lunches or quick dinners.

If you like one-pan chicken and rice ideas, you might enjoy my method for Garlic Butter Chicken and Rice which uses many of the same flavor principles.

Variations

  • Kid-friendly: Reduce Dijon and lemon for a milder sauce. Add a sprinkle of Parmesan to make it more familiar to children.
  • Low-carb: Swap linguine for zucchini ribbons or a spiralized vegetable for a lighter plate. Add extra herbs for volume.
  • Gluten-free: Use a gluten-free linguine and cook per package instructions. The sauce is naturally gluten-free.
  • Extra veggies: Toss in steamed broccoli, peas, or cherry tomatoes for color and nutrition. Add them when you toss the pasta with the sauce.
  • Creamier sauce: Stir in 1/4 cup heavy cream or cream cheese at the end for a richer finish that dresses up the pasta.

These tweaks help adapt the recipe for picky eaters, dietary needs, or whatever produce is in your fridge.

FAQ

Can I use frozen chicken?

Yes. Thaw completely and warm it in the pan before adding the pasta. Frozen chicken that is not thawed will release too much moisture and cool the sauce.

Can I make this ahead of time?

You can prepare the sauce and chicken a few hours ahead and refrigerate them separately from the pasta. Reheat gently and toss with freshly cooked pasta for best texture.

Is the recipe spicy?

No. This is not a spicy dish. Dijon mustard has a gentle tang, not heat. If you want a little kick, add a pinch of red pepper flakes.

How do I make it more flavorful without adding salt?

Add extra fresh herbs, a bit more lemon, or a small splash of white wine while making the sauce. These build flavor without relying solely on salt.

Can I use whole wheat pasta?

Yes. Whole wheat linguine works well and adds fiber. Cook according to package directions and taste for doneness.

Conclusion

I hope this Cowboy Butter Chicken Linguine finds its way into your weekly rotation. It is a warm, quick, and family-friendly meal that brings the house together. If you want more inspiration or a different spin on cowboy butter pasta, I recommend the I Am Homesteader recipe for a similar take, and you might also like The Happier Homemaker version for ideas to tweak the flavors.

Thank you for cooking with me today. Keep it simple, keep it tasty, and enjoy sharing this meal with the people you love.

Cowboy Butter Chicken Linguine

Prep Time 10 minutes
Cook Time 15 minutes
Total Time 25 minutes
Servings 4 servings
Calories 550
A fast and comforting weeknight meal featuring linguine coated in a rich butter and Dijon sauce, complemented by tender chicken and fresh herbs.

Ingredients

Pasta

  • 12 oz linguine (Use a good brand for firm texture. Stir occasionally so it does not stick.)

Chicken

  • 2 cups cooked and sliced chicken (Rotisserie chicken makes this a time saver. Slice or shred into bite-sized pieces.)

Sauce

  • 1/2 cup unsalted butter (Unsalted gives you control over seasoning. Use high quality butter for best flavor.)
  • 4 cloves garlic, minced (Mince finely so it melts into the sauce.)
  • 2 tbsp Dijon mustard (Dijon adds tang and depth.)
  • 1 medium lemon, juiced (Fresh lemon brightens the sauce. Add more if you want extra zing.)
  • 1/4 cup fresh herbs (parsley and thyme), chopped (Fresh herbs lift the dish.)
  • Salt to taste (Add in small amounts and taste as you go.)
  • Pepper to taste (Freshly ground black pepper gives warmth.)

Instructions 

Cooking the Pasta and Sauce

  • Cook the linguine according to package instructions, then drain.
  • In a large pan, melt the butter over medium heat.
  • Add the minced garlic and sauté until fragrant.
  • Stir in the Dijon mustard and lemon juice, mixing well.
  • Add the cooked chicken and let it warm through.
  • Toss in the cooked linguine and fresh herbs.
  • Season with salt and pepper to taste, and serve immediately.

Notes

Serve on a warm platter for a family-style meal. Parmesan can be added for added creaminess. Leftovers can be stored in the fridge for up to 3 days.
Calories: 550kcal
Course: Dinner, Main Course
Cuisine: American
Keyword: Comfort Food, Cowboy Butter Chicken, Linguine, Quick Dinner

Zesty Cowboy Butter Chicken: Lemon Bowtie Pasta & Broccoli

Zesty Cowboy Butter Chicken: Lemon Bowtie Pasta & Broccoli

The first thing you notice is the bright lemon smell, then the soft sizzle of butter and garlic in the pan. You hear the pot bubbling and the gentle clink of a wooden spoon as you stir. In my kitchen, that sound means dinner is on its way and the family will gather.

This dish fills the house with a warm, tangy aroma that makes everyone come out of their rooms. It is easy enough for weeknights and special enough for guests. If you like simple pasta dinners, you might also enjoy my Garlic Butter Chicken and Bowtie Pasta for another cozy option.

Why this works

Zesty Cowboy Butter Chicken: Lemon Bowtie Pasta & Broccoli

This recipe balances bright lemon, smoky paprika, and rich butter. The bowtie pasta soaks up the sauce, and the broccoli brings color and texture. It is a complete meal in one skillet and pot, saving time and dishes.

I created this for busy families. You can prep while the pasta cooks and finish the sauce in the same pan you seared the chicken in. That saves time and keeps cleanup low. For a different weeknight favorite, try my tested Baked Lemon Butter Chicken for nights when you want a hands-off approach.

I test these recipes many times before sharing. I focus on safe cooking steps, consistent results, and flavors that children and adults both enjoy. The chicken should always reach 165°F to be safe and juicy.

Process Overview

“This is where the magic happens—when the aroma fills the kitchen.”

Start by prepping everything. Cook the bowtie pasta while you cut the chicken and chop the broccoli. Sear the chicken quickly to get a golden crust. Use the same pan to build the cowboy butter sauce for flavor depth.

Finish by tossing pasta, broccoli, and chicken together so each bite gets sauce. If you like grilled notes, this same cowboy butter idea works well on skewers, as I showed with my Grilled Chicken Skewers with Cowboy Butter.

Ingredients

H2: Pantry and fresh items

  • Boneless, skinless chicken breasts — cut into bite-sized pieces or thin cutlets.
    Lily’s tip: Trim excess fat and pound thicker pieces thin for even cooking. Use 1.5 to 2 pounds for a family of four.

  • Bowtie pasta (Farfalle).
    Lily’s tip: Use 12 ounces. Bowtie holds sauce well and feels fun for kids.

  • Fresh broccoli florets.
    Lily’s tip: Cut into small, even florets so they cook quickly and match the pasta size.

  • Unsalted butter.
    Lily’s tip: Use real butter for the best flavor. Start with 4 tablespoons total for a rich, silky sauce.

  • Freshly minced garlic.
    Lily’s tip: Mince cloves fine so the garlic melts into the sauce without big raw bites.

  • Finely minced shallots.
    Lily’s tip: Shallots add sweetness and depth. One medium shallot is usually enough.

  • Fresh rosemary.
    Lily’s tip: Use a small amount. Strip leaves from the stem and finely chop for even flavor.

  • Fresh thyme.
    Lily’s tip: Remove leaves from the stem. Thyme pairs beautifully with lemon and butter.

  • Fresh parsley.
    Lily’s tip: Chop roughly and save some for garnish to brighten the dish at the end.

  • Smoked paprika.
    Lily’s tip: One teaspoon adds a warm, smoky note without heat. Use more if you like smoky flavors.

  • Red pepper flakes (optional).
    Lily’s tip: Add a pinch for mild kick. Leave out for little ones.

  • Lemon zest.
    Lily’s tip: Zest before juicing so you get the most bright flavor.

  • Lemon juice.
    Lily’s tip: Fresh juice tastes best. Use one medium lemon for about 2 tablespoons.

  • Dijon mustard.
    Lily’s tip: A teaspoon or two adds a subtle tang and helps the sauce emulsify.

  • Worcestershire sauce.
    Lily’s tip: Use sparingly. It gives savory depth.

  • Low-sodium chicken broth.
    Lily’s tip: Use about 1/2 to 1 cup. It helps loosen the sauce and add body.

  • Salt.
    Lily’s tip: Season in layers. Start with a little when cooking pasta and adjust at the end.

  • Black pepper.
    Lily’s tip: Freshly cracked is best for aroma and flavor.

H3: Ingredient notes and Lily’s tips

I like to lay everything out on the counter before I start. That keeps the pace steady and the family fed faster. If you want a creamier sauce, add a splash of heavy cream at the end. For a lighter meal, use a bit more lemon and reduce butter by one tablespoon.

Also, if you prefer a different pasta, most short pasta shapes will work. I often swap in penne or rotini when farfalle is not on hand. For a comforting casserole twist, see my Chicken Alfredo Pasta Bake for inspiration.

Directions

  1. Prep Your Ingredients:
    Cut your chicken breasts into uniform bite-sized pieces or thin cutlets. Chop your broccoli into small florets. Finely mince your garlic and shallots. Zest and juice your lemon. Roughly chop your fresh parsley, rosemary, and thyme.
    Encouraging note: Prep makes cooking calm and quick. Take a deep breath. You are doing great.

  2. Cook the Pasta:
    Bring a large pot of generously salted water to a rolling boil. Add the bowtie pasta and cook according to package directions until al dente. Reserve about 1 to 1.5 cups of the starchy pasta water before draining.
    Encouraging note: Save that pasta water. It helps the sauce cling to the pasta and brings the whole dish together.

  3. Sear the Chicken:
    Pat your chicken pieces dry and season with salt and black pepper. In a large skillet, melt 1 tablespoon of unsalted butter over medium-high heat. Add the chicken in a single layer and cook for 3-4 minutes per side until golden brown and cooked through. Remove the chicken and set aside.
    Encouraging note: A hot pan gives good color. If your pieces are crowded, sear in batches. Keep the cooked pieces warm on a plate.

  4. Build the Cowboy Butter Sauce:
    Reduce heat to medium. Add the remaining unsalted butter to the skillet. Once melted, add the minced shallots and cook for 2-3 minutes until softened. Stir in the minced garlic, chopped rosemary, and thyme, cooking for another minute.
    Encouraging note: This step smells amazing. Let those aromatics bloom gently without burning.

  5. Add Spices and Liquids:
    Stir in the smoked paprika and red pepper flakes and cook for about 30 seconds. Pour in the chicken broth, scraping up any browned bits from the pan. Bring to a simmer.
    Encouraging note: Those browned bits add deep flavor. A quick scrape brings them into the sauce.

  6. Finish the Sauce:
    Stir in the Dijon mustard, Worcestershire sauce, lemon zest, and lemon juice. Let the sauce simmer gently for 2-3 minutes to reduce and thicken.
    Encouraging note: Taste and adjust salt and pepper. This is the moment to balance acid and richness.

  7. Combine & Toss:
    Add the cooked broccoli florets to the sauce and let them cook until crisp-tender. Return the cooked chicken to the skillet with the sauce and broccoli. Add the drained bowtie pasta and toss everything gently to coat.
    Encouraging note: Toss with a little reserved pasta water if the sauce needs to loosen. This helps the sauce cling to every bowtie.

  8. Serve Immediately:
    Garnish with fresh chopped parsley and serve hot.
    Encouraging note: Family meals are about connection. Serve with a smile and let everyone help pass bowls and extra lemon wedges.

Safety note: Always check that the chicken reaches an internal temperature of 165°F with a meat thermometer. That ensures safety while keeping the meat juicy.

Serving

Zesty Cowboy Butter Chicken: Lemon Bowtie Pasta & Broccoli

Serve this family-style right from the skillet into bowls or a big serving dish. Add lemon wedges on the side for anyone who wants extra brightness.

For a complete meal, pair it with a simple green salad and warm crusty bread to mop up the sauce. If you have picky eaters, serve the chicken and pasta slightly separated so everyone can build their own plates.

For a fun weeknight setup, place the skillet on the table with a serving spoon, a bowl of grated Parmesan, and extra parsley for garnish. If you want plating ideas for a dinner party, you can present individual portions with a sprig of rosemary on top.

I also have a full recipe page if you want a printable version to tuck into your meal plan: Zesty Cowboy Butter Chicken recipe.

Storage

Refrigerator:
Store leftovers in an airtight container for up to 3 days. Cool the dish to room temperature before refrigerating to protect flavor and texture.

Reheating:
Reheat on the stove over low heat with a splash of chicken broth or reserved pasta water. This keeps the sauce silky and prevents the chicken from drying out. Microwave reheating works too; add a splash of liquid and cover loosely to keep moisture.

Freezing:
You can freeze the cooked chicken and sauce for up to 2 months in a freezer-safe container. I do not recommend freezing the pasta with the sauce because it can become mushy when thawed. Instead, freeze the chicken and sauce, and boil fresh pasta when ready to serve.

Kitchen Notes

  • Shortcut 1: Use pre-cut chicken or thin cutlets to save 10 minutes on prep.
  • Shortcut 2: Frozen broccoli florets work fine. Thaw and pat dry before adding to the sauce.
  • Shortcut 3: Swap in rotisserie chicken for an ultra-quick dinner. Add it at the end to warm through.
  • Shortcut 4: Use low-sodium chicken broth and adjust salt at the end for better control.
  • Shortcut 5: If you want a creamy finish, stir in 1/4 cup of heavy cream at the end and heat gently.

Variations

  • For picky eaters: Keep the broccoli separate and offer the sauce on the side. Serve chicken pieces plain for those who prefer simple flavors.
  • For a vegetarian version: Replace chicken with hearty mushrooms and extra chickpeas for protein.
  • For grain-free: Use chickpea or lentil pasta for added fiber and protein while keeping the texture similar.
  • For extra heat: Add more red pepper flakes or a splash of hot sauce to the sauce.
  • For a lighter version: Use 2 tablespoons of butter and more lemon juice. Add a splash of olive oil to finish for extra shine.

FAQ

Q: Can I use chicken thighs instead of breasts?
A: Yes. Boneless, skinless thighs are forgiving and stay juicy. Adjust searing time slightly; thighs may need an extra minute or two.

Q: How can I make the sauce thicker?
A: Simmer a little longer to reduce the liquid or stir in a tablespoon of butter at the end. You can also whisk a teaspoon of cornstarch into a bit of cold water and add it if you need a quicker thicken.

Q: Can I prepare this ahead for guests?
A: You can cook the chicken and make the sauce ahead. Reheat gently, cook fresh pasta, and toss together just before serving for the best texture.

Q: What other vegetables pair well?
A: Asparagus, peas, or baby spinach all work. Add them at different times so they stay bright and crisp.

Q: Is this kid-friendly?
A: Yes. Omit the red pepper flakes and serve a little sauce on the side for the children. Most kids enjoy the simple lemon-butter flavor and fun bowtie pasta.

Conclusion

I hope this Zesty Cowboy Butter Chicken with Lemon Bowtie Pasta and Broccoli becomes a regular in your weeknight rotation. It is one of those dishes that feels special but comes together quickly, and it always brings the family to the table.

For more inspiration and similar cowboy butter recipes, check these trusted posts: Cowboy Butter Chicken Linguine – I Am Homesteader and Cowboy Butter Chicken Pasta – The Happier Homemaker.

Thanks for cooking with me. Come back soon for more family-friendly recipes and practical tips from my kitchen.

Zesty Cowboy Butter Chicken with Lemon Bowtie Pasta and Broccoli

Prep Time 15 minutes
Cook Time 20 minutes
Total Time 35 minutes
Servings 4 servings
Calories 600
A deliciously tangy and buttery chicken dish served with bowtie pasta and broccoli, perfect for busy weeknights and special gatherings.

Ingredients

Main Ingredients

  • 1.5 pounds Boneless, skinless chicken breasts (Cut into bite-sized pieces or thin cutlets.)
  • 12 ounces Bowtie pasta (Farfalle) (Holds sauce well and is fun for kids.)
  • 2 cups Fresh broccoli florets (Cut into small, even florets.)
  • 4 tablespoons Unsalted butter (Use real butter for the best flavor.)
  • 4 cloves Freshly minced garlic (Mince fine so it melts into the sauce.)
  • 1 medium Finely minced shallot (Adds sweetness and depth.)
  • 1 teaspoon Fresh rosemary (Finely chopped for even flavor.)
  • 1 teaspoon Fresh thyme leaves (Pairs beautifully with lemon and butter.)
  • 1/4 cup Fresh parsley (Chop roughly; save some for garnish.)
  • 1 teaspoon Smoked paprika (Adds a warm, smoky note.)
  • 1 pinch Red pepper flakes (optional) (For mild kick. Leave out for kids.)
  • 1 tablespoon Lemon zest (Zest before juicing for best flavor.)
  • 2 tablespoons Lemon juice (Fresh juice preferred, from one medium lemon.)
  • 1 teaspoon Dijon mustard (Adds subtle tang and helps emulsify sauce.)
  • 1 tablespoon Worcestershire sauce (Use sparingly for savory depth.)
  • 1 cup Low-sodium chicken broth (Loosens sauce and adds body.)
  • to taste Salt (Season in layers.)
  • to taste Black pepper (Freshly cracked is best.)

Instructions 

Preparation

  • Cut chicken into uniform bite-sized pieces or thin cutlets.
  • Chop broccoli into small florets.
  • Finely mince garlic and shallots.
  • Zest and juice the lemon.
  • Roughly chop parsley, rosemary, and thyme.

Cooking the Pasta

  • Bring a large pot of salted water to a rolling boil. Add bowtie pasta and cook according to package directions until al dente.
  • Reserve about 1 to 1.5 cups of starchy pasta water before draining.

Searing the Chicken

  • Pat chicken dry and season with salt and black pepper.
  • In a large skillet, melt 1 tablespoon of butter over medium-high heat.
  • Add chicken in a single layer and cook for 3-4 minutes per side until golden brown and cooked through.
  • Remove chicken and set aside.

Building the Cowboy Butter Sauce

  • Reduce heat to medium and add remaining unsalted butter to the skillet.
  • Once melted, add minced shallots and cook for 2-3 minutes until softened.
  • Stir in garlic, chopped rosemary, and thyme, cooking for another minute.

Finishing the Sauce

  • Stir in smoked paprika and red pepper flakes; cook for about 30 seconds.
  • Pour in chicken broth and scrape up any browned bits from the pan, bringing to a simmer.
  • Stir in Dijon mustard, Worcestershire sauce, lemon zest, and lemon juice, then let the sauce simmer gently for 2-3 minutes.

Combining Everything

  • Add broccoli florets to the sauce, cooking until crisp-tender.
  • Return chicken to the skillet with sauce and broccoli. Add drained bowtie pasta and toss gently to coat.

Serving

  • Garnish with fresh chopped parsley and serve hot.

Notes

For creamier sauce, add a splash of heavy cream at the end. If using different pasta, most short shapes work well.
Calories: 600kcal
Course: Dinner, Main Course
Cuisine: American
Keyword: butter sauce, Chicken, Easy Dinner, Family Recipe, Pasta

Quick Blackstone Chicken Breast

I can almost smell the garlic and paprika as I walk into the kitchen. The sizzle of chicken hitting a hot Blackstone grill is one of those sounds that makes everyone pause and smile. It is the kind of simple, confident cooking that feeds a family and sparks good conversation.

I am Lily, a home cook who loves quick meals that still feel special. This Quick Blackstone Chicken Breast recipe is my go-to when I need dinner on the table fast. If you like fast weeknight meals, you might also enjoy my guide to air fryer chicken breasts for another easy option.

Why this works

Quick Blackstone Chicken Breast

This recipe works because it combines heat, timing, and simple seasoning. The Blackstone gives a fast, even sear. The seasoning is straightforward, so the chicken stays tender and juicy. You get flavor without fuss.

If you are scanning for quick family dinners, this fits right into a weeknight rotation. It plays well with simple sides like steamed vegetables, a salad, or quick rice. For more ideas in the same family-friendly lane, check out these quick and easy chicken recipes to mix into your meal plan.

This dish saves time in two ways. First, the high heat cooks chicken fast. Second, the minimal seasoning means no long marinating wait. Busy evenings still deserve good food. This one delivers every time.

Process Overview

“This is where the magic happens—when the aroma fills the kitchen.”

The process is simple. Heat the grill, oil and season the breasts, sear both sides, and rest. The hard part is waiting for the resting time so juices settle. The rest brings the best texture and keeps each bite juicy.

This method is forgiving. If your chicken is a touch thicker, give it a minute or two more per side. If it is thinner, watch carefully and remove early. You will learn how your Blackstone behaves, and that makes every future cook easier.

Ingredients

  • 4 boneless, skinless chicken breasts
    • Lily’s tip: Choose breasts that are similar in size for even cooking. If one breast is much larger, pound it to match the others.
  • 2 tablespoons olive oil
    • Lily’s tip: Use extra virgin olive oil for flavor, but regular olive oil works fine and is more budget friendly.
  • 1 teaspoon garlic powder
    • Lily’s tip: Garlic powder gives even flavor quickly. If you prefer fresh garlic, mince one clove and rub it on the breasts before oiling.
  • 1 teaspoon paprika
    • Lily’s tip: Smoked paprika adds a subtle smoky note. Use sweet paprika if you want a milder taste.
  • Salt and pepper to taste
    • Lily’s tip: Season both sides. I like kosher salt because it clings well to the meat.
  • Fresh herbs for garnish (optional)
    • Lily’s tip: Parsley or cilantro brightens the dish. Add them at the end to keep the flavor fresh.

These pantry staples keep the prep fast. I often double the recipe because leftovers reheat well and stretch into salads, tacos, or sandwiches the next day. If you want a saucier finish, try pairing this chicken with a quick pan sauce or a spoonful of pesto.

Directions

  1. Preheat the Blackstone grill to medium-high heat.

    • Encouraging note: Let the griddle heat fully so you get that instant sear. It only takes a few minutes and it is worth the wait.
  2. In a bowl, toss the chicken breasts with olive oil, garlic powder, paprika, salt, and pepper until evenly coated.

    • Encouraging note: Make sure each breast is well coated. The oil helps the spices stick and promotes a beautiful crust.
  3. Place the chicken breasts on the grill and cook for about 5-7 minutes on each side, or until the internal temperature reaches 165°F (75°C).

    • Encouraging note: Use an instant read thermometer to check the thickest part. If the breasts are very thick, add a minute or two per side.
  4. Remove from the grill and let rest for a few minutes.

    • Encouraging note: Resting is not optional. It lets juices redistribute so every bite is moist and tender.
  5. Garnish with fresh herbs if desired and serve immediately.

    • Encouraging note: A quick sprinkle of chopped herbs brightens the plate. Call everyone to the table while the chicken is still warm.

If you like, slice the chicken against the grain for neat, family-style serving. Sliced chicken also helps it cool to a safe temperature faster for younger children. For other cooking styles that still make weeknight life easy, try my balsamic baked chicken breast for a hands-off alternative.

Serving

Quick Blackstone Chicken Breast

Serving this family-style is warm and simple. Place the whole breasts on a large platter. Sprinkle chopped parsley or cilantro over the top. Add lemon wedges to the side for anyone who likes a bright squeeze.

Pair with easy sides for a balanced plate. Steamed green beans, roasted potatoes, or a quick couscous all work. I also like to set out a bowl of warmed tortillas and salsa for an informal taco night. For a creamy side that kids usually love, consider a small scoop of mashed potatoes or a buttery rice pilaf.

Leftovers make great sandwiches. Layer sliced chicken on crusty bread with mayo and greens. If you need inspiration for creamy pairings, my recipe for creamy garlic parmesan chicken breast has ideas that translate well to sides.

Storage

Store leftover chicken in an airtight container in the refrigerator. It will keep well for up to 4 days. Cool the chicken to room temperature before refrigerating to prevent condensation inside the container.

To reheat without drying, slice the chicken and warm in a skillet with a splash of chicken broth or water over low heat. Cover the pan to trap steam and heat gently until warmed through. You can also reheat in a 300°F oven for 8 to 10 minutes. Using lower heat keeps the meat tender.

If you plan to freeze, wrap individual portions tightly in plastic wrap and place them in a freezer bag. They will keep for up to 3 months. Thaw overnight in the refrigerator before reheating.

Kitchen Notes

  • Use an instant read thermometer for reliable results. I trust it more than judging by time alone.
  • If your Blackstone runs hot, lower the heat to medium. Better a longer cook than char without doneness.
  • Pound very thick breasts to even thickness so everything cooks at the same pace.
  • Clean the griddle while it is still warm to avoid stuck bits next time.
  • Make a double batch and refrigerate the extra for quick lunches during the week.

These small shortcuts save time and keep dinner stress low. I keep a food thermometer in a drawer by the stove so it is always handy.

Variations

  • For picky eaters: Use only salt and a little olive oil. Kids often prefer plain chicken. Serve with a favorite dipping sauce.
  • Low carb: Serve over a bed of leafy greens or with roasted broccoli and cauliflower rice.
  • Gluten free: The recipe is naturally gluten free so it fits this diet without swaps.
  • Bold flavor: Add 1 teaspoon chili powder and a squeeze of lime for a zesty finish. The lime brightens the flavors.
  • Herb crust: Mix chopped rosemary and thyme with the olive oil and press gently onto the breasts before grilling.

If you want a full lineup of family-tested ideas, you might enjoy this roundup of deliciously easy chicken breast recipes to try tonight.

FAQ

Q: Can I use frozen chicken breasts for this recipe?
A: It is best to thaw them completely first. Thawed chicken cooks more evenly. Plan to thaw overnight in the refrigerator.

Q: How do I know when the chicken is done?
A: The safe internal temperature is 165°F. Use an instant read thermometer in the thickest part of the breast.

Q: Can I cook this on a cast iron pan instead of a Blackstone?
A: Yes. Heat a cast iron skillet on the stove and follow the same timing. The skillet will also give a nice sear.

Q: What if my chicken browns too quickly?
A: Lower the heat and move the chicken to a cooler zone. Finish cooking gently until the internal temperature hits 165°F.

Q: Can I marinate the chicken ahead of time?
A: You can. A simple olive oil, lemon juice, and herb marinade for 30 minutes helps flavor. If you marinate longer, keep it in the fridge and no more than 24 hours.

Conclusion

I hope this Quick Blackstone Chicken Breast becomes one of your go-to family meals. It is fast, dependable, and full of homey flavor. For step-by-step inspiration from another home cook, see this helpful guide to Blackstone Chicken – Easy Griddle Chicken Breast – Wendy Polisi. If you want tips on choosing and prepping the best breasts for your griddle, this article on Best Blackstone Chicken Breasts – Lara Clevenger is a great read.

Thanks for cooking with me. Come back and tell me how your family liked it.

Quick Blackstone Chicken Breast

Prep Time 10 minutes
Cook Time 15 minutes
Total Time 25 minutes
Servings 4 servings
Calories 250
A quick and flavorful chicken breast recipe that's perfect for busy weeknights, cooked on a Blackstone grill for a deliciously tender result.

Ingredients

Main ingredients

  • 4 pieces boneless, skinless chicken breasts (Choose breasts that are similar in size for even cooking.)
  • 2 tablespoons olive oil (Use extra virgin olive oil for flavor, but regular olive oil works fine.)
  • 1 teaspoon garlic powder (Garlic powder gives even flavor quickly. Use fresh garlic if preferred.)
  • 1 teaspoon paprika (Smoked paprika adds a subtle smoky note.)
  • to taste salt (Season both sides. Kosher salt recommended.)
  • to taste pepper (Season both sides.)
  • Fresh herbs for garnish (Parsley or cilantro brightens the dish.)

Instructions 

Preparation

  • Preheat the Blackstone grill to medium-high heat.
  • In a bowl, toss the chicken breasts with olive oil, garlic powder, paprika, salt, and pepper until evenly coated.

Cooking

  • Place the chicken breasts on the grill and cook for about 5-7 minutes on each side, or until the internal temperature reaches 165°F (75°C).
  • Remove from the grill and let rest for a few minutes.

Serving

  • Garnish with fresh herbs if desired and serve immediately.
  • Slice the chicken against the grain for neat, family-style serving.

Notes

Store leftover chicken in an airtight container in the refrigerator for up to 4 days. To reheat, slice and warm in a skillet with broth or water to prevent drying.
Calories: 250kcal
Course: Dinner, Main Course
Cuisine: American, Family-Friendly
Keyword: Blackstone Chicken, Easy Family Dinner, Grilled Chicken, quick chicken recipe, weeknight meals

Flavor-Packed Blackstone Griddle Chicken Stir Fry: Healthy & Quick Dinner

I can smell the garlic and honey hitting the hot griddle. The sound of a soft sizzle fills the kitchen as veggies start to brown and chicken pieces turn golden. My family gathers around the counter, tiny forks at the ready, and I feel that warm, quiet satisfaction that comes from feeding the people I love.

This chicken stir fry on the Blackstone griddle is one of those dinners that feels special but comes together fast. If you like simple weeknight meals, you might also enjoy my queso chicken enchiladas, another family favorite that saves time without losing flavor.

Why this works

Flavor-Packed Blackstone Griddle Chicken Stir Fry: Healthy & Quick Dinner

This recipe balances speed, flavor, and nutrition in a way that really helps busy families. Vegetables get caramelized on the griddle while the chicken cooks separately, so nothing steams into mush. The sauce is light but bold, clinging to every bite.

I test these kinds of dinners often and keep a list of reliable weeknight ideas. If you want more family-tested ideas, check my collection of best 30 chicken dinner recipes. This stir fry fits right into a busy evening because it uses one large cooking surface, little cleanup, and ingredients you can mix and match.

Process Overview

“This is where the magic happens—when the aroma fills the kitchen.”

In short, you prep, heat the griddle, cook vegetables in one zone, sear the chicken in the other, toss in peppers and aromatics, and finish with a glossy sauce. The griddle gives you quick, even heat and that lovely char that keeps kids asking for more.

For quick weeknight wins, I often pull from my list of best 5 easy chicken recipes for weeknight dinners and adapt flavors for what’s in the fridge. The method in this recipe is flexible and forgiving.

Ingredients

Pantry and produce with my tips

  • 3 boneless chicken breasts, diced into 1-inch pieces
    Tip: Pat the chicken dry with paper towels before dicing so it browns faster on the griddle. If you like bite-sized pieces for kids, cut slightly smaller.

  • 2 cups broccoli florets
    Tip: Use fresh if you can; frozen florets work too. If using frozen, give them a minute to thaw on the griddle so they don’t release too much water.

  • 1 yellow bell pepper, cut into 1-inch pieces
    Tip: Yellow peppers are sweet and kid-friendly. Cut uniform pieces so everything cooks at the same rate.

  • 1 red bell pepper, cut into 1-inch pieces
    Tip: Red peppers add color and sweetness. If your family prefers milder taste, remove the seeds and ribs.

  • 1/2 cup shredded carrots
    Tip: Pre-shredded carrots save time. They also add a touch of natural sweetness and vibrant color.

  • 2 teaspoons minced garlic
    Tip: Fresh minced garlic gives the best flavor. Add it near the end of cooking to keep it from burning.

  • 1/2 teaspoon ground ginger
    Tip: Ground ginger is convenient and consistent. If you have fresh ginger, use 1 teaspoon grated for a brighter note.

  • 2 tablespoons avocado oil
    Tip: Avocado oil tolerates the griddle’s high heat and gives a neutral flavor. Olive oil can work but may smoke more.

  • 2 tablespoons sesame seeds
    Tip: Toast them lightly in a small pan for extra aroma, or sprinkle them raw for quick finish.

  • 1/2 cup chicken broth
    Tip: Low-sodium broth keeps the sauce from getting too salty. You can substitute water in a pinch.

  • 1/4 cup soy sauce
    Tip: Use reduced-sodium soy sauce if you are watching salt, or try a gluten-free tamari for sensitivity.

  • 2 tablespoons honey
    Tip: Honey balances the soy. For a vegan swap, use maple syrup; flavor will be slightly different.

  • 1 tablespoon cornstarch
    Tip: Mix cornstarch with the broth to avoid lumps. This gives the sauce a shiny, slightly thickened finish.

If you want more ideas for weeknight chicken dinners, I keep a list of best 9 chicken recipes for weeknight dinners that you can adapt for family tastes.

Directions

  1. Preheat the Blackstone griddle to medium-high heat, about 400°F.
    Encouraging note: A hot griddle is the secret to quick searing. While it warms up, take a minute to breathe and gather your ingredients.

  2. Whisk together chicken broth, soy sauce, honey, and cornstarch in a bowl to make the stir-fry sauce and set aside.
    Encouraging note: Whisk until smooth. This little step saves time during cooking and makes the sauce lump-free.

  3. Spread avocado oil across the griddle surface and create two cooking zones.
    Encouraging note: One side will be for veggies and the other for chicken. Setting zones keeps textures right and speeds cleanup.

  4. Add broccoli and shredded carrots to one side of the griddle and cook for 2–3 minutes, stirring occasionally.
    Encouraging note: Let the broccoli get a little color. Kids often like the slight crunch when vegetables are not overcooked.

  5. Place diced chicken on the other side, season with salt and pepper, and cook for 3–5 minutes while flipping regularly until browned and cooked through.
    Encouraging note: Give the chicken space so it browns instead of steams. If you have a meat thermometer, aim for 165°F for safety and juiciness. For a milder flavor, remove pan juices as the chicken finishes.

  6. Add the bell peppers to the vegetables and cook for 1–2 minutes until slightly tender.
    Encouraging note: Peppers cook quickly and still hold color. This keeps the dish lively and appealing for kids.

  7. Combine the chicken and vegetables on the griddle and add the minced garlic and ground ginger, cooking for about 1 minute until fragrant.
    Encouraging note: Garlic and ginger bloom fast. Watch closely so they deepen flavor without burning.

  8. Pour the prepared sauce over the mixture and toss everything together.
    Encouraging note: Stir thoroughly so every piece gets coated. The cornstarch will begin to thicken the sauce.

  9. Cook for another 1–2 minutes until the sauce thickens and coats the chicken and vegetables.
    Encouraging note: The sauce should be glossy and cling to the food. If it gets too thick, add a tablespoon of water to loosen.

  10. Serve hot over rice and finish with sesame seeds.
    Encouraging note: Serve family-style so everyone can help themselves. Sprinkle sesame seeds last for a little crunch and visual appeal. For a hands-off dinner option, remember my collection of best crock pot chicken recipes when you need an even easier night.

Serving

Flavor-Packed Blackstone Griddle Chicken Stir Fry: Healthy & Quick Dinner

H3 How I serve this to my family

I usually spread out a big bowl of steamed white or brown rice and a platter with the stir fry right on the griddle if the table is safe from heat. Let everyone scoop what they want. Little ones like to mix veggies and rice into a small bowl, while older kids often want extra sauce.

H3 Simple sides to round it out

A quick cucumber salad or a simple green salad with vinaigrette pairs well. If you have leftover rice, crisp up small fried rice bowls with a bit of scrambled egg for a second night.

Storage

Store leftovers in an airtight container in the refrigerator for up to 3 days. The sauce can tighten as it cools. To reheat, warm gently in a skillet over medium heat with a splash of water or broth to loosen the sauce. You can also reheat in the microwave in 30 second bursts, stirring in between.

If you want to freeze portions, cool completely and place in a freezer-safe container for up to 2 months. Thaw overnight in the refrigerator before reheating. Note that fresh veggies may be softer after freezing, so this method works best when you plan to reheat for meal-prep bowls.

Kitchen Notes

  • Use two cooking zones on the griddle. One side for veggies, one for protein, for perfect texture.
  • Prep everything before heating the griddle. Stir fry waits for no one.
  • If you do not have cornstarch, arrowroot or potato starch can work in the same amount.
  • Taste the sauce before pouring and adjust salt or honey to your family’s preference.
  • Keep a small bottle of sesame oil nearby. A tiny drizzle after plating adds a lovely nutty finish.

Variations

  • For picky eaters: Swap broccoli for snap peas or thinly sliced zucchini. Mild flavors help transition kids to new veggies.
  • Lower sodium: Use low-sodium soy sauce and low-sodium chicken broth. Increase a little honey for balance if needed.
  • Gluten-free: Use tamari instead of soy sauce and confirm your broth is gluten-free. Cornstarch is gluten-free and works as the thickener.
  • Spicy version: Add 1 teaspoon of Sriracha or a pinch of red pepper flakes when you add the sauce. Let older family members add heat at the table.
  • Vegetarian swap: Replace chicken with firm tofu, pressed and cubed. Brown the tofu the same way you would the chicken and proceed with the sauce.

FAQ

Q: Can I use boneless skinless thighs instead of breasts?
A: Yes. Thighs stay juicier and take slightly longer to cook. Cut into 1-inch pieces and adjust cooking time until they reach 165°F.

Q: What if my children do not like strong flavors?
A: Cut the garlic to 1 teaspoon and omit the ground ginger. Serve sauce on the side for dipping so they can control flavor level.

Q: Can I make the sauce ahead of time?
A: Absolutely. Whisk the sauce and store in the fridge up to 24 hours. Give it a quick stir before using since cornstarch can settle.

Q: Is this safe for toddlers?
A: Yes, if you cut ingredients into small pieces and cool to a safe temperature. Reduce sodium by using low-sodium soy sauce and smaller portions of sauce.

Q: What rice do you recommend?
A: Jasmine or long-grain white rice is classic, but brown rice adds fiber and satiety. Quinoa is a good gluten-free alternative that pairs nicely.

Conclusion

I hope this Flavor-Packed Blackstone Griddle Chicken Stir Fry becomes one of your go-to family dinners. It is fast, healthy, and perfect for busy nights when you want something satisfying without hours in the kitchen. For a version with noodles and a similar griddle technique, you might like the detailed guide for Easy Chicken Stir Fry with Noodles on the Blackstone. If you enjoy teriyaki-style flavors, this recipe pairs well with the ideas in Teriyaki Chicken Stir Fry – Eat Yourself Skinny for inspiration.

Thanks for cooking with me. Come back soon for more family-friendly meals that keep dinner time joyful and stress-free.

Blackstone Griddle Chicken Stir Fry

Prep Time 15 minutes
Cook Time 10 minutes
Total Time 25 minutes
Servings 4 servings
Calories 400
A quick and healthy chicken stir fry made on the Blackstone griddle, featuring vibrant vegetables and a bold sauce.

Ingredients

For the Stir Fry

  • 3 pieces boneless chicken breasts, diced into 1-inch pieces (Pat the chicken dry with paper towels for better browning.)
  • 2 cups broccoli florets (Fresh is best; frozen works too.)
  • 1 piece yellow bell pepper, cut into 1-inch pieces (Uniform pieces ensure even cooking.)
  • 1 piece red bell pepper, cut into 1-inch pieces (Remove seeds for milder flavor, if preferred.)
  • 1/2 cup shredded carrots (Pre-shredded options save time.)
  • 2 teaspoons minced garlic (Add near the end to prevent burning.)
  • 1/2 teaspoon ground ginger (Fresh grated ginger can be used for brighter flavor.)
  • 2 tablespoons avocado oil (Good for high heat.)
  • 2 tablespoons sesame seeds (Toast for extra aroma, optional.)

For the Sauce

  • 1/2 cup chicken broth (Low-sodium recommended.)
  • 1/4 cup soy sauce (Use gluten-free tamari if needed.)
  • 2 tablespoons honey (Maple syrup can be a vegan substitute.)
  • 1 tablespoon cornstarch (Mix with broth to avoid lumps.)

Instructions 

Preparation

  • Preheat the Blackstone griddle to medium-high heat, about 400°F.
  • In a bowl, whisk together chicken broth, soy sauce, honey, and cornstarch to make the stir-fry sauce and set aside.
  • Spread avocado oil on the griddle and create two cooking zones: one for veggies and one for chicken.

Cooking

  • Add broccoli and shredded carrots to one side of the griddle and cook for 2–3 minutes, stirring occasionally.
  • Place diced chicken on the other side, season with salt and pepper, and cook for 3–5 minutes until browned.
  • Add bell peppers to the vegetables and cook for 1–2 minutes until slightly tender.
  • Combine chicken and vegetables, adding minced garlic and ground ginger, cooking for about 1 minute until fragrant.
  • Pour the prepared sauce over the mixture and toss everything together.
  • Cook for another 1–2 minutes until sauce thickens and coats the chicken and vegetables.

Serving

  • Serve hot over rice and finish with sesame seeds.

Notes

Store leftovers for up to 3 days in an airtight container. Reheat gently with water or broth. For freezing, cool completely and store for up to 2 months.
Calories: 400kcal
Course: Dinner, Main Course
Cuisine: American, Asian
Keyword: Blackstone Griddle, Chicken Stir Fry, Easy Recipe, Healthy Family Meal, Quick Dinner

Blackstone Bourbon Chicken

I step into my kitchen and the first thing I notice is the warm, sweet scent of bourbon and brown sugar melding with garlic. The griddle hisses as the chicken hits the surface. That sound tells me dinner is almost ready and the family will be smiling soon.

I am Lily, a home cook and food blogger who loves simple meals that bring people together. This Blackstone Bourbon Chicken is one of those recipes that makes weeknights feel special without extra fuss. It is forgiving, fast, and full of flavor. If you like easy grills and happy family tables, you will love this dish.

I often pair this recipe with other quick family favorites like my oven baked chicken thighs for a busy night. For a lighter twist, try it with air fryer chicken breasts when you want a different texture.

Why this works

Blackstone Bourbon Chicken

This recipe balances sweet, salty, and a touch of heat. The bourbon adds depth without overpowering the chicken. Brown sugar caramelizes on the griddle and creates little pockets of flavor.

The method uses simple steps and a short marinade. That makes it a time saver on busy evenings. You can marinate while you set the table and still get dinner on the table quickly.

Cooking on a flat top like a Blackstone lets you sear more surface area evenly. This gives the chicken great color and a slightly crisp exterior while keeping the inside moist.

If you love family friendly meals, this is a keeper. I often serve it with rice and quick steamed veggies. For another fast weeknight bowl idea, try my teriyaki chicken bowl that families seem to crave.

Process Overview

“This is where the magic happens—when the aroma fills the kitchen.”

The overall flow is gentle. Mix a simple marinade, soak the chicken, heat the griddle, and cook. The marinade does two things. It flavors the meat and tenderizes it a bit.

You do not need special skills to pull this off. Follow the steps and use a meat thermometer for peace of mind. If you want a different cook method, this marinade also works well with air fryer or oven methods. I have a clear guide for air fryer chicken breasts that shows how to use similar flavors.

Ingredients

Here are the ingredients with my personal tips for each. Each tip is a small trick I use at home to help families get consistent results.

  • 4 boneless, skinless chicken breasts
    Tip: Pound thicker ends gently so the breasts are even. This helps everything cook at the same time.

  • 1/2 cup bourbon
    Tip: Use a mid range bottle. The alcohol cooks off and leaves a deep flavor. If you prefer no alcohol, swap for chicken broth and a splash of apple cider vinegar.

  • 1/4 cup soy sauce
    Tip: Low sodium soy sauce keeps salt in check for kids. Taste the marinade before adding salt.

  • 1/4 cup brown sugar
    Tip: Light brown sugar gives a subtle molasses note. Pack it lightly when measuring for consistent sweetness.

  • 2 cloves garlic, minced
    Tip: Fresh garlic is worth it here. If you are short on time, 1/2 teaspoon garlic powder will work.

  • 1 tablespoon olive oil
    Tip: Olive oil helps the marinade cling and promotes browning on the griddle.

  • 1/2 teaspoon black pepper
    Tip: Freshly ground black pepper adds brightness. Use more or less to suit your family.

  • 1/4 teaspoon red pepper flakes (optional)
    Tip: These give a gentle heat. Leave them out for young children or add more for adults.

  • Chopped green onions for garnish
    Tip: Slice thin and add right before serving for color and fresh bite.

Directions

  1. In a bowl, mix together bourbon, soy sauce, brown sugar, garlic, olive oil, black pepper, and red pepper flakes.
    Encouragement: This is an easy mix that smells amazing. Stir until the sugar dissolves and know you have a great base.

  2. Add chicken breasts to the marinade, ensuring they are well-coated. Marinate for at least 30 minutes, or up to 2 hours in the refrigerator.
    Encouragement: Even 30 minutes helps. If you need a faster option, start cooking after 15 minutes and accept a lighter flavor.

  3. Preheat your Blackstone griddle over medium-high heat.
    Encouragement: Let the griddle get hot so you get a good sear. A stable heat makes the texture truly satisfying.

  4. Remove chicken from marinade and place on the griddle. Grill for about 6-8 minutes on each side, or until the internal temperature reaches 165°F and the chicken is cooked through.
    Encouragement: Use a thermometer and trust the read. Flip once for a clean crust. If you get a little glaze on the surface, that is perfect.

  5. Garnish with chopped green onions before serving.
    Encouragement: A quick sprinkle brightens the dish and makes it feel special for the table.

  6. Serve hot and enjoy your delicious bourbon chicken!
    Encouragement: Gather the family and enjoy. This recipe shines when shared with people you love.

If you prefer to cook inside, this same approach works on a large skillet or oven. I sometimes move the cooked breasts to a 350°F oven to finish if they brown too fast. For skewers and cook times on a flat top alternative, my air fryer chicken skewers guide makes a handy reference.

Serving

Blackstone Bourbon Chicken

Serve this bourbon chicken family style. Slice the breasts and arrange them on a large platter. Spoon any pan juices over the top and scatter chopped green onions.

Pair with steamed rice or a simple fried rice. A side of roasted broccoli or snap peas adds color and crunch. For a full meal, add a green salad and warm rolls.

Make it a bowl night by piling rice or noodles in a wide bowl, topping with sliced chicken, and adding quick pickled cucumbers or shredded carrots for tang. Kids love it with a side of corn or simple roasted potatoes.

If you want a lower carb option, serve the sliced chicken over a bed of mixed greens or cauliflower rice. The marinade holds up well to different bases.

Storage

Refrigerate leftover chicken within two hours of cooking. Place it in an airtight container and use within 3 to 4 days.

To reheat, warm gently in a skillet over medium-low heat. Add a tablespoon of water or broth to the pan and cover briefly to keep the chicken moist. You can also reheat in a 350°F oven for 10 to 12 minutes.

For longer storage, freeze cooked chicken in a freezer safe container for up to 3 months. Thaw in the refrigerator overnight before reheating. The texture may change slightly, but the flavor holds up well.

Kitchen Notes

  • Shortcut 1: Cut chicken into strips before marinating for faster flavor absorption and quicker cooking.
  • Shortcut 2: Use low sodium soy sauce to control salt for kids and sensitive eaters.
  • Shortcut 3: Double the marinade for a larger family crowd and reserve some to drizzle after cooking. Do not reuse raw marinade.
  • Shortcut 4: If you do not have a griddle, use a heavy skillet over medium-high heat for similar results.
  • Shortcut 5: Make it a sheet pan meal by placing veggies on the pan and cooking at 425°F alongside the chicken when sliced thin.

Variations

  • For picky eaters: Reduce brown sugar slightly and leave out red pepper flakes. Serve with familiar sides like mashed potatoes.
  • For gluten free: Use tamari instead of soy sauce and check labels on broths and other packaged ingredients.
  • For low sugar: Replace brown sugar with a 1 to 1 mix of a sugar substitute designed for cooking and a touch of molasses for depth.
  • For a smoky twist: Add 1/2 teaspoon smoked paprika to the marinade.
  • For a spicy family version: Add 1 teaspoon sriracha or more red pepper flakes to the marinade.

FAQ

Q: Can I use chicken thighs instead of breasts?
A: Yes. Boneless, skinless chicken thighs work great. They stay very tender and need slightly less time if cut smaller.

Q: Does the bourbon make the chicken taste boozy?
A: No. Most alcohol cooks off during cooking and leaves behind flavor. You get depth and warmth, not a strong boozy taste.

Q: How long can I marinate the chicken?
A: Up to 2 hours is ideal for this recipe. Longer marinating can change the texture because of the acids and alcohol in the mix.

Q: Can I make the sauce ahead of time?
A: Yes. Mix and store the marinade in the fridge up to 24 hours. Do not reuse marinade that has been in contact with raw chicken unless you boil it first.

Q: What temperature should I cook the chicken to?
A: Cook until the internal temperature reaches 165°F. A quick read with an instant read thermometer is the most accurate way.

Conclusion

I hope this Blackstone Bourbon Chicken becomes one of your family favorites. It is a dish that fills the kitchen with inviting smells and makes weeknights feel a bit more special. If you want a tried and tested griddle version, I like this detailed guide to making bourbon chicken on a flat top for step by step visuals. For a version inspired by popular restaurant flavors, this recipe that copies CJ’s favorite style gives a nice comparison and extra tips.

For a quick oven baked alternative that fits busy schedules, check my oven baked boneless skinless chicken thighs. For a different take on flavors kids love, my teriyaki chicken bowl recipe is a family hit. For more quick air fryer options, see my guides on air fryer chicken breasts, air fryer chicken skewers, and air fryer chicken wings.

Bourbon Chicken on the Griddle – Easy Blackstone Chicken Recipe and CJ’s Copy Cat Bourbon Chicken – Blackstone Products

Enjoy this meal with people you love. Send me a note if you try it and I will be cheering you on.

Blackstone Bourbon Chicken

Prep Time 30 minutes
Cook Time 16 minutes
Total Time 46 minutes
Servings 4 servings
Calories 250
A quick and flavorful dish featuring marinated chicken breasts cooked on a griddle, perfect for weeknight dinners.

Ingredients

For the Marinade

  • 1/2 cup bourbon (Use a mid-range bottle for best flavor.)
  • 1/4 cup soy sauce (Low sodium soy sauce recommended.)
  • 1/4 cup brown sugar (Light brown sugar gives a subtle molasses note.)
  • 2 cloves garlic, minced (Fresh garlic is preferable.)
  • 1 tablespoon olive oil (Helps the marinade cling to the chicken.)
  • 1/2 teaspoon black pepper (Use freshly ground for better flavor.)
  • 1/4 teaspoon red pepper flakes (Optional for a little heat.)

For the Chicken

  • 4 pieces boneless, skinless chicken breasts (Pound thicker ends for even cooking.)
  • Chopped for garnish green onions (Add just before serving.)

Instructions 

Preparation

  • In a bowl, mix together bourbon, soy sauce, brown sugar, garlic, olive oil, black pepper, and red pepper flakes until the sugar dissolves.
  • Add chicken breasts to the marinade, ensuring they are well-coated. Marinate for at least 30 minutes, up to 2 hours.
  • Preheat your Blackstone griddle over medium-high heat.

Cooking

  • Remove chicken from marinade and place on the griddle. Grill for about 6-8 minutes on each side, until internal temperature reaches 165°F.
  • Garnish with chopped green onions before serving.
  • Serve hot and enjoy your delicious bourbon chicken with family.

Notes

Refrigerate leftovers within two hours and use within 3 to 4 days. You can freeze cooked chicken for up to 3 months.
Calories: 250kcal
Course: Dinner, Main Course
Cuisine: American
Keyword: Bourbon Chicken, Easy Dinner, Family Meal, Griddle Chicken, quick recipe

Perfect Chicken Marinade

The kitchen hums with the sound of a sizzling pan and the warm smell of garlic and honey. You know that moment when everyone pauses and asks, "What smells so good?" That little pause is gold to me. It means the house will fill with happy voices and hungry hands soon.

This Perfect Chicken Marinade is one of those recipes that makes weeknights feel special and busy Sundays feel effortless. If you enjoy bold, approachable flavors, you might also like my twist on a Mexican version that saves time and keeps kids smiling: easy Mexican chicken marinade.

Why this works

Perfect Chicken Marinade

This marinade balances five key things: acid, oil, salt, sweet, and aromatics. The apple cider vinegar and soy sauce gently tenderize the chicken. Olive oil carries flavor into the meat. Honey adds caramel and browning on the grill or in the pan. Garlic and oregano give a familiar family-friendly aroma.

It works fast, too. Even an hour in the fridge makes a noticeable difference. That saves time when you are juggling homework, activities, and bedtime routines. If your favorite dinner night is the grill night, this mix plays perfectly with a quick sear or a long-low cook for tender results. For more ideas that work on the grill, check out my guide to grilled chicken marinade.

This recipe is forgiving. You can adjust salt, swap honey for maple, or add a squeeze of lemon. It keeps family meals stress-free and full of flavor.

Process Overview

“This is where the magic happens—when the aroma fills the kitchen.”

In short, you whisk, you coat, you chill, and you cook. The longer the chicken marinates, the deeper the flavor and the more tender the meat. You can also use this marinade to speed up a busy weeknight by prepping the night before and cooking the next day.

If you like oven-baked dinners on a time crunch, this marinade pairs beautifully with a quick bake. See my oven-baked thigh method for a fast, hands-off meal that the whole family will reach for: 30-minute oven-baked boneless skinless chicken thighs.

Ingredients

  • 1/4 cup olive oil
    Lily’s tip: Use a good extra-virgin olive oil for flavor. If you need a neutral oil, avocado oil also works well.

  • 3 tablespoons soy sauce
    Lily’s tip: Low-sodium soy sauce helps control salt. For gluten-free, use tamari.

  • 2 tablespoons apple cider vinegar
    Lily’s tip: This adds a gentle tang that helps tenderize. White wine vinegar is a mild substitute.

  • 2 tablespoons honey
    Lily’s tip: Honey gives a lovely glaze when grilled. For a vegan switch, use maple syrup.

  • 3 cloves garlic, minced
    Lily’s tip: Fresh garlic beats jarred garlic for the brightest flavor. Mince finely so it disperses into the marinade.

  • 1 teaspoon dried oregano
    Lily’s tip: Oregano brings a homey, herby note. If you have fresh oregano, double the amount.

  • 1 teaspoon black pepper
    Lily’s tip: Freshly cracked black pepper adds more lift than pre-ground.

  • 1 teaspoon salt
    Lily’s tip: If you use low-sodium soy sauce, keep this amount. Taste the marinade before adding more.

H3 Lily’s personal guide to measurements
These amounts work for 1.5 to 2 pounds of chicken. I often scale up the recipe for a large family or a weekend meal prep. If you plan to marinate larger bone-in pieces, allow more time for the flavors to penetrate.

If you want a sweeter glaze, add an extra teaspoon of honey. If you prefer more tang, add another 1/2 teaspoon of apple cider vinegar. The recipe is flexible and forgiving.

Directions

H3 Step-by-step with encouragement

  1. In a bowl, whisk together olive oil, soy sauce, apple cider vinegar, honey, garlic, oregano, black pepper, and salt.
    Encouraging note: Take a moment to smell the mixture. You will already taste the promise of dinner. Whisk until honey blends in and the oil looks smooth.

  2. Place chicken in a resealable bag or a dish, and pour the marinade over it.
    Encouraging note: Make sure each piece gets a nice coating. If you have little helpers, this is a fun step for kids to gently massage the bag.

  3. Seal the bag or cover the dish and refrigerate for at least 1 hour, or up to overnight for best results.
    Encouraging note: Even a short rest of 1 hour improves flavor. Overnight is ideal when you plan meals ahead. Label the bag if you prep in advance.

  4. Grill or cook chicken as desired.
    Encouraging note: Cook to an internal temperature of 165°F. Sear on medium-high heat for a nice crust, then lower the heat to finish through. Serve with confidence and a smile.

H3 Cooking tips
If you pan-sear, wipe off excess marinade to avoid burning. If grilling, let the chicken come close to room temperature for 15 minutes before placing it on the grates. For a faster weeknight, sear both sides and finish in a 400°F oven for even cooking.

For a different meal, slice the cooked chicken and use it in bowls with rice and veggies. If you want an Asian-leaning bowl with honey and soy notes, try my teriyaki-style recipe for inspiration: 30-minute teriyaki chicken bowl.

Serving

Perfect Chicken Marinade

Serve this chicken family-style on a large platter so everyone can help themselves. Slice thicker breasts across the grain for tenderness. Arrange lemon wedges and fresh parsley or cilantro for color and brightness.

Pair it with simple sides like roasted vegetables, a crisp green salad, or fluffy rice. For a quick family favorite, toss the sliced chicken on top of a big bowl of greens and grain for a one-pan dinner.

If you want to get dinner on the table even faster, try serving the chicken with air-fried vegetables for a crispy contrast: air fryer chicken breasts shows how well this style works with quick sides.

Storage

Store leftover cooked chicken in an airtight container in the refrigerator for up to 3 to 4 days. Keep cooled chicken out of warm conditions before refrigerating. If you plan to keep raw marinated chicken, store it in the fridge for no more than 2 days.

To reheat, slice the chicken and warm gently in a skillet with a splash of chicken broth or water. This keeps the meat moist. You can also reheat in a 325°F oven covered with foil for 10 to 15 minutes. Avoid high heat to prevent drying.

If you want to freeze cooked chicken, wrap tightly and freeze for up to 3 months. Thaw overnight in the fridge and reheat gently.

Kitchen Notes

  • Use a resealable bag to marinate. It saves space and helps the marinade coat evenly.
  • Double the recipe for family dinners and freeze extras for quick meals.
  • If you forget to marinate, make a quick 20-minute version by scoring the chicken and using warm marinade. Flavor will be decent.
  • For bone-in chicken, add 30 minutes to the marinating time and plan for a longer cook time.
  • Keep a small bowl of the leftover marinade aside before adding raw chicken if you want to use it as a sauce. Do not use raw marinade that touched raw chicken without boiling it first.

Variations

  • Picky eaters: Reduce the garlic to 1 clove and cut honey to 1 tablespoon for a milder profile. Serve with favorite dipping sauces on the side.
  • Keto-friendly: Swap honey for 1 teaspoon of a keto-approved sweetener or omit it and add a squeeze of lemon for brightness.
  • Gluten-free: Use tamari instead of soy sauce. The rest of the recipe stays the same.
  • Spicy twist: Add 1/2 teaspoon red pepper flakes or 1 teaspoon smoked paprika to the marinade for warmth without overwhelming kids.
  • Herb-forward: Add 1 tablespoon chopped fresh parsley and 1 teaspoon thyme for a fresher, garden-style marinade.

FAQ

H3 1. How long should I marinate chicken for best results?
Marinate for at least 1 hour. For deeper flavor and tenderness, aim for 4 to 12 hours. Avoid marinating more than 24 hours, which can make the texture mushy.

H3 2. Can I use this marinade on bone-in chicken?
Yes. Bone-in chicken benefits from longer marinating. Plan for 4 to 12 hours and longer cooking time to reach 165°F internally.

H3 3. Is this marinade safe for kids?
Yes. It uses familiar ingredients and mild seasonings. Reduce garlic or honey if needed for picky palates. Keep spices low and serve sauces on the side.

H3 4. Can I make this ahead and freeze raw marinated chicken?
Yes. Place the marinated chicken in a freezer-safe bag and freeze for up to 3 months. Thaw overnight in the fridge before cooking.

H3 5. What is the best way to check doneness?
Use an instant-read thermometer. Insert into the thickest part; 165°F is safe for poultry. Let the chicken rest 5 minutes after cooking to redistribute juices.

Conclusion

I hope this Perfect Chicken Marinade becomes one of your go-to recipes for family dinners. It is simple, flexible, and full of the kind of flavor that gets people to the table faster. For another take on an all-purpose marinade that works for grilling or baking, I often consult reliable guides like The BEST Chicken Marinade (For Grilling or Baking) for inspiration.

If you want ideas for different flavor profiles and tricks to keep chicken juicy, I also recommend checking out The Best Chicken Marinade Recipe – Modern Honey. Happy cooking, and may your kitchen always smell like something wonderful.

Perfect Chicken Marinade

Prep Time 10 minutes
Cook Time 20 minutes
Total Time 30 minutes
Servings 4 servings
Calories 220
This versatile chicken marinade balances flavor and tenderness, making family dinners effortless and delicious.

Ingredients

Marinade Ingredients

  • 1/4 cup olive oil (Use a good extra-virgin olive oil for flavor.)
  • 3 tablespoons soy sauce (Low-sodium soy sauce helps control salt. For gluten-free, use tamari.)
  • 2 tablespoons apple cider vinegar (This adds a gentle tang that helps tenderize.)
  • 2 tablespoons honey (Honey gives a lovely glaze when grilled. For a vegan switch, use maple syrup.)
  • 3 cloves garlic, minced (Fresh garlic beats jarred garlic for the brightest flavor.)
  • 1 teaspoon dried oregano (Oregano brings a homey, herby note.)
  • 1 teaspoon black pepper (Freshly cracked black pepper adds more lift than pre-ground.)
  • 1 teaspoon salt (Taste the marinade before adding more if using low-sodium soy sauce.)

Instructions 

Marinade Preparation

  • In a bowl, whisk together olive oil, soy sauce, apple cider vinegar, honey, garlic, oregano, black pepper, and salt.
  • Make sure to blend until honey is incorporated and the oil looks smooth.

Marinating Chicken

  • Place chicken in a resealable bag or a dish, and pour the marinade over it.
  • Seal the bag or cover the dish and refrigerate for at least 1 hour, or up to overnight for best results.

Cooking

  • Grill or cook chicken as desired, ensuring it reaches an internal temperature of 165°F.

Notes

Store leftover cooked chicken in an airtight container in the refrigerator for up to 3 to 4 days. For freezing, wrap tightly and freeze for up to 3 months. Thaw overnight in the fridge and reheat gently.
Calories: 220kcal
Course: Dinner, Main Course
Cuisine: American
Keyword: chicken marinade, Cooking Tips, Easy Marinade, Family Dinner, Grilling

Best Grilled Chicken

I can still smell the lemon and garlic when I think about this grilled chicken. The sizzle of the grill, the small puff of steam when I open the lid, and the way the kitchen fills with a warm, bright aroma make me feel like family is already gathered around the table.

This recipe is one I test over and over until it feels right. It is practical, simple to scale for a crowd, and forgiving when life gets busy. If you want more easy ideas to pair with this chicken, I often reach for my favorite chicken macaroni recipes for a quick side dish: chicken macaroni recipes.

Why this works

Best Grilled Chicken

This method blends bright acid, olive oil, and garlic to tenderize the chicken and build flavor without masking its natural taste. The short marinade time saves dinner plans when afternoons run late. It also holds up well for family-style meals when you need to feed different appetites.

If you want more ideas for family dinners that move fast and please a crowd, check out these tested chicken dinner recipes. I write this with years of grilling for kids, grandparents, and neighbors. My tips aim to keep things safe, reliable, and delicious.

Process Overview

“This is where the magic happens—when the aroma fills the kitchen.”

At its heart, this recipe is about balancing flavor and timing. You do a quick prep, let the chicken rest in the fridge, then finish it on a hot grill to get that golden exterior and juicy interior. I recommend using a reliable meat thermometer and a simple routine so you can relax and enjoy company while the grill does its job.

You can also use the cooked chicken in cool salads or sandwiches for easy lunches. If you like chicken salads, this makes a great base for recipes like those found in my collection of chicken salad recipes.

Ingredients

Main Ingredients:

  • 2 pounds boneless (skinless chicken breasts (or thighs))
  • Paper towels (for drying)

Marinade:

  • ¼ cup olive oil
  • 2 tablespoons lemon juice
  • 3 cloves garlic (minced)
  • 1 teaspoon Italian seasoning
  • 1 teaspoon paprika
  • 1 teaspoon salt
  • ½ teaspoon black pepper

Optional:

  • Fresh parsley for garnish
  • Cooking oil for grill grates

My tips for each ingredient:

  • Chicken: Choose even size breasts or thighs for consistent cooking. If breasts are large, cut them in half horizontally or pound them thin.
  • Paper towels: Drying the chicken helps the marinade stick and gives a better sear on the grill.
  • Olive oil: Use a good, fruity extra virgin for flavor. It helps the marinade carry flavors into the meat.
  • Lemon juice: Adds brightness and gently tenderizes. Do not over-marinate in acidic mixes for more than 8 hours.
  • Garlic: Fresh garlic gives the most flavor. Use pressed or finely minced for even distribution.
  • Italian seasoning: Use a blend you like. For families with kids, a milder mix works well.
  • Paprika: Adds color and a subtle smoky note. Smoked paprika is optional if you want extra depth.
  • Salt and pepper: I test for salt after the chicken rests. If you prefer low-sodium, start with ¾ teaspoon and adjust after cooking.
  • Parsley: Adds color and freshness at the end. Chop it finely.
  • Cooking oil for grill grates: Use a high-smoke-point oil and a folded paper towel on tongs to coat the grates safely.

If you want more short, family-friendly chicken ideas that fit weeknight schedules, try my list of easy weeknight chicken recipes.

Directions

  1. Prep the Chicken

    • Pat chicken dry with paper towels.
    • Encouraging note: Drying the meat helps the marinade cling and gives you a better sear. Take a minute here; it pays off on the grill.
  2. Pound chicken breasts to even thickness for even cooking.

    • Encouraging note: Use a meat mallet or rolling pin inside a zip bag. This helps the chicken cook the same from edge to center.
  3. Trim excess fat if using thighs.

    • Encouraging note: A quick trim makes the chicken more pleasant for picky eaters and helps prevent flare-ups.
  4. Make the Marinade

    • In a bowl, whisk together olive oil, lemon juice, garlic, Italian seasoning, paprika, salt, and pepper.
    • Encouraging note: Taste a small dab on a spoon to check balance. Adjust lemon or salt to your preference.
  5. Marinate

    • Place chicken in a zip-top bag or shallow dish.
    • Encouraging note: Use a bag for easy cleanup and better coating.
  6. Pour marinade over chicken and coat evenly.

    • Encouraging note: Massage the bag so every piece gets covered. Kids like helping with this step.
  7. Marinate at least 30 minutes (up to 8 hours in the refrigerator).

    • Encouraging note: If you are short on time, even 30 minutes makes a difference. For a weekend meal, marinate a few hours for deeper flavor.
  8. Remove from fridge 15-20 minutes before grilling.

    • Encouraging note: Letting the chicken come toward room temperature helps it cook more evenly.
  9. Preheat Grill

    • Heat grill to 400-425°F (medium-high).
    • Encouraging note: A hot grill gives you a quick sear that locks in juices.
  10. Lightly oil grill grates to prevent sticking.

    • Encouraging note: Oil the grates right before you place the chicken on them to minimize sticking.
  11. Grill the Chicken

    • Place chicken on grill.
    • Encouraging note: Place pieces with a little space between them so heat circulates.
  12. Close lid and cook 5-7 minutes.

    • Encouraging note: Let the top form a crust. Avoid the temptation to lift the lid too often.
  13. Flip and cook another 5-7 minutes.

    • Encouraging note: Use tongs, not a fork, to keep juices inside.
  14. Cook until internal temperature reaches 165°F.

    • Encouraging note: Insert a meat thermometer into the thickest part. This is the best way to know the chicken is done without overcooking.
  15. Rest & Serve

    • Remove from grill and let rest 5-10 minutes.
    • Encouraging note: Resting lets the juices redistribute so every slice is moist.
  16. Slice against the grain.

    • Encouraging note: Slicing against the grain shortens muscle fibers and makes the meat feel more tender.
  17. Garnish with fresh parsley if desired.

    • Encouraging note: A simple sprinkle of parsley adds color and a light herb note kids often accept.

Each step keeps family meals stress-free and consistent. I recommend a quick taste test after resting so you can tweak salt or acidity for your next batch.

Serving

Best Grilled Chicken

Serve this chicken family-style on a large platter so everyone can pick their portions. Sliced breasts look beautiful next to roasted vegetables, a green salad, and lemon wedges. For casual nights, shred leftovers for tacos or wraps.

If you want a heartier plate, roasted sweet potatoes are a favorite pairing. I often serve this with a tray of sweet potato wedges and sometimes use the chicken in bowls paired with grains and greens. For more ideas that combine sweet potatoes and chicken, try these chicken and sweet potato ideas.

For a family picnic, pack the sliced chicken with pita, hummus, and crunchy veggies. It travels well and keeps young eaters happy.

Storage

Refrigerator:

  • Store cooked chicken in an airtight container for up to 4 days.
  • Tip: Slice before storing for quick use in salads, sandwiches, or reheated dinners.

Freezer:

  • Freeze sliced or whole pieces in a freezer bag for up to 3 months.
  • Tip: Press out air and label with the date. Thaw overnight in the refrigerator before reheating.

Reheating:

  • Oven: Warm slices covered at 300°F for 10-12 minutes, or until 165°F.
  • Stove: Warm in a skillet with a splash of broth over medium heat until heated through.
  • Microwave: Use 50 to 70 percent power and heat in short intervals to avoid drying.

Food safety note: Always reheat to 165°F and do not refreeze previously thawed cooked chicken.

Kitchen Notes

  • Use a meat thermometer. It removes the guesswork and prevents overcooking.
  • If using thighs, cook time varies by thickness. Watch the internal temperature.
  • For grill marks, rotate the chicken 90 degrees halfway through each cooking side.
  • For smoky flavor without a charcoal grill, add a small tin of soaked wood chips to a gas grill smoker box.
  • Make the marinade in large batches and freeze portions in zip bags for a fast weeknight dinner.

These shortcuts help keep dinnertime calm and predictable, which is my goal as a mom and a cook.

Variations

  • For picky eaters: Use less garlic and paprika. Serve plain lemon and oil on the side so everyone can add their own.
  • Low-sodium: Reduce salt to ¾ teaspoon and use lemon zest for extra flavor.
  • Gluten-free: This recipe is naturally gluten-free. Just double-check any seasoning blends.
  • Keto or low-carb: Serve with cauliflower rice and sautéed greens.
  • Spicy twist: Add ¼ to ½ teaspoon cayenne to the marinade for extra heat. Start small if children are eating.

These tweaks make the recipe flexible for family needs, dietary restrictions, and personal taste.

FAQ

Q: Can I use bone-in chicken for this recipe?
A: Yes. Bone-in pieces take longer to cook. Grill until the internal temperature reaches 165°F near the bone. Plan for 10 to 15 additional minutes depending on size.

Q: How long can I marinate the chicken?
A: At least 30 minutes and up to 8 hours in the refrigerator. Acidic marinades can start to change the texture if left too long.

Q: Can I bake this instead of grilling?
A: Yes. Bake at 425°F for 18 to 22 minutes depending on thickness. Finish under the broiler for 1 to 2 minutes for color if needed.

Q: How do I prevent flare-ups on the grill?
A: Trim visible fat, keep a spray bottle of water nearby, and move pieces away from flames until they calm down. Use indirect heat if flare-ups persist.

Q: Is leftover grilled chicken safe to eat cold?
A: Yes, as long as it has been stored properly and eaten within 4 days. Keep it chilled during serving to stay safe.

Conclusion

I hope this grilled chicken becomes a go-to on your dinner rotation. It is simple, family-friendly, and forgiving, which makes weeknight cooking easier and more enjoyable.

If you want another tested take on grilled chicken, I like the step-by-step approach in Once Upon a Chef’s grilled chicken recipe for technique notes. For a slightly different flavor profile and tips, see Tatyana’s Everyday Food grilled chicken recipe.

Thanks for cooking with me. Share this with your family and make a memory around the table.

Grilled Lemon Garlic Chicken

Prep Time 30 minutes
Cook Time 15 minutes
Total Time 45 minutes
Servings 4 servings
Calories 300
This grilled chicken is marinated with lemon, garlic, olive oil, and Italian seasoning, resulting in a juicy, flavorful dish perfect for family meals.

Ingredients

Main Ingredients

  • 2 pounds boneless (skinless chicken breasts or thighs) (Choose even size for consistent cooking.)
  • Paper towels (For drying the chicken.)

Marinade

  • ¼ cup olive oil (Use a good fruity extra virgin for flavor.)
  • 2 tablespoons lemon juice (Adds brightness; do not over-marinate.)
  • 3 cloves garlic (minced) (Fresh garlic gives the best flavor.)
  • 1 teaspoon Italian seasoning (Use a blend suitable for your family.)
  • 1 teaspoon paprika (Adds color; smoked paprika is optional.)
  • 1 teaspoon salt (Adjust according to taste.)
  • ½ teaspoon black pepper (Use to taste.)

Optional

  • Fresh parsley (For garnish.)
  • Cooking oil (For grill grates.)

Instructions 

Prep the Chicken

  • Pat chicken dry with paper towels.
  • Pound chicken breasts to even thickness for even cooking.
  • Trim excess fat if using thighs.

Make the Marinade

  • In a bowl, whisk together olive oil, lemon juice, garlic, Italian seasoning, paprika, salt, and pepper.

Marinate

  • Place chicken in a zip-top bag or shallow dish.
  • Pour marinade over chicken and coat evenly.
  • Marinate at least 30 minutes (up to 8 hours in the refrigerator).
  • Remove from fridge 15-20 minutes before grilling.

Preheat Grill

  • Heat grill to 400-425°F (medium-high).
  • Lightly oil grill grates to prevent sticking.

Grill the Chicken

  • Place chicken on grill.
  • Close lid and cook for 5-7 minutes.
  • Flip and cook another 5-7 minutes until internal temperature reaches 165°F.

Rest & Serve

  • Remove from grill and let rest for 5-10 minutes.
  • Slice against the grain and garnish with fresh parsley if desired.

Notes

Store cooked chicken in an airtight container for up to 4 days. It can also be frozen for up to 3 months. Reheat to 165°F before serving.
Calories: 300kcal
Course: Dinner, Main Course
Cuisine: American, Grilled
Keyword: Easy Chicken Recipes, Family Dinner, Grilled Chicken, Lemon Garlic Chicken, Marinated Chicken

The BEST Chicken Marinade

The scent of garlic and brown sugar hits you right when you walk into the kitchen. Pans clink softly. The oven hums and the whole house feels cozy.

This chicken marinade is the one I reach for when the week gets busy and the family needs a warm, comforting meal. If you like simple, reliable dinners, you might also enjoy my healthy chicken salad for lighter nights.

Why this works

The BEST Chicken Marinade

This blend balances sweet, salty, tangy, and herby notes that play well with chicken. The olive oil carries flavor into the meat. Balsamic and lemon add bright acidity that keeps the chicken juicy.

It saves time because you can marinate in the morning or the night before. That flexibility makes weeknight cooking feel manageable for busy families. If you want a richer, creamier weeknight option for company, you might remember how much family members enjoy a dish like Marry Me Chicken on a special night.

This recipe also works for grilling, baking, or pan-searing. That makes it handy for whatever your schedule and equipment allow.

Process Overview

“This is where the magic happens—when the aroma fills the kitchen.”

You will whisk, reserve a little marinade, then let the chicken rest and soak up the flavor. Simple steps set you up for consistent, delicious results. While it marinates, you can prepare a quick side or set the table for a family meal. If you prefer an Asian-style flavor profile for another night, try my teriyaki riff when you have time to experiment with rice bowls at home: teriyaki chicken rice bowl.

Ingredients

  • 1/2 cup extra virgin olive oil
    Tip: Use a good olive oil. It helps carry flavor into the meat and keeps chicken moist while cooking.

  • 1/2 cup balsamic vinegar
    Tip: A little balsamic adds sweet acidity. If yours is very strong, start with a bit less.

  • 1/4 cup low-sodium soy sauce
    Tip: Low-sodium keeps salt manageable. Swap regular soy if you prefer a stronger savory note.

  • 1/4 cup Worcestershire sauce
    Tip: This adds umami depth. It plays nicely with the brown sugar and rosemary.

  • 1/8 cup lemon juice
    Tip: Fresh lemon juice brightens the marinade. Fresh is best, but bottled works in a pinch.

  • 3/4 cup brown sugar
    Tip: Brown sugar gives caramelized color when grilling or baking. Light or dark both work.

  • 2 teaspoons dried rosemary
    Tip: Crumble dried rosemary between your fingers to release aroma. Use fresh if you have it; double the amount of fresh.

  • 2 tablespoons Dijon mustard
    Tip: Dijon binds the oil and vinegar while adding a gentle tang. It helps the marinade coat evenly.

  • Salt and pepper to taste
    Tip: Season lightly at first. You can always add more after cooking.

  • 6 chicken breasts or 3.5 lb chicken
    Tip: For even cooking, choose breasts of similar size. If using bone-in pieces, allow a few extra minutes when cooking.

  • 1 teaspoon garlic powder
    Tip: Garlic powder gives steady flavor without fresh garlic bits. If you prefer fresh, use 2 cloves minced.

My family loves using breasts for quick pan-searing. If you prefer bone-in thighs for fuss-free weeknights, this marinade works just as well.

For a make-ahead idea, consider marinated chicken served on top of quick pasta from my collection of chicken macaroni recipes.

Directions

  1. In a large mixing bowl, whisk together olive oil, balsamic vinegar, soy sauce, Worcestershire sauce, lemon juice, brown sugar, dried rosemary, Dijon mustard, salt, black pepper, and garlic powder until well combined.

    • Encouragement: Whisk until the sugar dissolves and the mixture looks glossy. It is already smelling wonderful by this point.
  2. Reserve half a cup of the marinade for later use.

    • Encouragement: This reserved portion is perfect for brushing while grilling or drizzling over the finished chicken. Keep it in a small covered container in the refrigerator.
  3. Place the chicken in a resealable bag and pour the remaining marinade over it. Seal the bag and gently massage to coat the chicken evenly.

    • Encouragement: Let the chicken get fully coated. Squeeze out excess air so the marinade hugs the meat and sit the bag flat in the fridge to save space.
  4. Refrigerate for at least 30 minutes or up to 24 hours for optimal flavor absorption.

    • Encouragement: Even a quick 30-minute rest makes a difference. Overnight is best when you want deeper flavor. Remember to take the chicken out of the fridge 15 minutes before cooking so it can come closer to room temperature.

Cooking tips after marinating:

  • For the oven: Preheat to 400°F. Bake the breasts on a baking sheet for 20 to 25 minutes, or until internal temperature reaches 165°F.
  • For the grill: Grill over medium heat, 6 to 8 minutes per side depending on thickness. Brush with reserved marinade for glossy color.
  • For the stovetop: Sear breasts in a hot skillet with a little oil, then finish in the oven for even cooking.

These methods help the sugars caramelize without burning the surface. Use an instant-read thermometer to confirm doneness.

Serving

The BEST Chicken Marinade

Serve this chicken family-style on a large platter so everyone can choose portion sizes. Slice the breasts and arrange them with fresh lemon wedges and a sprinkle of chopped parsley.

Pair the chicken with roasted vegetables, a green salad, or a pan of buttery mashed potatoes. For busy nights when you want a full spread, check my collection of family dinner ideas for sides and comfort dishes: family dinner ideas.

For a casual weeknight, serve shredded marinade chicken over rice bowls or toss it into warm pasta. Leftovers make great sandwiches or salads the next day.

Storage

Refrigerator:

  • Store cooked chicken in an airtight container for up to 4 days.
  • Keep the reserved unused marinade separate and discard if it touched raw chicken.

Freezer:

  • Freeze cooked sliced chicken for up to 3 months in freezer-safe bags. Thaw overnight in the refrigerator before reheating.

Reheat tips:

  • Reheat gently in a skillet with a splash of broth or water to keep it moist.
  • Warm in the oven at 300°F until heated through. Cover loosely with foil to prevent drying.

Label containers with dates. That helps busy families rotate meals and reduce waste.

Kitchen Notes

  • Use a resealable bag to marinate. It saves space and uses less marinade.
  • If grilling, brush with reserved marinade during the last 2 minutes to avoid flare-ups.
  • Double the recipe for a crowd and freeze half of the cooked chicken for quick meals.
  • If you are short on time, slice the chicken thin before marinating. Thin pieces absorb flavor faster.
  • For even cooking, pound thick breasts to an even thickness or choose similar-sized pieces.

These small shortcuts help you get dinner on the table without stress.

Variations

  • For picky eaters: Reduce the brown sugar to 1/2 cup and use less balsamic. The flavor will be milder and a bit sweeter.
  • Low-sodium option: Use reduced-sodium soy sauce and reduce added salt. Add extra lemon for brightness.
  • Gluten-free: Use gluten-free soy sauce or tamari in place of soy sauce and ensure Worcestershire is gluten-free.
  • Spicy twist: Add 1/2 teaspoon crushed red pepper or a splash of hot sauce to the marinade.
  • Herb-forward: Swap rosemary for 2 teaspoons dried thyme or add 1 tablespoon chopped fresh basil after cooking.

These tweaks keep the base recipe flexible for different diets and taste preferences.

FAQ

Q: How long can I marinate chicken safely?
A: You can marinate chicken in the refrigerator for 30 minutes to 24 hours. Longer than 24 hours can start to break down the meat texture.

Q: Can I use this marinade for other proteins?
A: Yes. It works well for pork chops, turkey cutlets, and firm fish like swordfish. Reduce marinating time for fish to 15 to 30 minutes.

Q: Is it safe to reuse the marinade?
A: Do not reuse raw marinade that touched raw chicken unless you boil it for at least 5 minutes to kill bacteria. It is safer to reserve a portion before adding the raw chicken.

Q: How do I prevent the sugar from burning on the grill?
A: Grill over medium heat and brush with the reserved marinade near the end of cooking. Watch for flare-ups and move the chicken to a cooler spot if needed.

Q: What side dishes pair best with this chicken?
A: Roast vegetables, herbed rice, mashed potatoes, and a crisp green salad all pair beautifully. For fun ideas, see my recipe roundups for easy sides and family meals.

Conclusion

I hope this marinade becomes one of your go-to recipes for weeknights and family dinners. When the house fills with those warm aromas, you will know dinner is going to bring everyone together. For another trusted take on a classic marinade, I like the technique shown in The BEST Chicken Marinade (For Grilling or Baking). If you want more variations and tested tips, this version from The Best Chicken Marinade Recipe – Modern Honey is a helpful reference.

Warm kitchen wishes,
Lily

Easy Chicken Marinade

Prep Time 15 minutes
Cook Time 25 minutes
Total Time 40 minutes
Servings 6 servings
Calories 350
This easy and flavorful chicken marinade combines the perfect balance of sweet, salty, tangy, and herby notes, ensuring juicy and delicious chicken for any meal.

Ingredients

Marinade Ingredients

  • 1/2 cup extra virgin olive oil (Use a good olive oil for flavor and moisture.)
  • 1/2 cup balsamic vinegar (A little balsamic adds sweet acidity. Start with less if very strong.)
  • 1/4 cup low-sodium soy sauce (Keeps salt manageable, can swap for regular soy.)
  • 1/4 cup Worcestershire sauce (Adds umami depth.)
  • 1/8 cup lemon juice (Use fresh for best results.)
  • 3/4 cup brown sugar (Gives caramelized color when cooking.)
  • 2 teaspoons dried rosemary (Use fresh if available, double the amount.)
  • 2 tablespoons Dijon mustard (Helps bind the marinade.)
  • to taste Salt and pepper Salt and pepper (Season lightly.)

Chicken

  • 6 pieces chicken breasts or 3.5 lb chicken (Choose breasts of similar size for even cooking.)
  • 1 teaspoon garlic powder (Substitutable with 2 cloves of minced garlic.)

Instructions 

Preparation

  • In a large mixing bowl, whisk together olive oil, balsamic vinegar, soy sauce, Worcestershire sauce, lemon juice, brown sugar, dried rosemary, Dijon mustard, salt, black pepper, and garlic powder until well combined.
  • Reserve half a cup of the marinade for later use.
  • Place the chicken in a resealable bag and pour the remaining marinade over it. Seal the bag and gently massage to coat the chicken evenly.
  • Refrigerate for at least 30 minutes or up to 24 hours.

Cooking

  • For the oven: Preheat to 400°F and bake the breasts for 20 to 25 minutes.
  • For the grill: Grill over medium heat, 6 to 8 minutes per side, brushing with reserved marinade.
  • For the stovetop: Sear in a hot skillet with a little oil, then finish in the oven.

Serving

  • Serve the chicken family-style on a large platter with lemon wedges and parsley.

Notes

Store cooked chicken refrigerated in a container for up to 4 days. Freeze cooked sliced chicken for up to 3 months. Thaw overnight in the fridge and reheat gently.
Calories: 350kcal
Course: Dinner, Main Course
Cuisine: American
Keyword: Balsamic Chicken, chicken marinade, Easy Marinade, Grilled Chicken