Author

Amelia Hart

Browsing

Baked Chicken Kabobs Recipe

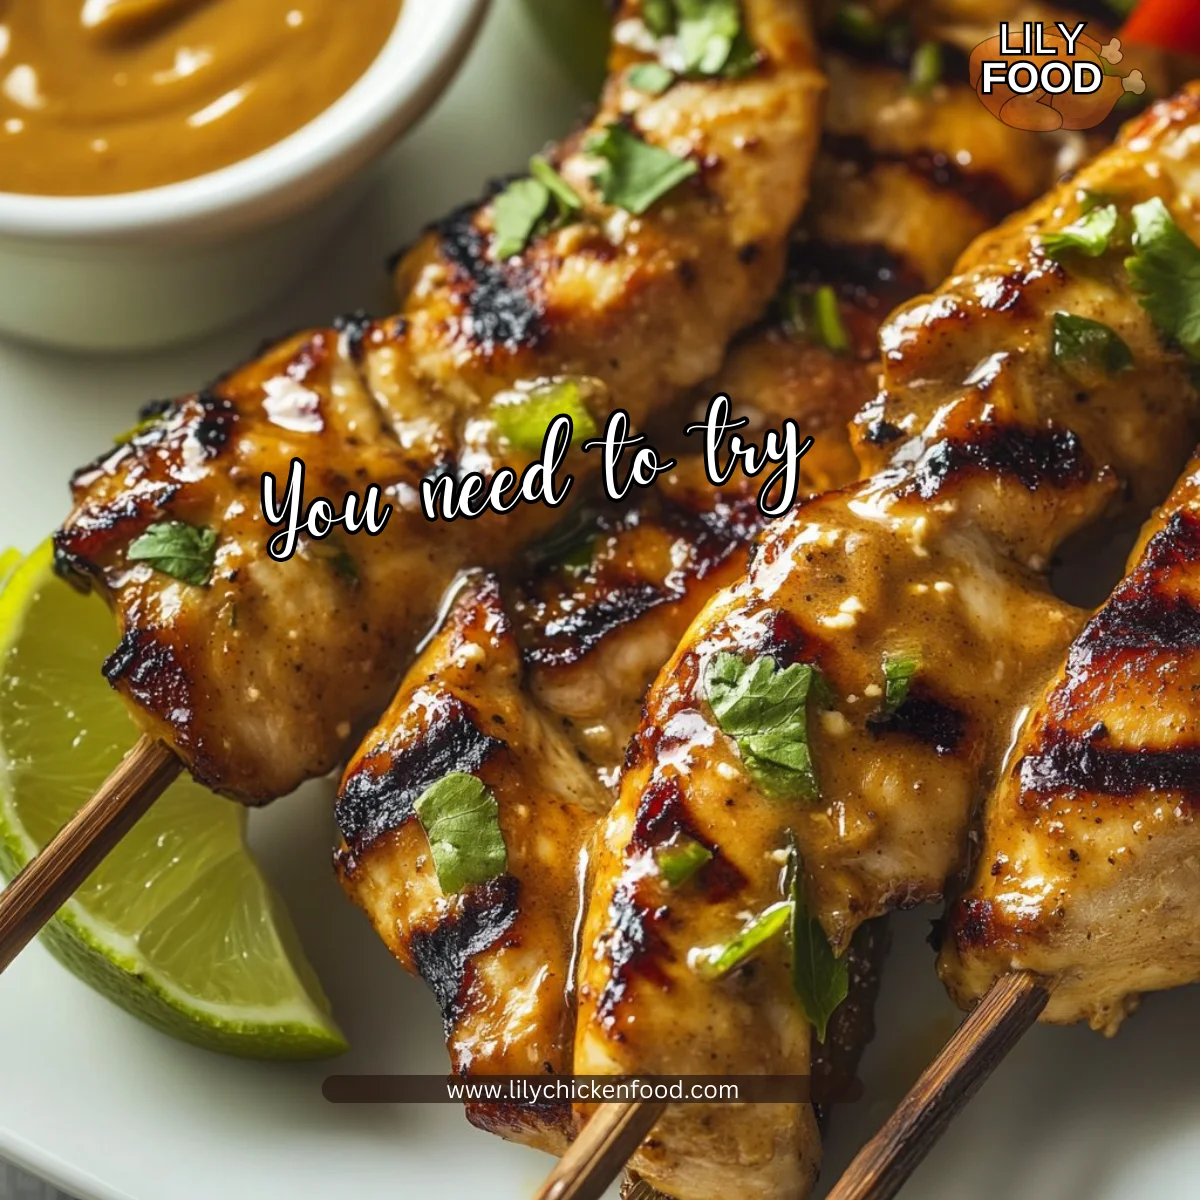
I can still smell it now. The citrus and garlic hit the air as soon as I open the bowl. The kitchen clock ticks, pans clink, and little feet echo down the hallway. Those sounds mean supper is coming together, and everyone leans in a little closer.

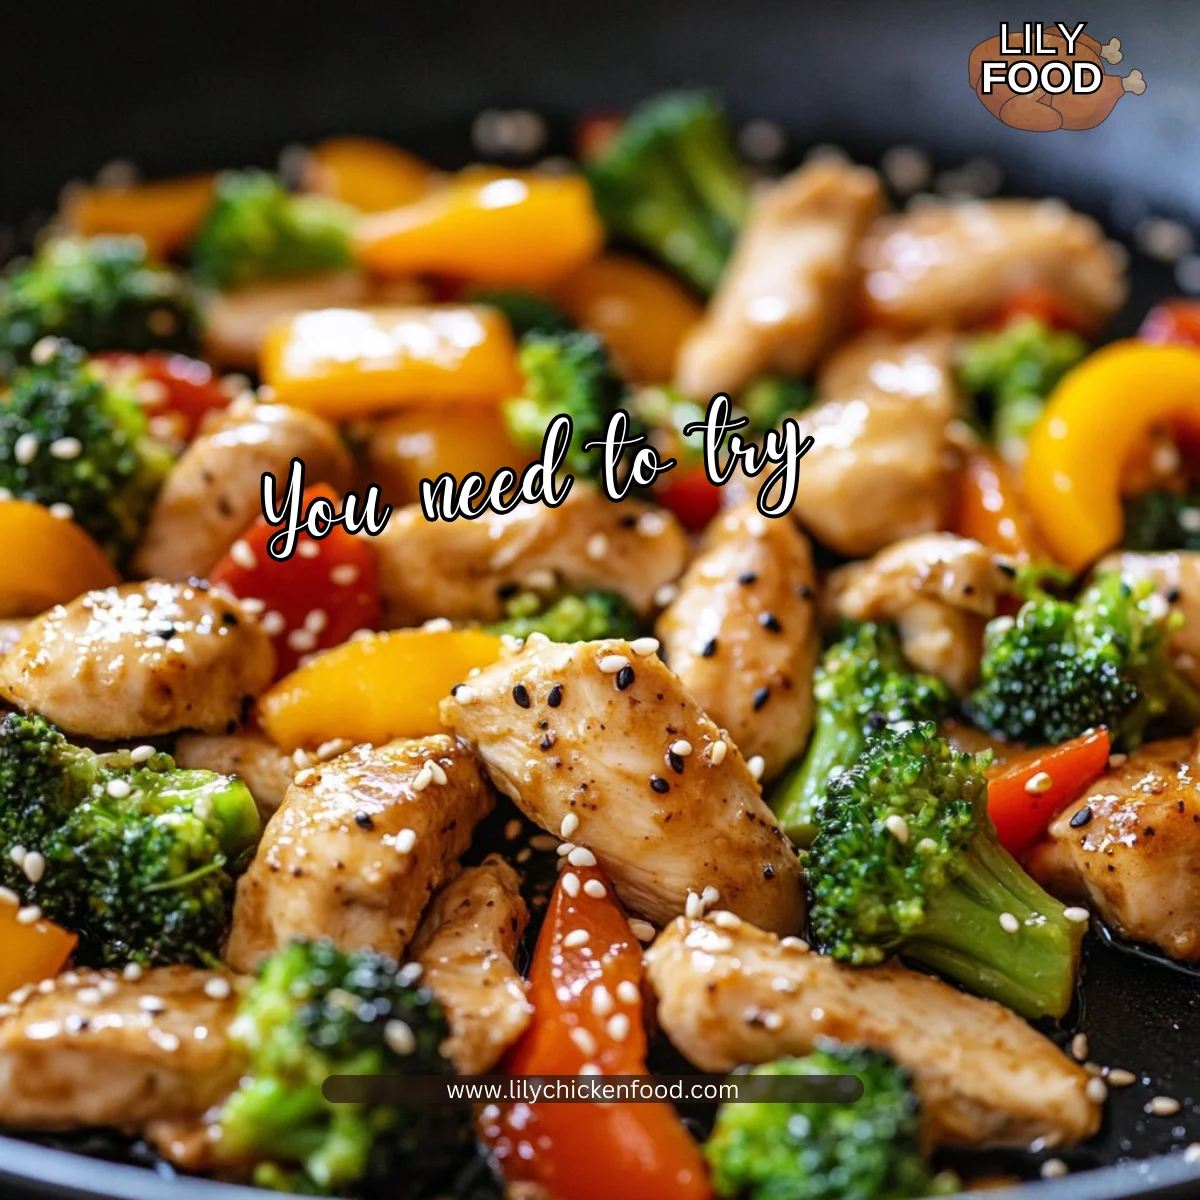
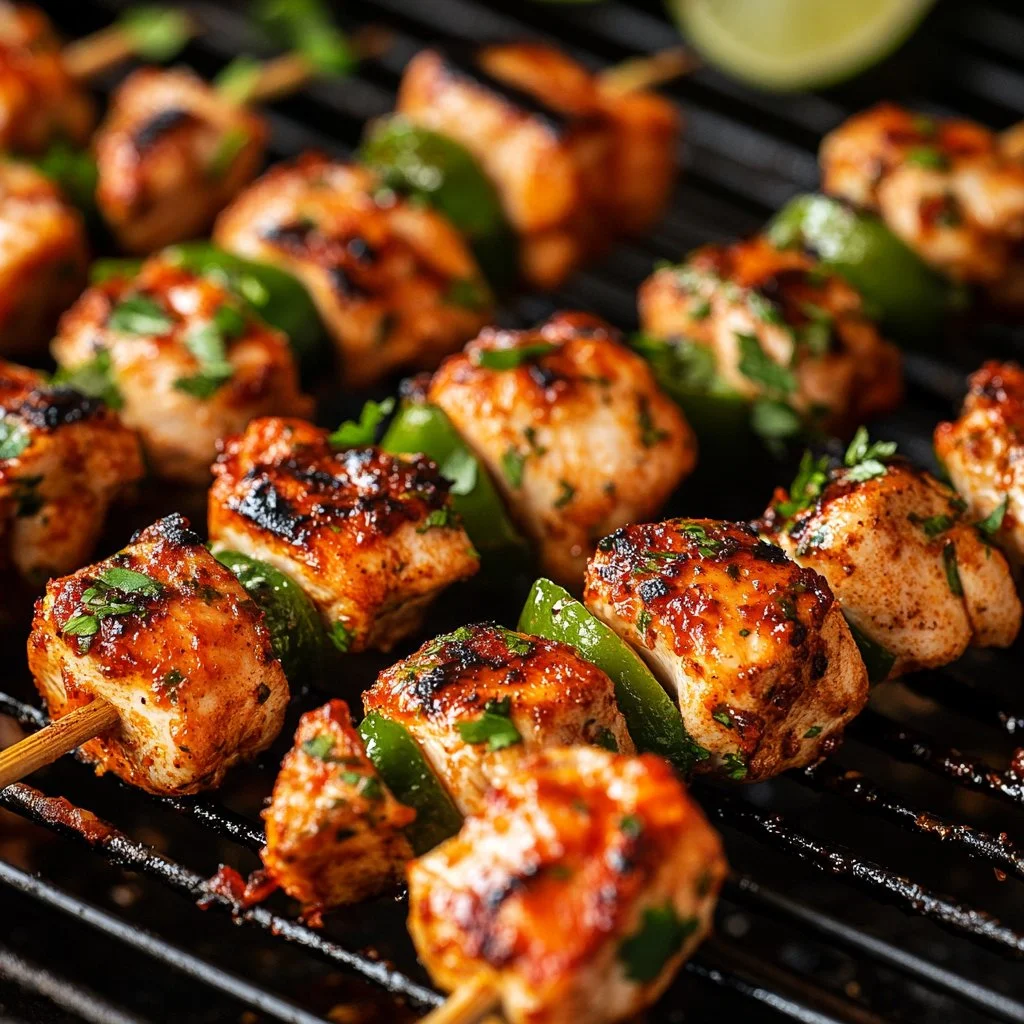
I love recipes that let the kitchen feel alive without keeping me there all night. These baked chicken kabobs deliver bright flavor, tender meat, and colorful veggies. They are simple enough for a weeknight and special enough to serve to friends. If you need fast, family-friendly chicken ideas, you might also enjoy my recipe for 30-minute oven-baked chicken thighs, which pairs well with these kabobs for a heartier meal.

Why this works

Baked Chicken Kabobs Recipe

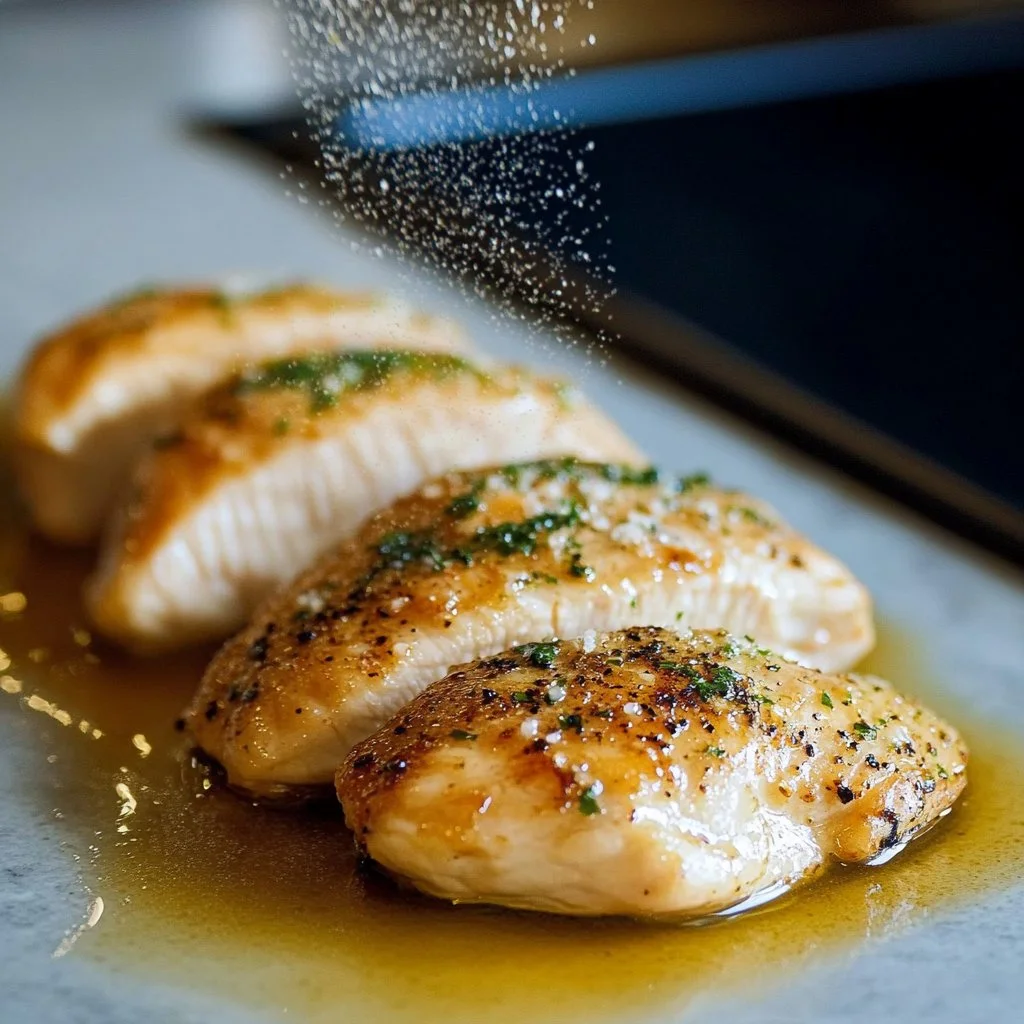
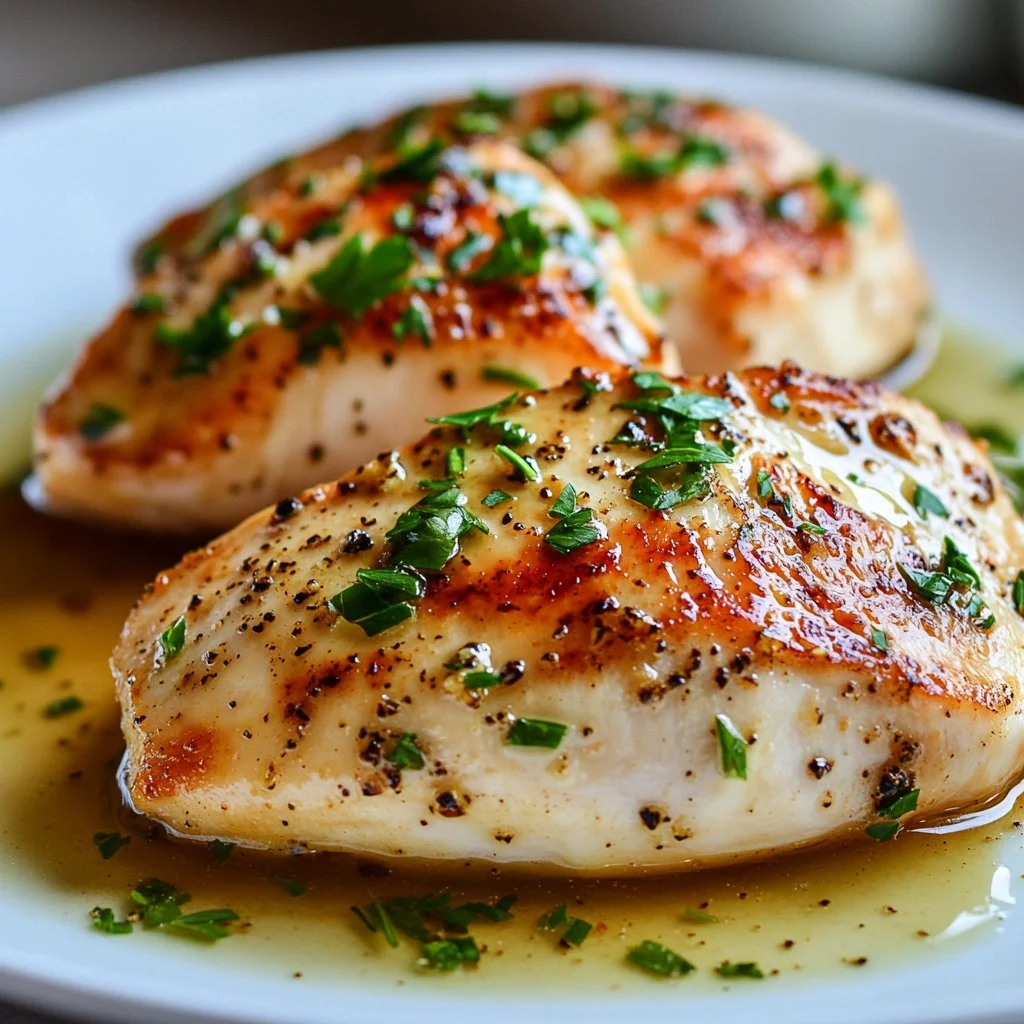
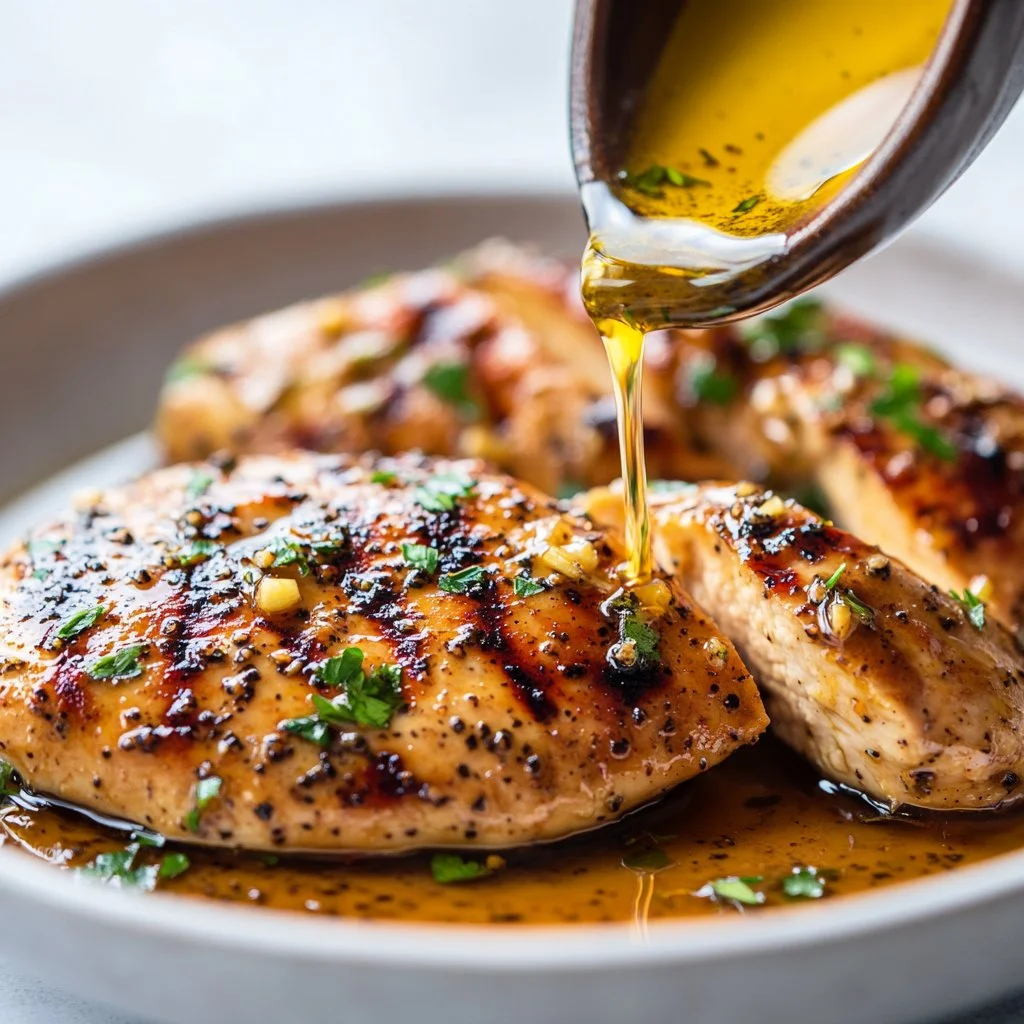
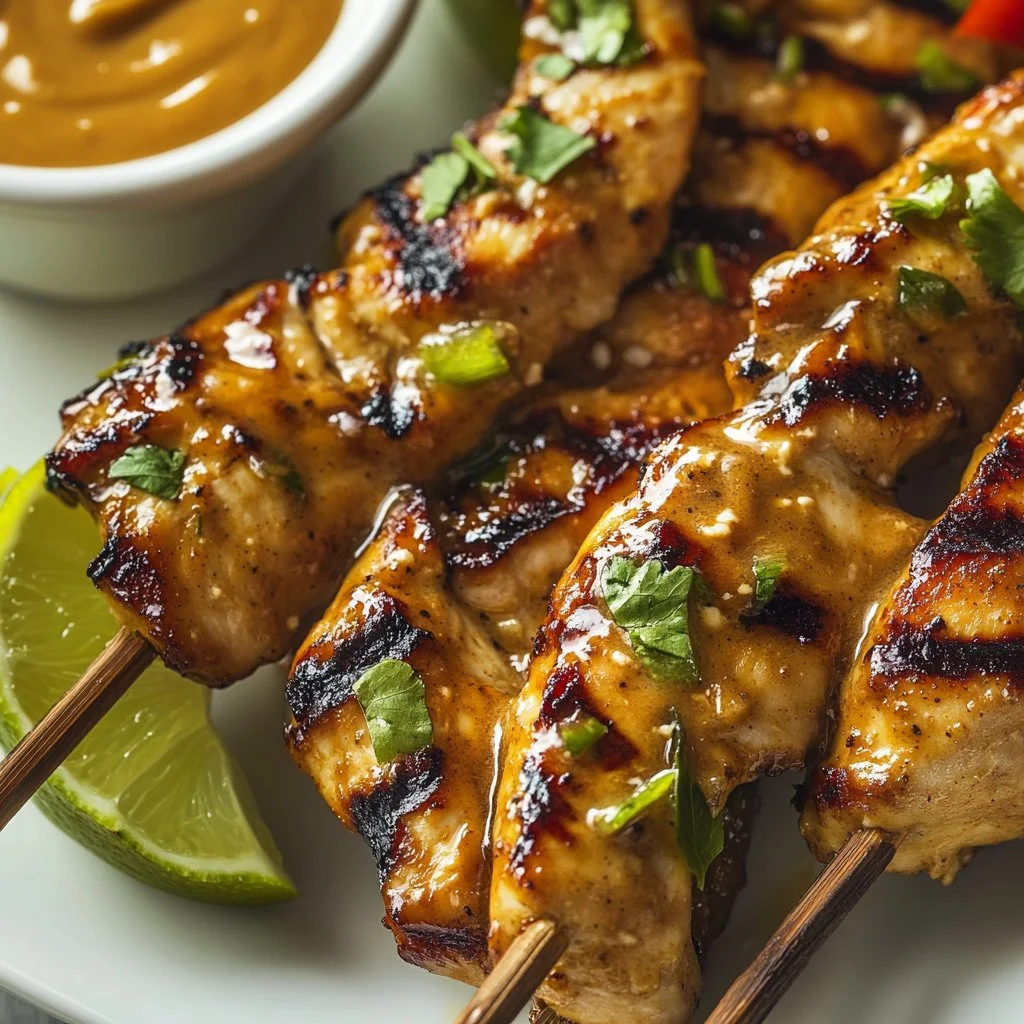
This recipe focuses on balance. The lemon and olive oil tenderize the chicken while the garlic and spices add a warm, familiar flavor kids and grownups both accept. Roasting the skewers on a single baking sheet saves time and keeps cleanup easy, which matters when life is busy.

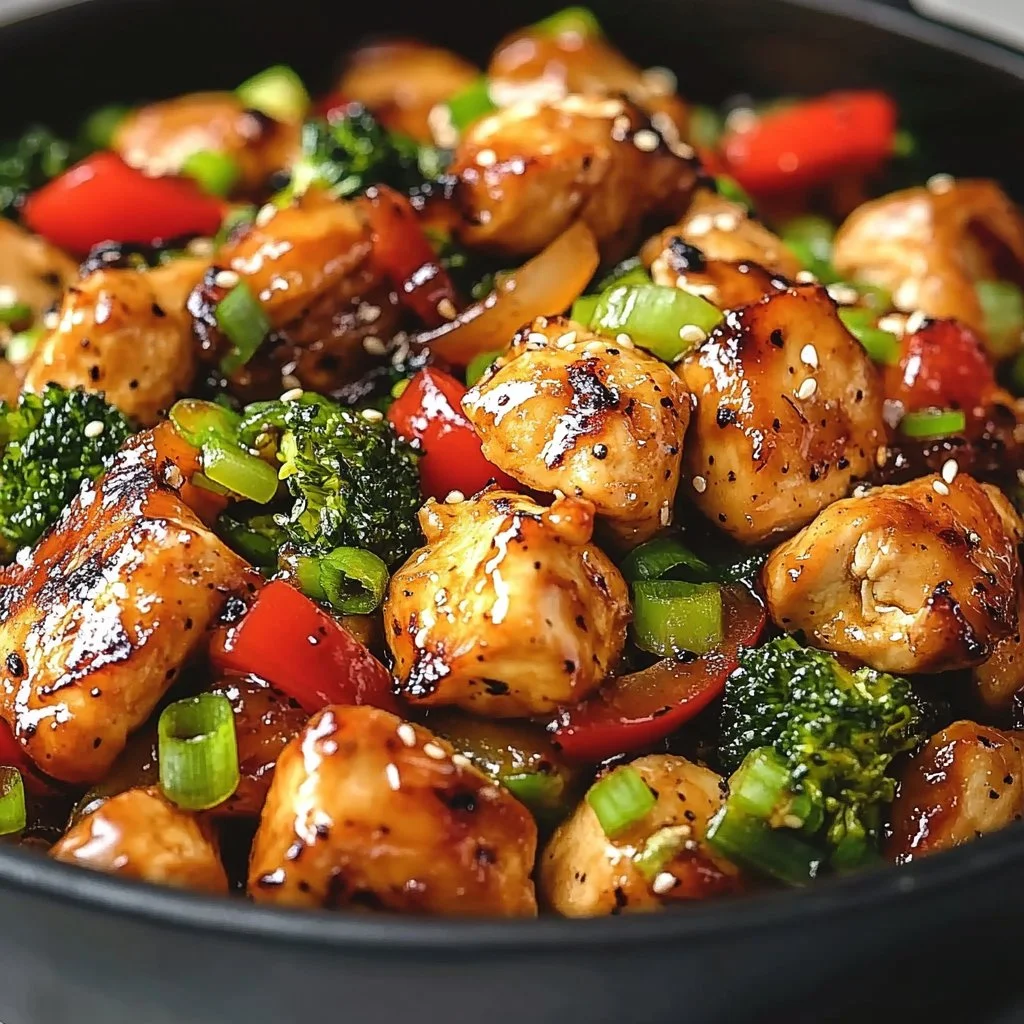
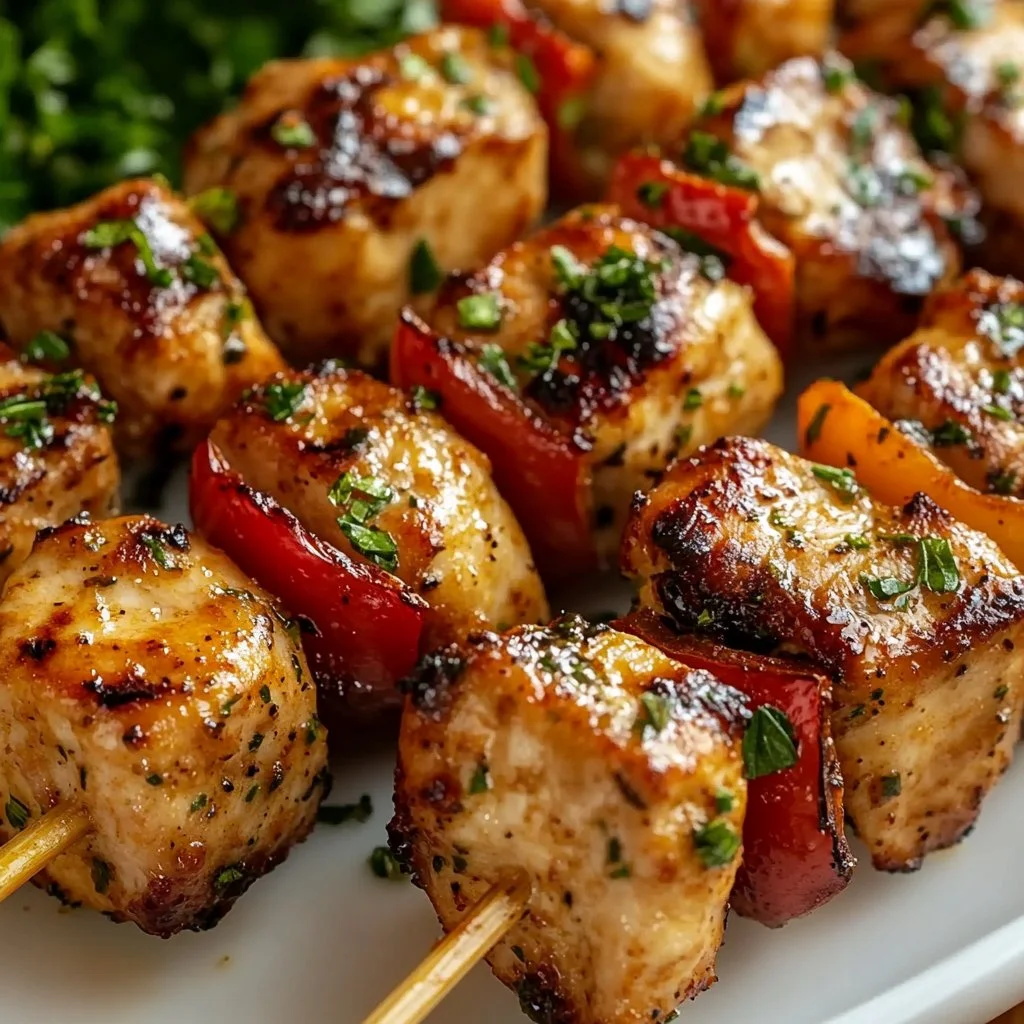
Threading chicken and vegetables together does more than look pretty. The veggies release moisture and flavor into the meat as they roast. That means juicy bites without constant attention. For another simple, flavorful poultry approach to weeknights, try my baked lemon butter chicken for a different citrus-saturated twist.

Process Overview

“This is where the magic happens—when the aroma fills the kitchen.”

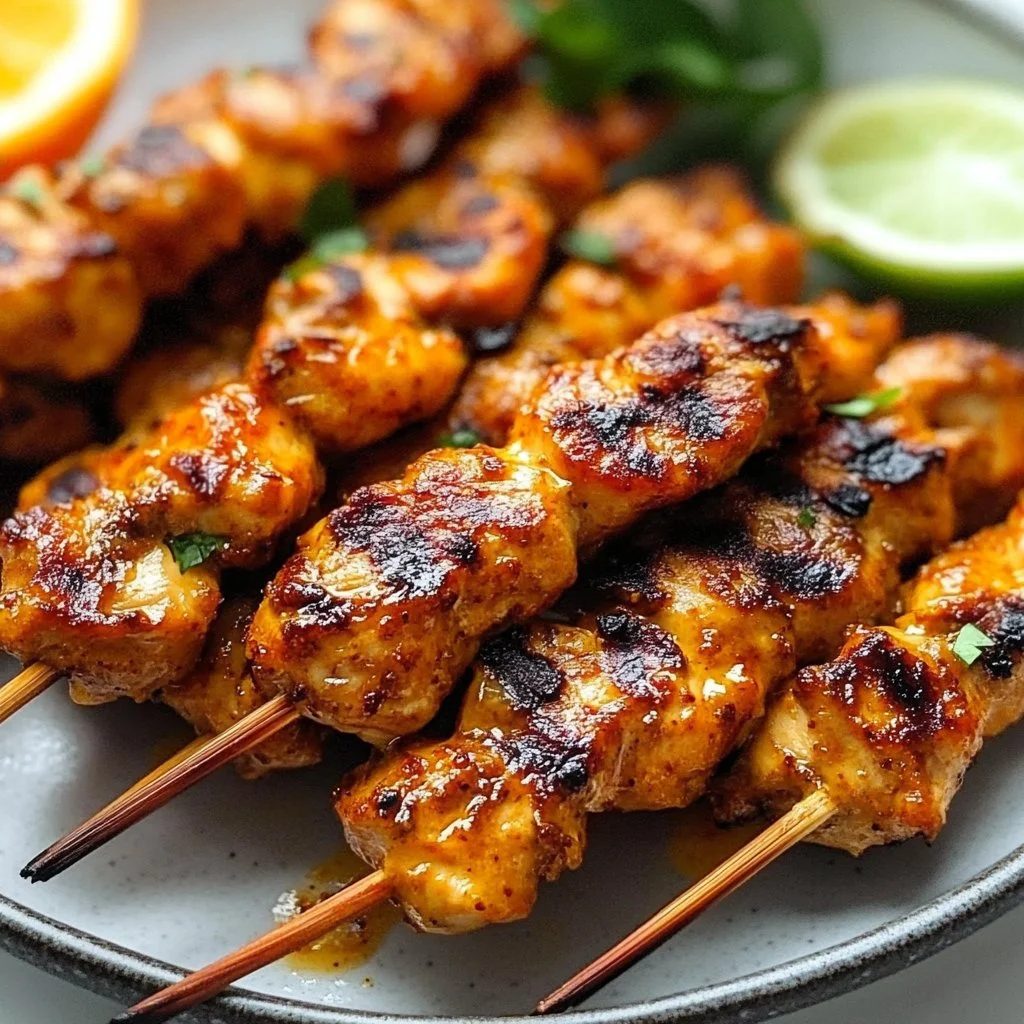
We marinate, thread, and roast. The marinade is straightforward and forgiving. Marinating for as little as 20 minutes gives a nice lift, but you can let it sit longer for deeper flavor. Baking on a hot sheet helps the pieces brown without drying.

This is the kind of recipe where you set the oven, let the oven do the work, and spend quality time with the family while food cooks. If you like crisp edges and bold color, you can finish the skewers under the broiler for a couple of minutes.

Ingredients

  • 600 g chicken breast, cut into chunks
    Lily’s tip: Use even-sized pieces for steady cooking. If your family prefers dark meat, swap in thighs and reduce the baking time slightly.

  • 1 red bell pepper, cut into chunks
    Lily’s tip: Red peppers add sweetness. If picky eaters avoid red, use orange or yellow for the same sweetness.

  • 1 green bell pepper, cut into chunks
    Lily’s tip: Green peppers give a little tang. Remove the seeds and membranes carefully for little hands.

  • 1 red onion, cut into chunks
    Lily’s tip: Red onion roasts sweetly. Soak slices in cold water briefly to tame raw bite for children.

  • 1 zucchini, sliced
    Lily’s tip: Slice zucchini slightly thicker so it does not turn to mush while baking.

  • 3 tbsp olive oil
    Lily’s tip: Use good olive oil for flavor. You only need enough to coat ingredients and carry the spices.

  • 2 tbsp lemon juice
    Lily’s tip: Fresh lemon juice brightens the dish. Bottled will work in a pinch, but fresh is best.

  • 3 cloves garlic, minced
    Lily’s tip: Press the garlic or mince finely so little ones don’t get sharp bites. Roasted garlic becomes mellow and sweet.

  • 1 tsp paprika
    Lily’s tip: Smoked paprika adds depth if you like a subtle smoky note.

  • 1 tsp dried oregano
    Lily’s tip: Dried oregano holds up well in the oven. If you have fresh, add a few chopped leaves after baking.

  • 1/2 tsp cumin
    Lily’s tip: Cumin gives warm, earthy flavor. Use less if you want a milder profile for kids.

  • Salt and black pepper, to taste
    Lily’s tip: Season lightly before marinating and adjust after cooking. Kids often prefer less salt, so keep a pinch separate for their plates.

For a fun family-friendly twist, mix the marinade into a bowl and let everyone dunk and thread their own skewers. It becomes dinner and an activity in one. If you want a creamier finish or a cooling sauce, check the flavors in my bang bang chicken bowl for inspiration.

Directions

  1. Preheat oven to 200°C (400°F). Line a baking sheet with foil or parchment paper.
    Encouraging note: This step is quick and sets you up for a smooth finish. While the oven warms, gather your skewers and chop your veggies.

<, p id=”instruction-step-2″>2. In a bowl, whisk together all marinade ingredients.,
Encouraging note: Whisk until the oil and lemon blend. You will smell the garlic and lemon right away.

, p id=”instruction-step-3″>3. Add chicken to the marinade and toss to coat. Marinate for at least 20 minutes if possible.,
Encouraging note: If time allows, marinate for up to 2 hours in the fridge. Even a short soak makes the chicken taste brighter.

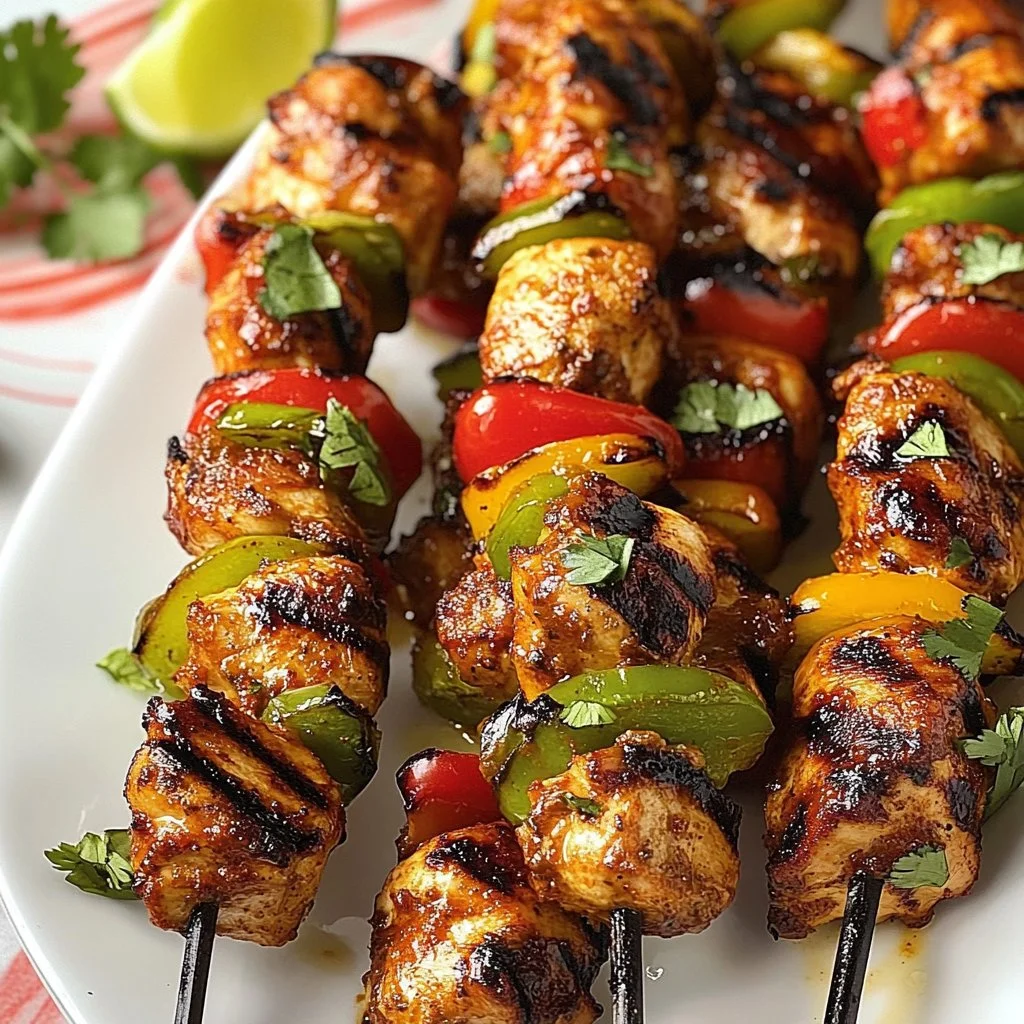
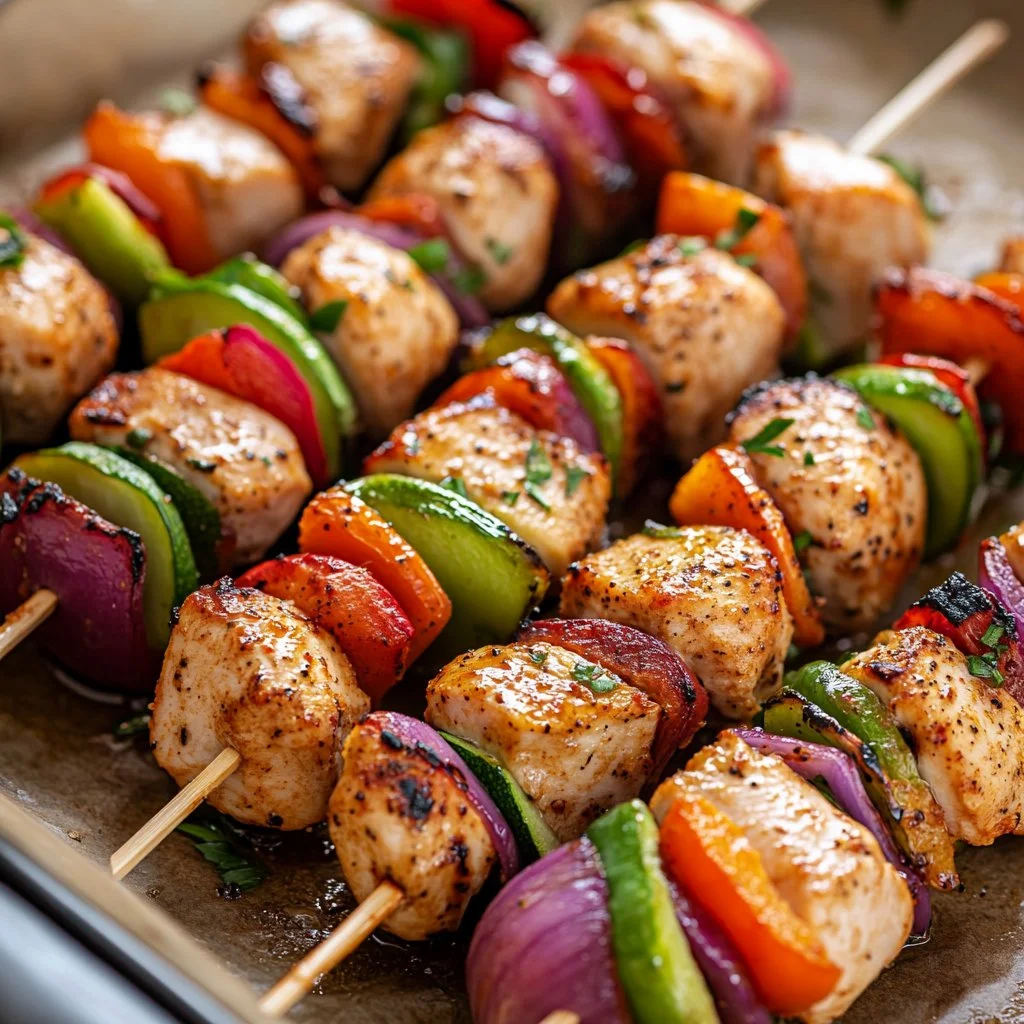
, p id=”instruction-step-4″>4. Thread chicken and vegetables onto skewers.,
Encouraging note: Alternate chicken and veggies so each skewer has color and flavor. If using wooden skewers, soak them in water for 20 minutes first.

, p id=”instruction-step-5″>5. Arrange skewers on the prepared baking sheet.,
Encouraging note: Give each skewer a little space so hot air circulates. This helps the edges brown and keeps the chicken juicy.

, p id=”instruction-step-6″>6. Bake for 25–30 minutes, turning once, until chicken is cooked through and lightly golden.,
Encouraging note: Check for doneness with a meat thermometer at 165°F. Turning halfway ensures even color and prevents sticking.

, id=”instruction-step-7″>7. Broil for 2–3 minutes at the end for extra color if desired.,
Encouraging note: Watch the broiler closely so the edges brown without burning. This step is optional but gives restaurant-style finish.

, =”instruction-step-8″>8. Remove from oven and rest 5 minutes before serving.
Encouraging note: Resting lets juices redistribute. It is a great moment to set the table, pour drinks, and call everyone to the table.

These steps are forgiving. If you need to pause, you can marinate the chicken overnight or prepare the skewers ahead and bake them later. For a complete family meal, serve these with rice, a crisp salad, or warm pita.

Serving

Baked Chicken Kabobs Recipe

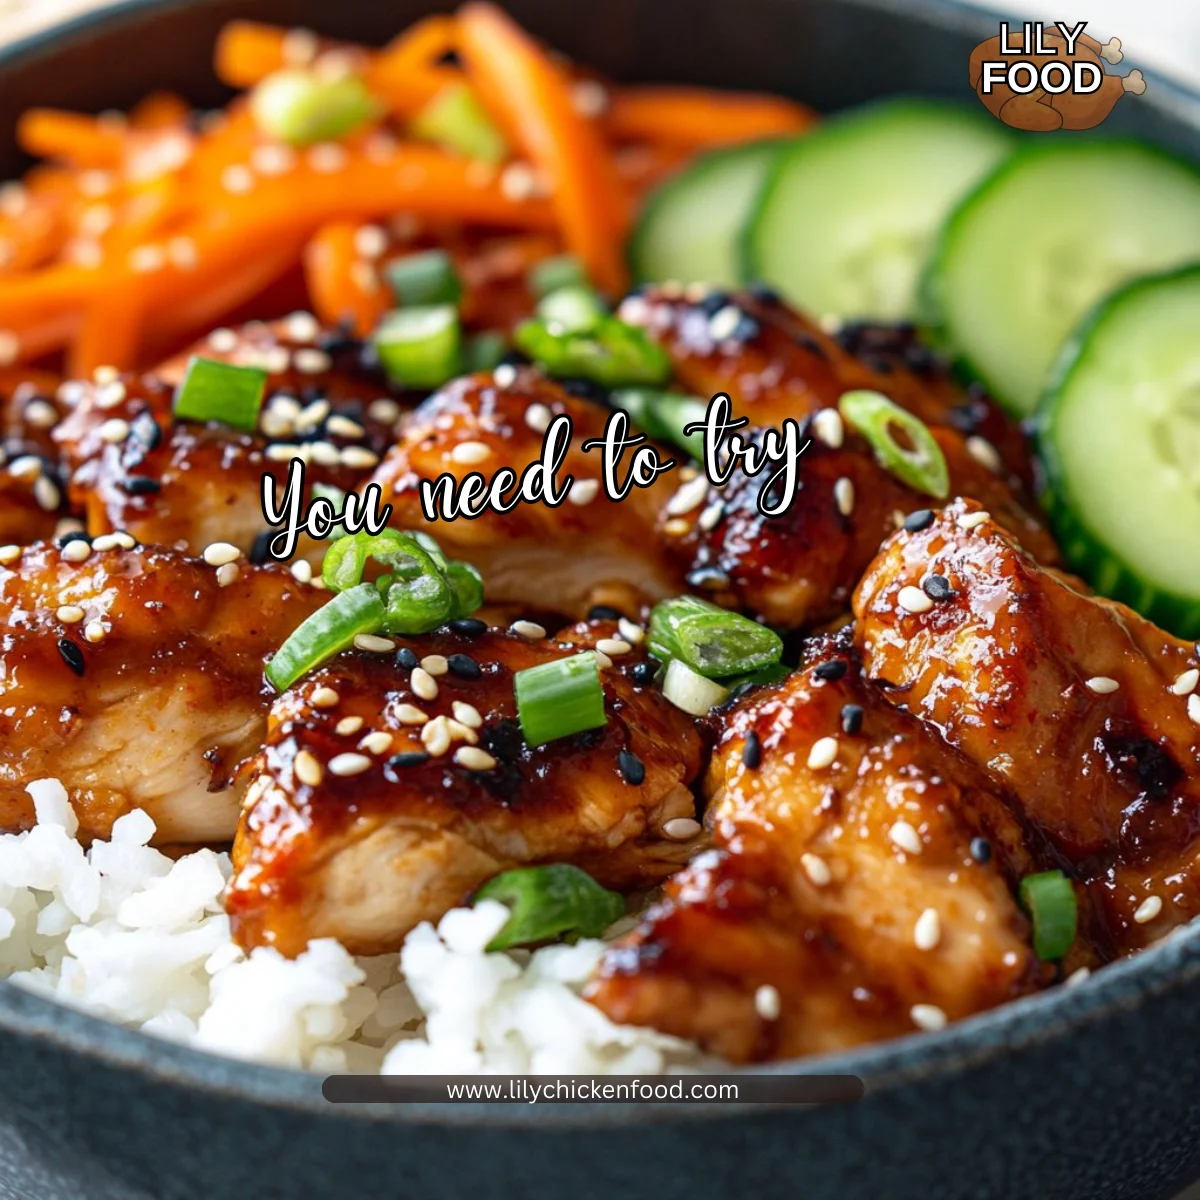
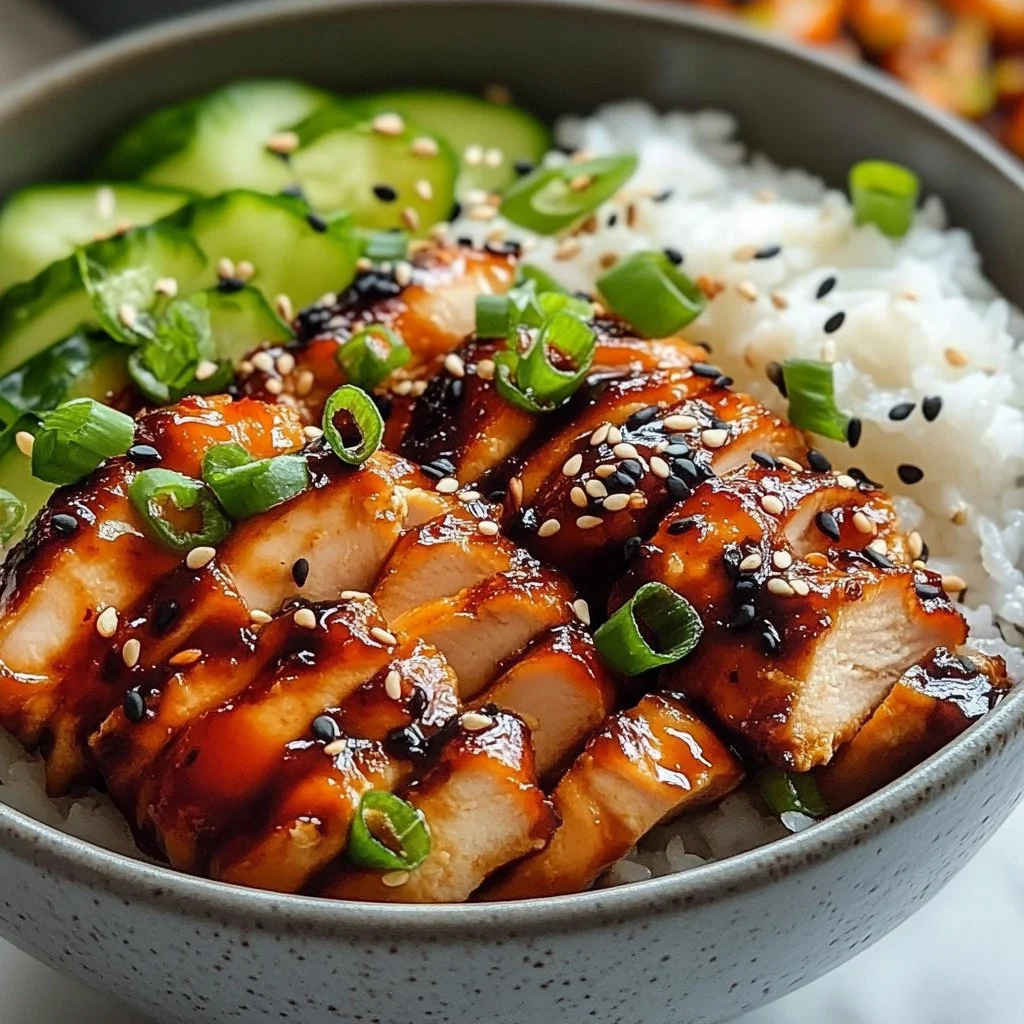
Serve these kabobs family-style on a large platter. Let everyone pull a skewer and build their plate. Offer lemon wedges, yogurt sauce, or a drizzle of tahini on the side for dipping. Bowls of rice or couscous pair beautifully and soak up the juices.

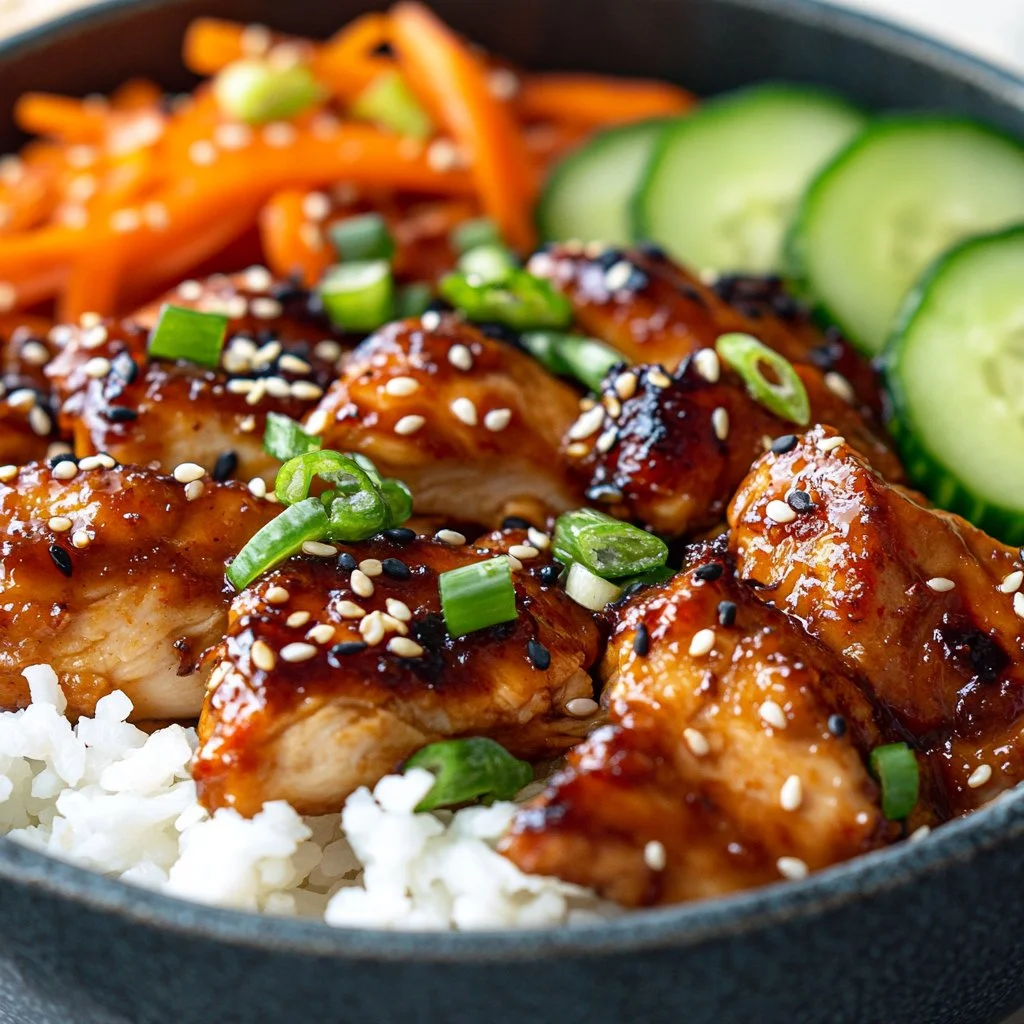
For a kid-friendly set up, slice the chicken off the skewers and place on small plates with carrot sticks and cucumber rounds. If you like sliders or hand-held options, remember my playful bang bang chicken sliders idea for a casual assembly that kids adore.

Storage

Refrigerating: Store leftover kabob pieces in an airtight container for up to 3 days. Keep vegetables and chicken together if you plan to reheat on a sheet pan.

Freezing: Cooked chicken freezes well. Remove vegetables that turn watery and freeze the chicken in a flat bag for up to 2 months. Thaw in the refrigerator overnight before reheating.

Reheating: Reheat in a 350°F oven for 8–12 minutes until warmed through. Place on a baking sheet and cover lightly with foil to prevent drying. You can also reheat in a skillet over medium heat with a splash of olive oil for quick crisping.

Meal prep tip: Make an extra batch of marinade and toss uncooked chicken in it to freeze for a fast meal later. When ready, thaw and bake as directed.

Kitchen Notes

  • Use metal or soaked wooden skewers. Soaked wooden skewers cut down on any chance of burning under the broiler.
  • Cut everything to similar sizes. This keeps cooking times even and avoids overcooked veggies.
  • Double the batch for a crowd. Leftovers reheat well and make great wraps.
  • Swap vegetables seasonally. Cherry tomatoes, mushrooms, or small potatoes work with the same timing if you par-cook denser vegetables.
  • Keep a simple yogurt dip on hand. Plain yogurt mixed with lemon, garlic, and a pinch of salt makes a fast family favorite.

Variations

  • For picky eaters: Keep chicken and a few plain veggie pieces separate on skewers. Serve with a small bowl of plain yogurt or ketchup for dipping.
  • Low-carb option: Serve over a bed of greens instead of rice. Add extra cucumbers and tomatoes for crunch.
  • Mediterranean style: Add a sprinkle of feta and chopped parsley after baking. Swap oregano for fresh basil if you prefer.
  • Spicy version: Add 1/4 tsp cayenne or a drizzle of hot sauce to the marinade for grown-up heat.
  • Gluten-free and dairy-free: This recipe is naturally gluten-free and can be kept dairy-free by using olive oil and lemon. For related tips, you might find inspiration in a gluten-free kabob variation that focuses on bold flavors and simple swaps.

FAQ

Q: Can I use frozen chicken?
A: Thaw completely before cutting and marinating. Frozen chicken can release extra water and dilute the marinade.

Q: How do I prevent vegetables from becoming soggy?
A: Cut them a bit thicker and give denser veggies a short par-cook. Keep zucchini slices larger so they hold shape.

Q: Can I cook these on the grill instead?
A: Yes. Grill over medium heat for about 10–12 minutes, turning occasionally, until the chicken reaches 165°F. Grilling gives great char and smoky flavor.

Q: Are wooden skewers safe in the oven?
A: Yes, if soaked first. Soak for at least 20 minutes to reduce burning. For safety, place them perpendicular to the oven rack so pointed ends do not touch the heating element.

Q: What side dishes pair well with these kabobs?
A: Simple sides like rice pilaf, a green salad, warm pita, or roasted potatoes all work. For a tangy contrast, a cucumber-yogurt salad brightens the whole plate.

Conclusion

I hope this baked chicken kabobs recipe becomes one of your go-to family meals. They are easy to prepare, forgiving, and full of flavor that kids and adults usually enjoy. If you want a gluten-free, dairy-free take with similar oven-baked convenience, see this helpful guide at Baked Chicken Kabobs in the Oven – Gluten-Free and Dairy-Free. For another oven-baked kabob perspective and tips on broiling for color, take a look at Baked Chicken Kabobs in the Oven – The Dizzy Cook.

Happy cooking, friends. Invite the family to help thread the skewers and enjoy the simple joy of a shared meal.

Baked Chicken Kabobs

Prep Time 30 minutes
Cook Time 30 minutes
Total Time 1 hour
Servings 4 servings
Calories 250
Enjoy vibrant flavors and tender meat with these easy-to-make baked chicken kabobs, perfect for family dinners or gathering with friends.

Ingredients

Main Ingredients

  • 600 g chicken breast, cut into chunks (Use even-sized pieces for steady cooking.)
  • 1 red bell pepper, cut into chunks (Red peppers add sweetness.)
  • 1 green bell pepper, cut into chunks (Remove seeds and membranes carefully.)
  • 1 red onion, cut into chunks (Red onion roasts sweetly.)
  • 1 zucchini, sliced (Slice zucchini slightly thicker.)

Marinade Ingredients

  • 3 tbsp olive oil (Use good quality olive oil for flavor.)
  • 2 tbsp lemon juice (Fresh lemon juice brightens the dish.)
  • 3 cloves garlic, minced (Press or mince finely for mild bites.)
  • 1 tsp paprika (Smoked paprika adds depth.)
  • 1 tsp dried oregano (Add fresh herbs after baking for a twist.)
  • 1/2 tsp cumin (Use less for a milder profile.)
  • Salt and black pepper, to taste (Season lightly before marinating.)

Instructions 

Preparation

  • Preheat oven to 200°C (400°F). Line a baking sheet with foil or parchment paper.
  • In a bowl, whisk together all marinade ingredients until smooth.
  • Add chicken to the marinade and toss to coat. Marinate for at least 20 minutes, or up to 2 hours.
  • Thread chicken and vegetables onto skewers, alternating for color and flavor.
  • Arrange skewers on the prepared baking sheet, leaving space between each skewer.

Cooking

  • Bake for 25–30 minutes, turning once, until chicken is cooked through and lightly golden.
  • Broil for 2–3 minutes for extra color if desired.
  • Remove from oven and rest for 5 minutes before serving.

Notes

Serve kabobs family-style and offer dips like yogurt sauce or tahini. Leftovers can be stored in an airtight container for up to 3 days.
Calories: 250kcal
Course: Dinner, Main Course
Cuisine: Mediterranean
Keyword: Baked Chicken Kabobs, Chicken Skewers, Easy Chicken Recipe, Family Dinner, Oven-Baked Kabobs

Cowboy Butter Lemon Bowtie Chicken with Broccoli

There is something about the smell of butter, garlic, and lemon that makes a kitchen feel like home. I can almost hear the soft simmer of sauce and the happy chatter at the table as this recipe comes together. The sound of a skillet singing as chicken browns is a family signal that dinner is ready.

I first made this Cowboy Butter Lemon Bowtie Chicken with Broccoli on a busy weeknight when everyone wanted something warm and comforting. It is forgiving, quick, and loved by kids and adults. If you want the printable, tested version I developed over time, you can find my kitchen-tested Cowboy Butter Lemon Bowtie Chicken with Broccoli recipe on my site.

Why this works

Cowboy Butter Lemon Bowtie Chicken with Broccoli

This dish works because it balances speed and flavor. The bowtie pasta cooks fast. The chicken browns quickly in butter and garlic. Bright lemon lifts the whole plate. Broccoli adds color and a fresh bite that kids usually accept when it meets buttery sauce.

It is a time saver for weeknights and a crowd pleaser for Sunday dinner. If you love a simple grilled twist, you might also enjoy my take on grilled chicken skewers with cowboy butter for backyard gatherings.

The method is straightforward. You can finish it in the time it takes to boil pasta. The cleanup is friendly, and leftovers reheat even better the next day.

Process Overview

“This is where the magic happens—when the aroma fills the kitchen.”

I teach home cooks to move in three parts: pasta, protein, and sauce. While the pasta cooks, brown the chicken, then bring everything together in the skillet with butter, garlic, and lemon. The pace keeps the food hot and the flavors bright.

I often prep the broccoli while the pasta boils. That little multitask saves time and keeps things relaxed. For another hands-on lemon butter dinner idea, try my simple baked lemon butter chicken for nights when you want to put something in the oven.

Ingredients

  • 8 oz bowtie pasta
    Lily tip: Use good quality pasta. Measure by weight if you can for consistent portions. If you only have a cup measure, 8 oz is about 2 cups dry bowties.

  • 2 chicken breasts, diced
    Lily tip: Cut the chicken into even pieces so they cook at the same rate. Pat dry before seasoning for better browning.

  • 2 cups broccoli florets
    Lily tip: Trim broccoli into bite-size pieces so kids can eat them easily. If you like softer veg, steam a minute before adding to the skillet.

  • 1/4 cup butter
    Lily tip: Unsalted butter lets you control salt. If using salted, reduce added salt a touch.

  • 2 cloves garlic, minced
    Lily tip: Fresh garlic gives the best flavor. Mince finely so it melts into the sauce and does not leave big bites.

  • 1 lemon, juiced
    Lily tip: Fresh juice brightens the dish more than bottled lemon. Squeeze into a small bowl and remove seeds before adding.

  • 1 tsp lemon zest
    Lily tip: Zest before juicing. Use a microplane for fine zest that blends into the sauce.

  • Salt and pepper to taste
    Lily tip: Season in steps. Add a little when cooking chicken, then adjust at the end.

  • Parmesan cheese for serving (optional)
    Lily tip: Freshly grated parmesan adds a salty, nutty finish. Offer it at the table so family members can choose.

If you like the comfort of pasta with buttery sauces, you may also enjoy my garlic butter chicken and bowtie pasta for a similar cozy dinner. See my notes here: garlic butter chicken and bowtie pasta.

Directions

  1. Cook the bowtie pasta according to package instructions. Drain and set aside.
    Encouragement: Let the pasta cook to just tender. Overcooked pasta will get soft when tossed with the sauce, so keep an eye on it.

  2. In a large skillet, melt the butter over medium heat.
    Encouragement: Let the butter foam and turn lightly golden. That little nutty flavor will deepen the dish.

  3. Add the diced chicken and season with salt and pepper. Cook until the chicken is browned and cooked through, about 6-7 minutes.
    Encouragement: Keep the pan warm but not hot enough to burn the butter. Stir a few times so the chicken browns evenly.

  4. Add the minced garlic and cook for an additional 1 minute until fragrant.
    Encouragement: Garlic cooks fast. Smell it and you will know it is ready. Do not let it brown too much.

  5. Stir in the broccoli florets and cook for 2-3 minutes until they are tender.
    Encouragement: The broccoli should stay slightly crisp to give a fresh contrast. If your family prefers softer vegetables, cook an extra minute.

  6. Add the cooked pasta to the skillet along with the lemon juice and lemon zest. Toss everything together until well combined.
    Encouragement: Toss gently to coat every bowtie with buttery lemon goodness. Taste and adjust salt and pepper.

  7. Serve hot, topped with Parmesan cheese if desired.
    Encouragement: Bring the skillet to the table or plate it family-style. A final squeeze of lemon brightens each serving.

I like to taste along the way and encourage you to do the same. A little extra lemon or a pinch of salt makes a big difference and helps you tailor the dish to your family.

Serving

Cowboy Butter Lemon Bowtie Chicken with Broccoli

Serve this meal family-style on a large shallow bowl so everyone can help themselves. The bowties hold sauce in their folds, and the diced chicken is perfect for little hands. Pass parmesan at the table so each person can add as much as they like.

Add a simple green salad or crusty bread if you want to stretch the meal a bit. For a fun family night, set out toppings like extra lemon wedges, chopped parsley, or red pepper flakes so each person can customize their plate.

If you want another flavor-packed bowl with fresh sides, my lemon chili grilled chicken bowls with cucumber salad and hummus make a bright seasonal option. Try that variation here: lemon chili grilled chicken bowls with fresh cucumber salad and hummus.

Storage

Leftovers store well in an airtight container in the refrigerator for up to 3 days. The broccoli will soften with time but the flavors remain lovely.

To reheat, warm gently in a skillet over low heat with a splash of water or a teaspoon of butter to revive the sauce. Microwave in 30 second bursts, stirring between, to avoid overcooking the chicken and pasta.

If you want to freeze portions, place cooled food into freezer-safe containers. Freeze for up to 2 months. Thaw overnight in the refrigerator and reheat gently in a skillet for best texture.

Kitchen Notes

  • Prep ahead: Dice the chicken and chop the broccoli the night before to save time on busy evenings.
  • One-pan cleanup: Use the same skillet to brown chicken and finish the pasta. It saves dishes and keeps flavors concentrated.
  • Pasta timing: Start the pasta before you cook the chicken so everything finishes together.
  • Swap the broccoli: If broccoli is not available, use asparagus, peas, or green beans for bright color and crunch.
  • Kid-friendly trick: Toss a small portion of pasta with just butter and parmesan for picky eaters, then mix in chicken and broccoli for everyone else.

Variations

  • For picky eaters: Remove the broccoli and add corn or peas. Keep flavors simple and add veggies in steps they like.
  • Low carb option: Replace bowtie pasta with cooked cauliflower rice or zucchini ribbons. Keep the same lemon butter sauce.
  • Gluten free: Use your favorite gluten free bowtie pasta and check labels on any processed ingredients.
  • Herb boost: Add chopped parsley or basil at the end for a fresh herbal lift.
  • Spicy version: Stir in a pinch of red pepper flakes or a splash of hot sauce for heat.

These small changes let you adapt the recipe to different diets and family tastes while keeping the core flavors.

FAQ

Q: Can I use chicken thighs instead of breasts?
A: Yes. Boneless skinless thighs work well and stay juicy. Cut into uniform pieces and adjust cooking time if needed.

Q: Can I make this dairy free?
A: Yes. Swap butter for a dairy free butter or olive oil. Finish with nutritional yeast instead of parmesan if you want a cheesy note.

Q: How do I keep the chicken from drying out?
A: Dice the chicken into even pieces and do not overcook. Cook until just done and remove from heat when the center is no longer pink.

Q: Can I make this ahead of time for guests?
A: You can partially assemble ingredients ahead. Cook pasta and chicken, then store separately. Reheat and toss together before serving to keep textures fresh.

Q: What should I serve with this for a balanced meal?
A: A simple side salad or steamed green beans are great. Bread or rolls round it out if you want more comfort food.

Conclusion

Thank you for letting me share this family favorite. I hope it becomes a quick weeknight hero in your home and a scent that brings everyone to the table. If you want to compare this version with other tested recipes, you can find the original inspiration on Cowboy Butter Lemon Bowtie Chicken with Broccoli – Umami and a classic lemon chicken and broccoli bowtie approach at Lemon Chicken with Broccoli & Bow Ties Recipe | Ina Garten.

Happy cooking,
Lily

Cowboy Butter Lemon Bowtie Chicken with Broccoli

Prep Time 15 minutes
Cook Time 15 minutes
Total Time 30 minutes
Servings 4 servings
Calories 450
A quick and comforting recipe featuring bowtie pasta, chicken, and broccoli in a buttery lemon sauce, perfect for weeknight dinners.

Ingredients

Main Ingredients

  • 8 oz bowtie pasta (Use good quality pasta.)
  • 2 pieces chicken breasts, diced (Cut into even pieces for uniform cooking.)
  • 2 cups broccoli florets (Trim into bite-size pieces for easier eating.)
  • 1/4 cup butter (Unsalted butter for better salt control.)
  • 2 cloves garlic, minced (Fresh garlic gives the best flavor.)
  • 1 unit lemon, juiced (Fresh juice brightens the dish.)
  • 1 tsp lemon zest (Zest before juicing for a fine blend.)
  • Salt and pepper to taste (Season in steps for best flavor.)
  • Parmesan cheese for serving (optional) (Freshly grated adds a salty finish.)

Instructions 

Cooking Pasta

  • Cook the bowtie pasta according to package instructions. Drain and set aside.

Cooking Chicken

  • In a large skillet, melt the butter over medium heat.
  • Add the diced chicken and season with salt and pepper. Cook until browned and cooked through, about 6-7 minutes.
  • Add the minced garlic and cook for an additional 1 minute until fragrant.
  • Stir in the broccoli florets and cook for 2-3 minutes until tender.

Combining and Serving

  • Add the cooked pasta to the skillet along with the lemon juice and lemon zest. Toss everything together until well combined.
  • Serve hot, topped with Parmesan cheese if desired.

Notes

Leftovers can be stored in an airtight container in the refrigerator for up to 3 days. Reheat gently to revive the sauce.
Calories: 450kcal
Course: Dinner, Main Course
Cuisine: American, Comfort Food
Keyword: Broccoli, Chicken, Lemon, Pasta, Quick Dinner

Chicken with Garlic Butter

I remember the first time I made chicken with garlic butter for my family. The kitchen smelled like warm garlic and butter, and the sizzle of the chicken on the griddle sounded like a little celebration. My kids came running, and the whole house felt cozy and full.

This recipe is simple enough for a weeknight and special enough for a Sunday dinner. If you love bold garlic flavors, you might enjoy my twist on shawarma flavors too in this other family favorite: chicken shawarma with garlic sauce.

Why this works

Chicken with Garlic Butter

This method uses high heat and a little butter to lock in juices and build a brown, savory crust. Garlic butter gives big flavor without long prep. That makes it perfect for busy families who want something fast, tasty, and comforting.

It is also forgiving. You can stretch this across meals, pack leftovers into lunches, and feed picky eaters with small changes. If you enjoy quick, buttery dinners with a family focus, you might also like the easy comfort of my Cowboy Butter Lemon Bowtie Chicken with Broccoli for another time-saving option.

Process Overview

“This is where the magic happens—when the aroma fills the kitchen.”

The magic is in the timing. A hot surface sears the outside and keeps the inside tender. Garlic butter melts and coats the chicken as it cooks. The result is a simple, crowd-pleasing dish that looks and tastes like you spent more time on it than you really did.

I like to work in stages: prep, heat, sear, rest, and serve. Each step is short and intentional. When the aroma fills the kitchen, you know dinner is nearly ready.

Ingredients

  • 4 boneless, skinless chicken breasts
  • 4 tablespoons garlic butter
  • Salt and pepper to taste
  • Fresh parsley, chopped (for garnish)

Lily’s personal tips for each

  • 4 boneless, skinless chicken breasts
    • Tip: Pound thicker breasts to an even thickness. They cook more evenly and stay tender. If you only have bone-in, plan for longer cook time.
  • 4 tablespoons garlic butter
    • Tip: Use a high-quality garlic butter or make your own with softened butter and minced garlic. Fresh garlic gives the brightest flavor.
  • Salt and pepper to taste
    • Tip: Season generously. Salt helps form a nice crust. I season both sides and lightly again after cooking if needed.
  • Fresh parsley, chopped (for garnish)
    • Tip: Parsley brightens the dish and adds a fresh finish. Cilantro works if you prefer a slightly different herb note.

If you like pairing garlic chicken with potatoes or beef, check out my quick skillet idea in this recipe for garlic butter beef bites with potatoes. It uses the same pantry flavors for a heartier meal.

Directions

  1. Preheat your Blackstone Griddle over medium-high heat.

    • Encouraging note: A hot griddle is your best friend. Give it a few minutes to come up to temperature so the chicken sears quickly.
  2. Season chicken breasts with salt and pepper.

    • Encouraging note: Be kind to the meat. Season both sides and press the spices in lightly. This step makes a big difference in flavor.
  3. Melt the garlic butter on the griddle.

    • Encouraging note: Let the butter foam and smell the garlic wake up. Keep an eye on it so it does not brown too fast.
  4. Add the chicken breasts to the griddle and cook for about 6-7 minutes on each side, or until fully cooked and golden brown.

    • Encouraging note: Resist the urge to flip too often. Let the chicken form a golden crust before turning. Use a thermometer to check for 165°F at the thickest part.
  5. Remove from heat and let it rest for a few minutes.

    • Encouraging note: Resting lets the juices redistribute. Cover loosely with foil if you need to keep it warm while you finish sides.
  6. Garnish with fresh parsley before serving. Enjoy!

    • Encouraging note: A sprinkle of parsley and a squeeze of lemon if you like will lift the whole plate. You did it!

If you enjoy quick grilled flavors, this method shares tips I use for other simple meals like my easy grilled Asian chicken skewers with honey garlic sauce. The sequence of hot surface, proper rest, and bright garnish repeats across many good weeknight recipes.

Serving

Chicken with Garlic Butter

Serve family-style on a large platter so everyone can help themselves. Lay the chicken breasts on a bed of buttered rice, mashed potatoes, or roasted vegetables. Add lemon wedges for squeezing and a small bowl of extra garlic butter if someone wants more.

For a family-style feel, place two sides on the table and let each person pick their portions. Kids love a simple plate with chicken, a veg, and a carb. Adults will appreciate the golden crust and the garlic aroma.

Pair with a bright salad or steamed green beans to balance the richness. For a rustic dinner, slice the chicken and serve over crusty bread to soak up the garlic butter.

Storage

Fridge

  • Cool the chicken to room temperature before storing.
  • Place in an airtight container and refrigerate up to 4 days.
  • Store the garlic butter separately if you prefer to reheat without extra fat.

Reheat

  • Oven: Preheat to 350°F. Place chicken in a baking dish with a splash of broth or water. Cover and heat for 10 to 15 minutes.
  • Stovetop: Reheat gently in a skillet over medium-low heat with a teaspoon of butter or oil. Turn often to warm through.
  • Microwave: Use short intervals and cover to keep the meat from drying. Add a damp paper towel over the plate to lock moisture.

Leftovers make great sandwiches, salads, or a quick pasta topper. Slice and toss with greens for an easy lunch.

Kitchen Notes

  • Use a thermometer. 165°F at the thickest part means safe, juicy chicken.
  • Even thickness matters. Pound to even thickness for consistent cooking.
  • Swap the Blackstone for a heavy skillet if needed. Cast iron works well.
  • Make extra garlic butter. Freeze it in small portions for fast dinners.
  • Keep herbs fresh. A final herb sprinkle brightens the whole dish and makes it family friendly.

For a creamy garlic twist that kids often love, try my quick kofta idea in this recipe for chicken kofta with creamy garlic yogurt sauce.

Variations

  • For picky eaters

    • Keep the garlic light. Use 2 tablespoons of garlic butter and offer extra at the table.
    • Serve plain slices alongside a dipping sauce like ketchup or mild ranch.
  • For low-carb or keto

    • Serve over a bed of sautéed spinach or cauliflower mash.
    • Use herb butter and skip any sugary marinades.
  • For gluten-free families

    • This dish is naturally gluten-free. Avoid cross-contamination and you are set.
  • For a spicy kick

    • Mix a pinch of red pepper flakes into the butter before melting.
    • Add a cayenne sprinkle to the seasoning.
  • For a citrus note

    • Add lemon zest to the butter or squeeze fresh lemon over each breast before serving.

These tweaks keep the recipe flexible so every member of the family can enjoy it.

FAQ

Q: Can I use chicken thighs instead of breasts?
A: Yes. Bone-in thighs will need longer to cook, about 8 to 10 minutes per side depending on thickness. Remove from heat when they reach 165°F and rest.

Q: Can I use store-bought garlic butter?
A: Absolutely. A high-quality, fresh garlic butter will speed things up and taste great. I often use store-bought when I am short on time.

Q: What if I do not have a Blackstone Griddle?
A: A heavy cast-iron skillet or stainless steel pan works well. The key is a hot, even surface to sear the chicken.

Q: How do I prevent the garlic from burning?
A: Keep the butter moving and watch the heat. If the garlic browns too fast, lower the heat and spoon the butter over the chicken rather than letting it pool and burn.

Q: Is this recipe kid-friendly?
A: Yes. The flavors are simple and familiar. Offer sides your kids already like and reduce the garlic if they prefer milder tastes.

Conclusion

I hope this garlic butter chicken becomes one of your go-to family dinners. It is quick, forgiving, and full of the kind of flavor that brings people to the table.

For another take on simple garlic butter chicken sauces and technique, I often refer to recipes like Garlic Butter Chicken (4 Ingredient Sauce!) from Don’t Go Bacon My Heart for inspiration. If you want a fast 20-minute version with clear timing and pantry tips, this version on Wholesome Yum’s Garlic Butter Chicken (Easy 20-Minute Dinner) is a helpful read.

Thank you for cooking with me. Gather your family, listen for the sizzle, and enjoy the simple joy of a meal made with butter, garlic, and a little love.

Garlic Butter Chicken

Prep Time 10 minutes
Cook Time 15 minutes
Total Time 25 minutes
Servings 4 servings
Calories 320
A simple yet flavorful chicken dish featuring garlic butter that is perfect for busy weeknights or special family dinners.

Ingredients

Main Ingredients

  • 4 pieces boneless, skinless chicken breasts (Pound thicker breasts to an even thickness for better cooking.)
  • 4 tablespoons garlic butter (Use high-quality garlic butter or make your own with softened butter and minced garlic.)
  • Salt and pepper to taste (Season generously to help form a nice crust.)
  • Fresh parsley, chopped (for garnish) (Parsley brightens the dish; cilantro can be used for a different flavor.)

Instructions 

Preparation

  • Preheat your Blackstone Griddle over medium-high heat.
  • Season chicken breasts with salt and pepper on both sides.
  • Melt the garlic butter on the griddle until foamy.

Cooking

  • Add the seasoned chicken breasts to the griddle and cook for about 6-7 minutes on each side, or until fully cooked and golden brown.
  • Remove from heat and let the chicken rest for a few minutes.

Serving

  • Garnish with fresh parsley before serving.

Notes

For best results, use a thermometer to ensure chicken reaches 165°F at the thickest part. Leftovers make great sandwiches or salads. Keep garlic butter on hand for quick meals.
Calories: 320kcal
Course: Dinner, Main Course
Cuisine: American
Keyword: Easy Chicken Recipe, Family Dinner, Garlic Butter Chicken, Quick Meal

Flavor-Packed Blackstone Griddle Chicken Stir Fry: Healthy & Quick Dinner

I can smell the garlic and honey hitting the hot griddle. The sound of a soft sizzle fills the kitchen as veggies start to brown and chicken pieces turn golden. My family gathers around the counter, tiny forks at the ready, and I feel that warm, quiet satisfaction that comes from feeding the people I love.

This chicken stir fry on the Blackstone griddle is one of those dinners that feels special but comes together fast. If you like simple weeknight meals, you might also enjoy my queso chicken enchiladas, another family favorite that saves time without losing flavor.

Why this works

Flavor-Packed Blackstone Griddle Chicken Stir Fry: Healthy & Quick Dinner

This recipe balances speed, flavor, and nutrition in a way that really helps busy families. Vegetables get caramelized on the griddle while the chicken cooks separately, so nothing steams into mush. The sauce is light but bold, clinging to every bite.

I test these kinds of dinners often and keep a list of reliable weeknight ideas. If you want more family-tested ideas, check my collection of best 30 chicken dinner recipes. This stir fry fits right into a busy evening because it uses one large cooking surface, little cleanup, and ingredients you can mix and match.

Process Overview

“This is where the magic happens—when the aroma fills the kitchen.”

In short, you prep, heat the griddle, cook vegetables in one zone, sear the chicken in the other, toss in peppers and aromatics, and finish with a glossy sauce. The griddle gives you quick, even heat and that lovely char that keeps kids asking for more.

For quick weeknight wins, I often pull from my list of best 5 easy chicken recipes for weeknight dinners and adapt flavors for what’s in the fridge. The method in this recipe is flexible and forgiving.

Ingredients

Pantry and produce with my tips

  • 3 boneless chicken breasts, diced into 1-inch pieces
    Tip: Pat the chicken dry with paper towels before dicing so it browns faster on the griddle. If you like bite-sized pieces for kids, cut slightly smaller.

  • 2 cups broccoli florets
    Tip: Use fresh if you can; frozen florets work too. If using frozen, give them a minute to thaw on the griddle so they don’t release too much water.

  • 1 yellow bell pepper, cut into 1-inch pieces
    Tip: Yellow peppers are sweet and kid-friendly. Cut uniform pieces so everything cooks at the same rate.

  • 1 red bell pepper, cut into 1-inch pieces
    Tip: Red peppers add color and sweetness. If your family prefers milder taste, remove the seeds and ribs.

  • 1/2 cup shredded carrots
    Tip: Pre-shredded carrots save time. They also add a touch of natural sweetness and vibrant color.

  • 2 teaspoons minced garlic
    Tip: Fresh minced garlic gives the best flavor. Add it near the end of cooking to keep it from burning.

  • 1/2 teaspoon ground ginger
    Tip: Ground ginger is convenient and consistent. If you have fresh ginger, use 1 teaspoon grated for a brighter note.

  • 2 tablespoons avocado oil
    Tip: Avocado oil tolerates the griddle’s high heat and gives a neutral flavor. Olive oil can work but may smoke more.

  • 2 tablespoons sesame seeds
    Tip: Toast them lightly in a small pan for extra aroma, or sprinkle them raw for quick finish.

  • 1/2 cup chicken broth
    Tip: Low-sodium broth keeps the sauce from getting too salty. You can substitute water in a pinch.

  • 1/4 cup soy sauce
    Tip: Use reduced-sodium soy sauce if you are watching salt, or try a gluten-free tamari for sensitivity.

  • 2 tablespoons honey
    Tip: Honey balances the soy. For a vegan swap, use maple syrup; flavor will be slightly different.

  • 1 tablespoon cornstarch
    Tip: Mix cornstarch with the broth to avoid lumps. This gives the sauce a shiny, slightly thickened finish.

If you want more ideas for weeknight chicken dinners, I keep a list of best 9 chicken recipes for weeknight dinners that you can adapt for family tastes.

Directions

  1. Preheat the Blackstone griddle to medium-high heat, about 400°F.
    Encouraging note: A hot griddle is the secret to quick searing. While it warms up, take a minute to breathe and gather your ingredients.

  2. Whisk together chicken broth, soy sauce, honey, and cornstarch in a bowl to make the stir-fry sauce and set aside.
    Encouraging note: Whisk until smooth. This little step saves time during cooking and makes the sauce lump-free.

  3. Spread avocado oil across the griddle surface and create two cooking zones.
    Encouraging note: One side will be for veggies and the other for chicken. Setting zones keeps textures right and speeds cleanup.

  4. Add broccoli and shredded carrots to one side of the griddle and cook for 2–3 minutes, stirring occasionally.
    Encouraging note: Let the broccoli get a little color. Kids often like the slight crunch when vegetables are not overcooked.

  5. Place diced chicken on the other side, season with salt and pepper, and cook for 3–5 minutes while flipping regularly until browned and cooked through.
    Encouraging note: Give the chicken space so it browns instead of steams. If you have a meat thermometer, aim for 165°F for safety and juiciness. For a milder flavor, remove pan juices as the chicken finishes.

  6. Add the bell peppers to the vegetables and cook for 1–2 minutes until slightly tender.
    Encouraging note: Peppers cook quickly and still hold color. This keeps the dish lively and appealing for kids.

  7. Combine the chicken and vegetables on the griddle and add the minced garlic and ground ginger, cooking for about 1 minute until fragrant.
    Encouraging note: Garlic and ginger bloom fast. Watch closely so they deepen flavor without burning.

  8. Pour the prepared sauce over the mixture and toss everything together.
    Encouraging note: Stir thoroughly so every piece gets coated. The cornstarch will begin to thicken the sauce.

  9. Cook for another 1–2 minutes until the sauce thickens and coats the chicken and vegetables.
    Encouraging note: The sauce should be glossy and cling to the food. If it gets too thick, add a tablespoon of water to loosen.

  10. Serve hot over rice and finish with sesame seeds.
    Encouraging note: Serve family-style so everyone can help themselves. Sprinkle sesame seeds last for a little crunch and visual appeal. For a hands-off dinner option, remember my collection of best crock pot chicken recipes when you need an even easier night.

Serving

Flavor-Packed Blackstone Griddle Chicken Stir Fry: Healthy & Quick Dinner

H3 How I serve this to my family

I usually spread out a big bowl of steamed white or brown rice and a platter with the stir fry right on the griddle if the table is safe from heat. Let everyone scoop what they want. Little ones like to mix veggies and rice into a small bowl, while older kids often want extra sauce.

H3 Simple sides to round it out

A quick cucumber salad or a simple green salad with vinaigrette pairs well. If you have leftover rice, crisp up small fried rice bowls with a bit of scrambled egg for a second night.

Storage

Store leftovers in an airtight container in the refrigerator for up to 3 days. The sauce can tighten as it cools. To reheat, warm gently in a skillet over medium heat with a splash of water or broth to loosen the sauce. You can also reheat in the microwave in 30 second bursts, stirring in between.

If you want to freeze portions, cool completely and place in a freezer-safe container for up to 2 months. Thaw overnight in the refrigerator before reheating. Note that fresh veggies may be softer after freezing, so this method works best when you plan to reheat for meal-prep bowls.

Kitchen Notes

  • Use two cooking zones on the griddle. One side for veggies, one for protein, for perfect texture.
  • Prep everything before heating the griddle. Stir fry waits for no one.
  • If you do not have cornstarch, arrowroot or potato starch can work in the same amount.
  • Taste the sauce before pouring and adjust salt or honey to your family’s preference.
  • Keep a small bottle of sesame oil nearby. A tiny drizzle after plating adds a lovely nutty finish.

Variations

  • For picky eaters: Swap broccoli for snap peas or thinly sliced zucchini. Mild flavors help transition kids to new veggies.
  • Lower sodium: Use low-sodium soy sauce and low-sodium chicken broth. Increase a little honey for balance if needed.
  • Gluten-free: Use tamari instead of soy sauce and confirm your broth is gluten-free. Cornstarch is gluten-free and works as the thickener.
  • Spicy version: Add 1 teaspoon of Sriracha or a pinch of red pepper flakes when you add the sauce. Let older family members add heat at the table.
  • Vegetarian swap: Replace chicken with firm tofu, pressed and cubed. Brown the tofu the same way you would the chicken and proceed with the sauce.

FAQ

Q: Can I use boneless skinless thighs instead of breasts?
A: Yes. Thighs stay juicier and take slightly longer to cook. Cut into 1-inch pieces and adjust cooking time until they reach 165°F.

Q: What if my children do not like strong flavors?
A: Cut the garlic to 1 teaspoon and omit the ground ginger. Serve sauce on the side for dipping so they can control flavor level.

Q: Can I make the sauce ahead of time?
A: Absolutely. Whisk the sauce and store in the fridge up to 24 hours. Give it a quick stir before using since cornstarch can settle.

Q: Is this safe for toddlers?
A: Yes, if you cut ingredients into small pieces and cool to a safe temperature. Reduce sodium by using low-sodium soy sauce and smaller portions of sauce.

Q: What rice do you recommend?
A: Jasmine or long-grain white rice is classic, but brown rice adds fiber and satiety. Quinoa is a good gluten-free alternative that pairs nicely.

Conclusion

I hope this Flavor-Packed Blackstone Griddle Chicken Stir Fry becomes one of your go-to family dinners. It is fast, healthy, and perfect for busy nights when you want something satisfying without hours in the kitchen. For a version with noodles and a similar griddle technique, you might like the detailed guide for Easy Chicken Stir Fry with Noodles on the Blackstone. If you enjoy teriyaki-style flavors, this recipe pairs well with the ideas in Teriyaki Chicken Stir Fry – Eat Yourself Skinny for inspiration.

Thanks for cooking with me. Come back soon for more family-friendly meals that keep dinner time joyful and stress-free.

Blackstone Griddle Chicken Stir Fry

Prep Time 15 minutes
Cook Time 10 minutes
Total Time 25 minutes
Servings 4 servings
Calories 400
A quick and healthy chicken stir fry made on the Blackstone griddle, featuring vibrant vegetables and a bold sauce.

Ingredients

For the Stir Fry

  • 3 pieces boneless chicken breasts, diced into 1-inch pieces (Pat the chicken dry with paper towels for better browning.)
  • 2 cups broccoli florets (Fresh is best; frozen works too.)
  • 1 piece yellow bell pepper, cut into 1-inch pieces (Uniform pieces ensure even cooking.)
  • 1 piece red bell pepper, cut into 1-inch pieces (Remove seeds for milder flavor, if preferred.)
  • 1/2 cup shredded carrots (Pre-shredded options save time.)
  • 2 teaspoons minced garlic (Add near the end to prevent burning.)
  • 1/2 teaspoon ground ginger (Fresh grated ginger can be used for brighter flavor.)
  • 2 tablespoons avocado oil (Good for high heat.)
  • 2 tablespoons sesame seeds (Toast for extra aroma, optional.)

For the Sauce

  • 1/2 cup chicken broth (Low-sodium recommended.)
  • 1/4 cup soy sauce (Use gluten-free tamari if needed.)
  • 2 tablespoons honey (Maple syrup can be a vegan substitute.)
  • 1 tablespoon cornstarch (Mix with broth to avoid lumps.)

Instructions 

Preparation

  • Preheat the Blackstone griddle to medium-high heat, about 400°F.
  • In a bowl, whisk together chicken broth, soy sauce, honey, and cornstarch to make the stir-fry sauce and set aside.
  • Spread avocado oil on the griddle and create two cooking zones: one for veggies and one for chicken.

Cooking

  • Add broccoli and shredded carrots to one side of the griddle and cook for 2–3 minutes, stirring occasionally.
  • Place diced chicken on the other side, season with salt and pepper, and cook for 3–5 minutes until browned.
  • Add bell peppers to the vegetables and cook for 1–2 minutes until slightly tender.
  • Combine chicken and vegetables, adding minced garlic and ground ginger, cooking for about 1 minute until fragrant.
  • Pour the prepared sauce over the mixture and toss everything together.
  • Cook for another 1–2 minutes until sauce thickens and coats the chicken and vegetables.

Serving

  • Serve hot over rice and finish with sesame seeds.

Notes

Store leftovers for up to 3 days in an airtight container. Reheat gently with water or broth. For freezing, cool completely and store for up to 2 months.
Calories: 400kcal
Course: Dinner, Main Course
Cuisine: American, Asian
Keyword: Blackstone Griddle, Chicken Stir Fry, Easy Recipe, Healthy Family Meal, Quick Dinner

Blackstone Bourbon Chicken

I step into my kitchen and the first thing I notice is the warm, sweet scent of bourbon and brown sugar melding with garlic. The griddle hisses as the chicken hits the surface. That sound tells me dinner is almost ready and the family will be smiling soon.

I am Lily, a home cook and food blogger who loves simple meals that bring people together. This Blackstone Bourbon Chicken is one of those recipes that makes weeknights feel special without extra fuss. It is forgiving, fast, and full of flavor. If you like easy grills and happy family tables, you will love this dish.

I often pair this recipe with other quick family favorites like my oven baked chicken thighs for a busy night. For a lighter twist, try it with air fryer chicken breasts when you want a different texture.

Why this works

Blackstone Bourbon Chicken

This recipe balances sweet, salty, and a touch of heat. The bourbon adds depth without overpowering the chicken. Brown sugar caramelizes on the griddle and creates little pockets of flavor.

The method uses simple steps and a short marinade. That makes it a time saver on busy evenings. You can marinate while you set the table and still get dinner on the table quickly.

Cooking on a flat top like a Blackstone lets you sear more surface area evenly. This gives the chicken great color and a slightly crisp exterior while keeping the inside moist.

If you love family friendly meals, this is a keeper. I often serve it with rice and quick steamed veggies. For another fast weeknight bowl idea, try my teriyaki chicken bowl that families seem to crave.

Process Overview

“This is where the magic happens—when the aroma fills the kitchen.”

The overall flow is gentle. Mix a simple marinade, soak the chicken, heat the griddle, and cook. The marinade does two things. It flavors the meat and tenderizes it a bit.

You do not need special skills to pull this off. Follow the steps and use a meat thermometer for peace of mind. If you want a different cook method, this marinade also works well with air fryer or oven methods. I have a clear guide for air fryer chicken breasts that shows how to use similar flavors.

Ingredients

Here are the ingredients with my personal tips for each. Each tip is a small trick I use at home to help families get consistent results.

  • 4 boneless, skinless chicken breasts
    Tip: Pound thicker ends gently so the breasts are even. This helps everything cook at the same time.

  • 1/2 cup bourbon
    Tip: Use a mid range bottle. The alcohol cooks off and leaves a deep flavor. If you prefer no alcohol, swap for chicken broth and a splash of apple cider vinegar.

  • 1/4 cup soy sauce
    Tip: Low sodium soy sauce keeps salt in check for kids. Taste the marinade before adding salt.

  • 1/4 cup brown sugar
    Tip: Light brown sugar gives a subtle molasses note. Pack it lightly when measuring for consistent sweetness.

  • 2 cloves garlic, minced
    Tip: Fresh garlic is worth it here. If you are short on time, 1/2 teaspoon garlic powder will work.

  • 1 tablespoon olive oil
    Tip: Olive oil helps the marinade cling and promotes browning on the griddle.

  • 1/2 teaspoon black pepper
    Tip: Freshly ground black pepper adds brightness. Use more or less to suit your family.

  • 1/4 teaspoon red pepper flakes (optional)
    Tip: These give a gentle heat. Leave them out for young children or add more for adults.

  • Chopped green onions for garnish
    Tip: Slice thin and add right before serving for color and fresh bite.

Directions

  1. In a bowl, mix together bourbon, soy sauce, brown sugar, garlic, olive oil, black pepper, and red pepper flakes.
    Encouragement: This is an easy mix that smells amazing. Stir until the sugar dissolves and know you have a great base.

  2. Add chicken breasts to the marinade, ensuring they are well-coated. Marinate for at least 30 minutes, or up to 2 hours in the refrigerator.
    Encouragement: Even 30 minutes helps. If you need a faster option, start cooking after 15 minutes and accept a lighter flavor.

  3. Preheat your Blackstone griddle over medium-high heat.
    Encouragement: Let the griddle get hot so you get a good sear. A stable heat makes the texture truly satisfying.

  4. Remove chicken from marinade and place on the griddle. Grill for about 6-8 minutes on each side, or until the internal temperature reaches 165°F and the chicken is cooked through.
    Encouragement: Use a thermometer and trust the read. Flip once for a clean crust. If you get a little glaze on the surface, that is perfect.

  5. Garnish with chopped green onions before serving.
    Encouragement: A quick sprinkle brightens the dish and makes it feel special for the table.

  6. Serve hot and enjoy your delicious bourbon chicken!
    Encouragement: Gather the family and enjoy. This recipe shines when shared with people you love.

If you prefer to cook inside, this same approach works on a large skillet or oven. I sometimes move the cooked breasts to a 350°F oven to finish if they brown too fast. For skewers and cook times on a flat top alternative, my air fryer chicken skewers guide makes a handy reference.

Serving

Blackstone Bourbon Chicken

Serve this bourbon chicken family style. Slice the breasts and arrange them on a large platter. Spoon any pan juices over the top and scatter chopped green onions.

Pair with steamed rice or a simple fried rice. A side of roasted broccoli or snap peas adds color and crunch. For a full meal, add a green salad and warm rolls.

Make it a bowl night by piling rice or noodles in a wide bowl, topping with sliced chicken, and adding quick pickled cucumbers or shredded carrots for tang. Kids love it with a side of corn or simple roasted potatoes.

If you want a lower carb option, serve the sliced chicken over a bed of mixed greens or cauliflower rice. The marinade holds up well to different bases.

Storage

Refrigerate leftover chicken within two hours of cooking. Place it in an airtight container and use within 3 to 4 days.

To reheat, warm gently in a skillet over medium-low heat. Add a tablespoon of water or broth to the pan and cover briefly to keep the chicken moist. You can also reheat in a 350°F oven for 10 to 12 minutes.

For longer storage, freeze cooked chicken in a freezer safe container for up to 3 months. Thaw in the refrigerator overnight before reheating. The texture may change slightly, but the flavor holds up well.

Kitchen Notes

  • Shortcut 1: Cut chicken into strips before marinating for faster flavor absorption and quicker cooking.
  • Shortcut 2: Use low sodium soy sauce to control salt for kids and sensitive eaters.
  • Shortcut 3: Double the marinade for a larger family crowd and reserve some to drizzle after cooking. Do not reuse raw marinade.
  • Shortcut 4: If you do not have a griddle, use a heavy skillet over medium-high heat for similar results.
  • Shortcut 5: Make it a sheet pan meal by placing veggies on the pan and cooking at 425°F alongside the chicken when sliced thin.

Variations

  • For picky eaters: Reduce brown sugar slightly and leave out red pepper flakes. Serve with familiar sides like mashed potatoes.
  • For gluten free: Use tamari instead of soy sauce and check labels on broths and other packaged ingredients.
  • For low sugar: Replace brown sugar with a 1 to 1 mix of a sugar substitute designed for cooking and a touch of molasses for depth.
  • For a smoky twist: Add 1/2 teaspoon smoked paprika to the marinade.
  • For a spicy family version: Add 1 teaspoon sriracha or more red pepper flakes to the marinade.

FAQ

Q: Can I use chicken thighs instead of breasts?
A: Yes. Boneless, skinless chicken thighs work great. They stay very tender and need slightly less time if cut smaller.

Q: Does the bourbon make the chicken taste boozy?
A: No. Most alcohol cooks off during cooking and leaves behind flavor. You get depth and warmth, not a strong boozy taste.

Q: How long can I marinate the chicken?
A: Up to 2 hours is ideal for this recipe. Longer marinating can change the texture because of the acids and alcohol in the mix.

Q: Can I make the sauce ahead of time?
A: Yes. Mix and store the marinade in the fridge up to 24 hours. Do not reuse marinade that has been in contact with raw chicken unless you boil it first.

Q: What temperature should I cook the chicken to?
A: Cook until the internal temperature reaches 165°F. A quick read with an instant read thermometer is the most accurate way.

Conclusion

I hope this Blackstone Bourbon Chicken becomes one of your family favorites. It is a dish that fills the kitchen with inviting smells and makes weeknights feel a bit more special. If you want a tried and tested griddle version, I like this detailed guide to making bourbon chicken on a flat top for step by step visuals. For a version inspired by popular restaurant flavors, this recipe that copies CJ’s favorite style gives a nice comparison and extra tips.

For a quick oven baked alternative that fits busy schedules, check my oven baked boneless skinless chicken thighs. For a different take on flavors kids love, my teriyaki chicken bowl recipe is a family hit. For more quick air fryer options, see my guides on air fryer chicken breasts, air fryer chicken skewers, and air fryer chicken wings.

Bourbon Chicken on the Griddle – Easy Blackstone Chicken Recipe and CJ’s Copy Cat Bourbon Chicken – Blackstone Products

Enjoy this meal with people you love. Send me a note if you try it and I will be cheering you on.

Blackstone Bourbon Chicken

Prep Time 30 minutes
Cook Time 16 minutes
Total Time 46 minutes
Servings 4 servings
Calories 250
A quick and flavorful dish featuring marinated chicken breasts cooked on a griddle, perfect for weeknight dinners.

Ingredients

For the Marinade

  • 1/2 cup bourbon (Use a mid-range bottle for best flavor.)
  • 1/4 cup soy sauce (Low sodium soy sauce recommended.)
  • 1/4 cup brown sugar (Light brown sugar gives a subtle molasses note.)
  • 2 cloves garlic, minced (Fresh garlic is preferable.)
  • 1 tablespoon olive oil (Helps the marinade cling to the chicken.)
  • 1/2 teaspoon black pepper (Use freshly ground for better flavor.)
  • 1/4 teaspoon red pepper flakes (Optional for a little heat.)

For the Chicken

  • 4 pieces boneless, skinless chicken breasts (Pound thicker ends for even cooking.)
  • Chopped for garnish green onions (Add just before serving.)

Instructions 

Preparation

  • In a bowl, mix together bourbon, soy sauce, brown sugar, garlic, olive oil, black pepper, and red pepper flakes until the sugar dissolves.
  • Add chicken breasts to the marinade, ensuring they are well-coated. Marinate for at least 30 minutes, up to 2 hours.
  • Preheat your Blackstone griddle over medium-high heat.

Cooking

  • Remove chicken from marinade and place on the griddle. Grill for about 6-8 minutes on each side, until internal temperature reaches 165°F.
  • Garnish with chopped green onions before serving.
  • Serve hot and enjoy your delicious bourbon chicken with family.

Notes

Refrigerate leftovers within two hours and use within 3 to 4 days. You can freeze cooked chicken for up to 3 months.
Calories: 250kcal
Course: Dinner, Main Course
Cuisine: American
Keyword: Bourbon Chicken, Easy Dinner, Family Meal, Griddle Chicken, quick recipe

Best Chicken Marinade Recipes

I inhaled deeply the first time I mixed this marinade for my family. The bright lemon, sweet honey, and garlic filled the kitchen and the kids came running. You can hear the sizzle of chicken hitting a hot pan and the warm chatter around the table.

If you need a reliable, weeknight-friendly marinade that makes everyone smile, this is it. For more ideas on quick family dinners, I often turn to my list of easy weeknight dinners to pair with whatever I grill or bake.

Why this works

Best Chicken Marinade Recipes

This marinade hits three family-friendly notes. It balances bright acid from lemon, savory depth from soy sauce, and gentle sweetness from honey. Together they tenderize the chicken while building flavor.

It saves time in a busy week. Mix the marinade in minutes and refrigerate the chicken while you finish homework, prep a salad, or take a quick walk. When the family sits down, you already have a main course that tastes like you spent more time on it than you did.

If you want full meals that feature this kind of flexible protein, browse my collection of family chicken dinner recipes for inspiration. You will see how a single marinade can be the backbone of many meals.

Process Overview

“This is where the magic happens—when the aroma fills the kitchen.”

The method is simple and forgiving. Whisk, soak, and cook. The longer the chicken marinates, the deeper the flavor, but even one hour makes a difference.

I often use this marinade to convert a plain chicken breast into something the whole table will reach for. It also works for thighs, drumsticks, or even chicken tenders. If you are looking for comforting sides to go with this, try a creamy pasta from my chicken macaroni recipes collection.

Ingredients

Below are the exact amounts and my personal tips for each item. These tips make the marinade easy to use and tailor to your family.

1/4 cup olive oil

Tip: Use regular olive oil for a neutral taste or extra virgin olive oil for a fruitier note. Measure in a liquid cup for accuracy. Olive oil helps the marinade coat the chicken and prevents sticking when you grill.

1/4 cup soy sauce

Tip: Use low-sodium soy sauce if you are watching salt. If your family likes bold umami, stick with regular soy sauce. It adds depth and color to the chicken.

2 tablespoons lemon juice

Tip: Freshly squeezed lemon juice brightens the whole dish. One medium lemon usually yields about 2 tablespoons. If you prefer milder acid, reduce to 1 tablespoon.

2 tablespoons honey

Tip: Honey balances the acid and creates a light glaze when you grill. For less sweetness, use 1 tablespoon or swap in maple syrup for a different flavor.

3 cloves garlic, minced

Tip: Fresh garlic gives the best aroma. If you need to swap, use 1 teaspoon garlic powder, but fresh minced packs more punch.

1 teaspoon dried oregano

Tip: Dried oregano is pantry-friendly and pairs well with lemon and garlic. You can substitute Italian seasoning if you prefer a blend.

1 teaspoon black pepper

Tip: Freshly ground black pepper adds brightness. If you have a pepper-sensitive eater, reduce to 1/2 teaspoon.

1 teaspoon salt

Tip: If you used low-sodium soy sauce, you can keep this amount. Otherwise, taste before adding more later. Salt helps the marinade penetrate for more even seasoning.

Directions

  1. In a bowl, whisk together the olive oil, soy sauce, lemon juice, honey, garlic, oregano, pepper, and salt.

    • Encouragement: Take a moment to smell the mixture. That aroma means you are already winning dinner tonight.
  2. Place chicken in a resealable plastic bag and pour the marinade over the chicken.

    • Encouragement: Seal the bag gently and press out extra air so the chicken stays in contact with the liquid. You will appreciate how evenly it flavors.
  3. Seal the bag and refrigerate for at least 1 hour, or overnight for best results.

    • Encouragement: Overnight marinades deepen the flavor. If time is short, even 60 minutes will do. While it marinates, set the table or chop a quick salad. For inspired side ideas, try pairing with recipes from my chicken and sweet potato recipes collection.
  4. Remove chicken from marinade and grill, bake, or sauté as desired.

    • Encouragement: Pat the chicken dry first for better browning. Cook to an internal temperature of 165 °F. Serve hot and watch the family smile.

Each step is forgiving. If you forget to marinate early, a quick 30 to 60 minute soak still gives better results than none.

Serving

Best Chicken Marinade Recipes

Serve this chicken family-style on a large platter so everyone can choose portions. Slice grilled breasts across the grain for tenderness. Thighs and drumsticks are perfect for little hands.

Pair it with simple sides that the family loves. A green salad, roasted vegetables, warm rolls, or a buttery mashed potato work well. For a casual weeknight spread, I often put out bowls of rice, steamed broccoli, and pickled cucumbers so everyone builds their own plate.

To keep things cozy, set the platter in the center and invite everyone to pass it around. The aroma will bring the family together before the first bite.

Storage

Refrigerator

  • Store leftover cooked chicken in an airtight container for up to 4 days. Cool the chicken to room temperature no longer than two hours before refrigerating.

Freezer

  • Freeze cooked pieces in freezer bags for up to 3 months. Label with the date and portion sizes for easy thawing later.

Reheating

  • Reheat gently in a 350 °F oven until warmed through. To keep chicken moist, add a light splash of chicken stock or water and cover the dish with foil.
  • For quicker reheats, slice the chicken and warm in a skillet over medium heat for a few minutes. Avoid high heat which dries the meat.

Marinade safety

  • Never reuse marinade that has touched raw chicken unless you boil it for several minutes to kill bacteria. If you want a sauce, reserve a bit of the marinade before it touches raw meat.

Kitchen Notes

  • Use a resealable bag to marinate for easier cleanup and better contact between chicken and liquid.
  • If grilling, oil the grates lightly to prevent sticking and to get those pretty grill marks.
  • Swap lemon juice with lime juice for a subtle citrus swap that kids usually enjoy.
  • For even faster weeknight prep, double the marinade and freeze half in an ice tray. Pop a cube into a bag of chicken when you remember ahead of time.
  • If you have picky eaters, reserve a small portion of the chicken plain before marinating or reduce garlic and pepper.

Variations

  • Kid-Friendly: Reduce black pepper to 1/4 teaspoon and omit oregano if your kids prefer milder herb notes. Use a little extra honey to make a lightly sweet glaze.
  • Low-Sodium: Use 1/4 cup low-sodium soy sauce and reduce added salt to 1/2 teaspoon. Taste before serving and adjust as needed.
  • Gluten-Free: Substitute tamari or a gluten-free soy sauce to keep the flavor while avoiding gluten.
  • Whole30 / Paleo: Replace honey with a tablespoon of date paste for sweetness and use coconut aminos instead of soy sauce.
  • Spicy Kick: Add 1/2 teaspoon crushed red pepper or 1 teaspoon chili paste to the marinade. Serve cooled yogurt on the side to balance heat for kids.

These tweaks let you keep one base recipe while addressing different tastes and diets in your home.

FAQ

Q: How long can I marinate chicken safely?
A: You can marinate in the refrigerator for 1 hour up to 24 hours. White meat like breasts benefits from 1 to 8 hours. Dark meat like thighs can go longer. Avoid marinades longer than 24 hours as the texture can become mushy.

Q: Can I use this marinade for other proteins?
A: Yes. It works well on pork chops, firm tofu, and even shrimp. Adjust marinating time for delicate proteins. Shrimp needs only 15 to 30 minutes.

Q: Do I need to baste the chicken while cooking?
A: Not necessary. If you want a glossy finish, brush reserved marinade that you boiled, or a fresh mix of honey and lemon, onto the chicken during the last few minutes of cooking.

Q: Can I skip the oil?
A: You can omit oil if you prefer, but oil helps distribute fat soluble flavors and protects the chicken from sticking when grilling. If avoiding oil, consider a nonstick pan or grill mat.

Q: How do I know when the chicken is done?
A: Use an instant-read thermometer. The safe internal temperature for cooked chicken is 165 °F in the thickest part. Let it rest five minutes before slicing.

Conclusion

Thanks for letting me share this simple, reliable chicken marinade from my family to yours. If you want a proven marinade specifically tuned for grilling or baking, I like the clear instructions in The BEST Chicken Marinade (For Grilling or Baking). For more healthy and easy marinade ideas you can rotate through the week, see these easy chicken marinades that work for different dietary needs.

Cooking for the people you love is the best kind of cooking. Keep trying, keep tasting, and enjoy the sounds and smells of a busy, happy kitchen.

Family-Friendly Chicken Marinade

Prep Time 10 minutes
Cook Time 20 minutes
Total Time 30 minutes
Servings 4 servings
Calories 250
A quick and easy marinade combining lemon, honey, and garlic, perfect for tenderizing chicken and adding flavor for happy family dinners.

Ingredients

Marinade Ingredients

  • 1/4 cup olive oil (Use regular or extra virgin olive oil depending on desired flavor.)
  • 1/4 cup soy sauce (Use low-sodium if watching salt.)
  • 2 tablespoons lemon juice (Freshly squeezed is best.)
  • 2 tablespoons honey (Can substitute with maple syrup for a different flavor.)
  • 3 cloves garlic, minced (Fresh garlic is preferred for aroma.)
  • 1 teaspoon dried oregano (Can substitute with Italian seasoning.)
  • 1 teaspoon black pepper (Reduce if sensitive to spice.)
  • 1 teaspoon salt (Adjust based on soy sauce used.)

Instructions 

Preparation

  • In a bowl, whisk together the olive oil, soy sauce, lemon juice, honey, garlic, oregano, pepper, and salt.
  • Place chicken in a resealable plastic bag and pour the marinade over the chicken.
  • Seal the bag gently, pressing out extra air for even flavor.
  • Refrigerate for at least 1 hour, or overnight for best results.

Cooking

  • Remove chicken from marinade and grill, bake, or sauté as desired.
  • Cook to an internal temperature of 165 °F and serve.

Notes

Serve with simple side dishes like salads, roasted vegetables or hearty sides like mashed potatoes. Store leftovers in an airtight container for up to 4 days, or freeze for up to 3 months.
Calories: 250kcal
Course: Dinner, Main Course
Cuisine: American
Keyword: chicken marinade, Easy Marinade, Family Dinner, Grilling, quick recipe

Savory Korean BBQ Chicken Bowls for Perfect Weeknight Dinners

I remember walking into my kitchen the first time I made these Savory Korean BBQ Chicken Bowls and feeling like the room changed. The sweet and spicy scent of gochujang and ginger filled the air. The pan sang as the chicken sizzled, and my family gathered around the counter, curious and hungry.

This bowl is one of those weeknight miracles that tastes like you spent all afternoon, but you did not. If you are looking for a reliable dinner that feels special but comes together quickly, you might also enjoy my collection of recipes for best 5 easy chicken recipes for weeknight dinners. I keep this bowl in my regular rotation because it feeds everyone, stores well, and uses simple ingredients.

Why this works

Savory Korean BBQ Chicken Bowls for Perfect Weeknight Dinners

This recipe balances three important things for busy families. First, it is fast. The marinade doubles as a sauce, so you do not need extra steps. Second, it is flexible. Swap rice for quinoa, or leave out the gochujang for milder flavors. Third, it is tasty. The sweet, salty, and spicy notes create a deep flavor that kids and adults often both enjoy.

I lean on this dish for family nights when time is tight and appetites are large. If you need more weeknight inspiration that stretches a small amount of effort into several meals, try the ideas in my best 9 chicken recipes for weeknight dinners. Those recipes follow the same principle: simple prep, big payoff.

Process Overview

“This is where the magic happens—when the aroma fills the kitchen.”

The process is straightforward. You mix the marinade, toss the chicken, sear or grill quickly, and assemble the bowls. The key moments are letting the sauce cling to the chicken and allowing a hot pan to caramelize the sugars for those delightful browned bits.

For busy evenings, you can marinate the chicken in the morning and finish in the evening. If you prefer set-and-forget, check my collection of slow cooker ideas like the best crock pot chicken recipes for alternative hands-off meals.

Ingredients

  • 1 pound Chicken Thighs, cut into 1-inch pieces
    • Tip: Thighs stay juicy and handle high heat well. If you prefer breasts, cut them into slightly smaller pieces and watch the cooking time.
  • 1/4 cup Low-Sodium Soy Sauce, or tamari for gluten-free
    • Tip: Using low-sodium soy sauce keeps the bowl balanced. Taste and adjust at the end if you want saltier flavor.
  • 2 tablespoons Gochujang, adjust to preferred spice level
    • Tip: Start with less if your family is sensitive to heat. You can add a touch more at the table for those who like spice.
  • 2 tablespoons Brown Sugar, honey is a great alternative
    • Tip: Brown sugar helps caramelize the chicken. If you use honey, reduce heat slightly to prevent burning.
  • 1 tablespoon Sesame Oil, other oils can be used, but will have different flavor
    • Tip: A little sesame oil gives authentic aroma. Use vegetable oil for searing if you do not have sesame oil, then drizzle sesame oil at the end.
  • 2 cloves Garlic, minced
    • Tip: Fresh garlic packs the best flavor. If you are in a pinch, 1/2 teaspoon garlic powder will work.
  • 1 tablespoon Fresh Ginger, grated or powdered can be used
    • Tip: Fresh ginger brightens the sauce. Use 1/2 teaspoon ground ginger if needed.
  • 2 tablespoons Rice Vinegar, or apple cider vinegar
    • Tip: Rice vinegar adds a subtle tang that balances sweetness. Apple cider vinegar has a stronger flavor, so use slightly less.
  • 2 cups Cooked Rice, jasmine or brown rice
    • Tip: Make rice ahead or use a rice cooker on timer. Brown rice adds fiber and keeps you full longer.
  • 1 cup Cucumber, sliced
    • Tip: Seed the cucumber if you prefer less moisture in the bowl.
  • 1 cup Carrots, sliced thinly or shredded
    • Tip: Matchstick carrots add color and crunch. You can quick-pickle them in a splash of rice vinegar for brightness.
  • 1 cup Edamame, fresh or frozen
    • Tip: Frozen edamame thaws quickly in boiling water and boosts protein and color.
  • 1/2 cup Kimchi, for authentic flavor
    • Tip: Kimchi brings acidity and umami. If you do not like kimchi, use a small splash of rice vinegar and a few sesame seeds.
  • 1 tablespoon Sesame Seeds, for texture
    • Tip: Toast sesame seeds briefly for a nuttier taste.
  • 2 tablespoons Green Onions, thinly sliced
    • Tip: Add on top just before serving for freshness and crunch.

Directions

  1. Mix the sauce.

    • In a bowl, combine soy sauce, gochujang, brown sugar, sesame oil, garlic, ginger, and rice vinegar. Whisk until smooth.
    • Encouragement: Smell the mixture. You should notice a sweet and spicy perfume that tells you the bowl will be lively.
  2. Marinate the chicken.

    • Toss the chicken pieces with about two-thirds of the sauce. Reserve the rest to finish the bowls.
    • Encouragement: If you have time, let the chicken sit for 20 to 30 minutes. Even 10 minutes improves flavor.
  3. Prepare rice and vegetables.

    • Reheat or cook rice to reach 2 cups cooked. Slice cucumbers, shred carrots, and steam edamame if frozen.
    • Encouragement: Use this time to set out bowls and toppings so assembly is quick once the chicken is done.
  4. Heat the pan.

    • Warm a large skillet over medium-high heat and add a splash of neutral oil. The pan should be hot enough that a drop of sauce sizzles.
    • Encouragement: A hot pan gives you the caramelization you want. Do not overcrowd the pan or the chicken will steam instead of brown.
  5. Cook the chicken.

    • Add the marinated chicken to the hot skillet in a single layer. Let it sear without moving for 2 to 3 minutes, then stir and cook another 3 to 4 minutes until cooked through and slightly caramelized.
    • Encouragement: If some pieces brown more than others, that is okay. Those browned bits bring deep flavor to the bowls.
  6. Glaze with reserved sauce.

    • Pour the reserved sauce into the pan and toss with the chicken for 1 minute until it thickens slightly and coats the pieces.
    • Encouragement: The sauce will become glossy. That sheen is part of what makes each bite satisfying.
  7. Build the bowls.

    • Divide rice between bowls, top with chicken, then arrange cucumbers, carrots, edamame, and kimchi. Sprinkle sesame seeds and green onions on top.
    • Encouragement: Let each family member customize. Bowls are great for picky eaters because everyone can choose their toppings.
  8. Final taste check.

    • Taste one bite and adjust with a sprinkle of salt, a dash of soy, or an extra spoonful of kimchi juice for tang.
    • Encouragement: A small adjustment at the end turns good into great. Trust your palate.

If you love hands-off options for busy nights, you can adapt this flavor profile for a rotisserie chicken in a hurry. I describe similar quick swaps in my post about deliciously easy rotisserie chicken recipes for busy weeknights.

Serving

Savory Korean BBQ Chicken Bowls for Perfect Weeknight Dinners

Serve family-style with bowls set at the center of the table. Place extra kimchi, gochujang, and sesame seeds in small dishes so everyone can adjust heat and texture. Offer napkins and a bowl for bones or trimmings if you used bone-in chicken.

For children, build a milder version without kimchi and with less gochujang. Keep a small plate of plain rice for very picky eaters and a side of fresh cucumber slices for crunch. My family eats from the same bowls but everyone assembles them slightly differently.

Storage

  • Refrigerator: Store leftover chicken and toppings separately from rice in airtight containers for up to 3 to 4 days.

    • Tip: Keeping components separated prevents the rice from getting soggy and retains texture.
  • Freezer: Cooked chicken and sauce freeze well for up to 2 months. Freeze in meal-sized portions.

    • Tip: Thaw in the refrigerator overnight before reheating.
  • Reheating: Reheat chicken in a skillet over medium heat with a splash of water or oil to prevent drying. Microwave gently in 30-second increments if short on time.

    • Tip: Add a squeeze of rice vinegar or a few drops of sesame oil after reheating to revive bright flavors.

Kitchen Notes

  • Use boneless, skinless thighs for even cooking and less mess.
  • If you like charred flavor, finish the chicken on a hot grill for 1 to 2 minutes per side.
  • Make extra sauce and keep it in the fridge to top leftovers or use as a dipping sauce for vegetables.
  • Quick-pickle the carrots in a 1 to 1 water and vinegar bath with a pinch of sugar for 10 minutes to add brightness.
  • If you are short on time, buy pre-cooked rice from the grocery section and frozen pre-sliced carrots.

Variations

  • Milder kids version: Reduce gochujang to 1 teaspoon and skip kimchi. Add a little honey for sweetness.
  • Gluten-free: Use tamari instead of soy sauce and ensure your gochujang is certified gluten-free.
  • Low-carb: Swap rice for cauliflower rice or a bed of mixed greens for a lighter bowl.
  • Vegan option: Replace chicken with pressed tofu or tempeh and follow the same marinade and cooking method.
  • Meal-prep bowl: Double the recipe, portion into containers with rice and vegetables, and refrigerate for lunches all week.

If you want an alternative saucy bowl with similar family-friendly appeal, my bang-bang chicken bowl offers a different but equally comforting flavor. You can read about it in my bang-bang chicken bowl recipe post.

FAQ

Q: Can I use chicken breasts instead of thighs?
A: Yes. Use slightly smaller pieces and watch cook time so they do not dry out. Breasts cook faster than thighs and benefit from a quick sear.

Q: How spicy is this for children?
A: The heat level depends on your gochujang. Start with 1 teaspoon for kids and increase later for adults. The sauce has sweet and savory notes that often balance the spice.

Q: Can I make this gluten-free?
A: Absolutely. Swap soy sauce for tamari and verify that your gochujang does not contain wheat. Many brands offer gluten-free options.

Q: Is there a low-sugar alternative?
A: Use honey or a sugar substitute like coconut sugar. Taste and reduce heat slightly when using liquid sweeteners to prevent burning.

Q: What side dishes pair well with these bowls?
A: Simple sides like steamed broccoli, a mixed green salad, or quick-pickled veggies pair well. I also like serving a small miso soup on the side for a heartier meal.

Conclusion

I hope these Savory Korean BBQ Chicken Bowls become a trusted recipe in your weeknight lineup. They offer comfort, speed, and the kind of bold flavor that brings the family to the table. If you want another take on grilled Korean flavors, check out this helpful recipe for Grilled Korean BBQ Chicken from The Real Food Dietitians. For more bowl-style inspiration with simple prep, this BBQ Chicken Rice Bowls recipe at Jar Of Lemons is a great companion to try next.

Thanks for cooking with me. Come back soon for more simple, family-first meals.

Savory Korean BBQ Chicken Bowls

Prep Time 30 minutes
Cook Time 15 minutes
Total Time 45 minutes
Servings 4 servings
Calories 550
These Savory Korean BBQ Chicken Bowls balance sweet, salty, and spicy flavors, making for a quick and satisfying weeknight dinner.

Ingredients

For the Marinade and Chicken

  • 1 pound Chicken Thighs, cut into 1-inch pieces (Thighs stay juicy and handle high heat well.)
  • 1/4 cup Low-Sodium Soy Sauce, or tamari for gluten-free (Using low-sodium soy sauce keeps the bowl balanced.)
  • 2 tablespoons Gochujang, adjust to preferred spice level (Start with less if your family is sensitive to heat.)
  • 2 tablespoons Brown Sugar, honey is a great alternative (Brown sugar helps caramelize the chicken.)
  • 1 tablespoon Sesame Oil (Use vegetable oil for searing if you don't have sesame oil.)
  • 2 cloves Garlic, minced (Fresh garlic packs the best flavor.)
  • 1 tablespoon Fresh Ginger, grated (Fresh ginger brightens the sauce.)
  • 2 tablespoons Rice Vinegar, or apple cider vinegar (Rice vinegar adds a subtle tang.)

For the Bowls

  • 2 cups Cooked Rice, jasmine or brown rice (Make rice ahead or use a rice cooker on timer.)
  • 1 cup Cucumber, sliced (Seed the cucumber for less moisture in the bowl.)
  • 1 cup Carrots, sliced thinly or shredded (Matchstick carrots add color and crunch.)
  • 1 cup Edamame, fresh or frozen (Frozen edamame thaws quickly in boiling water.)
  • 1/2 cup Kimchi, for authentic flavor (Kimchi brings acidity and umami.)
  • 1 tablespoon Sesame Seeds, for texture (Toast sesame seeds briefly for a nuttier taste.)
  • 2 tablespoons Green Onions, thinly sliced (Add on top just before serving for freshness.)

Instructions 

Preparation

  • In a bowl, combine soy sauce, gochujang, brown sugar, sesame oil, garlic, ginger, and rice vinegar. Whisk until smooth.
  • Toss the chicken pieces with about two-thirds of the sauce. Reserve the rest to finish the bowls.
  • Reheat or cook rice to reach 2 cups cooked. Slice cucumbers, shred carrots, and steam edamame if frozen.

Cooking

  • Warm a large skillet over medium-high heat and add a splash of neutral oil.
  • Add the marinated chicken to the hot skillet in a single layer. Let it sear without moving for 2 to 3 minutes, then stir and cook another 3 to 4 minutes until cooked through and slightly caramelized.
  • Pour the reserved sauce into the pan and toss with the chicken for 1 minute until it thickens slightly and coats the pieces.

Assembly

  • Divide rice between bowls, top with chicken, then arrange cucumbers, carrots, edamame, and kimchi.
  • Sprinkle sesame seeds and green onions on top.
  • Taste one bite and adjust with a sprinkle of salt, a dash of soy, or an extra spoonful of kimchi juice for tang.

Notes

Store leftover chicken and toppings separately from rice in airtight containers for up to 3 to 4 days. Cooked chicken and sauce freeze well for up to 2 months.
Calories: 550kcal
Course: Dinner, Main Course
Cuisine: Korean
Keyword: Easy Chicken Recipe, Family Dinner, Healthy Bowl, Korean BBQ Chicken, Weeknight Meal

Chicken Satay

I can still smell the garlic and toasted peanuts as I write this. The kitchen hums with the grill and the laughter of kids at the table. When you make chicken satay at home, the whole family leans in to taste.

I started making this recipe years ago for my little ones. It became a quick weeknight favorite and a party staple for weekend guests. If you love fast, family-friendly dinners, this recipe will become a new go-to. For another easy chicken dinner idea that your family will love, try my take on oven-baked boneless skinless chicken thighs in a different post: 30-Min Oven Baked Boneless Skinless Chicken Thighs.

Why this works

Chicken Satay

Chicken satay balances simple technique with big, familiar flavors. The marinade is quick to mix and needs little hands-on time. You can marinate ahead to save time on busy evenings. That makes it a perfect family dinner when you want flavor without stress.

The peanut butter and fish sauce mix gives a savory and slightly sweet base that even picky eaters tend to like. The lime juice brightens the dish and keeps it from feeling heavy. When we grill, I can usually get everything on the table in under 30 minutes if the chicken marinates earlier.

If you want an equally family-friendly saucy chicken dish with sweet and savory notes, you might also enjoy my teriyaki chicken bowl: 30-Minute Teriyaki Chicken Bowl.

Process Overview

“This is where the magic happens—when the aroma fills the kitchen.”

I like to think of this recipe as three simple parts: the marinade, the skewering, and the quick grill. The marinade brings the flavor, skewers make it kid-friendly and fun, and the grill adds a smoky finish. You can also use an air fryer if you prefer an indoor method; I have a step-by-step for that here: Air Fryer Chicken Breasts.

The goal is to keep each step easy so you can enjoy time with family. Prep in the morning, and dinner practically cooks itself.

Ingredients

  • 1 pound chicken breast, cut into strips
    Lily’s tip: Cut strips about 1/2 inch thick so they cook evenly. If kids like smaller bites, cut shorter lengths before marinating.

  • 2 tablespoons soy sauce
    Lily’s tip: Use low-sodium soy sauce if you are watching salt. It still gives the needed savory depth.

  • 1 tablespoon peanut butter
    Lily’s tip: Smooth peanut butter blends easily into the marinade. If you have allergies, see the Variations section for substitutes.

  • 1 tablespoon fish sauce
    Lily’s tip: Fish sauce adds umami. Start with one tablespoon and taste the sauce before serving, so it does not overpower.

  • 1 tablespoon brown sugar
    Lily’s tip: Light brown sugar dissolves quickly and adds a gentle caramel note that kids love.

  • 1 tablespoon lime juice
    Lily’s tip: Fresh lime juice brightens the marinade. Bottled will work, but fresh is best.

  • 2 cloves garlic, minced
    Lily’s tip: Mince finely so the garlic disperses and cooks without large raw pieces.

  • 1 teaspoon curry powder
    Lily’s tip: Curry powder adds a warm, familiar flavor without heat. Adjust to taste.

  • Skewers (wooden or metal)
    Lily’s tip: If using wooden skewers, soak them in water for 30 minutes before grilling. Metal skewers are reusable and heat up quickly.

  • Peanut sauce for serving
    Lily’s tip: I like to make an extra batch of peanut sauce so everyone can dip. Warm it slightly before serving for the best texture.

Directions

  1. In a bowl, combine soy sauce, peanut butter, fish sauce, brown sugar, lime juice, garlic, and curry powder to make the marinade.
    Encouraging note: Whisk until smooth and fragrant. It should smell nutty and bright. If you need an easy shortcut, let older kids help with stirring.

  2. Add the chicken strips to the marinade, ensuring they are well coated. Cover and refrigerate for at least 1 hour or overnight for best results.
    Encouraging note: The longer you marinate, the more flavor the chicken will soak up. If you are short on time, even 30 minutes will add flavor.

  3. Preheat the grill to medium-high heat. If using wooden skewers, soak them in water for 30 minutes to prevent burning.
    Encouraging note: A steady, medium-high grill gives you good char without drying out the chicken. You can also heat a grill pan indoors.

  4. Thread the marinated chicken onto skewers.
    Encouraging note: Fold each strip in half and slide it on so pieces sit snugly but not crowded. Kids love threading skewers as a fun activity.

  5. Grill the skewers for about 5-7 minutes per side or until the chicken is cooked through and has grill marks.
    Encouraging note: Flip once for the best grill lines. Use a thermometer to check for 165°F in the thickest piece for safety and juiciness.

  6. Serve hot with peanut sauce for dipping.
    Encouraging note: Let the skewers rest a few minutes so juices settle. Serve with warm peanut sauce and lime wedges for extra brightness.

If you want a hands-off method, you can adapt these steps for the air fryer. I often switch between a grill and the air fryer depending on weather and time. For a guide to cooking skewers in the air fryer, see this helpful post I wrote: Air Fryer Chicken Skewers.

Serving

Chicken Satay

Serve chicken satay family-style on a large platter. Arrange the skewers with fresh lime wedges and a bowl of warm peanut sauce in the center. Add cucumber slices and steamed jasmine rice for a classic pairing.

I like to include a simple vegetable on the side, such as a quick cucumber salad or roasted broccoli. For a full family meal that kids gobble up, try pairing these skewers with crunchy oven-roasted wings for a party platter: Air Fryer Chicken Wings.

For serving to small children, slide the cooked chicken off the skewers and cut into bite-sized pieces. Keep the peanut sauce on the side if you are concerned about allergies.

Storage

Refrigerate leftover chicken satay in an airtight container for up to 3 days. Keep the peanut sauce in a separate container to preserve texture.

To reheat, warm in a 350°F oven for 8 to 10 minutes, or heat gently in a skillet with a little oil. If you use an air fryer, reheat at 350°F for 3 to 5 minutes until warmed through. Avoid reheating in the microwave when possible, as it can dry the chicken.

If you froze pre-cooked skewers, thaw overnight in the refrigerator, then reheat using the oven or air fryer for the best texture.

Kitchen Notes

  • Use boneless, skinless chicken breasts for lean meat that grills quickly. If you prefer thighs, they stay juicier.
  • Marinate overnight for deepest flavor. Even a one-hour soak will make a difference.
  • If using wooden skewers, soak them every time to prevent burning. Metal skewers cut down on prep time.
  • Test one skewer first on the grill to check heat and timing. Adjust the rest if needed.
  • Keep extra peanut sauce on hand. It doubles as a dip for veggies and rice.

Variations

  • For peanut allergies, use sunflower seed butter or almond butter as a swap. Check labels and inform guests.
  • To make it spicy, add 1 teaspoon of chili garlic sauce to the marinade and a pinch of red pepper flakes to the peanut sauce.
  • For a low-carb plate, serve the skewers over a bed of mixed greens and grilled vegetables.
  • Swap chicken breast for boneless chicken thighs to add extra moisture and a richer flavor.
  • For a vegetarian version, use firm tofu or tempeh. Press tofu well, slice into strips, and marinate the same way before grilling.

If your family likes different textures, try pairing this with my air fryer chicken breasts recipe for an easy combo night: Air Fryer Chicken Breasts.

FAQ

Can I make the marinade without fish sauce?

Yes. Fish sauce adds depth, but you can use 2 teaspoons of soy sauce plus 1 teaspoon of Worcestershire sauce instead. Taste and adjust so the flavor stays balanced.

How long can I marinate the chicken?

You can marinate for 30 minutes up to 24 hours. Overnight gives the best flavor. Avoid much longer than 24 hours to prevent texture change.

Can I use frozen chicken?

Thaw chicken completely in the refrigerator before cutting and marinating. Marinating frozen chicken will not work well because the meat will not absorb flavors until thawed.

What kind of peanut sauce should I serve?

A smooth, warm peanut sauce made with coconut milk, peanut butter, soy sauce, and lime juice is classic. For a quick version, thin creamy peanut butter with a splash of soy sauce and lime juice to taste.

Is chicken satay safe for kids?

Yes, when cooked to an internal temperature of 165°F. For young kids, remove the chicken from the skewers and chop into small pieces. Watch for peanut allergies and offer an alternative if needed.

Conclusion

I hope this chicken satay brings warm memories to your kitchen. It is a simple recipe that feeds both busy weeknights and little celebrations. The smell of garlic, lime, and toasted peanut will quickly become part of your family’s favorite dinners.

For a classic take on chicken satay with peanut sauce and a trusted tested method, I also recommend this recipe from The Modern Proper: Chicken Satay with Peanut Sauce | The Modern Proper. If you want a Thai-inspired version with helpful step-by-step photos, this guide from RecipeTin Eats is a great reference: Thai Chicken Satay with Peanut Sauce – RecipeTin Eats.

Thanks for cooking with me. Invite the family into the kitchen, let someone thread the skewers, and enjoy the simple joy of shared food.

Chicken Satay

Prep Time 30 minutes
Cook Time 14 minutes
Total Time 44 minutes
Servings 4 servings
Calories 250
A quick and flavorful chicken satay recipe that's perfect for family dinners and gatherings. Easy marinade combined with grilling creates a delicious meal enjoyed by all.

Ingredients

For the marinade

  • 2 tablespoons soy sauce (Use low-sodium for less salt.)
  • 1 tablespoon peanut butter (Smooth peanut butter blends easily.)
  • 1 tablespoon fish sauce (Start with one tablespoon and taste before serving.)
  • 1 tablespoon brown sugar (Light brown sugar dissolves quickly.)
  • 1 tablespoon lime juice (Fresh lime juice is best.)
  • 2 cloves garlic, minced (Mince finely for even flavor.)
  • 1 teaspoon curry powder (Adjust to taste.)

For grilling

  • 1 pound chicken breast, cut into strips (Cut strips about 1/2 inch thick.)
  • Skewers (wooden or metal) (Soak wooden skewers in water for 30 minutes if using.)
  • Peanut sauce for serving (Prepare extra for dipping.)

Instructions 

Marinating

  • In a bowl, combine soy sauce, peanut butter, fish sauce, brown sugar, lime juice, garlic, and curry powder to make the marinade.
  • Add the chicken strips to the marinade, ensuring they are well coated. Cover and refrigerate for at least 1 hour, preferably overnight.

Grilling

  • Preheat the grill to medium-high heat.
  • Thread the marinated chicken onto skewers.
  • Grill the skewers for about 5-7 minutes per side or until the chicken is cooked through and has grill marks.
  • Serve hot with peanut sauce for dipping.

Notes

Refrigerate leftovers for up to 3 days. For reheating, warm in an oven or skillet, avoiding the microwave to prevent drying out.
Calories: 250kcal
Course: Dinner, Main Course
Cuisine: Asian, Thai
Keyword: Chicken Satay, Family Dinner, Grilled Chicken, Peanut Sauce, quick recipe

Chicken Enchiladas

There’s something special about the smell of chicken enchiladas wafting through the kitchen. You know that sound—the bubbling of sauce, the sizzling of melted cheese, and the gentle hum of family chatter. As soon as dinner is near, the whole house fills with warmth, anticipation, and the promise of a delicious meal.

Chicken enchiladas are more than just a recipe; they are a family tradition. They bring us together, create joyful memories, and are loved by both young and old alike. Here is how to make them easily and satisfyingly.

Why This Works

Chicken Enchiladas

Chicken enchiladas are a perfect dish for busy families. With a little prep, you can assemble everything in one evening and let the oven do its magic. These enchiladas are comforting, filling, and ready in about 30 minutes from start to finish.

You can easily scale the recipe up for larger gatherings or small enough for an intimate family dinner. They are versatile; serve them with toppings your family enjoys, making meal times both enjoyable and personal.

Process Overview

“This is where the magic happens—when the aroma fills the kitchen.”

Making chicken enchiladas is a step-by-step journey that anyone can follow. You mix, fill, and bake, allowing all those wonderful flavors to blend together. I can assure you that the time spent preparing these enchiladas will be worth every minute when you see the joy on your family’s faces.

Ingredients

Here’s what you will need:

  • 2 cups cooked shredded chicken
  • 8 flour tortillas
  • 1 cup shredded cheese (cheddar or Monterey Jack)
  • 1 cup sour cream
  • 1 can cream of chicken soup
  • 1/2 cup chicken broth
  • 1 teaspoon garlic powder
  • 1 teaspoon onion powder
  • Salt and pepper to taste
  • Chopped green onions for garnish

Lily’s Personal Tips:

  • Chicken: I use rotisserie chicken for convenience. It saves time and adds flavor.
  • Tortillas: Flour tortillas are soft and easy to roll. They hold the filling well.
  • Cheese: Choose your family’s favorite cheese to make it even more enjoyable.
  • Soup: Cream of chicken soup adds richness. Try low-fat options if you’re looking for a lighter dish.
  • Broth: This will thin out the sauce. You can use homemade broth for extra flavor.

Directions

  1. Preheat your oven to 350°F (175°C).

    • This step ensures everything cooks evenly.
  2. In a mixing bowl, combine shredded chicken, garlic powder, onion powder, salt, and pepper.

    • Mix well to ensure the chicken is seasoned throughout.
  3. In a separate bowl, mix together sour cream, cream of chicken soup, and chicken broth until smooth.

    • Make sure it’s creamy; this will be the sauce that makes your enchiladas divine.
  4. Take a tortilla, fill it with a portion of the chicken mixture, and sprinkle some cheese, then roll it up and place it seam-side down in a greased baking dish.

    • Don’t overfill the tortillas to prevent spills.
  5. Repeat with all tortillas and fill the baking dish.

    • Arrange them snugly for an appealing presentation.
  6. Pour the remaining sour cream mixture over the top of the enchiladas and sprinkle with the remaining cheese.

    • This is what will make your enchiladas come out bubbly and golden.
  7. Bake in the preheated oven for 20-25 minutes or until bubbly and golden.

    • Keep an eye on them. You want a nice golden color, not burnt.
  8. Garnish with chopped green onions before serving.

    • The fresh green onions add a lovely touch to the dish.

Serving

Chicken Enchiladas

When it comes time to serve, place the baking dish in the center of the table. This meal is best enjoyed family-style. Allow everyone to serve themselves, making it a fun and engaging experience. Pair these enchiladas with a simple salad or some Mexican rice to round out the meal.

Don’t forget to keep a few extra toppings nearby, like salsa, guacamole, or additional cheese. These can elevate the meal even further and cater to individual tastes.

Storage

Leftovers can be stored in an airtight container in the refrigerator for up to 3 days. When reheating, place them in the oven at 350°F (175°C) to maintain that creamy texture. If the enchiladas seem dry, drizzle with a bit of chicken broth or water before covering with foil to help keep them moist as they heat.

Kitchen Notes

  • Use Pre-Cooked Chicken: Rotisserie chicken or even leftover chicken works best and saves time.
  • Prep Ahead: Assemble the enchiladas ahead of time and store them in the fridge until you’re ready to bake.
  • Frozen Option: You can freeze them unbaked. Just wrap well and bake from frozen, adding an extra 10-15 minutes to the bake time.
  • Double the Batch: This recipe doubles easily, so make more for family gatherings.
  • Microwave Method: If you’re short on time, you can microwave your assembled enchiladas. Cover with a damp paper towel and heat in intervals.

Variations

  • Vegetarian Option: Substitute the chicken with black beans, sautéed bell peppers, and zucchini for a delicious veggie version.
  • Spicy Twist: Add diced jalapeños to the chicken mixture for an extra kick.
  • Different Sauces: Use green enchilada sauce instead of the creamy mixture if you prefer a spicier, more traditional flavor.
  • Cheese Choices: Try pepper jack cheese for a spicier bite.
  • Gluten-Free Tortillas: Use corn tortillas for those with gluten sensitivities.

FAQ

  1. Can I make enchiladas ahead of time?
    Yes, you can prepare and assemble them a day in advance, then bake when ready to serve.

  2. What can I serve with chicken enchiladas?
    They pair well with Mexican rice, beans, guacamole, or a fresh salad.

  3. Can I use a different type of meat?
    Absolutely, shredded beef or turkey work just as well.

  4. How do I keep my tortillas from falling apart?
    Warm the tortillas in a hot skillet for a few seconds or in the microwave for a few seconds to make them more pliable.

  5. Are these enchiladas freezer-friendly?
    Yes! Assemble them uncooked, wrap tightly, and freeze.

As you finish making these chicken enchiladas, take a moment to appreciate what you’ve created. Gathering around the table with loved ones to enjoy a hearty meal is what home is all about. With every bite, you’re not just sharing food but moments and memories that will last a lifetime. Enjoy!

Chicken Enchiladas

Prep Time 10 minutes
Cook Time 25 minutes
Total Time 35 minutes
Servings 6 servings
Calories 300
Easy and satisfying chicken enchiladas that blend comforting flavors and create joyful family memories.

Ingredients

Main Ingredients

  • 2 cups cooked shredded chicken (Rotisserie chicken is convenient.)
  • 8 pieces flour tortillas (Soft and easy to roll.)
  • 1 cup shredded cheese (cheddar or Monterey Jack) (Use your family's favorite cheese.)
  • 1 cup sour cream
  • 1 can cream of chicken soup (Adds richness; low-fat options available.)
  • 1/2 cup chicken broth (Thin out the sauce, homemade recommended.)
  • 1 teaspoon garlic powder
  • 1 teaspoon onion powder
  • to taste Salt and pepper
  • as needed Chopped green onions for garnish (Add a fresh touch.)

Instructions 

Preparation

  • Preheat your oven to 350°F (175°C).
  • In a mixing bowl, combine shredded chicken, garlic powder, onion powder, salt, and pepper. Mix well.
  • In a separate bowl, mix together sour cream, cream of chicken soup, and chicken broth until smooth.

Assembly

  • Take a tortilla, fill it with a portion of the chicken mixture, sprinkle some cheese, roll it up and place it seam-side down in a greased baking dish.
  • Repeat with all tortillas and fill the baking dish snugly.
  • Pour the remaining sour cream mixture over the top and sprinkle with the remaining cheese.

Baking

  • Bake in the preheated oven for 20-25 minutes or until bubbly and golden.
  • Garnish with chopped green onions before serving.

Notes

Leftovers can be stored in an airtight container for up to 3 days. When reheating, place in the oven at 350°F (175°C).
Calories: 300kcal
Course: Dinner, Main Course
Cuisine: Mexican
Keyword: Chicken Enchiladas, Comfort Food, Easy Dinner, Family Meal, quick recipe

Mexican Barbecue - tender chicken skewers marinated with a delicious Mexican blend of spices for the perfect barbecue

The kitchen fills with a bright, smoky scent as I mix fresh lime, garlic, and warm spices. I can hear the sizzle as the first skewer hits the hot grill, and family chatter drifts in from the backyard. Those simple sounds mean dinner is both ready and real.

This Mexican barbecue chicken is one of those meals I turn to when I want something that smells amazing, cooks quickly, and makes everyone feel at home. It pairs well with easy sides and comes together in a way that fits busy schedules. If you need a fast, flavorful dinner idea, I love how this recipe works with my other weeknight favorites like these busy rotisserie ideas: busy weeknight rotisserie ideas.

Why this works

Mexican Barbecue - tender chicken skewers marinated with a delicious Mexican blend of spices for the perfect barbecue

H3: Family Approved

The flavor hits familiar notes and keeps things exciting. The spice blend is bold but not scary, so kids and adults both dig in. The marinade softens the chicken and keeps it juicy on the grill. If someone in your family prefers milder food, you can pull a few skewers out early while the rest take on the full spice.

H3: Time Saving and Flexible

You can marinate for just one hour and still get great taste. If you plan ahead, an overnight soak makes the meat extra tender. This recipe adapts to whatever you have on hand. I often borrow quick tricks from other grilling favorites like my go-to skewers, but I keep things simple so busy nights stay calm. If you want a different grilled flavor idea, check out this proven recipe for quick skewers: easy grilled Asian chicken skewers.

Process Overview

“This is where the magic happens—when the aroma fills the kitchen.”

H3: The Big Picture

We marinate, thread, grill, and rest. Marinating gives the chicken time to soak up flavor. Threading keeps pieces even for a consistent cook. Grilling gives a charred touch and smoky aroma that makes dinner feel like a celebration. Finally, resting locks the juices in.

A quick note about technique: if you are new to working with chicken breast, these step-by-step tips combine well with general chicken breast advice I share in other recipes: chicken breast tips.

Ingredients

  • 2 pounds boneless skinless chicken breasts, cut into 1.5 inch pieces
    • Lily’s tip: Trim fat and try to cut pieces the same size for even cooking.
  • 1/2 Cup fresh lime juice (about 4 limes)
    • Lily’s tip: Fresh juice brightens the spice mix better than bottled.
  • 1/4 Cup olive oil
    • Lily’s tip: Olive oil helps the spices cling and helps char on the grill.
  • 3 cloves garlic, minced
    • Lily’s tip: Use a garlic press or grate on a microplane for a smooth paste.
  • 2 teaspoons chili powder
    • Lily’s tip: This gives mild heat and a classic flavor.
  • 1 teaspoon ground cumin
    • Lily’s tip: Toast a pinch in a dry pan for 30 seconds to deepen the aroma if you have time.
  • 1 teaspoon smoked paprika
    • Lily’s tip: Smoked paprika adds that barbecue warmth without a smoker.
  • 1 teaspoon dried oregano
    • Lily’s tip: Mexican oregano if you have it makes it more authentic.
  • 2 tablespoons brown sugar
    • Lily’s tip: The sugar helps caramelize the exterior for a pretty glaze.
  • 1 teaspoon kosher salt
    • Lily’s tip: Adjust to taste; salt enhances the other flavors.
  • 1/2 teaspoon black pepper
    • Lily’s tip: Freshly ground gives the best flavor.
  • 2 tablespoons chopped cilantro, optional
    • Lily’s tip: Stir in after grilling to keep the green, fresh flavor.
  • 8 to 10 wooden skewers, soaked in water at least 30 minutes, or metal skewers
    • Lily’s tip: Soaking wooden skewers prevents burning and keeps the ends cool for little hands.

If you like Mediterranean or Middle Eastern skewers, this recipe also draws inspiration from other spiced chicken ideas for shaping and serving. For a twist in seasoning, I sometimes adapt notes I use when working with kofta: chicken kofta inspiration.

Directions

  1. Combine the marinade.

    • In a medium bowl, whisk together lime juice, olive oil, garlic, chili powder, cumin, smoked paprika, oregano, brown sugar, salt, and pepper.
    • Encouragement: Take a moment to smell the lime and spices. It already feels like a small party.
  2. Marinate the chicken.

    • Add the chicken pieces to a large zip-top bag or bowl and pour in the marinade. Press out excess air and seal. Refrigerate at least 1 hour, up to overnight.
    • Encouragement: If you are short on time, one hour still works. Overnight just deepens the flavor.
  3. Prepare your grill.

    • Preheat outdoor grill to medium-high, about 400 to 450°F. If using a grill pan, set a burner to medium-high and preheat the pan.
    • Encouragement: Give your grill a few minutes to get hot. A hot surface creates a better sear.
  4. Thread the skewers.

    • Thread chicken onto skewers in a single layer, leaving a bit of space between pieces so heat can circulate.
    • Encouragement: Keep the pieces even and you will feel proud when they cook evenly.
  5. Grill the skewers.

    • Place skewers on the grill. Cook 4 to 5 minutes per side, flipping once, until an instant-read thermometer reads 165°F in the center.
    • Encouragement: Don’t worry if the edges get a little charred. That is flavor.
  6. Rest the chicken.

    • Remove skewers and let rest 5 minutes. Sprinkle with chopped cilantro if you like.
    • Encouragement: Resting keeps the meat juicy. Use this time to warm tortillas or finish a side.
  7. Final touches.

    • Serve with lime wedges and extra cilantro. Offer bowls of sliced avocado, salsa, and warm tortillas for family-style assembling.
    • Encouragement: Let everyone build their own tacos. Kids love choosing toppings.

If you prefer cooking in the oven, set to 425°F and bake the threaded skewers on a sheet pan for 12 to 15 minutes, turning once. You can also broil for 1 to 2 minutes on high at the end to mimic a char.

Serving

Mexican Barbecue - tender chicken skewers marinated with a delicious Mexican blend of spices for the perfect barbecue

H3: Family Style Ideas

Lay the skewers on a large platter and place bowls of toppings around them. Warm flour or corn tortillas, sliced avocado, chopped tomatoes, shredded lettuce, pickled onions, and a simple crema make great accompaniments. For a heartier side, I like a creamy pasta salad or macaroni that the kids will eat. Try pairing with one of my favorite pasta sides for a crowd: best chicken macaroni sides.

H3: Plate It Simply

If you prefer plates, remove the chicken from the skewers and serve on a bed of cilantro lime rice. Add a wedge of lime and a drizzle of plain yogurt or crema. Everyone can choose their own heat level with a spicy salsa on the side.

Storage

  • Refrigerator

    • Store leftovers in an airtight container for 3 to 4 days.
    • Tip: Keep sauces separate if possible to maintain texture.
  • Freezer

    • Freeze cooled, cooked skewers in a freezer-safe container for up to 3 months. Thaw overnight in the fridge before reheating.
  • Reheating

    • Oven: Preheat to 350°F, place skewers on a sheet pan, and warm 8 to 10 minutes until heated through.
    • Stovetop: Warm in a skillet over medium heat with a splash of water or oil, cover for even heating.
    • Microwave: Use short bursts of 20 to 30 seconds and rotate to avoid overcooking.
    • Tip: Add a squeeze of lime after reheating to refresh the flavor.

Kitchen Notes

  • Use pre-cut chicken to save 10 minutes when you are short on time.
  • Make the marinade in advance and pour over chicken when you get home.
  • Swap wooden skewers for metal ones to skip soaking.
  • Use a grill basket if pieces are small or you prefer a quick flip.
  • Keep an instant-read thermometer handy to avoid overcooking.

These little shortcuts keep dinner smooth and let you spend more time with the people you love.

Variations

H3: Milder for Picky Eaters

Reduce chili powder to 1/2 teaspoon and omit smoked paprika. Add a little extra brown sugar or honey for a sweeter glaze kids often prefer.

H3: Dark Meat Option

Use boneless skinless thighs instead of breasts. Thighs stay juicier and handle longer marinating well. Cook the same way but check for doneness at 165°F.

H3: Vegetarian or Vegan

Use extra-firm tofu or large mushroom caps in place of chicken. Press tofu and marinate longer for the best flavor. Grill until you get good color.

H3: Gluten Free and Low Sodium

This recipe is naturally gluten free. To reduce sodium, use low-salt spice blends and reduce added salt to 1/2 teaspoon, then adjust after cooking.

H3: Different Sauce Ideas

Serve with a yogurt-lime sauce for cool contrast or a smoky chipotle mayo for extra heat. For a lighter finish, salsa verde and fresh pico de gallo work beautifully.

FAQ

Q: How long should I marinate the chicken?
A: At least 1 hour for good flavor. Overnight gives deeper taste and more tender results.

Q: Can I use chicken thighs instead of breasts?
A: Yes. Thighs work great and stay moist. Cook until the internal temperature reaches 165°F.

Q: Do I need to soak wooden skewers?
A: Yes. Soak for at least 30 minutes to prevent burning and keep the ends safer to handle.

Q: Can I make this ahead for a party?
A: Absolutely. Marinate the chicken a day ahead and thread skewers in the morning. Keep covered in the fridge until ready to grill.

Q: What if my grill flares up?
A: Move skewers to a cooler part of the grill until flames die down. Reduce flare-ups by trimming excess fat from the chicken and patting pieces dry before grilling.

Conclusion

I hope this Mexican barbecue chicken becomes one of your go-to meals for family nights. The spice mix is straightforward, the method is forgiving, and the results invite everyone to the table. For another take on bold, smoky marinated chicken with a creamy element, I like the approach used in Smoky and Spicy Yogurt Marinated Chicken Kebabs. If you want a citrusy, oven-friendly version that reminds me of a classic backyard pollo, check out this oven roasted recipe: Pollo Asado (Oven Roasted, Grilled) Recipe.

Thanks for cooking with me. When you make this, I hope the smells and sounds in your kitchen feel as warm and welcome as the meals that gather your family around the table.

Mexican Barbecue Chicken Skewers

Prep Time 15 minutes
Cook Time 15 minutes
Total Time 30 minutes
Servings 4 servings
Calories 350
This Mexican barbecue chicken skewers recipe is a flavorful and quick dinner option that is family-approved, perfect for busy nights. The marinated chicken is grilled to perfection, providing a smoky aroma that makes dinner feel special.

Ingredients

For the Marinade

  • 1/2 Cup fresh lime juice (about 4 limes) (Fresh juice brightens the spice mix better than bottled.)
  • 1/4 Cup olive oil (Helps the spices cling and char on the grill.)
  • 3 cloves garlic, minced (Use a garlic press or grate on a microplane for a smooth paste.)
  • 2 teaspoons chili powder (This gives mild heat and a classic flavor.)
  • 1 teaspoon ground cumin (Toast a pinch in a dry pan for 30 seconds to deepen aroma if you have time.)
  • 1 teaspoon smoked paprika (Adds barbecue warmth without a smoker.)
  • 1 teaspoon dried oregano (Mexican oregano makes it more authentic.)
  • 2 tablespoons brown sugar (Helps caramelize the exterior for a pretty glaze.)
  • 1 teaspoon kosher salt (Adjust to taste; salt enhances other flavors.)
  • 1/2 teaspoon black pepper (Freshly ground gives the best flavor.)

For the Chicken

  • 2 pounds boneless skinless chicken breasts, cut into 1.5 inch pieces (Trim fat and try to cut pieces the same size for even cooking.)
  • 2 tablespoons chopped cilantro, optional (Stir in after grilling to keep the green, fresh flavor.)
  • 8 to 10 pieces wooden skewers, soaked in water for at least 30 minutes, or metal skewers (Soaking wooden skewers prevents burning and keeps the ends cool for little hands.)

Instructions 

Preparation

  • In a medium bowl, whisk together lime juice, olive oil, garlic, chili powder, cumin, smoked paprika, oregano, brown sugar, salt, and pepper.
  • Add the chicken pieces to a large zip-top bag or bowl and pour in the marinade. Press out excess air and seal. Refrigerate at least 1 hour, up to overnight.
  • Preheat outdoor grill to medium-high, about 400 to 450°F. If using a grill pan, set a burner to medium-high and preheat the pan.

Grilling

  • Thread chicken onto skewers in a single layer, leaving a bit of space between pieces.
  • Place skewers on the grill. Cook 4 to 5 minutes per side, flipping once, until an instant-read thermometer reads 165°F in the center.
  • Remove skewers and let rest 5 minutes. Sprinkle with chopped cilantro if you like.

Serving

  • Serve with lime wedges and extra cilantro. Offer bowls of sliced avocado, salsa, and warm tortillas for family-style assembling.

Notes

Store leftovers in an airtight container for 3 to 4 days. Freeze cooked skewers in a freezer-safe container for up to 3 months. Reheat in the oven or stovetop.
Calories: 350kcal
Course: Dinner, Main Course
Cuisine: Barbecue, Mexican
Keyword: Barbecue Chicken, Family Dinner, Grilling, Quick Meal, Skewers