Category

Mediterranean & Flavor-Packed Chicken

Category

This post contains affiliate links. As an Amazon Associate, I earn from qualifying purchases. This comes at no extra cost to you.

This Easy Thai Chicken Soup Recipe combines creamy coconut milk, bold Thai red curry paste, and tender halal chicken for a symphony of flavor and aroma. The vibrant blend of spices and fresh herbs creates a perfect balance of richness and freshness in every spoonful. Ready in just 30 minutes, it’s a quick and satisfying meal for any occasion.

Table of Contents

Why This Easy Thai Chicken Soup Recipe Shines

  • This recipe is quick and effortless, taking 30 minutes from start to finish, making it perfect for busy weeknights.
  • The creamy coconut milk and halal chicken provide a rich yet light base, balanced by the tangy lime juice and fresh cilantro.
  • Using Thai red curry paste ensures authentic flavor without requiring countless specialty spices.
  • This dish offers flexibility in ingredients, letting you adapt vegetables and spice levels to suit your preferences.

Everything You Need for Easy Thai Chicken Soup Recipe

The Thai red curry paste is the star ingredient, lending depth, heat, and a signature Thai flavor to the soup. Combined with coconut milk, it creates a silky, aromatic broth that is both comforting and invigorating.

How To Make Easy Thai Chicken Soup Recipe Step by Step

  1. Heat the vegetable oil in a large pot over medium heat.
  2. Add the onion and sauté until softened, about 3-4 minutes.
  3. Stir in the garlic and ginger, cooking for another 1 minute until fragrant.
  4. Add the Thai red curry paste and cook for 1-2 minutes, stirring frequently to combine with the aromatics.
    A bowl of homemade Thai chicken soup garnished with fresh cilantro and lime wedges.

    Instant Pot Duo 7-in-1 Electric Pressure Cooker

    Kitchen ApplianceInstant Pot Duo 7-in-1 Electric Pressure Cooker

    Perfect for quickly cooking chicken and broth for soups like this.

    View on Amazon →

    Cuisinart 3-Quart Stainless Steel Saucepan with Cover

    Essential CookwareCuisinart 3-Quart Stainless Steel Saucepan with Cover

    Ideal for simmering soups and sauces evenly without scorching.

    View on Amazon →

  5. Pour in the halal chicken broth and coconut milk, stirring until the mixture is smooth.
  6. Bring the soup to a gentle simmer over medium heat.
  7. Add the cooked halal chicken, mushrooms, and red bell pepper to the pot. Simmer for 5-7 minutes until the vegetables are tender.
  8. Stir in the fish sauce, soy sauce, lime juice, and sugar. Adjust seasonings as needed based on taste preferences.
  9. Remove from heat and garnish with fresh cilantro, green onions, and, if desired, sliced red chili for added heat.
  10. Serve hot and enjoy your Easy Thai Chicken Soup!

Common Mistakes to Avoid

  • Overcooking the vegetables can make them mushy and less vibrant. Simmer them for just 5-7 minutes to retain their texture and color.
  • Neglecting to stir the curry paste thoroughly may result in uneven flavors. Take time to combine it properly with the garlic, ginger, and onion.
  • Skipping the lime juice can leave the soup overly rich. The citrus tang balances the creamy coconut milk beautifully.

What to Serve With This Dish

  • Serve with steamed jasmine rice to soak up the fragrant, creamy broth.
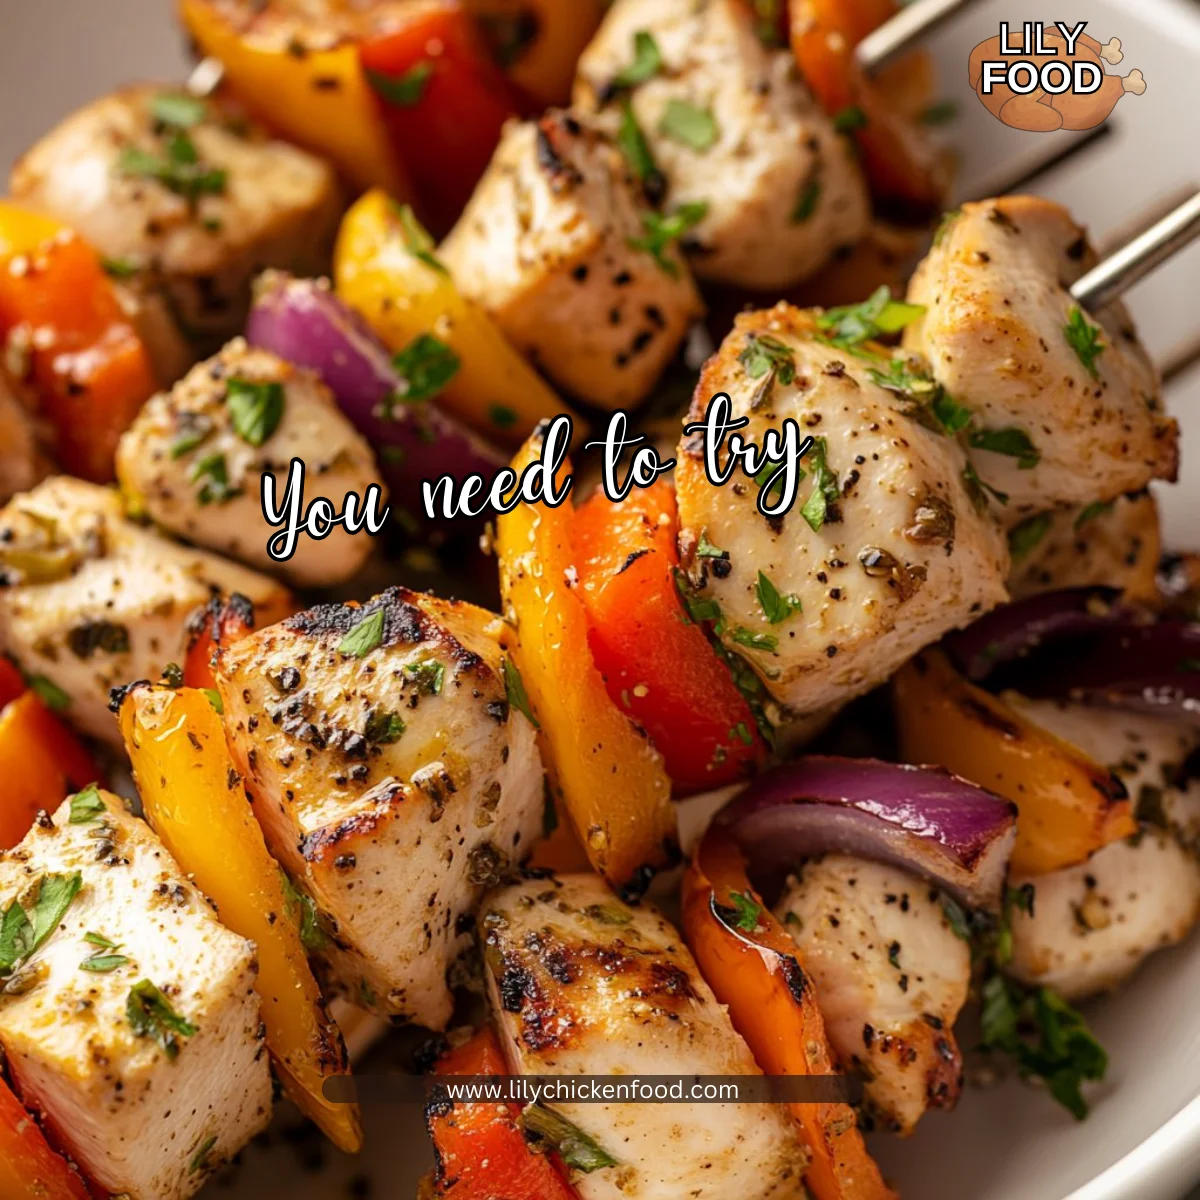
  • Pair with our grilled thai coconut chicken skewers for a complementary contrast in texture.
  • Fresh spring rolls with a light peanut dipping sauce balance the intense flavors of the soup.
  • A quick cucumber salad adds a refreshing, crunchy side to round out the meal.

Dish History and Origins

Thai chicken soup, known for its creamy base and bold spices, has its roots in traditional Thai cuisine, which expertly combines savory, sweet, sour, and spicy elements. Ingredients like fish sauce, coconut milk, and lime are staples in Thai cooking, reflecting the country’s emphasis on balanced flavors.

Dishes like this often draw inspiration from tom kha gai, a classic Thai soup featuring coconut and chicken, though this version simplifies preparation to suit modern home kitchens.

Expert Tips and Shortcuts

  • Use pre-cooked halal chicken to save time and streamline the cooking process.
  • Simmer the soup gently to avoid curdling the coconut milk, ensuring the broth stays creamy.
  • Prep all your vegetables in advance so you can add them to the pot without delay.
  • Add sliced red chili sparingly if you’re unsure of your preferred spice level—its heat intensifies as it sits.

Easy Thai Chicken Soup Recipe

Prep Time 15 minutes
Cook Time 25 minutes
Total Time 40 minutes
Servings 4 servings
Calories 350
A flavorful and comforting Thai-inspired chicken soup made with coconut milk, curry paste, and fresh vegetables.

Ingredients

Instructions 

  • Heat the vegetable oil in a large pot over medium heat.
  • Add the onion and sauté until softened, about 3-4 minutes.
  • Stir in the garlic and ginger, cooking for another 1 minute until fragrant.
  • Add the Thai red curry paste and cook for 1-2 minutes, stirring frequently to combine with the aromatics.
  • Pour in the halal chicken broth and coconut milk, stirring until the mixture is smooth.
  • Bring the soup to a gentle simmer over medium heat.
  • Add the cooked halal chicken, mushrooms, and red bell pepper to the pot. Simmer for 5-7 minutes until the vegetables are tender.
  • Stir in the fish sauce, soy sauce, lime juice, and sugar. Adjust seasonings as needed based on taste preferences.
  • Remove from heat and garnish with fresh cilantro, green onions, and, if desired, sliced red chili for added heat.
  • Serve hot and enjoy your Easy Thai Chicken Soup!

Notes

For a spicier soup, add more Thai red curry paste or garnish with extra sliced red chili. Ensure all ingredients are halal-certified if required.
Calories: 350kcal
Cost: $15
Course: Soup
Cuisine: Thai
Keyword: coconut milk soup, halal soup, Thai chicken soup
A bowl of homemade Thai chicken soup garnished with fresh cilantro and lime wedges.

Loved this recipe? Save it to your favorite Pinterest board so you can easily find it later! ✨

This post contains affiliate links. As an Amazon Associate, I earn from qualifying purchases. This comes at no extra cost to you.


Hot Italian Sub Sliders

Hot Italian Sub Sliders

Hot Italian Sub Sliders bring layers of savory deli meats, melty cheeses, and tangy banana peppers together in a compact, shareable format. The buttery garlic-herb topping adds a crave-worthy aroma and golden, crispy finish. Perfect for entertaining or a casual sandwich night, these sliders pack bold flavors into every bite.

Table of Contents

Why Hot Italian Sub Sliders Are Perfect for You

  • These sliders are quick to assemble, making them ideal for busy evenings or last-minute gatherings. With just 15 minutes of prep, you can serve up big sandwich ideas without the hassle of complicated recipes.
  • They’re baked together in one dish, saving you from juggling multiple pans. This makes cleanup easy and keeps your kitchen mess-free after sandwich night ideas.
  • Hot Italian Sub Sliders are versatile and shareable, great for meals for entertaining or game day appetizers. Their bold flavors and satisfying textures make them stand out as meat appetizer ideas.
  • Made with halal-certified ingredients, these sliders cater to a variety of dietary preferences. They’re perfect for anyone searching for cool recipes to try that meet specific needs.

Everything You Need for Hot Italian Sub Sliders

The combination of mozzarella and provolone in this recipe ensures maximum meltability and richness. These cheeses pair perfectly with the tangy banana peppers and savory deli meats for balanced Italian-inspired flavors.

How To Make Hot Italian Sub Sliders Step by Step

  1. Preheat the oven to 350°F (175°C). Lightly grease a 9×13-inch baking dish or line it with parchment paper for easy cleanup.
  2. Slice the slider buns horizontally while keeping the top and bottom halves intact. Place the bottom halves in the prepared baking dish.
  3. In a small bowl, mix melted butter, garlic powder, Italian seasoning, and Dijon mustard until well combined. Set the mixture aside.
  4. Close-up of hot Italian sub sliders with melted cheese and fresh toppings on a wooden tray.

    Breville Smart Oven Air Fryer Pro

    Kitchen ApplianceBreville Smart Oven Air Fryer Pro

    Perfect for baking sliders quickly and evenly with versatile cooking options

    View on Amazon →

    USA Pan Bakeware Rectangular Cake Pan 9x13 inch

    Essential CookwareUSA Pan Bakeware Rectangular Cake Pan 9×13 inch

    Ideal for baking sliders evenly — nonstick and durable for easy cleanup

    View on Amazon →

  5. Spread a thin layer of mayonnaise and marinara sauce evenly over the bottom halves of the buns.
  6. Layer the halal turkey pastrami, beef bologna, and chicken mortadella on the buns. Add the provolone and mozzarella slices on top of the meats.
  7. Sprinkle sliced banana peppers and black olives evenly over the cheese layer for a burst of tangy, salty flavor.
  8. Place the top halves of the slider buns over the layered fillings. Brush the tops generously with the garlic-herb butter mixture.
  9. Optionally, sprinkle grated Parmesan cheese over the buns for added flavor and crunch.
  10. Cover the dish with aluminum foil and bake for 15 minutes. Remove the foil and continue baking for another 5-7 minutes until golden and bubbly.
  11. Remove from the oven and let cool for a few minutes. Slice the sliders apart and serve while warm.

How to Prep, Store, and Reheat Hot Italian Sub Sliders

Prepare the sliders ahead of time by assembling them in the baking dish, covering tightly with foil, and refrigerating for up to 24 hours. When ready to bake, follow the same cooking instructions, adding an extra 5 minutes to the bake time if starting from cold.

Store cooked sliders in an airtight container in the fridge for up to 3 days. For reheating, bake in a 350°F oven for 10 minutes or until warmed through — this keeps the bread from drying out.

If freezing, wrap individual sliders tightly in foil and store in a zip-top bag for up to 1 month. Reheat directly from frozen in a 375°F oven for 15-20 minutes.

You might also enjoy our hot honey grilled chicken skewers.

Expert Tips for Nailing This Recipe

  • Use fresh buns or rolls to ensure the sliders hold together well after baking. Stale bread can become too crumbly and ruin the texture.
  • Don’t skip brushing the tops with garlic-herb butter — this step adds incredible aroma and a golden crust. The Dijon mustard in the mix enhances the depth of flavor.
  • Layering the meats and cheeses evenly ensures every slider is packed with flavor. Avoid piling everything in the center for consistent results.
  • Let the sliders cool for a few minutes before slicing to prevent the fillings from spilling out. This makes serving cleaner and easier!

The Inspiration Behind Hot Italian Sub Sliders

This dish is inspired by the classic Italian sub sandwich, known for its bold layers of cured meats, sharp cheeses, and tangy toppings. By transforming it into bite-sized sliders, this recipe makes the timeless combination perfect for gatherings and smaller portions.

Banana peppers and black olives bring the quintessential Italian tang, while baking enhances the flavors and melds the ingredients together. It’s an updated take on a beloved sandwich turned into shareable food for modern entertaining.

Easy Ingredient Swaps for This Dish

  • Swap the mozzarella for fontina or cheddar if preferred. These options still melt beautifully but bring slightly different textures and flavors.
  • Use roasted red peppers in place of banana peppers for a milder, sweeter topping. This keeps the tangy element softer for those who prefer less spice.
  • Replace marinara sauce with your favorite pesto for an herbaceous twist. Pair this with provolone for a delicious variation.


Hot Italian Sub Sliders

Prep Time 15 minutes
Cook Time 20 minutes
Total Time 35 minutes
Servings 12 sliders
Calories 320
Delicious and easy-to-make sliders packed with halal-certified deli meats, cheeses, and flavorful toppings.

Instructions 

  • Preheat the oven to 350°F (175°C). Lightly grease a 9x13-inch baking dish or line it with parchment paper.
  • Slice the slider buns horizontally, keeping the top and bottom halves intact as a sheet. Place the bottom halves in the prepared baking dish.
  • In a small bowl, mix the melted butter, garlic powder, Italian seasoning, and Dijon mustard. Set aside.
  • Spread a thin layer of mayonnaise and marinara sauce over the bottom halves of the buns.
  • Layer the halal turkey pastrami, beef bologna, and chicken mortadella evenly over the buns. Follow with the provolone and mozzarella slices.
  • Sprinkle the sliced banana peppers and black olives evenly over the cheese layer.
  • Place the top halves of the slider buns over the layered fillings.
  • Brush the tops of the buns generously with the butter mixture. Sprinkle grated Parmesan cheese over the tops, if using.
  • Cover the baking dish with aluminum foil and bake in the preheated oven for 15 minutes.
  • Remove the foil and bake for another 5-7 minutes, or until the tops are golden brown and the cheese is melted and bubbly.
  • Carefully remove the sliders from the oven and let them cool for a few minutes before slicing and serving.

Notes

You can substitute the deli meats and cheeses with your preferred halal-certified options. Adjust the toppings to suit your taste.
Calories: 320kcal
Cost: $15
Course: Main Course
Cuisine: Italian-American
Keyword: halal, Italian sub, Sliders

Close-up of hot Italian sub sliders with melted cheese and fresh toppings on a wooden tray.

Loved this recipe? Save it to your favorite Pinterest board so you can easily find it later! ✨

This post contains affiliate links. As an Amazon Associate, I earn from qualifying purchases. This comes at no extra cost to you.

This French Onion Chicken Orzo Casserole is a rich and savory dish that combines the sweet aroma of caramelized onions with tender halal chicken, creamy orzo pasta, and a golden layer of melted cheese. Every bite brings together comforting textures and bold flavors, making it a standout option for family dinners or cozy nights at home. With its satisfying blend of ingredients, this casserole delivers both indulgence and nourishment.

Table of Contents

Why This French Onion Chicken Orzo Casserole Works

  • This dish is perfect for busy weeknights because it combines quick-to-cook ingredients like pre-cooked halal chicken and dried orzo pasta for a hassle-free prep. The oven does most of the work, leaving you time to focus on other tasks.
  • The caramelized onions bring depth and sweetness that elevate the flavors of the casserole without requiring complicated techniques. With just sugar, salt, and pepper, the onions transform into a savory highlight of the dish.
  • The combination of mozzarella and Parmesan cheese creates a gooey, golden topping that makes the casserole irresistibly creamy. This layer adds texture and richness, making each serving feel indulgent yet approachable.
  • French Onion Chicken Orzo Casserole is versatile for various dietary needs since it uses halal chicken and simple pantry staples. You can easily adjust the seasoning or garnish to match your preferences.

Everything You Need for French Onion Chicken Orzo Casserole

The caramelized yellow onions are key to this dish, as they provide a sweet, deep flavor that contrasts beautifully with the creamy pasta and cheese. Be sure to cook them low and slow to bring out their natural sweetness and avoid burning.

How To Make French Onion Chicken Orzo Casserole Step by Step

  1. Preheat your oven to 375°F (190°C).
  2. In a large skillet, heat olive oil over medium heat. Add the sliced onions, sugar, salt, and black pepper. Cook for 20-25 minutes, stirring occasionally, until the onions are deeply caramelized.
  3. While the onions cook, boil the orzo pasta in salted water according to package instructions but reduce the cooking time by 2 minutes so it’s slightly firm. Drain and set aside.
  4. A close-up of French Onion Chicken Orzo Casserole in a baking dish topped with melted cheese and fresh herbs.

    Le Creuset Enameled Cast Iron Dutch Oven

    Kitchen ApplianceLe Creuset Enameled Cast Iron Dutch Oven

    Ideal for baking casseroles and ensuring even heat distribution for creamy results.

    View on Amazon →

    Lodge Cast Iron Skillet 12-inch

    Essential CookwareLodge Cast Iron Skillet 12-inch

    Perfect for caramelizing onions evenly and achieving deep flavors for this recipe.

    View on Amazon →

  5. Once the onions are caramelized, add the shredded chicken to the skillet and toss to combine. Remove from heat.
  6. In a mixing bowl, whisk together the halal chicken broth, heavy cream, garlic powder, dried thyme, and paprika.
  7. In a greased casserole dish, layer the cooked orzo pasta first, followed by the onion and chicken mixture. Pour the broth and cream mixture evenly over the top.
  8. Sprinkle the shredded mozzarella and grated Parmesan cheese evenly over the casserole.
  9. Cover the casserole dish with foil and bake for 20 minutes. Then, remove the foil and bake for another 10 minutes, or until the cheese is melted and bubbly.
  10. Remove the dish from the oven and let it rest for 5 minutes. Garnish with chopped parsley before serving, if desired.

Serving Ideas for French Onion Chicken Orzo Casserole

  • This casserole pairs wonderfully with a crisp green salad dressed in a light vinaigrette to balance its richness.
  • If you’re serving it on a cold evening, consider adding crusty garlic bread for dipping into the creamy sauce.
  • For a seasonal touch, roast some autumn vegetables like butternut squash or Brussels sprouts as a colorful side.
  • A warm cup of spiced apple cider makes the perfect beverage to complement the flavors of the dish.

Expert Tips for Perfect Results

  • When caramelizing onions, stir them occasionally but not too often; letting them sit in the pan allows the sugars to develop a deeper flavor.
  • Undercook the orzo slightly during boiling to ensure it stays firm and doesn’t become mushy in the casserole.
  • Using freshly grated Parmesan cheese instead of pre-shredded enhances the cheesy topping with a more authentic, nutty flavor.
  • Let the casserole rest for 5 minutes after baking to allow the sauce to thicken and the flavors to fully meld together.

The Origins of French Onion Chicken Orzo Casserole

This dish is inspired by the classic French onion soup, which is known for its deeply caramelized onions and rich broth. By integrating halal chicken and creamy orzo pasta, the recipe transforms the iconic flavors into a satisfying one-pan meal. While rooted in French cuisine, this casserole adapts the traditional flavors for a modern twist that’s easy to prepare and enjoy.

Looking for something similar? Try our grilled greek chicken kabobs.

For more ideas, check out our greek chicken kabobs.

You might also enjoy our easy cheesy keto chicken enchilada casserole.

Common Mistakes to Avoid

  • Skipping the caramelization step for the onions can result in a bland flavor. Take your time to cook them until they’re golden brown and sweet.
  • Overcooking the orzo pasta can lead to a mushy casserole texture. Be sure to reduce the boiling time slightly.
  • Not whisking the cream and broth mixture thoroughly may cause uneven seasoning, so take an extra moment to ensure everything is well combined.

French Onion Chicken Orzo Casserole

Prep Time 20 minutes
Cook Time 35 minutes
Total Time 55 minutes
Servings 6 servings
Calories 450
A comforting casserole featuring caramelized onions, shredded chicken, orzo pasta, and a creamy sauce topped with melted cheese.

Ingredients

Instructions 

  • Preheat your oven to 375°F (190°C).
  • In a large skillet, heat olive oil over medium heat. Add the sliced onions, sugar, salt, and black pepper. Cook for 20-25 minutes, stirring occasionally, until the onions are deeply caramelized.
  • While the onions are cooking, boil the orzo pasta in salted water according to package instructions, but reduce the cooking time by 2 minutes to keep it slightly firm. Drain and set aside.
  • Once the onions are caramelized, add the shredded chicken to the skillet and toss to combine. Remove from heat.
  • In a mixing bowl, whisk together the halal chicken broth, heavy cream, garlic powder, dried thyme, and paprika.
  • In a greased casserole dish, layer the cooked orzo pasta, followed by the onion and chicken mixture. Pour the broth and cream mixture evenly over the top.
  • Sprinkle the shredded mozzarella and grated Parmesan cheese evenly over the casserole.
  • Cover the casserole dish with foil and bake for 20 minutes. Then, remove the foil and bake for an additional 10 minutes, or until the cheese is melted and bubbly.
  • Remove the casserole from the oven and let it rest for 5 minutes. Garnish with chopped parsley before serving, if desired.

Notes

You can substitute rotisserie chicken for the shredded chicken to save time. For a vegetarian version, replace the chicken with sautéed mushrooms and use vegetable broth.
Calories: 450kcal
Cost: $15
Course: Main Course
Cuisine: French
Keyword: Casserole, Chicken, Orzo
A close-up of French Onion Chicken Orzo Casserole in a baking dish topped with melted cheese and fresh herbs.

Loved this recipe? Save it to your favorite Pinterest board so you can easily find it later! ✨

Greek Chicken Kabobs

I can still smell the citrus and oregano when I close my eyes. The sizzle of chicken hitting a hot grill, the little pops from zucchini and peppers, the laughter from around the kitchen table. Those sounds and smells tell me dinner is going to be a good one.

This recipe for Greek Chicken Kabobs is an everyday favorite in my house. It is bright, flexible, and easy to pull together even on a busy weeknight. If you like a lemony rice to go with your kabobs, try my simple pairing for lemon rice that the kids love: Greek chicken and lemon rice.

Why this works

Greek Chicken Kabobs

There are a few reasons this hits the mark for family dinners. The flavors are familiar but fresh. Garlic, lemon, and oregano give the chicken a bright, Mediterranean profile that people of all ages enjoy. The vegetables cook quickly and add color and texture to every bite.

This method saves time. You can marinate the chicken in the morning or an hour before dinner. While the meat soaks up flavor, the kids can help thread vegetables. For a bowl-style dinner that keeps things even simpler, try this filling option I make when I need a hands-off meal: Greek chicken bowls.

These kabobs also play well with leftovers. Make extra and use slices for salads, wraps, or a quick lunch the next day. The family-friendly nature of the dish makes it a reliable dinner when you want something both healthy and crowd-pleasing.

Process Overview

“This is where the magic happens—when the aroma fills the kitchen.”

The process is straightforward. Make a simple lemon and oregano marinade, cut the chicken into chunks, and marinate. Chop colorful vegetables and thread everything onto skewers. Then grill until the chicken is cooked but still juicy. It is satisfying to see the grill marks appear and to know a warm, comforting meal is moments away.

If you need a stove-to-oven alternative, I sometimes use a sheet pan method to keep things easy during busy weeks. You can find a reliable sheet pan option here: Greek sheet pan chicken.

Ingredients

I list the essentials below and add a short tip for each. These notes are from years of cooking for my family and small tweaks that help the flavors shine.

  • Chicken breast, boneless and skinless, about 1.5 to 2 pounds.
    Tip: Trim fat and cut into even, bite-size chunks so everything cooks evenly. If you prefer dark meat, thighs stay juicier.
    For a deeper yogurt-based marinate, I sometimes borrow the method from my marinated yogurt thighs post: marinated Greek yogurt chicken thighs.

  • Garlic, 3 to 4 cloves, minced.
    Tip: Fresh garlic gives the best punch. If you need a gentler flavor for kids, use 1 to 2 cloves.

  • Lemon juice, from 1 to 2 lemons, about 1/4 to 1/3 cup.
    Tip: Fresh-squeezed is bright and floral. Save the zest and add a little for extra aroma.

  • Dried oregano, 2 teaspoons.
    Tip: Use Greek oregano if you can find it. If only fresh oregano is available, double the amount since fresh herbs are milder.

  • Olive oil, 1/3 cup.
    Tip: A good extra virgin olive oil rounds out the marinade. It also helps the chicken brown on the grill.

  • Red onion, 1 medium.
    Tip: Peel and cut into wedges. Red onion becomes sweet when grilled and looks beautiful on the skewers.

  • Bell peppers, mixed colors, 2 to 3 total.
    Tip: Use a mix of red, yellow, and green for a family-friendly, colorful plate. Cut into chunks similar in size to the chicken.

  • Zucchini, 1 medium.
    Tip: Slice into half-moons or rounds about 1/2 inch thick so they do not slip through the skewers.

  • Rice, 3 cups cooked for serving.
    Tip: Long-grain or basmati works well. I like to cook rice with a little extra salt and a squeeze of lemon to echo the kabob flavors.

  • Yogurt, 1 cup plain Greek yogurt.
    Tip: If your family likes tang, use full-fat yogurt for richness. For a lighter bowl, choose low-fat.

  • Tzatziki sauce, store-bought or homemade, about 1 cup.
    Tip: Make simple tzatziki with grated cucumber, garlic, dill, lemon, and yogurt. It cools the palate and keeps kids happy.

Directions

  1. In a bowl, combine garlic, lemon juice, oregano, and olive oil to make the marinade.
    Note: Whisk until the ingredients are well blended. Taste a small bit of the marinade to adjust lemon or salt. This first step fills the kitchen with a bright, citrus scent that tells you dinner is on track.

  2. Cut chicken into chunks and marinate for at least 30 minutes.
    Note: If you have time, marinate 2 to 4 hours for more flavor. Cover the bowl and refrigerate. The family will notice the deeper flavor the next time you make this.

  3. While chicken is marinating, chop the red onion, bell peppers, and zucchini into bite-size pieces.
    Note: Keep the pieces uniform so they cook evenly. Let the kids help with threading later. It becomes part of the dinner ritual.

  4. Thread the marinated chicken and vegetables onto skewers, alternating between them.
    Note: Leave a little space between pieces so heat circulates. If you use wooden skewers, soak them for 20 minutes before threading to prevent burning.

  5. Grill the skewers over medium-high heat for about 10-15 minutes, turning occasionally, until the chicken is cooked through and has nice grill marks.
    Note: Use a thermometer to check for 165°F in the thickest part of the chicken. Turn the skewers so they get even color and a slight char. The sound of sizzle and the smell of charred vegetables is part of the experience.

  6. Serve the kabobs over a bed of rice with a side of yogurt tzatziki.
    Note: Let the kabobs rest for a few minutes before serving. The juices redistribute and the chicken stays moist. For a complete family-style meal try pairing with a simple salad like this one I make often: healthy Greek salad with chicken.

Each step encourages easy involvement from family members. Kids can rinse vegetables, thread peppers, or mix tzatziki. Little helpers make the process feel like a shared project, and dinner becomes something everyone looks forward to.

Serving

Greek Chicken Kabobs

Serve these kabobs family-style on a large platter. Lay the skewers across a bed of steaming rice and sprinkle chopped parsley or a bit of lemon zest on top. Place a bowl of tzatziki in the center and set out extra lemon wedges.

A big platter brings everyone to the table. Let each person pick their skewer and add sides as they like. This keeps the meal relaxed, and the casual presentation means less cleanup and more time together.

If you want to change things up, remove the chicken from the skewers and serve as slices over a salad or in pita pockets for a sandwich bar that kids can customize.

Storage

Store leftover kabobs in an airtight container in the refrigerator for up to 3 days. If you have leftover rice, keep it in a separate container so it reheats more evenly.

To reheat:

  • Oven: Place kabobs on a baking sheet at 350°F for 10 to 12 minutes until warmed through.
  • Stovetop: Remove chicken and vegetables from skewers and warm in a nonstick skillet over medium heat for 4 to 6 minutes. Turn often so chicken does not dry out.
  • Microwave: Use a microwave-safe plate and heat in 30-second intervals, checking for even warmth.

Tzatziki stays best when kept cold. Keep it in its own container and add fresh cucumber or dill if it looks slightly watery after a day or two.

Kitchen Notes

  • Use metal skewers if you grill often. They last and give a more even heat than wooden skewers.
  • For quick prep, buy pre-cut bell peppers and pre-chopped onion at the store. They save time and keep you cooking on a busy night.
  • If you need to make this gluten-free, check sauces and seasonings for hidden gluten. The recipe itself is naturally gluten-free.
  • To clean the grill quickly, heat it up after cooking and brush with a grill brush. A little oil on a paper towel works well to remove remaining bits.
  • If you do not have fresh lemon, use 3 tablespoons bottled lemon juice and a teaspoon of lemon zest for brightness.

Variations

  • For picky eaters: Keep some plain grilled chicken pieces without vegetables and serve with simple sides like plain rice and steamed veggies.
  • For low-carb diners: Skip the rice and serve the kabobs over a big salad or cauliflower rice.
  • For extra spice: Add 1/2 teaspoon crushed red pepper flakes to the marinade or brush skewers with a spicy yogurt glaze before serving.
  • For a vegetarian option: Replace chicken with cubed halloumi or firm tofu. Marinate and grill the same way for a satisfying meatless version.
  • For meal prep: Double the recipe and store in separate containers for lunches. Serve cold over salad or reheat briefly when ready to eat.

FAQ

Q: Can I use chicken thighs instead of breasts?
A: Yes. Thighs stay juicier and are forgiving if you slightly overcook them. Cut into even chunks so everything cooks at the same rate.

Q: How long can I marinate the chicken?
A: At least 30 minutes for good flavor. Up to 4 hours is ideal. Avoid marinating much longer than 8 hours when using citrus, as it can start to break down the meat texture.

Q: Do I need to soak wooden skewers?
A: Yes. Soak them in water for at least 20 minutes before threading to prevent burning on the grill.

Q: Can I bake the kabobs instead of grilling?
A: Absolutely. Arrange skewers on a baking sheet and roast at 425°F for 12 to 18 minutes, turning once until the chicken reaches 165°F.

Q: How do I make tzatziki at home quickly?
A: Mix 1 cup plain Greek yogurt, 1/2 cup grated cucumber (squeeze dry), 1 minced garlic clove, 1 tablespoon lemon juice, 1 tablespoon chopped dill, and salt to taste. Chill for 30 minutes to let flavors meld.

Conclusion

I hope this recipe makes your weeknights feel lighter and your dinners taste brighter. These Greek Chicken Kabobs are a simple way to bring the family together, whether you are grilling on a warm evening or broiling indoors on a cool night. If you want to compare another popular take on Greek-style kabobs, I often read reliable recipes like this one from Damn Delicious Greek Chicken Kabobs for inspiration. For another tender and juicy version, I also like the approach shown by Two Peas & Their Pod’s Greek Chicken Kabobs.

Thank you for cooking with me. I hope your kitchen fills with those bright smells, that happy sizzle, and lots of shared smiles around the table.

Greek Chicken Kabobs

Prep Time 30 minutes
Cook Time 15 minutes
Total Time 45 minutes
Servings 4 servings
Calories 450
Bright and flavorful Greek Chicken Kabobs perfect for family dinners, featuring marinated chicken, colorful vegetables, and served with yogurt tzatziki.

Ingredients

For the Marinade

  • 1.5 to 2 pounds Chicken breast, boneless and skinless (Trim fat and cut into even, bite-size chunks.)
  • 3 to 4 cloves Garlic, minced (Fresh garlic gives the best punch.)
  • 1/4 to 1/3 cup Lemon juice, from 1 to 2 lemons (Fresh-squeezed is bright and floral, save the zest for extra aroma.)
  • 2 teaspoons Dried oregano (Use Greek oregano if possible, otherwise double the amount of fresh oregano.)
  • 1/3 cup Olive oil (A good extra virgin olive oil rounds out the marinade.)

For the Kabobs

  • 1 medium Red onion (Peel and cut into wedges.)
  • 2 to 3 total Bell peppers, mixed colors (Use a mix of red, yellow, and green.)
  • 1 medium Zucchini (Slice into half-moons or rounds about 1/2 inch thick.)

For Serving

  • 3 cups Rice, cooked (Long-grain or basmati works well.)
  • 1 cup Plain Greek yogurt (Full-fat for richness or low-fat for a lighter bowl.)
  • 1 cup Tzatziki sauce (Store-bought or homemade.)

Instructions 

Preparation

  • In a bowl, combine garlic, lemon juice, oregano, and olive oil to make the marinade. Whisk until well blended.
  • Cut chicken into chunks and marinate for at least 30 minutes, or up to 4 hours for more flavor.
  • Chop the red onion, bell peppers, and zucchini into bite-size pieces, keeping them uniform for even cooking.

Assembly and Cooking

  • Thread the marinated chicken and vegetables onto skewers, alternating between them, leaving space between pieces.
  • Grill the skewers over medium-high heat for about 10-15 minutes, turning occasionally, until the chicken is cooked through.
  • Serve the kabobs over a bed of rice with a side of yogurt tzatziki.

Notes

Serve family-style on a large platter, letting everyone pick their skewer. Leftovers can be stored in an airtight container for up to 3 days. Reheat kabobs in the oven, on the stovetop, or in the microwave.
Calories: 450kcal
Course: Dinner, Main Course
Cuisine: Greek, Mediterranean
Keyword: Family-Friendly Recipes, Greek Chicken Kabobs, Grilled Chicken, Healthy Dinner, Kabobs

Grilled Greek Chicken Kabobs

I can still smell it as I write this. The bright lemon and oregano hit first, then warm garlic and olive oil follow. The grill sizzles and the whole kitchen hums, a sound that tells me dinner is almost ready.

I started making these kabobs for my family when the kids were small. They loved threading the pieces on skewers and testing small bites while I flipped the grill. If you like simple dinners that fill the house with cozy smells, you will love this too. For another quick skewer idea, try my easy grilled Asian chicken skewers with honey garlic sauce.

Why this works

Grilled Greek Chicken Kabobs

These kabobs balance bold flavors with fast prep. Olive oil carries the herbs and garlic, red wine vinegar brightens the chicken, and oregano gives a classic Greek note. The marinade soaks into bite-sized cubes quickly, so you do not need to marinate for hours.

This recipe shines for families. You can prep the marinade and cut the veggies while the kids set the table. The skewers cook in about 15 minutes, which keeps evenings relaxed and dinner time pleasant. If you want a deeper marinade flavor or an alternate method, I often use my grilled chicken marinade for larger batches or for meal prep.

This dish saves time and stretches well. Make extra, and you have great leftovers for lunches and salads.

Process Overview

“This is where the magic happens—when the aroma fills the kitchen.”

Start by whisking a simple marinade. Cut the chicken into cubes so each piece cooks evenly. Thread chicken and veggies onto skewers so the grill gets even contact. Preheat the grill to medium-high so you get a quick sear and lock in juices.

I often adapt this to a sheet pan for easy cleanup or when weather keeps me from grilling. If you prefer that method, my Greek sheet pan chicken shows how to get the same flavors with oven roasting.

Safety tip: cook chicken to an internal temperature of 165°F. A quick digital thermometer makes this fast and foolproof.

Ingredients

  • 1 lb chicken breast, cut into cubes
  • 3 tablespoons olive oil
  • 2 tablespoons red wine vinegar
  • 2 teaspoons dried oregano
  • 4 cloves garlic, minced
  • Salt and pepper to taste
  • Pita bread, for serving
  • Optional: vegetables for skewering (bell peppers, onions, cherry tomatoes)

Lily’s personal tips for vegetables

  • Bell peppers: Choose red or orange for sweetness. Cut into 1 to 1 1/2 inch pieces so they cook at the same rate as the chicken. If peppers are thick, give them a little more time on the grill.
  • Onions: I like using red or sweet onions. Cut into wedges and separate the layers so the heat hits each slice. If you want milder onion flavor, soak the wedges in cold water for 10 minutes before threading.
  • Cherry tomatoes: Add these last when assembling if you want them to keep their shape. They burst with sweet juices and give a nice pop of color. If you prefer them softer, skewer them between chicken pieces.

Pairing idea: these kabobs go beautifully with lemon rice and a simple salad. For a full meal idea, I often serve them with my Greek chicken and lemon rice.

Directions

  1. In a bowl, whisk together olive oil, red wine vinegar, oregano, garlic, salt, and pepper to make the marinade.

    • Take a moment to taste the marinade. Adjust salt if you like a bolder flavor. Trust your palate.
  2. Add the chicken cubes to the marinade and toss to coat. Let it marinate for at least 30 minutes.

    • If your schedule allows, marinate for 2 hours in the refrigerator for deeper flavor. If short on time, 30 minutes still does a great job.
  3. If using vegetables, prepare them by cutting into similar sizes.

    • Keep the veggies bite-sized so everything cooks evenly. Encourage kids to help with safe tasks like threading the pieces.
  4. Thread the chicken and vegetables onto skewers.

    • Alternate chicken and vegetables for color and texture. Leave a little space between pieces so heat circulates.
  5. Preheat the grill to medium-high heat.

    • Clean and oil the grates to prevent sticking. A hot grill gives a nice char without drying the chicken.
  6. Grill the kabobs for about 10-15 minutes, rotating occasionally, until the chicken is cooked through.

    • Look for clear juices and an internal temperature of 165°F. Rotate every few minutes so each side gets a turn at the heat.
  7. Serve with grilled pita bread.

    • Warm pita on the grill for 1 to 2 minutes per side. A squeeze of lemon over the kabobs brightens the whole plate.

Each step is simple, and you can involve the whole family. Little helpers can brush the marinade or arrange pita bread for serving. Cooking together makes the meal taste even better.

Serving

Grilled Greek Chicken Kabobs

Serve these kabobs family-style on a large platter. Pile the grilled pita on one side, add a bowl of tzatziki or plain yogurt for dipping, and scatter lemon wedges around. Let everyone build their own pita wraps. This keeps the mood relaxed and encourages conversation around the table.

If you want a bowl-style meal, these kabobs are lovely over greens, rice, or a grain bowl. Try serving them with my Greek chicken bowls for a colorful, handheld option that kids can customize.

For a casual weeknight, place the platter in the center of the table. Invite everyone to reach in and assemble as they like. It is a small family ritual we look forward to.

Storage

Store leftover kabobs in an airtight container. They keep well in the refrigerator for 3 to 4 days. If you plan ahead, remove chicken from skewers before storing to save space and make reheating easier.

To reheat in the oven: place chicken on a baking sheet, cover loosely with foil, and warm at 325°F for 10 to 12 minutes. For a quicker option, reheat in a skillet over medium heat for 3 to 5 minutes, turning once. A short grill reheat gives back some of the fresh-grilled flavor.

Freezing: remove chicken from skewers and pack into freezer-safe containers for up to 3 months. Thaw overnight in the refrigerator before reheating.

Safety note: always reheat to 165°F. A reliable digital thermometer helps you reheat confidently.

Kitchen Notes

  • Skewer choice: If using wooden skewers, soak them in water for 30 minutes to prevent burning. Metal skewers are reusable and easy for kids to handle.
  • Even pieces: Cut chicken and vegetables to similar sizes to ensure even cooking.
  • Make ahead: Marinate the chicken the night before for a deeper flavor and faster assembly on busy nights.
  • Tzatziki shortcut: Use plain Greek yogurt, add minced cucumber, garlic, lemon juice, and a pinch of dill for a quick sauce.
  • Grill timing: If your grill runs hot, reduce cooking time and keep a close eye to avoid overcooking.

Variations

  • For picky eaters: Serve plain grilled chicken cubes alongside the marinated kebabs. Offer dipping sauces like honey mustard, ketchup, or yogurt so each person can choose.
  • Low-carb option: Skip the pita and serve kabobs on a bed of greens with olives and feta.
  • Gluten-free: Ensure your pita is certified gluten-free or serve over rice or roasted vegetables.
  • Dairy-free: Skip tzatziki and use a garlic-lemon vinaigrette for a fresh, dairy-free dip.
  • Kid-friendly tweak: Cut chicken into smaller cubes and grill on two skewers per child so they can easily hold and eat without assisting.

If you enjoy hearty one-pan meals, these flavors can move to rice or sheet pan dinners too. For another family-friendly recipe that uses many of the same ingredients, check out this idea for bowl-style servings and meal prep inspiration.

FAQ

Q: How long should I marinate the chicken?
A: At least 30 minutes for good flavor. If you can, marinate 2 hours or overnight for best results. Do not exceed 24 hours to avoid texture changes.

Q: Can I use chicken thighs instead of breast?
A: Yes. Thighs stay juicier and work well on skewers. Adjust cooking time slightly, checking the internal temperature to reach 165°F.

Q: Do I need to oil the grill?
A: Yes. Brush the grill grates with oil or use an oiled paper towel to prevent sticking and help achieve nice grill marks.

Q: Can I make this indoors on a stovetop?
A: Yes. Use a heavy skillet or grill pan over medium-high heat and cook in batches so the pan stays hot. You will get similar browning and flavor.

Q: How do I prevent vegetables from burning before the chicken is done?
A: Cut vegetables into sizes that match chicken. If a vegetable cooks faster, remove it early or place it toward cooler parts of the grill. Cherry tomatoes typically need less time, so skewer them last or add them during the final minutes.

Conclusion

I hope these Grilled Greek Chicken Kabobs bring your family together the way they do mine. They are quick, flavorful, and easy to adapt for kids and grown-ups alike. If you want another version of this classic, I often look to tried recipes like the one on Grilled Greek Chicken Kabobs – Cooking For My Soul for inspiration, and I also like the take on Greek Chicken Kabobs {Tender & Juicy} – Two Peas & Their Pod for tips on seasoning and presentation.

Thanks for cooking with me today. Pack up the leftovers, smile at the little messes, and know you made something nourishing for the people you love.

Grilled Greek Chicken Kabobs

Prep Time 30 minutes
Cook Time 15 minutes
Total Time 45 minutes
Servings 4 servings
Calories 350
Flavorful grilled chicken kabobs with lemon, oregano, and garlic, perfect for family dinners.

Ingredients

For the marinade

  • 3 tablespoons olive oil
  • 2 tablespoons red wine vinegar
  • 2 teaspoons dried oregano
  • 4 cloves garlic, minced
  • to taste Salt
  • to taste Pepper

For the skewers

  • 1 lb chicken breast, cut into cubes
  • Pita bread, for serving
  • Optional: bell peppers, onions, cherry tomatoes (Vegetables for skewering)

Instructions 

Preparation

  • In a bowl, whisk together olive oil, red wine vinegar, oregano, garlic, salt, and pepper to make the marinade.
  • Add the chicken cubes to the marinade and toss to coat. Let it marinate for at least 30 minutes; for deeper flavor, marinate for 2 hours in the refrigerator.
  • Prepare veggies by cutting them into similar bite-sized pieces.
  • Thread the chicken and veggies onto skewers, alternating for color and texture, leaving little space between pieces.

Cooking

  • Preheat the grill to medium-high heat. Clean and oil the grates.
  • Grill the kabobs for about 10-15 minutes, turning occasionally, until chicken is cooked through and reaches an internal temperature of 165°F.

Serving

  • Serve with grilled pita bread, tzatziki, or plain yogurt for dipping. Squeeze lemon over the kabobs for added flavor.

Notes

For leftovers, store in an airtight container in the refrigerator for 3-4 days. For reheating, warm them in the oven or skillet to 165°F.
Calories: 350kcal
Course: Dinner, Main Course
Cuisine: Greek
Keyword: Easy Skewers, Family Dinner, Grilled Chicken Kabobs, Grilling, Marinated Chicken

Pin by Marissa Rahlf on Yummy food | Kabob recipes, Chicken kabob recipes, Grilled chicken kabobs

The kitchen smells like lemon and garlic. I hear the clink of skewers and the gentle hiss of the grill warming up. There is a steady rhythm to this work that settles the whole house and gathers everyone to the table.

Tonight I want to share a favorite from Marissa Rahlf: grilled chicken kabobs that are tender, bright, and simple enough for a weeknight. These kabobs are a family-pleaser and a memory-maker. If you love fruity kabobs, you might also enjoy my take on pineapple chicken kabobs that are perfect for outdoor nights.

Why this works

Pin by Marissa Rahlf on Yummy food | Kabob recipes, Chicken kabob recipes, Grilled chicken kabobs

These kabobs come together quickly and stretch to serve a hungry family. The marinade does most of the work, so you can prep the night before and spend less time in the kitchen when it matters. I tested the timing to balance flavor development with a fast turnaround.

The method uses direct heat on the grill for a nice sear and a short cook time to keep the chicken juicy. If you like Asian flavors with a little honey, check out my method for quick stovetop grilling in the easy grilled Asian chicken skewers. Those same principles of timing and heat control apply here.

This recipe saves time because you can:

  • Marinate in the morning, grill in the evening.
  • Use pre-cut vegetables or frozen options when you are short on time.
  • Grill alongside other items for an easy, all-in-one meal.

Process Overview

“This is where the magic happens—when the aroma fills the kitchen.”

Start with a simple marinade and let the flavors develop. Thread the chicken and veggies on skewers, preheat the grill, and cook quickly over medium-high heat. The goal is a thin crust outside and tender meat inside.

For step-by-step inspiration and a few plating tricks I use for weeknight dinners, take a look at my family-tested recipes in the chicken and spinach collection. It shows how I keep dinners varied while using the same practical techniques.

Timing is the key. Prep efficiently and you will have dinner on the table with minimal stress and lots of flavor.

Ingredients

Here is what you will need. I add a personal tip for each item so your kabobs come out reliably good.

  • 2 pounds boneless, skinless chicken breast, cut into 1 1/2 inch cubes.
    Tip: Trim excess fat and pat the pieces dry before marinating. Dry chicken absorbs marinade better and browns nicely on the grill.

  • 1/3 cup olive oil.
    Tip: Use a mild olive oil to keep the flavors balanced. It helps carry the marinade over the chicken and prevents sticking.

  • 1/3 cup fresh lemon juice, about 2 lemons.
    Tip: Fresh lemon brightens the dish. Bottled lemon is fine in a pinch, but fresh is worth the small squeeze.

  • 1/4 cup low sodium soy sauce.
    Tip: Low sodium helps control salt, especially if you plan to brush the kabobs with a glaze that contains salt or honey.

  • 2 tablespoons honey.
    Tip: Honey adds caramelization. If you are cooking for toddlers or a child with a sensitive palate, reduce to 1 tablespoon for less sweetness.

  • 3 garlic cloves, minced.
    Tip: Mince fresh for the best aroma. Garlic powder is okay if you need a quick swap, but fresh is more aromatic.

  • 1 teaspoon ground cumin.
    Tip: Cumin gives a warm depth without being spicy. Toast it lightly in a dry pan before mixing for an extra layer of flavor.

  • 1 teaspoon smoked paprika.
    Tip: Smoked paprika gives a subtle grill-like flavor even when using a gas grill.

  • 1/2 teaspoon black pepper.
    Tip: Freshly ground black pepper has the best flavor. Add it last to the marinade.

  • 1 medium red onion, cut into wedges.
    Tip: Thick wedges hold together on the skewer and roast without falling apart.

  • 2 bell peppers, assorted colors, cut into 1 1/2 inch pieces.
    Tip: Mix colors for a cheerful plate. Bell peppers caramelize quickly and add natural sweetness.

  • Optional: 8-10 cherry tomatoes.
    Tip: Add these last to avoid bursting too soon. They add juiciness and color.

  • 12 wooden or metal skewers.
    Tip: If using wooden skewers, soak them in water for 30 minutes to minimize charring.

If you like bowls or Mediterranean style plates, you can pair this marinade with sides listed in my lemon chili grilled chicken bowl recipe for a bright finish.

Directions

Follow these numbered steps. I include little encouragements so you know you are on track.

  1. Mix the marinade.
    In a medium bowl whisk together olive oil, lemon juice, soy sauce, honey, minced garlic, cumin, smoked paprika, and black pepper. You will smell garlic and lemon first. That is a good sign.

  2. Add the chicken.
    Place the chicken cubes in a large resealable bag or glass bowl. Pour the marinade over the chicken and press out excess air. Seal and toss to coat evenly. Let sit at room temperature for 15 minutes if you are in a hurry, or refrigerate for 2 to 4 hours for deeper flavor. Longer than 6 hours can start to change the texture because of the lemon juice.

  3. Prep the grill and veggies.
    Preheat your grill to medium-high, about 400°F to 425°F. Thread the chicken, onion wedges, bell pepper pieces, and optionally cherry tomatoes onto skewers. Alternate protein and vegetables so each bite has balance. If using wooden skewers, make sure they have soaked for 30 minutes.

  4. Oil the grill grates.
    Oil the grates with a brush or a folded towel dipped in oil using tongs. This reduces sticking and helps achieve nice grill marks. You are doing great.

  5. Grill the kabobs.
    Place skewers on the grill. Cook for about 10 to 12 minutes total, turning every 3 to 4 minutes so each side gets a little char. Chicken should reach an internal temperature of 165°F in the thickest pieces. Use a probe thermometer for accuracy.

  6. Rest briefly.
    Remove the kabobs from the grill and let them rest on a plate for 3 to 5 minutes. Resting locks in juices and makes the chicken more tender.

  7. Finish and serve.
    If you like a glaze, brush a little extra honey or reserved marinade that you did not use on raw chicken. Serve immediately and enjoy the smiles around the table. If you reserved marinade to use as a sauce, heat it to a boil before serving to make it safe.

If you enjoy plating meals family-style and want more ways to serve grilled items, my paleo cobb salad recipe shows how grilled chicken pairs with salads and grain-free sides for simple weeknight dinners.

Serving

Pin by Marissa Rahlf on Yummy food | Kabob recipes, Chicken kabob recipes, Grilled chicken kabobs

Serve these kabobs family-style right from the grill. Lay a long platter down the middle of the table and let everyone grab their favorites. Add bowls of warm pita, steamed rice, or a crisp green salad and you have a full meal.

I like to place sliced lemons and a simple garlic yogurt sauce on the side. The sauce is just plain yogurt, a squeeze of lemon, pinch of salt, and a little grated cucumber if you have it. It cools the palate and pairs well with the smoky notes.

If you want to create a make-your-own bowl station, place the kabobs on a cutting board, slice the chicken off the skewers, and let each person build a bowl with rice, greens, and sauce. That makes dinner interactive and fast.

Storage

Cooked kabobs keep well in the fridge for up to 4 days. Place the chicken and vegetables in an airtight container with a paper towel to absorb extra moisture.

To reheat:

  • Oven: Preheat to 350°F. Place kabobs on a baking sheet and cover loosely with foil. Heat 10 to 12 minutes until warm.
  • Stovetop: Remove chicken from skewers. Heat a skillet over medium with a teaspoon of oil, then sauté pieces for 3 to 4 minutes until warmed through.
  • Do not microwave unless you must. Microwaving can make the chicken rubbery. If using a microwave, cover and heat in 30 second intervals, turning between each.

For longer storage, freeze in single-serving portions up to 3 months. Thaw in the fridge overnight before reheating. If you plan to freeze, skip the yogurt sauce and add it fresh when serving.

Kitchen Notes

Here are five quick shortcuts I use to save time without losing flavor.

  • Use pre-cut chicken or ask your butcher to cut breast into even cubes to speed prep.
  • Substitute bottled lemon juice in a pinch, but add extra zest for brightness.
  • Thread larger pieces so they cook evenly and do not slip off the skewers.
  • Use metal skewers when grilling a lot; they last and transfer heat for even cooking.
  • Clean the grill grates with a wire brush while it preheats to ensure good sear marks.

These small changes keep dinner fast and family friendly.

Variations

Tweak the recipe to suit picky eaters or different diets.

  • For picky kids: Use just chicken and bell peppers. Leave out strong spices and serve with a favorite dipping sauce.
  • For low sodium: Use reduced sodium soy sauce and skip added salt. Add lemon zest to boost flavor.
  • For keto or paleo: Skip the honey or replace with a sugar-free syrup; serve with cauliflower rice and salad.
  • For vegetarian options: Swap chicken for large tofu cubes or halloumi cheese. Press tofu and marinate longer.
  • For spicy lovers: Add 1/2 teaspoon cayenne or a chopped jalapeño to the marinade.

These changes are easy and keep the core technique the same.

FAQ

Q: Can I make these kabobs in the oven or under the broiler?

A: Yes. Preheat the oven to 425°F and place skewers on a lightly oiled baking sheet. Roast 12 to 15 minutes, turning once. For broiler, set an oven rack 6 inches from the heat and broil 6 to 8 minutes per side, watching closely to avoid burning.

Q: How long should I marinate the chicken?

A: For quick flavor, 15 to 30 minutes at room temperature helps. For best results, marinate 2 to 4 hours in the fridge. Avoid marinating more than 8 hours because the acidity from lemon can change texture.

Q: Can I use chicken thighs instead of breasts?

A: Absolutely. Thighs are more forgiving and stay juicy. Cut into similar sized pieces as breasts and aim for the same internal temperature of 165°F.

Q: Are metal skewers better than wooden ones?

A: Metal skewers transfer heat and can help the center cook faster. Wooden skewers are fine when soaked for 30 minutes. Use what you have and adjust cook times slightly if needed.

Q: How do I know the chicken is done without a thermometer?

A: Cut a thicker piece to check the center. It should be white with clear juices. If juices run pink, cook a bit longer. A thermometer is the most reliable way to ensure 165°F.

Conclusion

I hope these kabobs become a go-to in your weeknight rotation. They are simple, flavorful, and bring everyone to the table. For a bit of local history about grilling traditions and community food culture I found an interesting mention in the County Journal June article, and if you want a printable reference to take to the grill, the grilling feature PDF is a handy resource.

Thank you for cooking with me. Come back soon for another family-friendly recipe and more tips from my kitchen.

Grilled Chicken Kabobs

Prep Time 30 minutes
Cook Time 12 minutes
Total Time 42 minutes
Servings 6 servings
Calories 320
Tender, bright grilled chicken kabobs marinated with lemon and garlic, perfect for a family weeknight dinner.

Ingredients

Chicken and Marinade Ingredients

  • 2 pounds boneless, skinless chicken breast, cut into 1 1/2 inch cubes (Trim excess fat and pat the pieces dry before marinating.)
  • 1/3 cup olive oil (Use a mild olive oil to keep the flavors balanced.)
  • 1/3 cup fresh lemon juice, about 2 lemons (Fresh lemon brightens the dish.)
  • 1/4 cup low sodium soy sauce (Controls salt, especially if glazing with salt or honey.)
  • 2 tablespoons honey (Adds caramelization; reduce to 1 tablespoon for less sweetness.)
  • 3 cloves garlic, minced (Mince fresh for the best aroma.)
  • 1 teaspoon ground cumin (Toasted lightly for extra flavor.)
  • 1 teaspoon smoked paprika (Gives a subtle grill-like flavor.)
  • 1/2 teaspoon black pepper (Freshly ground for best flavor.)

Vegetable Ingredients

  • 1 medium red onion, cut into wedges (Thick wedges hold together on the skewer.)
  • 2 bell peppers assorted colors, cut into 1 1/2 inch pieces (Mix colors for a cheerful plate.)
  • Optional 8-10 cherry tomatoes (Add these last to avoid bursting too soon.)
  • 12 wooden or metal skewers (Soak wooden skewers in water for 30 minutes to minimize charring.)

Instructions 

Preparation

  • Mix the marinade by whisking together olive oil, lemon juice, soy sauce, honey, minced garlic, cumin, smoked paprika, and black pepper.
  • Place chicken cubes in a resealable bag or glass bowl, pour the marinade over and toss to coat. Let sit for 15 minutes at room temperature or refrigerate for 2 to 4 hours.
  • Preheat the grill to medium-high, about 400°F to 425°F. Thread chicken, onion wedges, bell peppers, and optional cherry tomatoes onto skewers.
  • Oil the grill grates with a brush or towel dipped in oil to reduce sticking.

Cooking

  • Place skewers on the grill and cook for 10 to 12 minutes, turning every 3 to 4 minutes until chicken reaches an internal temperature of 165°F.
  • Remove kabobs from grill and let rest for 3 to 5 minutes before serving.

Serving

  • Serve kabobs family-style with warm pita, steamed rice, or salad. Consider adding a garlic yogurt sauce on the side.

Notes

Cooked kabobs keep in the fridge for up to 4 days. Reheat in the oven or stovetop, but avoid microwaving if possible. Freeze in portions for up to 3 months.
Calories: 320kcal
Course: Dinner, Main Course
Cuisine: American, Mediterranean
Keyword: Family Dinner, Grilled Chicken Kabobs, Grilling, Kabob Recipe, Marinated Chicken

Blackstone Greek Chicken and Peppers

I can smell garlic and lemon, and I hear the steady sizzle of the Blackstone griddle warming up. That sound means dinner is near, and the whole house leans toward the kitchen. Tonight we make a family favorite that is quick, bright, and forgiving: Blackstone Greek Chicken and Peppers.

This recipe is one of those weeknight winners. It fills the air with citrus and oregano, cooks fast, and gives you a simple platter that everyone can dig into. If you love easy family dinners, you might also enjoy pairing this with my Greek Chicken and Lemon Rice for a full, comforting meal. Greek Chicken and Lemon Rice

Why this works

Blackstone Greek Chicken and Peppers

This dish works for busy families because it blends simple ingredients into a finish that feels special. The Blackstone griddle gives you direct heat and room to cook vegetables and protein together. That saves time and cuts down on dishes.

The lemon and oregano brighten the chicken, so even picky eaters notice familiar flavors. If you need a comfort twist, serve with warm sides like BBQ Chicken Mac and Cheese for a kid-friendly pairing. Cooking this on the griddle keeps things hands-on and social, so kids can watch or help with pepper tossing.

Process Overview

“This is where the magic happens—when the aroma fills the kitchen.”

At the center is a short marinade and a hot griddle. The method is straightforward. Marinate the chicken for at least 30 minutes, heat the Blackstone to medium-high, and let the griddle work. You will char the peppers a bit while sealing in juices on the chicken.

I recommend testing one piece of chicken for doneness and keeping a thermometer handy. The whole meal comes together in about 30 to 40 minutes if you let the chicken rest after cooking. For a lighter side idea, try a citrus salad or roasted potatoes to soak up the juices. You can also nod toward bright Caribbean flavors with this simple swap: Caribbean Chicken and Rice

Ingredients

  • 4 boneless, skinless chicken breasts
    • Lily’s tip: Pound slightly even if they vary in thickness. Even pieces cook faster and stay juicier.
  • 2 bell peppers, any color, sliced
    • Lily’s tip: Use mixed colors for a bright plate. Thicker slices will char without getting mushy.
  • 1 onion, sliced
    • Lily’s tip: Sweet or yellow onions work best. Slice into 1/4 inch strips so they soften at the same time as the peppers.
  • 3 tablespoons olive oil
    • Lily’s tip: Use extra virgin for flavor. Reserve a tablespoon to finish the peppers if the griddle looks dry.
  • 2 tablespoons lemon juice
    • Lily’s tip: Fresh lemon makes a noticeable difference. If you must, bottled works in a pinch.
  • 2 teaspoons dried oregano
    • Lily’s tip: Crush in your hand before adding to the marinade for a more fragrant finish.
  • Salt and pepper to taste
    • Lily’s tip: Season generously. Chicken benefits from a good amount of salt to bring out flavor.
  • Feta cheese for topping (optional)
    • Lily’s tip: Crumble on at the end. It adds tang without overpowering the peppers.
  • Fresh parsley for garnish (optional)
    • Lily’s tip: Chop finely and add right before serving for a bright herb note.

If you like to plan ahead, the chicken can marinate longer for deeper flavor. For meal prep, pair leftovers with a balanced grain and vegetable bowl inspired by my Chicken and Sweet Potato Meal Prep approach.

Directions

  1. Preheat the Blackstone griddle to medium-high heat.

    • Encouraging note: Give it a few minutes so the surface is evenly hot. A well-heated griddle makes searing simple and reliable.
  2. In a bowl, mix olive oil, lemon juice, oregano, salt, and pepper.

    • Encouraging note: Taste a tiny bit of the marinade. The lemon and oregano should be present but balanced. Adjust to your family’s preference.
  3. Add chicken breasts to the bowl and marinate for at least 30 minutes.

    • Encouraging note: Marinating gives you time to chop peppers and onions and set the table. If you are short on time, even 15 minutes will add flavor.
  4. Once marinated, place chicken on the griddle and cook for about 5-7 minutes per side, or until cooked through.

    • Encouraging note: Use a meat thermometer. Chicken is done at 165° F. Let the sear happen without moving the chicken too often.
  5. Add sliced bell peppers and onions to the griddle alongside the chicken, cooking until they are tender and slightly charred.

    • Encouraging note: Toss the veggies occasionally so they char evenly. If the griddle looks dry, add the reserved tablespoon of olive oil.
  6. Serve the chicken topped with the cooked peppers, onions, feta cheese, and parsley.

    • Encouraging note: Let the chicken rest a few minutes so juices redistribute. Then slice and pile the peppers over the top for a family-style presentation.

If you prefer tacos, shred the cooked chicken and try the idea behind this recipe in a taco format inspired by Chicken Salad Sandwich style toppings for a fresh twist.

Serving

Blackstone Greek Chicken and Peppers

Serve family-style on a large platter. Slice the chicken and nestle the peppers and onions around it. Sprinkle feta and chopped parsley while everyone gathers. Provide warm pita, rice, or crusty bread to let people build their own plates. Kids love choosing colors and cheeses, and adults often add a squeeze of lemon for brightness.

If you have extra hands, set out bowls of extra toppings: sliced olives, cucumber, or a simple tzatziki. For a heartier family meal, add a side of roasted potatoes or warm couscous.

For a more informal night, place everything on the table and let everyone make plates. This meal encourages conversation and shared plates, which is how many of my best family memories form.

Storage

Store leftovers in an airtight container in the refrigerator for up to 4 days. Keep the chicken and vegetables together so flavors continue to meld. If you separated components, store chicken and peppers in separate containers for a fresher crunch later.

To reheat, use a skillet or the griddle over medium heat. Add a splash of olive oil and warm gently until heated through, about 4 to 6 minutes. For a faster microwave option, heat in 30 second intervals and rotate the container to prevent drying. If you plan to meal prep, this reheats nicely over rice or stuffed into a pita for lunches.

If you want a fresh-sounding lunch idea from leftovers, make a quick sandwich using inspiration from other simple chicken sandwiches and pair it with a crisp side.

Kitchen Notes

  • Use a thermometer to check for 165° F for safe, juicy cooking.
  • Slice peppers and onions consistently to get even cooking.
  • If your griddle sticks, wipe with a paper towel after it heats and add oil.
  • Make marinades in a shallow dish so the chicken contacts the flavor evenly.
  • Double the peppers on busy nights so you have leftovers for lunches.

Variations

  • For picky eaters: Keep one chicken breast plain or season only with salt and pepper. Let kids assemble their own plates.
  • Low carb: Serve over a bed of mixed greens instead of bread or rice.
  • Dairy-free: Skip feta and use olives and lemon for a tangy finish.
  • Spicy: Add 1/2 teaspoon red pepper flakes to the marinade or a spoonful of harissa to the peppers.
  • Mediterranean wrap: Slice the chicken thin and wrap in warmed flatbread with sliced tomatoes and a drizzle of yogurt.

These tweaks let you adapt the recipe to family preferences or dietary needs while keeping the core method intact.

FAQ

Q: Can I use chicken thighs instead of breasts?
A: Yes. Boneless, skinless thighs will stay moist and may take a minute or two longer. Check internal temperature to ensure doneness.

Q: How long can I marinate the chicken?
A: You can marinate for 30 minutes up to 8 hours in the refrigerator. Beyond that, the lemon can start to change texture. I usually aim for 1 to 2 hours when planning ahead.

Q: What if I do not have a Blackstone griddle?
A: You can use a large cast iron skillet or outdoor grill. The method is the same: high heat, direct contact, and short cook times. Sear the chicken and then finish with the peppers alongside.

Q: Can I make this ahead and reheat?
A: Yes. Store in the fridge up to 4 days. Reheat gently on a skillet or griddle with a splash of oil. Avoid microwave drying by covering and heating in short bursts.

Q: How do I prevent the peppers from getting soggy?
A: Keep the griddle hot and don’t overcrowd the pan. Cook peppers in a single layer and let them sit long enough to char before stirring.

Conclusion

I hope this Blackstone Greek Chicken and Peppers recipe brings a sunny, simple dinner to your family table. If you want another take on the same flavors, check out the original recipe inspiration found at If You Give a Girl a Grill’s Blackstone Greek Chicken and Peppers. For a fun handheld version, you might like the taco adaptation from Cooks Well With Others’ Blackstone Greek Chicken Tacos.

Thanks for cooking with me. When dinner is shared, the little daily moments become memories. Keep the griddle hot and the conversations warm.

Blackstone Greek Chicken and Peppers

Prep Time 30 minutes
Cook Time 10 minutes
Total Time 40 minutes
Servings 4 servings
Calories 450
A family favorite that is quick, bright, and forgiving, featuring marinated chicken cooked alongside colorful peppers and onions on a Blackstone griddle.

Ingredients

Main ingredients

  • 4 pieces boneless, skinless chicken breasts (Pound slightly even if they vary in thickness.)
  • 2 pieces bell peppers, any color, sliced (Use mixed colors for a bright plate.)
  • 1 piece onion, sliced (Sweet or yellow onions work best.)
  • 3 tablespoons olive oil (Use extra virgin for flavor.)
  • 2 tablespoons lemon juice (Fresh lemon makes a noticeable difference.)
  • 2 teaspoons dried oregano (Crush in your hand for a more fragrant finish.)
  • to taste Salt and pepper (Season generously.)
  • Feta cheese for topping (optional) (Crumble on at the end.)
  • Fresh parsley for garnish (optional) (Chop finely and add right before serving.)

Instructions 

Preparation

  • Preheat the Blackstone griddle to medium-high heat.
  • In a bowl, mix olive oil, lemon juice, oregano, salt, and pepper.
  • Add chicken breasts to the bowl and marinate for at least 30 minutes.

Cooking

  • Once marinated, place chicken on the griddle and cook for about 5-7 minutes per side, or until cooked through.
  • Add sliced bell peppers and onions to the griddle alongside the chicken, cooking until they are tender and slightly charred.

Serving

  • Serve the chicken topped with the cooked peppers, onions, feta cheese, and parsley.

Notes

Store leftovers in an airtight container in the refrigerator for up to 4 days. Reheat gently on a skillet or griddle with a splash of olive oil.
Calories: 450kcal
Course: Dinner, Main Course
Cuisine: Greek, Mediterranean
Keyword: Blackstone Griddle, Easy Dinner, Family Meal, Greek Chicken, quick recipe

Yogurt Marinated Chicken Kebabs

The smell of spices wafting through the house is like a warm embrace. You hear the sizzle of chicken hitting the grill, and your anticipation builds as you gather around the kitchen. It’s a moment where family memories are made. The laughter, the chatter, and the excitement of sharing a meal together are all wrapped up in these yogurt marinated chicken kebabs.

Why This Works

Yogurt Marinated Chicken Kebabs

Yogurt marinated chicken kebabs are not only delicious, but they also save you time in the kitchen. Marinating chicken in yogurt helps to tenderize the meat while infusing it with flavor. This simple technique allows you to prepare the marinade ahead of time. You can even let it sit overnight, which means that on a busy evening, dinner is mostly ready when you are.

This recipe is perfect for family gatherings or a cozy weeknight dinner. It’s easy to double or even triple for larger groups. Plus, with the kids helping out, skewering the chicken can be a fun activity that gets everyone involved.

Process Overview

“This is where the magic happens—when the aroma fills the kitchen.”

As you step into the kitchen, the excitement of creating something special fills the air. From the mixing of the marinade to grilling the kebabs, each step carries its own charm. Enjoy the moments as you prepare your meal, knowing that the result will be a dish everyone loves.

Ingredients

To create these delightful kebabs, gather the following ingredients:

  • 1 lb chicken breast, cut into cubes
  • 1 cup plain yogurt
    • Tip: Use full-fat yogurt for a creamier texture and richer flavor.
  • 2 tablespoons olive oil
    • Tip: Opt for extra virgin olive oil for a more robust taste.
  • 2 tablespoons lemon juice
    • Tip: Freshly squeezed lemon juice brightens the flavors beautifully.
  • 3 cloves garlic, minced
    • Tip: Fresh garlic adds a punch; feel free to adjust to your family’s taste.
  • 1 teaspoon ground cumin
    • Tip: Cumin adds warmth; consider toasting the seeds if you want a stronger flavor.
  • 1 teaspoon ground coriander
    • Tip: This herb complements cumin well; adjust depending on preference.
  • 1 teaspoon paprika
    • Tip: Use smoked paprika for an extra layer of flavor.
  • Salt and pepper to taste
    • Tip: Season generously to elevate all the flavors.
  • Skewers (if using wooden, soak in water for 30 minutes)
    • Tip: Soaking prevents burning and helps retain moisture.

Directions

Step-by-Step Instructions

  1. In a bowl, combine yogurt, olive oil, lemon juice, garlic, cumin, coriander, paprika, salt, and pepper to make the marinade.

    • Encouragement: This is your base—a mixture of creamy and zesty flavors that will transform your chicken.
  2. Add the chicken cubes to the marinade and mix until well coated.

    • Encouragement: Make sure every piece of chicken is enveloped in that delicious mixture.
  3. Cover and refrigerate for at least 1 hour, preferably overnight.

    • Encouragement: Giving it time to marinate will result in the juiciest chicken possible.
  4. Preheat the grill or oven to medium-high heat.

    • Encouragement: The right temperature is key for those tasty grill marks and a perfect cook.
  5. Thread the marinated chicken onto skewers.

    • Encouragement: Get creative here! You can alternate with vegetables if your family enjoys them.
  6. Grill the kebabs for about 10-15 minutes, turning occasionally, until fully cooked and slightly charred.

    • Encouragement: Listen for that satisfying sizzle, a sign that something great is happening.
  7. Serve hot with pita bread or a side salad.

    • Encouragement: Think about fresh ingredients that your family loves!

Serving

Yogurt Marinated Chicken Kebabs

Presenting your yogurt marinated chicken kebabs is a delightful experience. Serve them family-style on a large platter, surrounded by fresh pita, crisp veggies, and tangy sauces like tzatziki or hummus. This way, everyone can build their own plates, allowing for personalization and creativity.

It’s always wonderful when everyone gathers around the table, sharing stories and enjoying the feast together.

Storage

Leftover skewers can be refrigerated in an airtight container for up to three days. When you’re ready to enjoy them again, reheat in the oven at 350°F until warmed through. You can also pop them in the microwave for a quicker option, though this may make the chicken slightly less crispy.

Kitchen Notes

Here are a few shortcuts and tips to help streamline your experience:

  • Marinate Ahead: Make the marinade the night before and let the chicken soak overnight for maximum flavor.
  • Use the Freezer: Marinate the chicken, then freeze it. When you’re ready to cook, just thaw and grill.
  • Prep Vegetables: Chop any additional veggies ahead of time for quick assembly.
  • Batch Cooking: Make extra kebabs and freeze them for an easy weeknight meal.
  • Stay Organized: Clean as you go to keep your workspace tidy.

Variations

Not everyone in your family may share the same tastes. Here are some tweaks for more picky eaters or different diets:

  • Veggie Option: Substitute chicken with firm tofu or an assortment of sturdy vegetables like bell peppers and zucchini.
  • Spice Level: Adjust the spices for milder or bolder flavors. Consider using lemon zest for a brighter flavor instead of more acidity.
  • Herb-Infused: Add fresh herbs like cilantro or parsley to the marinade for a fresh kick.
  • Make It Sweet: Add a teaspoon of honey or maple syrup to the marinade for a slightly sweet twist.
  • Skewers: Try alternating the chicken with fruits like pineapple for a tropical flair.

FAQ

  1. Can I use chicken thighs instead of breasts?
    Absolutely! Chicken thighs are richer in flavor and will give you juicier kebabs.

  2. How long should I marinate the chicken?
    For the best results, marinate for at least an hour or overnight.

  3. Can I bake these kebabs instead of grilling?
    Yes! Bake them in a preheated oven at 400°F for about 20-25 minutes.

  4. Do I have to use yogurt?
    While yogurt adds a unique tang and tenderness, you can substitute it with sour cream if needed.

  5. What if I don’t have skewers?
    You can grill the chicken in a grill basket or on a sheet pan in the oven.

As you prepare these yogurt marinated chicken kebabs, remember that cooking is about bringing people together. Enjoy the love, laughter, and delicious food shared around your table. With each bite, you’re not just savoring a meal but creating memories that your family will cherish.

Here’s to many joyful evenings around the dinner table with these delectable kebabs. Happy cooking!

Yogurt Marinated Chicken Kebabs

Prep Time 1 hour
Cook Time 15 minutes
Total Time 1 hour 15 minutes
Servings 4 servings
Calories 250
Delicious yogurt marinated chicken kebabs that are tender, flavorful, and perfect for family gatherings or cozy dinners.

Ingredients

For the Marinade

  • 1 lb chicken breast, cut into cubes
  • 1 cup plain yogurt (Use full-fat yogurt for a creamier texture and richer flavor.)
  • 2 tablespoons olive oil (Opt for extra virgin olive oil for a more robust taste.)
  • 2 tablespoons lemon juice (Freshly squeezed lemon juice brightens the flavors beautifully.)
  • 3 cloves garlic, minced (Fresh garlic adds a punch; feel free to adjust to your family's taste.)
  • 1 teaspoon ground cumin (Cumin adds warmth; consider toasting the seeds if you want a stronger flavor.)
  • 1 teaspoon ground coriander (This herb complements cumin well; adjust depending on preference.)
  • 1 teaspoon paprika (Use smoked paprika for an extra layer of flavor.)

For Cooking

  • Skewers (if using wooden, soak in water for 30 minutes) (Soaking prevents burning and helps retain moisture.)

Instructions 

Preparation

  • In a bowl, combine yogurt, olive oil, lemon juice, garlic, cumin, coriander, paprika, salt, and pepper to make the marinade.
  • Add the chicken cubes to the marinade and mix until well coated.
  • Cover and refrigerate for at least 1 hour, preferably overnight.

Cooking

  • Preheat the grill or oven to medium-high heat.
  • Thread the marinated chicken onto skewers.
  • Grill the kebabs for about 10-15 minutes, turning occasionally, until fully cooked and slightly charred.

Serving

  • Serve hot with pita bread or a side salad.

Notes

Leftover skewers can be refrigerated in an airtight container for up to three days. When ready to enjoy, reheat in the oven at 350°F until warmed through. You can also microwave for a quicker option, though this may make the chicken slightly less crispy.
Calories: 250kcal
Course: Dinner, Main Course
Cuisine: Mediterranean
Keyword: Chicken Kebabs, Easy Dinner, Family Meal, Grilled Chicken, Yogurt Marinade

Chicken Al Pastor

I can still smell it now. The sweet tang of pineapple mingling with warm spices, the sizzle as the chicken hits the hot grill. The kitchen fills with that cozy, familiar sound that tells everyone dinner is almost ready.

This Chicken Al Pastor recipe is about more than flavor. It is about easy prep and joyful family meals. If you like bright, bold tacos that assemble quickly, you will love this. I often serve it alongside a quick salad like my avocado chicken salad when I want a green side. It keeps dinner simple and happy.

Why this works

Chicken Al Pastor

Chicken Al Pastor hits the sweet spot between fast and flavorful. The pineapple juice tenderizes the meat while adding brightness. A little apple cider vinegar balances the sweetness and helps the spices sink in.

This recipe saves time without losing depth of flavor. Marinate once, cook quickly, and serve family-style. If you need other easy weeknight chicken ideas, try my balsamic baked chicken breast for a different but equally simple dinner.

It is also very forgiving. You can marinate a short time or overnight and still get great results. That flexibility makes it perfect for busy evenings and small celebrations.

Process Overview

“This is where the magic happens—when the aroma fills the kitchen.”

The process is straightforward. Mix a bright, spiced marinade, let the chicken soak up the flavor, then grill. Finish with quick grilled pineapple and assemble warm tacos.

If you like step-by-step pictures or similar marinades, I have a post that walks through a few helpful techniques with simple swaps in case you are short on ingredients. See my avocado chicken egg salad post for ideas on cutting time without losing taste.

This method is kid-friendly and adaptable. You can pull apart the cooked chicken for tacos, bowls, or salads. It pairs well with plain rice or charred corn for picky eaters.

Ingredients

  • 2 lbs chicken thighs
  • 1 cup pineapple juice
  • 1/4 cup apple cider vinegar
  • 2 tablespoons olive oil
  • 2 tablespoons adobo sauce
  • 1 tablespoon chili powder
  • 1 tablespoon cumin
  • 1 teaspoon smoked paprika
  • Salt and pepper to taste
  • 1 cup fresh pineapple, chopped
  • Corn tortillas for serving
  • Toppings: onion, cilantro, lime

Lily’s personal tips for toppings:

  • Onion: Finely dice a small white onion and soak for 5 minutes in cold water if raw onion is too strong for your kids. This softens the bite while keeping crunch.
  • Cilantro: Chop it just before serving to keep the color and fresh flavor. If your family does not love cilantro, try chopped parsley for a mild alternative.
  • Lime: Cut wedges and let everyone squeeze to taste. A little lime brightens every bite and invites the whole family to customize.

If you want a lower sodium option, reduce added salt and use low-sodium adobo or rinse canned sauces. For a glaze-like finish, reserve a tablespoon of marinade, boil it briefly, and brush it on the chicken in the last minute of grilling.

For more ways to use leftover shredded chicken in salads and wraps, check my avocado chicken salad lettuce wraps post.

Directions

  1. In a bowl, mix pineapple juice, apple cider vinegar, olive oil, adobo sauce, chili powder, cumin, smoked paprika, salt, and pepper.

    • Take a moment to whisk everything well. This is your flavor base, and a good mix means even seasoning. If you have little helpers, let them add the spices while you stir.
  2. Marinate the chicken in the mixture for at least 30 minutes, preferably overnight.

    • Overnight gives the best flavor and tenderness. If you only have 30 minutes, that still works. Place the bowl in the fridge, or use a resealable bag to save space.
  3. Preheat the grill and cook the chicken until fully cooked, about 6-7 minutes per side.

    • Aim for medium-high heat so the outside chars slightly while the inside stays juicy. Use a meat thermometer if you like; the safe internal temperature is 165°F. Trust your grill, but check early the first time you try this recipe.
  4. Remove chicken from grill and let it rest before slicing.

    • Rest for 5 minutes to keep juices locked inside. Resting makes the slices tender and easier for little hands to pick up.
  5. Grill the fresh pineapple chunks until caramelized.

    • Use the same grill for quick char and juice. Pineapple takes 1 to 2 minutes per side on hot grates. The caramel adds a lovely sweet note that kids and grownups both enjoy.
  6. Serve the sliced chicken in corn tortillas with grilled pineapple and desired toppings.

    • Warm the tortillas on the grill or in a dry skillet for a minute per side. Lay everything out family-style and let everyone build their own tacos. This is a fun way to get kids engaged in dinner.

If you like pulled or chopped chicken, slice and toss with a few spoonfuls of leftover marinade that you boiled for safety. That keeps extra flavor while you assemble tacos.

Serving

Chicken Al Pastor

Serve Chicken Al Pastor family-style on a big platter. Arrange the sliced chicken, grilled pineapple, warm corn tortillas, and bowls of toppings. Let everyone build their own tacos. This keeps the meal casual and lets each person pick what they like.

For sides, a simple cabbage slaw or warm beans works well. If you want a green salad, my Asian chicken cranberry salad pairs beautifully and adds crunch.

Set out small plates, napkins, and lime wedges. The kids will love stacking pineapple with chicken, and adults will enjoy the bright acidity of the lime. Keep extra salsa and hot sauce on the table for people who like more heat.

Storage

Refrigerator: Store cooled chicken in an airtight container for up to 4 days. Keep the grilled pineapple in a separate container to avoid soggy chicken. Tortillas will stay good in a sealed bag for a few days.

Freezer: You can freeze cooked, sliced chicken for up to 3 months. Place it in a freezer-safe bag, squeeze out excess air, and label it with the date.

Reheating: Reheat gently to keep the chicken moist. Use a skillet over medium heat with a splash of oil or a few tablespoons of water and a lid to steam. You can also reheat in a 350°F oven for 10 to 12 minutes. Avoid high heat microwaving for long stretches because it can dry the chicken.

If you stored the pineapple, warm it briefly in a skillet before serving to bring back some of the caramelized flavor.

Kitchen Notes

  • Make extra marinade for bowls and leftovers by saving a small portion and boiling it for a minute before use.
  • For faster prep, butterfly and flatten the thighs so they cook evenly in less time.
  • Use boneless, skinless chicken thighs for the most tender results and quick grilling.
  • If you do not have a grill, a hot cast iron skillet gives a great sear. Finish in the oven if needed.
  • To keep tortillas soft, wrap them in a clean kitchen towel after warming and place in a low oven until ready to serve.

Variations

  • For picky eaters: Serve the unseasoned chicken on the side for those who prefer plain meat. Offer pineapple and toppings separately.
  • For a lighter option: Use boneless, skinless chicken breasts and reduce marinating time. Watch closely to avoid dryness.
  • For a keto-friendly plate: Skip the tortillas and serve chicken and pineapple over a bed of greens with avocado.
  • For smoky flavor: Add a touch of chipotle powder or use smoked paprika on the pineapple for more depth.
  • For an oven-friendly method: Roast marinated chicken on a sheet pan at 425°F for 18 to 20 minutes, turning once, until the internal temperature reaches 165°F.

FAQ

Q: Can I use chicken breasts instead of thighs?
A: Yes. Chicken breasts work fine. They cook faster, so watch them closely and check internal temperature to avoid drying.

Q: How long can I marinate the chicken?
A: You can marinate for 30 minutes to 24 hours. Longer gives more flavor, but over 24 hours can break down the meat too much.

Q: Is adobo sauce spicy?
A: Adobo sauce has a rich, smoky flavor and moderate heat. Start with less if you are sensitive to spice and add more after tasting.

Q: Can I make this inside on a stovetop?
A: Absolutely. Use a hot cast iron skillet and follow the same cooking times roughly. Finish in a 375°F oven if needed to reach 165°F.

Q: How do I make this kid-friendly?
A: Serve toppings on the side and offer plain tortillas or rice. Let kids build simple tacos with chicken and a little pineapple first, and add toppings as they like.

Conclusion

I hope this Chicken Al Pastor recipe brings warmth and ease to your table. It has been a favorite at our house for weeknights and weekend gatherings because it combines bright, family-friendly flavors with simple prep. If you want a quick, smoky take inspired by a fast casual favorite, check out this menu option from Chipotle’s Chicken al Pastor – Limited Time Only to compare flavors and ideas. For a tasty oven or sheet pan version, I also recommend this helpful recipe from Sheet Pan Chicken al Pastor (for Tacos, Burritos, and More!) which adapts well when you need a hands-off method.

Thanks for cooking with me. Gather around the table, let everyone build their own tacos, and enjoy the friendly chatter that comes with a meal made at home.

Chicken Al Pastor

Prep Time 30 minutes
Cook Time 20 minutes
Total Time 50 minutes
Servings 4 servings
Calories 350
A flavorful and easy Chicken Al Pastor recipe featuring marinated chicken thighs grilled to perfection, served with grilled pineapple and tacos, perfect for family meals.

Ingredients

For the Marinade

  • 1 cup pineapple juice
  • 1/4 cup apple cider vinegar
  • 2 tablespoons olive oil
  • 2 tablespoons adobo sauce
  • 1 tablespoon chili powder
  • 1 tablespoon cumin
  • 1 teaspoon smoked paprika
  • to taste Salt and pepper

For Grilling

  • 2 lbs chicken thighs (Boneless, skinless preferred)
  • 1 cup fresh pineapple, chopped
  • for serving Corn tortillas

Toppings

  • Onion (Finely diced, soak in cold water for mildness)
  • Cilantro (Chopped fresh before serving)
  • Lime (Cut into wedges)

Instructions 

Preparation

  • In a bowl, mix pineapple juice, apple cider vinegar, olive oil, adobo sauce, chili powder, cumin, smoked paprika, salt, and pepper.
  • Whisk everything well to combine for even seasoning.
  • Marinate the chicken in the mixture for at least 30 minutes, preferably overnight.

Cooking

  • Preheat the grill and cook the chicken for about 6-7 minutes per side until fully cooked.
  • Remove chicken from grill and let it rest for 5 minutes before slicing.
  • Grill the fresh pineapple chunks for 1-2 minutes per side until caramelized.
  • Serve the sliced chicken in corn tortillas with grilled pineapple and desired toppings.

Notes

Serve Chicken Al Pastor family-style for a casual dining experience. Store leftovers in airtight containers in the refrigerator for up to 4 days, or freeze for up to 3 months.
Calories: 350kcal
Course: Dinner, Main Course
Cuisine: Mexican
Keyword: Chicken Al Pastor, Family Meal, Grilled Chicken, Tacos, Weeknight Dinner

Greek Chicken Skewers

The kitchen is alive with inviting smells as the herbs and spices meld together. You can hear the sizzling sound of chicken skewers grilling, a melody that brings the family together. The air is filled with anticipation for a delicious meal. These Greek Chicken Skewers are not just about taste; they provoke memories of laughter and shared moments around the dinner table.

Why This Works

Greek Chicken Skewers

These Greek Chicken Skewers are a perfect choice for busy family nights. They’re quick to prepare, allowing you to spend more time with your loved ones instead of in the kitchen. Marinating the chicken takes minimal time, and grilling is an easy and healthy cooking method. You’ll find that these skewers not only save time but also bring a burst of flavor that everyone will love. Simple ingredients create a delightful dish that looks beautiful and tastes even better. This recipe is easy to double for larger gatherings, so you always have enough to go around.

Process Overview

“This is where the magic happens—when the aroma fills the kitchen.”

As you prepare these skewers, you’ll feel the magic unfold. The vibrant colors of the bell peppers and red onions complement the golden chicken, making this dish a feast for the eyes as well as the palate. In just a few easy steps, you can create a meal that feels special, even on a busy weeknight.

Ingredients

To make these Greek Chicken Skewers, you’ll need the following ingredients:

  • 2 lbs Chicken Breast: Look for fresh, boneless, skinless chicken breasts. You want meat that’s juicy and tender.

  • 1/4 Cup Olive Oil: Extra virgin olive oil adds a rich flavor. It’s also healthy and helps keep the chicken moist.

  • Juice of 1 Lemon: Fresh lemon juice brightens the dish and balances the flavors. You can also finely grate the zest for extra citrus pop.

  • 3 Cloves Garlic, Minced: Fresh garlic adds that aromatic punch. You can adjust the amount based on your family’s taste.

  • 1 Tbsp Dried Oregano: Greek cuisine often uses oregano. It brings a lovely earthiness to the dish.

  • Salt and Pepper to Taste: Essential for seasoning. A little salt enhances flavors, while fresh ground pepper adds warmth.

  • 1-2 Bell Peppers: Choose red, yellow, or green for color. They add sweetness and crunch.

  • 1 Red Onion: The onion gives a robust flavor once grilled. You can also swap for yellow or white onions if preferred.

  • Skewers: You can use wooden or metal skewers. If using wooden ones, soak them in water for about 30 minutes before grilling to prevent burning.

Directions

  1. In a bowl, mix olive oil, lemon juice, minced garlic, oregano, salt, and pepper to create the marinade. This marinade is the secret to juicy, flavorful chicken. Take a moment to enjoy the robust aroma.

  2. Cut the chicken breast into cubes and add to the marinade. Let it marinate for at least 30 minutes. If you can, let it marinate longer in the fridge for even more flavor.

  3. Cut the bell peppers and red onion into chunks. The colorful pieces will not only taste great but look beautiful on the skewers.

  4. Thread the marinated chicken, bell peppers, and red onion onto the skewers. Alternate the chicken and veggies, making it fun and vibrant.

  5. Preheat the grill over medium heat. It’s important to get the grill hot enough for those beautiful grill marks.

  6. Grill the kabobs for about 10-15 minutes, turning occasionally, until the chicken is cooked through and has grill marks. Keep an eye on them so they don’t burn.

  7. Serve on a platter and enjoy your Greek Chicken Kabobs! This dish is perfect for sharing, so gather your family around the table.

Serving

Greek Chicken Skewers

Serving these skewers family-style adds to the experience. Place them on a large platter and let everyone help themselves. You can also provide a variety of dips, like tzatziki or hummus, for extra flavor. Pair it with a simple Greek salad or warm pita bread to create a complete meal. Sharing a colorful platter brings smiles and encourages conversation, making the meal all the more memorable.

Storage

If you have leftovers, store them in an airtight container in the fridge for up to 3 days. To reheat, place them in a skillet over medium heat or pop them in the microwave for a quick meal. Just be careful not to overcook when reheating, as this can dry out the chicken.

Kitchen Notes

  • Marinate the chicken overnight for deeper flavor.
  • Use any leftover marinade to baste the chicken while grilling.
  • Add cherry tomatoes to the skewers for variety.
  • Serve with a side of rice or quinoa for a complete meal.
  • Clean your grill grates before preheating to ensure easy flipping.

Variations

If you have picky eaters or dietary restrictions, there are plenty of ways to adapt this recipe:

  • Vegetarian Option: Substitute chicken with cubes of tofu or hearty mushrooms. Marinate them the same way for extra flavor.

  • Low-Carb/Keto: Skip the bell peppers and onions, and serve with a salad instead.

  • Spicy Version: Add red pepper flakes to the marinade for heat.

  • Mediterranean Twist: Mix in diced zucchini or eggplant for a different veggie experience.

  • Kid-Friendly: Use smaller pieces of chicken and veggies for easier eating. Get the kids involved in threading the skewers for added fun.

FAQ

1. Can I prepare the skewers ahead of time?
Yes, you can marinate the chicken in advance and thread them onto skewers a day before serving. Keep them in the fridge until you are ready to grill.

2. What can I serve with these skewers?
These skewers pair well with a Greek salad, pita bread, rice, or tzatziki sauce.

3. Is it necessary to soak wooden skewers?
Yes, soaking wooden skewers helps prevent them from burning on the grill. About 30 minutes is sufficient.

4. Can I bake these skewers instead of grilling?
Absolutely! You can place them on a baking sheet and bake at 400°F for about 20-25 minutes, turning halfway through.

5. How can I tell if the chicken is done?
The chicken is fully cooked when it reaches an internal temperature of 165°F. Use a meat thermometer for accuracy.

In closing, cooking these Greek Chicken Skewers is not just about creating a dish; it’s about bringing your family together. The simple act of preparing food can foster connection and joy. Let’s savor those moments around the table with laughter, love, and delicious flavors. Happy cooking!

Greek Chicken Skewers

Prep Time 30 minutes
Cook Time 15 minutes
Total Time 45 minutes
Servings 4 servings
Calories 350
These Greek Chicken Skewers are quick to prepare and bursting with flavor, perfect for busy family nights and gatherings.

Ingredients

For the Marinade

  • 1/4 Cup Olive Oil (Extra virgin olive oil adds a rich flavor.)
  • 1 Juice Juice of 1 Lemon (Fresh lemon juice brightens the dish.)
  • 3 Cloves Garlic, Minced (Fresh garlic adds aromatic punch.)
  • 1 Tbsp Dried Oregano (Brings a lovely earthiness to the dish.)
  • to taste Salt and Pepper (Essential for seasoning, adjust as needed.)

For the Skewers

  • 2 lbs Chicken Breast, boneless and skinless (Look for fresh, juicy, and tender pieces.)
  • 1-2 Bell Peppers (Use red, yellow, or green for color.)
  • 1 Red Onion (Can be swapped for yellow or white onions.)
  • as needed Skewers (Use wooden (soak for 30 mins) or metal.)

Instructions 

Preparation

  • In a bowl, mix olive oil, lemon juice, minced garlic, oregano, salt, and pepper to create the marinade.
  • Cut the chicken breast into cubes and add to the marinade. Let it marinate for at least 30 minutes.
  • Cut the bell peppers and red onion into chunks.
  • Thread the marinated chicken, bell peppers, and red onion onto the skewers, alternating for a vibrant look.

Cooking

  • Preheat the grill over medium heat.
  • Grill the kabobs for about 10-15 minutes, turning occasionally, until the chicken is cooked through.

Serving

  • Serve on a platter and enjoy with family.

Notes

Marinate the chicken overnight for deeper flavor. Use leftover marinade to baste while grilling. Serve with dips like tzatziki or hummus, and a side of Greek salad or warm pita.
Calories: 350kcal
Course: Dinner, Main Course
Cuisine: Greek
Keyword: Family Dinner, Greek Chicken Skewers, Grilled Chicken, quick recipe, Skewers