Tag

Italian cuisine

Browsing

Garlic Lemon Parmesan Pasta

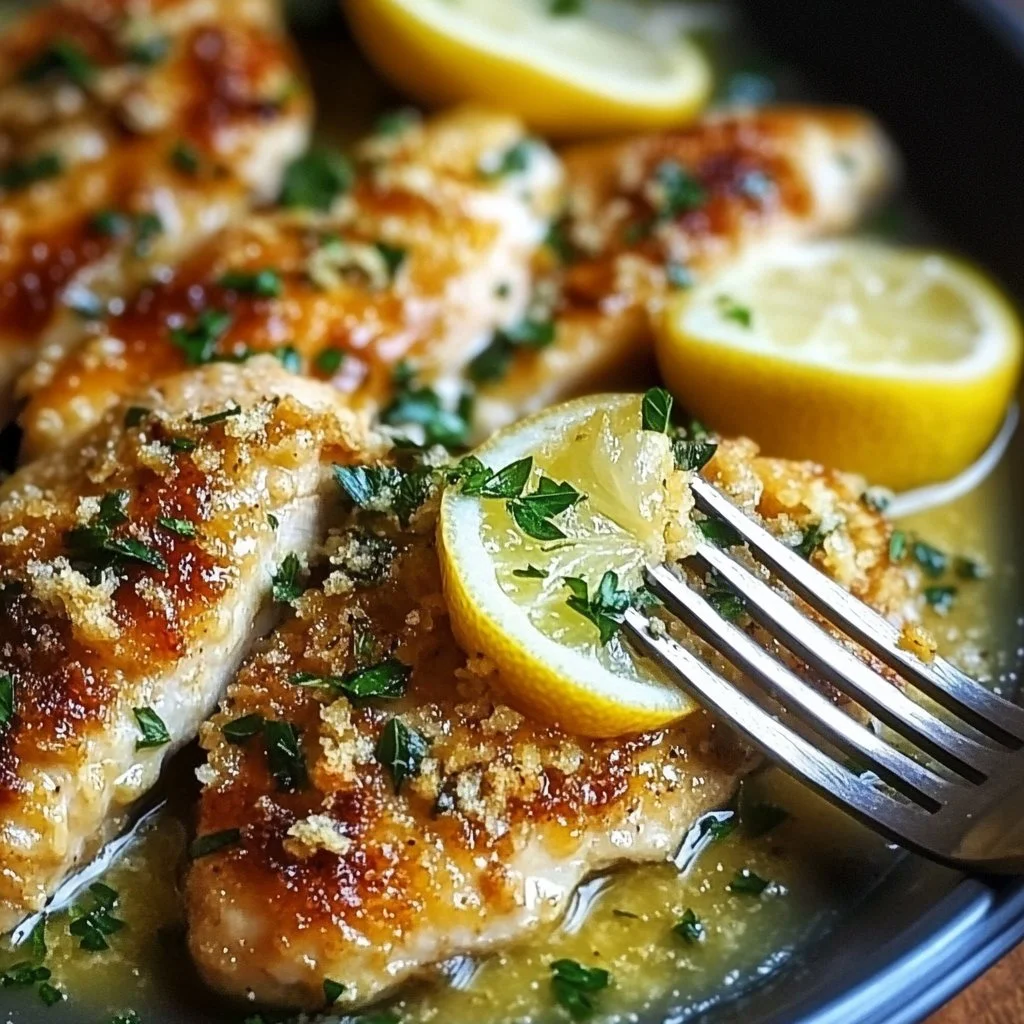
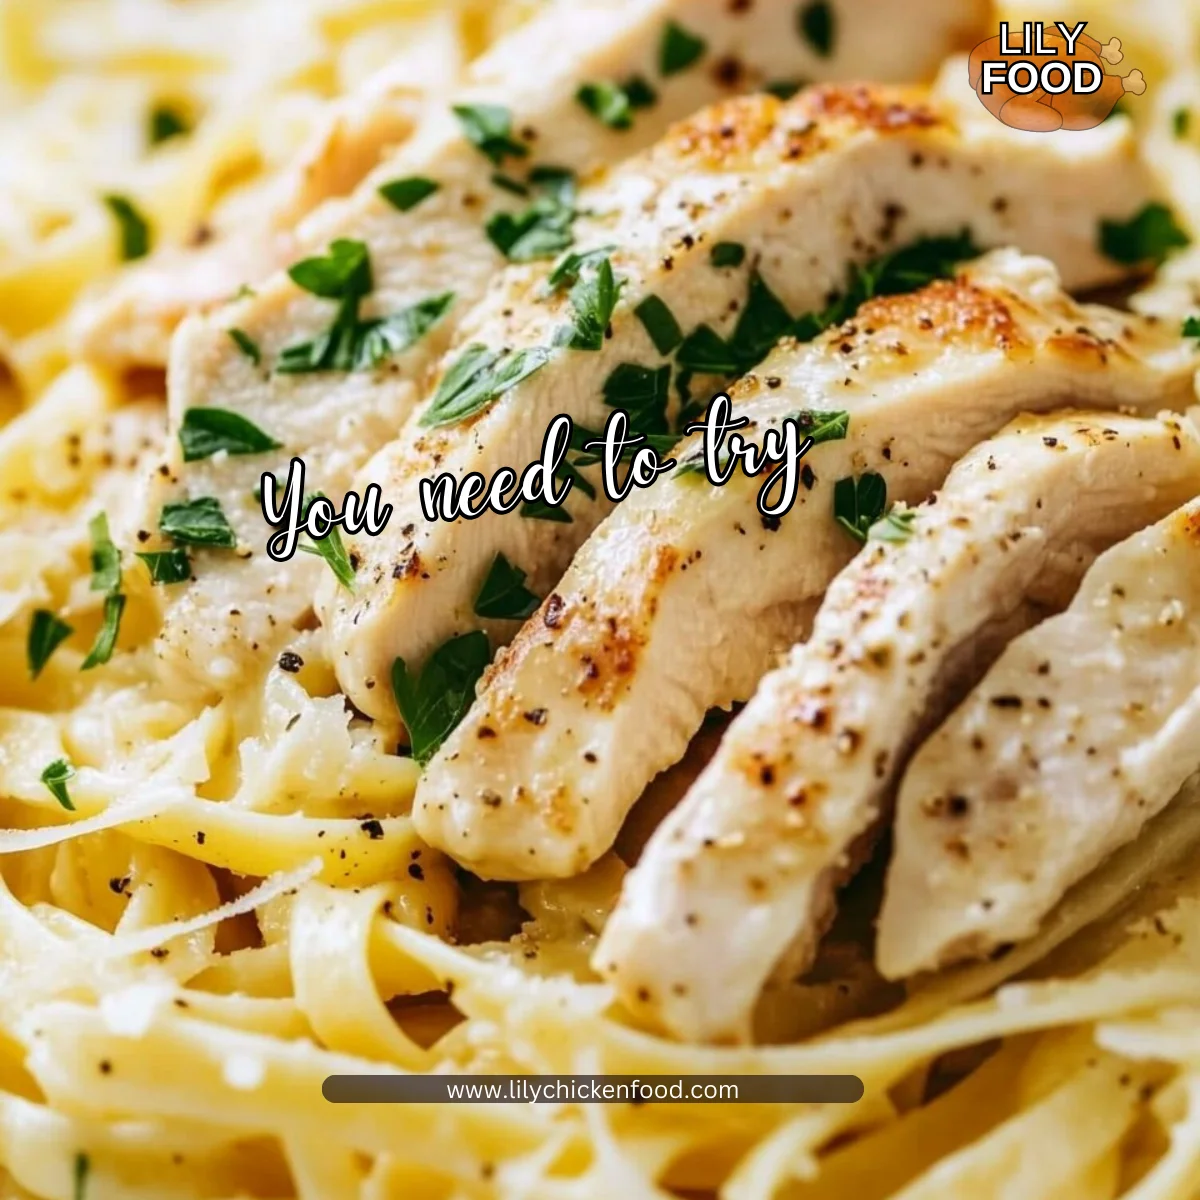
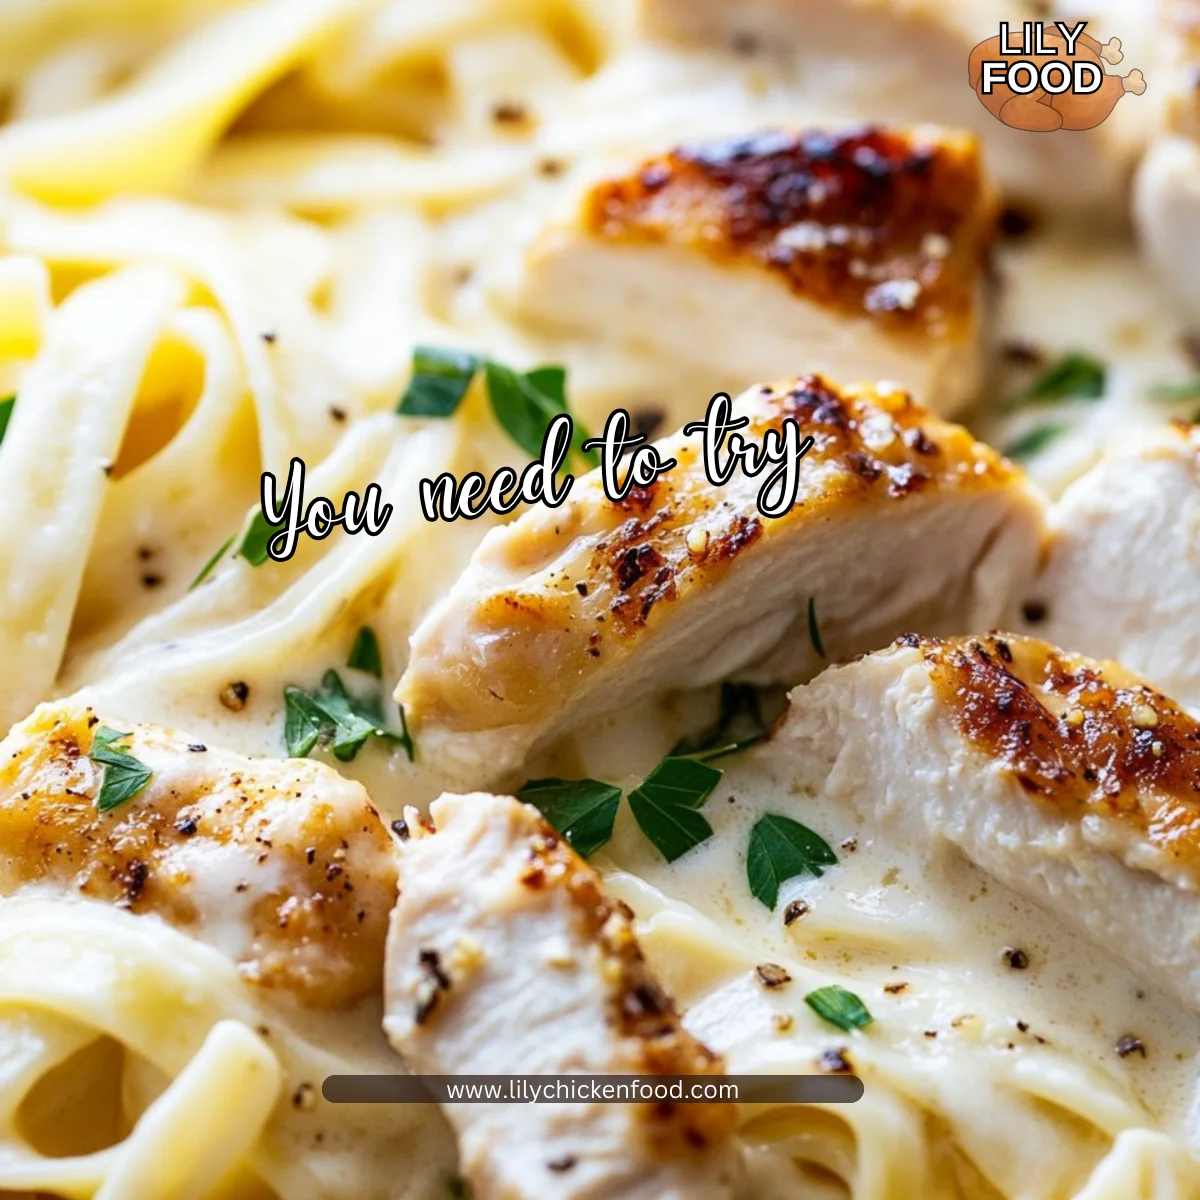
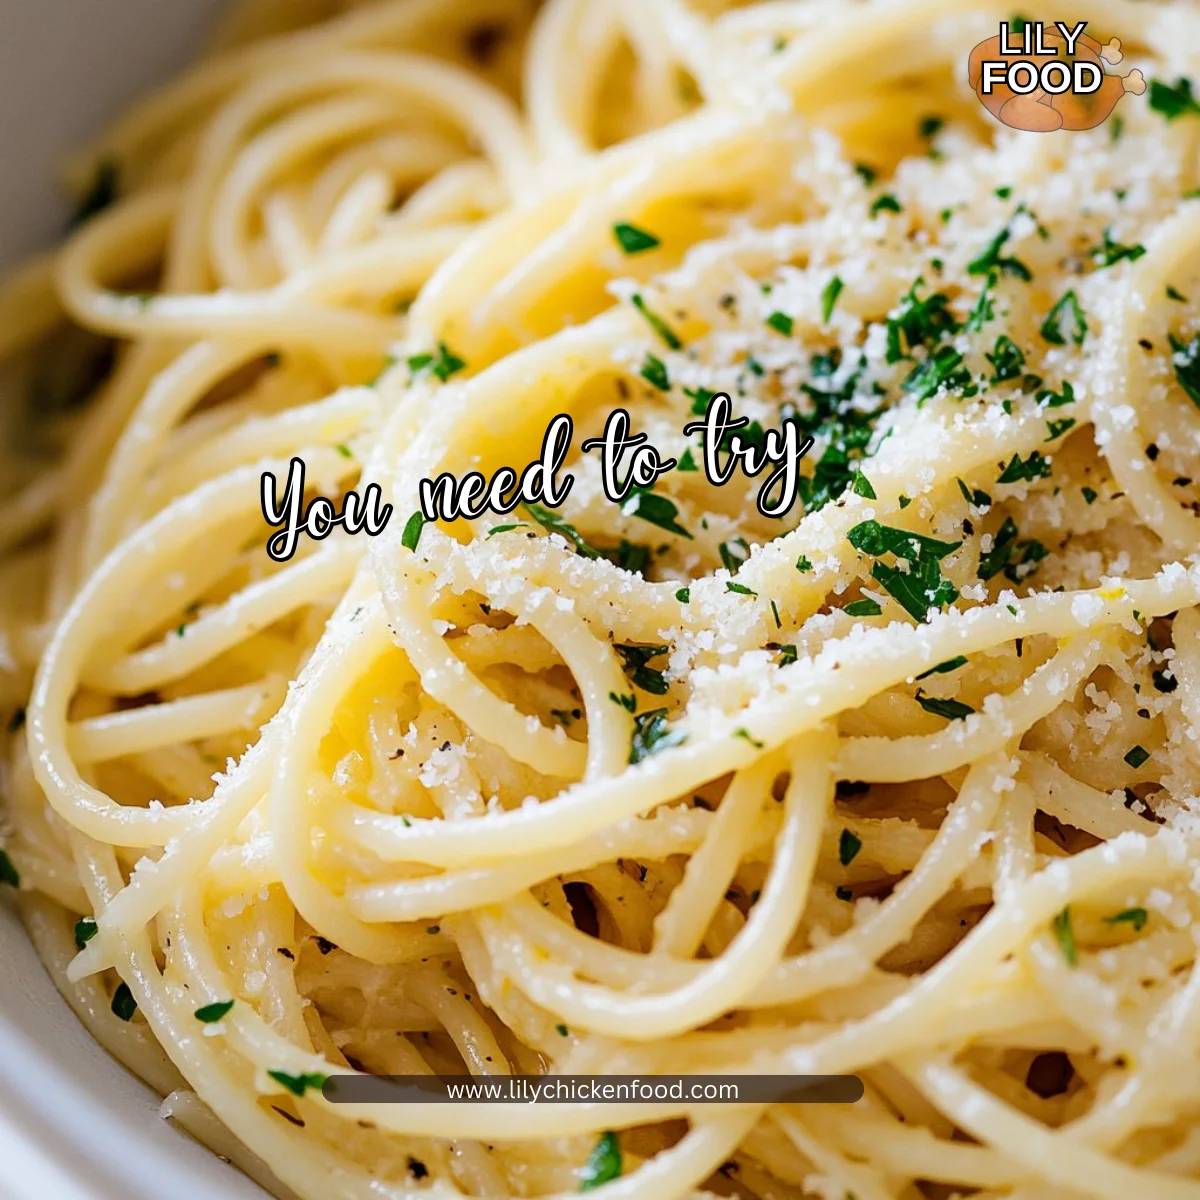
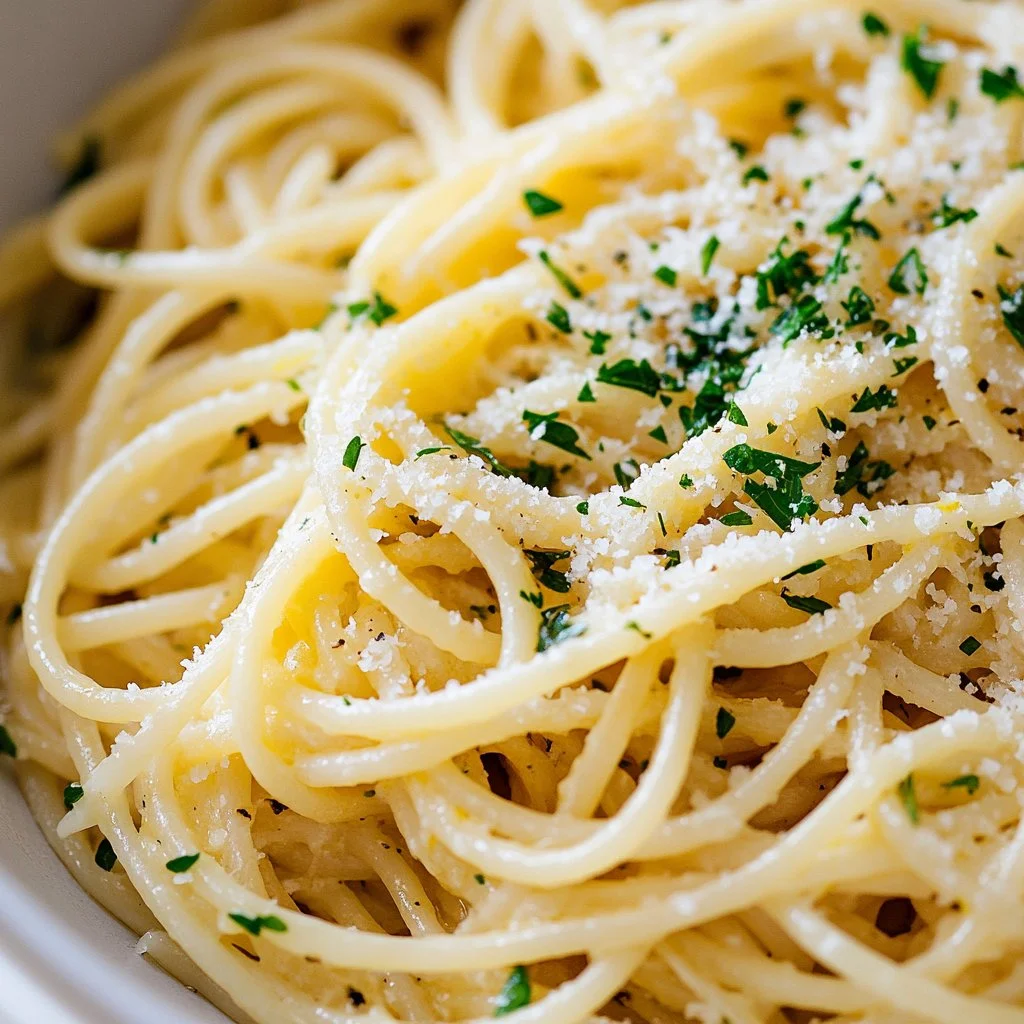
The moment you step into the kitchen, the warmth wraps around you like a cozy blanket. You hear the soft bubbling of water as it simmers, the gentle sizzle of garlic meeting butter, and your mouth begins to water. The smell of garlic mingles with fresh lemons, filling the space with comforting aromas that signal a delicious meal on the horizon. Today, we’re preparing a delightful Garlic Lemon Parmesan Pasta that is not only quick to make but is also bursting with flavor and goodness. It’s a dish that brings the family together, creating moments worth savoring.

Why this works

Garlic Lemon Parmesan Pasta

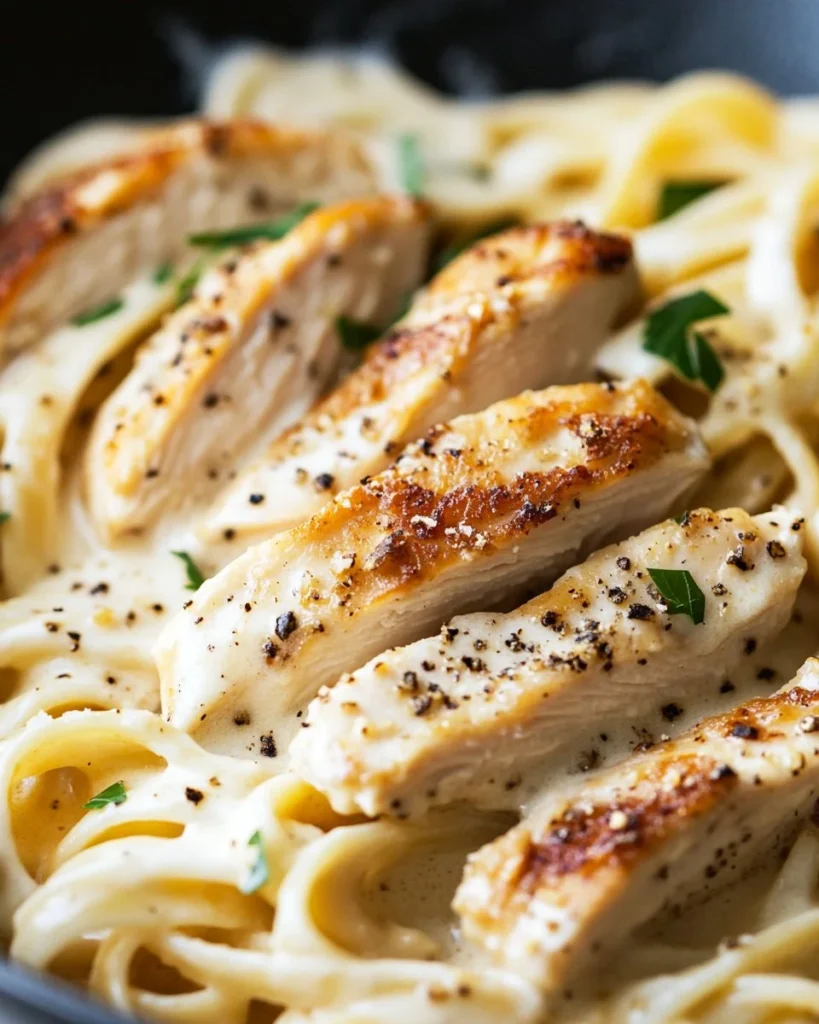
Garlic Lemon Parmesan Pasta is the perfect solution for busy weeknights. It requires minimal ingredients and takes less than 30 minutes to prepare. That means you get to spend less time cooking and more time enjoying dinner with your loved ones. The combination of garlic and lemon is bright and zesty, while the Parmesan cheese adds a creamy richness that makes this dish oh-so-satisfying. Plus, kids and adults alike will adore it, making it a versatile choice for any family meal.

Process Overview

“This is where the magic happens—when the aroma fills the kitchen.”

The process is straightforward and fulfilling. You’ll cook the pasta until perfectly al dente, sauté the garlic to bring out its flavor, and then combine everything harmoniously. In just a few simple steps, you’ll create a dish that’s not only tasty but also comforting—a meal that warms the soul.

Ingredients

Here’s what you’ll need for this easy-to-make pasta dish:

  • 8 oz pasta (spaghetti or your choice): Use whole grain or gluten-free pasta if needed.
  • 3 cloves garlic, minced: Fresh garlic adds depth. If you’re in a hurry, you can use pre-minced garlic from a jar.
  • 1/4 cup grated Parmesan cheese: Real cheese makes a difference. If you can, grab fresh Parmesan to grate at home.
  • 1 lemon, juiced and zested: Zesting the lemon adds bright flavor and fragrance. Roll the lemon on the counter before cutting to release more juice.
  • 4 tbsp butter: You can substitute with olive oil for a lighter option.
  • Salt and pepper to taste: Simple seasonings can elevate your dish. Always taste as you go.
  • Fresh parsley, chopped (for garnish): This adds a beautiful pop of color and freshness. You can use other herbs like basil or chives if you prefer!

Directions

  1. Cook the pasta according to package instructions until al dente. Drain and set aside.

    • When cooking pasta, remember to salt the water well. This becomes the first layer of flavor.
  2. In a large skillet, melt the butter over medium heat.

    • Make sure the butter doesn’t brown; we want it just melted and gently bubbling.
  3. Add the minced garlic and sauté until fragrant, about 1 minute.

    • Be careful not to let the garlic burn; it can turn bitter quickly.
  4. Add the cooked pasta to the skillet and toss to combine with the garlic and butter.

    • This step creates that magical blend of flavors as the pasta absorbs the garlic and butter goodness.
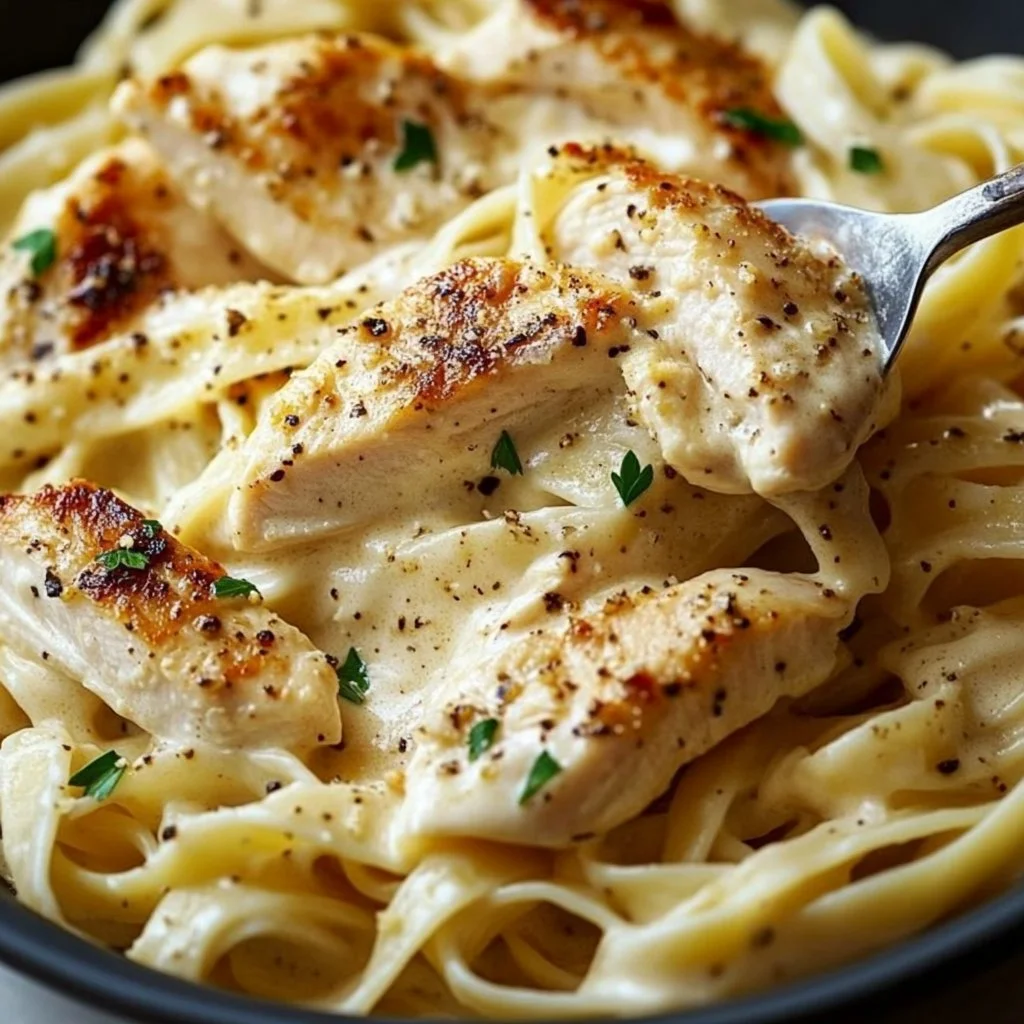
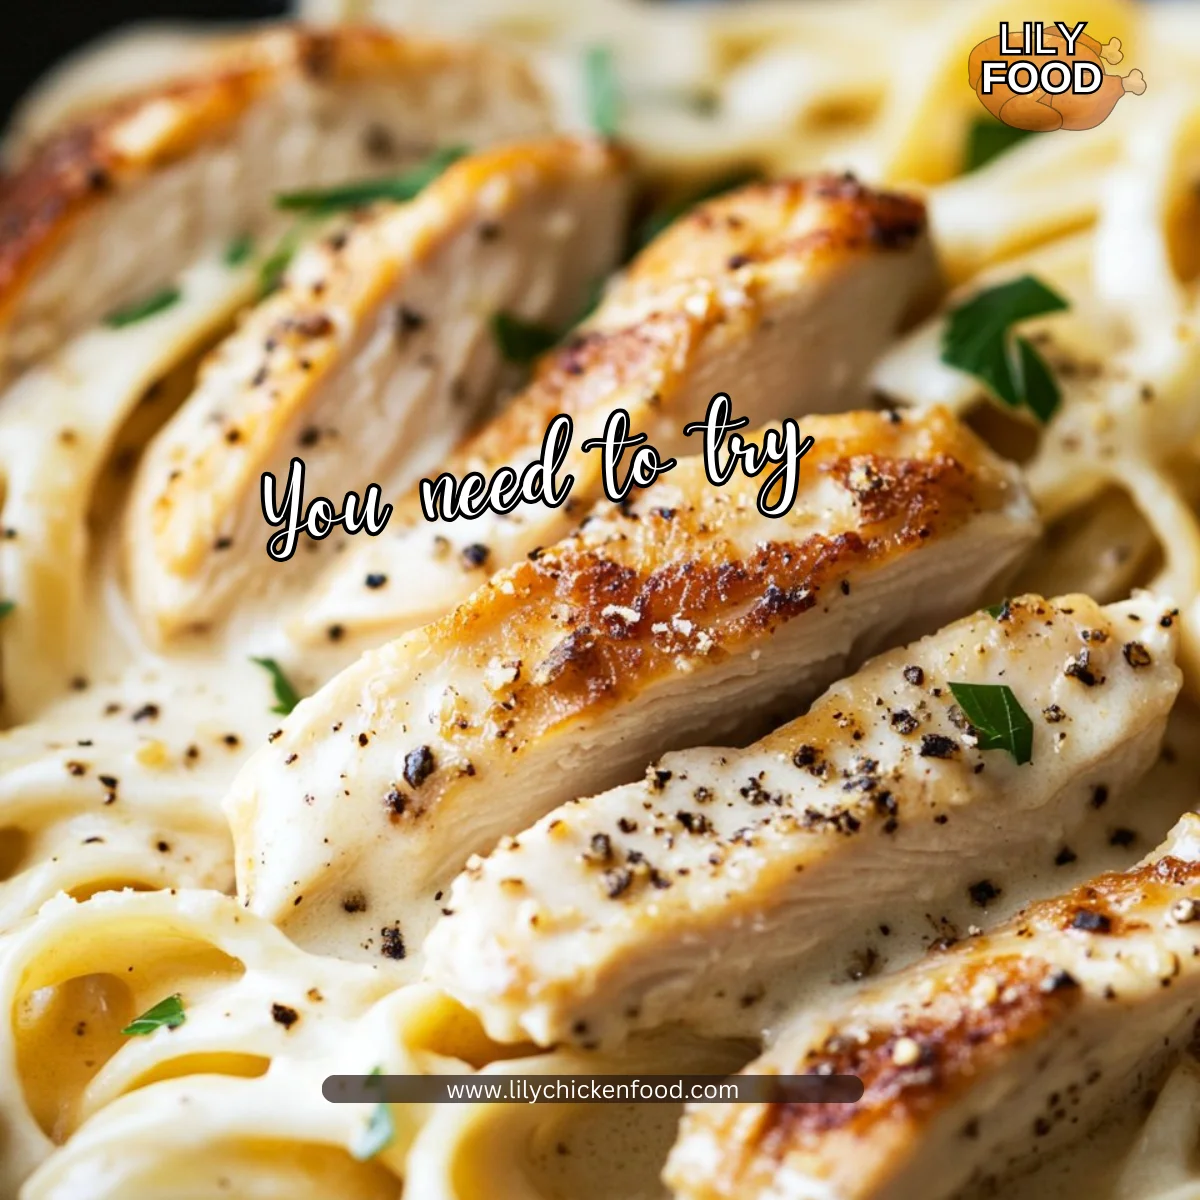
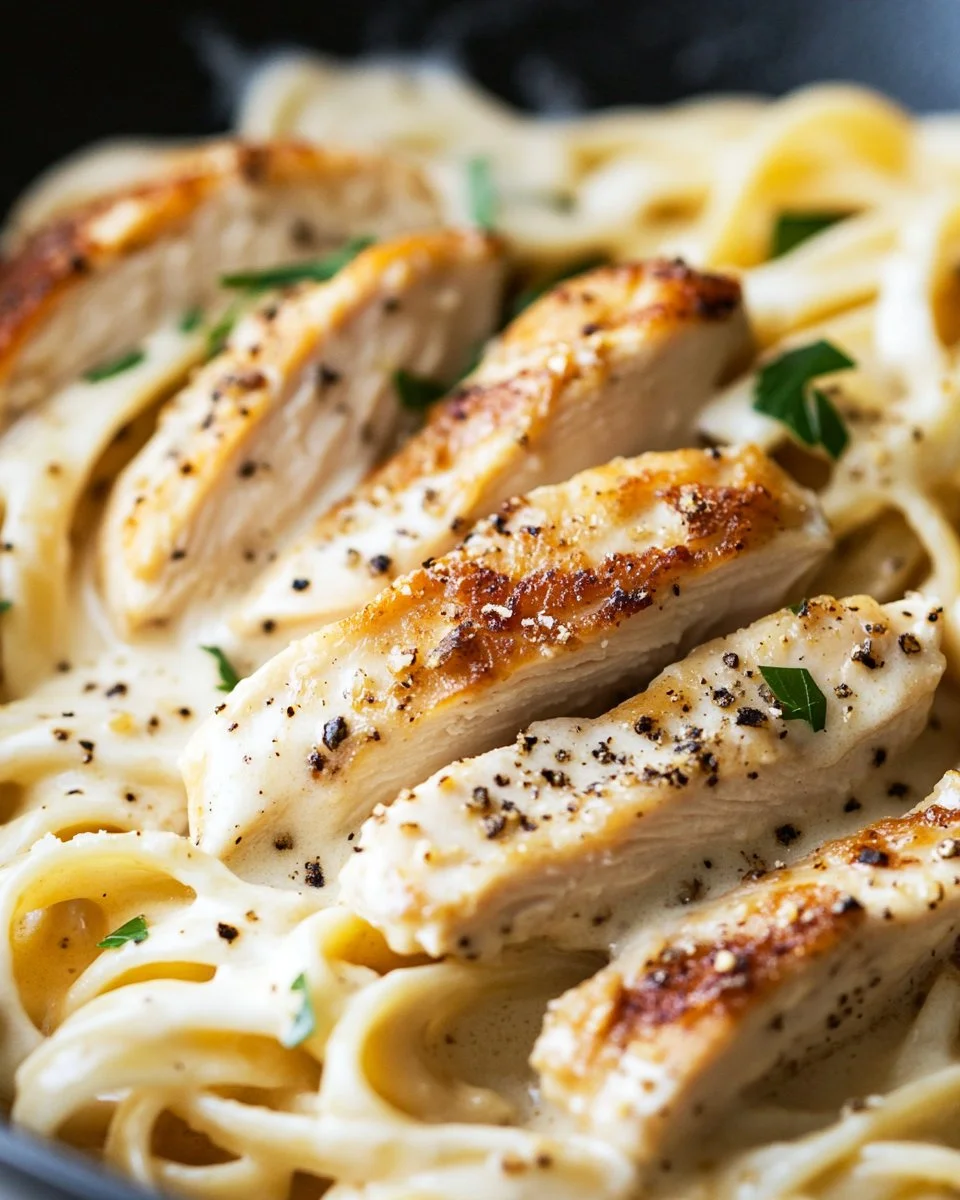
  5. Stir in the lemon juice, lemon zest, and grated Parmesan cheese.

    • The cheese will melt beautifully, creating a creamy sauce that coats every strand of pasta.
  6. Season with salt and pepper to taste.

    • Don’t be shy. Taste as you go to get the balance just right.
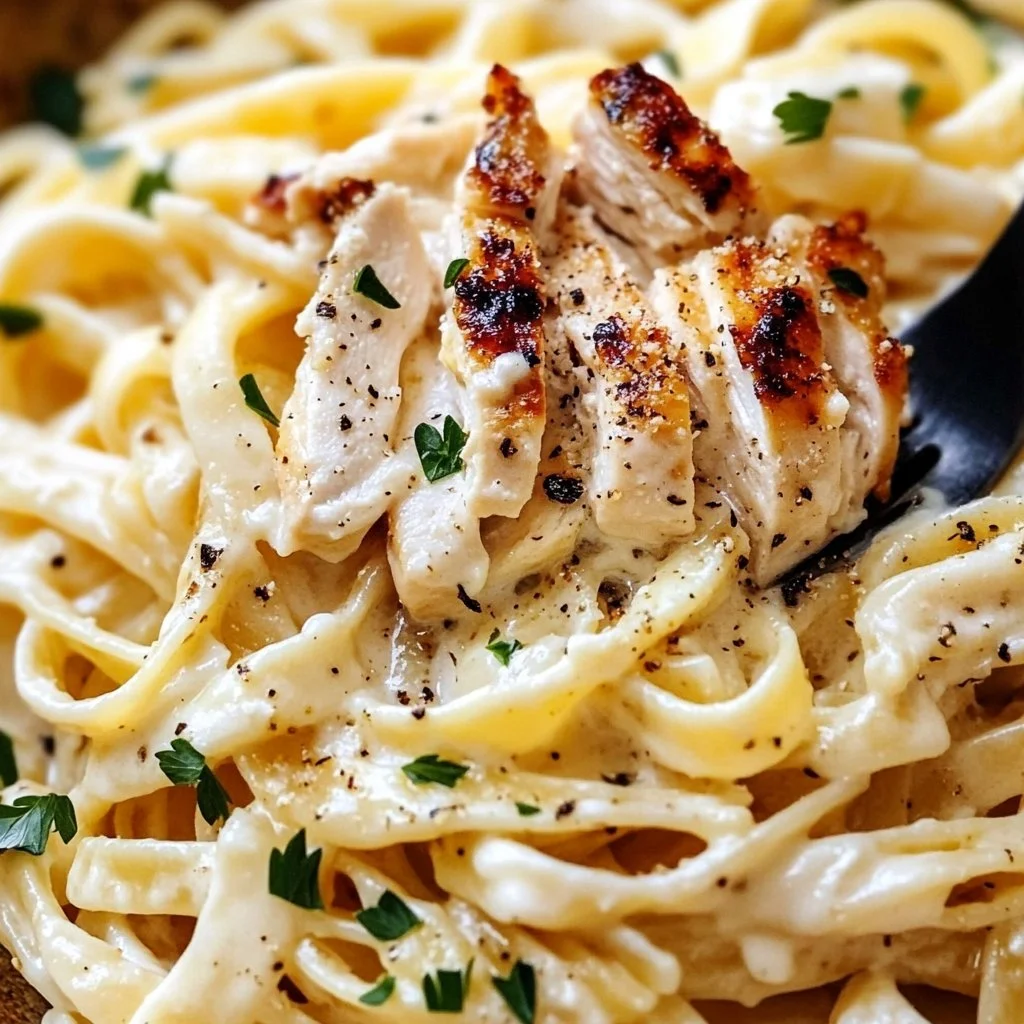
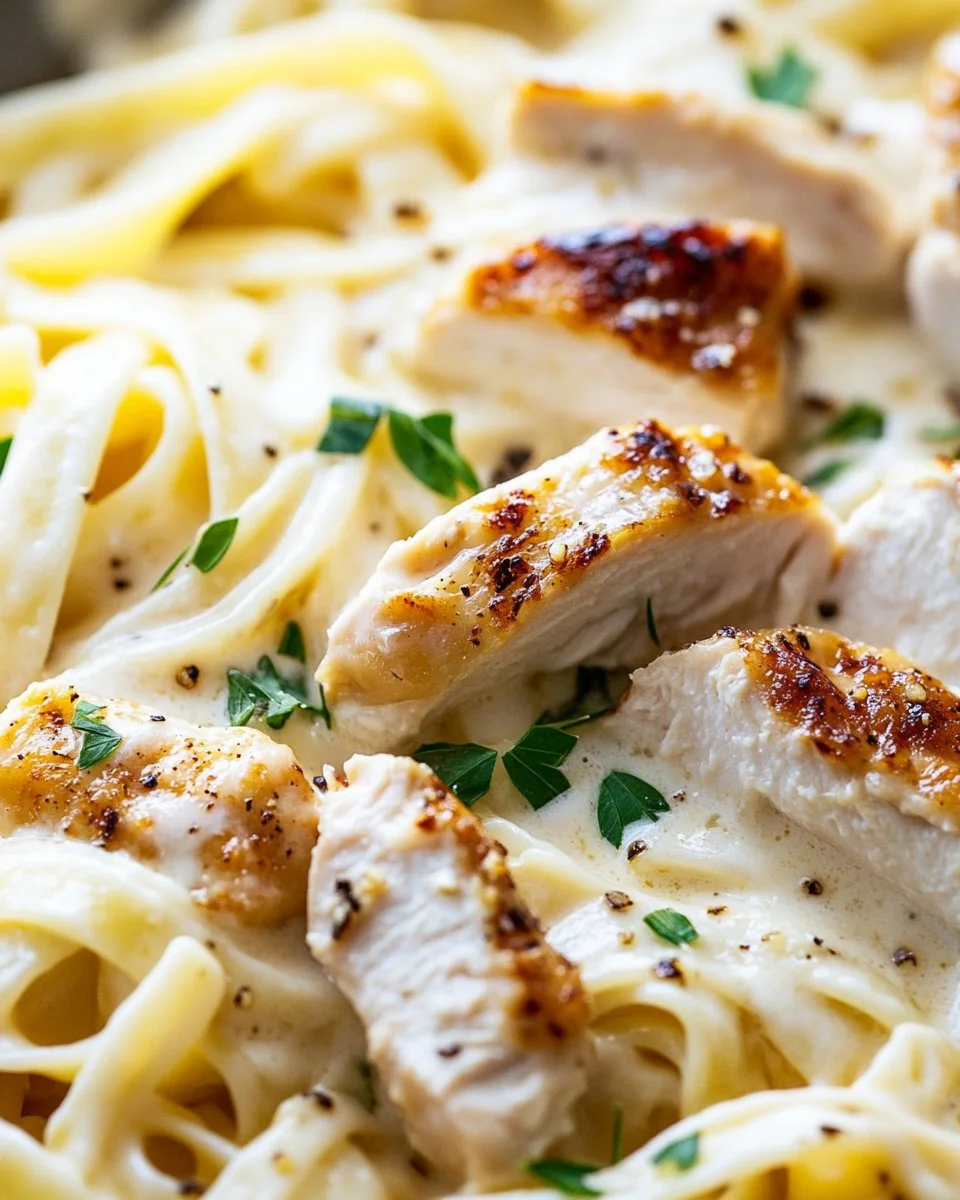
  7. Garnish with chopped parsley and serve warm.

    • The final touch of parsley adds freshness and color. Your dish is now ready to delight!

Serving

Garlic Lemon Parmesan Pasta

For a cozy family meal, serve the Garlic Lemon Parmesan Pasta family-style right in the skillet. This encourages everyone to dig in and share. You can provide a sprinkle of extra Parmesan and fresh parsley at the table for that beautiful presentation. Pair the pasta with a simple green salad and some crusty bread, and you have a wholesome meal everyone will enjoy.

Storage

Once dinner is over, and if you have leftovers, you can store them in an airtight container in the fridge for up to three days. To reheat, just add a splash of water or a bit of olive oil in a skillet over medium heat and stir until warmed through. This will help revive the sauce and keep everything delicious.

Kitchen Notes

  • Use a larger pot for boiling pasta to avoid sticking.
  • A splash of pasta water can be added when mixing to loosen up the sauce.
  • Feel free to double the recipe; it’s just as easy to make more!
  • Switch it up with different pasta shapes; penne or fettuccine works well.
  • Try adding veggies like spinach or cherry tomatoes for extra nutrition.

Variations

If you have picky eaters or specific dietary needs, here are a few tweaks:

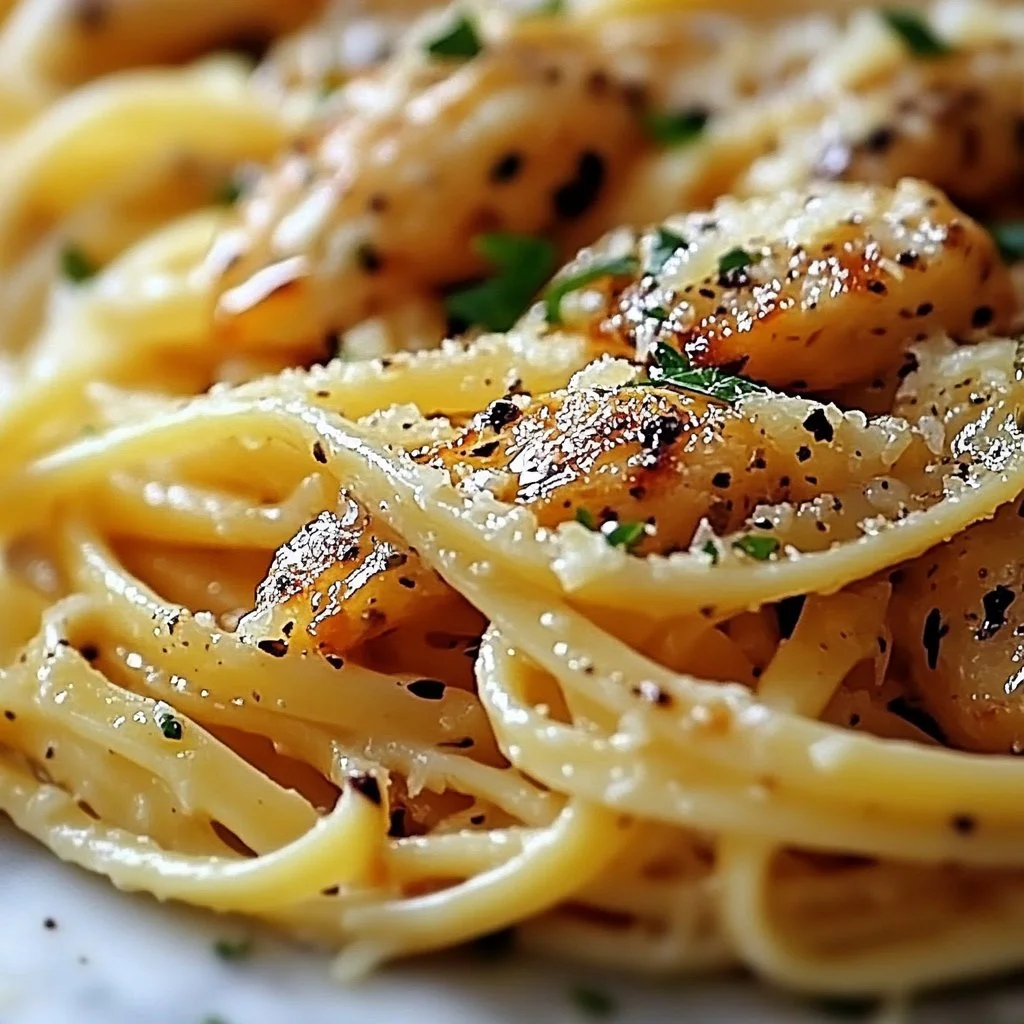
  • For a protein boost, add cooked chicken, shrimp, or chickpeas for a heartier dish.
  • For a vegan option, substitute butter with olive oil and Parmesan with nutritional yeast.
  • Add spices like red pepper flakes for a little kick!
  • Sneak in veggies like peas or broccoli for added color and nutrition.
  • Use lemon zest and juice from a different citrus like lime or orange for a new flavor profile.

FAQ

Q1: Can I use any type of pasta?
A1: Yes! You can use any pasta shape you prefer. Whole grain or gluten-free pasta also works great.

Q2: How can I make this dish without garlic?
A2: You can simply omit the garlic or use garlic powder, but fresh garlic really enhances the flavor.

Q3: Can I make this pasta ahead of time?
A3: While it’s best fresh, you can prepare the pasta and sauce separately and combine them just before serving.

Q4: Is there a way to make this dish lighter?
A4: Absolutely! Use olive oil instead of butter and reduce the amount of cheese.

Q5: What can I serve with this pasta?
A5: A simple side salad, garlic bread, or steamed vegetables make great companions.

By now, I hope you’re as excited as I am about this Garlic Lemon Parmesan Pasta. It’s more than just a meal—it’s about gathering around the table, sharing stories, and making memories. This dish is easy enough for a weeknight but special enough to serve on a Sunday. Enjoy cooking and savor every bite with your family. Happy eating!

Garlic Lemon Parmesan Pasta

Prep Time 10 minutes
Cook Time 15 minutes
Total Time 25 minutes
Servings 4 servings
Calories 400
A quick and flavorful pasta dish combining garlic, lemon, and Parmesan cheese that brings family together.

Ingredients

Main Ingredients

  • 8 oz pasta (spaghetti or your choice) (Use whole grain or gluten-free pasta if needed.)
  • 3 cloves garlic, minced (Fresh garlic adds depth. Pre-minced garlic can be used in a hurry.)
  • 1/4 cup grated Parmesan cheese (Freshly grated Parmesan is recommended.)
  • 1 lemon, juiced and zested (Zesting adds bright flavor; roll the lemon before cutting for more juice.)
  • 4 tbsp butter (Can substitute with olive oil for a lighter option.)
  • to taste Salt and pepper (Taste as you go to season perfectly.)
  • to taste Fresh parsley, chopped (for garnish) (Can use other herbs like basil or chives.)

Instructions 

Cooking Pasta

  • Cook the pasta according to package instructions until al dente. Drain and set aside.
  • Remember to salt the water well while cooking the pasta.

Sauté Garlic

  • In a large skillet, melt the butter over medium heat.
  • Ensure the butter is just melted and gently bubbling, without browning.
  • Add the minced garlic and sauté until fragrant, about 1 minute, being careful not to burn it.

Combine Ingredients

  • Add the cooked pasta to the skillet and toss to combine with the garlic and butter.
  • Stir in the lemon juice, lemon zest, and grated Parmesan cheese, allowing the cheese to melt and create a creamy sauce.
  • Season with salt and pepper to taste and garnish with chopped parsley before serving.

Notes

Serve family-style right in the skillet. Pair with a simple green salad and crusty bread. Store leftovers in an airtight container for up to three days.
Calories: 400kcal
Course: Dinner, Main Course
Cuisine: Italian
Keyword: Comfort Food, Family Meal, Garlic Lemon Parmesan, Pasta, Quick Dinner

Pesto Bruschetta Chicken

I love the enticing smell of herbs and roasted chicken wafting through the kitchen. As it fills the air, the soft sound of sizzling and bubbling makes me feel at home. Cooking together as a family always creates lasting memories. Today, I want to share a simple yet delightful recipe: Pesto Bruschetta Chicken. It’s perfect for a weeknight dinner or a casual get-together.

Why This Works

Pesto Bruschetta Chicken

This recipe hits all the right notes for busy families. First, it’s quick to put together, requiring minimal prep time while offering maximum flavor. The bright and fresh pesto mixed with juicy cherry tomatoes elevates each bite.

Not only does this dish taste amazing, but it’s also a visually stunning centerpiece for your table. It invites everyone to gather ‘round, share stories, and enjoy a comforting meal together. With a handful of ingredients, you get a delightful, nutritious dinner that satisfies the whole family.

Process Overview

“This is where the magic happens—when the aroma fills the kitchen.”

Every step in this recipe leads you to a cozy evening with your loved ones. You’ll be amazed at how quickly your kitchen transforms into a warm haven of delight.

Ingredients

To make Pesto Bruschetta Chicken, you will need:

  • 4 boneless, skinless chicken breasts
    Tip: Look for breasts that are uniform in size for even cooking.

  • 1 cup pesto sauce
    Tip: Homemade pesto is fantastic, but store-bought works well too for convenience.

  • 1 cup cherry tomatoes, halved
    Tip: Choose vibrant, firm tomatoes for the best flavor and color.

  • 1/2 cup mozzarella cheese, shredded
    Tip: Fresh mozzarella adds a wonderfully creamy texture if you can find it.

  • Salt and pepper to taste
    Tip: Season generously for added flavor.

  • Fresh basil for garnish
    Tip: Pluck the leaves just before serving for the freshest taste.

Directions

  1. Preheat the oven to 375°F (190°C).
    Preheating your oven ensures the chicken cooks evenly.

  2. Season the chicken breasts with salt and pepper.
    This simple step enhances the chicken’s natural flavor.

  3. Place the chicken in a baking dish and spread the pesto sauce evenly on top.
    The pesto will create a beautiful, flavorful crust on the chicken.

  4. Scatter the halved cherry tomatoes over the chicken.
    Their sweetness will infuse into the chicken as it bakes.

  5. Sprinkle shredded mozzarella cheese on top of the tomatoes.
    As it melts, it creates a gooey, delicious layer over the dish.

  6. Bake for 25-30 minutes or until the chicken is cooked through and no longer pink in the center.
    A meat thermometer should read 165°F for perfectly cooked chicken.

  7. Remove from the oven and let it rest for a few minutes.
    Letting it rest keeps the juices locked in.

  8. Garnish with fresh basil before serving.
    A sprinkle of basil makes everything better and adds brightness to the dish!

Serving

Pesto Bruschetta Chicken

Serving this dish is all about family-style enjoyment. Place the baking dish right in the center of the table. Let everyone serve themselves on their plates, savoring the beautiful combination of chicken, gooey cheese, and cherry tomatoes. Pair it with some crusty bread or a fresh salad for a complete meal that everyone will love.

Storage

If you have leftovers (which are rare with this tasty dish), store them in an airtight container in the fridge. They will last up to three days. When you’re ready to enjoy them again, reheat the chicken in the oven at 350°F (175°C) until warmed through. This will help to maintain the chicken’s juiciness. You can also microwave it, but be careful not to overcook it.

Kitchen Notes

Here are a few shortcuts to make your cooking experience even smoother:

  • Buy pre-cooked chicken or rotisserie chicken to save time.
  • Use store-bought pesto to simplify preparation.
  • Chop tomatoes and prepare everything in advance.
  • Add a dash of red pepper flakes to the pesto for a hint of heat.
  • Serve any leftovers over pasta for a quick lunch the next day.

Variations

Here are some possible tweaks for picky eaters or different diets:

  • For a vegetarian version, swap chicken for slices of eggplant or portobello mushrooms.
  • Add spinach or arugula to the cherry tomatoes for an extra dose of greens.
  • To make it gluten-free, ensure your pesto and any bread you serve are labeled gluten-free.
  • Use different herbs like cilantro or parsley if you want to change up the flavor profile.
  • For dairy-free, use vegan cheese or omit dairy altogether.

FAQ

1. Can I use frozen chicken breasts?
Yes, but make sure to thaw them first for even cooking.

2. What can I serve with this chicken?
Serve with a simple salad or garlic bread for a complete meal.

3. How do I know the chicken is cooked through?
Use a meat thermometer to check that it reaches 165°F.

4. Can I make this dish ahead of time?
Absolutely! Prepare the chicken and toppings in advance, then bake it just before serving.

5. Can I freeze the leftovers?
Yes, you can freeze the cooked chicken for up to three months. Let it thaw in the fridge before reheating.

Conclusion

Pesto Bruschetta Chicken is more than just a meal; it’s a way to bring your family together. As you enjoy each bite, remember the joy of connecting over home-cooked food. I hope this recipe fills your kitchen with warmth and delightful memories. Happy cooking!

Pesto Bruschetta Chicken

Prep Time 15 minutes
Cook Time 30 minutes
Total Time 45 minutes
Servings 4 servings
Calories 450
A simple and delightful chicken dish topped with fresh pesto, juicy cherry tomatoes, and gooey mozzarella cheese, perfect for weeknight dinners or gatherings.

Ingredients

Main Ingredients

  • 4 pieces boneless, skinless chicken breasts (Look for breasts that are uniform in size for even cooking.)
  • 1 cup pesto sauce (Homemade pesto is fantastic, but store-bought works well too for convenience.)
  • 1 cup cherry tomatoes, halved (Choose vibrant, firm tomatoes for the best flavor and color.)
  • 1/2 cup mozzarella cheese, shredded (Fresh mozzarella adds a wonderfully creamy texture if you can find it.)
  • to taste salt and pepper (Season generously for added flavor.)
  • Fresh basil for garnish (Pluck the leaves just before serving for the freshest taste.)

Instructions 

Preparation

  • Preheat the oven to 375°F (190°C). Preheating your oven ensures the chicken cooks evenly.
  • Season the chicken breasts with salt and pepper. This simple step enhances the chicken's natural flavor.
  • Place the chicken in a baking dish and spread the pesto sauce evenly on top. The pesto will create a beautiful, flavorful crust on the chicken.
  • Scatter the halved cherry tomatoes over the chicken. Their sweetness will infuse into the chicken as it bakes.
  • Sprinkle shredded mozzarella cheese on top of the tomatoes. As it melts, it creates a gooey, delicious layer over the dish.

Cooking

  • Bake for 25-30 minutes or until the chicken is cooked through and no longer pink in the center. A meat thermometer should read 165°F for perfectly cooked chicken.
  • Remove from the oven and let it rest for a few minutes. Letting it rest keeps the juices locked in.
  • Garnish with fresh basil before serving. A sprinkle of basil makes everything better and adds brightness to the dish!

Notes

Serve this dish family-style straight from the baking dish. Pair it with crusty bread or a fresh salad for a complete meal. Leftovers can be stored in an airtight container in the fridge for up to three days.
Calories: 450kcal
Course: Dinner, Main Course
Cuisine: Italian
Keyword: Easy Chicken Recipes, Family Dinner, Pesto Bruschetta Chicken, quick chicken recipe, Weeknight Meal

Lemon Chicken Romano

There is something truly special about the smell of food cooking in the kitchen. The sizzle of chicken hitting a hot pan fills the air, mingling with the bright zest of lemon. This Lemon Chicken Romano recipe is a delightful blend of flavors that can easily turn a weekday dinner into a memorable family feast. As you let this dish come together, you’ll hear the gentle sounds of your family gathering around the dining table, excited for a taste of what’s cooking.

Why This Works

Lemon Chicken Romano

This Lemon Chicken Romano is not just a delicious meal; it’s a dish that brings families together. The crispy chicken coated with flavorful breadcrumbs and Romano cheese is sure to get everyone at the table eager to dig in. It’s a time-saver as well; the preparation and cooking times are short. In about 30 minutes, you can serve up a meal that feels special but is easy enough for any night of the week.

Gathering around the table to enjoy good food is about more than just filling stomachs. It allows families to share stories and build connections. This recipe makes that easy, letting you focus on each other rather than the cooking.

Process Overview

“This is where the magic happens—when the aroma fills the kitchen.”

Cooking Lemon Chicken Romano is a simple process that results in a rich and fragrant meal. You’ll begin by preparing the chicken and letting it bake or fry until golden and crispy. In the background, you will create a light lemon sauce that not only enhances the flavor but also brings a zesty brightness to the dish.

The ease of the recipe ensures everyone, from kids to adults, can find joy in the experience. As the chicken cooks, you can set the table, serve some sides, and share moments with your family.

Ingredients

  1. 4 chicken breasts – Choose boneless and skinless for a quick cook.
  2. 1 cup breadcrumbs – You can use store-bought or make your own for freshness.
  3. 1/2 cup grated Romano cheese – It adds a delightful salty bite to the dish.
  4. 2 eggs – Free-range eggs add richer flavor.
  5. 1 lemon (zested and juiced) – Use fresh for the best flavor.
  6. 2 cloves garlic (minced) – It brings warmth and depth to the sauce.
  7. Salt and pepper to taste – Don’t forget this crucial seasoning step.
  8. Olive oil for cooking – Extra virgin olive oil is always a great choice.
  9. Fresh parsley for garnish – This adds a pop of color and freshness.

Lily’s personal tips:

  • When selecting chicken, look for even thickness to ensure even cooking.
  • For a crunchy texture, consider using panko breadcrumbs.
  • Use organic lemons to get the most vibrant zest.
  • Make sure to season every layer of your food for the best taste.
  • Fresh parsley not only looks great but adds bright flavor.

Directions

  1. Preheat the oven to 400°F (200°C) or heat olive oil in a frying pan over medium heat. This first step sets the stage for a lovely meal.
  2. In a shallow bowl, beat the eggs and mix in lemon zest, salt, and pepper. In another bowl, combine breadcrumbs and Romano cheese. This dual-bowl strategy keeps things organized and helps the flavors shine.
  3. Dip each chicken breast into the egg mixture, then coat it with the breadcrumb and cheese mixture. Make sure every inch is covered! This is where you build that tasty crust.
  4. Place the coated chicken on a baking sheet or directly in the frying pan. If baking, consider lining the sheet for easy cleanup.
  5. Bake for 20-25 minutes or fry until golden brown and cooked through, about 6-7 minutes per side. You’ll know it’s ready when it’s golden and the kitchen smells divine.
  6. In a small saucepan, combine lemon juice, minced garlic, and additional olive oil, heating gently. This sauce is the finishing touch that takes the dish over the top.
  7. Drizzle the lemon sauce over the crispy chicken and garnish with fresh parsley. Presenting your meal with garnishes makes it feel extra special.
  8. Serve the chicken with pasta, rice, or roasted vegetables. Choose sides that your family loves!

Serving

Lemon Chicken Romano

Nothing brings people together like a family-style meal. Arrange the Lemon Chicken Romano on a large serving platter. Surround it with vibrant side dishes. Encourage everyone to help themselves. This communal aspect makes for laughter and conversation, setting the stage for wonderful family memories.

Storage

If you happen to have leftovers, which I rarely do, store the chicken in an airtight container in the fridge. It will be good for about 3 days. To reheat, place the chicken on a baking sheet and warm it in the oven at 350°F (175°C) until heated through. This helps retain the chicken’s crispy texture. You can also warm it in the microwave, but the texture may not be the same.

Kitchen Notes

  • Prep Ahead: You can coat the chicken early in the day and store it in the fridge until you’re ready to cook.
  • Shortcuts: Buy pre-grated Romano cheese and pre-minced garlic to save time.
  • Less Mess: Use one hand for wet ingredients and one for dry, making breading easier and less messy.
  • Uniform Cooking: Pound the chicken to an even thickness for even cooking.
  • Baking Sheet: Use a non-stick baking mat or spray the baking sheet with olive oil for easy cleanup.

Variations

If you have picky eaters or dietary restrictions, there are plenty of ways to customize this dish:

  • For gluten-free diets, substitute breadcrumbs with gluten-free options or crushed almonds.
  • Consider adding a handful of spinach to the lemon sauce for added nutrition.
  • Swap out Romano cheese for parmesan or a dairy-free alternative if you want to cater to lactose intolerance.
  • Add herbs like thyme or oregano to the breadcrumb mix for a different herbal profile.
  • Change the flavor by adding red pepper flakes to the lemon sauce for a kick.

FAQ

  1. Can I use chicken thighs instead of breasts?
    Yes, chicken thighs will work wonderfully. They will be juicier, but make sure they are cooked to an internal temperature of 165°F (75°C).

  2. What sides pair well with this dish?
    Serve with pasta, rice, or a fresh green salad. Roasted vegetables complement the lemon’s brightness nicely.

  3. Can I make this dish in advance?
    You can bread the chicken in advance and store it in the refrigerator before baking or frying. It saves time for dinner.

  4. Is this suitable for freezing?
    Yes, freeze the uncooked breaded chicken. Just be sure to use it within 3 months for the best quality.

  5. Can I use dried herbs instead of fresh?
    Certainly! However, dried herbs are more potent. Use a third of the amount if you are substituting fresh for dried.

As you gather around the dinner table with your family, remember that sharing food is about sharing love. This Lemon Chicken Romano is not just a meal; it’s a chance to reconnect and create memories. Enjoy cooking, savor the flavors, and cherish every bite. Cooking doesn’t have to be complicated; it can be simple and rewarding, just like the love shared around your family table.

Lemon Chicken Romano

Prep Time 15 minutes
Cook Time 25 minutes
Total Time 40 minutes
Servings 4 servings
Calories 400
A delightful blend of crispy chicken, flavorful breadcrumbs, and zesty lemon sauce that brings families together around the dinner table.

Ingredients

For the Chicken

  • 4 pieces chicken breasts, boneless and skinless (Choose even thickness for uniform cooking.)
  • 1 cup breadcrumbs (Store-bought or homemade for freshness.)
  • 1/2 cup grated Romano cheese (Adds a delightful salty bite.)
  • 2 pieces eggs (Free-range eggs add richer flavor.)
  • 1 piece lemon, zested and juiced (Use fresh for the best flavor.)
  • 2 cloves garlic, minced (Brings warmth and depth to the sauce.)
  • to taste salt (Crucial for seasoning.)
  • to taste pepper (Crucial for seasoning.)
  • as needed olive oil for cooking (Extra virgin for the best flavor.)
  • to garnish fresh parsley (Adds color and freshness.)

Instructions 

Preparation

  • Preheat the oven to 400°F (200°C) or heat olive oil in a frying pan over medium heat.
  • In a shallow bowl, beat the eggs and mix in lemon zest, salt, and pepper.
  • In another bowl, combine breadcrumbs and Romano cheese.
  • Dip each chicken breast into the egg mixture, then coat it with the breadcrumb and cheese mixture.
  • Place the coated chicken on a baking sheet or in the frying pan.

Cooking

  • Bake for 20-25 minutes or fry until golden brown and cooked through, about 6-7 minutes per side.
  • In a small saucepan, combine lemon juice, minced garlic, and additional olive oil, heating gently.
  • Drizzle the lemon sauce over the crispy chicken and garnish with fresh parsley.

Serving

  • Arrange the Lemon Chicken Romano on a large serving platter and serve with pasta, rice, or roasted vegetables.

Notes

You can coat the chicken early in the day and store it in the fridge until ready to cook. Use panko breadcrumbs for crunch and pound chicken to an even thickness for uniform cooking. Store leftovers in an airtight container for up to 3 days.
Calories: 400kcal
Course: Dinner, Main Course
Cuisine: Italian
Keyword: Chicken Romano, Crispy Chicken, Easy Recipe, Family Dinner, Lemon Chicken

Ultimate Chicken Parmesan

I step into the kitchen and the air changes. The warm scent of garlic and tomato greets me, soft and familiar. Pans clink. The oven hums. That sound means comfort is on its way.

This Ultimate Chicken Parmesan is the recipe I reach for when I want something that feels special but stays simple. I make it for weeknight dinners and Sunday gatherings. If you want a similar weeknight version, try my classic Chicken Parmesan recipe for a quicker twist.

Why this works

Ultimate Chicken Parmesan

This dish hits three notes every family loves. Crispy, golden chicken on the outside. Bright, tangy marinara. Gooey, bubbling cheese that pulls apart with a fork. It is comfort and celebration all on one plate.

It saves time without losing flavor. Browning in a skillet locks in juices so the oven only needs to finish the cooking. That cuts total hands-on time and keeps things moist. For other crowd-pleasers with similar flavor profiles, you might like my creamy garlic Parmesan chicken for a softer, saucier option.

This recipe also stretches well. Make two pans and freeze one, or use leftovers in sandwiches. If you want a slow cooker twist for busy days, see my crockpot garlic Parmesan chicken thighs for another easy approach.

Process Overview

“This is where the magic happens—when the aroma fills the kitchen.”

We brown, bake, and melt. Browning gives a crisp crust that stands up to sauce. Baking finishes the chicken gently and melts the cheese to a perfect golden top. It is simple, dependable, and lovely for family dinners.

Along the way I remind myself to trust the timing and enjoy the smells. If you prefer a skillet-only method, the flavors stay true and you can adapt by following the technique in my garlic Parmesan chicken and potatoes skillet for similar results in one pan.

Ingredients

  • 4 boneless, skinless chicken breasts
    • Lily’s tip: Pound each breast to an even thickness so they cook evenly. A zip-top bag and a rolling pin work great.
  • 1 cup breadcrumbs
    • Lily’s tip: Use plain or Italian-style breadcrumbs. For crunch, add 1/4 cup panko to the mix.
  • 1/2 cup grated Parmesan cheese
    • Lily’s tip: Freshly grated Parmesan melts better and gives brighter flavor than pre-grated.
  • 1 teaspoon Italian seasoning
    • Lily’s tip: Mix with salt and pepper, and add a pinch of red pepper flakes if the family likes a little heat.
  • 2 cups marinara sauce
    • Lily’s tip: Use a good-quality jarred sauce or make a simple tomato sauce. Warm it slightly before pouring over the chicken.
  • 1 1/2 cups shredded mozzarella cheese
    • Lily’s tip: Whole milk mozzarella gives creamier melt. Freshly shredded melts smoother than pre-shredded.
  • Salt and pepper to taste
    • Lily’s tip: Season both sides of the chicken before breading for balanced flavor.
  • Olive oil for cooking
    • Lily’s tip: Use enough oil to coat the skillet. A medium-high heat helps create a golden crust quickly.

These basic pantry items come together easily. Assemble them before you start to keep the process calm and steady.

Directions

  1. Preheat the oven to 375°F (190°C).
    • Encouraging note: Give the oven a few minutes to reach temperature so the chicken finishes evenly. Pour a cup of tea while it warms.
  2. In a shallow dish, mix breadcrumbs, Parmesan cheese, Italian seasoning, salt, and pepper.
    • Encouraging note: Take a moment to taste a pinch. Adjust the seasoning so it sings. This mix is the flavor coat for your chicken.
  3. Coat each chicken breast in the breadcrumb mixture, pressing to adhere.
    • Encouraging note: Press firmly so the crumbs stick. If a spot looks thin, press again. It will crisp up nicely in the pan.
  4. Heat olive oil in a large skillet over medium heat. Cook chicken until golden brown on both sides, about 4 minutes per side.
    • Encouraging note: Work in batches if needed. A golden crust sets the foundation for a juicy chicken under the sauce.
  5. Transfer the chicken to a baking dish. Pour marinara sauce over the chicken and top with mozzarella cheese.
    • Encouraging note: Be generous with sauce for extra comfort. A spoonful more will keep everything moist and flavorful.
  6. Bake in the preheated oven for 20-25 minutes, until the chicken is cooked through and the cheese is bubbly.
    • Encouraging note: Use a meat thermometer if you like. Chicken is done at 165°F. Let the cheese bubble and brown a touch.
  7. Serve hot with additional marinara sauce if desired.
    • Encouraging note: Let the pan rest 3 to 5 minutes before serving. It helps the juices settle and makes slicing neat.

If you want a one-pan shortcut, sear and then cover the skillet to finish in the oven. For a crispier top, broil for 1-2 minutes at the end, watching closely so the cheese does not burn.

Serving

Ultimate Chicken Parmesan

Serve this family-style on a large platter so everyone can help themselves. Add a big bowl of pasta tossed with a little olive oil and garlic, or keep it low-carb with a green salad and roasted vegetables.

I like to place bowls of extra marinara and grated Parmesan on the table. Little touches let everyone customize their plate. For a playful weeknight switch, serve slices of chicken on soft rolls for simple chicken Parmesan sandwiches. Looking for a spicy side? My Bang Bang Chicken Bowl adds a bright, punchy contrast for adventurous eaters.

Storage

Refrigerator: Store leftover chicken in an airtight container for up to 3 days. Keep sauce separate if you want to avoid sogginess.

Freezer: Freeze portions in a freezer-safe container for up to 2 months. Thaw overnight in the fridge before reheating.

Reheating: Reheat in a 350°F oven for 15-20 minutes to keep the crust crisp. If you are short on time, microwave in short bursts, then finish under the broiler for a minute to revive the exterior.

Label containers with the date so you know when to use them. These simple steps make leftovers taste almost as good as fresh.

Kitchen Notes

  • Shortcut breading: Use seasoned panko for extra crunch and skip the Parmesan in the mix if you add it later for more flavor layering.
  • Make ahead: Bread the chicken and store on a tray covered in the fridge for up to 1 day. This saves time on busy nights.
  • Sauce swap: Use a chunky marinara for texture or a smooth tomato-basil sauce for a refined finish.
  • Double batch: Cook twice the chicken and freeze half. Reheat for quick weeknight meals when life gets busy.
  • Kid-friendly: Keep one pan plain with just cheese for picky eaters, and add herbs or red pepper flakes to a second pan for adults.

These tips help you adapt the recipe to your schedule and taste preferences without stress.

Variations

  • Low-carb: Replace breadcrumbs with almond flour or crushed pork rinds. Serve with roasted vegetables instead of pasta.
  • Gluten-free: Use gluten-free breadcrumbs or crushed gluten-free crackers. Ensure your marinara is gluten-free.
  • Lighter version: Skip the pan-frying step. Bake breaded chicken at 425°F for 18-22 minutes to get a lighter crust.
  • Extra cheesy: Mix shredded mozzarella and fontina for a richer, creamier top.
  • Herb-forward: Add fresh basil and oregano under the cheese for a burst of fresh flavor.

Each variation keeps the heart of the dish while accommodating diets and picky eaters. Trust your kitchen and your family’s preferences.

FAQ

Q: Can I use chicken thighs instead of breasts?

A: Yes. Boneless, skinless chicken thighs work well and stay juicy. Reduce baking time slightly and check for doneness at 165°F. Thighs add a richer flavor that many families love.

Q: How do I avoid soggy breading?

A: Brown the chicken well in the skillet to set the crust before adding sauce. Use slightly warm, not hot, sauce when spooning it on. Finish in the oven just long enough to cook through and melt the cheese.

Q: Can I prepare this ahead for guests?

A: Absolutely. Bread and pan-sear the chicken the day before, then refrigerate. On the day, assemble, add sauce and cheese, and bake. This reduces hands-on time when guests arrive.

Q: What sides pair best with Chicken Parmesan?

A: Classic choices are spaghetti with olive oil and garlic, Caesar salad, or garlic bread. Roasted green beans or a simple mixed greens salad are lighter complements.

Q: Is there a vegetarian alternative?

A: Use thick eggplant slices or large portobello mushrooms in place of chicken. Bread, brown, and bake them the same way. Eggplant Parmesan is a delicious vegetarian cousin.

Conclusion

I hope this Ultimate Chicken Parmesan becomes a warm, reliable recipe in your home. It has been a go-to for my family because it delivers comfort without fuss and stretches to feed hungry housefuls. For inspiration on classic techniques and another family-style version, check out this thoughtful write-up on The Best Chicken Parmigiana (Family Recipe) | A Simple Palate. If you like a step-by-step video and a trusted tested method, take a look at this detailed guide for Chicken Parmesan Recipe (with Video) – Allrecipes.

Happy cooking, and save a slice for someone you love.

Ultimate Chicken Parmesan

Prep Time 15 minutes
Cook Time 25 minutes
Total Time 40 minutes
Servings 4 servings
Calories 480
A simple yet special dish featuring crispy chicken, vibrant marinara, and gooey cheese, perfect for weeknight dinners or gatherings.

Ingredients

For the chicken

  • 4 pieces boneless, skinless chicken breasts (Pound each breast to an even thickness for even cooking.)
  • 1 cup breadcrumbs (Use plain or Italian-style breadcrumbs. Add 1/4 cup panko for extra crunch.)
  • 1/2 cup grated Parmesan cheese (Freshly grated Parmesan melts better.)
  • 1 teaspoon Italian seasoning (Mix with salt and pepper; add red pepper flakes for some heat.)
  • 2 cups marinara sauce (Use high-quality jarred or homemade; warm slightly before use.)
  • 1 1/2 cups shredded mozzarella cheese (Whole milk mozzarella gives a creamier melt.)
  • to taste salt and pepper (Season both sides of the chicken before breading.)
  • as needed tablespoons olive oil (Coat skillet for frying.)

Instructions 

Preparation

  • Preheat the oven to 375°F (190°C).
  • In a shallow dish, mix breadcrumbs, Parmesan cheese, Italian seasoning, salt, and pepper.
  • Coat each chicken breast in the breadcrumb mixture, pressing to adhere.

Cooking

  • Heat olive oil in a large skillet over medium heat. Cook chicken until golden brown on both sides, about 4 minutes per side.
  • Transfer the chicken to a baking dish. Pour marinara sauce over the chicken and top with mozzarella cheese.
  • Bake in the preheated oven for 20-25 minutes, until the chicken is cooked through and the cheese is bubbly.
  • Serve hot with additional marinara sauce if desired.

Notes

This dish can be adapted for freezing and reheating. Serve with pasta or a green salad.
Calories: 480kcal
Course: Dinner, Main Course
Cuisine: Italian
Keyword: Baked Chicken, Cheesy Chicken, Chicken Parmesan, Comfort Food, Family Dinner

Creamy Garlic Parmesan Chicken

I remember the first time I made this Creamy Garlic Parmesan Chicken. The kitchen smelled like roasted garlic and warm butter. The sizzle of chicken in the pan made everyone in the house pause and peek in, curious.

You will hear those same small footsteps and see the same hopeful faces. This dish brings that cozy kitchen sound and the comfort of a dinner that feels a little fancy but comes together fast. If you prefer a pan-friendly weeknight version, I also have a full write up at Creamy Garlic Parmesan Chicken Breast that complements this post.

Why this works

Creamy Garlic Parmesan Chicken

This recipe is the kind of family meal that earns a place on repeat. It balances creamy richness with bright garlic and nutty Parmesan, and it comes together quickly on a single skillet. That means less time cooking and more time at the table.

The flavors are familiar, so picky eaters will often try a bite without complaint. At the same time the sauce feels special enough for guests or a small celebration. If you like to plan ahead, the sauce holds well and keeps its texture when gently reheated.

This is also a time-saver. You can brown the chicken, make the sauce, and have everything plated within 30 minutes. When life gets busy, this becomes the recipe that rescues dinner. If you want a slow-cooker option for busier days, check out my practical spin in the Crockpot Garlic Parmesan Chicken Thighs post.

Process Overview

“This is where the magic happens—when the aroma fills the kitchen.”

The method is simple and forgiving. Brown the chicken to build flavor, then let the sauce do the heavy lifting. The garlic infuses the cream, and the Parmesan melts into a silky sauce that clings to the meat.

You will want a heavy skillet with a lid or an oven-safe pan. A heavy pan gives a nice sear and keeps the sauce warm while it finishes. This recipe responds well to small adjustments, so feel free to use slightly less cream or a touch more cheese depending on how rich you like it.

Ingredients

  • 2 boneless, skinless chicken breasts
    Lily’s tip: Pound to an even thickness for even cooking. If your family prefers dark meat, swap in boneless skinless thighs and adjust cook time.

  • 1 tablespoon olive oil
    Lily’s tip: Use a good quality olive oil for a cleaner flavor. You can blend with 1 teaspoon butter for extra richness if desired.

  • 3 cloves garlic, minced
    Lily’s tip: Mince finely and add to the pan when it is hot but not smoking. Fresh garlic gives the brightest flavor. If you have little ones, use 2 cloves to soften the bite.

  • 1 cup heavy cream
    Lily’s tip: Heavy cream makes the sauce silky. For a lighter version, use half-and-half, but the sauce will be thinner.

  • 1 cup grated Parmesan cheese
    Lily’s tip: Use freshly grated Parmesan for the best melt and flavor. Pre-grated cheese contains anti-caking agents that can change texture.

  • Salt and pepper to taste
    Lily’s tip: Season in layers. Lightly salt before searing and adjust the sauce at the end for the best balance.

  • Chopped parsley for garnish
    Lily’s tip: Parsley brightens the plate. If you do not have parsley, a little lemon zest also lifts the flavors nicely.

If you want to pair this with mushrooms and get another weeknight favorite, try my creamy mushroom thighs recipe for a family-friendly option at Creamy Garlic Mushroom Chicken Thighs.

Directions

  1. Heat olive oil in a pan over medium heat.
    Encouraging note: Let the oil get hot enough that a drop of water sizzles. A properly heated pan gives a golden crust that tastes wonderful.

  2. Season chicken breasts with salt and pepper, then add to the pan. Cook until golden brown on both sides and cooked through, about 6-7 minutes per side.
    Encouraging note: Resist the urge to move the chicken too soon. Let each side form a crust. If your breasts are thick, cut them in half to speed cooking.

  3. Remove chicken from the pan and set aside.
    Encouraging note: Set the chicken on a plate and tent with foil. This keeps it warm while you finish the sauce and keeps the meat juicy.

  4. In the same pan, add minced garlic and sauté for about 1 minute until fragrant.
    Encouraging note: Watch the garlic closely. It cooks fast and you want it golden, not brown. Stir gently to release all the aroma.

  5. Add heavy cream and bring to a simmer.
    Encouraging note: Stir as the cream warms. A slow simmer helps the flavors come together without separating the cream.

  6. Stir in Parmesan cheese until melted and smooth.
    Encouraging note: Add the cheese gradually and stir constantly. Freshly grated cheese melts more smoothly than pre-grated varieties.

  7. Return chicken to the pan and coat with the sauce.
    Encouraging note: Nestle the chicken into the sauce and spoon it over the top. This encourages the chicken to finish cooking in the sauce and soak up flavor.

  8. Cook for an additional 2-3 minutes on low heat.
    Encouraging note: Use low heat so the sauce thickens gently. You are aiming for a glossy sauce that clings to the chicken.

  9. Garnish with chopped parsley before serving.
    Encouraging note: A sprinkle of parsley adds color and a fresh note that balances the richness. Tell your family to gather around.

If you like the idea of adding roasted potatoes directly to the pan for a one-skillet meal, my skillet recipe for chicken and potatoes shows how to do that without extra work at Garlic Parmesan Chicken and Potatoes Skillet.

Serving

Creamy Garlic Parmesan Chicken

Serve family-style right from the pan for a warm, communal feel. Place the pan in the center of the table and let everyone help themselves. This dish pairs well with simple sides that soak up the sauce.

Good serving ideas:

  • Steamed green beans or roasted broccoli for a vegetable that can handle the cream.
  • A bed of cooked pasta, rice, or mashed potatoes to carry the sauce.
  • Crusty bread for dipping if you want to keep things casual and hands-on for kids.

If you prefer to make it part of a family-style spread with a twist, try slicing the chicken and serving it over a tray of buttered egg noodles or creamy polenta. For a Middle Eastern-inspired side to serve alongside this chicken, my chicken kofta with garlic yogurt pairs nicely and adds variety to a family meal at Chicken Kofta with Creamy Garlic Yogurt Sauce.

Storage

Store leftovers in an airtight container in the refrigerator for up to 3 days. Let the sauce cool slightly before refrigerating to prevent condensation.

To reheat:

  • Warm gently in a skillet over medium-low heat. Add a splash of milk or cream if the sauce seems thick.
  • You can also reheat in the microwave in 30 second bursts, stirring between bursts until warm. Do not overheat or the sauce can separate.

If you freeze the dish, freeze only the chicken without a lot of sauce for best results. Thaw in the refrigerator overnight and reheat gently. Heavy cream does not always freeze well, so freezing may change the texture.

Kitchen Notes

  • Use a heavy skillet for the best sear and even heat distribution. Cast iron or stainless steel works well.
  • If the sauce looks too thin, simmer a minute longer. If it looks grainy, lower the heat and whisk gently until smooth.
  • Taste and adjust salt only after the cheese melts. Parmesan is salty and can change the seasoning.
  • For faster prep, mince garlic in advance and keep in the fridge for up to 24 hours. Fresh is best but convenience helps on busy nights.
  • To keep things moist, do not overcook the chicken. Use a meat thermometer; 165 °F is the safe internal temperature for poultry.

If you want a quick alternative that keeps the creamy concept but is adapted for picky eaters, check my thick and comforting thighs recipe for ideas on texture and seasoning at Creamy Garlic Mushroom Chicken Thighs.

Variations

  • Lighter Version: Swap heavy cream for half-and-half. The sauce will be thinner but still flavorful. Add a teaspoon of cornstarch dissolved in water if you like a thicker finish.
  • Kid-Friendly: Use 2 cloves of garlic and omit or reduce pepper. Slice the chicken before serving so little hands can reach in easily.
  • Low-Carb: Serve over cauliflower mash or zucchini noodles. The sauce is naturally low carb without added starch.
  • Herb Change-Up: Add a teaspoon of dried Italian seasoning while simmering for a herb-forward twist. Fresh thyme or basil also pairs well.
  • Protein Swap: Use boneless skinless thighs instead of breasts if your family prefers darker meat. Thighs stay moist and add deeper flavor.

For a different style that complements picky palates and keeps garlic front-and-center, I also recommend my chicken kofta recipe for a flavorful family meal at Chicken Kofta with Creamy Garlic Yogurt Sauce.

FAQ

Q: Can I use pre-grated Parmesan?
A: You can, but freshly grated Parmesan melts more smoothly and gives a better texture. Pre-grated can sometimes feel grainy.

Q: How do I keep the sauce from splitting?
A: Keep the heat low when you add the cheese. Stir gently and avoid boiling the sauce once the dairy is added.

Q: Can I make this dairy-free?
A: Try using a dairy-free cream alternative and a dairy-free Parmesan substitute. The texture will be different but still tasty. Taste and adjust seasoning.

Q: How thick should the chicken breasts be?
A: Aim for about 3-4 ounces each after trimming and 1/2 to 3/4 inch thick. Pound thicker breasts to an even thickness for even cooking.

Q: Can I cook this in the oven?
A: Yes. Sear the chicken on the stovetop, add the sauce, then transfer to an oven-safe pan and bake at 375 °F for 10 minutes until the internal temperature reaches 165 °F.

Conclusion

I hope this Creamy Garlic Parmesan Chicken becomes one of your go-to family meals. It is a recipe I trust when I want something that tastes special without taking the whole evening. If you like seeing other versions, the Salt & Lavender take on Creamy Garlic Parmesan Chicken offers a lovely variance, and for another popular perspective see the Gimme Delicious version of Creamy Garlic Parmesan Chicken.

Thanks for cooking with me. Put on some music, invite the family, and let that kitchen smell bring everyone together.

Creamy Garlic Parmesan Chicken

Prep Time 10 minutes
Cook Time 20 minutes
Total Time 30 minutes
Servings 4 servings
Calories 600
A quick and comforting chicken dish featuring a creamy garlic and Parmesan sauce, perfect for family dinners or special occasions.

Ingredients

Main ingredients

  • 2 pieces boneless, skinless chicken breasts (Pound to an even thickness for even cooking.)
  • 1 tablespoon olive oil (Use a good quality olive oil for a cleaner flavor.)
  • 3 cloves garlic, minced (Mince finely for bright flavor.)
  • 1 cup heavy cream (For a lighter version, use half-and-half.)
  • 1 cup grated Parmesan cheese (Use freshly grated for best melt and flavor.)
  • Salt and pepper to taste (Season in layers for best balance.)
  • Chopped parsley for garnish (Brings brightness to the plate.)

Instructions 

Preparation

  • Heat olive oil in a pan over medium heat until hot.
  • Season chicken breasts with salt and pepper, then add to the pan. Cook until golden brown on both sides and cooked through, about 6-7 minutes per side.
  • Remove chicken from the pan and set aside, tenting with foil to keep warm.

Making the sauce

  • In the same pan, add minced garlic and sauté for about 1 minute until fragrant.
  • Add heavy cream and bring to a simmer, stirring as the cream warms.
  • Stir in Parmesan cheese until melted and smooth.

Combining

  • Return chicken to the pan and coat with the sauce, cooking for an additional 2-3 minutes on low heat.
  • Garnish with chopped parsley before serving.

Notes

Store leftovers in an airtight container in the fridge for up to 3 days. Reheat gently to prevent separating the sauce.
Calories: 600kcal
Course: Dinner, Main Course
Cuisine: Italian
Keyword: Chicken Recipe, Comfort Food, Creamy Garlic Parmesan Chicken, Family Dinner, One-Skillet Meals

Classic Chicken Parmesan

There is something magical about the sound of silverware clinking and the laughter of children as they gather around the table. When the aroma of something delicious fills the kitchen, it becomes a warm invitation for everyone. That’s the kind of scene I recall from my childhood. It reminds me of family dinners where my grandmother’s classic chicken Parmesan would often steal the spotlight. The tender chicken, crispy coating, and rich marinara sauce always had everyone coming back for seconds. It is moments like these that reinforce the love and togetherness that come from sharing a heartfelt meal.

Why This Classic Chicken Parmesan Feels Like Home

Classic chicken Parmesan is a dish that resonates with many families. It brings warmth and comfort, while still being straightforward enough for a weeknight dinner. Every bite of this savory creation feels like a hug. The combination of juicy chicken, tangy marinara, and gooey mozzarella creates a melody of flavors that sing harmoniously together.

This meal has a special place in our family for a reason. It is versatile, easy to prepare, and pleasing to even the pickiest eaters. From my experience, making chicken Parmesan becomes a delightful affair when the whole family joins in. Whether it’s breading the chicken or sprinkling on some cheese, everyone can be part of the cooking adventure. This shared experience around food is one that fosters love and connection.

The Simple Magic Behind Classic Chicken Parmesan

What makes classic chicken Parmesan truly shine? It’s about simplicity wrapped in richness. You’ll find that this dish combines easily accessible ingredients that come together quickly. From the crunchy breadcrumb coating to the bubbling cheese melted into a perfect golden layer, it is hard to resist. Each bite tells a story of comfort—when flavors meld together and simply feel right.

With just a few steps, you can bring restaurant-quality chicken Parmesan to your kitchen. Plus, it makes you look like a master chef without the stress. I can assure you, it feels good to create something so satisfying while keeping your time in the kitchen to a minimum.

Why This Recipe Works for Our Busy, Joyful Nights

In our bustling home, busy nights are part of life. However, with a simple recipe like chicken Parmesan, we don’t sacrifice flavor or family time. It is the perfect blend of effort and ease. Once we get through the initial prep work, the cooking can actually be a joyful experience. This dish works wonders for those evenings when everyone is hungry and looking for something to fill them up.

You prepare it in under an hour, which is a win for any night. The beauty of classic chicken Parmesan is that its familiar taste brings everyone together. Even if you’ve had a long day, the process becomes cathartic. Your kitchen transforms into a space of joy, where good food becomes a comfort.

Classic Chicken Parmesan

How to Make Classic Chicken Parmesan, The Heartwarming Way

Making classic chicken Parmesan is both straightforward and rewarding. You’ll find that with each step, your kitchen fills with delightful aromas, and soon enough, your family will be eagerly awaiting dinner.

“This is where the magic happens—when the aroma fills the kitchen and my kids come running in, asking ‘Is it ready yet?’”

Step-by-Step Overview: Keeping It Simple

  1. Preheat the oven to 400°F (200°C). Starting with a hot oven ensures your dish cooks evenly and the cheese melts beautifully.

  2. Season the chicken breasts with salt, pepper, garlic powder, and Italian seasoning. This simple seasoning adds depth to the chicken. Feel free to adjust the spices to match your family’s taste.

  3. In a shallow bowl, combine breadcrumbs and grated Parmesan cheese. This delicious mixture will form a golden crust. The Parmesan adds a fantastic flavor.

  4. Dip each chicken breast in beaten eggs, then coat with the breadcrumb mixture. Ensure that every inch of the chicken is covered. The egg acts as the glue, so don’t rush this step.

  5. Heat olive oil in a large skillet over medium heat. Fry the chicken for 3-4 minutes on each side until golden brown. A little browning here builds flavor, just like grandma showed me. Keep an eye on it to prevent burning.

  6. Once browned, place the chicken in a baking dish. It should have a nice crust on it. It is a joy to see the golden color.

  7. Top each piece with marinara sauce and shredded mozzarella cheese. This is where things get cheesy! Don’t skimp on the sauce.

  8. Bake in the preheated oven for 15-20 minutes until the cheese is bubbly. Your home will smell incredible as it finishes baking.

  9. Garnish with fresh basil if desired and serve. Simple yet vibrant, fresh basil can brighten the dish. Remember, it’s the little things that elevate it.

Serving Classic Chicken Parmesan with Love

When it comes to serving, I love presenting our classic chicken Parmesan family-style. It creates a feeling of togetherness, with the dish in the center of the table where everyone can help themselves. This is where stories are shared, delightful conversations flow, and laughter fills the air.

Typically, I will serve it alongside a fresh salad or some garlic bread, allowing everyone to enjoy a hearty meal. The joy of watching my kids sprinkle extra cheese or pass around the sauce creates lasting memories. Each family member has a favorite way of enjoying the dish, making it special for everyone. I often tell them to load up their plates with that yummy marinara sauce—it’s all about what makes them happy.

Classic Chicken Parmesan

Storage & Reheat Tips

When we have leftovers, which is often with this dish, I make sure to store them properly. It’s a good idea to place the chicken in an airtight container in the refrigerator. When you’re ready to enjoy the leftovers, reheating the chicken in the oven retains that lovely crunch. The microwave is fine for a quick lunch, but the oven brings back that just-made warmth.

If you find yourself with too much chicken Parmesan, consider freezing it before baking. You can assemble everything in the baking dish, cover it tightly, and it will be ready for a rainy day. When the time comes, just pop it in the oven, and you have a meal that tastes freshly made.

My Kitchen Notes & Shortcuts

As with any recipe, I’ve learned a few tips and tricks that can improve the chicken Parmesan experience.

  • Use thicker chicken breasts for juicier meat: Thicker pieces allow the chicken to retain moisture better, avoiding dry bites.

  • Mix up the breadcrumbs: Panko breadcrumbs can add extra crunch. It’s a bit of an upgrade that’s worth trying.

  • Let the kids help with the breading: It’s the fun part! It keeps them engaged, and they get to take pride in their cooking contribution.

  • Experiment with different cheeses: Sometimes, I mix sharp cheddar with mozzarella for a twist. Just like in life, a little variation can lead to delightful surprises.

  • Prep the sauce a day ahead: If you’re really short on time, having your sauce ready to go makes this dish come together seamlessly.

Family-Friendly Variations

There is no shortage of ways to tweak this classic chicken Parmesan to suit your family’s preferences. For a lighter version, you might try baking the chicken without frying first. Just season your chicken and place it straight in the oven. For a kid-friendly twist, consider using bite-sized pieces of chicken and turn them into chicken Parmesan sliders.

Another fun variation is to use different proteins. You can substitute chicken with eggplant for a vegetarian option or turkey for a leaner choice. Playing with the ingredients allows you to add your family’s personal touch to the dish.

FAQs About Classic Chicken Parmesan

Can I make this ahead for a busy week?

Absolutely! In fact, letting it sit for an hour lets the flavors get to know each other, just like an old family recipe.

How can I make this gluten-free?

You can use gluten-free breadcrumbs or even ground almonds as a tasty alternative. It will still be delightful.

Can I freeze chicken Parmesan?

Yes, you can! Just assemble the dish in advance, freeze it before baking, and it will be a fantastic fallback meal.

What sides go well with chicken Parmesan?

Salads, garlic bread, or even pasta make excellent companions. It’s all about creating a complete meal.

How can I ensure the chicken stays tender?

Brining the chicken in salt water for a bit before cooking can help maintain moisture and tenderness.

One Final Thought from My Kitchen

As you venture into making this classic chicken Parmesan, remember that the essence of cooking lies in the love and care you put into it. This dish isn’t just about feeding your family; it’s about nourishing relationships and creating memorable moments. I hope this meal finds its way into your family’s laughter and stories. If it does, my grandmother’s kitchen is smiling. Happy cooking!

Classic Chicken Parmesan

Prep Time 20 minutes
Cook Time 25 minutes
Total Time 45 minutes
Servings 4 servings
Calories 650
A heartwarming dish of juicy chicken, crispy coating, and rich marinara that brings families together around the table.

Ingredients

For the Chicken

  • 4 pieces chicken breasts (Use thicker pieces for juicier meat.)
  • 1 teaspoon salt
  • 1 teaspoon black pepper
  • 1 teaspoon garlic powder
  • 1 teaspoon Italian seasoning (Feel free to adjust to taste.)
  • 2 large eggs (Beaten.)

For the Coating

  • 1 cup breadcrumbs (Panko can be used for extra crunch.)
  • 1/2 cup grated Parmesan cheese (Adds fantastic flavor.)

For Cooking

  • 1/4 cup olive oil (For frying the chicken.)

For Topping

  • 2 cups marinara sauce (Don't skimp on the sauce.)
  • 1 cup shredded mozzarella cheese

For Garnish

  • 1 bunch fresh basil (Optional, but adds vibrancy.)

Instructions 

Preparation

  • Preheat the oven to 400°F (200°C).
  • Season the chicken breasts with salt, pepper, garlic powder, and Italian seasoning.
  • In a shallow bowl, combine breadcrumbs and grated Parmesan cheese.
  • Dip each chicken breast in beaten eggs, then coat with the breadcrumb mixture.

Cooking

  • Heat olive oil in a large skillet over medium heat.
  • Fry the chicken for 3-4 minutes on each side until golden brown.
  • Once browned, place the chicken in a baking dish.
  • Top each piece with marinara sauce and shredded mozzarella cheese.
  • Bake in the preheated oven for 15-20 minutes until the cheese is bubbly.

Serving

  • Garnish with fresh basil if desired and serve family-style.

Notes

Store leftovers in an airtight container. For best results, reheat in the oven to maintain crunchiness. You can also freeze unbaked chicken Parmesan for later use.
Calories: 650kcal
Course: Dinner, Main Course
Cuisine: Italian
Keyword: Baked Chicken, Chicken Parmesan, Comfort Food, Easy Recipe, Family Dinner

Dumpling Lasagna

I can still hear the clatter of plates and the small chorus of, "Is it ready?" from around the table as the smell of tomato and warm cheese fills the kitchen. My kids set the napkins while I spoon sauce and tuck dumplings into the baking dish, and somehow that small ritual makes even a busy weeknight feel like a little celebration. It’s the kind of dinner that pulls everyone close and gives me a moment to breathe between life’s errands and bedtime stories. If you love comfort food with a twist, give Dumpling Lasagna a try; it’s easy, comforting, and full of cozy flavors that invite conversation and seconds. For another cozy meal idea you might enjoy, I’ve often turned to homemade chicken and dumplings on days when I want that same slow-simmered feeling with a different kind of comfort.

Why This Dumpling Lasagna Feels Like Home

This dish is a mashup of two beloved classics: tender dumplings and layered lasagna. It keeps the soft, pillowy bite of dumplings and pairs it with the saucy, cheesy familiarity of lasagna. It is the kind of meal that warms your hands and your heart, and it often becomes the centerpiece of small celebrations at our kitchen table.

What I love most is how forgiving it is. You do not need perfect pasta sheets or a long afternoon to pull this together. It’s a dish that forgives a missed chop or a hurried stir. Meanwhile, because dumplings cook in the sauce and cheese melds on top, you get great texture and a satisfying finish with minimal fuss. For another dish that brings families together easily, try this simple comfort food recipe I return to when I want easy and familiar.

Dumpling Lasagna

Why Dumpling Lasagna is Our New Family Favorite

This recipe is quick enough for weeknights but feels special enough for Sunday dinners. Dumplings replace traditional lasagna noodles, so there is less assembly and often less mess for the kids to help with. The layers trap pockets of ricotta and spinach, and every scoop pulls a little string of melted mozzarella.

I remember teaching my older son to arrange dumplings in a circle the first time he helped. He was so proud when he saw the bubbly top after baking. Those small victories at the stove are what make cooking worth the effort, and Dumpling Lasagna hands you plenty of them. If you like trying new, family-friendly twists on classics, this dish will feel like a warm invitation to gather.

The Simple Magic Behind Dumpling Lasagna

The magic is in the contrast. Soft dumplings meet tangy marinara and rich cheeses, and the spinach-ricotta layer gives you a fresh, creamy middle. Texture tells the story here: look for the cheese to turn a gentle golden and the sauce to bubble around the edges. If the top is brimming with golden spots and the center gives slightly when nudged, you know it is ready.

If you want another dish to make on a rainy day, try pairing the same spirit of comfort with a different stew or pot of dumplings like the recipe for delicious homemade chicken and dumplings I lean on when the wind blows cold. Both meals bring that slow-kitchen comfort, but Dumpling Lasagna gets you to the table faster.

How to Make Dumpling Lasagna, The Heartwarming Way

“This is where the magic happens—when the aroma fills the kitchen and my kids come running in, asking ‘Is it ready yet?’”

Here’s a quick overview so you can see the whole picture before we start. You mix a creamy ricotta filling with spinach and herbs. Then you spread sauce, tuck in dumplings, and layer the ricotta. A final crown of mozzarella and parmesan goes on top. Bake till bubbly and golden. The dish smells like tomato and melted cheese and looks beautiful when it comes out of the oven.

This process is hands-on but not fussy. The colors will guide you: bright red sauce, flecks of green from the spinach, and a golden top. The aroma tells you it is close when it fills the room and has that sweet-sour tomato note that pulls everyone toward the table. For another comforting recipe that uses dumplings in a different way, consider my go-to family favorite when you want something spoonable and soothing.

Ingredients You’ll Need

Dumplings
Ricotta cheese
Spinach
Marinara sauce
Mozzarella cheese
Parmesan cheese
Garlic
Italian seasoning
Salt
Pepper

Don’t skip the fresh herbs if you can find them; they lift the dish. But this is also a very forgiving recipe. If you have frozen spinach, thaw and squeeze it dry. If you need to swap a cheese or stretch the ricotta, go ahead. This is about feeding people and making memories, not making a museum piece. If you like, you can find a warm cousin to this recipe in my notes on that old-fashioned comfort stew that our family turns to in stormy weather.

Step-by-Step Directions: Keeping It Simple

  1. Preheat the oven to 375°F (190°C).
    Place your rack in the middle of the oven so the top browns evenly. Preheating helps the cheese melt smoothly and the dumplings cook through.

  2. In a mixing bowl, combine ricotta cheese, chopped spinach, garlic, Italian seasoning, salt, and pepper.
    Mix until the spinach is evenly distributed. Taste a tiny bit of the mixture and adjust seasoning if you think it needs more salt or pepper.

  3. In a baking dish, spread a layer of marinara sauce.
    Use a thin, even layer so the dumplings get flavor and enough moisture to cook. A jarred marinara works fine; pick one you like the taste of.

  4. Layer dumplings on top of the sauce, then add a layer of the ricotta mixture.
    Place dumplings close but not crowded so heat circulates. Spoon ricotta gently so you keep lovely pockets of filling.

  5. Repeat the layers, finishing with marinara sauce on top.
    Two to three layers usually works depending on your dish depth. The final sauce layer keeps the top from drying out during the first part of baking.

  6. Sprinkle mozzarella and parmesan cheeses over the top.
    Be generous with the cheese if your family loves a gooey top. A little parmesan adds a nutty finish that makes the dish sing.

  7. Cover with foil and bake for 25 minutes.
    Covering traps heat and steam, allowing dumplings to cook tender. This step helps the center reach a safe temperature without over-browning the cheese.

  8. Remove the foil and bake for an additional 15 minutes, or until the cheese is bubbly and golden.
    A little browning is great for flavor; it gives you those toasty notes my grandmother loved. If the top is golden and sauce is bubbling, you are there.

  9. Let it cool slightly before serving.
    Wait 5 to 10 minutes so everything sets; this makes slicing or scooping much neater and keeps little mouths safe from molten cheese. Let the kids set the table while it cools; they love that small role.

Dumpling Lasagna

Each step is quick, and you will find rhythm as you go. The key is to be relaxed: this is not a dress rehearsal. Let a child stir the ricotta mix or arrange the dumplings. Those small moments are what make a meal ours. For more ideas on mixing and matching comforting textures, see this classic family-style recipe that shows how simple swaps create new favorites.

Serving Dumpling Lasagna with Love

Bring the dish to the table while it is still warm and let people serve themselves family-style. I usually place a big salad, crusty bread, and a small bowl of extra parmesan nearby. The kids love to add a bit more cheese and a drizzle of olive oil. Let someone pour the drinks while someone else gets the napkins; that little choreography makes dinner feel like a team effort.

Serve with a bright green salad or roasted vegetables to balance the richness. A spoonful of extra marinara on the side keeps it saucy for those who like every bite dipped. Watching my kids compare who got the largest dumpling is one of those small, silly traditions that makes me smile. If you want to pair it with a soup or another comfort starter, I often reach for a bowl of stewy dumplings on really chilly evenings; the two together feel like a hug.

Dumpling Lasagna

Storage & Reheat Tips (Keeping the Goodness)

Store any leftovers in an airtight container in the refrigerator for up to 3 days. If you plan to keep it longer, freeze individual portions covered well to prevent freezer burn; they will keep for up to 2 months.

For reheating, the oven is your friend. Place leftovers in a small baking dish, cover with foil, and heat at 350°F (175°C) until warmed through. The microwave is fine for a quick lunch; cover loosely and heat in short bursts, stirring or turning halfway through to ensure even heat. If you have frozen portions, thaw overnight in the fridge before reheating for best texture. For a crisp top again, finish in the oven or under a broiler for a minute, watching closely.

If you want to take the stress out of weeknight cooking, try prepping the ricotta-spinach mix and storing it in the fridge a day ahead. Then you only need to assemble and bake when you come home. I also like to freeze pre-assembled but unbaked portions for single-serving reheats. Learn more tricks from a comforting recipe I use when time is short at my pantry-friendly favorite.

My Kitchen Notes & Shortcuts

  • Use frozen dumplings if you want speed. No shame in that. They cook well right in the sauce, and it saves time.
  • Swap fresh spinach for frozen if that is what you have. Thaw, squeeze dry, and fold in. Nobody needs soggy surprises.
  • Make the ricotta mixture a day ahead. It saves time and the flavors get friendlier in the fridge.
  • If you do not want a tomato-heavy version, use a creamy béchamel and call it comfort under a different name. It is still Dumpling Lasagna in spirit.
  • Let the kids help sprinkle the cheeses. It is safe and they love the job. A proud little sous-chef is a kitchen win.

These small shortcuts let you save time without losing the heart of the meal. Over the years I have learned to keep a jar of good sauce on hand and to lean on frozen greens when the day runs away from me. It keeps dinners warm and real.

Family-Friendly Variations

Make it lighter: swap part-skim ricotta and use less mozzarella. Add extra spinach and mushrooms to bulk up the veggie content.
Kid-approved: drop in pepperoni slices between layers for a fun twist if your crew loves pizza flavors.
Meat lover’s version: brown ground pork or turkey with garlic and Italian seasoning, then mix it into the marinara for a hearty layer.
Gluten-free: use gluten-free dumplings or make a simple ricotta-and-egg batter dumpling that fits your needs.
Cheesy upside-down: for a crispy top, add extra parmesan and broil for 1 minute at the end. Watch closely so it does not burn.

Think of these ideas as invitations to make the dish your own. My family has tried each of these and every version had its fans and its funny stories. Let your table tell a new story tonight.

Dumpling Lasagna

FAQs About Dumpling Lasagna

Can I make this ahead for a busy week?
Absolutely. Assemble it the day before, cover, and refrigerate. Let it sit for an hour at room temperature before baking, or bake straight from the fridge with an extra 10 minutes.

What kind of dumplings work best?
Frozen potstickers or soft store-bought dumplings are a great shortcut. Homemade dumplings are lovely if you have the time. The key is to have them plump and tender so they bake into the sauce.

How do I prevent the top from burning?
Cover with foil during the first part of baking, as the recipe says. Remove foil for the last 15 minutes to get that bubbly, golden finish. If it starts to brown too fast, lower the rack or tent with foil.

Can I freeze leftovers?
Yes. Cool completely, then freeze in airtight containers. Thaw in the fridge overnight before reheating for best texture.

Is there a vegetarian option?
Yes. Use a hearty marinara, add extra vegetables like zucchini, mushrooms, and bell peppers, and layer them with the ricotta. It is just as comforting.

One Final Thought from My Kitchen

I hope this recipe finds its way into your weeknight rotation and your family stories. There is something quietly joyful about a dish that brings people to the table without much drama. Dumpling Lasagna does that. It’s forgiving, warm, and a little playful, and it makes room for everyone—kids, tired partners, and hungry friends.

Conclusion

If you want to see a viral twist that inspired variations across the web, the Viral pork dumpling lasagna – The Modern Nonna is a fun place to explore similar ideas and flavor swaps. For another take that shows how this idea spread on social platforms and how people changed it to fit their kitchens, check out this round-up of the Viral TikTok Dumpling Lasagna – Myriad Recipes.

Until next time, happy cooking. Give this one a try; it’s easier than it looks, and you might surprise yourself with how quickly it becomes one of your family’s favorite meals.

Dumpling Lasagna

Prep Time 20 minutes
Cook Time 40 minutes
Total Time 1 hour
Servings 6 servings
Calories 450
A comforting fusion of tender dumplings layered with marinara and cheesy goodness, perfect for weeknight dinners and family gatherings.

Ingredients

Dumpling Layer

  • 12 pieces Dumplings (Use frozen or homemade dumplings.)

Cheese Mixture

  • 15 oz Ricotta cheese (You can substitute with part-skim ricotta for a lighter option.)
  • 10 oz Spinach (Fresh or thawed frozen spinach can be used. Squeeze to remove excess moisture.)
  • 2 cloves Garlic (Minced garlic adds flavor.)
  • 1 tbsp Italian seasoning (Use fresh herbs if available.)
  • 1 tsp Salt (Adjust according to taste.)
  • 1/2 tsp Black pepper (Freshly ground is preferred.)

Sauce & Toppings

  • 24 oz Marinara sauce (Use your favorite jarred or homemade sauce.)
  • 2 cups Mozzarella cheese (Shredded mozzarella for topping.)
  • 1/2 cup Parmesan cheese (Grated parmesan adds a nutty flavor.)

Instructions 

Preparation

  • Preheat the oven to 375°F (190°C) and place the rack in the middle.
  • In a mixing bowl, combine ricotta cheese, chopped spinach, garlic, Italian seasoning, salt, and pepper. Mix until well combined.
  • In a baking dish, spread a layer of marinara sauce.

Layering

  • Layer dumplings on top of the sauce, followed by a layer of the ricotta mixture. Repeat the layers, finishing with marinara sauce on top.
  • Generously sprinkle mozzarella and parmesan cheeses over the top.

Baking

  • Cover with foil and bake for 25 minutes.
  • Remove the foil and bake for an additional 15 minutes, or until the cheese is bubbly and golden.
  • Let it cool slightly before serving.

Notes

This dish is forgiving and versatile; feel free to customize ingredients according to your preferences. It pairs well with a bright salad or crusty bread.
Calories: 450kcal
Course: Dinner, Main Course
Cuisine: American, Italian
Keyword: cheesy, Comfort Food, Dumpling Lasagna, Easy Dinner, Family-Friendly

Chicken Alfredo Pasta

There’s something magical about the smell of dinner coming together in the kitchen. Picture the sound of sizzling chicken, the gentle bubbling of creamy sauce, and the aroma wafting through the house. Just before dinner time, your family gathers around, and their eyes light up with anticipation. Cooking is not just about the food; it’s about bringing loved ones together and creating cherished memories.

Why This Works

Chicken Alfredo Pasta

This Chicken Alfredo Pasta is a family favorite for many reasons. First, it’s quick and easy to prepare, making it perfect for busy weeknights. You can have a hearty meal on the table in under 30 minutes. Second, it’s a crowd-pleaser. Creamy, cheesy, and a little bit indulgent, it satisfies even the pickiest eaters in your home. Plus, cooking it in one skillet means less cleanup afterward—great for busy families.

Process Overview

“This is where the magic happens—when the aroma fills the kitchen.”

As we dive into this Chicken Alfredo Pasta recipe, let’s make sure the process feels seamless and enjoyable. Cooking should be a joyful experience, allowing you to bond with your family. With the right ingredients and a bit of enthusiasm, anyone can whip this up in no time.

Ingredients

  • 12 oz fettuccine pasta
  • 2 tablespoons olive oil
  • 1 lb chicken breast, sliced
  • 3 cloves garlic, minced
  • 1 cup heavy cream
  • 1 cup grated Parmesan cheese
  • Salt and pepper to taste
  • Parsley, for garnish

Lily’s Tips:

  • Choose fettuccine because its flat shape holds the creamy sauce beautifully.
  • Use extra virgin olive oil for a richer flavor.
  • Don’t rush the chicken cooking process; a golden brown crust adds depth to your dish.
  • Fresh garlic is a must; it makes a world of difference in flavor.
  • Go for freshly grated Parmesan as it melts better and brings a creamier texture to your sauce.

Directions

  1. Cook the fettuccine pasta according to package instructions; drain and set aside.
    Tip: Toss a pinch of salt in the boiling water for added flavor.
  2. In a large skillet, heat olive oil over medium heat. Add the chicken slices, season with salt and pepper, and cook until golden brown and cooked through. Remove and set aside.
    Tip: Make sure not to overcrowd the pan; this helps in browning the chicken evenly.
  3. In the same skillet, add the minced garlic and sauté for about 1 minute until fragrant.
    Tip: Keep an eye on the garlic, as it can burn quickly.
  4. Pour in the heavy cream and bring to a simmer. Stir in the Parmesan cheese until melted and the sauce is smooth.
    Tip: If the sauce is too thick, add a splash of pasta water to reach your desired consistency.
  5. Add the cooked pasta and chicken back into the skillet, tossing to coat everything in the sauce.
    Tip: Ensure every noodle gets a nice coating of that luxurious sauce.
  6. Garnish with parsley and serve immediately.
    Tip: A sprinkle of extra Parmesan on top enhances the presentation.

Serving

Chicken Alfredo Pasta

To serve Chicken Alfredo Pasta family-style, simply place the skillet in the center of the table. Pair it with a fresh salad and warm crusty bread for a complete meal. Encourage everyone to help themselves, creating a cozy atmosphere that makes everyone feel at home.

Storage

This Chicken Alfredo Pasta stores well in the refrigerator. Place leftovers in an airtight container and refrigerate for up to 3 days. When reheating, add a splash of cream or milk to the skillet to bring back the creaminess. Heat over low until warmed through, stirring occasionally.

Kitchen Notes

  • Use pre-cooked rotisserie chicken for an even quicker meal.
  • Consider adding steamed broccoli or peas for a pop of color and nutrition.
  • Make sure you taste the sauce as you cook, adjusting salt and pepper to your preference.
  • If you have leftover Alfredo sauce, it makes a great base for homemade pizza!
  • Invest in good non-stick cookware for easy cleanup and even cooking.

Variations

If your family has different tastes or dietary restrictions, don’t worry. Here are some tweaks:

  • For a vegetarian option, substitute the chicken with mushrooms or your favorite vegetables.
  • Try whole wheat pasta for added fiber and nutrients.
  • If you need a lower-calorie alternative, use half-and-half or a milk of your choice instead of heavy cream.
  • For a zesty twist, add some lemon juice or zest for freshness.
  • Experiment with different cheese such as Romano or mozzarella for a different flavor profile.

FAQ

  • Can I use a different type of pasta?
    Yes! Any pasta shape you prefer will work, though fettuccine is traditional.

  • How do I prevent the sauce from getting too thick?
    Add a bit of pasta water or extra cream while reheating to reach your desired consistency.

  • Can I make this dish ahead of time?
    While it’s best enjoyed fresh, you can pre-cook the pasta and chicken, then combine everything right before serving.

  • Is this recipe gluten-free?
    You can use gluten-free pasta to make this dish suitable for gluten-sensitive individuals.

  • Can I freeze the leftovers?
    Little bits of heavy cream may separate when frozen, but you can freeze it for up to 2 months. Just make sure to reheat slowly.

As we wrap up, I hope this Chicken Alfredo Pasta recipe becomes a cherished staple in your home. Cooking for loved ones is about more than just flavors; it’s about gathering around the table and sharing experiences. Enjoy this delicious meal, and remember that the best moments are often found in the simplest of dishes.

Chicken Alfredo Pasta

Prep Time 10 minutes
Cook Time 20 minutes
Total Time 30 minutes
Servings 4 servings
Calories 600
A creamy, cheesy chicken pasta dish that is quick to prepare and perfect for busy weeknights.

Ingredients

Pasta Ingredients

  • 12 oz fettuccine pasta

Chicken and Seasoning

  • 1 lb chicken breast, sliced
  • 2 tablespoons olive oil (Use extra virgin for richer flavor.)
  • 3 cloves garlic, minced (Fresh garlic enhances flavor.)
  • Salt and pepper to taste

Sauce Ingredients

  • 1 cup heavy cream (Can substitute with half-and-half for lower calories.)
  • 1 cup grated Parmesan cheese (Freshly grated is best for melting.)
  • Parsley, for garnish

Instructions 

Preparation

  • Cook the fettuccine pasta according to package instructions; drain and set aside.
  • In a large skillet, heat olive oil over medium heat. Add the chicken slices, season with salt and pepper, and cook until golden brown and cooked through. Remove and set aside.
  • In the same skillet, add the minced garlic and sauté for about 1 minute until fragrant.
  • Pour in the heavy cream and bring to a simmer. Stir in the Parmesan cheese until melted and the sauce is smooth.
  • Add the cooked pasta and chicken back into the skillet, tossing to coat everything in the sauce.
  • Garnish with parsley and serve immediately.

Notes

This dish stores well in the refrigerator for up to 3 days. Reheat with a splash of cream or milk to restore creaminess. Add vegetables like steamed broccoli or peas for added nutrition.
Calories: 600kcal
Course: Dinner, Main Course
Cuisine: Italian
Keyword: Chicken Alfredo, Family Recipe, One Skillet Meal, Pasta, Quick Dinner

Chicken Fettuccine Alfredo

There’s something magical about the kitchen when you’re cooking a comforting meal like Chicken Fettuccine Alfredo. The rich aroma of garlic wafts through the air, mingling with the warmth of melted butter. You can hear the gentle bubbling of cream as it simmers on the stove. It’s an experience that invites everyone to gather around the table. This dish is not just a meal; it’s a time to connect with family and create memories that linger long after the plates are cleared.

Why This Works

Chicken Fettuccine Alfredo

Chicken Fettuccine Alfredo is one of those timeless recipes that truly brings the family together. It’s creamy, indulgent, and so much easier to prepare than you might expect. This recipe makes great use of the simple ingredients that many of us already have in our kitchens. Plus, the way it comes together in less than 30 minutes makes it a perfect choice for busy weeknights. Who wouldn’t want to whip up a restaurant-quality dish in no time?

Process Overview

“This is where the magic happens—when the aroma fills the kitchen.”

Cooking is a multi-sensory experience. As you work through this recipe, you’ll be treated to delightful sights and smells that are sure to elevate your mood. Each step is designed to be straightforward, guiding you through the process of crafting this delicious meal. Let’s dive into what you need and how to make this happen.

Ingredients

Here’s what you’ll need for your Chicken Fettuccine Alfredo:

  • Fettuccine pasta (12 oz): Go for fresh if possible; it cooks quicker and has a lovely texture.
  • Chicken breast (1 lb): Use thinly sliced chicken for even cooking. You can also use rotisserie chicken for a shortcut.
  • Heavy cream (1 cup): This is the secret to that velvety smooth sauce. Be sure to use heavy cream for the best results.
  • Parmesan cheese (1 cup, grated): Freshly grated cheese melts better and adds a lovely flavor.
  • Butter (4 tablespoons): Unsalted is best so you can control the saltiness of the dish.
  • Garlic (3 cloves, minced): Fresh garlic elevates the dish. Avoid pre-minced if you can.
  • Salt (to taste): Start with a little and adjust as you go.
  • Pepper (to taste): Freshly cracked will give the best flavor.
  • Parsley (for garnish): Fresh parsley adds a pop of color and a hint of freshness at the end.

Lily’s Tips:

  • Pasta: Always salt your pasta water for better flavor absorption.
  • Chicken: Marinate your chicken with a little olive oil, salt, and pepper for extra flavor.
  • Cream: Never let your cream boil, as this can cause separation.
  • Cheese: Save a little cheese for garnish.
  • Garlic: Sauté garlic on medium-low heat to avoid burning, which can make it taste bitter.

Directions

  1. Start by cooking the fettuccine pasta according to the package instructions until al dente. Drain it and set it aside. Remember to reserve a bit of pasta water if you want to adjust the sauce’s consistency later.

  2. In a large skillet, melt the butter over medium heat. Add the minced garlic and sauté until fragrant. This step is crucial as the garlic infuses the butter and enhances the overall flavor.

  3. Next, add the sliced chicken breast to the skillet. Cook until the chicken is no longer pink, about 5-7 minutes. Don’t rush this step; properly cooked chicken adds to the dish’s heartiness.

  4. Pour in the heavy cream and bring it to a gentle simmer. The warmth will start to bring everything together.

  5. Stir in the grated Parmesan cheese until it melts and the sauce becomes smooth. This is where the magic really begins. The cheese adds a wonderful creaminess.

  6. Add your cooked fettuccine to the sauce and toss everything to coat. This step ensures that every noodle is enveloped in that delightful creamy sauce.

  7. Season with salt and pepper to taste. Taste as you go, and remember that everyone’s preference is different.

  8. Finish by garnishing with chopped parsley and serve. Your kitchen will smell irresistible!

Serving

Chicken Fettuccine Alfredo

Serving Chicken Fettuccine Alfredo family-style makes it even more inviting. Choose a large serving bowl and let everyone help themselves. Offer a sprinkle of extra Parmesan at the table, so everyone can have it to their liking. Pair it with a simple green salad and some crusty bread for a complete meal.

Storage

If you have leftovers (though I doubt it!), you can store them in an airtight container in the refrigerator for up to 3 days. When you’re ready to enjoy it again, reheat gently on the stovetop over medium-low heat. You may need to add a splash of cream or milk to bring back the creaminess of the sauce.

Kitchen Notes

Here are some handy shortcuts to make your life easier:

  • Pre-cut Chicken: Buy pre-sliced chicken for quicker prep time.
  • Frozen Fettuccine: Use frozen fettuccine for a fast meal option.
  • Pre-minced Garlic: If you’re short on time, this might save you a few minutes.
  • Use a Salad Kit: Adding a store-bought salad kit makes it easy to have fresh greens with your meal.
  • Meal Prep: Make a double batch for quick meals later in the week.

Variations

If you’re cooking for picky eaters or special diets, try these tweaks:

  • Vegetarian: Replace chicken with sautéed mushrooms or a medley of colorful bell peppers.
  • Gluten-Free: Use gluten-free fettuccine pasta; many brands taste great!
  • Spicy: Add some red pepper flakes to the sauce for a kick.
  • Extra Veggies: Spinach, peas, or broccoli can be added for nutrition.
  • Richer Flavor: Use a splash of white wine in the sauce for a deeper taste.

FAQ

  1. Can I use a different type of pasta?
    Yes, any pasta shape will work, but fettuccine is traditional.

  2. Is this dish kid-friendly?
    Absolutely! Kids usually love creamy pasta dishes.

  3. Can I make this in advance?
    While it’s best fresh, you can make the sauce ahead and reheat it when ready to serve.

  4. What other proteins can I add?
    Shrimp or smoked salmon can be delicious alternatives.

  5. How do I make it dairy-free?
    Use coconut cream and a dairy-free cheese alternative.

As you enjoy this Chicken Fettuccine Alfredo, remember the laughter and stories shared around the table. Cooking is more than just a means to fill our stomachs; it’s a way to connect with those we love. As you gather with your family, may your home be filled with warmth, joy, and the delightful aroma of good food. Happy cooking!

Chicken Fettuccine Alfredo

Prep Time 10 minutes
Cook Time 20 minutes
Total Time 30 minutes
Servings 4 servings
Calories 600
A creamy and indulgent chicken fettuccine alfredo that’s quick to prepare and perfect for family gatherings.

Ingredients

Pasta Ingredients

  • 12 oz Fettuccine pasta (Use fresh if possible; it cooks quicker.)

Main Ingredients

  • 1 lb Chicken breast, thinly sliced (Or use rotisserie chicken for a shortcut.)
  • 1 cup Heavy cream (Use heavy cream for best results.)
  • 1 cup Parmesan cheese, grated (Freshly grated cheese melts better.)
  • 4 tbsp Butter, unsalted (Control the saltiness by using unsalted.)

Flavor Ingredients

  • 3 cloves Garlic, minced (Fresh is best; avoid pre-minced.)
  • Salt to taste (Start with a little and adjust as needed.)
  • Pepper to taste (Freshly cracked will give the best flavor.)
  • Parsley for garnish (Adds a pop of color and freshness.)

Instructions 

Cooking the Pasta

  • Cook the fettuccine pasta according to package instructions until al dente, drain, and set aside. Reserve a bit of pasta water to adjust the sauce's consistency later.

Sauté Garlic

  • In a large skillet, melt the butter over medium heat. Add the minced garlic and sauté until fragrant.

Cook Chicken

  • Add the sliced chicken breast to the skillet. Cook until no longer pink, about 5-7 minutes.

Create Sauce

  • Pour in the heavy cream and bring to a gentle simmer. Stir in the grated Parmesan cheese until it melts and the sauce becomes smooth.

Combine

  • Add the cooked fettuccine to the sauce and toss everything to coat.

Season and Serve

  • Season with salt and pepper to taste. Garnish with chopped parsley, and serve family-style in a large serving bowl.

Notes

If you have leftovers, store them in an airtight container in the refrigerator for up to 3 days. Reheat gently on the stovetop, adding a splash of cream or milk if necessary.
Calories: 600kcal
Course: Dinner, Main Course
Cuisine: Italian
Keyword: Chicken Fettuccine Alfredo, Creamy Pasta, Family Recipe, Pasta, Quick Dinner

Chicken Alfredo

When you walk into a home filled with the comforting aroma of butter and garlic, you can’t help but feel at ease. The sound of water boiling and sizzling pans creates a symphony of anticipation. This is the magic of cooking, especially when you’re preparing a dish as beloved as Chicken Alfredo. Whether it’s a busy weeknight or a cozy Sunday dinner, this creamy pasta dish brings everyone together around the table.

Why This Works

Chicken Alfredo

Chicken Alfredo is a fantastic choice for families. It’s quick to prepare, using ingredients that are often staples in your kitchen. In about 30 minutes, you can create a restaurant-quality meal without the fuss. The creamy sauce clings beautifully to the fettuccine, and the tender chicken makes it hearty enough to satisfy even the hungriest of appetites. You can serve it with a side salad or some garlic bread for a complete meal that will have everyone asking for seconds.

Process Overview

“This is where the magic happens—when the aroma fills the kitchen.”

This recipe is straightforward, making it accessible for cooks of all levels. You’ll be amazed at how simple ingredients can turn into a delicious feast. The whole process takes just a few steps and is perfect for those evenings when time is tight but you still want to make something special.

Ingredients

  • 8 oz fettuccine pasta
    Tip: For a healthier alternative, opt for whole wheat fettuccine or gluten-free pasta.
  • 2 cups cooked chicken, sliced
    Tip: Use rotisserie chicken to save time. It adds flavor and is super convenient.
  • 1 cup heavy cream
    Tip: For a lighter option, you can use half-and-half, but the cream gives a rich flavor.
  • 1/2 cup grated Parmesan cheese
    Tip: Freshly grated cheese melts better than pre-packaged options.
  • 2 tablespoons butter
    Tip: Don’t skip the butter; it adds a nice richness to the sauce.
  • 2 cloves garlic, minced
    Tip: Fresh garlic really elevates the dish, but garlic powder can work in a pinch.
  • Salt and pepper to taste
    Tip: Adjust according to your family’s preferences.
  • Parsley for garnish
    Tip: Fresh parsley not only adds color but also a bright flavor contrast.

Directions

  1. Cook the fettuccine pasta according to package instructions; drain and set aside.
    Make sure to salt your water for flavor. Don’t forget to reserve a bit of the pasta water for later; it can help adjust the sauce consistency.

  2. In a large skillet, melt the butter over medium heat.
    Keep an eye on it and stir occasionally to avoid burning. The butter should foam and then settle without browning.

  3. Add the minced garlic and sauté for about 30 seconds until fragrant.
    The aroma is incredible, isn’t it? Just wait a moment longer to let that true garlic goodness shine without it burning.

  4. Pour in the heavy cream and bring to a simmer.
    This is where the magic truly begins. Stir often for an even consistency.

  5. Stir in the Parmesan cheese until melted and smooth.
    Once the cheese has melted, let it blend perfectly into the creamy sauce. It’s going to taste divine.

  6. Add the cooked chicken and cooked fettuccine to the skillet; toss to combine.
    Coat the pasta and chicken well with the sauce. This is a chance to get those arms moving and mix everything together beautifully.

  7. Season with salt and pepper to taste.
    Don’t be shy. Taste the sauce and adjust the seasonings until it’s just right for your family.

  8. Serve hot, garnished with parsley.
    A little bit of green on top makes everything more appealing. Enjoy the smiles around the table.

Serving

Chicken Alfredo

When serving Chicken Alfredo family-style, use a large bowl or platter. This invites everyone to gather around and enjoy together. I like to sprinkle extra Parmesan on top for that cheesy goodness and have a side of garlic bread for dipping. It makes for a delightful meal that fosters conversation and connection.

Storage

If you have leftovers, store them in an airtight container in the refrigerator for up to three days. To reheat, add a splash of milk or reserved pasta water to get the sauce creamy again. Warm gently on the stovetop or microwave until heated through.

Kitchen Notes

  • Use rotisserie chicken to save time.
  • Prepare the sauce while the pasta cooks.
  • Enhance flavor with extra herbs like basil or oregano.
  • Make it a meal with a side salad.
  • Double the recipe for larger gatherings.

Variations

For picky eaters or various diets, consider these tweaks:

  • Substitute grilled shrimp or sautéed vegetables for the chicken.
  • Use cauliflower fettuccine for a low-carb version.
  • For a spicy kick, add red pepper flakes.
  • Make it vegan by replacing heavy cream with coconut cream and using vegan cheese.
  • Add broccoli or peas for extra veggies.

FAQ

1. Can I use a different type of pasta?
Absolutely! This sauce works well with any type you prefer, such as penne or rigatoni.

2. How can I make this dish healthier?
Use whole grain pasta and reduce the cream by replacing half with chicken broth.

3. Can I make Chicken Alfredo ahead of time?
While it’s best served fresh, the sauce can be made and stored in the fridge for up to two days. Just reheat and add the freshly cooked pasta.

4. What should I serve with Chicken Alfredo?
A side salad, garlic bread, or steamed vegetables make excellent accompaniments.

5. Can I freeze Chicken Alfredo?
It’s not recommended to freeze this dish because the cream can separate upon thawing, making it grainy. However, you can freeze any extra sauce separately.

In conclusion, Chicken Alfredo is not just a meal; it’s a way to create lasting memories with loved ones. Cooking this dish brings the family together, filling hearts and bellies with warmth. Remember, it’s about enjoying the process just as much as the meal. Happy cooking!

Chicken Alfredo

Prep Time 10 minutes
Cook Time 20 minutes
Total Time 30 minutes
Servings 4 servings
Calories 600
A creamy pasta dish combining fettuccine, tender chicken, and a rich Alfredo sauce, perfect for busy weeknights or cozy dinners.

Ingredients

Pasta and Chicken

  • 8 oz fettuccine pasta (For a healthier alternative, opt for whole wheat fettuccine or gluten-free pasta.)
  • 2 cups cooked chicken, sliced (Use rotisserie chicken to save time. It adds flavor and is super convenient.)

Sauce Ingredients

  • 1 cup heavy cream (For a lighter option, you can use half-and-half, but the cream gives a rich flavor.)
  • 1/2 cup grated Parmesan cheese (Freshly grated cheese melts better than pre-packaged options.)
  • 2 tablespoons butter (Don’t skip the butter; it adds a nice richness to the sauce.)
  • 2 cloves garlic, minced (Fresh garlic really elevates the dish, but garlic powder can work in a pinch.)
  • to taste salt (Adjust according to your family’s preferences.)
  • to taste pepper (Adjust according to your family’s preferences.)
  • for garnish parsley (Fresh parsley not only adds color but also a bright flavor contrast.)

Instructions 

Cooking the Pasta

  • Cook the fettuccine pasta according to package instructions; drain and set aside.
  • Make sure to salt your water for flavor. Don’t forget to reserve a bit of the pasta water for later; it can help adjust the sauce consistency.

Making the Sauce

  • In a large skillet, melt the butter over medium heat.
  • Add the minced garlic and sauté for about 30 seconds until fragrant.
  • Pour in the heavy cream and bring to a simmer.
  • Stir in the Parmesan cheese until melted and smooth.

Bringing it Together

  • Add the cooked chicken and cooked fettuccine to the skillet; toss to combine.
  • Season with salt and pepper to taste.
  • Serve hot, garnished with parsley.

Notes

When serving Chicken Alfredo family-style, use a large bowl or platter. This invites everyone to gather around and enjoy together. If you have leftovers, store them in an airtight container in the refrigerator for up to three days. To reheat, add a splash of milk or reserved pasta water to get the sauce creamy again.
Calories: 600kcal
Course: Dinner, Main Course
Cuisine: Italian
Keyword: Chicken Alfredo, Comfort Food, Creamy sauce, Pasta, Weeknight Dinner