Tag

easy recipes

Browsing

Chicken Pot Pie with Biscuits

I can still smell it now. The warm, buttery steam rolls out of the oven and makes the whole kitchen feel like a hug. I hear the gentle bubbling of the filling and the soft crack of biscuit tops as they brown. Those sounds promise comfort and a full table.

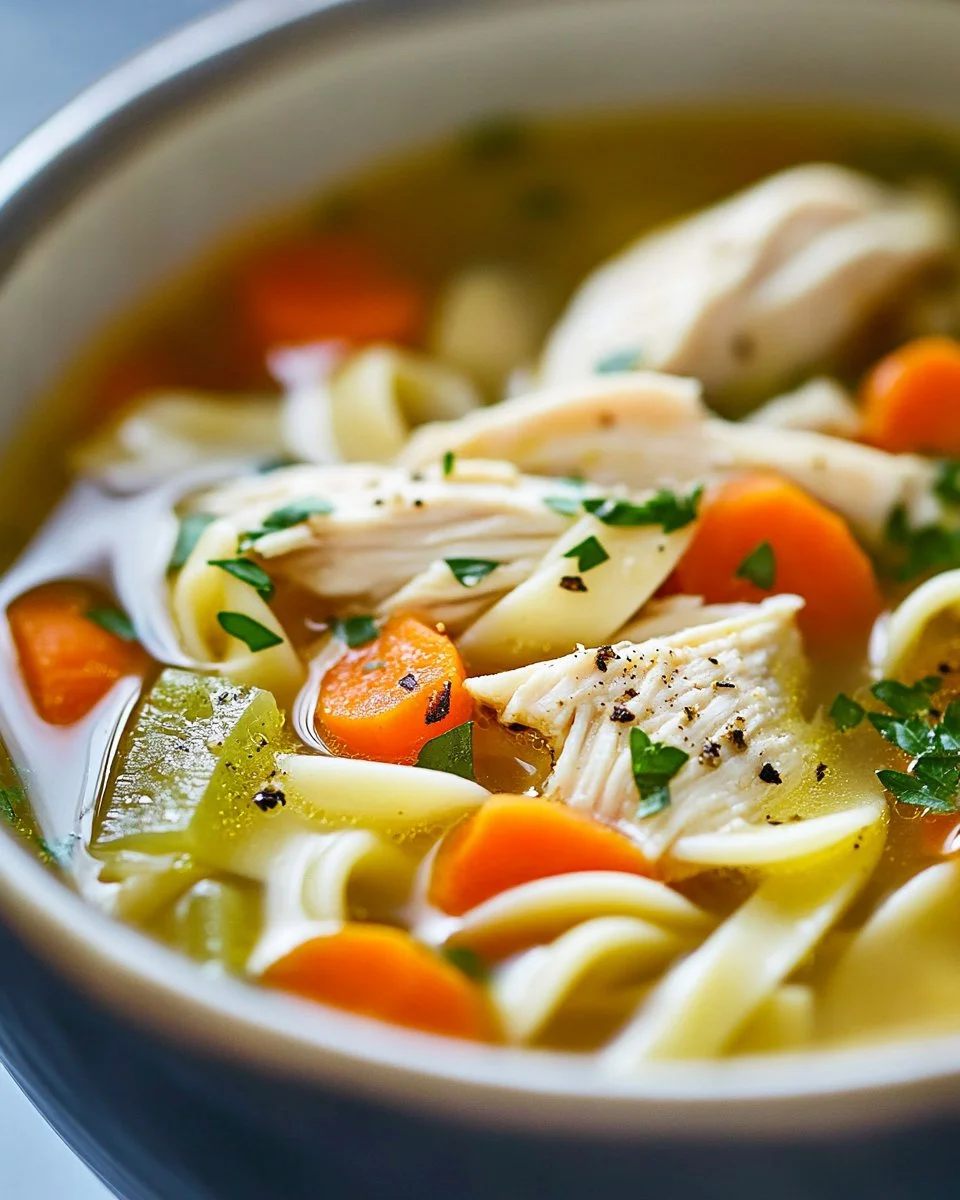
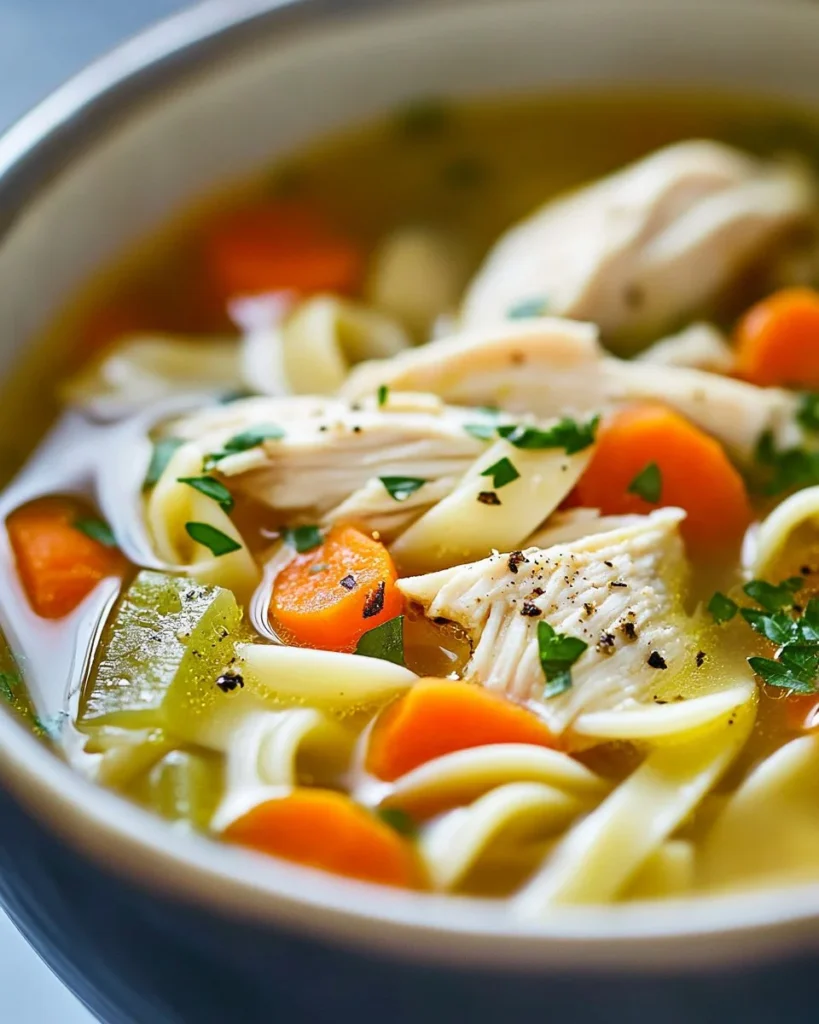
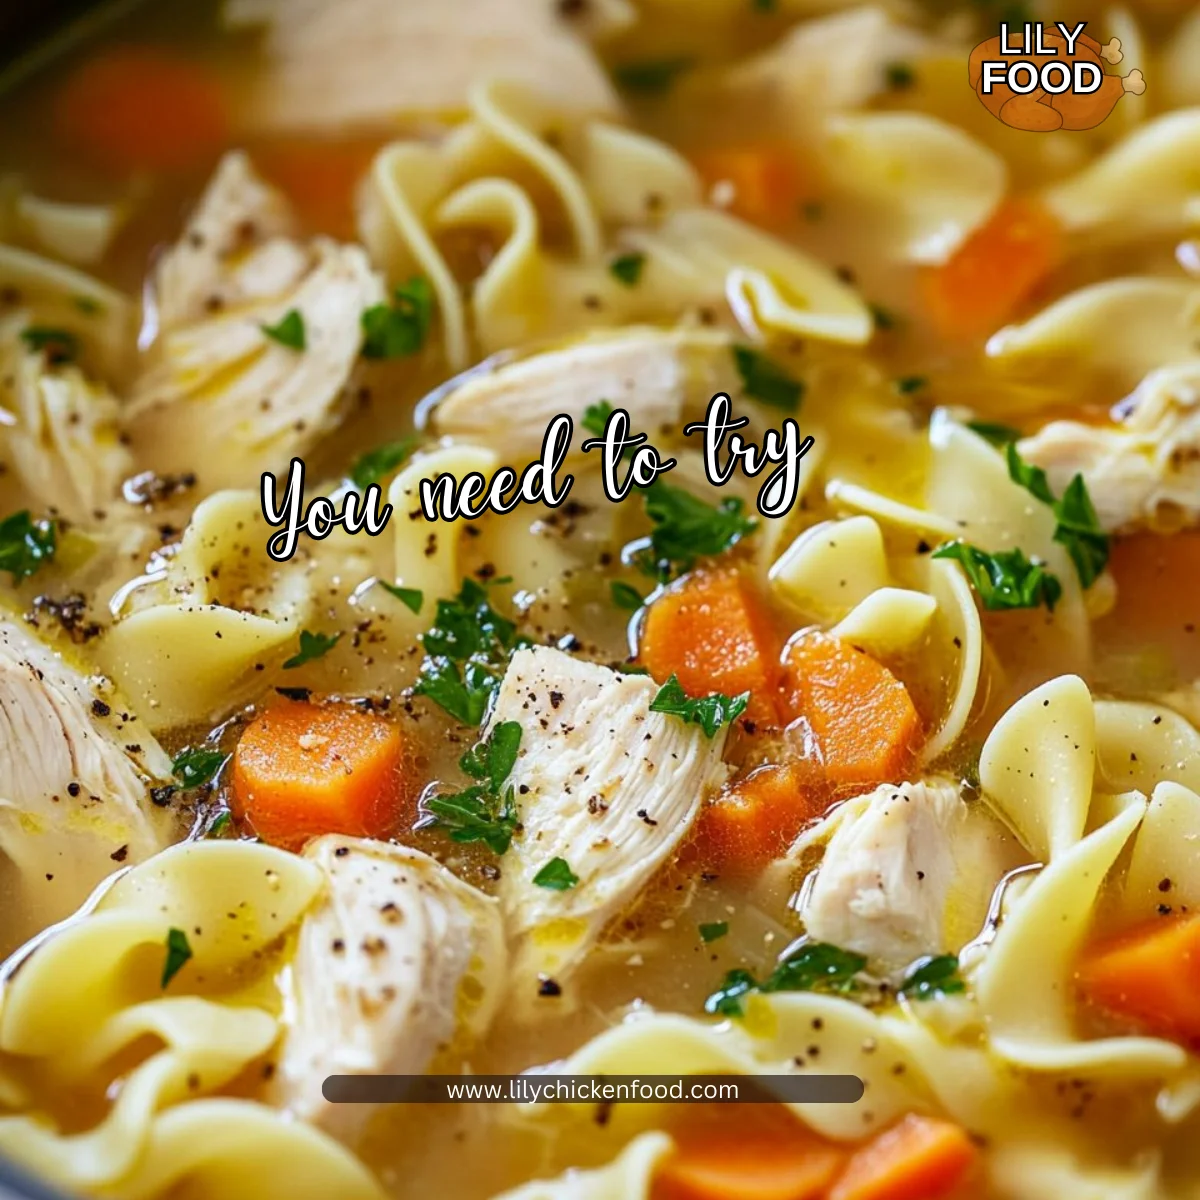
This recipe reminds me of weeknights with kids at the table and friends dropping by. If you like a bowl version, you might enjoy my take on chicken pot pie soup for a quicker, spoonable comfort meal.

Why this works

Chicken Pot Pie with Biscuits

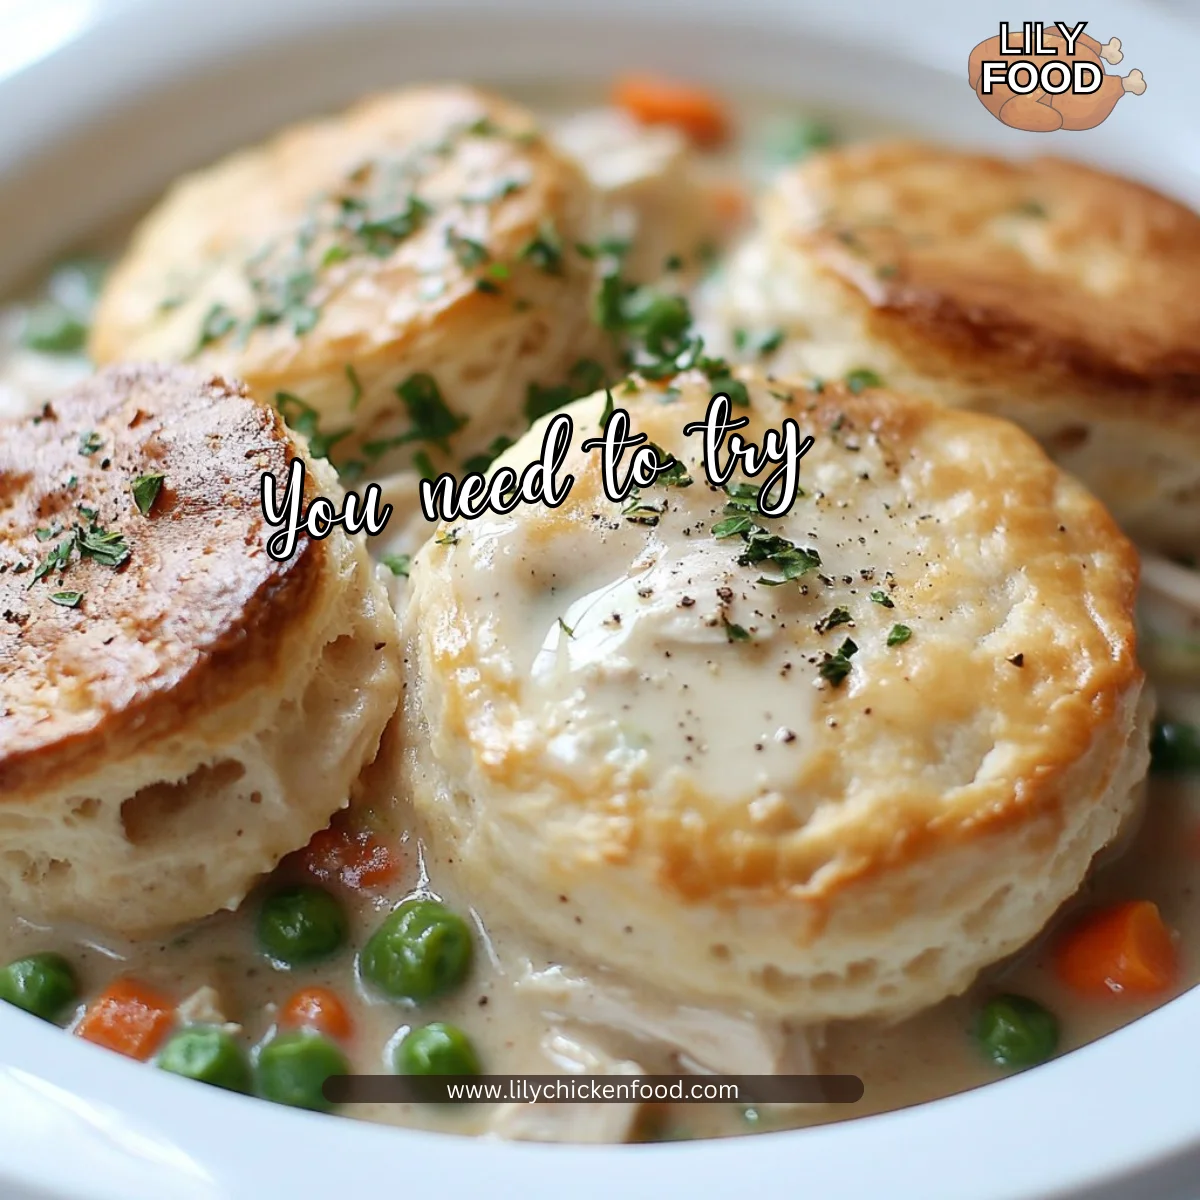
This chicken pot pie with biscuits balances a creamy, savory filling and a golden, flaky biscuit top. The biscuits make it fast and family friendly. They take the place of a rolled pastry so you save time without losing the crispy, buttery contrast.

Using cooked chicken cuts the steps down to the essentials and keeps dinner doable on busy nights. If you want a classic version, I often point readers to my guide on the classic pot pie for pastry tips and extra sauce ideas.

This version is forgiving. You can use rotisserie chicken, leftover roasted chicken, or store-bought cooked pieces and still get a cozy, satisfying dish. The result keeps well and tastes even better the next day, which is perfect for lunches or leftovers.

Process Overview

“This is where the magic happens—when the aroma fills the kitchen.”

The method is straightforward. You make a simple roux, add broth and milk to make a creamy sauce, fold in chicken and vegetables, bake briefly, then top with biscuits until golden. The assembly is quick and the oven does the rest.

If you like one-pot slow-cooker comfort, you might also enjoy the creamy slow-cooker flavors in my crockpot white chicken chili. It uses similar pantry staples and is another great make-ahead option.

Ingredients

  • 2 cups cooked chicken, diced
    Tip: Rotisserie chicken works great. If you want a smoky flavor, leftover chipotle honey chicken thighs add a nice twist.

  • 1 cup frozen mixed vegetables
    Tip: Use peas and carrots or a mixed blend. No need to thaw; they will heat through in the sauce.

  • 1 cup chicken broth
    Tip: Low-sodium broth helps you control the salt. Add more for a saucier filling.

  • 1/2 cup milk
    Tip: Whole milk gives the creamiest result, but 2% works fine for a lighter dish.

  • 1/4 cup butter
    Tip: Use real butter for flavor. If you need dairy free, a butter substitute will work.

  • 1/4 cup all-purpose flour
    Tip: This is your thickening agent. Stir it into melted butter to make a smooth base.

  • 1 teaspoon onion powder
    Tip: Onion powder gives gentle flavor without chunks. Sautéed fresh onion also works if you prefer.

  • 1 teaspoon garlic powder
    Tip: Garlic powder blends smoothly into the sauce. You can swap for a minced clove if you like fresh garlic.

  • Salt and pepper to taste
    Tip: Start with a little and adjust after the sauce thickens.

  • Biscuits (homemade or refrigerated)
    Tip: Refrigerated biscuit dough is a real time saver. Homemade biscuits give extra flavor and texture. If using homemade, make them slightly smaller so they brown evenly on top.

My best practical tip for ingredients is to keep cooked chicken on hand in the fridge. I often make a batch of easy crockpot chicken thighs for weeknight recipes and then use the leftovers here.

Directions

  1. Preheat oven to 400°F (200°C).
    Encouragement: Preheating now saves time later. Get the oven ready and then enjoy a quick prep without rushing.

  2. In a saucepan, melt the butter over medium heat. Stir in flour, onion powder, garlic powder, salt, and pepper; cook for 1 minute.
    Encouragement: Keep stirring so the flour cooks but does not brown. This step gives your sauce a smooth base.

  3. Gradually whisk in chicken broth and milk; cook until thickened.
    Encouragement: Take your time whisking. The mixture will go from thin to creamy and will coat the back of a spoon when it is ready.

  4. In a large bowl, combine cooked chicken and mixed vegetables. Pour the sauce over the chicken mixture and stir to combine.
    Encouragement: Taste for seasoning. If it needs a pinch more salt or pepper, adjust now. Your filling should feel cozy and well seasoned.

  5. Pour the mixture into a baking dish.
    Encouragement: Spread it evenly so every scoop gets a good mix of chicken and vegetables. A 9-inch square or similar works well.

  6. Bake the mixture for 20 minutes.
    Encouragement: This step helps the filling set and heat through. It also lets the edges bubble and thicken a bit before the biscuits go on.

  7. Remove from the oven and top with biscuits.
    Encouragement: Arrange the biscuits evenly. For a rustic look, nestle them into the filling; for neat portions, space them out.

  8. Return to the oven and bake until biscuits are golden brown, about 15-20 minutes.
    Encouragement: Keep an eye on the color. Golden with a little crunch on top is the goal. Your kitchen will smell amazing.

  9. Let cool slightly before serving.
    Encouragement: Give it 5 minutes so the filling sets and the biscuits hold their shape. Then serve warm and enjoy the smiles at the table.

Serving

Chicken Pot Pie with Biscuits

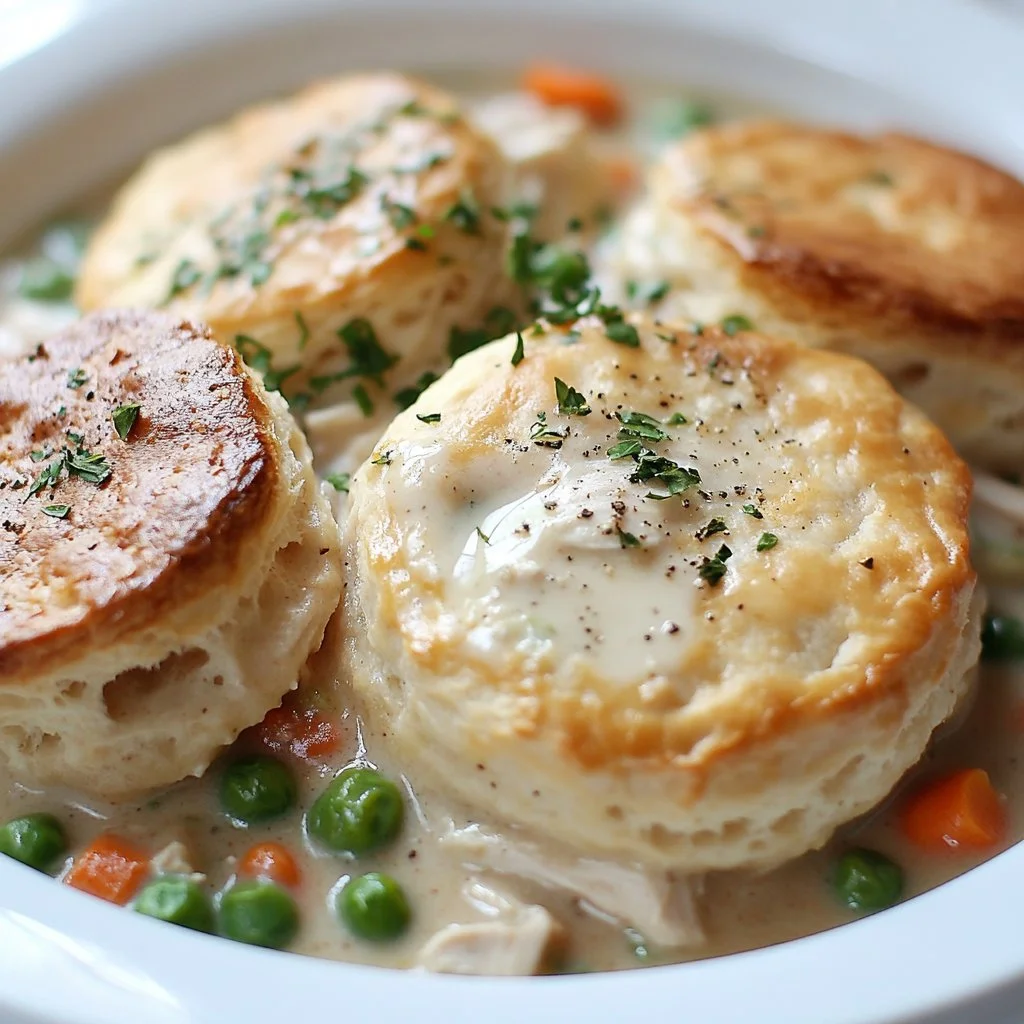
Serve this pot pie family-style straight from the baking dish. Place a large spoon in the center and let everyone help themselves. The biscuit tops break into soft, buttery pieces that pair beautifully with creamy filling.

For a balanced plate, add a simple green salad or steamed green beans. Kids usually love the biscuit pieces, so consider offering a small bowl for sharing if you have a lively table.

If you want to be extra cozy, serve with a warm drink and buttered rolls on the side. The meal feels like a hug, and that is the point.

Storage

Refrigerator: Store leftovers in an airtight container for up to 3 days. The biscuits will soften over time, but the flavors deepen.

Reheating: Reheat single portions in the microwave for about 1 to 2 minutes, depending on power. For the best texture, reheat in a 350°F oven for 10 to 15 minutes, covered with foil to avoid over-browning.

Freezer: You can freeze the filling separately for up to 3 months. Thaw in the fridge overnight before topping with biscuits and baking. If you freeze a fully assembled dish with raw biscuit dough on top, wrap tightly and bake from thawed for best results.

Label your storage containers with the date. Leftovers are a weeknight hero and heat up well for quick lunches.

Kitchen Notes

  • Shortcut 1: Use store-bought cooked chicken or rotisserie to save time.
  • Shortcut 2: Refrigerated biscuit dough is a fast and reliable topping.
  • Shortcut 3: Make the filling a day ahead and bake the biscuits fresh before serving.
  • Shortcut 4: Double the filling and freeze half for a ready meal later.
  • Shortcut 5: Use a hand whisk or fork if you do not have a heavy whisk; keep stirring until smooth.

These quick ideas keep the recipe family-friendly and adaptable to busy schedules.

Variations

  • For picky eaters: Swap mixed vegetables for peas only, corn, or finely chopped carrots. Keep the seasoning mild and offer hot sauce on the side for adults.
  • For low-carb: Replace biscuits with a cauliflower mash topping or a cheesy cauliflower crust.
  • For dairy-free: Use a plant-based butter substitute and a non-dairy milk like oat or soy. Thicken a little longer if needed.
  • For extra herb flavor: Stir in 1 teaspoon dried thyme or 1 tablespoon chopped fresh parsley into the sauce before pouring over the chicken.
  • For a richer filling: Add 1/2 cup shredded cheddar to the sauce for a cheesy variation that kids often love.

These swaps keep the same comforting idea while adapting to tastes and diets.

FAQ

Can I use raw chicken?

Yes. If using raw chicken, cook it first until it reaches 165°F and shred or dice it. Using cooked or leftover chicken is faster and keeps the recipe simple.

Can I make this gluten-free?

Yes. Use a gluten-free flour blend for the roux and gluten-free biscuits. Make sure your broth is labeled gluten-free.

How do I stop the biscuits from getting soggy?

Pre-bake the filling for 10 minutes before adding the biscuits to reduce moisture. Also, space biscuits a bit to allow hot air to circulate for better browning.

Can I prepare this ahead of time?

Absolutely. Assemble the filling and refrigerate up to 24 hours. Add biscuits just before baking so they stay fresh and flaky.

What size baking dish should I use?

A 9-inch square or similar 2-quart baking dish works well. If you use a larger dish, the filling may be shallower and bake a bit faster.

Conclusion

Thank you for spending time with this recipe. I hope it becomes one of your go-to family meals for easy weeknights. If you want another twist on biscuit-topped comfort, check a similar approach from The Cozy Cook’s chicken pot pie with biscuits. For a version that focuses on flaky, buttery biscuit tops, take a look at the Pinch of Yum biscuit-topped pot pie for inspiration.

Chicken Pot Pie with Biscuits

Prep Time 15 minutes
Cook Time 35 minutes
Total Time 50 minutes
Servings 6 servings
Calories 450
A comforting chicken pot pie topped with golden, flaky biscuits that delivers warmth and satisfaction for family dinners.

Ingredients

Filling Ingredients

  • 2 cups cooked chicken, diced (Rotisserie chicken works great.)
  • 1 cup frozen mixed vegetables (Use peas and carrots or a mixed blend; no need to thaw.)
  • 1 cup chicken broth (Low-sodium broth helps control salt.)
  • 1/2 cup milk (Whole milk gives creaminess.)
  • 1/4 cup butter (Use real butter for flavor.)
  • 1/4 cup all-purpose flour (This is your thickening agent.)
  • 1 teaspoon onion powder (Gives gentle flavor without chunks.)
  • 1 teaspoon garlic powder (Blends smoothly into the sauce.)
  • Salt and pepper to taste (Adjust after the sauce thickens.)

Biscuit Topping

  • Biscuits (homemade or refrigerated) (Refrigerated dough is a real time saver.)

Instructions 

Preparation

  • Preheat oven to 400°F (200°C).
  • In a saucepan, melt the butter over medium heat. Stir in flour, onion powder, garlic powder, salt, and pepper; cook for 1 minute.
  • Gradually whisk in chicken broth and milk; cook until thickened.
  • In a large bowl, combine cooked chicken and mixed vegetables. Pour the sauce over the chicken mixture and stir to combine.
  • Pour the mixture into a baking dish.
  • Bake the mixture for 20 minutes.
  • Remove from the oven and top with biscuits.
  • Return to the oven and bake until biscuits are golden brown, about 15-20 minutes.
  • Let cool slightly before serving.

Notes

Serve family-style and pair with a simple green salad or steamed beans. For a comforting experience, enjoy with a warm drink and buttered rolls on the side. Store leftovers in an airtight container for up to 3 days.
Calories: 450kcal
Course: Dinner, Main Course
Cuisine: American, Comfort Food
Keyword: Biscuits, Chicken Pot Pie, Comfort Food, Easy Dinner, Family Meal

Juicy Ground Chicken Kids Recipe

There’s something truly delightful about the sounds and smells in the kitchen when you’re cooking for your family. Picture this: the joyful chatter of kids setting the table as the aroma of something delicious simmers away on the stove. It brings back memories of my grandmother’s kitchen, where every meal felt like a big hug. Today, I want to share how to create a dish that does just that—a Juicy Ground Chicken Kids Recipe that’s not only flavorful but also fosters those warm family connections around the dinner table.

Why This Juicy Ground Chicken Kids Recipe Feels Like Home

When I think about my family meals, I always go back to the recipes that come together effortlessly yet taste incredibly special. This Juicy Ground Chicken Kids Recipe fits that bill perfectly. It’s a dish that can be on your table in under 30 minutes, making it ideal for our busy weeknights. The satisfaction of seeing everyone enjoy their dinner is truly priceless.

This recipe has quickly become a household favorite, and it’s no surprise why. Its simplicity means that even the little ones can help out in the kitchen, contributing to a sense of shared experience. Each bite is packed with flavor, and we often find ourselves coming back for seconds. With every meal, we reminisce about our day, and it feels like home.

Why Juicy Ground Chicken Kids Recipe is Our New Family Favorite

One of the biggest reasons this dish has claimed its spot in our hearts is its adaptability. Whether it’s game night, a casual Sunday dinner, or a simple Wednesday evening, this recipe easily fits into any occasion. With just a few ingredients, you can whip up a dish that feels special yet feels so comforting that it makes you want to curl up on the couch with your loved ones.

There’s also the beauty of the flavors. The combination of ground chicken, seasoning, and that touch of grated Parmesan creates a soothing and joyful experience, reminding me of those family dinners from my childhood. This isn’t just food; it’s moments of laughter, fun, and connection.

The Simple Magic Behind Juicy Ground Chicken Kids Recipe

What makes this recipe stand out is that it comes together quickly without feeling rushed. The ingredients are ubiquitous—most likely, you already have them in your pantry or fridge. This accessibility means that on those busy nights when planning meals becomes a chore, you can still pull together something delicious.

The process is straightforward and keeps the clean-up minimal. There’s nothing worse than a pile of dishes after a meal, and the last thing you want is for cooking to feel stressful. Instead, I assure you that making Juicy Ground Chicken Kids Recipe is a joyful experience from start to finish.

Juicy Ground Chicken Kids Recipe

How to Make Juicy Ground Chicken Kids Recipe, The Heartwarming Way

Let’s dive into the process of creating this delightful meal together. You’ll find that it’s an enjoyable time, even when little hands want to help out. Each step is simple, and I guarantee you’re going to feel that sense of accomplishment as you see the transformation in your cooking.

Step-by-Step Overview: Keeping It Simple

“This is where the magic happens—when the aroma fills the kitchen and my kids come running in, asking ‘Is it ready yet?’”

  1. Prep the Mixture: Start by combining ground chicken, breadcrumbs, Parmesan cheese, egg, garlic, onion powder, Italian seasoning, salt, and pepper in a large bowl. Mix until everything is well incorporated. Remember, it doesn’t have to be perfect—just combined.

  2. Shape It Up: Now, you can shape the mixture into small patties or meatballs. Let the kids join in; they love the tactile sensation of rolling them into shape. It’s so fun to watch their little creations!

  3. Heat Things Up: In a skillet, add a generous splash of olive oil and heat it over medium heat. You want that sizzle when you add the patties or meatballs—the sound is music to my ears.

  4. Cook to Perfection: Cook them for about 5-7 minutes on each side, or until they’re golden brown and cooked through. Don’t rush this part; having a little browning builds more flavor. Just like grandma taught me, it’s those extra bits of color that make a dish sing.

  5. The Best Part: Serve them warm with your favorite dipping sauce, such as ketchup or a homemade ranch. This is where you can get creative, using whatever your family loves best.

Ingredients You’ll Need

Here’s a list of the ingredients that make this dish come alive:

  • 1 pound ground chicken
  • 1/2 cup breadcrumbs
  • 1/4 cup grated Parmesan cheese
  • 1 egg
  • 1 clove garlic, minced
  • 1 teaspoon onion powder
  • 1 teaspoon Italian seasoning
  • Salt and pepper to taste
  • Olive oil for cooking

As you gather these ingredients, remember to add your own touch. Don’t skip on the herbs if you have fresh ones; they add a whole new layer of flavor. And if you’re missing something, get creative. Cooking is about using what you have, bringing your spin to a recipe.

Step-by-Step Directions

  1. In a large bowl, combine ground chicken, breadcrumbs, Parmesan cheese, egg, garlic, onion powder, Italian seasoning, salt, and pepper. Mix until well combined.

  2. Shape the mixture into small patties or meatballs.

  3. Heat olive oil in a skillet over medium heat.

  4. Cook the patties or meatballs for about 5-7 minutes on each side, or until golden brown and cooked through.

  5. Serve warm with your favorite dipping sauce.

Encourage your little chefs along the way—let them stir the mixture or help shape the patties. Cooking doesn’t have to be serious; it can be a joyous time filled with laughter and little messes.

Serving Juicy Ground Chicken Kids Recipe with Love

When it comes to enjoying this dish, I find that serving it family-style works wonders. We lay everything out in the middle of the table, allowing everyone to serve themselves— it brings a sense of togetherness.

Complement the chicken with a fresh salad or roasted veggies. My kids love dipping their bites into a creamy sauce or a homemade ketchup. You can also roll the patties in lettuce leaves to create fun wraps; this way, everyone can customize their meal, adding excitement to the table.

Juicy Ground Chicken Kids Recipe

Storage & Reheat Tips (Keeping the Goodness)

I love having leftovers because they mean an easy lunch or dinner for the next day. To store your cooked patties or meatballs, simply place them in an airtight container and refrigerate. They’ll last for about 3-4 days, which is perfect for meal prep.

When it’s time to enjoy them again, the microwave works just fine for a quick reheat, but I recommend popping them in the oven at 350°F for about 10 minutes to get that crispy exterior back. It brings back the warmth and flavor from the first cook.

My Kitchen Notes & Shortcuts

As I’ve made this Juicy Ground Chicken Kids Recipe more than a few times, here are some tips to keep in your back pocket:

  • Fresh Herbs Matter: If you happen to have fresh basil or parsley on hand, feel free to chop some up and mix them in. They add such a lovely aromatic flavor.

  • Mix and Match: You can experiment with different seasonings—try adding a pinch of paprika or some cayenne if your family enjoys a bit of heat.

  • Prep-Ahead Advantage: Make a double batch on a quiet day; those meal prep portions will save you on days when you’re busier than usual.

  • Kid Involvement: Let the little ones create their own meatball designs. They might come up with some imaginative shapes that make dinner fun.

Family-Friendly Variations

One of the joys of cooking is personalizing recipes to fit your family’s preferences. Here are a few ways we’ve enjoyed tweaking our Juicy Ground Chicken Kids Recipe:

  • Zucchini or Carrot Mix-In: Finely grate some zucchini or carrot into the mixture for added veggies. They blend in beautifully and keep everything moist.

  • Cheese Lovers Twist: A pocket of melted cheese surprises when biting into these patties. Just shape your balls around a small cube of cheese—yummy!

  • Spice it Up: For those slightly older kids who are a bit more adventurous, tossing in some diced jalapeños or getting creative with different herbs can ignite their taste buds.

FAQs About Juicy Ground Chicken Kids Recipe

Can I make this ahead for a busy week?

Absolutely! In fact, letting it sit for an hour allows the flavors to develop beautifully and get to know each other, reminiscent of an old family recipe.

What if I don’t have all the ingredients?

That’s the beauty of this dish. Feel free to use what you have. Cooking is about creativity, and improvising is what makes each dish special.

How can I keep this dish gluten-free?

You can swap the breadcrumbs for gluten-free alternatives like almond flour or crushed gluten-free crackers.

Can I freeze the patties?

Sure! Form the patties, place them on a baking sheet, and freeze them. Once frozen, transfer them to an airtight container or freezer bag, and they’ll be perfect for another day.

What do I serve with these patties?

You can serve them with a variety of side dishes, such as roasted vegetables, mashed potatoes, or even a friendly salad that has everyone’s favorite toppings.

One Final Thought from My Kitchen

I hope this Juicy Ground Chicken Kids Recipe becomes a staple in your home, just as it has in mine. It’s not just a meal; it’s about gathering at the table, sharing stories, and making memories—just like I did as a child. If this dish finds its place in your family, I know my grandmother’s kitchen is smiling down, proud to see these family traditions continue. Until next time, happy cooking!

Juicy Ground Chicken Kids Recipe

Prep Time 15 minutes
Cook Time 14 minutes
Total Time 29 minutes
Servings 4 servings
Calories 250
A quick and flavorful dish that brings families together, perfect for busy weeknights.

Ingredients

Main Ingredients

  • 1 pound ground chicken
  • 1/2 cup breadcrumbs
  • 1/4 cup grated Parmesan cheese
  • 1 large egg
  • 1 clove garlic, minced
  • 1 teaspoon onion powder
  • 1 teaspoon Italian seasoning
  • to taste salt and pepper
  • as needed olive oil for cooking (Use enough to coat the skillet)

Instructions 

Preparation

  • In a large bowl, combine ground chicken, breadcrumbs, Parmesan cheese, egg, garlic, onion powder, Italian seasoning, salt, and pepper. Mix until well combined.
  • Shape the mixture into small patties or meatballs.

Cooking

  • Heat olive oil in a skillet over medium heat.
  • Cook the patties or meatballs for about 5-7 minutes on each side, or until golden brown and cooked through.

Serving

  • Serve warm with your favorite dipping sauce.

Notes

Encourage kids to help in the kitchen; involve them in shaping the patties for a fun cooking experience.
Calories: 250kcal
Course: Dinner, Main Course
Cuisine: American, Family-Friendly
Keyword: Easy Recipe, Family Dinner, Ground Chicken Recipe, Juicy Ground Chicken, Kid-Friendly

The Best Teriyaki Chicken Rice Bowl

Nothing beats the comforting smell of teriyaki chicken simmering on the stove. The sweet and savory aroma fills the kitchen as the chicken sizzles and caramelizes. You can almost hear the rice bubbling away as it absorbs the flavors. This is truly a dish that warms not just the stomach but the heart.

Why this works

The Best Teriyaki Chicken Rice Bowl

This Teriyaki Chicken Rice Bowl is not just a meal; it’s a family favorite made easy. With simple ingredients and quick prep, you can spend less time in the kitchen and more time enjoying dinner with your loved ones. The combination of juicy chicken, sticky rice, and vibrant vegetables makes this bowl a hit. Plus, it’s adaptable to personal tastes, making it perfect for everyone in the family.

Process Overview

“This is where the magic happens—when the aroma fills the kitchen.”

Preparing this dish is straightforward and efficient. In just 30 minutes, you can have this scrumptious meal on the table. The teriyaki sauce envelops the chicken, infusing it with flavor, while the rice acts as the perfect canvas.

Ingredients

  • 1 pound boneless chicken thighs: Dark meat is juicier and more tender. Trim any visible fat for a better texture.
  • 1 cup jasmine rice: This fragrant rice pairs wonderfully with teriyaki. Rinse it before cooking for better texture.
  • 1/2 cup teriyaki sauce: You can use store-bought or homemade. Look for low-sodium options if you prefer.
  • 1 tablespoon sesame oil: Adds a nutty flavor to the chicken. A little goes a long way.
  • 1 cup broccoli florets: Fresh or frozen, they add a nice crunch and color. Steam them lightly to retain their brightness.
  • 1 red bell pepper, sliced: Sweet and crunchy, it complements the dish well. Feel free to substitute with any bell pepper you prefer.
  • 2 green onions, chopped: Sprinkle on top for a fresh, oniony bite.
  • Sesame seeds for garnish: Optional, but they add a lovely visual touch.

Directions

  1. Cook the rice: Rinse 1 cup of jasmine rice under cold water until the water runs clear. In a saucepan, combine the rinsed rice with 1.5 cups of water. Bring to a boil, then reduce to a simmer, cover, and cook for about 18 minutes. It’s okay if it’s bubbling; that means it’s cooking perfectly.

  2. Prep the chicken: While the rice is cooking, chop 1 pound of boneless chicken thighs into bite-sized pieces. This helps them cook evenly.

  3. Sauté the chicken: In a large skillet over medium-high heat, add 1 tablespoon of sesame oil. Once it’s hot, add the chicken pieces. Cook for 5-7 minutes, stirring occasionally, until they are browned and cooked through. The sizzle and color will bring a smile to your face.

  4. Add the teriyaki sauce: Pour in 1/2 cup of teriyaki sauce over the chicken. Stir to coat and allow it to simmer for another 3-5 minutes. This is the moment when the magic happens; the chicken soaks in all those flavors.

  5. Cook the veggies: Add 1 cup of broccoli florets and 1 sliced red bell pepper to the skillet. Stir often, cooking for an additional 3-4 minutes until the veggies are just tender. The vibrant colors will brighten your kitchen.

  6. Fluff the rice: Once the rice is done, remove it from the heat and let it sit for a few minutes. Then, fluff it gently with a fork. It’s light and ready to absorb all those delicious juices.

  7. Assemble the bowls: Spoon cooked rice into each bowl and top it generously with the teriyaki chicken and vegetables. Garnish with chopped green onions and a sprinkle of sesame seeds. Serve it warm.

Serving

The Best Teriyaki Chicken Rice Bowl

Serve your Teriyaki Chicken Rice Bowl family-style. Let everyone build their own bowl to suit their taste. This is a fun way to engage the family at dinner, and everyone loves making their own creations. Just place everything on the table and enjoy the togetherness.

Storage

Store any leftovers in an airtight container in the fridge for up to 3 days. When reheating, use a microwave or a stovetop skillet. Sprinkle a little water to prevent the rice from drying out. Heat until warmed through, but be careful not to overdo it. Enjoying this meal again is just as delightful!

Kitchen Notes

  • Keep marinated chicken in the fridge for quick cooking.
  • Pre-cook your rice in batches to save time during the week.
  • Use frozen veggies if you’re short on time. They steam beautifully in just a few minutes.
  • Consider using a rice cooker for perfectly cooked rice every time.
  • Make your teriyaki sauce ahead of time for extra convenience.

Variations

  • For picky eaters: Substituting chicken with tofu or even shrimp can make this dish adaptable.
  • Vegetarian: Use chickpeas instead of chicken and add more vegetables.
  • Gluten-free: Make or buy gluten-free teriyaki sauce and use gluten-free soy sauce alternatives.
  • Low-carb: Serve over cauli-rice instead of jasmine rice for a lighter option.
  • Spicy twist: Add sriracha or chili flakes to the teriyaki sauce for some heat.

FAQ

1. Can I use frozen chicken?
Yes, just ensure it’s thawed properly before cooking for even results.

2. What if I don’t have jasmine rice?
You can substitute with long-grain or basmati rice; just adjust cooking times as needed.

3. Is teriyaki sauce spicy?
Teriyaki sauce is primarily sweet and savory, but it can be spicy if you add hot ingredients.

4. Can I make this ahead?
Absolutely! You can marinate the chicken or even cook the whole dish and store it for later.

5. What should I serve on the side?
A simple green salad or some steamed edamame complements this meal beautifully.

In closing, I hope this Teriyaki Chicken Rice Bowl becomes as beloved in your home as it is in mine. Sharing meals with your family fosters connection and joy. So gather around the table, savor each bite, and create memories that linger long after the last meal is shared. Cooking does not just nurture the body; it nourishes the soul. Enjoy!

Teriyaki Chicken Rice Bowl

Prep Time 12 minutes
Cook Time 18 minutes
Total Time 30 minutes
Servings 4 servings
Calories 600
A comforting and flavorful teriyaki chicken rice bowl made with juicy chicken, fragrant jasmine rice, and vibrant vegetables, perfect for family dinners.

Ingredients

Main ingredients

  • 1 pound boneless chicken thighs (Dark meat is juicier and more tender. Trim any visible fat for a better texture.)
  • 1 cup jasmine rice (Rinse it before cooking for better texture.)
  • 1/2 cup teriyaki sauce (You can use store-bought or homemade. Look for low-sodium options if you prefer.)
  • 1 tablespoon sesame oil (Adds a nutty flavor to the chicken. A little goes a long way.)
  • 1 cup broccoli florets (Fresh or frozen, they add a nice crunch and color. Steam them lightly to retain their brightness.)
  • 1 medium red bell pepper, sliced (Sweet and crunchy, it complements the dish well.)
  • 2 pieces green onions, chopped (Sprinkle on top for a fresh, oniony bite.)
  • to taste sesame seeds for garnish (Optional, but they add a lovely visual touch.)

Instructions 

Cooking the Rice

  • Rinse 1 cup of jasmine rice under cold water until the water runs clear. In a saucepan, combine the rinsed rice with 1.5 cups of water. Bring to a boil, then reduce to a simmer, cover, and cook for about 18 minutes.

Preparing the Chicken

  • While the rice is cooking, chop 1 pound of boneless chicken thighs into bite-sized pieces.
  • In a large skillet over medium-high heat, add 1 tablespoon of sesame oil. Once it’s hot, add the chicken pieces.

Cooking the Chicken

  • Cook the chicken for 5-7 minutes, stirring occasionally, until they are browned and cooked through.
  • Pour in 1/2 cup of teriyaki sauce over the chicken. Stir to coat and allow it to simmer for another 3-5 minutes.

Cooking the Vegetables

  • Add 1 cup of broccoli florets and 1 sliced red bell pepper to the skillet. Stir often, cooking for an additional 3-4 minutes until the veggies are just tender.

Finishing Up

  • Once the rice is done, remove it from the heat and let it sit for a few minutes. Then fluff it gently with a fork.
  • Spoon cooked rice into each bowl and top it generously with the teriyaki chicken and vegetables. Garnish with chopped green onions and a sprinkle of sesame seeds.

Notes

Serve family-style, letting everyone build their own bowl. Store leftovers in an airtight container in the fridge for up to 3 days. Reheat in a microwave or skillet, adding a little water if needed.
Calories: 600kcal
Course: Dinner, Main Course
Cuisine: Asian, Japanese
Keyword: Comfort Food, Family Dinner, Quick Meal, Rice Bowl, Teriyaki Chicken

BBQ Chicken Sweet Potato Bowl

There’s something truly comforting about stepping into the kitchen as the sun is setting. The rich smell of sweet potatoes roasting in the oven mingles with the sound of sizzling chicken on the stove. It’s a symphony of scents and sounds, hinting at the delicious meal you’re about to create. Today, we are diving into a delightful and hearty recipe: the BBQ Chicken Sweet Potato Bowl. It’s a dish that brings warmth to your family as you gather around the table. Let’s get started!

Why This Works

BBQ Chicken Sweet Potato Bowl

This BBQ Chicken Sweet Potato Bowl is the perfect weeknight dinner solution. It’s not only flavorful but also incredibly satisfying. Sweet potatoes are a wonderful source of fiber and nutrients, and paired with protein-rich chicken, they create a well-rounded meal.

Making this dish is a great way to bring the family together. Everyone can customize their bowl with their favorite toppings. Plus, it saves you time. The sweet potatoes roast in the oven while you heat up the chicken, creating a delicious and filling dinner in under an hour.

Process Overview

“This is where the magic happens—when the aroma fills the kitchen.”

As the sweet potatoes roast and the chicken simmers, your kitchen will be filled with mouthwatering scents. This dish comes together seamlessly, allowing you to spend less time cooking and more time enjoying a meal with your loved ones.

Ingredients

Here’s what you’ll need to make these delightful bowls:

  • 2 chicken breasts, cooked and shredded
    Tip: Use leftover rotisserie chicken for quicker prep.
  • 2 medium sweet potatoes, cubed
    Tip: Look for firm sweet potatoes free from blemishes.
  • 1 cup corn, fresh or frozen
    Tip: Frozen corn is a great time-saver.
  • 1 avocado, diced
    Tip: Choose a ripe avocado for the creamiest texture.
  • 1/2 cup barbecue sauce
    Tip: Use your favorite store-bought or homemade sauce.
  • 1 tablespoon olive oil
    Tip: Extra virgin olive oil adds great flavor.
  • Salt and pepper to taste
    Tip: Adjust to your preference for seasoning.
  • Optional: diced red onion, cilantro, lime for serving
    Tip: Fresh herbs elevate the flavor and add brightness.

Directions

  1. Preheat the oven to 400°F (200°C).
    This step gets the kitchen ready for a delicious dish. The heat will bring out the best in the sweet potatoes!

  2. Toss the cubed sweet potatoes with olive oil, salt, and pepper. Spread out on a baking sheet and roast for 25-30 minutes until tender.
    Keep an eye on them and give them a gentle shake halfway through for even roasting.

  3. In a skillet, heat the shredded chicken and barbecue sauce until warmed through.
    This will take only a few minutes, and the smell will be simply irresistible.

  4. To assemble the bowls, place roasted sweet potatoes at the bottom, top with barbecue chicken, corn, and diced avocado.
    Layering creates a beautiful presentation; feel free to make it colorful and fun!

  5. Add any additional toppings such as red onion, cilantro, or a squeeze of lime. Serve warm.
    Encourage everyone to make their bowl unique—it’s all about enjoying what you love!

Serving

BBQ Chicken Sweet Potato Bowl

Serving this BBQ Chicken Sweet Potato Bowl family-style can be a wonderful experience. Place all the components in the center of the table and let everyone build their bowl. This approach brings a sense of togetherness as everyone selects their favorite ingredients. You can share stories about your day while enjoying a hearty meal.

Storage

Storing leftovers is easy! You can keep any extra BBQ Chicken Sweet Potato Bowls in airtight containers in the refrigerator for up to three days. When you’re ready to eat, reheat them in the microwave or on the stove until warmed through. Just be careful not to overheat the sweet potatoes, as they can become mushy.

Kitchen Notes

  • Prep Ahead: Wash and cut the sweet potatoes a day in advance for time-saving.
  • Shredding Chicken: Use a hand mixer to shred cooked chicken quickly.
  • Batch Cooking: Make extra sweet potatoes and chicken for quick lunches or dinners later on.
  • Frozen Corn: No need to thaw if using frozen corn; just toss it in when assembling the bowls.
  • Use One Pan: Roast the sweet potatoes and warm the chicken in one skillet to save on dishes!

Variations

This recipe can easily adapt to suit different tastes or dietary restrictions:

  • For Veggie Eaters: Substitute the chicken with black beans for a delicious plant-based option.
  • For Keto Dieters: Skip the corn and avocado for a lower-carb option.
  • Picky Eaters: Serve ingredients separately and let them choose what they want.
  • Wealth of Toppings: Consider adding cheese, salsa, or Greek yogurt for extra flavor.
  • Spicy Kick: Add jalapeños or a spicy barbecue sauce for those who like a little heat.

FAQ

1. Can I use other proteins instead of chicken?
Yes, you can use beef, turkey, or even tofu if you prefer a vegetarian option.

2. How can I make this dish healthier?
You can reduce the use of barbecue sauce or opt for a low-sugar version.

3. Can I prepare this dish in advance?
Yes, you can pre-cook the sweet potatoes and chicken, then assemble the bowls just before serving.

4. Is this recipe gluten-free?
Yes, all ingredients are gluten-free unless you use a barbecue sauce with gluten.

5. How do I know when the sweet potatoes are done?
They should be fork-tender and lightly browned on the edges.

Conclusion

As the meal comes together, the kitchen fills with warmth and delight. This BBQ Chicken Sweet Potato Bowl is not just food; it’s a way to connect with your loved ones, nourishing both body and soul. Remember, the best meals are those shared with family and friends, so gather around the table and enjoy every bite together. Happy cooking!

BBQ Chicken Sweet Potato Bowl

Prep Time 10 minutes
Cook Time 30 minutes
Total Time 40 minutes
Servings 4 servings
Calories 500
A comforting and customizable BBQ Chicken Sweet Potato Bowl featuring roasted sweet potatoes, shredded chicken, and fresh toppings.

Ingredients

Main Ingredients

  • 2 pieces chicken breasts, cooked and shredded (Use leftover rotisserie chicken for quicker prep.)
  • 2 medium sweet potatoes, cubed (Look for firm sweet potatoes free from blemishes.)
  • 1 cup corn, fresh or frozen (Frozen corn is a great time-saver.)
  • 1 piece avocado, diced (Choose a ripe avocado for the creamiest texture.)
  • 1/2 cup barbecue sauce (Use your favorite store-bought or homemade sauce.)
  • 1 tablespoon olive oil (Extra virgin olive oil adds great flavor.)
  • to taste salt (Adjust to your preference for seasoning.)
  • to taste pepper (Adjust to your preference for seasoning.)

Optional Toppings

  • to taste diced red onion (Fresh herbs elevate the flavor and add brightness.)
  • to taste cilantro (Fresh herbs elevate the flavor and add brightness.)
  • to taste lime (A squeeze for added freshness.)

Instructions 

Preparation

  • Preheat the oven to 400°F (200°C).
  • Toss the cubed sweet potatoes with olive oil, salt, and pepper. Spread out on a baking sheet and roast for 25-30 minutes until tender.

Cooking

  • In a skillet, heat the shredded chicken and barbecue sauce until warmed through.

Assembly

  • To assemble the bowls, place roasted sweet potatoes at the bottom, top with barbecue chicken, corn, and diced avocado.
  • Add any additional toppings such as red onion, cilantro, or a squeeze of lime. Serve warm.

Notes

Leftovers can be stored in airtight containers in the refrigerator for up to three days. Reheat in the microwave or on the stove until warmed through. Avoid overheating sweet potatoes as they can become mushy.
Calories: 500kcal
Course: Dinner, Main Course
Cuisine: American
Keyword: BBQ Chicken, Comfort Food, Customizable Dinner, Family Meal, Sweet Potato Bowl

Lemon Garlic Chicken

The kitchen fills with the bright, zesty aroma of lemons and the savory scent of garlic. It’s comforting, inviting, and just what you need after a long day. The sound of sizzling chicken softens the air, promising a meal that will bring everyone together. Lemon Garlic Chicken is not just a dish; it’s an experience that warms the heart and nourishes the soul.

Why This Works

Lemon Garlic Chicken

This recipe stands out for several reasons. First, it’s incredibly easy to prepare. The marinade does most of the hard work while you go about your day. Lemon Garlic Chicken is a favorite in my family because it doesn’t just taste good; it creates a sense of home.

This dish comes together quickly, making it perfect for busy weeknights. The fresh, vibrant flavors appeal to both kids and adults, making it a win-win for family dinners. You’ll appreciate how little time it takes to both prepare and clean up.

Process Overview

“This is where the magic happens—when the aroma fills the kitchen.”

When you mix lemon juice, garlic, and olive oil, the whole process feels effortless. Letting the chicken marinate allows the flavors to seep in, making each bite juicy and tender.

The actual cooking is just as simple, whether in a skillet or oven. As it cooks, the meal becomes a symphony of scents that call your family to the dinner table. Nothing beats the anticipation of sharing a homemade meal with loved ones.

Ingredients

  • Chicken Breasts (2 lbs): Choose skinless and boneless for easy eating. Quality matters, so look for organic or free-range if possible.
  • Lemon Juice (1/4 cup): Freshly squeezed is best. It adds depth and brightness. Avoid bottled for a fresher taste.
  • Garlic Cloves (4, minced): The more garlic, the better, in my book! If you love garlic, feel free to play around with the quantity.
  • Olive Oil (1/4 cup): Use extra virgin for a robust flavor. Olive oil helps keep the chicken moist and adds richness.
  • Salt (1/2 tsp): Just a sprinkle enhances the flavors beautifully. You can adjust this to your personal taste, especially if you’re watching your sodium intake.

Directions

  1. In a bowl, mix together lemon juice, minced garlic, olive oil, and salt to create the marinade. This step is simple but essential. Take a moment to appreciate the bright scents as they combine.

  2. Add the chicken breasts to the marinade and let it sit for at least 30 minutes. If you have more time, allowing it to marinate longer will intensify the flavor.

  3. Heat a skillet on the stovetop over medium heat or preheat the oven to 400°F (200°C). Set up your kitchen for success by having everything within reach.

  4. For stovetop, cook the chicken for about 6-7 minutes on each side or until fully cooked. For oven, place the chicken in a baking dish and bake for 20-25 minutes. Listen for that little sizzle—it’s a good sign!

  5. Serve hot with your favorite sides. You can pair it with steamed veggies, rice, or a fresh salad.

Serving

Lemon Garlic Chicken

For a family-style presentation, arrange the chicken on a big platter. Let everyone help themselves, creating a warm and communal dining experience. A sprinkle of fresh parsley or additional lemon wedges on the side adds a nice touch and elevates the dish visually. Family mealtime is about connection, and a simple setup makes serving easy.

Storage

Make any leftovers last by putting them in an airtight container. They will stay fresh in the refrigerator for up to 3-4 days. If you want to reheat, a skillet works best for retaining the juicy texture. Just add a splash of water or broth to keep it moist. You can also microwave it, but be cautious not to overdo it, as it can dry out.

Kitchen Notes

  • Use a meat mallet to flatten chicken breasts for even cooking.
  • Marinate the chicken overnight for even more flavor.
  • Double the marinade for a larger family meal.
  • Try adding herbs like thyme or rosemary for diversity.
  • Consider using chicken thighs for a juicier option.

Variations

If you have picky eaters or need to cater to different diets, here are some tweaks to consider:

  • For a keto version: Skip the sugar in bottled marinades and focus on fresh herbs.
  • Low-sodium option: Reduce the amount of salt or use salt-free seasoning blends.
  • For added flavor: Toss in red pepper flakes for a little heat.
  • Vegetarian option: Substitute the chicken with firm tofu or portobello mushrooms, marinated the same way.
  • For younger palates: Use less garlic and lemon if your kids prefer milder flavors.

FAQ

1. How long can I marinate the chicken for best results?
You can marinate the chicken for 30 minutes up to 24 hours. The longer it sits, the more flavorful it becomes.

2. Can I use frozen chicken breasts?
Yes, but make sure to thaw them completely before marinating and cooking.

3. What sides go well with Lemon Garlic Chicken?
Consider pairing it with rice, quinoa, steamed vegetables, or a fresh garden salad.

4. Is this dish gluten-free?
Absolutely! All the ingredients used in this recipe are naturally gluten-free.

5. How can I make this dish spicier?
Add red pepper flakes to the marinade or serve with a spicy dipping sauce on the side.

As you wrap up your Lemon Garlic Chicken, remember this dish is about more than just taste. It brings people together, sparks laughter, and creates cherished memories. Cooking is more than a task; it is an act of love, a chance to care for our families. So, gather around the table, share stories, and enjoy every bite. This meal is sure to become a favorite in your home, just like it has in mine. Happy cooking!

Lemon Garlic Chicken

Prep Time 30 minutes
Cook Time 25 minutes
Total Time 55 minutes
Servings 4 servings
Calories 350
A delicious and easy-to-make dish featuring marinated chicken breasts in lemon juice, garlic, and olive oil, perfect for busy weeknights.

Ingredients

For the Marinade

  • 1/4 cup Lemon Juice (Freshly squeezed is best.)
  • 4 cloves Garlic Cloves, minced (Feel free to increase the amount if you love garlic.)
  • 1/4 cup Olive Oil (Use extra virgin for a robust flavor.)
  • 1/2 tsp Salt (Adjust to personal taste.)

Main Ingredients

  • 2 lbs Chicken Breasts, skinless and boneless (Use organic or free-range if possible.)

Instructions 

Preparation

  • In a bowl, mix together lemon juice, minced garlic, olive oil, and salt to create the marinade.
  • Add the chicken breasts to the marinade and let it sit for at least 30 minutes.

Cooking

  • Heat a skillet over medium heat or preheat the oven to 400°F (200°C).
  • For stovetop, cook the chicken for about 6-7 minutes on each side or until fully cooked.
  • For oven, place the chicken in a baking dish and bake for 20-25 minutes.
  • Serve hot with your favorite sides.

Notes

Use a meat mallet to flatten chicken breasts for even cooking. Marinate overnight for even more flavor. Consider serving with sides like steamed veggies, rice, or a fresh salad.
Calories: 350kcal
Course: Dinner, Main Course
Cuisine: American, Mediterranean
Keyword: Easy Chicken Recipes, Family Meal, Healthy Dinner, Lemon Garlic Chicken, Marinated Chicken

BBQ Chicken Mac and Cheese

As you step into your kitchen, the aroma of BBQ chicken fills the air. The warm sound of sizzling chicken beckons you closer, promising a meal that will warm hearts and satisfy appetites. This BBQ Chicken Mac and Cheese is not just comfort food; it’s a memorable family experience waiting to happen. Gather your loved ones around the table, and let’s dive into this mouthwatering dish that combines two beloved favorites—BBQ chicken and creamy mac and cheese.

Why This Works

BBQ Chicken Mac and Cheese

This dish is a family favorite for a reason. It’s quick, easy, and loaded with flavor. With busy schedules, it can be challenging to find time to cook. That’s where this recipe shines. It takes less than an hour from start to finish, making it perfect for weeknight dinners or weekend gatherings. You can prepare this dish together with your family, turning mealtime into a fun bonding experience. Plus, who doesn’t love a creamy, cheesy dish with a smoky BBQ kick?

Process Overview

“This is where the magic happens—when the aroma fills the kitchen.”

Cooking this BBQ Chicken Mac and Cheese is an exciting journey. You’ll start by boiling your pasta, while chicken simmers away in a skillet. Then, you’ll create a creamy cheese sauce that envelopes your pasta in goodness—bringing it all together with BBQ chicken. Each step is straightforward, filling your kitchen with that delightful aroma.

Ingredients

For this recipe, you’ll need:

  • 1 lb (450g) chicken breast, cooked and shredded
    Tip: Rotisserie chicken works perfectly if you want to save time.

  • 1 tablespoon olive oil
    Tip: This gives a nice coating that helps the chicken sauté better.

  • 8 oz (225g) elbow macaroni or pasta of choice
    Tip: Any shape will do, but elbows hold sauce especially well.

  • 2 cups shredded cheddar cheese
    Tip: Use sharp cheddar for a bolder flavor.

  • 1 cup shredded mozzarella cheese
    Tip: Mozzarella adds creaminess and stretch.

  • 1 cup milk (low-fat preferred)
    Tip: You can substitute with almond or oat milk for a dairy-free option.

  • ½ cup BBQ sauce (your favorite brand)
    Tip: Choose sweet or smoky flavors depending on your preference.

  • 1 teaspoon garlic powder
    Tip: Fresh minced garlic can be used for a more intense flavor.

  • 1 teaspoon onion powder
    Tip: This enhances the overall depth without overpowering the dish.

  • ½ teaspoon smoked paprika
    Tip: This adds a lovely smoky note that pairs perfectly with BBQ.

  • Salt and pepper to taste
    Tip: Always taste as you go to achieve the perfect balance.

  • Fresh parsley, chopped (optional, for garnish)
    Tip: A lovely garnish adds a pop of color and freshness.

Directions

  1. Cook the pasta according to package instructions. Drain and set aside.
    Remember to stir occasionally during cooking to prevent sticking. You want it al dente for the perfect bite.

  2. Heat olive oil in a large skillet over medium heat. Add the shredded chicken and cook for 2-3 minutes to warm through.
    Keep stirring to ensure the chicken heats evenly and absorbs that delicious oil.

  3. Stir in the BBQ sauce, garlic powder, onion powder, smoked paprika, salt, and pepper. Mix well to coat the chicken in the sauce.
    The vibrant colors and aroma will get your family excited for what’s coming!

  4. In a separate saucepan, heat the milk over medium heat. Stir in the cheddar and mozzarella cheese, continuing to stir until the cheese is melted and the sauce is smooth.
    Don’t rush this part. Perfectly melted cheese is the secret to a creamy sauce!

  5. Add the cooked pasta to the cheese sauce, stirring to combine. Then, fold in the BBQ chicken mixture and continue stirring until everything is well mixed.
    This is the moment where everything comes together. The look and smell will be irresistible.

  6. Taste and adjust seasoning with salt and pepper if needed.
    It’s your opportunity to make it just the way your family likes it!

  7. Serve hot, garnished with fresh parsley if desired.
    Gather everyone around and enjoy the moment. Family meals are the best!

Serving

BBQ Chicken Mac and Cheese

Serving this BBQ Chicken Mac and Cheese family-style is a great way to bring everyone together. Transfer it to a large serving dish and let everyone help themselves. It invites conversation and laughter. Pair it with a side salad or grilled vegetables to complete the meal.

Storage

Leftovers can be stored in an airtight container in the fridge for up to three days. To reheat, simply warm it in the microwave or on the stovetop over low heat, adding a splash of milk to help restore the creamy texture. This dish holds its flavor well, so there’s no worry about losing that delicious BBQ kick.

Kitchen Notes

  • Shorten prep time: Use rotisserie chicken instead of cooking your own.
  • Double the recipe: This dish is great for feeding a crowd and even better for leftovers.
  • Experiment with cheese: Use any cheese you have on hand. Cream cheese can add extra creaminess.
  • Add veggies: Sneak in some cooked broccoli or peas for added nutrition.
  • Use one pot: Cook the pasta in the same pot you use for the cheese sauce to simplify cleanup.

Variations

While this recipe is fantastic as is, it’s easy to adapt to fit different tastes and dietary needs.

  • For picky eaters: Try adding a bit of ketchup to the BBQ sauce for a sweeter flavor.
  • Vegetarian option: Substitute the chicken with firm tofu or jackfruit, seasoned and sautéed just like the chicken.
  • Gluten-free: Use a gluten-free pasta option to make this dish suitable for those avoiding gluten.
  • Dairy-free: As mentioned, replace cheeses and milk with plant-based alternatives.
  • Spicy kick: Add some chopped jalapeños or a dash of hot sauce to the BBQ chicken for those who enjoy a little heat.

FAQ

  1. Can I make this recipe ahead of time?
    Yes, you can prep the chicken and cheese sauce in advance. Just store them separately and combine them with pasta when you’re ready to serve.

  2. What type of BBQ sauce should I use?
    Use your favorite brand. Sweet, tangy, or smoky BBQ sauces work best, depending on your family’s preference.

  3. Can I freeze the leftovers?
    Yes, this dish can be frozen. Just make sure to cool it completely before transferring it to a freezer-safe container. It can be kept for up to three months.

  4. How do I make this dish spicier?
    Incorporate some hot sauce into the BBQ sauce or add some pepper jack cheese for a spicy twist.

  5. What sides go well with BBQ Chicken Mac and Cheese?
    A fresh garden salad, steamed vegetables, or cornbread complement this dish nicely.

Conclusion

Cooking should never feel overwhelming. This BBQ Chicken Mac and Cheese recipe is not just a meal; it’s a chance to create lasting memories in the kitchen with your loved ones. The rich, smoky flavors and creamy texture will have your family asking for seconds. So grab your ingredients, gather the family, and make something delicious together. Remember, the best memories are made around the dinner table. Happy cooking!

BBQ Chicken Mac and Cheese

Prep Time 20 minutes
Cook Time 30 minutes
Total Time 50 minutes
Servings 6 servings
Calories 600
A delicious fusion of BBQ chicken and creamy mac and cheese, perfect for family gatherings.

Ingredients

Main Ingredients

  • 1 lb chicken breast, cooked and shredded (Rotisserie chicken works perfectly if you want to save time.)
  • 1 tablespoon olive oil (This gives a nice coating that helps the chicken sauté better.)
  • 8 oz elbow macaroni or pasta of choice (Any shape will do, but elbows hold sauce especially well.)
  • 2 cups shredded cheddar cheese (Use sharp cheddar for a bolder flavor.)
  • 1 cup shredded mozzarella cheese (Mozzarella adds creaminess and stretch.)
  • 1 cup milk (Low-fat preferred; can substitute with almond or oat milk for a dairy-free option.)
  • ½ cup BBQ sauce (Choose sweet or smoky flavors depending on your preference.)
  • 1 teaspoon garlic powder (Fresh minced garlic can be used for a more intense flavor.)
  • 1 teaspoon onion powder (This enhances the overall depth without overpowering the dish.)
  • ½ teaspoon smoked paprika (This adds a lovely smoky note that pairs perfectly with BBQ.)
  • to taste salt and pepper (Always taste as you go to achieve the perfect balance.)
  • optional fresh parsley, chopped (A lovely garnish adds a pop of color and freshness.)

Instructions 

Cooking the Pasta

  • Cook the pasta according to package instructions. Drain and set aside. Remember to stir occasionally during cooking to prevent sticking.

Preparing the Chicken

  • Heat olive oil in a large skillet over medium heat. Add the shredded chicken and cook for 2-3 minutes to warm through.
  • Stir in the BBQ sauce, garlic powder, onion powder, smoked paprika, salt, and pepper. Mix well to coat the chicken in the sauce.

Making the Cheese Sauce

  • In a separate saucepan, heat the milk over medium heat. Stir in the cheddar and mozzarella cheese, continuing to stir until the cheese is melted and the sauce is smooth.

Combining Everything

  • Add the cooked pasta to the cheese sauce, stirring to combine. Then, fold in the BBQ chicken mixture and continue stirring until everything is well mixed.
  • Taste and adjust seasoning with salt and pepper if needed.

Serving

  • Serve hot, garnished with fresh parsley if desired.

Notes

Leftovers can be stored in an airtight container in the fridge for up to three days. To reheat, warm it in the microwave or on the stovetop over low heat, adding a splash of milk if needed.
Calories: 600kcal
Course: Dinner, Main Course
Cuisine: American
Keyword: BBQ Chicken, Comfort Food, Family Dinner, Mac and Cheese, Quick Meal

Easy High Protein Feta Chicken Salad

The smell of freshly cooked chicken fills the air, mixed with tangy feta and zesty peppers. It’s the sound of family coming together in the kitchen, laughter and chatter echoing off the walls. Cooking doesn’t just nourish our bodies; it nourishes our souls. Today, I’m excited to share a recipe that brings both flavor and protein to your table—a delightful Easy High Protein Feta Chicken Salad that the whole family will enjoy.

Why This Works
Easy High Protein Feta Chicken Salad

This salad is not only packed with protein but is also a fantastic meal prep option. With just a few simple ingredients, you can have a delicious dish ready in no time. It’s perfect for busy days when you still want to serve something healthy to your family.

Kids love it too, and that makes this recipe a winner in our household. You can transform the leftovers into wraps or sandwiches for lunch the next day. Not to mention, this dish is colorful and inviting, which makes it a hit on any table.

Process Overview

“This is where the magic happens—when the aroma fills the kitchen.”

Making this Easy High Protein Feta Chicken Salad is simple and rewarding. You start by gathering your ingredients, then combine them into a wonderful mix of flavors and textures. In no time, you’ll have a dish that not only satisfies the taste buds but also fills you up with wholesome goodness.

Ingredients

Here’s what you’ll need for this refreshing salad:

  1. 3 cups cooked shredded chicken

    • You can use rotisserie chicken for convenience, or cook your own. The more tender, the better!
  2. 1/4 cup diced celery

    • Adds a nice crunch. Use fresh celery for the best flavor.
  3. 1/4 cup red onion

    • For a bit of sharpness. Soaking the onion in cold water for a few minutes can mellow its flavor.
  4. 1/3 cup pepperocinis (chopped)

    • These bring a delightful tanginess that brightens every bite. Adjust the amount if you like it milder.
  5. 1/3 cup roasted red peppers (the jarred marinated kind, chopped)

    • These add sweetness and deepen the flavor profile. Make sure to drain them well.
  6. 1/4 cup mayo

    • This creaminess ties everything together. I recommend using a lighter mayo for a healthier option.
  7. 1/3 cup plain non-fat Greek yogurt

    • A protein booster that makes this salad creamy without adding a lot of fat.
  8. 1 tbsp hot honey

    • For a little kick. You can adjust the quantity based on your spice preference.
  9. 1 tbsp pepperoncini juice

    • This adds an extra zing. Be careful not to overdo it to keep the balance.
  10. 1 tbsp chopped fresh dill

    • Fresh herbs elevate the dish. If you don’t have fresh dill, use dried but cut back to one teaspoon.
  11. 1/2 tsp oregano

    • A lovely herb that complements the chicken beautifully.
  12. 1/2 tsp garlic powder

    • For a bit of savory depth. Fresh garlic would work too if finely minced.
  13. 1/2 tsp salt

    • Enhances the flavors of all the ingredients.
  14. 6 oz crumbled feta

    • The star of the show! Feta adds creaminess and a salty, rich flavor that you won’t want to skip.

With these simple ingredients, you are ready to create a mouth-watering salad that fits right into your family’s busy lifestyle.

Directions

Let’s get cooking! Follow these easy steps for the perfect feta chicken salad:

  1. In a large bowl, combine the cooked shredded chicken, diced celery, red onion, chopped pepperocinis, and roasted red peppers. Make sure everything is well distributed. This way, every bite is full of flavor.

  2. In a separate bowl, mix the mayo, Greek yogurt, hot honey, pepperoncini juice, chopped dill, oregano, garlic powder, and salt. This creamy dressing will bring the entire salad together beautifully. Give it a good whisk until it’s smooth.

  3. Pour the dressing over the chicken and vegetable mixture. Stir well until everything is evenly coated. Don’t rush; this is the key to a flavorful salad.

  4. Gently fold in the crumbled feta cheese. Be careful not to break it apart too much. You want those nice, creamy chunks.

  5. Taste and adjust seasoning if necessary. A little extra salt or pepper never hurt anyone!

  6. Serve it fresh on a bed of greens, in a sandwich, or with your favorite crackers. Enjoy this hearty dish that’s sure to make your family smile!

Serving
Easy High Protein Feta Chicken Salad

This dish is perfect for family-style dining. Serve it in a large bowl so everyone can help themselves. You can pair it with a side of fresh veggies or a light green salad. It also goes great with whole grain crackers for an added crunch.

If you’re feeling creative, place the salad on a platter over a bed of mixed greens. You can also set out wraps and let each family member build their own. Kids love being part of the meal prep!

Storage

Leftover salad can be stored in an airtight container in the fridge for up to three days. When you’re ready to enjoy it again, scoop out what you need and hope for some leftovers to savor.

If you find it a bit dry after sitting in the fridge, add a touch more mayo or yogurt when you serve it. This will help restore its creaminess.

Kitchen Notes

Here are some shortcuts to speed up your cooking process:

  • Use rotisserie chicken: It saves time and effort. Just shred it up and you’re ready to go.

  • Pre-chop vegetables: If you have time during the week, chop your celery, onion, and peppers ahead of time and store them in the fridge.

  • Mix up the dressing in a jar: Combine the dressing ingredients in a jar and shake it up. It’s quick, and there’s less to clean!

  • Experiment with flavors: Add your favorite herbs or spices for a twist.

  • Double the batch: Make extra to have for the week. It’s perfect for lunch or a quick snack!

Variations

Taking care of picky eaters can be tricky. Here are a few tweaks:

  • Substitute the chicken: Use canned tuna or chickpeas for a different protein source. This makes it a great vegetarian option too!

  • Change the cheese: If feta isn’t a hit, try goat cheese or even shredded cheddar.

  • Add nuts or seeds: Throw in some sliced almonds or pumpkin seeds for an extra crunch.

  • Play with dressings: If yogurt-based sauces are a no-go, try a vinaigrette to keep it light.

  • Go low-carb: Serve it on lettuce wraps instead of bread for a refreshing twist.

FAQ

1. Can I make this salad ahead of time?
Absolutely! It stays fresh in the fridge for up to three days.

2. How can I make this dish gluten-free?
Simply serve it with gluten-free crackers or lettuce wraps instead of traditional bread.

3. What if I don’t have hot honey?
You can use regular honey if you prefer. Add a pinch of red pepper flakes for heat.

4. Can I use a different type of protein?
Yes, shredded turkey or even tofu can replace the chicken.

5. Is this dish suitable for meal prep?
Yes, it’s perfect for meal prep! Just portion it out into containers for the week.

Conclusion

Cooking together as a family can create beautiful memories. This Easy High Protein Feta Chicken Salad not only brings deliciousness to your table but is also a wonderful way to connect with your loved ones. Enjoy every bite together and remember, the best ingredient in any recipe is love. Happy cooking!

Feta Chicken Salad

Prep Time 15 minutes
Total Time 15 minutes
Servings 4 servings
Calories 350
A delicious and refreshing salad packed with protein, featuring tender chicken, tangy feta cheese, and vibrant vegetables, perfect for meal prep and family gatherings.

Ingredients

Main Ingredients

  • 3 cups cooked shredded chicken (Use rotisserie chicken for convenience.)
  • 1/4 cup diced celery (Use fresh celery for the best flavor.)
  • 1/4 cup red onion (Soak in cold water to mellow flavor.)
  • 1/3 cup pepperocinis (chopped) (Adjust amount for spiciness preference.)
  • 1/3 cup roasted red peppers (chopped) (Drain well before use.)
  • 1/4 cup mayo (Consider using lighter mayo for a healthier option.)
  • 1/3 cup plain non-fat Greek yogurt (Adds creaminess without much fat.)
  • 1 tbsp hot honey (Adjust quantity based on spice preference.)
  • 1 tbsp pepperoncini juice (Use carefully for balance.)
  • 1 tbsp chopped fresh dill (Dried dill can be used, reduce to 1 teaspoon.)
  • 1/2 tsp oregano (Complementary herb for chicken.)
  • 1/2 tsp garlic powder (Fresh garlic can be used, finely minced.)
  • 1/2 tsp salt (Enhances overall flavor.)
  • 6 oz crumbled feta (Adds creaminess and a rich flavor.)

Instructions 

Preparation

  • In a large bowl, combine the cooked shredded chicken, diced celery, red onion, chopped pepperocinis, and roasted red peppers. Make sure everything is well distributed.
  • In a separate bowl, mix the mayo, Greek yogurt, hot honey, pepperoncini juice, chopped dill, oregano, garlic powder, and salt. Whisk until smooth.
  • Pour the dressing over the chicken and vegetable mixture. Stir well until everything is evenly coated.
  • Gently fold in the crumbled feta cheese, taking care not to break it apart too much.
  • Taste and adjust seasoning if necessary.
  • Serve on a bed of greens, in a sandwich, or with crackers.

Notes

Leftover salad can be stored in an airtight container in the fridge for up to three days. If it becomes dry, add a touch more mayo or yogurt before serving.
Calories: 350kcal
Course: Lunch, Main Course, Salad
Cuisine: Mediterranean
Keyword: Chicken Salad, Feta Salad, Healthy Recipe, High Protein, meal prep

Chicken Salad Sandwich

There’s something comforting about stepping into a kitchen where a chicken salad sandwich is being prepared. The smell of tender chicken mingling with the tangy mayo and the crunch of fresh vegetables creates a cozy atmosphere that feels like home. With each chop, you can hear the sound of the knife hitting the cutting board, accompanied by the gentle whirl of a mixer or the soft thud of a bowl being stirred. It’s more than just food; it’s family, warmth, and memories waiting to be made.

Why This Works
Chicken Salad Sandwich

This chicken salad sandwich recipe is a true lifesaver for busy families. It’s quick to throw together, making it perfect for lunch or dinner on a hectic day. You can use leftover chicken, so it saves time and reduces waste.

Not only is it delicious, but it also allows everyone to customize their sandwich to their liking. Whether it’s on a slice of bread or served in a crisp lettuce wrap, each family member can create their perfect meal. Plus, it works well for picnics, gatherings, or simple lunches at home.

Process Overview

“This is where the magic happens—when the aroma fills the kitchen.”

In just a few simple steps, you can create a creamy, savory chicken salad that makes a satisfying sandwich. Gather your ingredients, mix them up, and soon you’ll have a delightful meal ready to enjoy. Whether you choose to serve it chilled or at room temperature, it’s a recipe that never disappoints.

Ingredients

Gather these easy-to-find ingredients:

  • 2 cups cooked chicken, shredded

    • Use rotisserie chicken for an easy shortcut.
  • 1/2 cup mayonnaise

    • You can use Greek yogurt for a healthier option.
  • 1/4 cup chopped celery

    • Fresh celery adds a nice crunch, but you can leave it out if your family doesn’t like it.
  • 1/4 cup chopped red onion

    • Red onion lends a bit of sweetness; substitute with green onions if desired.
  • 1 tablespoon Dijon mustard

    • This adds a delightful tang; yellow mustard works if that’s what you have.
  • Salt and pepper to taste

    • Always adjust to your family’s preference; taste as you go!
  • Bread or lettuce leaves for serving

    • Whole grain bread or large lettuce leaves make for great options.

Directions

  1. In a large bowl, combine the shredded chicken, mayonnaise, celery, red onion, and Dijon mustard.

    • Mix it well to ensure the flavors meld together.
  2. Sprinkle in salt and pepper according to your taste.

    • Don’t be shy! Taste as you go to find your perfect balance.
  3. Serve the chicken salad on your choice of bread or wrapped in lettuce leaves.

    • Don’t forget to share with your family or friends!

Each step is simple, and the process is forgiving. You can adjust flavors as you go, making it perfect for anyone in your family.

Serving
Chicken Salad Sandwich

To serve chicken salad sandwiches family-style, scoop generous portions into a large serving bowl. Provide an array of bread options, such as sliced whole grain, baguette, or even croissants. Lay out lettuce leaves for a refreshing wrap alternative. Place some chips or a fresh salad on the side for a complete meal.

Gathering around a table filled with options invites everyone to create their own combination, making it not just a meal but a fun experience.

Storage

Store any leftover chicken salad in an airtight container in the fridge for up to three days. If you’ve prepared a larger batch, consider dividing it into smaller portions for easy meals throughout the week.

To reheat, avoid the microwave as it can make the chicken salad watery. Instead, let it sit at room temperature for about 30 minutes before serving again, making sure it retains its creamy texture.

Kitchen Notes

Here are a few shortcuts to simplify your chicken salad preparation:

  • Use Leftover Chicken: Rotisserie chicken or leftover grilled chicken saves time.
  • Meal Prep: Chop vegetables ahead of time and store them in the fridge.
  • Mix and Match: Experiment with different herbs or spices for unique flavors.
  • Single Serving: Create individual portions in mason jars for easy grab-and-go lunches.
  • Freeze for Later: If you have extra chicken salad, consider freezing it for a quick meal later.

Variations

If you have picky eaters in your family or different dietary needs, here are some tweaks to consider:

  • For Lighter Options: Substitute half of the mayo with plain Greek yogurt.
  • Add Fruits: For a hint of sweetness, add halved grapes, diced apples, or dried cranberries.
  • Use Different Veggies: Carrots or bell peppers provide crunch and color.
  • Make it Spicy: Add diced jalapeños for a kick.
  • Dairy-Free: Substitute mayonnaise with avocado or make a tahini-based spread.

FAQ

1. Can I use canned chicken?
Yes, canned chicken works in a pinch. Just drain well and shred.

2. Is this recipe gluten-free?
Yes, if served in lettuce wraps or with gluten-free bread.

3. How can I make it ahead of time?
You can prepare the salad a day in advance and store it in the fridge.

4. How do I know if the chicken is cooked properly?
Ensure the internal temperature reaches 165°F when cooked.

5. What can I serve it with?
Chicken salad sandwiches pair wonderfully with fresh salads, chips, or fruits.

Conclusion

A chicken salad sandwich is more than just a meal; it’s a gathering spot for family and friends to enjoy delicious food together. Remember, the kitchen is where memories are made, laughter is shared, and love is served. Enjoy creating this comforting dish, and let it bring your family closer together around the dinner table. Happy cooking!

Chicken Salad Sandwich

Prep Time 15 minutes
Total Time 15 minutes
Servings 4 servings
Calories 350
A comforting and customizable chicken salad sandwich perfect for busy families and gatherings.

Ingredients

Main Ingredients

  • 2 cups cooked chicken, shredded (Use rotisserie chicken for an easy shortcut.)
  • 1/2 cup mayonnaise (You can use Greek yogurt for a healthier option.)
  • 1/4 cup chopped celery (Fresh celery adds a nice crunch, optional if family dislikes.)
  • 1/4 cup chopped red onion (Red onion lends sweetness; substitute with green onions if desired.)
  • 1 tablespoon Dijon mustard (Adds a delightful tang; yellow mustard works too.)
  • to taste Salt and pepper (Adjust to family’s preference; taste as you go.)
  • as needed Bread or lettuce leaves for serving (Whole grain bread or large lettuce leaves work great.)

Instructions 

Preparation

  • In a large bowl, combine the shredded chicken, mayonnaise, celery, red onion, and Dijon mustard.
  • Mix it well to ensure the flavors meld together.
  • Sprinkle in salt and pepper according to your taste.
  • Serve the chicken salad on your choice of bread or wrapped in lettuce leaves.

Notes

Store leftovers in an airtight container in the fridge for up to three days. Avoid microwaving to prevent a watery texture; let sit at room temperature to serve again.
Calories: 350kcal
Course: Dinner, Lunch
Cuisine: American
Keyword: Chicken Salad, Easy Meal, Family Recipe, Leftover Chicken, Sandwich

Homemade Chicken Noodle Soup

There’s something truly magical about walking into a kitchen filled with the warm, comforting aroma of chicken noodle soup. The sounds of bubbling broth and sizzling vegetables invite you to gather around the table. It’s a simple yet profound experience that brings families together, nurturing both body and soul. Today, I want to share with you my favorite homemade chicken noodle soup recipe. This cozy dish is perfect for chilly evenings and serves as a reminder of home.

Why This Works

Homemade Chicken Noodle Soup

Homemade chicken noodle soup is a family classic for good reason. It’s a dish that has been passed down through generations. The delightful combination of tender chicken, fresh vegetables, and hearty noodles makes it both satisfying and nourishing.

One of the best parts of this soup is how easy it is to prepare. With just a bit of chopping and simmering, you can create a meal that feels like it took all day. It’s a time-saver for busy evenings, yet it still has that homemade touch. Your family will love it, and you’ll appreciate how little time it takes to make.

Process Overview

“This is where the magic happens—when the aroma fills the kitchen.”

Making chicken noodle soup is not only straightforward but a joy. The process is simple and rewarding. You will chop some veggies, sauté them until soft, and then let everything simmer together. This is where patience pays off, and your kitchen will be enveloped in delicious smells. The anticipation of that first warm spoonful is always worth it.

Ingredients

Here’s what you’ll need for this cozy meal:

  • 1 tablespoon olive oil
  • 1 onion, chopped
  • 2 carrots, sliced
  • 2 celery stalks, sliced
  • 3 garlic cloves, minced
  • 8 cups chicken broth
  • 2 cups cooked chicken, shredded
  • 2 cups egg noodles
  • 1 teaspoon dried thyme
  • 1 bay leaf
  • Salt and pepper to taste
  • Fresh parsley for garnish

Lily’s Tips:

  • Olive Oil: Look for extra virgin olive oil for better flavor.
  • Onion: A yellow onion is your best bet; it has a sweet flavor when cooked.
  • Carrots: Choose firm carrots for the best texture.
  • Chicken Broth: Low-sodium broth allows you to control the salt.
  • Parsley: Fresh parsley adds a pop of color and freshness.

Directions

  1. In a large pot, heat the olive oil over medium heat. Add the onion, carrots, and celery, and cook until softened, about 5 minutes. This step builds the base for your soup.

  2. Stir in the garlic and cook for an additional minute. Garlic adds depth to the flavor, so don’t skip this!

  3. Pour in the chicken broth and bring to a boil. The boiling broth will start to blend all the wonderful flavors together.

  4. Add the shredded chicken, egg noodles, thyme, and bay leaf. Reduce heat and simmer for 15 minutes, or until the noodles are tender. Keep an eye on it; you want those noodles just right!

  5. Season with salt and pepper to taste. Taste as you go; it’s all about personal preference.

  6. Remove the bay leaf and serve hot, garnished with fresh parsley. Garnishing makes your dish look beautiful and adds extra flavor.

Serving

Homemade Chicken Noodle Soup

To serve chicken noodle soup family-style, ladle generous portions into bowls and offer crusty bread or buttered rolls on the side. Everyone loves to dunk bread into warm soup. This not only enhances the experience but creates a communal feel at the table.

Feel free to set out fresh herbs or a sprinkle of cheese for those who like to customize their soup. Enjoying the meal together creates lasting memories with your loved ones, especially on cozy nights.

Storage

Chicken noodle soup is perfect for leftovers. Store any extra soup in an airtight container in the refrigerator. It will last up to 3 days. When you’re ready to enjoy it again, simply reheat it on the stove over low heat. If the noodles have absorbed too much broth, feel free to add a splash of water or extra broth to get the consistency just right.

If you want to store it longer, consider freezing the soup. Just be sure to leave the noodles out until you’re ready to serve, as they tend to become mushy. Soup can be frozen for up to 3 months.

Kitchen Notes

  • Make use of a rotisserie chicken for an easy, time-saving option.
  • Pre-chop your vegetables and store them in the fridge for quick prep.
  • Use frozen vegetables as a shortcut; they hold up well in soup.
  • Consider using whole-grain egg noodles for added nutrition.
  • A slow cooker can also be used for this recipe; just adjust the cooking times.

Variations

Chicken noodle soup is versatile! Here are some tweaks you can try:

  • For Picky Eaters: Substitute vegetables with ones your family prefers, such as peas or corn.
  • Healthy Twist: Use whole wheat or gluten-free noodles for additional dietary needs.
  • Herbal Touch: Add fresh herbs like dill or rosemary for a flavor twist.
  • Spicy Kick: A pinch of red pepper flakes can give your soup an exciting kick.
  • Vegetarian Option: Swap out chicken for tofu and use vegetable broth for a plant-based version.

FAQ

Q1: Can I use raw chicken?
Yes, but you will need to cook it longer to ensure it’s fully cooked.

Q2: Can I make this soup in advance?
Absolutely! Just store it in the fridge and reheat when you’re ready to serve.

Q3: What type of chicken should I use?
Rotisserie chicken works well for convenience, but you can also use leftover grilled or baked chicken.

Q4: Is it necessary to use fresh herbs?
While fresh herbs enhance flavor, dried herbs work just fine if that’s what you have on hand.

Q5: Can I add other vegetables?
Sure! Feel free to get creative with vegetables like peas, corn, or even greens like spinach.

Conclusion

As the warm steam rises from your bowl of homemade chicken noodle soup, take a moment to appreciate the comfort it brings. This dish is more than just a recipe; it’s a heartwarming way to connect with family and friends. Remember, the best meals are made with love and shared around the table. Enjoy the process, savor every bite, and create those beautiful memories in your kitchen. Happy cooking!

Chicken Noodle Soup

Prep Time 10 minutes
Cook Time 20 minutes
Total Time 30 minutes
Servings 6 servings
Calories 250
This cozy chicken noodle soup recipe is perfect for chilly evenings, combining tender chicken, fresh vegetables, and hearty noodles for a comforting meal.

Ingredients

For the Soup

  • 1 tablespoon olive oil (Look for extra virgin olive oil for better flavor.)
  • 1 cup onion, chopped (A yellow onion is your best bet for its sweetness.)
  • 2 cups carrots, sliced (Choose firm carrots for the best texture.)
  • 2 cups celery stalks, sliced
  • 3 cloves garlic, minced (Garlic adds depth to flavor.)
  • 8 cups chicken broth (Low-sodium broth allows you to control the salt.)
  • 2 cups cooked chicken, shredded (Rotisserie chicken works well for convenience.)
  • 2 cups egg noodles (Consider using whole grain for better nutrition.)
  • 1 teaspoon dried thyme
  • 1 leaf bay leaf
  • to taste Salt and pepper (Adjust to your preference.)
  • to garnish Fresh parsley (Adds a pop of color and freshness.)

Instructions 

Cooking

  • In a large pot, heat the olive oil over medium heat.
  • Add the onion, carrots, and celery, and cook until softened, about 5 minutes.
  • Stir in the garlic and cook for an additional minute.
  • Pour in the chicken broth and bring to a boil.
  • Add the shredded chicken, egg noodles, thyme, and bay leaf.
  • Reduce heat and simmer for 15 minutes, or until noodles are tender.
  • Season with salt and pepper to taste.
  • Remove the bay leaf and serve hot, garnished with fresh parsley.

Notes

Chicken noodle soup is perfect for leftovers. Store in an airtight container in the fridge for up to 3 days. Freezing is an option, but leave out the noodles until ready to serve.
Calories: 250kcal
Course: Main Course, Soup
Cuisine: American
Keyword: Chicken Noodle Soup, Comfort Food, Easy Recipe, Family Meal, homemade soup

Chicken Noodle Soup

On a crisp autumn day, there’s nothing quite like the aroma of Chicken Noodle Soup wafting through the kitchen. The sound of bubbling broth creates a symphony that invites everyone to gather around the table. The warmth of this comforting dish fills the home, promising a sense of family and care with every bite. As the flavors meld together, you can almost hear the laughter and stories shared over this classic meal.

Why This Works

Chicken Noodle Soup

Chicken Noodle Soup is more than just a recipe; it’s a trusted family tradition. It’s simple, delicious, and can be made in under an hour, making it a perfect go-to for busy weeknight dinners. The ingredients are easy to find, and the steps are straightforward, allowing you to spend more time enjoying the meal and less time stressing over preparation.

The beauty of this soup lies in its versatility. You can tailor it to your family’s tastes or what you have on hand. Plus, it’s a wonderful way to bring everyone together. Whether you’re comforting a loved one or simply enjoying a cozy night at home, this recipe is sure to deliver warmth and nourishment.

Process Overview

“This is where the magic happens—when the aroma fills the kitchen.”

The cooking process for Chicken Noodle Soup is both engaging and satisfying. Each step contributes to building layers of flavor, creating something truly homemade. From sautéing the vegetables to adding the chicken and noodles, every action brings you closer to a bowl of soothing goodness.

As you prepare this soup, remember to embrace the moment. Cooking is not just about nourishment; it’s about creating memories and sharing love with the people you care about.

Ingredients

To create this hearty Chicken Noodle Soup, you will need the following ingredients:

  • 1 lb boneless chicken breast: Choose fresh chicken for the best flavor and texture.
  • 4 cups chicken broth: Homemade broth adds richness, but store-bought is a great time saver.
  • 2 cups egg noodles: These cook quickly and soak up the delicious broth.
  • 1 cup carrots, diced: Fresh carrots add sweetness and a pop of color.
  • 1 cup celery, diced: Celery brings a lovely crunch and savory depth.
  • 1 onion, chopped: Onion forms the base of your flavor.
  • 2 cloves garlic, minced: Garlic elevates the dish with its aromatic quality.
  • 1 tsp thyme: Dried thyme works well, but fresh thyme can enhance the flavor further.
  • Salt and pepper to taste: Always taste as you go for the perfect seasoning.
  • Fresh parsley for garnish: A sprinkle of parsley adds brightness and a fresh finish.

Lily’s Tips

  • Consider poaching the chicken breasts in the broth for extra flavor.
  • Use leftover rotisserie chicken for a quicker alternative.
  • Feel free to add more vegetables like peas or corn for extra nutrition.
  • Adjust the noodle quantity based on how thick you want your soup.
  • For a creamier version, stir in a splash of cream at the end.

Directions

  1. In a large pot, heat a little oil over medium heat. Add the chopped onion and garlic. Sauté until the onion is translucent. This step builds a fantastic base for your soup.
  2. Add the diced carrots and celery; cook for another 5 minutes. As they soften, you’ll appreciate their enticing aroma.
  3. Pour in the chicken broth and add the chicken breasts. Bring to a boil, then reduce to a simmer for about 20 minutes until the chicken is cooked through. Patience is key; this is where the broth starts to deepen.
  4. Remove the chicken breasts, shred them, and return to the pot. Shredding the chicken allows it to blend beautifully with the other ingredients.
  5. Stir in the egg noodles, thyme, salt, and pepper. Cook for an additional 10 minutes until the noodles are tender. This step turns a simple broth into a hearty meal.
  6. Garnish with fresh parsley before serving. This makes the soup visually appealing and adds a burst of flavor.

Serving

Chicken Noodle Soup

When it comes to serving your Chicken Noodle Soup, do it family-style. Pour the soup into a large serving bowl or let everyone fill their own bowls. Pair it with crusty bread for dipping and a simple green salad. Encourage everyone to help themselves and share their thoughts on the flavors. This makes the meal even more special and turns dinner into a shared experience.

Storage

Chicken Noodle Soup stores well in the refrigerator for up to 4 days. Allow the soup to cool completely before transferring it to an airtight container. When ready to enjoy, reheat it gently on the stove or in the microwave. You may need to add a splash of chicken broth to thin it out, as the noodles will absorb some liquid as the soup sits.

Kitchen Notes

Here are some shortcuts to make your soup-making process even smoother:

  • Use pre-cut vegetables from the store to save on chopping time.
  • Make a double batch and freeze half for a future meal.
  • Consider using a slow cooker to let the flavors meld while you go about your day.
  • Cook the noodles separately if you want a less thick soup; simply add them in when serving.
  • Incorporate a dash of lemon juice for brightness in flavors before serving.

Variations

Not everyone has the same tastes or dietary needs, and that’s okay! Here are a few tweaks to cater to different preferences:

  • For a gluten-free version, swap egg noodles for gluten-free pasta or skip the noodles entirely.
  • Add leafy greens such as spinach or kale for a nutrient boost and a pop of color.
  • Try using different proteins like turkey or even tofu for a vegetarian option.
  • Experiment with various herbs and spices such as rosemary or dill for a unique twist.
  • If your kids are picky, you can blend the soup to create a smoother texture.

Frequently Asked Questions

1. Can I use frozen chicken?
Yes, you can use frozen chicken. Just be sure to adjust the cooking time to allow it to fully cook through.

2. Can I make this soup in advance?
Absolutely! This soup can be made ahead and stored in the refrigerator for a few days.

3. What can I substitute for chicken broth?
You can use vegetable broth for a vegetarian option. Homemade is best, but store-bought works too.

4. How do I store leftovers?
Store cooled soup in an airtight container in the fridge for up to 4 days. It freezes well, too!

5. Why does my soup taste bland?
Always taste as you cook and adjust seasonings accordingly. Fresh herbs and proper seasoning will bring out the best in your soup.

As you prepare this Chicken Noodle Soup, savor each moment. The simple act of making this dish can strengthen bonds and create lasting memories. Share it with loved ones, and you’ll see how a bowl of soup can bring joy, comfort, and warmth into your home. Here’s to cooking with love and enjoying every comforting bite!

Chicken Noodle Soup

Prep Time 10 minutes
Cook Time 30 minutes
Total Time 40 minutes
Servings 6 servings
Calories 320
A warm, comforting Chicken Noodle Soup perfect for autumn days, filled with tender chicken, hearty vegetables, and flavorful broth.

Ingredients

Main Ingredients

  • 1 lb boneless chicken breast (Choose fresh chicken for the best flavor and texture.)
  • 4 cups chicken broth (Homemade broth adds richness, but store-bought is a great time saver.)
  • 2 cups egg noodles (These cook quickly and soak up the delicious broth.)
  • 1 cup carrots, diced (Fresh carrots add sweetness and a pop of color.)
  • 1 cup celery, diced (Celery brings a lovely crunch and savory depth.)
  • 1 medium onion, chopped (Onion forms the base of your flavor.)
  • 2 cloves garlic, minced (Garlic elevates the dish with its aromatic quality.)
  • 1 tsp thyme (Dried thyme works well; fresh thyme can enhance the flavor further.)
  • to taste salt and pepper (Always taste as you go for the perfect seasoning.)
  • to taste fresh parsley for garnish (A sprinkle of parsley adds brightness and a fresh finish.)

Instructions 

Preparation

  • In a large pot, heat a little oil over medium heat. Add the chopped onion and garlic. Sauté until the onion is translucent.
  • Add the diced carrots and celery; cook for another 5 minutes.
  • Pour in the chicken broth and add the chicken breasts. Bring to a boil, then reduce to a simmer for about 20 minutes until the chicken is cooked through.
  • Remove the chicken breasts, shred them, and return to the pot.
  • Stir in the egg noodles, thyme, salt, and pepper. Cook for an additional 10 minutes until the noodles are tender.
  • Garnish with fresh parsley before serving.

Notes

Consider poaching the chicken breasts in the broth for extra flavor. Use leftover rotisserie chicken for a quicker alternative. Feel free to add more vegetables like peas or corn for extra nutrition. Adjust the noodle quantity based on how thick you want your soup. For a creamier version, stir in a splash of cream at the end. Store leftovers in the refrigerator for up to 4 days.
Calories: 320kcal
Course: Main Course, Soup
Cuisine: American
Keyword: Autumn Recipes, Chicken Noodle Soup, Comfort Food, Easy Soup Recipe, Family Meal