Tag

easy recipes

Browsing

Coconut Lime Chicken

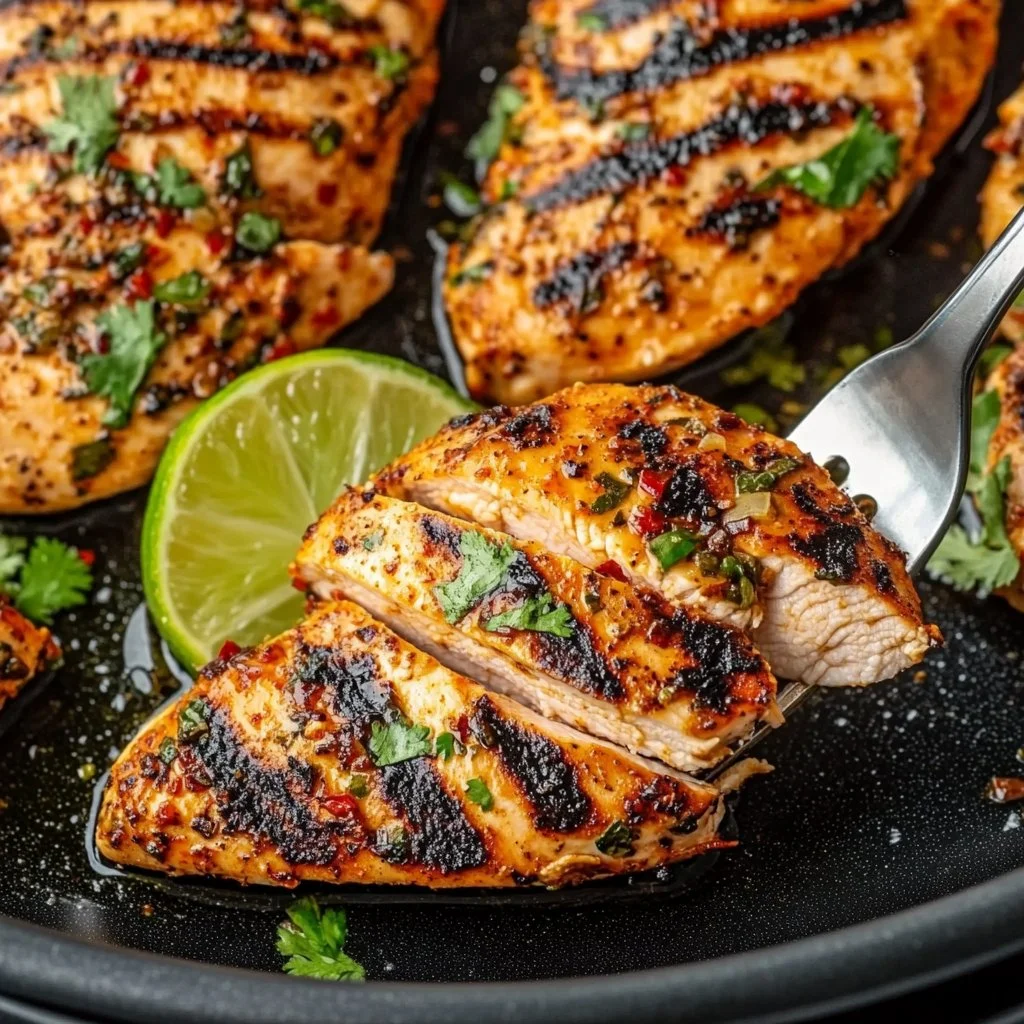
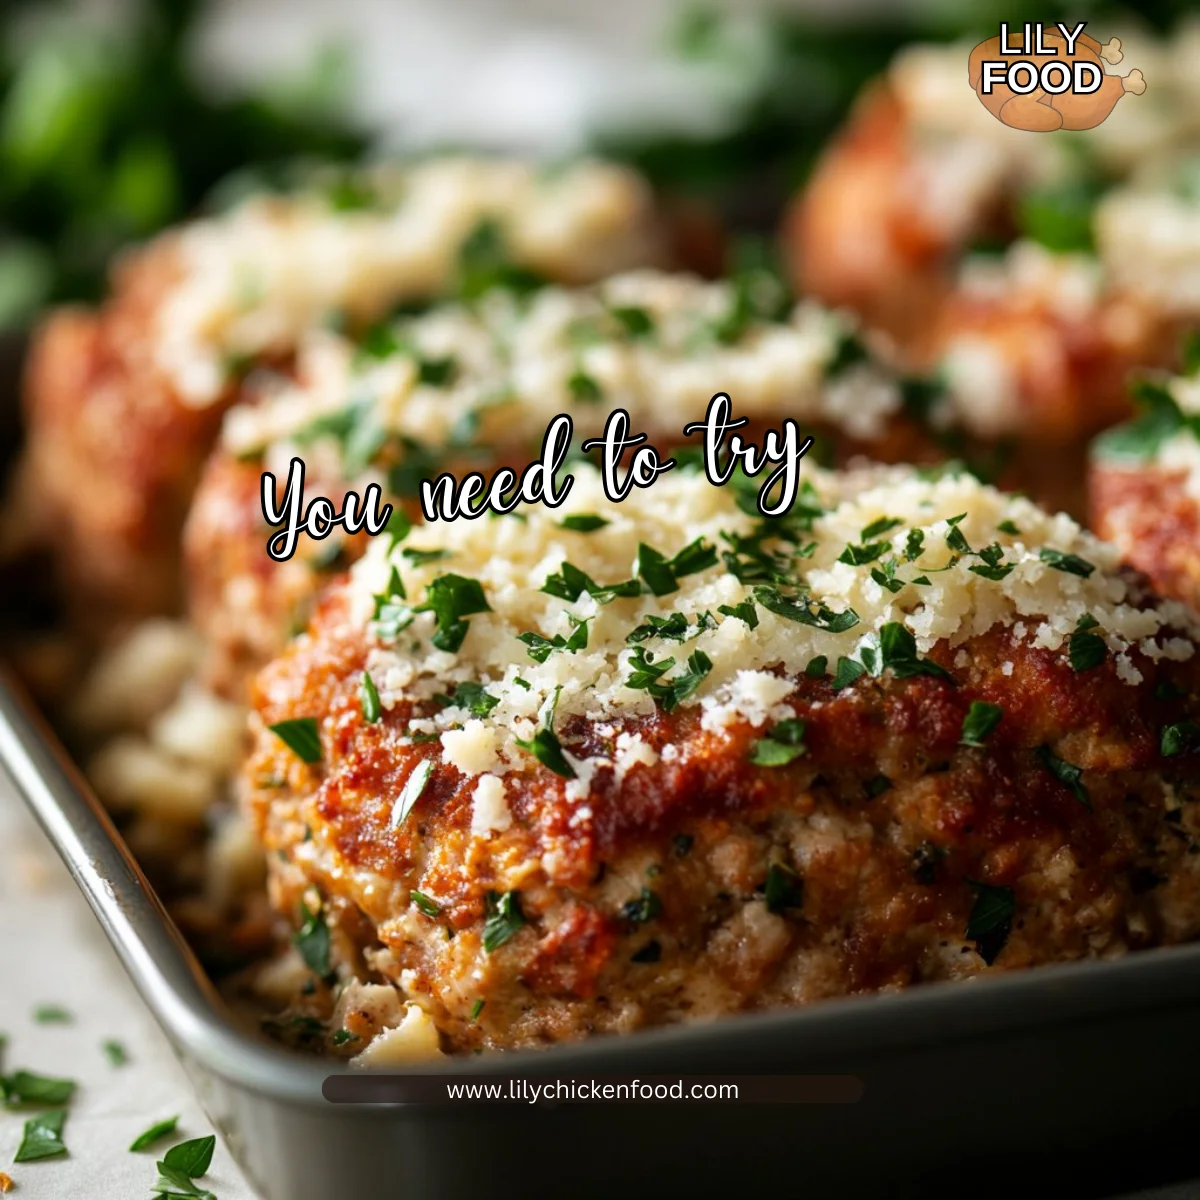
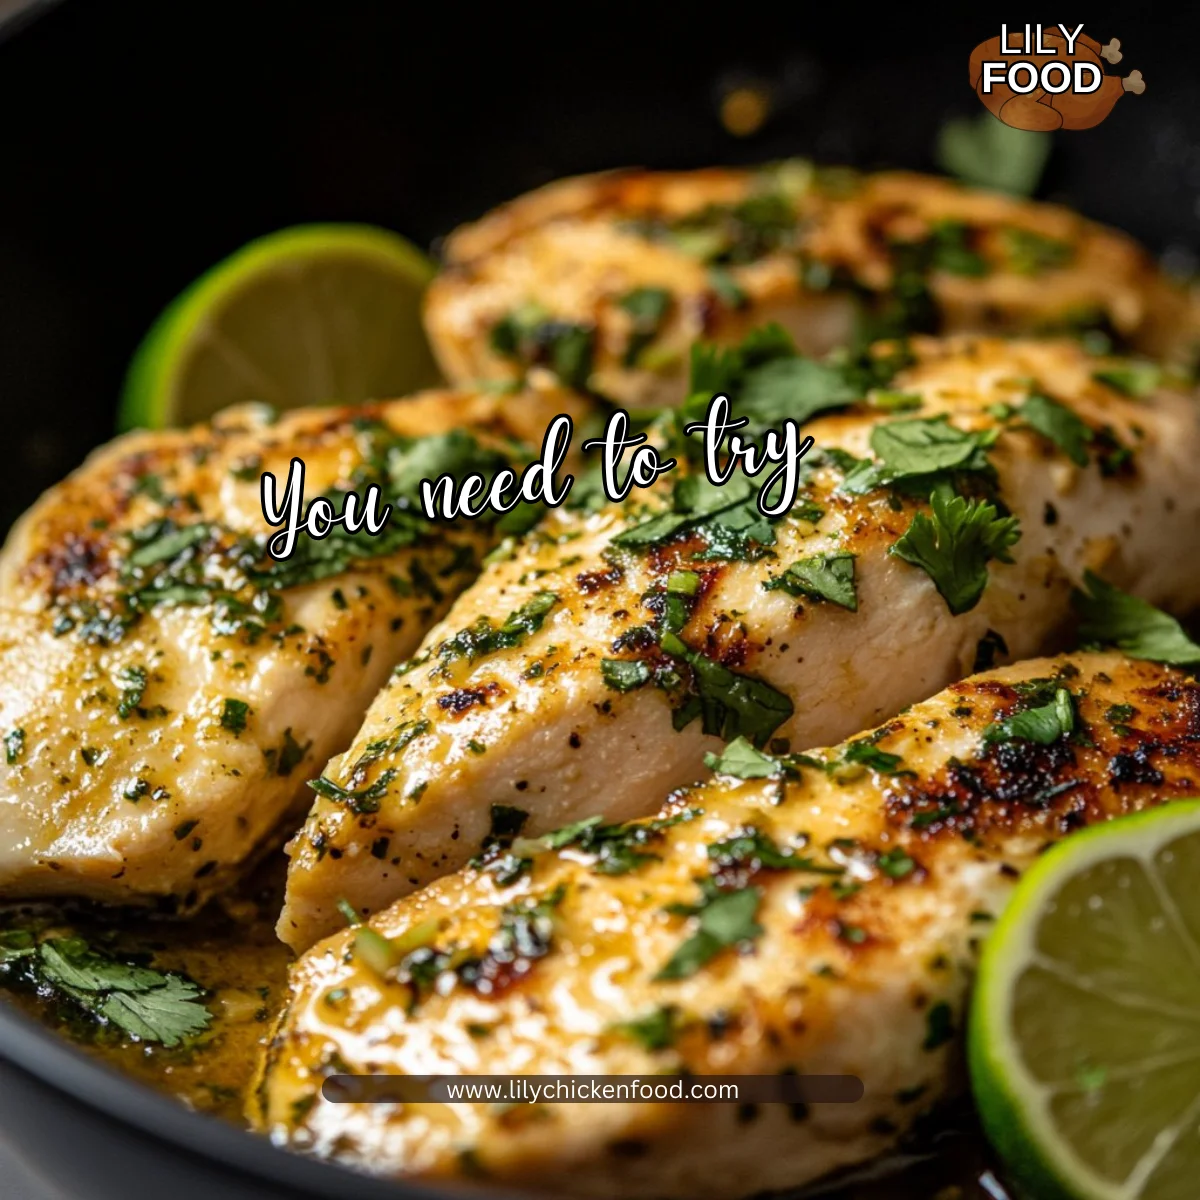
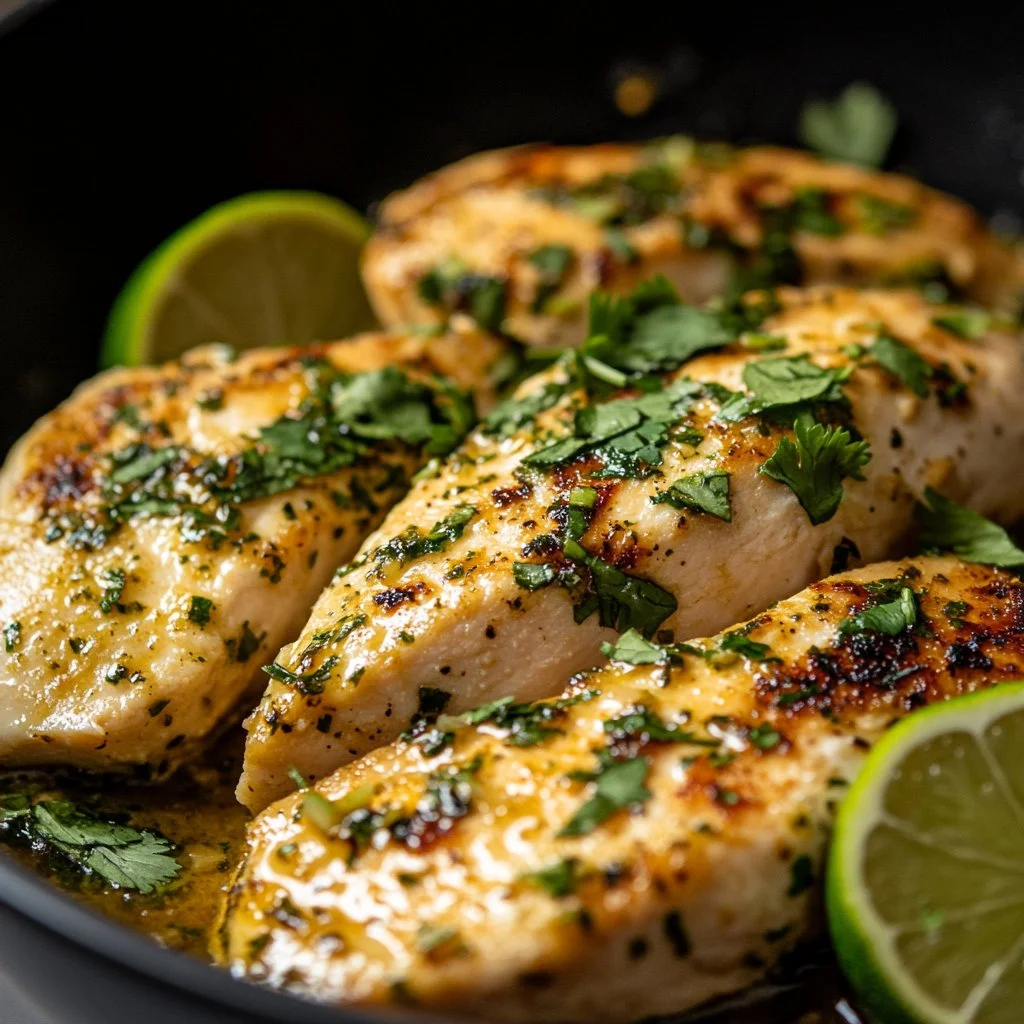
There’s something truly magical about the kitchen when you’re preparing a meal for your family. The sizzling sound of chicken hitting the hot skillet fills the room, blending beautifully with the sweet aroma of coconut and the zesty scent of lime. It’s a symphony for the senses, inviting and warm, promising nourishment and love. Today, I’m excited to share a delightful recipe for Coconut Lime Chicken. This dish is perfect for a cozy family dinner, offering vibrant flavors that everyone will enjoy.

Why this works

Coconut Lime Chicken

Coconut Lime Chicken is a fantastic choice for busy families. It leverages simple, fresh ingredients that come together quickly. The recipe is straightforward, making it perfect for an after-work dinner. Plus, the combination of coconut milk and lime creates a flavorful sauce that elevates the chicken into something special. You can have a delicious meal ready in just about 30 minutes, giving you more time to enjoy the evening with your loved ones.

Process Overview

“This is where the magic happens—when the aroma fills the kitchen.”

The process for making Coconut Lime Chicken is simple yet rewarding. You start by seasoning and searing the chicken, locking in those delicious flavors. Next, you’ll create a creamy coconut lime sauce that envelops the chicken, infusing it with moisture and zest. It’s straightforward enough for even novice cooks to feel like culinary stars.

Ingredients

Here’s what you will need for Coconut Lime Chicken:

  • 4 chicken breasts: Look for boneless, skinless chicken to keep it tender and easy to cook.
  • 1 cup coconut milk: Choose full-fat coconut milk for a creamier sauce that adds richness.
  • 1 lime (juiced and zested): Fresh lime juice will provide the best flavor.
  • 1/2 cup cilantro (chopped): If you’re not a fan of cilantro, parsley is a great substitute.
  • 2 cloves garlic (minced): Fresh garlic brings out the best flavor; avoid jarred if possible.
  • 1 tablespoon olive oil: Extra virgin olive oil works wonders for searing the chicken.
  • Salt and pepper to taste: Season generously for the best flavor.

Lily’s Personal Tips:

  • When selecting chicken, try to get breasts that are all a similar size for even cooking.
  • Always shake the can of coconut milk before measuring to ensure it’s well-mixed.
  • Save any leftover lime zest for adding to other dishes or even baked goods.
  • Fresh cilantro can be strong for some, so adjust the amount to your taste.
  • Mince garlic just before cooking to keep its natural oils intact and boost the flavor.

Directions

Let’s get cooking! Follow these easy steps to make your Coconut Lime Chicken:

  1. Preheat your oven to 375°F (190°C). This ensures your oven is hot and ready when it’s time to bake the chicken.

  2. Season the chicken breasts with salt and pepper. Don’t be shy; this layer of seasoning is what makes the chicken flavorful.

  3. Heat olive oil in a skillet over medium heat and add minced garlic, cooking until fragrant. This should take about 30 seconds. Your kitchen will smell amazing!

  4. Add the chicken breasts to the skillet and sear on both sides until golden brown, about 4-5 minutes per side. You want a nice crust to form.

  5. In a bowl, mix coconut milk, lime juice, lime zest, and chopped cilantro. This creamy mixture is what makes the dish shine, so whisk it well.

  6. Pour the coconut mixture over the chicken in the skillet. The chicken should be mostly covered; this will keep it moist.

  7. Transfer the skillet to the oven and bake for about 20 minutes, or until the chicken is cooked through. Use a meat thermometer for safety; it should read 165°F inside.

  8. Serve hot and enjoy! Take your time, savor each bite, and share with your family.

Serving

Coconut Lime Chicken

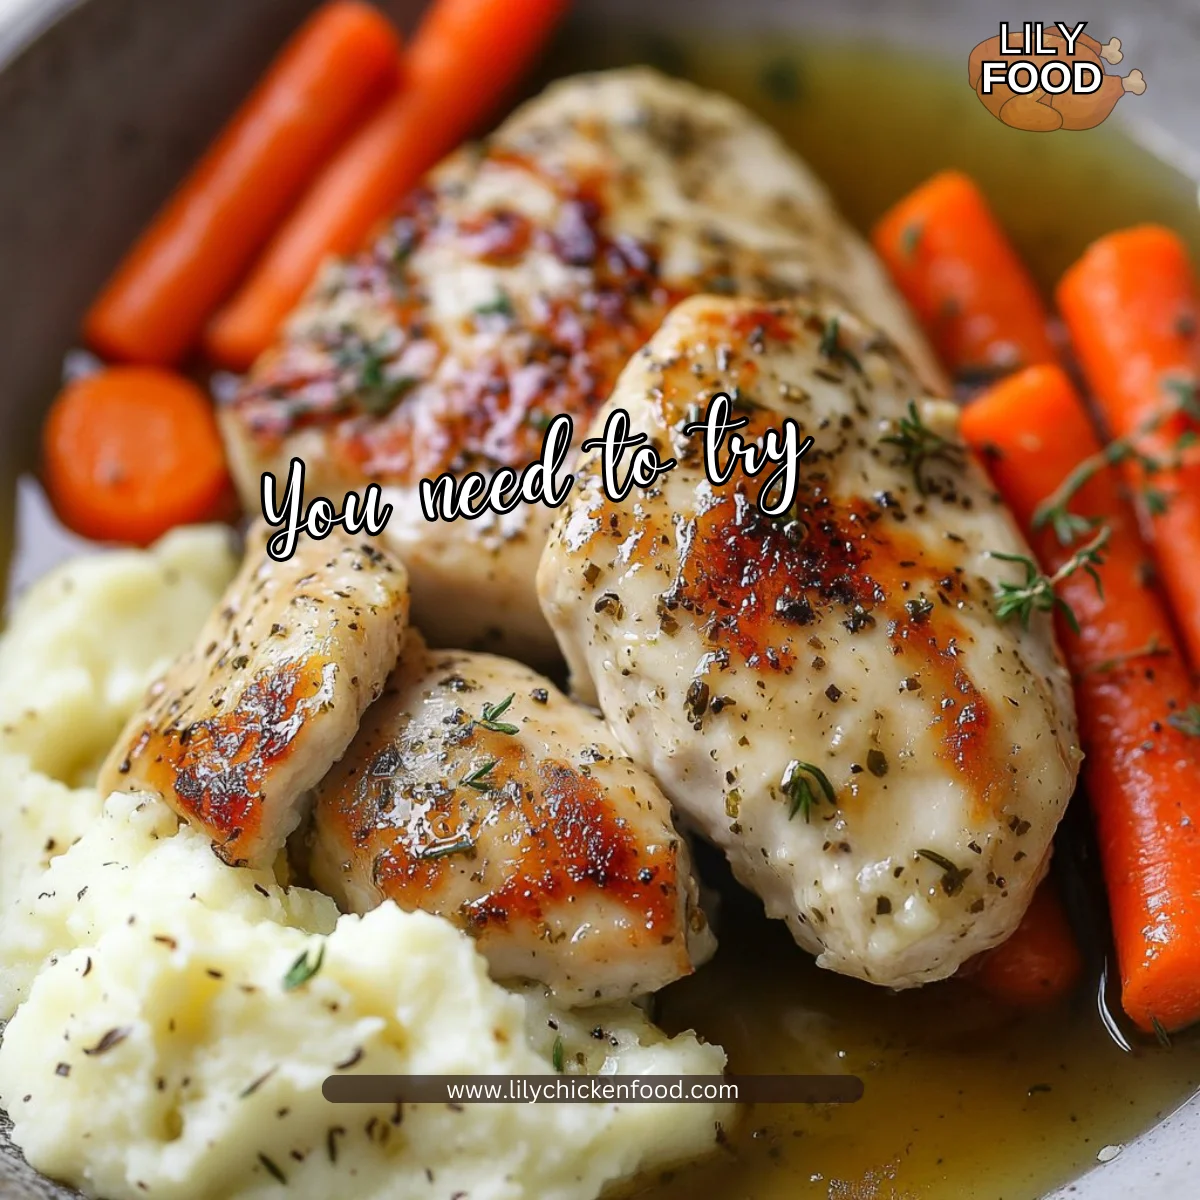
For a family-style meal, serve the Coconut Lime Chicken straight from the skillet. This adds an inviting touch to your table. You can pair it with steamed rice or quinoa to soak up that delicious coconut sauce. Add a side of sautéed vegetables or a fresh salad to round out the meal. Let everyone dig in and enjoy each other’s company over this delightful dish.

Storage

If you have leftovers (which is rare, but it happens!), store the Coconut Lime Chicken in an airtight container in the fridge. It will keep well for 3-4 days. To reheat, place it in the oven at 350°F (175°C) until warmed through. You can also microwave it, but be sure to cover it to prevent moisture loss.

Kitchen Notes

Here are some helpful shortcuts to make your cooking experience even easier:

  • Use pre-minced garlic from a jar to save time if you’re in a hurry.
  • Cook extra chicken and use it for meal prep throughout the week.
  • Feel free to double the coconut lime sauce for added flavor.
  • If you’re short on time, you can use chicken tenderloins, which cook faster.
  • Punctuate your meal with a fresh fruit salad for dessert. It complements the flavors nicely.

Variations

Not everyone has the same tastes, and that’s okay! Here are some tweaks you can make for picky eaters or dietary differences:

  • For those avoiding dairy, ensure to use dairy-free coconut milk, as this recipe already does.
  • If lime isn’t a family favorite, you can substitute it with lemon for a slightly different flavor.
  • Add some spice by incorporating red pepper flakes or diced jalapeños to the coconut sauce.
  • For a lighter sauce, reduce the amount of coconut milk and add chicken broth for flavor without the creaminess.
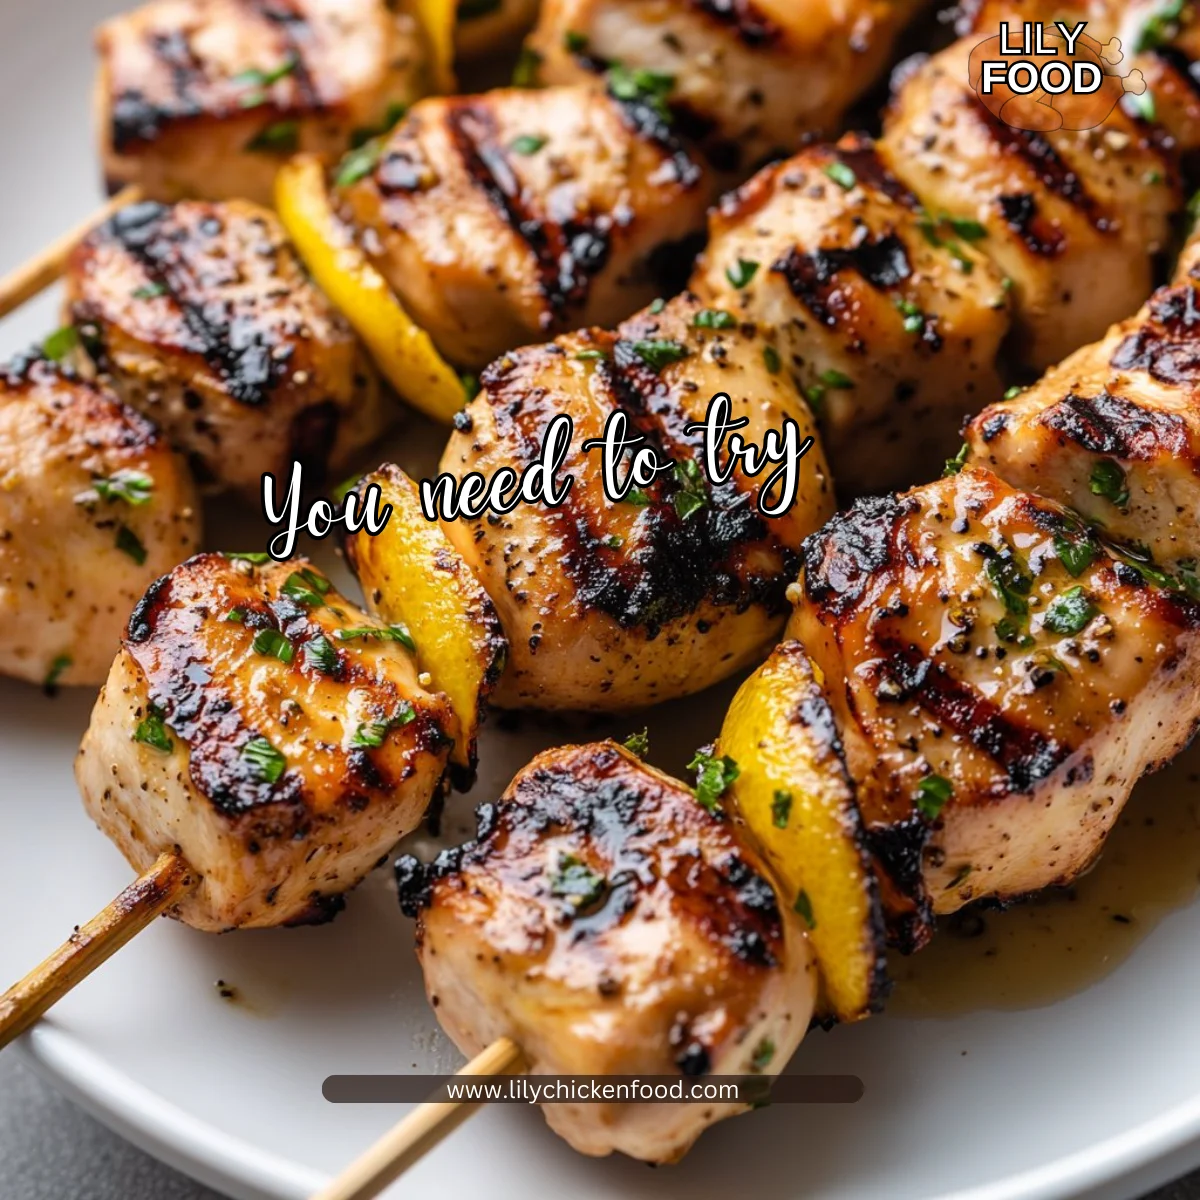
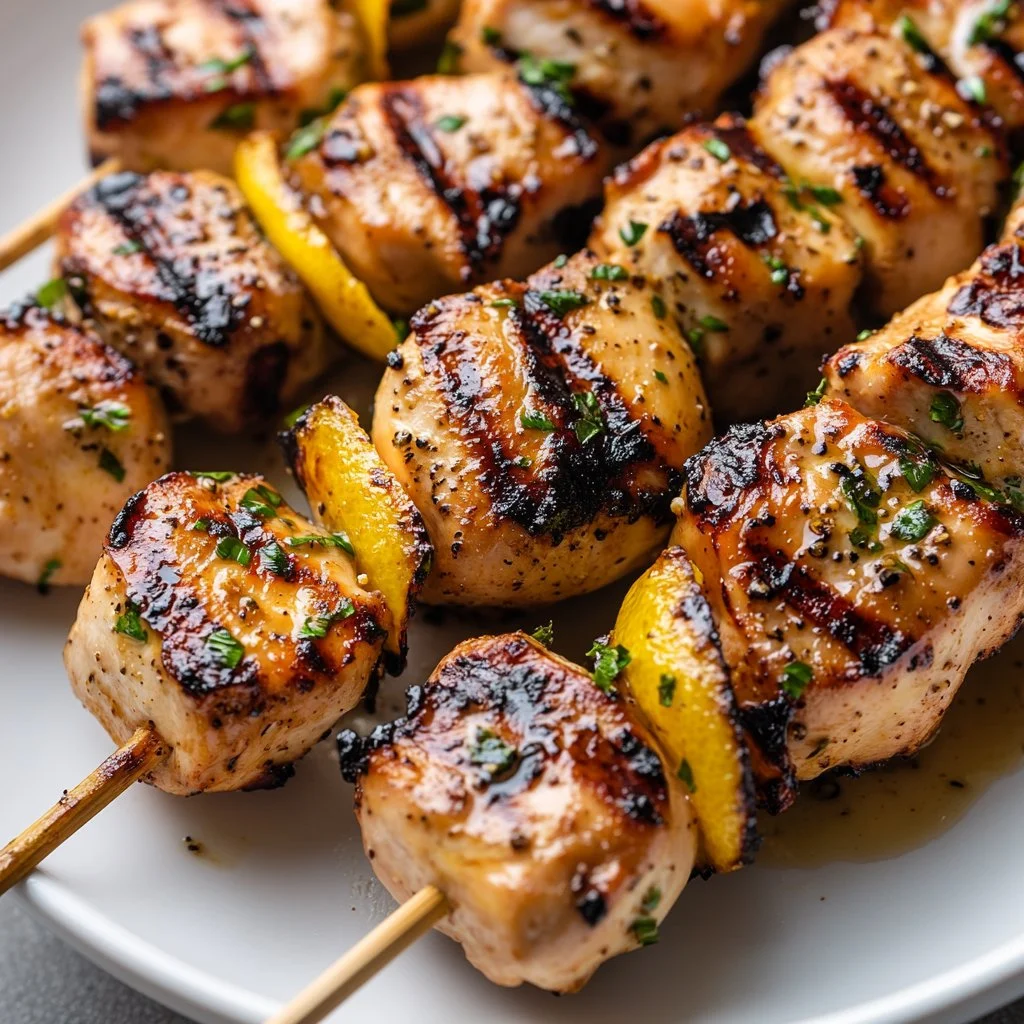
  • You can also try this recipe with shrimp or tofu for a vegetarian option, adjusting the cook time accordingly.

FAQ

1. Can I prepare this recipe ahead of time?
Yes! You can marinate the chicken in the coconut lime mixture for a couple of hours or overnight. Just bake it when you’re ready to eat.

2. What can I serve with Coconut Lime Chicken?
This dish pairs beautifully with rice, quinoa, or a fresh salad. Think about some roasted veggies for a complete meal.

3. How do I know when my chicken is cooked through?
Using a meat thermometer is the safest way. Chicken should reach an internal temperature of 165°F.

4. Can I freeze the leftovers?
Absolutely! Just keep it in a freezer-safe container. It will last for up to 2 months in the freezer.

5. How can I make this dish spicier?
Feel free to add some diced jalapeños or a pinch of cayenne pepper to the coconut lime mixture before baking.

Conclusion

Cooking has a way of bringing families together, and Coconut Lime Chicken is no exception. Whether you’re whipping it up on a busy weeknight or serving it for a special occasion, this dish offers warmth and goodness in every bite. I hope you enjoy making it as much as I do. Happy cooking!

Coconut Lime Chicken

Prep Time 10 minutes
Cook Time 20 minutes
Total Time 30 minutes
Servings 4 servings
Calories 450
A delightful dish featuring tender chicken breasts smothered in a creamy coconut lime sauce, perfect for a cozy family dinner.

Ingredients

Main Ingredients

  • 4 pieces boneless, skinless chicken breasts (Look for uniform size for even cooking.)
  • 1 cup coconut milk (Use full-fat for a creamier sauce.)
  • 1 piece lime (juiced and zested) (Fresh juice is recommended.)
  • 1/2 cup cilantro (chopped) (Substitute with parsley if desired.)
  • 2 cloves garlic (minced) (Fresh garlic enhances flavor.)
  • 1 tablespoon olive oil (Extra virgin is best for searing.)
  • Salt and pepper to taste (Season generously.)

Instructions 

Preparation

  • Preheat your oven to 375°F (190°C).
  • Season the chicken breasts with salt and pepper.
  • Heat olive oil in a skillet over medium heat and add minced garlic, cooking until fragrant, about 30 seconds.

Cooking

  • Add the chicken breasts to the skillet and sear on both sides until golden brown, about 4-5 minutes per side.
  • In a bowl, mix coconut milk, lime juice, lime zest, and chopped cilantro.
  • Pour the coconut mixture over the chicken in the skillet, ensuring the chicken is mostly covered.
  • Transfer the skillet to the oven and bake for about 20 minutes, or until the chicken is cooked through at an internal temperature of 165°F.

Serving

  • Serve hot with steamed rice or quinoa and enjoy!

Notes

Store leftovers in an airtight container in the fridge for 3-4 days. Reheat in the oven or microwave.
Calories: 450kcal
Course: Dinner, Main Course
Cuisine: Asian, Family
Keyword: Coconut Lime Chicken, Comfort Food, Easy Dinner, Family Meal, quick recipe

Easy Mexican Chicken Marinade

The aroma of spices fills the air, creating a warm and inviting atmosphere in the kitchen. As the sizzle of chicken meets the hot grill, your mouth begins to water in anticipation. Cooking meals that bring family together is what I love most, and today I’m excited to share a recipe for an Easy Mexican Chicken Marinade that will become a staple in your home.

With just a few simple ingredients, this marinade infuses your chicken with vibrant flavors that will impress everyone at the dinner table. The beauty of this recipe is its simplicity and how it allows you to use your time more wisely in a busy week.

Why this Works

Easy Mexican Chicken Marinade

This Easy Mexican Chicken Marinade is a lifesaver for busy families. It takes minimal effort to prepare, and you can customize it for each family member’s tastes. You can even prepare it ahead of time, making weeknight dinners stress-free.

The marinade combines some of my favorite spices to create a blend that not only tastes delicious but also brings warmth and comfort to your home. Plus, the vibrant flavors of lime and cilantro remind me of summer family gatherings.

Process Overview

“This is where the magic happens—when the aroma fills the kitchen.”

With each step of this process, you’ll find the joy in cooking. You mix your spices, marinate your chicken, and cook it to perfection. The best part is that you get to choose how to cook it: grill, bake, or pan-fry. No matter what, the result will be mouthwateringly delicious.

Ingredients

To create this amazing marinade, you’ll need:

  • 500 g boneless chicken breast
  • ½ Tablespoon Chili powder
  • 1 teaspoon Cumin
  • ½ Tablespoon Smoked paprika
  • 1 teaspoon Oregano
  • 1 Tablespoon fresh cilantro (finely chopped)
  • 2 Tablespoons Lime juice
  • ½ teaspoon Brown sugar
  • 2 Tablespoons olive oil
  • Salt and black pepper

Lily’s Tips:

  • Chicken: Choose boneless, skinless chicken breasts for a healthier option. If using thighs, they will remain juicy and flavorful.
  • Chili Powder: Adjust the amount based on your family’s spice preference. You can always start with less and add more later.
  • Cumin and Smoked Paprika: These spices add a wonderful earthiness. Make sure they are fresh for the best flavor.
  • Oregano: Using fresh oregano will give a brighter flavor, so grab it if you can.
  • Cilantro: If you have family members who dislike cilantro, feel free to omit it or replace it with parsley.

Directions

  1. Make the marinade: In a bowl, add chili powder, cumin, smoked paprika, oregano, brown sugar, cilantro leaves, lime juice, olive oil, salt, and black pepper. Mix all to combine. This step is simple but packs a punch. You’ll love the colors and scents as they blend beautifully together.

  2. Marinate the chicken: Place the chicken breast or thighs in a shallow dish or a Ziploc bag. Pour the marinade over the chicken and mix it to cover all the pieces. Cover with clingfilm or seal the bag and let it sit for at least 30 minutes or up to 24 hours in the fridge. The longer it marinates, the deeper the flavors will penetrate.

  3. Cook: You can bake, grill, air fry, or pan-fry the chicken as desired. The internal temperature of the cooked chicken should register at least 165°F with an instant-read thermometer. Remember, cooking methods are about preference. Whatever you choose, take a moment to enjoy the delicious aroma filling your home.

Serving

Easy Mexican Chicken Marinade

This Mexican chicken is perfect for serving family-style. Slice your chicken and place it on a big platter with colorful garnishes like fresh cilantro or lime wedges. Pair it with rice and beans, or serve it with tortillas and fresh salsa for a taco night that brings everyone together.

Creating a fun and inviting meal is all about how you present it. Let your family build their own plates and enjoy a night of sharing and laughter.

Storage

Leftovers can be stored in an airtight container in the fridge for up to 3 days. When reheating, aim for using the oven or stovetop to keep the chicken juicy. If you plan on freezing, ensure the chicken is fully cooled, then put it in a freezer-safe container. Thaw in the fridge overnight for best results.

Kitchen Notes

  1. Marinate your chicken overnight for maximum flavor.
  2. Use any leftover marinade as a dressing or sauce after cooking (just ensure to cook it first to eliminate any raw meat juices).
  3. Chicken thighs are perfect for the marinade if you prefer dark meat.
  4. Don’t hesitate to double the marinade recipe if you have extra chicken.
  5. Use fresh herbs for added brightness and flavor in your dishes.

Variations

This recipe is incredibly versatile. Here are a few tweaks to keep everyone in your family happy:

  • For picky eaters: Reduce the chili powder and spices to make a milder version. You can also omit cilantro if needed.
  • Gluten-free: This recipe is naturally gluten-free, making it perfect for those with dietary restrictions.
  • Low-carb: Serve with a side of veggies instead of rice or tortillas to keep it low-carb.
  • For a vegan option: Substitute chicken with tofu or tempeh. Follow the marinating process, but reduce the time to avoid over-soaking.

FAQ

1. How long can I marinate the chicken?
You can marinate chicken for 30 minutes up to 24 hours. The longer it sits, the more flavor it will absorb.

2. What’s the best method for cooking this chicken?
All methods work well. Grilling adds a lovely smoky flavor while baking keeps it juicy.

3. Can I use frozen chicken?
Yes, but make sure to thaw it in the fridge before marinating for the best absorption of flavor.

4. What can I serve with the chicken?
Great options include rice, beans, tacos, or a fresh salad with lime dressing.

5. How can I tell when the chicken is done?
Always check with an instant-read thermometer, aiming for an internal temperature of 165°F.

In the end, cooking is all about connection. Whether it’s gathering around the table or trying new recipes together, each moment shared over a meal is special. Make this Easy Mexican Chicken Marinade and fill your kitchen with delightful aromas that will create memories for your family to cherish. Enjoy your cooking journey!

Easy Mexican Chicken Marinade

Prep Time 10 minutes
Cook Time 20 minutes
Total Time 30 minutes
Servings 4 servings
Calories 250
A simple and flavorful marinade that infuses chicken with vibrant Mexican spices, perfect for busy families.

Ingredients

For the marinade

  • ½ tablespoon Chili powder (Adjust based on family's spice preference.)
  • 1 teaspoon Cumin (Use fresh for best flavor.)
  • ½ tablespoon Smoked paprika (Fresh spices add wonderful earthiness.)
  • 1 teaspoon Oregano (Fresh oregano gives a brighter flavor.)
  • 1 tablespoon Fresh cilantro (finely chopped) (Optional, can be replaced with parsley.)
  • 2 tablespoons Lime juice (Adds zest and freshness.)
  • ½ teaspoon Brown sugar (Balances the flavors.)
  • 2 tablespoons Olive oil (For moisture and richness.)
  • to taste Salt and black pepper (Add according to preference.)

For the chicken

  • 500 g Boneless chicken breast (Choose skinless for a healthier option.)

Instructions 

Preparation of Marinade

  • In a bowl, add chili powder, cumin, smoked paprika, oregano, brown sugar, cilantro, lime juice, olive oil, salt, and black pepper. Mix all to combine.

Marinate the Chicken

  • Place the chicken in a shallow dish or Ziploc bag. Pour the marinade over and cover all pieces. Refrigerate for at least 30 minutes or up to 24 hours.

Cooking the Chicken

  • Cook the marinated chicken by baking, grilling, air frying, or pan-frying until the internal temperature reaches 165°F.

Notes

Marinate overnight for maximum flavor. Use any leftover marinade as a sauce after cooking, ensuring it is cooked first. Chicken thighs are an excellent alternative for extra juiciness.
Calories: 250kcal
Course: Dinner, Main Course
Cuisine: Mexican
Keyword: chicken marinade, Easy Marinade, Mexican chicken

Grilled Chicken Skewers

There’s nothing like the enticing smell of grilled chicken skewers wafting through the air. The sizzling sound of meat hitting a hot grill, combined with the fragrance of herbs and spices, creates a warm atmosphere that fills the kitchen with joy and anticipation. Cooking for the family should be a delightful experience, where flavors come together, and memories are made around the dinner table.

Why This Works

Grilled Chicken Skewers

Grilled chicken skewers are a fantastic recipe for busy families. They come together quickly and provide a delicious, nutritious meal. You can prepare the chicken ahead of time, making them perfect for busy weeknights or weekend barbecues. Everyone gets to enjoy their meal fresh off the grill, while you save time on cleanup with minimal dishes to wash afterward.

This recipe is adaptable, meaning even the pickiest of eaters in your family can enjoy it. You can include your kids in the process, letting them thread the chicken onto skewers. It’s a great way to bond and teach them about cooking.

Process Overview

“This is where the magic happens—when the aroma fills the kitchen.”

Begin by marinating the chicken. The longer it soaks in the flavors, the better it will taste. This recipe allows enough time for you to enjoy a little family chat or help the kids with homework while everything is soaking up those delicious flavors.

Next, prepare the grill. A medium-high heat is perfect for cooking the chicken evenly while giving it that beautiful sear, enhancing both taste and presentation. Grill those skewers to juicy perfection!

Ingredients

For this recipe, you will need:

  • 1 pound chicken breast, cut into chunks
  • 1/4 cup olive oil
  • 2 tablespoons soy sauce
  • 2 tablespoons lemon juice
  • 2 cloves garlic, minced
  • 1 teaspoon paprika
  • Salt and pepper to taste
  • Skewers (soaked in water if wooden)

Lily’s Personal Tips:

  • Chicken Breast: Look for fresh, organic chicken if possible. It makes a difference in flavor.
  • Olive Oil: Extra virgin olive oil adds a richer taste.
  • Soy Sauce: Low-sodium soy sauce is a good option if you want to cut back on salt.
  • Lemon Juice: Freshly squeezed lemons provide a bright flavor.
  • Garlic: Adjust the amount based on your family’s taste — kids may prefer less garlic.

Directions

  1. In a mixing bowl, combine olive oil, soy sauce, lemon juice, minced garlic, paprika, salt, and pepper to make a marinade. This marinade is full of flavor and will tenderize the chicken beautifully.
  2. Add the chicken chunks to the marinade and let it sit for at least 30 minutes. You can also prepare it the night before for even richer taste!
  3. Preheat the grill to medium-high heat. It’s essential to get your grill nice and hot to achieve beautiful grill marks and a juicy inside.
  4. Thread the marinated chicken pieces onto the skewers. Make sure they are spaced out to cook evenly.
  5. Grill the skewers for about 10-15 minutes, turning occasionally, until the chicken is fully cooked and has grill marks. Use a meat thermometer to ensure the internal temperature reaches 165°F.
  6. Remove from grill and serve warm. Gather your family, and enjoy your delicious creations together.

Serving

Grilled Chicken Skewers

These grilled chicken skewers are best served family-style. Present them on a large platter and let everyone help themselves. Add sides like a fresh salad or some grilled vegetables for a complete meal. A bowl of dipping sauce like tzatziki or a homemade barbecue sauce can elevate the flavors even more.

Encourage everyone to build their plates according to their preferences. Allowing each person to customize their meal can make it a fun family gathering.

Storage

If you have leftovers, store them in an airtight container in the fridge. They’ll be good for up to three days. To reheat, simply pop them back on the grill for a few minutes or in the microwave until hot. Reheating on the grill helps retain that grilled flavor.

Kitchen Notes

  • Use metal skewers to avoid soaking. They’re reusable and heat up faster.
  • Prep your marinade in larger batches so that you have it ready for quick weeknight throws together.
  • Serve the chicken skewers with rice or quinoa for a filling meal.
  • Add seasonal veggies, like bell peppers or zucchini, to the skewers for variety.
  • Keep extra marinade for drizzling over the plated skewers for added moisture and flavor.

Variations

  • For Picky Eaters: Offer simple dips like ketchup or barbecue sauce.
  • Vegetarian Version: Substitute chicken with firm tofu or assorted veggies like bell peppers, mushrooms, and zucchini.
  • Gluten-Free: Use tamari instead of soy sauce to keep it gluten-free.
  • Spicy Kick: Add a teaspoon of red pepper flakes or your favorite hot sauce into the marinade for a spicy version.
  • Herb Twist: Mix in fresh herbs like rosemary or thyme into the marinade for a fresh flavor.

FAQ

1. How long should I marinate the chicken?
It’s best to marinate the chicken for at least 30 minutes, but if you have time, a few hours or even overnight will enhance the flavor.

2. What can I use instead of skewers?
You could use a grilling basket if you prefer, especially for smaller pieces. It’s an excellent way to avoid losing anything through the grill grates.

3. Can I cook these in the oven?
Yes, if you don’t have a grill, you can bake them in the oven at 400°F for about 20-25 minutes, turning halfway through for even cooking.

4. How do I know when the chicken is done?
The internal temperature should reach 165°F. You can use a meat thermometer to check this.

5. Can I freeze the marinated chicken?
Yes, you can freeze the marinated chicken for up to three months. Just thaw it overnight in the refrigerator before grilling.

As you gather around for this delicious meal, remember that cooking isn’t just about the food; it’s about the love we put into it and the connections we create. Enjoy these grilled chicken skewers and the moments spent with your loved ones. Happy cooking!

Grilled Chicken Skewers

Prep Time 30 minutes
Cook Time 15 minutes
Total Time 45 minutes
Servings 4 servings
Calories 300
Delicious and easy-to-make grilled chicken skewers, perfect for family dinners or weekend barbecues.

Ingredients

For the Marinade

  • 1/4 cup olive oil (Extra virgin for richer taste)
  • 2 tablespoons soy sauce (Low-sodium option recommended)
  • 2 tablespoons lemon juice (Freshly squeezed preferred)
  • 2 cloves garlic, minced (Adjust based on taste preference)
  • 1 teaspoon paprika
  • to taste none Salt and pepper

Main Ingredients

  • 1 pound chicken breast, cut into chunks (Look for fresh, organic chicken if possible)
  • to taste none Skewers (Soaked in water if using wooden skewers)

Instructions 

Preparation

  • In a mixing bowl, combine olive oil, soy sauce, lemon juice, minced garlic, paprika, salt, and pepper to make a marinade.
  • Add the chicken chunks to the marinade and let it sit for at least 30 minutes or prepare it the night before.

Grilling

  • Preheat the grill to medium-high heat.
  • Thread the marinated chicken pieces onto the skewers, ensuring they are spaced out for even cooking.
  • Grill the skewers for about 10-15 minutes, turning occasionally, until the chicken is fully cooked and has grill marks. The internal temperature should reach 165°F.
  • Remove from grill and serve warm.

Notes

Serve family-style on a large platter and allow everyone to customize their plates. Pairs well with fresh salad or grilled vegetables.
Calories: 300kcal
Course: Dinner, Main Course
Cuisine: American, Grilling
Keyword: Barbecue, Chicken Skewers, Easy Recipe, Family Dinner, Grilled Chicken

Make Garlic Herb Chicken with Mashed Potatoes and Glazed Carrots Tonight!

Ah, the sounds of the kitchen singing with the sizzle of garlic and the warmth of deliciousness. The aroma of garlic herb chicken wafting through your home is like ( textit{comfort food} ) wrapped in a warm hug. You can almost hear the laughter of happy family members settling around the table, eager to dig into a meal that feels like home. This Garlic Herb Chicken with Mashed Potatoes and Glazed Carrots is one of those meals that comes together beautifully, allowing you to create lasting memories without spending all day in the kitchen.

Why This Works

Make Garlic Herb Chicken with Mashed Potatoes and Glazed Carrots Tonight!

This dish is designed with families in mind. It’s not just about flavor; it’s about ease. With a few simple steps, you can whip up a meal that impresses without overwhelming you. First off, the chicken is infused with garlic and herbs, providing layers of flavor that make every bite exciting. The creamy mashed potatoes are the perfect cozy side, and the glazed carrots add a sweet touch—perfect for making even the pickiest eaters smile. Plus, most of the cooking can happen at the same time, saving you valuable minutes in the kitchen. Let’s dive into how you can create this delightful dinner.

Process Overview

“This is where the magic happens—when the aroma fills the kitchen.”

Cooking is not just about the food; it’s about the experience. As we prepare this meal together, you’ll witness the transformation of raw ingredients into a spread that sings of love and togetherness. From roasting the colorful carrots to searing the chicken to golden perfection, it’s a beautiful way to spend the evening. And the best part? You’ll have everything ready in about an hour. Let’s get started!

Ingredients

Here’s what you’ll need to create your Garlic Herb Chicken Dinner:

For the Chicken:

  • 4 boneless, skinless chicken breasts
  • 3 tablespoons olive oil, divided
  • 4 cloves garlic, minced
  • 1 teaspoon dried thyme
  • 1 teaspoon dried Italian herbs
  • 1 teaspoon salt
  • 1/2 teaspoon black pepper

For the Mashed Potatoes:

  • 4 large russet potatoes, peeled and cut into 2–3 inch chunks
  • 4 tablespoons butter
  • 1/2 cup whole milk, warmed
  • 2 ounces cream cheese (optional)

For the Glazed Carrots:

  • 1 pound carrots, peeled and sliced in half if large
  • 1 tablespoon olive oil
  • 2 tablespoons butter
  • 1 tablespoon honey
  • 1 clove garlic, grated

For the Pan Sauce:

  • 1 shallot, minced
  • 2 cloves garlic, minced
  • 1/2 cup dry white wine
  • 1/2 cup chicken stock
  • 2 tablespoons cold butter

Lily’s Tips:

  • Use fresh herbs when possible for a brighter flavor.
  • Don’t rush the chicken searing; golden-brown means more flavor.
  • For creamy mashed potatoes, keep the potatoes hot when mixing in the butter and milk.
  • Choose organic carrots for more sweetness and nutrition.
  • You can substitute the white wine with more chicken stock if preferred.

Directions

  1. Prepare the Potatoes
    Begin by adding the peeled and chunked potatoes to a pot of cold salted water. Bring the water to a boil and cook the potatoes until they are fork-tender, about 15 minutes. Drain the potatoes and return them to the hot pot for 1–2 minutes to steam off excess moisture. Cover and set them aside.

  2. Roast the Carrots
    Preheat your oven to 425°F. Toss the peeled and sliced carrots with 1 tablespoon of olive oil, salt, and pepper on a parchment-lined baking sheet. Roast the carrots for 25–35 minutes, or until they are tender and lightly caramelized. Near the end of the roasting time, melt 2 tablespoons of butter with 1 tablespoon of honey and 1 grated garlic clove in a small pan until the mixture is bubbly and fragrant. Pour this honey-butter glaze over the hot carrots and toss to coat them evenly.

  3. Sear the Chicken
    Pat the chicken breasts dry and season them with salt, pepper, half of the minced garlic, and the thyme and/or Italian herbs, rubbing the seasoning in with 1 tablespoon of olive oil. Heat the remaining 2 tablespoons of olive oil in a large skillet over medium-high heat. Sear the chicken for 5–6 minutes per side, or until it is golden brown and cooked through. Transfer the seared chicken to a plate and tent it with foil to keep it warm.

  4. Make the Pan Sauce
    In the same skillet used for the chicken, sauté the minced shallot and remaining garlic over medium heat for 1–2 minutes. Deglaze the pan with the white wine, scraping up any browned bits from the bottom of the skillet. Simmer the mixture for 2–3 minutes to reduce it slightly, then add the chicken stock and continue simmering until the sauce has thickened slightly. Off the heat, whisk in 2 tablespoons of cold butter until the sauce becomes silky and emulsified. Season the pan sauce with salt and pepper to taste.

  5. Mash the Potatoes
    Mash the hot potatoes to your desired consistency. In a small saucepan, warm the 4 tablespoons of butter and cream cheese (if using), and milk just until the mixture is melted and combined. Stir this warm, creamy mixture into the mashed potatoes until they are smooth and luscious. Season the mashed potatoes with salt and pepper to taste. How lovely it is to see them transform into a fluffy cloud of comfort.

Serving

Make Garlic Herb Chicken with Mashed Potatoes and Glazed Carrots Tonight!

To serve this meal family-style, place the chicken in the center alongside the creamy mashed potatoes and the sweet glazed carrots. Ladle some of the silky pan sauce over the chicken to enhance its flavors. Encourage everyone to help themselves and dig in. It’s a great way to connect, share stories, and enjoy a feast together.

Storage

Leftovers can be stored in airtight containers in the refrigerator for up to 3 days. When ready to enjoy again, reheat the chicken and mashed potatoes in the oven at 350°F until warmed through. The glazed carrots can be gently reheated on the stove, though they might lose some of their crispiness.

Kitchen Notes

  • Prep your ingredients in advance to streamline the cooking process.
  • Use a potato masher or ricer for the fluffiest mashed potatoes.
  • Make the pan sauce while the chicken rests to save time.
  • Use frozen carrots if fresh ones are unavailable; they work well in a pinch.
  • For a one-pan meal, consider roasting the chicken and carrots together on the same tray.

Variations

  • For picky eaters, keep the chicken seasoning simple with just salt and pepper.
  • You can make this dish gluten-free by using gluten-free chicken stock.
  • If there’s a vegetarian in the family, swap the chicken for roasted portobello mushrooms.
  • Use sweet potatoes instead of russet potatoes for a healthier spin on the mash.
  • For a Mediterranean twist, add feta cheese to the mashed potatoes and use olives in the carrot mix.

FAQ

Q: Can I use chicken thighs instead of breasts?
A: Absolutely! Chicken thighs are great for added flavor and moisture.

Q: How do I know when the chicken is cooked through?
A: Use a meat thermometer; it should read at least 165°F at the thickest part of the chicken.

Q: Can I make this meal ahead of time?
A: Yes! You can prep the chicken and veggies ahead of time; just cook everything when you’re ready to eat.

Q: Do I have to use wine in the sauce?
A: You can substitute with additional chicken stock or omit it entirely if you prefer.

Q: Is there a vegetarian version of this dish?
A: You can replace the chicken with hearty vegetables or plant-based protein and follow the same steps for preparing the sides.

A warm meal like this Garlic Herb Chicken with Mashed Potatoes and Glazed Carrots can truly bring the family together. It’s simple, satisfying, and loaded with flavors that resonate with love. Happy cooking, and I hope your kitchen fills with delightful aromas that inspire joy and conversation.

Garlic Herb Chicken Dinner

Prep Time 20 minutes
Cook Time 40 minutes
Total Time 1 hour
Servings 4 servings
Calories 650
A comforting and flavorful dinner featuring garlic herb chicken, creamy mashed potatoes, and sweet glazed carrots, perfect for sharing with loved ones.

Ingredients

For the Chicken

  • 4 pieces boneless, skinless chicken breasts
  • 3 tablespoons olive oil, divided (Use extra virgin for better flavor.)
  • 4 cloves garlic, minced
  • 1 teaspoon dried thyme
  • 1 teaspoon dried Italian herbs
  • 1 teaspoon salt
  • 1/2 teaspoon black pepper

For the Mashed Potatoes

  • 4 large russet potatoes, peeled and cut into 2–3 inch chunks
  • 4 tablespoons butter (Use unsalted butter for better control of seasoning.)
  • 1/2 cup whole milk, warmed
  • 2 ounces cream cheese (optional) (For an extra creamy texture.)

For the Glazed Carrots

  • 1 pound carrots, peeled and sliced in half if large
  • 1 tablespoon olive oil
  • 2 tablespoons butter
  • 1 tablespoon honey
  • 1 clove garlic, grated

For the Pan Sauce

  • 1 shallot minced
  • 2 cloves garlic, minced
  • 1/2 cup dry white wine (Can substitute with chicken stock.)
  • 1/2 cup chicken stock
  • 2 tablespoons cold butter

Instructions 

Preparation

  • Begin by adding the peeled and chunked potatoes to a pot of cold salted water. Bring the water to a boil and cook the potatoes until they are fork-tender, about 15 minutes. Drain the potatoes and return them to the hot pot for 1–2 minutes to steam off excess moisture. Cover and set them aside.
  • Preheat your oven to 425°F. Toss the peeled and sliced carrots with 1 tablespoon of olive oil, salt, and pepper on a parchment-lined baking sheet. Roast the carrots for 25–35 minutes, or until they are tender and lightly caramelized.

Cooking

  • For the carrots, near the end of the roasting time, melt 2 tablespoons of butter with 1 tablespoon of honey and 1 grated garlic clove in a small pan until the mixture is bubbly and fragrant. Pour this honey-butter glaze over the hot carrots and toss to coat them evenly.
  • Pat the chicken breasts dry and season them with salt, pepper, half of the minced garlic, and the thyme and/or Italian herbs, rubbing the seasoning in with 1 tablespoon of olive oil. Heat the remaining 2 tablespoons of olive oil in a large skillet over medium-high heat. Sear the chicken for 5–6 minutes per side, or until it is golden brown and cooked through. Transfer the seared chicken to a plate and tent it with foil to keep it warm.
  • In the same skillet used for the chicken, sauté the minced shallot and remaining garlic over medium heat for 1–2 minutes. Deglaze the pan with the white wine, scraping up any browned bits from the bottom of the skillet. Simmer the mixture for 2–3 minutes to reduce it slightly, then add the chicken stock and continue simmering until the sauce has thickened slightly. Off the heat, whisk in 2 tablespoons of cold butter until the sauce becomes silky and emulsified. Season the pan sauce with salt and pepper to taste.
  • Mash the hot potatoes to your desired consistency. In a small saucepan, warm the 4 tablespoons of butter and cream cheese (if using), and milk just until the mixture is melted and combined. Stir this warm, creamy mixture into the mashed potatoes until they are smooth and luscious. Season the mashed potatoes with salt and pepper to taste.

Serving

  • To serve this meal family-style, place the chicken in the center alongside the creamy mashed potatoes and the sweet glazed carrots. Ladle some of the silky pan sauce over the chicken to enhance its flavors.

Notes

Leftovers can be stored in airtight containers in the refrigerator for up to 3 days. Reheat the chicken and mashed potatoes in the oven at 350°F until warmed through.
Calories: 650kcal
Course: Dinner, Main Course
Cuisine: American
Keyword: Comfort Food, Easy Recipe, Family Dinner, Garlic Herb Chicken, Mashed Potatoes

No Peek Chicken Casserole

I can still smell it. The warm, savory steam that rolls out when I lift the foil makes the whole house feel like a hug. The gentle tick of the oven timer becomes part of a quiet rhythm as I set the table. Kids drop backpacks and come running at the first whiff.

I am Lily, a mom who cooks weeknight meals that bring the family together. I have been writing about simple, comforting dishes for years. If you love easy, reliable recipes, you might enjoy how this casserole pairs with my other warm favorites, like this my chicken noodle soup for chilly nights.

Why this works

No Peek Chicken Casserole

This casserole is a family favorite because it cooks itself while you get things done. The rice and soups create a steaming, flavor-packed base that keeps the chicken moist. The onion soup mix gives a seasoned crust without extra effort.

It saves time and mind space. Pop it in the oven and go about homework, errands, or folding laundry. For busy weeknights, nothing beats a dish that needs one pan and almost no babysitting.

If you want a reminder of classic comfort that everyone recognizes, try pairing leftovers with a simple salad or a slice of crusty bread. For a different comforting soup to serve alongside, see my classic chicken noodle soup notes.

Process Overview

“This is where the magic happens—when the aroma fills the kitchen.”

I like to think of this as a steam bath for the chicken. The rice slowly absorbs the soup flavors. The sealed foil creates a mini oven that cooks everything evenly. The result is tender chicken and perfectly cooked rice.

If you worry about timing, this is forgiving. The long bake time softens the rice fully and makes shredding easy if you want to serve the chicken that way. For a brighter garlic or ginger lift, I sometimes follow techniques I use in my ginger garlic version and add a squeeze of lemon to finish.

Ingredients

  • 4 boneless, skinless chicken breasts
    • Tip from Lily: Choose similar-sized breasts so they cook evenly. If one is much thicker, slice it horizontally.
  • 1 cup long-grain white rice
    • Tip from Lily: Rinse the rice quickly if you want less starch. Long-grain gives a light, separate texture.
  • 1 can (10.5 oz) cream of mushroom soup
    • Tip from Lily: Use a full-fat or reduced-sodium version based on your taste. The soup carries most of the savory base.
  • 1 can (10.5 oz) cream of chicken soup
    • Tip from Lily: Mixing both soups gives depth. If you prefer, swap cream of celery for a milder taste.
  • 1 1/4 cups water
    • Tip from Lily: Use warm water to help the soups blend smoothly and to reduce bake time variance.
  • 1 packet onion soup mix
    • Tip from Lily: Sprinkle evenly so each bite gets a bit of onion flavor. It forms a nice coating on the chicken.
  • Salt and pepper to taste
    • Tip from Lily: Season lightly before baking and re-season on the plate if needed. Salt level depends on the soup brand.

If you often cook from pantry staples, this recipe is a perfect example of pantry-meets-weeknight. For quick substitutions and using leftover rotisserie meat, see my leftover rotisserie chicken tips for ideas.

Directions

1️⃣ Preheat the oven to 350°F (175°C).

  • Encouraging note: Take a minute to preheat so the casserole starts cooking right away. I like to set the timer and breathe for a second.

2️⃣ Mix the base: In a large bowl, combine the rice, cream of mushroom soup, cream of chicken soup, and water. Stir until well-mixed.

  • Encouraging note: Stir until the mixture is smooth. You can give it a little extra swirl if the soups are thick. This is a quick, satisfying step.

3️⃣ Prepare the baking dish: Grease a 9×13-inch baking dish and pour in the rice and soup mixture, spreading it evenly over the bottom.

  • Encouraging note: Greasing prevents sticking and helps clean-up. Use a little butter or cooking spray so the rice slides out easily.

4️⃣ Add the chicken: Place the chicken breasts on top of the rice mixture and season with salt and pepper.

  • Encouraging note: Space the chicken pieces evenly so the steam circulates. A gentle press into the rice helps them nestle and cook evenly.

5️⃣ Top with onion soup mix: Sprinkle the packet of onion soup mix evenly over the chicken, ensuring each piece is well-coated.

  • Encouraging note: The onion mix forms a flavorful crust. If you have picky eaters, you can split the dish and only top half with the mix.

6️⃣ Cover tightly: Cover the dish tightly with aluminum foil. It’s crucial to keep it sealed to trap the steam, which will cook the rice and chicken to perfection.

  • Encouraging note: Press the foil close to the dish to keep steam in. This is the secret to moist, tender chicken without extra fuss.

7️⃣ Bake: Place the dish in the oven and bake for 1 hour and 30 minutes. Resist the temptation to peek during cooking—keeping the foil sealed is key!

  • Encouraging note: Set a timer and trust the process. This long bake softens the rice perfectly and gives you time to finish other tasks.

8️⃣ Rest and serve: Once done, remove the casserole from the oven and let it rest for a few minutes before serving. Enjoy the rich, savory flavors and tender chicken.

  • Encouraging note: Letting it rest helps the rice finish absorbing liquids and makes serving neater. Use two forks to shred chicken if you like it mixed in.

For more step-by-step ideas on homemade broths and comfort pairings, check my homemade chicken noodle soup guide, which pairs well with this casserole on a chilly night.

Serving

No Peek Chicken Casserole

Serve this casserole family-style straight from the baking dish. Place the dish in the center of the table and pass bowls for seconds. The smell invites conversation and slow, relaxed bites.

Simple sides work best. Steam green beans, a mixed salad, or roasted carrots keep the meal balanced. If you want a crunchy contrast, a small bowl of toast points or crackers is lovely.

For picky eaters, shred the chicken and let them spoon rice separately. Presentation matters with kids, so set out small bowls of grated cheese, ranch, or steamed peas to customize plates.

Storage

Store leftover casserole in an airtight container in the fridge for up to 4 days. The rice will firm up a bit, but reheating brings it back.

To reheat in the oven, cover and bake at 350°F for 20 to 30 minutes until warmed through. For a faster option, reheat single servings in the microwave for 2 to 3 minutes, stirring halfway.

If you want to freeze, portion into freezer-safe containers. Freeze for up to 3 months. Thaw overnight in the fridge before reheating. Add a splash of water when reheating from frozen to restore moisture.

Kitchen Notes

  • Use even-sized chicken pieces for uniform cooking.
  • If your family prefers brown rice, choose another method. Brown rice needs more water and time.
  • Low-sodium soup is a good swap if you watch salt. Taste and adjust after baking.
  • For easier clean-up, line the baking dish with foil before adding the mixture.
  • If someone in your family cannot have mushrooms, substitute an extra can of cream of chicken or cream of celery.

Variations

  • Cheesy top: Add 1 cup shredded cheddar in the last 10 minutes of baking for a melty finish.
  • Vegetables: Stir 1 cup frozen peas or mixed vegetables into the rice mixture before baking for extra color.
  • Lighter version: Use reduced-fat soups and cut the bake time by 10 minutes, checking for doneness.
  • Gluten-free: Use gluten-free condensed soups labeled as such and confirm your onion soup mix is gluten-free.
  • Picky eaters: Make one half plain rice and chicken, and the other half with the onion packet.

FAQ

Q: Can I use chicken thighs instead of breasts?
A: Yes. Bone-in thighs will change cook time slightly. Use boneless thighs for similar timing. They stay juicy and can give more flavor.

Q: Is it okay to peek during baking?
A: Try not to. Lifting the foil lets steam escape and can undercook the rice. If you must check, do it quickly and reseal tightly.

Q: Can I reduce the bake time?
A: Not safely. The long bake allows the rice to fully absorb liquid and the chicken to cook gently. Shortening time risks undercooked rice.

Q: My rice turned out too soft. What happened?
A: Using too much water or cooking at too low a temperature can over-soften rice. Measure water carefully and keep oven at 350°F.

Q: Can I double the recipe for a crowd?
A: Yes. Use two baking dishes with the same depth. Avoid overcrowding one pan, which can alter cooking times.

Conclusion

Thank you for letting me share this No Peek Chicken Casserole. It has saved many of my busy evenings and filled my table with full, happy bellies. For a classic take on this recipe, you can compare notes with the original No Peek Chicken Casserole at The Country Cook and a similar variation at No-Peek Chicken and Rice from Plain Chicken. Try it on a weeknight and notice how it changes the rhythm of your evening.

No Peek Chicken Casserole

Prep Time 10 minutes
Cook Time 1 hour 30 minutes
Total Time 1 hour 40 minutes
Servings 6 servings
Calories 320
A comforting, hands-off casserole that brings the family together, featuring tender chicken, flavorful rice, and creamy soup.

Ingredients

Main Ingredients

  • 4 pieces boneless, skinless chicken breasts (Choose similar-sized breasts for even cooking.)
  • 1 cup long-grain white rice (Rinse quickly for less starch.)
  • 1 can cream of mushroom soup (10.5 oz) (Use full-fat or reduced-sodium version.)
  • 1 can cream of chicken soup (10.5 oz) (Mixing both soups gives depth.)
  • 1.25 cups water (Use warm water for smoother blending.)
  • 1 packet onion soup mix (Sprinkle evenly for flavor.)
  • to taste salt and pepper (Season lightly before baking.)

Instructions 

Preparation

  • Preheat the oven to 350°F (175°C).
  • In a large bowl, combine the rice, cream of mushroom soup, cream of chicken soup, and water. Stir until well-mixed.
  • Grease a 9×13-inch baking dish and pour in the rice and soup mixture, spreading it evenly over the bottom.
  • Place the chicken breasts on top of the rice mixture and season with salt and pepper.
  • Sprinkle the packet of onion soup mix evenly over the chicken, ensuring each piece is well-coated.
  • Cover the dish tightly with aluminum foil.
  • Bake the casserole for 1 hour and 30 minutes.
  • Once done, remove the casserole from the oven and let it rest for a few minutes before serving.

Notes

Serve family-style from the baking dish, with simple sides like steamed green beans or mixed salad. Store leftovers in the fridge for up to 4 days, or freeze for up to 3 months.
Calories: 320kcal
Course: Dinner, Main Course
Cuisine: American, Comfort Food
Keyword: Casserole, Chicken, Easy Dinner, Family Meal, Weeknight Recipe

Garlic Parmesan Chicken Meatloaf

I can still smell the garlic when I walk into my kitchen. The soft sizzle from the pan, the gentle hum of the oven, and the warm peppery scent of Parmesan make everyone gather close. This Garlic Parmesan Chicken Meatloaf is one of those recipes that feels like a hug on a plate.

If you want the printable recipe card and a few extra photos, you can find my tested version on my Garlic Parmesan Chicken Meatloaf recipe page. I test family recipes until they are simple, reliable, and easy to love.

Why this works

Garlic Parmesan Chicken Meatloaf

This meatloaf hits all the notes families want. Ground chicken keeps it lighter than beef, while Parmesan adds a savory, nutty depth. Garlic gives the aroma that pulls everyone to the table.

H3 Family and time saving

It is quick to assemble and bakes in under an hour. That makes it a great weeknight main when homework, sports, and life need a home-cooked meal without a late night. Pair it with mashed potatoes or a simple salad and you have dinner ready.

For a similar hands-on weeknight idea that pairs well with leftovers, try my creamy chicken breast recipe that the kids often ask for next day lunches at my creamy garlic parmesan chicken breast page.

Process Overview

“This is where the magic happens—when the aroma fills the kitchen.”

The process is straightforward. You mix, shape, and bake. The garlic and Parmesan work together to keep the chicken flavorful and moist. Breadcrumbs and an egg bind the mixture so the loaves hold their shape and slice neatly for serving.

I write steps so home cooks can follow easily. Little tips along the way help ensure a moist result every time.

Ingredients

  • 1 lb ground chicken
    • Tip: Use fresh ground chicken from a trusted source or grind your own breasts and thighs for the best texture. Mixing breasts and thighs gives more flavor.
  • 1/2 cup grated Parmesan cheese
    • Tip: Freshly grated Parmesan melts and blends better than pre-grated powder. It adds a salty, savory boost.
  • 4 cloves garlic, minced
    • Tip: Mince garlic finely or press it. Raw garlic blends into the meat and becomes mellow and rich after baking.
  • 1/4 cup chopped fresh parsley
    • Tip: Parsley adds color and a light herb note. Flat leaf parsley is my preference for flavor.
  • 1/4 cup breadcrumbs
    • Tip: Plain breadcrumbs work well. If you only have panko, pulse it briefly in a food processor to match the texture.
  • 1 egg
    • Tip: The egg binds and adds moisture. If you are out of eggs, use 2 tablespoons of plain yogurt as a binder.
  • 1 tsp salt
    • Tip: Taste your Parmesan first since it can be salty. Adjust the added salt accordingly.
  • 1/2 tsp black pepper
    • Tip: Freshly cracked pepper brightens the flavors. Use more if your family likes a bit of bite.
  • 1 tsp Italian seasoning
    • Tip: I like a homemade mix of oregano, basil, and thyme. It pairs perfectly with Parmesan and garlic.

Short personal note: I test this recipe with my family and adjust salt and garlic to make sure it is kid-friendly and loved by adults too. For a different texture and extra veggies, see my skillet variation below.

In case you want another one-pan chicken and potato idea to serve alongside or use leftover meatloaf slices, check my skillet version at Garlic Parmesan Chicken and Potatoes Skillet.

Directions

  1. Preheat the oven to 375°F (190°C).

    • Encouraging note: Letting the oven reach the right temperature first makes baking predictable. While it heats, you can prep the rest.
  2. In a large bowl, combine ground chicken, Parmesan cheese, minced garlic, parsley, breadcrumbs, egg, salt, pepper, and Italian seasoning. Mix until well combined.

    • Encouraging note: Use clean hands or a spoon and mix gently until everything is incorporated. Overworking can tighten the meat, so stop once it looks unified.
  3. Form the mixture into mini loaf shapes and place them on a baking sheet lined with parchment paper.

    • Encouraging note: Mini loaves cook more evenly and are great for portioning. If you prefer one large loaf, shape it and increase the bake time a little.
  4. Bake for 30-35 minutes, or until the meatloaves are cooked through and they reach an internal temperature of 165°F (74°C).

    • Encouraging note: Use an instant-read thermometer for accuracy. The thermometer is your best friend for safe, juicy results.
  5. Serve with mashed potatoes, a side salad, or veggies.

    • Encouraging note: Let the loaves rest for a few minutes after baking so they firm up. Slice gently and serve warm to smiles around the table.

If you want to make these in a slow cooker for a hands-off day, I have a crockpot twist that adapts well and keeps the flavors intact. You can compare methods on my crockpot recipe page at my crockpot garlic parmesan chicken thighs page.

Serving

Garlic Parmesan Chicken Meatloaf

Serve these meatloaves family style on a large platter. I like to place the loaves in the center with mashed potatoes on one side and roasted vegetables on the other. Let everyone help themselves.

For kids, slice thin pieces and serve with a small scoop of their favorite sauce. For adults, pair with an easy salad and a lemon wedge to brighten the dish. Leftover slices make excellent sandwiches the next day.

Set out warm plates, and consider a small bowl of extra grated Parmesan for those who like an extra sprinkle. This meal keeps conversation flowing and plates full.

Storage

Refrigerate

  • Store cooled meatloaves in an airtight container for up to 4 days in the fridge.
  • To reheat, place slices on a baking sheet and warm at 325°F for 10 to 12 minutes until heated through.
  • Alternatively, microwave a single slice on medium power in 30 second intervals until warm.

Freezing

  • Wrap cooled loaves tightly in plastic wrap and foil, and freeze for up to 3 months.
  • Thaw in the fridge overnight before reheating in the oven to preserve texture.

Safety tip: Always reheat until the center reaches 165°F for safe eating. I label my containers with dates so nothing gets lost in the back of the fridge.

Kitchen Notes

  • Use a thermometer. It removes guesswork and keeps family meals worry free.
  • Make mini loaves for faster cooking and easy portion control.
  • Swap plain breadcrumbs for crushed crackers if you need a pantry substitute.
  • Double the recipe and freeze half for busy weeks. It saves time and stress.
  • Clean while you cook. Wipe counters and load the dishwasher during baking to keep the kitchen calm.

Variations

H3 For picky eaters

  • Mild version: Reduce garlic to 2 cloves and add 1/4 cup finely grated carrot or zucchini for extra moisture and hidden veggies.
  • Cheese swap: Replace Parmesan with 1/2 cup finely shredded mild cheddar for a familiar taste kids often prefer.

H3 For different diets

  • Low-carb: Replace breadcrumbs with 1/4 cup almond flour. Watch texture and add a touch of extra moisture if needed.
  • Gluten-free: Use gluten-free breadcrumbs or crushed gluten-free crackers.
  • Dairy-free: Omit Parmesan and add 2 tablespoons nutritional yeast and an extra pinch of salt for savory notes.

H3 Make it saucy

  • Brush a thin layer of ketchup or BBQ sauce before baking for a glossy finish the kids like.
  • For a tangy twist, mix 1 tablespoon Dijon mustard into the egg before combining.

If you want to pair this meatloaf with a sweeter sauce and garlicky potatoes, my honey BBQ chicken with garlic-Parmesan potatoes is a great inspiration and side idea at my honey BBQ chicken page.

FAQ

Q: Can I use ground turkey instead of ground chicken?
A: Yes. Ground turkey works similarly but may be leaner. Consider mixing in a little extra fat like a tablespoon of olive oil or using a mix of turkey dark meat for juiciness.

Q: How can I tell when the meatloaf is done without a thermometer?
A: Cut into the center and make sure juices run clear and there is no pink. However, a thermometer is more reliable and recommended for safety.

Q: Can I prepare these ahead of time?
A: Absolutely. Shape the loaves, cover, and refrigerate for up to 24 hours before baking. You can also freeze them before baking and bake from frozen with extra time.

Q: Is it safe to use ground chicken for meatloaf?
A: Yes. Ground chicken is safe when cooked to 165°F (74°C). Proper handling and cooking keep the meal healthy and delicious.

Q: What sides go best with this meatloaf?
A: Mashed potatoes, steamed green beans, roasted carrots, or a crisp salad are all great. For a cozy dinner, creamy mashed potatoes are my go-to comfort side.

Conclusion

I hope this Garlic Parmesan Chicken Meatloaf becomes a regular on your family table. It is comforting, straightforward, and built for busy evenings when you still want a homemade meal.

If you are looking for another take on this recipe from a trusted source, I like the version on Garlic Parmesan Chicken Meatloaf – The Recipe Critic for additional serving ideas. For a mini meatloaf spin with extra tips, see the helpful guide at Garlic Parmesan Chicken Meatloaves – Will Cook For Smiles.

Thank you for cooking with me. From my kitchen to yours, may every meal bring your family a little closer.

Garlic Parmesan Chicken Meatloaf

Prep Time 15 minutes
Cook Time 35 minutes
Total Time 50 minutes
Servings 6 servings
Calories 240
A comforting and flavorful meatloaf made with ground chicken, Parmesan cheese, and garlic, perfect for busy weeknights.

Ingredients

Main Ingredients

  • 1 lb ground chicken (Use fresh ground chicken from a trusted source or grind your own for the best texture.)
  • 1/2 cup grated Parmesan cheese (Freshly grated Parmesan melts and blends better than pre-grated.)
  • 4 cloves garlic, minced (Mince garlic finely or press it for best flavor.)
  • 1/4 cup chopped fresh parsley (Flat leaf parsley is preferred for flavor.)
  • 1/4 cup breadcrumbs (Plain breadcrumbs work well; if using panko, pulse it briefly in a food processor.)
  • 1 large egg (The egg binds and adds moisture.)
  • 1 tsp salt (Adjust according to the saltiness of your Parmesan.)
  • 1/2 tsp black pepper (Use freshly cracked pepper for best flavor.)
  • 1 tsp Italian seasoning (Homemade mix of oregano, basil, and thyme works well.)

Instructions 

Preparation

  • Preheat the oven to 375°F (190°C).
  • In a large bowl, combine ground chicken, Parmesan cheese, minced garlic, parsley, breadcrumbs, egg, salt, pepper, and Italian seasoning. Mix until well combined.
  • Form the mixture into mini loaf shapes and place them on a baking sheet lined with parchment paper.

Baking

  • Bake for 30-35 minutes, or until the meatloaves are cooked through and reach an internal temperature of 165°F (74°C).
  • Let the loaves rest for a few minutes before slicing and serving.

Serving

  • Serve with mashed potatoes, a side salad, or veggies.

Notes

For a different texture, try adding finely grated carrot or zucchini. If you want extra flavor, brush with ketchup or BBQ sauce before baking.
Calories: 240kcal
Course: Dinner, Main Course
Cuisine: American
Keyword: Chicken Dinner, Comfort Food, Easy Meatloaf, Garlic Parmesan Chicken Meatloaf, Weeknight Dinner

Cheesy Chicken Fritters

I can still smell them. The warm, cheesy steam rising from the skillet fills the kitchen and makes everyone pause at the doorway. There is a soft sizzle as the fritters hit the hot oil, a sound that promises comfort and a quick, hearty meal.

I have been testing family recipes in my kitchen for over 12 years. These cheesy chicken fritters are one of those wins that come together fast and please picky eaters and hungry teens alike. If you enjoy quick, cheesy meals, you might also like my cheesy garlic chicken wraps with a little spinach tucked inside for a simple weeknight swap.

Why this works

Cheesy Chicken Fritters

This recipe hits the sweet spot between ease and flavor. Ground chicken blends easily with cheese and seasonings, creating patties that cook quickly and stay juicy. The almond flour keeps the fritters light and gives them a gentle crust without heavy breading.

Time is precious for families. These fritters take about 20 minutes from start to finish when you have everything ready. They are a great option for when you need dinner on the table fast, packed with protein, and loved by kids who favor crisp, cheesy bites.

I test many family recipes and often borrow ideas from other simple dinners. If you want another cheesy crowd-pleaser, try my cheesy garlic chicken wraps for lunches or a picnic. Those wrap well and travel without losing flavor.

Process Overview

“This is where the magic happens—when the aroma fills the kitchen.”

Start by mixing everything in a bowl. The mixture should be moist and hold together when pressed. If it feels too loose, add a little more almond flour. If it feels too thick, a splash of water or another egg white can help.

Heat the skillet and brown the fritters in olive oil. You want a golden crust for contrast with the melty center. Flip them gently so they stay intact and finish cooking through. Serve them hot so the cheese is gooey and the edges are crisp.

If you like a saucy side, these fritters pair beautifully with a simple ranch dip or a warm tomato sauce. For another oven-friendly option, see my take on queso chicken enchiladas for an easy casserole-style dinner.

Ingredients

  • 1 lb ground chicken — I use lean ground chicken for a lighter fritter, but 85/15 works if you want more richness. Let it sit at room temperature for 10 minutes to mix more easily.
  • 1 cup shredded cheese (cheddar or mozzarella) — Sharp cheddar adds a punch, mozzarella gives a milder melt. Grate it fresh for better melting.
  • 1/4 cup almond flour — This keeps the fritters gluten-free and tender. If you do not have almond flour, fine breadcrumbs or oat flour work as swaps.
  • 1 large egg — The egg binds the mixture. If you need an egg-free option, try 2 tablespoons of flaxseed mixed with 6 tablespoons water, chilled.
  • 2 green onions, chopped — Add the whites and most of the greens for a mild onion flavor. Scallions brighten the mixture without overpowering it.
  • 1 tsp garlic powder — Use garlic powder for even distribution. Fresh garlic is okay if you prefer a sharper bite; finely mince 1 small clove.
  • 1 tsp onion powder — This boosts the savory base. For a fresh flavor, replace half with finely grated onion.
  • Salt and pepper to taste — Start with 1/2 tsp salt and 1/4 tsp pepper, then adjust after you taste the raw mixture cautiously.
  • Olive oil for frying — Use a neutral, light olive oil for frying. Heat it until shimmering but not smoking.

Tip from my test kitchen: If you want a softer fritter, let the mixed batter rest 10 minutes. The almond flour absorbs a bit of moisture and the patties hold together better. For more hands-off family meals, check my slow cooker cheesy chicken chili for an easy weeknight plan that feeds a crowd.

Directions

  1. In a large bowl, combine the ground chicken, shredded cheese, almond flour, egg, green onions, garlic powder, onion powder, salt, and pepper. Mix until well combined.
    Be gentle while mixing so the fritters stay tender. If the mixture feels too wet, add a tablespoon more almond flour at a time.

  2. Heat olive oil in a skillet over medium heat.
    Use enough oil to coat the bottom of the pan. It should shimmer but not smoke. Test with a small bit of mixture; it should sizzle when it hits the oil.

  3. Shape the chicken mixture into patties.
    Make them about 2 1/2 inches wide and 1/2 inch thick for even cooking. Wet your hands slightly to prevent sticking and press gently so the patties hold together.

  4. Add the patties to the skillet and cook for about 4-5 minutes on each side, or until golden brown and cooked through.
    Flip once and avoid pressing down. Cook until an instant-read thermometer reads 165°F in the center or the juices run clear.

  5. Serve hot and enjoy your cheesy chicken fritters!
    Let them rest on a paper towel for a minute to remove excess oil. Pair with veggies, a green salad, or a small bowl of dipping sauce.

Each step is designed to be forgiving. If one batch browns faster, lower the heat and finish the rest. These fritters reheat well, so you can make a double batch and save time on busy nights.

Serving

Cheesy Chicken Fritters

Serve these fritters family-style on a large platter so everyone can grab what they want. I like to stack a few on warmed plates, add a small bowl of ranch or yogurt-based dip, and a platter of carrot sticks and cucumber slices on the side.

For sandwich-style fun, place a fritter on a soft roll with lettuce, tomato, and a smear of pesto or mayo. Kids love a mini version on slider buns for lunch boxes. For a heartier meal, serve the fritters over rice or alongside roasted potatoes.

Warm, shared plates work well for busy families. If you want to add a baked side that complements the fritters, try a simple roasted broccoli or a quick couscous salad for a balanced dinner. For another family-friendly, smothered chicken idea, take a look at my smothered cheesy sour cream chicken for inspiration.

Family-style tips

Set out a few small bowls with condiments so everyone can personalize their plate. Fresh lemon wedges brighten the fritters and help cut the richness when kids ask for seconds.

Storage

Leftovers store well and make busy nights easier. Place cooled fritters in an airtight container in the refrigerator for up to 4 days. If you need longer storage, freeze them on a tray until firm, then transfer to a freezer bag for up to 3 months.

To reheat from the refrigerator, heat in a 350°F oven for 8 to 10 minutes, flipping once, until warmed through and crisp. For frozen fritters, bake at 375°F for 15 to 20 minutes or until fully heated and crisped. A toaster oven works great for single servings.

If you are short on time, reheat in a skillet over medium heat with a teaspoon of oil to restore the crust. Avoid microwaving unless you are in a hurry; microwaves will make the fritters soft and less crisp.

Kitchen Notes

  • Shortcut: Use pre-shredded cheese when you are in a hurry, but fresh-shredded melts better.
  • Make-ahead: Mix the patties and place them on a tray in the fridge for up to 4 hours before frying.
  • Crispy finish: Finish under the broiler for 1 minute if you want extra browning on top.
  • Allergy swap: Replace almond flour with 1/4 cup oat flour for a nut-free version. Adjust as needed for texture.
  • Batch cooking: Double the recipe and freeze half. Reheat as directed for quick lunches or dinners.

Variations

  • Kid-friendly: Add a small spoonful of ketchup or BBQ sauce into the mix and use mild cheddar for a familiar flavor. Keep green onions to a minimum or swap for finely grated carrot to sneak in veggies.
  • Low-carb: Stick with almond flour and serve with a side of cauliflower rice or a green salad. The fritters themselves are already low-carb friendly.
  • Spicy: Add 1/2 tsp smoked paprika and a pinch of cayenne for warmth. Serve with a cooling yogurt dip.
  • Italian twist: Swap the seasonings for 1 tsp oregano and 1 tsp basil and use mozzarella plus a tablespoon of grated Parmesan. Serve with marinara for dipping.
  • Gluten-free and dairy-free: Use a dairy-free shredded cheese alternative and ensure the cheese melts well. Almond flour keeps the recipe naturally gluten-free.

FAQ

Q: Can I bake these instead of frying?
A: Yes. Preheat the oven to 400°F, place the patties on a lightly greased baking sheet, and bake for 12 to 15 minutes, flipping halfway. Finish under the broiler for a minute for extra color.

Q: How do I know when they are cooked through?
A: Use an instant-read thermometer. The center should reach 165°F. If you do not have a thermometer, cut one open; the juices should run clear and the meat should not be pink.

Q: Can I use ground turkey or beef?
A: You can substitute ground turkey or ground beef. Cook times remain similar, but fattier meats may splatter more in the skillet, so adjust the heat if needed.

Q: Are these freezer friendly?
A: Absolutely. Freeze on a tray until firm, then store in a freezer-safe bag for up to 3 months. Reheat in the oven from frozen at 375°F for 15 to 20 minutes.

Q: What dipping sauces work best?
A: Simple pairings include ranch, honey mustard, marinara, or a yogurt-cucumber dip. A squeeze of fresh lemon over the fritter brightens the flavors too.

Conclusion

I hope these cheesy chicken fritters find a regular spot in your weeknight rotation. They cook fast, travel well for packed lunches, and keep everyone happy at the table. For a visual walkthrough, you might enjoy the step-by-step video from Natasha’s Kitchen which highlights key techniques. If you like comparing versions and tips, take a look at the recipe collection from Craving Home Cooked for another take on this comforting dish.

Thank you for sharing your kitchen with me. Come back soon for more cozy, family-tested chicken recipes and practical tips.

Cheesy Chicken Fritters

Prep Time 10 minutes
Cook Time 10 minutes
Total Time 20 minutes
Servings 4 servings
Calories 200
Quick and easy cheesy chicken fritters that are perfect for families and packed with flavor. A crowd-pleaser that cooks fast and stays juicy.

Ingredients

Main Ingredients

  • 1 lb ground chicken (Lean ground chicken is preferred for a lighter fritter.)
  • 1 cup shredded cheese (cheddar or mozzarella) (Sharp cheddar adds flavor, mozzarella for a milder melt.)
  • 1/4 cup almond flour (Keeps the fritters gluten-free and tender.)
  • 1 large egg (Binds the mixture together.)
  • 2 pieces green onions, chopped (Use the whites and most of the greens for mild flavor.)
  • 1 tsp garlic powder (For even distribution of flavor.)
  • 1 tsp onion powder (Enhances the savory base.)
  • to taste salt and pepper (Start with 1/2 tsp salt and 1/4 tsp pepper.)
  • as needed olive oil for frying (Use light olive oil for frying.)

Instructions 

Preparation

  • In a large bowl, combine the ground chicken, shredded cheese, almond flour, egg, green onions, garlic powder, onion powder, salt, and pepper. Mix until well combined.
  • Be gentle while mixing to keep the fritters tender. If the mixture is too wet, add a tablespoon of almond flour at a time.
  • Let the mixture rest for 10 minutes if you want softer fritters.

Cooking

  • Heat olive oil in a skillet over medium heat until shimmering but not smoking.
  • Shape the chicken mixture into patties about 2 1/2 inches wide and 1/2 inch thick. Wet your hands to prevent sticking.
  • Add the patties to the skillet and cook for about 4-5 minutes on each side until golden brown and cooked through.
  • Let the fritters rest on a paper towel for a minute to remove excess oil before serving.

Notes

Serve these fritters on a large platter with a small bowl of dipping sauce on the side. For a heartier meal, serve with rice or roasted potatoes. They are freezer-friendly too.
Calories: 200kcal
Course: Main Course, Snack
Cuisine: American
Keyword: Cheesy Chicken Fritters, Comfort Food, Easy Fritters, Family Recipe, Quick Dinner

Avocado Chicken Salad Lettuce Wraps

The air in my kitchen is warm with the bright scent of lemon and avocado. I can hear the soft clink of a spoon against a bowl and the happy chatter of my kids planning who gets the crispest lettuce leaf. There is something comforting about that sound, like home filling up.

This Avocado Chicken Salad Lettuce Wraps recipe came from evenings when I needed a quick, healthy dinner that everyone would eat. If you like similar flavors, try my Avocado Chicken Egg Salad for another family favorite.

Why this works

Avocado Chicken Salad Lettuce Wraps

This recipe works because it balances creaminess, brightness, and crunch in one easy bite. The avocado brings healthy fats and a silky texture, while the Greek yogurt keeps the salad light and tangy. Lettuce cups add a fresh crunch and make the meal feel special without extra effort.

It also saves time. You can use leftover chicken or a rotisserie bird for a ready-made protein that needs only a few minutes to shred. That means less time cooking and more time at the table with family. For a slightly different take on avocado and chicken, check my Avocado Chicken Salad post.

Process Overview

“This is where the magic happens—when the aroma fills the kitchen.”

The process is simple. Shred or chop cooked chicken, mix it with yogurt, mayo, onion, and lemon, then fold in avocado. Spoon the mix into chilled lettuce leaves and serve. It takes about 10 to 15 minutes once your chicken is ready.

I like to prep the chicken ahead when I can. If the kids are home, I make it a small family task: one person shreds, another chops onions, and a third rinses lettuce. Simple teamwork makes dinner faster and more joyful.

Ingredients

  • 2 cups cooked chicken, shredded (I use rotisserie)
    Tip: Rotisserie chicken gives a rich flavor and saves time. If you prefer, roast a few boneless breasts the night before and shred them cold.
  • ¼ cup plain Greek Yogurt
    Tip: Greek yogurt keeps the salad light and adds protein. Use full fat for creaminess or nonfat if you want fewer calories.
  • ¼ cup mayonnaise
    Tip: A small amount of mayo rounds out the texture. I use light mayo for everyday meals and full mayo for gatherings.
  • 3 Tablespoons onions, finely chopped
    Tip: Mild sweet onions or green onions work well for picky eaters. Rinse chopped white onion to tone down the bite.
  • 2 teaspoons lemon juice
    Tip: Fresh lemon brightens the flavors. If fresh lemons are not available, use about 1½ teaspoons of bottled juice.
  • Salt and freshly ground black pepper, to taste
    Tip: Start with a small pinch of each and taste before adding more. Kids often prefer less pepper.
  • 1 avocado, seeded, peeled, diced
    Tip: Choose a ripe but firm avocado. If it is too soft, it will mash completely into the mix.
  • Romaine hearts or bib lettuce, about 16 leaves
    Tip: Pick leaves that are whole and crisp. Bib lettuce is soft and tender for small hands, while romaine holds up better for travel.

For a spin on serving this mixture inside avocados, see my Chicken Salad Stuffed Avocado recipe.

Lily’s pantry notes

Keep extra lemons, plain yogurt, and mayo on hand. They make many quick meals possible, and you can adapt the salad for different tastes in minutes.

Directions

  1. Add chicken, yogurt, mayo, onion, and lemon juice to a bowl and mix well to combine.
    Encouragement: Use a large bowl so you can toss without spilling. A gentle toss keeps the chicken tender and cohesive.

  2. Season with salt and pepper, to taste.
    Encouragement: Taste as you go. A little lemon can brighten a lot, and a small pinch of salt will bring the flavors forward.

  3. Stir in avocado.
    Encouragement: Gently fold the avocado pieces in so they stay chunky and pretty. If you mash them slightly, the salad will be creamier.

  4. Serve in cold, crisp lettuce cups.
    Encouragement: Chill the lettuce for ten minutes before serving for extra crunch. Arrange the cups like little boats on a platter to make dinner feel fun.

  5. You might also like Thai Chicken Lettuce Wraps!
    Encouragement: If you want spice or herbs, add cilantro, a drizzle of chili sauce, or a sprinkle of chopped peanuts. For a southwest kick, try my Spicy Southwest Avocado Chicken Salad for inspiration.

Serve immediately for the best texture. If you wait too long, the lettuce will soften and the avocado will start to brown.

Serving

Avocado Chicken Salad Lettuce Wraps

I serve these family style on a large platter. Place the lettuce cups on one side and a bowl of the chicken salad on the other. That way everyone can build their own wrap. Kids love choosing how much filling to add.

For a complete meal, offer simple sides like carrot sticks, cucumber slices, or a small fruit salad. Add a few lemon wedges and a small bowl of extra chopped herbs so guests can customize their wraps.

Presentation tips

Use a shallow bowl to serve the chicken salad, so it is easy to scoop. Garnish with a few thin slices of avocado and a light dusting of black pepper for a homely but pretty finish.

Storage

Store cooled chicken salad in an airtight container in the refrigerator for up to 2 days. The avocado will brown slightly but the lemon slows the process.

If you want to prepare part of it ahead, make the chicken salad without avocado and keep it chilled. Dice and add fresh avocado within an hour before serving for best color and texture.

Do not freeze this salad. The lettuce will not hold up and avocado gets mushy after thawing.

Reheating and make-ahead

If your chicken is cold, you can warm just the chicken before mixing, then cool slightly before adding yogurt and avocado. For salads on busy days, shred chicken and mix the dressing separately. Combine everything at the last minute.

Kitchen Notes

  • Shortcut: Use a store-bought rotisserie chicken to save 20 to 30 minutes.
  • Shortcut: Swap plain Greek yogurt for dairy-free yogurt if needed.
  • Shortcut: Use pre-washed lettuce hearts to cut prep time.
  • Shortcut: Chop onions and store in a sealed container for up to two days to speed assembly.
  • Shortcut: Keep lemons zested and juiced in small containers in the fridge to add fresh flavor fast.

Variations

  • Kid-Friendly: Leave out raw onions and pepper. Mix in a small spoonful of honey for a sweet twist.
  • Low-Carb: Serve in large butter lettuce leaves or romaine hearts to keep it light.
  • Dairy-Free: Replace Greek yogurt with an equal amount of dairy-free yogurt and use avocado for creaminess.
  • High-Protein: Stir in a tablespoon of hemp seeds or chopped hard-boiled eggs.
  • Mediterranean Twist: Add chopped kalamata olives, diced cucumber, and a sprinkle of feta. For a fruit-forward version, check my Asian Chicken Cranberry Salad for ideas on mixing sweet and savory.

FAQ

Q: Can I use frozen chicken?
A: Yes. Thaw and warm it, then cool slightly before shredding. Avoid using hot chicken with yogurt to keep the salad texture right.

Q: How ripe should the avocado be?
A: Use an avocado that gives slightly to gentle pressure. Too soft and it will mash; too hard and it will be dry.

Q: Can I make this ahead for a picnic?
A: Make the chicken mixture up to a day ahead but add avocado right before serving. Pack lettuce leaves separately and assemble outdoors.

Q: Is this recipe freezer-friendly?
A: No. The avocado and lettuce do not freeze well. Freeze only the cooked chicken if you want long-term storage.

Q: How can I make this spicier?
A: Add a pinch of cayenne, a drizzle of hot sauce, or diced jalapeño to the mix. Start small and taste as you go.

Conclusion

I hope this Avocado Chicken Salad Lettuce Wraps recipe becomes one of those meals your family asks for again and again. The mix of creamy avocado, tangy yogurt, and crisp lettuce makes a light but satisfying dinner that is quick enough for weeknights and pretty enough for company.

For another take on the same flavors and an easy make-ahead option, see the recipe at Its Thyme 2 Cook for Avocado Chicken Salad Lettuce Wraps. If you want a slightly different method and extra tips, check the version at Domesticate ME for Avocado Chicken Salad Lettuce Wraps.

Thanks for cooking with me. Gather the family, pass the platter, and enjoy the simple pleasure of a homemade meal.

Avocado Chicken Salad Lettuce Wraps

Prep Time 15 minutes
Total Time 15 minutes
Servings 4 servings
Calories 350
A quick and healthy dinner featuring creamy avocado, tangy yogurt, and crisp lettuce leaves, perfect for family meals.

Ingredients

Main Ingredients

  • 2 cups cooked chicken, shredded (I use rotisserie) (Rotisserie chicken gives a rich flavor and saves time. If you prefer, roast a few boneless breasts the night before and shred them cold.)
  • ¼ cup plain Greek Yogurt (Keeps the salad light and adds protein. Use full fat for creaminess or nonfat if you want fewer calories.)
  • ¼ cup mayonnaise (A small amount of mayo rounds out the texture. I use light mayo for everyday meals and full mayo for gatherings.)
  • 3 Tablespoons onions, finely chopped (Mild sweet onions or green onions work well for picky eaters. Rinse chopped white onion to tone down the bite.)
  • 2 teaspoons lemon juice (Fresh lemon brightens the flavors. If fresh lemons are not available, use about 1½ teaspoons of bottled juice.)
  • Salt and freshly ground black pepper, to taste (Start with a small pinch of each and taste before adding more. Kids often prefer less pepper.)
  • 1 avocado, seeded, peeled, diced (Choose a ripe but firm avocado. If it is too soft, it will mash completely into the mix.)
  • about 16 leaves Romaine hearts or bib lettuce (Pick leaves that are whole and crisp. Bib lettuce is soft and tender for small hands, while romaine holds up better for travel.)

Instructions 

Preparation

  • Add chicken, yogurt, mayo, onion, and lemon juice to a bowl and mix well to combine.
  • Season with salt and pepper, to taste.
  • Stir in avocado.
  • Serve in cold, crisp lettuce cups.

Notes

Chill the lettuce for ten minutes before serving for extra crunch. If you want spice or herbs, add cilantro, chili sauce, or chopped peanuts.
Calories: 350kcal
Course: Dinner, Lunch, Main Course
Cuisine: American
Keyword: Avocado Chicken Salad, Family Recipe, Healthy Dinner, Lettuce Wraps, Quick Meal

Mini Chicken Pot Pies

The kitchen smells like warm butter and rosemary. I hear the soft pop of puff pastry in the oven and the little clinks of spoons against bowls. Those sounds mean a cozy dinner is close, and kids are already asking when they can help.

Mini chicken pot pies are one of those recipes that bring everyone to the table. They feel special, but they come together fast. If you want more notes and photos of the finished pies, I have the full post right here: my mini chicken pot pies page.

Why this works

Mini Chicken Pot Pies

Mini chicken pot pies pack comfort into handheld portions. They give you a creamy, savory filling tucked into flaky pastry. That combo of textures keeps kids and adults happy.

This recipe saves time without losing taste. You cook everything in one skillet, use frozen vegetables, and let store-bought puff pastry do the heavy lifting. Serve these at a busy weeknight dinner or bring them to a gathering and watch them disappear.

If you like family-friendly dinners that come together quickly, I also love pairing this style of dish with a hearty side like my BBQ chicken and sweet potato bowl. It keeps meal planning simple and satisfying.

Process Overview

“This is where the magic happens—when the aroma fills the kitchen.”

Start by cooking the chicken until it has a golden edge. Add the frozen vegetables to warm them through. A little flour and chicken broth make a creamy base. Fold in cream and herbs, and the filling is ready to spoon into pastry.

Rolling and cutting pastry is quick work when you use a muffin tin. Bake until the pastry blisters and browns. Let them cool just enough to hold, then watch everyone smile as they take their first bite.

For more ideas to pair with these pies, see my collection of sweet potato and chicken recipes for balanced family meals: best chicken and sweet potato recipes.

Ingredients

  • 3-4 boneless, skinless chicken breasts (about 1 lb)
    Tip: Buy evenly sized breasts if possible. If they are large, halve them so they cook evenly. I often use two large breasts cut into chunks.
  • 2 cups frozen mixed vegetables
    Tip: Use a mix with peas, carrots, and corn for color and texture. No need to thaw. I keep a bag in the freezer for quick dinners.
  • 2 tbsp unsalted butter
    Tip: Unsalted butter lets you control the salt. Add a small pat more at the end for extra shine if you like.
  • 1/4 cup all-purpose flour
    Tip: Sprinkle it evenly and stir to avoid lumps. This helps thicken the filling smoothly.
  • 1 cup low-sodium chicken broth
    Tip: Low-sodium keeps the salt level in your control. Taste and add more salt if needed at the end.
  • 1/2 cup heavy cream
    Tip: Heavy cream makes the filling rich and silky. For a lighter option, try half-and-half, but the filling will be thinner.
  • 2 sheets puff pastry
    Tip: Thaw in the fridge overnight or on the counter for 20 minutes if you are short on time. Handle gently so it stays flaky.
  • Salt, pepper, and thyme to taste
    Tip: Fresh thyme adds brightness. I add a light pinch of salt during cooking and adjust at the end.

My personal tip: keep all your ingredients prepped and near the stove. Cooking moves quickly once the chicken hits the pan.

Directions

  1. Preheat oven to 400°F (200°C).
    Encouraging note: Get the oven ready first. The warm oven means your pies bake perfectly while you finish the filling.

  2. In a skillet, melt butter over medium heat. Add diced chicken and cook until golden brown, about 8 minutes.
    Encouraging note: Let the chicken develop color. This adds flavor that makes the filling sing.

  3. Stir in frozen mixed vegetables until heated through.
    Encouraging note: Frozen vegetables steam and warm quickly. Stir gently so they stay bright and not mushy.

  4. Sprinkle flour over the mixture and gradually add chicken broth while stirring until thickened (about 5 minutes).
    Encouraging note: Stir as you add the broth. This avoids lumps and builds a smooth, creamy sauce. Take your time and enjoy the aroma.

  5. Mix in heavy cream, thyme, salt, and pepper; remove from heat.
    Encouraging note: Taste and adjust seasoning. A little extra thyme brightens the flavors and makes it feel like home.

  6. Roll out puff pastry sheets and cut circles to fit muffin tins.
    Encouraging note: Lightly flour your surface. If pastry softens, chill it for a few minutes. You can involve kids in cutting circles for a fun task.

  7. Fill pastry-lined cups with the chicken mixture; fold excess pastry over the top or cut smaller circles for lids.
    Encouraging note: Don’t worry about perfection. Rustic folds make them look homemade and lovely. Leave a small vent if you use a top.

  8. Bake for 20-25 minutes until golden brown.
    Encouraging note: Watch the edges. When the pastry is puffed and brown, they are ready. The kitchen will smell amazing.

  9. Cool slightly before serving.
    Encouraging note: Let them rest for 5 minutes so the filling sets. Then serve warm and share the smiles.

Serving

Mini Chicken Pot Pies

Serve these mini pot pies family-style on a large platter. Place the muffin tin on the table if you want a casual, hands-on feel. Add a simple green salad and some buttered bread for a complete meal.

For little hands, offer small plates and napkins. Let kids choose their pie and pick a favorite fork. I like to garnish with a sprinkle of fresh thyme for a pretty finish.

If you want a full spread of family-friendly dishes for a weeknight, combine these pies with a light side like steamed green beans or roasted sweet potatoes.

Storage

Store leftovers in an airtight container in the refrigerator for up to 3 days. For longer storage, freeze the pies in a single layer on a tray until firm, then transfer to a freezer bag for up to 2 months.

To reheat from the fridge, place pies on a baking sheet and warm in a 350°F oven for 10 to 12 minutes until hot. From frozen, bake at 375°F for 20 to 25 minutes, covering loosely with foil if the pastry browns too fast.

Make-ahead tip: You can fill the pastry cups, cover them, and bake the next day. Let them come to room temperature for 10 minutes before baking for even cooking.

If you want more ideas on hearty make-ahead chicken dishes, my slow cooker collection is full of effortless dinners: easy crock pot chicken recipes.

Kitchen Notes

  • Shortcut: Use rotisserie chicken if you are short on time. Shred it and fold into the sauce.
  • Shortcut: Swap puff pastry for refrigerated biscuit dough for a quicker crust.
  • Shortcut: If you do not have a muffin tin, use a small oven-safe ramekin and adjust baking time.
  • Shortcut: Double the filling and freeze the extras for a fast future meal.
  • Shortcut: To crisp the bottoms, preheat the muffin tin in the oven before lining with pastry.

For more quick kitchen ideas and appliance-friendly recipes, check my Instant Pot chicken category for fast weeknight solutions: instant pot chicken recipes.

Variations

  • For picky eaters: Omit peas and add finely chopped corn or grated carrots. You can also blend half the filling for a smoother texture.
  • For a vegetarian version: Replace chicken with diced and roasted mushrooms or cubed cooked tofu. Use vegetable broth instead of chicken broth.
  • For a gluten-free crust: Use store-bought gluten-free pie crust or make a biscuit-top using gluten-free flour.
  • For a lighter filling: Substitute heavy cream with half-and-half or a mixture of milk and Greek yogurt. The texture will be lighter.
  • For added flavor: Stir in a tablespoon of Dijon mustard or a sprinkle of smoked paprika for a subtle kick.

These tweaks let you make the recipe your own while keeping the heart of the dish intact.

FAQ

Q: Can I make the filling ahead of time?
A: Yes. Make the filling and refrigerate for up to 2 days. Rewarm gently on the stove before filling the pastry.

Q: Can I use frozen puff pastry?
A: Yes. Thaw it in the refrigerator overnight or on the counter for 20 minutes. Keep it cool so it stays flaky.

Q: How do I prevent soggy bottoms?
A: Avoid over-filling and drain any excess liquid from the filling. Preheating the muffin tin helps the bottoms crisp faster.

Q: Can I freeze assembled pies before baking?
A: Yes. Freeze them on a tray until firm, then store in a bag. Bake from frozen and add a few extra minutes to the bake time.

Q: What can I serve with these for a weeknight meal?
A: A simple salad, steamed vegetables, or roasted sweet potatoes make great sides and keep the meal balanced.

Conclusion

Thank you for spending a little time with me in the kitchen. These mini chicken pot pies are one of those recipes that bring comfort and smiles with very little fuss. I hope they become a favorite at your table and a dish your family asks for again and again.

If you want another take on individual pot pies and clear step-by-step photos, I like the version from One Little Project’s mini chicken pot pies as a helpful visual guide. For a cozy autumn twist and extra tips on making them ahead, the post at It’s Always Autumn is a lovely resource.

Happy baking, and send my best to your family around the table.

Mini Chicken Pot Pies

Prep Time 20 minutes
Cook Time 30 minutes
Total Time 50 minutes
Servings 6 pieces
Calories 350
Warm and comforting mini chicken pot pies filled with a creamy filling and wrapped in flaky puff pastry, perfect for a cozy family dinner.

Ingredients

For the Filling

  • 1 lb boneless, skinless chicken breasts (3-4 pieces) (Buy evenly sized breasts if possible; cut large ones in half for even cooking.)
  • 2 cups frozen mixed vegetables (A mix with peas, carrots, and corn is ideal.)
  • 2 tbsp unsalted butter (Let you control the salt level.)
  • 1/4 cup all-purpose flour (Sprinkle evenly to avoid lumps.)
  • 1 cup low-sodium chicken broth (Taste and add more salt if needed.)
  • 1/2 cup heavy cream (Can substitute with half-and-half.)
  • 2 sheets puff pastry (Thaw in the fridge overnight or for 20 minutes on the counter.)
  • to taste salt, pepper, and thyme (Fresh thyme adds brightness to the filling.)

Instructions 

Preparation

  • Preheat oven to 400°F (200°C).
  • In a skillet, melt butter over medium heat. Add diced chicken and cook until golden brown, about 8 minutes.
  • Stir in frozen mixed vegetables until heated through.
  • Sprinkle flour over the mixture and gradually add chicken broth while stirring until thickened, about 5 minutes.
  • Mix in heavy cream, thyme, salt, and pepper; remove from heat.
  • Roll out puff pastry sheets and cut circles to fit muffin tins.
  • Fill pastry-lined cups with the chicken mixture; fold excess pastry over the top or cut smaller circles for lids.
  • Bake for 20-25 minutes until golden brown.
  • Cool slightly before serving.

Notes

Serve these mini pot pies family-style on a large platter or serve them directly in the muffin tin. Store leftovers in an airtight container in the refrigerator for up to 3 days. Freeze for longer storage.
Calories: 350kcal
Course: Dinner, Main Course
Cuisine: American
Keyword: Comfort Food, Easy Dinner, Family-Friendly Meals, Mini Chicken Pot Pies, puff pastry

Chicken Pot Pie Biscuit Cups

I can still smell the butter and hear the little pops as biscuit edges brown while I pull these out of the oven. The kitchen fills with a warm, savory scent that makes everyone wander in. Little hands press into the muffin pan as we decide who gets the biggest one.

If you love family dinners that feel cozy but come together fast, this recipe is a keeper. If you have a minute, you can peek at my take on similar comfort food in my mini chicken pot pies post for more ideas.

Why this works

Chicken Pot Pie Biscuit Cups

This recipe pairs pantry staples with a simple assembly to create a homemade feeling without hours of work. Flaky biscuit dough forms a quick crust, while canned soup and frozen vegetables give reliable flavor and texture. It is a true weeknight hero.

It saves time when you need a hearty meal fast, and it stretches well for feeding a family. I often set the table while these bake, and we have dinner ready as soon as the timer dings. If you are curious about different crust ideas, you might enjoy my experiment with biscuit crusts in the Red Lobster biscuit chicken pot pie post.

Process Overview

“This is where the magic happens—when the aroma fills the kitchen.”

We use a muffin pan to make individual servings that are easy for kids and adults to hold. The process is mostly mixing, filling, and baking. You can prep the filling ahead and assemble right before baking. This makes it great for busy evenings or if you have company coming over at the last minute.

I like that each cup bakes evenly and the biscuit edges turn golden and slightly crisp. That contrast between soft filling and flaky crust is the comfort that keeps people coming back for seconds. These also travel well for potlucks and make great lunchbox treats.

Ingredients

  • 2 cans flaky layers biscuits
    • Tip: Use the flaky layers type for the best rise and texture. If your biscuits look a little stuck together, gently separate them with a butter knife along the seams.
  • 2 cans cream of chicken soup
    • Tip: For richer flavor, you can stir in a splash of milk or a tablespoon of sour cream. If you prefer less sodium, look for low-sodium soup and adjust seasoning.
  • 2 cans cooked chicken, or 2 cups fresh cooked chicken, shredded or chopped
    • Tip: Rotisserie chicken works great for speed and flavor. If using canned chicken, drain well to avoid watery filling.
  • 1 bag frozen mixed vegetables (about 10-12 oz)
    • Tip: No need to thaw. The vegetables cook through while the biscuit bakes. If you like peas and carrots only, that works too.
  • Salt and pepper, to taste
    • Tip: Start light. The canned soup can be salty. Taste the filling before seasoning if you are using fresh chicken and homemade soup.

I include these tips because small adjustments can make a big difference in family meals. I usually double-check seasoning with a spoon before filling the cups.

Directions

  1. Preheat your oven to 400°F (200°C) and lightly grease a 12-cup muffin pan with cooking spray or butter.

    • Encouraging note: While the oven warms, take a deep breath. You are already on your way to a warm, filling dinner that smells like home.
  2. In a large mixing bowl, combine the cream of chicken soup, cooked chicken, and frozen mixed vegetables. Stir until well mixed. Season the mixture with salt and pepper to taste.

    • Encouraging note: This is where you get to adjust the flavors. Taste a small spoonful and add a pinch more pepper if you like a little kick. It is okay to tweak as you go.
  3. Open the cans of flaky biscuits and separate the dough. Flatten each biscuit with your hands or a rolling pin. Press each flattened biscuit into the muffin pan cups, making sure to push the dough up the sides to form a cup.

    • Encouraging note: Don’t worry about perfection. The rustic look is charming, and pressing gently will help avoid tearing.
  4. Spoon the chicken and vegetable mixture into each biscuit cup, filling them generously.

    • Encouraging note: Be generous, but leave a little room at the top so the filling does not overflow as it heats. This is the comforting heart of the bite.
  5. Place the muffin pan in the preheated oven and bake for 18-20 minutes, or until the biscuit edges are golden brown and the filling is heated through.

    • Encouraging note: The countdown is always the best part. Set a timer and sneak a quick tidy of the kitchen while they bake.
  6. Once baked, allow the biscuit cups to cool for a few minutes in the pan before carefully removing them. Serve warm and enjoy!

    • Encouraging note: Let them rest so the filling sets a little. Then pass them around warm and watch the smiles grow.

Each step is designed to be approachable so cooks of all levels can pull this off. If you are making this with kids, give them safe tasks like spooning the filling or arranging biscuits.

Serving

Chicken Pot Pie Biscuit Cups

Serve these biscuit cups family-style on a big platter so everyone can pick their favorite one. They pair wonderfully with a simple green salad, roasted sweet potatoes, or a bowl of applesauce for a kid-friendly side. For a cozy night in, add steamed green beans and a warm drink.

If you want to make it a potluck favorite, set up a small toppings bar with shredded cheddar, chopped parsley, and hot sauce. Let guests customize their cups for more fun at the table. For more family-friendly pot pie ideas, you may enjoy my full chicken pot pie guide at my chicken pot pie post.

Storage

Make ahead: Assemble the cups in the muffin pan, cover tightly with plastic wrap, and refrigerate for up to 24 hours. Bake from chilled and add a few minutes to the bake time.

Refrigerator: Store leftover biscuit cups in an airtight container for up to 3 days. Place a paper towel under them to reduce steam buildup and sogginess.

Freezer: For longer storage, freeze cooled cups on a baking sheet until solid, then transfer to a freezer bag for up to 2 months. Reheat from frozen in a 350°F oven until heated through, about 20-25 minutes.

Reheating: Microwave for 1 to 2 minutes per cup on medium power for a quick meal. For the best texture, reheat in a 350°F oven for 8 to 12 minutes so the biscuit regains crispness.

Food safety note: If you used fresh chicken, refrigerate within two hours of cooking and reheat leftover portions to an internal temperature of 165°F.

Kitchen Notes

  • Use rotisserie chicken to save time and add flavor without extra work.
  • Swap cream of chicken with cream of mushroom for a milder flavor profile.
  • Lightly grease the muffin pan and consider using silicone liners for easy removal.
  • If biscuits brown too fast, tent the pan with foil for the final minutes.
  • Double the filling to bake in two pans when feeding a larger group.

These shortcuts come from years of adapting family recipes to real life. Little tricks like lining pans and using rotisserie chicken keep weeknights manageable.

Variations

  • For picky eaters: Use peas and carrots only, and mix in a little shredded cheddar for a familiar flavor. Many kids like the cheesy note.
  • Gluten-free: Use your favorite gluten-free biscuit dough and confirm the cream soup is gluten-free. Adjust baking time as needed.
  • Lower-sodium: Choose low-sodium soup and canned chicken, then add herbs and lemon zest to boost flavor naturally.
  • Veggie-forward: Replace chicken with extra beans or lentils and add a sprinkle of smoked paprika for depth.
  • Creamier Filling: Stir in 1/4 cup sour cream or cream cheese to the filling for extra richness.

If you want more hearty bowl ideas that family members enjoy, try my BBQ chicken sweet potato bowl for another easy weeknight option at my BBQ chicken sweet potato bowl recipe.

FAQ

Q: Can I use homemade biscuit dough?
A: Yes. Homemade biscuit dough works beautifully and may yield a flakier crust. Roll to similar thickness so baking time stays close.

Q: Do I have to thaw the frozen vegetables first?
A: No. You can use frozen vegetables straight from the bag. They will cook through in the oven. If you prefer, you can thaw and drain excess water to avoid a looser filling.

Q: Can I freeze assembled cups before baking?
A: Yes. Freeze assembled cups on a tray until solid, then move to a freezer bag. Bake from frozen, adding extra time until the filling is hot and the biscuit is golden.

Q: How do I prevent the biscuits from getting soggy?
A: Use slightly thicker biscuit dough and do not overfill. Let cups rest a few minutes after baking so the filling sets. Reheat in the oven to help restore crispness.

Q: Is this recipe kid-friendly?
A: Very much so. The portions are small and fun to handle. Offer mild seasonings for little ones and let older kids add toppings like cheese or crumbled bacon.

Conclusion

I hope this recipe brings the same warm kitchen feeling to your home as it does to mine. These Chicken Pot Pie Biscuit Cups are practical, comforting, and perfect for busy family nights. If you want a similar bite-size idea, take a peek at Mini Chicken Pot Pies from Julie’s Eats and Treats for another easy spin. For a version with a professional chef twist, check out Kardea Brown’s Chicken Pot Pie Stuffed Biscuit Cups on Food Network for inspiration.

Happy baking. Invite the family, pass the platter, and enjoy those cozy, buttery bites.

Chicken Pot Pie Biscuit Cups

Prep Time 15 minutes
Cook Time 20 minutes
Total Time 35 minutes
Servings 6 cups
Calories 350
These Chicken Pot Pie Biscuit Cups feature flaky biscuit cups filled with a savory chicken and vegetable mixture, making for a cozy and comforting family meal that comes together quickly.

Ingredients

Biscuit Cups

  • 2 cans flaky layers biscuits (Use the flaky layers type for the best rise and texture.)

Filling

  • 2 cans cream of chicken soup (For richer flavor, stir in a splash of milk or sour cream.)
  • 2 cans cooked chicken, or 2 cups fresh cooked chicken, shredded or chopped (Rotisserie chicken works great for speed and flavor.)
  • 1 bag frozen mixed vegetables (about 10-12 oz) (No need to thaw; they cook through while the biscuit bakes.)
  • to taste salt and pepper (Start light, especially if using canned soup.)

Instructions 

Preparation

  • Preheat your oven to 400°F (200°C) and lightly grease a 12-cup muffin pan with cooking spray or butter.
  • In a large mixing bowl, combine the cream of chicken soup, cooked chicken, and frozen mixed vegetables. Stir until well mixed. Season the mixture with salt and pepper to taste.
  • Open the cans of flaky biscuits and separate the dough. Flatten each biscuit with your hands or a rolling pin. Press each flattened biscuit into the muffin pan cups, pushing the dough up the sides to form a cup.
  • Spoon the chicken and vegetable mixture into each biscuit cup, filling them generously.

Baking

  • Place the muffin pan in the preheated oven and bake for 18-20 minutes, or until the biscuit edges are golden brown and the filling is heated through.
  • Once baked, allow the biscuit cups to cool for a few minutes in the pan before carefully removing them.

Notes

These biscuit cups can be made ahead and stored in the refrigerator for later baking. They also freeze well.
Calories: 350kcal
Course: Comfort Food, Dinner, Main Course
Cuisine: American
Keyword: Biscuit Cups, Chicken Pot Pie, Family Dinner, quick recipe