Author

Nichole Mora

Browsing

This post contains affiliate links. As an Amazon Associate, I earn from qualifying purchases. This comes at no extra cost to you.

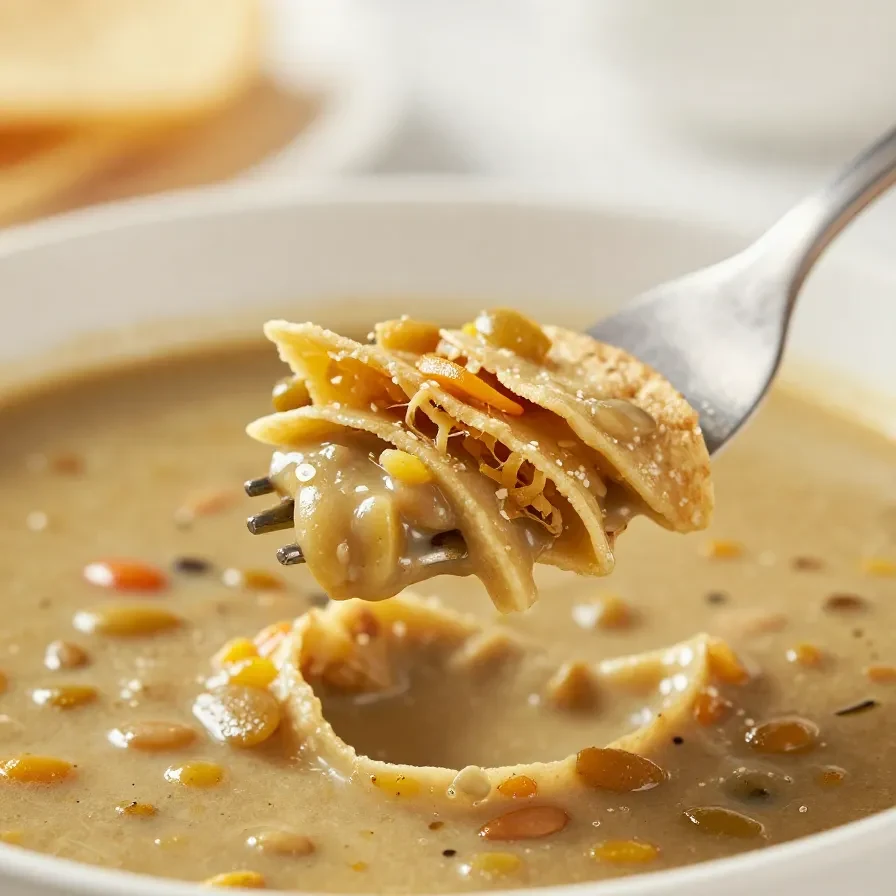
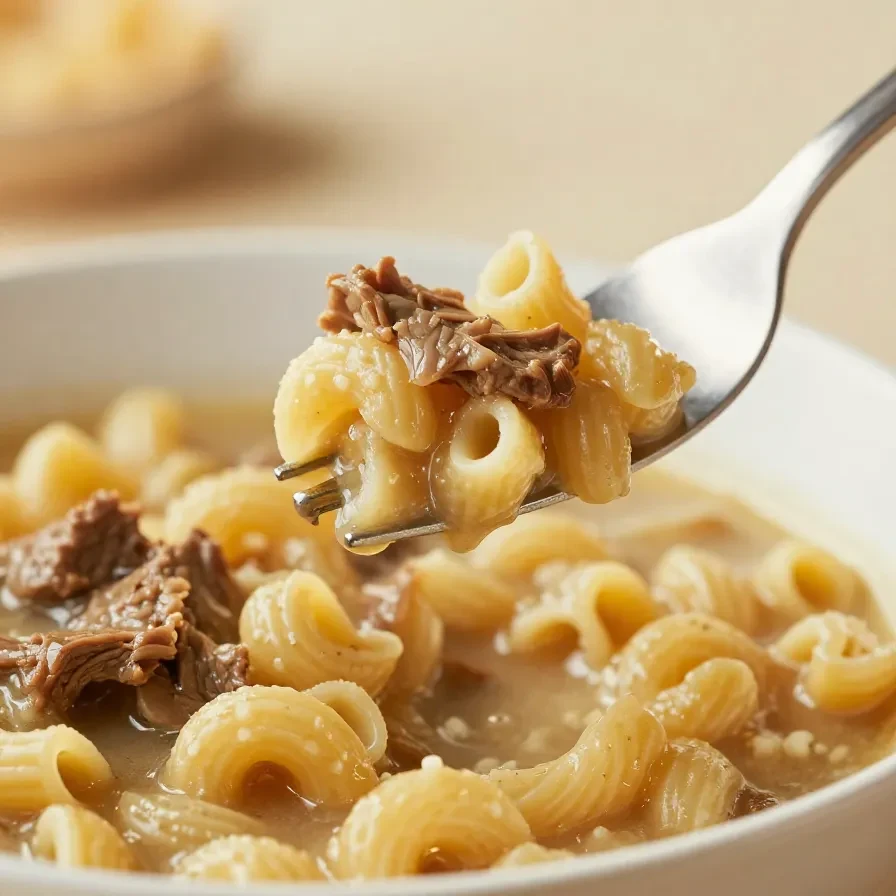
This Hearty Macaroni Soup with Beef is the ultimate combination of tender vegetables, flavorful spices, and perfectly cooked macaroni in a rich beef broth. The aroma of sautéed garlic and onions blends beautifully with the earthy notes of oregano and thyme, creating a heartwarming bowl of soup. Garnished with fresh parsley, this dish is satisfying, delicious, and ideal for busy weeknights or leisurely weekends.

Table of Contents

Why This Hearty Macaroni Soup with Beef Will Save Your Weeknights

  • This soup is incredibly simple to prepare with everyday ingredients. Even beginners will find the instructions easy to follow.
  • With a cook time of just 35 minutes, it’s the perfect quick meal solution for busy evenings. You’ll have a hearty and nourishing dish ready in no time.
  • Its one-pot cooking method minimizes cleanup, making life easier after a long day. Less mess means more time to enjoy the meal.
  • The combination of beef, macaroni, and vegetables makes it versatile and filling. It’s an all-in-one dish you can serve without needing additional sides.

Everything You Need for Hearty Macaroni Soup with Beef

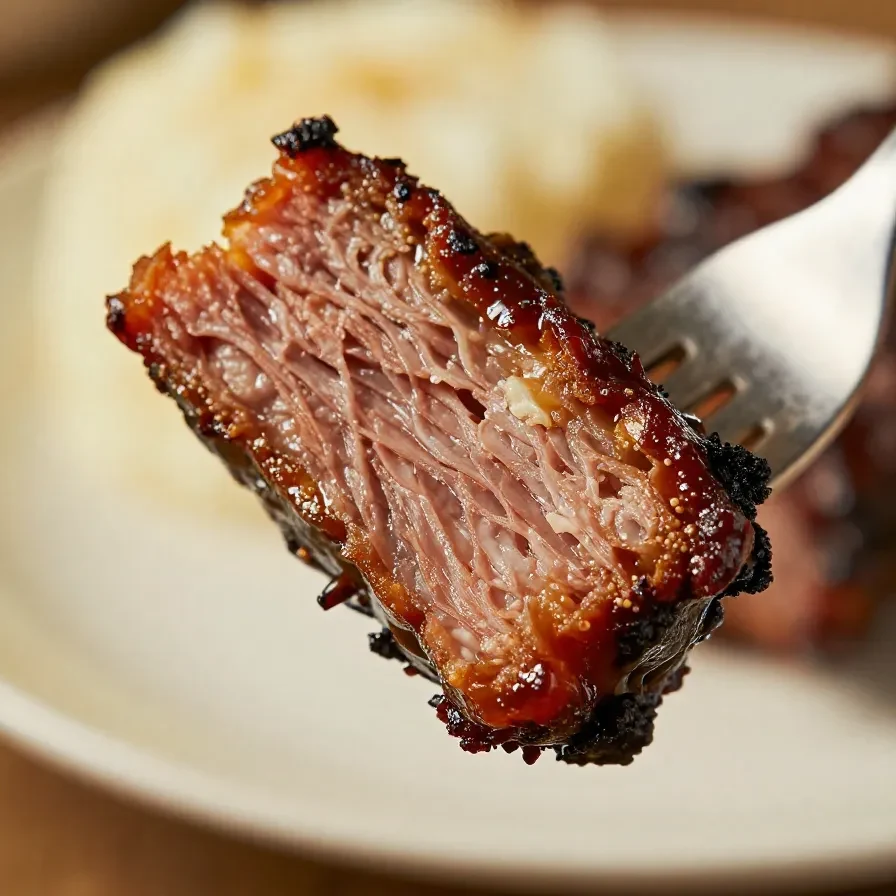
The halal-certified ground beef is the star of this dish, providing a robust and savory foundation. Meanwhile, the dried oregano and paprika enrich the broth with aromatic depth and subtle heat.

How To Make Hearty Macaroni Soup with Beef Step by Step

  1. Heat the olive oil in a large pot over medium heat.
  2. Add the ground beef and cook until browned, breaking it apart with a spoon. Drain excess fat if necessary.
  3. Add the chopped onion, garlic, carrots, and celery to the pot. Sauté for 5–7 minutes, stirring occasionally, until the vegetables are softened.
  4. A bowl of hearty macaroni soup with tender beef chunks, carrots, and celery in a savory broth.

    Instant Pot Duo 7-in-1 Electric Pressure Cooker

    Kitchen ApplianceInstant Pot Duo 7-in-1 Electric Pressure Cooker

    Speeds up cooking time and allows for easy one-pot meals — great for soups like this.

    View on Amazon →

    Lodge Dutch Oven 6 Quart

    Essential CookwareLodge Dutch Oven 6 Quart

    Ideal for simmering soups and stews with even heat distribution — perfect for this recipe.

    View on Amazon →

  5. Stir in the canned diced tomatoes, halal-certified beef broth, and water.
  6. Season the soup with oregano, thyme, black pepper, paprika, and salt to taste. Bring the mixture to a boil.
  7. Reduce the heat to low and let the soup simmer for 15 minutes to allow the flavors to meld together.
  8. Add the macaroni pasta to the pot and cook for 8–10 minutes, or until the pasta is tender.
  9. Stir in the frozen peas and cook for an additional 2–3 minutes.
  10. Taste and adjust seasoning if necessary. Remove from heat.
  11. Ladle the soup into bowls and garnish with fresh parsley before serving.

Origins and History of This Dish

Macaroni soup has roots in various culinary traditions, often combining pasta with seasonal vegetables and hearty proteins. This particular version with beef takes inspiration from comforting European soups, marrying rich flavors with simple preparation techniques. Over time, it has become a beloved household favorite for its satisfying balance of taste and texture.

Easy Ingredient Swaps for Hearty Macaroni Soup

  • Swap ground beef for ground turkey or chicken for a lighter alternative. The flavor will be milder, but the soup will still retain its hearty qualities.
  • Use gluten-free macaroni to cater to dietary preferences. Ensure you adjust the cooking time according to the brand’s instructions.
  • If fresh parsley isn’t available, dried parsley can be used for garnish. Its flavor is slightly subtler but still adds a touch of freshness.

Serving Ideas and Perfect Pairings

  • Serve this soup with warm crusty bread to soak up the rich broth. The bread complements the hearty texture of the dish.
  • A green side salad with a tangy vinaigrette pairs beautifully with the flavors in the soup, adding a burst of freshness and acidity.
  • Pair it with grated Parmesan cheese sprinkled on top for an extra layer of savory richness.
  • If you’re craving more vegetables, roasted zucchini or steamed broccoli would make excellent accompaniments.

Meal Prep, Storage, and Reheating Tips

Store leftover soup in an airtight container in the refrigerator for up to 3 days. For longer storage, freeze individual portions in freezer-safe containers for up to 2 months.

To reheat, warm the soup in a pot over medium heat, adding a splash of water or broth if it has thickened too much. Alternatively, microwave individual servings in a microwave-safe bowl, stirring halfway through to ensure even heating.

When freezing, avoid adding the macaroni beforehand, as it may become mushy. Instead, cook and add fresh pasta after thawing and reheating the soup.

Hearty Macaroni Soup with Beef

Prep Time 15 minutes
Cook Time 30 minutes
Total Time 45 minutes
Servings 6 servings
Calories 320
A comforting and hearty soup made with macaroni, beef, and vegetables, perfect for a satisfying meal.

Ingredients

Instructions 

  • Heat the olive oil in a large pot over medium heat.
  • Add the ground beef and cook until browned, breaking it apart with a spoon. Drain excess fat if necessary.
  • Add the chopped onion, garlic, carrots, and celery to the pot. Sauté for 5–7 minutes, stirring occasionally, until the vegetables are softened.
  • Stir in the canned diced tomatoes, halal-certified beef broth, and water.
  • Season the soup with oregano, thyme, black pepper, paprika, and salt to taste. Bring the mixture to a boil.
  • Reduce the heat to low and let the soup simmer for 15 minutes to allow the flavors to meld together.
  • Add the macaroni pasta to the pot and cook for 8–10 minutes, or until the pasta is tender.
  • Stir in the frozen peas and cook for an additional 2–3 minutes.
  • Taste and adjust seasoning if necessary. Remove from heat.
  • Ladle the soup into bowls and garnish with fresh parsley before serving.

Notes

You can substitute ground beef with ground turkey or chicken for a lighter option. Adjust the seasoning to your preference.
Calories: 320kcal
Cost: $15
Course: Main Course
Cuisine: American
Keyword: beef soup, hearty soup, macaroni soup
A bowl of hearty macaroni soup with tender beef chunks, carrots, and celery in a savory broth.

Loved this recipe? Save it to your favorite Pinterest board so you can easily find it later! ✨

This post contains affiliate links. As an Amazon Associate, I earn from qualifying purchases. This comes at no extra cost to you.

This Decadent Lentil Tortilla Soup is a vibrant combination of tender lentils, bold spices, and hearty vegetables simmered in a rich tomato-based broth. Topped with crispy tortilla strips and creamy garnishes, every spoonful is a satisfying burst of flavor and texture. Perfect for chilly days, this soup is an ultimate comfort food designed to make your kitchen smell divine and your taste buds dance.

Table of Contents

Why This Decadent Lentil Tortilla Soup Will Save Your Weeknights

  • This soup is ready in less than an hour, making it perfect for busy evenings. Its one-pot method means minimal cleanup after dinner, so you can relax.
  • Packed with plant-based protein from lentils and black beans, it’s a nourishing meal option. The hearty ingredients keep you full and satisfied without weighing you down.
  • The combination of bold spices and fresh lime juice creates a flavor-packed bowl. It’s a zesty and comforting dish that feels homemade but tastes like you spent hours crafting it.

Everything You Need for Decadent Lentil Tortilla Soup

The lentils are the star of this dish, providing a creamy texture and earthy flavor. Smoked paprika adds depth and a subtle smokiness, enhancing the rich broth.

How To Make Decadent Lentil Tortilla Soup Step by Step

  1. Heat olive oil in a large pot over medium heat. Add the diced onion and sauté until softened, about 3-4 minutes.
  2. Add minced garlic, red bell pepper, and green bell pepper. Cook for another 4-5 minutes, stirring occasionally, until the vegetables are tender.
  3. Add the rinsed lentils to the pot, along with the halal vegetable broth, water, ground cumin, smoked paprika, chili powder, ground coriander, and crushed red pepper flakes (if using). Stir well to combine.
  4. Bring the mixture to a boil, then reduce the heat to low. Cover and simmer for 20-25 minutes, or until the lentils are tender and flavorful.
  5. A bowl of hearty lentil tortilla soup garnished with fresh cilantro and crispy tortilla strips.

    Instant Pot Duo 7-in-1 Electric Pressure Cooker

    Kitchen ApplianceInstant Pot Duo 7-in-1 Electric Pressure Cooker

    Speeds up cooking lentils and beans — perfect for one-pot recipes like this soup.

    View on Amazon →

    Lodge Enameled Cast Iron Dutch Oven, 6 Quart

    Essential CookwareLodge Enameled Cast Iron Dutch Oven, 6 Quart

    Ideal for simmering soups and stews — retains heat evenly for perfect lentil cooking.

    View on Amazon →

  6. Stir in the diced tomatoes, black beans, and frozen corn. Simmer for an additional 10 minutes, allowing the flavors to meld together. Season with salt and pepper to taste.
  7. Prepare the tortilla strips while the soup is simmering: Heat vegetable oil in a frying pan over medium heat. Fry the sliced tortilla strips in batches until golden and crispy, about 1-2 minutes per batch. Drain on paper towels or use pre-made tortilla chips for convenience.
  8. Once the soup is ready, stir in the lime juice and fresh cilantro. Taste and adjust seasoning if needed.
  9. Serve the soup hot, garnished with shredded cheese, sour cream, and crispy tortilla strips. Add extra lime wedges and cilantro for brightness.

Frequently Asked Questions

  • Can I use canned lentils instead of dried? Yes, but reduce the simmering time significantly as canned lentils are already cooked.
  • How spicy is this soup? The crushed red pepper flakes add mild heat, but you can omit them for a milder flavor or add extra chili powder for more spice.
  • Is this soup gluten-free? Ensure your vegetable broth and toppings are certified gluten-free, and swap corn tortillas if needed.

Storage and Reheating Tips

To store, let the soup cool completely before transferring it to an airtight container. It can be refrigerated for up to 4 days or frozen for up to 3 months.

Reheat in a pot over medium heat, stirring occasionally, until warmed through. Add a splash of water or broth if the soup thickens in the fridge or freezer.

Common Mistakes to Avoid

  • Skipping the sauté step: Sautéing the onion and peppers develops their flavors, creating a richer base for the soup.
  • Overcooking the lentils: Tender lentils are key to the soup’s consistency. Keep an eye on them to avoid a mushy texture.
  • Not tasting as you cook: Adjusting the seasoning throughout ensures the final dish is balanced with spice and acidity.

Serving Ideas for This Decadent Lentil Tortilla Soup

  • Fresh avocado slices: Creamy avocado complements the zesty lime and smoky spices.
  • A side of crusty bread: Perfect for dipping into the hearty broth and scooping up tender lentils.
  • Simple green salad: Adds freshness and pairs beautifully with the bold flavors of the soup.
  • Mexican-style rice: Serve alongside for an extra filling and satisfying meal.

Decadent Lentil Tortilla Soup

Prep Time 15 minutes
Cook Time 35 minutes
Total Time 50 minutes
Servings 6 servings
Calories 320
A hearty and flavorful soup made with lentils, vegetables, and crispy tortilla strips, perfect for a comforting meal.

Ingredients

Instructions 

  • Heat olive oil in a large pot over medium heat. Add the diced onion and sauté until softened, about 3-4 minutes.
  • Add minced garlic, red bell pepper, and green bell pepper. Cook for another 4-5 minutes, stirring occasionally, until the vegetables are tender.
  • Add the rinsed lentils to the pot, along with the halal vegetable broth, water, ground cumin, smoked paprika, chili powder, ground coriander, and crushed red pepper flakes (if using). Stir well to combine.
  • Bring the mixture to a boil, then reduce the heat to low. Cover and simmer for 20-25 minutes, or until the lentils are tender.
  • Stir in the diced tomatoes, black beans, and frozen corn. Simmer for an additional 10 minutes, allowing the flavors to meld together. Season with salt and pepper to taste.
  • While the soup is simmering, prepare the tortilla strips: Heat vegetable oil in a frying pan over medium heat. Fry the sliced tortilla strips in batches until golden and crispy, about 1-2 minutes per batch. Remove and drain on paper towels. Alternatively, use pre-made tortilla chips for convenience.
  • Once the soup is ready, stir in the lime juice and fresh cilantro. Adjust seasoning if needed.
  • Serve the soup hot, garnished with shredded cheese, sour cream, and crispy tortilla strips. Add additional lime wedges and cilantro as desired.

Notes

For a vegan version, omit the cheese and sour cream or use plant-based alternatives. Adjust spice levels to your preference.
Calories: 320kcal
Cost: $15
Course: Main Course
Cuisine: Mexican
Keyword: halal, lentil soup, tortilla soup
A bowl of hearty lentil tortilla soup garnished with fresh cilantro and crispy tortilla strips.

Loved this recipe? Save it to your favorite Pinterest board so you can easily find it later! ✨

This post contains affiliate links. As an Amazon Associate, I earn from qualifying purchases. This comes at no extra cost to you.


BBQ Little Smokies Crock Pot Recipe


BBQ Little Smokies Crock Pot Recipe

This BBQ Little Smokies Crock Pot Recipe takes tender halal beef or chicken cocktail sausages and simmers them slowly in a tangy barbecue sauce, perfectly balanced with sweet grape jelly. The rich aroma of smoky spices fills your kitchen as the sauce thickens, coating each sausage in irresistible flavor. Ideal for gatherings, game days, or casual snacking, this dish comes together with minimal effort while delivering maximum taste.

Table of Contents

Why This Recipe Is a Lifesaver

  • Effortless preparation for busy hosts: With just a few ingredients and your trusty crock pot, this recipe minimizes prep time so you can focus on other party tasks or simply relax.
  • Guaranteed crowd appeal: The combination of smoky, sweet barbecue flavors ensures your guests will keep coming back for more throughout the evening.
  • Perfect for dietary needs: Using halal sausages, this dish caters to a wider range of dietary restrictions without sacrificing flavor or satisfaction.
  • Scalable for any occasion: Whether you’re cooking for a small family gathering or a big game day crowd, the recipe is easy to adjust for servings.

Everything You Need for BBQ Little Smokies Crock Pot Recipe

The grape jelly adds a subtle sweetness that perfectly balances the tanginess of the barbecue sauce, creating a rich and harmonious flavor. Smoked paprika is included as an optional ingredient to enhance the smoky depth of the dish, giving it an extra layer of complexity.

How To Make BBQ Little Smokies Crock Pot Recipe Step by Step

  1. Place the halal beef or chicken cocktail sausages (little smokies) into the crock pot.
  2. In a medium bowl, combine the barbecue sauce, grape jelly, honey, and smoked paprika (if using). Stir well until smooth and fully combined.
  3. Pour the sauce mixture evenly over the little smokies in the crock pot, ensuring each sausage is coated.
  4. Cover the crock pot with its lid and set it to low heat. Cook for 2-3 hours, stirring occasionally to ensure the sausages are evenly coated with the sauce.
    A crock pot filled with BBQ Little Smokies garnished with parsley.

    Crock-Pot 6-Quart Slow Cooker

    Essential CookwareCrock-Pot 6-Quart Slow Cooker

    Essential for slow-cooking recipes like BBQ Little Smokies — perfect for gatherings and parties.

    View on Amazon →

  5. Once fully heated through and the sauce is thickened, switch the crock pot to the warm setting if serving immediately or leave it on low heat until ready to serve.
  6. Serve warm as an appetizer or snack, using toothpicks for easy serving.

Creative Ways to Serve BBQ Little Smokies

  • Pair with a fresh veggie platter to balance the richness of the barbecue sauce.
  • Serve alongside crispy garlic bread for a hearty game-day spread.
  • Add to a buffet table with other crock pot appetizers to offer variety to guests.
  • Pair with our blackstone bbq chicken and corn for a cohesive barbecue-themed menu.

Avoid These Mistakes When Making BBQ Little Smokies

  • Skipping the occasional stirring: Stir every 30-45 minutes to ensure all sausages are evenly coated with the sauce and don’t dry out.
  • Using high heat: Always cook on low heat to achieve the best texture and avoid overcooking the sausages.
  • Neglecting optional flavor enhancers: Ingredients like honey and smoked paprika take the sauce to the next level, so don’t skip them unless absolutely necessary.

The History Behind Little Smokies

Little smokies, often referred to as cocktail sausages, originated as bite-sized cured meats intended for quick cooking and serving. Popularized in the mid-20th century, they became a staple of American party cuisine, frequently paired with sauces to enhance their savory flavor.

This BBQ variation transforms the classic little smokies by adding halal-friendly ingredients and a crock pot method, making it versatile and inclusive for modern gatherings.

Frequently Asked Questions

  • Can I use other types of sausages? Yes, you can substitute with other halal mini sausages or cocktail sausages, but ensure they are bite-sized for easy serving.
  • Can I make this ahead of time? Absolutely! Cook as directed and store in the refrigerator in an airtight container. Reheat in the crock pot on low before serving.
  • How do I adjust for smaller servings? Halve the ingredients and cook the same way, being mindful of stirring intervals to prevent burning.


BBQ Little Smokies Crock Pot Recipe

Prep Time 5 minutes
Cook Time 3 hours
Total Time 3 hours 5 minutes
Servings 8 servings
Calories 250
A simple and delicious crock pot recipe featuring halal beef or chicken cocktail sausages coated in a sweet and tangy barbecue sauce.

Ingredients

Instructions 

  • Place the halal beef or chicken cocktail sausages (little smokies) into the crock pot.
  • In a medium bowl, combine the barbecue sauce, grape jelly, honey, and smoked paprika (if using). Stir well until smooth and fully combined.
  • Pour the sauce mixture evenly over the little smokies in the crock pot.
  • Cover the crock pot with its lid and set it to low heat. Cook for 2-3 hours, stirring occasionally to ensure the sausages are evenly coated with the sauce.
  • Once fully heated through and the sauce is thickened, switch the crock pot to the warm setting if serving immediately or leave it on low heat until ready to serve.
  • Serve warm as an appetizer or snack, using toothpicks for easy serving.

Notes

For a spicier version, add a pinch of cayenne pepper to the sauce mixture. You can also substitute grape jelly with apricot preserves for a different flavor profile.
Calories: 250kcal
Cost: $10
Course: Appetizer
Cuisine: American
Keyword: BBQ little smokies, crock pot recipe, halal

A crock pot filled with BBQ Little Smokies garnished with parsley.

Loved this recipe? Save it to your favorite Pinterest board so you can easily find it later! ✨

This post contains affiliate links. As an Amazon Associate, I earn from qualifying purchases. This comes at no extra cost to you.


Hot Italian Sub Sliders

Hot Italian Sub Sliders

Hot Italian Sub Sliders bring layers of savory deli meats, melty cheeses, and tangy banana peppers together in a compact, shareable format. The buttery garlic-herb topping adds a crave-worthy aroma and golden, crispy finish. Perfect for entertaining or a casual sandwich night, these sliders pack bold flavors into every bite.

Table of Contents

Why Hot Italian Sub Sliders Are Perfect for You

  • These sliders are quick to assemble, making them ideal for busy evenings or last-minute gatherings. With just 15 minutes of prep, you can serve up big sandwich ideas without the hassle of complicated recipes.
  • They’re baked together in one dish, saving you from juggling multiple pans. This makes cleanup easy and keeps your kitchen mess-free after sandwich night ideas.
  • Hot Italian Sub Sliders are versatile and shareable, great for meals for entertaining or game day appetizers. Their bold flavors and satisfying textures make them stand out as meat appetizer ideas.
  • Made with halal-certified ingredients, these sliders cater to a variety of dietary preferences. They’re perfect for anyone searching for cool recipes to try that meet specific needs.

Everything You Need for Hot Italian Sub Sliders

The combination of mozzarella and provolone in this recipe ensures maximum meltability and richness. These cheeses pair perfectly with the tangy banana peppers and savory deli meats for balanced Italian-inspired flavors.

How To Make Hot Italian Sub Sliders Step by Step

  1. Preheat the oven to 350°F (175°C). Lightly grease a 9×13-inch baking dish or line it with parchment paper for easy cleanup.
  2. Slice the slider buns horizontally while keeping the top and bottom halves intact. Place the bottom halves in the prepared baking dish.
  3. In a small bowl, mix melted butter, garlic powder, Italian seasoning, and Dijon mustard until well combined. Set the mixture aside.
  4. Close-up of hot Italian sub sliders with melted cheese and fresh toppings on a wooden tray.

    Breville Smart Oven Air Fryer Pro

    Kitchen ApplianceBreville Smart Oven Air Fryer Pro

    Perfect for baking sliders quickly and evenly with versatile cooking options

    View on Amazon →

    USA Pan Bakeware Rectangular Cake Pan 9x13 inch

    Essential CookwareUSA Pan Bakeware Rectangular Cake Pan 9×13 inch

    Ideal for baking sliders evenly — nonstick and durable for easy cleanup

    View on Amazon →

  5. Spread a thin layer of mayonnaise and marinara sauce evenly over the bottom halves of the buns.
  6. Layer the halal turkey pastrami, beef bologna, and chicken mortadella on the buns. Add the provolone and mozzarella slices on top of the meats.
  7. Sprinkle sliced banana peppers and black olives evenly over the cheese layer for a burst of tangy, salty flavor.
  8. Place the top halves of the slider buns over the layered fillings. Brush the tops generously with the garlic-herb butter mixture.
  9. Optionally, sprinkle grated Parmesan cheese over the buns for added flavor and crunch.
  10. Cover the dish with aluminum foil and bake for 15 minutes. Remove the foil and continue baking for another 5-7 minutes until golden and bubbly.
  11. Remove from the oven and let cool for a few minutes. Slice the sliders apart and serve while warm.

How to Prep, Store, and Reheat Hot Italian Sub Sliders

Prepare the sliders ahead of time by assembling them in the baking dish, covering tightly with foil, and refrigerating for up to 24 hours. When ready to bake, follow the same cooking instructions, adding an extra 5 minutes to the bake time if starting from cold.

Store cooked sliders in an airtight container in the fridge for up to 3 days. For reheating, bake in a 350°F oven for 10 minutes or until warmed through — this keeps the bread from drying out.

If freezing, wrap individual sliders tightly in foil and store in a zip-top bag for up to 1 month. Reheat directly from frozen in a 375°F oven for 15-20 minutes.

You might also enjoy our hot honey grilled chicken skewers.

Expert Tips for Nailing This Recipe

  • Use fresh buns or rolls to ensure the sliders hold together well after baking. Stale bread can become too crumbly and ruin the texture.
  • Don’t skip brushing the tops with garlic-herb butter — this step adds incredible aroma and a golden crust. The Dijon mustard in the mix enhances the depth of flavor.
  • Layering the meats and cheeses evenly ensures every slider is packed with flavor. Avoid piling everything in the center for consistent results.
  • Let the sliders cool for a few minutes before slicing to prevent the fillings from spilling out. This makes serving cleaner and easier!

The Inspiration Behind Hot Italian Sub Sliders

This dish is inspired by the classic Italian sub sandwich, known for its bold layers of cured meats, sharp cheeses, and tangy toppings. By transforming it into bite-sized sliders, this recipe makes the timeless combination perfect for gatherings and smaller portions.

Banana peppers and black olives bring the quintessential Italian tang, while baking enhances the flavors and melds the ingredients together. It’s an updated take on a beloved sandwich turned into shareable food for modern entertaining.

Easy Ingredient Swaps for This Dish

  • Swap the mozzarella for fontina or cheddar if preferred. These options still melt beautifully but bring slightly different textures and flavors.
  • Use roasted red peppers in place of banana peppers for a milder, sweeter topping. This keeps the tangy element softer for those who prefer less spice.
  • Replace marinara sauce with your favorite pesto for an herbaceous twist. Pair this with provolone for a delicious variation.


Hot Italian Sub Sliders

Prep Time 15 minutes
Cook Time 20 minutes
Total Time 35 minutes
Servings 12 sliders
Calories 320
Delicious and easy-to-make sliders packed with halal-certified deli meats, cheeses, and flavorful toppings.

Instructions 

  • Preheat the oven to 350°F (175°C). Lightly grease a 9x13-inch baking dish or line it with parchment paper.
  • Slice the slider buns horizontally, keeping the top and bottom halves intact as a sheet. Place the bottom halves in the prepared baking dish.
  • In a small bowl, mix the melted butter, garlic powder, Italian seasoning, and Dijon mustard. Set aside.
  • Spread a thin layer of mayonnaise and marinara sauce over the bottom halves of the buns.
  • Layer the halal turkey pastrami, beef bologna, and chicken mortadella evenly over the buns. Follow with the provolone and mozzarella slices.
  • Sprinkle the sliced banana peppers and black olives evenly over the cheese layer.
  • Place the top halves of the slider buns over the layered fillings.
  • Brush the tops of the buns generously with the butter mixture. Sprinkle grated Parmesan cheese over the tops, if using.
  • Cover the baking dish with aluminum foil and bake in the preheated oven for 15 minutes.
  • Remove the foil and bake for another 5-7 minutes, or until the tops are golden brown and the cheese is melted and bubbly.
  • Carefully remove the sliders from the oven and let them cool for a few minutes before slicing and serving.

Notes

You can substitute the deli meats and cheeses with your preferred halal-certified options. Adjust the toppings to suit your taste.
Calories: 320kcal
Cost: $15
Course: Main Course
Cuisine: Italian-American
Keyword: halal, Italian sub, Sliders

Close-up of hot Italian sub sliders with melted cheese and fresh toppings on a wooden tray.

Loved this recipe? Save it to your favorite Pinterest board so you can easily find it later! ✨

This post contains affiliate links. As an Amazon Associate, I earn from qualifying purchases. This comes at no extra cost to you.

This Perfect Smoked Cream Cheese Recipe – Quick, Easy, and Delicious transforms a simple block of cream cheese into a smoky, flavorful appetizer that’s soft, rich, and irresistibly seasoned. The combination of smoked paprika, garlic powder, and onion powder melds beautifully into the creamy texture, creating a savory depth that pairs wonderfully with crackers, bread, or veggie sticks. Whether you’re hosting a backyard barbecue or a game day tailgate, this dish is both impressive and easy to prepare.

Table of Contents

Why Perfect Smoked Cream Cheese Recipe – Quick, Easy, and Delicious Is a Must-Try

  • This recipe brings bold flavors to a simple base ingredient, making it an effortless gourmet appetizer. The smoky undertone from paprika perfectly complements the creamy texture of the cheese.
  • It’s ideal for casual gatherings or formal events, providing a versatile dish that pairs beautifully with a variety of dippers. Crackers, sliced baguettes, and veggie sticks all shine alongside the rich flavor of smoked cream cheese.
  • The recipe requires minimal effort, yet delivers maximum impact with its aroma and visual appeal. Two hours in the smoker creates a luxurious block of cream cheese infused with spices and smoke.
  • Using the smoker elevates the dish, turning a humble ingredient into a centerpiece of your appetizer spread. It’s an excellent addition to your repertoire of smoked appetizer ideas.

Everything You Need for Perfect Smoked Cream Cheese Recipe – Quick, Easy, and Delicious

  • 1 block (8 oz) cream cheese
  • 2 tablespoons olive oil
  • 1 tablespoon smoked paprika
  • 1 teaspoon garlic powder
  • 1 teaspoon onion powder
  • 1/2 teaspoon ground black pepper
  • 1/2 teaspoon salt
  • 1 tablespoon chopped fresh parsley (optional, for garnish)
  • Assorted crackers, bread, or veggie sticks (for serving)

Smoked paprika is the star ingredient, lending its earthy, smoky flavor to the cream cheese and complementing the subtle sweetness of garlic and onion powder. Olive oil ensures the seasoning adheres well to the surface, while parsley adds a fresh pop of color and brightness when used as a garnish.

How To Make Perfect Smoked Cream Cheese Recipe – Quick, Easy, and Delicious Step by Step

  1. Preheat your smoker to 225°F (107°C). If you don’t have a smoker, set up a grill for indirect heat and use wood chips to create a smoky environment.
  2. Unwrap the cream cheese block and place it on a small piece of aluminum foil or a smoker-safe tray. Position it to ensure even exposure to smoke.
  3. Brush the entire block with olive oil to lock in moisture and help the seasonings adhere evenly.
  4. In a small bowl, combine smoked paprika, garlic powder, onion powder, ground black pepper, and salt. Stir the mixture thoroughly to ensure even distribution.
  5. Sprinkle the seasoning mixture over the cream cheese, covering all sides for maximum flavor. Use your fingers or a spoon to press the seasoning gently onto the surface.
  6. Place the cream cheese in the smoker and let it smoke at 225°F (107°C) for 2 hours. Avoid opening the smoker too frequently to maintain a consistent temperature and smoke level.
  7. A perfectly smoked cream cheese block garnished with fresh herbs on a wooden platter.

    Masterbuilt Digital Electric Smoker

    Kitchen ApplianceMasterbuilt Digital Electric Smoker

    An easy-to-use smoker for achieving perfect smoky flavor in recipes like this

    View on Amazon →

    Lodge Cast Iron Skillet 12-inch

    Essential CookwareLodge Cast Iron Skillet 12-inch

    Perfect for searing and baking — this recipe needs even heat distribution

    View on Amazon →

  8. Carefully remove the cream cheese from the smoker after 2 hours. It should have a slightly softened texture and a deep, smoky aroma.
  9. Transfer the smoked cream cheese to a serving plate and garnish with chopped parsley if desired. Serve immediately with crackers, bread, or veggie sticks for a satisfying appetizer spread.

Perfect Pairings to Serve With Your Smoked Cream Cheese

  • Crackers and flatbreads: These sturdy options enhance the creamy texture of smoked cream cheese while providing a crunchy contrast.
  • Fresh veggie sticks: Carrot, celery, and cucumber slices offer refreshing and crisp dippers to balance the richness of the cheese.
  • Sliced baguettes: Toasted or fresh slices bring a touch of rustic elegance and pair beautifully with smoky and spiced flavors.
  • Tailgate snacks: Include smoked cream cheese alongside wings or barbecue skewers, like our mexican barbecue – tender chicken skewers, to create a complete game-day appetizer spread.

Easy Ingredient Swaps for Smoked Cream Cheese

  • Alternative spices: Swap smoked paprika for chili powder for a spicier kick or use sweet paprika for a milder smokiness.
  • No fresh parsley? Use dried parsley or chives as garnish for a similar visual appeal and herbal note.
  • Olive oil substitute: Avocado oil can be used for brushing the cheese, offering a neutral flavor with high smoke stability.

Storage and Reheating Tips for Smoked Cream Cheese

To store leftover smoked cream cheese, wrap it tightly in plastic wrap and place it in an airtight container in the refrigerator. It will remain fresh for about 3-4 days. For longer storage, freeze the cream cheese, but note that its texture may change slightly.

When reheating, avoid the microwave as it may cause uneven heating. Instead, warm the cream cheese gently in a low-temperature oven or smoker for 10-15 minutes, just until softened and warmed through. Always serve smoked cream cheese at room temperature to enjoy its full flavor and creamy texture.

Perfect Smoked Cream Cheese Recipe – Quick, Easy, and Delicious

Prep Time 10 minutes
Cook Time 2 hours
Total Time 2 hours 10 minutes
Servings 8 servings
Calories 150
This smoked cream cheese recipe is quick, easy, and packed with smoky flavor. Perfect for serving with crackers, bread, or veggie sticks.

Ingredients

Instructions 

  • Preheat your smoker to 225°F (107°C). If you don’t have a smoker, you can use a grill with indirect heat and wood chips for a smoky flavor.
  • Remove the cream cheese from its packaging and place it on a small piece of aluminum foil or a smoker-safe tray.
  • Brush the entire surface of the cream cheese block with olive oil to help the seasoning stick and to keep it moist during smoking.
  • In a small bowl, mix together smoked paprika, garlic powder, onion powder, black pepper, and salt.
  • Sprinkle the seasoning mixture evenly over the cream cheese, covering all sides for maximum flavor.
  • Place the cream cheese in the smoker and smoke it at 225°F (107°C) for 2 hours. If using a grill, ensure it’s set up for indirect heat and add wood chips for smoking.
  • Carefully remove the cream cheese from the smoker after 2 hours. It should have a slightly soft texture and a beautiful smoky flavor.
  • Transfer the smoked cream cheese to a serving plate, garnish with chopped fresh parsley if desired, and serve immediately with crackers, bread, or veggie sticks.

Notes

For extra flavor, try experimenting with different wood chips like hickory or applewood. You can also add a drizzle of honey or hot sauce before serving.
Calories: 150kcal
Cost: $8
Course: Appetizer
Cuisine: American
Keyword: easy appetizer, smoked cream cheese, smoker recipe
A perfectly smoked cream cheese block garnished with fresh herbs on a wooden platter.

Loved this recipe? Save it to your favorite Pinterest board so you can easily find it later! ✨

This post contains affiliate links. As an Amazon Associate, I earn from qualifying purchases. This comes at no extra cost to you.

This Vegan Veggie Pinwheels With Broccoli And Carrots combines the crunch of fresh vegetables with the creamy tang of vegan cream cheese, all wrapped in a soft tortilla. Its vibrant colors and balanced flavors make it the perfect choice for a quick appetizer or snack. Ready in minutes, it’s nutritious, halal, and requires no cooking.

Table of Contents

Why Vegan Veggie Pinwheels With Broccoli And Carrots Are Perfect for You

  • This dish is ideal for busy schedules. With just 10 minutes of prep and no cooking required, it’s a lifesaver for quick meals or last-minute gatherings.
  • It’s loaded with fresh, nutrient-packed vegetables. Each bite delivers vitamins and fiber from broccoli, carrots, and bell peppers without compromising on flavor.
  • Perfect for vegan diets and halal-friendly eating. Vegan cream cheese adds a satisfying richness while keeping the dish accessible to a wide audience.
  • It’s incredibly versatile and portable. Great for party platters, packed lunches, or snacks on the go, these pinwheels hold up beautifully and stay fresh.

Everything You Need for Vegan Veggie Pinwheels With Broccoli And Carrots

Vegan cream cheese offers the creamy base that ties the vegetables together, while garlic and onion powder enhance the savory depth of flavors. Fresh parsley adds a touch of herbal brightness, perfect for complementing the pinwheels.

How To Make Vegan Veggie Pinwheels With Broccoli And Carrots Step by Step

  1. In a medium bowl, mix the vegan cream cheese, garlic powder, onion powder, parsley, salt, and pepper until smooth and well combined. Stir thoroughly to ensure the seasoning is evenly distributed.
  2. Spread an even layer of the seasoned vegan cream cheese onto each tortilla, coating it edge to edge for consistent flavor in every bite.
  3. Sprinkle the chopped broccoli, shredded carrots, and diced red bell pepper evenly over the cream cheese layer. Maintain an even distribution to prevent uneven rolling.
  4. Tightly roll each tortilla into a log, ensuring the fillings stay intact. The tighter the roll, the more cohesive the pinwheels will be once sliced.
  5. Close-up of vegan veggie pinwheels filled with broccoli and carrots on a wooden platter.

    Cuisinart Elemental 8-Cup Food Processor

    Kitchen ApplianceCuisinart Elemental 8-Cup Food Processor

    Perfect for quickly chopping vegetables like broccoli, carrots, and bell peppers for this recipe.

    View on Amazon →

    OXO Good Grips Serrated Utility Knife

    Essential CookwareOXO Good Grips Serrated Utility Knife

    A sharp serrated knife is essential for slicing pinwheels without squishing the fillings.

    View on Amazon →

  6. Use a sharp knife to slice each roll into pinwheels, approximately 1-inch thick. A serrated knife works best to prevent squishing while slicing.
  7. Arrange the pinwheels on a serving plate and serve immediately or refrigerate until ready to eat. These are a fantastic make-ahead option for gatherings.

Expert Tips and Pro Shortcuts

  • Use pre-shredded carrots and pre-diced bell peppers for faster prep. Many stores sell these ready-to-use, saving valuable time.
  • Chill the tortillas briefly before rolling. Cold tortillas are easier to handle and less likely to tear during assembly.
  • Prepare the cream cheese mixture a day in advance. This allows the flavors to meld together, enhancing the overall taste.
  • Serve these pinwheels cold for maximum freshness. Refrigerating them for 30 minutes post-assembly ensures the cream cheese layer firms up nicely.

Common Questions

  • Can I use a different type of tortilla? Yes, spinach, whole wheat, or regular flour tortillas all work, depending on your preference.
  • Is this recipe gluten-free? Swap the tortillas for gluten-free ones to make it suitable for a gluten-free diet.
  • What other vegetables can I use? Cucumber slices, radishes, or even shredded zucchini can be added for variety while keeping the dish fresh.

Meal Prep, Storage, and Reheating

To store, wrap the pinwheels tightly in plastic wrap or place them in an airtight container. They’ll stay fresh in the fridge for up to 3 days.

If freezing, keep the rolls whole and slice them after thawing to maintain their structure. Frozen pinwheels last up to 2 months.

You might also enjoy our cowboy butter lemon bowtie chicken.

Reheat in the fridge (for thawed pinwheels) or serve cold straight from storage for best results. Avoid microwaving as this can compromise the texture.

Looking for something similar? Try our zesty cowboy butter chicken: lemon.

For more ideas, check out our cowboy butter lemon bowtie chicken.

Serving Ideas for Vegan Veggie Pinwheels With Broccoli And Carrots

  • Pair these pinwheels with a tangy vegan dip, like hummus, to amplify the creamy textures and flavors.
  • Serve alongside a fresh green salad for a light, balanced meal. The crisp greens complement the hearty pinwheels.
  • Offer them as part of a party platter alongside fruit skewers or stuffed mushrooms for variety.
  • Make it a complete lunch with a side of roasted sweet potatoes. Their caramelized sweetness works beautifully with the savory pinwheels.

Vegan Veggie Pinwheels With Broccoli And Carrots

Prep Time 15 minutes
Total Time 15 minutes
Servings 4 servings
Calories 150
These vegan veggie pinwheels are a quick and healthy snack, packed with fresh broccoli, carrots, and a creamy vegan spread.

Ingredients

Instructions 

  • In a medium bowl, mix the vegan cream cheese, garlic powder, onion powder, parsley, salt, and pepper until smooth and well combined.
  • Spread an even layer of the seasoned vegan cream cheese onto each tortilla.
  • Sprinkle the chopped broccoli, shredded carrots, and diced red bell pepper evenly over the cream cheese layer.
  • Tightly roll each tortilla into a log, ensuring the fillings stay intact.
  • Use a sharp knife to slice each roll into pinwheels, approximately 1-inch thick.
  • Arrange the pinwheels on a serving plate and serve immediately or refrigerate until ready to eat.

Notes

You can substitute other vegetables like cucumber or spinach for variety. Refrigerate for up to 24 hours for best freshness.
Calories: 150kcal
Cost: $10
Course: Appetizer, Snack
Cuisine: American
Keyword: healthy snack, vegan pinwheels, veggie pinwheels
Close-up of vegan veggie pinwheels filled with broccoli and carrots on a wooden platter.

Loved this recipe? Save it to your favorite Pinterest board so you can easily find it later! ✨

This post contains affiliate links. As an Amazon Associate, I earn from qualifying purchases. This comes at no extra cost to you.


Best Pizza Dip Recipe

This Best Pizza Dip is a creamy, cheesy delight that combines the irresistible flavors of classic pizza with a rich, scoopable dip. Bursting with gooey mozzarella, tangy marinara, and savory halal sausage, it’s perfect for gatherings or casual evenings at home. Serve it warm with your favorite dippers for a satisfying appetizer experience.

Table of Contents

Why This Best Pizza Dip Works

  • This dish transforms halal-friendly pizza flavors into a portable, shareable appetizer. The creamy base blends perfectly with classic pizza toppings for a crowd favorite.
  • It assembles quickly using pantry staples like marinara sauce, mayonnaise, and dried herbs. This simplicity makes it ideal for last-minute party planning or busy weeknights.
  • Its baked, bubbly texture ensures every scoop has layers of melted cheese and flavorful toppings. Fresh parsley adds a vibrant finish, elevating its presentation.
  • Customizable toppings allow you to tailor it to dietary needs or personal preferences. Swap vegetables or halal sausage to suit vegetarian or gluten-free diets.

Everything You Need for Best Pizza Dip

The softened cream cheese is crucial for creating a smooth, creamy base that holds the toppings together. Using halal marinara sauce adds a tangy depth of flavor while keeping the dish inclusive for diverse dietary needs.

How To Make Best Pizza Dip Step by Step

  1. Preheat your oven to 375°F (190°C).
  2. In a medium mixing bowl, combine the cream cheese, sour cream, mayonnaise, garlic powder, dried oregano, dried basil, and red pepper flakes (if using). Mix until smooth and well combined.
  3. Spread the cream cheese mixture evenly into the bottom of a 9-inch pie dish or oven-safe skillet.
  4. Top the cream cheese layer with the halal marinara or pizza sauce, spreading it evenly.
  5. Sprinkle the shredded mozzarella cheese, shredded cheddar cheese, and grated Parmesan cheese evenly over the marinara sauce.
  6. Add the sliced black olives, diced green and red bell peppers, and sliced halal turkey sausage or chicken sausage on top as toppings.
  7. Place the dish in the preheated oven and bake for 20–25 minutes, or until the cheese is melted and bubbly.
  8. Remove the dish from the oven and let it cool slightly for 5 minutes. Garnish with chopped fresh parsley if desired.
  9. Serve warm with your choice of dippers such as pita chips, breadsticks, or vegetable sticks.
Close-up of a creamy pizza dip topped with melted cheese and pepperoni slices in a white baking dish.

Make-Ahead, Storage, and Reheating Tips

Prepare the cream cheese base and layer the marinara sauce ahead, storing it covered in the refrigerator for up to two days. Wait to add cheese and toppings until just before baking for best texture.

KitchenAid Artisan Stand Mixer

Kitchen ApplianceKitchenAid Artisan Stand Mixer

Ideal for mixing cream cheese and other ingredients smoothly and efficiently.

View on Amazon →

Lodge Cast Iron Skillet 12-inch

Essential CookwareLodge Cast Iron Skillet 12-inch

Perfect for baking and serving this dip with even heat distribution.

View on Amazon →

Leftovers can be stored in an airtight container in the fridge for up to three days. Reheat individual portions in the microwave or the entire dish in a 350°F oven until warmed through.

What to Serve with This Dish

Pita chips add a sturdy, crunchy texture that holds the creamy dip well. Breadsticks echo the flavors of pizza dough, making them an ideal match.

Vegetable sticks such as carrots and celery provide a refreshing, lighter contrast to the richness of the cheese layers. Pair with soft drinks or light beers for football game gatherings.

Expert Tips for Perfect Pizza Dip

  • Let the cream cheese soften entirely before mixing to avoid lumps in the base. A smooth base ensures even layering.
  • Pre-shredded cheese works in a pinch but grating fresh cheese adds better meltability and flavor. Opt for full-fat varieties for optimal results.
  • To avoid burning the cheese, tent the dish with foil during the last few minutes of baking. This preserves the gooey texture.
  • Serve straight from the skillet for a rustic, casual presentation. It retains warmth longer and minimizes cleanup.

The Inspiration Behind Pizza Dip

Pizza dip is inspired by the popularity of deconstructed dishes, particularly in American party appetizers. It captures the essence of traditional pizza flavors without the need for dough-making skills.

Its customizable layers and ability to accommodate dietary restrictions have made pizza dip a mainstay for events ranging from casual movie nights to game-day celebrations.


Best Pizza Dip

Prep Time 10 minutes
Cook Time 25 minutes
Total Time 35 minutes
Servings 8 servings
Calories 250
A delicious and cheesy pizza-inspired dip perfect for parties or gatherings.

Ingredients

Instructions 

  • Preheat your oven to 375°F (190°C).
  • In a medium mixing bowl, combine the cream cheese, sour cream, mayonnaise, garlic powder, dried oregano, dried basil, and red pepper flakes (if using). Mix until smooth and well combined.
  • Spread the cream cheese mixture evenly into the bottom of a 9-inch pie dish or oven-safe skillet.
  • Top the cream cheese layer with the halal marinara or pizza sauce, spreading it evenly.
  • Sprinkle the shredded mozzarella cheese, shredded cheddar cheese, and grated Parmesan cheese evenly over the marinara sauce.
  • Add the sliced black olives, diced green and red bell peppers, and sliced halal turkey sausage or chicken sausage on top as toppings.
  • Place the dish in the preheated oven and bake for 20–25 minutes, or until the cheese is melted and bubbly.
  • Remove the dish from the oven and let it cool slightly for 5 minutes. Garnish with chopped fresh parsley if desired.
  • Serve warm with your choice of dippers such as pita chips, breadsticks, or vegetable sticks.

Notes

You can substitute halal turkey sausage with any halal protein of your choice. Adjust the spice level by omitting or increasing the red pepper flakes.
Calories: 250kcal
Cost: $15
Course: Appetizer
Cuisine: American
Keyword: Pizza Dip

Close-up of a creamy pizza dip topped with melted cheese and pepperoni slices in a white baking dish.

Loved this recipe? Save it to your favorite Pinterest board so you can easily find it later! ✨

This post contains affiliate links. As an Amazon Associate, I earn from qualifying purchases. This comes at no extra cost to you.

Buffalo Chicken Sliders bring bold flavors to your plate with tender shredded chicken tossed in tangy buffalo sauce, topped with crisp lettuce, creamy dressing, and melted cheddar cheese. Nestled between soft slider buns, the combination of textures and the spicy aroma make these sliders perfect for game day or casual gatherings. Ready in under 30 minutes, this no-fuss recipe is a crowd favorite for any occasion.

Table of Contents

Why This Buffalo Chicken Sliders Recipe Works

  • Perfect for fast dinners: These sliders require just 15 minutes of prep and 12 minutes of baking, making them ideal for busy weeknights.
  • Spicy yet customizable: The buffalo sauce delivers bold heat, but you can adjust the spice level to suit your preferences.
  • Great for gatherings: With eight sliders per batch, this recipe ensures plenty to share with friends and family during game days.
  • Bursting with flavor: Each layer — from the creamy ranch spread to the melted cheddar — combines for a satisfying bite every time.

Everything You Need for Buffalo Chicken Sliders

The halal buffalo sauce is the key to the sliders’ signature tangy heat, while melted cheddar cheese adds a comforting richness. Using halal-certified ingredients ensures the dish is suitable for a wide range of guests.

How To Make Buffalo Chicken Sliders Step by Step

  1. Preheat your oven to 350°F (175°C).
  2. In a large mixing bowl, combine the shredded halal chicken breast with buffalo sauce, garlic powder, onion powder, salt, and pepper. Stir until the chicken is evenly coated.
  3. In a small bowl, mix the mayonnaise and halal ranch dressing to create a creamy spread.
  4. Slice the slider buns in half horizontally. Place the bottom halves on a baking tray lined with parchment paper.
  5. Spread a generous layer of the mayonnaise-ranch mixture onto the bottom halves of the buns.
  6. Top each bun with a portion of the buffalo chicken mixture, followed by shredded lettuce, sliced red onions, and shredded halal cheddar cheese.
  7. Cover with the top halves of the slider buns.
  8. Brush the tops of the buns with melted unsalted butter for added flavor and a golden finish.
  9. Place the tray in the oven and bake for 10-12 minutes, or until the cheese is melted and the buns are slightly toasted.
  10. Remove from the oven and serve the sliders warm.
Close-up of buffalo chicken sliders with melted cheese served on a wooden tray.

How To Store, Reheat, and Make Ahead

Refrigerate leftover sliders in an airtight container for up to 3 days. To freeze, wrap each slider individually in plastic wrap and store in a freezer-safe bag for up to 1 month. Reheat in the oven at 300°F (150°C) for best results—this keeps the buns from becoming soggy while warming the filling evenly.

KitchenAid Artisan Stand Mixer 5 Quart

Kitchen ApplianceKitchenAid Artisan Stand Mixer 5 Quart

Ideal for mixing sauces and spreads effortlessly — perfect for this recipe.

View on Amazon →

Nordic Ware Baking Sheet

Essential CookwareNordic Ware Baking Sheet

Durable and reliable for baking sliders evenly in the oven.

View on Amazon →

Looking for something similar? Try our pineapple chicken kabobs.

For more ideas, check out our grilled greek chicken kabobs.

You might also enjoy our greek chicken kabobs.

Common Mistakes to Avoid with Buffalo Chicken Sliders

  • Skipping the butter glaze: This step adds flavor and ensures the buns toast beautifully in the oven.
  • Using cold chicken: Make sure the shredded chicken is at room temperature so it absorbs the buffalo sauce evenly.
  • Overloading toppings: Too many toppings can make the sliders messy and difficult to handle; stick to the recommended amounts.

Serving Ideas for Buffalo Chicken Sliders

  • Serve with celery sticks and halal ranch dip: A classic pairing that complements the buffalo sauce’s heat.
  • Add crispy sweet potato fries: They’re a sweet, hearty side that balances the spice.
  • Pair with a cold beer or mocktail: The refreshing beverage contrasts the sliders’ bold flavors beautifully.
  • Include a light green salad: It provides a fresh, crisp counterpart to the richness of the dish.

Expert Tips To Elevate Your Buffalo Chicken Sliders

  • Toast the buns lightly before assembling: This step adds extra texture and prevents soggy bottoms.
  • Use freshly shredded cheddar cheese: It melts better and adds a creamier texture than pre-shredded options.
  • Make the chicken mixture a day ahead: This allows the flavors to deepen and saves time on game day.
  • Brush buns with garlic butter: Infusing the butter with a touch of minced garlic elevates the flavor profile.

Buffalo Chicken Sliders

Prep Time 15 minutes
Cook Time 12 minutes
Total Time 27 minutes
Servings 8 sliders
Calories 320
Delicious and spicy buffalo chicken sliders, perfect for a quick meal or party appetizer.

Ingredients

Instructions 

  • Preheat your oven to 350°F (175°C).
  • In a large mixing bowl, combine the shredded halal chicken breast with buffalo sauce, garlic powder, onion powder, salt, and pepper. Stir until the chicken is evenly coated.
  • In a small bowl, mix the mayonnaise and halal ranch dressing to create a creamy spread.
  • Slice the slider buns in half horizontally. Place the bottom halves on a baking tray lined with parchment paper.
  • Spread a generous layer of the mayonnaise-ranch mixture onto the bottom halves of the buns.
  • Top each bun with a portion of the buffalo chicken mixture, followed by shredded lettuce, sliced red onions, and shredded halal cheddar cheese.
  • Cover with the top halves of the slider buns.
  • Brush the tops of the buns with melted unsalted butter for added flavor and a golden finish.
  • Place the tray in the oven and bake for 10-12 minutes, or until the cheese is melted and the buns are slightly toasted.
  • Remove from the oven and serve the sliders warm.

Notes

You can substitute halal cheddar cheese with any other halal cheese of your choice. Adjust the buffalo sauce quantity for desired spice level.
Calories: 320kcal
Cost: $15
Course: Appetizer, Main Course
Cuisine: American
Keyword: Buffalo Chicken, halal, Sliders
Close-up of buffalo chicken sliders with melted cheese served on a wooden tray.

Loved this recipe? Save it to your favorite Pinterest board so you can easily find it later! ✨

This post contains affiliate links. As an Amazon Associate, I earn from qualifying purchases. This comes at no extra cost to you.


Ranch Trail Mix Snack Mix Recipe

This Ranch Trail Mix Snack Mix brings together crunchy pretzels, roasted almonds, cheesy crackers, and flavorful ranch seasoning for a bold, savory snack. It’s the perfect blend of textures and tastes to enjoy during busy afternoons or while entertaining. With simple prep and the addictive aroma of baked ranch seasoning, this dish is bound to become your go-to snack recipe.

Table of Contents

Why This Ranch Trail Mix Snack Mix Works

  • It’s a quick prep snack that’s ideal for gatherings or busy days. This recipe takes less than 10 minutes to assemble before baking—perfect for those who want a homemade touch without spending hours in the kitchen.
  • The flavor combination of tangy ranch seasoning pairs beautifully with salty pretzels and cheesy crackers. Each bite delivers a satisfying crunch and bold taste to curb cravings.
  • It’s highly shareable and convenient for potlucks or on-the-go snacking. Packed in an airtight container, it stays fresh and keeps its perfect texture for days.
  • The recipe is completely customizable for dietary needs. Using halal-certified ingredients ensures accessibility for diverse eating preferences.

Everything You Need for Ranch Trail Mix Snack Mix

The ranch seasoning mix is the star ingredient here, adding tangy, herbaceous flavor that coats every component of the snack mix. Olive oil ensures the seasoning sticks evenly while enhancing the crispiness during baking.

How To Make Ranch Trail Mix Snack Mix Step by Step

  1. Preheat your oven to 250°F (120°C) and line a large baking sheet with parchment paper for easy cleanup.
  2. In a large mixing bowl, combine the cereal, mini pretzels, almonds, sunflower seeds, sesame sticks, and cheese crackers. Toss gently to mix.
  3. In a small bowl, whisk together the olive oil and ranch seasoning until smooth and well blended.
  4. Drizzle the ranch mixture over the dry ingredients in the large bowl. Toss until everything is evenly coated.
    A close-up of a bowl filled with ranch trail mix snack mix, featuring pretzels, nuts, and crackers.

    KitchenAid Artisan Stand Mixer 5 Quart

    Kitchen ApplianceKitchenAid Artisan Stand Mixer 5 Quart

    Perfect for mixing large batches of ingredients effortlessly — a premium tool for snack prep.

    View on Amazon →

    Nordic Ware Natural Aluminum Baking Sheet

    Essential CookwareNordic Ware Natural Aluminum Baking Sheet

    Essential for baking the trail mix evenly and ensuring crispiness.

    View on Amazon →

  5. Spread the coated mix evenly onto the prepared baking sheet in a single layer.
  6. Bake for 45 minutes, stirring every 15 minutes to ensure even crisping and coating.
  7. Remove the baking sheet from the oven and let the trail mix cool completely to allow the flavors to set and prevent sogginess.
  8. Transfer the cooled trail mix to an airtight container for storage or serve immediately.

Frequently Asked Questions

  • Can I use a different type of seasoning mix? While ranch seasoning is recommended for its bold flavor, you could experiment with taco seasoning or garlic herb blends for a unique twist.
  • How long does this trail mix last? Stored in an airtight container, it stays fresh for up to one week. For longer storage, consider freezing it.
  • Is this recipe suitable for vegetarians? Absolutely! As long as the ingredients selected are halal-certified and vegetarian, this recipe works wonderfully.

Easy Ingredient Swaps and Substitutions

  • Replace sesame sticks with pita chips for a slightly softer crunch. The flavor will remain robust without compromising texture.
  • If you can’t find halal cheese crackers, try using plain whole wheat crackers and lightly dust them with Parmesan during the mixing stage.
  • Swap roasted sunflower seeds for pumpkin seeds to add a nutty richness without overpowering the ranch seasoning.

Common Mistakes to Avoid

  • Skipping the stirring step during baking. Stirring ensures even coating and prevents areas of the mix from burning.
  • Using too much oil can make the mix soggy instead of crisp. Stick to the recipe’s measurement for best results.
  • Failing to cool the mix completely before storage. Warm trail mix can create condensation, leading to a stale texture.

Storing and Meal Prep Tips

Store the Ranch Trail Mix Snack Mix in an airtight container to preserve its crunchiness. At room temperature, it stays fresh for about one week, but for extended storage, consider freezing it in resealable freezer bags.

If freezing, portion the mix into single-serving bags for convenient grab-and-go snacks. To thaw, simply let it sit at room temperature for about 10 minutes—no reheating is needed as it will remain crisp.

You might also enjoy our ranch garlic parmesan chicken skewers.

This recipe is perfect for prepping in advance for gatherings. Make it a day ahead and store it in airtight containers to ensure it’s ready to serve without extra stress.

For more ideas, check out our sheet pan chicken pitas with.


Ranch Trail Mix Snack Mix

Prep Time 10 minutes
Cook Time 45 minutes
Total Time 55 minutes
Servings 8 servings
Calories 250
A savory and crunchy trail mix perfect for snacking, featuring a blend of cereals, nuts, and crackers coated in a flavorful ranch seasoning.

Ingredients

Instructions 

  • Preheat your oven to 250°F (120°C) and prepare a large baking sheet by lining it with parchment paper.
  • In a large mixing bowl, combine the cereal, mini pretzels, almonds, sunflower seeds, sesame sticks, and cheese crackers.
  • In a small bowl, mix the olive oil and ranch seasoning until well combined.
  • Drizzle the ranch seasoning mixture over the dry ingredients in the large bowl and toss until everything is evenly coated.
  • Spread the coated mixture onto the prepared baking sheet in an even layer.
  • Bake the mixture in the preheated oven for 45 minutes, stirring every 15 minutes to ensure even coating and crispiness.
  • Remove the baking sheet from the oven and let the trail mix cool completely before serving or storing.
  • Transfer the cooled trail mix to an airtight container for storage.

Notes

You can substitute the nuts or crackers with your favorite halal-friendly options. Adjust the ranch seasoning to taste.
Calories: 250kcal
Cost: $10
Course: Snack
Cuisine: American
Keyword: Ranch Snack Mix, Trail Mix

A close-up of a bowl filled with ranch trail mix snack mix, featuring pretzels, nuts, and crackers.

Loved this recipe? Save it to your favorite Pinterest board so you can easily find it later! ✨

This post contains affiliate links. As an Amazon Associate, I earn from qualifying purchases. This comes at no extra cost to you.


Honey BBQ Crockpot Meatballs

Honey BBQ Crockpot Meatballs

Honey BBQ Crockpot Meatballs bring together tender halal meatballs and a rich honey barbecue sauce for a mouthwatering flavor explosion. The slow cooker method melds the sweet, smoky, and tangy notes perfectly, filling your kitchen with irresistible aromas. Serve them warm for a party appetizer or over rice for a satisfying main course.

Effortless to make and packed with bold flavors, this dish is perfect for game day gatherings or casual dinners. The luscious honey barbecue glaze clings to each meatball, ensuring every bite is packed with savory sweetness.

Table of Contents

Why Honey BBQ Crockpot Meatballs Are Perfect

  • Hands-off cooking: Let the slow cooker do the work while you focus on other tasks. The meatballs and sauce blend beautifully over hours with minimal effort.
  • Versatile dish: Serve these meatballs as an appetizer, snack, or over rice for a complete meal. They’re a hit for casual dinners or game day spreads.
  • Bold and balanced flavors: The sweet honey and tangy barbecue sauce create an unforgettable glaze. Every bite is packed with smoky richness and a touch of spice.
  • Halal-friendly recipe: This dish uses halal-certified ingredients, making it accessible for a wide range of dietary preferences. It’s perfect for sharing with friends and family.

Everything You Need for Honey BBQ Crockpot Meatballs

The smoked paprika adds a hint of smokiness, complementing the barbecue sauce’s tangy sweetness. Using frozen meatballs keeps prep time short, making this dish ideal for busy days.

Looking for something similar? Try our honey lime chicken.

For more ideas, check out our easy crockpot chicken fajitas.

You might also enjoy our savory korean bbq chicken bowls.

How To Make Honey BBQ Crockpot Meatballs Step by Step

  1. Place the frozen halal meatballs into the crockpot, ensuring they are evenly spread.
  2. In a medium bowl, whisk together the barbecue sauce, honey, ketchup, soy sauce, garlic powder, onion powder, smoked paprika, and black pepper until fully combined.
  3. Pour the sauce mixture over the meatballs in the crockpot, making sure all meatballs are coated evenly.
  4. Cover the crockpot with its lid and cook on low heat for 4-5 hours, or on high heat for 2-3 hours, stirring occasionally to evenly distribute the sauce.
  5. Once the meatballs are fully cooked and heated through, serve them warm as an appetizer, snack, or over rice for a main course.

Close-up of honey BBQ meatballs served in a bowl, garnished with parsley.

Crock-Pot 6-Quart Slow Cooker

Essential CookwareCrock-Pot 6-Quart Slow Cooker

Essential for hands-off cooking — perfect for slow-cooking meatballs to perfection.

View on Amazon →

Creative Ways to Serve and Pair This Dish

  • Serve on a platter with toothpicks for a convenient appetizer at parties.
  • Pair with creamy mashed potatoes to balance the sweet and tangy flavors.
  • Offer alongside fresh vegetable sticks and ranch dressing for a colorful appetizer spread.
  • Skewer the meatballs and serve on themed platters for a football party snack.

Expert Tips for Perfect Meatballs

  • Use a slow cooker liner to make cleanup easier and prevent sauce sticking to the sides. This saves time post-party.
  • Stir the meatballs gently every hour to ensure even coating of the sauce. This prevents uneven cooking and dry spots.
  • If making ahead, refrigerate the cooked meatballs and reheat in the crockpot with a splash of water or more sauce to keep them moist.
  • For added spice, sprinkle crushed red pepper flakes into the sauce mix before cooking.

Common Mistakes to Avoid

  • Skipping the stirring step: This can cause uneven sauce distribution, leaving some meatballs dry or under-flavored.
  • Using non-halal ingredients: Double-check labels to ensure your barbecue sauce and soy sauce meet halal requirements.
  • Overcooking: Be cautious not to cook past the recommended time as the meatballs may become tough instead of tender.


Honey BBQ Crockpot Meatballs

Prep Time 10 minutes
Cook Time 4 hours
Total Time 4 hours 10 minutes
Servings 6 servings
Calories 350
A simple and delicious recipe for tender meatballs coated in a sweet and smoky honey BBQ sauce, perfect as an appetizer or main dish.

Ingredients

Instructions 

  • Place the frozen halal meatballs into the crockpot, ensuring they are evenly spread.
  • In a medium bowl, whisk together the barbecue sauce, honey, ketchup, soy sauce, garlic powder, onion powder, smoked paprika, and black pepper until fully combined.
  • Pour the sauce mixture over the meatballs in the crockpot, making sure all meatballs are coated evenly.
  • Cover the crockpot with its lid and cook on low heat for 4-5 hours, or on high heat for 2-3 hours, stirring occasionally to evenly distribute the sauce.
  • Once the meatballs are fully cooked and heated through, serve them warm as an appetizer, snack, or over rice for a main course.

Notes

For a spicier version, add a pinch of cayenne pepper to the sauce mixture. Serve with toothpicks for easy handling as an appetizer.
Calories: 350kcal
Cost: $15
Course: Appetizer, Main Course
Cuisine: American
Keyword: Crockpot Meatballs, Honey BBQ Meatballs

Close-up of honey BBQ meatballs served in a bowl, garnished with parsley.

Loved this recipe? Save it to your favorite Pinterest board so you can easily find it later! ✨