Author

Nichole Mora

Browsing

This post contains affiliate links. As an Amazon Associate, I earn from qualifying purchases. This comes at no extra cost to you.


Shrimp Guacamole Bites Recipe

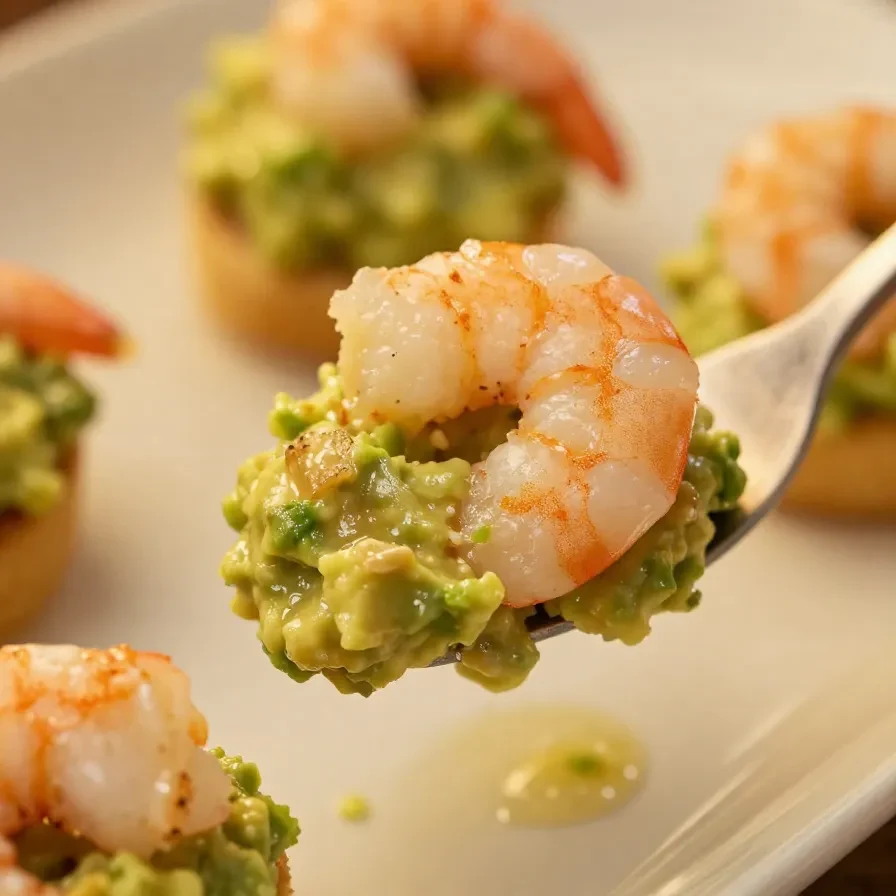
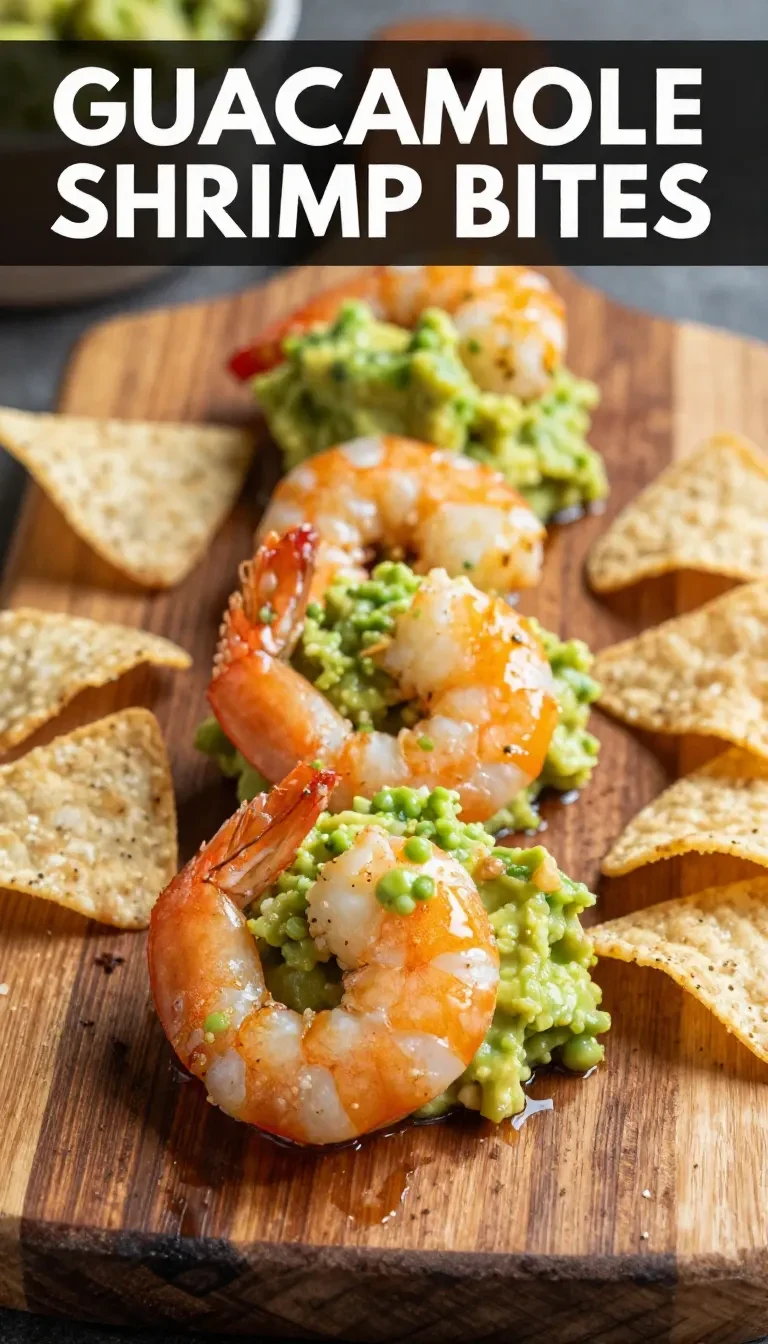
Shrimp Guacamole Bites combine tender, smoky shrimp with creamy guacamole, all atop crisp tortilla chips or crackers for a burst of flavor in every bite. The smoked paprika and cumin in the shrimp seasoning bring warmth and depth, while the lime-spiked guacamole adds a fresh, tangy contrast. Perfect for casual gatherings or upscale parties, these bite-sized treats deliver bold flavors and textures effortlessly.

Table of Contents

Why Shrimp Guacamole Bites Are Perfect for Any Occasion

  • Quick and easy to prepare: With a total cook time of just 6 minutes, these bites are ideal for last-minute appetizers or busy schedules.
  • Versatile serving options: Whether for brunch, wedding appetizers, or casual parties, these bites fit seamlessly into any event theme.
  • Packed with bold flavors: Juicy shrimp seasoned with smoked paprika and cumin pairs beautifully with lime-infused guacamole for an unforgettable taste.
  • Small-bites format: Perfectly portioned for finger food, these bites keep mess to a minimum while maximizing flavor in every serving.

Everything You Need for Shrimp Guacamole Bites

The smoked paprika adds a hint of smokiness to the shrimp, enhancing its natural sweetness, while lime juice in the guacamole brightens the dish with a tangy kick.

How To Make Shrimp Guacamole Bites Step by Step

  1. Preheat a skillet or grill pan over medium heat.
  2. In a bowl, toss the shrimp with olive oil, smoked paprika, garlic powder, cumin, salt, and black pepper until evenly coated.
  3. Cook the shrimp in the skillet for 2-3 minutes per side, or until they turn pink and opaque. Remove from heat and set aside.
  4. Close-up of shrimp guacamole bites served on a white platter.

    Lodge Cast Iron Skillet 12-inch

    Essential CookwareLodge Cast Iron Skillet 12-inch

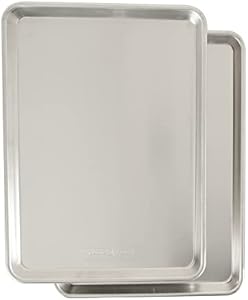
    Perfect for searing shrimp evenly and achieving a smoky flavor.

    View on Amazon →

  5. In a separate bowl, mash the avocado until smooth. Stir in lime juice, cilantro, and salt to make the guacamole.
  6. Lay out the tortilla chips or crackers on a serving platter.
  7. Top each chip with a dollop of guacamole.
  8. Place one cooked shrimp on top of the guacamole on each chip.
  9. Optional: Garnish each bite with diced tomatoes for added color and flavor.
  10. Serve immediately and enjoy!

Prep, Storage, and Reheating

Prepare the shrimp and guacamole up to two hours ahead of serving. Store the cooked shrimp in an airtight container in the refrigerator, and keep the guacamole covered with plastic wrap to prevent browning. For reheating, slightly warm the shrimp in a skillet for about 1 minute, ensuring they don’t overcook.

Common Mistakes to Avoid

  • Overcooking the shrimp: Cook just until they turn pink and opaque to keep them juicy and tender.
  • Using unripe avocados: An unripe avocado won’t mash smoothly or pair well with the shrimp’s flavors.
  • Skipping the lime juice: Lime prevents the guacamole from browning and adds essential acidity for balance.

A Brief History of Guacamole and Shrimp Pairings

Guacamole originates from Aztec cuisine, with its name deriving from Nahuatl words for “avocado sauce.” Over time, seafood like shrimp became a natural complement to the creamy, rich base, as coastal cuisines embraced the pairing for its balance of freshness and heartiness.

FAQs About Shrimp Guacamole Bites

  • Can I make this dish ahead of time? Yes, prepare the shrimp and guacamole up to two hours ahead and assemble just before serving.
  • Can I use crackers instead of tortilla chips? Absolutely, as long as they are sturdy enough to hold the toppings.
  • What drinks pair well with these bites? Light, citrusy beverages like margaritas or sparkling water with lime complement the flavors beautifully.


Shrimp Guacamole Bites

Prep Time 10 minutes
Cook Time 6 minutes
Total Time 16 minutes
Servings 12 bites
Calories 120
Delicious and easy-to-make appetizer featuring shrimp, guacamole, and tortilla chips.

Ingredients

Instructions 

  • Preheat a skillet or grill pan over medium heat.
  • In a bowl, toss the shrimp with olive oil, smoked paprika, garlic powder, cumin, salt, and black pepper until evenly coated.
  • Cook the shrimp in the skillet for 2-3 minutes per side, or until they turn pink and opaque. Remove from heat and set aside.
  • In a separate bowl, mash the avocado until smooth. Stir in lime juice, cilantro, and salt to make the guacamole.
  • Lay out the tortilla chips or crackers on a serving platter.
  • Top each chip with a dollop of guacamole.
  • Place one cooked shrimp on top of the guacamole on each chip.
  • Optional: Garnish each bite with diced tomatoes for added color and flavor.
  • Serve immediately and enjoy!

Notes

For best results, serve immediately to keep the chips or crackers crisp. You can substitute crackers for tortilla chips if desired.
Calories: 120kcal
Cost: $15
Course: Appetizer
Cuisine: Mexican-inspired
Keyword: bites, guacamole, shrimp

Close-up of shrimp guacamole bites served on a white platter.

Loved this recipe? Save it to your favorite Pinterest board so you can easily find it later! ✨

This post contains affiliate links. As an Amazon Associate, I earn from qualifying purchases. This comes at no extra cost to you.

This French Onion Chicken Orzo Casserole is a rich and savory dish that combines the sweet aroma of caramelized onions with tender halal chicken, creamy orzo pasta, and a golden layer of melted cheese. Every bite brings together comforting textures and bold flavors, making it a standout option for family dinners or cozy nights at home. With its satisfying blend of ingredients, this casserole delivers both indulgence and nourishment.

Table of Contents

Why This French Onion Chicken Orzo Casserole Works

  • This dish is perfect for busy weeknights because it combines quick-to-cook ingredients like pre-cooked halal chicken and dried orzo pasta for a hassle-free prep. The oven does most of the work, leaving you time to focus on other tasks.
  • The caramelized onions bring depth and sweetness that elevate the flavors of the casserole without requiring complicated techniques. With just sugar, salt, and pepper, the onions transform into a savory highlight of the dish.
  • The combination of mozzarella and Parmesan cheese creates a gooey, golden topping that makes the casserole irresistibly creamy. This layer adds texture and richness, making each serving feel indulgent yet approachable.
  • French Onion Chicken Orzo Casserole is versatile for various dietary needs since it uses halal chicken and simple pantry staples. You can easily adjust the seasoning or garnish to match your preferences.

Everything You Need for French Onion Chicken Orzo Casserole

The caramelized yellow onions are key to this dish, as they provide a sweet, deep flavor that contrasts beautifully with the creamy pasta and cheese. Be sure to cook them low and slow to bring out their natural sweetness and avoid burning.

How To Make French Onion Chicken Orzo Casserole Step by Step

  1. Preheat your oven to 375°F (190°C).
  2. In a large skillet, heat olive oil over medium heat. Add the sliced onions, sugar, salt, and black pepper. Cook for 20-25 minutes, stirring occasionally, until the onions are deeply caramelized.
  3. While the onions cook, boil the orzo pasta in salted water according to package instructions but reduce the cooking time by 2 minutes so it’s slightly firm. Drain and set aside.
  4. A close-up of French Onion Chicken Orzo Casserole in a baking dish topped with melted cheese and fresh herbs.

    Le Creuset Enameled Cast Iron Dutch Oven

    Kitchen ApplianceLe Creuset Enameled Cast Iron Dutch Oven

    Ideal for baking casseroles and ensuring even heat distribution for creamy results.

    View on Amazon →

    Lodge Cast Iron Skillet 12-inch

    Essential CookwareLodge Cast Iron Skillet 12-inch

    Perfect for caramelizing onions evenly and achieving deep flavors for this recipe.

    View on Amazon →

  5. Once the onions are caramelized, add the shredded chicken to the skillet and toss to combine. Remove from heat.
  6. In a mixing bowl, whisk together the halal chicken broth, heavy cream, garlic powder, dried thyme, and paprika.
  7. In a greased casserole dish, layer the cooked orzo pasta first, followed by the onion and chicken mixture. Pour the broth and cream mixture evenly over the top.
  8. Sprinkle the shredded mozzarella and grated Parmesan cheese evenly over the casserole.
  9. Cover the casserole dish with foil and bake for 20 minutes. Then, remove the foil and bake for another 10 minutes, or until the cheese is melted and bubbly.
  10. Remove the dish from the oven and let it rest for 5 minutes. Garnish with chopped parsley before serving, if desired.

Serving Ideas for French Onion Chicken Orzo Casserole

  • This casserole pairs wonderfully with a crisp green salad dressed in a light vinaigrette to balance its richness.
  • If you’re serving it on a cold evening, consider adding crusty garlic bread for dipping into the creamy sauce.
  • For a seasonal touch, roast some autumn vegetables like butternut squash or Brussels sprouts as a colorful side.
  • A warm cup of spiced apple cider makes the perfect beverage to complement the flavors of the dish.

Expert Tips for Perfect Results

  • When caramelizing onions, stir them occasionally but not too often; letting them sit in the pan allows the sugars to develop a deeper flavor.
  • Undercook the orzo slightly during boiling to ensure it stays firm and doesn’t become mushy in the casserole.
  • Using freshly grated Parmesan cheese instead of pre-shredded enhances the cheesy topping with a more authentic, nutty flavor.
  • Let the casserole rest for 5 minutes after baking to allow the sauce to thicken and the flavors to fully meld together.

The Origins of French Onion Chicken Orzo Casserole

This dish is inspired by the classic French onion soup, which is known for its deeply caramelized onions and rich broth. By integrating halal chicken and creamy orzo pasta, the recipe transforms the iconic flavors into a satisfying one-pan meal. While rooted in French cuisine, this casserole adapts the traditional flavors for a modern twist that’s easy to prepare and enjoy.

Looking for something similar? Try our grilled greek chicken kabobs.

For more ideas, check out our greek chicken kabobs.

You might also enjoy our easy cheesy keto chicken enchilada casserole.

Common Mistakes to Avoid

  • Skipping the caramelization step for the onions can result in a bland flavor. Take your time to cook them until they’re golden brown and sweet.
  • Overcooking the orzo pasta can lead to a mushy casserole texture. Be sure to reduce the boiling time slightly.
  • Not whisking the cream and broth mixture thoroughly may cause uneven seasoning, so take an extra moment to ensure everything is well combined.

French Onion Chicken Orzo Casserole

Prep Time 20 minutes
Cook Time 35 minutes
Total Time 55 minutes
Servings 6 servings
Calories 450
A comforting casserole featuring caramelized onions, shredded chicken, orzo pasta, and a creamy sauce topped with melted cheese.

Ingredients

Instructions 

  • Preheat your oven to 375°F (190°C).
  • In a large skillet, heat olive oil over medium heat. Add the sliced onions, sugar, salt, and black pepper. Cook for 20-25 minutes, stirring occasionally, until the onions are deeply caramelized.
  • While the onions are cooking, boil the orzo pasta in salted water according to package instructions, but reduce the cooking time by 2 minutes to keep it slightly firm. Drain and set aside.
  • Once the onions are caramelized, add the shredded chicken to the skillet and toss to combine. Remove from heat.
  • In a mixing bowl, whisk together the halal chicken broth, heavy cream, garlic powder, dried thyme, and paprika.
  • In a greased casserole dish, layer the cooked orzo pasta, followed by the onion and chicken mixture. Pour the broth and cream mixture evenly over the top.
  • Sprinkle the shredded mozzarella and grated Parmesan cheese evenly over the casserole.
  • Cover the casserole dish with foil and bake for 20 minutes. Then, remove the foil and bake for an additional 10 minutes, or until the cheese is melted and bubbly.
  • Remove the casserole from the oven and let it rest for 5 minutes. Garnish with chopped parsley before serving, if desired.

Notes

You can substitute rotisserie chicken for the shredded chicken to save time. For a vegetarian version, replace the chicken with sautéed mushrooms and use vegetable broth.
Calories: 450kcal
Cost: $15
Course: Main Course
Cuisine: French
Keyword: Casserole, Chicken, Orzo
A close-up of French Onion Chicken Orzo Casserole in a baking dish topped with melted cheese and fresh herbs.

Loved this recipe? Save it to your favorite Pinterest board so you can easily find it later! ✨

This post contains affiliate links. As an Amazon Associate, I earn from qualifying purchases. This comes at no extra cost to you.


Bruschetta Dip Recipe

Bruschetta Dip combines juicy diced tomatoes, chopped basil, and red onion with a tangy balsamic vinegar dressing in a scoopable, vibrant dish. Topped with shredded mozzarella, it offers a harmonious balance of freshness and richness that pairs perfectly with toasted baguette slices or pita chips. This easy appetizer is ideal for parties, game days, or anytime you need a quick and flavorful snack.

Table of Contents

Why Bruschetta Dip Fits Any Occasion

  • This dish is perfect for game-day spreads, offering a crowd-pleasing flavor that pairs well with other appetizers. Its simplicity makes it easy to whip up while prepping for other snacks.
  • The fresh ingredients make it a healthier choice compared to heavier dips, ideal for those seeking non cheese appetizers or non meat appetizers. Each bite delivers a burst of vibrant flavor, keeping it light yet satisfying.
  • Its versatility makes it great for casual gatherings or elegant parties, as it can be served with baguette slices, pita chips, or even as a topping for other dishes. You can easily pre-portion servings into cups for grab-and-go convenience.
  • With no cooking required, bruschetta dip is a quick option for busy nights or last-minute entertaining. The fresh basil and balsamic vinegar elevate its aroma, creating an enticing centerpiece for any table.

Everything You Need for Bruschetta Dip

The balance of ripe tomatoes and aromatic basil is crucial to the dish’s flavor, while balsamic vinegar adds a slight tanginess that ties everything together. Mozzarella cheese adds richness, rounding out the texture and presentation.

How To Make Bruschetta Dip Step by Step

  1. Wash and dice the tomatoes into small, evenly sized pieces to ensure consistency in texture.
  2. Finely chop the red onion and garlic, then add them to a mixing bowl along with the diced tomatoes.
  3. Chop the fresh basil leaves and stir them gently into the mixture. The basil should be finely chopped to distribute its herbal essence throughout the dip.
  4. Drizzle the extra-virgin olive oil and balsamic vinegar over the ingredients. Add the salt and black pepper, mixing well to combine and season uniformly.
  5. Transfer the bruschetta dip to a serving bowl, leveling it evenly for presentation.
  6. Sprinkle the shredded mozzarella cheese on top, allowing it to slightly melt into the dip for added richness.
  7. Serve immediately with toasted baguette slices or pita chips. The crunchiness of the bread enhances the dip’s vibrant texture.
A bowl of freshly made bruschetta dip with diced tomatoes, basil, and garlic.

Breville Sous Chef Food Processor

Kitchen ApplianceBreville Sous Chef Food Processor

Perfect for evenly chopping tomatoes, onions, and garlic for this recipe.

View on Amazon →

OXO Good Grips Mixing Bowl Set

Essential CookwareOXO Good Grips Mixing Bowl Set

Durable and versatile mixing bowls for combining ingredients evenly and efficiently.

View on Amazon →

Frequently Asked Questions

Can I make bruschetta dip ahead of time?
Yes! Prepare the dip up to a day in advance and store it in an airtight container in the fridge. Add the shredded mozzarella just before serving for the best texture.
What’s the best way to dice tomatoes for this dish?
Use a sharp knife to achieve clean, even cuts. Avoid overly soft tomatoes, as they can make the dip watery.
Can I substitute another type of cheese?
While mozzarella is ideal, you could use finely grated Parmesan or crumbled feta for a slightly different flavor profile.

Common Mistakes to Avoid

  • Using overripe tomatoes can result in a mushy or watery dip. Opt for firm, ripe tomatoes for the best texture.
  • Skipping the balsamic vinegar might make the flavors feel incomplete. Its tanginess balances the sweetness of the tomatoes and richness of the cheese.
  • Not mixing thoroughly can lead to uneven seasoning. Ensure the salt, pepper, oil, and vinegar are evenly distributed for a harmonious taste.

Expert Tips for the Best Results

  • Chill the dip for about 15 minutes before serving to let the flavors meld and enhance the overall taste.
  • Toast the baguette slices with a drizzle of olive oil for added crunch and flavor. This simple step makes the serving vessel as delightful as the dip itself.
  • Consider garnishing with a sprig of basil or a dash of freshly cracked pepper for an elegant presentation.
  • Serve bruschetta dip in small individual cups at parties for a finger-food-friendly option that’s easy to grab and enjoy.

Meal Prep, Storage, and Reheating

Store leftover bruschetta dip in an airtight container in the refrigerator for up to 2 days. Avoid freezing, as this can alter the consistency of the fresh ingredients.

To reheat, bring the dip to room temperature and stir well before serving. If you’ve added mozzarella, it can be lightly warmed in the microwave for a few seconds to refresh the texture.

You might also enjoy our pesto bruschetta chicken.


Bruschetta Dip

Prep Time 15 minutes
Total Time 15 minutes
Servings 4 servings
Calories 150
A fresh and flavorful dip made with ripe tomatoes, basil, and mozzarella cheese, perfect for serving with toasted baguette slices or pita chips.

Ingredients

Instructions 

  • Wash and dice the tomatoes into small pieces, ensuring they are evenly sized for the dip.
  • Finely chop the red onion and garlic, and add them to a mixing bowl along with the diced tomatoes.
  • Chop the fresh basil leaves and stir them into the bowl.
  • Drizzle the extra-virgin olive oil and balsamic vinegar over the mixture, then add the salt and black pepper for seasoning.
  • Mix all the ingredients thoroughly until well combined.
  • Transfer the bruschetta dip to a serving bowl and sprinkle shredded mozzarella cheese on top.
  • Serve immediately with toasted baguette slices or pita chips for dipping.

Notes

For best results, use fresh, ripe tomatoes and high-quality olive oil. You can substitute mozzarella with Parmesan or feta cheese for a different flavor.
Calories: 150kcal
Cost: $8
Course: Appetizer
Cuisine: Italian
Keyword: Bruschetta, Dip, Tomatoes

A bowl of freshly made bruschetta dip with diced tomatoes, basil, and garlic.

Loved this recipe? Save it to your favorite Pinterest board so you can easily find it later! ✨

This post contains affiliate links. As an Amazon Associate, I earn from qualifying purchases. This comes at no extra cost to you.


Iced Chai Latte With Pumpkin Cold Foam

This Iced Chai Latte With Pumpkin Cold Foam is a perfect blend of warming spices, smooth chai tea, and fluffy pumpkin-infused foam. The aromatic chai and creamy cold foam create a delightful contrast, making it the ideal drink for any cozy yet refreshing moment. With its inviting pumpkin pie spice layer, this beverage is a stunning treat both in taste and presentation.

Table of Contents

Why This Iced Chai Latte With Pumpkin Cold Foam Is Perfect For You

  • It’s a Starbucks-inspired treat you can recreate at home for a fraction of the cost. You get the rich flavor of chai and pumpkin without needing to visit a café.
  • Perfect for halal or plant-based diets with simple substitutions. Whether using dairy or vegan-friendly options, this recipe maintains its creamy and spiced quality.
  • The pumpkin cold foam takes your drink to the next level. Its fluffy texture and pumpkin pie spice elevate the chai latte with a seasonal twist.
  • This recipe strikes the balance between indulgence and refreshment. The iced chai base cools you down, while the warm spices satisfy autumn cravings.

Everything You Need for Iced Chai Latte With Pumpkin Cold Foam

The pumpkin puree and pumpkin pie spice are essential for flavor, creating the creamy cold foam that sets this latte apart. These ingredients add both depth and a festive touch to your drink.

How To Make Iced Chai Latte With Pumpkin Cold Foam Step by Step

  1. Bring 1 cup of water to a boil in a small saucepan. Add the chai tea bags and steep for 5 minutes. Remove the tea bags and let the chai concentrate cool slightly.
  2. In a separate saucepan, heat the milk over medium-low heat until warm. Stir in the sugar, cinnamon, ginger, cardamom, and cloves until fully dissolved, then remove from heat to cool slightly.
  3. In a mixing bowl, combine heavy cream (or plant-based whipping cream), pumpkin puree, maple syrup, and pumpkin pie spice. Use a milk frother or whisk to whip the mixture until light and airy.
  4. A glass of iced chai latte topped with creamy pumpkin cold foam, served on a wooden table.

    Breville Milk Cafe Frother

    Kitchen ApplianceBreville Milk Cafe Frother

    Premium frother for creating perfectly airy pumpkin cold foam with ease.

    View on Amazon →

    Pyrex Glass Mixing Bowl Set

    Essential CookwarePyrex Glass Mixing Bowl Set

    Durable and versatile mixing bowls for preparing the spiced milk and pumpkin cold foam.

    View on Amazon →

  5. Fill a tall glass with ice cubes. Pour the cooled chai concentrate into the glass, followed by the spiced milk mixture. Stir gently to combine.
  6. Carefully spoon the pumpkin cold foam over the iced chai latte, creating a thick, creamy layer on top. Optional: garnish with a sprinkle of pumpkin pie spice or cinnamon.
  7. Serve immediately and enjoy your refreshing Iced Chai Latte With Pumpkin Cold Foam.

Common Mistakes To Avoid

  • Skipping the cooling step for chai concentrate can dilute your drink. Let it cool slightly before mixing with milk and ice.
  • Over-whipping the pumpkin cold foam may lead to a dense texture. Stop whisking once you achieve a light, airy consistency.
  • Using overly sweetened milk or cream can overpower the spices. Balance sweetness to highlight the chai and pumpkin flavors.

Serving Ideas and Pairings

  • Pair with a freshly baked pumpkin muffin to complement the pumpkin spice theme.
  • Serve alongside chai-spiced cookies for a delightful tea-time treat.
  • Enjoy with a simple almond biscotti for a light and crisp texture contrast.
  • Offer as a dessert drink after a cozy soup or stew meal for a festive finish.

Your Questions Answered

  • Can I use decaf chai tea bags? Yes, this recipe works perfectly with decaf chai tea, giving you the same flavor without the caffeine.
  • Is this recipe customizable for vegan diets? Absolutely! Use plant-based milk and whipping cream to create a vegan-friendly version.
  • How long does the pumpkin cold foam last? The foam is best served fresh but can be stored in the fridge for up to 24 hours. Re-whisk before use if needed.

Expert Tips for Perfect Results

  • Use freshly brewed chai tea for the boldest flavor. Pre-made concentrates often lack the depth of freshly steeped tea.
  • Chill your glass before filling it with ice to prevent quick melting and keep your drink cold longer.
  • For extra frothiness in the foam, use chilled cream or plant-based whipping cream before whisking.
  • Experiment with your sweetener, such as honey or agave syrup, to customize the sweetness level without compromising flavor.


Iced Chai Latte With Pumpkin Cold Foam

Prep Time 10 minutes
Cook Time 5 minutes
Total Time 15 minutes
Servings 1 servings
Calories 200
A refreshing and creamy iced chai latte topped with pumpkin cold foam, perfect for fall or any time of year.

Ingredients

Instructions 

  • Bring 1 cup of water to a boil in a small saucepan. Add the chai tea bags and steep for 5 minutes. Remove the tea bags and let the chai concentrate cool slightly.
  • In a separate saucepan, heat the milk over medium-low heat until warm. Stir in the sugar, cinnamon, ginger, cardamom, and cloves until fully dissolved. Remove from heat and allow to cool slightly.
  • In a mixing bowl, combine heavy cream (or plant-based whipping cream), pumpkin puree, maple syrup, and pumpkin pie spice. Use a milk frother or whisk to whip the mixture until it forms a light and airy foam.
  • Fill a tall glass with ice cubes. Pour the cooled chai concentrate into the glass, followed by the spiced milk mixture. Stir gently to combine.
  • Carefully spoon the pumpkin cold foam over the iced chai latte, creating a thick, creamy layer on top.
  • Optional: Garnish with a sprinkle of pumpkin pie spice or a pinch of cinnamon for extra flavor.
  • Serve immediately and enjoy your refreshing Iced Chai Latte with Pumpkin Cold Foam.

Notes

For a vegan option, use plant-based whipping cream and a non-dairy milk like almond or oat milk. Adjust sweetness to taste by using your preferred sweetener.
Calories: 200kcal
Cost: $5
Course: Beverage
Cuisine: American
Keyword: chai latte, iced drink, pumpkin cold foam

A glass of iced chai latte topped with creamy pumpkin cold foam, served on a wooden table.

Loved this recipe? Save it to your favorite Pinterest board so you can easily find it later! ✨

This post contains affiliate links. As an Amazon Associate, I earn from qualifying purchases. This comes at no extra cost to you.

This Pigs in a Blanket (Halal Version) recipe turns halal beef or chicken sausages into bite-sized delights, wrapped in buttery puff pastry and baked to golden perfection. The crispy texture and rich aroma make them an irresistible snack or appetizer for any gathering. With simple ingredients and steps, you’ll have a crowd-pleaser ready in no time.

Table of Contents

Why This Pigs in a Blanket (Halal Version) Works

  • Puff pastry effortlessly creates a flaky, golden crust that contrasts perfectly with the juicy halal sausages. This combination ensures each bite is packed with flavor and texture.
  • Using halal-certified ingredients allows everyone to enjoy this classic snack without compromising dietary restrictions. It’s inclusive and perfect for gatherings with mixed diets.
  • Quick to assemble and cook in under 30 minutes, this recipe is ideal for busy weeknights or unexpected guests. No fuss, just simple ingredients and straightforward preparation.
  • Versatile enough to pair with a range of dipping sauces or side dishes, making it a staple for parties, game days, or family dinners. You’ll never run out of serving ideas!

Everything You Need for Pigs in a Blanket (Halal Version)

The halal puff pastry is the star of this recipe, delivering that signature buttery flakiness. Sesame seeds are optional but add a nutty aroma and delightful crunch atop the pastry crust.

How To Make Pigs in a Blanket (Halal Version) Step by Step

  1. Preheat your oven to 375°F (190°C) and line a baking sheet with parchment paper to prevent sticking and ensure easy cleanup.
  2. Dust a clean work surface lightly with flour and roll out the puff pastry sheet to ensure even thickness. This step helps the pastry bake evenly.
  3. Cut the puff pastry into 12 equal strips, wide enough to wrap around the sausages. Use a sharp knife or pizza cutter for clean edges.
  4. Wrap each halal sausage with one strip of puff pastry, ensuring the edges slightly overlap. Pinch the ends to seal the pastry securely.
  5. Place the wrapped sausages seam-side down on the prepared baking sheet, leaving space between each for even baking.
  6. Brush the tops of the pastry with the beaten egg for a golden finish. Sprinkle sesame seeds on top if desired for added flavor and texture.
  7. Bake in the preheated oven for 15-20 minutes, or until the pastry is puffed and golden brown.
    A plate of golden-brown pigs in a blanket served on a wooden table.

    Breville Smart Oven Air Fryer Pro

    Kitchen ApplianceBreville Smart Oven Air Fryer Pro

    A versatile countertop oven that can bake, air fry, and toast — ideal for recipes like pigs in a blanket.

    View on Amazon →

    Nordic Ware Natural Aluminum Commercial Baking Sheet

    Essential CookwareNordic Ware Natural Aluminum Commercial Baking Sheet

    A durable, non-stick baking sheet perfect for evenly baking pastries like pigs in a blanket.

    View on Amazon →

  8. Remove from the oven and let cool for a few minutes before serving. Enjoy warm with your favorite dipping sauce!

Easy Ingredient Swaps

  • If puff pastry isn’t available, crescent roll dough can be used for a softer, bread-like texture. Roll it thinner for a similar flaky effect.
  • For a dairy-free option, look for halal puff pastry brands that use vegetable-based fats rather than butter. The taste and texture remain just as enjoyable.
  • Not a fan of sesame seeds? Try a sprinkle of nigella seeds or shredded cheese on top for a unique twist in flavor and appearance.

Common Mistakes to Avoid

  • Skipping the flour dusting can cause the pastry to stick to the surface, making it harder to roll and cut evenly. Always use a light dusting of flour.
  • Overlapping the pastry edges too much can create uneven baking. Wrap tightly but ensure the overlap is minimal for uniform cooking.
  • Neglecting egg wash will result in a dull pastry surface. Always brush with egg for a shiny, golden finish.

Meal Prep and Storage Tips

Prepare pigs in a blanket ahead of time by assembling them and refrigerating on a baking tray covered with plastic wrap. Bake them fresh when needed for optimal flakiness.

To store, place leftovers in an airtight container in the fridge for up to 3 days. For longer storage, freeze the unbaked pastries and cook directly from frozen at 375°F (190°C), adding 5-7 extra minutes.

Reheat baked leftovers in a 350°F (175°C) oven for 5-10 minutes to restore their crispness without drying them out.

Serving Ideas for Pigs in a Blanket (Halal Version)

  • Pair with honey mustard dipping sauce for a sweet and tangy balance to the savory pastry.
  • Serve alongside a platter of mixed roasted veggies for a colorful and healthy spread.
  • Offer marinara sauce or garlic aioli for those who prefer bold, garlicky flavors as a dip.
  • Complete a game-day menu with classic appetizers like chips and guacamole or sliders for variety.

Pigs in a Blanket (Halal Version)

Prep Time 10 minutes
Cook Time 20 minutes
Total Time 30 minutes
Servings 12 servings
Calories 250
A delicious and easy-to-make appetizer featuring halal sausages wrapped in puff pastry, perfect for any gathering.

Ingredients

Instructions 

  • Preheat your oven to 375°F (190°C) and line a baking sheet with parchment paper.
  • Dust a clean work surface lightly with flour and roll out the puff pastry sheet to ensure even thickness.
  • Cut the puff pastry into 12 equal strips, wide enough to wrap around the sausages.
  • Wrap each halal sausage with one strip of puff pastry, ensuring the edges slightly overlap. Pinch the ends to seal the pastry.
  • Place the wrapped sausages seam-side down on the prepared baking sheet, leaving space between each.
  • Brush the tops of the pastry with the beaten egg for a golden finish. Sprinkle sesame seeds on top if desired.
  • Bake in the preheated oven for 15-20 minutes, or until the pastry is puffed and golden brown.
  • Remove from the oven and let cool for a few minutes before serving. Enjoy warm!

Notes

You can substitute sesame seeds with poppy seeds or omit them entirely. Serve with your favorite dipping sauce for added flavor.
Calories: 250kcal
Cost: $10
Course: Appetizer
Cuisine: American
Keyword: easy appetizer, halal pigs in a blanket, halal recipe
A plate of golden-brown pigs in a blanket served on a wooden table.

Loved this recipe? Save it to your favorite Pinterest board so you can easily find it later! ✨

This post contains affiliate links. As an Amazon Associate, I earn from qualifying purchases. This comes at no extra cost to you.


Starbucks Iced Pumpkin Cream Chai Recipe

The Starbucks Iced Pumpkin Cream Chai combines the smooth warmth of chai tea with a rich, velvety pumpkin cream topping. The aroma of pumpkin pie spice mingles with the earthy tea base to create a beverage that feels like the essence of autumn. Perfect for any time of year, this copycat recipe lets you recreate the seasonal favorite right in your kitchen.

Table of Contents

Why Starbucks Iced Pumpkin Cream Chai Is Perfect For You

  • Skip the coffee shop lines. Making this iced pumpkin cream chai at home means enjoying the Starbucks experience without the wait.
  • Fully customizable. You can adjust the sweetness, creaminess, or spice level to suit your exact taste preferences.
  • Halal-friendly ingredients and options. This recipe uses halal alternatives, making it accessible while keeping the flavors authentic.
  • Save money. Creating your own copycat pumpkin chai latte costs far less than ordering it every day.

Everything You Need for Starbucks Iced Pumpkin Cream Chai

  • 1 1/2 cups chai tea (brewed and cooled)
  • 1/2 cup milk (whole milk, almond milk, or any halal milk alternative)
  • 2 tablespoons pumpkin puree
  • 2 tablespoons halal sweetened condensed milk or maple syrup (for sweetness)
  • 1/2 teaspoon pumpkin pie spice
  • 1/4 teaspoon vanilla extract
  • 1 cup ice cubes
  • 1/4 cup heavy cream (halal and dairy or halal alternatives like coconut cream)
  • 1/2 teaspoon powdered sugar (optional, for cream sweetness)
  • Additional pinch of pumpkin pie spice (for garnish)

The pumpkin puree is the star ingredient in this recipe, providing the rich, earthy sweetness while enhancing the fall-inspired vibe. Paired with pumpkin pie spice, it creates an irresistible flavor profile.

How To Make Starbucks Iced Pumpkin Cream Chai Step by Step

  1. Brew your favorite chai tea and let it cool completely. You can use chai tea bags or loose-leaf chai tea for an authentic base.
  2. In a small bowl or blender, whisk or blend the pumpkin puree, sweetened condensed milk (or maple syrup), pumpkin pie spice, and vanilla extract until smooth.
  3. Prepare the pumpkin cream topping: In a mixing bowl, whisk the heavy cream and powdered sugar (optional) until slightly thickened but pourable. Stir in a small amount of the pumpkin mixture to flavor the cream.
  4. Fill a glass with ice cubes. Pour the cooled chai tea and milk into the glass, stirring gently to combine.
  5. A Starbucks Iced Pumpkin Cream Chai Latte in a clear cup on a wooden table.

    Breville Milk Cafe Frother

    Kitchen ApplianceBreville Milk Cafe Frother

    Ideal for frothing milk or cream for the perfect pumpkin cream topping with professional results.

    View on Amazon →

    OXO Good Grips Mixing Bowl Set

    Essential CookwareOXO Good Grips Mixing Bowl Set

    Durable and versatile mixing bowls perfect for blending the pumpkin cream topping and other ingredients.

    View on Amazon →

  6. Carefully pour the pumpkin cream topping over the chai mixture, allowing it to float on top.
  7. Sprinkle a pinch of pumpkin pie spice on top for garnish.
  8. Serve immediately and enjoy your homemade Starbucks-inspired iced pumpkin cream chai!

Common Questions About Starbucks Iced Pumpkin Cream Chai

  • Can I use decaffeinated chai tea? Yes, decaffeinated chai tea works well for those seeking non caffeine pumpkin drinks.
  • What if I don’t have pumpkin pie spice? You can mix cinnamon, nutmeg, ginger, and cloves to create a homemade spice blend.
  • Can this drink be vegan? Absolutely! Use almond or coconut milk and substitute coconut cream for the heavy cream.

How to Prep, Store, and Reheat This Drink

Preparing components in advance simplifies serving. Brew and chill the chai tea, and store the pumpkin mixture in an airtight container in the refrigerator for up to 3 days.

This drink is best enjoyed fresh, but you can store the finished drink for up to 24 hours in the fridge. Reheat the chai base gently on the stove or microwave before assembling if needed.

Easy Ingredient Swaps for This Pumpkin Chai

If you’re out of condensed milk, maple syrup makes a fantastic substitute for sweetness with a subtle caramel note. For a dairy-free topping, swap heavy cream for chilled coconut cream for a rich texture without the dairy.

The Origins of Pumpkin and Chai Pairing

The fusion of pumpkin and chai flavors stems from their parallel use of warming spices. Pumpkin pie spice and chai spice both highlight cinnamon, nutmeg, and cloves, creating a harmonious blend.

Starbucks popularized this pairing with seasonal offerings that celebrate autumn’s most iconic flavors. This homemade version lets you enjoy those signature tastes year-round.


Starbucks Iced Pumpkin Cream Chai

Prep Time 10 minutes
Total Time 10 minutes
Servings 2 servings
Calories 200
A delicious homemade version of Starbucks' Iced Pumpkin Cream Chai, perfect for fall!

Ingredients

Instructions 

  • Brew your favorite chai tea and let it cool completely. You can use chai tea bags or loose-leaf chai tea. Chill in the refrigerator if needed.
  • In a small bowl or blender, whisk or blend the pumpkin puree, sweetened condensed milk (or maple syrup), pumpkin pie spice, and vanilla extract until smooth.
  • Prepare the pumpkin cream topping: In a mixing bowl, whisk the heavy cream and powdered sugar (optional) until slightly thickened but pourable. Stir in a small amount of the pumpkin mixture to flavor the cream.
  • Fill a glass with ice cubes. Pour the cooled chai tea and milk into the glass, stirring gently to combine.
  • Carefully pour the pumpkin cream topping over the chai mixture, allowing it to float on top.
  • Sprinkle a pinch of pumpkin pie spice on top for garnish.
  • Serve immediately and enjoy your homemade Starbucks-inspired Iced Pumpkin Cream Chai!

Notes

You can adjust the sweetness by using more or less sweetened condensed milk or maple syrup. For a dairy-free version, use coconut cream and almond milk.
Calories: 200kcal
Cost: $5
Course: Beverage
Cuisine: American
Keyword: iced chai, pumpkin chai, Starbucks copycat

A Starbucks Iced Pumpkin Cream Chai Latte in a clear cup on a wooden table.

Loved this recipe? Save it to your favorite Pinterest board so you can easily find it later! ✨

This post contains affiliate links. As an Amazon Associate, I earn from qualifying purchases. This comes at no extra cost to you.


Starbucks Iced Pumpkin Cream Chai Tea Latte Recipe

The Starbucks Iced Pumpkin Cream Chai Tea Latte combines warm chai spices with a creamy pumpkin topping for a perfect balance of seasonal flavors. Its silky texture and delicate hints of vanilla and pumpkin pie spice make every sip indulgent and refreshing. This recipe faithfully recreates the fan-favorite autumn drink in the comfort of your kitchen with simple, halal-friendly ingredients.

Table of Contents

Why Make This Recipe

  • The Starbucks Iced Pumpkin Cream Chai Tea Latte lets you enjoy a café-quality drink at a fraction of the cost. Made with pantry staples, this recipe saves you time and money while delivering incredible flavor.
  • Recreate the signature pumpkin cream topping with minimal effort. Whisking together vanilla, pumpkin puree, and spices ensures a deliciously smooth topping that elevates your drink.
  • This chai tea latte is customizable for different dietary needs. Swap heavy cream for coconut cream or use plant-based milk to make a dairy-free version.
  • Perfect for entertaining guests or treating yourself. Its layered presentation and aromatic qualities make it a show-stopper you’ll want to serve every autumn.

Ingredients List

The chai tea concentrate provides the essential base of bold, spiced flavors. Pairing this with pumpkin puree and pumpkin pie spice creates the comforting autumn profile fans adore.

Step-by-Step Instructions

  1. Prepare the pumpkin cream topping: In a small bowl, whisk together heavy cream, pumpkin puree, vanilla extract, and pumpkin pie spice until smooth. Optionally, use a milk frother to achieve a light, airy texture.
  2. Fill a tall glass with ice cubes to the top.
  3. In a separate container, mix the chai tea concentrate and cold milk. Stir well to combine.
  4. Pour the chai tea and milk mixture over the ice cubes in the glass.
  5. Carefully spoon the prepared pumpkin cream topping over the chai tea latte, creating a layered effect.
  6. A close-up of a Starbucks Iced Pumpkin Cream Chai Tea Latte topped with creamy pumpkin foam.

    Breville Bambino Plus Espresso Machine

    Kitchen ApplianceBreville Bambino Plus Espresso Machine

    Perfect for crafting café-quality drinks at home, including chai tea lattes.

    View on Amazon →

    Zulay Milk Frother Handheld

    Essential CookwareZulay Milk Frother Handheld

    Create a light and airy pumpkin cream topping with this easy-to-use frother.

    View on Amazon →

  7. Drizzle a touch of maple syrup or honey over the pumpkin cream for added sweetness, if desired.
  8. Sprinkle a pinch of pumpkin pie spice on top for garnish.
  9. Serve immediately with a straw or spoon and enjoy!

Origin and History

The Starbucks Pumpkin Cream Chai Tea Latte made its debut as part of the chain’s autumn lineup, inspired by the success of their Pumpkin Spice Latte. It was developed to offer a lighter, iced alternative for chai lovers during the fall season.

Its introduction cemented chai tea’s place in seasonal drink menus, blending warming spices with pumpkin flavors. Starbucks has consistently seen global excitement around its pumpkin offerings, reflecting the drink’s enduring popularity.

Common Questions

  • Can I make this ahead of time? Yes, you can prepare the pumpkin cream topping and store it in the fridge for up to 2 days. Assemble the drink just before serving to preserve the texture.
  • Is this drink caffeinated? The caffeine content depends on the chai tea concentrate used. Check the label or choose a decaffeinated version if desired.
  • Can I double the recipe? Absolutely! Simply multiply the ingredient quantities to make multiple servings at once and follow the same preparation steps.

Serving Ideas

  • Pair it with freshly baked pumpkin cream cheese muffins for a thematic treat.
  • Serve alongside a warm croissant for a satisfying breakfast or snack.
  • Enjoy it with a slice of spiced apple cake to amplify the seasonal flavors.
  • Offer the drink as part of an autumn-themed brunch menu with friends and family.

Easy Swaps

  • Swap heavy cream with coconut cream for a dairy-free option. This adds a subtle nutty flavor that complements the chai spices.
  • Use oat milk instead of cow’s milk for a creamier texture and a naturally sweet finish.
  • Replace maple syrup with agave nectar for a less robust sweetness that melds beautifully with the pumpkin topping.


Starbucks Iced Pumpkin Cream Chai Tea Latte

Prep Time 10 minutes
Total Time 10 minutes
Servings 1 servings
Calories 250
A refreshing and creamy iced chai tea latte with a pumpkin twist, perfect for fall!

Ingredients

Instructions 

  • Prepare the pumpkin cream topping: In a small bowl, whisk together heavy cream, pumpkin puree, vanilla extract, and pumpkin pie spice until smooth. Optionally, use a milk frother to achieve a light, airy texture.
  • Fill a tall glass with ice cubes to the top.
  • In a separate container, mix the chai tea concentrate and cold milk. Stir well to combine.
  • Pour the chai tea and milk mixture over the ice cubes in the glass.
  • Carefully spoon the prepared pumpkin cream topping over the chai tea latte, creating a layered effect.
  • Drizzle a touch of maple syrup or honey over the pumpkin cream for added sweetness, if desired.
  • Sprinkle a pinch of pumpkin pie spice on top for garnish.
  • Serve immediately with a straw or spoon and enjoy!

Notes

For a dairy-free version, use coconut cream and almond or oat milk. Adjust sweetness to taste by adding more maple syrup or honey.
Calories: 250kcal
Cost: $5
Course: Beverage
Cuisine: American
Keyword: chai tea latte, iced latte, pumpkin cream

A close-up of a Starbucks Iced Pumpkin Cream Chai Tea Latte topped with creamy pumpkin foam.

Loved this recipe? Save it to your favorite Pinterest board so you can easily find it later! ✨

This post contains affiliate links. As an Amazon Associate, I earn from qualifying purchases. This comes at no extra cost to you.


Starbucks Copycat Homemade Chai Syrup Recipe

This Starbucks Copycat Homemade Chai Syrup Recipe combines warming spices like cinnamon, cloves, and cardamom with bold black tea and rich vanilla for a perfectly balanced flavor. The thick, fragrant syrup captures the essence of chai and allows you to recreate Starbucks-inspired chai lattes and flavored coffee at home with ease. Its aromatic blend is ideal for cozy mornings or adding a festive touch to your favorite beverages.

Table of Contents

Why This Recipe Is Perfect for You

  • Save money by making Starbucks-style chai lattes at home. This recipe creates a syrup that rivals the flavor and quality of the store-bought version at a fraction of the price.
  • Fully customize your drinks to suit your preferences. Whether you prefer yours extra spicy or sweeter, you control the flavor profile with every batch.
  • Enjoy halal-certified chai syrup without concern. By using halal-certified tea bags, this recipe ensures inclusive enjoyment for everyone.
  • Easy-to-make and versatile in use. From chai lattes to chai-flavored coffees, this syrup transforms your beverages into café-quality indulgences in seconds.

Ingredients You’ll Need

Cardamom pods add a distinct floral touch to this syrup, enhancing the authentic chai flavor. Cinnamon sticks provide a deep, warming aroma that’s central to the recipe’s signature taste.

Step-by-Step Instructions

  1. In a medium saucepan, combine water, sugar, cinnamon sticks, cloves, cardamom pods, star anise, ground ginger, nutmeg, and black pepper.
  2. Bring the mixture to a boil over medium-high heat, then reduce the heat to low and simmer for 10 minutes to allow the spices to infuse.
  3. Add the black tea bags to the saucepan and simmer for another 5 minutes, ensuring the tea steeps fully.
  4. Remove the saucepan from heat and stir in the vanilla extract.
  5. Strain the syrup through a fine-mesh sieve or cheesecloth into a clean jar or bottle to remove the spices and tea bags.
  6. Let the syrup cool completely before sealing the jar or bottle. Store in the refrigerator for up to 2 weeks.
  7. To use, mix 2-3 tablespoons of chai syrup with steamed milk (dairy or plant-based) for a chai latte, or stir it into coffee for a chai-flavored coffee. Adjust sweetness to taste.
A jar of homemade chai syrup surrounded by spices like cinnamon, cloves, and cardamom on a wooden table.

Breville Smart Tea Infuser

Kitchen ApplianceBreville Smart Tea Infuser

Perfect for steeping black tea with precise temperature control for optimal flavor extraction.

View on Amazon →

Cuisinart Stainless Steel Saucepan 2 Quart

Essential CookwareCuisinart Stainless Steel Saucepan 2 Quart

Ideal for simmering spices and creating syrups with precise heat control.

View on Amazon →

Common Mistakes to Avoid

  • Avoid over-boiling the syrup; this can result in a bitter taste from the spices or tea. Keep the heat low during simmering to preserve the delicate flavors.
  • Straining improperly can leave spice sediment in your syrup. Use a fine-mesh sieve or cheesecloth for a smooth and clear finish.
  • Do not skip cooling before storing. If sealed while warm, condensation can form and shorten the syrup’s shelf life.

Expert Tips for Best Results

  • Add a dash of ground cinnamon at the end to enhance the warm spice aroma. This step mimics the distinct spicy undertones of Starbucks beverages.
  • For a pumpkin chai latte, stir in 2-3 tablespoons of pumpkin puree during the simmering stage. This addition pairs beautifully with chai spices and offers a seasonal flair.
  • Use filtered water to ensure the spices shine without interference from mineral flavors. Clean, neutral water makes a noticeable difference in the result.
  • Double the batch and freeze individual portions for quick access. Ice cube trays work perfectly for portioning ready-to-use chai syrup cubes.

Serving Ideas and Pairings

  • Pair a chai latte made with this syrup with simple butter cookies. Their mild flavor complements the bold spices without overpowering the drink.
  • Serve alongside our roasted chicken (chipotle copycat recipe) for a flavorful, spice-forward meal combination.
  • Use the syrup as a drizzle over warm oatmeal or pancakes. Its sweetness and spice create an indulgent yet balanced breakfast experience.
  • Add it to iced coffee for a refreshing twist on iced lattes. The syrup blends effortlessly into chilled beverages for a summer-friendly option.

Storage and Reheating

Store the chai syrup in a clean, airtight jar or bottle in the refrigerator for up to 2 weeks. Ensure the jar is completely cooled before sealing it to prevent condensation buildup.

For longer storage, freeze the syrup in portions using silicone ice cube trays. Transfer the cubes to a freezer-safe bag once solid, and they will keep for up to 3 months.

To reheat, thaw frozen syrup overnight in the fridge, then gently warm it in a small saucepan on low heat. Avoid overheating to preserve the delicate spice notes.


Starbucks Copycat Homemade Chai Syrup Recipe

Prep Time 5 minutes
Cook Time 15 minutes
Total Time 20 minutes
Servings 16 servings
Calories 50
A homemade chai syrup recipe inspired by Starbucks, perfect for chai lattes or chai-flavored coffee.

Instructions 

  • In a medium saucepan, combine water, sugar, cinnamon sticks, cloves, cardamom pods, star anise, ground ginger, nutmeg, and black pepper.
  • Bring the mixture to a boil over medium-high heat, then reduce the heat to low and simmer for 10 minutes to allow the spices to infuse.
  • Add the black tea bags to the saucepan and simmer for another 5 minutes, ensuring the tea steeps fully.
  • Remove the saucepan from heat and stir in the vanilla extract.
  • Strain the syrup through a fine-mesh sieve or cheesecloth into a clean jar or bottle to remove the spices and tea bags.
  • Let the syrup cool completely before sealing the jar or bottle. Store in the refrigerator for up to 2 weeks.
  • To use, mix 2-3 tablespoons of chai syrup with steamed milk (dairy or plant-based) for a chai latte, or stir it into coffee for a chai-flavored coffee. Adjust sweetness to taste.

Notes

For a stronger flavor, increase the steeping time for the tea bags. Adjust the spice quantities to suit your taste preferences.
Calories: 50kcal
Cost: $5
Course: Beverage
Cuisine: Indian-inspired
Keyword: chai syrup, homemade chai, Starbucks copycat

A jar of homemade chai syrup surrounded by spices like cinnamon, cloves, and cardamom on a wooden table.

Loved this recipe? Save it to your favorite Pinterest board so you can easily find it later! ✨