Author

Amelia Hart

Browsing

Extra Crispy Fried Chicken

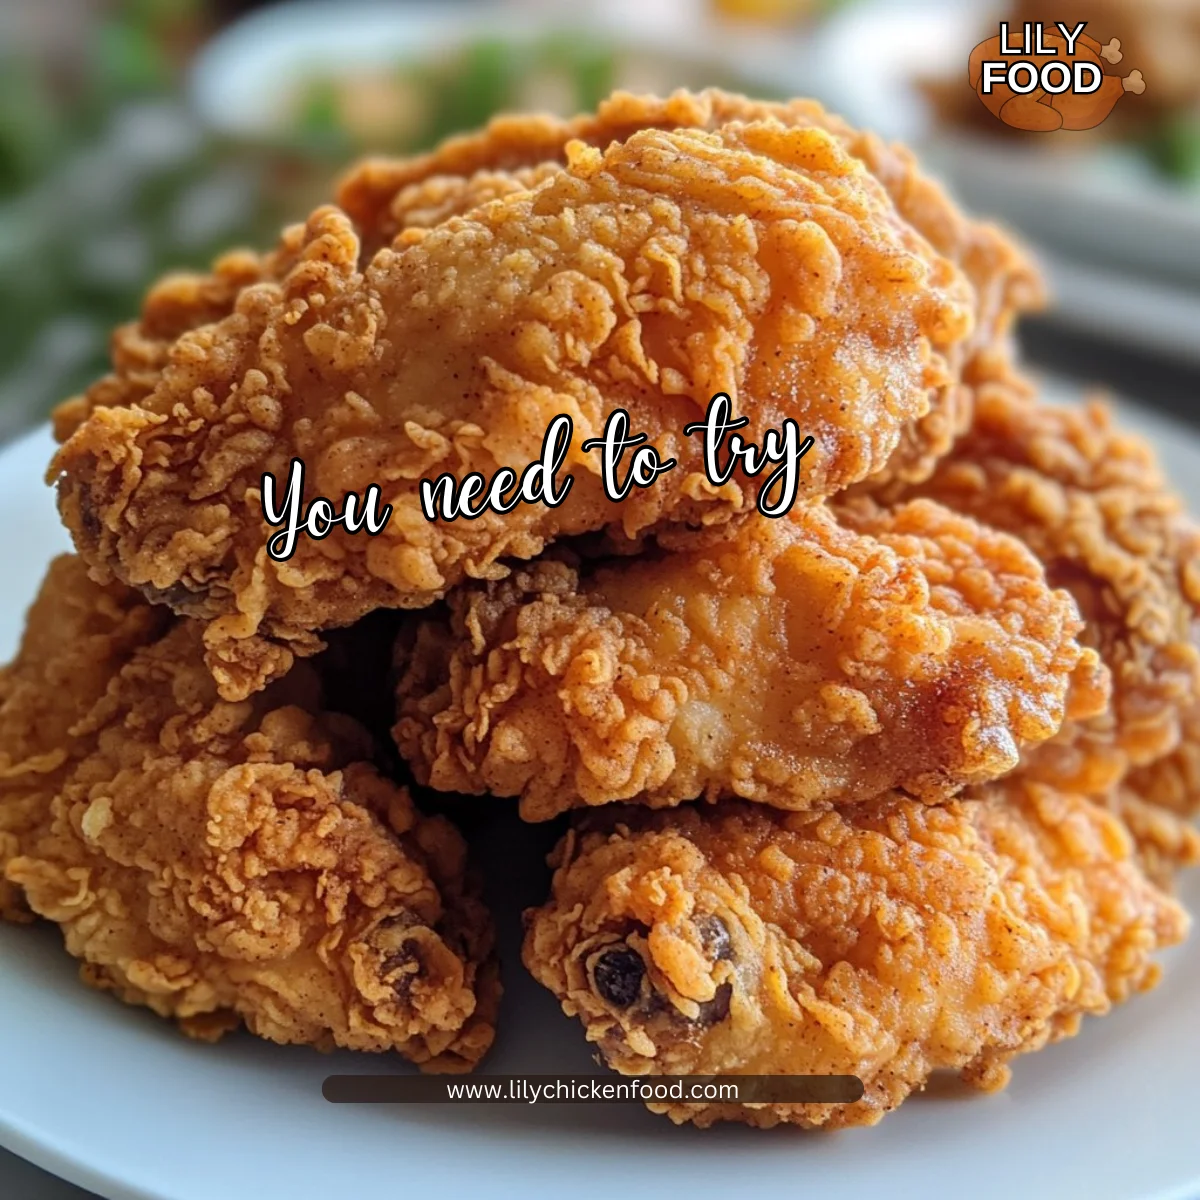
I take a deep breath and the kitchen answers me back. The warm smell of seasoned flour and hot oil wraps around the room. I hear the gentle sizzle as the first piece hits the pan, and I know a simple, joyful meal is on the way.

This recipe for Extra Crispy Fried Chicken has been a family favorite for years. I test and refine each step until the crust sings and the meat stays juicy. If you love crunchy textures and easy weeknight wins, you might also enjoy my take on Bang Bang Chicken Crispy Rice Salad, a bright dish that pairs well with fried favorites.

Why this works

Extra Crispy Fried Chicken

I have made fried chicken in many kitchens over the years. The secret to extra crispiness is simple. It is a mix of time, technique, and a few small swaps that pay off every time.

Buttermilk tenderizes the meat. The seasoned flour builds a strong, crackly crust. Frying at the right temperature seals juices and keeps oil off the meat. This method is forgiving and family-friendly, so you can involve kids in simple jobs like coating pieces.

It is also a time saver when you plan ahead. Marinate the chicken overnight and the next day cooks quickly. That makes it perfect for busy nights and weekend gatherings. If you want a similar comfort-food kick with a different spice profile, check my Copy Cat KFC Fried Chicken for another family-pleasing option.

Process Overview

“This is where the magic happens—when the aroma fills the kitchen.”

I approach this recipe in easy stages. First, the chicken soaks in buttermilk to tenderize and add subtle tang. Next, the flour mix builds flavor and structure. Finally, careful frying at a steady temperature creates that iconic crunch.

You will want a thermometer for both the oil and the chicken. I trust a digital probe to verify safety and doneness. With a little patience, the payoff is crispy, golden pieces that everyone reaches for at the table.

If you enjoy citrusy versions, try my twist on a saucy favorite like Crispy Orange Chicken for another family dinner idea.

Ingredients

  • 4 chicken pieces
    Tip: Use a mix of thighs and drumsticks for even cooking and juicy results. Bone-in pieces hold moisture better than boneless.
  • 2 cups buttermilk
    Tip: If you do not have buttermilk, mix 2 cups milk with 2 tablespoons lemon juice and let sit 5 minutes. The acid helps tenderize.
  • 2 cups all-purpose flour
    Tip: Measure flour by spooning it into the cup and leveling off. This keeps the coating light and crisp.
  • 1 tablespoon paprika
    Tip: Sweet paprika adds color and a gentle smoky note. Use smoked paprika for deeper flavor.
  • 1 teaspoon garlic powder
    Tip: Garlic powder blends uniformly into the flour for consistent flavor.
  • 1 teaspoon onion powder
    Tip: Onion powder boosts savory depth without adding moisture.
  • 1 teaspoon salt
    Tip: Salt the flour, not only the chicken. It seasons the crust as it forms.
  • 1/2 teaspoon black pepper
    Tip: Freshly ground pepper gives brighter spice than pre-ground.
  • Vegetable oil for frying
    Tip: Use an oil with a high smoke point such as canola or peanut oil. Fill your pot so pieces can float with at least 2 inches of oil above them.

Personal note: I like to prep my station before frying. Line a tray with a wire rack for resting fried pieces. That simple step keeps the crust crisp longer. For a crispier double layer, you can double-dip: dip back into buttermilk and into the flour again right before frying.

For an alternate crunchy meal with less oil, you can check my oven and air fryer methods like Air Fryer Chicken Mozzarella Wraps. They are great when you want less frying.

Directions

  1. Marinate chicken pieces in buttermilk for at least 2 hours, preferably overnight.
    Encouragement: This step makes a big difference. Overnight gives the juiciest, most flavorful results. If short on time, 2 hours still helps.

  2. In a bowl, combine flour, paprika, garlic powder, onion powder, salt, and black pepper.
    Encouragement: Whisk until the spices look well blended. This is where you build the seasoning that becomes the crispy crust.

  3. Remove chicken from buttermilk and let excess drip off.
    Encouragement: Gently shake each piece so a thin layer of buttermilk clings. Too much drips away and avoids a soggy coating.

  4. Dredge each piece in the flour mixture, ensuring it is fully coated.
    Encouragement: Press the flour onto the chicken so it sticks. For extra crunch, you can dip again in buttermilk and recoat in flour for a double crust.

  5. Heat oil in a deep fryer or large pot to 350°F (175°C).
    Encouragement: A stable oil temperature keeps the crust from absorbing too much oil. Use a thermometer and adjust heat as needed.

  6. Fry chicken in batches until golden brown and cooked through, about 15-18 minutes per batch.
    Encouragement: Do not overcrowd the pot. Turn pieces once or twice so they brown evenly. Check the thickest part with a probe; it should read 165°F.

  7. Drain on paper towels and serve hot.
    Encouragement: Rest on a wire rack for a few minutes to keep the crust crisp. Call the family to the table while the pieces finish their last crackle.

Tasting tip: Sprinkle a little flaky salt over the chicken the moment it comes out of the oil for a bright finish.

I recommend keeping one pan on low heat in case anyone wants to warm a second batch. Frying in batches keeps each piece perfectly textured and ready to serve.

If you are curious about serving ideas that use leftover or shredded fried chicken, try my quick skillet stir-ins like Ground Chicken Fried Rice. It is a great way to use extra meat.

Serving

Extra Crispy Fried Chicken

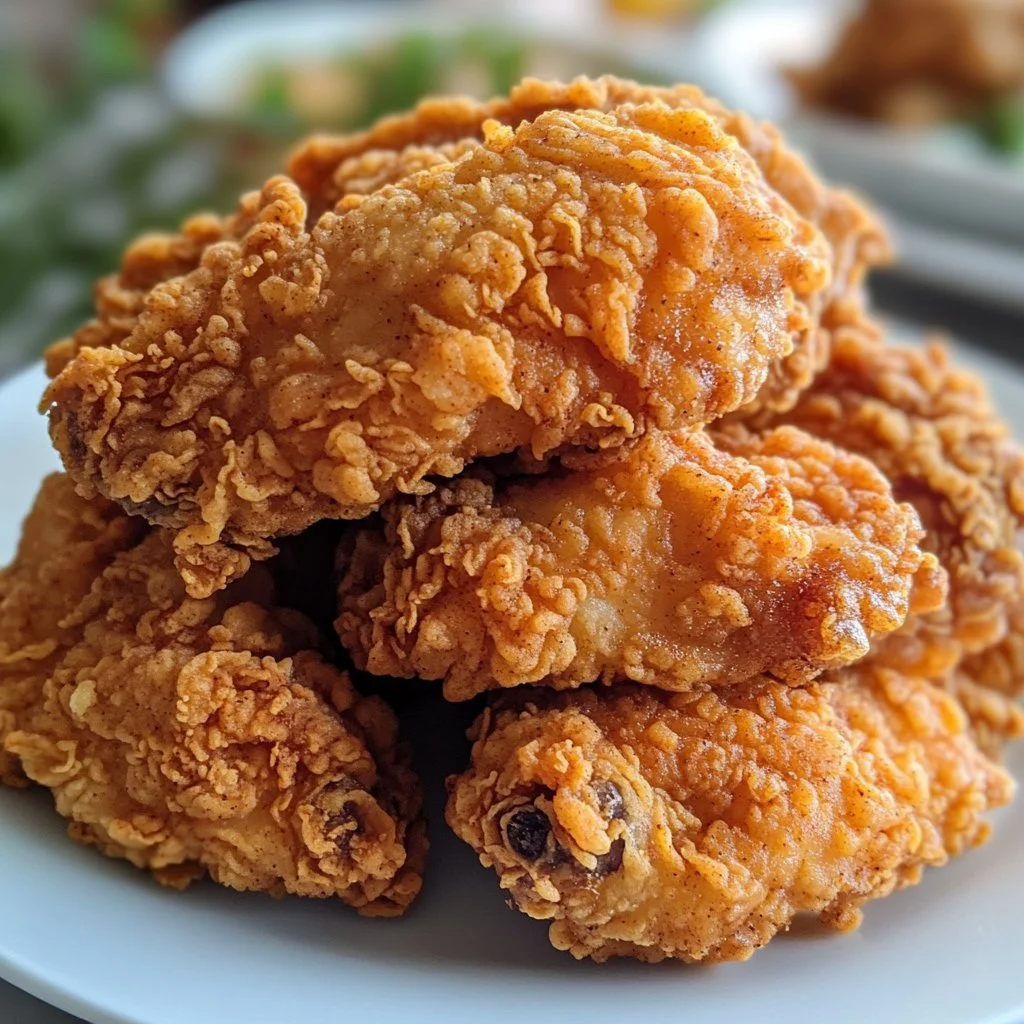
Serve this Extra Crispy Fried Chicken family-style on a large platter. Arrange the pieces so the crust faces up and the steam can escape. I like to place lemon wedges, pickles, and a bowl of honey on the side.

H3 Family-style ideas

  • Classic sides: mashed potatoes, coleslaw, and green beans make a balanced meal.
  • Picnic version: slice the chicken and make hearty sandwiches with slaw and pickles.
  • Kid-friendly: offer small bowls of ketchup and ranch for dipping.

Make it an event. Let everyone build their plate. Kids can choose sides and adults can add hot sauce or honey. The communal experience turns a simple meal into a family memory.

Storage

Refrigerate leftover chicken within two hours of cooking. Place in an airtight container or wrap in foil. Properly stored, fried chicken keeps for up to 3 days in the fridge.

Reheat tips:

  • Oven method: Preheat oven to 375°F. Place chicken on a wire rack set over a baking sheet and warm for 10-15 minutes until heated through. This restores crispiness best.
  • Air fryer: Reheat at 350°F for 6-8 minutes, turning once.
  • Microwave: Use only if you are short on time. Microwave for short bursts and then finish in a hot skillet for a minute to add crisp.

Food safety note: Always check the internal temperature after reheating. It should reach 165°F to be safe to eat.

Kitchen Notes

  • Use a thermometer: An instant-read probe ensures safe and perfectly cooked chicken.
  • Patience with oil: Let oil come to temp between batches. Too low and the crust soaks oil.
  • Wire rack resting: Rest on a rack, not paper towels, if you want to keep crispier edges.
  • Scale up safely: If doubling the recipe, fry more batches rather than crowding the pot.
  • Prep ahead: Marinate overnight and set up a coating station to speed evening cooking.

These shortcuts help you make restaurant-quality results at home with less stress.

Variations

  • For picky eaters: Use milder spices or reduce paprika and pepper. Serve with simple honey or ketchup on the side.
  • Spicy kick: Add 1 teaspoon cayenne or hot paprika to the flour for heat. Offer cooling ranch for kids.
  • Gluten-free option: Use a gluten-free all-purpose flour blend and ensure your buttermilk substitute is safe. Fry carefully as GF coatings sometimes brown faster.
  • Oven-fried version: Bake at 425°F for 35-40 minutes, turning halfway, after spraying crust with oil. Expect a slightly different texture but great flavor.
  • Low-oil option: Use an air fryer at 380°F for 18-22 minutes, flipping halfway, brushing with a light oil spray.

These tweaks keep the recipe adaptable for taste and dietary needs while retaining the heart of the dish.

FAQ

Q: Can I use boneless chicken for this recipe?
A: Yes. Boneless pieces cook faster, about 8-12 minutes depending on thickness. Use a thermometer to reach 165°F internally.

Q: How do I prevent the coating from falling off?
A: Shake excess buttermilk, press flour onto the chicken, and let coated pieces rest 10 minutes before frying. This helps the crust set.

Q: What oil is best for frying?
A: Use a neutral oil with a high smoke point such as canola, peanut, or vegetable oil. They tolerate 350°F well without burning.

Q: Is double-dredging necessary?
A: Not necessary but recommended for extra crunch. Double-dredge by dipping back into buttermilk then re-coating in flour before frying.

Q: How do I know when oil is ready?
A: Use a candy or deep-fry thermometer. 350°F is ideal. If you do not have a thermometer, test with a small pinch of flour; it should sizzle immediately and not burn.

Conclusion

I hope this Extra Crispy Fried Chicken becomes a warm addition to your family table. I tested this recipe for years and love how simple steps lead to reliable, crunchy results. If you want to compare techniques, take a look at a slightly different take I like from My Gorgeous Recipes on extra crispy fried chicken and another method with an emphasis on extra crunch at Pups With Chopsticks’ super crispy fried chicken.

Thanks for cooking with me. Tell your family to set the table while the chicken finishes, and enjoy every crispy bite.

Extra Crispy Fried Chicken

Prep Time 2 hours
Cook Time 18 minutes
Total Time 2 hours 18 minutes
Servings 4 servings
Calories 400
This Extra Crispy Fried Chicken recipe is a family favorite, featuring a perfectly seasoned crust and tender meat, ideal for busy weeknights or special gatherings.

Ingredients

Chicken Marinade

  • 4 pieces chicken pieces (thighs and drumsticks recommended) (Bone-in pieces keep moisture better.)
  • 2 cups buttermilk (Substitute with 2 cups milk mixed with 2 tbsp lemon juice and let sit for 5 mins if needed.)

Flour Mixture

  • 2 cups all-purpose flour (Spoon into the cup and level off for a light, crisp coating.)
  • 1 tablespoon paprika (Sweet paprika for color and flavor; smoked paprika adds depth.)
  • 1 teaspoon garlic powder (Blends evenly into flour for consistent flavor.)
  • 1 teaspoon onion powder (Boosts savory depth without adding moisture.)
  • 1 teaspoon salt (Season the flour to ensure a flavorful crust.)
  • 1/2 teaspoon black pepper (Use freshly ground for better spice flavor.)

For Frying

Instructions 

Marinating

  • Marinate the chicken pieces in buttermilk for at least 2 hours, preferably overnight.

Preparing the Flour Mixture

  • In a bowl, combine flour, paprika, garlic powder, onion powder, salt, and black pepper.

Coating the Chicken

  • Remove chicken from buttermilk and let excess drip off.
  • Dredge each piece in the flour mixture, ensuring it is fully coated. For extra crunch, consider double-dipping.

Frying

  • Heat oil in a deep fryer or large pot to 350°F (175°C).
  • Fry chicken in batches until golden brown and cooked through, about 15-18 minutes per batch.
  • Drain on paper towels and serve hot.

Notes

Serve family-style with lemon wedges, pickles, and a bowl of honey. Classic sides like mashed potatoes and coleslaw complement the chicken well. Store leftovers in an airtight container for up to 3 days.
Calories: 400kcal
Course: Comfort Food, Dinner, Main Course
Cuisine: American
Keyword: Buttermilk Chicken, Comfort Food, extra crispy, Family Recipe, Fried Chicken

Crispy Cheesy Chicken Ranch Patties

I love it when a recipe fills the kitchen with warm, savory smells and the happy clatter of pans. The scent of garlic and cheddar frying in oil makes everyone wander toward the stove. When the patties sizzle, you know dinner is happening, and that is a comforting sound in any busy home.

I created these Crispy Cheesy Chicken Ranch Patties as a weeknight go-to for families. They cook quickly, are easy to shape with little hands helping, and everyone gets to pick their favorite toppings. If you like simple weeknight magic that doubles as great leftovers, you are in the right place. For another family-friendly chicken idea, I like to pair these patties with a lighter salad like the Bang Bang Chicken Crispy Rice Salad for a fun contrast. Bang Bang Chicken Crispy Rice Salad

Why this works

Crispy Cheesy Chicken Ranch Patties

This recipe balances ease, flavor, and family needs. The ranch seasoning brings a familiar, tangy profile that kids recognize. The shredded cheddar melts into pockets of gooey goodness. Bread crumbs and a short chill help the patties hold their shape so they cook evenly.

The method also saves time. You can mix patties ahead and refrigerate them, or make a double batch for lunches later in the week. If you want another cheesy handheld to rotate through your menu, try my Cheesy Garlic Chicken Wraps for a different way to use tender chicken. Cheesy Garlic Chicken Wraps

These patties are forgiving and flexible. You do not need fancy equipment to get a golden crust. Just a skillet, good oil, and a confident flip.

Process Overview

“This is where the magic happens—when the aroma fills the kitchen.”

I keep the process simple so busy families can follow along easily. Mix gently, form patties, chill briefly, then pan fry. The brief chill helps the patties stay together without needing extra binders. Cooking in batches gives each patty room to brown.

If you want a slightly different texture or a lower-fat finish, I experimented with air frying a while back and found great results. You can use that technique when you want a lighter option. For air fryer tips that inspired me, visit this air fryer version I tested. Cheesy Garlic Chicken Wraps – Air Fryer Tips

Ingredients

  • 2 lbs ground chicken
    Tip: Use fresh or well-thawed. Ground chicken is mild and takes flavors well. If your mix is very lean, add a tablespoon of olive oil to improve juiciness.

  • 1 egg
    Tip: Room temperature eggs bind better. If you forget to warm the egg, it is fine straight from the fridge.

  • ½ cup plain bread crumbs
    Tip: Plain crumbs keep the flavor neutral. Panko will make them lighter and crispier.

  • 1 oz ranch seasoning mix (1 packet)
    Tip: Choose your favorite brand. I like a ranch with chives for extra herbal notes.

  • 3 garlic cloves, smashed and minced
    Tip: Smash first, then mince finely to release more flavor without big pieces.

  • ½ cup finely diced onion
    Tip: Mild onion or sweet onion works best for family meals. Finely dice so it cooks through in the patty.

  • ½ cup finely shredded cheddar cheese
    Tip: Sharp cheddar gives more bite, mild is great for kids. Grate your own for better melting.

  • 2–3 tablespoons oil, for frying (vegetable or avocado oil recommended)
    Tip: Avocado oil tolerates higher heat and adds a neutral flavor.

  • Burger buns or sandwich rolls
    Tip: Toasted buns add texture. Brioche is a treat for special nights.

  • Lettuce, tomato, pickles
    Tip: Keep toppings varied so everyone can customize their own burger.

  • Extra ranch dressing or cheese slices
    Tip: Offer extra ranch for dipping. Add cheese slices during the last minute of cooking to melt on top.

For more flavor ideas that pair well with these patties, I often serve a citrusy orange chicken on rotation. Try the Crispy Orange Chicken for a bright contrast when you want something different. Crispy Orange Chicken

Directions

  1. In a large bowl, combine ground chicken, egg, bread crumbs, ranch seasoning, garlic, onion, and shredded cheddar. Mix just until combined—do not overmix.
    Encouragement: Mix gently. Overworking can make patties tough. You want everything combined and a little forgiving.

  2. Divide the mixture into 6–8 equal portions and shape into round, flattened patties about ½ to ¾ inch thick.
    Encouragement: Press gently and make a slight indentation in the center of each patty to help them stay flat while cooking.

  3. Place patties on a parchment-lined tray and refrigerate for 15–30 minutes to help them hold their shape.
    Encouragement: This short chill makes a big difference. Use the time to set the table or prep toppings with the kids.

  4. Heat 2–3 tablespoons of oil in a large skillet over medium heat.
    Encouragement: Let the oil shimmer but not smoke. A steady heat gives you a golden crust without burning.

  5. Cook the patties in batches, 4–5 minutes per side, or until golden brown and internal temperature reaches 165°F (74°C).
    Encouragement: Don’t rush the flip. Let a good crust form before turning. Use a meat thermometer for safe, consistent results.

  6. Transfer to a paper towel-lined plate to drain excess oil.
    Encouragement: A quick rest helps the patties finish cooking evenly and keeps them juicy.

  7. Serve warm on buns with toppings, or enjoy as-is with your favorite sides.
    Encouragement: Let everyone build their own burger. Little choices at the table make dinner more fun.

If you are serving kids who like plain flavors, reserve some plain patties before adding toppings. For a melty finish, add a cheese slice in the last minute and cover the pan to melt.

Serving

Crispy Cheesy Chicken Ranch Patties

Serve these patties family-style with a basket of buns and bowls of toppings. Place lettuce, sliced tomato, pickles, and extra ranch on the table so everyone can customize. The assembly line approach makes dinner interactive and lightens the workload.

For a full family meal, add a side of roasted potatoes or a crisp slaw. If you want a lighter handheld option, pair the patties with crunchy mozzarella wraps for a snack-style plate. Crunchy Crispy Air Fryer Chicken Mozzarella Wraps

Kids love customizing. Give them choices like single patties with cut-up veggies or full burgers with all the fixings. Leftovers make a quick lunch when reheated gently.

Storage

Fridge: Store cooked patties in an airtight container for up to 3 days. Cool them to room temperature first, then refrigerate.

Freezer: Freeze cooked patties on a baking sheet until firm, about 1 hour. Transfer to a freezer bag and keep for up to 3 months. Thaw overnight in the refrigerator before reheating.

Reheat: Warm patties in a skillet over medium-low heat for a few minutes on each side. You can also reheat in a 350°F oven until warmed through. For a crisp finish, a quick broil or air fry for 2–3 minutes works well.

Make-ahead tip: Form patties and freeze raw on a tray. Once solid, store in a bag and cook from frozen, adding a minute or two per side in the skillet.

Kitchen Notes

  • Use a meat thermometer to ensure the internal temperature reaches 165°F for safety.
  • Do not overmix the meat to keep patties tender and moist.
  • Chill patties briefly to help them hold their shape and reduce shrinking.
  • If the mixture feels wet, add an extra tablespoon of bread crumbs.
  • For a crispier crust, cook over medium-high heat but watch closely to avoid burning.

These small shortcuts make the cooking experience smoother and keep dinner stress low.

Variations

  • Kid-friendly plain patties: Skip the onions and extra garlic to make a milder patty for picky eaters.
  • Low-carb option: Serve patties over a salad or in lettuce cups instead of buns.
  • Spicy ranch: Add 1 teaspoon of chili powder or a pinch of cayenne for a kick.
  • Air fryer version: Lightly spray patties with oil and air fry at 375°F for 10-12 minutes, flipping halfway.
  • Gluten-free: Use gluten-free bread crumbs or crushed gluten-free crackers.

These tweaks help you tailor the recipe to tastes, diets, or what is in your pantry.

FAQ

Can I use ground turkey instead of ground chicken?

Yes. Ground turkey works well. It can be a bit drier, so consider adding a tablespoon of olive oil or an extra egg yolk for moisture.

How do I keep the patties from falling apart?

Chill the shaped patties for 15 to 30 minutes before cooking. This firms them up and reduces crumbling. Also avoid overhandling the mixture.

Can I bake these instead of frying?

You can. Preheat the oven to 400°F and place patties on a parchment-lined baking sheet. Lightly brush with oil and bake 12–15 minutes, flipping once, until internal temperature hits 165°F.

Are these safe to meal prep and freeze?

Absolutely. Freeze cooked or raw patties in a single layer, then transfer to a bag. Thaw overnight for best reheating results.

Can I make these spicy for adults?

Yes. Mix in chili flakes, diced jalapeño, or a teaspoon of hot sauce. Balance the heat with extra cheese or a creamy ranch on the side.

Conclusion

I hope these Crispy Cheesy Chicken Ranch Patties become one of your family favorites. They bring simple, reliable flavor and easy prep to busy evenings, and they invite everyone to participate in the meal. If you want a classic take with extra tips on crunch and coating techniques, check out the Crispy Cheesy Chicken Ranch Patties Recipe – Allrecipes for more inspiration. Crispy Cheesy Chicken Ranch Patties Recipe – Allrecipes If you prefer a lighter method, you might enjoy the air fryer approach in the Air Fryer Cheesy Chicken Ranch Burger Patties – Jam Hands post. Air Fryer Cheesy Chicken Ranch Burger Patties – Jam Hands

Thanks for cooking with me. When your kitchen smells like garlic, cheddar, and a little bit of ranch, you know you made something the family will smile about.

Crispy Cheesy Chicken Ranch Patties

Prep Time 15 minutes
Cook Time 15 minutes
Total Time 30 minutes
Servings 6 patties
Calories 280
These Crispy Cheesy Chicken Ranch Patties are a perfect weeknight dinner option, quick to make, and sure to please the entire family with customizable toppings.

Ingredients

Patties Ingredients

  • 2 lbs ground chicken (Use fresh or well-thawed.)
  • 1 large egg (Room temperature eggs bind better.)
  • ½ cup plain bread crumbs (Plain crumbs keep the flavor neutral.)
  • 1 oz ranch seasoning mix (Choose your favorite brand.)
  • 3 cloves garlic (Smash first, then mince finely.)
  • ½ cup finely diced onion (Mild onion or sweet onion works best.)
  • ½ cup finely shredded cheddar cheese (Sharp cheddar gives more bite.)
  • 2–3 tablespoons oil (Vegetable or avocado oil recommended.)

Topping Suggestions

  • burger buns or sandwich rolls (Toasted buns add texture.)
  • lettuce, tomato, pickles (Keep toppings varied for customization.)
  • extra ranch dressing or cheese slices (Offer extra ranch for dipping.)

Instructions 

Preparation

  • In a large bowl, combine ground chicken, egg, bread crumbs, ranch seasoning, garlic, onion, and shredded cheddar. Mix just until combined.
  • Divide the mixture into 6–8 equal portions and shape into round, flattened patties about ½ to ¾ inch thick.
  • Place patties on a parchment-lined tray and refrigerate for 15–30 minutes.

Cooking

  • Heat 2–3 tablespoons of oil in a large skillet over medium heat.
  • Cook the patties in batches, 4–5 minutes per side, until golden brown and internal temperature reaches 165°F.
  • Transfer to a paper towel-lined plate to drain excess oil.

Serving

  • Serve warm on buns with toppings, allowing everyone to customize their own burger.

Notes

Store cooked patties in an airtight container for up to 3 days in the fridge. For freezing, place on a baking sheet until firm, then transfer to a freezer bag.
Calories: 280kcal
Course: Dinner, Main Dish
Cuisine: American, Family-Friendly
Keyword: Cheesy Chicken, Crispy Chicken Patties, Easy Dinner, Family Meal, Ranch Chicken Patties

Cajun Chicken Sloppy Joes

The kitchen smells like butter and garlic. The sizzle of onion and bell pepper hits the pan and I know dinner is turning into something special. My kids crowd the counter, curious, and the whole house starts to hum with the familiar comfort of a family meal on the way.

I have been sharing recipes and family-tested tips for years, and I love simple dinners that feed a crowd without fuss. If you want a weeknight winner that brings bold flavors and quick cleanup, this Cajun Chicken Sloppy Joes recipe will become a family favorite. If you like Cajun spice in other dishes, you might also enjoy my take on Cajun chicken pasta my kids love for another weeknight option.

Why this works

Cajun Chicken Sloppy Joes

Cajun Chicken Sloppy Joes balance speed and flavor. Ground chicken cooks quickly, which means dinner is on the table fast. The Cajun seasoning brings a warm, savory punch that makes simple ingredients feel special.

This recipe saves time in the kitchen without sacrificing taste. You get the comfort of a sloppy joe but with less grease and more bright spice. I often make a double batch on Sunday and use leftovers for lunches or a busy weeknight. If you need an oven-based main to pair with this, try my 30-minute oven baked chicken thighs for an easy side or alternate main.

Cooking at home can be relaxed and joyful. This recipe helps keep the family at the table, even on the busiest nights.

Process Overview

“This is where the magic happens—when the aroma fills the kitchen.”

The process is straightforward. You sauté aromatics, brown the ground chicken, stir in seasonings and sauce, then simmer briefly. That short simmer lets the flavors knit together and keeps the chicken tender.

Keep your skillet hot but not scorching, and taste as you go. For another quick family bowl with bold flavors, you can compare the method to my 30-minute teriyaki chicken bowl, which uses similar steps for fast, satisfying meals.

This method gives you control. Season early, adjust late, and serve family-style for easy sharing.

Ingredients

  • 1 pound ground chicken
    Tip: Use lean ground chicken for less splash in the pan. If you prefer juicier results, try a slightly higher fat blend.

  • 1 tablespoon Cajun seasoning
    Tip: Use a mix you trust or make your own. Start with a tablespoon and adjust if your family likes more heat.

  • 1 onion, chopped
    Tip: Yellow onion brings sweetness. I often save time by using a food processor for a quick chop.

  • 2 cloves garlic, minced
    Tip: Fresh garlic is best. If you are short on time, 1/2 teaspoon garlic powder will work in a pinch.

  • 1 bell pepper, chopped
    Tip: Red or green both work. Red adds sweetness and color for picky eaters.

  • 1 can (8 oz) tomato sauce
    Tip: Choose plain tomato sauce for a clean flavor. If you like a hint of sweetness, a fire-roasted variety adds depth.

  • 1 tablespoon Worcestershire sauce
    Tip: This adds savory umami. If you are gluten-free, check the label for a gluten-free brand.

  • Salt and pepper to taste
    Tip: Add salt slowly and taste at the end. Freshly cracked black pepper makes a nice finish.

  • Burger buns
    Tip: Toast the buns lightly in the oven or on the skillet for better texture and less sogginess.

A quick note on spice levels. If you cook for little ones, start with half the Cajun seasoning and let adults add more at the table.

Directions

  1. In a large skillet, sauté onion, garlic, and bell pepper over medium heat until softened.
    Encouraging note: Keep stirring and breathe in that cozy scent. Softened veggies build the base of your flavor.

  2. Add ground chicken and cook until browned.
    Encouraging note: Break the meat into small pieces for even cooking. Don’t worry about perfection, just get a good sear.

  3. Stir in Cajun seasoning, tomato sauce, Worcestershire sauce, salt, and pepper.
    Encouraging note: Mix well and taste. Adjust seasoning little by little so it suits everyone at your table.

  4. Simmer for 5-7 minutes until heated through.
    Encouraging note: Simmer gently to let the sauce thicken a bit. This short step ties all the flavors together.

  5. Serve the mixture on burger buns.
    Encouraging note: Scoop it onto warm toasted buns, and watch the smiles. Serve family-style so everyone can build their own.

If you have a picky eater, keep a small bowl of plain browned chicken aside before adding the Cajun seasoning. This keeps mealtime calm and makes sure everyone eats.

Serving

Cajun Chicken Sloppy Joes

Serve Cajun Chicken Sloppy Joes family-style on a platter. Place toasted buns, cheese slices, pickles, and a simple slaw on the table so everyone can customize. I like to offer extra hot sauce and a bowl of fresh lime wedges for a bright finish.

Pair this meal with oven fries or a simple green salad. For a lighter side, steamed green beans or carrot sticks work well with children. Let the family build their own plate and keep dinner conversation flowing.

Storage

Leftovers store well in the fridge. Place cooled sloppy joe mixture in an airtight container for up to 3 days. For longer storage, freeze in freezer-safe containers or bags for up to 3 months.

To reheat from the fridge, warm gently in a skillet over low heat with a splash of water or broth to loosen the sauce. From frozen, thaw overnight in the fridge and reheat the same way. Reheat in the microwave for single portions, stirring every 30 seconds to heat evenly.

If you plan to meal prep, keep the buns separate until you serve to avoid sogginess. For easy lunches, pack reheated mixture in a thermos and add a fresh bun or wrap at mealtime.

Kitchen Notes

  • Shortcut: Use pre-chopped onions and peppers to save 5-10 minutes.
  • Shortcut: Swap ground turkey or beef if that is what you have on hand.
  • Shortcut: Make a double batch and freeze half for busy nights.
  • Shortcut: Toast buns in the same skillet after cooking to soak up flavor.
  • Shortcut: Use a squeeze bottle for quick sauce adjustments at the table.

These little shortcuts keep weeknight cooking doable and let you spend more time with family.

Variations

  • Mild version for picky kids: Use half the Cajun seasoning, add a teaspoon of brown sugar, and offer hot sauce on the side for adults.
  • Low-carb: Serve the sloppy joe mixture over lettuce wraps or cauliflower rice.
  • Vegetarian: Swap crumbled firm tofu or lentils for the chicken and adjust seasoning.
  • Spicy: Add a chopped jalapeño at step 1 and increase Cajun seasoning to taste.
  • Cheesy: Stir in a cup of shredded cheddar or pepper jack toward the end for a creamy finish.

Each variation keeps the spirit of the dish while adapting it to your family’s tastes or dietary needs.

FAQ

Q: Can I use ground turkey instead of ground chicken?
A: Yes. Ground turkey works well and cooks similarly. Watch the cooking time since lean turkey can dry out faster.

Q: How do I reduce sodium in this recipe?
A: Use low-sodium tomato sauce and a low-sodium Worcestershire sauce. Taste before adding salt and season gradually.

Q: Can I make this ahead for a party?
A: Absolutely. Make it a day ahead, cool, and refrigerate. Reheat slowly before serving and serve family-style.

Q: Is this recipe kid-friendly on the first try?
A: Many kids enjoy it, especially if you keep the spice mild. Offer toppings like cheese and pickles to entice picky eaters.

Q: What sides go best with these sloppy joes?
A: Oven fries, simple slaw, steamed veggies, or a green salad all pair nicely and round out the meal.

Conclusion

Thanks for cooking with me. I hope this Cajun Chicken Sloppy Joes recipe becomes a cozy weeknight favorite in your home. If you want to compare other takes on the same idea, I like this version from Cajun Chicken Sloppy Joes – Sprinkles and Sprouts for a slightly different twist, and this recipe from Cajun Chicken Sloppy Joes – 2 Nerds In A Truck gives another family-friendly angle.

Come back soon for more simple, family-tested meals. Happy cooking, and may your kitchen be full of good smells and good company.

Cajun Chicken Sloppy Joes

Prep Time 10 minutes
Cook Time 15 minutes
Total Time 25 minutes
Servings 4 servings
Calories 350
A quick and flavorful dinner option, these Cajun Chicken Sloppy Joes combine ground chicken with bold Cajun seasoning for a family-friendly meal that's ready in no time.

Ingredients

Main Ingredients

  • 1 pound ground chicken (Use lean ground chicken for less splash in the pan.)
  • 1 tablespoon Cajun seasoning (Adjust to taste; start with a tablespoon for milder spice.)
  • 1 medium onion, chopped (Yellow onion brings sweetness.)
  • 2 cloves garlic, minced (Fresh garlic is best; garlic powder can be used in a pinch.)
  • 1 medium bell pepper, chopped (Red adds sweetness, green is also suitable.)
  • 1 can (8 oz) tomato sauce (Choose plain for clean flavor.)
  • 1 tablespoon Worcestershire sauce (Check for gluten-free if necessary.)
  • to taste na salt and pepper (Add salt slowly and taste at the end.)
  • 4 na burger buns (Toast the buns lightly for better texture.)

Instructions 

Preparation

  • In a large skillet, sauté onion, garlic, and bell pepper over medium heat until softened.
  • Add ground chicken and cook until browned.
  • Stir in Cajun seasoning, tomato sauce, Worcestershire sauce, salt, and pepper.
  • Simmer for 5-7 minutes until heated through.
  • Serve the mixture on burger buns.

Notes

Serve family-style with toppings like cheese slices, pickles, and slaw. Leftovers can be stored in the fridge for up to 3 days or frozen for 3 months.
Calories: 350kcal
Course: Dinner, Main Course
Cuisine: American, Cajun
Keyword: Cajun Chicken Sloppy Joes, Comfort Food, Family Meal, Quick Dinner, Weeknight Dinner

Garlic Parmesan Chicken Meatloaf

I can still smell the garlic when I walk into my kitchen. The soft sizzle from the pan, the gentle hum of the oven, and the warm peppery scent of Parmesan make everyone gather close. This Garlic Parmesan Chicken Meatloaf is one of those recipes that feels like a hug on a plate.

If you want the printable recipe card and a few extra photos, you can find my tested version on my Garlic Parmesan Chicken Meatloaf recipe page. I test family recipes until they are simple, reliable, and easy to love.

Why this works

Garlic Parmesan Chicken Meatloaf

This meatloaf hits all the notes families want. Ground chicken keeps it lighter than beef, while Parmesan adds a savory, nutty depth. Garlic gives the aroma that pulls everyone to the table.

H3 Family and time saving

It is quick to assemble and bakes in under an hour. That makes it a great weeknight main when homework, sports, and life need a home-cooked meal without a late night. Pair it with mashed potatoes or a simple salad and you have dinner ready.

For a similar hands-on weeknight idea that pairs well with leftovers, try my creamy chicken breast recipe that the kids often ask for next day lunches at my creamy garlic parmesan chicken breast page.

Process Overview

“This is where the magic happens—when the aroma fills the kitchen.”

The process is straightforward. You mix, shape, and bake. The garlic and Parmesan work together to keep the chicken flavorful and moist. Breadcrumbs and an egg bind the mixture so the loaves hold their shape and slice neatly for serving.

I write steps so home cooks can follow easily. Little tips along the way help ensure a moist result every time.

Ingredients

  • 1 lb ground chicken
    • Tip: Use fresh ground chicken from a trusted source or grind your own breasts and thighs for the best texture. Mixing breasts and thighs gives more flavor.
  • 1/2 cup grated Parmesan cheese
    • Tip: Freshly grated Parmesan melts and blends better than pre-grated powder. It adds a salty, savory boost.
  • 4 cloves garlic, minced
    • Tip: Mince garlic finely or press it. Raw garlic blends into the meat and becomes mellow and rich after baking.
  • 1/4 cup chopped fresh parsley
    • Tip: Parsley adds color and a light herb note. Flat leaf parsley is my preference for flavor.
  • 1/4 cup breadcrumbs
    • Tip: Plain breadcrumbs work well. If you only have panko, pulse it briefly in a food processor to match the texture.
  • 1 egg
    • Tip: The egg binds and adds moisture. If you are out of eggs, use 2 tablespoons of plain yogurt as a binder.
  • 1 tsp salt
    • Tip: Taste your Parmesan first since it can be salty. Adjust the added salt accordingly.
  • 1/2 tsp black pepper
    • Tip: Freshly cracked pepper brightens the flavors. Use more if your family likes a bit of bite.
  • 1 tsp Italian seasoning
    • Tip: I like a homemade mix of oregano, basil, and thyme. It pairs perfectly with Parmesan and garlic.

Short personal note: I test this recipe with my family and adjust salt and garlic to make sure it is kid-friendly and loved by adults too. For a different texture and extra veggies, see my skillet variation below.

In case you want another one-pan chicken and potato idea to serve alongside or use leftover meatloaf slices, check my skillet version at Garlic Parmesan Chicken and Potatoes Skillet.

Directions

  1. Preheat the oven to 375°F (190°C).

    • Encouraging note: Letting the oven reach the right temperature first makes baking predictable. While it heats, you can prep the rest.
  2. In a large bowl, combine ground chicken, Parmesan cheese, minced garlic, parsley, breadcrumbs, egg, salt, pepper, and Italian seasoning. Mix until well combined.

    • Encouraging note: Use clean hands or a spoon and mix gently until everything is incorporated. Overworking can tighten the meat, so stop once it looks unified.
  3. Form the mixture into mini loaf shapes and place them on a baking sheet lined with parchment paper.

    • Encouraging note: Mini loaves cook more evenly and are great for portioning. If you prefer one large loaf, shape it and increase the bake time a little.
  4. Bake for 30-35 minutes, or until the meatloaves are cooked through and they reach an internal temperature of 165°F (74°C).

    • Encouraging note: Use an instant-read thermometer for accuracy. The thermometer is your best friend for safe, juicy results.
  5. Serve with mashed potatoes, a side salad, or veggies.

    • Encouraging note: Let the loaves rest for a few minutes after baking so they firm up. Slice gently and serve warm to smiles around the table.

If you want to make these in a slow cooker for a hands-off day, I have a crockpot twist that adapts well and keeps the flavors intact. You can compare methods on my crockpot recipe page at my crockpot garlic parmesan chicken thighs page.

Serving

Garlic Parmesan Chicken Meatloaf

Serve these meatloaves family style on a large platter. I like to place the loaves in the center with mashed potatoes on one side and roasted vegetables on the other. Let everyone help themselves.

For kids, slice thin pieces and serve with a small scoop of their favorite sauce. For adults, pair with an easy salad and a lemon wedge to brighten the dish. Leftover slices make excellent sandwiches the next day.

Set out warm plates, and consider a small bowl of extra grated Parmesan for those who like an extra sprinkle. This meal keeps conversation flowing and plates full.

Storage

Refrigerate

  • Store cooled meatloaves in an airtight container for up to 4 days in the fridge.
  • To reheat, place slices on a baking sheet and warm at 325°F for 10 to 12 minutes until heated through.
  • Alternatively, microwave a single slice on medium power in 30 second intervals until warm.

Freezing

  • Wrap cooled loaves tightly in plastic wrap and foil, and freeze for up to 3 months.
  • Thaw in the fridge overnight before reheating in the oven to preserve texture.

Safety tip: Always reheat until the center reaches 165°F for safe eating. I label my containers with dates so nothing gets lost in the back of the fridge.

Kitchen Notes

  • Use a thermometer. It removes guesswork and keeps family meals worry free.
  • Make mini loaves for faster cooking and easy portion control.
  • Swap plain breadcrumbs for crushed crackers if you need a pantry substitute.
  • Double the recipe and freeze half for busy weeks. It saves time and stress.
  • Clean while you cook. Wipe counters and load the dishwasher during baking to keep the kitchen calm.

Variations

H3 For picky eaters

  • Mild version: Reduce garlic to 2 cloves and add 1/4 cup finely grated carrot or zucchini for extra moisture and hidden veggies.
  • Cheese swap: Replace Parmesan with 1/2 cup finely shredded mild cheddar for a familiar taste kids often prefer.

H3 For different diets

  • Low-carb: Replace breadcrumbs with 1/4 cup almond flour. Watch texture and add a touch of extra moisture if needed.
  • Gluten-free: Use gluten-free breadcrumbs or crushed gluten-free crackers.
  • Dairy-free: Omit Parmesan and add 2 tablespoons nutritional yeast and an extra pinch of salt for savory notes.

H3 Make it saucy

  • Brush a thin layer of ketchup or BBQ sauce before baking for a glossy finish the kids like.
  • For a tangy twist, mix 1 tablespoon Dijon mustard into the egg before combining.

If you want to pair this meatloaf with a sweeter sauce and garlicky potatoes, my honey BBQ chicken with garlic-Parmesan potatoes is a great inspiration and side idea at my honey BBQ chicken page.

FAQ

Q: Can I use ground turkey instead of ground chicken?
A: Yes. Ground turkey works similarly but may be leaner. Consider mixing in a little extra fat like a tablespoon of olive oil or using a mix of turkey dark meat for juiciness.

Q: How can I tell when the meatloaf is done without a thermometer?
A: Cut into the center and make sure juices run clear and there is no pink. However, a thermometer is more reliable and recommended for safety.

Q: Can I prepare these ahead of time?
A: Absolutely. Shape the loaves, cover, and refrigerate for up to 24 hours before baking. You can also freeze them before baking and bake from frozen with extra time.

Q: Is it safe to use ground chicken for meatloaf?
A: Yes. Ground chicken is safe when cooked to 165°F (74°C). Proper handling and cooking keep the meal healthy and delicious.

Q: What sides go best with this meatloaf?
A: Mashed potatoes, steamed green beans, roasted carrots, or a crisp salad are all great. For a cozy dinner, creamy mashed potatoes are my go-to comfort side.

Conclusion

I hope this Garlic Parmesan Chicken Meatloaf becomes a regular on your family table. It is comforting, straightforward, and built for busy evenings when you still want a homemade meal.

If you are looking for another take on this recipe from a trusted source, I like the version on Garlic Parmesan Chicken Meatloaf – The Recipe Critic for additional serving ideas. For a mini meatloaf spin with extra tips, see the helpful guide at Garlic Parmesan Chicken Meatloaves – Will Cook For Smiles.

Thank you for cooking with me. From my kitchen to yours, may every meal bring your family a little closer.

Garlic Parmesan Chicken Meatloaf

Prep Time 15 minutes
Cook Time 35 minutes
Total Time 50 minutes
Servings 6 servings
Calories 240
A comforting and flavorful meatloaf made with ground chicken, Parmesan cheese, and garlic, perfect for busy weeknights.

Ingredients

Main Ingredients

  • 1 lb ground chicken (Use fresh ground chicken from a trusted source or grind your own for the best texture.)
  • 1/2 cup grated Parmesan cheese (Freshly grated Parmesan melts and blends better than pre-grated.)
  • 4 cloves garlic, minced (Mince garlic finely or press it for best flavor.)
  • 1/4 cup chopped fresh parsley (Flat leaf parsley is preferred for flavor.)
  • 1/4 cup breadcrumbs (Plain breadcrumbs work well; if using panko, pulse it briefly in a food processor.)
  • 1 large egg (The egg binds and adds moisture.)
  • 1 tsp salt (Adjust according to the saltiness of your Parmesan.)
  • 1/2 tsp black pepper (Use freshly cracked pepper for best flavor.)
  • 1 tsp Italian seasoning (Homemade mix of oregano, basil, and thyme works well.)

Instructions 

Preparation

  • Preheat the oven to 375°F (190°C).
  • In a large bowl, combine ground chicken, Parmesan cheese, minced garlic, parsley, breadcrumbs, egg, salt, pepper, and Italian seasoning. Mix until well combined.
  • Form the mixture into mini loaf shapes and place them on a baking sheet lined with parchment paper.

Baking

  • Bake for 30-35 minutes, or until the meatloaves are cooked through and reach an internal temperature of 165°F (74°C).
  • Let the loaves rest for a few minutes before slicing and serving.

Serving

  • Serve with mashed potatoes, a side salad, or veggies.

Notes

For a different texture, try adding finely grated carrot or zucchini. If you want extra flavor, brush with ketchup or BBQ sauce before baking.
Calories: 240kcal
Course: Dinner, Main Course
Cuisine: American
Keyword: Chicken Dinner, Comfort Food, Easy Meatloaf, Garlic Parmesan Chicken Meatloaf, Weeknight Dinner

Cheesy Chicken Fritters

I can still smell them. The warm, cheesy steam rising from the skillet fills the kitchen and makes everyone pause at the doorway. There is a soft sizzle as the fritters hit the hot oil, a sound that promises comfort and a quick, hearty meal.

I have been testing family recipes in my kitchen for over 12 years. These cheesy chicken fritters are one of those wins that come together fast and please picky eaters and hungry teens alike. If you enjoy quick, cheesy meals, you might also like my cheesy garlic chicken wraps with a little spinach tucked inside for a simple weeknight swap.

Why this works

Cheesy Chicken Fritters

This recipe hits the sweet spot between ease and flavor. Ground chicken blends easily with cheese and seasonings, creating patties that cook quickly and stay juicy. The almond flour keeps the fritters light and gives them a gentle crust without heavy breading.

Time is precious for families. These fritters take about 20 minutes from start to finish when you have everything ready. They are a great option for when you need dinner on the table fast, packed with protein, and loved by kids who favor crisp, cheesy bites.

I test many family recipes and often borrow ideas from other simple dinners. If you want another cheesy crowd-pleaser, try my cheesy garlic chicken wraps for lunches or a picnic. Those wrap well and travel without losing flavor.

Process Overview

“This is where the magic happens—when the aroma fills the kitchen.”

Start by mixing everything in a bowl. The mixture should be moist and hold together when pressed. If it feels too loose, add a little more almond flour. If it feels too thick, a splash of water or another egg white can help.

Heat the skillet and brown the fritters in olive oil. You want a golden crust for contrast with the melty center. Flip them gently so they stay intact and finish cooking through. Serve them hot so the cheese is gooey and the edges are crisp.

If you like a saucy side, these fritters pair beautifully with a simple ranch dip or a warm tomato sauce. For another oven-friendly option, see my take on queso chicken enchiladas for an easy casserole-style dinner.

Ingredients

  • 1 lb ground chicken — I use lean ground chicken for a lighter fritter, but 85/15 works if you want more richness. Let it sit at room temperature for 10 minutes to mix more easily.
  • 1 cup shredded cheese (cheddar or mozzarella) — Sharp cheddar adds a punch, mozzarella gives a milder melt. Grate it fresh for better melting.
  • 1/4 cup almond flour — This keeps the fritters gluten-free and tender. If you do not have almond flour, fine breadcrumbs or oat flour work as swaps.
  • 1 large egg — The egg binds the mixture. If you need an egg-free option, try 2 tablespoons of flaxseed mixed with 6 tablespoons water, chilled.
  • 2 green onions, chopped — Add the whites and most of the greens for a mild onion flavor. Scallions brighten the mixture without overpowering it.
  • 1 tsp garlic powder — Use garlic powder for even distribution. Fresh garlic is okay if you prefer a sharper bite; finely mince 1 small clove.
  • 1 tsp onion powder — This boosts the savory base. For a fresh flavor, replace half with finely grated onion.
  • Salt and pepper to taste — Start with 1/2 tsp salt and 1/4 tsp pepper, then adjust after you taste the raw mixture cautiously.
  • Olive oil for frying — Use a neutral, light olive oil for frying. Heat it until shimmering but not smoking.

Tip from my test kitchen: If you want a softer fritter, let the mixed batter rest 10 minutes. The almond flour absorbs a bit of moisture and the patties hold together better. For more hands-off family meals, check my slow cooker cheesy chicken chili for an easy weeknight plan that feeds a crowd.

Directions

  1. In a large bowl, combine the ground chicken, shredded cheese, almond flour, egg, green onions, garlic powder, onion powder, salt, and pepper. Mix until well combined.
    Be gentle while mixing so the fritters stay tender. If the mixture feels too wet, add a tablespoon more almond flour at a time.

  2. Heat olive oil in a skillet over medium heat.
    Use enough oil to coat the bottom of the pan. It should shimmer but not smoke. Test with a small bit of mixture; it should sizzle when it hits the oil.

  3. Shape the chicken mixture into patties.
    Make them about 2 1/2 inches wide and 1/2 inch thick for even cooking. Wet your hands slightly to prevent sticking and press gently so the patties hold together.

  4. Add the patties to the skillet and cook for about 4-5 minutes on each side, or until golden brown and cooked through.
    Flip once and avoid pressing down. Cook until an instant-read thermometer reads 165°F in the center or the juices run clear.

  5. Serve hot and enjoy your cheesy chicken fritters!
    Let them rest on a paper towel for a minute to remove excess oil. Pair with veggies, a green salad, or a small bowl of dipping sauce.

Each step is designed to be forgiving. If one batch browns faster, lower the heat and finish the rest. These fritters reheat well, so you can make a double batch and save time on busy nights.

Serving

Cheesy Chicken Fritters

Serve these fritters family-style on a large platter so everyone can grab what they want. I like to stack a few on warmed plates, add a small bowl of ranch or yogurt-based dip, and a platter of carrot sticks and cucumber slices on the side.

For sandwich-style fun, place a fritter on a soft roll with lettuce, tomato, and a smear of pesto or mayo. Kids love a mini version on slider buns for lunch boxes. For a heartier meal, serve the fritters over rice or alongside roasted potatoes.

Warm, shared plates work well for busy families. If you want to add a baked side that complements the fritters, try a simple roasted broccoli or a quick couscous salad for a balanced dinner. For another family-friendly, smothered chicken idea, take a look at my smothered cheesy sour cream chicken for inspiration.

Family-style tips

Set out a few small bowls with condiments so everyone can personalize their plate. Fresh lemon wedges brighten the fritters and help cut the richness when kids ask for seconds.

Storage

Leftovers store well and make busy nights easier. Place cooled fritters in an airtight container in the refrigerator for up to 4 days. If you need longer storage, freeze them on a tray until firm, then transfer to a freezer bag for up to 3 months.

To reheat from the refrigerator, heat in a 350°F oven for 8 to 10 minutes, flipping once, until warmed through and crisp. For frozen fritters, bake at 375°F for 15 to 20 minutes or until fully heated and crisped. A toaster oven works great for single servings.

If you are short on time, reheat in a skillet over medium heat with a teaspoon of oil to restore the crust. Avoid microwaving unless you are in a hurry; microwaves will make the fritters soft and less crisp.

Kitchen Notes

  • Shortcut: Use pre-shredded cheese when you are in a hurry, but fresh-shredded melts better.
  • Make-ahead: Mix the patties and place them on a tray in the fridge for up to 4 hours before frying.
  • Crispy finish: Finish under the broiler for 1 minute if you want extra browning on top.
  • Allergy swap: Replace almond flour with 1/4 cup oat flour for a nut-free version. Adjust as needed for texture.
  • Batch cooking: Double the recipe and freeze half. Reheat as directed for quick lunches or dinners.

Variations

  • Kid-friendly: Add a small spoonful of ketchup or BBQ sauce into the mix and use mild cheddar for a familiar flavor. Keep green onions to a minimum or swap for finely grated carrot to sneak in veggies.
  • Low-carb: Stick with almond flour and serve with a side of cauliflower rice or a green salad. The fritters themselves are already low-carb friendly.
  • Spicy: Add 1/2 tsp smoked paprika and a pinch of cayenne for warmth. Serve with a cooling yogurt dip.
  • Italian twist: Swap the seasonings for 1 tsp oregano and 1 tsp basil and use mozzarella plus a tablespoon of grated Parmesan. Serve with marinara for dipping.
  • Gluten-free and dairy-free: Use a dairy-free shredded cheese alternative and ensure the cheese melts well. Almond flour keeps the recipe naturally gluten-free.

FAQ

Q: Can I bake these instead of frying?
A: Yes. Preheat the oven to 400°F, place the patties on a lightly greased baking sheet, and bake for 12 to 15 minutes, flipping halfway. Finish under the broiler for a minute for extra color.

Q: How do I know when they are cooked through?
A: Use an instant-read thermometer. The center should reach 165°F. If you do not have a thermometer, cut one open; the juices should run clear and the meat should not be pink.

Q: Can I use ground turkey or beef?
A: You can substitute ground turkey or ground beef. Cook times remain similar, but fattier meats may splatter more in the skillet, so adjust the heat if needed.

Q: Are these freezer friendly?
A: Absolutely. Freeze on a tray until firm, then store in a freezer-safe bag for up to 3 months. Reheat in the oven from frozen at 375°F for 15 to 20 minutes.

Q: What dipping sauces work best?
A: Simple pairings include ranch, honey mustard, marinara, or a yogurt-cucumber dip. A squeeze of fresh lemon over the fritter brightens the flavors too.

Conclusion

I hope these cheesy chicken fritters find a regular spot in your weeknight rotation. They cook fast, travel well for packed lunches, and keep everyone happy at the table. For a visual walkthrough, you might enjoy the step-by-step video from Natasha’s Kitchen which highlights key techniques. If you like comparing versions and tips, take a look at the recipe collection from Craving Home Cooked for another take on this comforting dish.

Thank you for sharing your kitchen with me. Come back soon for more cozy, family-tested chicken recipes and practical tips.

Cheesy Chicken Fritters

Prep Time 10 minutes
Cook Time 10 minutes
Total Time 20 minutes
Servings 4 servings
Calories 200
Quick and easy cheesy chicken fritters that are perfect for families and packed with flavor. A crowd-pleaser that cooks fast and stays juicy.

Ingredients

Main Ingredients

  • 1 lb ground chicken (Lean ground chicken is preferred for a lighter fritter.)
  • 1 cup shredded cheese (cheddar or mozzarella) (Sharp cheddar adds flavor, mozzarella for a milder melt.)
  • 1/4 cup almond flour (Keeps the fritters gluten-free and tender.)
  • 1 large egg (Binds the mixture together.)
  • 2 pieces green onions, chopped (Use the whites and most of the greens for mild flavor.)
  • 1 tsp garlic powder (For even distribution of flavor.)
  • 1 tsp onion powder (Enhances the savory base.)
  • to taste salt and pepper (Start with 1/2 tsp salt and 1/4 tsp pepper.)
  • as needed olive oil for frying (Use light olive oil for frying.)

Instructions 

Preparation

  • In a large bowl, combine the ground chicken, shredded cheese, almond flour, egg, green onions, garlic powder, onion powder, salt, and pepper. Mix until well combined.
  • Be gentle while mixing to keep the fritters tender. If the mixture is too wet, add a tablespoon of almond flour at a time.
  • Let the mixture rest for 10 minutes if you want softer fritters.

Cooking

  • Heat olive oil in a skillet over medium heat until shimmering but not smoking.
  • Shape the chicken mixture into patties about 2 1/2 inches wide and 1/2 inch thick. Wet your hands to prevent sticking.
  • Add the patties to the skillet and cook for about 4-5 minutes on each side until golden brown and cooked through.
  • Let the fritters rest on a paper towel for a minute to remove excess oil before serving.

Notes

Serve these fritters on a large platter with a small bowl of dipping sauce on the side. For a heartier meal, serve with rice or roasted potatoes. They are freezer-friendly too.
Calories: 200kcal
Course: Main Course, Snack
Cuisine: American
Keyword: Cheesy Chicken Fritters, Comfort Food, Easy Fritters, Family Recipe, Quick Dinner

Avocado Chicken Salad Lettuce Wraps

The air in my kitchen is warm with the bright scent of lemon and avocado. I can hear the soft clink of a spoon against a bowl and the happy chatter of my kids planning who gets the crispest lettuce leaf. There is something comforting about that sound, like home filling up.

This Avocado Chicken Salad Lettuce Wraps recipe came from evenings when I needed a quick, healthy dinner that everyone would eat. If you like similar flavors, try my Avocado Chicken Egg Salad for another family favorite.

Why this works

Avocado Chicken Salad Lettuce Wraps

This recipe works because it balances creaminess, brightness, and crunch in one easy bite. The avocado brings healthy fats and a silky texture, while the Greek yogurt keeps the salad light and tangy. Lettuce cups add a fresh crunch and make the meal feel special without extra effort.

It also saves time. You can use leftover chicken or a rotisserie bird for a ready-made protein that needs only a few minutes to shred. That means less time cooking and more time at the table with family. For a slightly different take on avocado and chicken, check my Avocado Chicken Salad post.

Process Overview

“This is where the magic happens—when the aroma fills the kitchen.”

The process is simple. Shred or chop cooked chicken, mix it with yogurt, mayo, onion, and lemon, then fold in avocado. Spoon the mix into chilled lettuce leaves and serve. It takes about 10 to 15 minutes once your chicken is ready.

I like to prep the chicken ahead when I can. If the kids are home, I make it a small family task: one person shreds, another chops onions, and a third rinses lettuce. Simple teamwork makes dinner faster and more joyful.

Ingredients

  • 2 cups cooked chicken, shredded (I use rotisserie)
    Tip: Rotisserie chicken gives a rich flavor and saves time. If you prefer, roast a few boneless breasts the night before and shred them cold.
  • ¼ cup plain Greek Yogurt
    Tip: Greek yogurt keeps the salad light and adds protein. Use full fat for creaminess or nonfat if you want fewer calories.
  • ¼ cup mayonnaise
    Tip: A small amount of mayo rounds out the texture. I use light mayo for everyday meals and full mayo for gatherings.
  • 3 Tablespoons onions, finely chopped
    Tip: Mild sweet onions or green onions work well for picky eaters. Rinse chopped white onion to tone down the bite.
  • 2 teaspoons lemon juice
    Tip: Fresh lemon brightens the flavors. If fresh lemons are not available, use about 1½ teaspoons of bottled juice.
  • Salt and freshly ground black pepper, to taste
    Tip: Start with a small pinch of each and taste before adding more. Kids often prefer less pepper.
  • 1 avocado, seeded, peeled, diced
    Tip: Choose a ripe but firm avocado. If it is too soft, it will mash completely into the mix.
  • Romaine hearts or bib lettuce, about 16 leaves
    Tip: Pick leaves that are whole and crisp. Bib lettuce is soft and tender for small hands, while romaine holds up better for travel.

For a spin on serving this mixture inside avocados, see my Chicken Salad Stuffed Avocado recipe.

Lily’s pantry notes

Keep extra lemons, plain yogurt, and mayo on hand. They make many quick meals possible, and you can adapt the salad for different tastes in minutes.

Directions

  1. Add chicken, yogurt, mayo, onion, and lemon juice to a bowl and mix well to combine.
    Encouragement: Use a large bowl so you can toss without spilling. A gentle toss keeps the chicken tender and cohesive.

  2. Season with salt and pepper, to taste.
    Encouragement: Taste as you go. A little lemon can brighten a lot, and a small pinch of salt will bring the flavors forward.

  3. Stir in avocado.
    Encouragement: Gently fold the avocado pieces in so they stay chunky and pretty. If you mash them slightly, the salad will be creamier.

  4. Serve in cold, crisp lettuce cups.
    Encouragement: Chill the lettuce for ten minutes before serving for extra crunch. Arrange the cups like little boats on a platter to make dinner feel fun.

  5. You might also like Thai Chicken Lettuce Wraps!
    Encouragement: If you want spice or herbs, add cilantro, a drizzle of chili sauce, or a sprinkle of chopped peanuts. For a southwest kick, try my Spicy Southwest Avocado Chicken Salad for inspiration.

Serve immediately for the best texture. If you wait too long, the lettuce will soften and the avocado will start to brown.

Serving

Avocado Chicken Salad Lettuce Wraps

I serve these family style on a large platter. Place the lettuce cups on one side and a bowl of the chicken salad on the other. That way everyone can build their own wrap. Kids love choosing how much filling to add.

For a complete meal, offer simple sides like carrot sticks, cucumber slices, or a small fruit salad. Add a few lemon wedges and a small bowl of extra chopped herbs so guests can customize their wraps.

Presentation tips

Use a shallow bowl to serve the chicken salad, so it is easy to scoop. Garnish with a few thin slices of avocado and a light dusting of black pepper for a homely but pretty finish.

Storage

Store cooled chicken salad in an airtight container in the refrigerator for up to 2 days. The avocado will brown slightly but the lemon slows the process.

If you want to prepare part of it ahead, make the chicken salad without avocado and keep it chilled. Dice and add fresh avocado within an hour before serving for best color and texture.

Do not freeze this salad. The lettuce will not hold up and avocado gets mushy after thawing.

Reheating and make-ahead

If your chicken is cold, you can warm just the chicken before mixing, then cool slightly before adding yogurt and avocado. For salads on busy days, shred chicken and mix the dressing separately. Combine everything at the last minute.

Kitchen Notes

  • Shortcut: Use a store-bought rotisserie chicken to save 20 to 30 minutes.
  • Shortcut: Swap plain Greek yogurt for dairy-free yogurt if needed.
  • Shortcut: Use pre-washed lettuce hearts to cut prep time.
  • Shortcut: Chop onions and store in a sealed container for up to two days to speed assembly.
  • Shortcut: Keep lemons zested and juiced in small containers in the fridge to add fresh flavor fast.

Variations

  • Kid-Friendly: Leave out raw onions and pepper. Mix in a small spoonful of honey for a sweet twist.
  • Low-Carb: Serve in large butter lettuce leaves or romaine hearts to keep it light.
  • Dairy-Free: Replace Greek yogurt with an equal amount of dairy-free yogurt and use avocado for creaminess.
  • High-Protein: Stir in a tablespoon of hemp seeds or chopped hard-boiled eggs.
  • Mediterranean Twist: Add chopped kalamata olives, diced cucumber, and a sprinkle of feta. For a fruit-forward version, check my Asian Chicken Cranberry Salad for ideas on mixing sweet and savory.

FAQ

Q: Can I use frozen chicken?
A: Yes. Thaw and warm it, then cool slightly before shredding. Avoid using hot chicken with yogurt to keep the salad texture right.

Q: How ripe should the avocado be?
A: Use an avocado that gives slightly to gentle pressure. Too soft and it will mash; too hard and it will be dry.

Q: Can I make this ahead for a picnic?
A: Make the chicken mixture up to a day ahead but add avocado right before serving. Pack lettuce leaves separately and assemble outdoors.

Q: Is this recipe freezer-friendly?
A: No. The avocado and lettuce do not freeze well. Freeze only the cooked chicken if you want long-term storage.

Q: How can I make this spicier?
A: Add a pinch of cayenne, a drizzle of hot sauce, or diced jalapeño to the mix. Start small and taste as you go.

Conclusion

I hope this Avocado Chicken Salad Lettuce Wraps recipe becomes one of those meals your family asks for again and again. The mix of creamy avocado, tangy yogurt, and crisp lettuce makes a light but satisfying dinner that is quick enough for weeknights and pretty enough for company.

For another take on the same flavors and an easy make-ahead option, see the recipe at Its Thyme 2 Cook for Avocado Chicken Salad Lettuce Wraps. If you want a slightly different method and extra tips, check the version at Domesticate ME for Avocado Chicken Salad Lettuce Wraps.

Thanks for cooking with me. Gather the family, pass the platter, and enjoy the simple pleasure of a homemade meal.

Avocado Chicken Salad Lettuce Wraps

Prep Time 15 minutes
Total Time 15 minutes
Servings 4 servings
Calories 350
A quick and healthy dinner featuring creamy avocado, tangy yogurt, and crisp lettuce leaves, perfect for family meals.

Ingredients

Main Ingredients

  • 2 cups cooked chicken, shredded (I use rotisserie) (Rotisserie chicken gives a rich flavor and saves time. If you prefer, roast a few boneless breasts the night before and shred them cold.)
  • ¼ cup plain Greek Yogurt (Keeps the salad light and adds protein. Use full fat for creaminess or nonfat if you want fewer calories.)
  • ¼ cup mayonnaise (A small amount of mayo rounds out the texture. I use light mayo for everyday meals and full mayo for gatherings.)
  • 3 Tablespoons onions, finely chopped (Mild sweet onions or green onions work well for picky eaters. Rinse chopped white onion to tone down the bite.)
  • 2 teaspoons lemon juice (Fresh lemon brightens the flavors. If fresh lemons are not available, use about 1½ teaspoons of bottled juice.)
  • Salt and freshly ground black pepper, to taste (Start with a small pinch of each and taste before adding more. Kids often prefer less pepper.)
  • 1 avocado, seeded, peeled, diced (Choose a ripe but firm avocado. If it is too soft, it will mash completely into the mix.)
  • about 16 leaves Romaine hearts or bib lettuce (Pick leaves that are whole and crisp. Bib lettuce is soft and tender for small hands, while romaine holds up better for travel.)

Instructions 

Preparation

  • Add chicken, yogurt, mayo, onion, and lemon juice to a bowl and mix well to combine.
  • Season with salt and pepper, to taste.
  • Stir in avocado.
  • Serve in cold, crisp lettuce cups.

Notes

Chill the lettuce for ten minutes before serving for extra crunch. If you want spice or herbs, add cilantro, chili sauce, or chopped peanuts.
Calories: 350kcal
Course: Dinner, Lunch, Main Course
Cuisine: American
Keyword: Avocado Chicken Salad, Family Recipe, Healthy Dinner, Lettuce Wraps, Quick Meal

Creamy Chicken Salad with Celery and Herbs

I remember the first time I made this dish for my family. The smell of garlic and lemon hit the air and everyone paused what they were doing. Pans clinked. Little feet padded in the hallway. The kitchen felt alive in the best way.

This recipe is the kind of meal that soothes a busy weeknight. It cooks quickly, fills the house with a comforting aroma, and sits center stage on the table so everyone can help themselves. If you like simple comfort with bright flavors, you will love this one. For another lemon-forward favorite I often rotate in our weeknight lineup, try my baked lemon butter chicken for a slightly different take.

Why this works

Pin on Mains

This dish works for families because it balances speed, flavor, and ease. You get a juicy main, a quick sauce, and vegetables that cook right in the same pan. That means fewer dishes and more time to sit down together.

The method saves time without skimping on taste. A short sear locks in flavor. A simple pan sauce brings richness without fuss. Kids and adults both find it familiar and easy to love. If you need another fast and faithful chicken recipe for busy nights, my 30-minute oven baked boneless skinless chicken thighs are a lifesaver.

This is also a versatile template. Swap vegetables, add spices, or make it dairy-free. The bones of the recipe stay the same, so you can customize without relearning technique.

Process Overview

“This is where the magic happens—when the aroma fills the kitchen.”

In a few simple steps you will sear, deglaze, and finish in one skillet. The sear builds color and flavor. Deglazing lifts those fond bits into a glossy sauce. A short simmer brings everything together. That quick progression keeps the chicken tender and the veggies bright.

The whole process takes about 30 to 40 minutes from start to finish. That makes it perfect for weeknights and for nights when you want something homey and satisfying without a big time commitment.

Ingredients

  • 1 1/2 pounds boneless skinless chicken thighs, trimmed
  • Lily’s tip: Thighs stay juicy and are forgiving if you slightly overcook. I buy them in bulk and freeze what I will not use within three days.
  • 1 teaspoon salt and 1/2 teaspoon black pepper
  • Lily’s tip: Season both sides just before cooking. It helps build a better crust.
  • 2 tablespoons olive oil
  • Lily’s tip: Use a neutral or extra virgin olive oil for flavor. Heat the pan first so the oil does not burn.
  • 4 cloves garlic, minced
  • Lily’s tip: Fresh garlic gives the best pop. Add it after you sear the chicken so it does not burn.
  • 1 medium onion, thinly sliced
  • Lily’s tip: A sweet onion or yellow onion caramelizes nicely and adds body to the sauce.
  • 8 oz baby bella mushrooms, sliced
  • Lily’s tip: Mushrooms soak up flavor. If kids are picky, slice them thin so they blend in.
  • 1 cup low sodium chicken broth
  • Lily’s tip: Low sodium gives you control. Taste before adding more salt.
  • 1/3 cup dry white wine or extra chicken broth
  • Lily’s tip: Wine adds depth. If you avoid alcohol, use more broth and a squeeze of lemon.
  • 2 tablespoons butter
  • Lily’s tip: Swirl in at the end for shine and a silky mouthfeel.
  • 1 tablespoon fresh lemon juice
  • Lily’s tip: A little acid brightens the whole dish. Add at the end so it stays fresh.
  • 1/2 cup chopped parsley
  • Lily’s tip: Add half the parsley into the sauce and the rest as a garnish for color and freshness.
  • Optional vegetables: 2 cups baby spinach or 1 cup halved cherry tomatoes
  • Lily’s tip: Spinach wilts quickly. Tomatoes add a sweet pop that kids often love.

For more comforting family recipes that pair well with this one, I often turn to my collection of chicken and spinach recipes when I want an easy side.

Directions

  1. Pat the chicken thighs dry and season with 1 teaspoon salt and 1/2 teaspoon pepper.
  • Encouraging note: Dry meat sears better. Take a minute to pat them; it makes a visible difference.
  1. Heat 2 tablespoons olive oil in a large skillet over medium-high heat until shimmering.
  • Encouraging note: The pan should be hot but not smoking. That heat gives you a golden crust.
  1. Sear the chicken, 4 to 5 minutes per side, until nicely browned. Transfer to a plate.
  • Encouraging note: Do this in batches if needed. Overcrowding cools the pan and prevents browning.
  1. Add the onion and mushrooms to the pan. Cook 5 to 6 minutes until softened and starting to brown.
  • Encouraging note: Stir occasionally, scrape the bottom, and let the vegetables pick up those browned bits.
  1. Add garlic and cook 30 to 45 seconds until fragrant.
  • Encouraging note: Garlic cooks quickly. Keep an eye on it so it does not burn.
  1. Deglaze the pan with 1/3 cup white wine, scraping up the browned bits with a wooden spoon.
  • Encouraging note: The sizzle tells you you are building flavor. If you prefer no alcohol, use extra broth here.
  1. Pour in 1 cup chicken broth and bring to a gentle simmer.
  • Encouraging note: A simmer melds flavors without drying the chicken. Adjust heat as needed.
  1. Return the chicken to the skillet, nestling it into the sauce. Simmer 8 to 10 minutes, or until internal temperature reaches 165°F.
  • Encouraging note: A quick meat thermometer check takes the guesswork out of doneness.
  1. Stir in 2 tablespoons butter and 1 tablespoon lemon juice. Add spinach or cherry tomatoes if using and cook until just wilted or warmed.
  • Encouraging note: Butter and lemon brighten and finish the sauce. Taste and adjust salt.
  1. Sprinkle with 1/2 cup chopped parsley and serve.
  • Encouraging note: Fresh herbs make a big difference. A little garnish lifts the whole plate.

If you are serving this with pasta or rice, toss the finished sauce with a cup of cooked pasta or spoon it over mashed potatoes. For more cozy meal ideas that pair well with this sauce, I often reach for recipes from my list of chicken macaroni favorites.

Quick tips while you cook

  • Keep ingredients at hand so you can move smoothly from step to step.
  • Use a thermometer for consistent results.
  • Taste the sauce and tweak with salt, pepper, or a dash of lemon.

Serving

Pin on Mains

I serve this family-style right from the skillet. Place the pan on a trivet in the middle of the table. Set out plates, a basket of crusty bread, and a simple green salad.

For a family-friendly plate, spoon chicken and mushrooms over steamed rice, buttered noodles, or creamy mashed potatoes. Let everyone take what they like. Kids often go for extra sauce on their rice, so keep a ladle handy.

If you want a prettier presentation for guests, arrange chicken on a platter and spoon sauce over the top. Scatter extra parsley and a few lemon wedges for brightness.

Storage

To refrigerate, let the dish cool to room temperature then store in an airtight container for up to 4 days. The sauce keeps well and may taste even better the next day.

To freeze, place cooled portions in freezer-safe containers. Freeze up to 3 months. Thaw in the fridge overnight before reheating.

To reheat on the stove, warm gently over low heat with a splash of chicken broth to loosen the sauce. Reheat in the oven at 325°F in a covered dish until warmed through. Microwaving works for single servings; cover loosely and stir halfway through to ensure even heating.

Kitchen Notes

  • Use a heavy skillet for even heat and better browning.
  • Dry the chicken thoroughly for the best sear.
  • If mushrooms are not your thing, swap in diced bell peppers.
  • Taste the sauce before adding more salt; store-bought broth can be salty.
  • Leftover sauce makes a quick sandwich spread or pasta topper.

Variations

  • Picky eaters: Omit mushrooms and onions and add sliced carrots or peas to make it more familiar.
  • Low-carb option: Serve over cauliflower rice or a bed of sautéed greens.
  • Dairy-free: Skip the butter and finish with 1 tablespoon olive oil and extra lemon.
  • Spicy twist: Add 1/4 teaspoon red pepper flakes when you add the garlic.
  • Kid-friendly makeover: Shred the cooked chicken and mix with a little sauce to serve over buttered noodles.

If you like smoky, sweet flavors, try incorporating elements from my chipotle honey chicken thighs recipe to give a different spin that still appeals to family diners.

FAQ

Q: Can I use chicken breasts instead of thighs? A: Yes. Chicken breasts cook faster and can dry out more easily. Reduce simmer time and watch the internal temperature. Remove from heat at 160°F and rest to reach 165°F.

Q: Can I make this gluten-free? A: Absolutely. Use gluten-free broth and serve over rice or gluten-free pasta. The sauce is naturally gluten-free.

Q: How can I tell when the chicken is done without a thermometer? A: Cut into the thickest piece. The juices should run clear and the meat should be opaque. A thermometer is the most reliable method.

Q: Can I double the recipe for a larger family meal? A: Yes. Use a larger skillet or split into two pans. Avoid overcrowding to maintain a good sear.

Q: Will the sauce thicken if I leave it longer on the stove? A: Yes, simmering will reduce and thicken the sauce. If it reduces too much, add a splash of broth to loosen it.

Conclusion

I hope this recipe becomes a weeknight favorite in your home like it is in mine. It is forgiving, fast, and full of flavor. The way the kitchen fills with warmth and chatter while this cooks is one of my favorite parts of family dinners.

For the gear-minded who like to explore the practical side of mains and connectors, I found a helpful reference for a 9 Pin Mains to Throttle and Ebrake Breakout Cable that explains wiring in clear terms. If you need high current circular power connectors for a project, check the product details for the 3 Pin Mains Power AC/DC Circular High Current Connectors | LMV for technical specs and options.

Thanks for letting me share this recipe. I love hearing how your family makes it their own, so please come back and tell me what changes you made and what everyone thought.

One-Skillet Garlic Lemon Chicken Thighs

Prep Time 10 minutes
Cook Time 30 minutes
Total Time 40 minutes
Servings 4 servings
Calories 400
A quick and comforting one-skillet meal featuring juicy chicken thighs, garlic, and lemon, perfect for busy weeknights.

Ingredients

Main Ingredients

  • 1.5 pounds boneless skinless chicken thighs, trimmed (Thighs stay juicy and are forgiving if you slightly overcook.)
  • 1 teaspoon salt (Season both sides just before cooking.)
  • 0.5 teaspoon black pepper (Season both sides just before cooking.)
  • 2 tablespoons olive oil (Use a neutral or extra virgin olive oil for flavor.)
  • 4 cloves garlic, minced (Fresh garlic gives the best pop.)
  • 1 medium onion, thinly sliced (A sweet onion or yellow onion caramelizes nicely.)
  • 8 oz baby bella mushrooms, sliced (Mushrooms soak up flavor.)
  • 1 cup low sodium chicken broth (Low sodium gives you control.)
  • 1/3 cup dry white wine or extra chicken broth (Wine adds depth; substitute broth if preferred.)
  • 2 tablespoons butter (Swirl in at the end for shine.)
  • 1 tablespoon fresh lemon juice (A little acid brightens the dish.)
  • 0.5 cup chopped parsley (Add half into the sauce and use the rest as garnish.)
  • 2 cups baby spinach (optional) (Spinach wilts quickly.)
  • 1 cup halved cherry tomatoes (optional) (Tomatoes add a sweet pop.)

Instructions 

Preparation

  • Pat the chicken thighs dry and season with salt and pepper.
  • Heat olive oil in a large skillet over medium-high heat until shimmering.
  • Sear the chicken for 4 to 5 minutes per side until nicely browned. Transfer to a plate.
  • Add the onion and mushrooms to the pan, cooking for 5 to 6 minutes until softened and starting to brown.
  • Add garlic and cook for 30 to 45 seconds until fragrant.
  • Deglaze the pan with white wine, scraping up the browned bits with a wooden spoon.
  • Pour in chicken broth and bring to a gentle simmer.
  • Return the chicken to the skillet and nestle it into the sauce. Simmer for 8 to 10 minutes, or until the internal temperature reaches 165°F.
  • Stir in butter and lemon juice. Add spinach or cherry tomatoes and cook until just wilted or warmed.
  • Sprinkle with parsley and serve.

Notes

Serve family-style from the skillet with crusty bread and a green salad. Store in an airtight container for up to 4 days or freeze for up to 3 months.
Calories: 400kcal
Course: Dinner, Main Course
Cuisine: American, Comfort Food
Keyword: Chicken Thighs, Family-Friendly, Garlic Lemon Chicken, One-skillet meal, Quick Dinner

Paleo Grilled Chicken Cobb Salad with Honey Dijon Dressing

A warm kitchen smell greets you the moment the grill comes alive. The sizzle of chicken on hot metal, the soft clink of a salad bowl, the gentle chop of an avocado. These are the sounds and smells that mean a simple, nourishing dinner is on its way.

This Paleo Grilled Chicken Cobb Salad with Honey Dijon Dressing is one of my go-to family meals. It is bright, hearty, and quick enough for weeknights, yet pretty enough for a Sunday supper. If you love bold flavors and easy prep, this recipe will become a regular in your rotation. For another family favorite that pairs well with weeknight grilling, try my recipe for chipotle honey chicken thighs with smoked gouda mashed potatoes to inspire your menu planning.

Why this works

Paleo Grilled Chicken Cobb Salad with Honey Dijon Dressing

This salad checks so many boxes for busy families. The grilled chicken gives hearty protein that kids and adults both recognize. The avocado and boiled eggs add creamy texture and healthy fats. Crisp cherry tomatoes and mixed greens keep the dish fresh.

It is also a time saver. You can grill the chicken while boiling eggs and crisping bacon. Once everything is ready, assembly takes minutes. If you prefer a lighter dressing or want to swap vinaigrette ideas, my guide to homemade Caesar dressing without raw anchovies offers a simple method to make dressings from pantry staples.

Because the elements hold up well, you can prep parts ahead for busy evenings. Cook extra chicken for leftovers or for a quick lunch the next day. This flexibility makes the salad ideal for families juggling after-school activities and late workdays.

Process Overview

“This is where the magic happens—when the aroma fills the kitchen.”

Start with the chicken and bacon. While the grill heats and the bacon browns, set a pot of water on to boil for eggs. Arrange a work station with bowls for chopped avocado, halved tomatoes, and crumbled cheese.

Once you get the hang of the flow, assembly feels effortless. If you like to prepare components in advance, my recipe for homemade chicken salad with grapes shows how to portion proteins and make quick midweek meals that keep well in the fridge. With a little prep, you can turn this Cobb salad into a weekly staple.

Ingredients

Below are the ingredients you need. I include a short tip for each to help you get the best flavor and texture.

  • 2 grilled chicken breasts, sliced.
    • Tip: Grill over medium-high heat until the internal temperature reaches 165 °F. Let the chicken rest 5 minutes before slicing so juices stay locked in.
  • 4 cups mixed greens.
    • Tip: Use a sturdy mix like romaine and baby kale to hold the weight of the toppings without wilting.
  • 1 avocado, diced.
    • Tip: Choose an avocado that yields slightly to gentle pressure. Toss diced avocado in a splash of lemon juice if you plan to prep ahead to avoid browning.
  • 2 boiled eggs, chopped.
    • Tip: For creamy yolks, boil eggs for 9 minutes, then plunge into ice water. Peel gently to keep whites intact.
  • 1 cup cherry tomatoes, halved.
    • Tip: Use ripe tomatoes for sweetness. If they are super juicy, drain excess liquid so your salad does not become watery.
  • 1/2 cup crumbled bacon.
    • Tip: Cook bacon until crisp and drain on paper towels. Crumble just before serving to keep it crunchy.
  • 1/4 cup blue cheese, crumbled.
    • Tip: Buy a small chunk and crumble yourself. It melts more pleasantly into the salad than pre-crumbled varieties.
  • 1/4 cup olive oil.
    • Tip: Use extra virgin olive oil for dressings for the best flavor. Measure carefully for emulsification.
  • 2 tablespoons Dijon mustard.
    • Tip: Dijon adds tang and helps the dressing emulsify. If you prefer milder, use 1 tablespoon and increase honey slightly.
  • 2 tablespoons honey.
    • Tip: Use a mild honey to balance the mustard. Honey makes the dressing family-friendly and helps marry flavors.
  • 1 tablespoon apple cider vinegar.
    • Tip: Apple cider vinegar gives a gentle brightness. Use white wine vinegar for a subtler note if you prefer.
  • Salt and pepper to taste.
    • Tip: Season components lightly as you build. Taste the finished salad and adjust seasoning just before serving.

Directions

  1. In a large bowl, combine mixed greens, grilled chicken, avocado, boiled eggs, cherry tomatoes, bacon, and blue cheese.

    • Encouraging note: Take your time to layer the ingredients. Let the kids help place colors on the salad so everyone feels part of the meal.
  2. In a small bowl, whisk together olive oil, Dijon mustard, honey, apple cider vinegar, salt, and pepper to make the dressing.

    • Encouraging note: Whisk until the dressing is smooth and glossy. If you like, shake it in a jar for easy storage and an even emulsion.
  3. Drizzle the dressing over the salad and toss gently to combine.

    • Encouraging note: Start with half the dressing, toss, then add more as needed. This helps avoid overdressing and keeps the greens crisp.
  4. Serve immediately and enjoy your healthy meal!

    • Encouraging note: Serve at the table and watch everyone dive in. This salad shines best fresh, so enjoy the bright textures and warm grilled chicken together as a family.

For an easy weeknight option, you can prep the dressing and bacon ahead. I also recommend pairing this salad with a simple side, or add extra grilled vegetables to stretch the meal for hungry teens.

Serving

Paleo Grilled Chicken Cobb Salad with Honey Dijon Dressing

Serve this salad family-style in one large platter so everyone can take what they like. Arrange the protein, veggies, and toppings in rows across the greens for a classic Cobb presentation. Place the dressing in a small pitcher so family members can choose the amount they prefer.

If you are serving guests, add warm slices of grilled sourdough or roasted sweet potatoes on the side. For little ones who prefer separated flavors, offer small bowls with components and let them build their own plates.

Pair the salad with a chilled sparkling water or a light iced tea. The simplicity of the dressing and the grilled chicken keeps flavors balanced and crowd-pleasing.

Storage

Leftovers store well when you keep the components separate. Place mixed greens and dressing in different containers to prevent sogginess.

  • In the refrigerator: Store cooked chicken and bacon in an airtight container for up to 3 days. Egg halves or chopped eggs stay good for 3 to 4 days.
  • For assembled leftovers: If you must assemble ahead, pack avocado and dressing separately and combine just before serving. Assembled salads keep for about 12 hours in the fridge but will soften over time.
  • Reheating: Reheat sliced chicken gently in a skillet over medium-low heat or in the microwave for 30 to 60 seconds. Warm chicken on top of cool greens keeps textures balanced.
  • Freezing: Do not freeze assembled salad. Cooked chicken can be frozen for up to 3 months, but thaw overnight in the refrigerator before reheating.

A practical trick is to prep everything on a Sunday and store components in clear containers for grab-and-go dinners during the week.

Kitchen Notes

  • Make extra chicken: Cook 3 to 4 breasts when you grill so you can use leftovers for sandwiches, wraps, or quick lunches.
  • Use a salad spinner: Wash and spin your greens dry to help the dressing adhere and prevent watering down the salad.
  • Warm bacon shortcut: Crisp bacon in the oven at 400 °F for 15 to 20 minutes for hands-off cooking and even results.
  • Quick boiled eggs: Start eggs in cold water, bring to a boil, then cover and remove from heat. Let sit for 9 minutes before cooling in ice water.
  • Swap cheeses: If blue cheese is too strong for some in your family, swap for crumbled feta or goat cheese for a milder tang.

Variations

  • Picky eaters: Separate the toppings on a platter so children can pick what they like. Offer plain grilled chicken slices for those who prefer less dressing.
  • Dairy-free: Omit the blue cheese and replace with toasted sunflower seeds or chopped almonds for crunch and a nutty flavor.
  • Low-sodium: Use reduced-sodium bacon or turkey bacon and taste the dressing before adding extra salt.
  • Vegetarian: Substitute grilled portobello or marinated tempeh for the chicken and omit bacon for a hearty vegetarian Cobb.
  • Keto friendly: This recipe is already low in carbs, but reduce honey to 1 teaspoon in the dressing to lower carbs further.

FAQ

Q: Can I use rotisserie chicken instead of grilling?
A: Yes. Rotisserie chicken is a great time saver. Slice or shred it and toss it into the salad cold or warmed.

Q: How do I make boiled eggs easy to peel?
A: Use slightly older eggs and cool them immediately in ice water after boiling. The ice bath helps the membrane separate from the shell.

Q: Can I make the dressing without honey?
A: Absolutely. Substitute with a stevia blend or reduce the mustard slightly and use a splash of orange juice for natural sweetness.

Q: What is the best way to keep avocado from browning?
A: Toss diced avocado with a small squeeze of lemon or lime juice. If you prepare the avocado far ahead, store it in an airtight container with a piece of cut onion to slow browning.

Q: Is this salad family-friendly for kids?
A: Yes. The familiar flavors of chicken, bacon, and eggs appeal to many children. Offer toppings on the side to accommodate varying tastes.

Conclusion

I hope this Paleo Grilled Chicken Cobb Salad with Honey Dijon Dressing becomes a comforting family favorite in your kitchen. It balances bright vegetables, savory grilled chicken, and a sweet-tangy dressing into a meal that feels both special and doable on busy nights. For inspiration on similar salads and to compare techniques, you might enjoy this detailed take on a similar salad from Healthy Grilled Chicken Cobb Salad with Honey Dijon Dressing and this classic variation from How To Make Classic Chicken Cobb Salad (Paleo).

Thanks for cooking with me. Gather the family, turn on the grill, and enjoy the simple joy of a shared meal.

Paleo Grilled Chicken Cobb Salad with Honey Dijon Dressing

Prep Time 20 minutes
Cook Time 20 minutes
Total Time 40 minutes
Servings 4 servings
Calories 450
A vibrant and hearty salad featuring grilled chicken, creamy avocado, boiled eggs, and a sweet-tangy dressing, perfect for family dinners.

Ingredients

Salad Components

  • 2 pieces grilled chicken breasts, sliced (Grill over medium-high heat until the internal temperature reaches 165 °F. Let the chicken rest 5 minutes before slicing.)
  • 4 cups mixed greens (Use a sturdy mix like romaine and baby kale to hold the weight of the toppings without wilting.)
  • 1 piece avocado, diced (Choose an avocado that yields slightly to gentle pressure. Toss diced avocado in a splash of lemon juice if you plan to prep ahead to avoid browning.)
  • 2 pieces boiled eggs, chopped (For creamy yolks, boil eggs for 9 minutes, then plunge into ice water. Peel gently to keep whites intact.)
  • 1 cup cherry tomatoes, halved (Use ripe tomatoes for sweetness. If they are super juicy, drain excess liquid so your salad does not become watery.)
  • 1/2 cup crumbled bacon (Cook bacon until crisp and drain on paper towels. Crumble just before serving to keep it crunchy.)
  • 1/4 cup blue cheese, crumbled (Buy a small chunk and crumble yourself. It melts more pleasantly into the salad than pre-crumbled varieties.)

Dressing

  • 1/4 cup olive oil (Use extra virgin olive oil for dressings for the best flavor. Measure carefully for emulsification.)
  • 2 tablespoons Dijon mustard (Dijon adds tang and helps the dressing emulsify. If you prefer milder, use 1 tablespoon and increase honey slightly.)
  • 2 tablespoons honey (Use a mild honey to balance the mustard. Honey makes the dressing family-friendly and helps marry flavors.)
  • 1 tablespoon apple cider vinegar (Apple cider vinegar gives a gentle brightness. Use white wine vinegar for a subtler note if you prefer.)
  • Salt and pepper to taste (Season components lightly as you build. Taste the finished salad and adjust seasoning just before serving.)

Instructions 

Preparation

  • In a large bowl, combine mixed greens, grilled chicken, avocado, boiled eggs, cherry tomatoes, bacon, and blue cheese.
  • In a small bowl, whisk together olive oil, Dijon mustard, honey, apple cider vinegar, salt, and pepper to make the dressing.
  • Drizzle the dressing over the salad and toss gently to combine.
  • Serve immediately and enjoy your healthy meal!

Notes

Leftovers store well when you keep the components separate. Store in an airtight container for up to 3 days. Consider prepping everything on a Sunday for easy weeknight meals.
Calories: 450kcal
Course: Main Course, Salad
Cuisine: American, Paleo
Keyword: Cobb Salad, Family Meal, Grilled Chicken, Healthy Dinner, Paleo Recipe

Ultimate Chicken Parmesan

I step into the kitchen and the air changes. The warm scent of garlic and tomato greets me, soft and familiar. Pans clink. The oven hums. That sound means comfort is on its way.

This Ultimate Chicken Parmesan is the recipe I reach for when I want something that feels special but stays simple. I make it for weeknight dinners and Sunday gatherings. If you want a similar weeknight version, try my classic Chicken Parmesan recipe for a quicker twist.

Why this works

Ultimate Chicken Parmesan

This dish hits three notes every family loves. Crispy, golden chicken on the outside. Bright, tangy marinara. Gooey, bubbling cheese that pulls apart with a fork. It is comfort and celebration all on one plate.

It saves time without losing flavor. Browning in a skillet locks in juices so the oven only needs to finish the cooking. That cuts total hands-on time and keeps things moist. For other crowd-pleasers with similar flavor profiles, you might like my creamy garlic Parmesan chicken for a softer, saucier option.

This recipe also stretches well. Make two pans and freeze one, or use leftovers in sandwiches. If you want a slow cooker twist for busy days, see my crockpot garlic Parmesan chicken thighs for another easy approach.

Process Overview

“This is where the magic happens—when the aroma fills the kitchen.”

We brown, bake, and melt. Browning gives a crisp crust that stands up to sauce. Baking finishes the chicken gently and melts the cheese to a perfect golden top. It is simple, dependable, and lovely for family dinners.

Along the way I remind myself to trust the timing and enjoy the smells. If you prefer a skillet-only method, the flavors stay true and you can adapt by following the technique in my garlic Parmesan chicken and potatoes skillet for similar results in one pan.

Ingredients

  • 4 boneless, skinless chicken breasts
    • Lily’s tip: Pound each breast to an even thickness so they cook evenly. A zip-top bag and a rolling pin work great.
  • 1 cup breadcrumbs
    • Lily’s tip: Use plain or Italian-style breadcrumbs. For crunch, add 1/4 cup panko to the mix.
  • 1/2 cup grated Parmesan cheese
    • Lily’s tip: Freshly grated Parmesan melts better and gives brighter flavor than pre-grated.
  • 1 teaspoon Italian seasoning
    • Lily’s tip: Mix with salt and pepper, and add a pinch of red pepper flakes if the family likes a little heat.
  • 2 cups marinara sauce
    • Lily’s tip: Use a good-quality jarred sauce or make a simple tomato sauce. Warm it slightly before pouring over the chicken.
  • 1 1/2 cups shredded mozzarella cheese
    • Lily’s tip: Whole milk mozzarella gives creamier melt. Freshly shredded melts smoother than pre-shredded.
  • Salt and pepper to taste
    • Lily’s tip: Season both sides of the chicken before breading for balanced flavor.
  • Olive oil for cooking
    • Lily’s tip: Use enough oil to coat the skillet. A medium-high heat helps create a golden crust quickly.

These basic pantry items come together easily. Assemble them before you start to keep the process calm and steady.

Directions

  1. Preheat the oven to 375°F (190°C).
    • Encouraging note: Give the oven a few minutes to reach temperature so the chicken finishes evenly. Pour a cup of tea while it warms.
  2. In a shallow dish, mix breadcrumbs, Parmesan cheese, Italian seasoning, salt, and pepper.
    • Encouraging note: Take a moment to taste a pinch. Adjust the seasoning so it sings. This mix is the flavor coat for your chicken.
  3. Coat each chicken breast in the breadcrumb mixture, pressing to adhere.
    • Encouraging note: Press firmly so the crumbs stick. If a spot looks thin, press again. It will crisp up nicely in the pan.
  4. Heat olive oil in a large skillet over medium heat. Cook chicken until golden brown on both sides, about 4 minutes per side.
    • Encouraging note: Work in batches if needed. A golden crust sets the foundation for a juicy chicken under the sauce.
  5. Transfer the chicken to a baking dish. Pour marinara sauce over the chicken and top with mozzarella cheese.
    • Encouraging note: Be generous with sauce for extra comfort. A spoonful more will keep everything moist and flavorful.
  6. Bake in the preheated oven for 20-25 minutes, until the chicken is cooked through and the cheese is bubbly.
    • Encouraging note: Use a meat thermometer if you like. Chicken is done at 165°F. Let the cheese bubble and brown a touch.
  7. Serve hot with additional marinara sauce if desired.
    • Encouraging note: Let the pan rest 3 to 5 minutes before serving. It helps the juices settle and makes slicing neat.

If you want a one-pan shortcut, sear and then cover the skillet to finish in the oven. For a crispier top, broil for 1-2 minutes at the end, watching closely so the cheese does not burn.

Serving

Ultimate Chicken Parmesan

Serve this family-style on a large platter so everyone can help themselves. Add a big bowl of pasta tossed with a little olive oil and garlic, or keep it low-carb with a green salad and roasted vegetables.

I like to place bowls of extra marinara and grated Parmesan on the table. Little touches let everyone customize their plate. For a playful weeknight switch, serve slices of chicken on soft rolls for simple chicken Parmesan sandwiches. Looking for a spicy side? My Bang Bang Chicken Bowl adds a bright, punchy contrast for adventurous eaters.

Storage

Refrigerator: Store leftover chicken in an airtight container for up to 3 days. Keep sauce separate if you want to avoid sogginess.

Freezer: Freeze portions in a freezer-safe container for up to 2 months. Thaw overnight in the fridge before reheating.

Reheating: Reheat in a 350°F oven for 15-20 minutes to keep the crust crisp. If you are short on time, microwave in short bursts, then finish under the broiler for a minute to revive the exterior.

Label containers with the date so you know when to use them. These simple steps make leftovers taste almost as good as fresh.

Kitchen Notes

  • Shortcut breading: Use seasoned panko for extra crunch and skip the Parmesan in the mix if you add it later for more flavor layering.
  • Make ahead: Bread the chicken and store on a tray covered in the fridge for up to 1 day. This saves time on busy nights.
  • Sauce swap: Use a chunky marinara for texture or a smooth tomato-basil sauce for a refined finish.
  • Double batch: Cook twice the chicken and freeze half. Reheat for quick weeknight meals when life gets busy.
  • Kid-friendly: Keep one pan plain with just cheese for picky eaters, and add herbs or red pepper flakes to a second pan for adults.

These tips help you adapt the recipe to your schedule and taste preferences without stress.

Variations

  • Low-carb: Replace breadcrumbs with almond flour or crushed pork rinds. Serve with roasted vegetables instead of pasta.
  • Gluten-free: Use gluten-free breadcrumbs or crushed gluten-free crackers. Ensure your marinara is gluten-free.
  • Lighter version: Skip the pan-frying step. Bake breaded chicken at 425°F for 18-22 minutes to get a lighter crust.
  • Extra cheesy: Mix shredded mozzarella and fontina for a richer, creamier top.
  • Herb-forward: Add fresh basil and oregano under the cheese for a burst of fresh flavor.

Each variation keeps the heart of the dish while accommodating diets and picky eaters. Trust your kitchen and your family’s preferences.

FAQ

Q: Can I use chicken thighs instead of breasts?

A: Yes. Boneless, skinless chicken thighs work well and stay juicy. Reduce baking time slightly and check for doneness at 165°F. Thighs add a richer flavor that many families love.

Q: How do I avoid soggy breading?

A: Brown the chicken well in the skillet to set the crust before adding sauce. Use slightly warm, not hot, sauce when spooning it on. Finish in the oven just long enough to cook through and melt the cheese.

Q: Can I prepare this ahead for guests?

A: Absolutely. Bread and pan-sear the chicken the day before, then refrigerate. On the day, assemble, add sauce and cheese, and bake. This reduces hands-on time when guests arrive.

Q: What sides pair best with Chicken Parmesan?

A: Classic choices are spaghetti with olive oil and garlic, Caesar salad, or garlic bread. Roasted green beans or a simple mixed greens salad are lighter complements.

Q: Is there a vegetarian alternative?

A: Use thick eggplant slices or large portobello mushrooms in place of chicken. Bread, brown, and bake them the same way. Eggplant Parmesan is a delicious vegetarian cousin.

Conclusion

I hope this Ultimate Chicken Parmesan becomes a warm, reliable recipe in your home. It has been a go-to for my family because it delivers comfort without fuss and stretches to feed hungry housefuls. For inspiration on classic techniques and another family-style version, check out this thoughtful write-up on The Best Chicken Parmigiana (Family Recipe) | A Simple Palate. If you like a step-by-step video and a trusted tested method, take a look at this detailed guide for Chicken Parmesan Recipe (with Video) – Allrecipes.

Happy cooking, and save a slice for someone you love.

Ultimate Chicken Parmesan

Prep Time 15 minutes
Cook Time 25 minutes
Total Time 40 minutes
Servings 4 servings
Calories 480
A simple yet special dish featuring crispy chicken, vibrant marinara, and gooey cheese, perfect for weeknight dinners or gatherings.

Ingredients

For the chicken

  • 4 pieces boneless, skinless chicken breasts (Pound each breast to an even thickness for even cooking.)
  • 1 cup breadcrumbs (Use plain or Italian-style breadcrumbs. Add 1/4 cup panko for extra crunch.)
  • 1/2 cup grated Parmesan cheese (Freshly grated Parmesan melts better.)
  • 1 teaspoon Italian seasoning (Mix with salt and pepper; add red pepper flakes for some heat.)
  • 2 cups marinara sauce (Use high-quality jarred or homemade; warm slightly before use.)
  • 1 1/2 cups shredded mozzarella cheese (Whole milk mozzarella gives a creamier melt.)
  • to taste salt and pepper (Season both sides of the chicken before breading.)
  • as needed tablespoons olive oil (Coat skillet for frying.)

Instructions 

Preparation

  • Preheat the oven to 375°F (190°C).
  • In a shallow dish, mix breadcrumbs, Parmesan cheese, Italian seasoning, salt, and pepper.
  • Coat each chicken breast in the breadcrumb mixture, pressing to adhere.

Cooking

  • Heat olive oil in a large skillet over medium heat. Cook chicken until golden brown on both sides, about 4 minutes per side.
  • Transfer the chicken to a baking dish. Pour marinara sauce over the chicken and top with mozzarella cheese.
  • Bake in the preheated oven for 20-25 minutes, until the chicken is cooked through and the cheese is bubbly.
  • Serve hot with additional marinara sauce if desired.

Notes

This dish can be adapted for freezing and reheating. Serve with pasta or a green salad.
Calories: 480kcal
Course: Dinner, Main Course
Cuisine: Italian
Keyword: Baked Chicken, Cheesy Chicken, Chicken Parmesan, Comfort Food, Family Dinner

Chicken Pot Pie

The kitchen smells like butter and warm pastry. Pots clink softly on the stovetop. The oven clock ticks as the house waits for something comforting. That first breath of hot, savory steam is why I make chicken pot pie when I want the family gathered around the table.

This recipe is for busy weeknights and slow Sundays. You will hear small voices ask when it is ready and the soft scrape of a fork on a plate. If you love cozy dinner ideas, try my chicken pot pie soup for a quick spin on the same flavors: chicken pot pie soup.

Why this works

Chicken Pot Pie

This version uses a rotisserie chicken and a few pantry staples. That saves time without losing the home-style taste. Rotisserie chicken brings deep, roasted flavor. The cream of chicken soup creates a rich, velvety filling with almost no fuss.

Family life needs meals that feel special and are easy to pull together. This pot pie checks both boxes. It reheats well for school lunches and leftovers disappear fast at dinner. If you want a fuller breakdown or a larger batch, check my full chicken pot pie recipe for more tips and measurements: my full chicken pot pie recipe.

Process Overview

“This is where the magic happens—when the aroma fills the kitchen.”

Think of this as a friendly, step-by-step process you can count on. You will mix the filling, nestle it in a crust, and let the oven do the work. The crust browns while the filling bubbles and the house fills with the scent of comfort.

If you want smaller portions for picky eaters, you can make mini versions that are perfect for little hands and lunchboxes. I walk through those ideas in my mini chicken pot pies post: mini chicken pot pies.

Ingredients

  • 1 rotisserie chicken, shredded
    • Lily’s tip: Use the meat from the breast and thighs for the best texture. Save the carcass for stock.
  • 1 cup frozen mixed vegetables
    • Lily’s tip: Peas, carrots, and corn work well. No need to thaw first unless you prefer.
  • 1 can (10.5 oz) cream of chicken soup
    • Lily’s tip: For a lighter flavor, mix half soup and half low-sodium chicken broth.
  • 1/2 cup milk
    • Lily’s tip: Whole milk makes the filling richer. Use 2% if you want it lighter.
  • 1/2 teaspoon garlic powder
    • Lily’s tip: Garlic powder blends better than fresh garlic in quick casseroles.
  • 1/2 teaspoon onion powder
    • Lily’s tip: It boosts depth without chopping onion.
  • Salt and pepper to taste
    • Lily’s tip: Start with 1/4 teaspoon salt and a few grinds of pepper. Adjust after mixing.
  • 1 store-bought pie crust (or 2 crusts for top and bottom)
    • Lily’s tips:
      • One crust version: Use a single crust in a shallow dish and top with biscuits or puff pastry for a quicker finish.
      • Two crust version: Use both crusts for a classic double-crust pie that seals the filling and gives a beautiful top.

If you want a biscuit-style top like a well-loved restaurant favorite, I often mix it with a biscuit twist inspired by my Red Lobster biscuit-topped pot pie post: biscuit-topped pot pie ideas.

Directions

  1. Preheat the oven to 425°F (220°C).

    • Encouraging note: Get the oven ready first so it is hot and waiting when you finish assembling. A hot oven gives a flakier crust.
  2. In a large bowl, combine shredded chicken, frozen vegetables, cream of chicken soup, milk, garlic powder, onion powder, salt, and pepper. Mix well.

    • Encouraging note: Be gentle but sure when mixing. Taste a spoonful and adjust the seasoning. You are building the heart of the meal.
  3. Place one pie crust in a pie dish and pour the chicken mixture into it.

    • Encouraging note: Press the crust gently to fit the dish. If the crust tears, patch with a small piece from the second crust or press the edges to secure it.
  4. Cover with the second pie crust, sealing the edges. Cut slits in the top crust to allow steam to escape.

    • Encouraging note: Seal the edges with a fork or your fingers. The slits let the filling bubble without making a mess in the oven.
  5. Bake in the preheated oven for about 30-35 minutes or until the crust is golden brown.

    • Encouraging note: Keep an eye on the color. If the edges brown too fast, tent foil lightly over the top. The house will fill with a warm, savory smell that draws everyone in.
  6. Let it cool for a few minutes before serving.

    • Encouraging note: The filling needs a short rest to set. Use this time to plate sides, pour drinks, and call the family to the table. If you need another weeknight idea after leftovers, try my BBQ chicken sweet potato bowl for a fresh contrast: BBQ chicken sweet potato bowl.

Serving

Chicken Pot Pie

Serve this chicken pot pie family-style for the best feel. Place the pie in the center of the table on a simple trivet. Let everyone help themselves to a generous slice. Add steamed greens or a bright salad to cut the richness and bring color to the plate.

For children, a small scoop on their plate is often met with wide eyes and happy noises. For adults, a crisp green salad and a tangy vinaigrette balance the creamy filling. If you want to make it extra special, set out a bowl of crushed red pepper or a small dish of chopped fresh parsley for garnish.

Family-Style Tips

  • Use a shallow pie dish to get more golden crust and less spillover.
  • Serve with warm dinner rolls if you did a single crust version.
  • Save a wedge for the next day. Leftovers often improve overnight.

Storage

Refrigerator

  • Store leftovers in an airtight container for up to 3 days.
  • You can also cover the whole pie with foil and refrigerate for up to 2 days.

Freezer

  • For longer storage, freeze unbaked assembled pies for up to 1 month. Wrap tightly in plastic wrap and foil.
  • Thaw overnight in the fridge before baking. You may need to add a few extra minutes to the bake time.

Reheating

  • To reheat a slice, place it on a baking sheet and warm at 350°F for 15-20 minutes until heated through and the crust is crisp.
  • Microwave works in a pinch but the crust will soften. For a crisper top, give it a few minutes under the oven broiler, watching closely.

Kitchen Notes

  • Shortcut: Use rotisserie chicken to cut the prep time in half.
  • Shortcut: Frozen mixed vegetables are a simple, no-chop option.
  • Shortcut: Lightly brush the top crust with milk or egg wash for a shiny, golden finish.
  • Shortcut: If the filling feels thin, stir in 1 tablespoon of flour or cornstarch mixed with a little water to thicken.
  • Shortcut: Make extra filling and freeze it in a freezer-safe container. Thaw and pour into a crust for a fast dinner later.

Variations

  • Gluten-free: Use a store-bought gluten-free crust. Ensure your cream of chicken soup is gluten-free or make a homemade white sauce.
  • Vegetarian: Replace chicken with cubed potatoes and extra mushrooms. Use a vegetarian cream soup or a roux-based sauce with vegetable broth.
  • Low-carb: Skip the bottom crust and bake in a deep dish with only a thin top crust or a mashed cauliflower topping.
  • Picky eaters: Keep the vegetables on the side and serve them separately. Let each person add what they like to their slice.
  • Fancy touch: Add a splash of white wine and 1 teaspoon Dijon mustard to the filling for added depth.

FAQ

Q: Can I use cooked chicken that is not rotisserie?
A: Yes. Any leftover roasted or baked chicken works. Just shred or chop it into bite-size pieces and use the same quantity.

Q: Do I have to use cream of chicken soup?
A: No. You can replace it with a homemade white sauce made from butter, flour, and chicken broth for a fresher flavor. The canned soup saves time.

Q: How do I prevent a soggy bottom crust?
A: Use a hot oven and a shallow dish. Prebaking the bottom crust for 5 minutes helps. Also, make sure the filling is not too watery.

Q: Can I make this ahead of time?
A: Yes. Assemble the pie and keep it covered in the fridge for up to 24 hours. Bring it to room temperature before baking for even cooking.

Q: How do I know when it is done?
A: The crust should be a deep golden brown and the filling should bubble through the vents. If the top browns too quickly, cover with foil until the filling bubbles.

Conclusion

I hope this chicken pot pie becomes one of your go-to family favorites. The scent as it bakes, the shared spoons at the table, and the satisfied quiet after the meal are small joys that make cooking so worthwhile.

For a homemade approach with a few extra tips, I like the way this version is explained in the Homemade Chicken Pot Pie guide: Homemade Chicken Pot Pie – Tastes Better From Scratch. If you want to try a classic double-crust technique, this double-crust recipe gives clear, helpful steps: Chicken Pot Pie Recipe – Sally’s Baking Addiction.

Thank you for letting me share this simple, cozy recipe. Gather the family, enjoy the warmth, and make room for seconds.

Chicken Pot Pie

Prep Time 15 minutes
Cook Time 35 minutes
Total Time 50 minutes
Servings 8 servings
Calories 350
A comforting and easy chicken pot pie made with rotisserie chicken and pantry staples, perfect for family dinners on busy weeknights.

Ingredients

Filling Ingredients

  • 1 whole rotisserie chicken, shredded (Use the meat from the breast and thighs for the best texture. Save the carcass for stock.)
  • 1 cup frozen mixed vegetables (Peas, carrots, and corn work well. No need to thaw first unless you prefer.)
  • 1 can cream of chicken soup (10.5 oz) (For a lighter flavor, mix half soup and half low-sodium chicken broth.)
  • 1/2 cup milk (Whole milk makes the filling richer. Use 2% if you want it lighter.)
  • 1/2 teaspoon garlic powder (Garlic powder blends better than fresh garlic in quick casseroles.)
  • 1/2 teaspoon onion powder (It boosts depth without chopping onion.)
  • to taste salt (Start with 1/4 teaspoon salt and a few grinds of pepper. Adjust after mixing.)
  • to taste pepper

Crust Ingredients

Instructions 

Preparation

  • Preheat the oven to 425°F (220°C).
  • In a large bowl, combine shredded chicken, frozen vegetables, cream of chicken soup, milk, garlic powder, onion powder, salt, and pepper. Mix well.
  • Place one pie crust in a pie dish and pour the chicken mixture into it.
  • Cover with the second pie crust, sealing the edges. Cut slits in the top crust to allow steam to escape.

Baking

  • Bake in the preheated oven for about 30-35 minutes or until the crust is golden brown.
  • Let it cool for a few minutes before serving.

Notes

Serve family-style and let everyone help themselves. Pair with steamed greens or a bright salad to balance the richness.
Calories: 350kcal
Course: Dinner, Main Course
Cuisine: American
Keyword: Chicken Pot Pie, Comfort Food, Easy Dinner, Family Dinner, rotisserie chicken