Author

Amelia Hart

Browsing

Garlic Butter Chicken and Bowtie Pasta

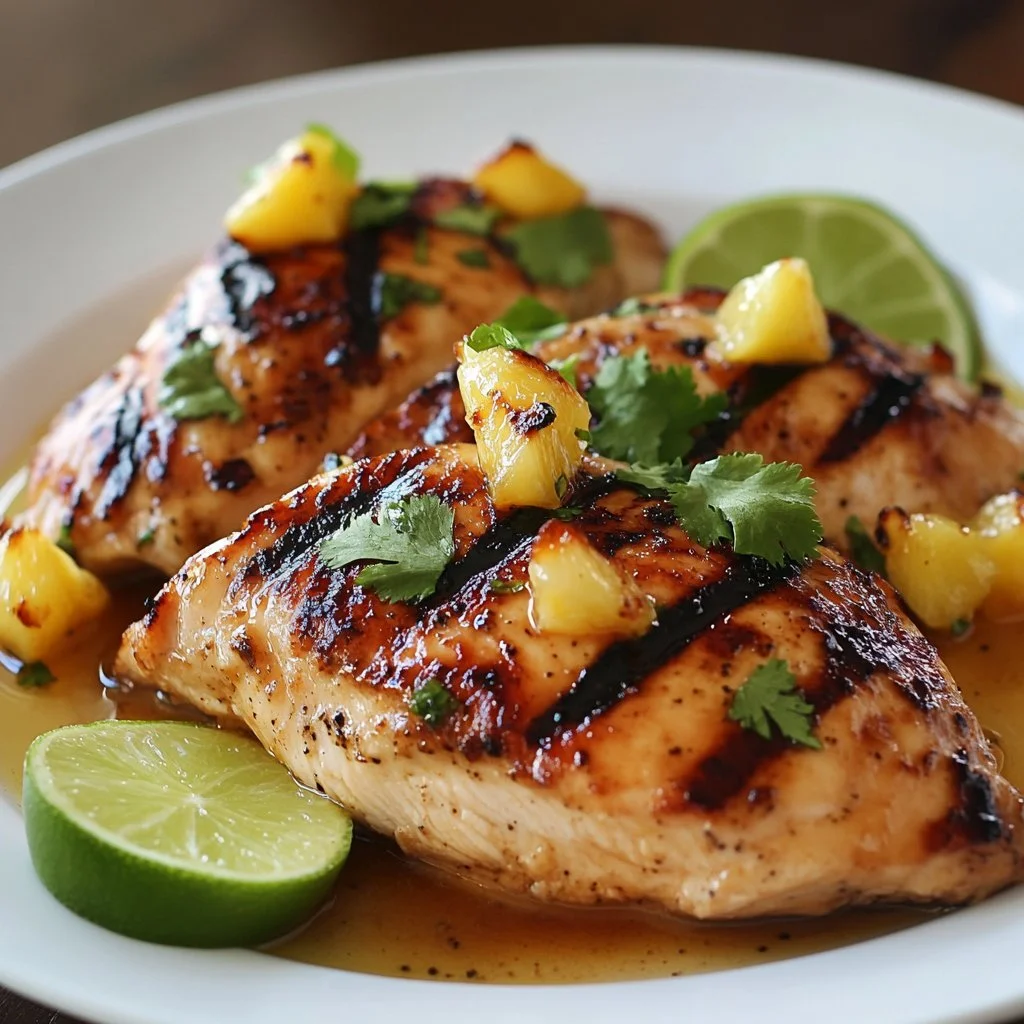
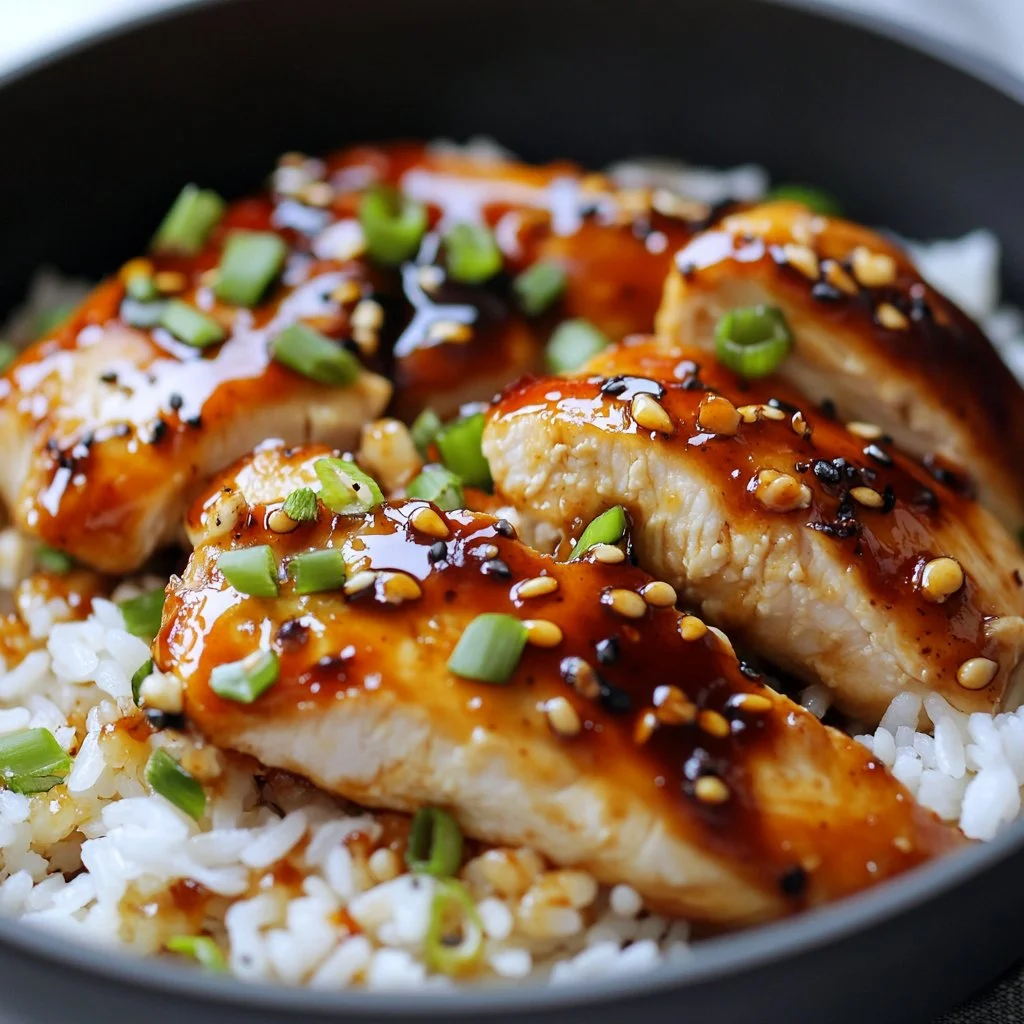
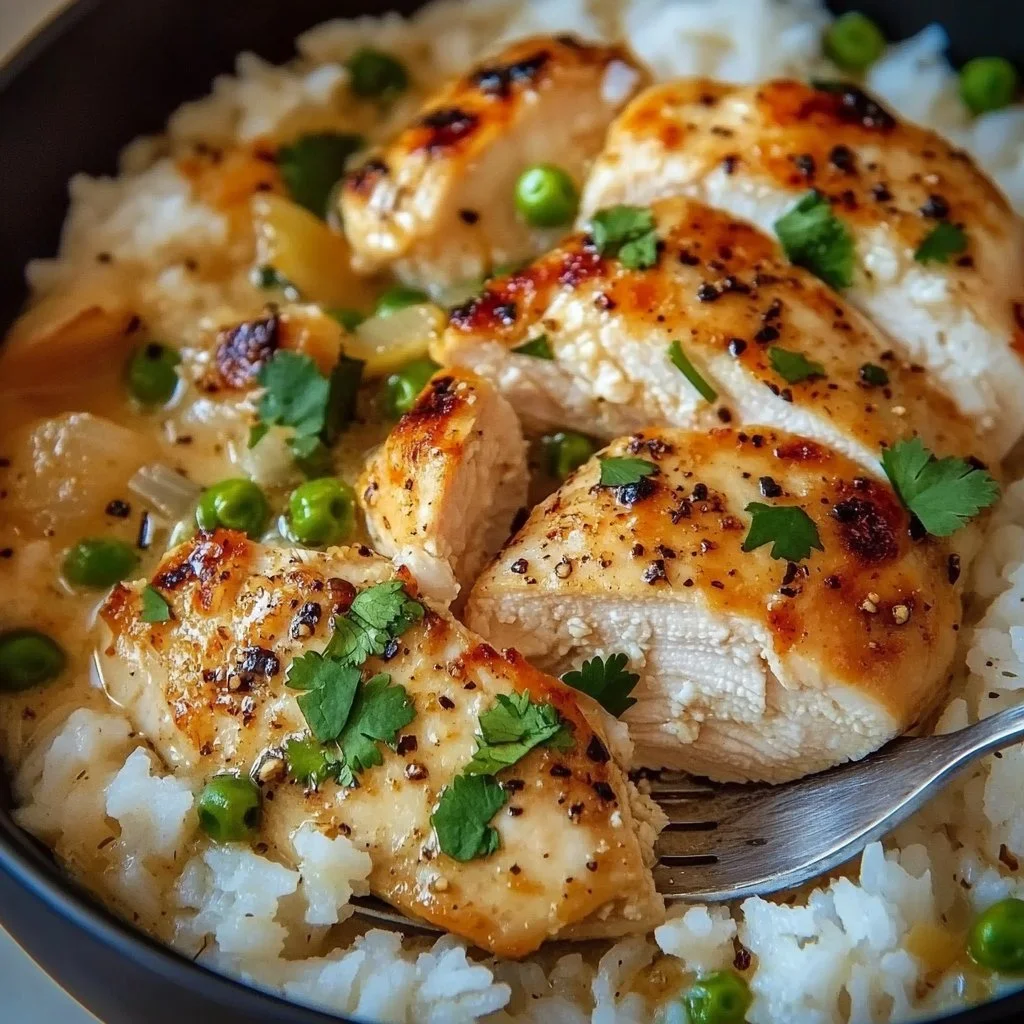
There’s something wonderfully comforting about the smell of garlic and butter wafting through the kitchen. It’s that warm, inviting aroma that calls everyone in the house. As you stir together the ingredients, you can hear the soft bubbling of the sauce, combined with the gentle simmer of the pasta. This is the perfect backdrop to a family meal that feels special and tastes divine. Today, I’m sharing one of my family’s favorites: Garlic Butter Chicken and Bowtie Pasta.

Why This Works

Garlic Butter Chicken and Bowtie Pasta

This recipe is a fantastic blend of rich flavors and textures that your whole family will love. Garlic butter? Yes, please. Tender chicken perfectly coated in creamy sauce? It’s like a warm hug on a plate.

Not only does this dish taste incredible, but it’s also quick to prepare. With just a few ingredients and a straightforward cooking method, you’ll have dinner ready in no time. This is ideal for busy weeknights when you want to serve something delicious without spending hours in the kitchen.

Process Overview

“This is where the magic happens—when the aroma fills the kitchen.”

Cooking this Garlic Butter Chicken and Bowtie Pasta is truly an enjoyable experience. It brings your family together—from the delightful scents that fill your home to the smiles on their faces when they dig into a warm, hearty meal. You’ll love how this simple process transforms everyday ingredients into something extraordinary. Let’s get started!

Ingredients

For this recipe, you will need:

  • 2 chicken breasts
  • 8 oz bowtie pasta
  • 4 cloves garlic, minced
  • 1/2 cup butter
  • 1 cup heavy cream
  • 1 cup chicken broth
  • 1/2 cup Parmesan cheese
  • Salt and pepper to taste
  • Fresh parsley for garnish

Lily’s Tips:

  • Chicken Breasts: Look for ones that are plump and of even size for even cooking.
  • Bowtie Pasta: This shape holds onto the sauce beautifully.
  • Garlic: Fresh garlic is a must. It provides the best flavor.
  • Butter: Use unsalted butter for more control over the saltiness of the dish.
  • Parmesan Cheese: Freshly grated cheese melts better than pre-packaged varieties.

Directions

  1. Cook the bowtie pasta according to package instructions; drain and set aside.
    Note: Don’t forget to save a bit of pasta water. It can help adjust the sauce later if needed.

  2. In a large skillet, melt butter over medium heat.
    This step sets the stage for all the rich flavors to come. Just watch it melt into a beautiful golden hue.

  3. Add minced garlic and sauté until fragrant.
    The smell of sautéing garlic is magic in the kitchen. Make sure not to burn it—keep an eye on it as it cooks.

  4. Add chicken breasts and cook until browned and cooked through.
    Turn them a couple of times to get an even golden crust. This will seal in the juices.

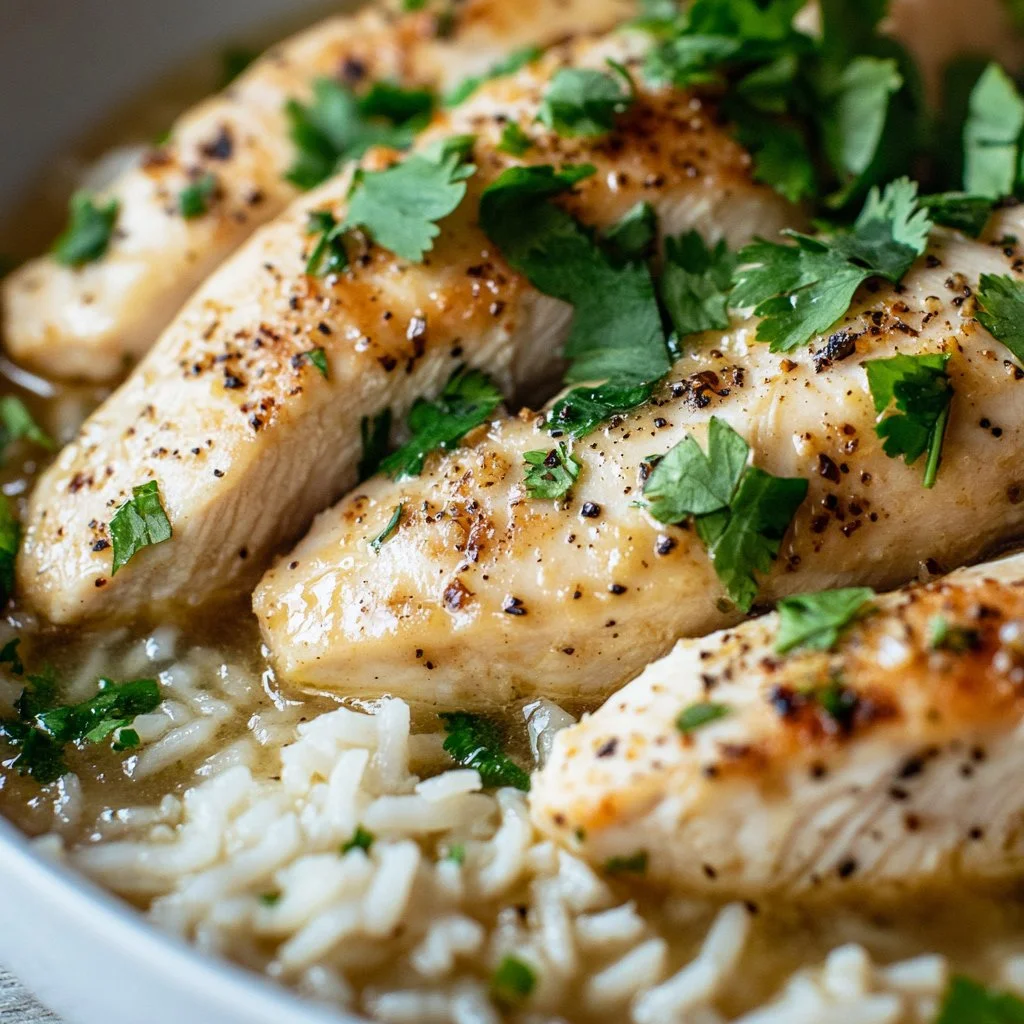
  5. Remove chicken from skillet and slice.
    Letting the chicken rest for a few minutes before slicing ensures it stays juicy.

  6. In the same skillet, add chicken broth and heavy cream; bring to a simmer.
    The beauty of one-pan meals is the flavor buildup in the skillet. Scrape any tasty bits off the bottom.

  7. Stir in Parmesan cheese, salt, and pepper.
    Watch as everything comes together into a creamy, cheesy sauce—it’s dreamy!

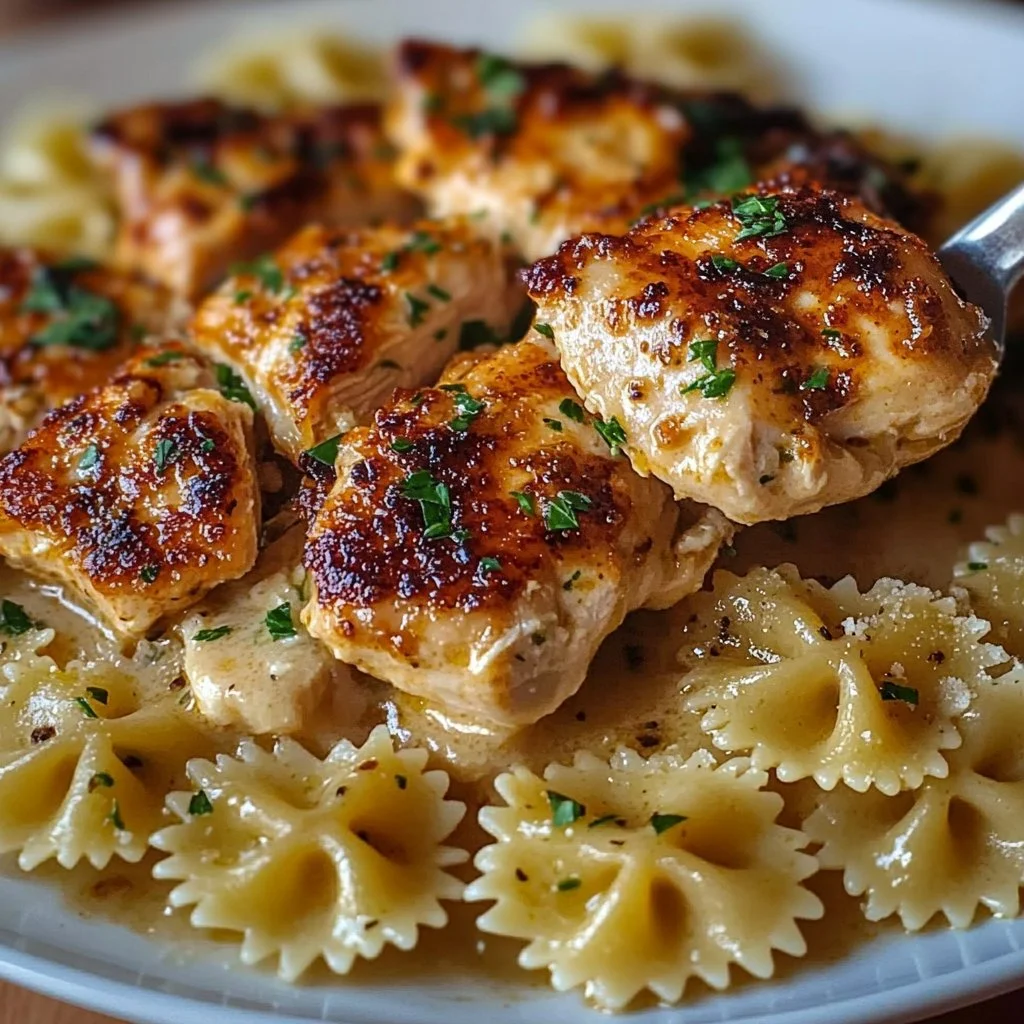
  8. Add cooked pasta and sliced chicken to the sauce; mix well.
    This is where you can really get everyone involved. Have the kids help stir.

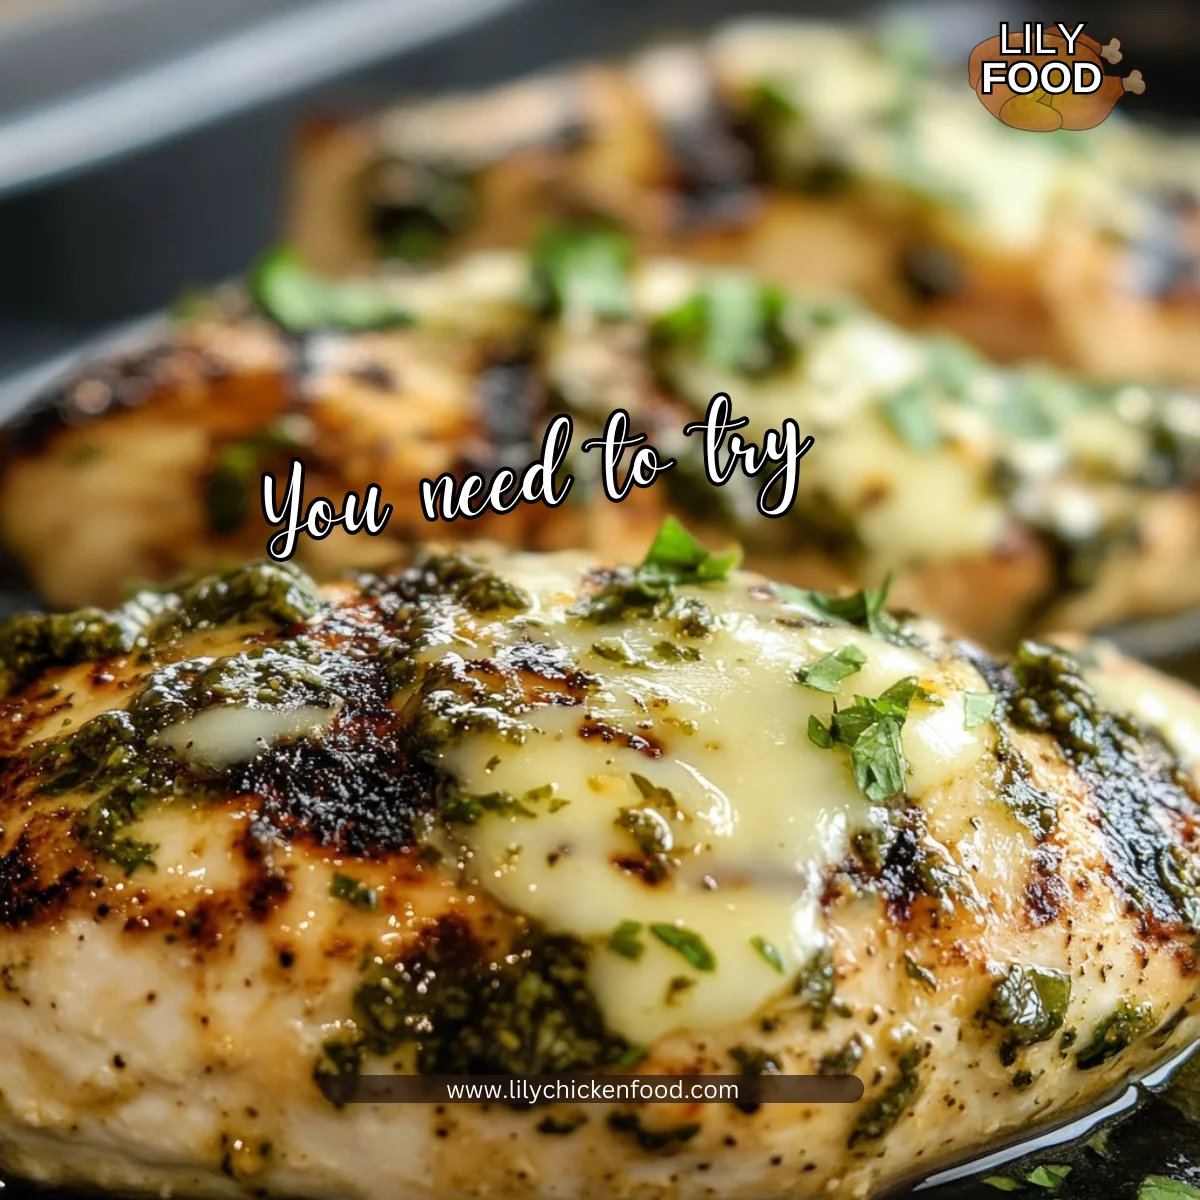
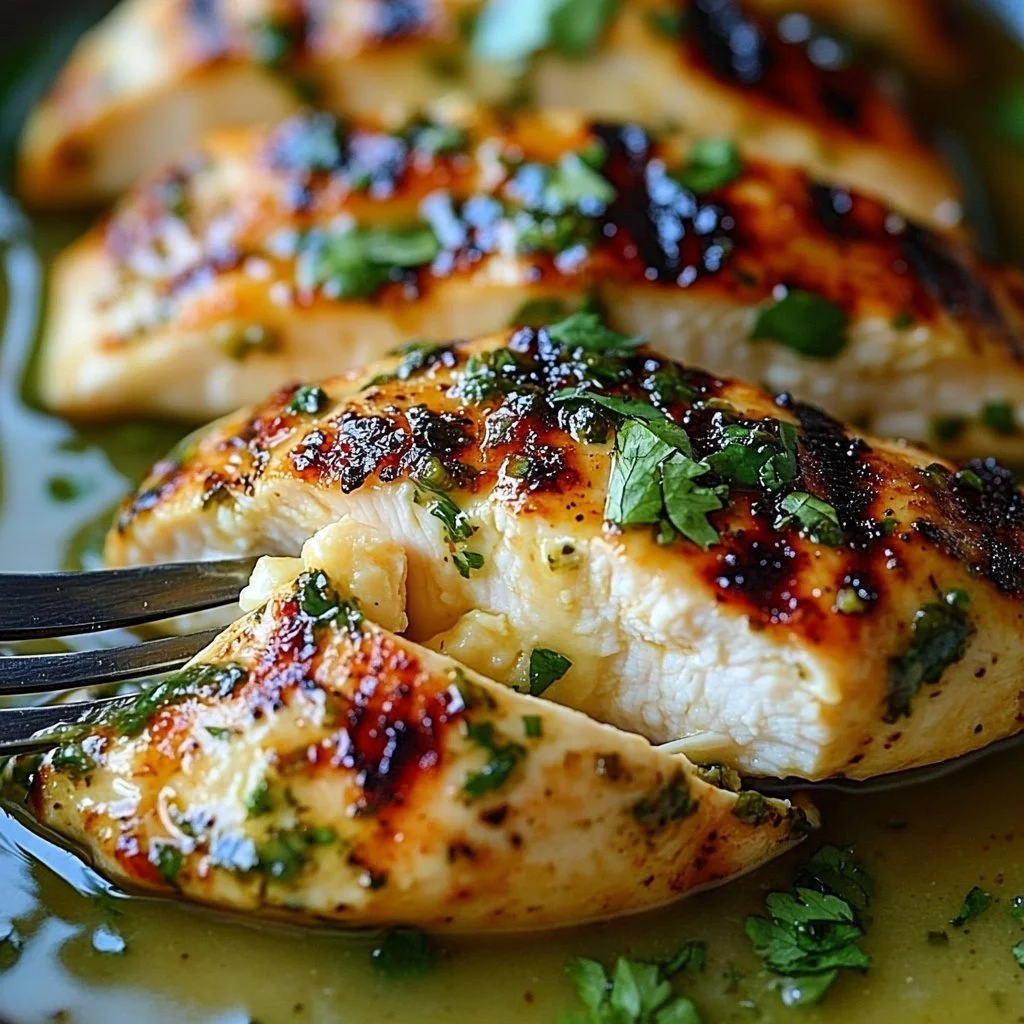
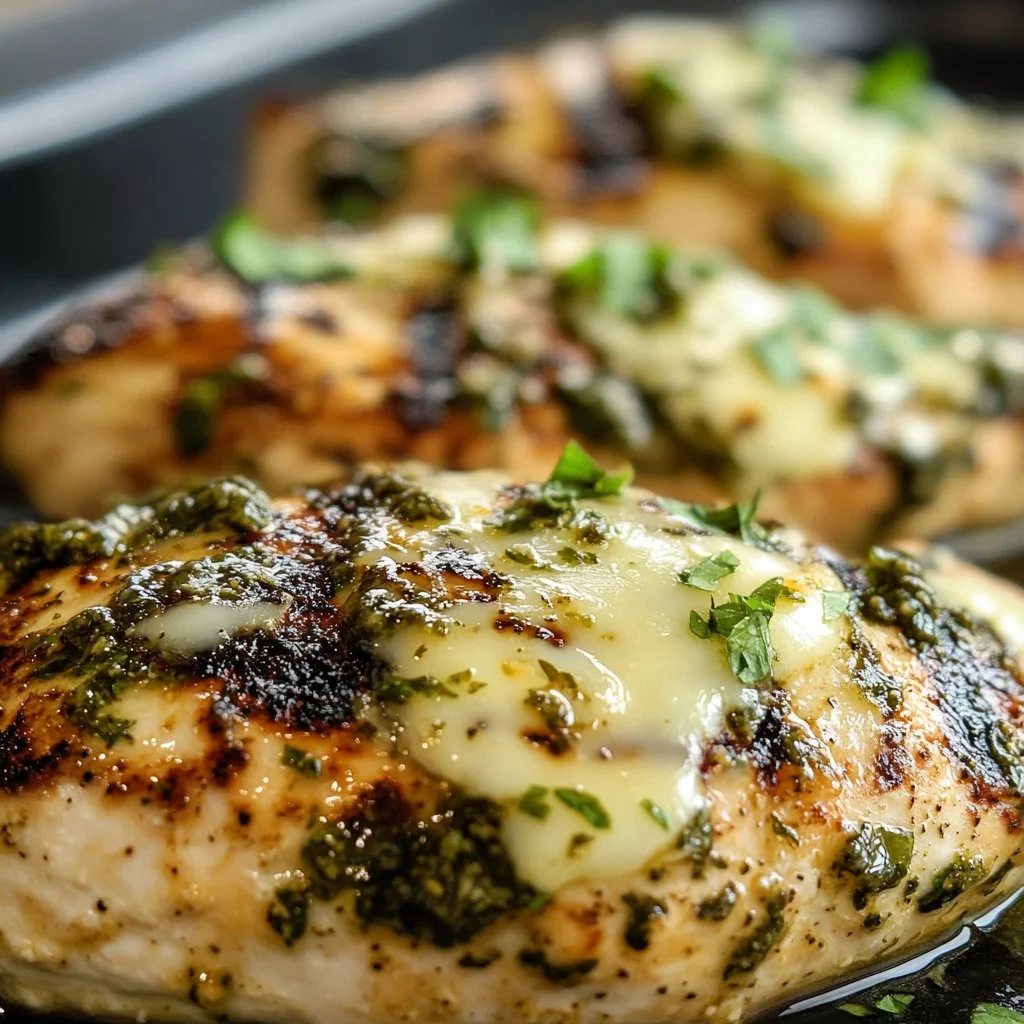
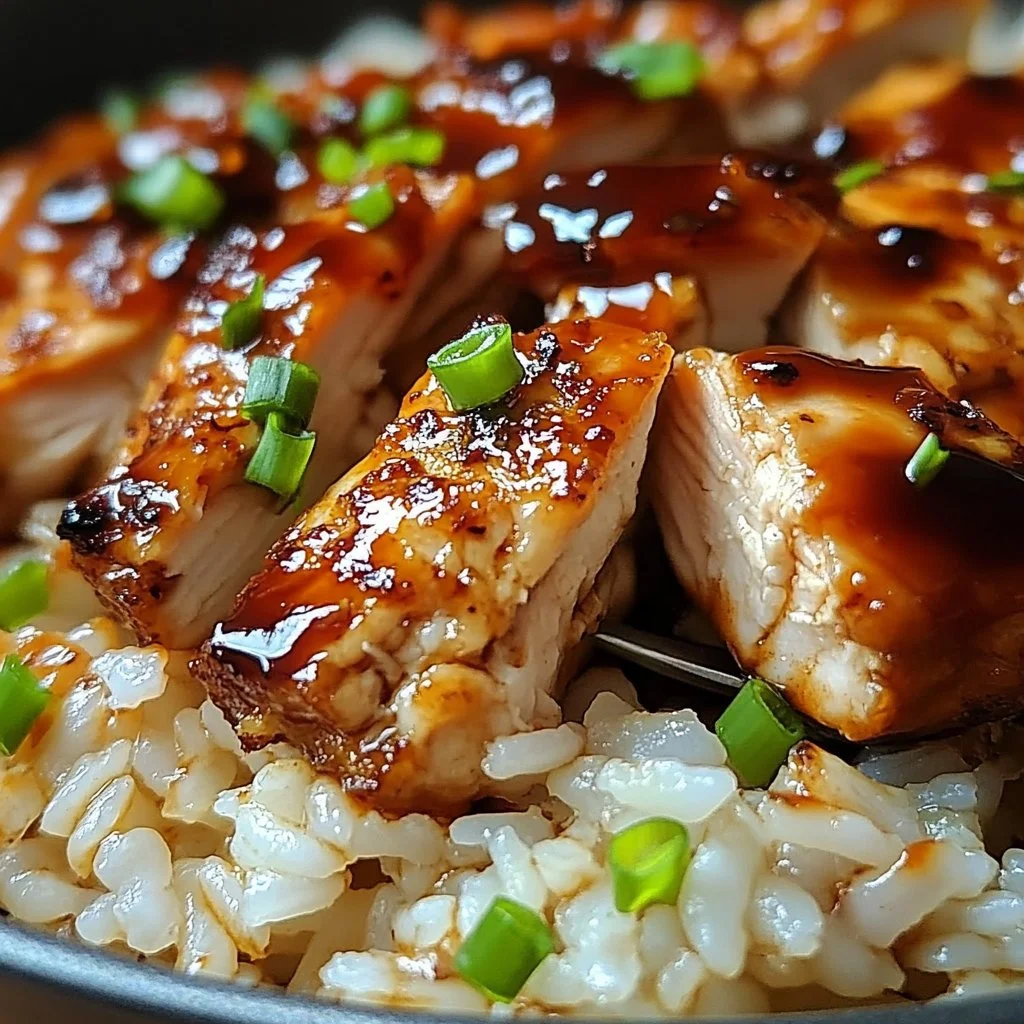
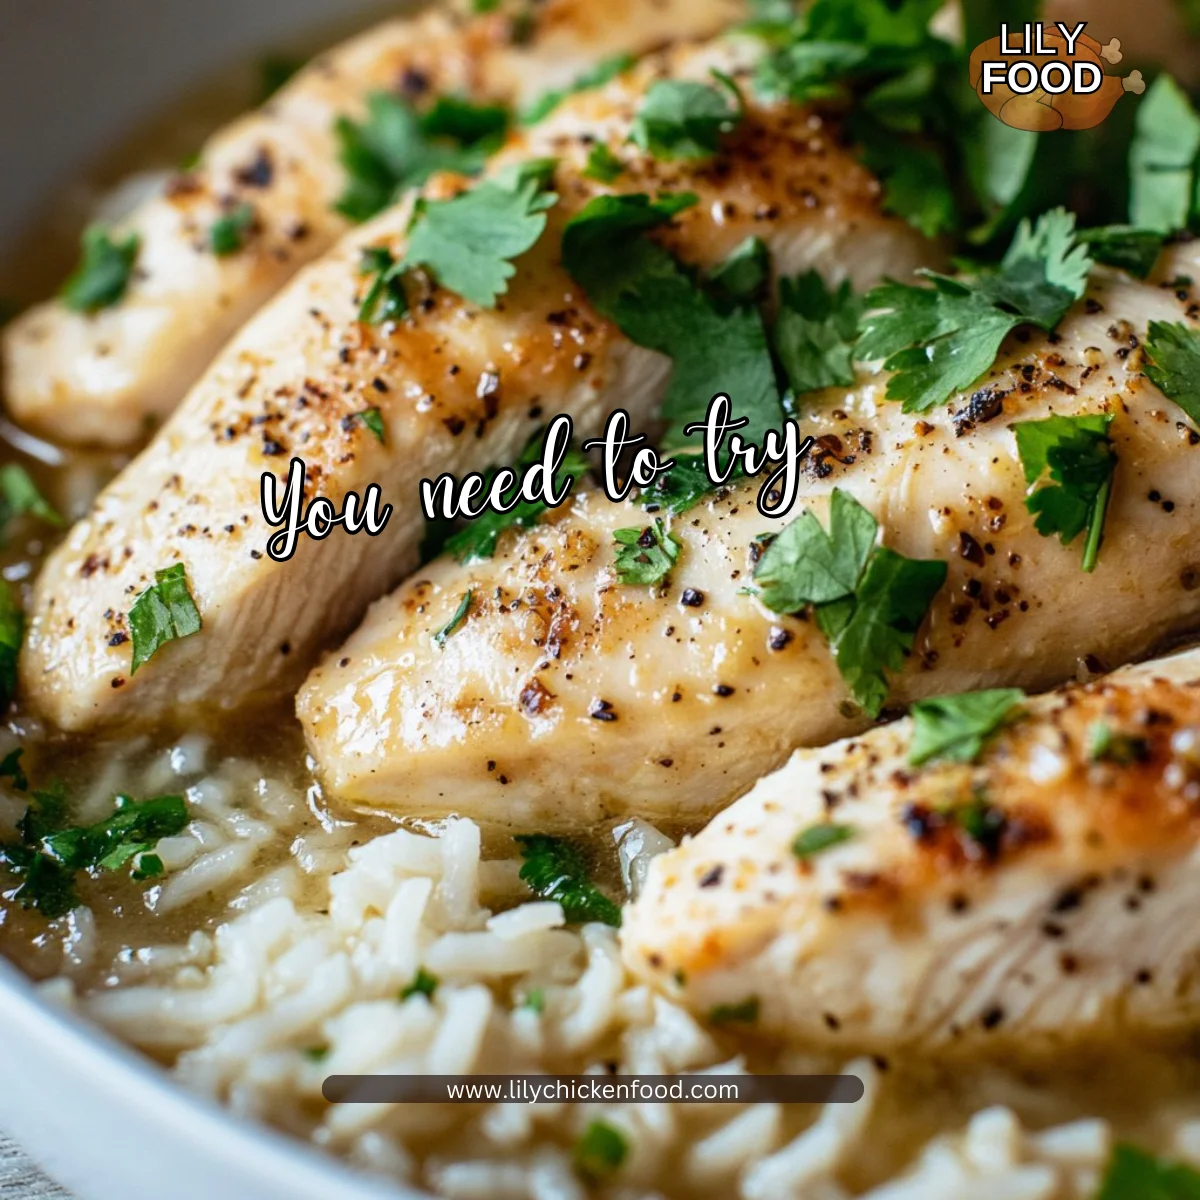
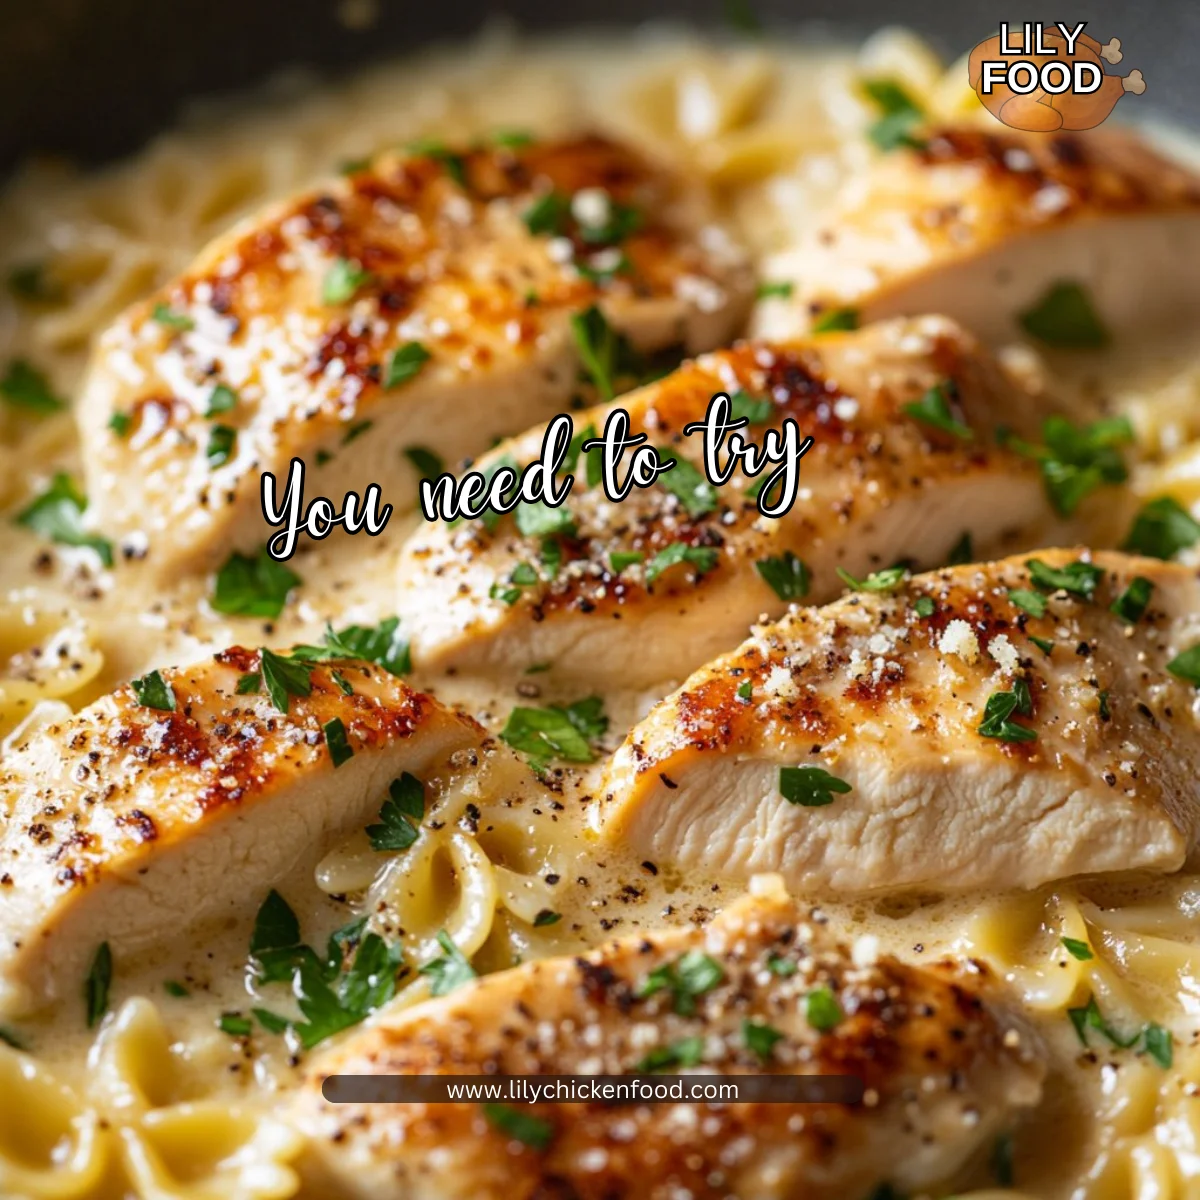
  9. Serve hot, garnished with fresh parsley.
    The pop of green looks lovely and adds a fresh touch to the rich dish.

Serving

Garlic Butter Chicken and Bowtie Pasta

When it comes to serving Garlic Butter Chicken and Bowtie Pasta, make it family-style. Present it in a large bowl and let everyone help themselves. You can sprinkle a bit more Parmesan cheese on top for those who love a cheesy finish.

Don’t forget to pair this dish with a simple side salad or some steamed vegetables to balance out the meal. Enjoy the laughter and conversations around the table as everyone digs in.

Storage

If you have leftovers (which is rare, but it happens!), store the Garlic Butter Chicken and Bowtie Pasta in an airtight container in the fridge. It should be good for 3 to 4 days.

When reheating, do so gently in a skillet over low heat. Add a splash of chicken broth or cream to revive the sauce and keep it creamy.

Kitchen Notes

Here are some handy shortcuts to keep in mind:

  • Meal Prep: Cook the chicken and make the sauce ahead of time. Store it separately for up to two days.
  • Pasta Cooking: Remember to add salt to your pasta water for added flavor.
  • Frozen Chicken: Use frozen chicken breasts; just increase the cooking time.
  • One-Pot Wonder: Instead of cooking pasta separately, you can cook the pasta in the sauce with added water.
  • Herbs: Fresh herbs like thyme or basil can add extra flavor if you have them on hand.

Variations

This recipe can easily adapt to suit different tastes:

  • Picky Eaters: Cut the chicken into smaller pieces or treat them to a fun shape pasta.
  • Healthier Option: Use whole wheat or gluten-free pasta to fit dietary needs.
  • Veggie Boost: Add in spinach or cherry tomatoes for extra nutrients.
  • Low-Carb: Substitute pasta with zucchini noodles or spaghetti squash for a lighter meal.
  • Spice it Up: Add a pinch of red pepper flakes to the garlic for a kick.

FAQ

1. Can I use other types of pasta?
Yes, feel free to substitute any pasta you have on hand. Just adjust the cooking time as necessary.

2. Is there a vegetarian version of this dish?
Absolutely! Swap out the chicken for sautéed mushrooms or a plant-based protein.

3. How can I make it dairy-free?
Use a dairy-free butter alternative and substitute the heavy cream with coconut cream or a plant-based cream.

4. Can I freeze leftovers?
Yes, but keep in mind the pasta may become a bit soft upon thawing. It’s best to freeze the sauce and chicken separately.

5. What can I serve with this dish?
A green salad, garlic bread, or steamed veggies are excellent options for side dishes.

As you finish up the meal, take a moment to savor the joy that comes with sharing a homemade dinner. Cooking can be a beautiful way to bond with loved ones, creating not just food but also lasting memories. Enjoy your Garlic Butter Chicken and Bowtie Pasta, and cherish those precious family moments at the table.

Garlic Butter Chicken and Bowtie Pasta

Prep Time 10 minutes
Cook Time 20 minutes
Total Time 30 minutes
Servings 4 servings
Calories 600
A comforting and quick family meal featuring tender chicken in a creamy garlic butter sauce, served with bowtie pasta.

Ingredients

Main Ingredients

  • 2 pieces chicken breasts (Look for plump, even-sized breasts for even cooking.)
  • 8 oz bowtie pasta (This shape holds onto the sauce beautifully.)
  • 4 cloves garlic, minced (Fresh garlic is a must for the best flavor.)
  • 1/2 cup butter (Use unsalted for better control over seasoning.)
  • 1 cup heavy cream (Provides a rich, creamy texture.)
  • 1 cup chicken broth (Adds depth to the sauce.)
  • 1/2 cup Parmesan cheese (Freshly grated melts better than pre-packaged.)
  • Salt and pepper to taste
  • Fresh parsley for garnish (Adds freshness and color.)

Instructions 

Cooking Pasta

  • Cook the bowtie pasta according to package instructions; drain and set aside. Save a bit of pasta water for the sauce if needed.

Preparing Sauce

  • In a large skillet, melt butter over medium heat.
  • Add minced garlic and sauté until fragrant, being careful not to burn it.
  • Add chicken breasts and cook until browned and cooked through, turning a couple of times.
  • Remove chicken from skillet and let it rest for a few minutes before slicing.
  • In the same skillet, add chicken broth and heavy cream; bring to a simmer.
  • Stir in Parmesan cheese, salt, and pepper, mixing until well combined.
  • Add cooked pasta and sliced chicken to the sauce; mix well and serve hot, garnished with fresh parsley.

Notes

For serving, present in a large bowl. Pair with a side salad or steamed vegetables. Leftovers can be stored in an airtight container for 3 to 4 days.
Calories: 600kcal
Course: Dinner, Main Course
Cuisine: American, Family
Keyword: Comfort Food, Family Meal, Garlic Butter Chicken, Pasta, Quick Dinner

Honey BBQ Chicken with Garlic Parmesan Potatoes

There’s something about entering a kitchen while dinner is cooking. The sweet smell of Honey BBQ chicken fills the air, blending with the savory scent of roasted garlic potatoes. You can almost hear the sizzle from the pan, a calming and familiar sound that says home. This experience is perfect for any family gathering, weeknight dinner, or simply a way to show your loved ones you care.

Why This Works

Honey BBQ Chicken with Garlic Parmesan Potatoes

Life gets busy, and finding a meal that’s both delicious and quick is a treasure. This Honey BBQ Chicken with Garlic Parmesan Potatoes is perfect for family dinners where you want to gather everyone around the table without spending hours in the kitchen.

The combination of sweet and savory flavors appeals to both kids and adults. Bonus: it’s easy! You can make it in under an hour, allowing more time for laughter and conversation at the dinner table.

Process Overview

“This is where the magic happens—when the aroma fills the kitchen.”

The process of making this meal is straightforward and engaging. You’ll find it’s not just about cooking; it’s about creating memories as you chop, sauté, and serve. With each step, you’ll notice how the kitchen transforms into a haven filled with family-friendly flavors, bringing everyone together.

Ingredients

To make Honey BBQ Chicken with Garlic Parmesan Potatoes, you’ll need:

  • 4 chicken breasts: Look for breasts that are even in size for uniform cooking.
  • 1 cup Honey BBQ sauce: A good quality sauce will enhance the flavor. You can even make your own if you like!
  • 2 cups potatoes, diced: I recommend using russet or Yukon gold potatoes for a fluffy texture.
  • 1 cup shredded Parmesan cheese: Freshly grated cheese melts better than the pre-shredded variety.
  • 2 tablespoons garlic, minced: Fresh garlic gives a more robust flavor compared to powdered garlic.
  • 2 tablespoons olive oil: Use extra virgin olive oil for richer taste and health benefits.
  • Salt and pepper to taste: Adjust based on your family’s preferences.
  • Chopped parsley for garnish: Fresh herbs brighten up the dish visually and add freshness.

Directions

  1. Preheat the oven to 400°F (200°C).
    Start with this step to ensure your oven is ready when the time comes to roast your potatoes.

  2. In a bowl, combine the diced potatoes, olive oil, minced garlic, salt, and pepper; toss to coat.
    This is a crucial step. Make sure every potato is coated evenly for maximum flavor.

  3. Spread the potatoes on a baking sheet and bake for 20-25 minutes until tender and golden.
    Keep an eye on them. You want them crispy but not overcooked.

  4. While the potatoes are baking, grill or pan-fry the chicken breasts until cooked through.
    Cooking chicken can seem daunting, but the best way to check is by using a meat thermometer—it should read 165°F.

  5. Brush the Honey BBQ sauce over the chicken during the last few minutes of cooking.
    This allows the sauce to caramelize a bit, making every bite absolutely heavenly.

  6. Remove the potatoes from the oven, sprinkle with Parmesan cheese, and return to the oven for an additional 5 minutes until the cheese is melted.
    This is one of the best moments—watching the cheese melt into a golden crust.

  7. Serve the BBQ chicken with the Garlic Parmesan Potatoes and garnish with chopped parsley.
    Take a moment to appreciate your amazing creation before digging in.

Serving

Honey BBQ Chicken with Garlic Parmesan Potatoes

Serve this dish family-style on a large platter. It encourages sharing and conversation. Let your family dish out their favorites. The sweet BBQ chicken pairs perfectly with the gooey cheesy potatoes. Don’t forget to sprinkle a little more parsley for that pop of color.

Storage

If you have leftovers, they can stay fresh in the fridge for up to 4 days. Just make sure to store the chicken and potatoes in airtight containers. When you’re ready to enjoy them again, simply reheat in the oven at 350°F (175°C) for 15-20 minutes until warmed through. You can also use a microwave, but the oven will keep the potatoes crispy.

Kitchen Notes

  • Prep Ahead: You can dice the potatoes and marinate the chicken the night before to save time.
  • Add Veggies: Toss in some broccoli or green beans before roasting the potatoes for extra nutrition.
  • Chicken Substitutes: This recipe works great with thighs or drumsticks too.
  • Quick Cleanup: Line your baking sheet with parchment paper for easy cleanup.
  • Cooking Tools: A meat thermometer will help you avoid over or undercooking your chicken.

Variations

  • For Picky Eaters: If BBQ sauce isn’t a favorite, try a simple salt and pepper seasoning or teriyaki sauce instead.
  • Low-Carb Options: Substitute potatoes with cauliflower florets for a lighter version.
  • Gluten-Free: Ensure your BBQ sauce is gluten-free, and you’re all set.
  • Spicy Kick: Add some cayenne pepper or hot sauce to the BBQ sauce for a spice lovers’ twist.
  • Herb Alternatives: Use different herbs like thyme or rosemary instead of parsley for varied flavor profiles.

FAQ

  1. Can I use frozen chicken?
    Yes, but it’s best to thaw it overnight in the fridge beforehand.

  2. What side dishes go well with this meal?
    A simple salad or steamed vegetables would be a great addition.

  3. Can I bake the chicken instead of grilling it?
    Absolutely! Bake at 375°F (190°C) for 25-30 minutes.

  4. What BBQ sauce do you recommend?
    I love using a honey BBQ sauce for this, but any favorite BBQ sauce will work.

  5. Can I prepare the potatoes the night before?
    Yes, but it’s best to keep them in water to prevent browning.

As you savor every bite of this warm, filling meal, remember that cooking is more than just about nourishment. It’s an opportunity to create family traditions and moments that last a lifetime. Enjoy the process and the result, and don’t hesitate to gather your loved ones around the table. Happy cooking!

Honey BBQ Chicken with Garlic Parmesan Potatoes

Prep Time 15 minutes
Cook Time 30 minutes
Total Time 45 minutes
Servings 4 servings
Calories 540
A deliciously sweet and savory combo of Honey BBQ chicken breasts served alongside garlic roasted potatoes topped with Parmesan cheese, perfect for family gatherings or quick weeknight dinners.

Ingredients

For the Chicken

  • 4 pieces chicken breasts (Look for breasts that are even in size for uniform cooking.)
  • 1 cup Honey BBQ sauce (A good quality sauce will enhance the flavor. You can even make your own if you like!)

For the Potatoes

  • 2 cups potatoes, diced (I recommend using russet or Yukon gold potatoes for a fluffy texture.)
  • 1 cup shredded Parmesan cheese (Freshly grated cheese melts better than the pre-shredded variety.)
  • 2 tablespoons garlic, minced (Fresh garlic gives a more robust flavor compared to powdered garlic.)
  • 2 tablespoons olive oil (Use extra virgin olive oil for richer taste and health benefits.)
  • to taste Salt and pepper (Adjust based on your family’s preferences.)
  • as needed Chopped parsley for garnish (Fresh herbs brighten up the dish visually and add freshness.)

Instructions 

Preparation

  • Preheat the oven to 400°F (200°C).
  • In a bowl, combine the diced potatoes, olive oil, minced garlic, salt, and pepper; toss to coat.
  • Spread the potatoes on a baking sheet and bake for 20-25 minutes until tender and golden.

Cooking Chicken

  • While the potatoes are baking, grill or pan-fry the chicken breasts until cooked through.
  • Brush the Honey BBQ sauce over the chicken during the last few minutes of cooking.

Finishing Touches

  • Remove the potatoes from the oven, sprinkle with Parmesan cheese, and return to the oven for an additional 5 minutes until the cheese is melted.
  • Serve the BBQ chicken with the Garlic Parmesan Potatoes and garnish with chopped parsley.

Notes

If you have leftovers, they can stay fresh in the fridge for up to 4 days. Just make sure to store the chicken and potatoes in airtight containers. Reheat in the oven at 350°F (175°C) for 15-20 minutes until warmed through.
Calories: 540kcal
Course: Dinner, Main Course
Cuisine: American
Keyword: Comfort Food, Family Dinner, Garlic Parmesan Potatoes, Honey BBQ Chicken, Quick Meal

Healthy Mediterranean Chicken Tacos
The sun is setting outside as you prepare dinner in your cozy kitchen. The smell of spices fills the air while the sizzling sound of chicken on the grill sets a comforting backdrop. Cooking for your family can be such a joyful moment, especially with a meal like Healthy Mediterranean Chicken Tacos.

Why This Works

Healthy Mediterranean Chicken Tacos
Healthy Mediterranean Chicken Tacos are a hit for several reasons. First, they are packed with flavor. The combination of spices used to season the chicken creates a taste sensation that will have everyone at the table asking for more.

Equally important, these tacos are quick to prepare. In just 30 minutes, you can have a nutritious and delicious meal ready for your family. This means more time to spend together without the stress of a long cooking process. You can easily make these tacos on a busy weeknight, making them a fantastic addition to your family’s dinner repertoire.

Process Overview

“This is where the magic happens—when the aroma fills the kitchen.”

The magic happens during each part of the cooking process. From seasoning the chicken to grilling it to perfection, you will savor the experience. Each step brings you closer to a delicious meal that warms hearts and brings smiles.

Ingredients

To make these Healthy Mediterranean Chicken Tacos, gather the following ingredients:

  • 1 pound boneless, skinless chicken breasts
  • 1 tablespoon olive oil
  • 2 teaspoons smoked paprika
  • 1 teaspoon garlic powder
  • 1 teaspoon onion powder
  • Salt and pepper to taste
  • 8 small corn tortillas
  • 1 cup chopped romaine lettuce
  • 1 cup diced tomatoes
  • 1/2 cup cucumber, diced
  • 1/4 cup red onion, diced
  • 1/4 cup feta cheese, crumbled
  • 1/4 cup tzatziki sauce
  • Fresh parsley for garnish

Lily’s Tips:

  • Opt for organic chicken for a healthier option.
  • Fresh herbs can elevate the flavor even more; consider adding dill or oregano.
  • If you want a little more spice, add a pinch of cayenne pepper to the seasoning.

Directions

  1. In a large bowl, combine olive oil, smoked paprika, garlic powder, onion powder, salt, and pepper. Add the chicken and toss to coat. This is where the flavors begin to mingle and create something special.

  2. Heat a grill or skillet over medium-high heat. Cook the chicken for 6-7 minutes per side or until fully cooked. Listen for that sizzle—the sound of deliciousness coming to life.

  3. Remove the chicken and let it rest for a few minutes. Then slice it into strips. Resting the chicken keeps it juicy, which makes every bite so much better.

  4. Warm the corn tortillas in a pan or microwave. This step makes them pliable and ready to hold all that yummy goodness.

  5. Assemble the tacos by layering the chicken, lettuce, tomatoes, cucumber, red onion, and feta on each tortilla. Feel free to add a little extra of your favorites!

  6. Drizzle with tzatziki sauce and garnish with parsley before serving. Watch as your family gathers around the table, ready to dig in.

Serving

Healthy Mediterranean Chicken Tacos
These Healthy Mediterranean Chicken Tacos are best served family-style. Arrange everything on the table, and let everyone build their own. This not only makes serving easy, but it also encourages your family to get involved in the meal. Each person can customize their taco with their favorite toppings.

Storage

If you have leftovers, store them in an airtight container in the refrigerator for up to three days. To reheat, simply warm the chicken in a skillet over medium heat until heated through. You can also crisp up the tortillas a little if you like.

Kitchen Notes

  • Use pre-cooked chicken if you’re short on time.
  • Make the tzatziki sauce ahead of time; it can last in the fridge for up to a week.
  • Chop veggies in advance to save time during the week.
  • For a quick meal prep option, consider grilling extra chicken on the weekend for future tacos.
  • Mix up the spices in the chicken marinade for variety next time.

Variations

If you have picky eaters in the family, here are some tweaks you can make:

  • Substitute grilled shrimp or beef for the chicken.
  • Use flour tortillas instead of corn for a softer option.
  • Try different toppings like avocado or olives to keep things interesting.
  • For a vegetarian option, replace chicken with grilled vegetables or chickpeas.
  • Swap tzatziki for guacamole for a different flavor profile.

FAQ

Q: Can I make these tacos gluten-free?
A: Yes! Just ensure you use gluten-free tortillas.

Q: Can I freeze the chicken for later?
A: Absolutely. You can freeze the seasoned chicken; just be sure to thaw it in the fridge before cooking.

Q: What can I use instead of feta cheese?
A: You can use goat cheese or omit cheese altogether for a dairy-free version.

Q: How do I make my tzatziki sauce lighter?
A: Use Greek yogurt and add a splash of lemon juice for a zing while keeping it creamy.

Q: Can I use a slow cooker for the chicken?
A: Yes, absolutely! Cook on low for 4-6 hours for evenly tender chicken.

Conclusion

These Healthy Mediterranean Chicken Tacos offer a delightful way to nourish your family while enjoying time together in the kitchen. With a burst of fresh flavors and textures, they are sure to become a favorite. Remember, every meal is an opportunity to create memories. Enjoy the cooking process, and watch how a simple meal can bring your family closer.

Healthy Mediterranean Chicken Tacos

Prep Time 15 minutes
Cook Time 15 minutes
Total Time 30 minutes
Servings 4 servings
Calories 350
A nutritious and flavorful meal packed with spices, perfect for busy weeknights.

Ingredients

Chicken and Marinade

  • 1 pound boneless, skinless chicken breasts (Opt for organic chicken for a healthier option.)
  • 1 tablespoon olive oil
  • 2 teaspoons smoked paprika
  • 1 teaspoon garlic powder
  • 1 teaspoon onion powder
  • to taste Salt and pepper

Taco Components

  • 8 small corn tortillas (Can substitute with flour tortillas for a softer option.)
  • 1 cup chopped romaine lettuce
  • 1 cup diced tomatoes
  • 1/2 cup cucumber, diced
  • 1/4 cup red onion, diced
  • 1/4 cup feta cheese, crumbled (Can substitute with goat cheese or omit for dairy-free.)
  • 1/4 cup tzatziki sauce (Consider making it ahead of time.)
  • Fresh parsley for garnish

Instructions 

Preparation

  • In a large bowl, combine olive oil, smoked paprika, garlic powder, onion powder, salt, and pepper. Add the chicken and toss to coat.
  • Heat a grill or skillet over medium-high heat. Cook the chicken for 6-7 minutes per side or until fully cooked.
  • Remove the chicken and let it rest for a few minutes. Then slice it into strips.
  • Warm the corn tortillas in a pan or microwave.

Assembly

  • Assemble the tacos by layering the chicken, lettuce, tomatoes, cucumber, red onion, and feta on each tortilla.
  • Drizzle with tzatziki sauce and garnish with parsley before serving.

Notes

Store leftovers in an airtight container in the refrigerator for up to three days. Reheat chicken in a skillet over medium heat. Consider using pre-cooked chicken to save time.
Calories: 350kcal
Course: Dinner, Main Course
Cuisine: Healthy, Mediterranean
Keyword: Chicken Recipe, Family Meal, Healthy Tacos, Mediterranean Chicken Tacos, Quick Dinner

Key West Grilled Chicken

There’s something special about the sound of sizzling chicken on the grill and the sweet, tangy scent of citrus wafting through the kitchen. The vibrant aroma of grilled Key West Chicken can transform an ordinary day into a memorable family gathering. The sun may be shining, birds may be chirping, but nothing beats the delightful sound of laughter and conversation shared over a delicious meal.

This dish is not just a recipe; it’s a family experience. It brings everyone together, creating lasting memories. And the best part? It saves you time in the kitchen while still providing a fresh and energizing meal.

Why This Works

Key West Grilled Chicken

This recipe is all about family time. Key West Grilled Chicken captures the bright, sunny flavors of the tropics and combines them with the ease of grilling. It’s a perfect choice for busy weeknights or laid-back weekends. The marinade is quick to whip up, and you can let it do its magic while you attend to other tasks around the house.

With just a few simple ingredients, you can create a flavorful meal that pleases even the pickiest of eaters. Plus, grilling means less mess in the kitchen and more outdoor enjoyment. It’s truly an all-in-one win for family dinners!

Process Overview

“This is where the magic happens—when the aroma fills the kitchen.”

As you gather your ingredients and prepare to cook, you’ll find that the process is straightforward. You’ll marinate the chicken, fire up the grill, and in no time, you’ll have a delightful meal ready to serve. Follow along as we break down the steps, ensuring each part is easy to follow.

Ingredients

Here’s what you’ll need for the Key West Grilled Chicken along with a few personal tips:

  • 4 boneless, skinless chicken breasts
    Tip: Opt for organic chicken when available for better flavor and quality.

  • 1/4 cup lime juice
    Tip: Use fresh limes for the best taste; the bottled stuff does not compare.

  • 1/4 cup orange juice
    Tip: Squeeze your oranges right before using to maximize freshness.

  • 1/4 cup pineapple juice
    Tip: If you have fresh pineapple, blend a slice instead of using juice for added texture.

  • 2 tablespoons olive oil
    Tip: Use extra virgin olive oil for richer flavor.

  • 2 cloves garlic, minced
    Tip: Fresh garlic will give you a kick that powdered garlic can’t match.

  • 1 teaspoon salt
    Tip: Kosher salt is preferred for even seasoning.

  • 1/2 teaspoon black pepper
    Tip: Freshly ground pepper is the best for a pungent flavor.

  • 1 teaspoon cumin
    Tip: Toast the cumin seeds before grinding for an earthy depth.

  • 1/4 cup chopped fresh cilantro (for garnish)
    Tip: To keep cilantro fresh, store it upright in a glass of water in the fridge.

Directions

Follow these steps for perfectly grilled Key West Chicken:

  1. In a bowl, whisk together lime juice, orange juice, pineapple juice, olive oil, garlic, salt, pepper, and cumin to create the marinade.
    Encouragement: Don’t rush—take a moment to really whisk it together. This marinade is key!

  2. Place the chicken breasts in a resealable plastic bag or a shallow dish and pour the marinade over the chicken. Seal the bag or cover the dish and refrigerate for at least 1 hour, or overnight for the best flavor.
    Encouragement: If time allows, letting it marinate overnight will deeply infuse the flavors!

  3. Preheat the grill to medium-high heat.
    Encouragement: Preheating is essential for searing the chicken and locking in those juices!

  4. Remove chicken from the marinade and discard the marinade.
    Encouragement: Pat the chicken dry with a paper towel to get nice grill marks.

  5. Grill the chicken for 6-8 minutes on each side, or until fully cooked and juices run clear.
    Encouragement: Don’t flip too soon; let it sear before turning!

  6. Remove from the grill and let rest for a few minutes before slicing.
    Encouragement: Resting is key to juicy chicken—don’t skip this step!

  7. Garnish with chopped cilantro and serve. Enjoy!
    Encouragement: Gather the family around the table for a truly special meal!

Serving

Key West Grilled Chicken

This delicious Key West Grilled Chicken is perfect for serving family-style. Slice the chicken breasts and arrange them on a large platter. You can add sides like grilled vegetables, rice, or a fresh salad.

Consider setting up a family taco bar with toppings like shredded lettuce, guacamole, and salsa. This way, each person can customize their plate and enjoy the meal together.

Storage

Once you’ve enjoyed your meal, you may have some leftovers. The grilled chicken can be stored in an airtight container in the fridge for up to four days. For reheating, simply microwave it for a minute or until warmed through, or throw it back on the grill for a few moments to reheat and impart that smoky flavor.

If you want to freeze any leftovers, wrap the chicken tightly in aluminum foil or put it in a freezer-safe container. It should stay fresh in the freezer for up to three months. Just remember to thaw in the fridge overnight before reheating.

Kitchen Notes

Here are some shortcuts that can save you time while preparing this dish:

  • Pre-marinate chicken during meal prep at the beginning of the week.
  • Use bottled juice if fresh isn’t available.
  • Use a meat thermometer to check doneness (165°F is the goal).
  • Leftover marinade can be used as a dressing for salads after boiling it for safety.
  • Grill extra chicken to use in salads, sandwiches, or wraps throughout the week.

Variations

This recipe can be easily adapted for different diets or preferences:

  • For Picky Eaters: Skip the cumin if your family prefers milder flavors and add a touch of honey to the marinade for a sweeter taste.
  • Gluten-Free: This recipe is naturally gluten-free, so you’re all set.
  • For a Spicy Kick: Add red pepper flakes or jalapeños to the marinade for some heat.
  • Vegetarian Option: Replace the chicken with thick slices of zucchini, eggplant, or portobello mushrooms in the marinade for a fantastic grilled veggie option.
  • Low-Carb: Serve with a side of cauliflower rice instead of traditional rice for a keto-friendly meal.

FAQ

1. How long should I marinate the chicken?
For best flavor, marinate for at least 1 hour, but overnight is best.

2. Can I grill the chicken indoors?
Yes, you can use a grill pan on the stovetop or an indoor electric grill.

3. What is the best way to tell if chicken is cooked?
A meat thermometer should read 165°F in the thickest part of the breast.

4. Can I make the marinade ahead of time?
Absolutely! You can prepare the marinade and store it in the fridge for up to 2 days before using.

5. What’s a good side dish to serve with this chicken?
Grilled vegetables, rice, or a fresh green salad are all excellent options.

As you gather your family at the dinner table, remember that the heart of the meal is more than just good food; it’s about sharing moments together. This Key West Grilled Chicken recipe not only satisfies the taste buds but also brings smiles, laughter, and warmth to your home. Every bite is a reminder that family matters, and so does sharing delicious food. Enjoy every moment!

Key West Grilled Chicken

Prep Time 15 minutes
Cook Time 16 minutes
Total Time 31 minutes
Servings 4 servings
Calories 300
A vibrant and flavorful grilled chicken recipe inspired by the bright flavors of Key West, perfect for family gatherings and easy weeknight meals.

Ingredients

Marinade

  • 1/4 cup lime juice (Use fresh limes for the best taste.)
  • 1/4 cup orange juice (Squeeze your oranges right before using to maximize freshness.)
  • 1/4 cup pineapple juice (If you have fresh pineapple, blend a slice instead of using juice for added texture.)
  • 2 tablespoons olive oil (Use extra virgin olive oil for richer flavor.)
  • 2 cloves garlic, minced (Fresh garlic will give you a kick that powdered garlic can't match.)
  • 1 teaspoon salt (Kosher salt is preferred for even seasoning.)
  • 1/2 teaspoon black pepper (Freshly ground pepper is the best for a pungent flavor.)
  • 1 teaspoon cumin (Toast the cumin seeds before grinding for an earthy depth.)

For Serving

  • 4 pieces boneless, skinless chicken breasts (Opt for organic chicken when available for better flavor and quality.)
  • 1/4 cup chopped fresh cilantro (Store cilantro upright in a glass of water in the fridge.)

Instructions 

Preparation

  • In a bowl, whisk together lime juice, orange juice, pineapple juice, olive oil, garlic, salt, pepper, and cumin to create the marinade.
  • Place the chicken breasts in a resealable plastic bag or a shallow dish and pour the marinade over the chicken. Seal the bag or cover the dish and refrigerate for at least 1 hour, or overnight for the best flavor.

Cooking

  • Preheat the grill to medium-high heat.
  • Remove chicken from the marinade and discard the marinade. Pat the chicken dry with a paper towel.
  • Grill the chicken for 6-8 minutes on each side, or until fully cooked and juices run clear.
  • Remove from the grill and let rest for a few minutes before slicing.

Serving

  • Garnish with chopped cilantro and serve. Enjoy!

Notes

Consider setting up a family taco bar with toppings like shredded lettuce, guacamole, and salsa. Leftover chicken can be stored in an airtight container in the fridge for up to four days or frozen for up to three months.
Calories: 300kcal
Course: Dinner, Main Course
Cuisine: American, Tropical
Keyword: Citrus Marinade, Family Recipe, Grilled Chicken, Key West Chicken, Outdoor Cooking

Grilled Salsa Verde Pepper Jack Chicken

Grilled Salsa Verde Pepper Jack Chicken fills the kitchen with a tantalizing aroma as it sizzles away on the grill. The rich sounds of chicken cooking, combined with the fresh scent of salsa verde, make it almost impossible to resist this dish. It’s the kind of meal that not only brings the family together around the dinner table but also celebrates flavorful moments that linger in your memory.

Why This Works

Grilled Salsa Verde Pepper Jack Chicken

This Grilled Salsa Verde Pepper Jack Chicken is not only delicious but also saves you time in the kitchen. After a long day, you want a dish that cooks quickly and is still packed with flavor. This recipe takes just a half-hour, meaning you can enjoy quality family time instead of spending hours in the kitchen.

The combination of spicy pepper jack cheese with vibrant salsa verde will appeal to the whole family, making it a satisfying option for dinner. Plus, it’s an easy way to introduce more vibrant flavors into your meals without overwhelming anyone. It’s a fantastic choice for busy weeknights or weekend barbecues.

Process Overview

“This is where the magic happens—when the aroma fills the kitchen.”

The process for making this dish is straightforward and allows you to enjoy the grilling experience. You’ll find yourself getting lost in the smells and sounds of the cooking process. Grilling creates a mouthwatering char that’s hard to resist, and the best part is, you can relax while it cooks!

Ingredients

So, what do you need to bring this flavorful dish to life? Here’s a quick breakdown of the ingredients:

  1. 4 boneless, skinless chicken breasts: Chicken breasts are versatile and lean. Look for organic options if possible.
  2. 1 cup salsa verde: The vibrant flavors in salsa verde will elevate your chicken. Choose a brand that doesn’t use preservatives for the best taste.
  3. 1 cup shredded pepper jack cheese: This cheese adds creaminess and a bit of a kick. For a milder flavor, you can substitute with Monterey Jack.
  4. 1 tablespoon olive oil: This will help the spices stick while adding a rich flavor. Use extra virgin for the best quality.
  5. Salt and pepper to taste: Simple seasonings that will enhance the chicken’s natural flavors. Freshly ground pepper will give you the best taste.

Lily’s Tips:

  • For juicier chicken, consider marinating it in salsa verde for an hour before grilling.
  • Let your chicken rest for a few minutes after grilling to seal in the juices.

Directions

Let’s get started with the cooking! Follow these simple steps, and you’ll be well on your way to a delicious dinner.

  1. Preheat grill to medium-high heat.
    Getting the grill to the right temperature ensures that your chicken cooks evenly.

  2. Season chicken breasts with olive oil, salt, and pepper.
    Rub the oil in gently, ensuring every part is seasoned. This step gives every bite great flavor.

  3. Grill chicken for 6-7 minutes on each side or until cooked through.
    Listen for the sizzle! That’s your chicken developing a wonderful char.

  4. In the last few minutes of grilling, top each chicken breast with salsa verde and pepper jack cheese.
    This is where the magic happens, the salsa will heat through, and the cheese will begin to melt.

  5. Close the grill lid until cheese is melted.
    Keeping the lid closed helps create an oven-like environment that perfectly melts the cheese.

  6. Remove from grill and let rest before serving.
    This resting step locks in all the tasty juices. Patience will pay off here!

Serving

Grilled Salsa Verde Pepper Jack Chicken

When it comes to serving, I love to present this chicken family-style. Place the grilled chicken on a large platter, allowing everyone to help themselves. Serve with warm tortillas and a side of rice or a fresh garden salad. This dish invites sharing and encourages everyone to create their own perfect bite.

Storage

If you happen to have leftovers, don’t worry! Store them in an airtight container in the fridge for up to 3 days. Reheat in the microwave or on the grill to bring back the fresh flavors. If you’re reheating in the microwave, cover with a damp paper towel to keep the chicken moist.

Kitchen Notes

  • Marinate: If you have time, marinate the chicken in salsa verde for 1 hour before grilling.
  • Use a thermometer: Chicken should reach an internal temperature of 165°F to ensure it’s fully cooked.
  • Add veggies: Consider grilling some zucchini or bell peppers alongside the chicken for a complete meal.
  • Cheese alternatives: If you prefer non-dairy cheese, use a vegan pepper jack option.
  • Make it spicy: Add sliced jalapeños on top of the chicken for an extra kick.

Variations

Everyone has different tastes, and that’s what makes cooking fun! Here are some simple tweaks:

  • For picky eaters: Keep the toppings simple. Just use cheese and a light sprinkle of taco seasoning instead of salsa.
  • For low-carb diets: Serve the chicken over a bed of sautéed spinach instead of rice or tortillas.
  • Vegetarian option: Substitute chicken with thick slices of portobello mushrooms for a hearty texture.
  • Spicier option: Swap out pepper jack cheese for habanero cheese or sprinkle red pepper flakes on top.

FAQ

  1. Can I cook this in the oven?
    Yes! Preheat your oven to 375°F and bake for 25-30 minutes, adding the salsa and cheese in the last 5 minutes.

  2. What kind of salsa verde should I use?
    Choose any brand you love, or make your own using tomatillos, jalapeño, lime juice, and cilantro.

  3. Can I freeze the leftovers?
    Yes! Store them in a freezer-safe bag for up to 3 months.

  4. Is this recipe gluten-free?
    Yes, all the ingredients listed are naturally gluten-free.

  5. Can I use chicken thighs instead?
    Absolutely! Chicken thighs will add even more moisture and flavor.

In closing, I hope you and your family enjoy this Grilled Salsa Verde Pepper Jack Chicken as much as we do. It’s easy to prepare, bursting with flavor, and brings everyone together at the table. Cooking can be such a joyful experience, and it’s all about creating moments that you’ll cherish. Find joy in the simple meals and let the aromas fill your home. Happy cooking!

Grilled Salsa Verde Pepper Jack Chicken

Prep Time 10 minutes
Cook Time 20 minutes
Total Time 30 minutes
Servings 4 servings
Calories 300
A quick and flavorful meal featuring grilled chicken breasts topped with vibrant salsa verde and spicy pepper jack cheese.

Ingredients

Main ingredients

  • 4 pieces boneless, skinless chicken breasts (Look for organic options if possible.)
  • 1 cup salsa verde (Choose a brand that doesn't use preservatives for the best taste.)
  • 1 cup shredded pepper jack cheese (For a milder flavor, substitute with Monterey Jack.)
  • 1 tablespoon olive oil (Use extra virgin for the best quality.)
  • to taste salt (Enhances the chicken’s natural flavors.)
  • to taste pepper (Freshly ground pepper provides the best taste.)

Instructions 

Preparation

  • Preheat grill to medium-high heat.
  • Season chicken breasts with olive oil, salt, and pepper.

Grilling

  • Grill chicken for 6-7 minutes on each side or until cooked through.
  • Top each chicken breast with salsa verde and pepper jack cheese in the last few minutes of grilling.
  • Close the grill lid until cheese is melted.
  • Remove from grill and let rest before serving.

Notes

For juicier chicken, consider marinating it in salsa verde for an hour before grilling. Serve family-style with warm tortillas, rice, or salad. Store leftovers in an airtight container in the fridge for up to 3 days.
Calories: 300kcal
Course: Dinner, Main Course
Cuisine: Mexican
Keyword: Easy Dinner, Family Meal, Grilled Chicken, Pepper Jack Cheese, Salsa Verde

Street Corn Chicken Rice Bowl

Nothing beats the feeling of stepping into a warm kitchen, where the aroma of grilled chicken and spices dances in the air. The sizzle of corn hitting the hot skillet is music to my ears, a promise of deliciousness on the horizon. Today, I’m excited to share with you a recipe that brings comfort, joy, and a hint of adventure to the dinner table: the Street Corn Chicken Rice Bowl. It’s a vibrant dish that’s not just satisfying but also incredibly easy to prepare on a busy weeknight.

Why this works

Street Corn Chicken Rice Bowl

This recipe is the very definition of a family favorite. First, it’s a time-saver. You can have it on the table in less than 30 minutes, which means more time spent with loved ones instead of hovering over the stove. The combination of grilled chicken, sweet corn, and zesty lime crema ensures that everyone at the table is delighted.

Another reason this dish is a winner is its flexibility. You can tweak ingredients based on what your family loves or what you have on hand. It’s a one-bowl meal that satisfies hunger and makes everyone feel good.

Process Overview

“This is where the magic happens—when the aroma fills the kitchen.”

In just a few steps, you’ll create a filling meal that captures the essence of street food. The sequence is simple: sauté the corn, prepare the lime crema, layer your rice bowl, and top it off beautifully. Each step is straightforward, allowing you to focus on what really matters—creating a wonderful shared experience over dinner.

Ingredients

Let’s gather what you need for this mouthwatering dish:

  • 2 cups cooked rice (white, brown, or cilantro-lime rice)
  • 2 chicken breasts (grilled and sliced)
  • 1 cup corn kernels (fresh, frozen, or canned)
  • 1/2 cup black beans (drained and rinsed)
  • 1/4 cup diced red onion
  • 1/4 cup diced tomatoes
  • 1/4 cup crumbled cotija cheese
  • 2 tablespoons chopped fresh cilantro (for garnish)
  • 1 tablespoon olive oil
  • 1 teaspoon chili powder
  • 1/2 teaspoon smoked paprika
  • 1/2 teaspoon cumin
  • 1/4 teaspoon salt
  • 1/4 teaspoon black pepper
  • 1/2 cup sour cream or Greek yogurt
  • Juice of 1 lime
  • 1/2 teaspoon garlic powder
  • 1/4 teaspoon salt

Lily’s Tips

  • Rice: Cilantro-lime rice adds a zesty kick. Just mix cooked rice with some lime juice and fresh cilantro.
  • Chicken: Grill the chicken the day before to make prep even quicker.
  • Corn: For extra flavor, consider charring the corn on the grill if you have the time.
  • Beans: Canned beans are a huge time-saver when you’re in a pinch. Rinse them well for the best flavor.
  • Lime crema: Add more lime juice for a tangier dressing.

Directions

  1. Heat a skillet over medium heat. Add the olive oil and sauté the corn kernels for 3-4 minutes until lightly charred. Season with chili powder, smoked paprika, cumin, salt, and pepper. Set aside. The aroma is already irresistible.

  2. In a small bowl, mix together the sour cream, lime juice, garlic powder, and salt to make the lime crema. Adjust lime juice to taste. This creamy mixture adds a delightful zing.

  3. Assemble the bowls: Start with a base of cooked rice. Layer the grilled chicken slices, charred corn, black beans, diced tomatoes, red onion, and cotija cheese on top. Each layer adds texture and flavor—get creative!

  4. Drizzle the lime crema over the bowl and garnish with fresh cilantro. Feel free to add more toppings if you wish.

  5. Serve immediately and enjoy! Share smiles and stories over this delicious meal.

Serving

Street Corn Chicken Rice Bowl

To serve this dish family-style, create a beautiful spread by placing all the components on the table. Let everyone build their own rice bowl exactly how they like it. Watching your loved ones customize their meal is half the fun. Plus, it encourages everyone to try something new!

Storage

If you have leftovers (which is rare but happens), store each component in separate airtight containers in the fridge. The rice and beans will hold up well for about three days. Just reheat them gently in the microwave. The lime crema keeps well too, but it’s best used within two days for fresh flavor.

Kitchen Notes

  • Cook Rice in Bulk: Make extra rice over the weekend to save time during the week.
  • Pre-cook Chicken: Grill or sauté chicken ahead of time and refrigerate.
  • Frozen Corn: If you’re short on fresh corn, frozen works perfectly and cooks quickly.
  • Meal Prep: Chop the veggies ahead of time for an even quicker assembly.
  • Dress Up Leftovers: Use leftovers to create a wrap or salad the next day—no food waste here!

Variations

  • For Picky Eaters: If kids aren’t fans of black beans, substitute with refried beans or simply leave them out.
  • Vegetarian Option: Replace chicken with grilled tofu or tempeh, and add more veggies like bell peppers or zucchini.
  • Spicy Kick: Add jalapeños or your favorite hot sauce for a bit of heat.
  • Gluten-Free: This recipe is naturally gluten-free, but always check labels when buying canned or packaged ingredients.
  • Dairy-Free: Swap out cotija cheese for nutritional yeast or vegan cheese, and use a dairy-free yogurt for the crema.

FAQ

1. Can I use brown rice instead of white rice?
Absolutely. Brown rice adds a nuttier flavor and more fiber.

2. How can I make this dish spicier?
Consider adding more chili powder, diced jalapeños, or your favorite hot sauce.

3. Can I prepare this dish in advance?
You can prep the ingredients in advance but it’s best to assemble the bowl just before serving.

4. Is there a substitute for cotija cheese?
Feta cheese or any crumbly cheese works as a great substitute.

5. How do I store leftovers?
Keep leftovers in airtight containers in the fridge for up to three days.

As we wrap up this cooking adventure, I hope this Street Corn Chicken Rice Bowl becomes a cherished recipe in your family’s meal rotation. Food should be a source of comfort and joy, and I believe this bowl offers just that. So gather around the table, savor each bite, and share those warm nights filled with laughter and love. Happy cooking!

Street Corn Chicken Rice Bowl

Prep Time 15 minutes
Cook Time 15 minutes
Total Time 30 minutes
Servings 4 servings
Calories 600
A vibrant and satisfying dish combining grilled chicken, sweet corn, and zesty lime crema, perfect for busy weeknights.

Ingredients

Base Ingredients

  • 2 cups cooked rice (white, brown, or cilantro-lime rice)
  • 2 breasts chicken (grilled and sliced)
  • 1 cup corn kernels (fresh, frozen, or canned)
  • 1/2 cup black beans (drained and rinsed)
  • 1/4 cup diced red onion
  • 1/4 cup diced tomatoes
  • 1/4 cup crumbled cotija cheese
  • 2 tablespoons chopped fresh cilantro (for garnish)

Seasonings and Dressing

  • 1 tablespoon olive oil
  • 1 teaspoon chili powder
  • 1/2 teaspoon smoked paprika
  • 1/2 teaspoon cumin
  • 1/4 teaspoon salt
  • 1/4 teaspoon black pepper
  • 1/2 cup sour cream or Greek yogurt
  • Juice of 1 lime
  • 1/2 teaspoon garlic powder
  • 1/4 teaspoon salt

Instructions 

Preparation

  • Heat a skillet over medium heat. Add the olive oil and sauté the corn kernels for 3-4 minutes until lightly charred. Season with chili powder, smoked paprika, cumin, salt, and pepper. Set aside.
  • In a small bowl, mix together the sour cream, lime juice, garlic powder, and salt to make the lime crema. Adjust lime juice to taste.

Assembly

  • Assemble the bowls: Start with a base of cooked rice. Layer the grilled chicken slices, charred corn, black beans, diced tomatoes, red onion, and cotija cheese on top.
  • Drizzle the lime crema over the bowl and garnish with fresh cilantro.
  • Serve immediately and enjoy!

Notes

For a family-style serving, place all components on the table and let everyone build their own rice bowl. Store leftovers in separate airtight containers for up to three days.
Calories: 600kcal
Course: Dinner, Main Course
Cuisine: Comfort Food, Mexican
Keyword: Chicken Rice Bowl, Easy Dinner, One Bowl Meal, Quick Healthy Meal, Street Corn

One-Pan Honey BBQ Chicken Rice

I can smell sweet honey and smoky BBQ from the stove. The kitchen hums with soft clinks of pan and spoon. My kids call from the living room and the house fills with that warm, welcome dinner feeling.

I’m Lily, a food blogger and home cook with over 10 years of testing weeknight favorites. I focus on recipes that save time and bring the family together. This One-Pan Honey BBQ Chicken Rice is one of those meals that feels like a hug on a plate.

If you love easy family dinners, this recipe pairs nicely with my Honey BBQ Chicken with Garlic Parmesan Potatoes for another cozy option. Read on for tips, tricks, and answers to common questions so you can feel confident cooking this tonight.

Why this works

One-Pan Honey BBQ Chicken Rice

This recipe shines because it keeps everything in one pan. That means fewer dishes and more time to sit with your family. The rice soaks up the honey BBQ sauce, turning ordinary grains into a rich, flavorful base for the chicken.

The method balances sweetness, tang, and savory notes in a way that most kids and picky eaters enjoy. It’s also forgiving. If the rice needs a touch more time, you can give it a few extra minutes covered and still have a great result.

Families with busy schedules will love how hands-off the bake time is. You can prep, pop it into the oven, and check on it with plenty of time left for homework, baths, or setting the table. If you like lighter weeknight lunches, try my Bang Bang Chicken Crispy Rice Salad for a crunchy alternative.

Process Overview

“This is where the magic happens—when the aroma fills the kitchen.”

The idea is simple. Brown the chicken to lock in juices. Add rice and broth so the grains absorb flavor. Top with the saucy honey BBQ mix and bake until tender. The oven does the finishing work while you get on with family time.

This one-pan approach also works beautifully for other comfort dishes. If you want a creamy twist, my BBQ Chicken Mac and Cheese uses a similar mindset: crisp, creamy, and dinner-table friendly.

Ingredients

  • 2 cups rice
    Lily’s tip: Use long-grain white rice for a fluffy texture. Rinse it briefly under cold water to remove extra starch if you like separate grains.

  • 4 chicken breasts
    Lily’s tip: Try to pick evenly sized breasts. If one is much thicker, pound it down gently so all pieces cook at the same rate.

  • 1 cup honey
    Lily’s tip: Use mild-flavored honey so it blends with the BBQ sauce and does not overpower the dish.

  • 1 cup BBQ sauce
    Lily’s tip: Choose a medium-sweet sauce. If your family prefers less tang, pick a milder bottle or reduce the amount a touch.

  • 1 cup chicken broth
    Lily’s tip: Low-sodium broth helps you control the salt. If you use regular broth, taste before adding extra salt.

  • 1 tablespoon olive oil
    Lily’s tip: Olive oil helps brown the chicken quickly. Use a small amount so the pan stays mostly lean.

  • Salt and pepper to taste
    Lily’s tip: Season the chicken simply. Add salt to the rice mixture only if your broth is low in sodium.

  • Chopped green onions for garnish (optional)
    Lily’s tip: Green onions add color and a mild bite. Sprinkle them at the end to keep them bright.

If you like a sweeter twist, pair this meal with a hearty sweet potato side. My BBQ Chicken Sweet Potato Bowl shows how well these flavors team up.

Directions

  1. Preheat your oven to 375°F (190°C).
    Encouragement: This little step sets you up for success. Take a breath and get your baking dish ready.

  2. In a large oven-safe pan, heat olive oil over medium heat.
    Encouragement: Let the oil warm until it shimmers but does not smoke. That helps the chicken brown nicely.

  3. Season the chicken breasts with salt and pepper and cook them in the pan until browned on both sides.
    Encouragement: Browning adds flavor. It does not need to be fully cooked through. Aim for a golden crust on both sides.

  4. In a bowl, mix honey and BBQ sauce together.
    Encouragement: Taste a small spoonful and adjust if you want it sweeter or tangier. This is your chance to personalize it.

  5. Remove the chicken from the pan and set aside.
    Encouragement: Don’t worry if a little sauce or brown bits stick to the pan. Those bits are flavor you want in the rice.

  6. Add rice and chicken broth to the pan, stirring to combine.
    Encouragement: Scrape up any browned bits so the rice soaks them up. Make sure the rice sits evenly across the pan.

  7. Place the chicken back on top of the rice mixture and pour the honey BBQ sauce over it.
    Encouragement: Cover each breast so the sauce can seep into the rice while baking. The sight of sauce glistening on the chicken always makes me smile.

  8. Cover the pan with a lid or foil and bake in the preheated oven for about 25-30 minutes, or until the chicken is cooked through and the rice is tender.
    Encouragement: Keep the pan covered to trap steam. If your chicken is thicker, you may need a few extra minutes. Use an instant-read thermometer to check for 165°F in the thickest part.

  9. Garnish with chopped green onions if desired before serving.
    Encouragement: Let the dish rest for 5 minutes before serving so the rice sets up a bit. Leftovers transform well into a hearty bowl, inspired by my Chicken Sweet Potato Rice Bowl if you want to remix flavors for lunch.

Serving

One-Pan Honey BBQ Chicken Rice

Serve this dish family-style right from the pan. Place the pan in the center of the table and let everyone serve themselves. Add a simple green salad and a pitcher of water or iced tea.

For picky eaters, spoon plain rice on one side of the plate and place a small piece of chicken to the side. The sauce is mild enough that many kids will try it. For adults, offer extra BBQ sauce or a sprinkle of red pepper flakes at the table.

A side of steamed vegetables keeps the meal balanced. Roasted broccoli or snap peas add color and a fresh bite.

Storage

Cool leftovers within two hours and transfer to an airtight container. Store in the fridge for up to 3 days. The rice will continue to absorb flavor, making the leftovers even more intense.

To reheat, warm gently on the stove over low heat with a splash of chicken broth or water. Cover the pan to create steam and keep the rice from drying out. You can also reheat individual portions in the microwave for 1 to 2 minutes, stirring halfway through.

If you want to freeze, spoon portions into freezer-safe containers. Freeze for up to 2 months. Thaw in the fridge overnight and reheat as above.

Kitchen Notes

  • Use an oven-safe skillet with a tight-fitting lid for the best results.
  • If your skillet is not oven-safe, transfer everything to a baking dish before covering.
  • For extra color, broil the dish uncovered for 2 to 3 minutes at the end. Watch closely so it does not burn.
  • Taste your sauce before pouring it over the chicken. Adjust honey or BBQ sauce to fit family preferences.
  • Invest in an instant-read thermometer to ensure juicy, perfectly cooked chicken.

Variations

  • For picky eaters: Leave the sauce on the side and season chicken simply with salt and pepper. Serve sauce as a dip.
  • For lower sugar: Use a reduced-sugar BBQ sauce and cut the honey to 1/2 cup. Add a splash of apple cider vinegar to keep brightness.
  • For gluten-free: Check your BBQ sauce label to ensure it is gluten-free. Most rice and chicken are naturally gluten-free.
  • For a vegetarian version: Substitute firm tofu or seasoned seitan and use vegetable broth. Press extra-firm tofu to remove moisture, brown it, and bake until heated through.
  • For extra veggies: Add diced bell peppers, carrots, or peas to the rice before baking. Chop them small so they cook fully in the same time frame.

FAQ

Q: Can I use brown rice instead of white rice?
A: You can. Brown rice needs more liquid and a longer cook time. Use 2 1/2 to 3 cups of broth and bake for an additional 15 to 20 minutes, checking for tenderness.

Q: My chicken dried out. What went wrong?
A: Likely overcooking. Check early with an instant-read thermometer. Also make sure pieces are similar in size for even cooking.

Q: Can I make this on the stovetop only?
A: Yes. Cover the pan and simmer on low for about 20 to 25 minutes after adding rice and broth. Keep the heat gentle so the rice cooks without burning.

Q: How can I make the sauce spicier?
A: Stir in a teaspoon of hot sauce or a pinch of cayenne. Start small and taste, because the honey will mellow heat.

Q: Is this recipe freezer friendly?
A: Yes. Portion into freezer-safe containers and freeze up to 2 months. Thaw overnight and reheat gently with a splash of broth.

Conclusion

Thank you for cooking with me. I hope this One-Pan Honey BBQ Chicken Rice becomes a regular on your weeknight rotation. It brings comfort, saves time, and fills your kitchen with wonderful smells that mean home.

For a slightly quicker take with similar flavors, see this Delicious 30-Minute Honey BBQ Chicken and Rice Recipe for inspiration. If you want another one-pan option with seasoned rice, check out this One-Pan Honey BBQ Chicken with Seasoned Rice to compare techniques and sauces.

Happy cooking, and love to your table.

One-Pan Honey BBQ Chicken Rice

Prep Time 10 minutes
Cook Time 30 minutes
Total Time 40 minutes
Servings 4 servings
Calories 490
This easy and flavorful one-pan dish combines chicken, rice, and a sweet honey BBQ sauce for a cozy family dinner.

Ingredients

Main Ingredients

  • 2 cups rice (Use long-grain white rice for a fluffy texture.)
  • 4 pieces chicken breasts (Pick evenly sized breasts for even cooking.)
  • 1 cup honey (Use mild-flavored honey.)
  • 1 cup BBQ sauce (Choose a medium-sweet sauce.)
  • 1 cup chicken broth (Low-sodium helps control salt.)
  • 1 tablespoon olive oil (Used to brown the chicken.)
  • to taste salt and pepper (Season chicken simply.)
  • to taste chopped green onions (optional) (Adds color and a mild bite.)

Instructions 

Preparation

  • Preheat your oven to 375°F (190°C).
  • In a large oven-safe pan, heat olive oil over medium heat.
  • Season the chicken breasts with salt and pepper and cook until browned on both sides.
  • In a bowl, mix honey and BBQ sauce together.
  • Remove the chicken from the pan and set aside.
  • Add rice and chicken broth to the pan, stirring to combine.

Cooking

  • Place the chicken back on top of the rice mixture and pour the honey BBQ sauce over it.
  • Cover the pan with a lid or foil and bake for about 25-30 minutes, or until the chicken is cooked through and the rice is tender.
  • Garnish with chopped green onions if desired before serving.

Notes

Serve family-style from the pan. Leftovers can be stored in the fridge for up to 3 days or frozen for up to 2 months.
Calories: 490kcal
Course: Dinner, Main Course
Cuisine: American
Keyword: Comfort Food, easy weeknight dinner, Family Dinner, Honey BBQ Chicken, One-Pan Meal

No Peek Chicken Casserole

I can still smell it. The warm, savory steam that rolls out when I lift the foil makes the whole house feel like a hug. The gentle tick of the oven timer becomes part of a quiet rhythm as I set the table. Kids drop backpacks and come running at the first whiff.

I am Lily, a mom who cooks weeknight meals that bring the family together. I have been writing about simple, comforting dishes for years. If you love easy, reliable recipes, you might enjoy how this casserole pairs with my other warm favorites, like this my chicken noodle soup for chilly nights.

Why this works

No Peek Chicken Casserole

This casserole is a family favorite because it cooks itself while you get things done. The rice and soups create a steaming, flavor-packed base that keeps the chicken moist. The onion soup mix gives a seasoned crust without extra effort.

It saves time and mind space. Pop it in the oven and go about homework, errands, or folding laundry. For busy weeknights, nothing beats a dish that needs one pan and almost no babysitting.

If you want a reminder of classic comfort that everyone recognizes, try pairing leftovers with a simple salad or a slice of crusty bread. For a different comforting soup to serve alongside, see my classic chicken noodle soup notes.

Process Overview

“This is where the magic happens—when the aroma fills the kitchen.”

I like to think of this as a steam bath for the chicken. The rice slowly absorbs the soup flavors. The sealed foil creates a mini oven that cooks everything evenly. The result is tender chicken and perfectly cooked rice.

If you worry about timing, this is forgiving. The long bake time softens the rice fully and makes shredding easy if you want to serve the chicken that way. For a brighter garlic or ginger lift, I sometimes follow techniques I use in my ginger garlic version and add a squeeze of lemon to finish.

Ingredients

  • 4 boneless, skinless chicken breasts
    • Tip from Lily: Choose similar-sized breasts so they cook evenly. If one is much thicker, slice it horizontally.
  • 1 cup long-grain white rice
    • Tip from Lily: Rinse the rice quickly if you want less starch. Long-grain gives a light, separate texture.
  • 1 can (10.5 oz) cream of mushroom soup
    • Tip from Lily: Use a full-fat or reduced-sodium version based on your taste. The soup carries most of the savory base.
  • 1 can (10.5 oz) cream of chicken soup
    • Tip from Lily: Mixing both soups gives depth. If you prefer, swap cream of celery for a milder taste.
  • 1 1/4 cups water
    • Tip from Lily: Use warm water to help the soups blend smoothly and to reduce bake time variance.
  • 1 packet onion soup mix
    • Tip from Lily: Sprinkle evenly so each bite gets a bit of onion flavor. It forms a nice coating on the chicken.
  • Salt and pepper to taste
    • Tip from Lily: Season lightly before baking and re-season on the plate if needed. Salt level depends on the soup brand.

If you often cook from pantry staples, this recipe is a perfect example of pantry-meets-weeknight. For quick substitutions and using leftover rotisserie meat, see my leftover rotisserie chicken tips for ideas.

Directions

1️⃣ Preheat the oven to 350°F (175°C).

  • Encouraging note: Take a minute to preheat so the casserole starts cooking right away. I like to set the timer and breathe for a second.

2️⃣ Mix the base: In a large bowl, combine the rice, cream of mushroom soup, cream of chicken soup, and water. Stir until well-mixed.

  • Encouraging note: Stir until the mixture is smooth. You can give it a little extra swirl if the soups are thick. This is a quick, satisfying step.

3️⃣ Prepare the baking dish: Grease a 9×13-inch baking dish and pour in the rice and soup mixture, spreading it evenly over the bottom.

  • Encouraging note: Greasing prevents sticking and helps clean-up. Use a little butter or cooking spray so the rice slides out easily.

4️⃣ Add the chicken: Place the chicken breasts on top of the rice mixture and season with salt and pepper.

  • Encouraging note: Space the chicken pieces evenly so the steam circulates. A gentle press into the rice helps them nestle and cook evenly.

5️⃣ Top with onion soup mix: Sprinkle the packet of onion soup mix evenly over the chicken, ensuring each piece is well-coated.

  • Encouraging note: The onion mix forms a flavorful crust. If you have picky eaters, you can split the dish and only top half with the mix.

6️⃣ Cover tightly: Cover the dish tightly with aluminum foil. It’s crucial to keep it sealed to trap the steam, which will cook the rice and chicken to perfection.

  • Encouraging note: Press the foil close to the dish to keep steam in. This is the secret to moist, tender chicken without extra fuss.

7️⃣ Bake: Place the dish in the oven and bake for 1 hour and 30 minutes. Resist the temptation to peek during cooking—keeping the foil sealed is key!

  • Encouraging note: Set a timer and trust the process. This long bake softens the rice perfectly and gives you time to finish other tasks.

8️⃣ Rest and serve: Once done, remove the casserole from the oven and let it rest for a few minutes before serving. Enjoy the rich, savory flavors and tender chicken.

  • Encouraging note: Letting it rest helps the rice finish absorbing liquids and makes serving neater. Use two forks to shred chicken if you like it mixed in.

For more step-by-step ideas on homemade broths and comfort pairings, check my homemade chicken noodle soup guide, which pairs well with this casserole on a chilly night.

Serving

No Peek Chicken Casserole

Serve this casserole family-style straight from the baking dish. Place the dish in the center of the table and pass bowls for seconds. The smell invites conversation and slow, relaxed bites.

Simple sides work best. Steam green beans, a mixed salad, or roasted carrots keep the meal balanced. If you want a crunchy contrast, a small bowl of toast points or crackers is lovely.

For picky eaters, shred the chicken and let them spoon rice separately. Presentation matters with kids, so set out small bowls of grated cheese, ranch, or steamed peas to customize plates.

Storage

Store leftover casserole in an airtight container in the fridge for up to 4 days. The rice will firm up a bit, but reheating brings it back.

To reheat in the oven, cover and bake at 350°F for 20 to 30 minutes until warmed through. For a faster option, reheat single servings in the microwave for 2 to 3 minutes, stirring halfway.

If you want to freeze, portion into freezer-safe containers. Freeze for up to 3 months. Thaw overnight in the fridge before reheating. Add a splash of water when reheating from frozen to restore moisture.

Kitchen Notes

  • Use even-sized chicken pieces for uniform cooking.
  • If your family prefers brown rice, choose another method. Brown rice needs more water and time.
  • Low-sodium soup is a good swap if you watch salt. Taste and adjust after baking.
  • For easier clean-up, line the baking dish with foil before adding the mixture.
  • If someone in your family cannot have mushrooms, substitute an extra can of cream of chicken or cream of celery.

Variations

  • Cheesy top: Add 1 cup shredded cheddar in the last 10 minutes of baking for a melty finish.
  • Vegetables: Stir 1 cup frozen peas or mixed vegetables into the rice mixture before baking for extra color.
  • Lighter version: Use reduced-fat soups and cut the bake time by 10 minutes, checking for doneness.
  • Gluten-free: Use gluten-free condensed soups labeled as such and confirm your onion soup mix is gluten-free.
  • Picky eaters: Make one half plain rice and chicken, and the other half with the onion packet.

FAQ

Q: Can I use chicken thighs instead of breasts?
A: Yes. Bone-in thighs will change cook time slightly. Use boneless thighs for similar timing. They stay juicy and can give more flavor.

Q: Is it okay to peek during baking?
A: Try not to. Lifting the foil lets steam escape and can undercook the rice. If you must check, do it quickly and reseal tightly.

Q: Can I reduce the bake time?
A: Not safely. The long bake allows the rice to fully absorb liquid and the chicken to cook gently. Shortening time risks undercooked rice.

Q: My rice turned out too soft. What happened?
A: Using too much water or cooking at too low a temperature can over-soften rice. Measure water carefully and keep oven at 350°F.

Q: Can I double the recipe for a crowd?
A: Yes. Use two baking dishes with the same depth. Avoid overcrowding one pan, which can alter cooking times.

Conclusion

Thank you for letting me share this No Peek Chicken Casserole. It has saved many of my busy evenings and filled my table with full, happy bellies. For a classic take on this recipe, you can compare notes with the original No Peek Chicken Casserole at The Country Cook and a similar variation at No-Peek Chicken and Rice from Plain Chicken. Try it on a weeknight and notice how it changes the rhythm of your evening.

No Peek Chicken Casserole

Prep Time 10 minutes
Cook Time 1 hour 30 minutes
Total Time 1 hour 40 minutes
Servings 6 servings
Calories 320
A comforting, hands-off casserole that brings the family together, featuring tender chicken, flavorful rice, and creamy soup.

Ingredients

Main Ingredients

  • 4 pieces boneless, skinless chicken breasts (Choose similar-sized breasts for even cooking.)
  • 1 cup long-grain white rice (Rinse quickly for less starch.)
  • 1 can cream of mushroom soup (10.5 oz) (Use full-fat or reduced-sodium version.)
  • 1 can cream of chicken soup (10.5 oz) (Mixing both soups gives depth.)
  • 1.25 cups water (Use warm water for smoother blending.)
  • 1 packet onion soup mix (Sprinkle evenly for flavor.)
  • to taste salt and pepper (Season lightly before baking.)

Instructions 

Preparation

  • Preheat the oven to 350°F (175°C).
  • In a large bowl, combine the rice, cream of mushroom soup, cream of chicken soup, and water. Stir until well-mixed.
  • Grease a 9×13-inch baking dish and pour in the rice and soup mixture, spreading it evenly over the bottom.
  • Place the chicken breasts on top of the rice mixture and season with salt and pepper.
  • Sprinkle the packet of onion soup mix evenly over the chicken, ensuring each piece is well-coated.
  • Cover the dish tightly with aluminum foil.
  • Bake the casserole for 1 hour and 30 minutes.
  • Once done, remove the casserole from the oven and let it rest for a few minutes before serving.

Notes

Serve family-style from the baking dish, with simple sides like steamed green beans or mixed salad. Store leftovers in the fridge for up to 4 days, or freeze for up to 3 months.
Calories: 320kcal
Course: Dinner, Main Course
Cuisine: American, Comfort Food
Keyword: Casserole, Chicken, Easy Dinner, Family Meal, Weeknight Recipe

Coconut Chicken & Rice

The kitchen smells like warm coconut and toasted garlic. Pots clink gently on the stove. I love that quiet moment when a simple dinner turns into something comforting for the whole family.

This Coconut Chicken & Rice recipe is one of those meals. It fills the house with a cozy aroma and brings everyone to the table. If you enjoy easy weeknight dinners with big flavor, you might also like my Bang Bang Chicken Crispy Rice Salad, which uses the same family-friendly mindset.

Why this works

Coconut Chicken & Rice

This recipe works because it combines tender chicken, creamy coconut, and fluffy jasmine rice in one comforting plate. The liquid ratio keeps the chicken juicy and the rice soft. It is forgiving, which matters when kids are hungry and parents are busy.

It also saves time. You can brown the chicken while the rice starts. Then a short simmer finishes both elements without much babysitting. For more weeknight rice bowls that use similar shortcuts, check out my Chicken Sweet Potato Rice Bowl for another quick family meal idea.

The flavors are familiar and mild. That makes it easy to please picky eaters while still offering a dish adults enjoy. Small swaps and additions let you tailor heat, herbs, and texture without losing the heart of the recipe.

Process Overview

“This is where the magic happens—when the aroma fills the kitchen.”

Start by browning the chicken to build flavor. Then add the coconut milk and broth to create a silky cooking liquid. Simmer gently so the chicken cooks through and absorbs the coconut flavor.

While the chicken simmers, rinse and cook jasmine rice. Cooking the rice separately lets you make it extra fluffy. If you prefer everything in one pan, you can follow one-pan recipes like my French Onion Chicken Rice Bake for a different approach.

A brief rest after cooking helps the juices settle in the chicken. Garnish with fresh cilantro for brightness and a pop of color.

Ingredients

  • 2 chicken breasts
    Lily tip: Choose boneless, skinless breasts about 6-8 oz each for even cooking. Pound lightly if one is much thicker so they finish at the same time.

  • 1 cup jasmine rice
    Lily tip: Rinse the rice until the water runs clear to remove excess starch. This keeps the rice fluffy, not sticky.

  • 1 cup coconut milk
    Lily tip: Use full-fat coconut milk for the creamiest sauce. If you prefer lighter, use a reduced-fat version, but the sauce will be slightly thinner.

  • 1 cup chicken broth
    Lily tip: Low-sodium broth gives you control over seasoning. Taste near the end and add salt if needed.

  • 1 small onion, diced
    Lily tip: Yellow or sweet onion works best for a mellow base. Dice small so it softens quickly.

  • 2 cloves garlic, minced
    Lily tip: Fresh garlic gives the best aroma. If you are short on time, jarred minced garlic works in a pinch.

  • 1 tablespoon olive oil
    Lily tip: Use a neutral-tasting oil if you want a cleaner coconut flavor. Olive oil is great for browning and adds a homey note.

  • Salt and pepper to taste
    Lily tip: Season in stages. A little at the start and a final check before serving keeps the flavors balanced.

  • Fresh cilantro for garnish
    Lily tip: Add cilantro just before serving. It brightens the rich coconut sauce and makes the dish look inviting.

If you like citrus brightness with coconut, keep a lime nearby for squeezing at the table.

For more rice-based chicken recipes and inspiration, I often refer to ideas like my Greek Chicken and Lemon Rice. It helps when planning multiple weeknight menus that share pantry staples.

Directions

  1. Heat olive oil in a large skillet over medium heat.
    Encouragement: Warm the pan until the oil shimmers so the chicken gets a nice golden crust.

  2. Add diced onion and minced garlic, sautéing until soft.
    Encouragement: Stir often and enjoy the smell. Soft onions and garlic make a lovely base.

  3. Season chicken breasts with salt and pepper, then add to the skillet. Cook until golden brown on both sides, about 5 minutes per side.
    Encouragement: Resist the urge to move the chicken too much. Let it develop a good sear for better flavor.

  4. Pour in coconut milk and chicken broth. Bring to a simmer.
    Encouragement: The sauce will look creamy and inviting. Scrape the pan to lift any brown bits for extra flavor.

  5. Reduce heat to low, cover the skillet, and let cook for 15-20 minutes, or until the chicken is cooked through.
    Encouragement: Check for an internal temperature of 165°F to ensure safety. A few minutes past the timer may be needed for thicker pieces.

  6. Meanwhile, rinse jasmine rice and cook according to package instructions.
    Encouragement: Take a moment to fluff the rice with a fork and keep it warm under a lid until the chicken is ready.

  7. Serve the chicken over fluffy rice, garnished with fresh cilantro.
    Encouragement: Slice the chicken across the grain for tender bites and spoon extra sauce over the rice for full flavor.

If you want to add a crunchy element, serve with toasted coconut flakes or chopped peanuts on the side. For recipe variations that use ground chicken and different seasonings, my Ground Chicken Fried Rice shows how versatile ground poultry can be.

Timing and temperature notes

Plan for about 30 to 40 minutes from start to finish. Browning takes about 10 minutes, simmering 15 to 20 minutes, and rice about 15 to 20 minutes. Always use a meat thermometer to confirm the chicken reaches 165°F.

Serving

Coconut Chicken & Rice

Family-style idea

Serve this dish in a wide shallow bowl or on a large platter. Place the rice first, then lay the chicken on top. Spoon the coconut sauce around the edges so everyone can choose how saucy they want their plate.

I like to put lime wedges, extra cilantro, and a small bowl of chopped chili flakes on the table. This lets family members customize their bowls. For a simple vegetable side, steam broccoli or snap peas for color and crunch.

Offer plates and spoons so kids can scoop rice and sauce easily. A small salad on the side makes the meal feel complete without adding hassle.

Storage

Cool any leftovers quickly and store in airtight containers. Refrigerate for up to 3 days. The rice can absorb more liquid over time, so you may notice a thicker sauce after storing.

To reheat stovetop: Add a splash of water or broth and warm gently over low heat until heated through. This helps loosen the sauce and revives the rice texture.

To reheat microwave: Place the portion in a microwave-safe dish. Add a tablespoon or two of water or broth, cover loosely, and heat in 60 second bursts, stirring between intervals.

Do not refreeze cooked chicken and rice after refrigeration. Reheat only once to keep food safety on track.

Kitchen Notes

  • Shortcut: Use pre-minced garlic and pre-diced onion from the fridge section to cut prep time by 5 minutes.
  • Shortcut: Make the rice in a rice cooker while you cook the chicken. It frees you to watch the skillet.
  • Shortcut: Double the sauce and freeze extra in ice cube trays for single-serving sauce boosts later.
  • Shortcut: Swap coconut milk cartons for shelf-stable cans if you like to keep long-lasting pantry items.
  • Shortcut: If you have leftover rotisserie chicken, shred it and add it in at step 4 to cut cooking time.

These small shortcuts help on busy nights without sacrificing the dish’s heart. They also make this recipe friendly for new cooks.

Variations

  • For picky eaters: Reduce the onion amount and serve the sauce on the side. Keep cilantro optional. Serve plain rice and chicken first, then offer the sauce for dipping.
  • For more veggies: Add diced bell pepper or frozen peas into the sauce during the final 5 minutes of simmering. They add color and nutrients without extra work.
  • For a spicy kick: Stir in 1/2 teaspoon red pepper flakes or a tablespoon of sriracha to the sauce at step 4. Taste and add more if you like it hot.
  • Keto or low-carb option: Skip the rice and serve the coconut chicken over cauliflower rice or steamed zucchini ribbons.
  • Vegan adaptation: Replace chicken with firm tofu or tempeh, and use vegetable broth. Brown the tofu well before simmering to build flavor.

Small tweaks let this recipe fit many diets and preferences while keeping the core comforting flavor.

FAQ

Q: Can I use bone-in chicken?
A: Yes. Bone-in pieces will need more time to cook. Simmer covered for 25 to 30 minutes and check for a 165°F temperature at the thickest part near the bone.

Q: Can I make this in a slow cooker?
A: You can. Brown the chicken first for better flavor, then add to the slow cooker with coconut milk and broth. Cook on low for 3 to 4 hours or on high for 1.5 to 2 hours. Add delicate herbs at the end.

Q: Is coconut milk safe for people with nut allergies?
A: Coconut is classified differently than tree nuts, but some people with tree nut allergies react to coconut. Check with your family members and choose alternatives if needed, like creamy oat milk with a bit of coconut extract for flavor.

Q: How do I prevent the rice from getting mushy?
A: Rinse the rice, use the correct water ratio on the package, and avoid overcooking. Fluff with a fork and serve immediately for the best texture.

Q: Can I prepare this ahead for meal prep?
A: Yes. Cook rice and chicken separately and store in meal prep containers. Add fresh cilantro and lime on the day you eat it. Reheat gently and add a splash of broth to refresh the sauce.

Conclusion

I hope this Coconut Chicken & Rice becomes one of your go-to family dinners. It is simple, comforting, and kind to busy weeknights. If you want a glazed twist, I recommend checking out a lovely variation on a glazed coconut chicken and rice for inspiration. For a lighter, bowl-style version with similar flavors, take a look at the healthier take found at Skinnytaste’s Coconut Chicken Rice Bowl.

Thanks for cooking with me. Come back soon for more family-friendly recipes and kitchen tips.

Coconut Chicken & Rice

Prep Time 10 minutes
Cook Time 25 minutes
Total Time 40 minutes
Servings 4 servings
Calories 550
This comforting Coconut Chicken & Rice recipe combines tender chicken, creamy coconut, and fluffy jasmine rice to create a warm and inviting meal that pleases both kids and adults.

Ingredients

Main ingredients

  • 2 breasts chicken breasts (Choose boneless, skinless breasts about 6-8 oz each for even cooking. Pound lightly if one is much thicker.)
  • 1 cup jasmine rice (Rinse the rice until the water runs clear to remove excess starch.)
  • 1 cup coconut milk (Use full-fat coconut milk for the creamiest sauce.)
  • 1 cup chicken broth (Low-sodium broth gives you control over seasoning.)
  • 1 small onion, diced (Use yellow or sweet onion for a mellow base.)
  • 2 cloves garlic, minced (Fresh garlic gives the best aroma.)
  • 1 tablespoon olive oil (Use a neutral oil for a cleaner coconut flavor.)
  • to taste Salt and pepper (Season in stages for balanced flavors.)
  • for garnish Fresh cilantro (Add just before serving for brightness.)

Instructions 

Cooking

  • Heat olive oil in a large skillet over medium heat.
  • Add diced onion and minced garlic, sautéing until soft.
  • Season chicken breasts with salt and pepper, then add to the skillet. Cook until golden brown on both sides, about 5 minutes per side.
  • Pour in coconut milk and chicken broth. Bring to a simmer.
  • Reduce heat to low, cover, and let cook for 15-20 minutes, or until the chicken is cooked through.
  • Meanwhile, rinse jasmine rice and cook according to package instructions.
  • Serve the chicken over fluffy rice, garnished with fresh cilantro.

Notes

For a spicy kick, stir in red pepper flakes or sriracha to the sauce. For a low-carb option, serve over cauliflower rice or steamed zucchini.
Calories: 550kcal
Course: Dinner, Main Course
Cuisine: Asian, Family-Friendly
Keyword: Coconut Chicken, Easy Dinner, family-friendly recipe, Jasmine Rice, One-Pan Meal

Chicken Enchiladas with Sour Cream Sauce

I can still smell the warm tortillas and the tang of sour cream sauce when I walk into the kitchen. The soft sizzle of cheese melting under a warm oven light feels like a cozy hug. These moments make weeknight dinners feel special.

This Chicken Enchiladas with Sour Cream Sauce recipe is one I turn to when the family needs comfort and the clock is against us. If you like bold, saucy chicken dinners, you might also enjoy my chicken shawarma with garlic sauce for another easy weeknight option.

Why this works

Chicken Enchiladas with Sour Cream Sauce

This recipe balances creamy sauce and tender chicken in a way that feeds a crowd and keeps cleanup simple. It reheats beautifully and serves well family-style, so you can spend less time at the stove and more time at the table.

Using cooked shredded chicken saves time and lets the sauce do the heavy lifting. If you need a one-pan weeknight hero, my one-pan juicy chicken with balsamic sauce is another dish that follows this save-time, feed-everyone approach.

Process Overview

“This is where the magic happens—when the aroma fills the kitchen.”

The method is straightforward. You mix the shredded chicken with a little cheese and spices, roll it in tortillas, and top everything with a smooth sour cream and cream-of-chicken sauce. Bake until bubbly and golden. The oven does most of the work while you set the table and call everyone to dinner.

Ingredients

  • 2 cups cooked shredded chicken
    • Lily’s tip: Rotisserie chicken works great. If you have leftover roasted chicken, shred it while the oven warms.
  • 8 flour tortillas
    • Lily’s tip: Use medium flour tortillas so they roll easily. Warm them briefly in the microwave to prevent cracking.
  • 1 cup shredded cheese (cheddar or Mexican blend)
    • Lily’s tip: A mix of sharp cheddar and Monterey Jack gives good melting and flavor.
  • 1 can cream of chicken soup
    • Lily’s tip: Shake the can well. If you prefer less sodium, use a low-sodium version.
  • 1 cup sour cream
    • Lily’s tip: Full-fat sour cream makes a silkier sauce, but a light version works in a pinch.
  • 1 cup chicken broth
    • Lily’s tip: Use homemade or low-sodium broth. If the sauce seems thin, reduce the broth slightly.
  • 1 teaspoon garlic powder
    • Lily’s tip: Garlic powder gives steady flavor. For fresh garlic, use one clove minced.
  • 1 teaspoon onion powder
    • Lily’s tip: Onion powder blends into the sauce better than raw onions for this recipe.
  • 1 teaspoon cumin
    • Lily’s tip: Cumin adds warmth. Adjust to your family’s taste.
  • Salt and pepper to taste
    • Lily’s tip: Start light and taste the chicken filling before rolling.
  • Chopped cilantro (for garnish)
    • Lily’s tip: Add just before serving to keep it bright and fresh.

If you like heartier filling, add a half cup of cooked black beans or corn to the shredded chicken before rolling. For extra texture, mix in a few tablespoons of diced green chiles.

Directions

  1. Preheat your oven to 350°F (175°C).

    • Encouragement: Warming the oven first saves time later. You are off to a great start.
  2. In a bowl, mix the cooked shredded chicken, half of the cheese, garlic powder, onion powder, cumin, salt, and pepper.

    • Encouragement: Taste a small spoonful to check seasoning. A well-seasoned filling makes all the difference.
  3. Spoon a portion of the chicken mixture into each tortilla, roll them up, and place in a greased baking dish.

    • Encouragement: Don’t worry about perfection. Tuck the ends in and line them snugly so they stay together while baking.
  4. In another bowl, whisk together the cream of chicken soup, sour cream, and chicken broth. Pour this sauce over the rolled tortillas.

    • Encouragement: Pour slowly to evenly coat each roll. The sauce will keep them moist and comforting.
  5. Sprinkle the remaining cheese on top.

    • Encouragement: A little extra cheese makes the meal feel like a celebration. Go ahead and add a generous sprinkle.
  6. Bake for 20-25 minutes until heated through and bubbly.

    • Encouragement: Let the oven work its magic. The bubbling surface and melted cheese tell you it’s ready.
  7. Garnish with chopped cilantro and serve.

    • Encouragement: Fresh cilantro and a squeeze of lime brighten every bite. Gather everyone and enjoy.

If you want a small shortcut, use a store-bought rotisserie chicken to speed up step two. For a lighter touch, swap one cup of sour cream for Greek yogurt.

During the rolling step you can line the tortillas tightly in the dish so they support each other. If you are feeding picky eaters, leave the sauce on the side and let everyone spoon it on their own portion.

Serving

Chicken Enchiladas with Sour Cream Sauce

Serve the enchiladas family-style in the baking dish on the center of the table. Add bowls of extra sour cream, chopped tomatoes, sliced avocado, or pickled jalapeños so everyone can customize their plate.

Pair with a simple green salad and some warm rice for a complete meal. Let the kids help top their own plates. It turns dinner into a small celebration and keeps mealtime relaxed.

Storage

Store leftovers in an airtight container in the refrigerator for up to 3 days. To reheat, place single servings on a microwave-safe plate and heat for 1 to 2 minutes until warm. You can also reheat in a 325°F oven for 10 to 15 minutes covered with foil to keep the enchiladas moist.

If you want to freeze portions, wrap individual pieces in foil and place them in a freezer bag for up to 2 months. Thaw in the refrigerator overnight and reheat in the oven for best texture.

For quick weeknight prep, I sometimes double the recipe and freeze half. When you are ready to enjoy, pull a tray out of the freezer the night before and let it thaw in the refrigerator.

Also helpful is this slow-cooker idea for busy days: if you enjoy slow-simmered flavors, see my crockpot white chicken chili with cream cheese for another make-ahead favorite.

Kitchen Notes

  • Prep tortillas right before rolling. A short microwave wrap or quick pan warm prevents splitting.
  • Use rotisserie chicken to cut prep time to under 10 minutes.
  • If the sauce is too thick, add up to a quarter cup more broth to reach your preferred consistency.
  • For crispier tops, remove foil in the last 5 minutes of baking and broil briefly while watching carefully.
  • Save time by shredding chicken with two forks while it is still slightly warm.

Variations

  • For picky eaters: Leave sauce on the side and let them top their own enchiladas. You can also make smaller "enchilada roll-ups" for little hands.
  • For a lighter version: Substitute Greek yogurt for half the sour cream and use low-fat cheese.
  • For vegetarian: Replace chicken with seasoned black beans and roasted sweet potatoes. The sour cream sauce still works beautifully.
  • For extra heat: Add a diced jalapeño to the chicken mixture or sprinkle crushed red pepper into the sauce.
  • For a Mexican-style twist: Stir in a half cup of salsa verde into the sauce for tang and brightness, and top with sliced radishes.

If you love experimenting with chicken recipes, you might also like my slow and comforting easy crockpot chicken thighs with creamy gravy.

FAQ

Can I use corn tortillas instead of flour?

Yes. Corn tortillas work fine. Warm them briefly in a damp towel so they do not break. They will have a different texture and a slightly stronger corn flavor.

Can I make these ahead of time?

Yes. Assemble the enchiladas up to the baking step and keep them covered in the refrigerator for up to 24 hours. When ready, bake as directed, adding a few extra minutes if they are cold.

Is there a gluten-free option?

Yes. Use certified gluten-free corn tortillas and check the label on the cream of chicken soup for gluten. Some brands have a gluten-free version or you can make a simple white sauce with gluten-free flour.

How can I make this spicier without overpowering kids?

Add a mild green salsa or a small amount of finely diced mild green chiles. Keep the heat on the side so each person can choose their level.

What is the best way to shred chicken quickly?

Use two forks, or pulse cooked chicken in a food processor with quick bursts. If you prefer hand-shredded texture, use forks for a more rustic feel. For a different flavor profile, try shredding chicken that has been roasted with simple spices.

For a different crowd-pleasing chicken dinner, try my recipe for chicken kofta with creamy garlic yogurt sauce when you want meatballs on a weeknight.

Conclusion

I hope this Chicken Enchiladas with Sour Cream Sauce becomes a weeknight favorite in your home. It is forgiving, creamy, and made to bring people together around the table. For a slightly different take and more tips, I like the detailed classic version at Sour Cream Chicken Enchiladas – New Mexican Foodie. If you want another regional take on the same comforting dish, this version has helpful notes at Sour Cream Chicken Enchiladas – Midwexican.

Thanks for cooking with me. Wrap a warm tortilla, call the family, and enjoy the little moments that make dinner memorable.

Chicken Enchiladas with Sour Cream Sauce

Prep Time 15 minutes
Cook Time 25 minutes
Total Time 40 minutes
Servings 6 servings
Calories 450
A comforting recipe perfect for weeknight dinners, combining creamy sauce and tender chicken wrapped in warm tortillas.

Ingredients

Main Ingredients

  • 2 cups cooked shredded chicken (Rotisserie chicken works great.)
  • 8 pieces flour tortillas (Use medium flour tortillas so they roll easily.)
  • 1 cup shredded cheese (cheddar or Mexican blend) (A mix of sharp cheddar and Monterey Jack gives good melting and flavor.)
  • 1 can cream of chicken soup (Shake the can well. Low-sodium version can be used.)
  • 1 cup sour cream (Full-fat sour cream makes a silkier sauce.)
  • 1 cup chicken broth (Use homemade or low-sodium broth.)
  • 1 teaspoon garlic powder (For fresh garlic, use one clove minced.)
  • 1 teaspoon onion powder (Onion powder blends into the sauce better.)
  • 1 teaspoon cumin (Adjust to your family's taste.)
  • to taste Salt and pepper (Start light and taste the chicken filling before rolling.)
  • to garnish Chopped cilantro (Add just before serving to keep it bright.)

Instructions 

Preparation

  • Preheat your oven to 350°F (175°C).
  • In a bowl, mix the cooked shredded chicken, half of the cheese, garlic powder, onion powder, cumin, salt, and pepper.
  • Spoon a portion of the chicken mixture into each tortilla, roll them up, and place in a greased baking dish.
  • In another bowl, whisk together the cream of chicken soup, sour cream, and chicken broth. Pour this sauce over the rolled tortillas.
  • Sprinkle the remaining cheese on top.

Cooking

  • Bake for 20-25 minutes until heated through and bubbly.
  • Garnish with chopped cilantro and serve.

Notes

Store leftovers in an airtight container for up to 3 days. For freezing, wrap in foil and place in a freezer bag for up to 2 months.
Calories: 450kcal
Course: Dinner, Main Course
Cuisine: Mexican
Keyword: Chicken Enchiladas, Comfort Food, Easy Recipe, Sour Cream Sauce, Weeknight Dinner