The kitchen smells like garlic and warm spices. The slow hum of the crockpot is a gentle promise of dinner. Little feet patter in the hallway and someone laughs at a small kitchen mishap.
I love the way a simple recipe turns a busy day into something cozy. If you enjoy easy weeknight dinners, you might also like my easy crockpot chicken thighs with creamy gravy, which is another family favorite.
Why this works

This recipe saves time and creates big, comforting flavors with almost no fuss. The crockpot does the heavy lifting, so you can work, play with the kids, or relax while dinner cooks slowly all afternoon.
I have been cooking and testing crockpot recipes for more than a decade. I share this one because it consistently wins over picky eaters and busy parents alike. The cream cheese makes the chili rich and smooth, while the ranch packet adds a familiar, savory note that kids love.
For a different spice profile when you want something brighter, try my chicken shawarma with garlic sauce. It is a great contrast and shows how versatile simple chicken recipes can be.
Process Overview
“This is where the magic happens—when the aroma fills the kitchen.”
The process is wonderfully simple. You combine ingredients in the crockpot, let them mingle for hours, then finish with cream cheese for a silky texture. The long, slow simmer lets flavors develop without much attention.
You can set it in the morning and come home to a warm, hearty meal. This is the kind of dinner that brings everyone to the table.
Ingredients
-
1 lb shredded boneless skinless chicken breasts
Tip: Use cooked rotisserie chicken for a faster start, or poach breasts in salted water and shred with two forks. -
1 can corn (drained)
Tip: Frozen corn works well too. Thaw and drain before adding for the same texture. -
1 can black beans (drained and rinsed)
Tip: Rinse to reduce sodium and any canning liquid flavor. If your family dislikes beans, reduce to half a can. -
1 can diced tomatoes with green chilies
Tip: Use mild if kids are sensitive to heat, or fire-roasted for a deeper smoky taste. -
8 oz cream cheese
Tip: Soften at room temperature for easy melting. Low-fat cream cheese thins differently, so expect a slightly lighter texture. -
1 cup chicken broth
Tip: Use low-sodium broth so you can control the salt at the end. -
1 packet ranch seasoning
Tip: If you prefer a cleaner ingredient list, use a homemade ranch blend of dried parsley, dill, garlic powder, onion powder, and salt. -
1 tsp chili powder
Tip: Adjust to taste. For a smokier flavor, try smoked paprika in addition to the chili powder. -
Salt and pepper to taste
Tip: Start with a small pinch and adjust after the cream cheese melts. Cream cheese can mute saltiness.
My goal with these tips is to help you adapt the recipe to your pantry and your family. If you want a heartier, pasta-based dinner, consider the flavors in my cowboy butter lemon bowtie chicken with broccoli for inspiration.
Directions
-
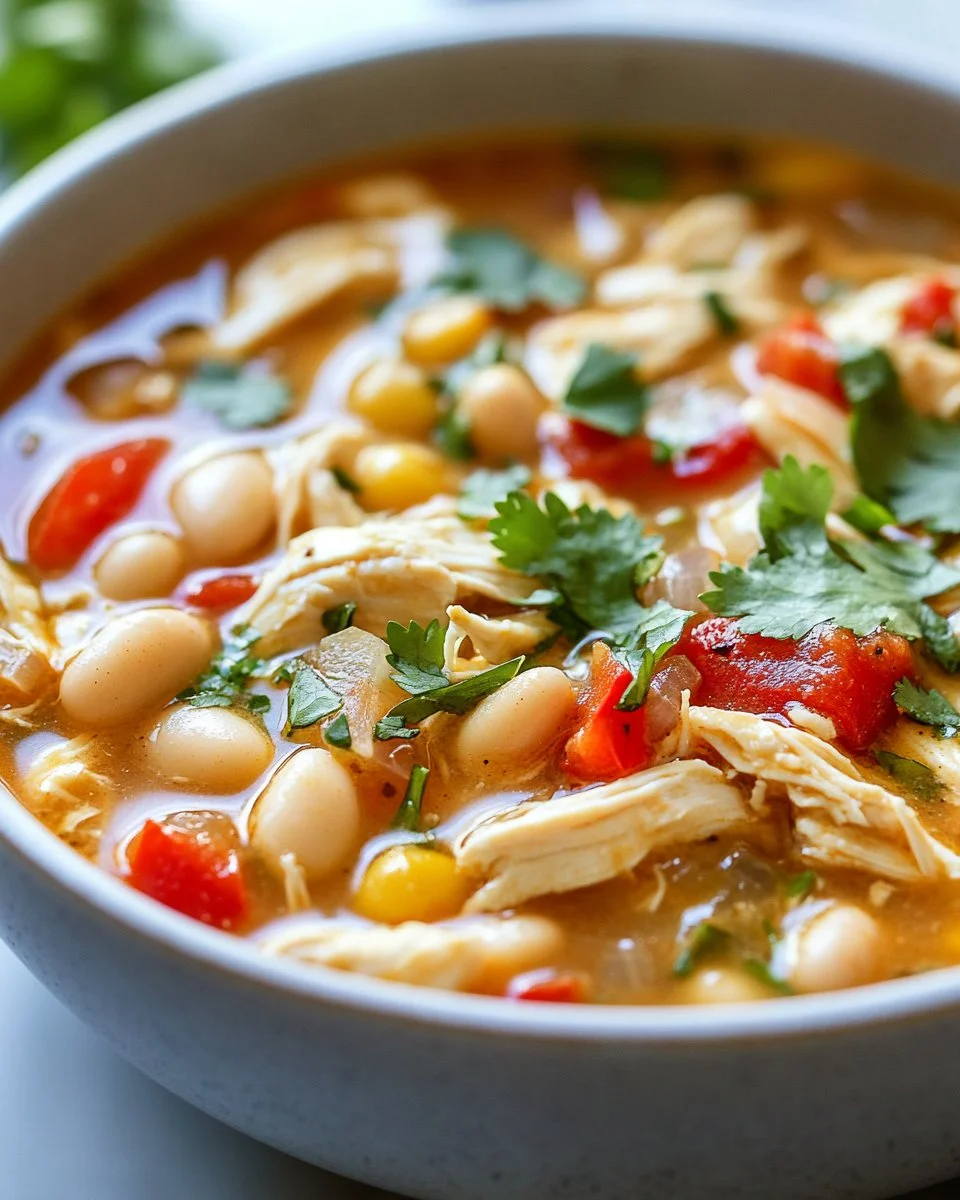
In a crockpot, combine the shredded chicken, corn, black beans, diced tomatoes, ranch seasoning, chili powder, salt, and pepper.
Encouraging note: Mix gently but thoroughly. This is the moment to smell the spices and smile. If you used rotisserie chicken, this step is even faster. -
Pour in the chicken broth and stir until well combined.
Encouraging note: The broth helps everything cook evenly. If your crockpot seems crowded, reduce broth slightly; you can always thin it later with more broth. -
Cook on low for 6-8 hours or on high for 3-4 hours.
Encouraging note: Low and slow gives deeper flavor, but high works when time is short. The house will start to smell amazing, and family members will begin to drift toward the kitchen. -
About 30 minutes before serving, add the cream cheese to the crockpot and stir until melted and well blended.
Encouraging note: Cut the cream cheese into cubes before adding to help it melt faster. If you want a chunkier texture for picky kids, fold some cream cheese in at the table. -
Serve warm and enjoy!
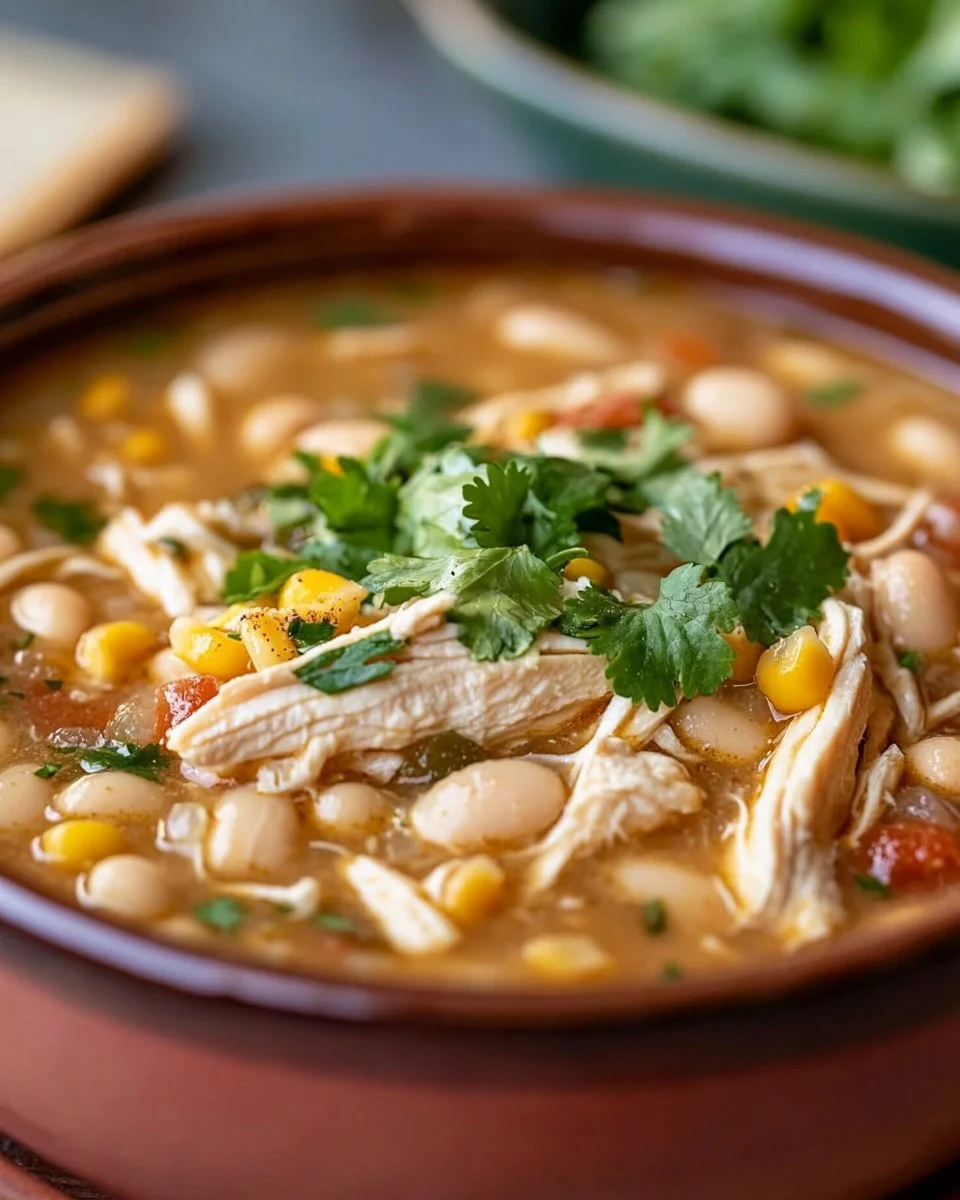
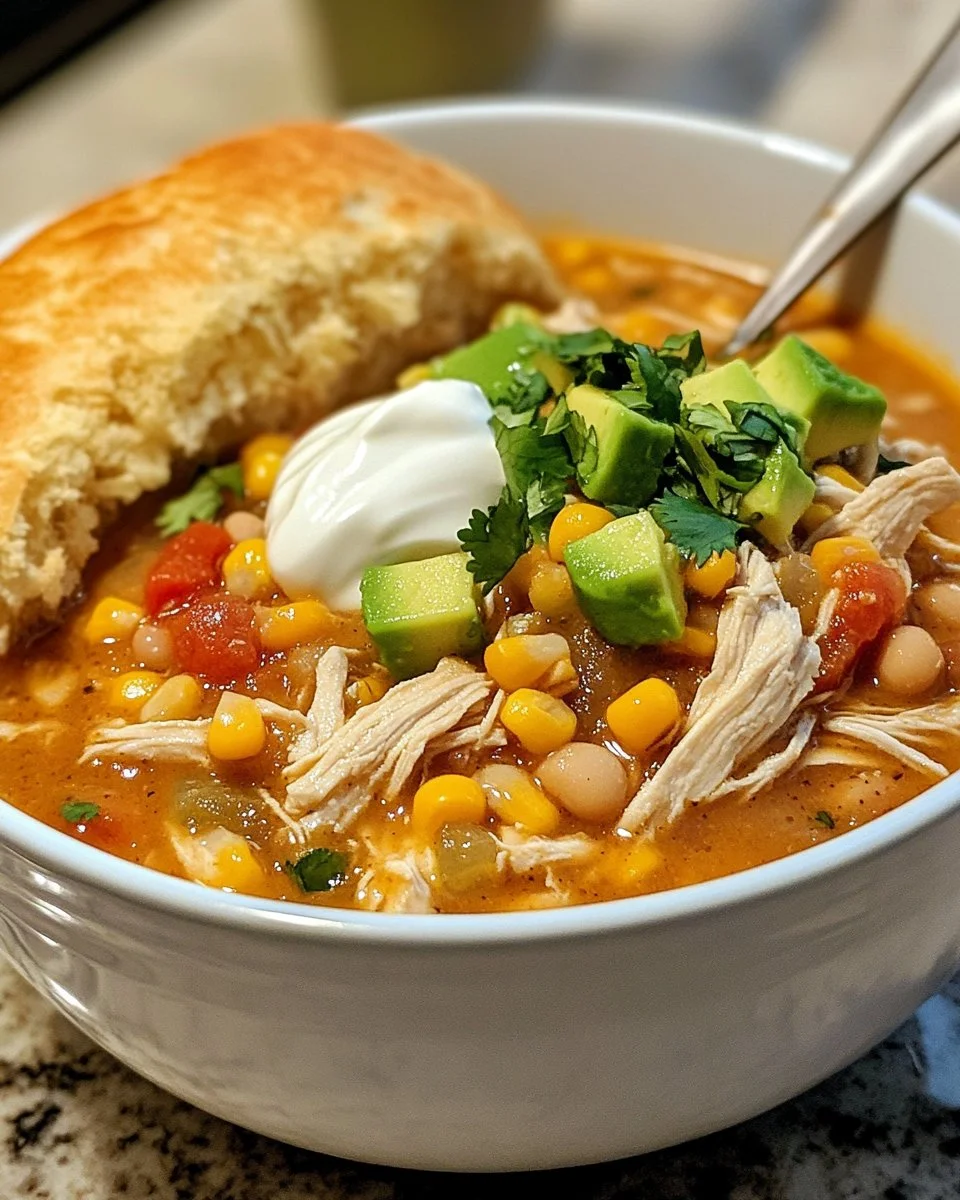
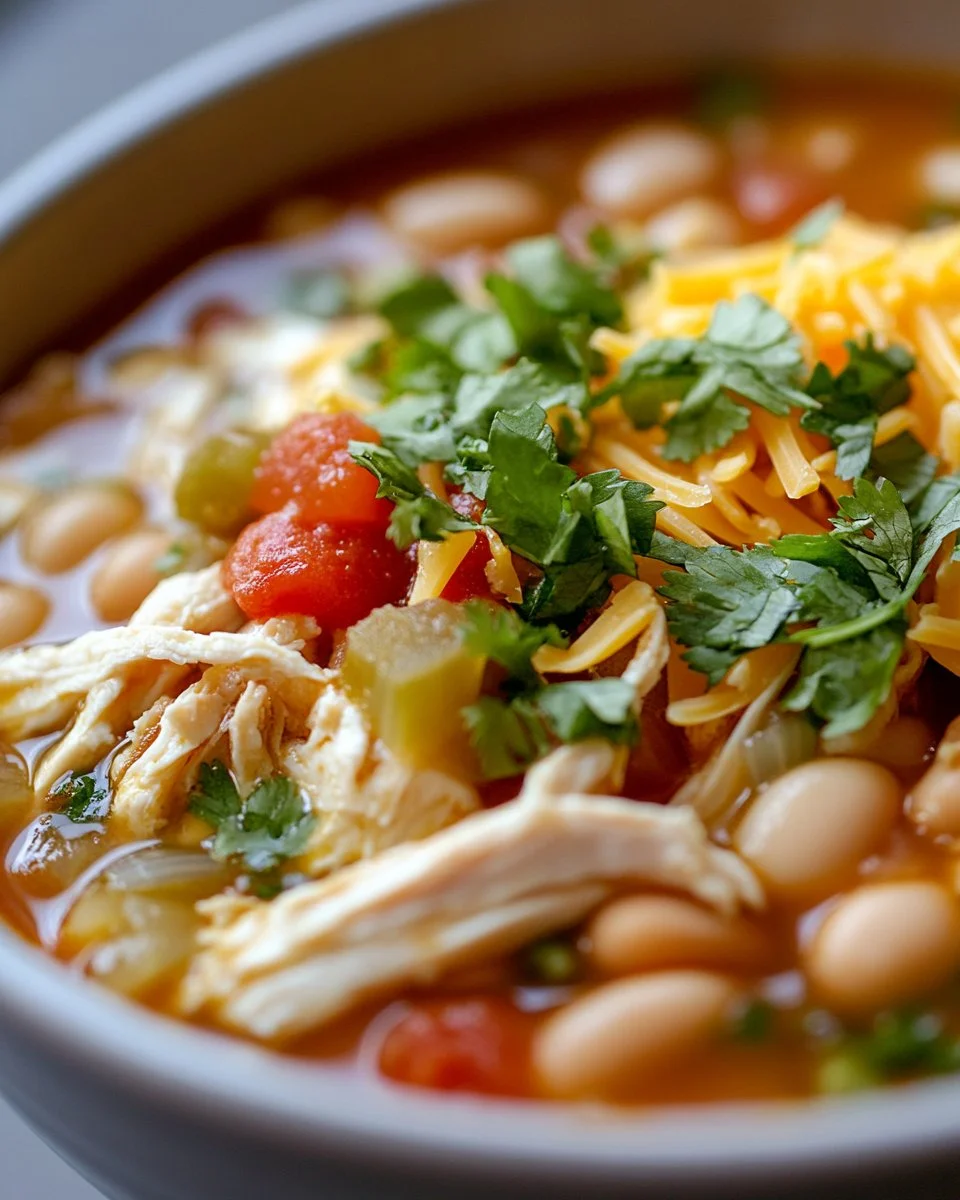
Encouraging note: Top with your favorite garnishes like shredded cheese, cilantro, a squeeze of lime, or tortilla chips. This is the best part—watching everyone dig in.
If you like adding mushrooms for an earthier flavor, you can borrow techniques from my creamy garlic mushroom chicken thighs to sauté mushrooms separately and stir them in at the end.
Serving

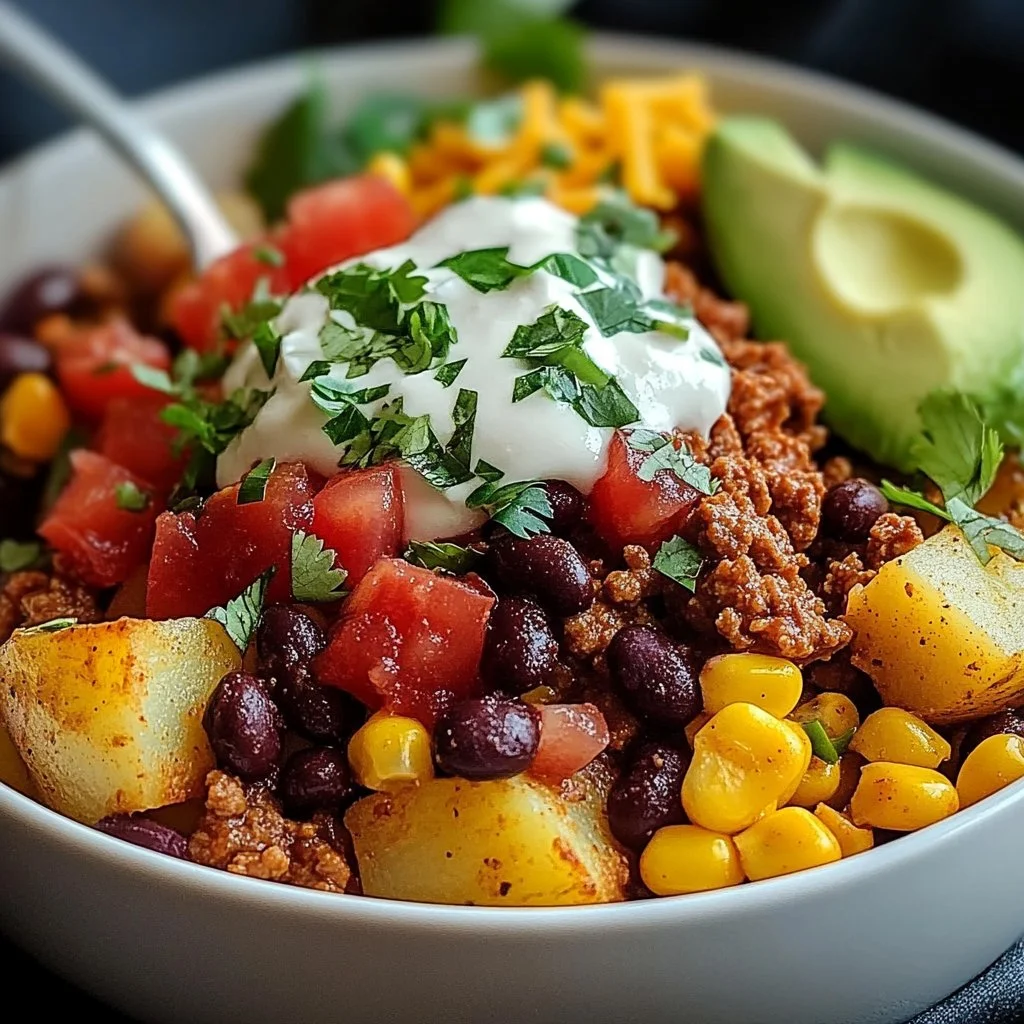
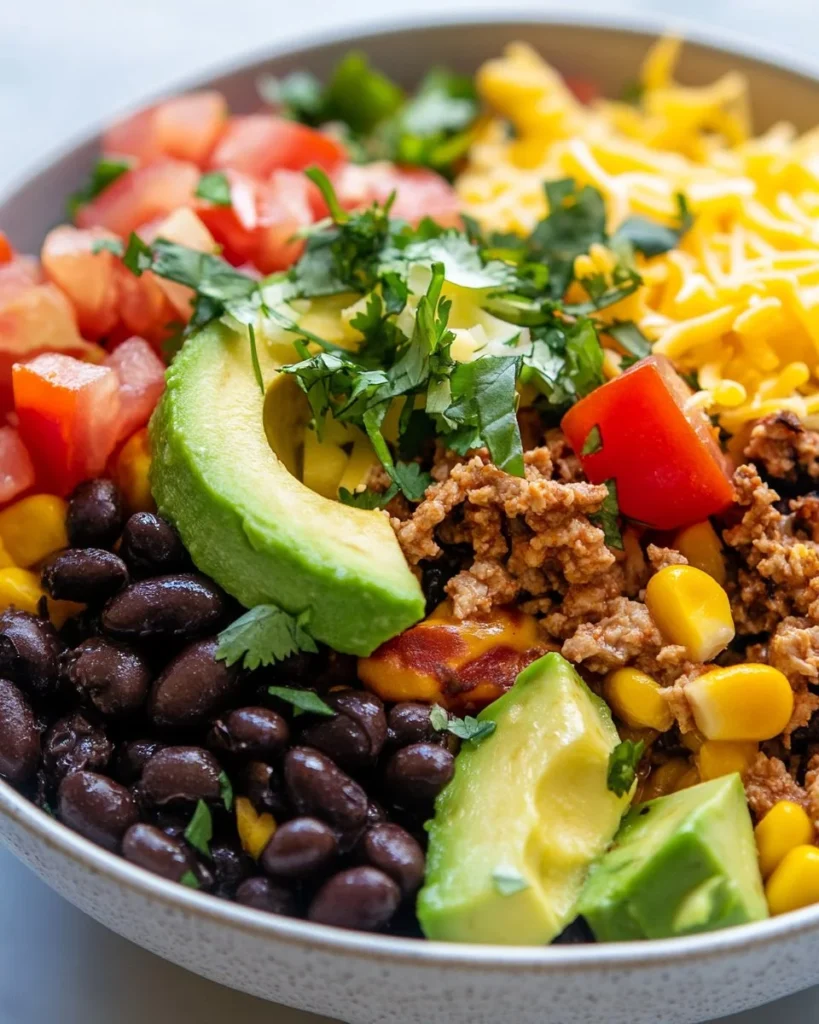
Serve this chili family-style in a large bowl and let everyone help themselves. Place bowls of shredded cheese, chopped cilantro, lime wedges, and tortilla chips on the table.
This dish pairs well with warm cornbread or a simple green salad for freshness. Set out spoons and napkins, and let the family customize their bowls.
For younger children, keep a small bowl of plain shredded chicken and some mild toppings available. That way, everyone eats happily without extra stress.
Storage
Cool leftovers quickly by letting them come to room temperature for no more than two hours. Transfer to an airtight container and refrigerate.
Refrigerator: Keep for 3 to 4 days. Reheat individual portions in the microwave on medium power, stirring halfway through.
Freezer: This chili freezes well. Portion into freezer-safe containers, leaving headspace for expansion. Freeze for up to 3 months. Thaw overnight in the refrigerator before reheating.
Reheating tip: If the chili thickens after refrigeration, stir in a splash of chicken broth while reheating to restore the creamy texture.
Kitchen Notes
- Shortcut: Use pre-shredded rotisserie chicken right from the store to save an hour.
- Time saver: Add the cream cheese at the last 30 minutes so it melts smooth without overcooking.
- Kid friendly: Serve with tortilla chips or rice so picky eaters can hide extra veggies.
- Flavor booster: A squeeze of fresh lime before serving brightens the entire dish.
- Make it dairy-free: Replace cream cheese with a dairy-free cream alternative and add a tablespoon of cornstarch mixed with water to thicken.
For another quick dinner idea that uses simple pantry ingredients, try my creamy garlic parmesan chicken breast as a weeknight alternative.
Variations
- Lower carb: Skip the corn and serve the chili over cauliflower rice or spoon it into halved roasted peppers.
- Vegetarian swap: Use a firm plant-based chicken substitute or extra white beans and vegetable broth instead of chicken. Add extra spices for depth.
- Spicier version: Add a diced jalapeño with the other ingredients or a pinch of cayenne. Taste as you go.
- Lighter option: Use reduced-fat cream cheese and lower-sodium broth. The texture will be slightly lighter but still satisfying.
- Slow cooker to stove: Make this on the stove by simmering the ingredients for 20 to 30 minutes until flavors meld, then stir in cream cheese off the heat.
These tweaks make it easy to feed everyone at the table, even with different tastes and dietary needs.
FAQ
Q: Can I use chicken thighs instead of breasts?
A: Yes, shredded boneless skinless chicken thighs work great. They are more forgiving and stay moist. Adjust cooking time slightly if you start with raw thighs.
Q: Is it safe to leave the crockpot on while I am at work?
A: Yes, for the typical 6 to 8 hour low setting this recipe is safe. Make sure your crockpot is in good condition and placed on a heat-safe surface away from edges.
Q: Can I make this in an Instant Pot?
A: You can. Use the poultry setting or manual high pressure for about 10 minutes, then quick-release, shred the chicken, stir in cream cheese, and use the sauté setting to finish.
Q: How do I thicken the chili if it seems thin?
A: Simmer uncovered for 10 to 15 minutes to reduce liquid. Or mix 1 tablespoon cornstarch with 2 tablespoons cold water and stir in, cooking until thickened.
Q: Can I prepare this the night before?
A: Yes, assemble everything in the crockpot insert, cover, and refrigerate overnight. In the morning, place the insert in the crockpot and cook as directed. Add cream cheese in the last 30 minutes.
Conclusion
I hope this crockpot white chicken chili with cream cheese becomes one of your go-to family meals. It is simple, comforting, and forgiving, perfect for busy nights and hungry kids.
For a slightly different creamy white chili inspiration, see this Crockpot White Chicken Chili (Contest Winning!) – The Chunky Chef which influenced some ideas for texture and timing.
If you want another make-ahead cream cheese crockpot option, this Crockpot Cream Cheese Chicken Chili – Family Review Guide offers useful tips for freezing and serving.
Thanks for cooking with me. Invite your family, share a bowl, and enjoy the warm sounds and smells of home.

Crockpot White Chicken Chili
Ingredients
Chicken and Base Ingredients
- 1 lb shredded boneless skinless chicken breasts (Use cooked rotisserie chicken for a faster start.)
- 1 can corn (Frozen corn works well too.)
- 1 can black beans (Rinse to reduce sodium.)
- 1 can diced tomatoes with green chilies (Use mild if kids are sensitive to heat.)
- 1 cup chicken broth (Use low-sodium broth.)
- 1 packet ranch seasoning (Use a homemade ranch blend for cleaner ingredients.)
- 1 tsp chili powder (Adjust to taste.)
- Salt to taste Salt and pepper (Start with a small pinch.)
Creamy Finish
- 8 oz cream cheese (Soften at room temperature for easy melting.)
Instructions
Preparation
- In a crockpot, combine the shredded chicken, corn, black beans, diced tomatoes, ranch seasoning, chili powder, salt, and pepper.
- Pour in the chicken broth and stir until well combined.
Cooking
- Cook on low for 6-8 hours or on high for 3-4 hours.
- About 30 minutes before serving, add the cream cheese to the crockpot and stir until melted and well blended.
Serving
- Serve warm and enjoy, topping with shredded cheese, cilantro, lime, or tortilla chips.