Author

Amelia Hart

Browsing

The BEST Healthy Chicken Salad

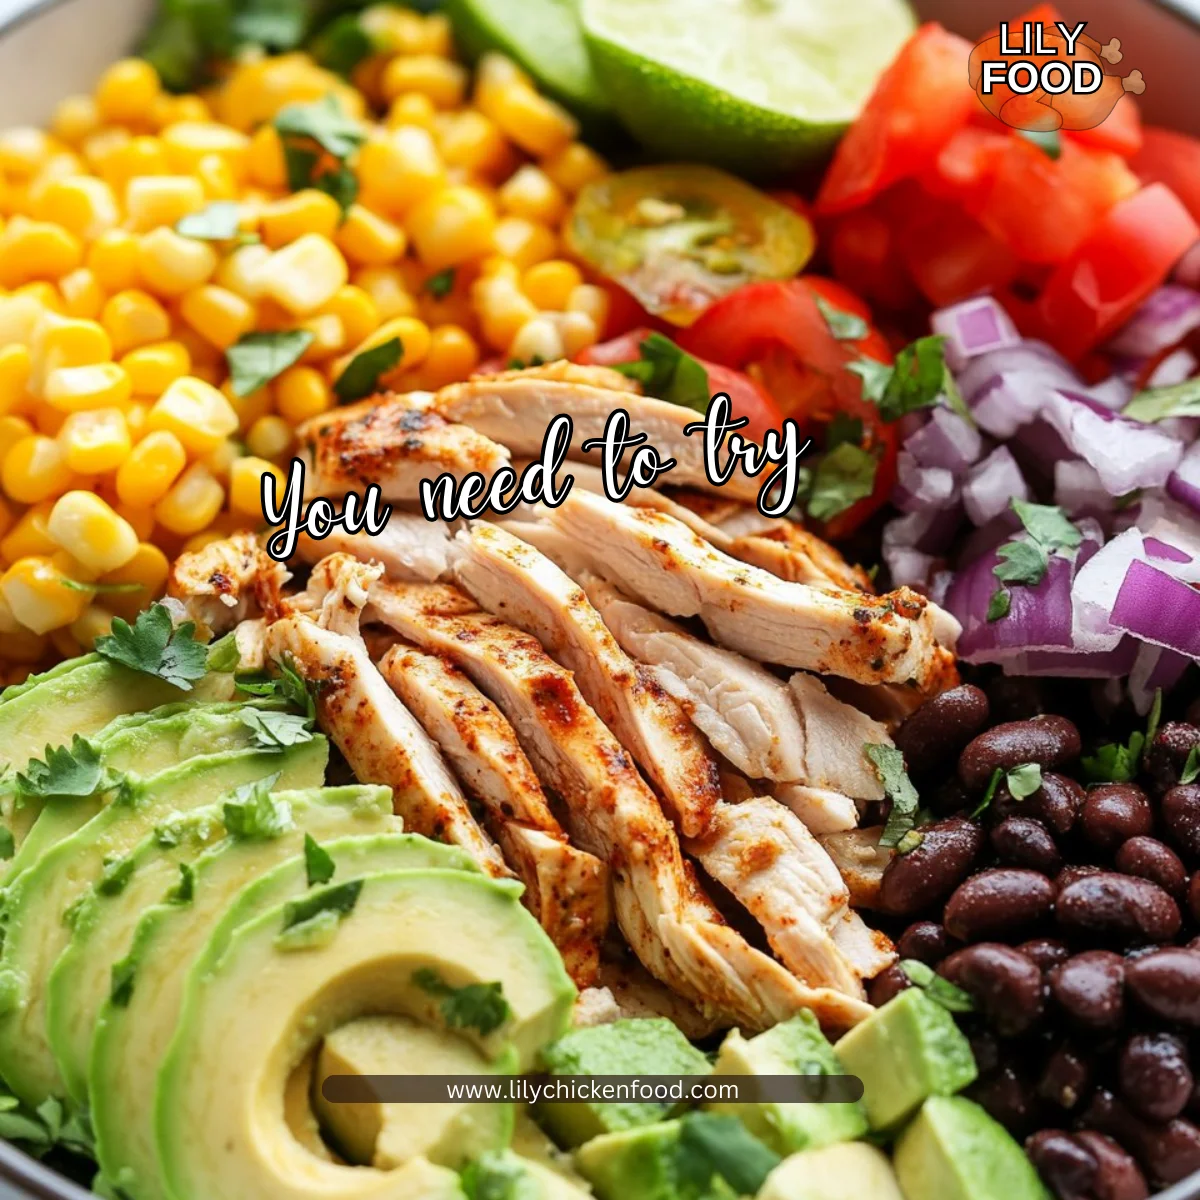
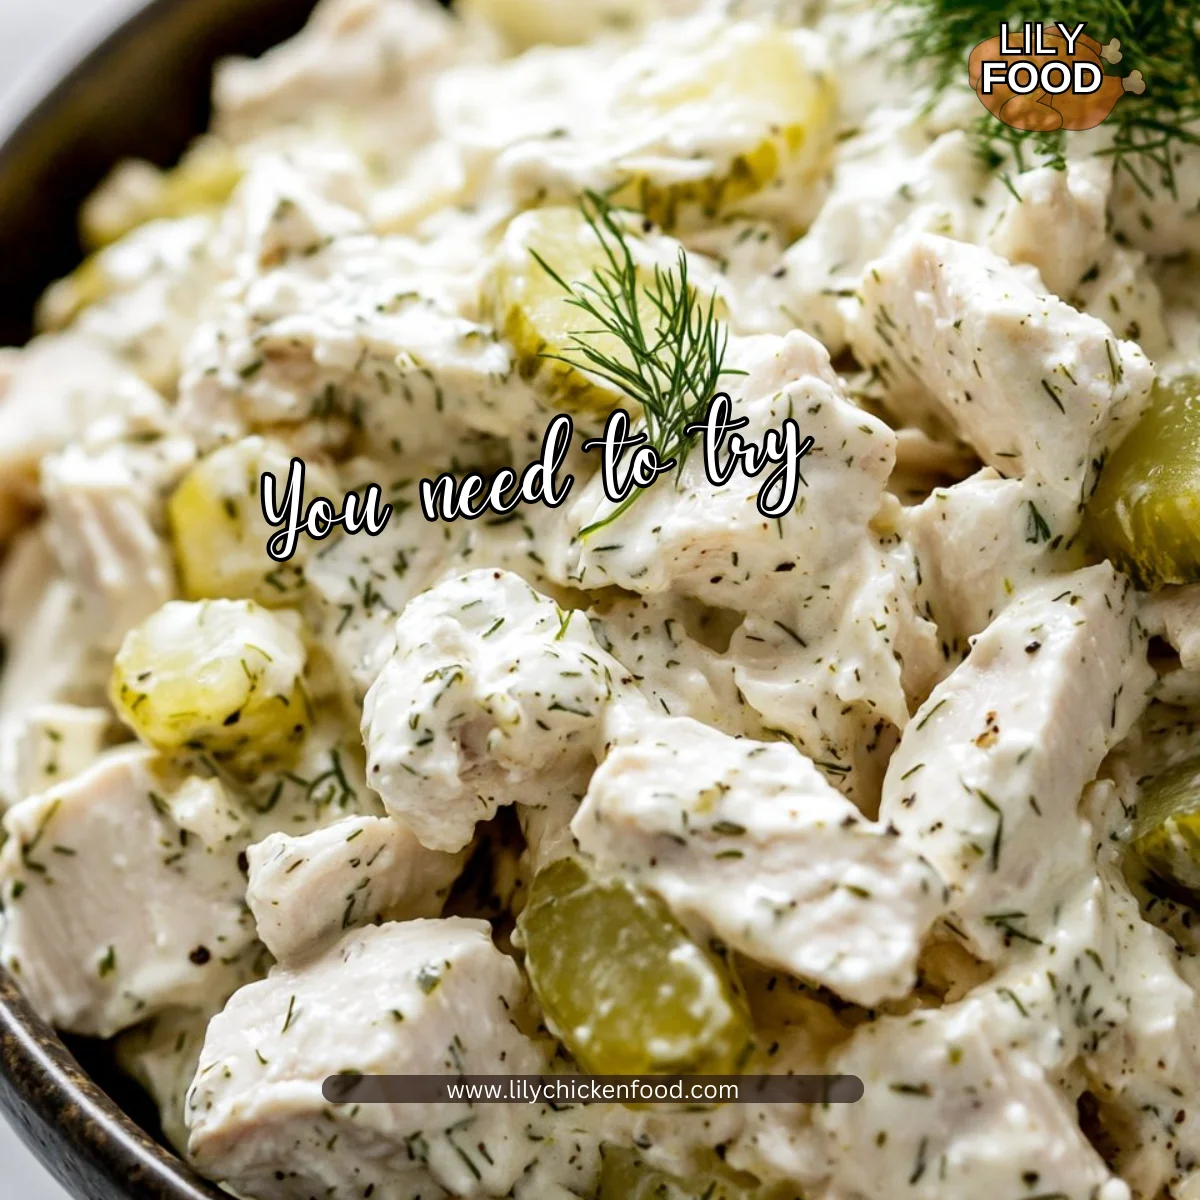
There is something truly special about walking into a kitchen filled with the scent of savory chicken mixed with the crunch of fresh veggies. It is a sound that brings warmth and comfort, like a embrace you can taste. This Healthy Chicken Salad is not just an ordinary recipe; it’s a family favorite that brings everyone together, whether for lunch or dinner. The magic happens when you toss everything together, creating a simple yet delicious dish that appeals to both kids and adults.

Why This Works

The BEST Healthy Chicken Salad

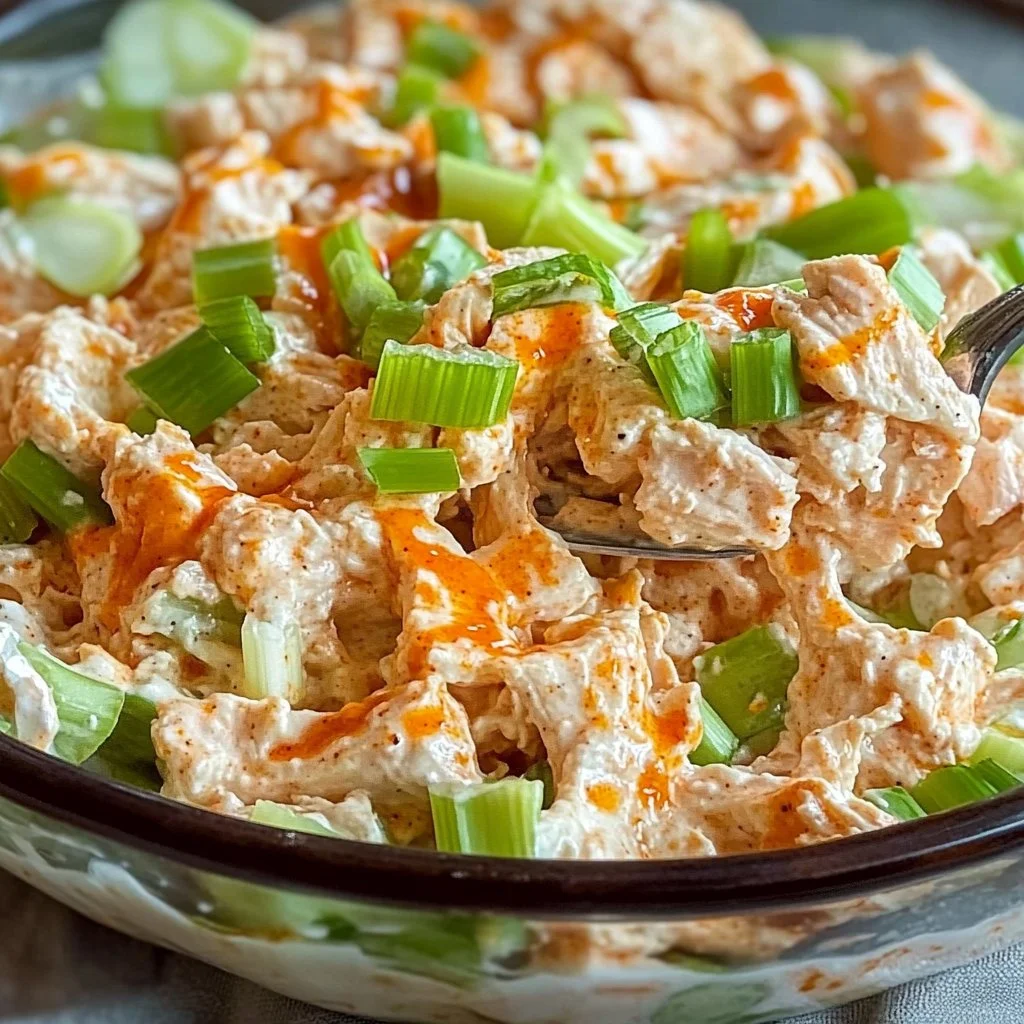
This chicken salad works because it checks every box for a busy family. First, it’s versatile; you can serve it on a bed of greens, in a sandwich, or in wraps. It’s also a time-saver. Once you have the ingredients ready, you can whip up a meal in no time. The combination of textures—from crunchy celery to juicy grapes—creates a delightful bite every time. Plus, the non-traditional use of Greek yogurt gives it a creamy richness without the extra calories. Your family will love it, and you will love how quick and easy it is.

Process Overview

“This is where the magic happens—when the aroma fills the kitchen.”

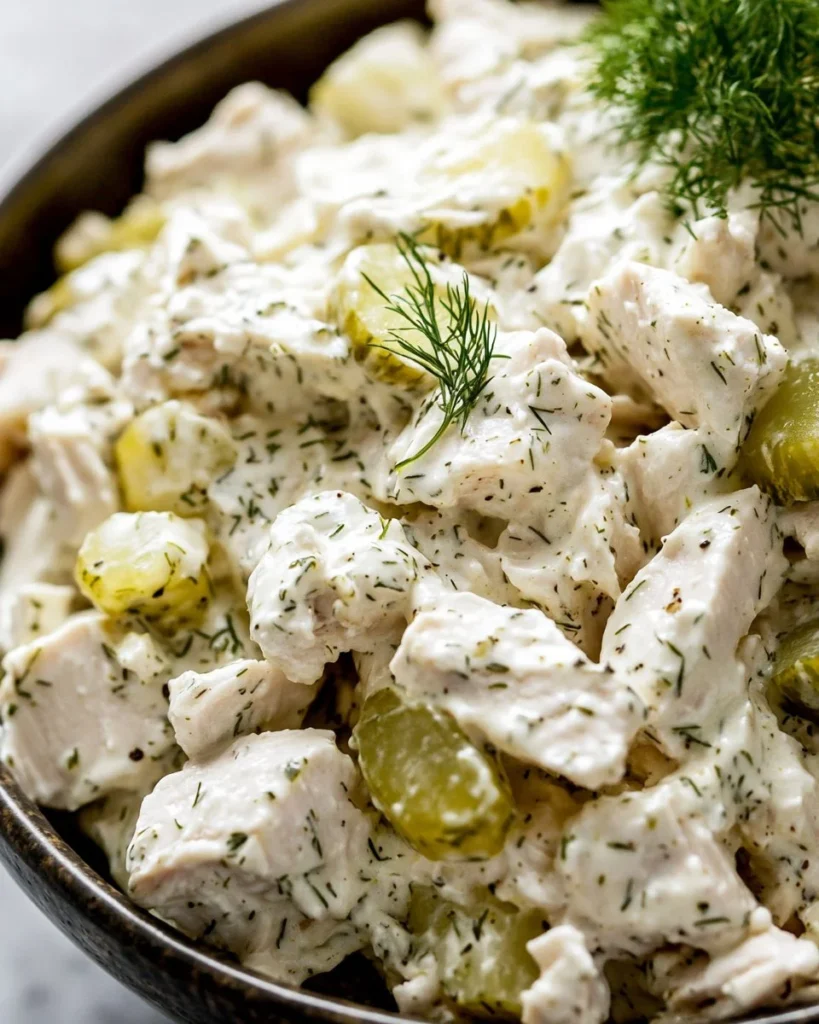
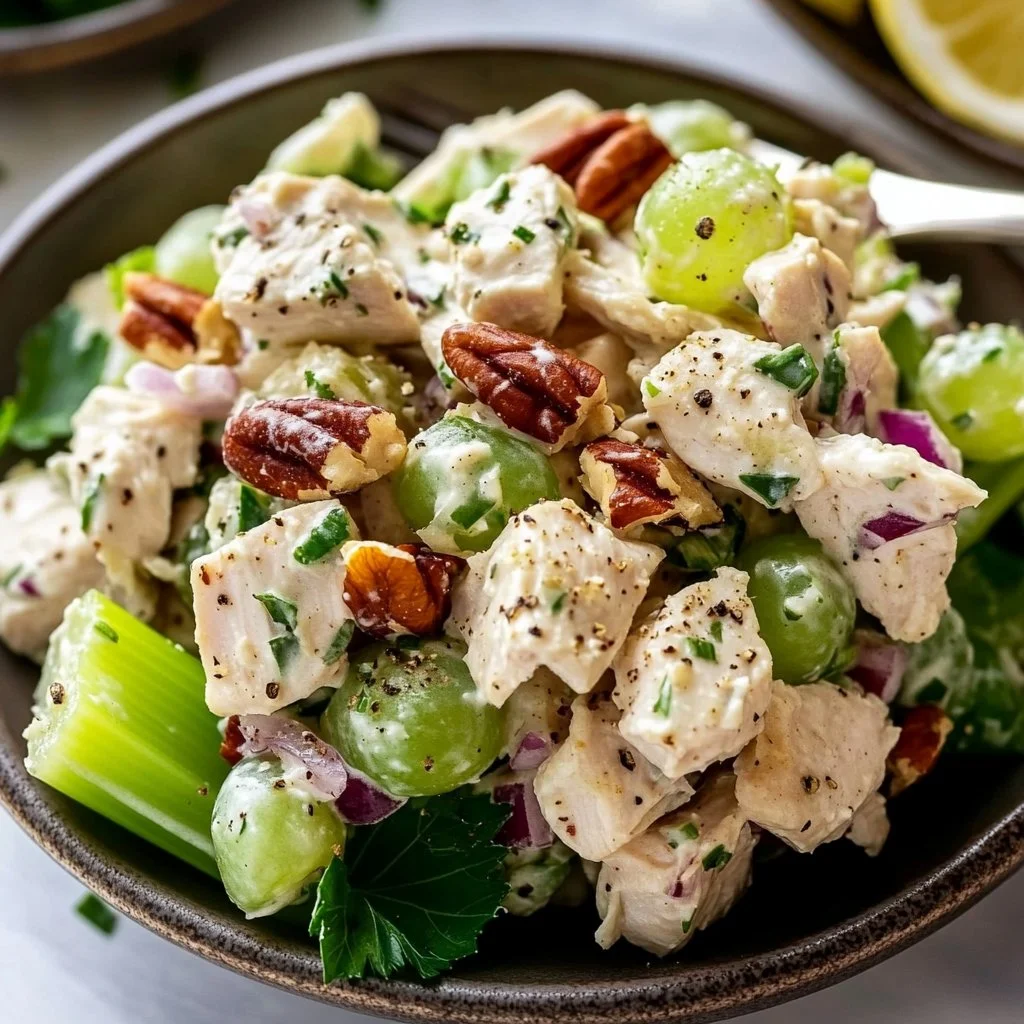
Gathering the ingredients and seeing them come together is a joyful experience. The crunch of fresh veggies and the sweetness of grapes mixed with seasoned chicken creates an explosion of flavors. Plus, this recipe is easy to modify based on what you have on hand. With just a few simple steps, you will have a wholesome meal that can be enjoyed any time of the day.

Ingredients

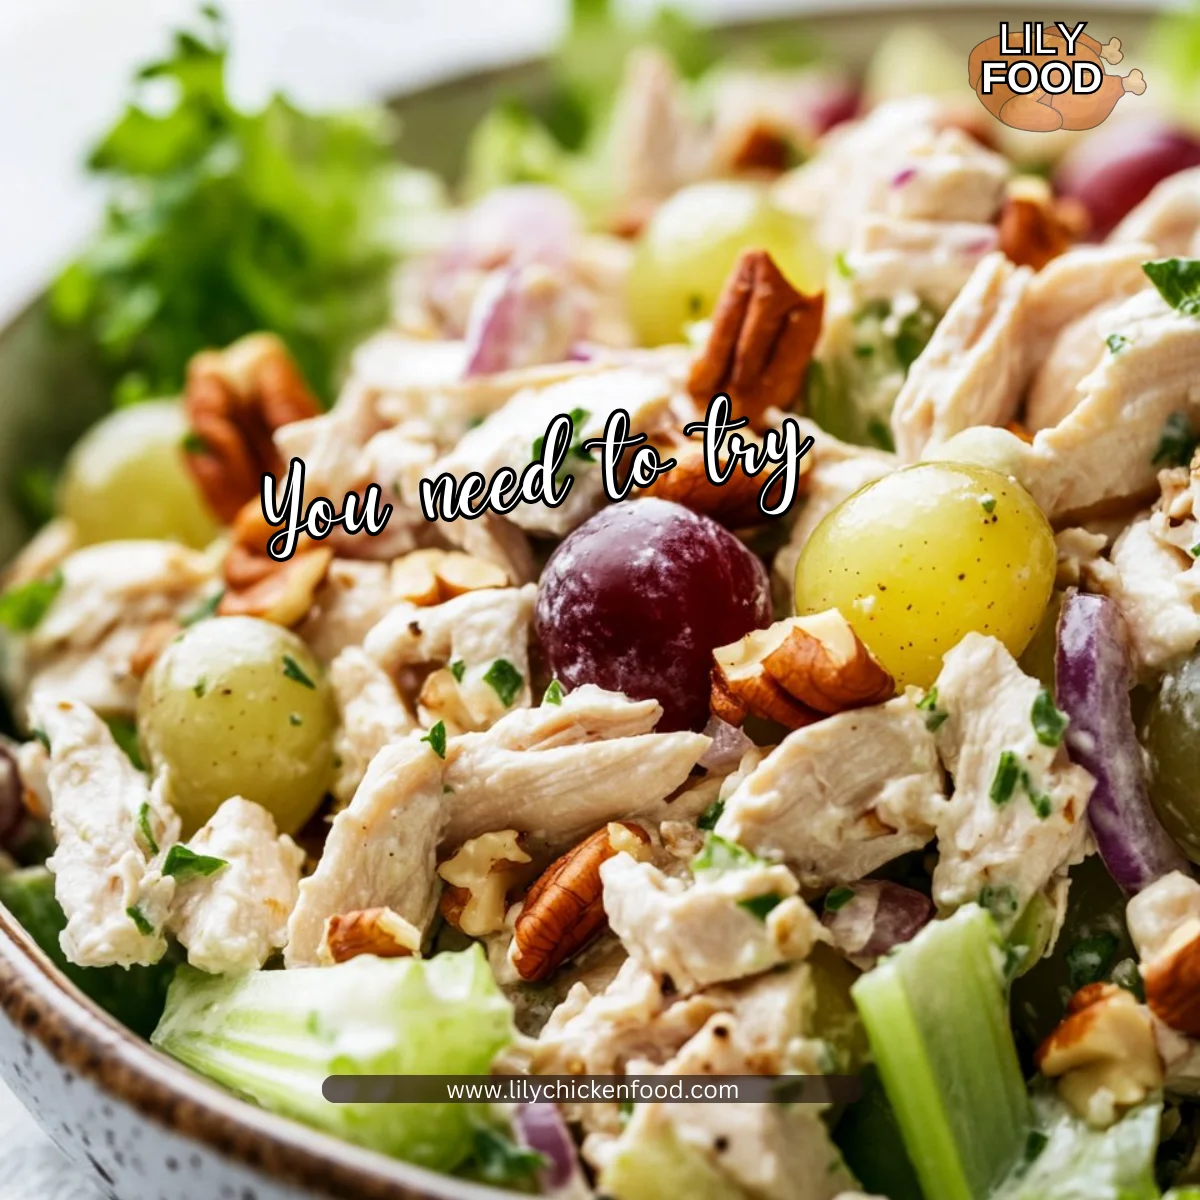
For this deliciously healthy chicken salad, you’ll need the following ingredients:

  • 2.5 cups cooked, diced or shredded chicken
  • 3 stalks of celery – about 1/2 cup diced
  • 1 cup sliced grapes
  • 1/3 cup chopped pecans
  • 1/3 cup chopped red onion
  • 1/2 cup plain Greek yogurt
  • 1/4 cup mayo
  • 1 tablespoon Dijon mustard
  • 1 teaspoon lemon juice
  • 1-2 teaspoons fresh lemon zest
  • Salt and pepper – to taste

Lily’s Personal Tips

  • Chicken: Use leftover rotisserie chicken for added flavor.
  • Celery: Crisp celery adds a nice crunch. Use the freshest stalks you can find.
  • Grapes: Sweet, seedless grapes are best. They provide a refreshing burst in each bite.
  • Pecans: For an even deeper flavor, toast the pecans lightly before chopping them.
  • Dijon Mustard: This adds a slight sharpness. Feel free to adjust the amount based on your preference.

Directions

  1. Prepare your grapes:
    Start by adding grapes to a water-filled bowl with 1 teaspoon of baking soda stirred in. Let them sit for about 5 minutes. This simple step removes the film on the grapes, making them taste even better.

    Encouragement Note: This small effort will make a noticeable difference in the flavor.

  2. Rinse and slice:
    After soaking, rinse the grapes and dry them thoroughly. Then slice them in half.

    Encouragement Note: You can even get the kids involved in slicing the grapes. It’s a fun task!
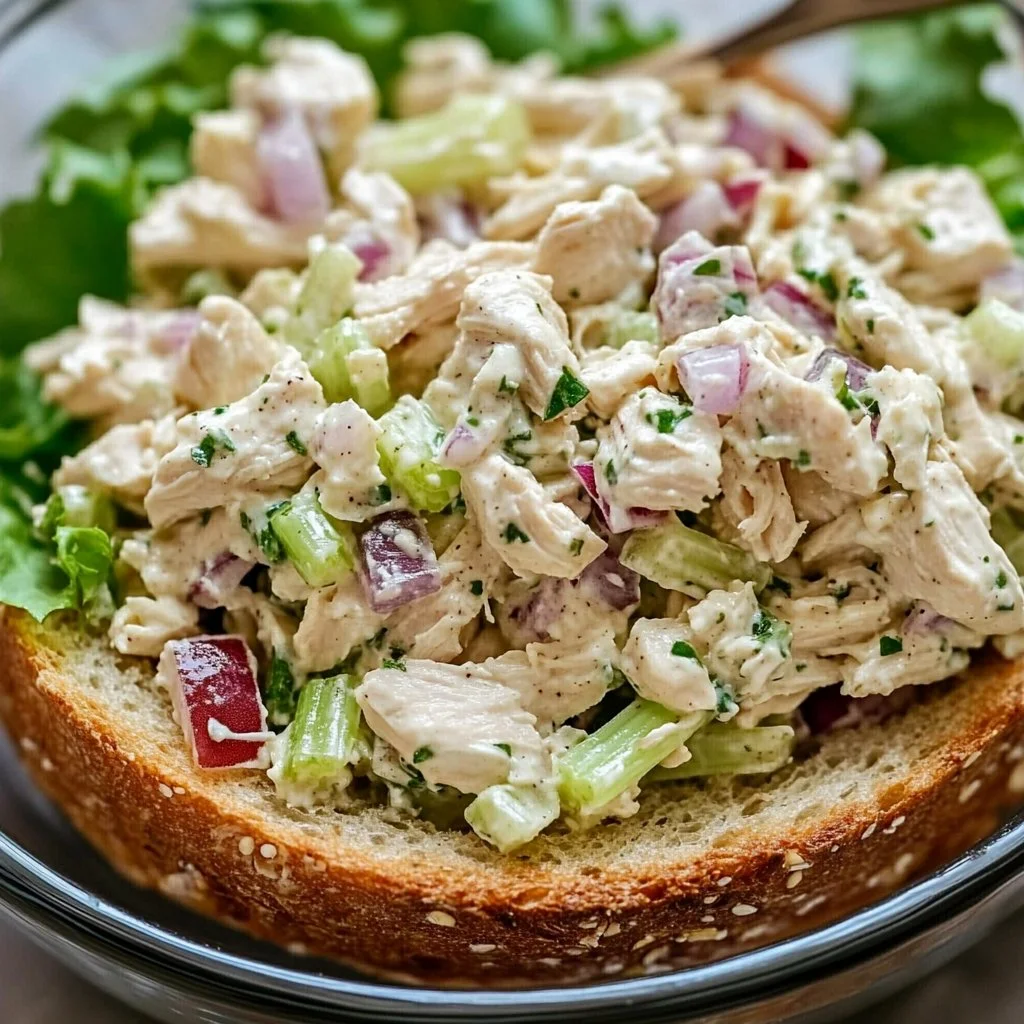
  3. Mix the salad:
    In a medium bowl, combine the sliced grapes, diced chicken, celery, pecans, and red onion.

    Encouragement Note: Feel free to adjust the veggie amounts according to your family’s likes.

  4. Make the dressing:
    In another bowl, stir together Greek yogurt, mayonnaise, Dijon mustard, lemon juice, and lemon zest. Season with salt and pepper to taste.

    Encouragement Note: The dressing can be adjusted to be creamier or tangier based on your preferences.

  5. Combine everything:
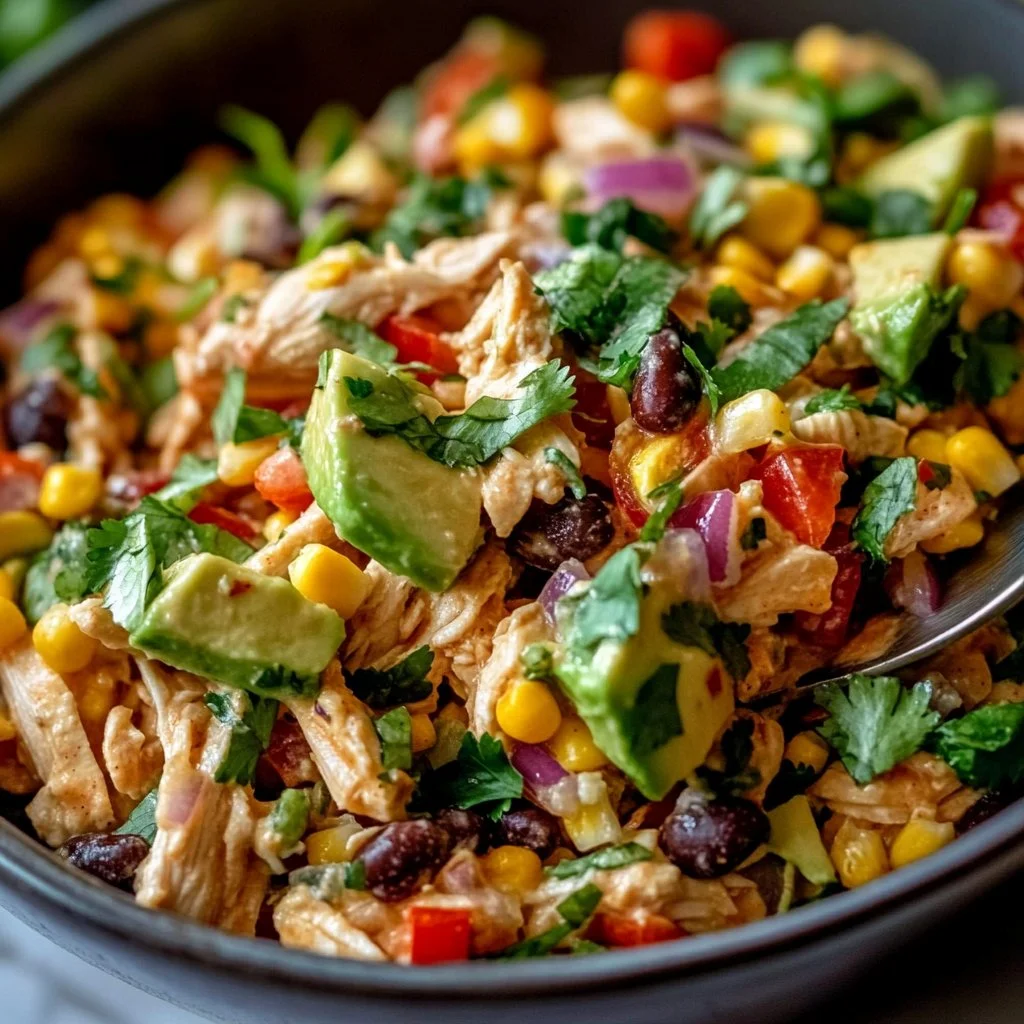
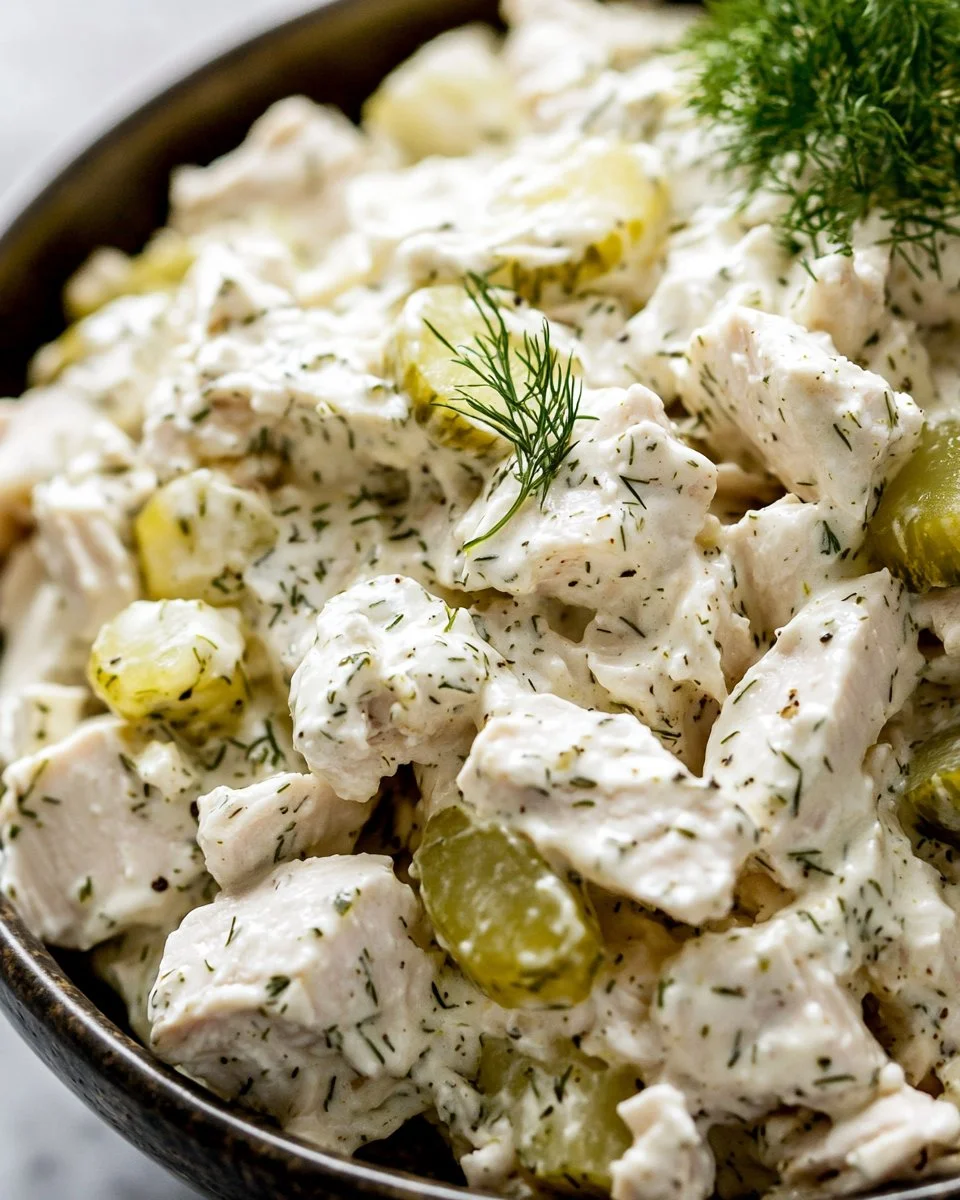
    Pour the dressing over the chicken mixture and toss everything together until well combined into a creamy, chunky chicken salad.

    Encouragement Note: Toss gently to keep that wonderful texture intact.

  6. Serve or chill:
    You can serve the salad immediately or store it for a few hours to let the flavors meld together before serving.

    Encouragement Note: This salad tastes even better after sitting a while in the fridge.

Serving

The BEST Healthy Chicken Salad

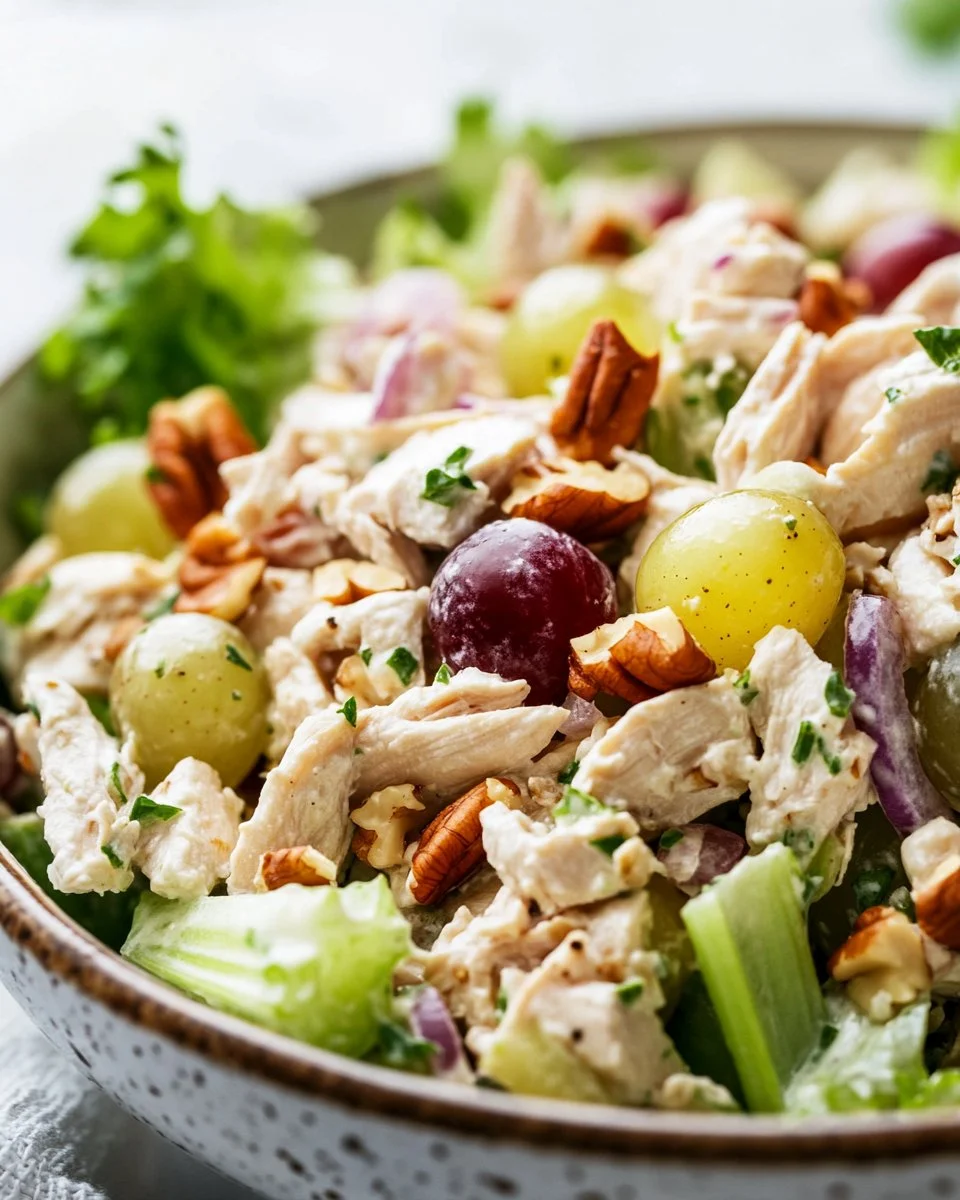
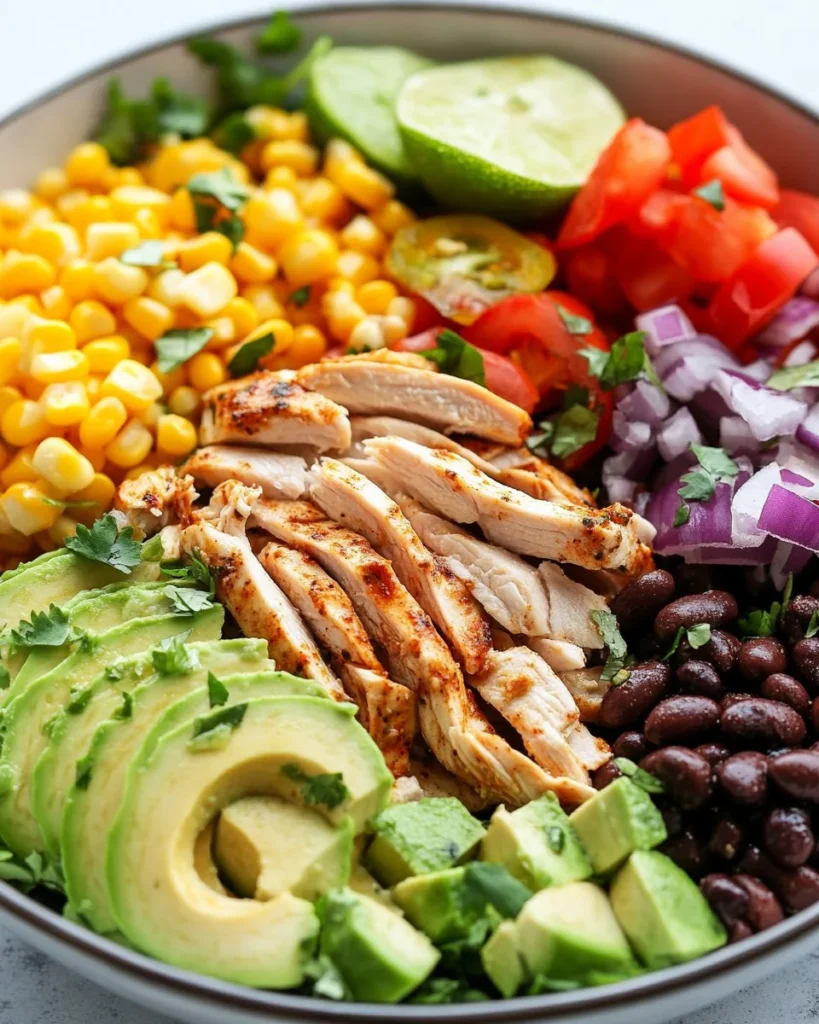
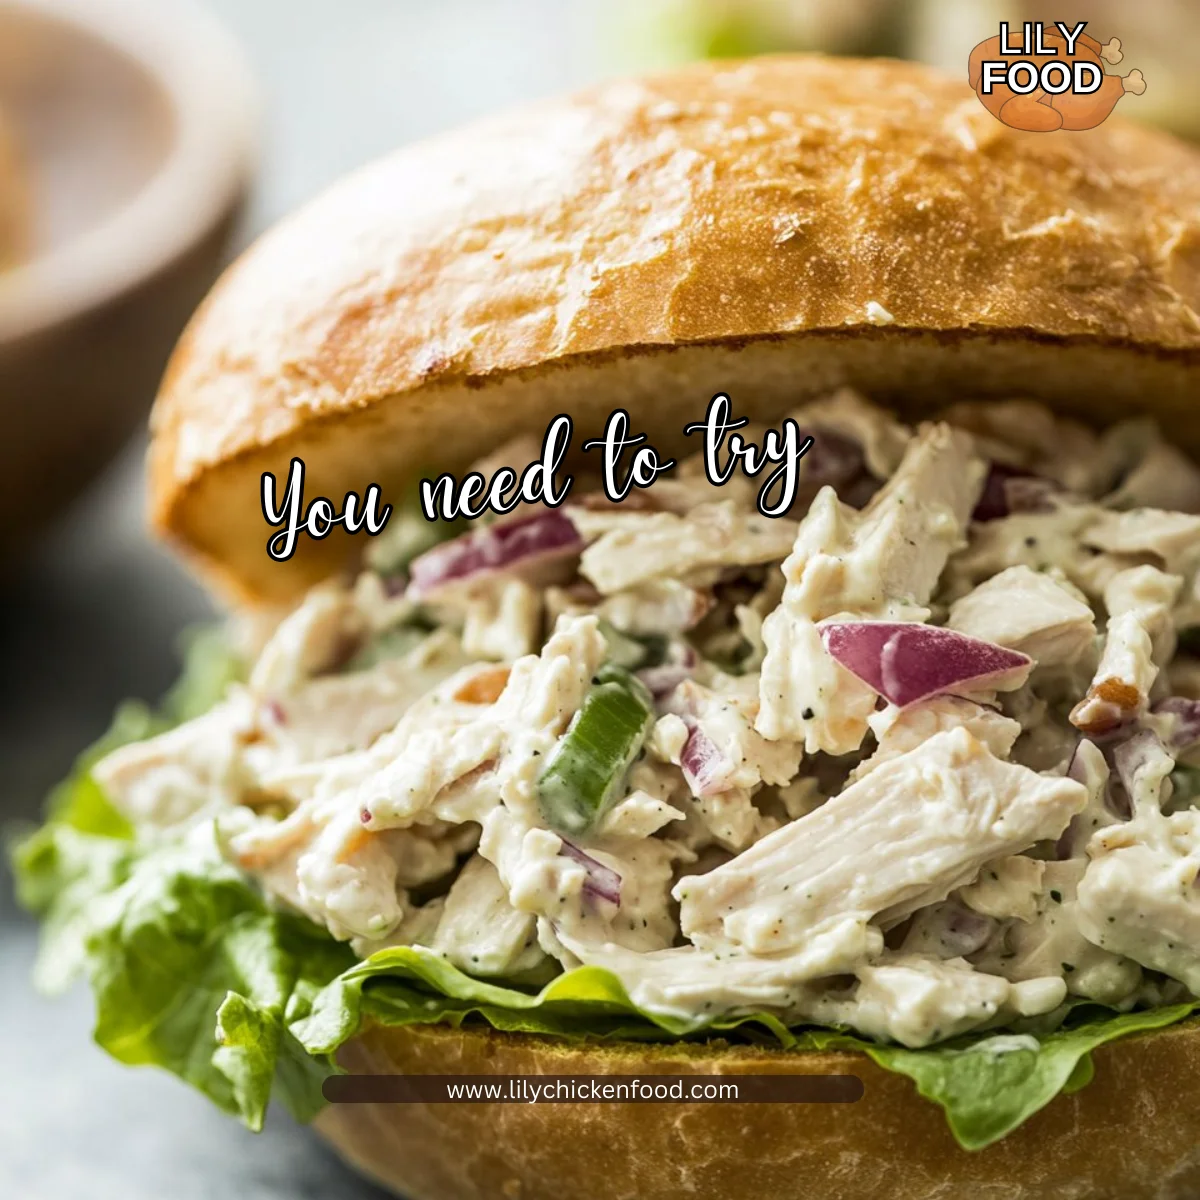
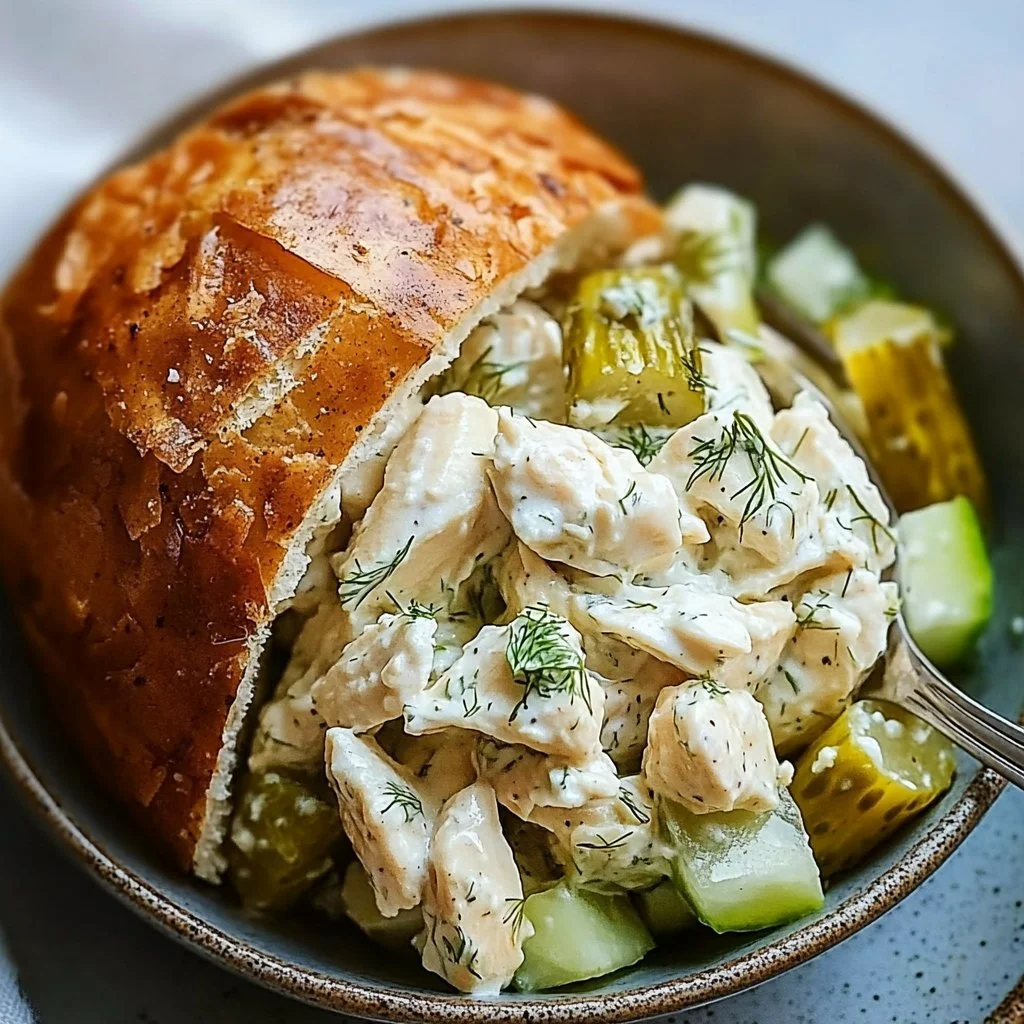
To serve this chicken salad family-style, place it in a large bowl in the center of the table. It goes perfectly alongside crusty bread or a green salad. Encourage everyone to take their portions and mix it up with additional toppings like extra pecans or even crumbled feta cheese. It’s a dish that brings everyone to the table, inviting conversation and connection.

Storage

This chicken salad stores well in the refrigerator for up to three days. Just keep it in an airtight container. If the salad thickens too much after a day in the fridge, you can stir in a little more Greek yogurt or mayo to loosen it.

When it comes to reheating, this dish is best enjoyed cold. So, make sure to set it out for a few minutes before serving if it’s been refrigerated overnight.

Kitchen Notes

  • Make Ahead: Prepare the chicken salad a day in advance to save time.
  • Prep for Kids: Involve your kids in measuring and mixing.
  • Quick Protein: Use canned chicken for a super-fast version.
  • Substitutes: Swap Greek yogurt for avocado for a dairy-free version.
  • On-the-Go: Pack this salad in jars for an easy grab-and-go lunch.

Variations

Picky eaters or those following different diets are covered! Here are some personalization ideas:

  • Vegetarian: Substitute chicken with chickpeas or diced tofu for added protein.
  • Low Carb: Serve on lettuce wraps instead of bread or tortillas.
  • Add Fruits: Toss in apples or pineapple if your family enjoys sweeter dishes.
  • Nut-Free: Omit the pecans and consider adding sunflower seeds for crunch.
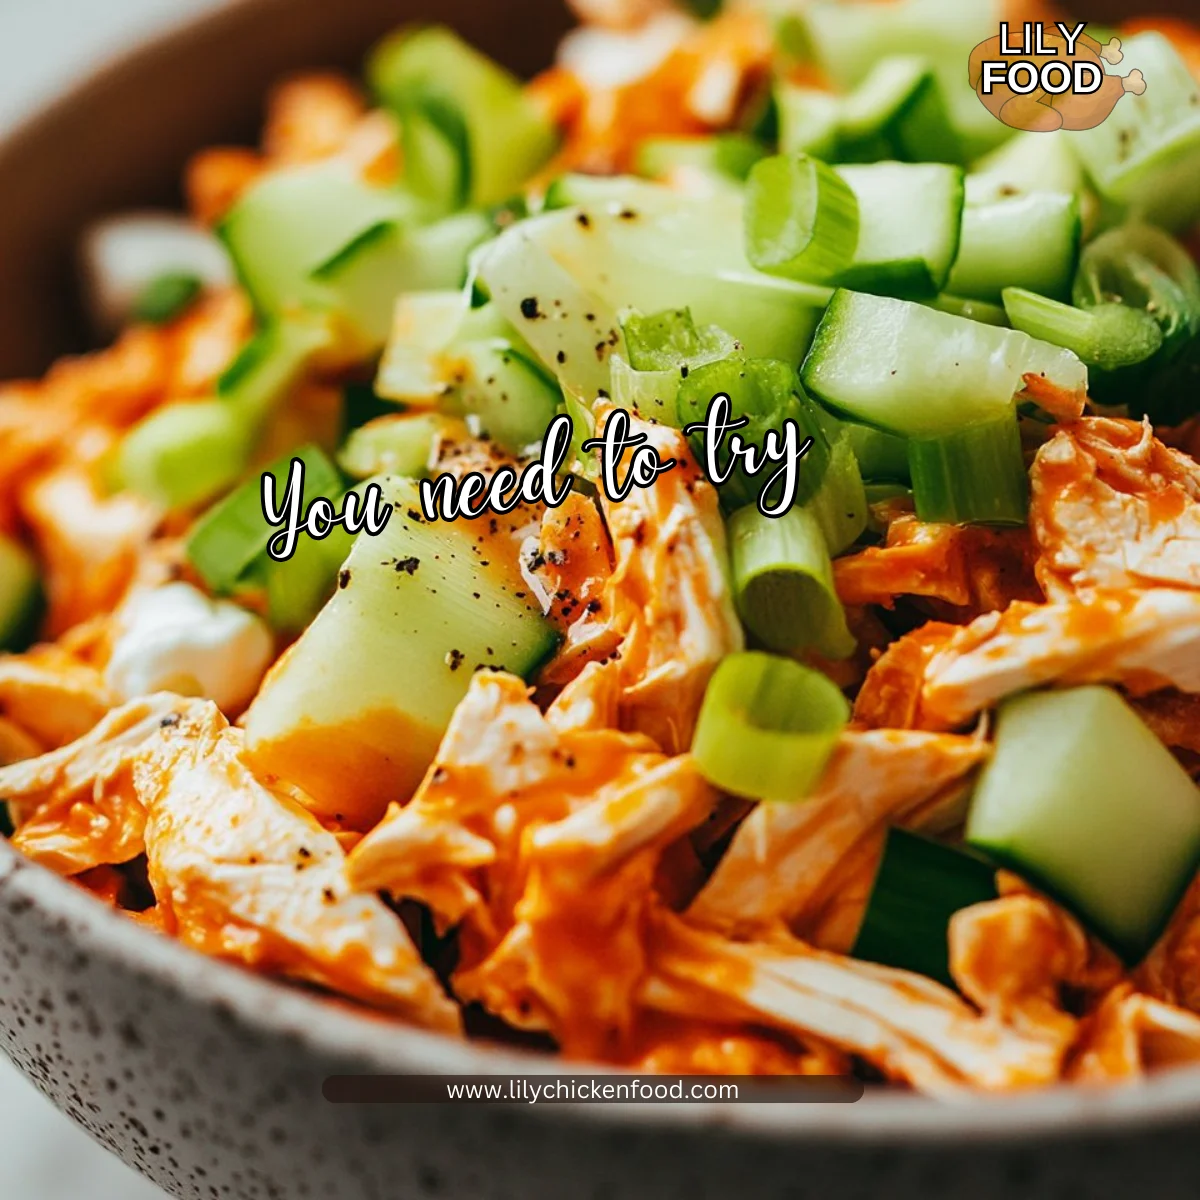
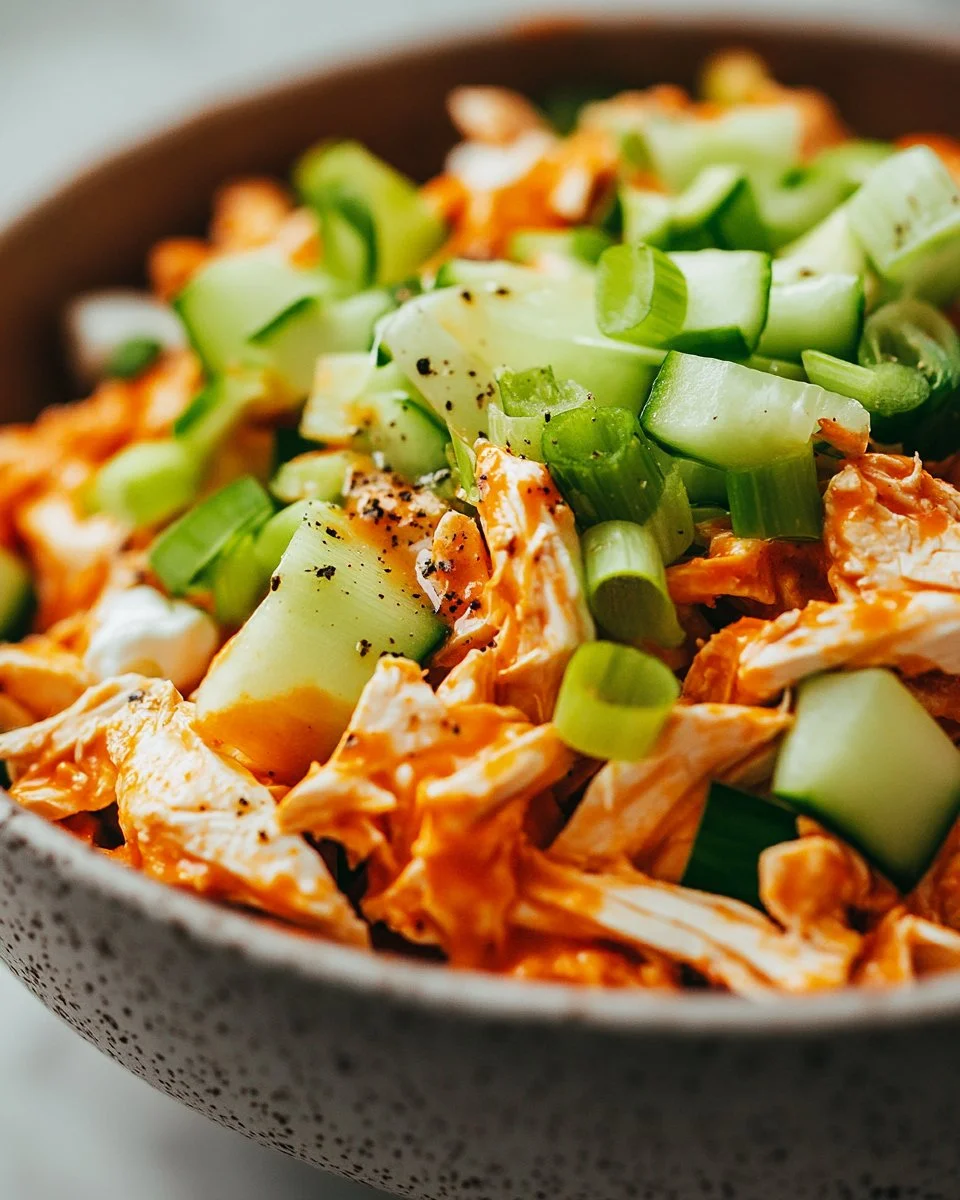
  • Spicy Kick: Add sriracha or diced jalapeños for a bit of heat.

FAQ

  1. Can I use frozen chicken?
    Yes, just make sure to cook it thoroughly and allow it to cool before adding it to the salad.

  2. Is this salad gluten-free?
    Yes, all the ingredients are naturally gluten-free. Just ensure your mayonnaise is gluten-free.

  3. Can I use other types of nuts?
    Absolutely! Walnuts or almonds work beautifully as substitutes.

  4. How do I make this dairy-free?
    You can swap the Greek yogurt and mayo for vegan alternatives or avocado.

  5. How long does this chicken salad last in the fridge?
    It will stay fresh in the fridge for up to three days in an airtight container.

As we wrap up this recipe, remember that cooking is always about family, love, and spending quality time together. This Healthy Chicken Salad is more than just a dish; it’s a chance to gather around the table. Enjoy every bite, knowing that you have created something healthy and delicious for yourself and your loved ones. Happy cooking!

Healthy Chicken Salad

Prep Time 15 minutes
Total Time 15 minutes
Servings 4 servings
Calories 300
A deliciously healthy chicken salad, perfect for family lunches or dinners, combining flavors and textures with a creamy dressing.

Ingredients

Main Ingredients

  • 2.5 cups cooked, diced or shredded chicken (Use leftover rotisserie chicken for added flavor.)
  • 3 stalks celery – about 1/2 cup diced (Crisp celery adds a nice crunch.)
  • 1 cup sliced grapes (Sweet, seedless grapes are best.)
  • 1/3 cup chopped pecans (For an even deeper flavor, toast the pecans lightly.)
  • 1/3 cup chopped red onion
  • 1/2 cup plain Greek yogurt (Provides creamy richness without extra calories.)
  • 1/4 cup mayo
  • 1 tablespoon Dijon mustard (Adds a slight sharpness.)
  • 1 teaspoon lemon juice
  • 1-2 teaspoons fresh lemon zest
  • Salt and pepper – to taste

Instructions 

Preparation

  • Start by adding grapes to a water-filled bowl with 1 teaspoon of baking soda stirred in. Let them sit for about 5 minutes.
  • After soaking, rinse the grapes and dry them thoroughly. Then slice them in half.
  • In a medium bowl, combine the sliced grapes, diced chicken, celery, pecans, and red onion.
  • In another bowl, stir together Greek yogurt, mayonnaise, Dijon mustard, lemon juice, and lemon zest. Season with salt and pepper to taste.
  • Pour the dressing over the chicken mixture and toss everything together until well combined.
  • You can serve the salad immediately or store it for a few hours to let the flavors meld together before serving.

Notes

This chicken salad stores well in the refrigerator for up to three days. Best enjoyed cold.
Calories: 300kcal
Course: Dinner, Lunch, Salad
Cuisine: American
Keyword: Chicken Salad, Easy Meal, Family Favorite, Healthy Recipes, Quick Prep

Chipotle Lime Chicken Salad

The kitchen buzzes with activity. You hear the sizzle of chicken in the pan, and the scent of lime and spices dances in the air. It’s the sound of a family meal being prepared with love. This Chipotle Lime Chicken Salad is more than just a dish; it’s a joyful experience that brings everyone together at the table. With vibrant colors and a spicy kick, it connects flavors and family in a simple, wholesome way.

Why This Works

Chipotle Lime Chicken Salad

This Chipotle Lime Chicken Salad is a winner for many reasons. First, it’s quick to prepare, making it perfect for busy family nights. You can whip up this salad in under 30 minutes, giving you more time to enjoy dinner with loved ones.

The combination of shredded chicken, black beans, and fresh veggies means you’re packing all the nutrients into one dish. It’s deliciously filling while also being light and refreshing. Plus, feel free to get the kids involved! It’s a great way to introduce them to cooking and have fun in the kitchen.

Process Overview

“This is where the magic happens—when the aroma fills the kitchen.”

As you gather the ingredients and start mixing, you’ll find that this salad is not only simple but also satisfying. Let’s break it down into easy steps to make the process even smoother.

Ingredients

Here’s what you will need for this amazing salad:

  • 2 cups cooked chicken, shredded: Use rotisserie chicken for a time saver. It adds a flavorful touch.
  • 1 can black beans, drained and rinsed: A great source of protein and fiber. Rinse well to reduce sodium.
  • 1 cup corn, cooked: Frozen corn works just fine. Just cook it until warm.
  • 1 red bell pepper, diced: Adds color and a crunchy texture. Don’t skip this; it brightens up the dish.
  • 1/2 cup red onion, diced: A mild onion adds depth. You can soak diced onion in cold water for a milder flavor.
  • 1 avocado, diced: For creaminess. Choose a ripe avocado for the best texture and flavor.
  • 1/4 cup fresh cilantro, chopped: Adds freshness. If cilantro is not your thing, try parsley instead.
  • Juice of 2 limes: This gives it that zesty kick. Freshly squeezed is best for flavor.
  • 2 tablespoons chipotle sauce: Adds a smoky heat. Adjust to your spice preference.
  • Salt and pepper to taste: Essential seasonings. Always taste as you go.

Directions

  1. In a large mixing bowl, combine the shredded chicken, black beans, corn, red bell pepper, red onion, and avocado. This colorful mix is sure to delight everyone.

  2. In a small bowl, whisk together the lime juice, chipotle sauce, salt, and pepper. Feel free to adjust the chipotle sauce based on your spice tolerance.

  3. Pour the dressing over the salad and gently toss to combine. Be gentle with the avocado to keep it intact.

  4. Stir in the chopped cilantro. This is where the salad starts to really come alive with flavor.

  5. Serve immediately or refrigerate for later. It tastes fresh but can also be enjoyed the next day!

Serving

Chipotle Lime Chicken Salad

Serving this salad family-style is a great way to create a warm atmosphere around the table. Use a big beautiful bowl to showcase the vibrant colors. You can even offer additional lime wedges on the side for those who love an extra zing. Consider pairing it with some warm tortillas or corn chips for a delightful crunch.

Storage

To keep the salad fresh, store it in an airtight container in the refrigerator. It will be good for about 2-3 days. Keep in mind that avocado tends to brown, so if you plan to store leftovers, consider adding the avocado just before serving. For reheating, if you want to warm the chicken salad, do it gently in the microwave or enjoy it cold.

Kitchen Notes

  • Use leftover grilled chicken for added depth of flavor.
  • For quicker prep, use pre-cooked frozen corn.
  • Substitute lime juice with lemon juice if needed.
  • Dice veggies ahead of time for a quicker assembly.
  • Blend the dressing in advance and store it in the fridge.

Variations

Not everyone has the same taste preferences. Here are some variations that can tailor the salad to everyone’s liking:

  • For Picky Eaters: Leave out the onions or cilantro. You can also add some shredded cheese for extra flavor.
  • For Vegans: Swap chicken with chickpeas or tempeh for a plant-based protein.
  • For Gluten-Free: This salad is naturally gluten-free. Just double-check that your chipotle sauce is gluten-free.
  • For Extra Crunch: Add some nuts or seeds like sunflower seeds or sliced almonds.

FAQ

1. Can I use raw chicken?
Yes, you can grill or sauté raw chicken. Just ensure it reaches an internal temperature of 165°F.

2. How long will the salad stay fresh?
It is best enjoyed within 2-3 days if stored properly in the fridge.

3. Can I make this salad ahead of time?
Yes, just wait to add avocado until you are ready to serve to prevent browning.

4. What can I serve with this salad?
Tortilla chips, warm tortillas, or a side of rice complement the salad well.

5. How can I make it spicier?
Add more chipotle sauce or diced jalapeños for an extra kick.

In conclusion, the Chipotle Lime Chicken Salad is not just a meal; it’s a celebration of flavors and family time in the kitchen. It’s easy to make, tastes fantastic, and invites everyone to gather around the table. So, grab those ingredients, get cooking, and enjoy this delicious salad with your loved ones. Whether you whip it up on a busy weeknight or serve it at a gathering, it’s sure to be a hit. Happy cooking!

Chipotle Lime Chicken Salad

Prep Time 15 minutes
Cook Time 15 minutes
Total Time 30 minutes
Servings 4 servings
Calories 400
A vibrant and refreshing salad featuring shredded chicken, black beans, fresh veggies, and a zesty chipotle-lime dressing, perfect for family dinners.

Ingredients

Main Ingredients

  • 2 cups cooked chicken, shredded (Use rotisserie chicken for a time saver.)
  • 1 can black beans, drained and rinsed (A great source of protein and fiber.)
  • 1 cup corn, cooked (Frozen corn works just fine.)
  • 1 piece red bell pepper, diced (Adds color and a crunchy texture.)
  • 1/2 cup red onion, diced (Soak in cold water for a milder flavor.)
  • 1 piece avocado, diced (Choose a ripe avocado for the best texture.)
  • 1/4 cup fresh cilantro, chopped (If cilantro is not preferred, try parsley.)
  • 2 tablespoons chipotle sauce (Adjust based on your spice preference.)
  • 2 pieces limes, juiced (Freshly squeezed is best for flavor.)
  • to taste salt and pepper (Essential seasonings.)

Instructions 

Preparation

  • In a large mixing bowl, combine the shredded chicken, black beans, corn, red bell pepper, red onion, and avocado.
  • In a small bowl, whisk together the lime juice, chipotle sauce, salt, and pepper.
  • Pour the dressing over the salad and gently toss to combine, being careful with the avocado.
  • Stir in the chopped cilantro.
  • Serve immediately or refrigerate for later.

Notes

To keep the salad fresh, store it in an airtight container for up to 2-3 days. Add avocado just before serving to prevent browning.
Calories: 400kcal
Course: Main Course, Salad
Cuisine: American, Mexican
Keyword: Chicken Salad, Chipotle, Healthy Recipe, Lime, Quick Meal

Delicious Buffalo Chicken Salad

The smell of buffalo sauce wafts through the air as you step into the kitchen. You hear the comforting sound of chopping vegetables and sizzling chicken, setting the stage for a family dinner. That’s right, it’s time to make a delicious Buffalo Chicken Salad that will not only tantalize your taste buds but also bring everyone to the table. This recipe is simple, flavorful, and perfect for busy nights when you want a meal that’s both nutritious and satisfying.

Why This Works

Delicious Buffalo Chicken Salad

This Buffalo Chicken Salad is a family favorite for many reasons. First, it uses rotisserie chicken, saving you precious time on busy days. You don’t have to worry about cooking the chicken from scratch, which means you can have dinner ready in minutes.

Second, the combination of savory buffalo sauce and creamy Greek yogurt makes this salad a delightful treat. The crunch of fresh celery adds texture, while the flavor is a guaranteed crowd-pleaser. With just a few simple ingredients, this dish is sure to become a weekly staple at your family table.

Process Overview

“This is where the magic happens—when the aroma fills the kitchen.”

Creating this Buffalo Chicken Salad is a breeze. You will mix all the ingredients in one bowl and serve it instantly for a refreshing meal. It’s as easy as chopping, mixing, and enjoying. The whole family can help, making it a fun and engaging activity.

Ingredients

Here’s what you’ll need for this delicious recipe:

  • 2 cups rotisserie chicken, shredded: Look for a well-seasoned chicken for extra flavor.
  • 1/2 cup celery, chopped: This adds a nice crunch to your salad.
  • 1/2 cup Greek yogurt: A healthier alternative to mayonnaise, it keeps the salad creamy.
  • 1/4 cup buffalo sauce: Adjust according to your spice preference.
  • Salt and pepper to taste: This will enhance the flavors.
  • Optional: Green onions for garnish: A great way to add a bit of color and additional flavor.

Lily’s Tips

  • For easy shredding, use two forks to pull apart the chicken.
  • Choose a buffalo sauce that suits your family’s heat tolerance.
  • Greek yogurt can be substituted with sour cream, but the flavor will be richer with Greek yogurt.

Directions

  1. In a large bowl, combine the shredded rotisserie chicken, chopped celery, Greek yogurt, and buffalo sauce.
    Note: Use a spatula to fold gently, making sure everything is coated evenly.

  2. Mix until well combined.
    Encouragement: This step is simple, and it smells wonderful already.

  3. Season with salt and pepper to taste.
    Tip: Taste as you go to get your preferred flavor balance.

  4. Serve immediately or store in the refrigerator for meal prep.
    Pro tip: This salad tastes even better after sitting for a few hours, as the flavors meld together!

Serving

Delicious Buffalo Chicken Salad

To serve your Buffalo Chicken Salad family-style, transfer it to a large bowl and place it in the center of the table. Pair it with an assortment of greens like mixed greens or romaine. Let family members scoop their servings into lettuce wraps or onto their plates. This way, everyone can customize their meal.

Storage

Keep any leftovers in an airtight container in the refrigerator for up to three days. If you feel like portioning ahead, scoop single servings into containers for grab-and-go lunches. When you’re ready to eat, simply take it out and enjoy.

Be sure to reheat any chicken you might plan to include, but remember that the salad portion is best enjoyed chilled.

Kitchen Notes

  • Use pre-chopped veggies to save time.
  • For additional flavor, add garlic powder or onion powder to the mix.
  • Swap Greek yogurt for a plant-based yogurt if you are dairy-free.
  • Make a double batch for leftover lunches.
  • Use any leftover salad on a sandwich or wrap for a new meal idea.

Variations

For families with picky eaters or specific dietary needs, here are some customization options:

  • Picky Eaters: If someone in your family is not a fan of buffalo sauce, leave it out and use a mild dressing like ranch or vinaigrette.
  • Gluten-Free: This salad is naturally gluten-free! Just ensure any sauces you use are certified gluten-free.
  • Low-Carb: Serve it on a bed of spinach or with sliced cucumbers instead of bread to keep it low-carb.
  • Vegetarian: Substitute the chicken with chickpeas or shredded carrots for a veggie version.
  • Spicy Lovers: Add jalapeños or a sprinkle of cayenne pepper for an extra kick.

FAQ

1. Can I use frozen chicken?
Yes, but you must cook it first. A rotisserie chicken is much easier and quicker.

2. How long does this salad last in the fridge?
It stays fresh for about three days when stored in an airtight container.

3. Can I make this salad ahead of time?
Absolutely! It’s perfect for meal prep. Just mix everything a few hours beforehand and refrigerate.

4. Can I freeze this salad?
It is not recommended to freeze, as the texture of the ingredients will change.

5. What can I serve with this salad?
Serve it with fresh bread, crackers, or enjoy it with a side of fresh fruit.

In conclusion, this Buffalo Chicken Salad is not just a meal; it’s a heartwarming way to gather your family around the table. When the aroma fills your kitchen, you know you’re about to create lasting memories. Enjoy making it together, and savor every delightful bite. Happy cooking!

Buffalo Chicken Salad

Prep Time 10 minutes
Total Time 10 minutes
Servings 4 servings
Calories 320
A delicious and simple Buffalo Chicken Salad made with shredded rotisserie chicken, celery, Greek yogurt, and buffalo sauce. Perfect for busy nights and family gatherings.

Ingredients

Main ingredients

  • 2 cups rotisserie chicken, shredded (Look for a well-seasoned chicken for extra flavor.)
  • 1/2 cup celery, chopped (This adds a nice crunch to your salad.)
  • 1/2 cup Greek yogurt (A healthier alternative to mayonnaise, it keeps the salad creamy.)
  • 1/4 cup buffalo sauce (Adjust according to your spice preference.)
  • to taste Salt and pepper (This will enhance the flavors.)
  • optional Green onions for garnish (A great way to add a bit of color and additional flavor.)

Instructions 

Preparation

  • In a large bowl, combine the shredded rotisserie chicken, chopped celery, Greek yogurt, and buffalo sauce.
  • Use a spatula to fold gently, making sure everything is coated evenly.
  • Mix until well combined.
  • Season with salt and pepper to taste.
  • Serve immediately or store in the refrigerator for meal prep.

Notes

For easy shredding, use two forks to pull apart the chicken. Greek yogurt can be substituted with sour cream for a richer flavor. This salad tastes even better after sitting for a few hours, as the flavors meld together.
Calories: 320kcal
Course: Main Course, Salad
Cuisine: American
Keyword: Buffalo Chicken Salad, Chicken Salad, Family Recipe, Healthy Dinner, Quick Meals

Chicken Salad Sandwich

There’s something comforting about stepping into a kitchen where a chicken salad sandwich is being prepared. The smell of tender chicken mingling with the tangy mayo and the crunch of fresh vegetables creates a cozy atmosphere that feels like home. With each chop, you can hear the sound of the knife hitting the cutting board, accompanied by the gentle whirl of a mixer or the soft thud of a bowl being stirred. It’s more than just food; it’s family, warmth, and memories waiting to be made.

Why This Works
Chicken Salad Sandwich

This chicken salad sandwich recipe is a true lifesaver for busy families. It’s quick to throw together, making it perfect for lunch or dinner on a hectic day. You can use leftover chicken, so it saves time and reduces waste.

Not only is it delicious, but it also allows everyone to customize their sandwich to their liking. Whether it’s on a slice of bread or served in a crisp lettuce wrap, each family member can create their perfect meal. Plus, it works well for picnics, gatherings, or simple lunches at home.

Process Overview

“This is where the magic happens—when the aroma fills the kitchen.”

In just a few simple steps, you can create a creamy, savory chicken salad that makes a satisfying sandwich. Gather your ingredients, mix them up, and soon you’ll have a delightful meal ready to enjoy. Whether you choose to serve it chilled or at room temperature, it’s a recipe that never disappoints.

Ingredients

Gather these easy-to-find ingredients:

  • 2 cups cooked chicken, shredded

    • Use rotisserie chicken for an easy shortcut.
  • 1/2 cup mayonnaise

    • You can use Greek yogurt for a healthier option.
  • 1/4 cup chopped celery

    • Fresh celery adds a nice crunch, but you can leave it out if your family doesn’t like it.
  • 1/4 cup chopped red onion

    • Red onion lends a bit of sweetness; substitute with green onions if desired.
  • 1 tablespoon Dijon mustard

    • This adds a delightful tang; yellow mustard works if that’s what you have.
  • Salt and pepper to taste

    • Always adjust to your family’s preference; taste as you go!
  • Bread or lettuce leaves for serving

    • Whole grain bread or large lettuce leaves make for great options.

Directions

  1. In a large bowl, combine the shredded chicken, mayonnaise, celery, red onion, and Dijon mustard.

    • Mix it well to ensure the flavors meld together.
  2. Sprinkle in salt and pepper according to your taste.

    • Don’t be shy! Taste as you go to find your perfect balance.
  3. Serve the chicken salad on your choice of bread or wrapped in lettuce leaves.

    • Don’t forget to share with your family or friends!

Each step is simple, and the process is forgiving. You can adjust flavors as you go, making it perfect for anyone in your family.

Serving
Chicken Salad Sandwich

To serve chicken salad sandwiches family-style, scoop generous portions into a large serving bowl. Provide an array of bread options, such as sliced whole grain, baguette, or even croissants. Lay out lettuce leaves for a refreshing wrap alternative. Place some chips or a fresh salad on the side for a complete meal.

Gathering around a table filled with options invites everyone to create their own combination, making it not just a meal but a fun experience.

Storage

Store any leftover chicken salad in an airtight container in the fridge for up to three days. If you’ve prepared a larger batch, consider dividing it into smaller portions for easy meals throughout the week.

To reheat, avoid the microwave as it can make the chicken salad watery. Instead, let it sit at room temperature for about 30 minutes before serving again, making sure it retains its creamy texture.

Kitchen Notes

Here are a few shortcuts to simplify your chicken salad preparation:

  • Use Leftover Chicken: Rotisserie chicken or leftover grilled chicken saves time.
  • Meal Prep: Chop vegetables ahead of time and store them in the fridge.
  • Mix and Match: Experiment with different herbs or spices for unique flavors.
  • Single Serving: Create individual portions in mason jars for easy grab-and-go lunches.
  • Freeze for Later: If you have extra chicken salad, consider freezing it for a quick meal later.

Variations

If you have picky eaters in your family or different dietary needs, here are some tweaks to consider:

  • For Lighter Options: Substitute half of the mayo with plain Greek yogurt.
  • Add Fruits: For a hint of sweetness, add halved grapes, diced apples, or dried cranberries.
  • Use Different Veggies: Carrots or bell peppers provide crunch and color.
  • Make it Spicy: Add diced jalapeños for a kick.
  • Dairy-Free: Substitute mayonnaise with avocado or make a tahini-based spread.

FAQ

1. Can I use canned chicken?
Yes, canned chicken works in a pinch. Just drain well and shred.

2. Is this recipe gluten-free?
Yes, if served in lettuce wraps or with gluten-free bread.

3. How can I make it ahead of time?
You can prepare the salad a day in advance and store it in the fridge.

4. How do I know if the chicken is cooked properly?
Ensure the internal temperature reaches 165°F when cooked.

5. What can I serve it with?
Chicken salad sandwiches pair wonderfully with fresh salads, chips, or fruits.

Conclusion

A chicken salad sandwich is more than just a meal; it’s a gathering spot for family and friends to enjoy delicious food together. Remember, the kitchen is where memories are made, laughter is shared, and love is served. Enjoy creating this comforting dish, and let it bring your family closer together around the dinner table. Happy cooking!

Chicken Salad Sandwich

Prep Time 15 minutes
Total Time 15 minutes
Servings 4 servings
Calories 350
A comforting and customizable chicken salad sandwich perfect for busy families and gatherings.

Ingredients

Main Ingredients

  • 2 cups cooked chicken, shredded (Use rotisserie chicken for an easy shortcut.)
  • 1/2 cup mayonnaise (You can use Greek yogurt for a healthier option.)
  • 1/4 cup chopped celery (Fresh celery adds a nice crunch, optional if family dislikes.)
  • 1/4 cup chopped red onion (Red onion lends sweetness; substitute with green onions if desired.)
  • 1 tablespoon Dijon mustard (Adds a delightful tang; yellow mustard works too.)
  • to taste Salt and pepper (Adjust to family’s preference; taste as you go.)
  • as needed Bread or lettuce leaves for serving (Whole grain bread or large lettuce leaves work great.)

Instructions 

Preparation

  • In a large bowl, combine the shredded chicken, mayonnaise, celery, red onion, and Dijon mustard.
  • Mix it well to ensure the flavors meld together.
  • Sprinkle in salt and pepper according to your taste.
  • Serve the chicken salad on your choice of bread or wrapped in lettuce leaves.

Notes

Store leftovers in an airtight container in the fridge for up to three days. Avoid microwaving to prevent a watery texture; let sit at room temperature to serve again.
Calories: 350kcal
Course: Dinner, Lunch
Cuisine: American
Keyword: Chicken Salad, Easy Meal, Family Recipe, Leftover Chicken, Sandwich

Flavored Dill Pickle Chicken Salad

The comforting aroma of Dill Pickle Chicken Salad fills the air, enticing your senses. You hear the crunch of diced pickles blending with the soft sounds of shredded chicken and creamy dressing coming together in a bowl. This delightful dish is easy to create and perfect for busy family days. With one bite, you’ll experience a burst of flavor that will remind you of summer picnics and cozy family dinners.

Why This Works

Flavored Dill Pickle Chicken Salad

This Flavored Dill Pickle Chicken Salad is a truly versatile dish. It allows you to bring the family together around the table while saving precious time in the kitchen. The creamy and tangy notes from the pickles and dressing create a delightful contrast to the tender chicken.

Moreover, the simplicity of this salad means you can whip it up in under 30 minutes. Whether it’s a busy weekday lunch or a potluck gathering, this recipe never disappoints. It’s a tasty way to enjoy chicken while packing in delicious flavors with minimal effort.

Process Overview

“This is where the magic happens—when the aroma fills the kitchen.”

As you gather your ingredients and start mixing, you’ll witness the transformation of simple components into a dish your whole family will love. It’s all about blending those flavors just right.

Here’s a snapshot of what to expect: from shredding the chicken to combining everything in one bowl. You will find that the process is straightforward and immensely satisfying. Get ready for a flavorful experience that is just as heartwarming as the memories you’ll create while sharing this meal.

Ingredients

To make your Flavored Dill Pickle Chicken Salad, you will need the following ingredients:

  • 2 cups cooked chicken, shredded: Use leftover rotisserie chicken for convenience.
  • 1 cup dill pickles, diced: Choose crunchy pickles for that satisfying bite.
  • 1/2 cup mayonnaise: This adds creaminess. You can opt for light mayonnaise if you prefer.
  • 1/4 cup Greek yogurt: This balances the mayo and adds a healthy twist.
  • 1 tablespoon Dijon mustard: For a mild tang. Feel free to add more for extra zest.
  • 1 tablespoon fresh dill, chopped: Fresh herbs always elevate any dish.
  • Salt and pepper to taste: Season to your family’s preference.
  • 1/4 cup chopped celery (optional): This gives a wonderful crunch to the salad.
  • 1/4 cup chopped red onion (optional): A little bite from the onion makes it more flavorful.

Directions

  1. In a large bowl, combine the shredded chicken, diced dill pickles, mayonnaise, Greek yogurt, and Dijon mustard. Mix well.
    This is the foundation of your salad, so ensure it’s well combined for the best flavor.
  2. Add the chopped fresh dill, salt, and pepper, and stir to combine.
    Always taste as you go, adjusting the seasonings to fit your family’s liking.
  3. If desired, fold in chopped celery and red onion for added crunch.
    Adding these extras gives a delightful texture and enhances the overall taste.
  4. Serve immediately or refrigerate for 30 minutes to allow flavors to meld.
    Chilling will enhance the flavors even more—if you can wait!
  5. Enjoy on its own or as a sandwich filling.
    This salad is perfect for a quick meal or as part of a larger spread.

Serving

Flavored Dill Pickle Chicken Salad

To serve Flavored Dill Pickle Chicken Salad family-style, simply transfer it to a large platter or bowl. You can offer a variety of sides, such as sliced tomatoes, whole wheat crackers, or pitas, to complement the salad. This way, each family member can enjoy it their favorite way. Watching everyone dig in will surely bring a smile to your face.

Storage

Store any leftovers in an airtight container in the refrigerator. It will stay fresh for about 3 to 5 days. If you want to enjoy it later, simply give it a good stir before serving. If the salad thickens, you can mix in a little more mayonnaise or Greek yogurt to bring back its creaminess.

Kitchen Notes

  • Pre-cooked Chicken: Use rotisserie chicken or canned chicken to save time.
  • Batch Cooking: Make a larger batch and enjoy it throughout the week for quick lunches.
  • Chill Before Serving: For optimal flavor, let the salad sit in the fridge for at least 30 minutes before serving.
  • Experiment with Add-Ins: Feel free to add nuts like walnuts or almonds for extra texture.
  • Make-Ahead Friendly: This salad allows you to prepare it a day ahead to save time on busy days.

Variations

If you have picky eaters or specific dietary preferences, consider these tweaks:

  • For Keto: Use full-fat Greek yogurt and cut out the yogurt for more room for mayonnaise.
  • For Gluten-Free: This recipe is naturally gluten-free. Just ensure all packaged ingredients are gluten-free.
  • For Vegan: Substitute chicken with chickpeas and use vegan mayo and yogurt.
  • Extra Crunch: Add chopped bell peppers or diced cucumbers for a veggie boost.
  • Different Proteins: Try this salad with tuna or turkey for a unique spin.

FAQ

1. Can I use frozen chicken for this recipe?
Yes, just ensure it’s fully cooked and shredded before adding it to the salad.

2. How can I make this salad spicier?
Add a dash of hot sauce or a pinch of cayenne pepper to the mix.

3. What can I use instead of Greek yogurt?
You can substitute sour cream or omit it if you prefer a creamier texture with just mayo.

4. Can I make this salad the night before?
Absolutely! It often tastes better when the flavors have time to meld in the fridge overnight.

5. What are some good sides to serve with this salad?
Fresh veggie sticks, tortilla chips, or a light green salad pair wonderfully with it.

As you share this Flavored Dill Pickle Chicken Salad with your family, remember that it’s about creating connection and joy around the table. In our busy lives, taking a moment to enjoy a meal together is a cherished gift. This salad not only brings great flavor but also heartwarming moments into your kitchen. Enjoy each bite, and happy cooking!

Flavored Dill Pickle Chicken Salad

Prep Time 15 minutes
Total Time 15 minutes
Servings 6 servings
Calories 300
A quick and flavorful chicken salad that combines shredded chicken, dill pickles, and creamy dressing, perfect for busy family days.

Ingredients

Main Ingredients

  • 2 cups cooked chicken, shredded (Use leftover rotisserie chicken for convenience.)
  • 1 cup dill pickles, diced (Choose crunchy pickles for that satisfying bite.)
  • 1/2 cup mayonnaise (This adds creaminess. You can opt for light mayonnaise if you prefer.)
  • 1/4 cup Greek yogurt (This balances the mayo and adds a healthy twist.)
  • 1 tablespoon Dijon mustard (For a mild tang. Feel free to add more for extra zest.)
  • 1 tablespoon fresh dill, chopped (Fresh herbs always elevate any dish.)
  • Salt and pepper to taste (Season to your family's preference.)
  • 1/4 cup chopped celery (optional) (This gives a wonderful crunch to the salad.)
  • 1/4 cup chopped red onion (optional) (A little bite from the onion makes it more flavorful.)

Instructions 

Preparation

  • In a large bowl, combine the shredded chicken, diced dill pickles, mayonnaise, Greek yogurt, and Dijon mustard. Mix well.
  • Add the chopped fresh dill, salt, and pepper, and stir to combine.
  • If desired, fold in chopped celery and red onion for added crunch.
  • Serve immediately or refrigerate for 30 minutes to allow flavors to meld.
  • Enjoy on its own or as a sandwich filling.

Notes

For best flavor, let the salad sit in the fridge for at least 30 minutes before serving. Store any leftovers in an airtight container for about 3 to 5 days.
Calories: 300kcal
Course: Lunch, Salad
Cuisine: American
Keyword: Chicken Salad, Dill Pickle Chicken Salad, Easy Salad, Family Recipe, Quick Meal

Classic Chicken Noodle Soup

There’s nothing quite like the comforting aroma of a classic chicken noodle soup simmering away in your kitchen. The sounds of bubbling broth and soft sizzling vegetables fill the air, making it impossible not to feel at home. As you stroll through your cozy space, the warmth envelops you, promising a delicious meal that brings family together. This classic recipe isn’t just a meal; it’s a heartwarming experience that nourishes both body and soul.

Why This Works

Classic Chicken Noodle Soup

This Classic Chicken Noodle Soup recipe works wonders for busy families. Not only does it bring everyone to the table, but it also creates lasting memories around dinner time. The use of a Crockpot makes it incredibly time-saving. Just toss in the ingredients in the morning before your day gets hectic, and let time do the work.

The simplicity of this dish encourages family involvement, too. Whether it’s chopping vegetables or stirring the pot, everyone can pitch in, fostering togetherness. You’ll find that the rich flavors meld together, creating a comforting bowl of goodness that warms you from the inside out.

Process Overview

“This is where the magic happens—when the aroma fills the kitchen.”

Think about the joy you’ll feel when you hear that gentle bubbling sound that signals your soup is nearly ready. The blending of flavors is a culinary dance, encouraging patience as it transforms basic ingredients into something extraordinary. This soup is easy, satisfying, and utterly delicious—perfect for a weeknight dinner or a cozy Sunday afternoon.

Ingredients

To make this heartwarming soup, you will need the following ingredients:

  • 1 lb chicken breast
  • 8 cups chicken broth
  • 1 cup carrots, sliced
  • 1 cup celery, chopped
  • 1 onion, diced
  • 3 cloves garlic, minced
  • 1 tsp thyme
  • 1 tsp oregano
  • 2 cups egg noodles
  • Salt and pepper to taste
  • Fresh parsley for garnish

Lily’s Personal Tips

  • Chicken Breast: Use boneless, skinless chicken breast for ease. You can also use thighs for a richer flavor.
  • Chicken Broth: Homemade broth is fantastic, but store-bought is a great time-saver. Choose low-sodium for better control over salt content.
  • Carrots and Celery: Fresh veggies make a difference. Use organic if possible for enhanced flavor.
  • Garlic: Freshly minced garlic gives a deeper flavor compared to pre-minced options.
  • Fresh Parsley: This brightens up the soup and adds a pop of color. Optional, but highly recommended.

Directions

Let’s get cooking! Follow these simple steps to create your soup:

  1. In a Crockpot, place the chicken breast. It’s okay if it’s frozen; it will cook beautifully throughout the day.

    This is your base and what will provide the wonderful, rich flavor.

  2. Add the chicken broth, carrots, celery, onion, garlic, thyme, and oregano.

    Don’t worry too much about precision; this soup loves a little flexibility.

  3. Cover and cook on low for 6-8 hours or until the chicken is cooked through.

    You might want to sneak a taste of the broth while it’s cooking—just to be sure it’s perfect!

  4. Remove the chicken, shred it, and return it to the pot.

    Shredding the chicken is a great opportunity for some family fun. Get the kids involved!

  5. Stir in the egg noodles and cook for an additional 20-30 minutes until the noodles are tender.

    The egg noodles are like little pillows in the soup. The longer they soak, the more flavor they absorb!

  6. Season with salt and pepper, and garnish with fresh parsley before serving.

    A little sprinkle of parsley makes everything look even more inviting.

Serving

Classic Chicken Noodle Soup

Serving this soup family-style is where the magic continues. Ladle warm soup into deep bowls, and watch as smiles spread across the table. You could even serve with crusty bread or homemade rolls, leaving everyone feeling satisfied. Create a space for sharing stories and laughter, as this soup is best enjoyed surrounded by loved ones.

Storage

Leftover soup can be a lifesaver! Here are some practical fridge and reheating tips:

  • In the Fridge: Store any leftover soup in an airtight container for up to 3 days.
  • Reheating: Gently reheat on the stove over medium heat until hot. You may want to add a little extra broth to loosen it up.
  • Freezing: You can freeze portions for up to 2 months. Just make sure to leave out the egg noodles if you plan to freeze it, as they can become mushy when thawed.

Kitchen Notes

Here are five handy shortcuts to make this recipe even easier:

  • Prep Ahead: Chop your veggies the night before and store them in the fridge.
  • Rotisserie Chicken: Use pre-cooked rotisserie chicken for a fast alternative.
  • Frozen Veggies: Frozen carrots and celery are acceptable if you’re in a hurry.
  • Add Spinach: For extra nutrition, toss in a handful of fresh spinach during the last 10 minutes of cooking.
  • Spice It Up: Add a dash of red pepper flakes if you enjoy a bit of heat.

Variations

Every family has different tastes. Here are some tweaks for picky eaters or special diets:

  • For Picky Eaters: Omit the onions and garlic, and add in more familiar vegetables like corn or peas.
  • Gluten-Free: Use gluten-free egg noodles or rice to accommodate gluten sensitivities.
  • Low-Carb: Substitute egg noodles with zucchini noodles or cauliflower rice.
  • Chicken Alternatives: Try shredded turkey for a post-holiday twist.
  • Vegetarian Version: Swap out the chicken for chickpeas and the broth for vegetable broth. It’s hearty and satisfying!

FAQ

  1. Can I use frozen chicken?
    Yes, you can put frozen chicken directly into the Crockpot without any issues.

  2. How can I make this soup richer?
    Adding a splash of cream at the end will make it creamy and rich.

  3. What should I serve with chicken noodle soup?
    Crusty bread, crackers, or a simple salad makes delightful accompaniments.

  4. Can I make this in a regular pot?
    Absolutely! Just simmer on the stove for 1-2 hours instead of using the Crockpot.

  5. How do I know the chicken is done?
    The chicken should reach an internal temperature of 165°F.

In conclusion, this Classic Chicken Noodle Soup is more than just a recipe. It’s a vehicle for gathering your loved ones around the table. The savory aromas and heartwarming flavors create connections and stories that will linger long after the last spoonful is gone. As you make this dish, remember that you are creating not just a meal, but a moment to share with your family. Enjoy every comforting bite.

Classic Chicken Noodle Soup

Prep Time 15 minutes
Cook Time 7 hours 30 minutes
Total Time 7 hours 45 minutes
Servings 6 servings
Calories 350
A heartwarming and comforting chicken noodle soup perfect for family gatherings, made effortlessly in a Crockpot.

Ingredients

Main Ingredients

  • 1 lb chicken breast (Use boneless, skinless for ease.)
  • 8 cups chicken broth (Homemade is great, but store-bought is a time-saver. Choose low-sodium.)
  • 1 cup carrots, sliced (Fresh veggies are recommended.)
  • 1 cup celery, chopped (Fresh veggies are recommended.)
  • 1 each onion, diced (Freshly diced for best flavor.)
  • 3 cloves garlic, minced (Freshly minced for deeper flavor.)
  • 1 tsp thyme
  • 1 tsp oregano
  • 2 cups egg noodles (Soak in the broth for flavor.)
  • Salt and pepper to taste
  • Fresh parsley for garnish (Optional, but recommended for presentation.)

Instructions 

Cooking

  • In a Crockpot, place the chicken breast. It’s okay if it’s frozen; it will cook beautifully throughout the day.
  • Add the chicken broth, carrots, celery, onion, garlic, thyme, and oregano.
  • Cover and cook on low for 6-8 hours or until the chicken is cooked through.
  • Remove the chicken, shred it, and return it to the pot.
  • Stir in the egg noodles and cook for an additional 20-30 minutes until the noodles are tender.
  • Season with salt and pepper, and garnish with fresh parsley before serving.

Notes

Store leftover soup in an airtight container for up to 3 days. For longer storage, freeze portions without the egg noodles for up to 2 months.
Calories: 350kcal
Course: Main Course, Soup
Cuisine: American
Keyword: Chicken Noodle Soup, Comfort Food, Crockpot Soup, Easy Recipe, Family Meal

Classic Ginger Garlic Chicken Noodle Soup

There’s something soothing about stepping into a kitchen filled with the warm, inviting aromas of ginger and garlic. The gentle sound of bubbling broth fills the air, hinting at the delightful meal that’s in the works. As you stir the pot, anticipation builds, and you can’t help but feel at home. This Classic Ginger Garlic Chicken Noodle Soup is just the thing for a cozy family dinner.

Why This Works

Classic Ginger Garlic Chicken Noodle Soup

The beauty of this soup lies in its simplicity and heartwarming nature. It brings together simple ingredients like chicken, vegetables, and noodles to create a satisfying dish that feels like a hug in a bowl. Plus, this recipe is designed for busy families. The entire meal can be ready in under 30 minutes, allowing you to spend more time enjoying each other’s company instead of being stuck in the kitchen.

Process Overview

“This is where the magic happens—when the aroma fills the kitchen.”

Creating this Ginger Garlic Chicken Noodle Soup is a straightforward process. You’ll quickly sauté the aromatics, then build your soup by adding broth and other ingredients. The only hard part? Waiting for it to finish cooking while your kitchen fills with that delicious smell.

Ingredients

To make this comforting soup, gather the following ingredients:

  • 2 tablespoons vegetable oil
  • 1 onion, chopped
  • 3 cloves garlic, minced
  • 1 tablespoon fresh ginger, grated
  • 4 cups chicken broth
  • 1 cup cooked chicken, shredded
  • 2 cups egg noodles
  • 1 cup mixed vegetables (carrots, celery, peas)
  • Salt and pepper to taste
  • Fresh parsley or cilantro for garnish

Lily’s Tips:

  • Use olive oil for a richer flavor.
  • Don’t rush chopping the onions; the finer they are, the more they blend into the broth.
  • Fresh ginger elevates the flavor more than powdered ginger.
  • Feel free to use rotisserie chicken for a quicker option.
  • Opt for frozen mixed veggies if fresh ones aren’t available; they work just as well.

Directions

  1. In a large pot, heat the vegetable oil over medium heat. Add the chopped onion and sauté until translucent.
    Tip: Stir occasionally to avoid burning the onions. It should take about 5 minutes.

  2. Stir in the minced garlic and grated ginger, sautéing for another minute until fragrant.
    Tip: Keep an eye on it—burnt garlic turns bitter and can spoil the soup flavor.

  3. Pour in the chicken broth and bring to a boil.
    Tip: Use low-sodium broth to control the saltiness and let your ingredients shine.

  4. Add the cooked chicken, egg noodles, and mixed vegetables. Cook until the noodles are done, about 5-7 minutes.
    Tip: Stir gently to separate the noodles; nobody wants a clump of noodles stuck together.

  5. Season with salt and pepper to taste.
    Tip: Taste as you go. It’s always easier to add more seasoning than to fix an over-seasoned soup.

  6. Serve hot, garnished with fresh parsley or cilantro.
    Tip: Adding herbs right before serving brightens the dish and adds a beautiful finishing touch.

Serving

Classic Ginger Garlic Chicken Noodle Soup

When you’re ready to serve, ladle the soup into bowls. For a family-style presentation, bring the pot to the table so everyone can help themselves. You might want to provide some crusty bread or crackers on the side. This way, each person can customize their bowl with extra herbs or even a dash of hot sauce for those who like a little kick.

Storage

Leftovers store well in the refrigerator for up to three days. Allow the soup to cool down to room temperature before transferring it to airtight containers. When you’re ready to enjoy it again, simply reheat in a saucepan over medium heat. You might need to add a splash of broth or water while reheating to prevent it from becoming too thick.

Kitchen Notes

  • When short on time, use pre-chopped vegetables.
  • Consider cooking the noodles separately and adding them only when you’re ready to serve to prevent sogginess.
  • Adjust the amount of garlic and ginger to suit your taste.
  • Use leftover turkey instead of chicken for a different seasonal flavor.
  • Feel free to switch up the type of noodles based on your preference.

Variations

If you have picky eaters at home or are accommodating different diets, here are some easy tweaks you can try:

  • For a gluten-free version, substitute egg noodles with gluten-free pasta.
  • Add in leafy greens like spinach or kale for an extra nutrient boost.
  • Swap chicken for tofu to create a vegetarian option.
  • Use your favorite seasonal vegetables for variety.
  • Introduce a splash of soy sauce or sesame oil for an Asian-inspired twist.

FAQ

1. Can I use frozen chicken?
Yes, you can use frozen chicken. Just be sure to cook it longer until fully cooked through.

2. What can I use instead of chicken broth?
Vegetable broth or homemade broth works well if you want a lighter flavor.

3. How do I make it spicier?
Adding crushed red pepper or fresh chili slices can add the kick you’re looking for.

4. Can I freeze this soup?
Yes, but it’s best to freeze the soup without the noodles. Cook and add the noodles fresh when you’re ready to eat it.

5. How long will leftovers last in the fridge?
Leftover soup can be stored for up to three days in the refrigerator.

In conclusion, this Classic Ginger Garlic Chicken Noodle Soup is a delightful mix of flavors and comfort. It’s a recipe that feels like home and warms your heart — perfect for family gatherings or cozy nights in. Gather your loved ones around the table, fill your bowls, and enjoy the magic that happens not just in the pot, but also in the connections you create while sharing a meal.

Classic Ginger Garlic Chicken Noodle Soup

Prep Time 10 minutes
Cook Time 20 minutes
Total Time 30 minutes
Servings 4 servings
Calories 300
A heartwarming and comforting noodle soup filled with the flavors of ginger, garlic, and chicken, perfect for family dinners.

Ingredients

Soup Ingredients

  • 2 tablespoons vegetable oil (Can substitute with olive oil for richer flavor.)
  • 1 cup onion, chopped (Chop finely for better blending into the broth.)
  • 3 cloves garlic, minced
  • 1 tablespoon fresh ginger, grated (Fresh ginger elevates the flavor more than powdered ginger.)
  • 4 cups chicken broth (Use low-sodium broth to control saltiness.)
  • 1 cup cooked chicken, shredded (Rotisserie chicken can be used for convenience.)
  • 2 cups egg noodles (Consider cooking separately to avoid sogginess.)
  • 1 cup mixed vegetables (carrots, celery, peas) (Frozen mixed vegetables work well.)
  • to taste salt and pepper (Taste as you go for best seasoning.)
  • to taste fresh parsley or cilantro for garnish (Adds a beautiful finishing touch.)

Instructions 

Preparation

  • In a large pot, heat the vegetable oil over medium heat. Add the chopped onion and sauté until translucent, about 5 minutes.
  • Stir in the minced garlic and grated ginger, and sauté for another minute until fragrant.
  • Pour in the chicken broth and bring to a boil.
  • Add the cooked chicken, egg noodles, and mixed vegetables. Cook until the noodles are done, about 5-7 minutes.
  • Season with salt and pepper to taste.
  • Serve hot, garnished with fresh parsley or cilantro.

Notes

Leftovers store well for up to three days in the refrigerator. Allow to cool before storing in airtight containers. Reheat in a saucepan, adding broth or water as needed to prevent thickness.
Calories: 300kcal
Course: Main Course, Soup
Cuisine: American, Comfort Food
Keyword: Chicken Soup, Comfort Food, Family Meal, Ginger Garlic Chicken Noodle Soup, Quick Dinner

Slow Cooker Cheesy Chicken Chili

I can smell the warm spices already. The sound of a slow cooker humming in the kitchen means dinner is almost ready and the house feels like a hug. This Slow Cooker Cheesy Chicken Chili is one of those recipes that fills your home with comfort.

If you enjoy easy, family-friendly chicken dinners, you might also like my cheesy garlic chicken wraps for another weeknight idea.

Why this works

Slow Cooker Cheesy Chicken Chili

This recipe brings together simple pantry ingredients and a hands-off cooking method. The slow cooker does the heavy lifting, so you get tender chicken that soaks up tomato, spice, and cheesy creaminess. It is perfect for busy nights, school days, and relaxed weekends.

It is also very family-friendly. Kids love the cheesy texture and adults appreciate the bold flavors. If you like layered comfort dishes, try my smothered cheesy sour cream chicken for another crowd pleaser.

Because everything cooks low and slow, you can prep in the morning, run errands, and come back to a warm, ready meal. That time-saving freedom makes this a keeper for busy families.

Process Overview

“This is where the magic happens—when the aroma fills the kitchen.”

The process is simple. Brown or cook the bacon ahead if you like extra crisp texture. Layer ingredients in the slow cooker, let them mingle all day, then finish with cream cheese and shredded cheddar for the final creamy pull.

For a slightly different flavor profile the next time, check out my sweet chili glazed chicken thighs. Little changes to spices or toppings keep this chili interesting.

Ingredients

Below is the ingredient list with my personal tips for each item. Read the tips before you shop. They help make this chili even more family-friendly and foolproof.

  • 2 chicken breasts
    • Tip: Use boneless, skinless breasts. If your family prefers dark meat, use thighs instead and reduce cook time by a little. Pat dry so seasoning sticks.
  • 2 cans Rotel tomatoes with green chilis
    • Tip: Rotel adds a nice kick. If younger kids are tasting, choose the mild version.
  • 2 cans black beans (drained and rinsed)
    • Tip: Rinse well to reduce sodium and any canned flavor. Drain in a colander and let sit a minute to remove excess liquid.
  • 1 can corn
    • Tip: Drain the corn. You can use frozen corn if that is what you have on hand.
  • 32 oz chicken broth
    • Tip: Use low-sodium broth so you can control the salt. If you want thicker chili, reduce broth by 1/2 cup.
  • 1 packet dry ranch seasoning
    • Tip: This adds tang and depth. If you do not have ranch, use a teaspoon of onion powder and a pinch of dried dill.
  • 8 slices cooked and crumble bacon
    • Tip: Cook bacon until crisp and crumble it. Reserve some crumbles as a garnish for extra crunch.
  • 8 oz cream cheese (at room temperature )
    • Tip: Let the cream cheese sit on the counter for 30 minutes before adding. It melts smoother that way.
  • 1 cup shredded cheddar cheese
    • Tip: Use sharp cheddar for bold flavor, or mild if kids prefer. Grate your own for better melting.
  • Salt and pepper to taste
    • Tip: Add salt sparingly at first. The bacon and broth add saltiness.
  • 2 tbsp chili powder
    • Tip: Measure carefully. If your chili powder is very fresh, the flavor will be robust.
  • 1 tbsp cumin
    • Tip: Cumin brings the warmth. Toast lightly in a dry pan first if you want a nuttier scent.
  • 1 tbsp garlic powder
    • Tip: Garlic powder blends into the dish better than fresh garlic for long slow cooking.
  • Extra cheese
    • Tip: Keep a little extra shredded cheddar or a Mexican blend for topping at the table.
  • Fritos
    • Tip: Fritos add salt and crunch. Offer them on the side so chips do not go soggy in leftovers.
  • Hot Sauce (for serving )
    • Tip: Provide hot sauce at the table so everyone can adjust heat individually.

Before you start, gather everything so the morning rush does not steal your calm. If you want a quick weeknight twist, my 30-minute oven-baked boneless skinless chicken thighs are a fast protein option to pair with leftovers.

Directions

  1. Begin with the chicken on the bottom, add all ingredients to the slow cooker except for cream cheese and cheddar cheese and toppings.

    • Encouragement: Lay the breasts flat and sprinkle the spices evenly. You will see how easy this is when ingredients stack together.
  2. Set temperature to low and cook for 6-8 hours or high for 4 hours.

    • Encouragement: The low setting gives richer flavor. Put the lid on and go about your day. The kitchen will slowly fill with an inviting aroma.
  3. Half way through cook time, add cream cheese.

    • Encouragement: Drop in chunks of room temperature cream cheese so it melts smoothly. Stir gently if you can, but do not over-stir. It will fold into a silky texture.
  4. When ready to eat, shred chicken and add cheddar cheese. Let melt then serve with desired toppings.

    • Encouragement: Use two forks to shred right in the slow cooker for less cleanup. Stir in the cheddar so it melts into the chili, then top with bacon crumbles and extra cheese for a family-style finish.

Notes while cooking:

  • Taste before serving and adjust salt or heat. Add hot sauce if you want more kick.
  • If the chili looks too thin after shredding, set the slow cooker to high for 15-30 minutes with the lid off to thicken.

If you like one-pot dinner ideas, you may enjoy my cheesy garlic chicken wrap tips in the Kitchen Notes below.

Serving

Slow Cooker Cheesy Chicken Chili

Serve this cheesy chicken chili family-style in a large bowl right from the slow cooker. Bring out bowls and toppings and let everyone customize. Offer extra cheese, crumbled bacon, Fritos, and hot sauce at the table.

For a heartier meal, serve with cornbread or over steamed rice. For a lighter option, spoon into large lettuce cups for a crunchy contrast. Kids love it with chips on the side, while adults usually add a few drops of hot sauce.

Leftovers taste even better the next day. The flavors deepen overnight and the cream cheese keeps the chili luxuriously creamy.

Storage

Cool the chili to room temperature before storing. Place it in an airtight container and refrigerate for up to 4 days.

To reheat on the stove, warm gently over medium-low heat and stir frequently. Add a splash of chicken broth or water if it seems thick. To microwave, use a microwave-safe bowl and heat in 1-minute intervals, stirring between each, until warm.

For longer storage, freeze in freezer-safe containers for up to 3 months. Thaw overnight in the refrigerator before reheating. Note that texture may change slightly after freezing, but the flavor remains comforting.

Kitchen Notes

  • Prep ahead: Dice the bacon and measure spices the night before for faster morning assembly.
  • Browning tip: You do not need to brown the chicken, but searing for 2-3 minutes per side adds extra flavor if you have time.
  • Cream cheese handling: Cut into cubes so it melts evenly when added halfway through cooking.
  • Thickening shortcut: Stir in 1/4 cup masa harina or cornmeal at the end for a thicker, slightly corn-flavored chili.
  • Quick swap: Use shredded rotisserie chicken in the last hour to cut cook time in half.

And remember, small shortcuts keep dinner on the table faster without losing that homemade heart. For more quick chicken recipes, check out my cheesy garlic chicken wrap notes.

Variations

  • For picky eaters: Reduce chili powder to 1 tablespoon and omit hot sauce. Serve chips and cheese on the side so kids can customize bites.
  • Gluten-free: This recipe is naturally gluten-free if you use gluten-free ranch seasoning and check your canned ingredients.
  • Low carb: Skip the corn and serve over cauliflower rice. Use a low-carb chip or omit chips altogether.
  • Spicy: Add a chopped jalapeño or 1/2 teaspoon cayenne for extra heat.
  • Vegetarian option: Swap chicken for extra black beans and a can of diced potatoes. Use vegetable broth and omit bacon to make a hearty vegetarian chili.

Small switches make this recipe suit any family. Try one variation each week to find your favorite.

FAQ

Q: Can I use frozen chicken breasts?
A: Yes. If using frozen chicken breasts, cook on low for 8-9 hours or high for about 5 hours. Check that the chicken reaches 165 °F before shredding.

Q: Do I have to use cream cheese?
A: No. You can replace cream cheese with 1 cup sour cream added at the end of cooking. Add slowly and keep the heat low to prevent curdling.

Q: How can I make the chili thicker?
A: Shred the chicken and then cook uncovered on high for 15-30 minutes. You can also stir in 1/4 cup masa harina or cornstarch slurry and cook until thickened.

Q: Is this freezable?
A: Yes. Cool completely, then freeze in portion-sized containers for up to 3 months. Thaw overnight in the fridge before reheating.

Q: Can I double the recipe?
A: Yes. Use a large slow cooker and extend cook time slightly if needed. Make sure the cooker is no more than three-quarters full for even cooking.

Conclusion

I hope this Slow Cooker Cheesy Chicken Chili becomes a warm staple in your home. It is one of those dishes that brings everyone to the table and invites second helpings. If you want another version for inspiration, I referenced a similar take in the Slow Cooker Cheesy Chicken Chili Recipe – 3 Boys and a Dog. For a creamier, super-indulgent spin, I like the approach used in the Slow Cooker Cream Cheese Crack Chicken Chili as a helpful comparison.

Thanks for cooking with me. Fill your home with this cozy aroma and enjoy dinner with the people you love.

Slow Cooker Cheesy Chicken Chili

Prep Time 15 minutes
Cook Time 8 hours
Total Time 8 hours 15 minutes
Servings 6 servings
Calories 450
A comforting and easy slow-cooker dish featuring tender chicken, bold spices, and creamy cheese, perfect for family dinners.

Ingredients

Main Ingredients

  • 2 pieces chicken breasts (Boneless, skinless. Substitute thighs if preferred.)
  • 2 cans Rotel tomatoes with green chilis (Choose mild for younger kids.)
  • 2 cans black beans (drained and rinsed) (Rinse to reduce sodium.)
  • 1 can corn (Drain or use frozen corn.)
  • 32 oz chicken broth (Use low-sodium broth for better control over salt.)
  • 1 packet dry ranch seasoning (For depth of flavor; substitute with onion powder and dill if unavailable.)
  • 8 slices cooked and crumbled bacon (Reserve some for garnishing.)
  • 8 oz cream cheese (at room temperature) (Let sit for 30 minutes before adding.)
  • 1 cup shredded cheddar cheese (Use sharp cheddar for more flavor.)
  • Salt and pepper to taste (Add sparingly.)
  • 2 tbsp chili powder (Measure carefully.)
  • 1 tbsp cumin (Toast lightly for nuttier scent.)
  • 1 tbsp garlic powder (Blends better than fresh garlic in slow cooking.)
  • Extra cheese (For toppings.)
  • Fritos (Serve on the side.)
  • Hot Sauce (for serving) (Provide at the table.)

Instructions 

Preparation

  • Begin with the chicken on the bottom of the slow cooker, then add all other ingredients except for cream cheese and cheddar cheese.
  • Lay the chicken breasts flat and sprinkle the spices evenly over them.

Cooking

  • Set the temperature to low and cook for 6-8 hours, or high for about 4 hours.
  • Halfway through the cooking time, add the cream cheese in chunks.

Finishing Touches

  • When ready to eat, shred the chicken and stir in the cheddar cheese until melted.
  • Top with bacon crumbles and extra cheese before serving.

Notes

Taste before serving and adjust salt or heat. Leftovers taste better the next day. Store in an airtight container for up to 4 days, or freeze for up to 3 months.
Calories: 450kcal
Course: Dinner, Main Course
Cuisine: American
Keyword: Cheesy Chicken Chili, Comfort Food, Easy Dinner, Family-Friendly, Slow Cooker

White Chicken Chili

I can smell the warm spices and simmering chicken as soon as this chili starts bubbling on the stove. The kitchen fills with a cozy scent of cumin and garlic. I love the soft clink of my wooden spoon against the pot and the quiet chatter of family in the next room.

This white chicken chili is the kind of recipe that makes a house feel like home. It is quick, forgiving, and perfect for those nights when you want comfort without fuss. If you like simple, weeknight chicken dinners, you might also enjoy my 30-minute oven baked boneless skinless chicken thighs, which pair beautifully with this soup if you want extra chicken.

Why this works

White Chicken Chili

This chili hits all the home-cooked notes: it has cozy richness, bright acidity, and a creamy texture that pleases kids and adults alike. It is also a time-saver for busy families. The base uses pantry staples and a rotisserie chicken or leftover chicken to cut prep time.

My family loves that it comes together in one pot. You can make it on a weeknight, and it holds well for lunches or school-night leftovers. If you need more quick chicken ideas, try my sweet chili glazed chicken thighs for a change in flavor or to turn the leftovers into something new.

Process Overview

“This is where the magic happens—when the aroma fills the kitchen.”

The method is straightforward. We sauté an onion, add spices and broth, and use both pureed and whole beans to get that creamy, hearty body without heavy cream. Corn adds sweetness and texture. Finishing the pot with sour cream and shredded chicken keeps the soup bright and velvety.

If you enjoy hands-off cooking, this recipe pairs nicely with my air fryer chicken breasts for a quick protein prep that you can use in many meals.

Ingredients

  • 1 tablespoon olive oil
    • Tip: Use a good extra virgin olive oil for flavor. Heat until shimmering, not smoking.
  • 1 small yellow onion, chopped (about ½ cup)
    • Tip: Dice uniformly so it softens quickly. Swap for 1/2 cup shallot if you want a milder onion note.
  • 2 garlic cloves, finely minced (or 1 ½ teaspoons garlic powder)
    • Tip: Fresh garlic gives the best aroma. If you use garlic powder, add it with the spices.
  • 2 1/2 cups low-sodium chicken broth
    • Tip: Low-sodium lets you control salt. If you only have regular broth, taste before adding extra salt.
  • 2 4 oz cans diced green chilies
    • Tip: Mild or hot works. My family prefers mild, but add one hot can if you want a little kick.
  • 1 1/2 teaspoons ground cumin
    • Tip: Toast for 10 seconds in the dry pan before adding liquid to bring out flavor.
  • 1/4 teaspoon cayenne pepper
    • Tip: Adjust to taste. Omit for sensitive eaters or increase slightly for more heat.
  • 1/2 teaspoon dried oregano
    • Tip: Crumble between your fingers before adding to release oils.
  • 1/2 teaspoon paprika
    • Tip: Smoked paprika adds depth. Regular sweet paprika keeps it bright.
  • 1/2 small lime, juice from
    • Tip: Fresh lime brightens the bowl at the end. Start with half and add more if needed.
  • Salt and freshly ground black pepper, to taste
    • Tip: Season in layers. Add a little while cooking and adjust at the end.
  • 2 15 oz cans great northern beans
    • Tip: Drain and rinse to remove can liquid. One can will be pureed for creaminess.
  • 1 cup sour cream (or plain Greek yogurt)
    • Tip: Greek yogurt gives a tangy, protein-rich option. Add off heat to prevent curdling.
  • 1 cup corn (frozen or fresh)
    • Tip: Frozen corn is convenient. No need to thaw if adding to simmering soup.
  • 2 heaping cups cooked chicken, shredded (rotisserie or left-over chicken*)
    • Tip: Rotisserie chicken is a weeknight hero. Leftovers from other meals work well.
  • Fresh cilantro
    • Tip: Chop just before serving for a bright finish.
  • Shredded cheese
    • Tip: Cheddar or Monterey Jack melt nicely. Offer on the side for picky eaters.
  • Tortilla chips
    • Tip: Use sturdy chips for scooping or break them up as a crunchy garnish.
  • Green onions
    • Tip: Add sliced for bite and color.
  • Avocado
    • Tip: Slices add creaminess and make bowls feel special.

For more ways to use shredded chicken, try my Bang Bang chicken bowl recipe for inspiration.

Directions

  1. Heat olive oil in a large (5-6 quart) pot over medium-high heat. Add onion and sauté until softened, 3-5 minutes. Add garlic and cook for 30 seconds.

    • Encouraging note: You will know the onions are ready when they smell sweet and look translucent. Don’t rush this step.
  2. Add chicken broth, green chilies, cumin, cayenne, paprika, oregano, lime juice and season with salt and pepper to taste.

    • Encouraging note: Taste as you go. This is where you build the flavor, so take a moment to adjust seasonings.
  3. Drain and rinse beans in a strainer.

    • Encouraging note: Rinsing removes extra sodium and starch. Little steps like this make the final bowl cleaner in taste.
  4. Measure out a big ladleful of the beans and add to a food processor with a splash of broth from the soup. Puree until smooth (this step is optional but helps to yield the creamy and thick texture we want from this chili!).

    • Encouraging note: If you do not have a food processor, use an immersion blender right in the pot or mash with a potato masher. The texture will still be lovely.
  5. Add pureed beans, whole beans and corn to the soup pot. Bring the mixture to a simmer and cook, uncovered, for 15 to 30 minutes.

    • Encouraging note: Simmering allows flavors to marry. If you are short on time, 15 minutes works. For deeper flavor, let it simmer closer to 30 minutes.
  6. Remove from heat and stir in sour cream and cooked chicken.

    • Encouraging note: Mixing in the sour cream off the heat keeps the soup smooth and prevents curdling. Stir gently so the chicken stays tender.
  7. Serve garnished with cilantro, shredded cheese, avocado slices and tortilla chips if desired.

    • Encouraging note: Let everyone customize their bowl. The toppings make this dish fun for kids and grown-ups alike.

If you want to turn this into a handheld option, try these chicken sliders inspired by my Bang Bang chicken sliders as a side or next-day twist.

Serving

White Chicken Chili

I serve this chili family-style in a large serving pot or Dutch oven on the table. Let everyone ladle into bowls and add their own toppings. Kids love building their bowl with shredded cheese and crunchy chips. Adults often add extra cilantro and a squeeze more lime.

For a simple weeknight dinner, place bowls, a tray of toppings, and a loaf of crusty bread on the table. It invites family to gather and customize their meals. If you need a quick side, a simple green salad or roasted vegetables pair nicely.

Storage

  • Refrigerator: Store leftovers in an airtight container for up to 4 days. Cool to room temperature before refrigerating.
  • Freezer: Freeze in individual portions in freezer-safe containers for up to 3 months. Thaw in the fridge overnight before reheating.
  • Reheating: Rewarm gently on the stove over medium-low heat, stirring often. If it thickens too much, add a splash of broth or water. Avoid boiling after adding sour cream to keep the texture silky.
  • Make-ahead tip: You can cook the soup without sour cream and chicken, then finish both at serving time. This keeps the chicken moist and the sour cream fresh.

Kitchen Notes

  • Use a rotisserie chicken to save time and add flavor.
  • Puree only one can of beans for creaminess and keep the other whole for texture.
  • Frozen corn is convenient and adds sweetness without extra prep.
  • If you are short on time, skip simmering longer than 15 minutes and the chili will still be excellent.
  • Keep toppings separate so picky eaters can build their own bowls.

Variations

  • For a dairy-free version, swap sour cream for full-fat coconut milk or a dairy-free yogurt. Add it off heat to maintain creaminess.
  • For a vegetarian option, omit chicken and add extra beans or roasted cauliflower. Use vegetable broth in place of chicken broth.
  • For a low-carb bowl, skip the corn and serve the chili over cauliflower rice or with a side salad.
  • To make it spicier, add chopped jalapeno with the onions or increase cayenne to taste.
  • For smoky flavor, use smoked paprika and add a splash of chipotle in adobo if your family tolerates heat.

FAQ

Q: Can I use other beans instead of great northern beans?
A: Yes. Cannellini or navy beans work well. They offer a similar creamy texture. Just make sure to rinse them.

Q: Will the sour cream curdle if I heat it?
A: Sour cream can curdle at high heat. Stir it in off the heat and rewarm gently if needed. Greek yogurt behaves the same way, so add it off heat as well.

Q: How can I make this more kid-friendly?
A: Use mild green chilies and reduce or omit cayenne. Let kids top their bowl with cheese and chips to make it familiar and fun.

Q: Is this freezer friendly?
A: Yes. Freeze in portioned containers for up to 3 months. Thaw in the refrigerator overnight and reheat gently on the stove.

Q: Can I make this in a slow cooker or Instant Pot?
A: Yes. For a slow cooker, combine ingredients except sour cream and chicken and cook on low for 4 hours. Stir in chicken and sour cream at the end. For an Instant Pot, use the sauté function, then cook on high pressure for 5 minutes and quick release. Finish with sour cream.

Conclusion

I hope this white chicken chili becomes a go-to pot for your family weeknights. It is forgiving, full of flavor, and perfect for busy evenings when you want comfort without a long list of steps. For additional inspiration and another highly rated take on this recipe, I often look to Cooking Classy’s White Chicken Chili and Tastes Better From Scratch’s creamy white chicken chili for ideas on texture and spice adjustments.

Warmly,
Lily

White Chicken Chili

Prep Time 15 minutes
Cook Time 30 minutes
Total Time 45 minutes
Servings 6 servings
Calories 350
A cozy, creamy white chicken chili that comes together quickly in one pot, perfect for busy weeknights.

Ingredients

Base Ingredients

  • 1 tablespoon olive oil (Use a good extra virgin olive oil for flavor. Heat until shimmering, not smoking.)
  • 1 small yellow onion, chopped (about ½ cup) (Dice uniformly so it softens quickly.)
  • 2 cloves garlic, finely minced (Fresh garlic gives the best aroma. If you use garlic powder, add it with the spices.)
  • 2.5 cups low-sodium chicken broth (Low-sodium lets you control salt.)
  • 2 cans diced green chilies (4 oz each) (Mild or hot works.)

Spices

  • 1.5 teaspoons ground cumin (Toast for 10 seconds in the dry pan before adding liquid to bring out flavor.)
  • 0.25 teaspoon cayenne pepper (Adjust to taste.)
  • 0.5 teaspoon dried oregano (Crumble between your fingers before adding.)
  • 0.5 teaspoon paprika (Smoked paprika adds depth.)
  • 0.5 small lime, juice from (Fresh lime brightens the bowl.)
  • Salt and freshly ground black pepper, to taste (Season in layers.)

Beans & Cream

  • 2 cans great northern beans (15 oz each) (Drain and rinse to remove can liquid.)
  • 1 cup sour cream (or plain Greek yogurt) (Add off heat to prevent curdling.)

Veggies & Chicken

  • 1 cup corn (frozen or fresh) (No need to thaw if adding to simmering soup.)
  • 2 cups cooked chicken, shredded (Use rotisserie or leftover chicken.)

Toppings

  • Fresh cilantro (Chop just before serving for a bright finish.)
  • Shredded cheese (Cheddar or Monterey Jack melt nicely.)
  • Tortilla chips (Use sturdy chips for scooping.)
  • Green onions (Add sliced for bite and color.)
  • Avocado (Slices add creaminess.)

Instructions 

Cooking

  • Heat olive oil in a large pot over medium-high heat. Add onion and sauté until softened, about 3-5 minutes. Add garlic and cook for 30 seconds.
  • Add chicken broth, green chilies, cumin, cayenne, paprika, oregano, lime juice, and season with salt and pepper to taste.
  • Drain and rinse beans in a strainer.
  • Measure out a big ladleful of the beans and add to a food processor with a splash of broth from the soup. Puree until smooth.
  • Add pureed beans, whole beans, and corn to the soup pot. Bring the mixture to a simmer and cook, uncovered, for 15 to 30 minutes.
  • Remove from heat and stir in sour cream and cooked chicken.
  • Serve garnished with cilantro, shredded cheese, avocado slices, and tortilla chips if desired.

Notes

Store leftovers in an airtight container for up to 4 days or freeze in individual portions for up to 3 months. Serve chili family-style with a tray of toppings for a fun dinner. For variations, see the additional notes about making it vegetarian, dairy-free, etc.
Calories: 350kcal
Course: Main Course, Soup
Cuisine: American, Comfort Food
Keyword: Chicken Soup, Comfort Food, One Pot Meal, Quick Dinner, White Chicken Chili

Buffalo Chicken Salad High Protein

The kitchen is alive with the sound of chopping and sizzling. The aroma of Buffalo sauce and tender chicken fills the air, creating a warm invitation for the family to gather. Each bite of this Buffalo Chicken Salad is a reminder of home, love, and togetherness. It’s a dish that speaks to the heart, offering bold flavors wrapped in a comforting embrace.

Why This Works

Buffalo Chicken Salad High Protein

This Buffalo Chicken Salad is perfect for busy families. It’s packed with high protein to keep everyone energized throughout the day. With just a few ingredients, you can whip up a meal that not only tastes amazing but also comes together quickly.

By using shredded chicken that can be prepared in advance, you cut down on prep time. This means you can spend less time in the kitchen and more time with your loved ones. The combination of creamy Greek yogurt and spicy Buffalo sauce creates a satisfaction that even the pickiest eaters won’t resist. Plus, it’s a great introduction to healthier eating without sacrificing flavor.

Process Overview

“This is where the magic happens—when the aroma fills the kitchen.”

As you start this cooking adventure, remember that preparing Buffalo Chicken Salad is a straightforward process. The key is to gather your ingredients and set up your workspace for a smooth and enjoyable experience. When all is done, it is the delicious scent wafting through your home that will bring your family together.

Ingredients

Here’s what you’ll need for this delightful dish:

  • 4 cups shredded chicken
  • 2 stalks celery, finely chopped (about ½ cup)
  • 4 stalks green onion, finely chopped
  • 1 cup Greek yogurt (nonfat recommended for lower calories)
  • ⅓ cup buffalo sauce
  • Juice from ½ large lemon
  • 1 teaspoon garlic powder
  • ½ teaspoon paprika
  • ¼ teaspoon salt (adjust to taste)
  • ¼ teaspoon black pepper

Lily’s Personal Tips:

  • Shredded Chicken: Use rotisserie chicken for an easy shortcut or plan a batch at the beginning of the week to have on hand.
  • Celery: Fresh celery adds crunch and a refreshing taste. Always wash and dry it well before chopping.
  • Green Onions: These not only add flavor but also a pop of color to the salad. Try to chop them finely for a perfect blend.
  • Greek Yogurt: If you want a richer flavor, opt for full-fat Greek yogurt, but nonfat works well for a lighter option.
  • Buffalo Sauce: Personalize the heat level by choosing your favorite brand or adjusting the amount to suit your family’s taste.

Directions

  1. Begin by aligning all ingredients at arm’s reach for a smooth process. You’ll need cooked chicken, buffalo sauce, celery, and Greek yogurt.
  2. Shred cooked chicken into bite-sized pieces for even sauce coverage. Ensure the texture is moist and tender, enhancing the salad appeal.
  3. In a large bowl, combine Greek yogurt and buffalo sauce. Stir until smooth and creamy, creating a luscious base with a spicy aroma.
  4. Finely chop celery and green onions, adding them to the bowl. These will provide a refreshing crunch that balances the heat.
  5. Introduce the shredded chicken to the bowl. Gently toss ingredients to ensure an even coating, enhancing the unbeatable evenly-spiced texture.
  6. Taste the mixture and adjust salt, pepper, or additional buffalo sauce to achieve the perfect balance.
  7. Allow the salad to chill for at least 30 minutes, letting flavors meld. This results in a dish that’s as cohesive in flavor as it is eye-catching.
  8. Just before serving, garnish with crumbled blue cheese and a sprinkle of fresh herbs for added aroma and visual appeal.

Serving

Buffalo Chicken Salad High Protein

Serving Buffalo Chicken Salad is all about creating a family-style experience. Present it in a large bowl at the center of the table, encouraging everyone to scoop their own helping. Pair it with whole-grain crackers or a light side of fresh veggies to complement the flavors. You can even serve it on a bed of mixed greens for a colorful presentation. Kids will love making their own wraps or sandwiches with it too.

Storage

This salad keeps well in the refrigerator for up to three days. Store it in an airtight container to maintain freshness. If you’re preparing it for a meal-prep Sunday, consider not adding garnishes until right before serving. If you find it too thick after a few days, just mix in a spoonful of Greek yogurt or a splash of water to loosen it up.

Kitchen Notes

  • Prep Chicken Ahead: Keep cooked shredded chicken in the fridge for quick meal solutions.
  • Chop Vegetables in Advance: Slice celery and onions ahead of time to make preparation faster.
  • Batch Your Dressing: Make extra sauce and mix with different salads throughout the week.
  • Use Leftover Chicken: This is a great way to use up any leftover chicken from a previous meal.
  • Switch Up Your Greens: Try arugula, spinach, or even kale for an exciting twist.

Variations

Not everyone in the family may enjoy Buffalo flavors. Consider these adaptations:

  • For Picky Eaters: Omit the buffalo sauce and mix with ranch dressing for a milder flavor.
  • Chicken Alternatives: Swap in turkey or grilled tofu for a vegetarian option.
  • Add More Veggies: Throw in diced bell peppers or shredded carrots for added crunch.
  • Spice Adjustments: If buffalo sauce is too spicy, use a milder hot sauce to achieve a similar taste without the heat.
  • Gluten-Free Option: Serve the salad over gluten-free pasta or in lettuce wraps for a refreshing option.

FAQ

  1. How do I cook the chicken?
    You can boil, bake, or sauté chicken breasts until cooked through. For added flavor, season the chicken with salt, pepper, and garlic powder before cooking.

  2. Can I use store-bought buffalo sauce?
    Absolutely! Just make sure to choose a sauce that fits your heat preference.

  3. Is this salad healthy?
    Yes! It’s high in protein and can be lower in calories if you use nonfat Greek yogurt.

  4. Can this salad be made ahead of time?
    It’s best served fresh but can be made up to three days in advance. Simply store it in the fridge.

  5. What should I serve it with?
    It pairs well with whole-grain crackers, pita bread, or a fresh side salad.

As you savor this Buffalo Chicken Salad, think about the moments it brings to your family. Meals like this are more than just food on a plate; they are opportunities for connections and memories that last a lifetime. Take a moment to enjoy cooking together, share stories, and build a loving atmosphere in your home. Happy cooking!

Buffalo Chicken Salad

Prep Time 15 minutes
Total Time 45 minutes
Servings 6 servings
Calories 350
A bold, protein-packed Buffalo Chicken Salad that's perfect for busy families, combining tender chicken with spicy buffalo sauce and creamy Greek yogurt.

Ingredients

Main Ingredients

  • 4 cups shredded chicken (Rotisserie chicken can be used for convenience.)
  • 2 stalks celery, finely chopped (About ½ cup.)
  • 4 stalks green onion, finely chopped (Adds flavor and color.)
  • 1 cup Greek yogurt (Nonfat recommended for lower calories.)
  • cup buffalo sauce (Adjust amount according to desired heat.)
  • ½ large lemon, juiced (For freshness.)
  • 1 teaspoon garlic powder (Enhances flavor.)
  • ½ teaspoon paprika
  • ¼ teaspoon salt (Adjust to taste.)
  • ¼ teaspoon black pepper

Instructions 

Preparation

  • Align all ingredients at arm’s reach for a smooth process.
  • Shred cooked chicken into bite-sized pieces.
  • In a large bowl, combine Greek yogurt and buffalo sauce. Stir until smooth and creamy.
  • Finely chop celery and green onions, adding them to the bowl.
  • Introduce the shredded chicken to the bowl and gently toss to ensure even coating.
  • Taste the mixture and adjust salt, pepper, or additional buffalo sauce as needed.
  • Allow the salad to chill for at least 30 minutes to let flavors meld.
  • Just before serving, garnish with crumbled blue cheese and a sprinkle of fresh herbs.

Notes

Serve family-style in a large bowl. Pairs well with whole-grain crackers or fresh veggies. Store in an airtight container for up to three days.
Calories: 350kcal
Course: Dinner, Lunch, Salad
Cuisine: American
Keyword: Buffalo Chicken Salad, Easy Dinner, Family Meal, Healthy Salad, quick recipe