Tag

chicken recipes

Browsing

Smothered Cheesy Sour Cream Chicken

Smell the sour cream and garlic as the oven starts to warm. You hear the gentle bubbling of cheese and the soft pop of steam as flavors come together. The kitchen feels like a cozy hug, and everyone gathers round for a family dinner that feels special but was simple to make.

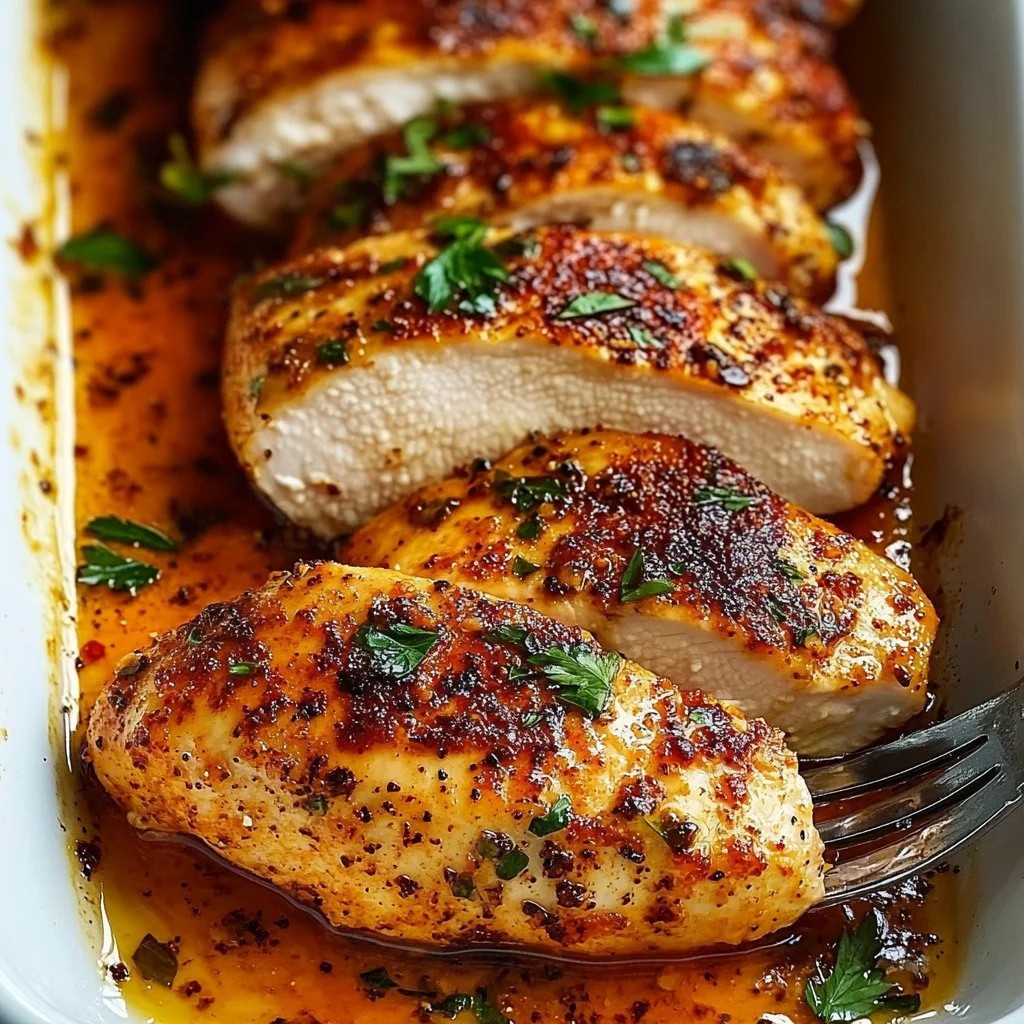
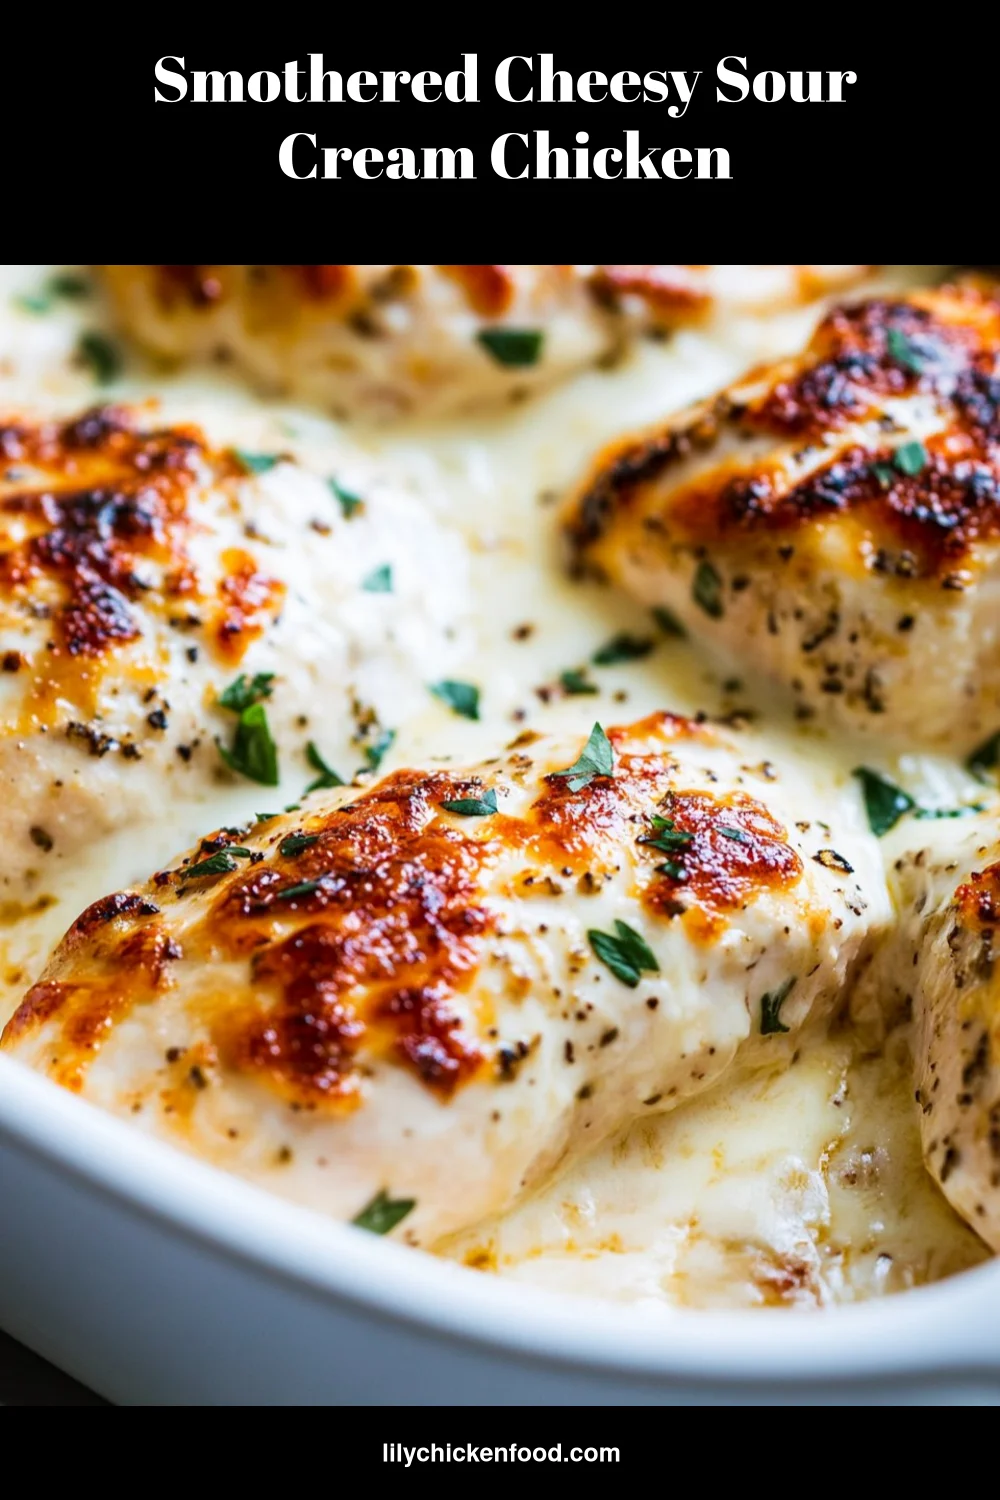
If you love simple chicken dinners, you might also enjoy my Bang Bang Chicken Sliders, which are another quick crowd pleaser. Tonight, we are making Smothered Cheesy Sour Cream Chicken, a comforting dish that folds creamy tang, melty cheese, and gentle herbs into tender chicken breasts.

Why this works

Smothered Cheesy Sour Cream Chicken

This recipe is a win for busy families. It uses familiar ingredients you likely have on hand and comes together without complicated steps. The sour cream keeps the chicken moist during long baking, and the cornstarch helps the sauce set so you get a glossy, spoonable topping.

It is also a time-saver compared with fussier methods. You can prep while the oven preheats, and then let it bake while you tidy up, set the table, or help the kids with homework. If you want more quick family meals, check my air fryer chicken recipes for other low-effort favorites.

Process Overview

“This is where the magic happens—when the aroma fills the kitchen.”

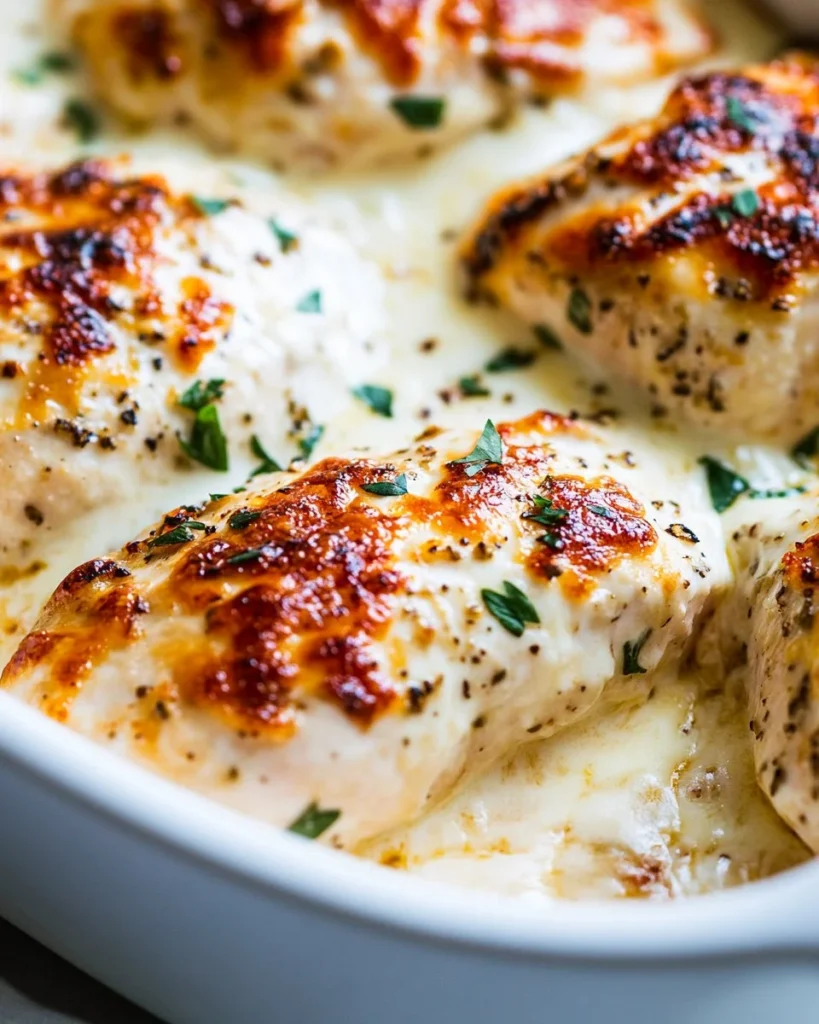
The method is simple and forgiving. You layer the mozzarella and then cover the chicken with a sour cream and Parmesan mixture. The low-and-slow bake allows the flavors to meld and the cheese to turn golden.

When you try this once, you will see how easy it is to make weeknight dinners feel special. It is an ideal recipe for a family meal, early guest nights, or when you want leftovers for the next day.
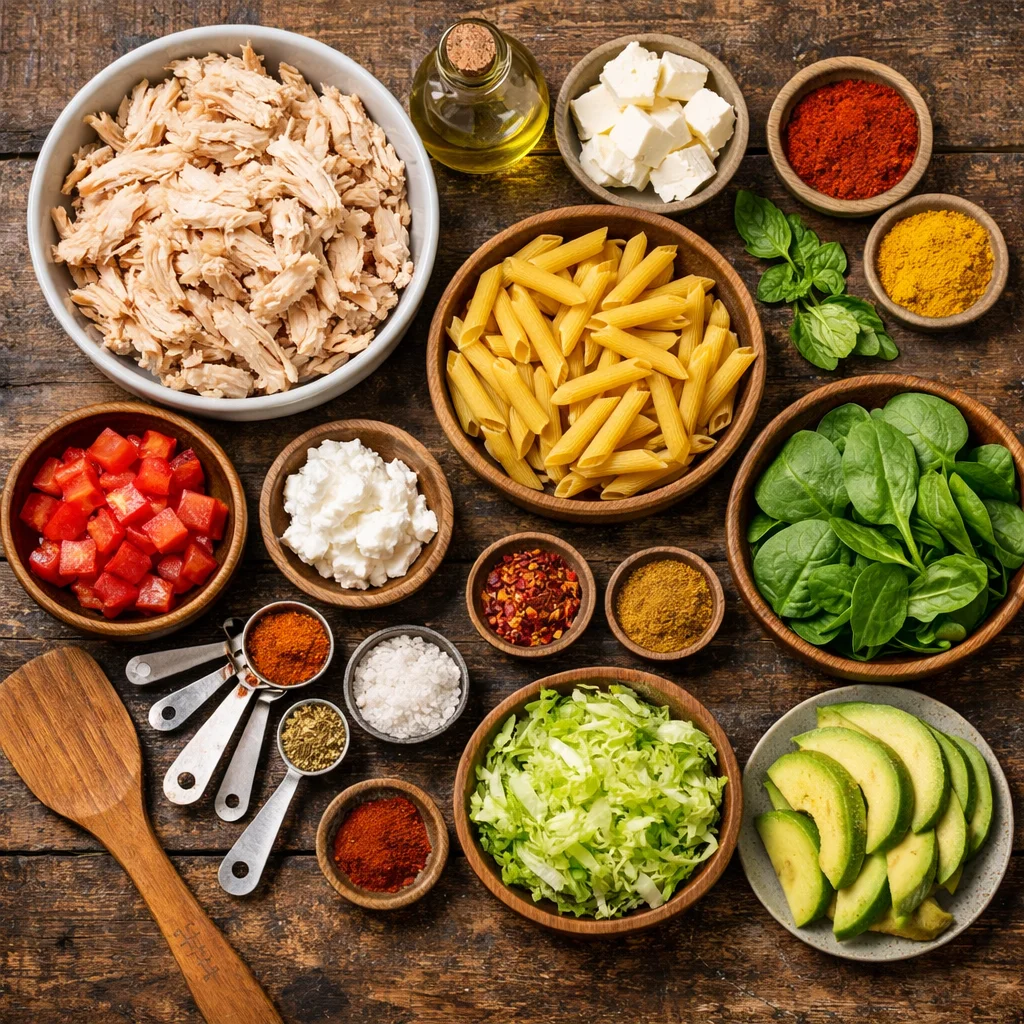
Ingredients

What you will need

  • 4 boneless, skinless chicken breasts
    Tip from Lily: Choose even-sized breasts so they cook at the same rate. If one is thick, slice it in half horizontally.

  • 1 cup sour cream (for creamy flavor)
    Tip from Lily: Use full-fat sour cream for best texture. Greek yogurt works in a pinch for a lighter option.

  • 3/4 cup grated Parmesan cheese (divided)
    Tip from Lily: Freshly grated Parmesan melts and browns better than pre-grated. Reserve half to sprinkle on top at the end.

  • 4 slices mozzarella cheese (for melty texture)
    Tip from Lily: Use low-moisture mozzarella for a smooth melt. Tear thicker slices if you want extra pull.

  • 1 tbsp cornstarch (for thickening)
    Tip from Lily: Mix cornstarch with the sour cream evenly to avoid lumps and help the topping thicken as it bakes.

  • 1 tsp dried oregano (for a hint of herb flavor)
    Tip from Lily: Oregano adds a warm herbal note. If you have fresh herbs, fold them in after baking for brightness.

  • 1 tsp garlic powder (for added flavor)
    Tip from Lily: Garlic powder spreads flavor evenly without adding moisture. Fresh minced garlic can be used, but reduce quantity to 1/2 tsp.

  • Salt and black pepper, to taste
    Tip from Lily: Season both sides of the chicken before adding the topping. Taste the mixture and adjust so the final dish is not bland.

Directions

  1. Preheat your oven to 375°F (190°C). Lightly grease a 9×13-inch baking dish to prevent sticking and make cleanup easier.
    Encouragement: Give the pan a quick spray and smile. Small prep steps save time later.

  2. Place the chicken breasts in the prepared baking dish, arranging them in a single layer to ensure even cooking.
    Encouragement: Space them out just a bit so the heat circulates. You are building a dependable base for the sauce.

  3. In a mixing bowl, combine 1 cup sour cream, 1/2 cup Parmesan cheese, 1 tablespoon cornstarch, 1 teaspoon oregano, 1 teaspoon garlic powder, and salt and pepper to taste. Stir until smooth and well-blended.
    Encouragement: Stir patiently until smooth. The simple mixture is full of flavor and will make the chicken sing.

  4. Place one slice of mozzarella cheese on top of each chicken breast for a melty layer during baking.
    Encouragement: The mozzarella keeps the chicken moist and gives you the satisfying stringy cheese texture everyone loves.

  5. Spread the sour cream mixture evenly over each chicken breast, then sprinkle the remaining Parmesan cheese on top.
    Encouragement: Spread with care so every bite gets a creamy coating. Think of it as giving your chicken a cozy blanket.

  6. Bake in the preheated oven for about 60 minutes, or until the chicken reaches an internal temperature of 165°F (74°C), and the cheese is golden and bubbly.
    Encouragement: Use a meat thermometer for confidence. The smell when it’s done is the best kind of signal.

  7. Allow the dish to stand for a few minutes before serving to let flavors meld. Enjoy this creamy, cheesy chicken!
    Encouragement: Resting helps the juices settle. Gather the family and get ready for smiles all around.

Tip: If your breasts are very thick, you can pound them to an even thickness before starting. Even thickness makes the timed bake more reliable.

Serving

Smothered Cheesy Sour Cream Chicken

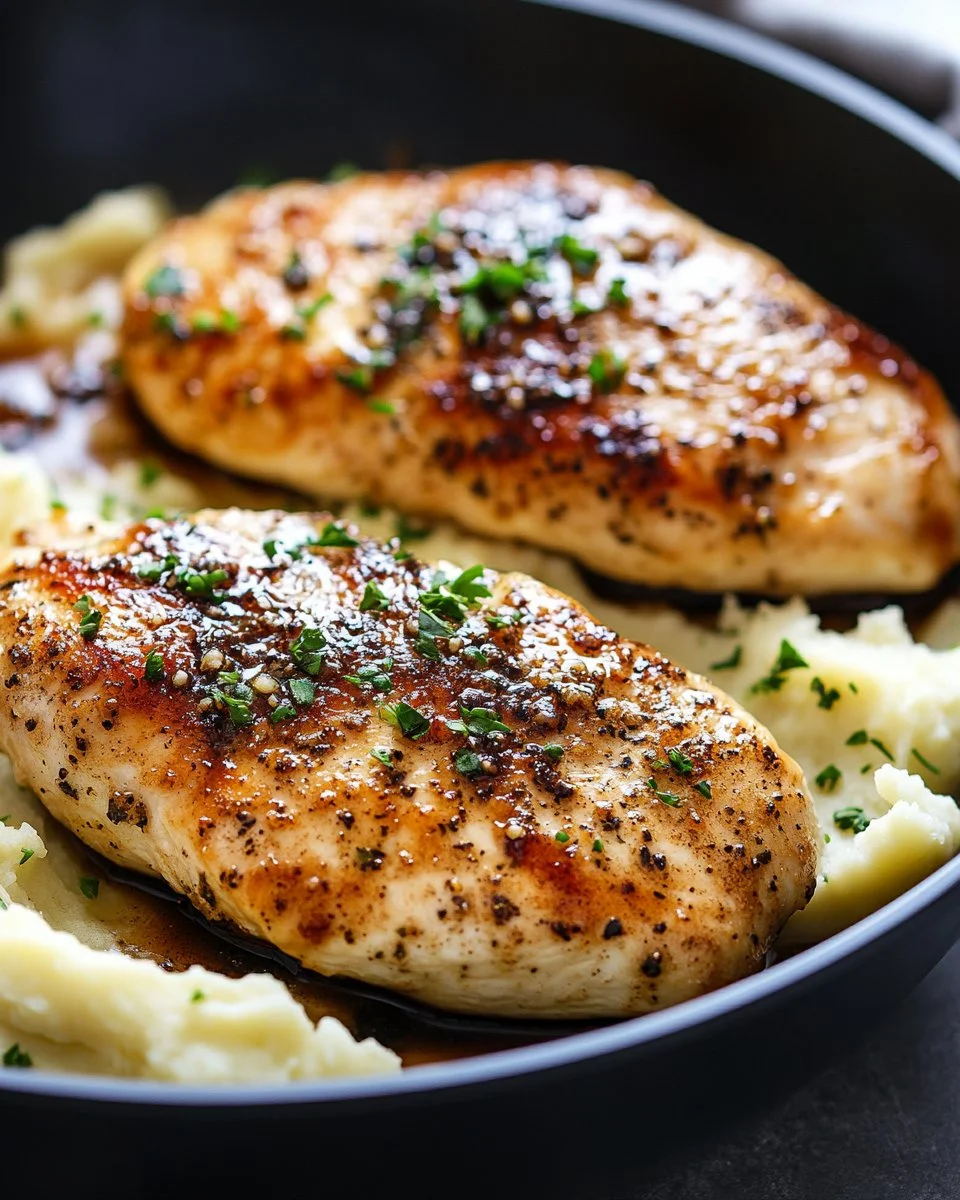
Serve this dish family-style in the same pan so everyone can scoop out their favorite part. Place bowls of steamed green beans, roasted broccoli, or a crisp salad on the table for balance. Fluffy mashed potatoes or buttered egg noodles are classic companions that soak up the cheesy sauce.

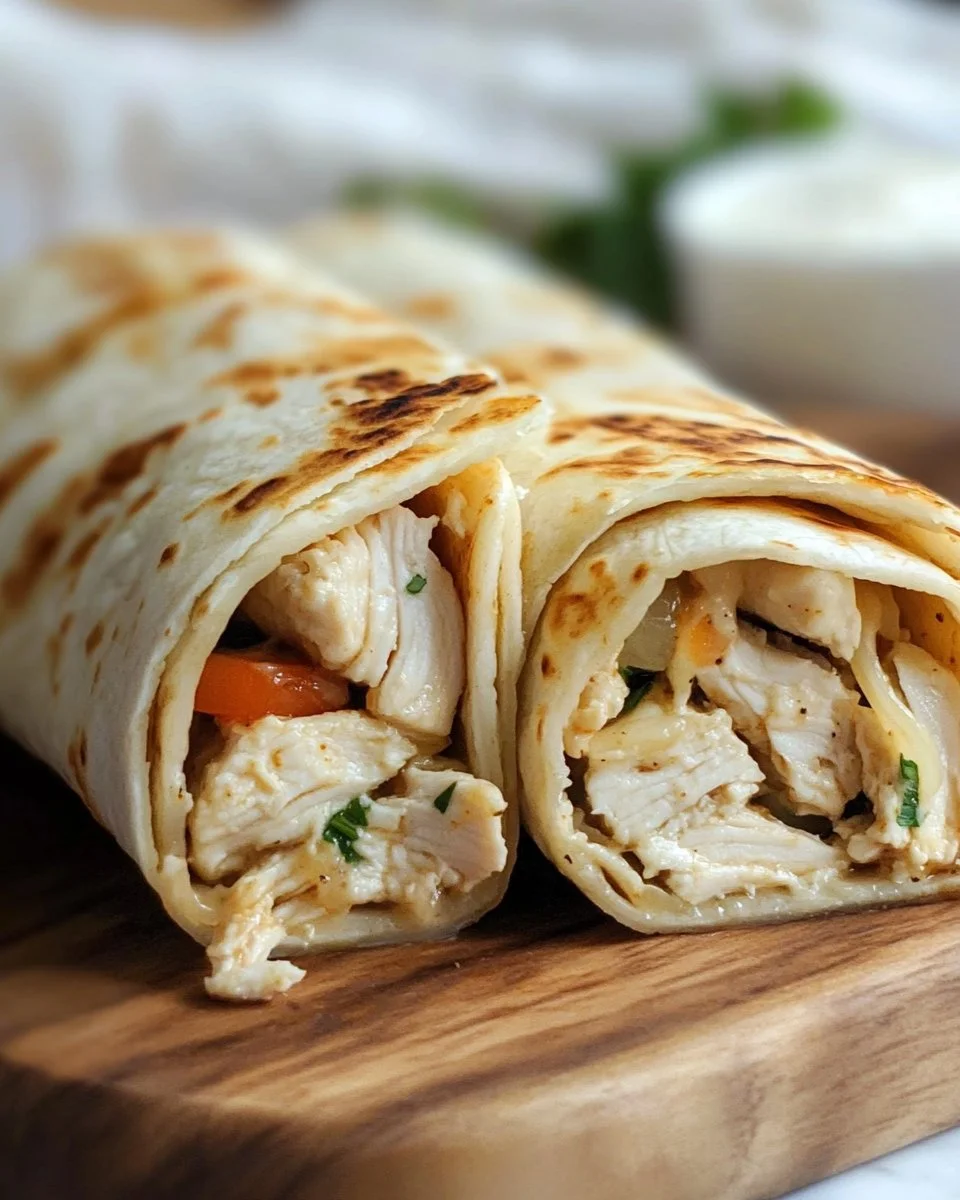
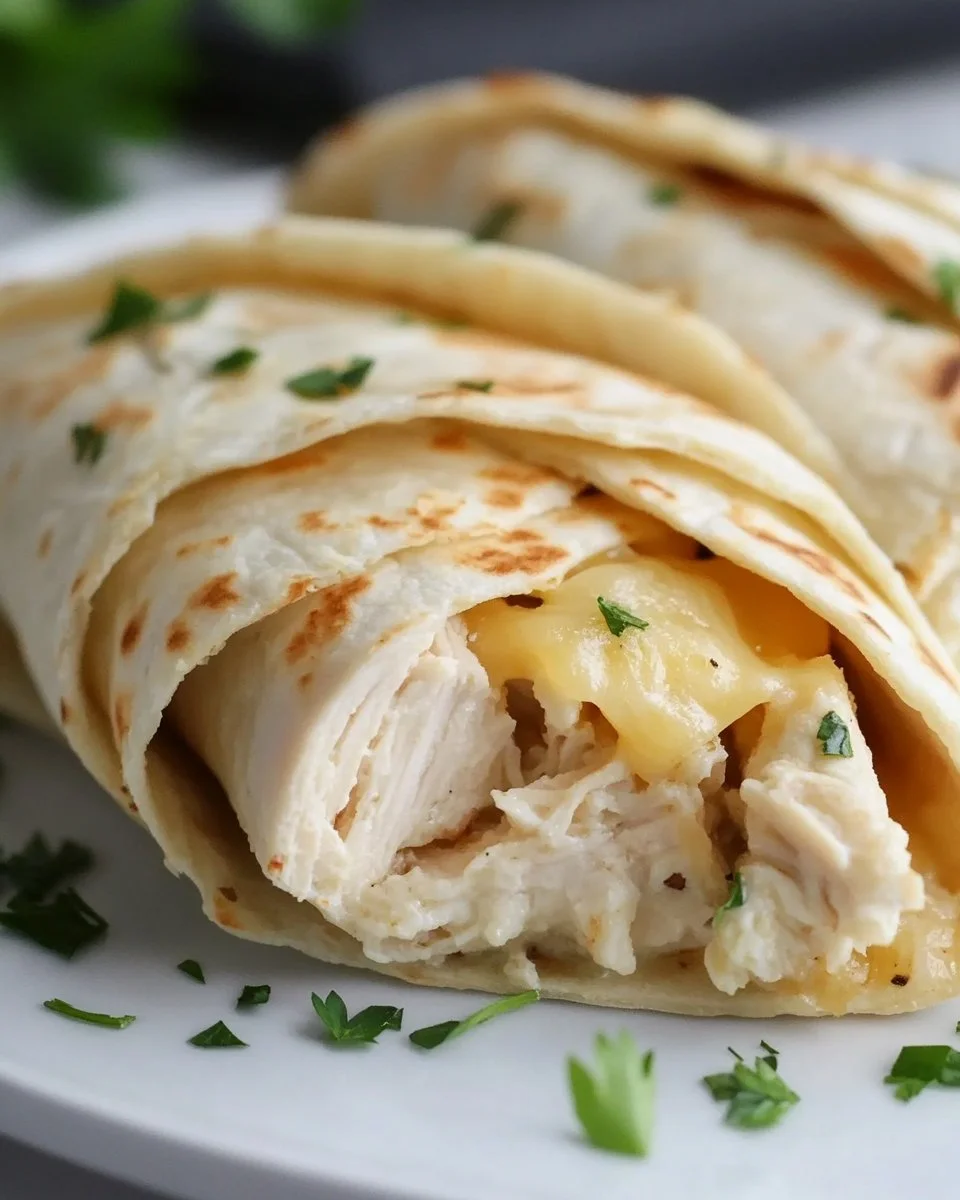
For a lighter plate, pair with a lemony arugula salad and whole grain rolls. If you have picky eaters, slice the chicken and let them pick the cheese or sauce on top. This recipe is perfect for serving alongside other simple family favorites like comfort side dishes or a selection from my Air Fryer Chicken Mozzarella Wraps when you want something crunchy.

Storage

Refrigerate leftovers in an airtight container for up to 3 days. The sauce will firm up in the fridge; reheat gently to bring back the creamy texture.

To reheat: place portions in an oven-safe dish, cover with foil, and warm at 350°F for about 15 to 20 minutes, or until heated through. You can also microwave single servings in 30-second intervals until warm, though the oven keeps the topping more attractive.

For longer storage, freeze in a freezer-safe container for up to 2 months. Thaw overnight in the refrigerator before reheating.

Kitchen Notes

  • Shortcut: Use rotisserie chicken pieces for a no-bake, quicker version. Mix sauce and bake only until heated.
  • Shortcut: Swap in plain Greek yogurt for part of the sour cream to reduce calories while keeping creaminess.
  • Shortcut: If you prefer, slice chicken breasts thinly and layer them for faster baking.
  • Shortcut: Pre-grate your Parmesan and store it in the fridge so weeknight prep is faster.
  • Shortcut: Use a shallow, wide dish so the cheese browns evenly and you avoid long hot-spot bakes.

Variations

  • For picky eaters: Omit oregano and use a sprinkle of Italian seasoning instead. Keep mozzarella on the side so kids can choose.
  • For low-carb: Serve over cauliflower mash or roasted vegetables instead of potatoes or noodles.
  • For gluten-free: This recipe is naturally gluten-free if your cornstarch is certified GF. Always check labels.
  • For extra heat: Add 1/4 teaspoon red pepper flakes to the sour cream mix or top with a drizzle of hot sauce before serving.
  • For herb-forward flavor: Stir in 1 tablespoon chopped fresh parsley or basil after baking for a fresh pop.

FAQ

Q: Can I use chicken thighs instead of breasts?
A: Yes. Bone-in thighs may need longer baking. Boneless thighs work well and stay juicy with the same method.

Q: Can I make this ahead of time?
A: Yes. Assemble the dish up to the baking step, cover, and refrigerate for a few hours. Bake from cold and add a few extra minutes.

Q: Is there a dairy-free option?
A: Use dairy-free sour cream and dairy-free shredded cheese alternatives. Texture will vary, but the concept is the same.

Q: How do I know when the chicken is done?
A: Use an instant-read thermometer. The safe internal temperature is 165°F (74°C) at the thickest part.

Q: Why is cornstarch included?
A: Cornstarch helps thicken the sour cream topping so the sauce clings to the chicken and becomes silky during baking.

Conclusion

Thanks for cooking with me. I hope this smothered cheesy sour cream chicken becomes a go-to dish for your family nights and cozy gatherings. If you enjoy variations and want a different cheese twist, you can compare this version to other ideas like the Cheesy Sour Cream Chicken – Call Me PMc for inspiration. For a similar smothered recipe with slightly different flavors, see Smothered Cheesy Sour Cream Chicken – Sugar Dish Me.

Happy baking, and tell your family this one was made with love.

Smothered Cheesy Sour Cream Chicken

Prep Time 15 minutes
Cook Time 1 hour
Total Time 1 hour 15 minutes
Servings 4 servings
Calories 350
A comforting dish that combines creamy sour cream, melty cheese, and tender chicken breasts, making it a perfect weeknight family dinner.

Ingredients

Main Ingredients

  • 4 pieces boneless, skinless chicken breasts (Choose even-sized breasts for even cooking.)
  • 1 cup sour cream (Use full-fat for best texture, Greek yogurt works as a lighter alternative.)
  • 3/4 cup grated Parmesan cheese (Reserve half to sprinkle on top at the end.)
  • 4 slices mozzarella cheese (Use low-moisture for a smooth melt.)
  • 1 tbsp cornstarch (Mix evenly with sour cream to avoid lumps.)
  • 1 tsp dried oregano (For a hint of herb flavor.)
  • 1 tsp garlic powder (Or reduce to 1/2 tsp if using fresh minced garlic.)
  • to taste null salt and black pepper (Season the chicken before adding the topping.)

Instructions 

Preparation

  • Preheat your oven to 375°F (190°C) and lightly grease a 9×13-inch baking dish.
  • Place the chicken breasts in the prepared baking dish in a single layer.
  • In a mixing bowl, combine sour cream, 1/2 cup Parmesan cheese, cornstarch, oregano, garlic powder, and salt and pepper. Stir until smooth.
  • Place one slice of mozzarella cheese on top of each chicken breast.
  • Spread the sour cream mixture evenly over each chicken breast and sprinkle the remaining Parmesan cheese on top.

Baking

  • Bake in the preheated oven for about 60 minutes until the chicken reaches an internal temperature of 165°F (74°C) and the cheese is golden.
  • Allow to stand for a few minutes before serving.

Notes

Refrigerate leftovers in an airtight container for up to 3 days. The sauce will firm up in the fridge; reheat gently to restore texture. Can freeze for up to 2 months.
Calories: 350kcal
Course: Dinner, Main Course
Cuisine: American
Keyword: cheesy, Chicken, Comfort Food, Family Dinner, sour cream

Oven Baked Chicken Breast

I can already smell it. The warm, savory scent of roasted chicken fills the air and makes the kitchen feel like home. You hear the gentle tick of the oven timer and the soft clink of a baking sheet. That small chorus tells you dinner is coming together.

This oven baked chicken breast recipe is simple, reliable, and perfect for busy weeknights or lazy Sundays. I test this method often for my family. It is forgiving, fast, and keeps the meat juicy when you follow a few smart steps.

Why this works

Oven Baked Chicken Breast

This method focuses on even heat and straightforward seasoning. Baking at a steady temperature lets the chicken cook through gently. The olive oil helps the spices stick and promotes a light, golden crust.

I choose this technique when I want a meal that fits family life. It saves time, and you can cook a few breasts at once for lunches, salads, or tacos. It also leaves room for sides without babysitting the pan.

As a food blogger and home cook, I trust recipes that deliver consistent results. This one does. You get flavorful, moist chicken without fancy tools or long prep.

Process Overview

“This is where the magic happens—when the aroma fills the kitchen.”

The process is short. Prep, rub, bake, rest. Each step builds flavor and keeps the meat tender.

You can prep the seasoning ahead of time. That makes weeknight dinners feel calm and manageable. The oven does most of the work while you set the table or help with homework.

A quick rest after baking is important. It gives the juices a chance to settle back into the meat. That is the small act that makes a big difference.

Ingredients

  • 4 chicken breasts
    Lily tip: Choose even-sized breasts so they cook at the same rate. If one is much thicker, pound it gently to match the others.

  • 2 tablespoons olive oil
    Lily tip: Use a good quality olive oil for flavor and to help the seasonings adhere. You can substitute avocado oil if you prefer.

  • 1 teaspoon garlic powder
    Lily tip: Garlic powder gives steady flavor without burning like fresh garlic might. If you like fresh garlic, use one minced clove and reduce the powder to 1/2 teaspoon.

  • 1 teaspoon onion powder
    Lily tip: Onion powder adds roundness. It blends well with paprika and helps the chicken taste savory and balanced.

  • 1 teaspoon paprika
    Lily tip: Paprika gives color and a mild sweetness. Use smoked paprika for a subtle smoky note, or regular sweet paprika for a classic flavor.

  • Salt and pepper to taste
    Lily tip: Salt is essential for flavor. I recommend 1/2 to 3/4 teaspoon kosher salt per breast, adjusted to your taste. Freshly ground black pepper brightens the mix.

  • Fresh herbs (optional for garnish)
    Lily tip: Parsley, thyme, or chives add a fresh finish. Scatter them on right before serving to keep their color and aroma.

Each ingredient plays a role. Together they create a simple, family-friendly profile that kids and adults can enjoy.

Directions

  1. Preheat the oven to 400°F (200°C).
    You are setting the stage here. A hot oven gives a quick, even roast that keeps the chicken juicy inside.

  2. In a bowl, mix olive oil, garlic powder, onion powder, paprika, salt, and pepper.
    Take a moment to whisk everything together. The oil carries the spices evenly across the chicken and helps the crust form.

  3. Rub the seasoning mixture all over the chicken breasts.
    Be generous and feel free to rub under the thin edge for more flavor. A good rub makes every bite taste intentional.

  4. Place the chicken breasts on a baking sheet lined with parchment paper.
    Parchment keeps clean up quick and prevents sticking. Give the pieces space so heat circulates freely around each breast.

  5. Bake for 25-30 minutes, or until the chicken is cooked through and juices run clear.
    Use an instant-read thermometer if you can. The safe internal temperature is 165°F. If the breasts are very thin, check closer to 20 minutes.

  6. Let rest for a few minutes before slicing.
    Resting is key. It keeps the meat moist and locks those juices in. Five minutes can make a big difference.

  7. Garnish with fresh herbs if desired and serve.
    A little green on top makes the dish feel special. This is a great moment to call everyone to the table.

You will find each step easy to follow. If you have kids helping, this recipe is forgiving and teaches simple kitchen skills.

Serving

Oven Baked Chicken Breast

Serve this chicken family-style on a large platter so everyone can choose their portion. Slice the breasts into thin pieces for salads or serve whole for heartier plates.

H3 Family-style serving ideas

  • Weeknight platter: Add roasted carrots, steamed broccoli, and warm rolls. Let each person build their own plate.
  • Taco night: Slice the chicken and place it beside soft tortillas, shredded lettuce, and salsa. Kids love assembling their own tacos.
  • Salad upgrade: Slice chilled leftover chicken and toss with mixed greens, cherry tomatoes, and a lemon vinaigrette for quick lunches.
  • Grain bowl: Pair with cooked rice or quinoa, a scoop of hummus, and roasted vegetables for a balanced meal.

This chicken is flexible. It fits into lunches, quick dinners, and even packed school lunches. Keep a small container of the pan juices or a simple sauce on the side to brighten the meat.

Storage

Cool the chicken to room temperature for no more than two hours. Then refrigerate in an airtight container.

Store cooked chicken in the fridge for up to 4 days. For longer storage, freeze in a sealed freezer bag for up to 3 months. Label the bag with the date.

To reheat, slice the chicken and warm gently in a skillet with a splash of broth or water over medium heat. Cover for a minute to steam through. You can also reheat in the oven at 300°F for 10-15 minutes until warmed through.

If you are reheating in a microwave, add a damp paper towel over the slices to keep moisture. Heat in short intervals to avoid drying out the meat.

Leftover chicken is perfect for sandwiches, pasta, and salads. Think of it as a versatile ingredient that saves time on busy days.

Kitchen Notes

  • Use a meat thermometer. It takes the guesswork out of doneness and protects you from overcooking.
  • Pound uneven breasts to a uniform thickness for even cooking. Place the breast between plastic wrap and press gently with a pan.
  • Make the seasoning mix in a small jar. Store it in your spice rack for quick dinners.
  • Rest the meat under tented foil for 2 to 5 minutes to keep it warm without sweating.
  • Double the batch and freeze half for easy weeknight meals. Thaw overnight in the fridge before reheating.

These shortcuts keep the recipe fast and friendly for family life. Little changes add up to consistent results.

Variations

  • For picky eaters: Reduce the garlic and onion powder by half. Keep the paprika light and season gently with salt. Kids often prefer a milder profile.
  • For low-sodium diets: Use low-sodium salt and add fresh lemon juice or herbs for flavor instead of increasing salt.
  • For a Mediterranean twist: Add 1 teaspoon dried oregano and the zest of one lemon to the seasoning. Serve with a side of tzatziki and olives.
  • For a smoky flavor: Use 1/2 teaspoon smoked paprika and a pinch of cumin. Serve with roasted sweet potatoes.
  • For a gluten-free option: This recipe is naturally gluten-free when you use gluten-free spices and parchment.

Small tweaks let you adapt the chicken to different tastes and diets without losing the core technique.

FAQ

Q: Can I use bone-in chicken breasts?
A: Yes. Bone-in breasts take longer to cook. Increase bake time to about 35-40 minutes and check for an internal temperature of 165°F near the bone.

Q: How do I prevent dry chicken?
A: Do not overcook. Use a thermometer and remove the chicken at 165°F. Let it rest for a few minutes to redistribute juices before slicing.

Q: Can I marinate the chicken instead of using a dry rub?
A: Absolutely. A 30-minute to 2-hour marinade with olive oil, lemon, and herbs adds flavor. Pat the chicken dry before adding the dry seasoning for a nice crust.

Q: Is it okay to bake at a different temperature?
A: You can bake at 375°F for a slightly longer time, around 30-35 minutes. Lower heat is gentler but take care to monitor internal temperature.

Q: Can I prepare this ahead for a party?
A: Yes. Bake the chicken and slice it. Keep warm in a low oven at 200°F covered with foil, or serve at room temperature on a platter for a buffet. Offer sauces on the side.

Conclusion

I hope this oven baked chicken breast becomes one of your go-to recipes. It is simple, dependable, and kind to busy family schedules. Little habits like using a thermometer and letting the meat rest will reward you with moist, flavorful chicken every time.

For another trusted variation of a baked chicken breast recipe, I like the practical method shown by Oven Baked Chicken Breast – RecipeTin Eats. For additional tips on achieving juicy results and serving ideas, check out Baked Chicken Breast | Gimme Some Oven.

Thanks for cooking with me. I love hearing how your family enjoys this recipe, so come back and share your favorite twist.

Oven Baked Chicken Breast

Prep Time 10 minutes
Cook Time 30 minutes
Total Time 40 minutes
Servings 4 servings
Calories 250
A simple, reliable recipe for juicy oven-baked chicken breasts that is perfect for busy weeknights or lazy Sundays.

Ingredients

Main Ingredients

  • 4 pieces chicken breasts (Choose even-sized breasts so they cook at the same rate.)
  • 2 tablespoons olive oil (Use a good quality olive oil for flavor.)
  • 1 teaspoon garlic powder (Use fresh garlic if preferred; reduce garlic powder.)
  • 1 teaspoon onion powder (Adds roundness to the flavor.)
  • 1 teaspoon paprika (Use smoked paprika for a subtle smoky note.)
  • Salt and pepper to taste (1/2 to 3/4 teaspoon kosher salt per breast.)
  • Fresh herbs (optional for garnish) (Parsley, thyme, or chives add a fresh finish.)

Instructions 

Preparation

  • Preheat the oven to 400°F (200°C).
  • In a bowl, mix olive oil, garlic powder, onion powder, paprika, salt, and pepper.
  • Rub the seasoning mixture all over the chicken breasts.
  • Place the chicken breasts on a baking sheet lined with parchment paper.

Cooking

  • Bake for 25-30 minutes, or until the chicken is cooked through and juices run clear.
  • Let rest for a few minutes before slicing.
  • Garnish with fresh herbs if desired and serve.

Notes

Cool the chicken to room temperature for no more than two hours before refrigerating. Store cooked chicken in the fridge for up to 4 days or freeze for up to 3 months.
Calories: 250kcal
Course: Dinner, Main Course
Cuisine: American
Keyword: Easy Chicken Recipe, Family Dinner, Juicy Chicken Breast, Oven Baked Chicken, Weeknight Meal

As a busy person who loves to whip up mouthwatering meals after a long day, I know how important it is to have quick and delicious chicken recipes on hand. In this roundup, I’m excited to share my absolute favorite chicken dishes that are perfect for weeknight dinners. From the finger-licking Bang Bang Chicken Sliders to the zesty Pineapple Cowboy Candy Chicken Wings, these recipes will save you time in the kitchen while satisfying your family's cravings. Get ready to discover flavorful options that will transform your dinner routine and leave everyone asking for seconds!

1. Bang Bang Chicken Sliders Recipe

Bang Bang Chicken Sliders Recipe

Picture this: a chaotic weeknight transformed into a mini celebration with the clink of plates and the irresistible aroma of spicy Bang Bang Chicken Sliders wafting through the air. This recipe is not just a meal; it's a delightful experience that pulls everyone to the table, creating cherished family moments amidst the hustle and bustle. If you're looking for a quick yet flavorful dinner that brings everyone together, this slider recipe is a must-try—it just might become your new favorite weeknight staple!

View Recipe →

2. Crunchy Crispy Air Fryer Chicken & Mozzarella Wraps

Crunchy Crispy Air Fryer Chicken & Mozzarella Wraps

There's something magical about the sight and smell of Crunchy Crispy Air Fryer Chicken & Mozzarella Wraps that makes every meal feel like a special occasion. As the tortillas crisp up, anticipation fills the air, igniting laughter and friendly debates over who gets the last bite. This delightful recipe not only delivers a perfect blend of comfort and flavor but also transforms everyday chaos into cherished family moments. Dive into this article and discover how to create these easy, satisfying wraps that are bound to become a staple at your dinner table—your taste buds will thank you!

View Recipe →

3. Quick & Easy Homemade Butter Chicken Recipe

Quick & Easy Homemade Butter Chicken Recipe

There's something magical about the aroma of butter chicken wafting through the kitchen, especially when it draws loved ones around the dinner table. This quick and easy homemade butter chicken recipe is not only a delight to the senses but also a heartwarming way to create cherished moments with family. Ready to whip up a flavorful dish that makes weeknight dinners feel special? Grab your apron and dive into a hassle-free cooking experience that promises both rich taste and lasting memories.

View Recipe →

4. Pineapple Cowboy Candy Chicken Wings

Pineapple Cowboy Candy Chicken Wings

Discover the mouthwatering delight of Pineapple Cowboy Candy Chicken Wings, a dish that transforms any gathering into a cherished family moment. With a perfect blend of sweet, spicy, and sticky flavors, these wings not only promise to please even the pickiest eaters but also fill your home with a warm, inviting aroma that draws everyone together. Dive into our article to uncover the recipe that brings joy, laughter, and unforgettable memories to the dinner table—because there's nothing quite like cooking for the ones you love.

View Recipe →

5. Cheesy Garlic Chicken Wraps

Cheesy Garlic Chicken Wraps

Imagine a rainy evening filled with laughter and the comforting aroma of garlic and butter wafting through your kitchen. These Cheesy Garlic Chicken Wraps are the perfect embodiment of home-cooked warmth, promising to wrap your family in coziness with each gooey, cheesy bite. Discover how to create this easy, crowd-pleasing dish that not only satisfies hunger but also creates cherished memories around the dinner table, transforming ordinary nights into delightful culinary experiences. Let’s dive into a recipe that brings both flavor and joy to your home!

View Recipe →

6. Crispy Orange Chicken

Crispy Orange Chicken

There's something magical about the aroma of crispy orange chicken wafting through the kitchen, bringing family together for a moment of connection and comfort. This recipe isn’t just a dish; it’s a warm invitation to slow down and savor the flavors that make your house feel like a home. Join us as we dive into why this Crispy Orange Chicken recipe is more than just dinner—it’s a delightful experience that wraps you in the cozy embrace of sweet and tangy goodness. Get ready to create memories around the dinner table with every bite!

View Recipe →

7. Easy Street Corn Chicken Bowl

Easy Street Corn Chicken Bowl

Transform your weeknight dinners with a warm and vibrant Easy Street Corn Chicken Bowl that’s bound to bring your family together. The enticing aroma of cumin-laced corn fills the air, sparking excitement as your loved ones gather around the table, making each bite a delicious blend of comforting flavors and cherished moments. Discover why this dish isn’t just a meal but a heartwarming routine that turns busy nights into treasured family gatherings, and learn how to create your own culinary hug at home!

View Recipe →

8. Sticky Pineapple-Teriyaki Chicken Wings

Sticky Pineapple-Teriyaki Chicken Wings

Imagine the warm, inviting aroma of sweet pineapple and soy wafting through your home, as your family gathers around the dinner table, ready for a deliciously sticky feast. These Sticky Pineapple-Teriyaki Chicken Wings have transformed our weeknight dinners into a cherished family tradition filled with laughter and joy. Bursting with flavor and easy to make, this recipe is your ticket to creating memorable meals that everyone will love. Dive into the full article to discover how you can bring this comforting dish into your kitchen and elevate your family dinners!

View Recipe →

9. Bang Bang Chicken Skewers

Bang Bang Chicken Skewers

There's something truly magical about the aromas wafting from the kitchen, and Bang Bang Chicken Skewers embody that warmth and nostalgia. Picture a gathering filled with laughter and delicious flavors, as these grilled skewers drizzled in a mouthwatering peanut sauce become the star of your meal. Dive into this article to discover a simple yet transformative recipe that not only satisfies your cravings but also brings loved ones together, creating memories that will linger long after the last bite.

View Recipe →

If you're anything like me, there's nothing quite as satisfying as a dish that tantalizes your taste buds and fills your kitchen with the irresistible aroma of garlic. I’ve rounded up my top nine garlic chicken recipes that are not only bursting with flavor but also incredibly easy to prepare. Whether you're in the mood for something cheesy, creamy, or packed with herbs, I've got you covered! Each recipe promises to transform your everyday meals into something special, so get ready to impress your family and friends with delicious, flavor-packed dishes that you'll want to make again and again.

1. Cheesy Garlic Chicken Wraps

Cheesy Garlic Chicken Wraps

There's nothing quite like the comforting aroma of garlic and butter wafting through the kitchen, especially on a rainy evening filled with laughter and love. Dive into the world of Cheesy Garlic Chicken Wraps—a recipe that brings a cozy vibe straight to your dining table. With gooey, melted cheese and savory chicken enveloped in warm tortillas, these wraps are not just a meal; they’re a hug for your taste buds. Join me as we explore how this recipe can transform your family dinners into delightful memories, packed with flavor and nostalgia.

View Recipe →

2. Chicken Shawarma with Garlic Sauce

Chicken Shawarma with Garlic Sauce

If you’re craving a dish that brims with flavor and brings the family together, look no further than Chicken Shawarma with Garlic Sauce! This recipe transforms busy weeknights into culinary adventures, filling your kitchen with the irresistible aroma of spices while making dinner a breeze. With tender, grilled chicken and a creamy garlic sauce that packs a punch, you’ll discover how easy it is to enjoy a taste of Middle Eastern cuisine right at home—perfect for quick meals or leisurely Sunday feasts. Dive into the full recipe and elevate your next dinner experience!

View Recipe →

3. Cheesy Garlic Chicken Wraps

Cheesy Garlic Chicken Wraps

If you're searching for a dish that combines comfort with quick preparation, look no further than Cheesy Garlic Chicken Wraps! This delightful recipe brings the warmth of your kitchen to the dinner table, making it an easy favorite for families of all sizes. With the irresistible aroma of garlic and melting cheese mingling in the air, you'll quickly discover why this meal will have everyone eagerly requesting it again. Dive into this article for a tasty solution that promises not just flavor, but also the joy of family togetherness over a simple yet special dinner.

View Recipe →

4. Sheet Pan Garlic Butter Chicken and Veggies

Sheet Pan Garlic Butter Chicken and Veggies

Imagine opening your oven to the rich aroma of garlic and butter wafting through your kitchen, instantly warming your heart and home. This Sheet Pan Garlic Butter Chicken and Veggies is not just a meal; it's a weeknight lifesaver that marries convenience with comfort, offering a delightful blend of tender chicken and vibrant roasted vegetables—all in one easy-to-clean pan! Dive into this recipe to discover how to create a comforting family dinner that will have everyone asking for seconds. Plus, don't miss out on other quick and tasty options like Bang Bang Chicken Sliders for your next culinary adventure!

View Recipe →

5. Garlic Herb Chicken

Garlic Herb Chicken

Imagine a bustling weeknight transformed into a cozy family gathering with just one simple recipe: Garlic Herb Chicken. This succulent dish fills your kitchen with the mouthwatering aromas of garlic and butter while delivering flavors that will make everyone at the table smile. With its easy preparation and comforting taste, this meal not only makes dinner a breeze but also creates lasting memories. Ready to turn your next dinner into a cherished family moment? Dive into our guide to discover how to whip up this crowd-pleaser that will have your loved ones asking for seconds!

View Recipe →

6. Garlic Butter Chicken Crockpot Recipe: 6-Hour Magic for Tender Bliss

Garlic Butter Chicken Crockpot Recipe: 6-Hour Magic for Tender Bliss

Are you ready to transform your weeknight dinners into a culinary delight with minimal effort? This Garlic Butter Chicken Crockpot Recipe promises just that—tender, flavorful chicken swimming in a luscious garlic-butter sauce, all achieved with the magic of slow cooking. Perfect for busy families, this dish will have your kitchen smelling divine and your loved ones gathering around the table for a heartwarming meal. Dive into this easy, comforting recipe that brings together taste and convenience, and discover why it's bound to become a staple in your household!

View Recipe →

7. Creamy Garlic Parmesan Chicken Breast

Creamy Garlic Parmesan Chicken Breast

Imagine stepping into your kitchen and being enveloped by the enticing aroma of garlic and butter, all while creating a dinner that feels like a warm hug. This Creamy Garlic Parmesan Chicken Breast recipe is your ticket to a quick yet indulgent meal, where tender chicken and a luscious sauce come together effortlessly in one pan. With its blend of comforting flavors and speedy preparation, this dish promises to become a favorite that will draw friends and family to the table, eager to savor every bite. Ready to elevate your weeknight dinners? Dive into this recipe for a delightful, home-cooked experience!

View Recipe →

8. Creamy Garlic Mushroom Chicken Thighs

Creamy Garlic Mushroom Chicken Thighs

Imagine stepping into your kitchen and being enveloped by the irresistible aroma of garlic and butter, hinting at a delightful family dinner waiting to happen. With this Creamy Garlic Mushroom Chicken Thighs recipe, you'll create a comforting meal that's not just easy to whip up but also feels indulgent enough for a special occasion. In just a few simple steps, you can have a dish that wraps your loved ones in warmth and flavor, making it a perfect addition to your weekly dinner rotation. Ready to impress? Let’s dive in!

View Recipe →

9. Crockpot Garlic Parmesan Chicken Thighs

Crockpot Garlic Parmesan Chicken Thighs

Imagine stepping into your kitchen to the warm, inviting aroma of garlic and butter, signaling that dinner is about to become a comforting reality. This Crockpot Garlic Parmesan Chicken Thighs recipe not only makes your home smell incredible but also brings your family closer together as they reach for seconds at the dining table. Perfect for busy evenings, this dish does most of the work while you enjoy quality time with your loved ones, making mealtime a breeze. Get ready to impress everyone with minimal effort—let’s dive into this easy, delicious recipe that promises a satisfying dining experience for all!

View Recipe →

Marry Me Chicken

The rich smell of olive oil and garlic fills the kitchen as I prepare this delightful dish. You hear the soft sizzling of the chicken in the skillet, all while the thought of a cozy family dinner lingers in the air. This is Marry Me Chicken, a recipe so good that it might just be worth a proposal.

Why This Works

Marry Me Chicken

Marry Me Chicken is one of those meals that feels special yet comes together with ease. It’s perfect for busy weeknights when you want to serve your family something delicious without spending hours in the kitchen. The creamy sauce enveloping the chicken pairs beautifully with pasta or rice, making it a complete meal.

Not only is this a time-saver, but it also has that wow factor that can impress anyone at the dinner table. After all, who wouldn’t fall in love after tasting a dish this comforting?

Process Overview

“This is where the magic happens—when the aroma fills the kitchen.”

The process for making Marry Me Chicken is not just straightforward but also quite enjoyable. From searing the chicken to creating that luscious creamy sauce, each step brings warmth into your home. You will appreciate how quickly it all comes together, allowing you to enjoy more quality time with your loved ones.

Ingredients

  • 4 boneless, skinless chicken breasts
  • 2 tablespoons olive oil
  • Salt and pepper to taste
  • 1 teaspoon garlic powder
  • 1 tablespoon Italian seasoning
  • 1 cup heavy cream
  • 1 cup chicken broth
  • 1 cup diced tomatoes
  • 1 cup grated Parmesan cheese
  • Fresh parsley for garnish

Lily’s Personal Tips

  • Chicken Breasts: Choose organic if possible. You can also use chicken thighs for a different flavor.
  • Olive Oil: Extra virgin olive oil offers a richer taste.
  • Garlic Powder: Fresh garlic can be used but adjust the quantity to avoid overpowering the dish.
  • Parmesan Cheese: Grating it fresh gives the best texture and flavor.
  • Fresh Parsley: This does not only look pretty; it adds a fresh taste that balances the creaminess.

Directions

  1. Preheat your oven to 375°F (190°C).

    • Starting with a preheated oven ensures your chicken cooks evenly.
  2. Season the chicken breasts with salt, pepper, garlic powder, and Italian seasoning.

    • Make sure to rub the seasoning in well for the best flavor.
  3. In a large skillet, heat olive oil over medium-high heat. Add the chicken breasts and sear until golden brown, about 5 minutes on each side.

    • This will give your chicken a beautiful crust and lock in the juices.
  4. Remove the chicken from the skillet and set aside.

    • Letting it rest is key to keeping it moist.
  5. In the same skillet, add chicken broth, heavy cream, and diced tomatoes. Stir well and bring to a simmer.

    • You’ll want those flavors to meld together beautifully.
  6. Stir in the Parmesan cheese until melted.

    • This will create a creamy sauce that coats everything perfectly.
  7. Return the chicken to the skillet, spooning sauce over the top.

    • Make sure each piece is well coated; this is where the love really comes in.
  8. Transfer the skillet to the preheated oven and bake for 20-25 minutes until the chicken is cooked through.

    • Use a meat thermometer; the internal temperature should reach 165°F.
  9. Garnish with fresh parsley and serve over pasta or rice.

    • A sprinkle of parsley adds both color and taste; serve it up family-style for that heartwarming touch.

Serving

Marry Me Chicken

Marry Me Chicken is best served warm and family-style. Load it up over a bed of pasta or rice, and let everyone help themselves. Consider adding some steamed vegetables or a fresh salad on the side to complete your meal. Sharing this dish around the table creates a loving environment where every bite feels like a hug.

Storage

If you have leftovers (which is rare, trust me), you can store them in an airtight container in the fridge for up to four days. When ready to enjoy again, reheat gently on the stovetop or in the microwave, adding a splash of broth or cream to maintain the sauce’s richness.

Kitchen Notes

  • Use one skillet for everything to minimize clean-up.
  • Look for pre-cut chicken or ask your butcher for help to save time.
  • Make a double batch and freeze it for those nights you don’t want to cook.
  • Consider adding a splash of white wine to the sauce for extra flavor.
  • Keep your herbs fresh by storing them in water in the fridge.

Variations

Feel free to customize Marry Me Chicken according to your family’s tastes or dietary needs. Here are a few ideas:

  • Substitute almond milk for heavy cream for a lighter option.
  • Use dairy-free cheese alternatives if anyone is lactose intolerant.
  • For a spicy kick, add red pepper flakes to the sauce.
  • Toss in some chopped spinach or kale for added greens.
  • If you have picky eaters, slice the chicken into bite-sized pieces for easier eating.

FAQ

1. Can Marry Me Chicken be made in advance?
Yes, you can prepare the chicken and the sauce ahead. Just bake it when you are ready to serve.

2. Is it possible to use frozen chicken?
While fresh chicken works best, you can use frozen chicken; just ensure it is cooked through completely.

3. What can I serve with Marry Me Chicken?
Pasta, rice, or even a simple side salad pairs nicely with this dish.

4. How do I know when the chicken is fully cooked?
Use a meat thermometer; it should read 165°F.

5. Can I make this dish in a slow cooker?
Yes, you can adapt it for a slow cooker; just add everything and cook on low for 4-6 hours.

Conclusion

Thank you for joining me on this delightful cooking journey. Marry Me Chicken is truly a dish that brings families together around the table. With its wonderful flavors and simple preparation, it’s bound to become a favorite in your home. I hope you enjoy cooking and sharing this special meal with your loved ones. Until next time, happy cooking!

Marry Me Chicken

Prep Time 10 minutes
Cook Time 30 minutes
Total Time 40 minutes
Servings 4 servings
Calories 600
A delicious and creamy chicken dish that's perfect for family dinners, combining tender chicken with a flavorful sauce. A dish so good, it might just earn a proposal!

Ingredients

Main Ingredients

  • 4 pieces boneless, skinless chicken breasts (Choose organic if possible or substitute with chicken thighs.)
  • 2 tablespoons olive oil (Extra virgin olive oil offers a richer taste.)
  • 1 teaspoon garlic powder (Fresh garlic can be used but adjust the quantity.)
  • 1 tablespoon Italian seasoning (Adds flavor to the chicken.)
  • 1 cup heavy cream (For a creamy sauce.)
  • 1 cup chicken broth (Adds depth to the sauce.)
  • 1 cup diced tomatoes (Provide flavor and texture.)
  • 1 cup grated Parmesan cheese (Grating fresh gives the best texture and flavor.)
  • to taste salt and pepper (Used for seasoning.)
  • as needed fresh parsley for garnish (Adds a fresh taste and visual appeal.)

Instructions 

Preparation

  • Preheat your oven to 375°F (190°C).
  • Season the chicken breasts with salt, pepper, garlic powder, and Italian seasoning.
  • In a large skillet, heat olive oil over medium-high heat. Add the chicken breasts and sear until golden brown, about 5 minutes on each side.
  • Remove the chicken from the skillet and set aside.
  • In the same skillet, add chicken broth, heavy cream, and diced tomatoes. Stir well and bring to a simmer.
  • Stir in the Parmesan cheese until melted.
  • Return the chicken to the skillet, spooning sauce over the top.
  • Transfer the skillet to the preheated oven and bake for 20-25 minutes until the chicken is cooked through.
  • Garnish with fresh parsley and serve over pasta or rice.

Notes

Consider serving with steamed vegetables or a fresh salad. Store leftovers in an airtight container in the fridge for up to four days.
Calories: 600kcal
Course: Dinner, Main Course
Cuisine: American
Keyword: Chicken, Comfort Food, Creamy sauce, Family Dinner, Quick Meal

rotisserie chicken recipes have saved my weeknight dinners more times than I can count. You know those days when you walk in the door tired, everyone is hungry, and the thought of cooking from scratch feels like a bad joke? Yep, that. A warm store bought chicken is basically a shortcut to a real meal that still feels homemade. I keep one in the fridge like it is my little safety net. If you are busy, feeding a family, or just trying to eat something better than cereal, you are in the right place.
Deliciously Easy Rotisserie Chicken Recipes for Busy Weeknights

Why You’ll Love Rotisserie Chicken

First of all, it is already cooked. That is the big win. You get tender meat, a little bit of seasoning, and enough flavor to carry a dish without doing much work.

I also love that it is flexible. One chicken can turn into tacos, soup, pasta, and lunch the next day without anyone feeling like they are eating the same thing over and over.

Here are a few reasons it works so well on busy nights:

  • Fast dinners in 15 to 30 minutes because the protein is done
  • Budget friendly since it stretches across multiple meals
  • Beginner proof because you are mostly assembling, not “chef level” cooking
  • Kid friendly and easy to adjust for picky eaters

One small personal tip: when I get home, I pull the meat off while it is still a little warm. It is way easier, and then future you will feel very smug when dinner takes five minutes of effort.

Deliciously Easy Rotisserie Chicken Recipes for Busy Weeknights

Top Rotisserie Chicken Recipes for Easy Dinners

This is the part where rotisserie chicken recipes really shine. These are my go to dinners when I need something reliable that tastes like I tried harder than I did.

1) Creamy Chicken Pesto Pasta

This one is comfort food that still feels fresh. The pesto does most of the heavy lifting, and the chicken makes it filling.

What you’ll need:

  • 2 to 3 cups shredded rotisserie chicken
  • 8 oz pasta (penne or spaghetti both work)
  • 3 to 4 tablespoons pesto
  • 1 splash of cream or half and half (or a spoon of cream cheese)
  • Handful of spinach (optional but nice)
  • Salt, pepper, and parmesan

How I make it: Cook the pasta. Before you drain it, save a half cup of the pasta water. Toss pasta with pesto and a splash of cream. Add chicken and spinach, then loosen it with a bit of pasta water until it looks silky. Finish with parmesan and black pepper.

2) Weeknight Chicken Tacos

These are the “everyone can build their own” dinner, which means fewer complaints at the table. I warm shredded chicken in a pan with a little salsa or taco seasoning and a splash of water. Then I set out tortillas and toppings.

Quick topping ideas: shredded lettuce, diced tomatoes, avocado, cheese, sour cream, lime wedges, hot sauce. If you have time, heat tortillas in a dry pan for that toasty flavor.

3) Cozy Chicken and Rice Soup

If you are tired or the weather is gloomy, this is the answer. I saute a little onion and carrot in a pot, add chicken broth, toss in shredded chicken, and add cooked rice. If I have lemon, I squeeze some in at the end. It wakes everything up. This soup tastes even better the next day, which feels like a small life victory.

When I’m deciding which dinner to make, I think about what I have in the fridge and what mood we are in. Pasta night feels like a treat. Taco night feels fun. Soup night feels calming. Either way, the chicken gets you there fast.

“I tried your taco idea with rotisserie chicken and it seriously saved my Tuesday. My kids ate it without negotiating, which never happens.”

Healthy and Creative Uses for Rotisserie Chicken

If your brain goes straight to heavy meals, I get it. But rotisserie chicken recipes can be lighter too. The trick is pairing the chicken with crunchy veggies, bright sauces, and simple grains.

One of my favorites is a big chopped salad that does not feel sad. I do romaine, cucumbers, cherry tomatoes, red onion, a little feta, and chicken. Then I drizzle a quick dressing with olive oil, lemon, salt, pepper, and a tiny spoon of mustard. It is the kind of meal that makes you feel like you are taking care of yourself.

Here are more healthy ideas that still taste exciting:

Lettuce wrap bowls: Chicken, shredded carrots, cucumber, and a quick sauce like soy sauce plus a little honey and lime.

Buffalo chicken sweet potatoes: Bake or microwave sweet potatoes, top with chicken tossed in buffalo sauce, add Greek yogurt and green onions.

Protein packed breakfast scramble: Add a handful of chicken to eggs with spinach and a little cheese. It sounds odd until you try it, and then you are hooked.

Creative tip: mix shredded chicken with a spoon of hummus or mashed avocado instead of mayo for a quick sandwich filling. It is creamy, it holds together, and it feels fresher.

Meal Prep Ideas with Rotisserie Chicken

If you want your week to feel easier, do a little meal prep right after you bring the chicken home. Nothing intense. Just small steps that make future meals almost automatic.

Here is my simple routine:

Step 1: Pull off all the meat and separate it into light and dark if you care, or just toss it together if you do not.

Step 2: Portion it into containers. I like doing 2 cup portions because that is about right for one dinner recipe.

Step 3: Save the bones and skin in a bag for broth. If you will not make broth, it is totally fine to toss, but homemade broth is a nice bonus if you have time on the weekend.

Some easy prep combos that make lunches and dinners fast:

Chicken and grain boxes: cooked rice or quinoa, chicken, roasted veggies, and a sauce like salsa verde or tzatziki.

Wrap kit: shredded chicken, tortillas, shredded lettuce, shredded cheese, and a jar of salsa. Then dinner is just assembly.

Soup starter: portion chicken with chopped celery and carrots in a container so soup is a dump and heat situation later.

One more thing: label your containers. I have played the “is this chicken from Monday or Thursday” game, and I do not recommend it.

Tips for Storing and Reheating Rotisserie Chicken

This part matters because nobody wants dry, sad chicken. A little care goes a long way.

How to store it:

Get the meat off the bones within a day if you can. Store it in an airtight container in the fridge. It is usually best within 3 to 4 days. If you will not use it in that time, freeze it. I freeze in small portions so I can grab just what I need.

How to reheat it:

The goal is gentle heat and a bit of moisture. My favorite way is in a skillet with a splash of broth or water and a lid for a couple minutes. For the microwave, cover it with a damp paper towel and heat in short bursts so it does not turn tough.

Bonus: make quick broth:

If you saved the carcass, toss it in a pot with water, a chunk of onion, and a pinch of salt. Simmer for an hour or two. Strain it. Now you have broth that makes your next soup taste like you worked all day.

Common Questions

How much meat is on a rotisserie chicken?
Most average ones give you about 3 to 4 cups of shredded meat. Bigger chickens can give more, but I plan around 3 cups to be safe.

Can I freeze rotisserie chicken?
Yes. Freeze it in airtight bags or containers, ideally in meal sized portions. It is best within 2 to 3 months for good flavor and texture.

What is the easiest dinner to make with it?
Tacos, hands down. Warm the chicken with salsa or seasoning, then set out toppings. Dinner feels fun and it is done fast.

How do I keep reheated chicken from drying out?
Add moisture and do not overheat it. A splash of broth in a pan, or a damp paper towel in the microwave, makes a big difference.

Is rotisserie chicken already seasoned?
Usually yes, but every store does it differently. Taste a piece first, then decide if your recipe needs extra salt or seasoning.

Your New Weeknight Shortcut

When life gets busy, rotisserie chicken recipes are the kind of practical help that still tastes good and feels comforting. You can spin one chicken into pasta, tacos, soup, salads, and easy meal prep without getting stuck in the kitchen all night. Keep a few sauces and veggies around, and you will always have a plan. If you try one idea this week, start with the tacos or the pesto pasta and make it your own. Let me know what you end up making, because I am always looking for the next easy dinner win.
rotisserie chicken recipes

Rotisserie Chicken Recipes

Prep Time 15 minutes
Cook Time 15 minutes
Total Time 30 minutes
Servings 4 servings
Calories 400
Discover versatile and quick recipes using rotisserie chicken that save time and deliver comfort food, perfect for busy weeknights.

Ingredients

For Creamy Chicken Pesto Pasta

  • 2-3 cups shredded rotisserie chicken
  • 8 oz pasta (penne or spaghetti)
  • 3-4 tablespoons pesto
  • 1 splash cream or half and half ((or a spoon of cream cheese))
  • 1 handful spinach ((optional))
  • to taste salt and pepper
  • to taste parmesan

For Weeknight Chicken Tacos

  • 2 cups shredded rotisserie chicken
  • to taste salsa or taco seasoning
  • 1 splash water
  • to taste toppings such as shredded lettuce, diced tomatoes, avocado, cheese, sour cream, lime wedges, hot sauce

For Cozy Chicken and Rice Soup

  • 2 cups shredded rotisserie chicken
  • 4 cups chicken broth
  • 1 onion (diced)
  • 1 carrot (diced)
  • 2 cups cooked rice
  • to taste lemon juice ((if available))

Instructions 

Creamy Chicken Pesto Pasta

  • Cook the pasta according to package instructions.
  • Before draining, reserve half a cup of pasta water.
  • Toss the cooked pasta with pesto and a splash of cream.
  • Add in the shredded chicken and optional spinach, loosening the mixture with reserved pasta water until smooth.
  • Finish with parmesan and black pepper.

Weeknight Chicken Tacos

  • Warm shredded chicken in a pan with salsa or taco seasoning and a splash of water.
  • Set out tortillas and toppings for everyone to build their own tacos.

Cozy Chicken and Rice Soup

  • Sauté diced onion and carrot in a pot.
  • Add chicken broth and shredded chicken; bring to a simmer.
  • Stir in cooked rice.
  • If using, squeeze in lemon juice before serving.

Notes

These recipes are designed to be quick and adaptable. Feel free to customize them based on your preferences and what you have available in your pantry.
Calories: 400kcal
Course: Dinner, Main Course
Cuisine: American
Keyword: Comfort Food, easy recipes, meal prep, quick dinners, rotisserie chicken

Crispy Orange Chicken

There is a sound I love: my youngest setting the chopsticks down with deliberate care while the orange sauce begins to bubble and the kitchen fills with warm citrus and garlic. That smell wraps around the room like a soft blanket and somehow everyone looks up from their day, drawn in. This Crispy Orange Chicken has become our little kitchen signal that it is time to slow down and eat together.

Why This Crispy Orange Chicken Feels Like Home

Crispy Orange Chicken

This recipe feels like a hug on a plate. It pairs the childhood comfort of crunchy, golden bites with a bright, saucy orange finish that makes mouths happy and plates disappear fast. It is the kind of meal that fits into a busy week but still feels special enough for the weekend.

It matters because it comes together quickly, uses only a few bowls, and please-everyone flavors cut through the noise. Meanwhile, it gives you the freedom to involve the kids in small, fun tasks. From my experience, a meal that is quick yet full of warmth keeps the kitchen lively and the family talking.

How to Make Crispy Orange Chicken, The Heartwarming Way

“This is where the magic happens—when the aroma fills the kitchen and my kids come running in, asking ‘Is it ready yet?’”

Here is a short overview so you know what to expect. First, we turn ordinary chicken into tiny golden pillows by breading and frying. Next up, a tart and slightly sweet orange sauce comes together in the same time it takes to rest the chicken. From there, the fried pieces meet the sauce and transform into glossy, saucy bites that are crisp at the edges and sticky in the center.

Watch for visual cues as you cook: the chicken should be deep golden and not pale, the sauce should reduce to a syrupy gloss that coats the back of a spoon, and the aroma should be bright with orange and warm with garlic. Those cues are the kind of kitchen notes my grandmother would have pointed out, and they reliably tell you when you are on the right path.

Ingredients You’ll Need

1 lb boneless, skinless chicken breasts
1 cup all-purpose flour
2 large eggs (beaten)
1/4 cup vegetable oil (for frying)
1/2 cup fresh orange juice
3 tbsp low-sodium soy sauce
2 tbsp sugar
3 garlic cloves (minced)
1/2 tsp ginger powder

A few friendly notes: don’t skip the fresh orange juice if you can help it; it gives a clean brightness that bottled juice struggles to match. If you only have other citrus, experiment, but orange is the soul of this dish. Use what’s in your fridge when needed — cooking is about creativity, not perfection.

Step-by-Step Directions

  1. Cut the chicken breasts into bite-sized pieces.
    Aim for even pieces so they cook at the same rate.
    Little pieces mean more crunchy surface and happier forks.

  2. Set up a breading station with flour mixed with a pinch of salt in one bowl and beaten eggs in another.
    Keep things simple and organized so the coating step moves smoothly.
    Seasoning the flour is a small trick that boosts flavor.

  3. Dip each chicken piece in the egg mixture, allowing excess to drip off, then coat thoroughly with flour.
    Pat the flour on if needed so the breading sticks well.
    Work in batches to avoid soggy pieces.

  4. Heat oil in a large skillet over medium-high heat until shimmering (about 350°F).
    A drop of flour should sizzle when the oil is ready.
    Use an inexpensive thermometer for peace of mind if you like.

  5. Fry the chicken pieces in batches until golden brown (4-5 minutes per side).
    Don’t crowd the pan; too many pieces lower the oil temperature.
    A little browning here builds flavor, just like grandma showed me.

  6. In a saucepan, combine orange juice, soy sauce, sugar, garlic, and ginger powder; simmer until slightly thickened (about 5 minutes).
    Stir often so the sugar dissolves and the garlic softens but does not burn.
    The sauce should coat the back of a spoon when it is ready.

  7. Toss fried chicken with the orange sauce until well-coated.
    Work quickly so the chicken stays crisp on the outside while picking up the sauce.
    Give it a gentle toss; you want glossy coverage, not soggy drowning.

  8. Serve immediately over rice or noodles.
    Fresh scallions or a sprinkle of toasted sesame seeds add nice texture and color.
    Let the kids claim the rice bowl and make it their special scoop station.

Quick tip: frying in batches preserves crispiness, and if you keep finished pieces on a wire rack in a warm oven (about 200°F) they stay crisp until everything is ready. Let the kids stir the sauce under supervision — it is the fun part and makes them proud of the meal.

Crispy Orange Chicken

Serving Crispy Orange Chicken with Love

Crispy Orange Chicken

We serve this family-style, right in the middle of the table, with rice or noodles in a big bowl beside it. Everyone dishes their own portions and decides on extras. My husband loves an extra splash of soy sauce. My daughter loves more orange zest. My father prefers a side of steamed broccoli to balance the sweet.

Popular sides at our table: steamed jasmine rice, quick garlic bok choy, thin cucumber salad, or simple stir-fried green beans. A small bowl of extra sauce on the side is a thoughtful touch for those who want more tang. Bringing this to the table invites conversation and makes the meal feel like a shared event, not just another weeknight dinner.

Storage & Reheat Tips (Keeping the Goodness)

Store leftover chicken in an airtight container once cooled.
It will keep well in the fridge for up to 3 days.
If you want to keep it a bit longer, freeze in a single layer on a baking sheet until solid, then transfer to a freezer bag for up to 2 months.

Reheat ideas: the oven or a hot skillet brings back the best texture.
Spread the chicken on a baking sheet and warm at 350°F for 8-12 minutes, flipping once.
The microwave is fine for a quick lunch, but the oven or skillet returns more of that just-made crispiness.

If you are reheating from frozen, thaw overnight in the fridge if you can. Otherwise, bake at 350°F for 15-20 minutes from frozen, checking for even reheating.

My Kitchen Notes & Shortcuts

  • Prep ahead: Cut the chicken and set it in the fridge up to a day ahead. It saves time on hectic evenings.
  • Shortcut sauce: Use a bit of orange marmalade mixed with soy sauce and garlic when you are short on fresh juice. It adds depth and a hint of rind.
  • Healthier swap: For less oil, bake at 425°F on a greased rack for 12-15 minutes, then lightly spray and broil for color. It will be crisper than straight baking.
  • Kid duty: Let kids shake chicken in a bag with flour for a fun, low-mess breading step. They love it and you get a helper.
  • Flavor boost: Add a teaspoon of rice vinegar or a tiny pinch of red pepper flakes to the sauce if your family likes a little tang or heat.

Family-Friendly Variations

Make it your own with these easy adjustments. For a lighter take, use cornstarch in place of some of the flour for a lighter, almost velvety crust. For a gluten-free version, use a gluten-free flour blend and tamari instead of soy sauce.

If you want to sneak in more vegetables, toss in quick-cooking vegetables like snap peas and thinly sliced bell peppers in the last minute so they stay bright and crisp. For kids who prefer less sauce, serve the sauce on the side so everyone can dip to taste.

Another idea: turn it into lettuce wraps. Spoon warm chicken into crunchy butter lettuce, add some shredded carrots and a sprinkle of scallions, and let everyone build their own wrap. It is playful and adds a fresh element to the meal.

FAQs About Crispy Orange Chicken

Q: Can I make this ahead for a busy week?
A: Absolutely. The chicken can be fried and chilled, and the sauce kept separately. Reheat both gently and toss together just before serving. In fact, letting it sit for an hour helps the flavors marry.

Q: Is frying necessary for the crunch?
A: Frying gives the truest, fastest crisp. Baking or air frying are good alternatives if you prefer less oil; just expect a slightly different texture. A quick pan-fry can also crisp up baked pieces.

Q: How can I get the sauce thick without cornstarch?
A: Reduce the sauce a bit longer over medium heat so it concentrates and becomes glossy. A small pat of butter swirled in at the end also helps add body and shine.

Q: My sauce tastes too sweet. How do I fix it?
A: Balance it with a splash of rice vinegar or a squeeze of lime. A little acidity brightens and tames excess sugar.

Q: Any tips for kids who are picky about texture?
A: Offer the sauce on the side and let them dip. You can also serve the chicken with just a light brush of sauce so it stays more familiar.

One Final Thought from My Kitchen

Cooking is more than following a recipe. It is the moments we steal back from busy days to sit together and share warmth. This Crispy Orange Chicken is an invitation to simplify without sacrificing joy. It tastes like comfort, it comes together without fussy steps, and it offers plenty of room for family stories and small hands to help.

Conclusion

If you want inspiration for variations or another home cook’s take on orange chicken, I like to read and adapt ideas from reliable recipes like Chinese Orange Chicken – Modern Honey and Crispy Orange Chicken – Khin’s Kitchen. Try them, borrow what works, and make this recipe your own.

I hope this dish finds its way into your kitchen conversations and family memories. Give it a try—you might surprise yourself with how easily simple ingredients can make everyone gather at the table. Until next time, happy cooking.

Crispy Orange Chicken

Prep Time 15 minutes
Cook Time 20 minutes
Total Time 35 minutes
Servings 4 servings
Calories 400
A comforting dish of fried chicken pieces coated in a bright and slightly sweet orange sauce, perfect for family meals.

Ingredients

For the Chicken

  • 1 lb boneless, skinless chicken breasts (Cut into bite-sized pieces.)
  • 1 cup all-purpose flour (Season with a pinch of salt.)
  • 2 large eggs (Beaten.)
  • 1/4 cup vegetable oil (For frying.)

For the Sauce

  • 1/2 cup fresh orange juice (Don't substitute with bottled juice if possible.)
  • 3 tbsp low-sodium soy sauce
  • 2 tbsp sugar
  • 3 cloves garlic (Minced.)
  • 1/2 tsp ginger powder

Instructions 

Preparation

  • Cut the chicken breasts into bite-sized pieces. Aim for even pieces so they cook at the same rate.
  • Set up a breading station with flour mixed with a pinch of salt in one bowl and beaten eggs in another.
  • Dip each chicken piece in the egg mixture, allowing excess to drip off, then coat thoroughly with flour.

Cooking

  • Heat oil in a large skillet over medium-high heat until shimmering (about 350°F).
  • Fry the chicken pieces in batches until golden brown (4-5 minutes per side).
  • In a saucepan, combine orange juice, soy sauce, sugar, garlic, and ginger powder; simmer until slightly thickened (about 5 minutes).
  • Toss fried chicken with the orange sauce until well-coated.

Serving

  • Serve immediately over rice or noodles with optional toppings such as fresh scallions or toasted sesame seeds.

Notes

Storing: Store leftovers in an airtight container in the fridge for up to 3 days. Reheat in the oven or skillet for best texture.
Calories: 400kcal
Course: Dinner, Main Course
Cuisine: Asian, Chinese
Keyword: Chicken Recipe, Comfort Food, Crispy Orange Chicken, Family Dinner, Quick Meal