Category

Uncategorized

Category

Crock Pot Pot Roast

The kitchen smelled like slow-baked caramel and rosemary, the windows fogging from the warm breath of the house. My kids were laughing as they arranged the wooden spoons as if they were silverware, and the pot roast hummed quietly in the Crock Pot Pot Roast—soft gold and fragrant. That familiar warmth made the whole room feel like home, and I knew dinner would become one of those small, comforting memories we keep talking about.

Why This Crock Pot Pot Roast Feels Like Home

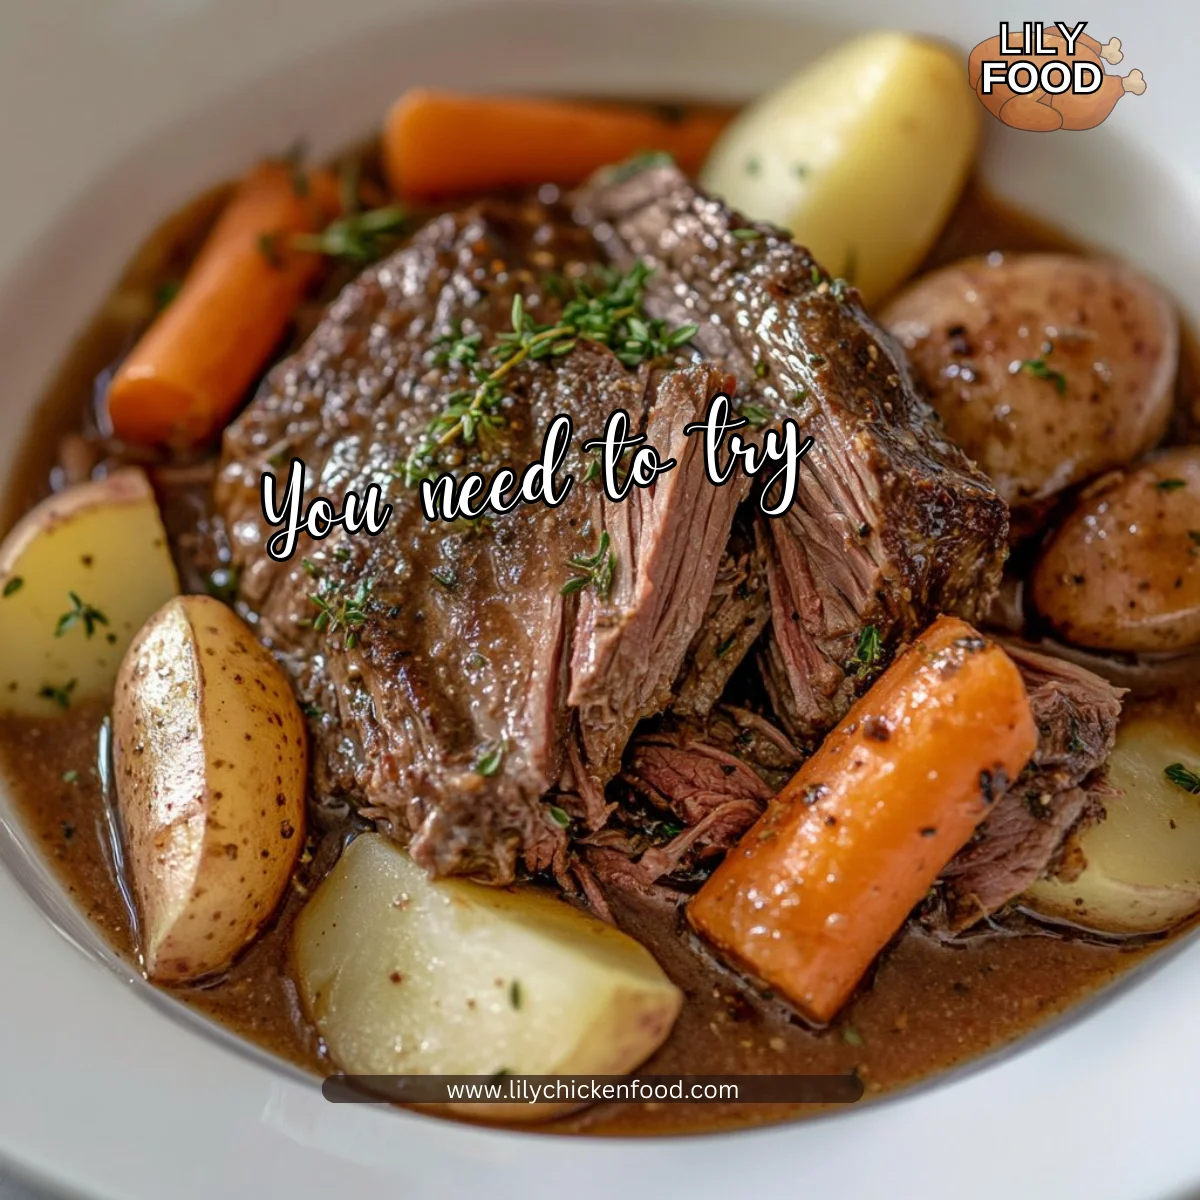
This pot roast is one of those meals that arrives like a warm hug. It takes ordinary ingredients and turns them into something gently rich, with meat so tender it practically falls apart when you lift it.

I love how a Crock Pot Pot Roast asks so little of you while giving so much back. It works for busy evenings, lazy Sundays, and family dinners where everyone has a say. Meanwhile, the slow cooking gives time for flavors to settle in, and that makes all the difference.
Crock Pot Pot Roast

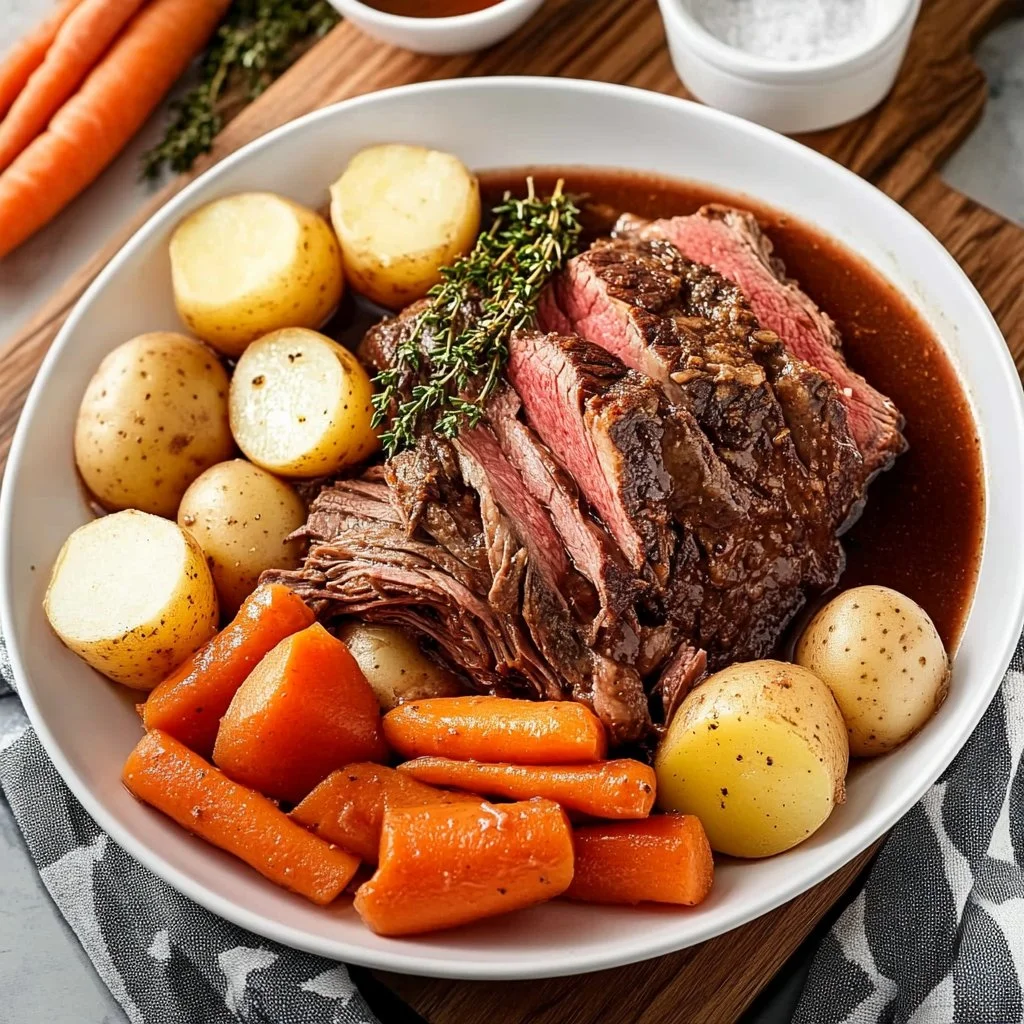
There is comfort in the smell, in the visual of those roasted carrots and potatoes cuddled under a brown, savory sauce. It’s also flexible—feel free to tweak it to what your family likes and what’s already in the fridge. For easy weeknight swaps, I sometimes peek at other slow cooker favorites like a few favorite slow-cooker chicken recipes to borrow ideas about timing and seasoning.

The Simple Magic Behind Crock Pot Pot Roast

This recipe is all about patience and balance. You build flavor in three simple ways: good meat, a little seasoning, and a long, slow cook. The beef chuck roast is a forgiving cut. Its marbling melts over time and gives the whole dish body.

Because the roast cooks with carrots, potatoes, and onion, the veggies soak up that beefy goodness and become their own little yellow-orange miracles. The broth and herbs pull everything together. When you pull the roast, it should be a deep brown outside and tender inside. That texture is your reward for waiting.

How to Make Crock Pot Pot Roast, The Heartwarming Way

“This is where the magic happens—when the aroma fills the kitchen and my kids come running in, asking ‘Is it ready yet?’”

Here’s a quick overview of the process so you’re not surprised when it all comes together. First, you build a cozy bed of vegetables in the slow cooker. Next up, you season the roast and nestle it on top. From there, pour in broth and garlic, cover, and let time do the job.

A visual cue to know you’re on the right track: the roast should pull apart gently with a fork and the vegetables should be soft, not mushy. The sauce should have a glossy sheen and a savory aroma that makes everyone take a deeper breath.

Ingredients You’ll Need

  • 3-4 pounds beef chuck roast
  • 4 carrots, chopped
  • 4 potatoes, chopped
  • 1 onion, chopped
  • 2 cups beef broth
  • 2 cloves garlic, minced
  • 1 teaspoon dried thyme
  • 1 teaspoon dried rosemary
  • Salt and pepper to taste
  • Optional: 2 tablespoons cornstarch (for gravy)
  • Optional: 2 tablespoons water (for gravy)

Don’t skip the fresh herbs if you can—thyme and rosemary are the soul of this dish. But also be kind to yourself: if you only have dried herbs or a quick spice mix, it will still turn out warm and satisfying. If you want inspiration for flavors that pair nicely, try a little garlic-parmesan influence in other slow cookers like my notes on a garlic-parmesan twist. Use what’s in your fridge; this is about creativity, not perfection.

Step-by-Step Directions

  1. Place the chopped carrots, potatoes, and onion in the bottom of the slow cooker.
    Spread them out so the roast sits on a comfortable bed.
    A helpful tip: toss the vegetables with a pinch of salt so they start seasoning early.

  2. Season the beef roast with salt, pepper, thyme, and rosemary.
    Rub the spices into the meat like you mean it.
    A little browning here builds flavor, just like grandma showed me.

  3. Place the seasoned roast on top of the vegetables.
    Center it so the juices can drip down and flavor everything.
    Meanwhile, take a moment to breathe—the long cook does the heavy lifting.

  4. Pour the beef broth and minced garlic over the roast.
    The broth should come up around the vegetables but not cover the roast.
    Garlic adds that warm, homey note without fuss.

  5. Cover the slow cooker and cook on low for 8-10 hours or high for 4-6 hours, until the meat is tender.
    You’ll know it’s ready when a fork slides in and the meat gives easily.
    It’s easier than it looks; let time do its thing.

  6. For optional gravy, whisk together cornstarch and water in a small bowl, stir into the slow cooker during the last 5 minutes of cooking.
    Stir gently to thicken the juices into a silky gravy.
    Let the kids stir this part; it’s a fun bit and they love seeing the change.

  7. Serve the pot roast with the vegetables and gravy.
    Lift the roast carefully, shred or slice, and spoon that glossy sauce over the top.
    Give it a try—you might surprise yourself with the depth of flavor.

Crock Pot Pot Roast

Each step is forgiving. If your timing changes, the roast can usually handle a little extra time. If you find the sauce a bit thin, a cornstarch slurry thickens it in minutes. If you want deeper flavor before the slow cook, briefly sear the roast on the stovetop for a minute per side. It takes a few minutes but adds a lot of character.

Serving Crock Pot Pot Roast with Love

I place the whole Crock Pot Pot Roast in the center of the table and let everyone help themselves. It feels more like a celebration when people pass bowls and ladle gravy on top.
Crock Pot Pot Roast

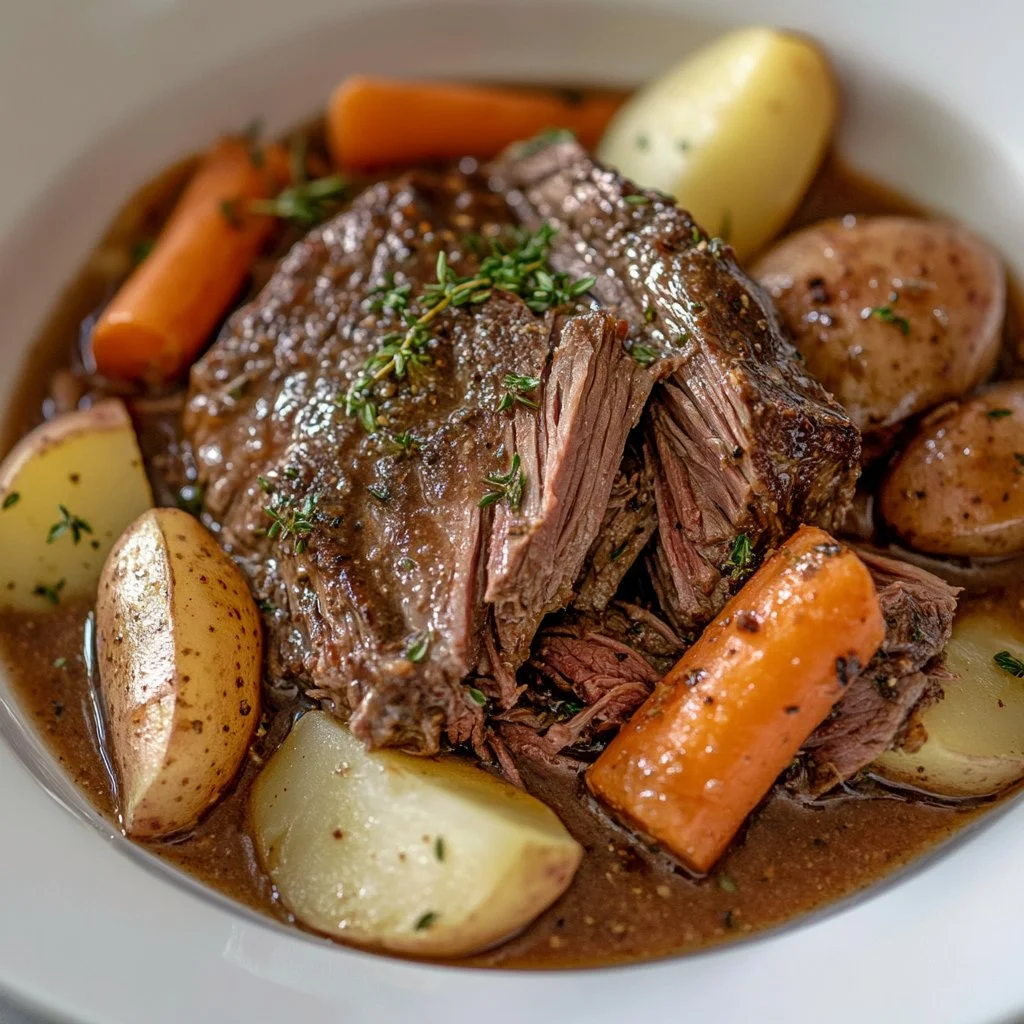
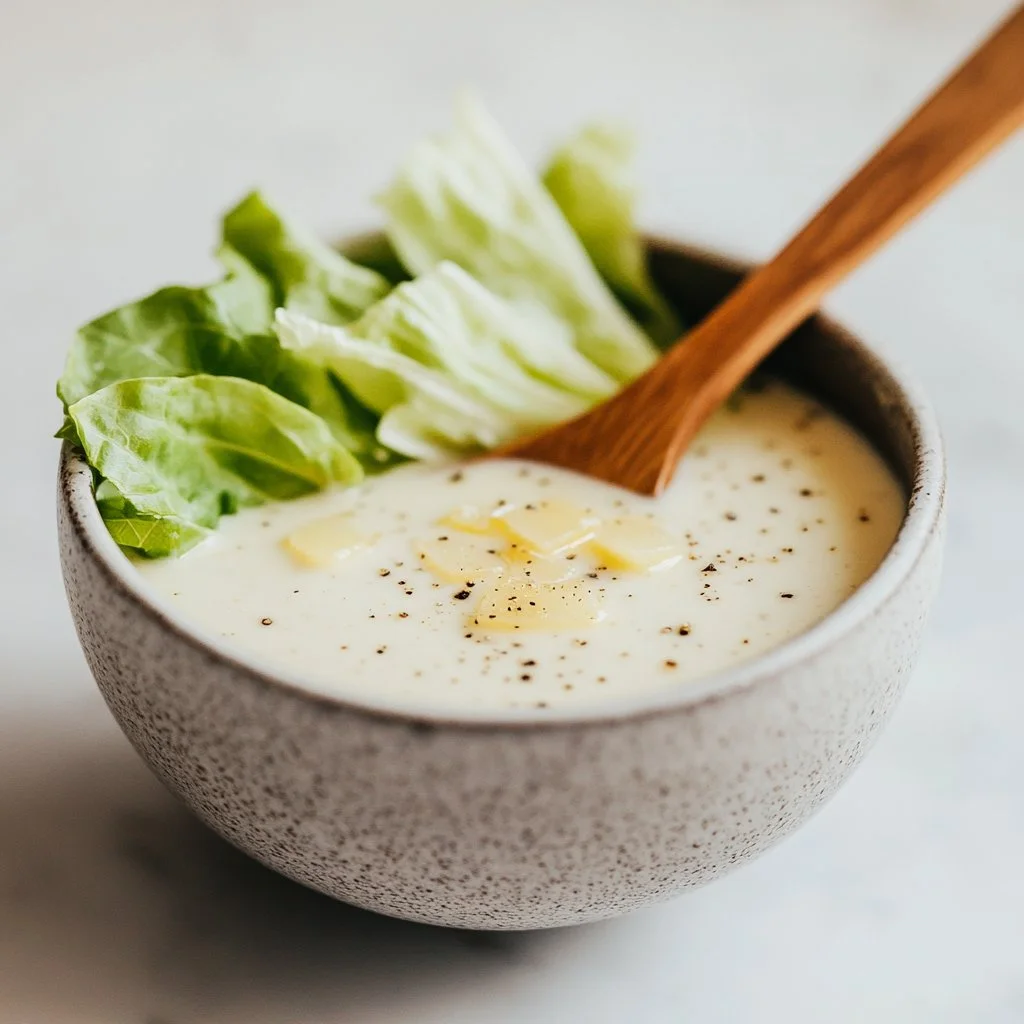
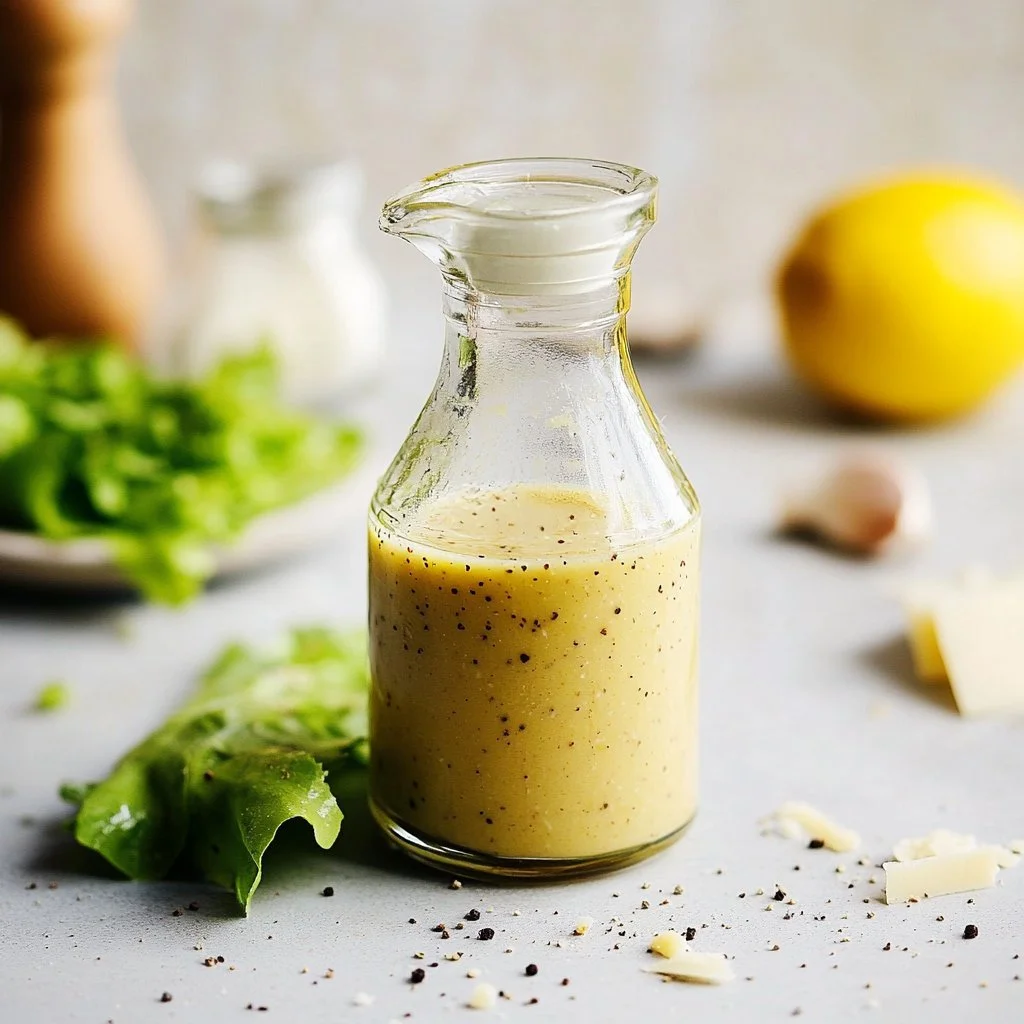
We like simple sides that don’t compete: a green salad with lemon, crusty bread to soak up juices, or a bowl of steamed greens. My youngest always asks for a little extra gravy, while my partner loves to pile potatoes on their plate. For a sweeter side, try pairing with sweet potato sides in weeknight rotations.

I love watching the little rituals—the quiet spooning of sauce, the gentle tug as someone pulls a tender piece of beef onto a plate. These are the small threads that braid a meal into a memory.

Storage & Reheat Tips (Keeping the Goodness)

To make leftovers last, let the roast cool slightly, then transfer to airtight containers. Store in the fridge for up to four days. For longer keeping, it freezes well for up to three months. When reheating, I recommend the oven or a stovetop skillet for the best texture and flavor.

The microwave is fine for a quick lunch, but the oven brings back that just-made warmth and helps retain the roast’s texture. Reheat at 325 F covered with foil for about 20 minutes, or until steaming through. If the sauce looks separated, whisk in a splash of stock or a spoonful of water while you reheat.

For different weeknight plans, combine leftovers into a hearty bowl with beans or use the meat in sandwiches. If you like slow cooker soups, the leftover broth and shredded beef make a comforting white chili style bowl. Store each component separately when you can, and reheat gently for the best results.

My Kitchen Notes & Shortcuts

  • Sear if you can. A quick brown adds deep flavor. It’s worth the 5 extra minutes.
  • Prep the night before. Chop your vegetables and keep them in the fridge so morning is effortless.
  • Use bone-in chuck when on sale. It adds extra richness.
  • Kid-friendly tasks: let them stir the cornstarch slurry or arrange the vegetables. Small jobs build confidence.
  • If you want a shortcut, try a simple swap inspired by other slow-cooker favorites like Angel Chicken for ideas about timing and hands-off cooking.

These are little tricks that save time without stealing soul from the dish. They make kitchen rhythm gentler and more joyful.

Family-Friendly Variations

Want to make it lighter? Swap half the potatoes for parsnips or turnips. Want a deeper, richer flavor? Add a splash of red wine to the broth at the start. For a kid-friendly version, chop vegetables smaller so they cook through evenly.

Try adding mushrooms in the last two hours of cooking for a deeper umami note. Or toss in a couple of bay leaves at the beginning, and remove them before serving. Playing with tradition keeps the dish fresh and invites your family to add their own twist.

These little changes make the recipe yours. I encourage you to experiment and find one twist that becomes your family’s signature touch.

Crock Pot Pot Roast

FAQs About Crock Pot Pot Roast

Can I make this ahead for a busy week?
Absolutely. In fact, letting it sit for an hour lets the flavors settle even more. Refrigerate overnight and reheat gently the next day; it often tastes better.

Will it dry out if I overcook it?
Because chuck roast has good fat, it is forgiving. Overcooking on low is safer than undercooking. If the liquid gets low, add a half cup of broth during cooking.

Can I use other cuts of beef?
Yes. Brisket or rump can work, but adjust times; some cuts might be leaner and cook a bit faster. Chuck is the easiest and most forgiving.

How do I thicken the gravy if it’s too thin?
Whisk together 2 tablespoons cornstarch with 2 tablespoons water and stir into the cooker during the last 5 minutes. Or remove some liquid, simmer on the stove, and reduce to taste.

Is this kid-friendly?
Very. The flavors are simple and comforting. You can mash the potatoes or shred the meat to make it easier for picky eaters.

One Final Thought from My Kitchen

I hope this Crock Pot Pot Roast finds a place in your week’s rhythm—on an easy weeknight, warming a gathering, or as the gentle star of Sunday dinner. It’s a recipe that rewards patience, invites little helpers, and keeps the table full of stories.

Conclusion

If you want another version to compare methods or flavor ideas, I like reading trusted guides like Perfect Slow Cooker Pot Roast – Cooking Classy for a classic approach. For a recipe that focuses on wholesome ingredients and balance, check out Crockpot Pot Roast Recipe – The Real Food Dietitians for helpful tips and nutritional perspective.

Until next time, happy cooking and may your kitchen be full of warmth, laughter, and good food.

Crock Pot Pot Roast

Prep Time 15 minutes
Cook Time 10 hours
Total Time 10 hours 15 minutes
Servings 6 servings
Calories 450
This comforting pot roast is slow-cooked to tender perfection with a delightful blend of herbs and vegetables, making it a family favorite.

Ingredients

Main Ingredients

  • 3-4 pounds beef chuck roast (A forgiving cut that becomes tender with slow cooking.)
  • 4 medium carrots, chopped (Adds sweetness and color.)
  • 4 medium potatoes, chopped (Use a hearty variety for best results.)
  • 1 medium onion, chopped (Develops a rich flavor.)
  • 2 cups beef broth (Adds moisture and flavor to the roast.)
  • 2 cloves garlic, minced (Imparts a warm, homey flavor.)

Seasoning

  • 1 teaspoon dried thyme (For herbal depth.)
  • 1 teaspoon dried rosemary (Essential for authentic flavor.)
  • to taste Salt and pepper (Season to preference.)

Optional Ingredients for Gravy

  • 2 tablespoons cornstarch (For thickening the sauce.)
  • 2 tablespoons water (For mixing with cornstarch.)

Instructions 

Preparation

  • Place the chopped carrots, potatoes, and onion in the bottom of the slow cooker. Spread them out so the roast sits on a comfortable bed.
  • Toss the vegetables with a pinch of salt to start seasoning early.
  • Season the beef roast with salt, pepper, thyme, and rosemary. Rub the spices into the meat.
  • Place the seasoned roast on top of the vegetables, centering it so the juices flavor everything.
  • Pour the beef broth and minced garlic over the roast. Ensure the broth surrounds the vegetables but doesn't cover the roast.

Cooking

  • Cover the slow cooker and cook on low for 8-10 hours or high for 4-6 hours, until the meat is tender.
  • For optional gravy, whisk cornstarch and water in a small bowl and stir it into the slow cooker during the last 5 minutes of cooking.
  • Serve the pot roast with the vegetables and gravy, lifting the roast carefully, shredding or slicing it as desired.

Notes

To store leftovers, cool slightly and transfer to airtight containers. Refrigerate for up to four days or freeze for three months. Reheat in the oven for the best texture.
Calories: 450kcal
Course: Dinner, Main Course
Cuisine: American, Comfort Food
Keyword: Beef, Comfort Food, Crock Pot, Pot Roast, Slow Cooker

Shirley Temple Recipe

The kitchen smells like citrus and sugar, with the tinny clink of ice in a tall glass. My kids are folding napkins at the table while I warm a jar of grenadine on the counter, remembering my aunt teaching me how to make this exact pink drink on a Sunday afternoon. It is one of those small rituals that turns an ordinary meal into a tiny celebration, and sometimes I pop a pitcher out for a movie night. If you enjoy family-friendly recipes and simple ideas for bringing everyone together, you might like exploring more of my collection on my author page at my recipe author page where I share quick, comforting dishes that pair well with a Shirley Temple Recipe.

Why This Shirley Temple Recipe Feels Like Home

There is something about the color and the fizz that turns a regular evening into a moment. This Shirley Temple Recipe is sweet, bright, and easy to love. It works whether you are tucking kids into bed after dinner or serving a mocktail at a family brunch.

Shirley Temple Recipe
Meanwhile, the simple ingredients mean you can make it in under five minutes. That is the kind of recipe I reach for when time is tight but I still want something special. It pleases children, gives adults a nostalgic sip, and clears the table quickly so we can move to dessert or storytelling.

Why it feels like home is partly about the ritual. Pouring the grenadine, watching it settle at the bottom, then topping with ginger ale is a tiny kitchen performance. It brings a hush and a smile, and the people at my table know this drink means comfort and a little excitement.

Why Shirley Temple Recipe is Our New Family Favorite

This drink is consistently a hit because it is adaptable and unfussy. It does not demand perfect ingredients to taste wonderful. Use what you have, and tweak it to your preference. For a softer sweetness, add a splash more ginger ale. For more drama, add crushed ice and extra cherry juice.

I pair it with simple snacks or big family dinners. When we make one-bowl meals or sliders, this drink feels just right. If you want a lively main to go with it, try a bold dish like the Bang Bang Chicken Bowl which balances spice and cool, sweet sips nicely.

The Simple Magic Behind Shirley Temple Recipe

The charm of this Shirley Temple Recipe is in the contrast. Sweet grenadine sits at the bottom while clear, bubbly ginger ale floats on top. The visual gradient makes it look treat-like, and the first sip is bright and fizzy, followed by a little fruity warmth from the cherries.

“This is where the magic happens, when the aroma fills the kitchen and my kids come running in, asking ‘Is it ready yet?’”

Next up, watch for texture and aroma cues. You want the ice to clink sweetly, not melt into a puddle. The ginger ale should be lively, not flat. The grenadine should hold as a deep pink ribbon until you give it a gentle swirl.

Why This Recipe Works for Our Busy, Joyful Nights

On hectic evenings, simple drinks let the meal feel intentional without extra stress. This Shirley Temple Recipe does not add dishes or long prep. It is a one-glass moment that feels special. I often set a small tray with cherries, lime wedges, and a jar of extra grenadine so family members can customize their own glass.

If you are juggling homework, homework folders, and a dinner that needs watching, this drink is the kind of detail that makes the night feel cared for. It gives the kids something grown-up and the adults a nostalgic pause.

How to Make Shirley Temple Recipe, The Heartwarming Way

Below is a quick, joyous walkthrough. The whole process is about simple steps and letting the sensory details guide you. The glass should look inviting, the fizz should sing, and the final sip should taste like a small celebration.

Step-by-Step Overview: Keeping It Simple

Start with clean, chilled glasses. That little extra step makes the drink look and feel more put together. Use chilled ginger ale for maximum fizz. Once you assemble the glass, the visual gradient and the aroma will tell you that you got it right.

The Cooking Process, Made Joyful

If you want to include older kids in the kitchen, this is the gentle, safe task to hand over. Give them the spoon for layering and let them drop in the cherries. It is one of those chores that feels like play.

Preparing Shirley Temple Recipe Without the Stress

The only slightly tricky bit is layering. Use the back of a spoon or pour slowly to keep that beautiful pink gradient. Otherwise, it is all joy and no fuss.

Ingredients You’ll Need

2 ounces grenadine syrup (use Rose’s grenadine syrup for a classic flavor; homemade version below)
8 ounces ginger ale (Canada Dry or Schweppes—choose your favorite brand)
1 cup ice cubes (crushed ice works, too, for a slushy vibe)
2 maraschino cherries maraschino cherries (plus a bit of cherry juice for extra sweetness)
lime wedge or mint sprig (for garnish)

A friendly note: don’t skip the cherries. They are the soul of the classic Shirley Temple. If you prefer less sweetness, use diet ginger ale or reduce the grenadine slightly. Use what’s in your fridge; creativity beats perfection in a family kitchen.

Step-by-Step Directions

  1. Fill a tall glass halfway with ice cubes.
    The glass should sparkle as the cubes clink—if it’s sweating, it’s perfect.

  2. Pour 2 ounces of grenadine syrup over the ice.
    Let it settle at the bottom for that iconic pink gradient.

  3. Slowly pour 8 ounces of ginger ale over the back of a spoon, aiming for a gentle layer.
    This trick helps the colors stay distinct.

  4. Stir gently once or twice—just enough to swirl the hues without losing the layered look.
    Slide in two maraschino cherries, and drizzle a teaspoon of cherry juice on top for extra flair.

  5. Garnish with a lime wedge or mint sprig if you like a citrus kick or herbal aroma.
    Serve immediately and watch faces light up.

A quick tip from my kitchen: the back-of-spoon trick works because it slows and spreads the liquid. If you lack a spoon, pour ginger ale slowly down the inside wall of the glass. Let kids do the cherry dropping; it is their favorite part and a small way to join in the meal.

Shirley Temple Recipe

Serving Shirley Temple Recipe with Love

We serve this family-style in my home. I place a pitcher in the middle of the table, a bowl of cherries, a jar of extra grenadine, and lime wedges on a little plate. Everyone helps themselves and adds the little touches they love.

Shirley Temple Recipe
Pair this drink with salty snacks, simple sandwiches, or a cozy pasta. My kids love it with sliders and chips. For a fuller dinner night, it complements a bright lemon chicken or a barbecue spread. If you need inspiration for family mains to match the mood, check out these chicken dinner ideas that often sit on our menu rotation for celebratory nights and simple weeknights alike: favorite chicken dinner recipes.

When guests arrive, this Shirley Temple Recipe makes a friendly first impression. It is nonalcoholic but never boring. It invites conversation and a little nostalgia.

Storage & Reheat Tips (Keeping the Goodness)

This is a drink you mostly make fresh, but you can prepare a few things ahead. Store grenadine in the fridge for months if unopened, and once opened, keep it tight in the fridge and use within a couple of months for the best flavor.

If you do make a bigger batch of the syrup or mix ahead, keep it in a sealed pitcher and add fresh ginger ale right before serving to keep the fizz. Avoid storing fully assembled glasses overnight; the ice will melt and the soda will go flat.

Honest advice: the microwave is not needed here. Instead, refresh a glass with a few fresh ice cubes and a quick top-up of ginger ale if it has sat too long.

For ideas on quick make-ahead sides and mains that pair well with easy drinks like this, take a peek at my favorites for weeknight comfort and crowd-pleasing meals in this collection of macaroni recipes that are ideal for quick family dinners: comforting macaroni recipes.

My Kitchen Notes & Shortcuts

  • Use a measuring jigger for grenadine so the sweetness stays consistent. It keeps kids happy and prevents a syrup-overload.
  • Crushed ice makes the drink feel festive, almost slushy. I keep a zip-top bag of crushed ice in the freezer for parties.
  • If you do not have grenadine, mix equal parts pomegranate juice and simple syrup for a quick substitute. It will taste fresher but is less traditionally bright.
  • Keep a small tray on the table for garnishes. It becomes a ritual and saves you from running back and forth.
  • Let older kids help with the pour; they love layering and it builds confidence in the kitchen.

If you want to pair with quick handhelds, our go-to is sliders. These are easy to assemble and always a hit at home, and they play nicely with bright drinks like this one. If sliders are on tonight’s plan, I recommend this recipe for inspiration: Bang Bang Chicken Sliders.

Family-Friendly Variations

Make It Your Own: Easy swaps to try.

  • Lighter Version: Use diet ginger ale or club soda with a touch less grenadine for fewer calories and a drier finish.
  • Fizzy Fruit Twist: Swap half of the ginger ale for lemon-lime soda for a citrus lift.
  • Adult-Friendly Spin: Add a splash of light rum or vodka to an adult glass while keeping the rest nonalcoholic. Label it clearly for safety.
  • Seasonal Twist: Add a few muddled fresh raspberries or a splash of pomegranate juice in autumn for a deeper flavor.
  • Slushy Shirley: Blend the ingredients with crushed ice for a frozen version that plays like dessert.

Playing with tradition is part of making this recipe your family’s own. I encourage experimenting and naming your favorite version. My nephew calls his “pink sunshine” and insists on extra cherries.

FAQs About Shirley Temple Recipe

Q: Can I make this ahead for a busy week?
A: Absolutely. Prepare grenadine ahead and chill ginger ale. Assemble glasses just before serving to keep the fizz.

Q: Is Rose’s grenadine the best choice?
A: Rose’s is classic and consistent. If you prefer real fruit flavor, make a simple syrup with pomegranate juice and sugar instead.

Q: Can children help make this?
A: Yes. This is a safe, fun recipe for kids to participate in. Give them the spoon for layering and the cherries for finishing touches.

Q: How long does an opened bottle of grenadine last?
A: Stored in the fridge, an opened bottle will last several months. Keep it sealed and use it within two to three months for best taste.

Q: What’s the best glass for serving?
A: A tall Collins or highball glass shows off the gradient and holds the perfect ice-to-drink ratio. But any clear glass will do; the important thing is the smile it brings.

One Final Thought from My Kitchen

I hope this Shirley Temple Recipe sits in your memory the way it sits in mine: as a small but steady comfort on the busiest nights. Let it be the thing that signals togetherness, something small that makes the table feel intentional. Make a pitcher, call the family, let everyone stir in a cherry, and enjoy the warmth of being together.

Conclusion

If you want a simple reference for the classic version and measurements, this guide walks through the traditional approach with helpful photos and notes at Shirley Temple Drink – Simple Joy. For another take with a few modern tips and a slightly different spin on the classic, this easy tutorial is clear and friendly at Easy Shirley Temple Recipe – The Baker Upstairs.

Until next time, give this recipe a try you might surprise yourself with how such a small drink can bring so much light to your table.

Shirley Temple

Prep Time 5 minutes
Total Time 5 minutes
Servings 4 servings
Calories 120
This sweet, fizzy Shirley Temple recipe is a family favorite, perfect for creating joyful moments at the table with its bright colors and nostalgic flavors.

Ingredients

For the drink

  • 2 ounces grenadine syrup (Use Rose’s grenadine syrup for a classic flavor.)
  • 8 ounces ginger ale (Choose your favorite brand, like Canada Dry or Schweppes.)
  • 1 cup ice cubes (Crushed ice works for a slushy vibe.)
  • 2 pieces maraschino cherries (Plus a bit of cherry juice for extra sweetness.)
  • 1 piece lime wedge (Optional, for garnish.)
  • 1 sprig mint (Optional, for garnish.)

Instructions 

Preparation

  • Fill a tall glass halfway with ice cubes.
  • Pour 2 ounces of grenadine syrup over the ice.
  • Slowly pour 8 ounces of ginger ale over the back of a spoon to layer.
  • Gently stir once or twice to swirl the colors without losing the layers.
  • Add two maraschino cherries and drizzle a teaspoon of cherry juice on top.
  • Garnish with a lime wedge or mint sprig, if desired.
  • Serve immediately and enjoy!

Notes

This drink is best served fresh. Store grenadine in the fridge for several months. If making ahead, prepare ingredients but assemble drinks just before serving to maintain fizz.
Calories: 120kcal
Course: Beverage, Mocktail
Cuisine: American
Keyword: celebration drink, family drink, Mocktail, non-alcoholic, Shirley Temple

Healthy Caesar Salad Dressing

There is a weekday evening that always lives in my memory: my kids clattering plates as they set the table, the warm garlic scent drifting from a small bowl on the counter, and my husband peeking in, smiling because he knows dinner is almost ready. That little bowl held our Healthy Caesar Salad Dressing, and it turned a simple romaine into something everyone gathered around. If you want a crisp, wholesome salad to sit beside a chicken dish, try my note on the best healthy chicken salad for a lovely pairing that keeps weeknight dinners easy and full of flavor.

Why Healthy Caesar Salad Dressing is Our New Family Favorite

I grew up with a heavy, anchovy-forward Caesar that was ceremonious but time-consuming. This Healthy Caesar Salad Dressing is my modern, lighter take that still gives the savory, tangy hug of the original. Meanwhile, it’s quicker to make and kinder on the fridge shelf, so it quietly became our go-to for busy nights.

Healthy Caesar Salad Dressing

What makes this version feel like home is the balance. There is bright lemon, the slow background salt of anchovy paste, and the smooth fatty mouthfeel from mayonnaise. It’s familiar but cleaner, easy enough to whip up while you fold laundry, and special enough for Sunday night when you want everyone to linger at the table.

The Simple Magic Behind Healthy Caesar Salad Dressing

“This is where the magic happens—when the aroma fills the kitchen and my kids come running in, asking ‘Is it ready yet?’”

Step back and breathe in the little cues: the dressing should look pale and glossy, the garlic aroma should be forward but not sharp, and a pinch of pepper will lift the whole thing. The flavor should taste layered rather than one-note. When it does, you know you’ve hit the mark.

Next up, this dressing’s texture is silky without being greasy. It clings to romaine leaves and can be thickened into a dip or spread if you add cheese. Those options make it a flexible tool in your weeknight arsenal.

How to Make Healthy Caesar Salad Dressing, The Heartwarming Way

This recipe is comfort with a wink: fast, forgiving, and full of character. You do not need fancy equipment—just a small bowl and a whisk. From there, your kitchen fills with the small, familiar smells that mean dinner is on.

Step-by-Step Overview: Keeping It Simple

Here’s the quick plan: gather everything, whisk the base, taste and adjust for zing, chill to let flavors marry, then toss with romaine. The dressing will be smooth and pale, the garlic softened, and the lemon bright. If you want a dip, add finely grated Parmigiano Reggiano and mix until thicker. The aroma is what pulls the family from their rooms.

Ingredients You’ll Need

What goes into our Healthy Caesar Salad Dressing is honest and straightforward. Lay these out before you begin so the rhythm of making it feels calm, not rushed.

  • 3/4 cup mayonnaise
  • 3 garlic cloves
  • 1 tablespoon lemon juice
  • 1 tablespoon anchovy paste
  • 1 tablespoon Worcestershire sauce
  • 1 teaspoon Dijon mustard
  • 1/4 teaspoon black pepper
  • 1/2 cup Parmigiano Reggiano cheese (optional (if using for dip or spread))

A small note from my kitchen: don’t skip the fresh garlic if you can help it. It’s the soul of the dressing. But if you are in a pinch, a jarred roasted garlic or a little garlic powder will stand in. Also, if anchovy paste makes you hesitate, try a half tablespoon first; it’s mainly there to add depth rather than a fishy punch.

Preparing Healthy Caesar Salad Dressing Without the Stress

The method is wonderfully straightforward. You can let kids help with the whisking, which becomes their proud contribution to dinner. If you have a little one who loves to stir, give them a towel and a small whisk and let them feel useful.

Step-by-Step Directions

  1. In a small bowl, add all ingredients minus the cheese.

    • Whisk gently until the mixture looks smooth and pale.
    • Taste for lemon and anchovy balance, adjusting a touch if needed.
  2. If desiring a thicker dressing or using it as a dip or spread, add finely grated Parmigiano Reggiano.

    • Stir the cheese in until it blends smoothly.
    • The dressing will take on a creamier texture.
  3. Mix until combined well and allow to rest in the refrigerator for approximately one hour.

    • This resting time softens the garlic and lets the flavors marry.
    • If time is tight, even 15 to 30 minutes helps a lot.
  4. Enjoy tossed with romaine lettuce or as a dip or spread.

    • Tossing immediately coats the lettuce with a glossy finish.
    • Serve extra on the side for bread, grilled veggies, or as a sandwich spread.

A quick tip: if the dressing feels a touch thick after chilling, stir in 1 teaspoon of water at a time until the desired consistency is back. Trust your palate; a little extra lemon can brighten it up if it mellows too much in the fridge.

Healthy Caesar Salad Dressing

Serving Healthy Caesar Salad Dressing with Love

We serve this dressing family-style in the center of the table. I put a big bowl of chopped romaine beside a small bowl of toasted croutons, a wedge of lemon, and a dish of shaved Parm for anyone who wants extra. It keeps things communal and warm.

Healthy Caesar Salad Dressing

In our house, one child likes extra cheese and no anchovy, another likes a heavier pour and a sprinkle of chili flakes, and my husband likes his with grilled chicken on top. For a complete meal, place a sliced roasted chicken or a warm grain bowl near the salad so everyone can customize. If you prefer something lighter, drizzle the dressing over mixed greens and top with halved cherry tomatoes for color.

Serve the dressing chilled, but not icy. Take it out of the fridge about 10 minutes before tossing if it has been sitting for a while. That small change keeps the flavors lively and helps the dressing spread more evenly over the leaves.

Storage & Reheat Tips (Keeping the Goodness)

Leftovers happen, and this dressing stores very well. Keep it in a sealed container or jar in the fridge for up to five days. Aromas settle, so give it a shake or stir before using.

If you’ve used it as a spread or dip and it seems thick after refrigeration, it will come back to a perfect consistency with a gentle stir or a teaspoon of water. There’s no need to reheat this dressing; it is best cold or room temperature. If you used it in a warm dish with roasted vegetables, reheat those separately and add the dressing afterwards for freshness.

If the flavors mellow too much over time, a quick squeeze of fresh lemon and a pinch of salt will revive the tang and brightness. Always use clean utensils when scooping to extend the life of the dressing.

My Kitchen Notes & Shortcuts

What I’ve learned is that small changes make weeknight cooking easier and still delicious.

  • Use a jar to whisk: Put ingredients in a jar, cap, and shake. It cleans up quickly and kids love helping with the shake.
  • Swap mayo for half Greek yogurt: For a tangier, lower-fat option, use half Greek yogurt and half mayo.
  • Prep ahead: Make the dressing the day before a picnic and store chilled. The flavor gets better as it rests.
  • Garlic tip: If raw garlic feels too sharp, finely grate it on a microplane and let it sit for 10 minutes to mellow before mixing.
  • Make it into a sandwich spread: Add extra cheese and a pinch of pepper, and your favorite bread becomes elevated.

And a small favorite shortcut: if you’re out of anchovy paste, a few drops of soy sauce can add a similar umami lift. Use sparingly and taste as you go.

I also like to pull inspiration from other salads when I’m planning a spread. If you want to keep dinner exciting and varied, try pairing this dressing with a different protein or grain each time to create new weeknight routines. For a fruit and savory balance, the Bang Bang Chicken Crispy Rice Salad is a playful contrast that kids sometimes choose over plain greens.

Family-Friendly Variations

Make this dressing your family’s own by tweaking a few elements. Each small change brings a new story to the table.

  • Kid-friendly mild: Reduce the anchovy paste to 1/2 tablespoon and add a touch more lemon.
  • Vegan-ish swap: Use vegan mayo and a teaspoon of miso paste for umami instead of anchovy paste.
  • Add herbs: Fold in finely chopped parsley or chives for freshness.
  • Warm Caesar: Toss steamed baby potatoes with a spoonful of the dressing for a cozy side.
  • Parmesan-free: Omit the cheese and add a tablespoon of nutritional yeast for a similar savory note.

If you have a pantry of staples, you can gently shift the dressing to suit tastes. My sister prefers adding a little honey for a subtle sweet counterpoint when serving the salad with spicier mains.

How We Enjoy Healthy Caesar Salad Dressing at Our Table

At our house, the salad becomes the gathering point. I set the big bowl of romaine, place the dressing in a smaller bowl, and let everyone take what they like. It slows the meal down in the nicest way because people talk, pass plates, and make small adjustments for themselves.

For a more plated dinner, I toss the romaine and dressing quickly, twirl it onto warmed plates, top with toasted croutons, shaved Parm, and a lemon wedge. It looks elegant but is so fast to prepare that the family still feels like home.

If you want to highlight proteins, grilled shrimp or a sliced roast chicken work beautifully. For a vegetarian main, toss roasted chickpeas on top for crunch and protein.

FAQs About Healthy Caesar Salad Dressing

Can I make this ahead for a busy week?

Absolutely! In fact, letting it sit for an hour lets the flavors get to know each other, just like an old family recipe. It also keeps well for up to five days in the fridge.

Is anchovy paste necessary?

You can skip it if you prefer, but anchovy paste adds a layer of savory depth that makes the dressing more complex. If you are unsure, start with 1/2 tablespoon and adjust after tasting.

Can I use this dressing as a dip?

Yes. If you want a thicker dip, stir in the finely grated Parmigiano Reggiano and chill until set. It makes a great dip for raw veggies or a spread for sandwiches.

How do I keep the dressing from separating?

Whisking well and chilling in an airtight container will keep the emulsion stable. If separation happens, a quick whisk or shake in a jar brings it back together.

What lettuce works best?

Romaine is classic for its crunch and heartiness, but the dressing is great on mixed greens, kale (massage the leaves first), or even as a sauce over roasted vegetables.

One Final Thought from My Kitchen

Before you go, a little encouragement: give this Healthy Caesar Salad Dressing a try even if Caesar has never been your favorite. It’s easier than it looks and very forgiving. You might surprise yourself.

If you love a bright, balanced salad that invites conversation, this dressing will be on your table often. It keeps meals simple, flavorful, and connected to the warm bustle of family life.

Conclusion

For more ideas and variations on healthy Caesar dressings you might enjoy seeing different takes, check out Love and Lemons’ Healthy Caesar Dressing for a fresh vegetable-forward twist, and for another delicious, wholesome version, see Eating Bird Food’s Healthy Caesar Dressing.

Healthy Caesar Salad Dressing

Prep Time 10 minutes
Total Time 1 hour
Servings 6 servings
Calories 120
A lighter take on classic Caesar salad dressing, featuring fresh garlic, lemon, and anchovy paste for flavor, perfect for tossing with romaine or as a dip.

Ingredients

Dressing Base

  • 3/4 cup mayonnaise (For a tangier option, substitute half with Greek yogurt.)
  • 3 cloves garlic (Fresh garlic is preferred for best flavor.)
  • 1 tablespoon lemon juice (Adjust to taste.)
  • 1 tablespoon anchovy paste (Can start with 1/2 tablespoon for less intensity.)
  • 1 tablespoon Worcestershire sauce
  • 1 teaspoon Dijon mustard
  • 1/4 teaspoon black pepper (Add more to taste.)

Optional Additive (for dip)

  • 1/2 cup Parmigiano Reggiano cheese (Add for a thicker dip or spread.)

Instructions 

Preparation

  • In a small bowl, add all ingredients minus the cheese.
  • Whisk gently until the mixture looks smooth and pale.
  • Taste for lemon and anchovy balance, adjusting if needed.
  • If desiring a thicker dressing or using it as a dip, add finely grated Parmigiano Reggiano.
  • Stir the cheese in until it blends smoothly.
  • Mix until combined well and allow to rest in the refrigerator for approximately one hour.
  • If time is short, resting for just 15 to 30 minutes helps.

Serving

  • Enjoy tossed with romaine lettuce or as a dip or spread.
  • Tossing immediately coats the lettuce with a glossy finish.

Notes

Store leftovers in a sealed container for up to five days. Stir before using. A quick squeeze of fresh lemon can revive faded flavors.
Calories: 120kcal
Course: Condiment, Dressing
Cuisine: American
Keyword: Caesar Dressing, Easy Recipe, Family Recipe, Healthy Dressing, Salad Dressing

Virgin Mojito

I can still hear the clatter of plates as my two little ones set the table, and the bright, citrusy scent of lime and fresh mint drifting in from the pitcher on the counter. It reminds me of summer afternoons at my grandmother’s house near the dam, where neighbors shared stories and a cool drink while the children chased dragonflies. That same easy, comforting feeling is exactly what a Virgin Mojito brings to my table.

Why This Virgin Mojito Feels Like Home

This Virgin Mojito is one of those recipes that shows up again and again in our life. It is bright, simple, and oddly nostalgic, like a fresh bouquet placed where everyone can see it.
Virgin Mojito

It matters because it comes together in minutes, uses a handful of everyday ingredients, and somehow makes everything feel a little more like a celebration. It asks for almost no cleanup, and the kids can get involved without any danger or fuss.

Meanwhile, it is forgiving. You can dial the sweetness up or down, swap sparkling water for club soda, or double the lime if you like extra zing. The basic technique—muddling mint, balancing lime and sweet, topping with bubbly—keeps the drink lively and fresh every time.

How to Make Virgin Mojito, The Heartwarming Way

“This is where the magic happens—when the aroma fills the kitchen and my kids come running in, asking ‘Is it ready yet?’”

Start with bright green mint and glossy limes. Muddling releases the fragrant oils from mint leaves without tearing them into bitterness. Next up, mix in fresh lime juice and a touch of sweetener so the flavors sing together, then top with cold soda water for that effervescent finish.

You will know you are on the right track when the glass looks like summer: pale green liquid dotted with mint, steam of tiny bubbles rising, and the aroma of lime at the rim. From there, a garnish of mint sprigs or a lime wheel makes it feel special, even when it is a fast weekday treat.

Ingredients You’ll Need

Fresh lime juice
Mint leaves
Soda water
Sugar or sweetener (optional)
Ice cubes

Don’t skip the fresh herbs; they are the soul of the drink. If you are short on fresh mint, try a small handful of crushed mint from the freezer for a last-minute fix. Use what is in your fridge—this is about creativity, not perfection.

A quick note about tools: a sturdy muddler helps, but the back of a wooden spoon works just fine. A long-handled spoon or a small whisk helps mix the lime and sugar if you are making a larger batch.

Step-by-Step Directions

  1. In a glass, muddle the mint leaves with fresh lime juice to release the flavors.
    Use gentle pressure and a few twists to bruise the leaves, not shred them.
    This releases aromatic oils that make the drink smell as bright as it tastes.

  2. Add sugar or sweetener if desired and mix well.
    Stir until the sugar dissolves, or use a simple syrup to skip dissolving.
    Taste and adjust—this is your family’s version, so go lighter or sweeter.

  3. Fill the glass with ice cubes.
    Plenty of ice keeps the drink crisp and keeps the soda sparkling.
    If you will be serving later, chill the glass first for extra coldness.

  4. Pour soda water over the ice and mix gently.
    Stir with a long spoon to lift the mint and mix the lime without crushing herbs.
    Watch for tiny bubbles climbing the glass; that is when you know it is lively.

  5. Garnish with additional mint leaves and lime slices. Enjoy your refreshing virgin mojito!
    Add a fun straw for the kids and a cocktail pick for the grown-ups if you like.
    Take a moment to breathe in the aroma—that first sniff is always the best part.

A quick tip from my kitchen: if you use granulated sugar, stir it into the lime before adding ice so it dissolves fully. If you want an easier route, make a simple syrup (equal parts sugar and water, heated to dissolve) and keep it in the fridge.

Virgin Mojito

Serving Virgin Mojito with Love

Serve this drink family-style, in a large pitcher, so everyone can help themselves.
Virgin Mojito

We set the pitcher in the middle of the table with a small tray of extra lime wedges and mint sprigs. The kids love customizing their own glass, and my husband always insists on adding a little extra lime just before he takes his first sip.

Pair a Virgin Mojito with light finger foods like grilled shrimp skewers, a bright tomato and cucumber salad, or spicy tacos. The citrus and mint cut through richness and refresh the palate, making it a great companion for many dishes.

If you are hosting, prepare an extra pitcher of lime-mint base and let guests choose how fizzy they want their drinks. This makes serving relaxed and keeps the host free to enjoy the conversation instead of fussing at the stove.

Storage & Reheat Tips (Keeping the Goodness)

A Virgin Mojito is best enjoyed fresh, so storing it is about preserving freshness rather than reheating. If you make a lime-mint base ahead, store it in an airtight container in the fridge for up to 48 hours.

To assemble later, pour the chilled base into a glass filled with fresh ice and add soda water at the last minute to keep the bubbles lively. If you add soda and then store it, the fizz will fade and the texture will soften.

If you are wondering about reheating, that does not apply here. Instead, focus on keeping components cold and separate. Keep mint blanched or frozen only if you plan to use it for cooking rather than for fresh drinks.

For the simple syrup: it will keep in the refrigerator for up to two weeks. Use it to sweeten iced tea, drizzle over fruit, or make more mojitos throughout the week.

My Kitchen Notes & Shortcuts

  • Make a lime-mint concentrate: Juice limes and muddle with mint, then strain and refrigerate. Add soda to taste when serving. This saves time and keeps bubbles fresh.
  • Use simple syrup instead of granulated sugar: it dissolves instantly and mixes evenly. Double the batch and store it for other drinks or desserts.
  • Freeze lime slices on a tray and transfer to a bag: they act as decorative ice and keep drinks cold without watering them down quickly.
  • Get the kids involved: let them place mint sprigs and lime wheels on each glass. It is a small job that makes them feel important and creates a memory.
  • If you have an immersion blender, pulse the mint and lime with a little syrup for a frothy, slushy twist.

I learned the concentrate trick during a summer picnic when I wanted ready-to-serve drinks without carrying bottles of soda. It made serving effortless and kept the kids happy while we watched the sunset.

Family-Friendly Variations

Our family likes to play with this recipe. Here are a few variations you can try.

  • Berry Mint Mojito: Add a handful of crushed raspberries or strawberries before muddling the mint for a fruity spin.
  • Cucumber Lime Mojito: Add thin cucumber slices with the mint for a cool, spa-like flavor that kids surprisingly love.
  • Tropical Twist: Stir in a splash of pineapple or mango juice for a sunlit version that pairs well with grilled foods.
  • Low-Sugar Option: Use a natural sweetener like stevia or erythritol and reduce the total sweetness to taste.
  • Sparkling Tea Mojito: Replace soda water with chilled sparkling green tea for extra depth and a hint of tannin.

Give it a try and note who in your family prefers which version. We’ve kept a little notebook where everyone ranks their favorite, and it has become a small, joyful tradition.

FAQs About Virgin Mojito

Virgin Mojito

Can I make this ahead for a busy week?

Absolutely. Make the lime-mint base up to 48 hours ahead and keep it chilled. Add soda water and ice just before serving to keep the bubbles crisp and fresh.

How can I make it less bitter if the mint tastes sharp?

Be gentle when muddling. Press and twist rather than tearing the leaves. Also avoid muddling too much of the mint stems, which can add bitter notes.

Can I scale this up for a crowd?

Yes. Multiply the ingredients and make a pitcher. Muddle the mint into the lime juice in a large bowl, add simple syrup if using, and refrigerate. Bring out soda water when guests arrive and let them top their glasses.

What if I want a frozen version?

Blend ice with the lime-mint base and a touch of syrup until slushy. Serve right away with a mint sprig on top. This is delightful on hot afternoons.

Is there a non-carbonated option for little ones?

Yes. Use chilled lemonade or diluted fruit juice instead of soda water for a still, kid-friendly version.

One Final Thought from My Kitchen

I hope this Virgin Mojito finds its way into your family moments, whether that is a quiet afternoon on the porch or a lively dinner with friends. It is simple to make, forgiving when you improvise, and always a little like a hug in a glass.

If this recipe becomes one of those little things your family asks for again and again, I will feel like my grandmother’s kitchen is smiling with us. Give it a try—you might surprise yourself with how easy it is to make something that feels special.

Conclusion

If you want another take on this classic mocktail with slightly different proportions and ideas, check out this helpful recipe from Virgin Mojito Recipe {Mojito Mocktail} – Sustainable Cooks for extra inspiration. For more refreshers and a creative twist on ingredients, I also like this guide from Virgin Mojito (Mocktail Recipe) – Strength and Sunshine.

Virgin Mojito

Prep Time 10 minutes
Total Time 10 minutes
Servings 4 servings
Calories 75
A refreshing and nostalgic mocktail made with lime, mint, and soda water, perfect for summer gatherings.

Ingredients

Main Ingredients

  • 4 oz Fresh lime juice (Juice from approximately 4 limes.)
  • 15 leaves Mint leaves (Fresh mint is best for flavor.)
  • 4 cups Soda water (Can be substituted with club soda.)
  • 0.5 cup Sugar or sweetener (Adjust according to taste; can substitute with simple syrup.)
  • 2 cups Ice cubes (Plenty of ice to keep the drink crisp.)

Instructions 

Preparation

  • In a glass, muddle the mint leaves with fresh lime juice to release the flavors.
  • Use gentle pressure and a few twists to bruise the leaves, not shred them.
  • Add sugar or sweetener if desired and mix well until the sugar dissolves.
  • Fill the glass with ice cubes.
  • Pour soda water over the ice and mix gently with a long spoon.
  • Garnish with additional mint leaves and lime slices, and enjoy!

Notes

Serve family-style in a large pitcher for easy self-serving. Adjust sweetness and mint to personal preference.
Calories: 75kcal
Course: Beverage, Mocktail
Cuisine: American, Summer
Keyword: Mocktail, Non-Alcoholic Drink, Refreshment, Summer Drink, Virgin Mojito

Dumpling Lasagna

I can still hear the clatter of plates and the small chorus of, "Is it ready?" from around the table as the smell of tomato and warm cheese fills the kitchen. My kids set the napkins while I spoon sauce and tuck dumplings into the baking dish, and somehow that small ritual makes even a busy weeknight feel like a little celebration. It’s the kind of dinner that pulls everyone close and gives me a moment to breathe between life’s errands and bedtime stories. If you love comfort food with a twist, give Dumpling Lasagna a try; it’s easy, comforting, and full of cozy flavors that invite conversation and seconds. For another cozy meal idea you might enjoy, I’ve often turned to homemade chicken and dumplings on days when I want that same slow-simmered feeling with a different kind of comfort.

Why This Dumpling Lasagna Feels Like Home

This dish is a mashup of two beloved classics: tender dumplings and layered lasagna. It keeps the soft, pillowy bite of dumplings and pairs it with the saucy, cheesy familiarity of lasagna. It is the kind of meal that warms your hands and your heart, and it often becomes the centerpiece of small celebrations at our kitchen table.

What I love most is how forgiving it is. You do not need perfect pasta sheets or a long afternoon to pull this together. It’s a dish that forgives a missed chop or a hurried stir. Meanwhile, because dumplings cook in the sauce and cheese melds on top, you get great texture and a satisfying finish with minimal fuss. For another dish that brings families together easily, try this simple comfort food recipe I return to when I want easy and familiar.

Dumpling Lasagna

Why Dumpling Lasagna is Our New Family Favorite

This recipe is quick enough for weeknights but feels special enough for Sunday dinners. Dumplings replace traditional lasagna noodles, so there is less assembly and often less mess for the kids to help with. The layers trap pockets of ricotta and spinach, and every scoop pulls a little string of melted mozzarella.

I remember teaching my older son to arrange dumplings in a circle the first time he helped. He was so proud when he saw the bubbly top after baking. Those small victories at the stove are what make cooking worth the effort, and Dumpling Lasagna hands you plenty of them. If you like trying new, family-friendly twists on classics, this dish will feel like a warm invitation to gather.

The Simple Magic Behind Dumpling Lasagna

The magic is in the contrast. Soft dumplings meet tangy marinara and rich cheeses, and the spinach-ricotta layer gives you a fresh, creamy middle. Texture tells the story here: look for the cheese to turn a gentle golden and the sauce to bubble around the edges. If the top is brimming with golden spots and the center gives slightly when nudged, you know it is ready.

If you want another dish to make on a rainy day, try pairing the same spirit of comfort with a different stew or pot of dumplings like the recipe for delicious homemade chicken and dumplings I lean on when the wind blows cold. Both meals bring that slow-kitchen comfort, but Dumpling Lasagna gets you to the table faster.

How to Make Dumpling Lasagna, The Heartwarming Way

“This is where the magic happens—when the aroma fills the kitchen and my kids come running in, asking ‘Is it ready yet?’”

Here’s a quick overview so you can see the whole picture before we start. You mix a creamy ricotta filling with spinach and herbs. Then you spread sauce, tuck in dumplings, and layer the ricotta. A final crown of mozzarella and parmesan goes on top. Bake till bubbly and golden. The dish smells like tomato and melted cheese and looks beautiful when it comes out of the oven.

This process is hands-on but not fussy. The colors will guide you: bright red sauce, flecks of green from the spinach, and a golden top. The aroma tells you it is close when it fills the room and has that sweet-sour tomato note that pulls everyone toward the table. For another comforting recipe that uses dumplings in a different way, consider my go-to family favorite when you want something spoonable and soothing.

Ingredients You’ll Need

Dumplings
Ricotta cheese
Spinach
Marinara sauce
Mozzarella cheese
Parmesan cheese
Garlic
Italian seasoning
Salt
Pepper

Don’t skip the fresh herbs if you can find them; they lift the dish. But this is also a very forgiving recipe. If you have frozen spinach, thaw and squeeze it dry. If you need to swap a cheese or stretch the ricotta, go ahead. This is about feeding people and making memories, not making a museum piece. If you like, you can find a warm cousin to this recipe in my notes on that old-fashioned comfort stew that our family turns to in stormy weather.

Step-by-Step Directions: Keeping It Simple

  1. Preheat the oven to 375°F (190°C).
    Place your rack in the middle of the oven so the top browns evenly. Preheating helps the cheese melt smoothly and the dumplings cook through.

  2. In a mixing bowl, combine ricotta cheese, chopped spinach, garlic, Italian seasoning, salt, and pepper.
    Mix until the spinach is evenly distributed. Taste a tiny bit of the mixture and adjust seasoning if you think it needs more salt or pepper.

  3. In a baking dish, spread a layer of marinara sauce.
    Use a thin, even layer so the dumplings get flavor and enough moisture to cook. A jarred marinara works fine; pick one you like the taste of.

  4. Layer dumplings on top of the sauce, then add a layer of the ricotta mixture.
    Place dumplings close but not crowded so heat circulates. Spoon ricotta gently so you keep lovely pockets of filling.

  5. Repeat the layers, finishing with marinara sauce on top.
    Two to three layers usually works depending on your dish depth. The final sauce layer keeps the top from drying out during the first part of baking.

  6. Sprinkle mozzarella and parmesan cheeses over the top.
    Be generous with the cheese if your family loves a gooey top. A little parmesan adds a nutty finish that makes the dish sing.

  7. Cover with foil and bake for 25 minutes.
    Covering traps heat and steam, allowing dumplings to cook tender. This step helps the center reach a safe temperature without over-browning the cheese.

  8. Remove the foil and bake for an additional 15 minutes, or until the cheese is bubbly and golden.
    A little browning is great for flavor; it gives you those toasty notes my grandmother loved. If the top is golden and sauce is bubbling, you are there.

  9. Let it cool slightly before serving.
    Wait 5 to 10 minutes so everything sets; this makes slicing or scooping much neater and keeps little mouths safe from molten cheese. Let the kids set the table while it cools; they love that small role.

Dumpling Lasagna

Each step is quick, and you will find rhythm as you go. The key is to be relaxed: this is not a dress rehearsal. Let a child stir the ricotta mix or arrange the dumplings. Those small moments are what make a meal ours. For more ideas on mixing and matching comforting textures, see this classic family-style recipe that shows how simple swaps create new favorites.

Serving Dumpling Lasagna with Love

Bring the dish to the table while it is still warm and let people serve themselves family-style. I usually place a big salad, crusty bread, and a small bowl of extra parmesan nearby. The kids love to add a bit more cheese and a drizzle of olive oil. Let someone pour the drinks while someone else gets the napkins; that little choreography makes dinner feel like a team effort.

Serve with a bright green salad or roasted vegetables to balance the richness. A spoonful of extra marinara on the side keeps it saucy for those who like every bite dipped. Watching my kids compare who got the largest dumpling is one of those small, silly traditions that makes me smile. If you want to pair it with a soup or another comfort starter, I often reach for a bowl of stewy dumplings on really chilly evenings; the two together feel like a hug.

Dumpling Lasagna

Storage & Reheat Tips (Keeping the Goodness)

Store any leftovers in an airtight container in the refrigerator for up to 3 days. If you plan to keep it longer, freeze individual portions covered well to prevent freezer burn; they will keep for up to 2 months.

For reheating, the oven is your friend. Place leftovers in a small baking dish, cover with foil, and heat at 350°F (175°C) until warmed through. The microwave is fine for a quick lunch; cover loosely and heat in short bursts, stirring or turning halfway through to ensure even heat. If you have frozen portions, thaw overnight in the fridge before reheating for best texture. For a crisp top again, finish in the oven or under a broiler for a minute, watching closely.

If you want to take the stress out of weeknight cooking, try prepping the ricotta-spinach mix and storing it in the fridge a day ahead. Then you only need to assemble and bake when you come home. I also like to freeze pre-assembled but unbaked portions for single-serving reheats. Learn more tricks from a comforting recipe I use when time is short at my pantry-friendly favorite.

My Kitchen Notes & Shortcuts

  • Use frozen dumplings if you want speed. No shame in that. They cook well right in the sauce, and it saves time.
  • Swap fresh spinach for frozen if that is what you have. Thaw, squeeze dry, and fold in. Nobody needs soggy surprises.
  • Make the ricotta mixture a day ahead. It saves time and the flavors get friendlier in the fridge.
  • If you do not want a tomato-heavy version, use a creamy béchamel and call it comfort under a different name. It is still Dumpling Lasagna in spirit.
  • Let the kids help sprinkle the cheeses. It is safe and they love the job. A proud little sous-chef is a kitchen win.

These small shortcuts let you save time without losing the heart of the meal. Over the years I have learned to keep a jar of good sauce on hand and to lean on frozen greens when the day runs away from me. It keeps dinners warm and real.

Family-Friendly Variations

Make it lighter: swap part-skim ricotta and use less mozzarella. Add extra spinach and mushrooms to bulk up the veggie content.
Kid-approved: drop in pepperoni slices between layers for a fun twist if your crew loves pizza flavors.
Meat lover’s version: brown ground pork or turkey with garlic and Italian seasoning, then mix it into the marinara for a hearty layer.
Gluten-free: use gluten-free dumplings or make a simple ricotta-and-egg batter dumpling that fits your needs.
Cheesy upside-down: for a crispy top, add extra parmesan and broil for 1 minute at the end. Watch closely so it does not burn.

Think of these ideas as invitations to make the dish your own. My family has tried each of these and every version had its fans and its funny stories. Let your table tell a new story tonight.

Dumpling Lasagna

FAQs About Dumpling Lasagna

Can I make this ahead for a busy week?
Absolutely. Assemble it the day before, cover, and refrigerate. Let it sit for an hour at room temperature before baking, or bake straight from the fridge with an extra 10 minutes.

What kind of dumplings work best?
Frozen potstickers or soft store-bought dumplings are a great shortcut. Homemade dumplings are lovely if you have the time. The key is to have them plump and tender so they bake into the sauce.

How do I prevent the top from burning?
Cover with foil during the first part of baking, as the recipe says. Remove foil for the last 15 minutes to get that bubbly, golden finish. If it starts to brown too fast, lower the rack or tent with foil.

Can I freeze leftovers?
Yes. Cool completely, then freeze in airtight containers. Thaw in the fridge overnight before reheating for best texture.

Is there a vegetarian option?
Yes. Use a hearty marinara, add extra vegetables like zucchini, mushrooms, and bell peppers, and layer them with the ricotta. It is just as comforting.

One Final Thought from My Kitchen

I hope this recipe finds its way into your weeknight rotation and your family stories. There is something quietly joyful about a dish that brings people to the table without much drama. Dumpling Lasagna does that. It’s forgiving, warm, and a little playful, and it makes room for everyone—kids, tired partners, and hungry friends.

Conclusion

If you want to see a viral twist that inspired variations across the web, the Viral pork dumpling lasagna – The Modern Nonna is a fun place to explore similar ideas and flavor swaps. For another take that shows how this idea spread on social platforms and how people changed it to fit their kitchens, check out this round-up of the Viral TikTok Dumpling Lasagna – Myriad Recipes.

Until next time, happy cooking. Give this one a try; it’s easier than it looks, and you might surprise yourself with how quickly it becomes one of your family’s favorite meals.

Dumpling Lasagna

Prep Time 20 minutes
Cook Time 40 minutes
Total Time 1 hour
Servings 6 servings
Calories 450
A comforting fusion of tender dumplings layered with marinara and cheesy goodness, perfect for weeknight dinners and family gatherings.

Ingredients

Dumpling Layer

  • 12 pieces Dumplings (Use frozen or homemade dumplings.)

Cheese Mixture

  • 15 oz Ricotta cheese (You can substitute with part-skim ricotta for a lighter option.)
  • 10 oz Spinach (Fresh or thawed frozen spinach can be used. Squeeze to remove excess moisture.)
  • 2 cloves Garlic (Minced garlic adds flavor.)
  • 1 tbsp Italian seasoning (Use fresh herbs if available.)
  • 1 tsp Salt (Adjust according to taste.)
  • 1/2 tsp Black pepper (Freshly ground is preferred.)

Sauce & Toppings

  • 24 oz Marinara sauce (Use your favorite jarred or homemade sauce.)
  • 2 cups Mozzarella cheese (Shredded mozzarella for topping.)
  • 1/2 cup Parmesan cheese (Grated parmesan adds a nutty flavor.)

Instructions 

Preparation

  • Preheat the oven to 375°F (190°C) and place the rack in the middle.
  • In a mixing bowl, combine ricotta cheese, chopped spinach, garlic, Italian seasoning, salt, and pepper. Mix until well combined.
  • In a baking dish, spread a layer of marinara sauce.

Layering

  • Layer dumplings on top of the sauce, followed by a layer of the ricotta mixture. Repeat the layers, finishing with marinara sauce on top.
  • Generously sprinkle mozzarella and parmesan cheeses over the top.

Baking

  • Cover with foil and bake for 25 minutes.
  • Remove the foil and bake for an additional 15 minutes, or until the cheese is bubbly and golden.
  • Let it cool slightly before serving.

Notes

This dish is forgiving and versatile; feel free to customize ingredients according to your preferences. It pairs well with a bright salad or crusty bread.
Calories: 450kcal
Course: Dinner, Main Course
Cuisine: American, Italian
Keyword: cheesy, Comfort Food, Dumpling Lasagna, Easy Dinner, Family-Friendly

Watermelon Slushies

I remember the sound of my little ones pulling chairs out and the dull thud of the watermelon hitting the counter. The kitchen smelled warm and sweet, a scent that mixed summer sunlight and the sticky hands of a child who had already stolen a slice. We were making Watermelon Slushies, and in those small, splashing moments the day felt easy and bright.

Why This Watermelon Slushies Feels Like Home

There is something about a simple glass of watermelon slush that calls everyone to the table. It is light, cool, and a little bit joyful in the way it bubbles against your lips. My kids come running at the sound of the blender because they know something good is coming. We make this when the garden peppers are still wet from morning dew and when we need something that feels like a pause in the middle of a busy day.

This recipe is fast, forgiving, and kind to small kitchens. You do not need special tools or fancy ingredients. A ripe watermelon, ice, and a little lime will take you a long way. It tastes like summer without any fuss, and that is exactly why it lives in our rotation.
Watermelon Slushies

Why this matters is simple. It brings people together around something that is both playful and nourishing. It asks for one bowl, one blender, and a willingness to slow down for a few minutes and enjoy the cool rush of fruit. Meanwhile, it gives you the freedom to add a touch of mint or a splash of lime if you want to get playful.

Why Watermelon Slushies is Our New Family Favorite

This isn’t just a drink. For us it has become a ritual on warm afternoons. We line up glasses on the counter, hand out straws, and let each person pick a garnish. The slush is a blank canvas that everyone can make their own.

It works for a crowd or for one sleepy parent who just needs a bright moment. With children at the table, it becomes a small lesson in making something from scratch together. The blender makes a fun noise. The chopping is a safe job. And the best part is watching people take that first cold sip and smile.

The Simple Magic Behind Watermelon Slushies

The real trick is using fruit that tastes like itself. A ripe watermelon will give you a deep red color, a clean, sweet flavor, and slushie texture that feels both frosty and silky. Ice gives structure and chill. Lime wakes up the sweetness without stealing the show. Mint is optional, but when it’s fresh it adds a whisper of cool that some of us love.

“This is where the magic happens—when the aroma fills the kitchen and my kids come running in, asking ‘Is it ready yet?’”

From there, it’s about balance: not too runny, not too icy. Watch the color and listen to the blender hum. When it looks bright and pours like a frosty river, you are there.

How to Make Watermelon Slushies, The Heartwarming Way

This is a gentle process, perfect for a weekday treat or a weekend gathering. You will need less than fifteen minutes from start to finish, including the chopping. The texture should be frosty and smooth, with tiny bits of ice that make each sip feel like a celebration.

Next up, give the watermelon a good chop. You want chunks small enough to blitz easily. Once the blender sings and the color turns that brilliant pink-red, taste and adjust. A squirt of lime will lift the flavor if the fruit is extra sweet. If you like, add a few mint leaves and pulse just to release their scent.
Watermelon Slushies

Ingredients You’ll Need

Watermelon
Ice
Lime juice (optional)
Mint leaves (optional)

Don’t skip the fresh herbs if you have them. A few mint leaves can change the whole mood of the drink. Use what you have in the fridge. This recipe is about creativity, not perfection.

I always say: pick a watermelon that smells slightly sweet at the stem end. If it sounds hollow when you tap it, that is usually a good sign. Buy a little more fruit than you think you need, because children do tend to steal the best chunks.

Step-by-Step Directions

  1. Cut the watermelon into chunks and remove the seeds.
    Slice the melon into manageable wedges first, then cut away the rind. Take out any big seeds as you go.
    Let the kids help with the seed-spotting. They love this part and it is one of the safest jobs at the counter.

  2. Place the watermelon chunks in a blender.
    Load the blender bowl loosely so the blades can move freely.
    If your blender is small, work in batches. It keeps the texture smooth and saves your motor.

  3. Add ice to the blender.
    Use enough ice to give the slush a frosty body but not so much that it dilutes the flavor.
    A ratio I use is roughly equal parts watermelon chunks to ice by volume, but adjust to your taste and the sweetness of the fruit.

  4. If desired, add a splash of lime juice and some mint leaves for extra flavor.
    A little lime brightens the sweetness and keeps the drink lively.
    Tear the mint leaves to release the aroma, and add just a few so the drink stays fresh rather than herbal.

  5. Blend until smooth and frosty.
    Pulse first to break down the larger pieces, then blend on high to finish.
    Stop and scrape the sides if needed. The color will become a vivid pink-red when it is ready.

  6. Pour into glasses and enjoy immediately.
    Serve right away while it is cold and frothy.
    This is the part where everyone gathers and the kitchen fills with laughter. Give it a try; you might surprise yourself.

Quick tip: If the slush looks watery, add a handful more ice and blend briefly. If it is too thick, a splash of cold water or more lime juice can help loosen it.

Serving Watermelon Slushies with Love

We set a big pitcher in the middle of the table and let everyone serve themselves. I like to put small plates of garnishes around it: lime wedges, mint sprigs, and a bowl of tiny watermelon cubes. It turns a simple drink into a family moment.

For adults, we sometimes add a hint of sparkling water or a splash of light rum for a weekend treat. For kids, I keep it simple and colorful. We use paper straws for little hands and bigger glasses for older kids.

Presentation matters in a small way. Rimming the glass with a little sugar or adding a tiny pink salt on the rim feels festive. But most of all, serve it with a smile and the small pleasures of a kitchen that is warm with people.
Watermelon Slushies

Storage & Reheat Tips (Keeping the Goodness)

Watermelon slush does not reheat in the traditional sense. It is best enjoyed cold and fresh. But you can save it for later with a couple of honest tricks.

If you have extra, pour it into an airtight container and freeze it flat. When you want another round, break the frozen block into rough chunks and blitz again with a splash of cold water or more ice. It will never be exactly the same as fresh, but it will be bright and ready.

Do not store a blended slush for more than 24 hours in the fridge. The texture softens and the flavors flatten. If you do keep it overnight, give it a quick whirl in the blender before serving to bring back some of the fizz.

If you made extra watermelon chunks, store them in a sealed container in the fridge for up to three days. They make a quick snack, a salad addition, or an instant slush when blended with ice.

My Kitchen Notes & Shortcuts

  • Freeze some watermelon cubes ahead of time. Pop them straight into the blender for a quick slush without adding too much ice.
  • Use a high-quality blender if you have one. It makes the texture smoother and works faster, which keeps kids engaged.
  • If the watermelon is very sweet, skip the lime. If it is mild, add more lime to lift the flavor.
  • Recruit kids for the easy parts: seed removal, handing you the mint, or choosing the glass. It builds small kitchen confidence.
  • No fresh mint? Try a thin slice of cucumber for a cool variation.

These little hacks save time and keep the result feeling homemade and thoughtful, not rushed.

Family-Friendly Variations

You can personalize this recipe to match the way your family likes to eat and drink.

  • Kid-Friendly Berry Twist: Add a small handful of strawberries or raspberries to the blender for a deeper color and berry flavor. It also ups the vitamin factor.
  • Light and Fizzy: Blend the slush as directed but top each glass with a splash of sparkling water. It feels more grown-up without booze.
  • Mint Lime Cooler: Muddle the mint and lime in the blender first, then add the watermelon and ice. This makes the mint flavor more present.
  • Boozy Weekend Version: For adults, stir in a tablespoon of white rum or vodka per glass to make a refreshing cocktail. Keep it optional and label the adult glasses.
  • Sugar-Free Boost: If you like a little extra sweetness, use a tiny drizzle of honey or agave. Often the watermelon needs no extra sugar at all.

See these as gentle nudges rather than rules. The best variation is the one that becomes a family favorite.

FAQs About Watermelon Slushies

Watermelon Slushies

Can I make this ahead for a busy week?
Yes. You can prep watermelon cubes and freeze them ahead. When you are ready, blend with ice. If you blend everything ahead, freeze the slush in a flat container and re-blend later for best texture.

How long will leftovers keep?
Blended slush will keep in the fridge up to 24 hours, but expect a change in texture. Freeze extra for longer storage, up to a month for decent results.

Can I use seedless watermelon?
Absolutely. Seedless watermelon is a great choice. If you use seeded fruit, remove larger seeds before blending.

What can I use instead of a blender?
A strong food processor will often do the job. For a rustic version, freeze the watermelon cubes and then crush them with a potato masher in a bowl, but this will have a chunkier texture.

Is it okay to add sweetener?
Yes, but taste first. Many watermelons are sweet enough on their own. A dash of honey or a little simple syrup will help if the fruit is underripe.

One Final Thought from My Kitchen

I hope this little recipe brings the same small joy to your table that it brings to ours. There is comfort in the ordinary things we share, especially when we make them together.

If you try this and your kids ask for it again tomorrow, let them. That is how family recipes begin. If you find a favorite twist, keep it in your notes and tell the story of why you make it that way. Food carries memory and warmth, and a simple glass of Watermelon Slushies can hold both.

Conclusion

If you want another simple take on this idea, I like the clear method in From My Bowl’s Watermelon Slushie recipe for its straightforward approach. For inspiration on variations and pretty serving ideas, see the tips at Chocolate Moosey’s Watermelon Slushie.

Until next time, happy cooking and happy sharing. May your kitchen be full of small noises, sticky smiles, and a pitcher at the ready.

Watermelon Slushies

Prep Time 10 minutes
Total Time 10 minutes
Servings 4 servings
Calories 80
A refreshing and playful drink made with ripe watermelon, ice, and a splash of lime, perfect for summer afternoons with the family.

Ingredients

Main Ingredients

  • 1 large watermelon, cut into chunks (Choose a ripe watermelon that smells sweet at the stem end.)
  • 2 cups ice (Adjust based on desired consistency.)

Optional Ingredients

  • 2 tablespoons lime juice (Adds brightness to the flavor.)
  • a few mint leaves (Fresh mint enhances the flavor.)

Instructions 

Preparation

  • Cut the watermelon into chunks and remove the seeds.
  • Slice the melon into manageable wedges first, then cut away the rind. Take out any large seeds as you go.
  • Involve kids in the seed-spotting process for fun.

Blending

  • Place the watermelon chunks in a blender.
  • Load the blender bowl loosely to allow blades to move freely.
  • Add ice to the blender, using a ratio of roughly equal parts watermelon to ice by volume.
  • If desired, add lime juice and mint leaves.
  • Blend until smooth and frosty, scraping sides if needed.

Serving

  • Pour the blended mixture into glasses and enjoy immediately.

Notes

Serve with garnishes of lime wedges and mint sprigs. For adults, consider adding a splash of rum or sparkling water.
Calories: 80kcal
Course: Beverage, Snack
Cuisine: American, Summer
Keyword: Family Recipe, Kid-Friendly, Refreshment, Summer Drink, Watermelon Slushy

Homemade Caesar Salad Dressing without Raw Anchovies

I can still hear the clink of forks on plates and the soft chatter of my kids as they set the table while I whisk a dressing that smells like a Sunday lunch memory. That warm, garlicky aroma always brings everyone into the kitchen, and tonight it’s for a simple, creamy Homemade Caesar Salad Dressing without Raw Anchovies that feels like a hug in a bowl. If you need a quick crowd-pleaser that doesn’t demand fancy ingredients, you’ll find this one easy and forgiving. For a heartier lunch pairing I sometimes serve it alongside my avocado chicken salad, which the kids say is their favorite way to stretch a weeknight meal into leftovers everyone loves.

Why This Homemade Caesar Salad Dressing without Raw Anchovies Feels Like Home

There’s something comforting about making a dressing from scratch, even when you skip a traditional ingredient like raw anchovies. I grew up in a kitchen where shortcuts were celebrated as long as flavor stayed front and center. This version of Homemade Caesar Salad Dressing without Raw Anchovies keeps the savory, umami heart of a classic without the worry some folks have about raw fish.

Meanwhile, this dressing comes together fast, needs only a few tools, and keeps well for a few days, so it’s a perfect weekday hero. The texture is silky and thick enough to cling to romaine leaves, yet light enough that no one feels weighed down.
Homemade Caesar Salad Dressing without Raw Anchovies

I often pair this dressing with crunchy homemade croutons or a roasted chicken from the sheet pan. If you want inspiration on complimentary salads, try my homemade chicken salad with grapes for a sweet-and-savoury contrast that the family loves.

Why Homemade Caesar Salad Dressing without Raw Anchovies is Our New Family Favorite

This version won over even the pickiest at my table because it keeps the flavor but removes the intimidating step of handling raw anchovies. Instead, we build savory depth with Worcestershire, parmesan, garlic, and a little mustard. The result tastes familiar and comforting, yet fresh.

For busy nights when time is short, I toss the dressing with torn romaine, grate fresh parmesan over the top, and add a handful of toasted nuts or seeds to make it special without fuss. You’ll find it’s a wonderful bridge between a quick salad and a meal that feels intentional.

The Simple Magic Behind Homemade Caesar Salad Dressing without Raw Anchovies

What makes this dressing sing is balance. Fat from the mayo and olive oil smooths the sharp edges of garlic and vinegar. The mustard and lemon add brightness, and parmesan gives that salty, savory backbone people love in a Caesar.

From there, you can adjust acid and salt to taste. A little more lemon if you like brightness, a splash more vinegar for tang, or an extra teaspoon of Worcestershire to nudge that meaty umami note. This dressing is a framework that invites small, confident adjustments.

Why This Recipe Works for Our Busy, Joyful Nights

It takes about 10 minutes from start to finish. No stove time, no fuss, and it uses equipment most home cooks already have. I often make a double batch and keep half for lunches. It cleans up quickly, which means more time for setting the table and less time washing dishes.

If you’re the kind who loves a one-bowl solution, you’ll appreciate how few bowls this uses. For a family-style finish, I put the salad bowl in the center and let everyone help themselves. It makes dinner feel like a tiny celebration even when the clock says otherwise.

How to Make Homemade Caesar Salad Dressing without Raw Anchovies, The Heartwarming Way

“This is where the magic happens—when the aroma fills the kitchen and my kids come running in, asking ‘Is it ready yet?’”

Here’s a quick overview of the process so you know what the dressing should look and feel like. You are aiming for a pale, creamy dressing with a speckling of parmesan and a glossy finish from the oil. The aroma should be bright with lemon and garlic but rounded by the savory parmesan.

Next up, gather everything on the counter. Pulse or puree the ingredients until smooth, then stream in a little oil to reach the texture you like. You’ll know you’re done when the dressing thickly coats a spoon and leaves a ribbon trail for a few seconds. If you want to explore texture ideas, take a peek at my simple make-ahead salad ideas that also benefit from creamy dressings.

Ingredients You’ll Need

  • 2 cloves garlic (chop ahead if your food processor won’t cut it finely)
  • 1 cup mayo (I used Hellman’s Vegan Mayo)
  • 2 tsp dijon mustard
  • ½ tsp mustard powder
  • 1-2 tbsp white vinegar (start with one tbsp and add more if you want a more acidic dressing)
  • 2 tsp Worcestershire sauce***
  • ½ cup shredded parmesan
  • juice of half a lemon
  • 2 tbsp olive oil (approx. see instructions)
  • ½ tsp ground black pepper

Don’t skip the fresh garlic if you can help it. It adds a warm, punchy note that bottled garlic just can’t replicate. If you must, roast a clove for a milder, sweeter taste. Also, feel free to swap the mayo for Greek yogurt if you want a tangier, lighter version. For ideas on complementary flavors, my Asian chicken cranberry salad pairs wonderfully when you want a contrast of textures.

Step-by-Step Overview: Keeping It Simple

  1. Add all of your ingredients to the food processor except for the olive oil. If your food processor has chop and puree options, select puree.

    • Use a measuring cup for the mayo and parmesan so the texture is consistent.
    • If you don’t have a food processor, a blender works fine, or whisk vigorously by hand.
  2. Begin to puree your ingredients.

    • Pause and scrape the bowl once so everything mixes evenly.
    • You should see the dressing turn pale and smooth.
  3. Slowly add one tablespoon of olive oil into your food processor while it purees.

    • This helps the oil emulsify and gives a creamier mouthfeel.
    • A steady drizzle is better than dumping it all at once.
  4. Turn your food processor off, and test your dressing.

    • Give it a taste and check the texture on a spoon.
    • Adjust salt, lemon, or vinegar if it needs a little pep.
  5. Slowly add another tablespoon (or more) of olive oil until you get the consistency you desire (two tablespoons gave me the perfect thick consistency I like in a Caesar salad dressing). Add more vinegar if you’d like as well.

    • Remember: you can always add, but you can’t easily take away. Go slowly.
  6. Store in the refrigerator in a container with a tight lid and consume within 3-4 days.

    • Label with the date.
    • Give it a gentle shake before serving if the oil separates.

A small note from my kitchen: I often let the dressing rest for 30 minutes in the fridge so the flavors mingle. If you make it ahead and it thickens too much, stir in a teaspoon of water or more lemon to loosen it just before serving.

Homemade Caesar Salad Dressing without Raw Anchovies

Preparing Homemade Caesar Salad Dressing without Raw Anchovies Without the Stress

If you’re nervous about texture, use a high-speed food processor or blender and pulse first. A coarse puree is fine if you like a little texture. For a totally smooth finish, scrape the sides and blend again.

If the dressing tastes flat, it likely needs acid or salt. Add a squeeze of lemon or a half teaspoon of salt, then taste again. If it tastes too sharp, a teaspoon of honey or a touch more mayo will round it out without making it sweet.

Serving Homemade Caesar Salad Dressing without Raw Anchovies with Love

We serve this dressing family-style in the middle of the table so everyone can choose how much they want. I toss chopped romaine leaves with just enough dressing to lightly coat them and then sprinkle extra parmesan on top.

To make the salad a full meal, add grilled chicken, roasted chickpeas, or a pan-seared salmon fillet. For crunchy contrasts, homemade croutons or toasted pine nuts are a favorite. One of my kids insists on a handful of roasted sweet corn for color and sweetness. For pairing ideas that work well with creamy dressings, try a chilled chicken salad like my avocado chicken egg salad on the side for a balanced spread.
Homemade Caesar Salad Dressing without Raw Anchovies

How We Enjoy Homemade Caesar Salad Dressing without Raw Anchovies at Our Table

We keep things casual. The large salad bowl goes to the center, the dressing in a small jar sits beside it, and everyone helps themselves. I encourage the kids to sprinkle the parmesan and arrange the croutons so little hands feel involved.

On holidays or when friends come over, I place bowls of toppings—chopped herbs, extra pepper, lemon wedges—and let people customize. It makes the meal feel shared and lively. The dressing also works great as a dip for raw veggies when you want a snack-hour option.

Storage & Reheat Tips (Keeping the Goodness)

Store your Homemade Caesar Salad Dressing without Raw Anchovies in an airtight container in the refrigerator. It keeps well for 3 to 4 days. Stir or shake well before using.

If it thickens in the fridge, let it sit at room temperature for 10 minutes and then whisk or add a teaspoon of water to loosen. This dressing is not meant to be reheated. If you want a warm salad topping, add warmed roasted chicken and serve immediately, but do not microwave the dressing.

For make-ahead planning, prepare the dressing up to 48 hours before serving. Taste and adjust just before serving for the brightest flavor.

My Kitchen Notes & Shortcuts

  • Use good parmesan. It makes a big difference. Freshly grated will give more flavor than pre-grated.
  • If you don’t have a food processor, use a blender or whisk by hand. For hand-whisking, finely grate the garlic and parmesan so they incorporate well.
  • Make a double batch and freeze a small portion in an ice cube tray for individual uses. Thaw quickly in the fridge for busy lunches.
  • Want a dairy-free version? Swap parmesan for a tablespoon of nutritional yeast for savory depth.
  • Let kids measure or crush the garlic with a fork. It’s a small way to involve them and make the process fun.

Family-Friendly Variations

  • Lighter version: Replace half the mayo with plain Greek yogurt for a tangy, lighter dressing.
  • Kid-friendly: Reduce the garlic to 1 clove and skip the mustard powder for a milder flavor.
  • Herby twist: Add a tablespoon of chopped fresh parsley or chives for brightness.
  • Spicy kick: Stir in a teaspoon of sriracha or red pepper flakes if your family likes heat.
  • Anchovy essence without raw fish: Add a tiny pinch of anchovy paste if you want a closer traditional flavor without raw anchovies.

These variations help make the recipe your own and keep meals fresh while staying convenient.

FAQs About Homemade Caesar Salad Dressing without Raw Anchovies

Homemade Caesar Salad Dressing without Raw Anchovies

Q: Can I make this ahead for a busy week?
A: Absolutely. Letting it sit for an hour or overnight lets the flavors blend. Store it in the fridge up to 3-4 days.

Q: Can I use bottled lemon juice instead of fresh?
A: Fresh lemon juice is best for bright flavor. Bottled juice works in a pinch, but I recommend adding a touch more vinegar or salt to brighten it.

Q: Is the Worcestershire necessary?
A: It adds that savory, umami note that replaces anchovies in this recipe. If you’re out, a splash of soy sauce can be a substitute, but use less to avoid adding too much salt.

Q: What if my dressing is too thin or too thick?
A: Too thin? Add more parmesan or a bit more mayo. Too thick? Stir in a teaspoon or two of water, lemon juice, or soft-boiled dressing warmed slightly.

Q: Can I use olive oil spray instead of olive oil?
A: No. Liquid oil helps emulsify the dressing. A spray won’t incorporate the same way.

One Final Thought from My Kitchen

Making Homemade Caesar Salad Dressing without Raw Anchovies is one of those small kitchen wins that gives you big returns. It’s fast, forgiving, and full of flavor—perfect for nights when you want to feed your family something comforting without stress. I hope you try it, tweak it, and make it your own. If it finds its way into your weeknight rotation, I’ll be smiling across the kitchen table with you.

Conclusion

If you want another simple, anchovy-free approach with just a few ingredients, this Easy Caesar Dressing Recipe (Just 6 Ingredients, No Anchovies) is a helpful companion to compare techniques and flavors. For a different take that still skips raw anchovies, this Caesar Dressing Without Anchovies Recipe – Key To My Lime offers useful variations and inspiration.

Homemade Caesar Salad Dressing without Raw Anchovies

Prep Time 10 minutes
Total Time 10 minutes
Servings 4 servings
Calories 150
A simple, creamy dressing that captures the essence of traditional Caesar salad without the anchovies, perfect for elevating any meal.

Ingredients

Dressing Ingredients

  • 2 cloves garlic, chopped (If your food processor won't cut it finely.)
  • 1 cup mayo (recommended: Hellman's Vegan Mayo) (Can substitute with Greek yogurt for a tangier version.)
  • 2 tsp dijon mustard
  • ½ tsp mustard powder
  • 1-2 tbsp white vinegar (Start with one tbsp, add more for a more acidic dressing.)
  • 2 tsp Worcestershire sauce (For a savory, umami flavor.)
  • ½ cup shredded parmesan (Use freshly grated for more flavor.)
  • 1/2 piece lemon (juice only) (Adds brightness.)
  • 2 tbsp olive oil (approx.)
  • ½ tsp ground black pepper

Instructions 

Preparation

  • Add all ingredients except for the olive oil to the food processor.
  • Select the puree option on your food processor.
  • Begin to puree the ingredients and scrape the bowl once for even mixing.
  • Slowly add one tablespoon of olive oil while pureeing until the dressing is creamy.
  • Test the dressing for texture and taste, adjust salt, lemon, or vinegar if needed.
  • Add more olive oil until the desired consistency is achieved.
  • Store in an airtight container in the fridge and use within 3-4 days.

Notes

Allow the dressing to rest for 30 minutes in the fridge before serving to enhance flavor. If it thickens too much, stir in a teaspoon of water or more lemon juice before serving.
Calories: 150kcal
Course: Appetizer, Salad Dressing
Cuisine: American
Keyword: Caesar Dressing, Easy Recipe, Homemade Dressing, No Anchovies, Salad Dressing

BBQ Chicken Sweet Potato Bowl

There’s something truly comforting about stepping into the kitchen as the sun is setting. The rich smell of sweet potatoes roasting in the oven mingles with the sound of sizzling chicken on the stove. It’s a symphony of scents and sounds, hinting at the delicious meal you’re about to create. Today, we are diving into a delightful and hearty recipe: the BBQ Chicken Sweet Potato Bowl. It’s a dish that brings warmth to your family as you gather around the table. Let’s get started!

Why This Works

BBQ Chicken Sweet Potato Bowl

This BBQ Chicken Sweet Potato Bowl is the perfect weeknight dinner solution. It’s not only flavorful but also incredibly satisfying. Sweet potatoes are a wonderful source of fiber and nutrients, and paired with protein-rich chicken, they create a well-rounded meal.

Making this dish is a great way to bring the family together. Everyone can customize their bowl with their favorite toppings. Plus, it saves you time. The sweet potatoes roast in the oven while you heat up the chicken, creating a delicious and filling dinner in under an hour.

Process Overview

“This is where the magic happens—when the aroma fills the kitchen.”

As the sweet potatoes roast and the chicken simmers, your kitchen will be filled with mouthwatering scents. This dish comes together seamlessly, allowing you to spend less time cooking and more time enjoying a meal with your loved ones.

Ingredients

Here’s what you’ll need to make these delightful bowls:

  • 2 chicken breasts, cooked and shredded
    Tip: Use leftover rotisserie chicken for quicker prep.
  • 2 medium sweet potatoes, cubed
    Tip: Look for firm sweet potatoes free from blemishes.
  • 1 cup corn, fresh or frozen
    Tip: Frozen corn is a great time-saver.
  • 1 avocado, diced
    Tip: Choose a ripe avocado for the creamiest texture.
  • 1/2 cup barbecue sauce
    Tip: Use your favorite store-bought or homemade sauce.
  • 1 tablespoon olive oil
    Tip: Extra virgin olive oil adds great flavor.
  • Salt and pepper to taste
    Tip: Adjust to your preference for seasoning.
  • Optional: diced red onion, cilantro, lime for serving
    Tip: Fresh herbs elevate the flavor and add brightness.

Directions

  1. Preheat the oven to 400°F (200°C).
    This step gets the kitchen ready for a delicious dish. The heat will bring out the best in the sweet potatoes!

  2. Toss the cubed sweet potatoes with olive oil, salt, and pepper. Spread out on a baking sheet and roast for 25-30 minutes until tender.
    Keep an eye on them and give them a gentle shake halfway through for even roasting.

  3. In a skillet, heat the shredded chicken and barbecue sauce until warmed through.
    This will take only a few minutes, and the smell will be simply irresistible.

  4. To assemble the bowls, place roasted sweet potatoes at the bottom, top with barbecue chicken, corn, and diced avocado.
    Layering creates a beautiful presentation; feel free to make it colorful and fun!

  5. Add any additional toppings such as red onion, cilantro, or a squeeze of lime. Serve warm.
    Encourage everyone to make their bowl unique—it’s all about enjoying what you love!

Serving

BBQ Chicken Sweet Potato Bowl

Serving this BBQ Chicken Sweet Potato Bowl family-style can be a wonderful experience. Place all the components in the center of the table and let everyone build their bowl. This approach brings a sense of togetherness as everyone selects their favorite ingredients. You can share stories about your day while enjoying a hearty meal.

Storage

Storing leftovers is easy! You can keep any extra BBQ Chicken Sweet Potato Bowls in airtight containers in the refrigerator for up to three days. When you’re ready to eat, reheat them in the microwave or on the stove until warmed through. Just be careful not to overheat the sweet potatoes, as they can become mushy.

Kitchen Notes

  • Prep Ahead: Wash and cut the sweet potatoes a day in advance for time-saving.
  • Shredding Chicken: Use a hand mixer to shred cooked chicken quickly.
  • Batch Cooking: Make extra sweet potatoes and chicken for quick lunches or dinners later on.
  • Frozen Corn: No need to thaw if using frozen corn; just toss it in when assembling the bowls.
  • Use One Pan: Roast the sweet potatoes and warm the chicken in one skillet to save on dishes!

Variations

This recipe can easily adapt to suit different tastes or dietary restrictions:

  • For Veggie Eaters: Substitute the chicken with black beans for a delicious plant-based option.
  • For Keto Dieters: Skip the corn and avocado for a lower-carb option.
  • Picky Eaters: Serve ingredients separately and let them choose what they want.
  • Wealth of Toppings: Consider adding cheese, salsa, or Greek yogurt for extra flavor.
  • Spicy Kick: Add jalapeños or a spicy barbecue sauce for those who like a little heat.

FAQ

1. Can I use other proteins instead of chicken?
Yes, you can use beef, turkey, or even tofu if you prefer a vegetarian option.

2. How can I make this dish healthier?
You can reduce the use of barbecue sauce or opt for a low-sugar version.

3. Can I prepare this dish in advance?
Yes, you can pre-cook the sweet potatoes and chicken, then assemble the bowls just before serving.

4. Is this recipe gluten-free?
Yes, all ingredients are gluten-free unless you use a barbecue sauce with gluten.

5. How do I know when the sweet potatoes are done?
They should be fork-tender and lightly browned on the edges.

Conclusion

As the meal comes together, the kitchen fills with warmth and delight. This BBQ Chicken Sweet Potato Bowl is not just food; it’s a way to connect with your loved ones, nourishing both body and soul. Remember, the best meals are those shared with family and friends, so gather around the table and enjoy every bite together. Happy cooking!

BBQ Chicken Sweet Potato Bowl

Prep Time 10 minutes
Cook Time 30 minutes
Total Time 40 minutes
Servings 4 servings
Calories 500
A comforting and customizable BBQ Chicken Sweet Potato Bowl featuring roasted sweet potatoes, shredded chicken, and fresh toppings.

Ingredients

Main Ingredients

  • 2 pieces chicken breasts, cooked and shredded (Use leftover rotisserie chicken for quicker prep.)
  • 2 medium sweet potatoes, cubed (Look for firm sweet potatoes free from blemishes.)
  • 1 cup corn, fresh or frozen (Frozen corn is a great time-saver.)
  • 1 piece avocado, diced (Choose a ripe avocado for the creamiest texture.)
  • 1/2 cup barbecue sauce (Use your favorite store-bought or homemade sauce.)
  • 1 tablespoon olive oil (Extra virgin olive oil adds great flavor.)
  • to taste salt (Adjust to your preference for seasoning.)
  • to taste pepper (Adjust to your preference for seasoning.)

Optional Toppings

  • to taste diced red onion (Fresh herbs elevate the flavor and add brightness.)
  • to taste cilantro (Fresh herbs elevate the flavor and add brightness.)
  • to taste lime (A squeeze for added freshness.)

Instructions 

Preparation

  • Preheat the oven to 400°F (200°C).
  • Toss the cubed sweet potatoes with olive oil, salt, and pepper. Spread out on a baking sheet and roast for 25-30 minutes until tender.

Cooking

  • In a skillet, heat the shredded chicken and barbecue sauce until warmed through.

Assembly

  • To assemble the bowls, place roasted sweet potatoes at the bottom, top with barbecue chicken, corn, and diced avocado.
  • Add any additional toppings such as red onion, cilantro, or a squeeze of lime. Serve warm.

Notes

Leftovers can be stored in airtight containers in the refrigerator for up to three days. Reheat in the microwave or on the stove until warmed through. Avoid overheating sweet potatoes as they can become mushy.
Calories: 500kcal
Course: Dinner, Main Course
Cuisine: American
Keyword: BBQ Chicken, Comfort Food, Customizable Dinner, Family Meal, Sweet Potato Bowl

Mutton Leg Roast

There’s something truly special about the smell of a roast wafting through the kitchen. It’s warm, inviting, and hints at joy-filled family moments to come. As you prepare a Mutton Leg Roast, you’ll hear the sounds of ingredients sizzling and the oven heating up, promising to deliver a meal that brings family together. This recipe will have everyone at the table, eager to share stories and enjoy the feast.

Why This Works

Mutton Leg Roast

This Mutton Leg Roast recipe works like a charm for a few reasons. First, it’s a dish that you can prepare ahead of time. Marinating the lamb overnight allows the flavors to seep in, making it tender and delicious. Plus, it saves you time on the day of the meal. You can focus on setting the table or spending time with family while the roast does its magic in the oven.

Second, it’s a fantastic way to feed a crowd. A 5.5 lbs leg of lamb provides hearty portions. You can serve it up family-style, encouraging everyone to dig in and enjoy. This recipe fosters a sense of togetherness that makes every bite more satisfying.

Process Overview

“This is where the magic happens—when the aroma fills the kitchen.”

When you embark on this cooking adventure, you can expect an enjoyable process. It’s easy and rewarding. You’ll feel accomplished as you watch the roast transform from a beautiful cut of meat to a tender, flavorful centerpiece for your family dinner.

Ingredients

Gather these ingredients for a truly delightful Mutton Leg Roast:

  • 5.5 lbs leg of lamb (2.5 KG)
  • 2.5 tsp Salt (or to taste)
  • 1.5 tsp Red chili powder (Cayenne pepper – use less for mild)
  • 2 tbsp garlic paste
  • 2 tbsp ginger paste
  • 1 tsp Crushed red chili
  • 1 tbsp green chili paste (optional)
  • 1 cup Yogurt
  • 2 tbsp cumin-coriander powder (dry roasted)
  • 1/4 cup Lemon juice
  • 2 tsp garam masala (or allspice powder or curry powder)
  • 2 tbsp oil
  • 1/2 tsp turmeric
  • 4 tbsp butter (optional)
  • Cilantro for garnish
  • 1 tbsp cornstarch (mixed in 1/4 cup of water)

Lily’s Personal Tips:

  • Use fresh spices where possible. They enhance the flavor significantly.
  • For a milder dish, adjust the red chili powder to your preference.
  • Allow the yogurt to come to room temperature before mixing it in; it helps the marinade adhere better.
  • Feel free to use any oil, but olive oil adds a lovely flavor.
  • A splash of vinegar can be used instead of lemon juice if you’re out of lemons.

Directions

  1. Pat dry and score your leg of lamb. Using a sharp knife, make deep cuts on the surface to help the marinade penetrate better.

  2. Mix all of the ingredients of the marinade. In a large bowl, combine the salt, red chili powder, garlic paste, ginger paste, crushed red chili, green chili paste, yogurt, cumin-coriander powder, lemon juice, garam masala, oil, turmeric, and cornstarch.

  3. Massage it well on the leg of lamb. Take your time with this step. The goal is to ensure the marinade reaches deep into the meat.

  4. Marinate overnight. Cover the lamb and let it sit in the fridge. This part is crucial, as it allows the flavors to meld and the meat to tenderize.

  5. Roasting the leg of lamb. Preheat your oven to 350°F. Place the marinated lamb in a roasting pan and cover it with foil. Roast for about 2.5 to 3 hours. Check occasionally and baste with its own juices to keep it moist.

  6. Prepare gravy. After removing the lamb, don’t discard the juices in the roasting pan. Place the pan over medium heat, add a bit of water to loosen any bits stuck to the bottom, and stir in the cornstarch mixture for a thick, flavorful gravy. Season with salt to taste.

Serving

Mutton Leg Roast

To serve your Mutton Leg Roast, slice it into even portions and place it on a large platter. Arrange the slices slightly overlapping to create an inviting presentation. Drizzle some of the rich gravy over the lamb, and garnish with chopped cilantro for a fresh touch.

Pair this with rice or naan for a complete meal. Family-style servings encourage sharing, so set out all the sides and let everyone help themselves. This is how food brings us closer.

Storage

After the meal, if you have leftovers (which is rare!), store the Mutton Leg Roast in an airtight container in the fridge for up to 3 days. Reheat it in the oven covered with foil to keep it moist. You can also slice it and use it in sandwiches, wraps, or salads for a tasty twist during the week.

Kitchen Notes

  • Use a meat thermometer to ensure your lamb reaches an internal temperature of 145°F for medium-rare.
  • Marinade length matters. If you’re short on time, try to marinate for at least 4 hours minimum.
  • Basting makes a difference. Baste the roast with pan juices every 30 minutes for incredible flavor and moisture.
  • For crispy skin, uncover the leg during the last 30 minutes of roasting.
  • Make-ahead gravy can be stored separately. Just reheat and thicken when you’re ready to serve.

Variations

If you’re cooking for a crowd with varying tastes, consider these adaptations:

  • Picky eaters: Leave out the green chili paste or reduce the spices for milder flavors.
  • Vegetarian option: You can adapt the marinade to soak vegetables like cauliflower or potatoes and roast them alongside the meat.
  • Gluten-free twist: Ensure your yogurt is gluten-free and skip flour-based thickeners for gravy; cornstarch works beautifully.
  • Mediterranean flair: Add rosemary or thyme to the marinade for a different herbaceous profile.
  • Recipe halving: Feel free to adjust quantities if you’re cooking for fewer people.

FAQ

  1. Can I use frozen leg of lamb?
    Yes, just ensure it’s completely thawed before marinating.

  2. Why should I marinate overnight?
    Marinating overnight allows the flavors to permeate the meat and tenderizes it.

  3. What’s the best way to test doneness?
    A meat thermometer is best. Look for 145°F for medium-rare doneness.

  4. Can I make the gravy ahead of time?
    Yes, you can prepare it in advance. Just reheat gently before serving.

  5. What sides go well with this roast?
    Consider serving it with rice, naan, roasted vegetables, or a fresh salad.

As you embark on making this Mutton Leg Roast, remember that the best meals come from the heart. This is a dish meant for sharing, laughter, and love around the table. Cooking is a celebration, and with every bite, you’ll create memories that your family will cherish for years to come. Enjoy!

Mutton Leg Roast

Prep Time 1 hour
Cook Time 3 hours
Total Time 4 hours
Servings 8 servings
Calories 450
A delightful and tender roasted leg of lamb, marinated overnight for maximum flavor, perfect for family gatherings.

Ingredients

For the Marinade

  • 5.5 lbs leg of lamb (A 5.5 lbs leg of lamb is recommended for hearty portions.)
  • 2.5 tsp Salt (Adjust to taste.)
  • 1.5 tsp Red chili powder (Cayenne pepper - use less for a milder flavor.)
  • 2 tbsp garlic paste (Enhances the flavor significantly.)
  • 2 tbsp ginger paste
  • 1 tsp Crushed red chili
  • 1 tbsp green chili paste (Optional.)
  • 1 cup Yogurt (Let come to room temperature before mixing.)
  • 2 tbsp cumin-coriander powder (Dry roasted.)
  • 1/4 cup Lemon juice (A splash of vinegar can be used instead.)
  • 2 tsp garam masala (Can substitute with allspice or curry powder.)
  • 2 tbsp oil (Olive oil adds a lovely flavor.)
  • 1/2 tsp turmeric
  • 4 tbsp butter (Optional.)
  • 1 tbsp cornstarch (Mixed in 1/4 cup of water.)

Instructions 

Preparation

  • Pat dry and score your leg of lamb. Make deep cuts on the surface to help the marinade penetrate better.
  • In a large bowl, mix all of the marinade ingredients: salt, red chili powder, garlic paste, ginger paste, crushed red chili, green chili paste, yogurt, cumin-coriander powder, lemon juice, garam masala, oil, turmeric, and cornstarch.
  • Massage the marinade well onto the leg of lamb to ensure it reaches deep into the meat.
  • Cover the lamb and let it marinate overnight in the fridge.

Cooking

  • Preheat your oven to 350°F (175°C).
  • Place the marinated lamb in a roasting pan and cover it with foil.
  • Roast for about 2.5 to 3 hours, checking occasionally and basting with its own juices.
  • For a thicker gravy, after removing the lamb, place the pan over medium heat, add water to loosen any bits stuck to the bottom, and stir in the cornstarch mixture.

Serving

  • Slice the Mutton Leg Roast into even portions and arrange them on a large platter.
  • Drizzle some of the rich gravy over the lamb and garnish with chopped cilantro.

Notes

After the meal, store leftovers in an airtight container in the fridge for up to 3 days. Reheat covered with foil to keep it moist. For crispy skin, uncover the leg during the last 30 minutes of roasting.
Calories: 450kcal
Course: Dinner, Main Course
Cuisine: Mediterranean
Keyword: Family Meal, Lamb Recipe, Marinated Lamb, Mutton Leg Roast, Roast Lamb

High-Protein Creamy Philly Cheesesteak Mac & Cheese Bliss

There’s something magical about stepping into a kitchen filled with the mouthwatering aroma of comfort food. The simmering sounds, the delightful scent of spices, and the anticipation of a warm meal waiting to be shared with loved ones are truly unmatched. Today, I’ll guide you through a recipe that captures all these cozy feelings while delivering a high-protein punch: High-Protein Creamy Philly Cheesesteak Mac & Cheese Bliss. This dish is more than just a meal; it’s a hug on a plate, perfect for gathering your family around the table.

Why This Works
High-Protein Creamy Philly Cheesesteak Mac & Cheese Bliss

This creamy and savory delight works on many levels. First and foremost, it combines the classic comfort of mac and cheese with the flavors of a Philly cheesesteak. Not only does this recipe cater to the appetites of both kids and adults, but it also allows busy families to whip up a wholesome meal in no time.

Using lean ground beef or turkey provides a protein boost while keeping it guilt-free. Bell peppers and onions add color, crunch, and nutrients, ensuring your family enjoys a balanced meal. Plus, the creamy sauce made with light cream cheese and mozzarella gives that rich texture we all crave, all while keeping it lighter than traditional options.

Process Overview

“This is where the magic happens—when the aroma fills the kitchen.”

Imagine the moment when you finish cooking, and your family gathers around the table. The rich, cheesy smell wafts through the air, the sizzling of the pan sets a perfect backdrop, and as you serve your high-protein creamy Philly cheesesteak mac and cheese, smiles light up the room. Cooking is not just about making meals; it’s about creating memories.

Ingredients

To get started, here’s what you will need for this delightful dish:

  • 8 oz Dry Macaroni (Consider whole wheat or chickpea pasta for a healthier twist. They cook similarly to traditional pasta.)
  • 1 lb Lean Ground Beef (Ground turkey is a great substitute for a lower fat option, or chickpeas for a vegetarian version.)
  • 1 cup Chopped White Onion (Yellow onion adds a similar sweetness, so feel free to swap.)
  • 2 cloves Minced Garlic (Freshly minced enhances the flavor tremendously. If you’re short on time, pre-minced works, but fresh is better.)
  • 2 cups Bell Peppers (Mix red, green, and yellow for a colorful dish, or use your family’s favorite.)
  • 2 tablespoons Butter (Olive oil can give a slightly healthier flavor.)
  • 8 oz Light Cream Cheese (Using regular cream cheese will give a creamier texture—choose based on your preference.)
  • 1 cup Shredded Mozzarella (Any melting cheese like cheddar can work too.)
  • 4 slices Light Cheese Slices (Choose a good melting cheese slice—cheddar or provolone are excellent choices.)
  • 1 teaspoon Salt
  • 1 teaspoon Pepper
  • 1 teaspoon Paprika (This adds a lovely smoky flavor to the dish.)
  • 1/2 teaspoon Chili Flakes (Adjust to taste for some added heat.)
  • 1/4 cup Fresh Parsley (Optional for garnish, but it brightens the dish.)

Directions

Let’s walk through the preparation of this comforting dish step by step.

  1. Cook the Macaroni: Bring a large pot of salted water to a boil. Add the macaroni and cook according to package directions until al dente. Drain and set aside.

  2. Sauté the Vegetables: In a large skillet, melt the butter over medium heat. Add the chopped onion and sauté for about 3 minutes, or until translucent.

  3. Add Garlic and Peppers: Stir in the minced garlic and bell peppers. Cook for another 5 minutes until the peppers are softened. That vibrant color and aroma means you’re on the right track!

  4. Brown the Meat: Push the vegetables to the side of the skillet, add the ground beef (or turkey) to the pan. Cook until browned, breaking it up as it cooks. This is essential for the cheesesteak flavor.

  5. Combine Ingredients: Once the meat is fully cooked, stir everything together. Season with salt, pepper, paprika, and chili flakes.

  6. Make the Sauce: Reduce the heat to low and add the light cream cheese. Stir until it melts into the mixture. Then, add the mozzarella gradually, stirring until creamy and combined.

  7. Combine with Pasta: Gently fold in the cooked macaroni until every piece is coated in that creamy sauce. If it seems too thick, add a splash of pasta water to loosen it up.

  8. Melt the Cheeses: Top with the cheese slices, cover the skillet, and allow the cheese to melt for about 5 minutes over low heat.

  9. Garnish and Serve: Sprinkle fresh parsley on top before serving to add a pop of color and brightness.

Serving
High-Protein Creamy Philly Cheesesteak Mac & Cheese Bliss

Serving this dish can be as simple as scooping it from the skillet to plates. For a family-style experience, serve it straight from the skillet on the table. Allow each family member to help themselves. Pair it with a simple green salad or steamed veggies to complete the meal.

Storage

Leftovers can be stored in an airtight container in the refrigerator for up to 3 days. To reheat, simply pop it in the microwave for about 2-3 minutes or warm it in a skillet over medium-low heat with a splash of milk. This will help maintain that creamy texture and prevent it from drying out.

Kitchen Notes

Here are some practical shortcuts and tips to make cooking easier for you:

  • Meal Prep: Cook the macaroni and ground meat ahead of time, then combine when ready to eat.
  • Frozen Vegetables: Use frozen bell peppers to save on prep time—no chopping required!
  • One-Pot Dish: If you want to save on dishes, consider cooking everything in one pot, starting with the meat and then adding macaroni and cheese.
  • Cheese Variety: Experiment with different cheeses based on your family’s preference for a unique twist.
  • Kid-Friendly: Involve the kids in stirring and combining; it’s a fun way to engage them in the cooking process.

Variations

Meeting the needs of picky eaters or different diets can be simple with a few adjustments:

  • Veggie-Loaded: Add more vegetables like spinach, mushrooms, or zucchini to boost nutrition.
  • Gluten-Free: Use gluten-free pasta to keep it suitable for those with gluten sensitivities.
  • Vegan Option: Substitute ground meat with lentils or black beans and use plant-based cream cheese or cashew cream.
  • Health-conscious: Opt for low-fat cheese or skip the cheese slices and add more herbs and spices instead.

FAQ

  1. Can I use other types of pasta?
    Yes! Whole wheat or chickpea pasta work wonderfully for a healthier option.

  2. How can I make this dish spicier?
    Add more chili flakes or even a dash of hot sauce to the mixture before serving.

  3. Is this dish freezable?
    Yes, it freezes well! Just be sure to store it in an airtight container. Thaw in the refrigerator before reheating.

  4. Can I double the recipe?
    Absolutely! Just ensure you have a large skillet or pot to accommodate.

  5. What can I serve with it?
    A simple salad or steamed vegetables makes a great side, balancing the richness of this dish.

Conclusion

High-Protein Creamy Philly Cheesesteak Mac & Cheese Bliss is more than just a meal; it’s a perfect way to gather family and share a hearty, delicious dish that everyone will love. As you step away from the stove, remember—the joy of cooking lies not just in the food itself but in the memories you create around it. So gather the family, serve it up, and enjoy every cheesy bite. Happy cooking!

High-Protein Creamy Philly Cheesesteak Mac & Cheese Bliss

Prep Time 15 minutes
Cook Time 30 minutes
Total Time 45 minutes
Servings 6 servings
Calories 450
A comforting and nutritious twist on classic mac and cheese, packed with high protein from lean ground beef or turkey and creamy cheeses, perfect for family gatherings.

Ingredients

Pasta and Base Ingredients

  • 8 oz Dry Macaroni (Consider whole wheat or chickpea pasta for a healthier twist.)
  • 1 lb Lean Ground Beef (Ground turkey is a great substitute for lower fat.)

Vegetables

  • 1 cup Chopped White Onion (Yellow onion can also be used.)
  • 2 cloves Minced Garlic (Freshly minced enhances the flavor.)
  • 2 cups Bell Peppers (Mix of red, green, and yellow for color.)

Cheeses and Sauces

  • 8 oz Light Cream Cheese (Use regular for a creamier texture.)
  • 1 cup Shredded Mozzarella (Any melting cheese like cheddar can work too.)
  • 4 slices Light Cheese Slices (Cheddar or provolone are excellent choices.)

Seasonings

  • 2 tbsp Butter (Olive oil can be used for a healthier option.)
  • 1 tsp Salt
  • 1 tsp Pepper
  • 1 tsp Paprika (Adds a lovely smoky flavor.)
  • 1/2 tsp Chili Flakes (Adjust to taste.)
  • 1/4 cup Fresh Parsley (Optional for garnish.)

Instructions 

Preparation

  • Bring a large pot of salted water to a boil. Add the macaroni and cook according to package directions until al dente. Drain and set aside.
  • In a large skillet, melt the butter over medium heat. Add the chopped onion and sauté for about 3 minutes, or until translucent.
  • Stir in the minced garlic and bell peppers. Cook for another 5 minutes until the peppers are softened.
  • Push the vegetables to the side of the skillet, add the ground beef (or turkey) to the pan. Cook until browned, breaking it up as it cooks.
  • Once the meat is fully cooked, stir everything together. Season with salt, pepper, paprika, and chili flakes.
  • Reduce the heat to low and add the light cream cheese. Stir until it melts into the mixture. Add the mozzarella gradually, stirring until creamy and combined.
  • Gently fold in the cooked macaroni until every piece is coated in that creamy sauce. If it seems too thick, add a splash of pasta water to loosen it up.
  • Top with the cheese slices, cover the skillet, and allow the cheese to melt for about 5 minutes over low heat.
  • Sprinkle fresh parsley on top before serving.

Notes

Leftovers can be stored in an airtight container in the refrigerator for up to 3 days. To reheat, use the microwave or warm in a skillet with a splash of milk to maintain creaminess.
Calories: 450kcal
Course: Dinner, Main Course
Cuisine: American, Comfort Food
Keyword: Cheesesteak, Comfort Food, Family Dinner, High Protein, Mac and Cheese