Category

Uncategorized

Category

{image_template}

I can still smell it now. The warm scent of roasted potatoes mixes with toasted spices and sizzling meat. The kitchen hums with the oven fan and the soft clatter of a skillet. That is the kind of dinner that makes the whole house gather.

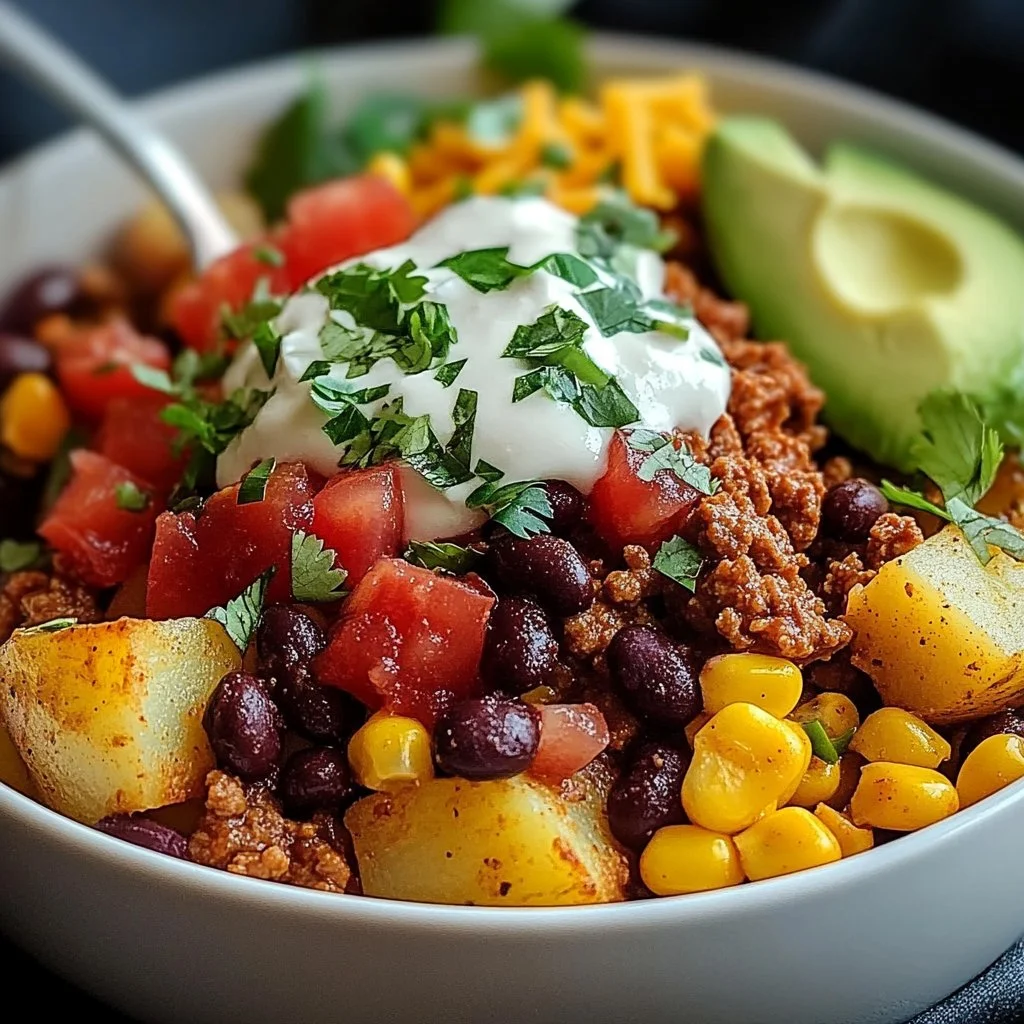
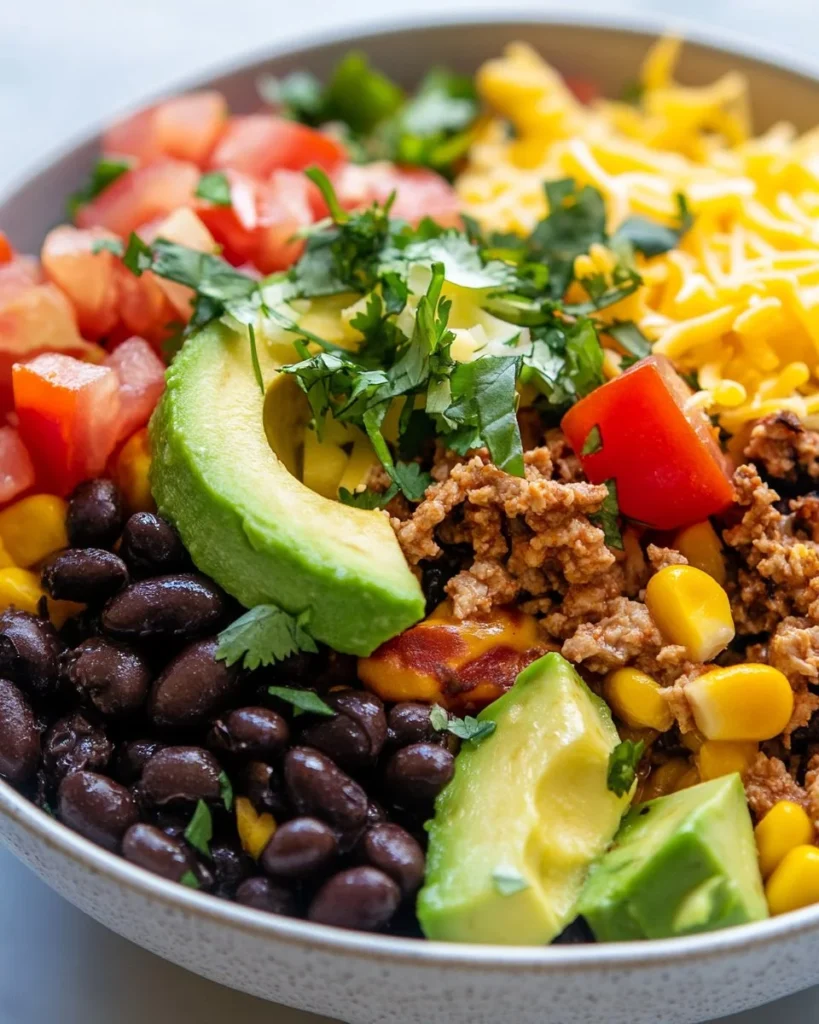
This Loaded Potato Taco Bowl is a simple weeknight winner. It fills the house with comforting smells, feeds a crowd, and comes together with minimal fuss. If you loved my bang bang chicken bowl, you will find the same cozy vibe here. It is hearty, customizable, and kid friendly.

Why this works

Loaded Potato Taco Bowl

This recipe combines two family favorites in one bowl: the crispy potato and the classic taco flavor profile. The contrast of textures keeps kids and adults interested. The roasted potatoes give you a satisfying crisp outside and a fluffy inside. The seasoned meat and beans add protein and warmth.

It saves time because everything cooks at once. You roast the potatoes while you brown the meat. Beans and corn come from the pantry or freezer. This makes it perfect for evenings when you want something homey without a long cooking marathon.

I often turn this into a build-your-own station for dinner guests. Let everyone assemble their bowl. It reduces last minute plate juggling and keeps the kitchen calm. If you like a similar layered, family style meal, try my street corn chicken bowl for another kid friendly twist.

Process Overview

“This is where the magic happens—when the aroma fills the kitchen.”

The process is straightforward. Roasted potatoes become the base. While they crisp, you brown the meat and season it. Then you layer beans, corn, tomatoes, and avocado. Finish with cheese and cilantro.

Think of it as simple mise en place. Chop the potatoes and tomatoes early. Drain and rinse the beans. Set out bowls for toppings so assembly moves fast. The goal is warm, comforting bowls with bright fresh touches.

Ingredients
H3 Lily’s personal tips for each

  • 2 large potatoes, diced
    Tip: Use russet for a fluffy interior and crisp exterior. Dice them evenly so they roast at the same rate.

  • 1 lb ground meat, beef, turkey, or chicken
    Tip: I like ground turkey for a lighter bowl. If using beef, drain excess fat for a cleaner flavor.

  • 1 cup black beans, drained and rinsed
    Tip: Rinsing removes extra sodium and the canned bean liquid. Warm them briefly before serving.

  • 1 cup corn
    Tip: Frozen corn works great. Thaw and pat dry so it does not water down the bowl.

  • 1 cup diced tomatoes
    Tip: Use Roma tomatoes for less liquid, or do halved cherry tomatoes for sweetness.

  • 1 avocado, diced
    Tip: Pick a slightly firm avocado and ripen on the counter a day before. Add lime if you want to prevent browning.

  • 1 cup shredded cheese
    Tip: Cheddar melts well. A mix of Monterey Jack and cheddar offers great melt and mild flavor.

  • 1 teaspoon chili powder
    Tip: Adjust to taste. For kids, reduce this by half and add more for adults.

  • 1 teaspoon cumin
    Tip: Toast the cumin briefly in a dry pan for a deeper aroma if you have a moment.

  • Salt and pepper to taste
    Tip: Season in layers. Lightly salt the potatoes and add a little to the meat so everything tastes balanced.

  • Olive oil
    Tip: Use a high quality extra virgin for flavor at the end or a neutral oil for roasting.

  • Fresh cilantro for garnish
    Tip: Chop cilantro last and sprinkle on right before serving for the freshest taste.

Directions

  1. Preheat the oven to 425°F (220°C).
    Encouraging note: Preheating gives you an immediate rush of aroma when the potatoes hit the hot oven. It sets the foundation for crispiness.

  2. Toss diced potatoes in a bowl with olive oil, salt, pepper, and half of the chili powder and cumin.
    Encouraging note: Be generous with the oil so the potatoes get golden. Seasoning early builds flavor deep into each bite.

  3. Spread the seasoned potatoes on a baking sheet and roast for 25-30 minutes or until crispy.
    Encouraging note: Flip them once halfway through for even browning. The kids will love the crunch and you will love how little attention they need.

  4. While the potatoes are baking, heat a skillet over medium heat and brown the ground meat.
    Encouraging note: Break the meat into small pieces as it cooks so it warms evenly and mixes nicely with the spices.

  5. Add the remaining chili powder, cumin, salt, and pepper to the meat, stirring to combine.
    Encouraging note: Taste and adjust seasonings. This is your chance to make the bowl mild or bold based on family preferences.

  6. Once the potatoes are done, assemble the taco bowl by layering roasted potatoes, black beans, corn, seasoned meat, diced tomatoes, and avocado.
    Encouraging note: Layering keeps hot and cold components distinct. Let each family member choose their own order for fun.

  7. Top with shredded cheese and fresh cilantro.
    Encouraging note: The cheese will melt on the warm meat and potatoes. Cilantro adds a bright finish that lifts the whole bowl.

  8. Serve and enjoy!
    Encouraging note: Sit down together and let everyone dig in. Family meals are about connection as much as flavor.

Serving

Loaded Potato Taco Bowl

H3 Family-style tips

Serve this bowl family-style on the table. Put roasted potatoes on one platter, meat in a skillet, and bowls of beans, corn, tomatoes, avocado, and cheese in the center. Let each person build their bowl.

For younger kids, make a small stack plate with potatoes, some meat, and a little cheese. Present the toppings on the side so picky eaters can choose. This keeps dinner relaxed and reduces waste.

If you have guests, offer tortilla chips on the side. They make a great scoop and add extra crunch. A squeeze of lime over each bowl brightens every bite.

Storage

Refrigerator tips
Store leftovers in an airtight container up to 3 days. Keep the avocado separate if possible. If not, add it fresh the next day and expect a little browning.

Freezing tips
You can freeze the cooked meat and roasted potatoes separately up to 2 months. Thaw overnight in the refrigerator before reheating.

Reheat with care
Reheat potatoes in a 400°F oven for 8 to 10 minutes to bring back crispiness. Heat meat in a skillet over medium heat until warmed through. Combine and top with fresh avocado and cilantro before serving.

Kitchen Notes

  • Shortcut 1: Use pre-diced frozen potatoes for a big time saver on busy nights.
  • Shortcut 2: Swap canned seasoned chilies for extra flavor with less work.
  • Shortcut 3: Brown the meat in advance and freeze in portions for quick assembly later.
  • Shortcut 4: Use a sheet pan for the meat and potatoes if you prefer to roast everything together. Adjust seasoning and watch for juices.
  • Shortcut 5: Keep bowls of toppings chilled on ice if you serve this at a party.

Variations
H3 For picky eaters and different diets

  • Vegetarian: Omit the meat and add extra black beans, roasted sweet potatoes, or crumbled tofu for protein.
  • Gluten-free: This recipe is naturally gluten-free. Watch labels on spice blends to be safe.
  • Low carb: Replace potatoes with roasted cauliflower florets for a lower carb bowl.
  • Kid friendly: Reduce chili powder and cumin, and offer cheese and avocado as optional add-ons.
  • Spicy adult version: Add a diced jalapeño to the meat or top with a hot sauce when serving.

FAQ
H3 Common questions answered

Q1: Can I make this ahead of time?
A1: Yes. Roast the potatoes and cook the meat a day ahead. Store separately and warm before serving. Add avocado fresh.

Q2: Which potato is best for roasting?
A2: Russet potatoes roast up crispy and fluffy. Yukon Gold will be creamier and still tasty. Cut them evenly for consistent cooking.

Q3: How can I make this dairy free?
A3: Omit the shredded cheese or use a dairy free alternative. Add a dollop of dairy free yogurt or a squeeze of lime to maintain creaminess.

Q4: Is this meal kid friendly?
A4: Absolutely. Keep the spices light and offer toppings on the side. Many kids enjoy building their own bowls.

Q5: Can I use ground turkey instead of beef?
A5: Yes. Ground turkey makes a lighter version and works beautifully with the spices. Brown it the same way as beef.

Conclusion

Thank you for letting me share this cozy, weeknight favorite. I love how simple ingredients come together to make something special for the whole family. If you want a version with a different texture and presentation, I often look to the Loaded Potato Taco Bowl Recipe at Simple Home Edit for inspiration. For a crispier take on potato taco bowls, the tips and photos at Crispy Potato Taco Bowls from How Sweet Eats are also lovely.

If you make this, come back and tell me how your family liked it. I love hearing your twists and seeing your photos. Happy cooking, from my kitchen to yours.

Loaded Potato Taco Bowl

Prep Time 15 minutes
Cook Time 30 minutes
Total Time 45 minutes
Servings 6 servings
Calories 550
A cozy and comforting dinner recipe that combines crispy roasted potatoes with seasoned meat, beans, corn, and fresh toppings, perfect for a filling family meal.

Ingredients

Main Ingredients

  • 2 large potatoes, diced (Use russet for a fluffy interior and crisp exterior. Dice them evenly so they roast at the same rate.)
  • 1 lb ground meat (beef, turkey, or chicken) (I like ground turkey for a lighter bowl. If using beef, drain excess fat for a cleaner flavor.)
  • 1 cup black beans, drained and rinsed (Rinsing removes extra sodium and the canned bean liquid. Warm them briefly before serving.)
  • 1 cup corn (Frozen corn works great. Thaw and pat dry so it does not water down the bowl.)
  • 1 cup diced tomatoes (Use Roma tomatoes for less liquid, or do halved cherry tomatoes for sweetness.)
  • 1 each avocado, diced (Pick a slightly firm avocado and ripen on the counter a day before. Add lime if you want to prevent browning.)
  • 1 cup shredded cheese (Cheddar melts well. A mix of Monterey Jack and cheddar offers great melt and mild flavor.)
  • 1 teaspoon chili powder (Adjust to taste. For kids, reduce this by half and add more for adults.)
  • 1 teaspoon cumin (Toast the cumin briefly in a dry pan for a deeper aroma if you have a moment.)
  • to taste salt and pepper (Season in layers. Lightly salt the potatoes and add a little to the meat so everything tastes balanced.)
  • to taste olive oil (Use a high quality extra virgin for flavor at the end or a neutral oil for roasting.)
  • to taste fresh cilantro for garnish (Chop cilantro last and sprinkle on right before serving for the freshest taste.)

Instructions 

Preparation

  • Preheat the oven to 425°F (220°C).
  • Toss diced potatoes in a bowl with olive oil, salt, pepper, and half of the chili powder and cumin.
  • Spread the seasoned potatoes on a baking sheet and roast for 25-30 minutes or until crispy.
  • While the potatoes are baking, heat a skillet over medium heat and brown the ground meat.
  • Add the remaining chili powder, cumin, salt, and pepper to the meat, stirring to combine.

Assembly

  • Once the potatoes are done, assemble the taco bowl by layering roasted potatoes, black beans, corn, seasoned meat, diced tomatoes, and avocado.
  • Top with shredded cheese and fresh cilantro.

Serving

  • Serve and enjoy! Sit down together and let everyone dig in.

Notes

Serve this bowl family-style. Offer toppings on the side to accommodate picky eaters and guests. Add tortilla chips for extra crunch.
Calories: 550kcal
Course: Dinner, Main Course
Cuisine: Mexican, Tex-Mex
Keyword: Comfort Food, easy recipes, Family Meal, Loaded Potato Taco Bowl, Weeknight Dinner

{image_template}

I can still smell it now. The warm, garlicky aroma that fills the kitchen as butter melts and garlic sizzles. You hear the gentle pop of searing beef and the quiet hum of the slow cooker doing its steady work. That comfort smell tells me dinner will be ready and everyone will gather around the table.

I’ve been cooking for my family for over a decade and I test recipes until they hold up on busy weeknights. If you love simple, flavor-forward meals, you might also enjoy my take on chicken shawarma with garlic sauce which shares that same garlicky warmth your family will love.

Why this works

Garlic Butter Beef Bites with Potatoes

This garlic butter beef bites with potatoes recipe is all about flavor, ease, and family time. Searing the beef locks in juices and creates a tasty crust, while the slow cooker finishes the meat until it is fall-apart tender. The halved baby potatoes soak up the garlic butter and beef broth for comfort in every bite.

Because most of the active work is searing and mixing a simple sauce, you spend less time over the stove and more time with your family. It’s a great weeknight meal when you want something homemade without a lot of fuss, and it doubles well for leftovers the next day. If you love one-pan comfort dinners, check out my recipe for cowboy butter lemon bowtie chicken with broccoli for another family favorite.

Process Overview

“This is where the magic happens—when the aroma fills the kitchen.”

Here’s the simple process in three parts. Sear the beef quickly to develop color and flavor. Combine a garlic butter sauce so every bite gets that rich, savory coating. Let the slow cooker do the rest, turning those seared bites and halved potatoes into a tender, cozy meal.

If you prefer a tighter timeline, you can use the oven or a pressure cooker for a faster finish. For more one-pan, hands-off meals that bring big flavor, have a look at my sheet-pan garlic butter chicken and veggies recipe.

Ingredients

  1. 1.5 pounds Beef stew meat (Cut into bite-sized pieces.)

    • Lily’s tip: Choose chuck or blade steak for connective tissue that turns silky when slow cooked. Trim large pieces into even bites so they cook uniformly.
  2. 1 pound Baby potatoes (Halved for even cooking.)

    • Lily’s tip: Use waxy baby potatoes so they hold their shape. Halving them gives a nice surface for the garlic butter to cling to.
  3. 4 tablespoons Unsalted butter (Melted for the garlic butter sauce.)

    • Lily’s tip: Unsalted lets you control salt level. If you want a deeper flavor, brown the butter lightly before adding garlic.
  4. 3 cloves Garlic (Minced for flavor.)

    • Lily’s tip: Fresh garlic beats jarred every time. Mince fine so it marries into the butter and doesn’t leave big raw pieces.
  5. 1 teaspoon Onion powder (Adds depth to the flavor.)

    • Lily’s tip: Onion powder gives a baked-on savory note without extra chopping. Toast it slightly in the butter for more complexity.
  6. 1 teaspoon Smoked paprika (For a smoky flavor.)

    • Lily’s tip: Smoked paprika adds a mild, smoky warmth. Use sweet paprika if you prefer less smoke.
  7. 0.5 teaspoon Dried thyme (Enhances the aroma.)

    • Lily’s tip: Crumble dried thyme between your fingers before adding to release oils and aroma.
  8. 0.5 teaspoon Dried rosemary (Adds a fragrant touch.)

    • Lily’s tip: Rub the rosemary in your palms to break it up; it can be woody, so smaller pieces distribute better.
  9. 0.5 teaspoon Salt (Or to taste.)

    • Lily’s tip: Start with half the salt if using salted beef or broth. You can always add a pinch before serving.
  10. 0.25 teaspoon Black pepper (For seasoning.)

  • Lily’s tip: Freshly ground black pepper tastes brighter. Adjust to your family’s preference.
  1. 0.25 cup Beef broth (To keep the dish moist.)
  • Lily’s tip: Use low-sodium broth to control salt. If you have homemade broth, even better.
  1. 1 tablespoon Olive oil (For searing the beef.)
  • Lily’s tip: Use a high-heat oil like a light olive oil or grapeseed to get a quick, even sear without smoking.

If you enjoy recipes that center garlic flavor, my roundup of best garlic chicken recipes has more ideas for weeknight dinners and crowd-pleasing meals.

Directions

  1. Gather all ingredients and cut the beef into bite-sized pieces and halve the baby potatoes.

    • Encouraging note: Take a deep breath and line everything up; mise en place makes the cooking calm and efficient.
  2. Optional: Parboil the baby potatoes for a few minutes to soften them slightly.

    • Encouraging note: This step helps the potatoes cook evenly and shortens slow cooker time. You can skip it if you are short on time.
  3. Heat olive oil in a skillet over medium-high heat and sear the beef bites until browned on all sides.

    • Encouraging note: Browning builds flavor. Work in batches so the meat gets a good sear instead of steaming.
  4. In a small bowl, combine melted butter, minced garlic, onion powder, smoked paprika, thyme, rosemary, salt, and black pepper to create the garlic butter sauce.

    • Encouraging note: Taste as you go. If your family loves garlic, add another half clove. The sauce is the heart of the dish.
  5. In the slow cooker, place the halved baby potatoes and seared beef. Pour the garlic butter sauce over the top and add beef broth.

    • Encouraging note: Nestle everything in gently so flavors mingle. Pour the butter across the beef and potatoes to evenly coat.
  6. Cover the slow cooker and cook on low for 6-8 hours or on high for 3-4 hours until the beef is fork-tender.

    • Encouraging note: Low and slow gives tenderness and depth. If you’re short on time, try high; just check tenderness a little early.
  7. Let the dish rest for about 10 minutes before serving.

    • Encouraging note: Resting lets juices redistribute and flavors settle. Use this time to set the table or slice a simple green salad.

If you want a handheld twist later, my cheesy garlic chicken wraps are a fun way to repurpose leftovers and make a quick lunch for the kids. Try them when you have extra beef bites at cheesy garlic chicken wraps.

Serving

Garlic Butter Beef Bites with Potatoes

Serve family-style in a large shallow bowl or on a platter so everyone can dig in. Spoon extra garlic butter from the slow cooker over the top and garnish with chopped parsley for color. This meal pairs nicely with a simple green salad, steamed green beans, or crusty bread to sop up the sauce.

If you are feeding little ones, set out a small dish of plain potatoes first. Let them choose their favorite bites and show them how the potatoes soak up all that buttery garlic. Keep extra salt and pepper on the side so adults can adjust seasoning to taste.

Storage

Refrigerator: Cool leftovers within two hours and store in an airtight container for up to 3 days. The potatoes will soak up more sauce, which keeps them moist but changes texture slightly.

Freezer: For longer storage, freeze in a freezer-safe container for up to 3 months. Thaw overnight in the refrigerator before reheating.

Reheating: Reheat gently on the stove over low heat with a splash of beef broth to loosen the sauce. In the microwave, cover loosely and heat in 1-minute intervals, stirring in between, until warmed through. The gentle heat keeps the beef tender and prevents the butter from separating.

Tip: If the sauce separates after freezing, whisk in a tablespoon of warm water or broth while reheating to bring it back together.

Kitchen Notes

  • Use a heavy skillet for searing so the pan holds heat and creates a better crust.
  • Parboil potatoes for 5 minutes if you prefer very tender potatoes in less time.
  • Brown the butter for a nutty flavor but watch carefully so it does not burn.
  • If your slow cooker runs hot, check for doneness an hour earlier on high.
  • Double the recipe for company; this dish scales well and leftovers keep nicely.

Variations

  • Kid-friendly: Omit smoked paprika and reduce black pepper. Serve with a mild ketchup or yogurt dip for picky eaters.
  • Low-carb: Swap potatoes for cauliflower florets; add them during the last 1.5 to 2 hours to avoid overcooking.
  • Gluten-free: This recipe is naturally gluten-free as written. Just confirm your beef broth is labeled gluten-free.
  • Instant Pot option: After searing in the Instant Pot on sauté, add sauce and broth, seal, and cook on high pressure for 25 minutes with a natural release for 10 minutes.
  • Herb-forward: Finish with fresh chopped rosemary and thyme for a brighter, fresher finish.

FAQ

Q: Can I use other cuts of beef?
A: Yes. Chuck or blade roast cut into bite-sized pieces works best. Steaks like sirloin will work but may not get as tender in the slow cooker.

Q: Do I have to sear the beef first?
A: Searing adds depth and color. If you are short on time, you can skip it, but the flavor will be less developed. I encourage a quick sear for the best result.

Q: Can I make this on the stovetop only?
A: You can. After searing, simmer covered over low heat for 1.5 to 2 hours, adding broth as needed until the beef is tender. Stir occasionally to prevent sticking.

Q: How can I thicken the sauce?
A: Remove the lid and simmer on high in the slow cooker for 20 to 30 minutes to reduce. Alternatively, whisk 1 teaspoon cornstarch with 1 tablespoon cold water and stir into hot sauce to thicken.

Q: Will this work with frozen beef?
A: For safety and even cooking, thaw the beef first. Searing frozen meat will steam and prevent proper browning.

Conclusion

Thank you for letting me share this cozy, family-friendly recipe. I hope it becomes one of those go-to dinners you turn to on busy nights when you want something warm and comforting. For a version with a similar heartwarming garlic butter approach, I like the take on Garlic Butter Steak Bites and Potatoes from The Country Cook and a slightly different method is offered at Coconuts & Kettlebells’ Garlic Butter Steak Bites and Potatoes. Happy cooking from my kitchen to yours.

Garlic Butter Beef Bites with Potatoes

Prep Time 15 minutes
Cook Time 8 hours
Total Time 8 hours 15 minutes
Servings 6 servings
Calories 400
A comforting weeknight meal featuring tender beef bites and halved baby potatoes, coated in a rich garlic butter sauce.

Ingredients

Main Ingredients

  • 1.5 pounds Beef stew meat, cut into bite-sized pieces (Choose chuck or blade steak for connective tissue that turns silky when slow cooked.)
  • 1 pound Baby potatoes, halved (Use waxy baby potatoes so they hold their shape.)
  • 4 tablespoons Unsalted butter, melted (Unsalted lets you control salt level; consider browning for deeper flavor.)
  • 3 cloves Garlic, minced (Fresh garlic beats jarred every time.)
  • 1 teaspoon Onion powder (Gives a baked-on savory note without extra chopping.)
  • 1 teaspoon Smoked paprika (Adds a mild, smoky warmth.)
  • 0.5 teaspoon Dried thyme (Enhances the aroma; crumble before adding.)
  • 0.5 teaspoon Dried rosemary (Rub in palms to break it up for better distribution.)
  • 0.5 teaspoon Salt (Start with half if using salted beef or broth.)
  • 0.25 teaspoon Black pepper (Freshly ground tastes brighter.)
  • 0.25 cup Beef broth (Use low-sodium broth to control salt.)
  • 1 tablespoon Olive oil (Use a high-heat oil for searing.)

Instructions 

Preparation

  • Gather all ingredients and cut the beef into bite-sized pieces and halve the baby potatoes.
  • Optional: Parboil the baby potatoes for a few minutes to soften them slightly.
  • Heat olive oil in a skillet over medium-high heat and sear the beef bites until browned on all sides.

Cooking

  • In a small bowl, combine melted butter, minced garlic, onion powder, smoked paprika, thyme, rosemary, salt, and black pepper.
  • In the slow cooker, place the halved baby potatoes and seared beef. Pour the garlic butter sauce over the top and add beef broth.
  • Cover the slow cooker and cook on low for 6-8 hours or on high for 3-4 hours until the beef is fork-tender.

Serving

  • Let the dish rest for about 10 minutes before serving.
  • Serve family-style in a large shallow bowl or on a platter, garnished with chopped parsley.

Notes

Refrigerate leftovers for up to 3 days. For longer storage, freeze for up to 3 months. Reheat gently to maintain tenderness.
Calories: 400kcal
Course: Dinner, Main Course
Cuisine: American, Comfort Food
Keyword: Easy Beef Recipe, Family Meal, Garlic Butter Beef Bites, Slow Cooker Dinner, Weeknight Dinner

Texas Sheet Cake

I remember the sound of my daughter running in from the back porch, sneakers squeaking, right as the kitchen filled with the warm smell of chocolate and butter. The tray of cake was just sliding into the oven and the whole house seemed to pause for a second, like everyone was holding their breath for dessert. That small hush before the first forkful is one of my favorite kitchen moments.

Why This Texas Sheet Cake Feels Like Home

This cake puts chocolate and ease together in a way that feels familiar and right. It bakes in one large pan, so there is less washing and more time to sit with family. The top becomes glossy with that classic fudgy frosting while the crumb stays moist and tender.

I love how it feeds a crowd without fuss. It’s the kind of recipe I make when friends drop by or when we need a quick dessert after a week of busy nights.
Texas Sheet Cake

There are memories folded into every bite. My grandmother used to make a version of this that smelled like Sunday afternoons. I keep one eye on the oven and another on the clock, because it always feels faster than the calendar says.

How to Make Texas Sheet Cake, The Heartwarming Way

Here’s the short, friendly version of how this happens: mix dry and wet, add hot water to melt the cocoa and make the batter silk, bake until a toothpick comes out clean, then pour glossy, buttery frosting over the warm cake so it sets into a crackly top.

“This is where the magic happens—when the aroma fills the kitchen and my kids come running in, asking ‘Is it ready yet?’”

You will notice the batter looks loose after you add boiling water. That is correct. The batter thins and becomes glossy, which helps the cake stay moist and bake evenly. When it’s in the oven watch for a dark, even color across the top and a little spring when you touch it gently. Those are the signs you’re on track.

Ingredients You’ll Need

2 cups all-purpose flour
2 cups sugar
1/2 teaspoon salt
1 teaspoon baking soda
1 cup unsweetened cocoa powder
1 cup buttermilk
1 cup vegetable oil
4 large eggs
2 teaspoons vanilla extract
1 cup boiling water
1/2 cup unsalted butter
1/4 cup milk
3 1/2 cups powdered sugar
1 teaspoon vanilla extract
1/2 cup chopped nuts (optional)

Friendly note: Don’t stress if you do not have buttermilk. A quick swap is 1 cup milk with 1 tablespoon white vinegar or lemon juice, stirred and left to sit for 5 minutes. Use what’s in your fridge; this cake is forgiving and made for real life.

Step-by-Step Directions

  1. Preheat your oven to 350°F (175°C). Grease and flour a large sheet pan.
    Make sure the pan is truly large—this cake spreads thin. I use a rimmed cookie sheet and it works great.

  2. In a large bowl, combine flour, sugar, salt, baking soda, and cocoa powder.
    Whisk well so the cocoa dissolves into the dry mix and there are no lumps.

  3. In another bowl, mix together buttermilk, vegetable oil, eggs, and vanilla.
    Whisk until smooth and the eggs are fully incorporated.

  4. Gradually add wet ingredients to dry ingredients, mixing until just combined.
    Don’t overmix here; a few small streaks are okay. Overworking will make a tougher cake.

  5. Finally, stir in boiling water until the batter is smooth.
    The batter will be thin. That’s how we get a tender, moist crumb—this is intentional.

  6. Pour the batter into the prepared pan and bake for 30-35 minutes or until a toothpick inserted in the center comes out clean.
    Rotate the pan halfway through if your oven has hot spots. The cake browns quickly at the edges.

  7. While the cake is baking, prepare the frosting by melting butter in a saucepan. Stir in cocoa powder and milk, bring to a boil.
    Boiling helps the sugars dissolve and gives the frosting that glossy texture. Watch it closely so it does not scorch.

  8. Remove from heat and add powdered sugar and vanilla, whisking until smooth.
    If the frosting seems thick, add a splash more milk. If too thin, whisk in a tablespoon more powdered sugar.

  9. Once the cake has cooled slightly, pour the frosting over the cake and sprinkle with chopped nuts if desired.
    Pour when the cake is still warm so the frosting sets up with those classic cracks and glossy peaks.

  10. Allow the cake to cool before serving.
    Cooling lets the frosting firm a bit so you get clean slices. If you can, wait 20-30 minutes—it’s worth it.

Quick tip: Let the kids help with step 8. They love watching the frosting thicken and you get a moment to breathe.

Texas Sheet Cake

Serving Texas Sheet Cake with Love

I serve this cake family-style on the counter so everyone can help themselves. A wide spatula and small plates work better than forks for neat pieces. It’s such a crowd-pleaser that there is rarely a piece left unclaimed.

Pair it with simple sides like vanilla ice cream, a spoon of whipped cream, or a few fresh berries to cut the richness. My son loves his with cold milk; my partner prefers a scoop of vanilla over a warm piece. The cake is flexible and welcomes these small rituals.

If you want to be a little fancy, sprinkle flaky sea salt over the frosting right after you pour it. The salt highlights the chocolate and makes each bite sing.

Texas Sheet Cake

Storage & Reheat Tips (Keeping the Goodness)

Store leftover cake in an airtight container at room temperature for up to 3 days. If your kitchen is warm, place it in the fridge to stop the frosting from getting sticky. It will still be moist the next day.

For longer keeping, wrap slices tightly and freeze for up to 2 months. Thaw in the fridge overnight, and bring to room temperature before serving.

Reheat a single slice in the microwave for 10-15 seconds for a quick, cozy treat. For a near-just-baked feel, warm a slice in a 300°F oven for 5-7 minutes. The oven revives that freshly-baked texture and lifts the aroma back into the room.

My Kitchen Notes & Shortcuts

  • Use boxed cake mix in a pinch: mix with a cup of strong brewed coffee instead of water and follow the rest of the steps for a faster weeknight version.
  • Prep ahead: make the frosting a day early and store in the fridge; warm gently before pouring over warm cake.
  • Nuts are optional: chopped pecans are classic, but skip them if someone in your family has allergies.
  • Pan swap: if you prefer a thicker cake, use a 9×13 pan and extend the bake time by 8-10 minutes. Check with a toothpick.
  • Kid-friendly step: give the kids the powdered sugar for step 8. It is safe and they love the cloud of sugar.

These small tricks keep the process manageable while keeping the soul of the recipe intact.

Family-Friendly Variations

Want to make it your own? Here are a few gentle twists that our family tries now and then.

  • Nut-free: omit nuts and add a handful of mini chocolate chips to the batter for extra pockets of chocolate.
  • Lighter: swap half the oil for applesauce. The texture shifts slightly but it still feels indulgent.
  • Boozy twist for grown-ups: stir a tablespoon of coffee liqueur into the frosting for depth. Keep kids out of the mixing for that one.
  • Peanut butter topping: drizzle warmed peanut butter over the frosted cake for a southern twist my kids adore.
  • Glazed berries: top slices with a quick compote of berries and a teaspoon of sugar for a bright contrast to the chocolate.

Invite your family to suggest their favorite change. This cake was meant to be shared and rewritten over time.

FAQs About Texas Sheet Cake

Q: Can I make this ahead for a busy week?
A: Absolutely. Bake a day ahead and store it covered at room temperature or in the fridge. Let it sit an hour before serving so flavors settle.

Q: My frosting looks grainy. What went wrong?
A: Often that is from adding cold powdered sugar to a hot mix too fast. Whisk slowly and heat gently, or add a teaspoon of milk at a time to smooth it out.

Q: The cake was dry. How can I fix that next time?
A: Make sure you add the boiling water and do not overbake. Ovens vary, so start checking at 25 minutes. A few moist crumbs on the toothpick mean you are done.

Q: Can I use Dutch-process cocoa instead of natural cocoa?
A: Yes, but adjust expectations: Dutch-process is less acidic and can shift the flavor slightly. If you swap, use high-quality cocoa and do not worry—your cake will still be delicious.

Q: How do I get those glossy cracks on top of the frosting?
A: Pour the frosting over warm cake. The contrast of warm cake and cooling frosting makes the top set with that lovely crackle.

One Final Thought from My Kitchen

This cake is more than a dessert. It is an invitation to slow down for a few minutes, pass plates around, and make a small memory. I have pulled it out for birthdays, late homework nights, and surprise guests. Each time, it returns the same kind of quiet joy to the table.

Give it a try even on a Tuesday. Let the hot chocolate smell fill your house and listen for the footsteps that mean family is coming. You might be surprised how a simple tray of cake can knit everyone together for a little while.

Conclusion

If you want a deeper walk through a classic Texas Sheet Cake method, I like the clear, step-by-step notes in this Texas Sheet Cake guide from Tastes Better From Scratch for comparison and inspiration. For a rich, very chocolate-forward take that families have loved, see the helpful breakdown in The Pioneer Woman’s Best Chocolate Sheet Cake.

Until next time, happy baking. If this cake finds its way into your family stories, know that a little kitchen magic just made someone smile.

Texas Sheet Cake

Prep Time 20 minutes
Cook Time 35 minutes
Total Time 55 minutes
Servings 20 servings
Calories 350
A crowd-pleasing dessert that combines chocolate and ease, baked in one large pan with a fudgy frosting on top, perfect for family gatherings.

Ingredients

Cake Ingredients

  • 2 cups all-purpose flour
  • 2 cups sugar
  • 1/2 teaspoon salt
  • 1 teaspoon baking soda
  • 1 cup unsweetened cocoa powder
  • 1 cup buttermilk
  • 1 cup vegetable oil
  • 4 large eggs
  • 2 teaspoons vanilla extract
  • 1 cup boiling water

Frosting Ingredients

  • 1/2 cup unsalted butter
  • 1/4 cup milk
  • 3 1/2 cups powdered sugar
  • 1 teaspoon vanilla extract
  • 1/2 cup chopped nuts (optional)

Instructions 

Preparation

  • Preheat your oven to 350°F (175°C). Grease and flour a large sheet pan.
  • In a large bowl, combine flour, sugar, salt, baking soda, and cocoa powder. Whisk well so the cocoa dissolves into the dry mix.
  • In another bowl, mix together buttermilk, vegetable oil, eggs, and vanilla. Whisk until smooth.
  • Gradually add wet ingredients to dry ingredients, mixing until just combined. Do not overmix.
  • Stir in boiling water until the batter is smooth. The batter will be thin.

Baking

  • Pour the batter into the prepared pan and bake for 30-35 minutes or until a toothpick inserted in the center comes out clean.

Frosting

  • While the cake is baking, prepare the frosting by melting butter in a saucepan. Stir in cocoa powder and milk, bring to a boil.
  • Remove from heat and add powdered sugar and vanilla, whisking until smooth.
  • Once the cake has cooled slightly, pour the frosting over the cake and sprinkle with chopped nuts if desired.

Cooling and Serving

  • Allow the cake to cool before serving, letting the frosting firm a bit.
  • Serve family-style and pair with vanilla ice cream, whipped cream, or fresh berries.

Notes

You can use boxed cake mix for a quicker version. If you don’t have buttermilk, use a mixture of milk and vinegar. Nuts are optional and can be substituted with mini chocolate chips.
Calories: 350kcal
Course: Dessert
Cuisine: American
Keyword: Chocolate Cake, Crowd-Pleaser, Easy Dessert, Family Recipe, Texas Sheet Cake