Category

30-Minute Chicken Dinners

Category

Peruvian Grilled Chicken Skewers

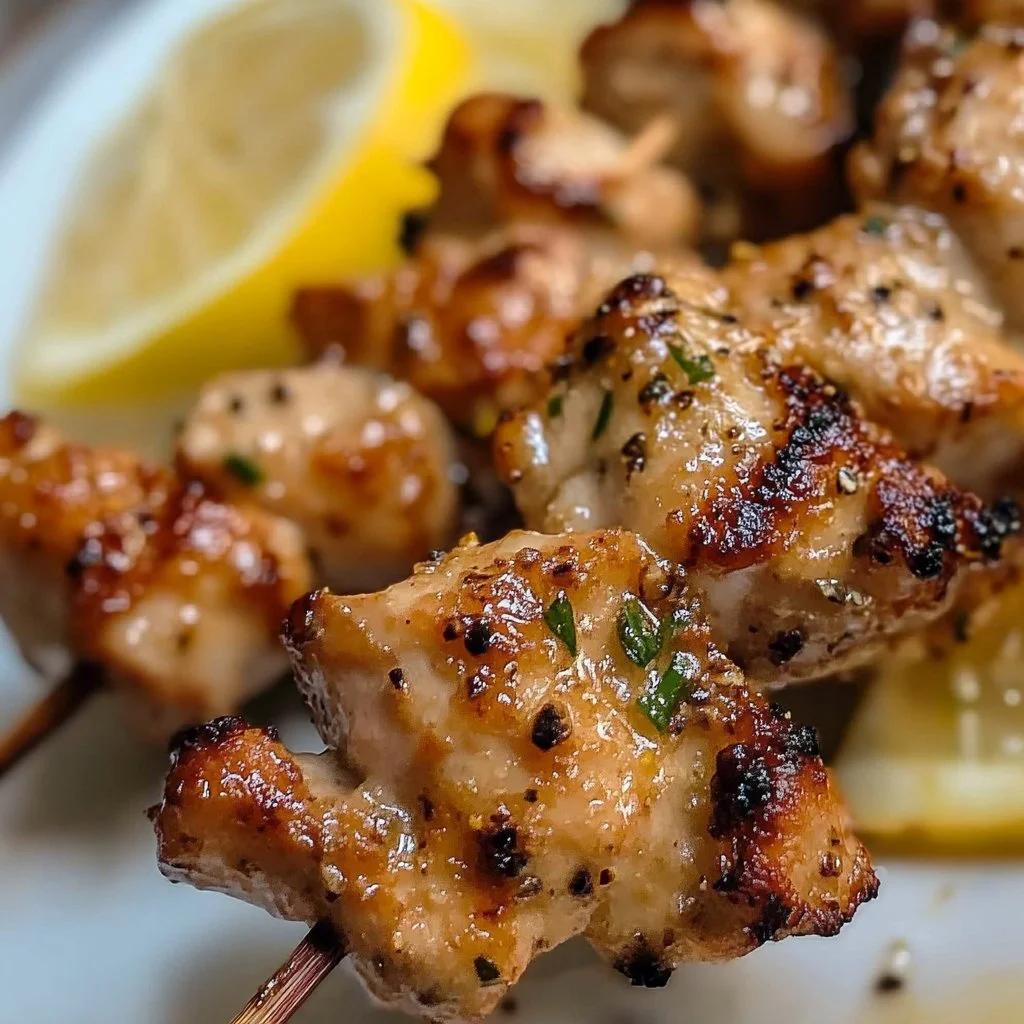
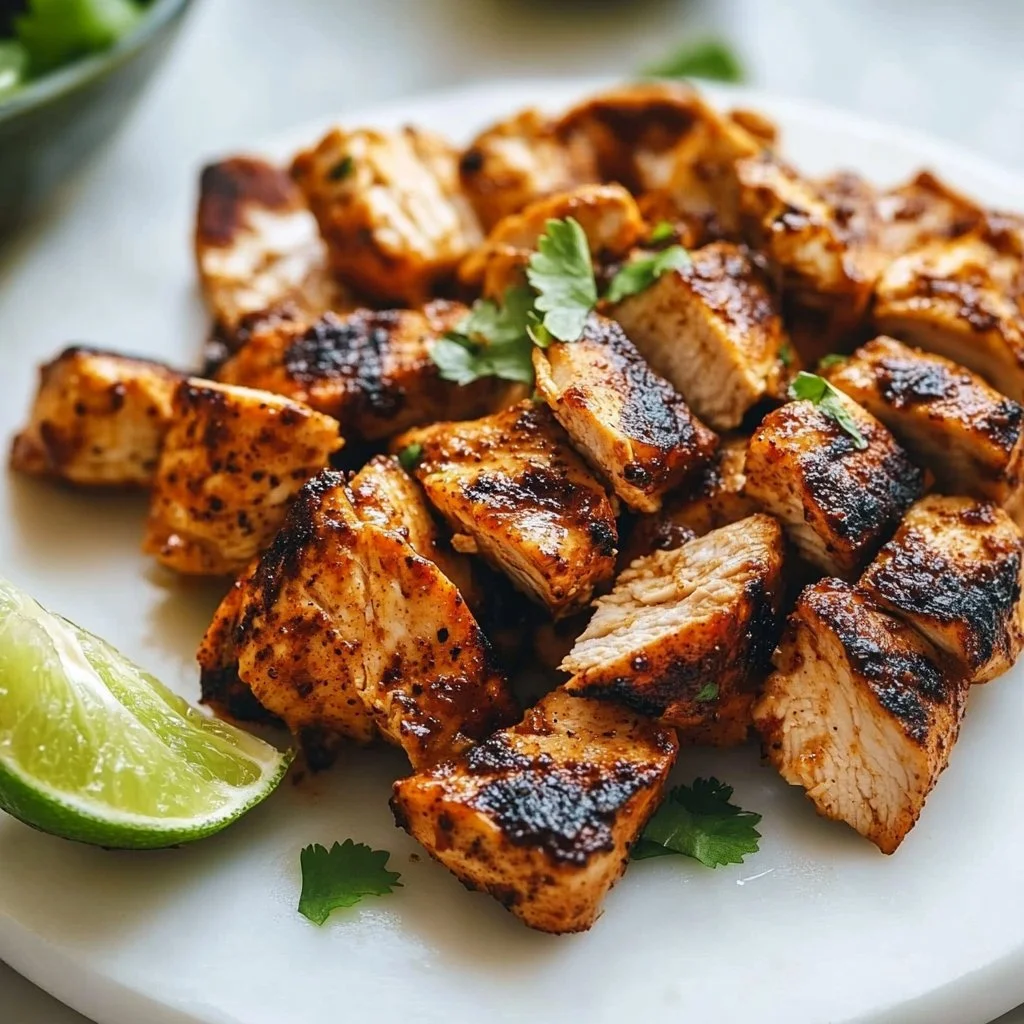
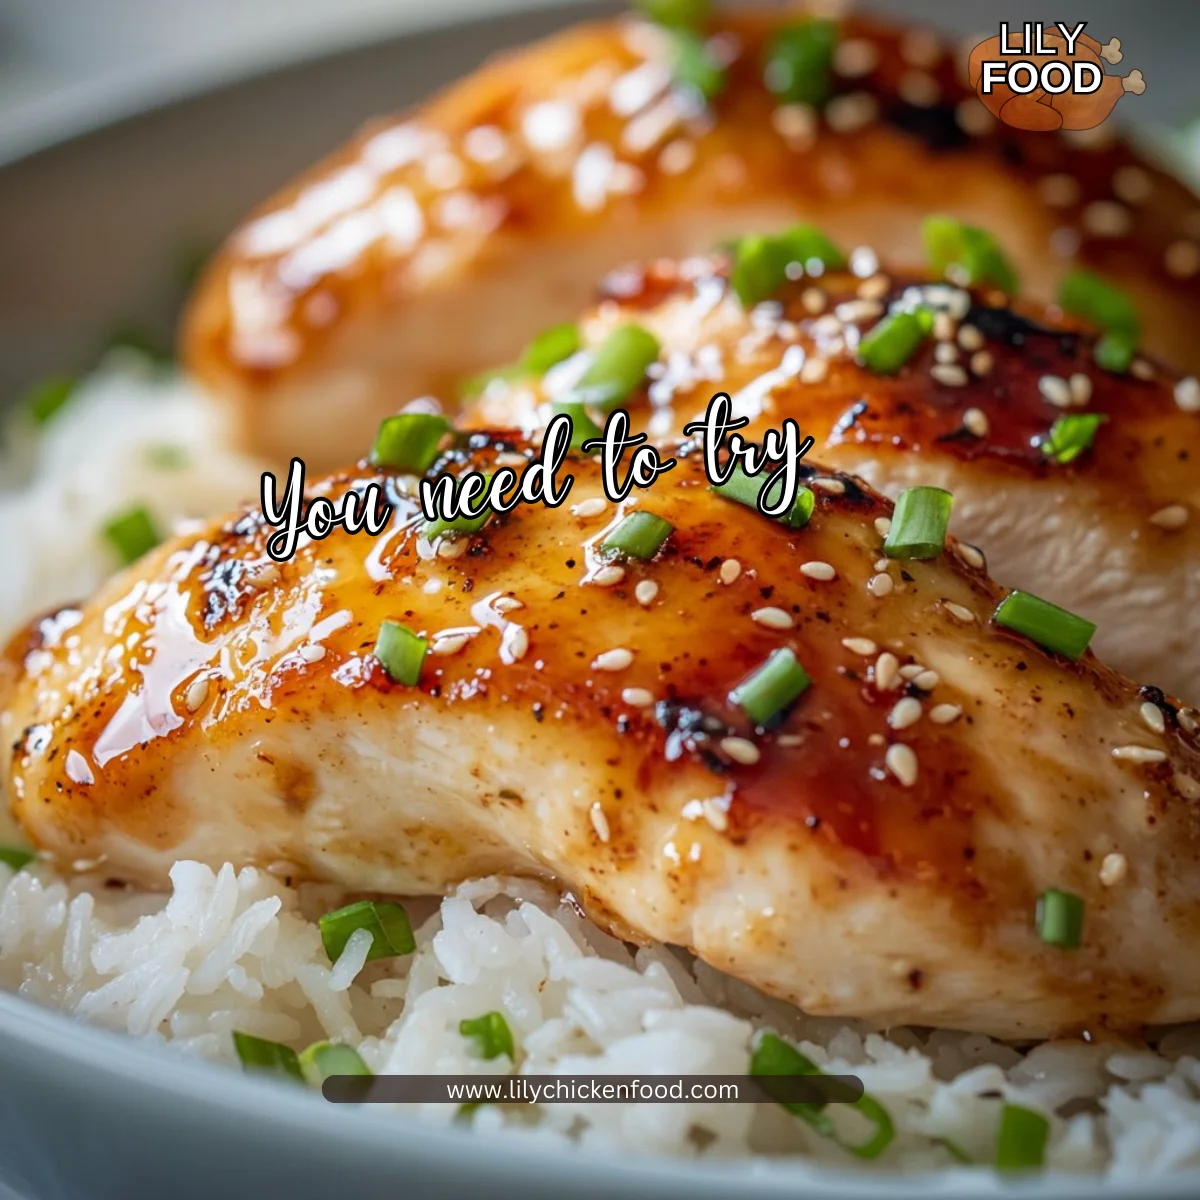
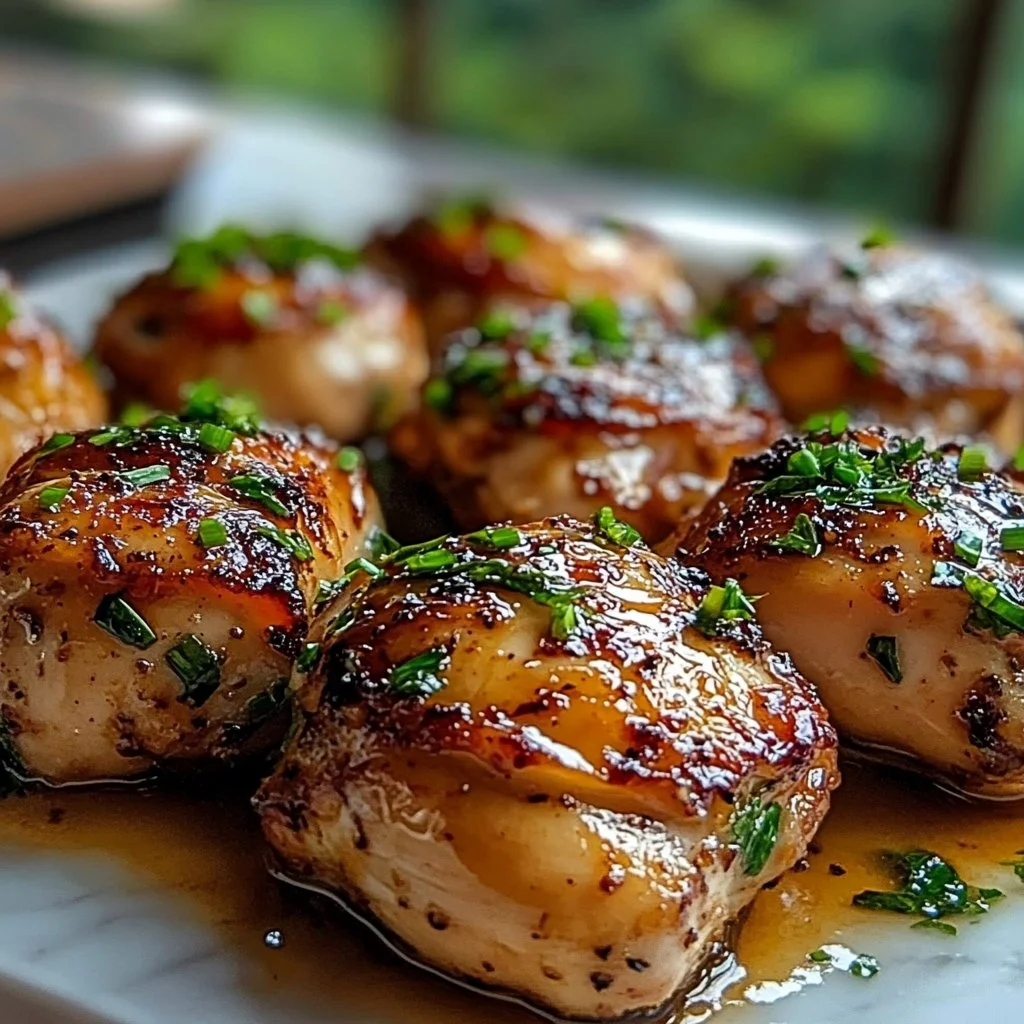
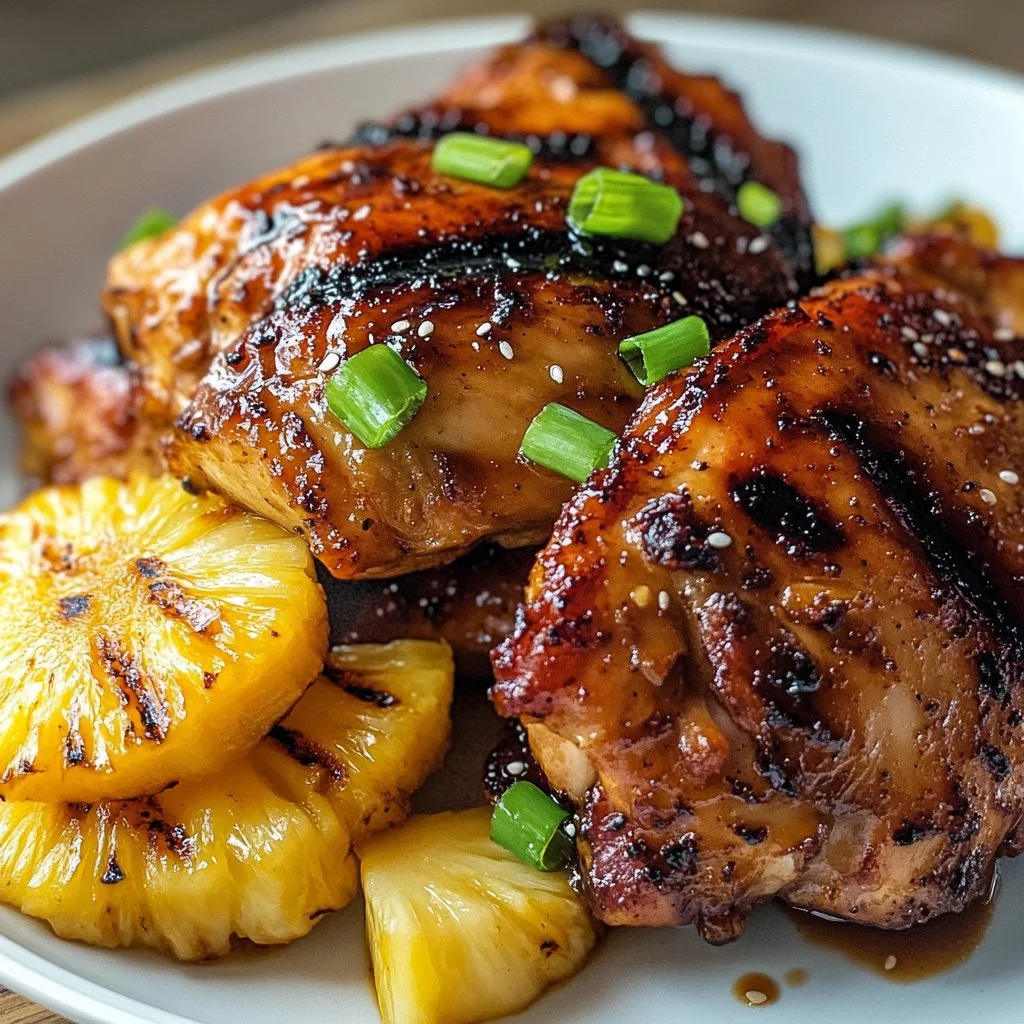
The kitchen is alive with the sounds of sizzling meat and laughter. As the grill heats up, the rich aroma of fragrant spices mingles with the smoky scent of chicken, igniting a sense of warmth and anticipation. Family dinners become celebrations, and each bite provides a small taste of joy and connection. Today, we’re diving into a delightful recipe for Peruvian Grilled Chicken Skewers that will bring everyone around the table.

Why This Works

Peruvian Grilled Chicken Skewers

These Peruvian Grilled Chicken Skewers are the perfect blend of flavor and simplicity. The marinade is easy to whip up, making it an ideal choice for busy families. You can prepare everything ahead of time, allowing you to spend more moments with your loved ones while the chicken grills to perfection. And because it’s so flavorful, your family won’t even realize they’re eating something healthy.

Process Overview

“This is where the magic happens—when the aroma fills the kitchen.”

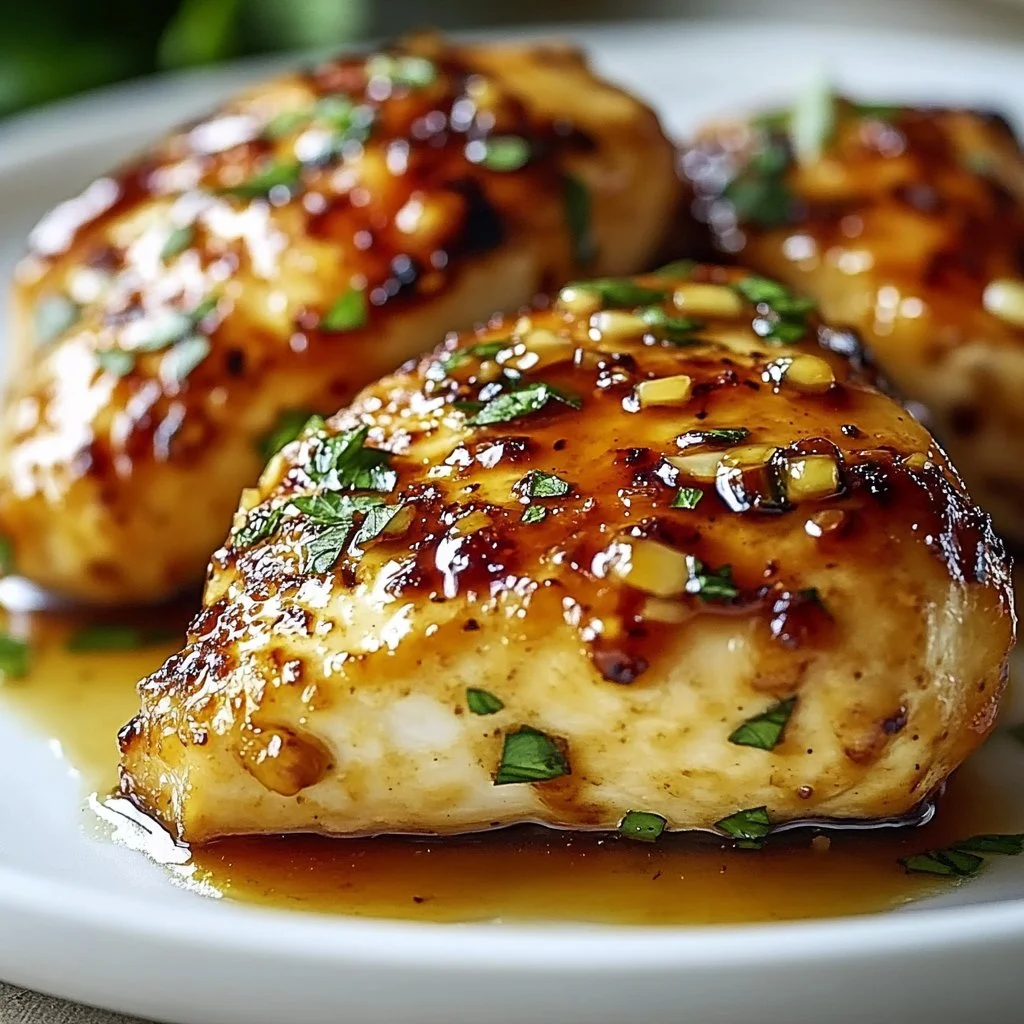
This dish is not just about the ingredients; it’s about creating memories. Marinating the chicken infuses it with rich flavors, making every bite burst with deliciousness. With just a few simple steps, you will be well on your way to creating a family favorite that everyone will look forward to enjoying together.

Ingredients

Let’s gather our ingredients. You will need:

  • 4 garlic cloves, minced or grated. Fresh garlic is best for a strong flavor.
  • 1 tablespoon olive oil. This adds richness and helps the spices adhere.
  • 1 tablespoon lime juice. Fresh lime juice brightens the dish—don’t use bottled juice!
  • 1 tablespoon soy sauce. This enhances the overall umami flavor.
  • 1 tablespoon honey (or brown sugar, or sugar). Honey gives a slight sweetness that balances the spices.
  • 2 teaspoons ground cumin. This adds that warm, earthy flavor typical of Peruvian cuisine.
  • 1 teaspoon oregano. Oregano complements the chicken perfectly.
  • 2 teaspoons paprika. This offers mild heat and a beautiful color.
  • 1/4 teaspoon ground annatto (optional). For added color and a subtle nutty flavor.
  • 1/2 teaspoon cayenne (optional). Use this for a touch of heat, according to your family’s taste!
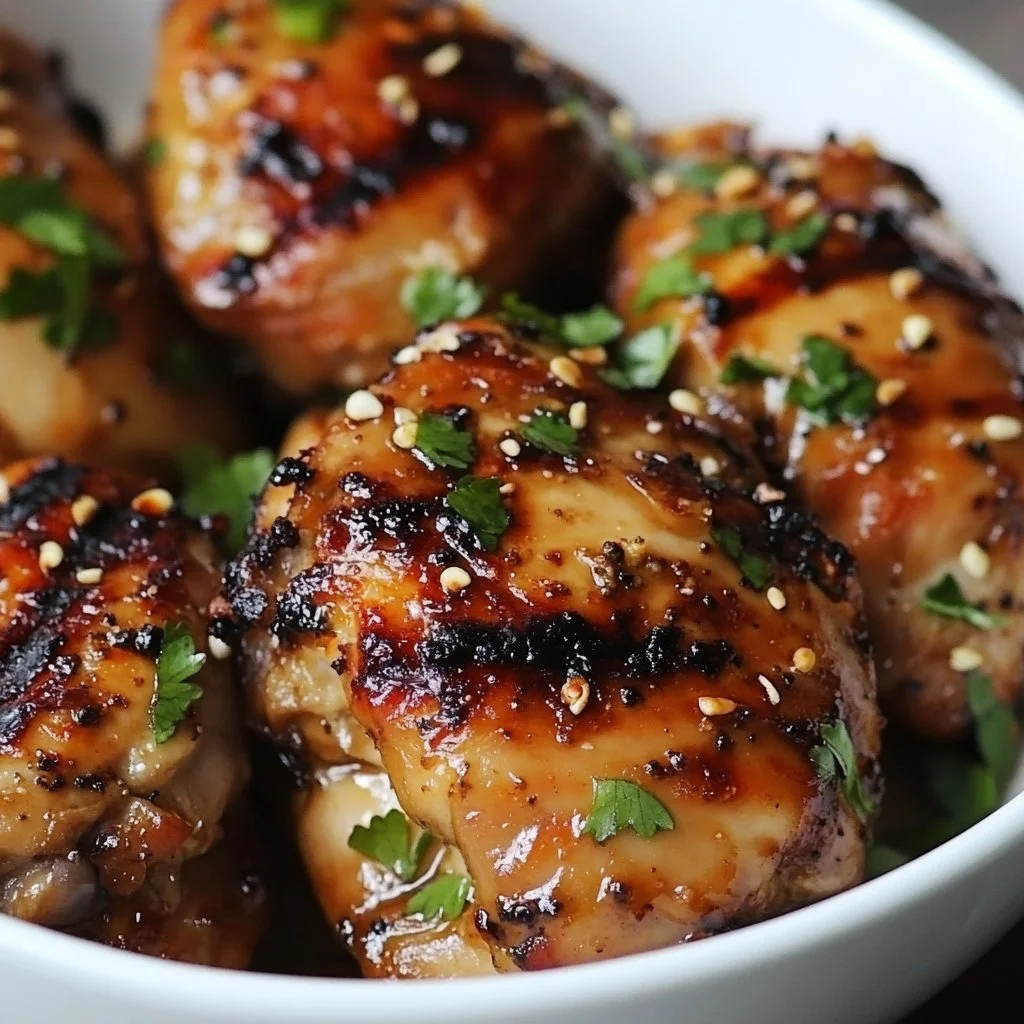
  • 1 pound boneless and skinless chicken breasts or thighs, cut into bite-sized pieces. Thighs are juicier, but breasts work just as well.

Directions

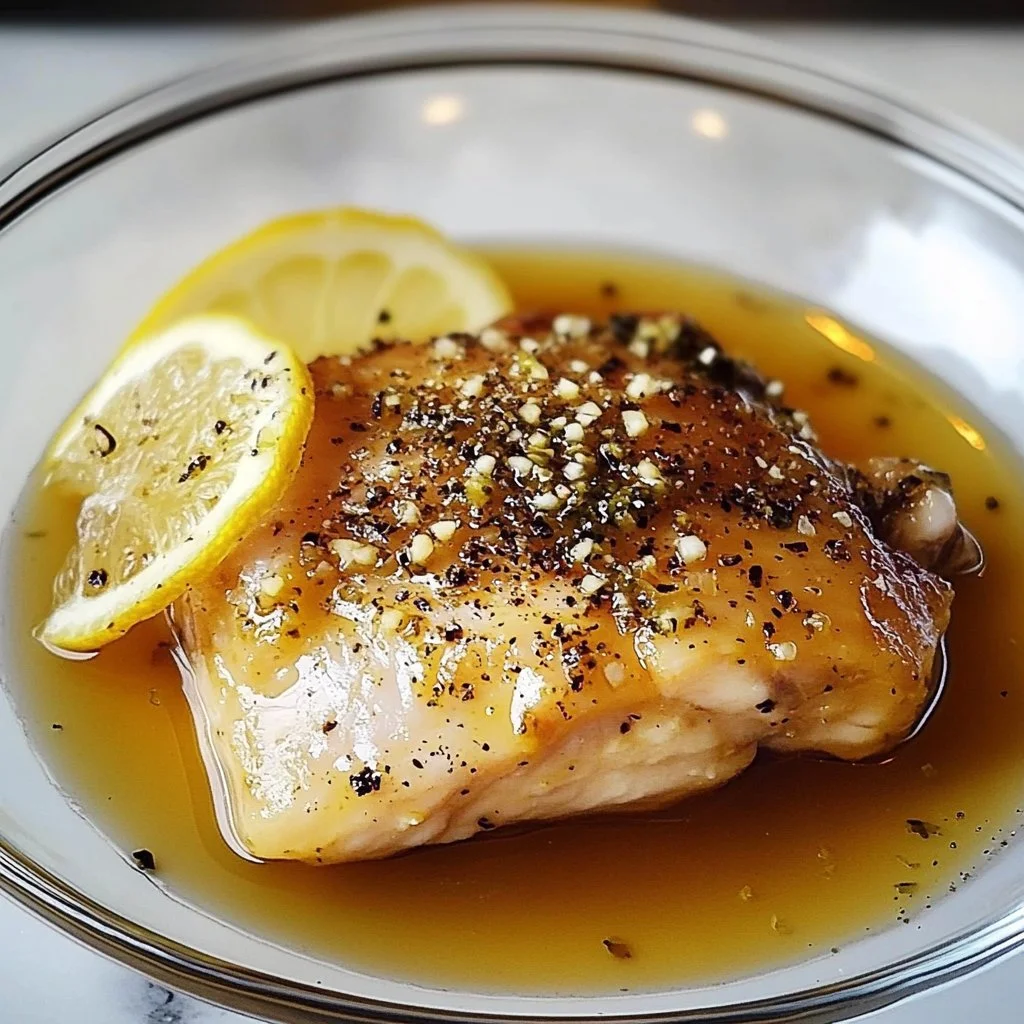
  1. Mix the marinade. In a bowl, combine the minced garlic, olive oil, lime juice, soy sauce, honey, cumin, oregano, paprika, annatto, and cayenne. Stir well to make sure everything is fully blended. Take your time here; the mixture should smell amazing!

  2. Marinate the chicken. Place the chicken pieces in a resealable plastic bag or a glass dish. Pour the marinade over the chicken and make sure every piece is coated. Seal or cover, then refrigerate for at least 20 minutes—or up to overnight for deeper flavor.

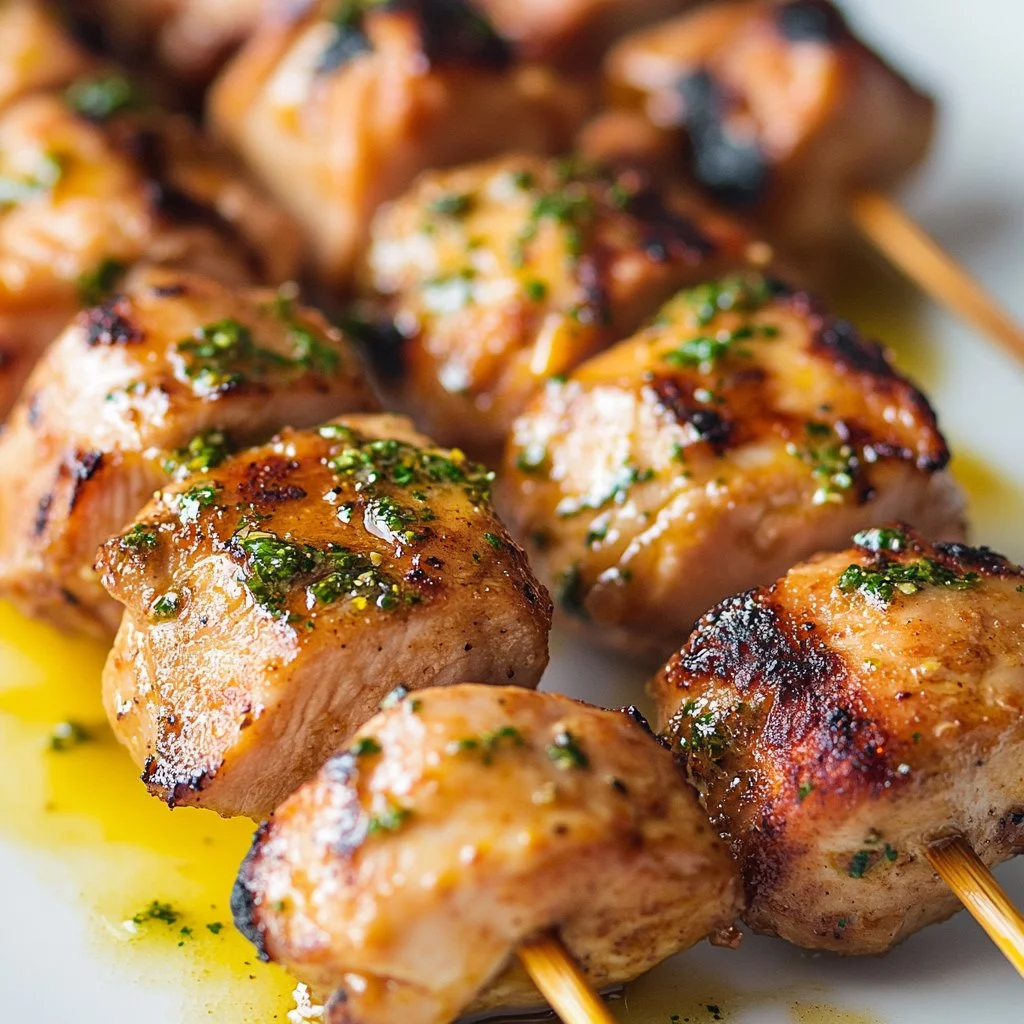
  3. Prepare to grill. After marinating, take the chicken out of the fridge. Shake off any excess marinade before skewering the pieces. This will help to avoid burning on the grill. You can use wooden skewers soaked in water for best results.

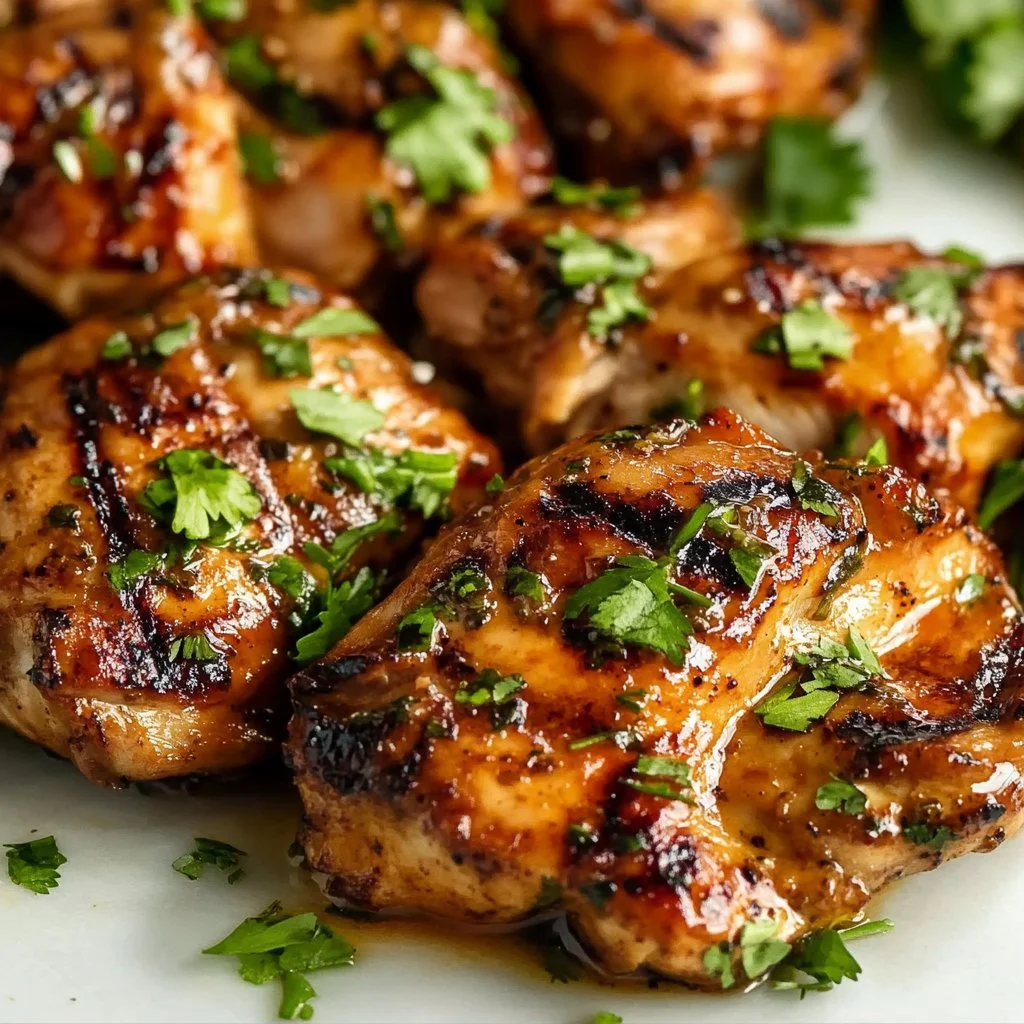
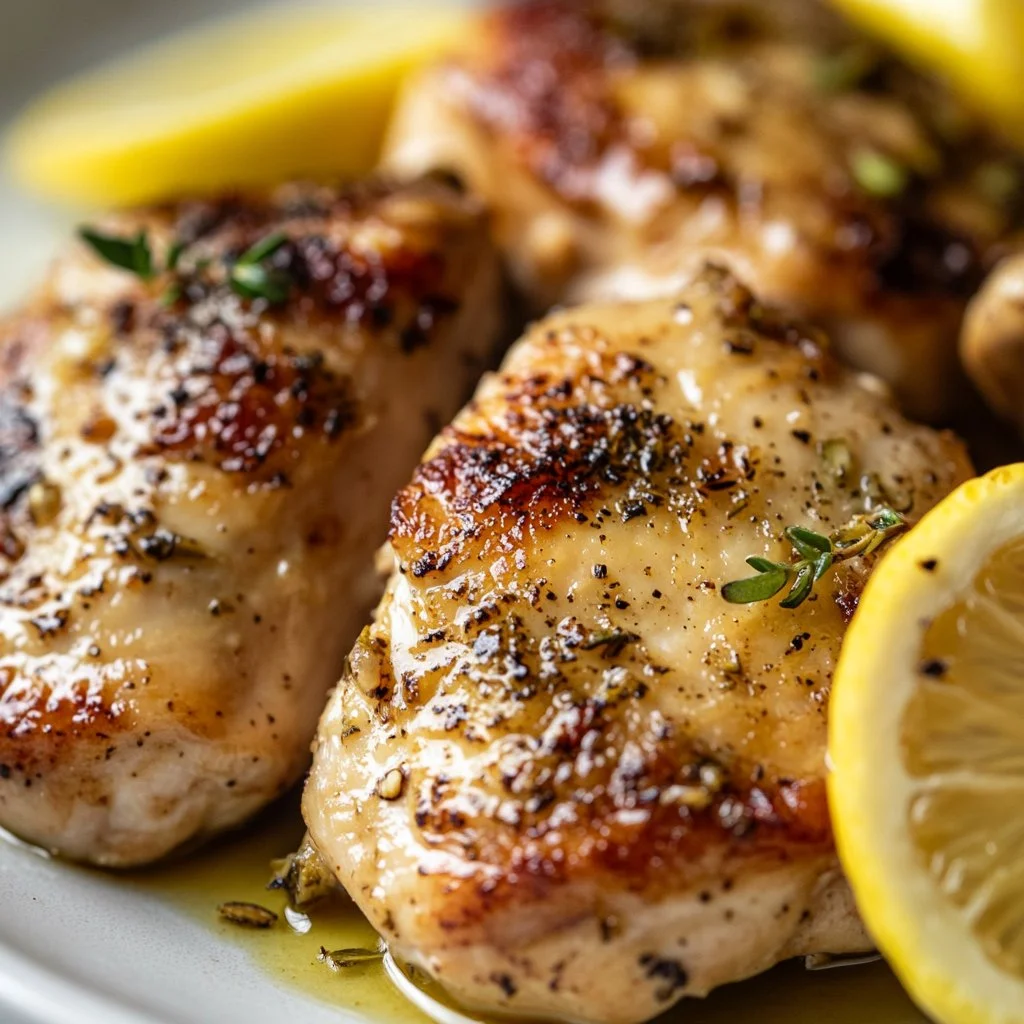
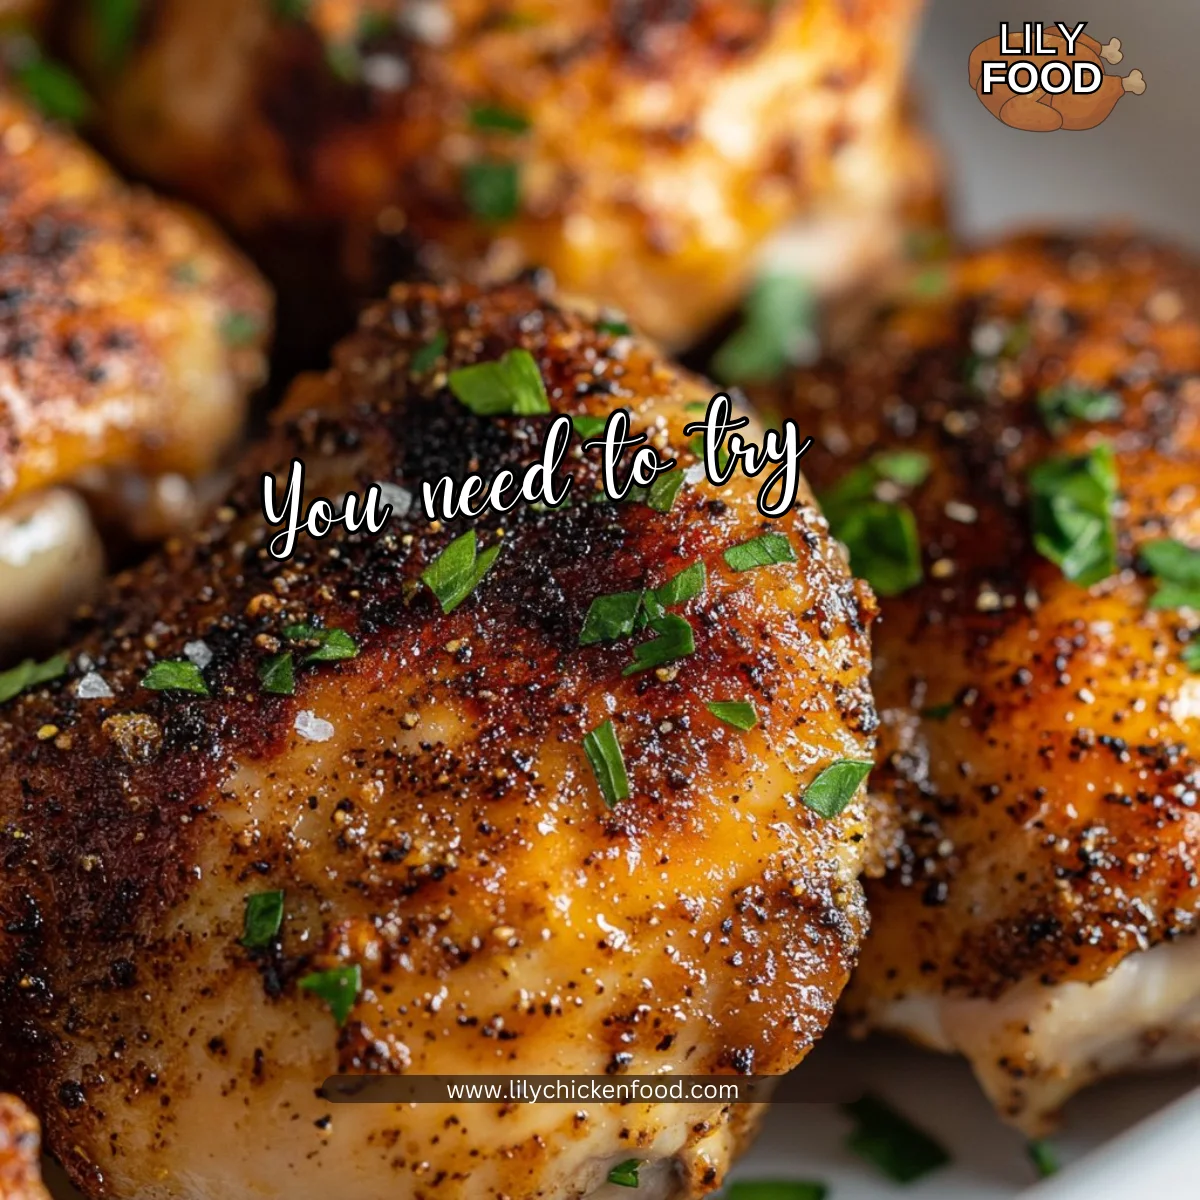
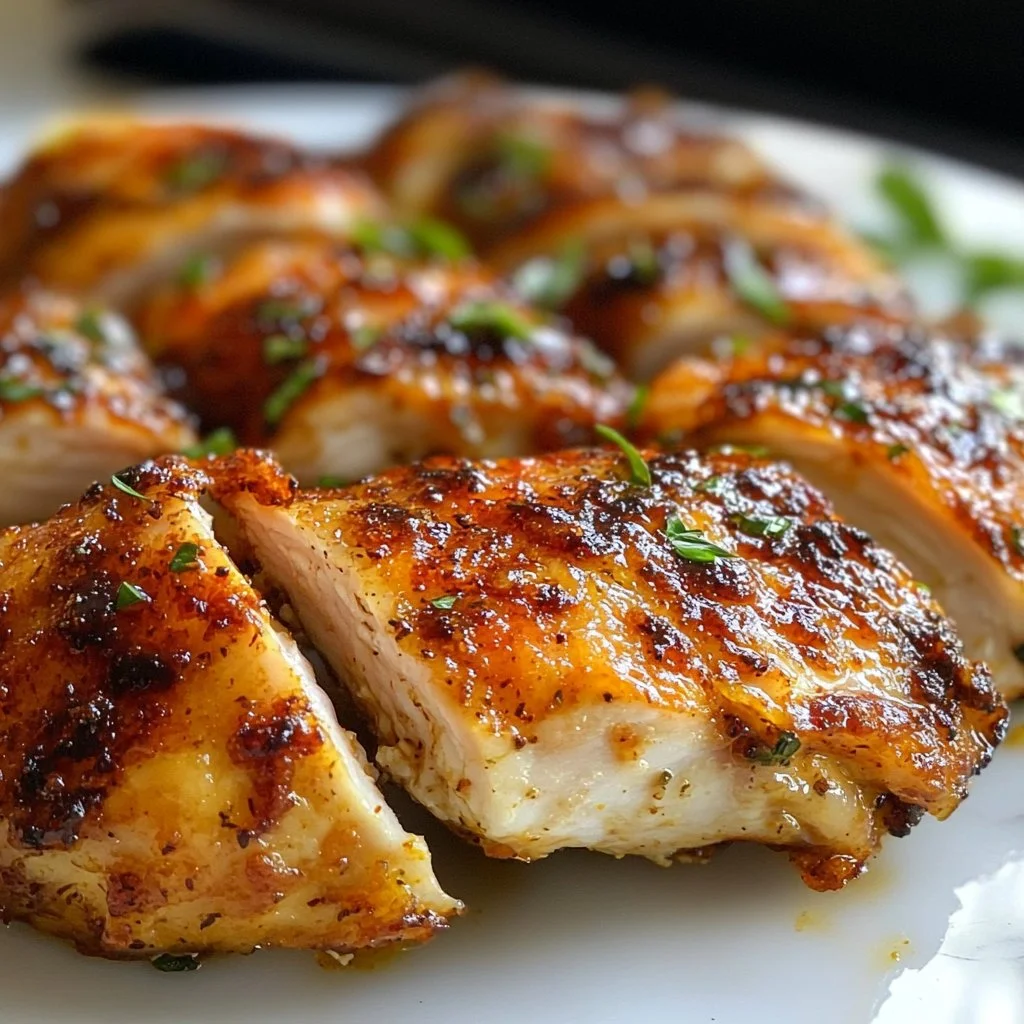
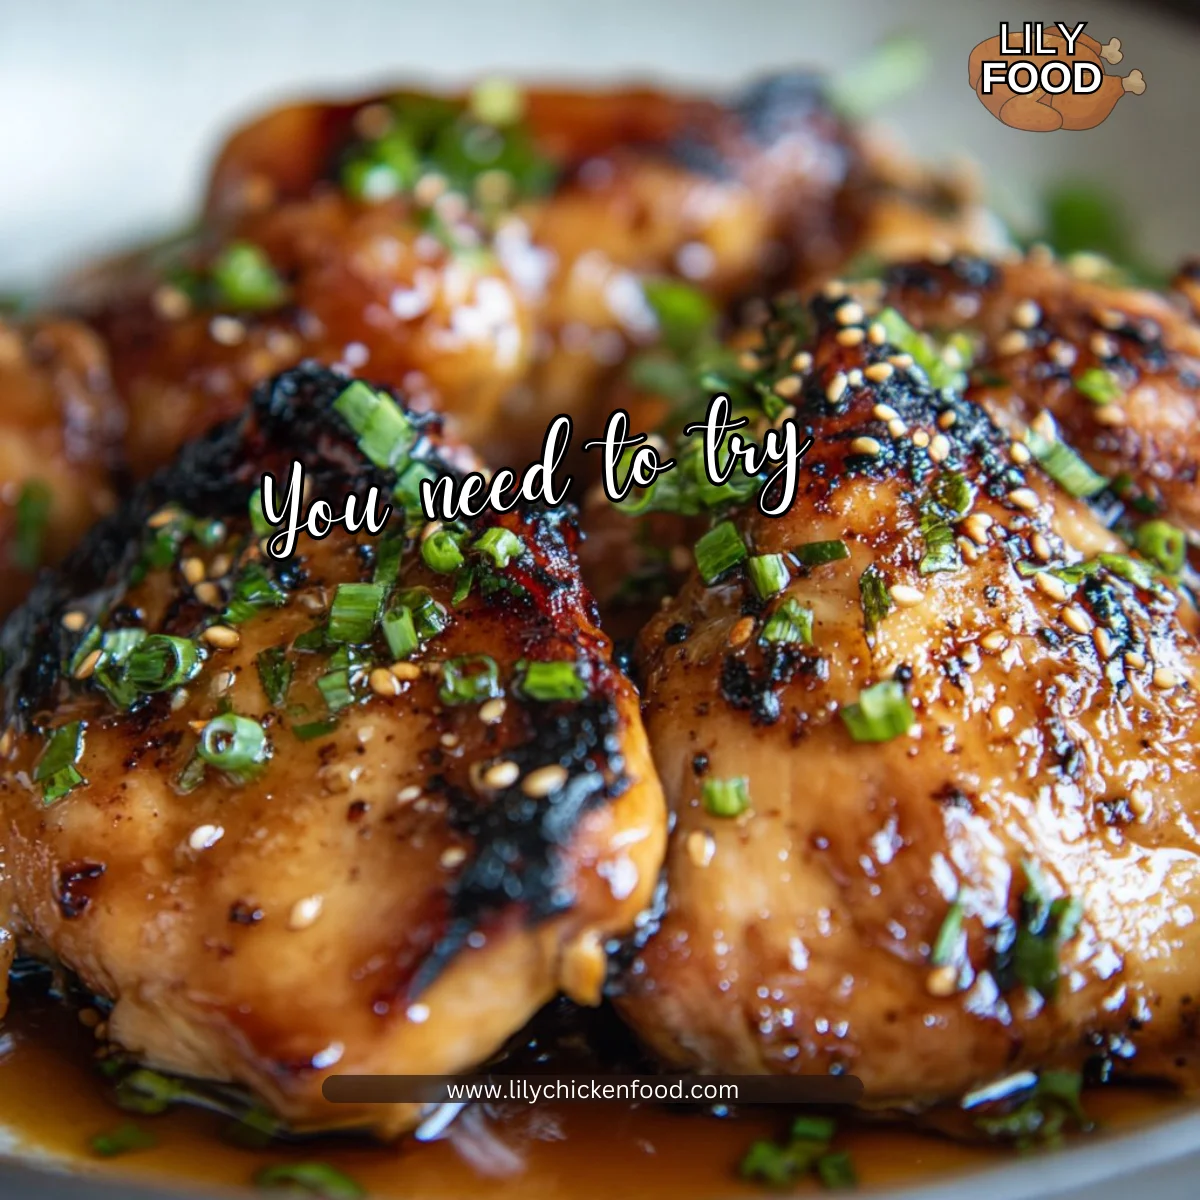
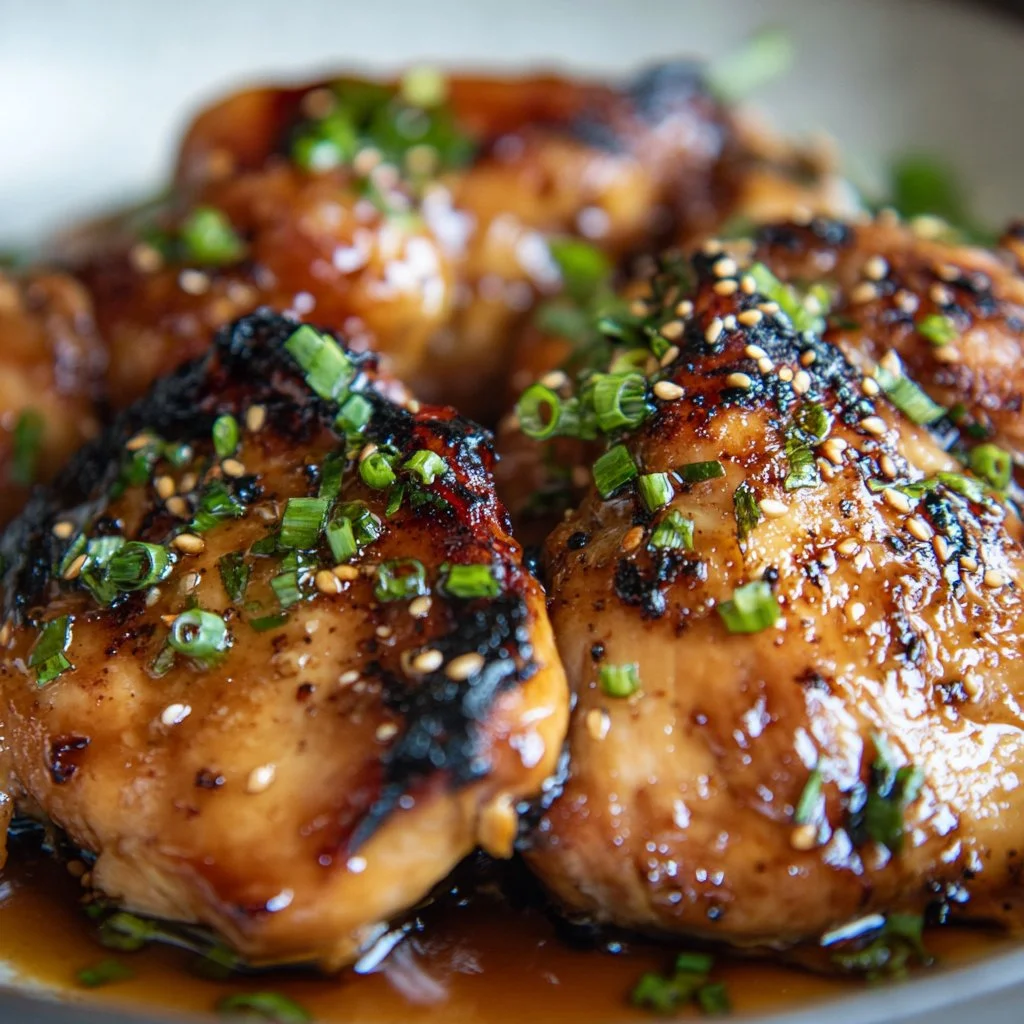
  4. Grill the skewers. Preheat your grill to medium-high heat. Place the skewers on the grill and cook for about 2-4 minutes per side. Look for a nice char and ensure the chicken is cooked through. If you like spice, consider swapping the cayenne for aji panca paste!

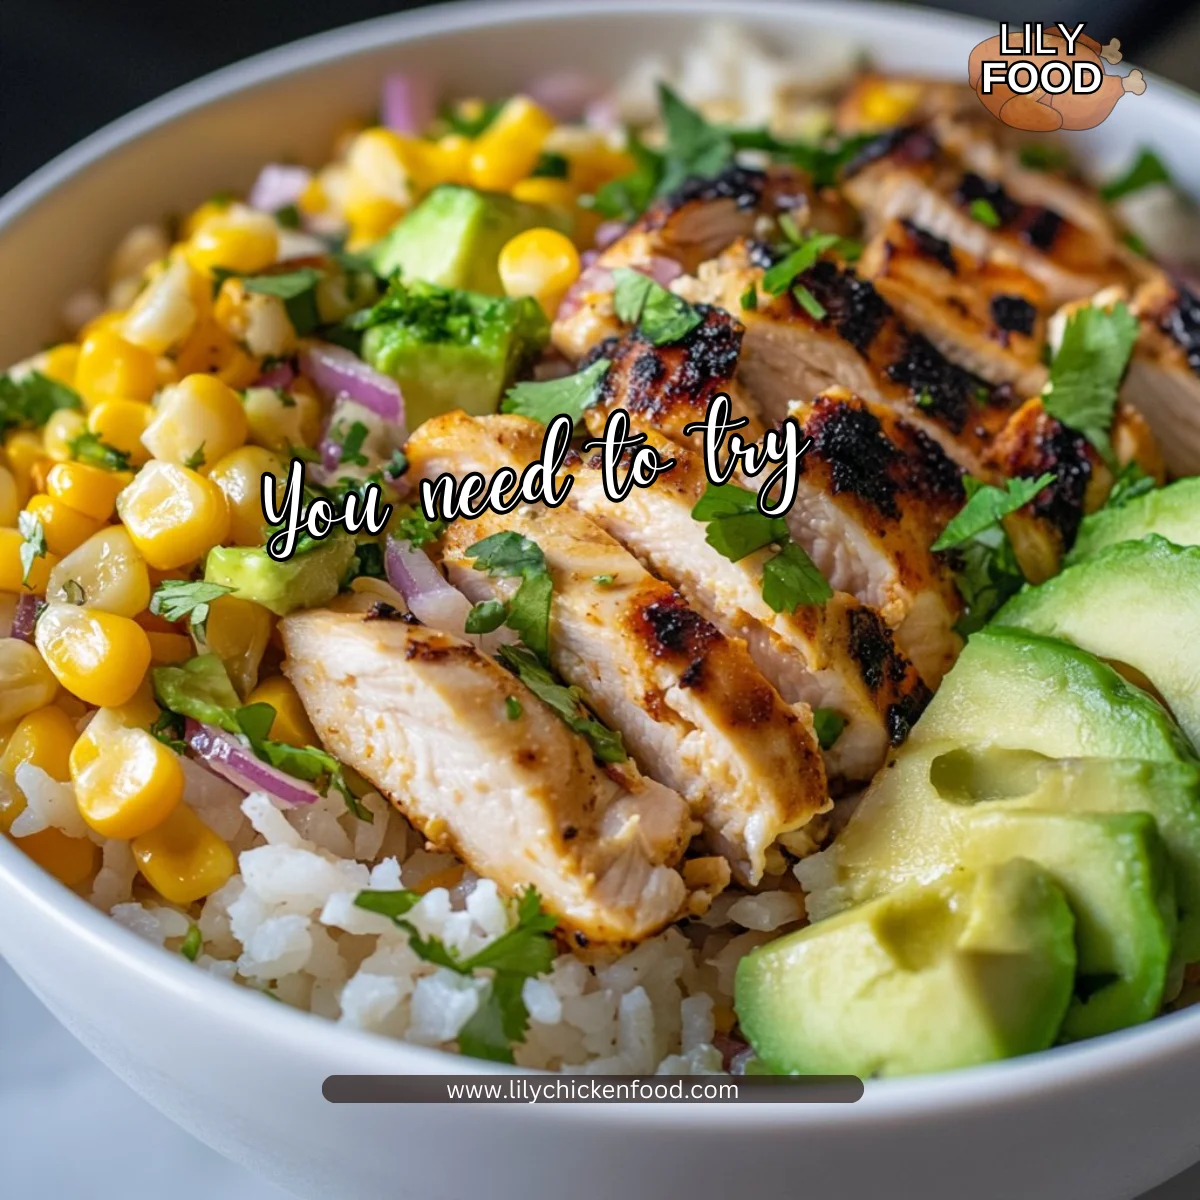
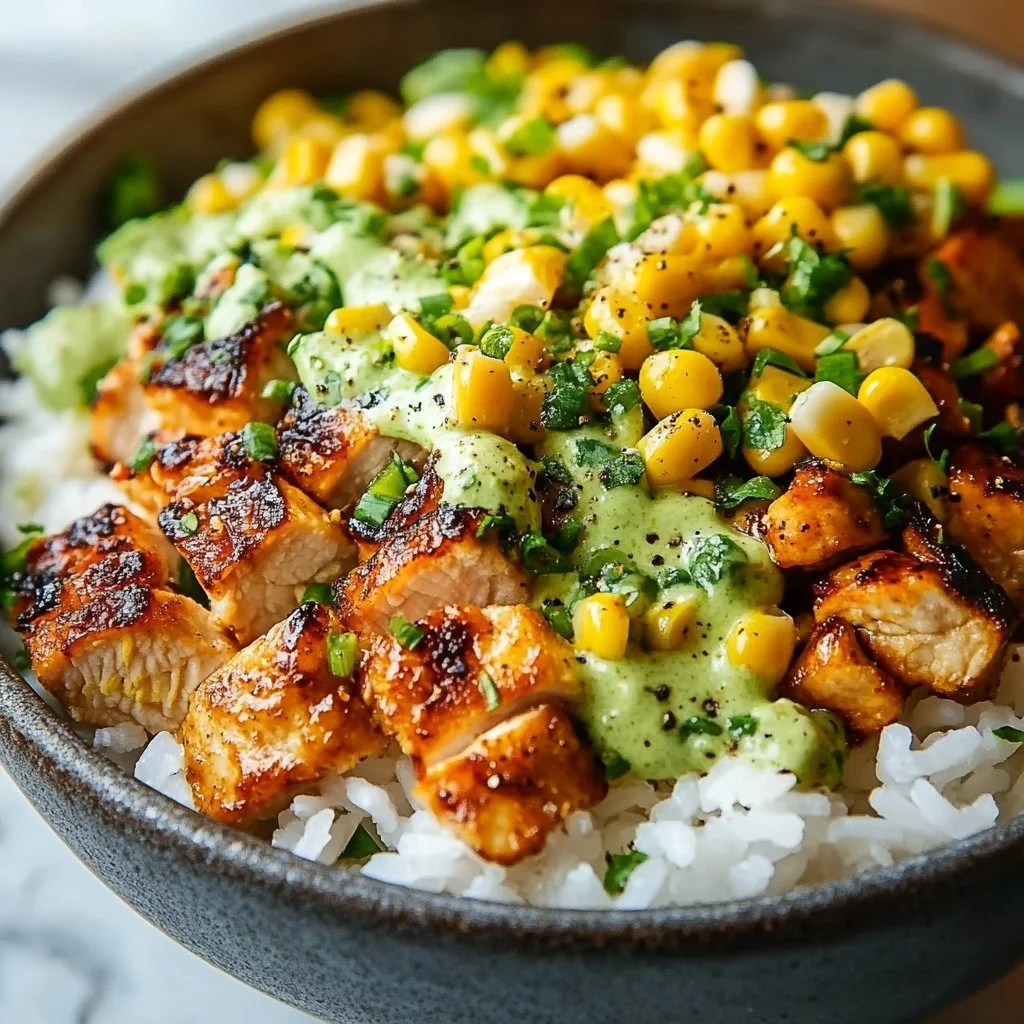
  5. Serve with Aji Verde. This zesty green sauce is a traditional accompaniment to grilled chicken in Peru. It complements the flavors beautifully and adds a creamy, tangy finish.
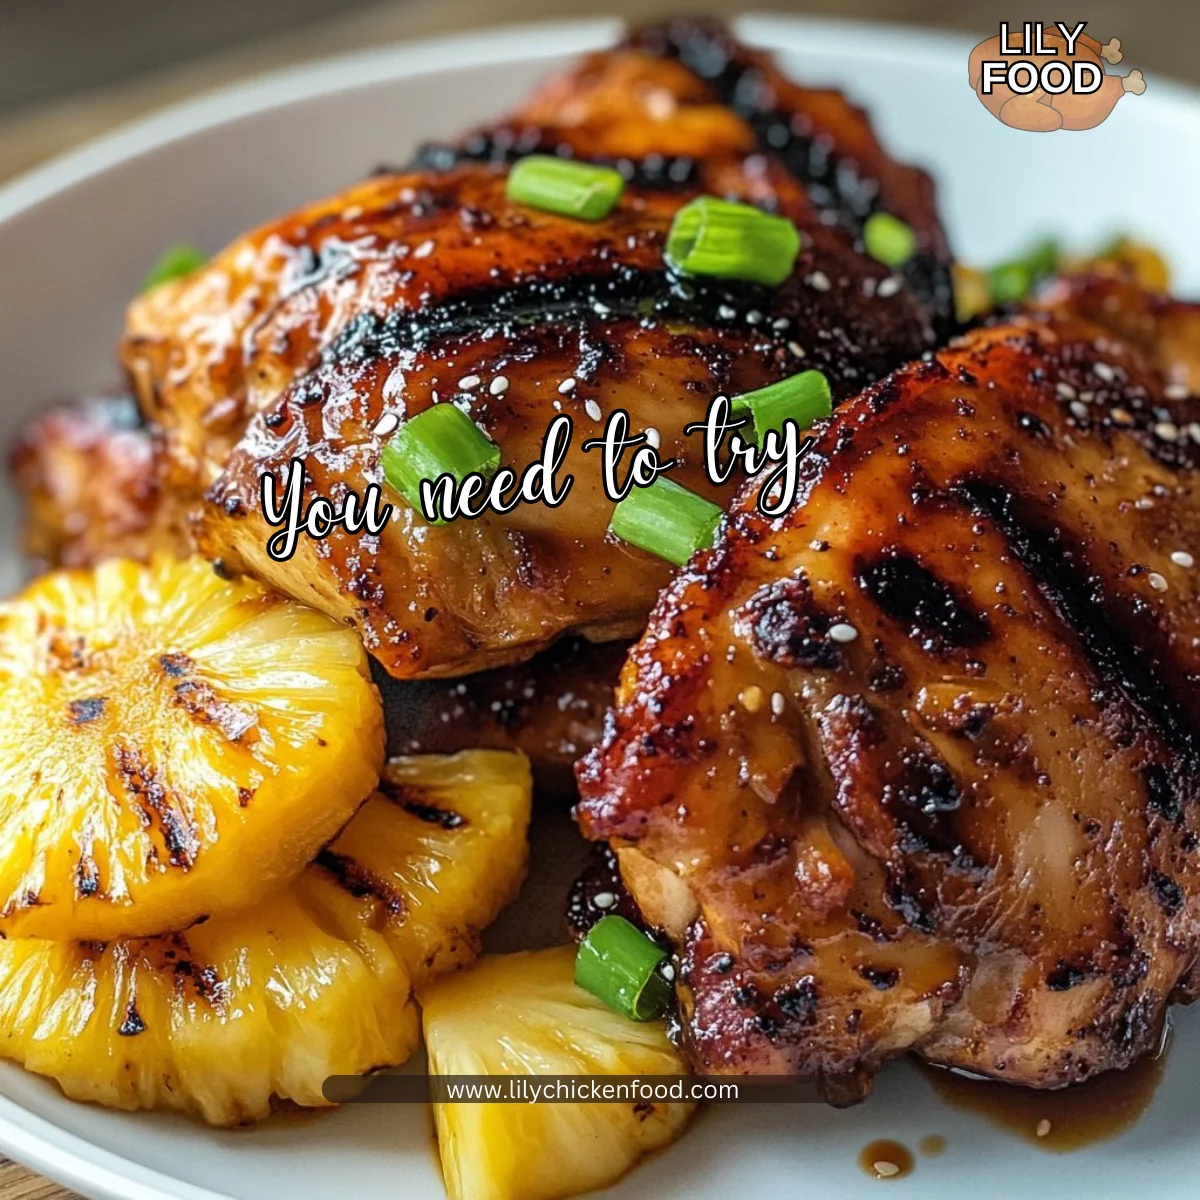
Serving

Peruvian Grilled Chicken Skewers

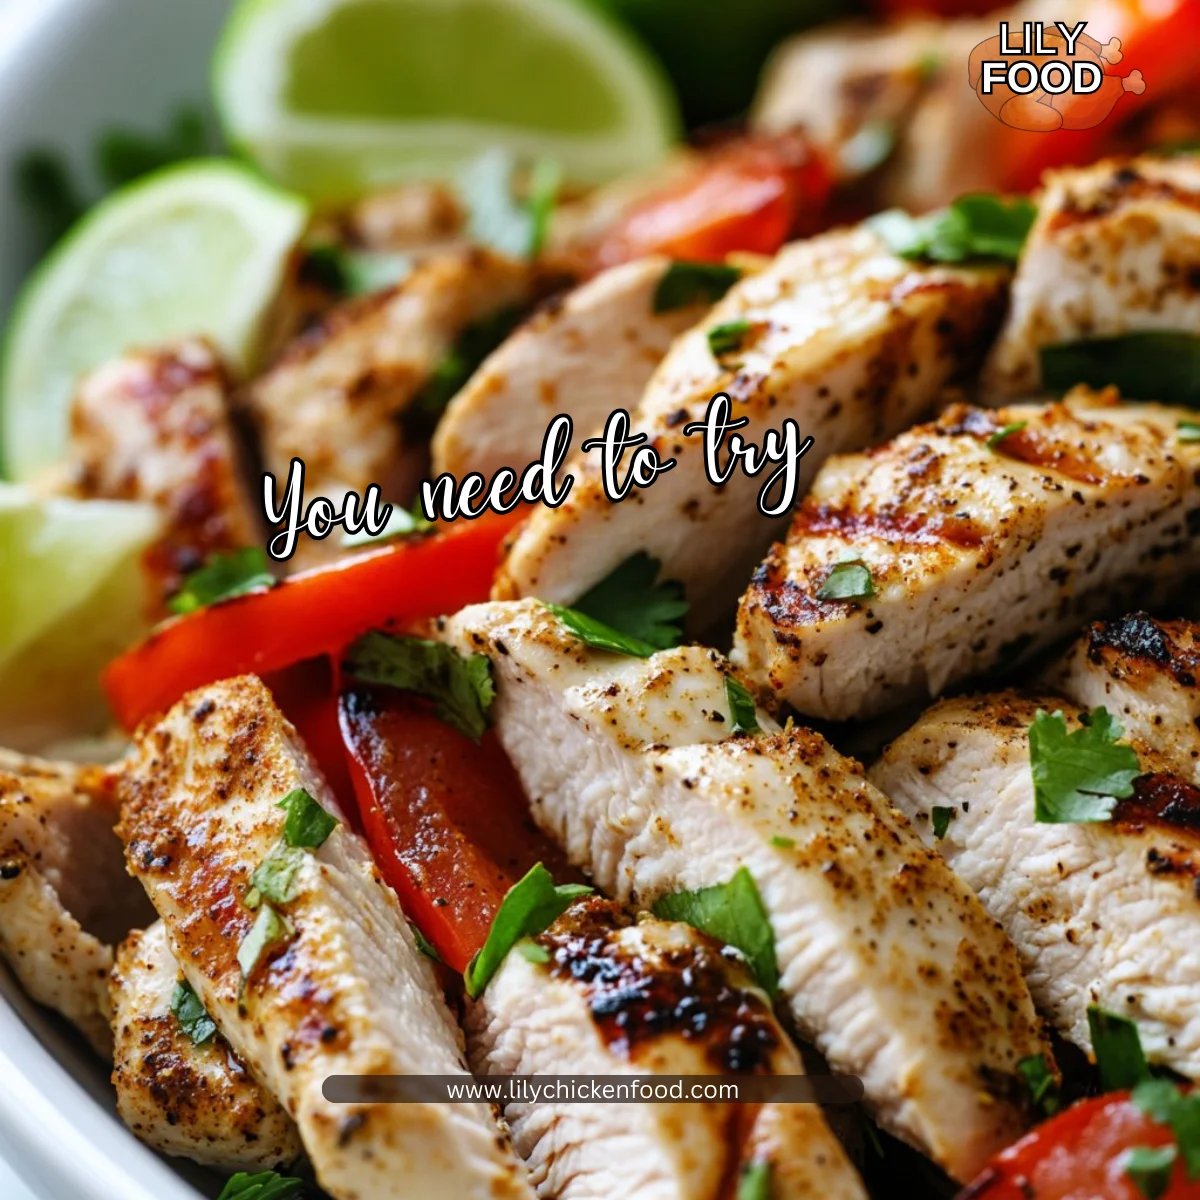
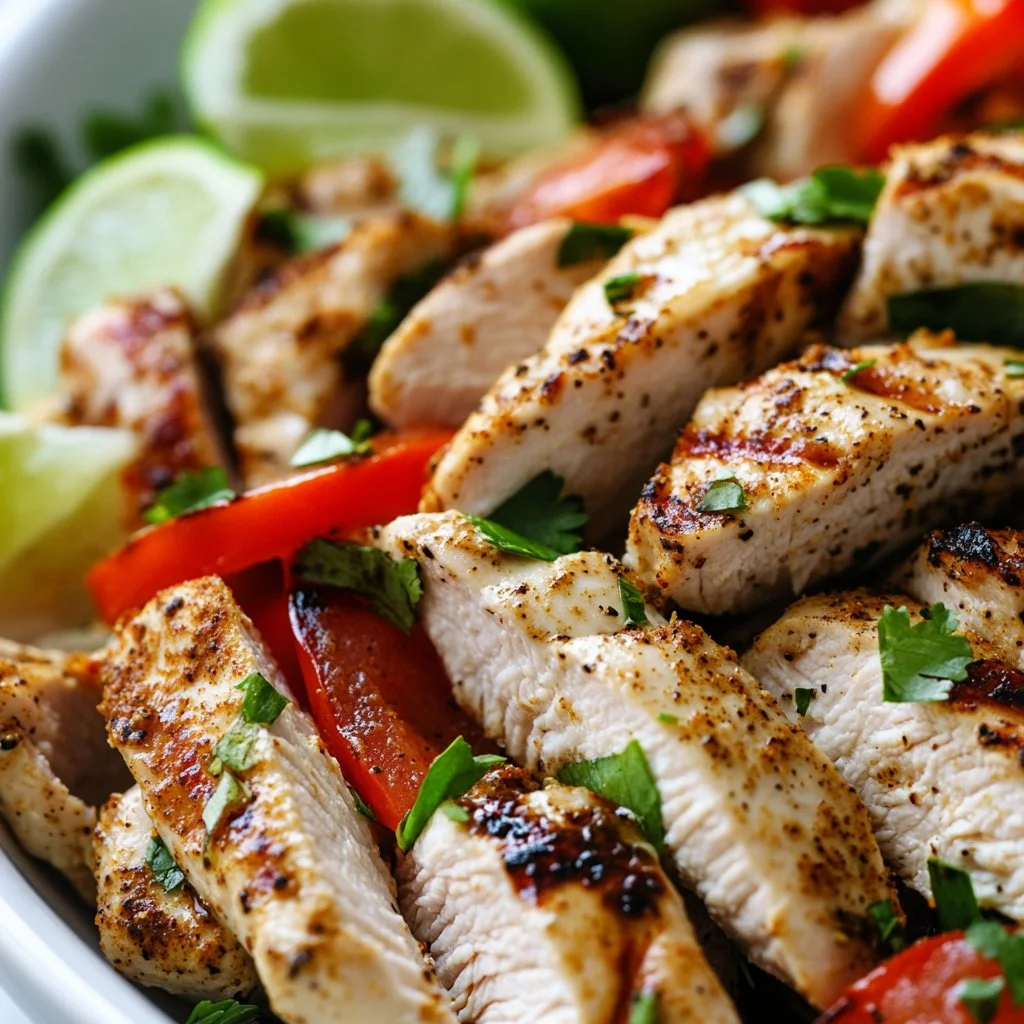
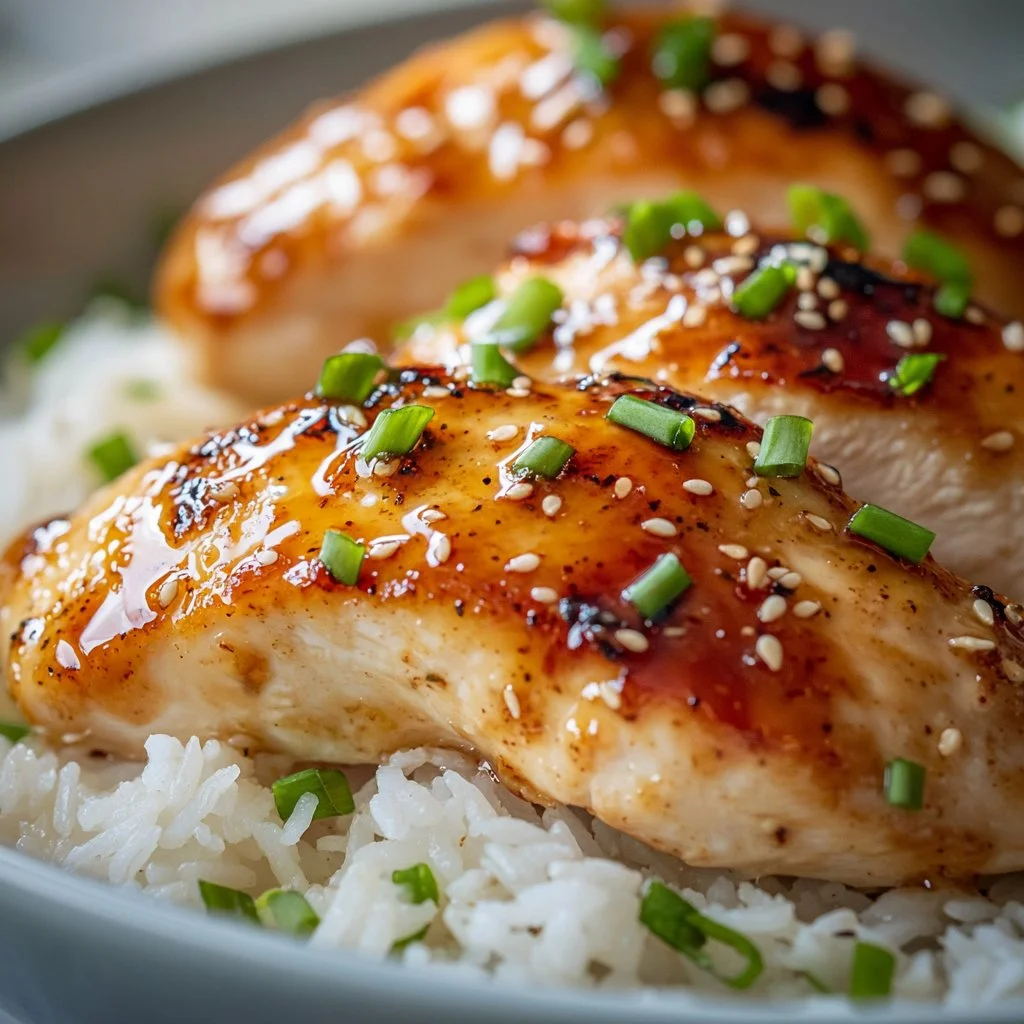
To serve, lay out the skewers on a large platter. You can garnish them with fresh lime wedges and a handful of chopped cilantro for a pop of color. Encourage everyone to dig in family-style, passing around sides like rice, corn, or fresh salad. Sharing a meal this way builds connection, and it’s a fantastic way to enjoy these delicious skewers together.

Storage

If you happen to have leftovers, store them in an airtight container in the refrigerator. They can last up to 3 days. When reheating, try to use a stovetop or grill to maintain their juicy texture. If you need to use the microwave, do so in short intervals to avoid overcooking the chicken.

Kitchen Notes

Here are some helpful shortcuts to make this recipe even easier:

  • Make-ahead marinade: Prepare the marinade a day in advance, so it’s ready to go when you need it.
  • Quick chicken prep: Cut chicken into smaller pieces to reduce marination time.
  • Frozen chicken: You can freeze marinated chicken for up to 3 months. Just thaw in the refrigerator before grilling.
  • Skip the skewering: If you’re short on time, grill the chicken pieces directly on the grill instead of skewering.
  • Mix and match veggies: Add bell peppers or zucchini to your skewers for extra nutrition and color.

Variations

Tweak this recipe to fit your family’s preferences:

  • Picky eaters: Serve the chicken without the marinade for those who prefer plainer flavors. You can also leave out any spices they might find overwhelming.
  • Vegetarian option: Substitute the chicken with firm tofu or vegetables like mushrooms, bell peppers, and zucchini.
  • Gluten-free: Make sure your soy sauce is gluten-free, or substitute with tamari sauce.

FAQ

  1. Can I use other meats?
    Yes, these flavors work well with pork or shrimp if you prefer!

  2. How spicy are these skewers?
    The cayenne is optional, and you can adjust the amount based on your family’s spice tolerance.

  3. Can I grill indoors?
    If you do not have outdoor grilling space, use a grill pan on your stove for a similar flavor.

  4. What can I serve with these skewers?
    They pair well with rice, a fresh green salad, or grilled vegetables.

  5. Can I marinate for too long?
    While marinating overnight is great, try not to exceed 24 hours, as the chicken might become too soft.

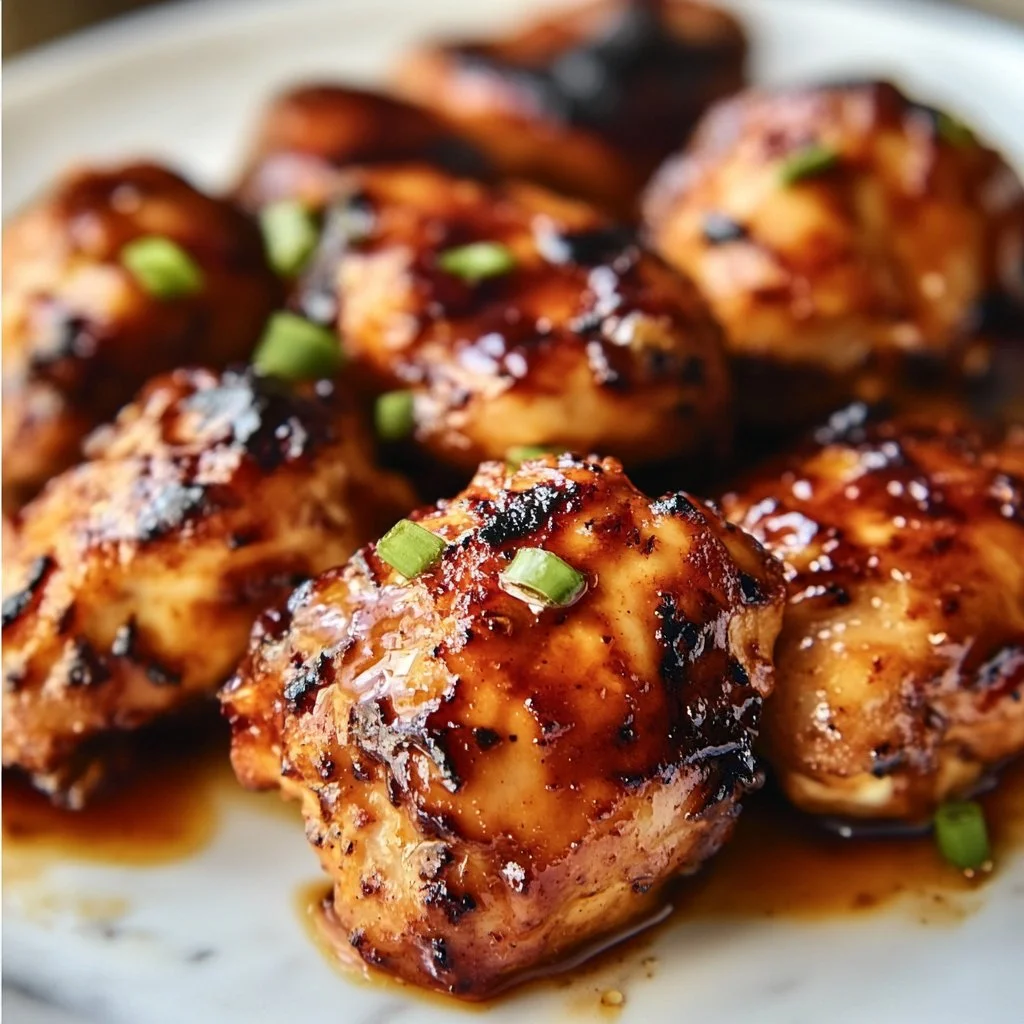
In closing, making Peruvian Grilled Chicken Skewers is not just about cooking; it’s about gathering friends and family around a shared meal. The joy of grilling and serving these flavorful skewers will create moments that linger long after the last bite. Enjoy every moment in the kitchen, and spread that warmth to everyone you love. Happy cooking!

Peruvian Grilled Chicken Skewers

Prep Time 20 minutes
Cook Time 10 minutes
Total Time 30 minutes
Servings 4 servings
Calories 230
These Peruvian Grilled Chicken Skewers are easy to prepare, full of flavorful spices, and perfect for family gatherings, bringing everyone together around the grill.

Ingredients

Marinade

  • 4 cloves garlic, minced or grated (Fresh garlic is best for a strong flavor.)
  • 1 tablespoon olive oil (This adds richness and helps the spices adhere.)
  • 1 tablespoon lime juice (Fresh lime juice brightens the dish—don’t use bottled juice!)
  • 1 tablespoon soy sauce (This enhances the overall umami flavor.)
  • 1 tablespoon honey (Gives a slight sweetness; can substitute with brown sugar or sugar.)
  • 2 teaspoons ground cumin (Adds a warm, earthy flavor.)
  • 1 teaspoon oregano (Complements the chicken perfectly.)
  • 2 teaspoons paprika (Offers mild heat and a beautiful color.)
  • 1/4 teaspoon ground annatto (Optional - for added color and a subtle nutty flavor.)
  • 1/2 teaspoon cayenne (Optional - adjust according to your family's taste!)

Chicken

  • 1 pound boneless and skinless chicken breasts or thighs (Cut into bite-sized pieces; thighs are juicier, but breasts work just as well.)

Instructions 

Preparation

  • In a bowl, combine the minced garlic, olive oil, lime juice, soy sauce, honey, cumin, oregano, paprika, annatto, and cayenne. Stir well to make sure everything is fully blended.
  • Place the chicken pieces in a resealable plastic bag or glass dish. Pour the marinade over the chicken and ensure every piece is coated. Seal or cover, then refrigerate for at least 20 minutes or up to overnight for deeper flavor.

Grilling

  • After marinating, take the chicken out of the fridge. Shake off excess marinade before skewering the pieces.
  • Preheat your grill to medium-high heat. Cook the skewers on the grill for about 2-4 minutes per side until a nice char is present and ensure the chicken is cooked through.
  • Serve with Aji Verde sauce for a traditional Peruvian touch.

Notes

Store leftovers in an airtight container in the refrigerator for up to 3 days. Reheat using stovetop or grill to maintain juiciness. If using a microwave, do so in short intervals to avoid overcooking.
Calories: 230kcal
Course: Dinner, Main Course
Cuisine: Peruvian
Keyword: Easy Recipe, Family Recipe, Grilled Chicken, Healthy Dinner, Skewers

Lemon Pepper Chicken Skewers

There’s something magical about the smell of chicken grilling on a warm evening. The sound of sizzling meat meets your ears as you gather with family around a sunny backyard. Imagine juicy chicken skewers infused with zesty lemon and cracked black pepper. This Lemon Pepper Chicken Skewers recipe is not just a dish; it’s an experience that draws loved ones closer together.

Why This Works

Lemon Pepper Chicken Skewers

Lemon Pepper Chicken Skewers are perfect for busy families. They are quick to prepare, using simple ingredients that you likely have on hand. This recipe takes around 30 minutes of hands-on time, making it an excellent choice for a weeknight dinner or a weekend gathering.

The beauty of these skewers is their versatility. Whether you’re feeding the kids or hosting friends, they deliver delicious, juicy bites that are easy to customize. The lemon adds freshness, while the pepper gives it a kick. It is a crowd-pleaser that brings everyone together in the kitchen.

Process Overview

“This is where the magic happens—when the aroma fills the kitchen.”

This recipe is straightforward. It involves marinating, grilling, and sharing. You simply mix the marinade, toss your chicken in it, and let it soak up all those flavors. The best part? You’ll have a delightful meal on the table in no time!

Ingredients

To make Lemon Pepper Chicken Skewers, gather these ingredients:

  • 1 lb chicken breast, cut into chunks
  • 2 tablespoons olive oil
  • 2 tablespoons lemon juice
  • 1 teaspoon lemon zest
  • 1 teaspoon black pepper
  • 1 teaspoon garlic powder
  • 1 teaspoon dried oregano
  • Salt to taste
  • Skewers (wooden or metal)

Lily’s Personal Tips for Skewers

  • Wooden Skewers: Soak them in water for 30 minutes before using to prevent burning on the grill.
  • Metal Skewers: Durable and reusable. Simply clean them well after each use.

Both types work great; choose based on what you have at home!

Directions

Follow these steps for a successful skewering experience:

  1. In a bowl, combine olive oil, lemon juice, lemon zest, black pepper, garlic powder, oregano, and salt. This marinade is where the flavor starts.

  2. Add chicken chunks to the marinade and toss to coat. Cover and refrigerate for at least 30 minutes. Letting it marinate makes the chicken tender and flavorful.

  3. Preheat the grill to medium-high heat. This ensures your chicken cooks evenly and gets that delicious grill mark.

  4. Thread marinated chicken onto skewers. Keep them tight so they cook uniformly.

  5. Grill the skewers for about 10-15 minutes, turning occasionally, until the chicken is cooked through and has grill marks. Keep an eye on them; you want juicy, charred goodness.

  6. Remove from grill and serve hot. Feel proud! You’ve just created a lovely meal that will bring smiles around the table.

Serving

Lemon Pepper Chicken Skewers

Lemon Pepper Chicken Skewers are best served family-style. Place the skewers on a big platter, perhaps with a fresh green salad or grilled vegetables. This way, everyone can help themselves and mingle. Serve with some warm pita or rice to make it a complete meal.

Storage

If you have leftovers, store them in an airtight container in the fridge. They will last for about 3 days. When reheating, do so gently in the microwave to keep the chicken moist. If you prefer, reheat on the grill for a few minutes to regain some of that original charred taste.

Kitchen Notes

Here are some quick shortcuts to make this recipe easier:

  • Prep Ahead: Marinate the chicken the night before for maximum flavor.
  • Frozen Chicken: Thaw chicken in the fridge overnight for a quick last-minute meal.
  • Use a Grill Pan: If you don’t have a grill, a grill pan on the stovetop will yield similar results.
  • Add Veggies: Mix bell peppers or onions in with the chicken for a colorful presentation.
  • Use Citrus Zest: Try adding lime or orange zest for a fun twist.

Variations

Feel free to tweak the recipe based on your family’s preferences or dietary needs:

  • Picky Eaters: Omit the black pepper for milder flavors. You can add a touch of honey in the marinade to please fussy palates.
  • Different Diets: Swap chicken for shrimp, tofu, or vegetables for a vegetarian option.

This recipe is adaptable, making it easy to cater to everyone at the table.

FAQ

  1. Can I use thighs instead of chicken breast?
    Yes! Chicken thighs add extra juiciness and flavor.

  2. What can I serve with chicken skewers?
    Consider a green salad, rice pilaf, or grilled corn on the cob for a complete meal.

  3. How do I know when the chicken is cooked through?
    Use a meat thermometer. The chicken should reach 165°F for safe consumption.

  4. Can I make these skewers in the oven?
    Absolutely! Use a broiler or bake at 400°F for about 20 minutes, turning halfway through.

  5. How can I add more flavor to the marinade?
    Experiment with additional spices like paprika, cayenne, or even a splash of soy sauce.

Conclusion

Cooking together should be fun, not stressful. These Lemon Pepper Chicken Skewers are a wonderful way to create lasting memories with family. The laughter, the delicious bites, and the joy of sharing are what cooking is all about. Grab your ingredients, get your loved ones involved, and enjoy the magic that happens in your kitchen. Happy grilling!

Lemon Pepper Chicken Skewers

Prep Time 30 minutes
Cook Time 15 minutes
Total Time 45 minutes
Servings 4 servings
Calories 300
Juicy chicken skewers infused with zesty lemon and cracked black pepper, perfect for a busy weeknight dinner or a weekend gathering.

Ingredients

For the marinade

  • 2 tablespoons olive oil
  • 2 tablespoons lemon juice
  • 1 teaspoon lemon zest
  • 1 teaspoon black pepper
  • 1 teaspoon garlic powder
  • 1 teaspoon dried oregano
  • to taste Salt (Adjust according to preference.)

For the skewers

  • 1 lb chicken breast, cut into chunks
  • Skewers (wooden or metal) (Soak wooden skewers in water for 30 minutes before using.)

Instructions 

Preparation

  • In a bowl, combine olive oil, lemon juice, lemon zest, black pepper, garlic powder, oregano, and salt.
  • Add chicken chunks to the marinade and toss to coat. Cover and refrigerate for at least 30 minutes.

Grilling

  • Preheat the grill to medium-high heat.
  • Thread marinated chicken onto skewers, keeping them tight for uniform cooking.
  • Grill the skewers for about 10-15 minutes, turning occasionally, until the chicken is cooked through and has grill marks.
  • Remove from grill and serve hot.

Notes

Serve family-style with a fresh green salad or grilled vegetables. Store leftovers in an airtight container for up to 3 days, reheating gently to maintain moisture.
Calories: 300kcal
Course: Dinner, Main Course
Cuisine: American, BBQ
Keyword: Chicken Skewers, Easy Recipe, Family Meal, Grilling, Lemon Pepper

Thai Grilled Chicken

There’s something magical about cooking on a warm evening. The sounds of sizzling meat on the grill, paired with the fragrant spices mingling in the air, create a cozy atmosphere. The smell of Thai grilled chicken wafts through the kitchen, transporting you to a bustling street market in Bangkok. It’s the kind of dish that brings the family together, wrapping you in warmth and comfort.

Why This Works

Thai Grilled Chicken

Thai grilled chicken is a fantastic choice for family dinners. It requires minimal prep time but packs a punch of flavor. In just a few steps, you can create a dish that feels special but is easy enough to make any night of the week. Plus, it keeps everyone engaged, from marinating the chicken together to grilling it as a team. This recipe not only saves time, but it also fills the home with delightful aromas that make everyone feel right at home.

Process Overview

“This is where the magic happens—when the aroma fills the kitchen.”

Cooking this Thai grilled chicken is not just about the end result. It’s about bonding with family. As you mix the marinade, you will experience the vibrant scents blend into an exciting adventure. This dish invites everyone to participate, whether they’re helping with the prep or simply enjoying the aroma. Let’s dive into the how-to and fill our kitchens with those mouthwatering smells!

Ingredients

To make this Thai grilled chicken, you’ll need:

  • 4 chicken thighs (skinless and boneless)
  • 3 tablespoons soy sauce
  • 2 tablespoons fish sauce
  • 2 tablespoons brown sugar
  • 1 tablespoon vegetable oil
  • 2 cloves garlic, minced
  • 1 tablespoon grated ginger
  • 1 teaspoon ground coriander
  • 1 teaspoon ground cumin
  • 1/2 teaspoon black pepper
  • Juice of 1 lime
  • Chopped cilantro for garnish

Lily’s Tips:

  • Chicken Thighs: They stay juicy and tender, making them perfect for grilling.
  • Soy Sauce and Fish Sauce: These add depth and umami—a must for authentic flavors.
  • Brown Sugar: Balances the salty and sour notes beautifully.
  • Ginger and Garlic: Freshly minced will always outperform the powdered versions.
  • Cilantro: A fresh pop of color and flavor that ties the dish together.

Directions

  1. In a bowl, combine soy sauce, fish sauce, brown sugar, vegetable oil, garlic, ginger, coriander, cumin, black pepper, and lime juice to create the marinade. This step is crucial—take a moment to enjoy the aromatic blend.

  2. Add the chicken thighs to the marinade, ensuring they are well-coated. Cover and refrigerate for at least 30 minutes or overnight for best results. Marinating overnight gives the flavors time to develop.

  3. Preheat the grill to medium-high heat. You want it hot enough to sear the chicken and create those beautiful grill marks.

  4. Remove chicken from marinade and discard the marinade. Trust me, the chicken will soak up plenty of flavor from the marination.

  5. Grill the chicken thighs for 6-7 minutes on each side or until fully cooked and the internal temperature reaches 165°F (75°C). Give them some time to develop a nice char, but flip them gently.

  6. Remove from grill and let rest for a few minutes. This helps retain the juices that make each bite so delicious.

  7. Garnish with chopped cilantro before serving. It adds a fresh touch that will make everyone appreciate the dish even more.

Serving

Thai Grilled Chicken

Serving this Thai grilled chicken family-style is the way to go. Place the grilled chicken on a large platter, sprinkle it generously with chopped cilantro, and let everyone dig in. Pair it with jasmine rice, grilled veggies, or a refreshing cucumber salad. This way, everyone can customize their plate, and it makes for a lovely communal experience at the dinner table.

Storage

If you have leftovers, store the grilled chicken in an airtight container in the fridge. It will keep well for about 3 to 4 days. To reheat, simply pop it in the microwave for a minute or two or on a skillet over low heat until warmed through. The flavor will remain rich and delicious, even the next day.

Kitchen Notes

  • Prep Ahead: Marinate the chicken the night before for a more flavorful meal.
  • Use a Meat Thermometer: To ensure perfectly cooked chicken every time.
  • Grill Pan Alternative: No outdoor grill? A grill pan on the stove works well too.
  • Double the Recipe: Make extra for salads and sandwiches during the week.
  • Quick Clean-Up: Line your grill pan with aluminum foil for easier cleanup.

Variations

  • For Picky Eaters: Swap chicken thighs for chicken breasts. They can be less fatty and often preferred.
  • No Fish Sauce: Replace it with a bit more soy sauce for a milder taste.
  • Spice it Up: Add some sliced chilies to the marinade for a kick of heat.
  • Vegetarian Alternative: Replace chicken with firm tofu or vegetables like zucchini and bell peppers.
  • Gluten-Free Option: Use tamari instead of soy sauce for gluten sensitivities.

FAQ

1. Can I use chicken breasts instead of thighs?
Yes, but chicken thighs are more forgiving and stay juicier. Breasts may dry out if overcooked.

2. How long should I marinate the chicken?
At least 30 minutes is great, but marinating overnight will yield even better results.

3. Can I grill this chicken on a stovetop grill?
Definitely! A stovetop grill pan works just as well for indoor grilling.

4. What can I serve with this grilled chicken?
Jasmine rice, a fresh salad, or grilled vegetables are all fantastic sides.

5. Can I freeze the marinated chicken?
Yes, you can freeze the marinated chicken before cooking. Just make sure to thaw it overnight in the fridge before grilling.

Conclusion

Cooking together creates memories that last a lifetime, especially when sharing delightful dishes like Thai grilled chicken. I hope this recipe brings your family together at the dinner table, filling your home with love and warmth. Gather your loved ones, enjoy the sounds and smells of your kitchen, and savor each delicious bite. Happy cooking!

Thai Grilled Chicken

Prep Time 30 minutes
Cook Time 15 minutes
Total Time 45 minutes
Servings 4 servings
Calories 220
A flavorful Thai grilled chicken dish that brings family together with its delightful aroma and taste.

Ingredients

For the Marinade

  • 3 tablespoons soy sauce (Adds depth and umami.)
  • 2 tablespoons fish sauce (Essential for authentic flavors.)
  • 2 tablespoons brown sugar (Balances salty and sour notes.)
  • 1 tablespoon vegetable oil
  • 2 cloves garlic, minced (Freshly minced for better flavor.)
  • 1 tablespoon grated ginger (Freshly minced for better flavor.)
  • 1 teaspoon ground coriander
  • 1 teaspoon ground cumin
  • 1/2 teaspoon black pepper
  • 1 unit Juice of 1 lime (Adds freshness.)

For Serving

  • 4 pieces chicken thighs, skinless and boneless (Juicy and tender, perfect for grilling.)
  • to taste Chopped cilantro (For garnish.)

Instructions 

Preparation

  • In a bowl, combine soy sauce, fish sauce, brown sugar, vegetable oil, garlic, ginger, coriander, cumin, black pepper, and lime juice to create the marinade.
  • Add the chicken thighs to the marinade, ensuring they are well-coated. Cover and refrigerate for at least 30 minutes or overnight.

Cooking

  • Preheat the grill to medium-high heat.
  • Remove chicken from marinade and discard the marinade.
  • Grill the chicken thighs for 6-7 minutes on each side or until fully cooked (internal temperature reaches 165°F / 75°C).
  • Remove from grill and let rest for a few minutes.
  • Garnish with chopped cilantro before serving.

Notes

Marinate overnight for best flavor. Use a meat thermometer for perfect chicken.
Calories: 220kcal
Course: Dinner, Main Course
Cuisine: Thai
Keyword: Easy Chicken Recipes, family recipes, Grilled Chicken, Marinated Chicken, Thai grilled chicken

Chicken Taco Marinade

As the sun sets and the kitchen fills with warm light, the savory aroma of a chicken taco marinade awakens the senses. You can hear the gentle sizzle as the chicken hits the grill, signaling a delightful meal ahead. The smell draws in your loved ones, anticipation building for the delicious dinner that awaits. This chicken taco marinade is all about creating memories around the dinner table, bringing family together with every bite.

Why This Works

Chicken Taco Marinade

This chicken taco marinade is a family favorite for many reasons. First, it’s packed with flavor. The spice blend pairs beautifully with the juicy chicken, creating a taste that everyone will love. Second, it’s time-saving. You can whip up the marinade in just a few minutes, allowing busy families to enjoy a home-cooked meal without extensive preparation. It’s perfect for a weeknight dinner or a fun weekend gathering. Simply marinate the chicken and let it work its magic while you prepare your favorite taco fixings. You’ll be amazed at how easy it can be to bring the fiesta home.

Process Overview

“This is where the magic happens—when the aroma fills the kitchen.”

The process of making this chicken taco marinade is straightforward and enjoyable. Start by gathering your ingredients and taking a moment to appreciate the vibrant colors and fresh scents. Mixing the marinade is a quick task, and once the chicken is coated, the flavors can meld together beautifully. You’ll soon find that the time spent marinating is well worth it when you take that first bite of your grilled chicken.

Ingredients

To make the best chicken taco marinade, here’s what you’ll need:

  • Chicken Breasts or Thighs: Choose skinless, boneless chicken breasts or thighs. They cook evenly and absorb the marinade beautifully. Thighs are juicier and offer more flavor, while breasts are leaner.

  • Taco Spice Blend: Use your favorite store-bought blend or make your own. A mix of chili powder, cumin, garlic powder, and paprika works wonders and is always a hit. Adjust the spices based on your family’s taste preferences.

  • Olive Oil: This adds moisture and helps the spices cling to the chicken. Extra virgin olive oil is a great choice, enhancing the overall flavor.

  • Fresh Lime Juice: Lime juice brightens the marinade, adding a refreshing zing. Use fresh limes for the best taste, as bottled lime juice can be too acidic.

Directions

  1. In a bowl, mix the taco spice blend with olive oil and fresh lime juice. Take a moment to appreciate the vibrant colors and enticing smells of your mixture. This is where the magic happens.

  2. Add the chicken breasts or thighs to the marinade, ensuring they are well coated. Use your hands to get in there; it’s a fun and satisfying step. You want each piece to soak up all that delicious flavor.

  3. Marinate for at least 30 minutes to 2 hours. If time allows, let it sit in the fridge longer for even more flavor. This is a great time to set the table or prep your favorite taco toppings.

  4. Grill the marinated chicken until fully cooked, about 6-7 minutes per side, depending on thickness. Listen for that satisfying sizzle! You want an internal temperature of 165°F for safe eating.

  5. Serve in tacos with your favorite toppings, like fresh salsa, avocado, or shredded cheese. Encourage everyone to build their perfect taco, creating a fun and interactive dining experience.

Serving

Chicken Taco Marinade

To serve this chicken taco dish family-style, lay everything out on the table. Use bright, colorful plates for the tacos and bowls for the toppings. Let each person assemble their own tacos. This not only makes dinner more enjoyable, but it also allows everyone to customize their experience. Whether it’s a little extra cheese or a spicy salsa, everyone can craft their ideal dish.

Storage

If you have leftovers (though they are rare), store the marinated chicken in an airtight container in the fridge for up to 3 days. When reheating, do so gently to retain moisture, as dry chicken is never pleasing. You can reheat in the oven at 350°F or briefly in a skillet on medium heat. Adding a splash of water or broth can help keep it moist.

Kitchen Notes

  • Batch Preparation: Make a double batch of this marinade and freeze half for later use. It’s a great time-saver for busy nights.

  • Slow Cooker Option: If you prefer, you can cook the marinated chicken in a slow cooker on low for 4-6 hours. Shred it for easy tacos.

  • Prep Ahead: Marinating the chicken the night before makes for an effortless dinner the next day.

  • Use Skewers: For a fun twist, cut the chicken into cubes, marinate, and then skewer them for grilling or broiling.

  • Custom Spice Level: Adjust the spice level by adding a pinch of cayenne or using a mild/more robust taco spice blend based on your family’s preferences.

Variations

If you have picky eaters or specific dietary needs, there are plenty of ways to tweak this marinade:

  • Vegetarian Option: Use the marinade on firm tofu or portobello mushrooms. They absorb flavors nicely and grill well.

  • Low-Carb: Serve the grilled chicken wrapped in lettuce leaves instead of tortillas.

  • Different Proteins: Try this marinade on pork or shrimp. Both are fantastic choices that take on the spices beautifully.

  • Add Fresh Herbs: If your family enjoys different herbs, add fresh cilantro or oregano to the marinade for an extra layer of flavor.

  • For Kids: Make a mild version of the marinade for the kids. Serve it alongside taco toppings so they can build their tacos just how they like.

FAQ

1. How long should I marinate the chicken?

You can marinate the chicken for as little as 30 minutes, but for maximum flavor, aim for 2 hours or even overnight.

2. Can I use bone-in chicken?

Yes, you can! Just ensure you adjust the cooking time to fully cook the chicken. Aim for an internal temperature of 165°F.

3. What are some good toppings for chicken tacos?

Fresh avocado, pico de gallo, shredded lettuce, cheese, sour cream, and jalapeños are always popular options.

4. Can I bake the marinated chicken instead of grilling?

Absolutely! Preheat your oven to 400°F. Place the chicken on a baking sheet and bake for about 20-25 minutes until fully cooked.

5. How can I make this marinade spicier?

Add diced jalapeños, cayenne pepper, or a splash of hot sauce to amp up the heat.

As you wrap up your week and gather with your family, remember that meals shared together leave lasting impressions. This chicken taco marinade brings flavor, love, and laughter around the dinner table. Embrace the moments spent cooking and eating together—it’s what makes a house a home. Happy cooking!

Chicken Taco Marinade

Prep Time 10 minutes
Cook Time 15 minutes
Total Time 25 minutes
Servings 4 servings
Calories 300
A flavorful chicken taco marinade that brings family together with every bite, perfect for weeknight dinners or fun gatherings.

Ingredients

For the Marinade

  • 1/4 cup olive oil (Extra virgin is preferred for enhanced flavor.)
  • 1/4 cup fresh lime juice (Use fresh limes for the best taste.)
  • 2 tablespoons taco spice blend (Use a store-bought blend or homemade with chili powder, cumin, garlic powder, and paprika.)

For the Chicken

  • 4 pieces skinless, boneless chicken breasts or thighs (Thighs are juicier, while breasts are leaner.)

Instructions 

Preparation

  • In a bowl, mix the taco spice blend with olive oil and fresh lime juice.
  • Add the chicken breasts or thighs to the marinade, ensuring they are well coated.
  • Marinate for at least 30 minutes to 2 hours, or longer for more flavor.

Cooking

  • Grill the marinated chicken until fully cooked, about 6-7 minutes per side, ensuring an internal temperature of 165°F.
  • Serve in tacos with your favorite toppings.

Notes

For a fun and interactive dining experience, lay out taco ingredients for assembly at the table. You can batch prepare the marinade and freeze half for later use.
Calories: 300kcal
Course: Dinner, Main Course
Cuisine: Mexican
Keyword: Chicken Taco Marinade, Easy Dinner, Grilled Chicken, Taco Recipe

Lemon Chicken

There’s something magical about the smell of lemon chicken cooking in the kitchen. The sizzle of chicken hitting the hot grill, the enticing aroma of garlic mingling with zesty lemon—it all sets the stage for a fantastic family meal. As the sounds of dinner preparations fill your home, you can almost hear the laughter and chatter of loved ones gathered around the table, eager to share stories and enjoy delicious food.

Why This Works

Lemon Chicken

This Lemon Chicken recipe is simple and perfect for busy families. It’s a time-saver and is packed with flavor that both kids and adults will love. The marinade makes the chicken juicy and tender while allowing for easy preparation.

You can whip this up in the morning or the night before, letting the chicken absorb all those tasty flavors. When dinner time rolls around, all you need to do is grill or bake it. This means more time for conversations and less time fussing over the stove. It’s a win-win for creating memories with your family.

Process Overview

“This is where the magic happens—when the aroma fills the kitchen.”

Let’s break down how easy it is to make this Lemon Chicken. The process involves marinating the chicken in a delightful mixture of olive oil, lemon juice, and herbs, then cooking it to perfection. Each step is straightforward, guiding you to create a meal that’s bursting with flavor.

Ingredients

To make this delicious Lemon Chicken, you will need:

  • 4 chicken thighs
  • 1/4 cup olive oil
  • 1/4 cup lemon juice (freshly squeezed is best)
  • 3 cloves garlic, minced
  • 1 tablespoon dried oregano
  • Salt and pepper to taste

Lily’s Tips:

  • Chicken Thighs: They stay moist during cooking. If you prefer, you can use chicken breasts, but adjust the cooking time.

  • Olive Oil: This not only adds flavor but helps to keep the chicken juicy. A good quality olive oil does wonders.

  • Lemon Juice: Freshly squeezed gives the best flavor. Bottled lemon juice can be too tart or lacking in freshness.

  • Garlic: Fresh garlic is aromatic and gives a robust flavor, so don’t skimp on it!

  • Oregano: Dried oregano works great, but if you have fresh, use it. It adds a lovely burst of flavor.

Directions

  1. In a bowl, whisk together olive oil, lemon juice, garlic, oregano, salt, and pepper. This step is fun! Feel free to taste it; you’ll see how the flavors blend beautifully.

  2. Place chicken thighs in a zip-top bag and pour marinade over the chicken. Seal and refrigerate for at least 30 minutes. While it’s marinating, imagine how delicious dinner will be.

  3. Preheat the grill or oven to 400°F (200°C). This ensures that everything cooks evenly and stays juicy.

  4. Remove chicken from marinade and discard the marinade. Keeping the chicken nice and simple for cooking makes it irresistible.

  5. Grill or bake chicken for 25-30 minutes, or until cooked through and juices run clear. You’ll love the moment you start to smell that lemony goodness.

  6. Serve hot and enjoy! Nothing beats the satisfaction of a homemade meal shared with family.

Serving

Lemon Chicken

To serve Lemon Chicken family-style, simply place the grilled or baked chicken on a large platter. Add a sprinkle of fresh herbs for a pop of color. It pairs wonderfully with a side of roasted vegetables or a simple green salad. Encourage everyone to dig in and share their thoughts as the delicious aroma fills the air.

Storage

If you have leftovers (though I doubt you will), store them in an airtight container in the fridge. They should stay fresh for about 3-4 days. When you’re ready to reheat, simply pop them in the microwave for a couple of minutes or warm them in a pan on the stovetop. Adding a splash of water can help keep them moist.

Kitchen Notes

Here are some handy shortcuts for quicker preparation:

  • Pre-chop garlic and herbs: That way, you can just grab them when you need them.

  • Marinate the chicken overnight: This allows the flavors to penetrate even deeper.

  • Use a grill pan: If you don’t have a grill, a grill pan works beautifully on the stovetop.

  • Frozen chicken thighs: They can be used; just remember to thaw them in the fridge the night before.

  • Meal prep: Make extra chicken thighs and use them in salads or sandwiches later in the week.

Variations

Want to customize this Lemon Chicken for any picky eaters or different diets? Here are a few ideas:

  • Add spice: If your family loves heat, add some red pepper flakes to the marinade.

  • Herb variations: Try replacing oregano with rosemary or thyme for a different flavor profile.

  • Citrus twist: Experiment with other citrus juices, like lime or orange, for a unique taste.

  • Gluten-free: This recipe is naturally gluten-free, making it a great choice for everyone.

  • Vegetarian option: Use portobello mushrooms marinated similarly for a delicious meat-free version.

FAQ

1. Can I use chicken breasts instead of thighs?
Yes, chicken breasts can be used. Just adjust the cooking time to ensure they don’t dry out.

2. How long should I marinate the chicken?
At least 30 minutes, but overnight is even better for maximum flavor.

3. Can I cook this in the oven?
Absolutely! Bake in a preheated oven at 400°F for 25-30 minutes.

4. What side dishes would you suggest?
Roasted vegetables, a fresh salad, or rice would pair wonderfully with this dish.

5. Can I freeze leftovers?
Yes, you can freeze leftover chicken for up to three months. Just ensure it’s stored in an airtight container.

Conclusion

Cooking Lemon Chicken is a delightful experience that brings the smell of home into your kitchen. It is simple, tasty, and perfect for family dinners. As you gather around the table, savor the delicious meal and the stories shared. Food has a magical way of bringing us together, and this Lemon Chicken is sure to be a family favorite. Enjoy every bite!

Lemon Chicken

Prep Time 30 minutes
Cook Time 30 minutes
Total Time 1 hour
Servings 4 servings
Calories 250
A simple and flavorful Lemon Chicken recipe perfect for busy families, marinated to tender perfection and easily grilled or baked for a delightful meal.

Ingredients

For the marinade

  • 1/4 cup olive oil (A good quality olive oil enhances flavor.)
  • 1/4 cup lemon juice (Freshly squeezed is best.)
  • 3 cloves garlic, minced (Fresh garlic adds robust flavor.)
  • 1 tablespoon dried oregano (Fresh oregano can be used for more flavor.)
  • to taste salt and pepper (Adjust according to preference.)

For the chicken

  • 4 pieces chicken thighs (Chicken thighs remain moist during cooking.)

Instructions 

Marinating the Chicken

  • In a bowl, whisk together olive oil, lemon juice, garlic, oregano, salt, and pepper.
  • Place chicken thighs in a zip-top bag and pour marinade over the chicken.
  • Seal and refrigerate for at least 30 minutes, or overnight for deeper flavor.

Cooking the Chicken

  • Preheat the grill or oven to 400°F (200°C).
  • Remove chicken from marinade and discard the marinade.
  • Grill or bake chicken for 25-30 minutes, or until cooked through and juices run clear.

Serving the Dish

  • Serve hot on a large platter with a sprinkle of fresh herbs.

Notes

If storing leftovers, keep in an airtight container in the fridge for 3-4 days. You can reheat in the microwave or stovetop with a splash of water to keep them moist.
Calories: 250kcal
Course: Dinner, Main Course
Cuisine: American, Mediterranean
Keyword: Chicken Thighs, easy recipes, Family Dinner, Grilled Chicken, Lemon Chicken

Street Corn Chicken Rice Bowl

There’s nothing like walking into a kitchen filled with the smell of grilled chicken and sweet corn. The sound of sizzling ingredients brings warmth and excitement, hinting at a meal that will bring the family together. Today, I’m excited to share a recipe that will do just that—a Street Corn Chicken Rice Bowl. It’s not just a meal; it’s a comforting experience that can fill your home with joy.

Why This Works

Street Corn Chicken Rice Bowl

This recipe is a delightful blend of flavors and textures, making it perfect for family dinners. It’s quick to prepare, so you won’t have to spend hours in the kitchen. The combination of juicy grilled chicken, sweet corn, and fresh avocado creates a colorful dish that even picky eaters will love.

Another advantage is that it’s versatile. You can customize each bowl according to your family’s preferences, making it a fun experience for everyone. This is especially important for busy nights when time is precious and everyone is looking for something delicious and filling.

Process Overview

“This is where the magic happens—when the aroma fills the kitchen.”

Making the Street Corn Chicken Rice Bowl is straightforward. You simply mix the main ingredients, add a few flavor enhancers, and serve. It only takes a few steps, making the process simple enough for even the youngest kitchen helpers to pitch in.

Ingredients

To get started, here’s what you’ll need:

  • 1 cup cooked rice

    • Tip: Use leftover rice for even quicker prep.
  • 1 lb grilled chicken, diced

    • Tip: Use a rotisserie chicken to save time.
  • 1 cup sweet corn, canned or grilled

    • Tip: If using canned corn, drain it well before adding.
  • 1/2 cup red onion, diced

    • Tip: Soak the diced onion in cold water for a few minutes to reduce pungency.
  • 1 avocado, sliced

    • Tip: Choose avocados that are ripe but not too soft for perfect slices.
  • 1/2 cup cilantro, chopped

    • Tip: If you’re not a fan of cilantro, parsley is a great substitute.
  • 1 lime, juiced

    • Tip: Roll the lime on the counter before juicing to get more juice out.
  • Salt and pepper to taste

    • Tip: Freshly cracked pepper elevates the flavor.
  • Optional toppings: cheese, jalapeños, sour cream

    • Tip: Have a toppings bar for a fun family activity.

Directions

  1. In a large bowl, combine the cooked rice, grilled chicken, sweet corn, and red onion.

    • You can have the kids help with this step to make it fun.
  2. Squeeze lime juice over the mixture and season with salt and pepper.

    • The lime will brighten the flavors, making it even more delicious.
  3. Toss everything together until well mixed.

    • Use your hands for a better mix or a large spatula if you prefer.
  4. Serve the mixture in bowls and top with avocado slices and cilantro.

    • Presenting the bowls can spark excitement at the dinner table.
  5. Add any optional toppings you desire.

    • Encourage each family member to personalize their bowl.
  6. Enjoy your flavorful and nutritious meal!

    • Take a moment to relish in the joy of sharing this meal together.

Serving

Street Corn Chicken Rice Bowl

To serve the Street Corn Chicken Rice Bowl family-style, place all the components in separate bowls on the table. Let each person create their own bowl according to their tastes. This not only encourages creativity but also makes mealtime a memorable experience filled with laughter and conversation.

Storage

If you have leftovers, store them in an airtight container in the fridge. Make sure to keep the avocado separate to prevent browning. Reheat the rice and chicken mixture in the microwave or on the stovetop, adding a splash of water to keep it moist. Avoid reheating avocado; instead, slice fresh avocado just before serving.

Kitchen Notes

  • Make a larger batch of rice ahead of time to use in multiple meals.
  • Use frozen corn if fresh or canned is unavailable; it’s just as sweet and delicious.
  • If you’re in a hurry, opt for pre-cooked grilled chicken, which you can find in most grocery stores.
  • Consider prepping the ingredients (chopping veggies, cooking rice) the day before.
  • A squeeze of lime over the entire bowl brightens flavors and adds freshness.

Variations

  • For the vegetarian or vegan crowd, swap the chicken for grilled tofu or additional beans.
  • To add more crunch, toss in some diced bell peppers or shredded cabbage.
  • Spice lovers can stir in diced jalapeños or a dash of hot sauce for an added kick.
  • For a different flavor profile, substitute corn with black beans.
  • Adjust the recipe for gluten-free diets by ensuring all ingredients are certified gluten-free.

FAQ

  1. Can I use brown rice instead of white rice?
    Yes, brown rice adds more fiber and has a nuttier taste. Just adjust the cooking time as needed.

  2. What if I don’t have fresh corn?
    Canned or frozen corn works just as well! Just make sure to rinse and drain if using canned.

  3. How can I make this dish more filling?
    Add a side of black beans or serve with warm tortillas.

  4. Can this recipe be frozen?
    It’s best to freeze only the chicken and rice mixture. Store in an airtight container and reheat on the stove when ready to enjoy.

  5. What can I use instead of cilantro?
    Italian parsley or green onions can both work as great substitutes if you’re not a fan of cilantro.

Conclusion

With this Street Corn Chicken Rice Bowl, you can bring your family together for a quick, delicious, and satisfying meal. Cooking does not have to be a chore; it can be an opportunity to connect and share. I hope this recipe finds a cherished place in your home, just as it has in mine. Enjoy your cooking, and remember that every meal is an opportunity to make lasting memories.

Street Corn Chicken Rice Bowl

Prep Time 15 minutes
Total Time 15 minutes
Servings 4 servings
Calories 450
A delightful mix of grilled chicken, sweet corn, and fresh avocado served over rice, perfect for family dinners.

Ingredients

Main Ingredients

  • 1 cup cooked rice (Use leftover rice for even quicker prep.)
  • 1 lb grilled chicken, diced (Use a rotisserie chicken to save time.)
  • 1 cup sweet corn, canned or grilled (If using canned corn, drain it well before adding.)
  • 1/2 cup red onion, diced (Soak the diced onion in cold water for a few minutes to reduce pungency.)
  • 1 medium avocado, sliced (Choose avocados that are ripe but not too soft for perfect slices.)
  • 1/2 cup cilantro, chopped (If you’re not a fan of cilantro, parsley is a great substitute.)
  • 1 medium lime, juiced (Roll the lime on the counter before juicing to get more juice.)
  • to taste salt (Freshly cracked pepper elevates the flavor.)
  • to taste pepper

Optional Toppings

  • to taste cheese (Have a toppings bar for a fun family activity.)
  • to taste jalapeños
  • to taste sour cream

Instructions 

Preparation

  • In a large bowl, combine the cooked rice, grilled chicken, sweet corn, and red onion.
  • Squeeze lime juice over the mixture and season with salt and pepper.
  • Toss everything together until well mixed.
  • Serve the mixture in bowls and top with avocado slices and cilantro.
  • Add any optional toppings you desire.
  • Enjoy your flavorful and nutritious meal!

Notes

To serve family-style, place all components in separate bowls and let everyone create their own bowl. Store leftovers in an airtight container in the fridge, keeping avocado separate to prevent browning. Reheat the rice and chicken mixture before serving.
Calories: 450kcal
Course: Dinner, Main Course
Cuisine: American, Mexican
Keyword: Chicken Rice Bowl, Comfort Food, Family Dinner, Quick Meal, Street Corn

Juicy Crispy Chicken Thighs

There’s something magical about the scent of roasting chicken wafting through the kitchen. The rich, savory aroma fills every corner, inviting everyone to gather around. You can almost hear the sizzle as the chicken transforms into a golden-brown masterpiece. Imagine the anticipation as you pull those juicy, crispy chicken thighs from the oven, ready to delight your family.

Why This Works

Juicy Crispy Chicken Thighs

Juicy crispy chicken thighs are the ultimate family meal. They are simple to prepare, crave-worthy, and don’t demand hours in the kitchen. You can easily serve this dish on a busy weeknight or for a special Sunday dinner. Not only does it save time, but the delicious results will make your loved ones feel special and cared for.

The skin crisps up beautifully, while the chicken remains tender and juicy on the inside. This recipe is designed to please everyone at the table—both kids and adults alike. Plus, it’s versatile enough to be enjoyed in wraps, salads, or on its own with sides of your choosing.

Process Overview

“This is where the magic happens—when the aroma fills the kitchen.”

The process for making these chicken thighs is straightforward. You will season them, roast them, and watch as they turn into a dish everyone will love. Follow the steps closely, and you’ll create a comforting family meal that’s sure to impress.

Ingredients

To get started, you’ll need a few key ingredients:

  • Chicken Thighs: Bone-in, skin-on thighs work best for flavor and crispiness.
  • Salt: Essential for enhancing the flavor of the chicken.
  • Pepper: Freshly cracked black pepper adds a mild kick.
  • Garlic Powder: Provides a hint of garlicky goodness.
  • Onion Powder: Adds depth and sweetness.
  • Paprika: Gives a beautiful color and a subtle smokiness.
  • Olive Oil: Helps to crisp the skin and locks in moisture.

Lily’s Tips: When buying chicken, choose thighs that have a good amount of fat for extra juiciness. If you’re watching salt intake, feel free to adjust the seasoning to your preference. Fresh herbs can also be added to jazz it up if you have any on hand, like rosemary or thyme.

Directions

  1. Preheat the oven to 425°F (220°C). This temperature ensures the chicken cooks perfectly and crisps up nicely.

  2. Pat the chicken thighs dry and place them in a bowl. This step is crucial. Drying them helps the skin become crispy as they roast.

  3. Drizzle with olive oil and season generously with salt, pepper, garlic powder, onion powder, and paprika. Don’t be shy with the seasoning. It really brings out the flavors!

  4. Arrange the chicken thighs on a baking sheet, skin side up if they have skin. Make sure there’s enough space around each piece for even cooking.

  5. Roast in the oven for about 30-35 minutes, or until the chicken reaches an internal temperature of 165°F (75°C) and the top is crispy and golden. Use a meat thermometer for accuracy.

  6. Let rest for a few minutes before serving or using in wraps, salads, or sandwiches. This resting time allows the juices to redistribute, making every bite more flavorful.

Serving

Juicy Crispy Chicken Thighs

To serve these juicy crispy chicken thighs, try plating them family-style on a large platter. Surround them with colorful sides like roasted vegetables, mashed potatoes, or a fresh garden salad. This creates a warm, inviting atmosphere at the dinner table.

Encourage everyone to take what they like. The crispy skin will draw them in, while the tender meat will keep them coming back for more. Remember, mealtime is about connection and joy—these thighs are sure to create wonderful memories.

Storage

Leftovers? No problem! Allow the chicken to cool completely before transferring it to an airtight container. Store it in the fridge for up to 3 days.

To reheat, simply place the chicken thighs on a baking sheet and warm them in a preheated oven at 350°F (175°C) for about 10-15 minutes. This method helps maintain that crispy skin, so you won’t lose any of that wonderful texture.

If you plan on keeping leftovers for longer, you can freeze them as well. Just wrap them tightly in foil and place them in a freezer-safe bag or container. When you’re ready to enjoy them again, thaw in the fridge overnight before reheating.

Kitchen Notes

  • Season Ahead: You can season the chicken thighs the night before and keep them in the fridge. This intensifies the flavors and saves time.
  • Use a Wire Rack: If you have a wire rack, place it on the baking sheet. This allows air to circulate around the chicken, enhancing the crispiness.
  • Try Different Flavors: Experiment with different spices like cayenne for heat or Italian seasoning for a herby touch.
  • Make it a One-Pan Meal: Toss some chopped veggies onto the baking sheet for a complete dinner that saves on dishes!
  • Don’t Skip the Resting: Always let the chicken sit before serving. It’s worth the wait for juicy results.

Variations

Not everyone loves chicken the same way. Here are some tweaks for picky eaters or different diets:

  • Spicy Thighs: Add a teaspoon of cayenne or chili powder for some heat.
  • Herbed Thighs: Mix in fresh herbs like rosemary or thyme with the spices for a fragrant twist.
  • Whole30 or Paleo-Friendly: Use the same spices but substitute olive oil for avocado oil or ghee.
  • Maple Glazed: Brush the chicken with a little maple syrup before roasting for a sweet and savory flavor.
  • Lemon Zest: Add lemon zest to the seasoning mix to brighten the dish, perfect for those who enjoy citrus flavors.

FAQ

1. Can I use boneless chicken thighs?
Yes, boneless thighs will work, but they will cook faster. Check the internal temperature after around 20-25 minutes.

2. What sides pair well with these chicken thighs?
Roasted vegetables, rice, mashed potatoes, or a fresh salad make excellent companions.

3. Can I marinate the chicken?
Absolutely! You can marinate it for a few hours or overnight for even more flavor.

4. Is there a gluten-free option?
This recipe is naturally gluten-free as all the ingredients are gluten-free.

5. How do I know when the chicken is done?
Using a meat thermometer is the best way to check. Aim for 165°F (75°C) for perfectly cooked thighs.

In closing, I hope you find joy in making these juicy crispy chicken thighs for your family. Cooking is not just about feeding our loved ones; it’s about creating moments that bring us closer together. Enjoy each bite, each laugh, and each shared story around the table. Happy cooking!

Juicy Crispy Chicken Thighs

Prep Time 15 minutes
Cook Time 35 minutes
Total Time 50 minutes
Servings 4 servings
Calories 250
Crispy-skinned chicken thighs that remain tender and juicy on the inside, making a perfect family meal any night of the week.

Ingredients

For the Chicken

  • 4 pieces bone-in, skin-on chicken thighs (Choose thighs with a good amount of fat for extra juiciness.)
  • 1 teaspoon salt (Adjust according to salt intake preference.)
  • 1 teaspoon freshly cracked black pepper (Adds a mild kick.)
  • 1 teaspoon garlic powder
  • 1 teaspoon onion powder (Adds depth and sweetness.)
  • 1 teaspoon paprika (Gives color and subtle smokiness.)
  • 2 tablespoons olive oil (Helps to crisp the skin.)

Instructions 

Preparation

  • Preheat the oven to 425°F (220°C).
  • Pat the chicken thighs dry and place them in a bowl.
  • Drizzle with olive oil and season generously with salt, pepper, garlic powder, onion powder, and paprika.
  • Arrange the chicken thighs on a baking sheet, skin side up if they have skin.

Cooking

  • Roast in the oven for about 30-35 minutes, or until the chicken reaches an internal temperature of 165°F (75°C).
  • Let rest for a few minutes before serving.

Notes

Leftovers can be stored in an airtight container in the fridge for up to 3 days. Reheat in a preheated oven at 350°F (175°C) for about 10-15 minutes. For longer storage, freeze the chicken tightly wrapped.
Calories: 250kcal
Course: Dinner, Main Course
Cuisine: American
Keyword: Chicken Thighs, Crispy Chicken, Easy Dinner, Family Meal, Roasted Chicken

Honey Garlic Chicken Breasts

The smell of honey and garlic wafts through the air, creating a warm and inviting atmosphere in your kitchen. You hear the gentle sizzle of chicken breasts cooking, a sound that signals deliciousness is on the way. As you prepare to gather your family around the table, you know that this Honey Garlic Chicken Breasts recipe will not only satisfy their appetites but also fill their hearts with love.

Why This Works

Honey Garlic Chicken Breasts

This recipe is a true winner for busy families. It’s quick, simple, and requires minimal ingredients, yet it packs a flavor punch that everyone will love. With just a little bit of time for marinating, you can transform ordinary chicken breasts into a mouthwatering dish.

Imagine the joy on your family’s faces as they take their first bites. The sweet and savory combination of honey and garlic makes this dish a crowd-pleaser. Not to mention, it works wonderfully for weeknight dinners or even for special occasions. Time-saving and delicious? Sign me up!

Process Overview

“This is where the magic happens—when the aroma fills the kitchen.”

The process is straightforward. You mix a few ingredients to create the marinade, let the chicken soak up those flavors for a little while, then cook it to juicy perfection. The key is in the marinade—this is where the magic happens. Before you know it, you’ll be serving a delightful meal that looks as good as it tastes.

Ingredients

  • 2 chicken breasts
  • 1/4 cup honey
  • 2 cloves garlic, minced
  • 1 tablespoon soy sauce
  • 1 tablespoon olive oil
  • Salt and pepper to taste
  • Rice or vegetables for serving

Here are a few personal tips for each ingredient:

  • Chicken Breasts: Look for fresh, skinless chicken breasts. If they’re thick, consider pounding them to ensure even cooking.
  • Honey: Use a good quality honey for sweeter depth. Local honey is often the best choice.
  • Garlic: Freshly minced garlic adds a punch to the dish. Don’t skip this step!
  • Soy Sauce: Opt for low-sodium soy sauce if you want to keep the salt content in check.
  • Olive Oil: Extra virgin olive oil will provide a lovely flavor.
  • Salt and Pepper: Taste as you go. A little seasoning can make a big difference.
  • Rice or Vegetables: For a quick meal, pre-cooked rice works well. Steam or roast veggies for a nutritious side.

Directions

  1. In a bowl, mix together honey, minced garlic, soy sauce, olive oil, salt, and pepper. Whisk until combined. Remember, this mixture is the star of the dish.
  2. Coat the chicken breasts in the honey garlic mixture and let marinate for at least 30 minutes. If you have more time, marinating longer will deepen the flavors!
  3. Preheat a skillet over medium heat. Cook the marinated chicken breasts for about 5-7 minutes on each side or until cooked through. The sizzling sound tells you they are cooking just right.
  4. Serve with fluffy rice or crisp vegetables. Your family will love how the sauce clings to every bite.

Serving

Honey Garlic Chicken Breasts

To serve this dish family-style, place the chicken breasts on a large platter and drizzle any remaining sauce over them. Pair with a bowl of fluffy rice and freshly steamed vegetables. Allow everyone to help themselves. This encourages connection and conversation at the table, which is what family mealtime is all about.

Storage

Leftover Honey Garlic Chicken can be stored in an airtight container in the fridge for up to 3 days. When reheating, use a microwave for a quick lunch or reheat in a skillet over low heat to retain taste and texture. For longer storage, consider freezing the cooked chicken for up to a month. Just thaw it in the fridge before reheating.

Kitchen Notes

  • Prep Time: To save time, prep the chicken and marinade the night before.
  • Multi-tasking: While the chicken is marinating, get your sides ready to save time.
  • One-skillet Meal: You can cook veggies in the same skillet after the chicken for easy cleanup and extra flavor.
  • Make it Spicy: Add a pinch of red pepper flakes to the marinade for a kick.
  • Double the Recipe: Make extra chicken for meal prep.

Variations

  • For Picky Eaters: If your family is not fond of garlic, you can reduce the amount or replace it with ginger.
  • Gluten-Free: Use tamari instead of regular soy sauce.
  • Paleo-Friendly: Substitute honey with maple syrup.
  • Herbed Chicken: Add fresh herbs like rosemary or thyme to elevate the flavors.
  • Faster Cooking: Cut the chicken into strips for quicker cooking.

FAQ

  1. Can I use chicken thighs instead of breasts?
    Yes, chicken thighs work wonderfully as they are juicy and flavorful.

  2. Can I make this dish ahead of time?
    You can marinate the chicken beforehand and store it in the fridge. Cook it just before serving.

  3. What can I serve with Honey Garlic Chicken?
    It pairs well with rice, noodles, or a fresh salad.

  4. How do I know when the chicken is done?
    The internal temperature should reach 165°F for safe consumption.

  5. Can I use bone-in chicken?
    Yes, but cook times will vary. Adjust your cooking time to ensure they are fully cooked.

As you finish preparing this Honey Garlic Chicken, remember that cooking is not just about food. It’s about creating memories, sharing laughter, and nurturing your loved ones. This dish is not only delicious but also embodies the love you put into every meal. Enjoy it with family, and relish in the joy of sharing good food together.

Honey Garlic Chicken Breasts

Prep Time 30 minutes
Cook Time 15 minutes
Total Time 45 minutes
Servings 4 servings
Calories 350
A quick and delicious recipe featuring marinated chicken breasts cooked in a sweet and savory honey garlic sauce, perfect for busy weeknights or special occasions.

Ingredients

For the marinade

  • 1/4 cup honey (Use a good quality honey for deeper sweetness.)
  • 2 cloves garlic, minced (Freshly minced garlic adds a punch to the dish.)
  • 1 tablespoon soy sauce (Opt for low-sodium if desired.)
  • 1 tablespoon olive oil (Use extra virgin for better flavor.)
  • to taste Salt and pepper (Season according to preference.)

For the main ingredients

  • 2 pieces chicken breasts (Look for fresh, skinless chicken. Pound if thick.)
  • for serving Rice or vegetables (Pre-cooked rice or steamed vegetables are recommended.)

Instructions 

Preparation

  • In a bowl, mix together honey, minced garlic, soy sauce, olive oil, salt, and pepper. Whisk until combined.
  • Coat the chicken breasts in the honey garlic mixture and let marinate for at least 30 minutes.

Cooking

  • Preheat a skillet over medium heat.
  • Cook the marinated chicken breasts for about 5-7 minutes on each side or until cooked through.
  • Serve with rice or vegetables, drizzling any remaining sauce over the chicken.

Notes

Leftover chicken can be stored in an airtight container in the fridge for up to 3 days. For longer storage, freeze cooked chicken for up to a month.
Calories: 350kcal
Course: Dinner, Main Course
Cuisine: American, Family
Keyword: Chicken Breasts, Easy Recipe, Family Meal, Honey Garlic Chicken, Quick Dinner

Huli Huli Chicken translates to "Turn Turn Chicken" in English.

Nothing quite beats the warmth of a kitchen filled with delightful aromas. The sizzle of chicken on the grill brings a symphony of sounds, mingling with the sweet and savory notes of Huli Huli chicken. As the flavors meld together, anticipation builds in our hearts and stomachs. This dish not only delights the palate but also creates a sense of connection at the dinner table, where family gathered to share a meal truly comes alive.

Why This Works

Huli Huli Chicken translates to "Turn Turn Chicken" in English.

Huli Huli chicken is the epitome of a family-friendly dish. It brings people together, creating cherished moments around the table while keeping your weeknight meal prep simple. The marinade tenderizes the chicken and infuses it with flavor, making it a delicious, time-saving choice for busy families. Once you try your hand at Huli Huli chicken, you’ll see why it’s a regular in our dinner rotation.

Process Overview

“This is where the magic happens—when the aroma fills the kitchen.”

The process of making Huli Huli chicken doesn’t just produce a meal; it creates an experience. Marinating the chicken allows the flavors to deepen and develop. And as you grill it, the delightful aroma fills your home, setting the stage for a wonderful family gathering. Let’s dive into what you’ll need.

Ingredients

To whip up this Huli Huli chicken, gather the following ingredients:

  • 4 chicken thighs or breasts: Choose thighs for a juicier option. Breast is leaner but can dry out if overcooked.
  • 1/2 cup soy sauce: A must for that savory base. Opt for low-sodium soy sauce to control the saltiness.
  • 1/4 cup brown sugar: Adds a lovely sweetness and helps caramelize the chicken on the grill.
  • 2 cloves garlic, minced: Fresh garlic infuses the marinade with a robust flavor.
  • 1 tablespoon fresh ginger, grated: This brightens the dish and adds a warming spice.
  • 1 tablespoon sesame oil: Provides a nutty flavor. Add a drizzle over the finished chicken for extra depth.
  • Cooked rice, for serving: A perfect, comforting base for the chicken.
  • Grilled vegetables, for serving: Seasonal veggies like bell peppers or zucchini add color and nutrition.

Directions

  1. In a bowl, whisk together soy sauce, brown sugar, garlic, ginger, and sesame oil to make the marinade. Be sure to mix it well so the sugar dissolves completely.

  2. Add the chicken to the marinade and let it soak for at least 1 hour in the refrigerator. Longer marinating times will produce even tastier results, so don’t hesitate to let it sit for up to 24 hours if time allows.

  3. Preheat the grill to medium-high heat. Ensuring the grill is hot enough will help achieve those beautiful grill marks and sear.

  4. Remove chicken from the marinade and place it on the grill. Discard the used marinade to avoid contamination.

  5. Grill the chicken for about 6-8 minutes on each side, turning once, until fully cooked and caramelized. Keep an eye on it; grilling times may vary depending on your grill and the thickness of your chicken.

  6. Serve the Huli Huli Chicken over cooked rice with grilled vegetables on the side. This creates a colorful, inviting plate that your family will love!

Serving

Huli Huli Chicken translates to "Turn Turn Chicken" in English.

When serving Huli Huli chicken, think family-style. Place the chicken, rice, and grilled vegetables in the center of the table and let everyone serve themselves. This approach not only fosters conversation but also builds a sense of togetherness as you enjoy a delicious meal.

Storage

Once you’ve had your fill, store any leftovers in an airtight container in the fridge. Huli Huli chicken stays fresh for up to three days. When you’re ready to enjoy it again, simply reheat it in the microwave or a frying pan over low heat. If you notice it’s a bit dry, add a splash of chicken broth to keep it juicy.

Kitchen Notes

Here are some helpful shortcuts to streamline your cooking:

  • Marinate a double batch and freeze half for later. Just remember to thaw it in the fridge overnight before grilling.
  • Use a grill pan or broiler if you can’t grill outside. It’ll still yield great flavor.
  • Prep your marinade in advance and store it in the fridge. You’ll cut down on time when it’s time to marinate your chicken.
  • If using skewers for small pieces of chicken, soak them in water for 30 minutes before grilling to prevent burning.
  • Grill extra vegetables while cooking; they make a great addition to salads or sandwiches later in the week.

Variations

Not everyone has the same taste preferences, and that’s okay! Here are some tweaks you can try:

  • For picky eaters: Use less garlic or ginger or skip those ingredients entirely. Serve the marinade on the side for dipping.
  • For a different protein: Substitute chicken with pork tenderloin or shrimp for a delightful change.
  • To keep it plant-based: Swap chicken for firm tofu or tempeh, marinating and grilling just as you would the chicken.
  • For a gluten-free option: Look for gluten-free soy sauce, which is available in most stores.
  • For a spicy kick: Add crushed red pepper flakes or a dash of sriracha to the marinade for heat.

FAQ

1. Can I use frozen chicken?
Yes, you can use frozen chicken. Make sure to thaw it completely before marinating and cooking.

2. What can I serve with Huli Huli chicken?
In addition to rice and grilled veggies, you can serve it with a light salad or coleslaw for extra crunch.

3. How do I know when the chicken is done?
The chicken is done when its internal temperature reaches 165°F. Use a meat thermometer for accuracy.

4. Can I make this recipe in the oven?
Absolutely! Bake the marinated chicken on a lined baking sheet at 375°F for about 25-30 minutes, flipping halfway through.

5. How spicy is Huli Huli chicken?
The recipe as written is not spicy, but you can adjust the heat by adding more ginger or incorporating chili flakes.

Conclusion

As you gather around the table to enjoy your Huli Huli chicken, take a moment to appreciate the flavors and the connections that food can forge. Each bite of this savory dish tells a story—one of warmth, togetherness, and love. Savor the memory-making and the deliciousness of this meal as you create even more fond moments with your family. Happy cooking!

Huli Huli Chicken

Prep Time 1 hour
Cook Time 16 minutes
Total Time 1 hour 16 minutes
Servings 4 servings
Calories 350
Huli Huli chicken is a family-friendly dish that combines savory and sweet flavors, perfect for gatherings around the dinner table.

Ingredients

Chicken and Marinade

  • 4 pieces chicken thighs or breasts (Choose thighs for a juicier option.)
  • 1/2 cup soy sauce (Opt for low-sodium soy sauce to control saltiness.)
  • 1/4 cup brown sugar (Adds sweetness and helps caramelize the chicken.)
  • 2 cloves garlic, minced (Fresh garlic infuses robust flavor.)
  • 1 tablespoon fresh ginger, grated (Brightens the dish and adds warming spice.)
  • 1 tablespoon sesame oil (Provides a nutty flavor.)

Serving Suggestions

  • Cooked rice (A comforting base for the chicken.)
  • Grilled vegetables (Seasonal veggies like bell peppers or zucchini.)

Instructions 

Preparation

  • In a bowl, whisk together soy sauce, brown sugar, garlic, ginger, and sesame oil to make the marinade.
  • Add the chicken to the marinade and let it soak for at least 1 hour in the refrigerator, or up to 24 hours for best results.

Grilling

  • Preheat the grill to medium-high heat.
  • Remove chicken from the marinade and place it on the grill. Discard the used marinade.
  • Grill the chicken for about 6-8 minutes on each side, turning once, until fully cooked and caramelized.

Serving

  • Serve the Huli Huli Chicken over cooked rice with grilled vegetables on the side.

Notes

Store any leftovers in an airtight container in the fridge. Huli Huli chicken stays fresh for up to three days. Reheat in the microwave or frying pan; add chicken broth if dry.
Calories: 350kcal
Course: Dinner, Main Course
Cuisine: Hawaiian
Keyword: BBQ Chicken, Family Dinner, Grilled Chicken, Huli Huli Chicken, Marinade

Huli Huli Chicken

Imagine stepping into a kitchen filled with the enticing aroma of sweet and savory grilled chicken. The sizzle of chicken on the grill creates an inviting sound that draws family and friends. As the warmth of the grill sends out delicious scents, it’s hard not to feel excitement for the meal ahead.

Why This Works

Huli Huli Chicken

Huli Huli Chicken is more than just a meal; it’s a family experience. The blend of flavors in the marinade brings a taste of Hawaii to your dinner table. With just a few ingredients, you can have this flavorful dish ready in no time.

The best part? It’s an excellent way to bond with loved ones. You can prep the marinade together, letting kids help mix, or set them up to be the taste-testers. Moreover, this recipe is great for busy schedules. You can marinate the chicken in the morning and throw it on the grill in the evening. It saves time without sacrificing flavor, leaving you free to enjoy quality time with those you love.

Process Overview

“This is where the magic happens—when the aroma fills the kitchen.”

When the marinade combines, flavors meld together, creating a deliciously vibrant dish. You can almost taste the sweetness of the brown sugar against the saltiness of the soy sauce. Add in the zing of ginger and garlic, and you’ve got a hit on your hands.

Ingredients

To make Huli Huli Chicken, you’ll need:

  • 4 chicken thighs
  • 1/2 cup soy sauce
  • 1/4 cup brown sugar
  • 1/4 cup pineapple juice
  • 2 tablespoons ginger, grated
  • 1 tablespoon garlic, minced
  • 1 tablespoon sesame oil
  • 1 teaspoon black pepper
  • 2 green onions, chopped (for garnish)

Lily’s Tips:

  • Chicken thighs: Opt for bone-in, skin-on thighs for the juiciest results. They won’t dry out as quickly as chicken breast.
  • Soy sauce: Use low-sodium soy sauce to control the saltiness without sacrificing flavor.
  • Brown sugar: Dark brown sugar gives a deeper flavor profile. Feel free to use light brown if you prefer a milder taste.
  • Pineapple juice: Fresh pressed juice adds an extra fruity kick, but bottled works too for convenience.
  • Ginger and garlic: Use fresh if possible. These two ingredients really elevate the dish and add a homemade touch.

Directions

  1. In a bowl, mix soy sauce, brown sugar, pineapple juice, ginger, garlic, sesame oil, and black pepper to create the marinade. This is a fun step—let the kids help stir!

  2. Add the chicken thighs to the marinade, cover, and refrigerate for at least 2 hours or overnight for better flavor. Overnight is best, but even two hours will allow the flavors to infuse.

  3. Preheat the grill to medium-high heat. This keeps your chicken cooking evenly, giving it that nice char without burning.

  4. Remove chicken from marinade and grill for 6-8 minutes on each side, or until fully cooked and charred. Listen for that sizzling sound—it’s music to your ears!

  5. Transfer to a plate, garnish with chopped green onions, and serve. Everyone will love the beautiful presentation and fantastic flavor.

Serving

Huli Huli Chicken

When serving Huli Huli Chicken, think family-style. Place the whole platter in the center of the table, allowing everyone to serve themselves. This not only encourages sharing but also turns dinner into a communal experience.

Consider serving it with coconut rice for a tropical touch or a simple side salad to balance the flavors. Fresh fruit salad or grilled veggies also pair beautifully.

Storage

If you happen to have leftovers, no problem! Store the chicken in an airtight container in the refrigerator for up to three days. Reheat in the oven at 350°F until warmed through, about 15-20 minutes. You can also reheat it on the grill for a nice char and preserve that smoky flavor.

Kitchen Notes

  • Use a zip-top bag for marinating. It allows for easy mixing and takes up less space in the fridge.
  • If you’re short on time, a quick 30-minute marinate will still offer great flavor.
  • Utilize your grill’s indirect heat for more even cooking.
  • Don’t discard the marinade. You can simmer it for a few minutes to make a tasty sauce to drizzle over the chicken.
  • Clean the grill before starting to avoid any sticking.

Variations

Not everyone has the same tastes. Here are a few ideas to tweak this recipe:

  • Picky eaters: Substitute chicken thighs for chicken breasts. The result is equally delicious but leaner.
  • Gluten-free: Swap the soy sauce for gluten-free tamari.
  • Spicy kick: Add red pepper flakes or a bit of sriracha to the marinade.
  • Pineapple chunks: Grill some pineapple alongside the chicken for a fun and fruity side.
  • Vegan option: Replace chicken with firm tofu. Marinate and grill until nicely charred.

FAQ

Q1: Can I use boneless chicken?
A1: Yes, boneless chicken will work! Reduce grilling time to about 4-6 minutes on each side.

Q2: How can I make this dish in the oven?
A2: Preheat your oven to 375°F. Place marinated chicken thighs in a baking dish and bake for 35-40 minutes, basting with marinade halfway.

Q3: Can I grill frozen chicken?
A3: It’s best to thaw chicken before grilling for even cooking.

Q4: What can I serve with Huli Huli chicken?
A4: Coconut rice, grilled vegetables, or a fresh salad are great accompaniments.

Q5: How do I know when the chicken is cooked?
A5: Chicken is fully cooked when it reaches an internal temperature of 165°F. Use a meat thermometer for accuracy.

In conclusion, Huli Huli Chicken isn’t just a recipe; it’s an invitation to create wonderful memories with family. Whether it’s the joyous sound of laughter filling the air as you grill or the heartening smiles around the dinner table, this dish brings people together. Take a moment to enjoy the experience, and let the flavors transport you to a tropical paradise. Happy cooking!

Huli Huli Chicken

Prep Time 2 hours
Cook Time 16 minutes
Total Time 2 hours 16 minutes
Servings 4 servings
Calories 300
A delightful Hawaiian dish featuring sweet and savory marinated grilled chicken, perfect for family gatherings and busy schedules.

Ingredients

Marinade

  • 1/2 cup soy sauce (Use low-sodium for less saltiness.)
  • 1/4 cup brown sugar (Dark brown sugar offers a richer flavor.)
  • 1/4 cup pineapple juice (Fresh pressed juice adds extra flavor.)
  • 2 tablespoons ginger, grated (Use fresh ginger for best flavor.)
  • 1 tablespoon garlic, minced (Fresh garlic enhances taste.)
  • 1 tablespoon sesame oil
  • 1 teaspoon black pepper

Chicken

  • 4 pieces chicken thighs (Bone-in, skin-on thighs are recommended.)

Garnish

  • 2 tablespoons green onions, chopped (For garnish.)

Instructions 

Preparation

  • In a bowl, mix soy sauce, brown sugar, pineapple juice, ginger, garlic, sesame oil, and black pepper to create the marinade.
  • Add the chicken thighs to the marinade, cover, and refrigerate for at least 2 hours or overnight for better flavor.

Cooking

  • Preheat the grill to medium-high heat.
  • Remove chicken from marinade and grill for 6-8 minutes on each side, or until fully cooked and charred.
  • Transfer to a plate, garnish with chopped green onions, and serve.

Notes

When serving, place the platter in the center of the table for family-style dining. Pair with coconut rice or a fresh salad. Store leftovers in an airtight container for up to three days.
Calories: 300kcal
Course: Dinner, Main Course
Cuisine: Hawaiian
Keyword: Family Meal, Grilled Chicken, Hawaiian Recipe, Huli Huli Chicken, Marinated Chicken