Tag

Mexican Cuisine

Browsing

Easy Creamy White Chicken Enchiladas

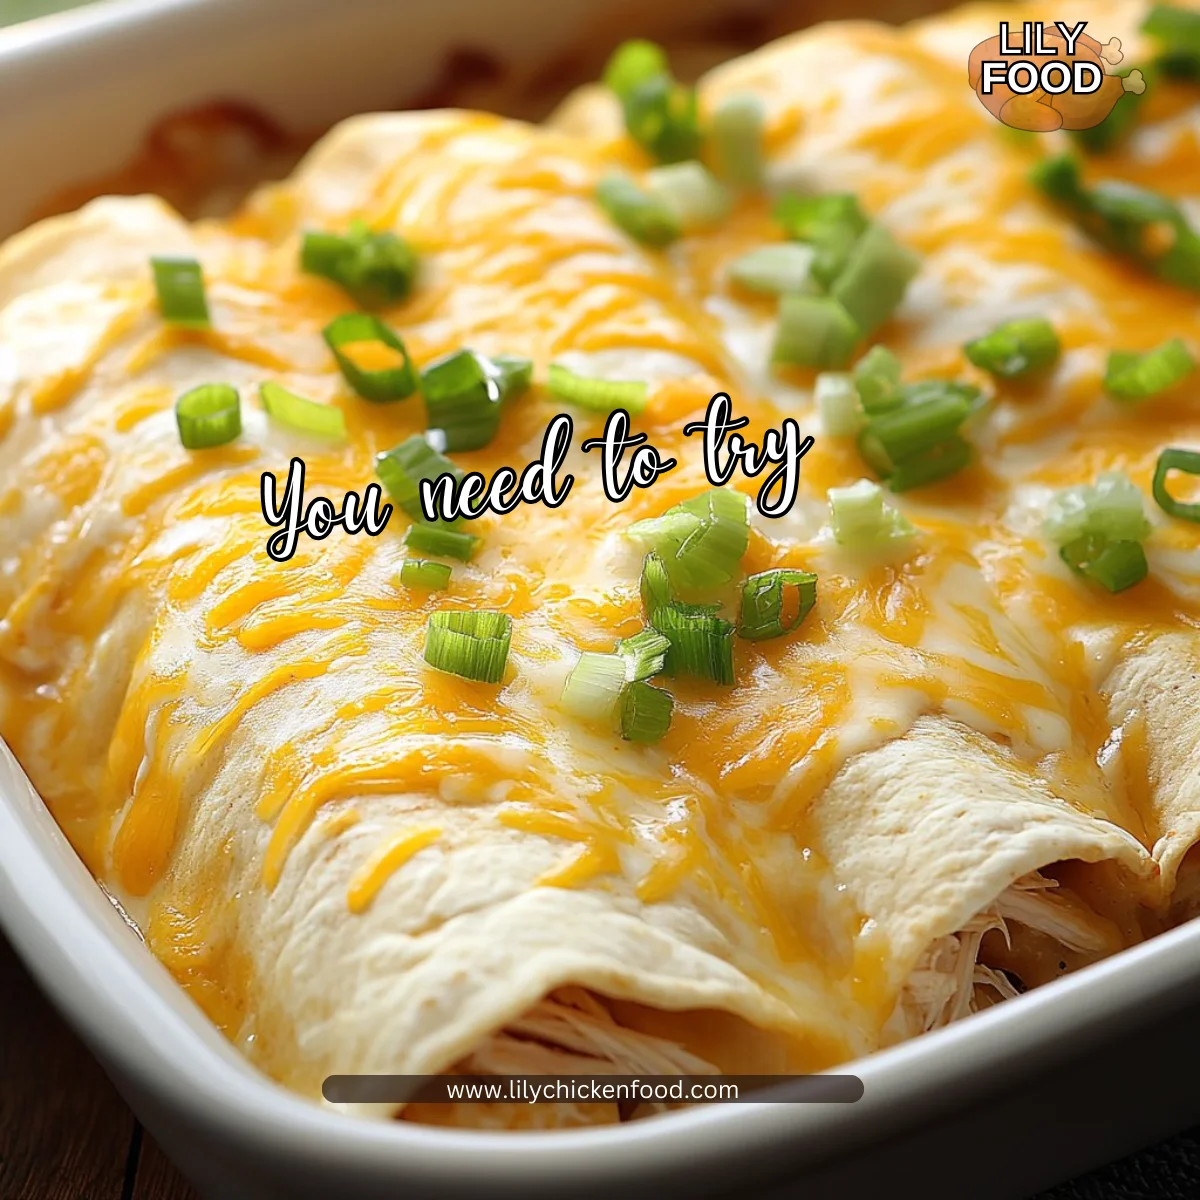
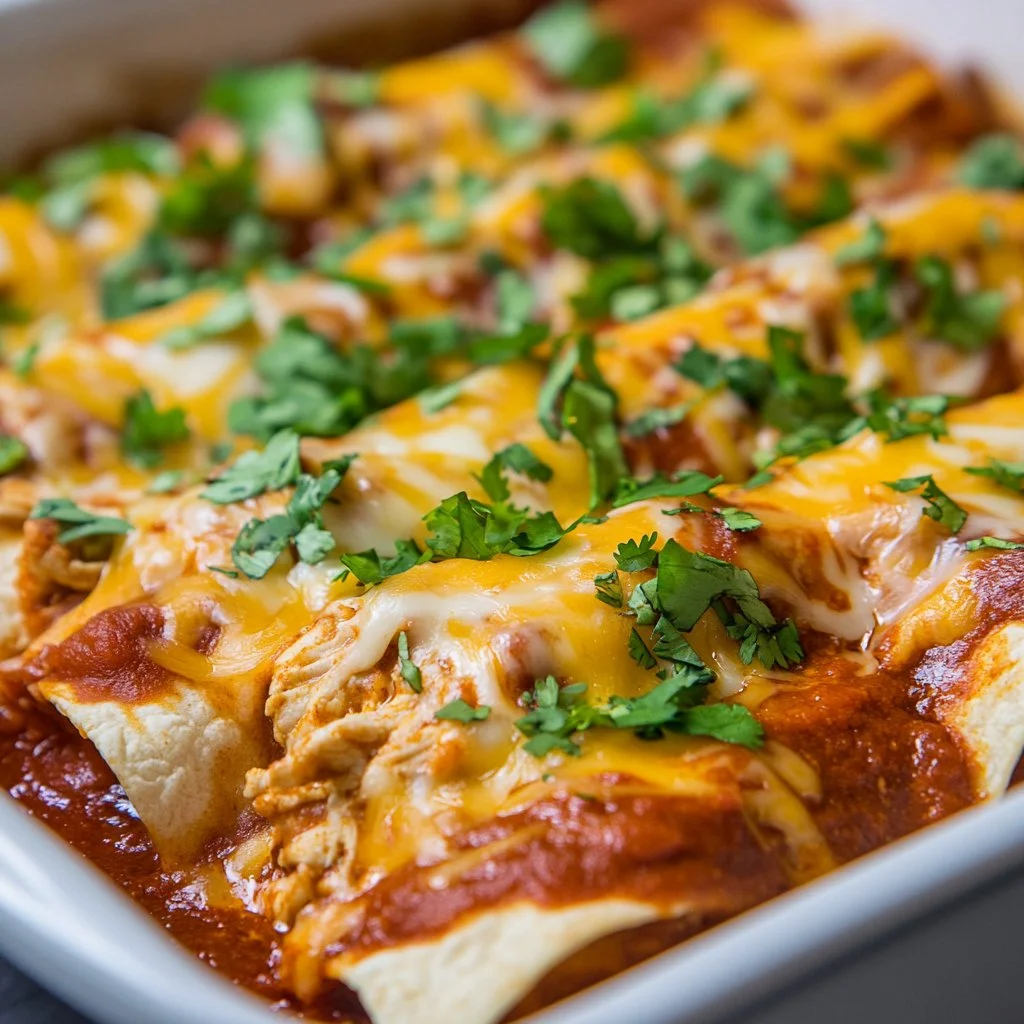
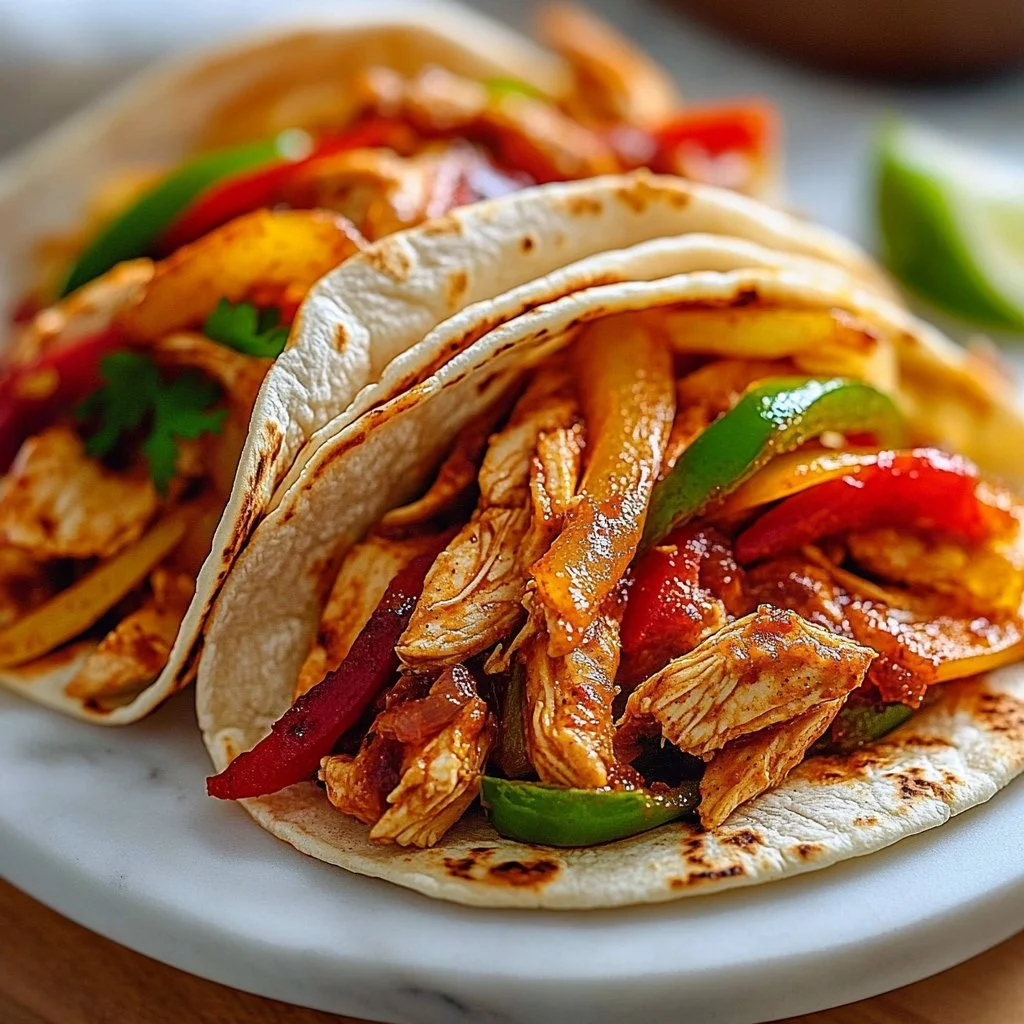
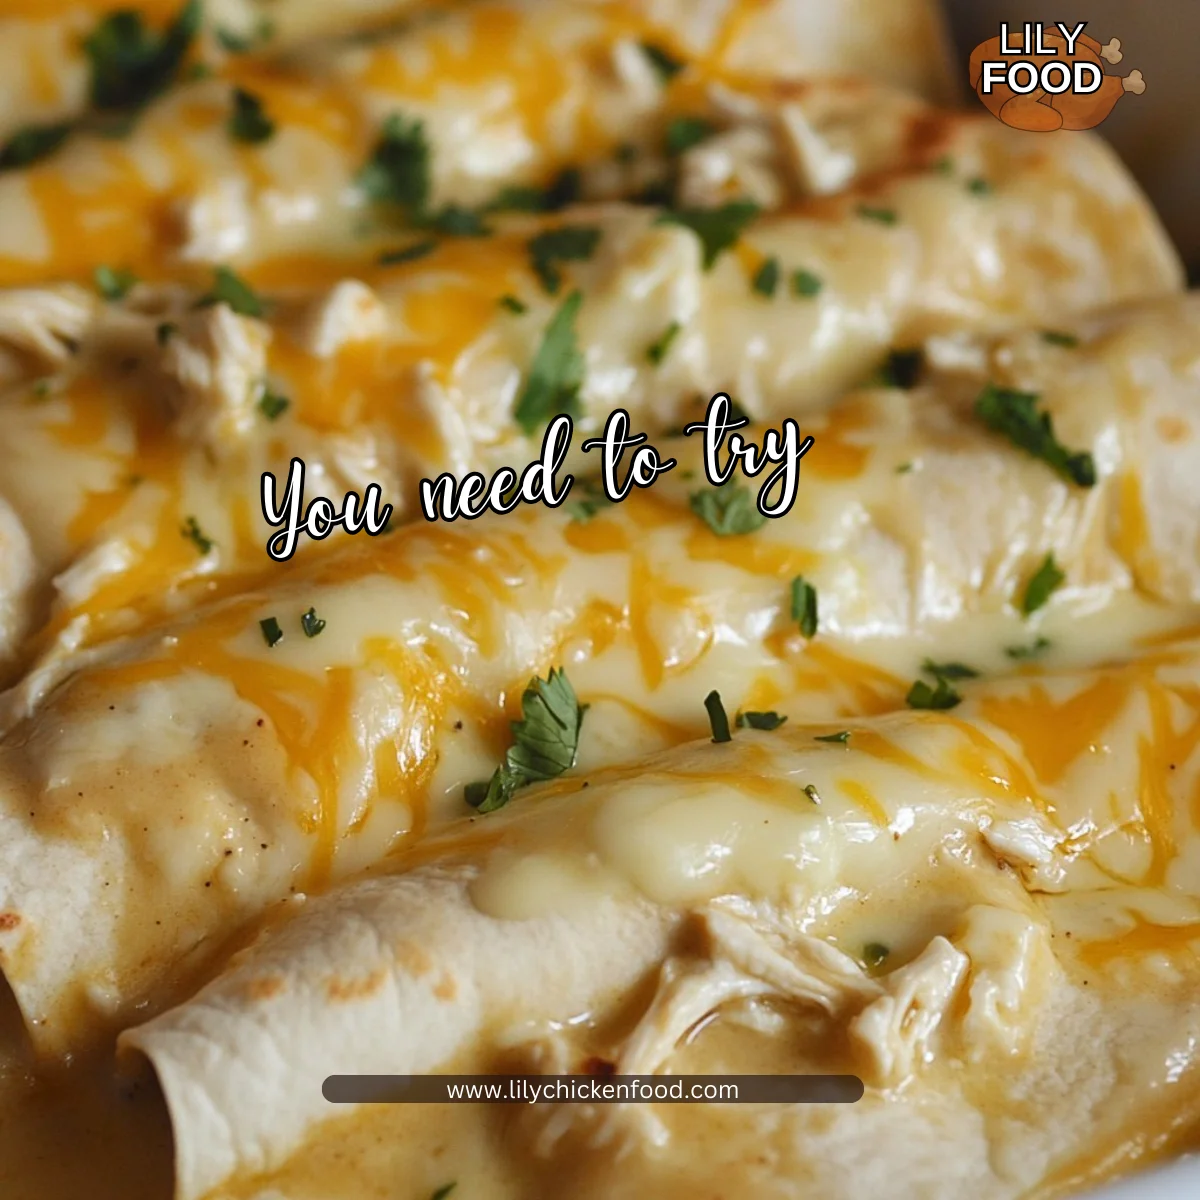
There’s something special about stepping into a kitchen filled with the warm scent of buttery goodness, spices, and creamy comfort. The sounds of sizzling, stirring, and laughter blend together to create a symphony that feels like home. Today, I’m excited to share an easy recipe for creamy white chicken enchiladas with you. This dish is as delightful to make as it is to enjoy; it is perfect for family gatherings or a cozy weeknight dinner.

Why This Works

Easy Creamy White Chicken Enchiladas

These enchiladas are a true time-saver, making dinner more enjoyable without the hassle. They can be assembled quickly and pop into the oven while you wrap up your day. Using rotisserie chicken cuts down your prep time, leaving you with more moments to spend with your loved ones. Creamy and cheesy with just the right amount of seasoning, these enchiladas are sure to bring smiles all around the table.

Process Overview

“This is where the magic happens—when the aroma fills the kitchen.”

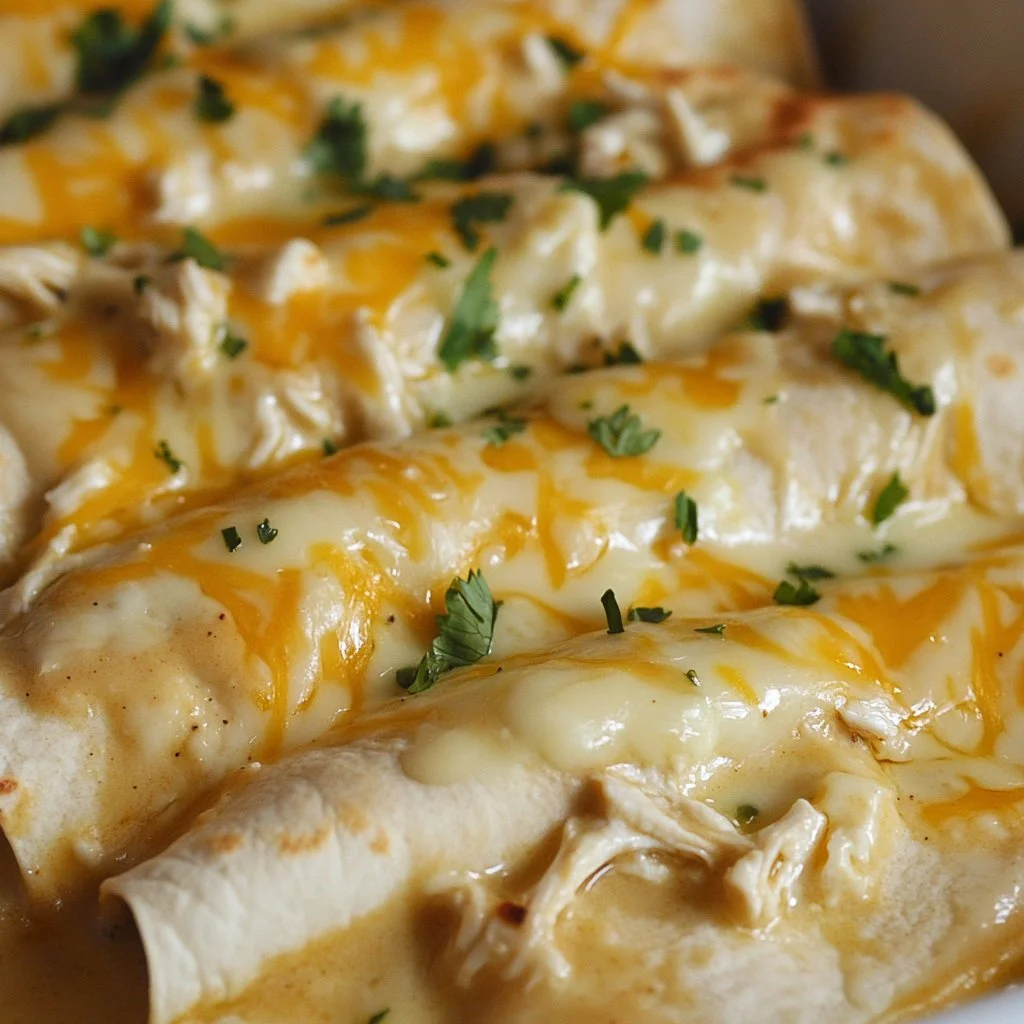
As you cook, the kitchen will come alive. The gentle bubbling of the sauce, the melting of cheese, and the warmth enveloping every bite create a cozy atmosphere. Let’s dive into the wonderful process of making these creamy white chicken enchiladas together.

Ingredients

Here’s what you’ll need for these scrumptious enchiladas:

  • 8 flour tortillas (soft taco size): Choose fresh ones for the best taste.
  • 3 cups shredded chicken (I use rotisserie): Saves time and adds flavor.
  • 2 cups shredded Monterey Jack cheese (or Pepper Jack): Creamy, melty goodness.
  • 4 ounces softened cream cheese: Adds richness—let it sit at room temperature for easy mixing.
  • 2 tsp garlic powder: A must-have for that lovely aroma.
  • 3 tbsp butter: For a rich, flavorful sauce.
  • 3 tbsp flour: Helps thicken the sauce perfectly.
  • 1 tbsp taco seasoning (NOT the whole packet): Just enough to add a kick.
  • 1 (14.5oz) can of chicken broth (2 cups): A flavorful base for the sauce.
  • 3/4 cup sour cream: Creamy delight that pulls the dish together.
  • 1 (4oz) can of diced green chiles: Optional, but it adds a wonderful flavor.

Directions

Ready to cook? Here’s how to make these easy creamy white chicken enchiladas:

  1. Preheat the oven to 350°F and grease a 9×13 baking dish. This is your cozy baking space.

  2. In a medium-size bowl, mix the chicken with the cream cheese, garlic powder, and HALF of the shredded cheese (about 1 cup). This combination is unbeaten. The creamy texture will make rolling the enchiladas easy.

  3. Evenly stuff the mixture into your flour tortillas and place them into your prepared pan. Don’t worry if they get a little messy; it’s all part of the fun.

  4. In a saucepan over medium heat, melt the butter and then stir in the flour and taco seasoning. Cooking the flour helps get rid of the raw taste.

  5. Add the chicken broth and whisk until smooth; allow the mixture to heat up for a few minutes until warm. It will start to smell fantastic and thicken a bit.

  6. Add 1/2 a cup of the shredded cheese and whisk until well incorporated. This is where the creaminess begins.

  7. Stir in the sour cream and can of chiles; whisk for just a minute or until the sour cream is completely dissolved, but do not allow it to boil. Keep an eye on this—you’re almost there!

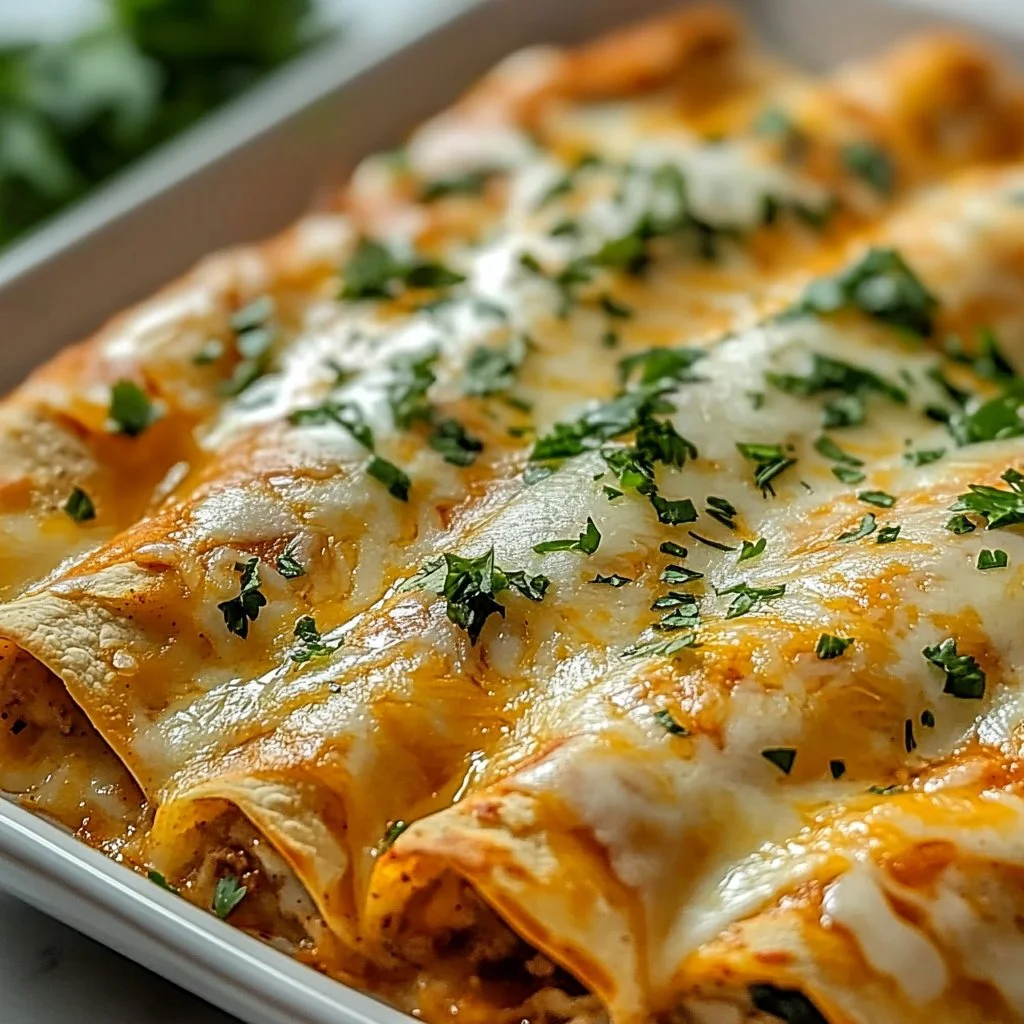
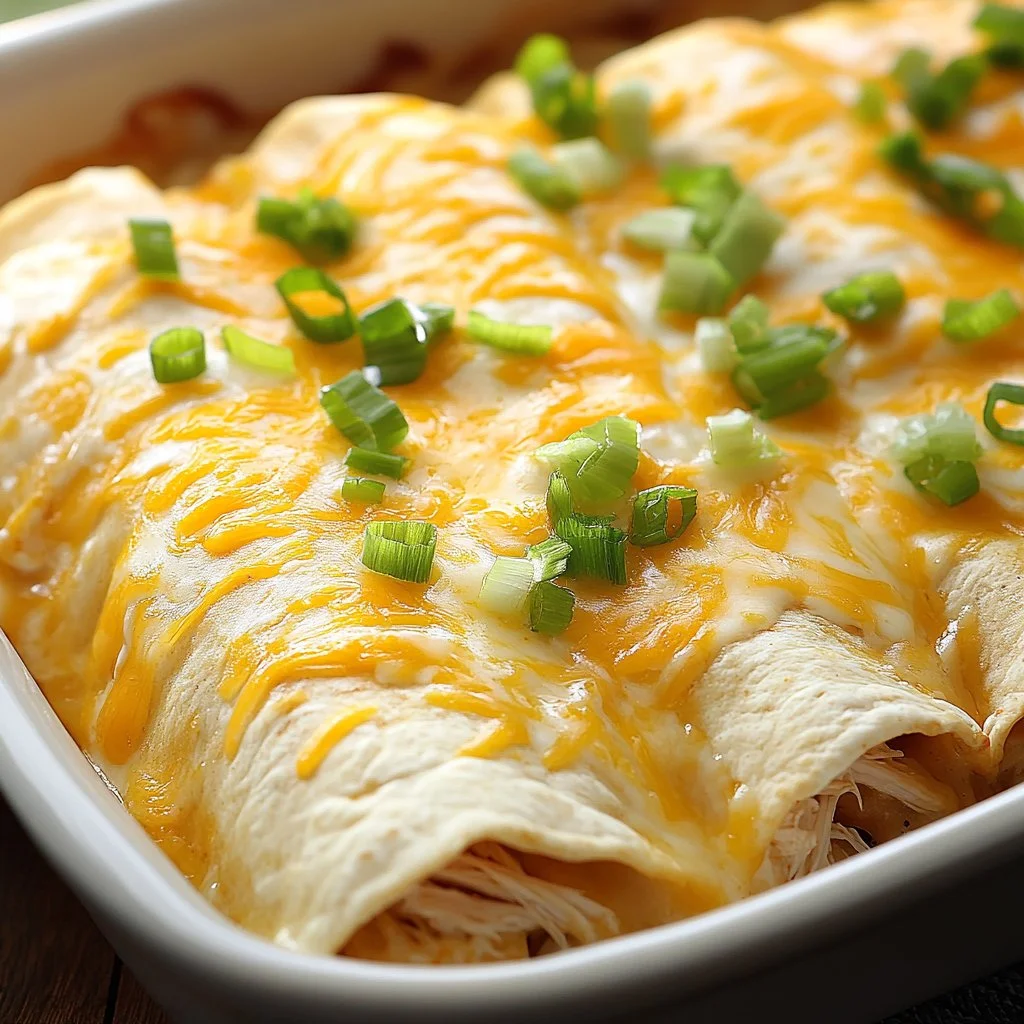
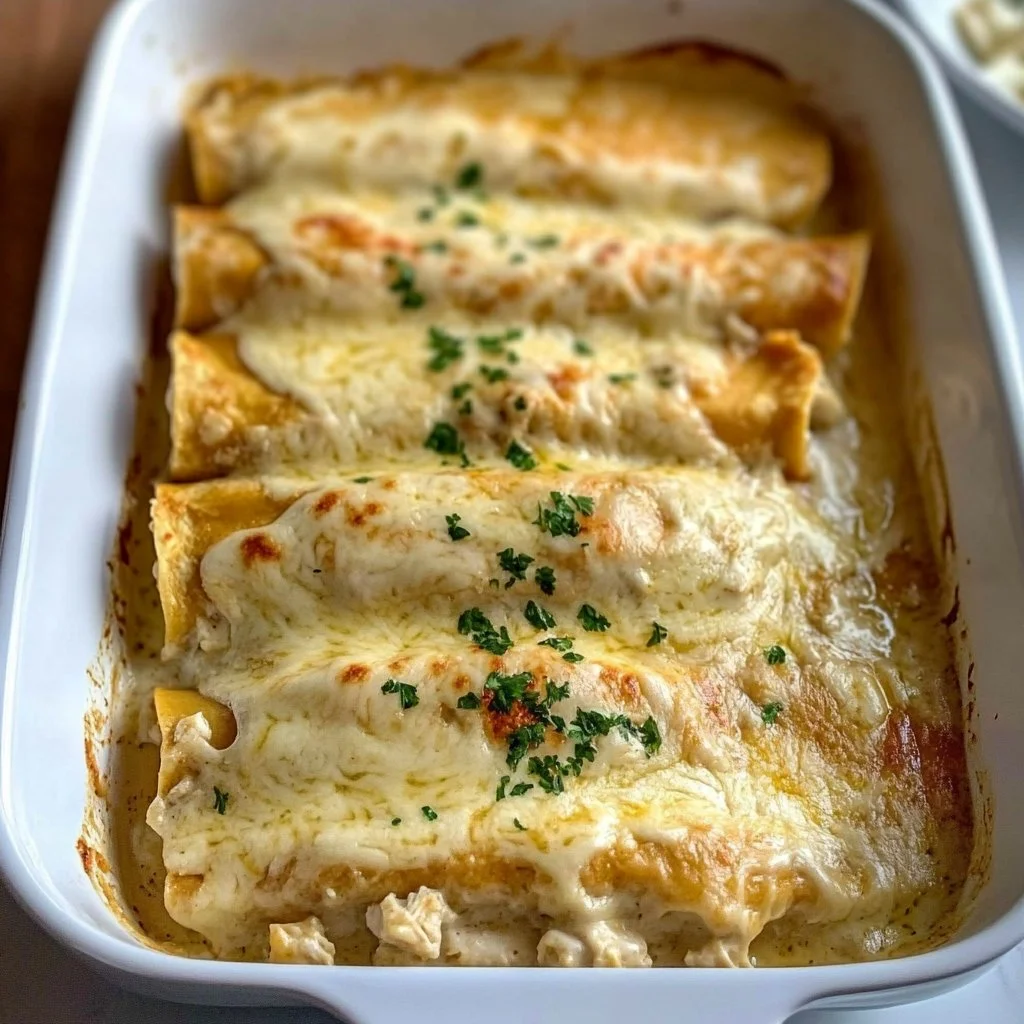
  8. Pour the sauce over the enchiladas and top with the remaining cheese. Look at that gooey goodness!

  9. Bake for 22-25 minutes and then switch the broiler on for a few minutes to brown the cheese. This is where the magic really happens—it will bubble and turn golden!

The adults in the family like to serve these with hot sauce. Refried beans and Spanish rice are also delicious on the side. You’ll find that this dish is a crowd-pleaser.

Serving

Easy Creamy White Chicken Enchiladas

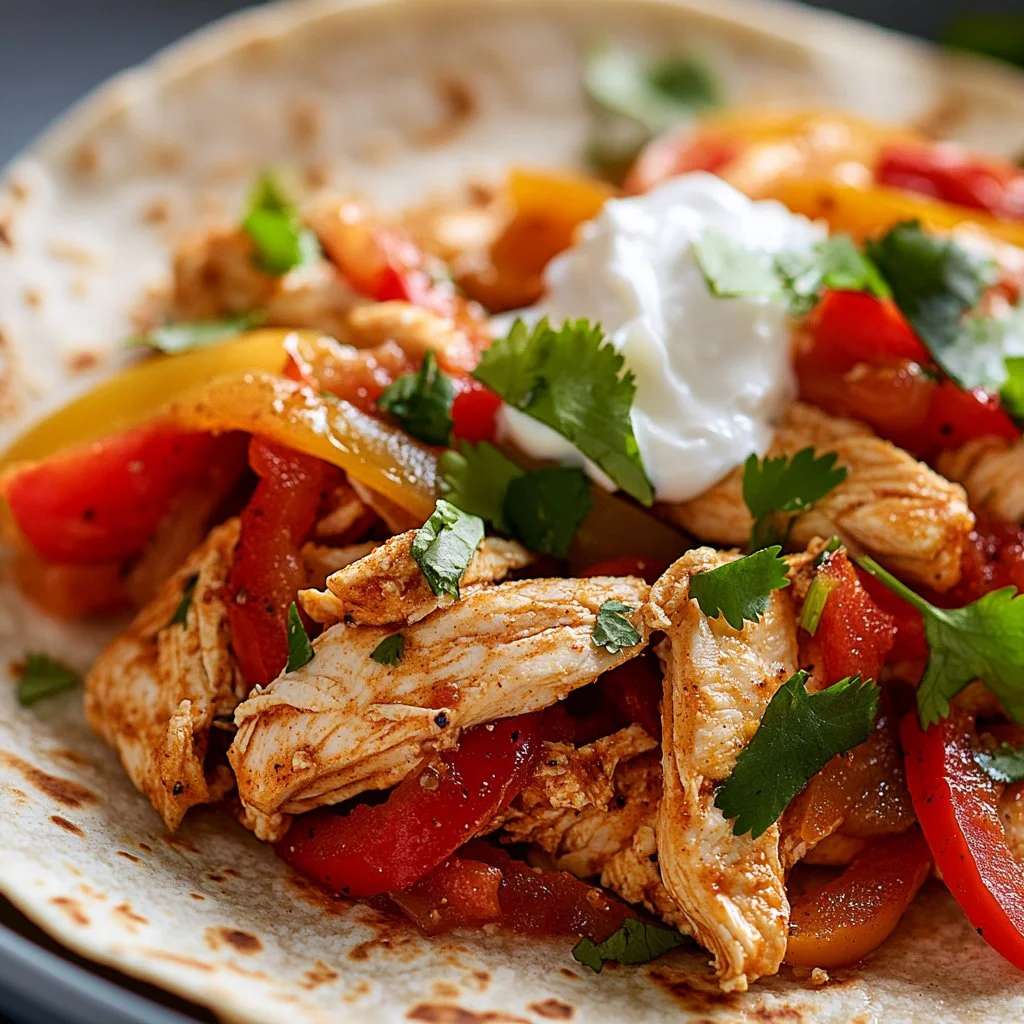
Serve these creamy white chicken enchiladas family-style. Just place the dish in the center of the table and let everyone dig in. You can garnish with some fresh cilantro or even a squeeze of lime for a zesty touch. Pair with your favorite sides for a complete meal.

Storage

Leftovers? No problem! Allow the enchiladas to cool completely before covering them tightly with foil or transferring them to an airtight container. They will keep well in the fridge for up to 3 days. When you’re ready to enjoy them again, simply reheat in the oven at 350°F until heated through. You can also pop them in the microwave for a quicker option, though the oven will help keep that wonderful crispy topping intact.

Kitchen Notes

Here are a few shortcuts to make your cooking even easier:

  • Use store-bought rotisserie chicken—it saves time and adds flavor.
  • Prepare the filling ahead of time and let it sit in the fridge until you’re ready to assemble.
  • Use pre-shredded cheese; it saves time and ensures a perfectly melted topping.
  • If you’re tight on time, consider using flour tortillas from a store. Fresh ones taste great, but the ones in the freezer section work in a pinch.
  • Don’t hesitate to double the recipe. They freeze well and make for a great future meal.

Variations

If you have picky eaters or want to adapt for different diets, here are some tweaks:

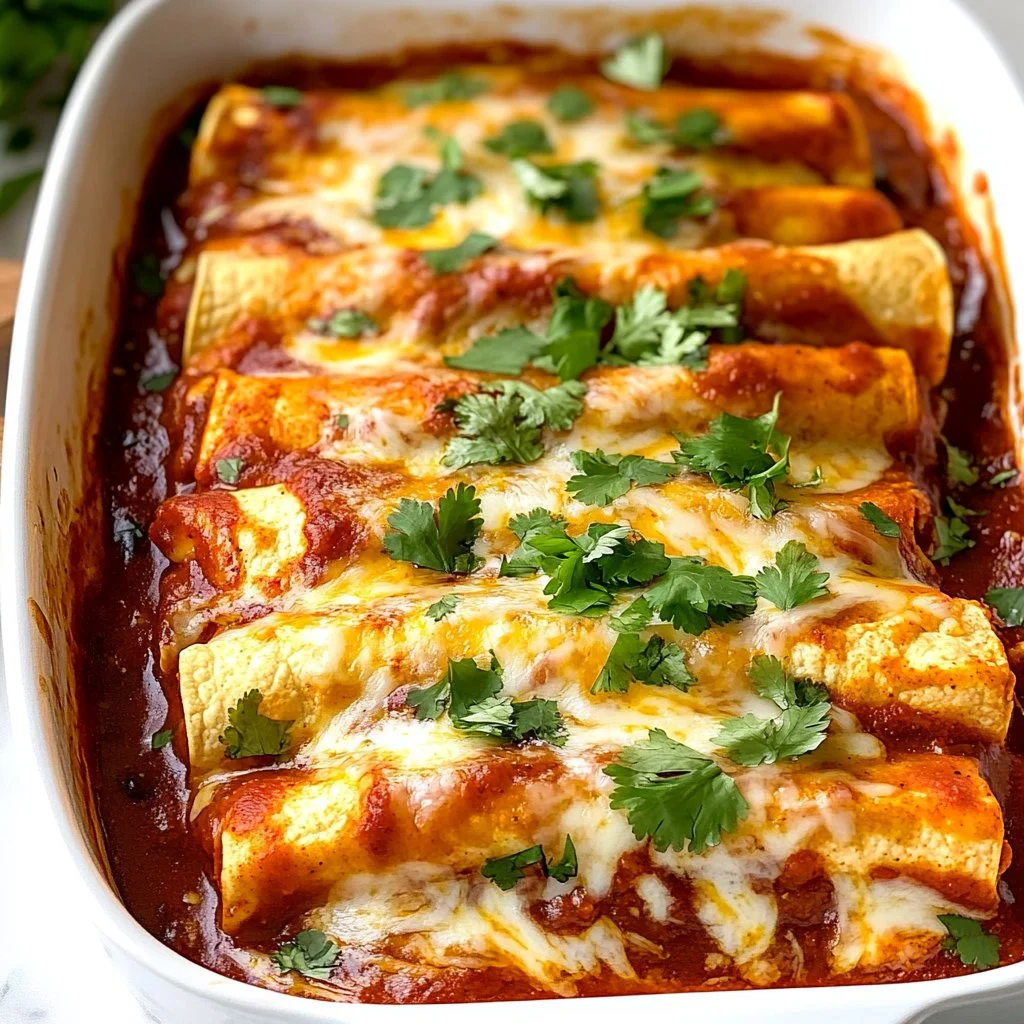
  • For spice lovers: Add some diced jalapeños or a dash of hot sauce to the filling.
  • For a vegetarian option: Replace the chicken with black beans or sautéed veggies.
  • Dairy-free: Use dairy-free alternatives for cheese and sour cream.
  • For kids: Leave out the green chiles and spice and serve with their favorite side dishes.
  • Gluten-free: Opt for gluten-free tortillas and adjust your flour in the sauce accordingly.

FAQ

  1. Can I freeze these enchiladas?
    Yes, they freeze very well. Just make sure they are completely cooled and use an airtight container.

  2. Can I use corn tortillas instead of flour?
    Absolutely, but you may want to soften them before rolling to prevent cracking.

  3. What is a good side dish to serve with these?
    Refried beans and Spanish rice are great options. You can also serve a fresh salad.

  4. Can I make this dish ahead of time?
    Yes, you can prepare everything and assemble it in advance, then bake when you’re ready.

  5. How can I make this dish spicier?
    You can add more taco seasoning or some chopped green chiles to the filling for an extra kick.

In closing, I hope these easy creamy white chicken enchiladas bring joy to your table. They’re a delicious way to gather family and friends, creating memories over a comforting meal. Enjoy the process, embrace the aromas, and above all, savor each delightful bite. Happy cooking!

Creamy White Chicken Enchiladas

Prep Time 15 minutes
Cook Time 30 minutes
Total Time 45 minutes
Servings 6 servings
Calories 450
A delightful and creamy dish that brings comfort and smiles to your family dinner table.

Ingredients

Main Ingredients

  • 8 pieces flour tortillas (soft taco size) (Choose fresh ones for the best taste.)
  • 3 cups shredded chicken (rotisserie) (Saves time and adds flavor.)
  • 2 cups shredded Monterey Jack cheese (or Pepper Jack) (Creamy, melty goodness.)
  • 4 ounces softened cream cheese (Adds richness; let it sit at room temperature for easy mixing.)
  • 2 teaspoons garlic powder (A must-have for that lovely aroma.)

Sauce Ingredients

  • 3 tablespoons butter (For a rich, flavorful sauce.)
  • 3 tablespoons flour (Helps thicken the sauce perfectly.)
  • 1 tablespoon taco seasoning (Just enough to add a kick.)
  • 1 can chicken broth (14.5oz; 2 cups) (A flavorful base for the sauce.)
  • 3/4 cup sour cream (Creamy delight that pulls the dish together.)
  • 1 can diced green chiles (4oz) (Optional; adds wonderful flavor.)

Instructions 

Preparation

  • Preheat the oven to 350°F and grease a 9x13 baking dish.
  • In a medium-size bowl, mix the chicken with the cream cheese, garlic powder, and HALF of the shredded cheese (about 1 cup).
  • Evenly stuff the mixture into your flour tortillas and place them into your prepared pan.

Cooking

  • In a saucepan over medium heat, melt the butter and then stir in the flour and taco seasoning.
  • Add the chicken broth and whisk until smooth; allow the mixture to heat up for a few minutes until warm.
  • Add 1/2 a cup of the shredded cheese and whisk until well incorporated.
  • Stir in the sour cream and can of chiles; whisk for just a minute or until the sour cream is completely dissolved, but do not allow it to boil.
  • Pour the sauce over the enchiladas and top with the remaining cheese.
  • Bake for 22-25 minutes and then switch the broiler on for a few minutes to brown the cheese.

Notes

Allow leftovers to cool completely before covering them tightly or transferring to an airtight container. They will keep well in the fridge for up to 3 days. Reheat in the oven at 350°F for best results.
Calories: 450kcal
Course: Dinner, Main Course
Cuisine: Comfort Food, Mexican
Keyword: Chicken Enchiladas, Comfort Food, Creamy Enchiladas, Easy Dinner, Family Recipe

Chicken Enchiladas

There’s something special about the smell of chicken enchiladas wafting through the kitchen. You know that sound—the bubbling of sauce, the sizzling of melted cheese, and the gentle hum of family chatter. As soon as dinner is near, the whole house fills with warmth, anticipation, and the promise of a delicious meal.

Chicken enchiladas are more than just a recipe; they are a family tradition. They bring us together, create joyful memories, and are loved by both young and old alike. Here is how to make them easily and satisfyingly.

Why This Works

Chicken Enchiladas

Chicken enchiladas are a perfect dish for busy families. With a little prep, you can assemble everything in one evening and let the oven do its magic. These enchiladas are comforting, filling, and ready in about 30 minutes from start to finish.

You can easily scale the recipe up for larger gatherings or small enough for an intimate family dinner. They are versatile; serve them with toppings your family enjoys, making meal times both enjoyable and personal.

Process Overview

“This is where the magic happens—when the aroma fills the kitchen.”

Making chicken enchiladas is a step-by-step journey that anyone can follow. You mix, fill, and bake, allowing all those wonderful flavors to blend together. I can assure you that the time spent preparing these enchiladas will be worth every minute when you see the joy on your family’s faces.

Ingredients

Here’s what you will need:

  • 2 cups cooked shredded chicken
  • 8 flour tortillas
  • 1 cup shredded cheese (cheddar or Monterey Jack)
  • 1 cup sour cream
  • 1 can cream of chicken soup
  • 1/2 cup chicken broth
  • 1 teaspoon garlic powder
  • 1 teaspoon onion powder
  • Salt and pepper to taste
  • Chopped green onions for garnish

Lily’s Personal Tips:

  • Chicken: I use rotisserie chicken for convenience. It saves time and adds flavor.
  • Tortillas: Flour tortillas are soft and easy to roll. They hold the filling well.
  • Cheese: Choose your family’s favorite cheese to make it even more enjoyable.
  • Soup: Cream of chicken soup adds richness. Try low-fat options if you’re looking for a lighter dish.
  • Broth: This will thin out the sauce. You can use homemade broth for extra flavor.

Directions

  1. Preheat your oven to 350°F (175°C).

    • This step ensures everything cooks evenly.
  2. In a mixing bowl, combine shredded chicken, garlic powder, onion powder, salt, and pepper.

    • Mix well to ensure the chicken is seasoned throughout.
  3. In a separate bowl, mix together sour cream, cream of chicken soup, and chicken broth until smooth.

    • Make sure it’s creamy; this will be the sauce that makes your enchiladas divine.
  4. Take a tortilla, fill it with a portion of the chicken mixture, and sprinkle some cheese, then roll it up and place it seam-side down in a greased baking dish.

    • Don’t overfill the tortillas to prevent spills.
  5. Repeat with all tortillas and fill the baking dish.

    • Arrange them snugly for an appealing presentation.
  6. Pour the remaining sour cream mixture over the top of the enchiladas and sprinkle with the remaining cheese.

    • This is what will make your enchiladas come out bubbly and golden.
  7. Bake in the preheated oven for 20-25 minutes or until bubbly and golden.

    • Keep an eye on them. You want a nice golden color, not burnt.
  8. Garnish with chopped green onions before serving.

    • The fresh green onions add a lovely touch to the dish.

Serving

Chicken Enchiladas

When it comes time to serve, place the baking dish in the center of the table. This meal is best enjoyed family-style. Allow everyone to serve themselves, making it a fun and engaging experience. Pair these enchiladas with a simple salad or some Mexican rice to round out the meal.

Don’t forget to keep a few extra toppings nearby, like salsa, guacamole, or additional cheese. These can elevate the meal even further and cater to individual tastes.

Storage

Leftovers can be stored in an airtight container in the refrigerator for up to 3 days. When reheating, place them in the oven at 350°F (175°C) to maintain that creamy texture. If the enchiladas seem dry, drizzle with a bit of chicken broth or water before covering with foil to help keep them moist as they heat.

Kitchen Notes

  • Use Pre-Cooked Chicken: Rotisserie chicken or even leftover chicken works best and saves time.
  • Prep Ahead: Assemble the enchiladas ahead of time and store them in the fridge until you’re ready to bake.
  • Frozen Option: You can freeze them unbaked. Just wrap well and bake from frozen, adding an extra 10-15 minutes to the bake time.
  • Double the Batch: This recipe doubles easily, so make more for family gatherings.
  • Microwave Method: If you’re short on time, you can microwave your assembled enchiladas. Cover with a damp paper towel and heat in intervals.

Variations

  • Vegetarian Option: Substitute the chicken with black beans, sautéed bell peppers, and zucchini for a delicious veggie version.
  • Spicy Twist: Add diced jalapeños to the chicken mixture for an extra kick.
  • Different Sauces: Use green enchilada sauce instead of the creamy mixture if you prefer a spicier, more traditional flavor.
  • Cheese Choices: Try pepper jack cheese for a spicier bite.
  • Gluten-Free Tortillas: Use corn tortillas for those with gluten sensitivities.

FAQ

  1. Can I make enchiladas ahead of time?
    Yes, you can prepare and assemble them a day in advance, then bake when ready to serve.

  2. What can I serve with chicken enchiladas?
    They pair well with Mexican rice, beans, guacamole, or a fresh salad.

  3. Can I use a different type of meat?
    Absolutely, shredded beef or turkey work just as well.

  4. How do I keep my tortillas from falling apart?
    Warm the tortillas in a hot skillet for a few seconds or in the microwave for a few seconds to make them more pliable.

  5. Are these enchiladas freezer-friendly?
    Yes! Assemble them uncooked, wrap tightly, and freeze.

As you finish making these chicken enchiladas, take a moment to appreciate what you’ve created. Gathering around the table with loved ones to enjoy a hearty meal is what home is all about. With every bite, you’re not just sharing food but moments and memories that will last a lifetime. Enjoy!

Chicken Enchiladas

Prep Time 10 minutes
Cook Time 25 minutes
Total Time 35 minutes
Servings 6 servings
Calories 300
Easy and satisfying chicken enchiladas that blend comforting flavors and create joyful family memories.

Ingredients

Main Ingredients

  • 2 cups cooked shredded chicken (Rotisserie chicken is convenient.)
  • 8 pieces flour tortillas (Soft and easy to roll.)
  • 1 cup shredded cheese (cheddar or Monterey Jack) (Use your family's favorite cheese.)
  • 1 cup sour cream
  • 1 can cream of chicken soup (Adds richness; low-fat options available.)
  • 1/2 cup chicken broth (Thin out the sauce, homemade recommended.)
  • 1 teaspoon garlic powder
  • 1 teaspoon onion powder
  • to taste Salt and pepper
  • as needed Chopped green onions for garnish (Add a fresh touch.)

Instructions 

Preparation

  • Preheat your oven to 350°F (175°C).
  • In a mixing bowl, combine shredded chicken, garlic powder, onion powder, salt, and pepper. Mix well.
  • In a separate bowl, mix together sour cream, cream of chicken soup, and chicken broth until smooth.

Assembly

  • Take a tortilla, fill it with a portion of the chicken mixture, sprinkle some cheese, roll it up and place it seam-side down in a greased baking dish.
  • Repeat with all tortillas and fill the baking dish snugly.
  • Pour the remaining sour cream mixture over the top and sprinkle with the remaining cheese.

Baking

  • Bake in the preheated oven for 20-25 minutes or until bubbly and golden.
  • Garnish with chopped green onions before serving.

Notes

Leftovers can be stored in an airtight container for up to 3 days. When reheating, place in the oven at 350°F (175°C).
Calories: 300kcal
Course: Dinner, Main Course
Cuisine: Mexican
Keyword: Chicken Enchiladas, Comfort Food, Easy Dinner, Family Meal, quick recipe

Chicken Enchiladas with Homemade Red Enchilada Sauce

The warm, inviting scents of spices and roasted chicken fill the air. As you enter the kitchen, you hear a gentle simmering sound coming from the stove. It’s the beginning of an exciting family dinner—homemade Chicken Enchiladas with Red Enchilada Sauce. The combination of savory shredded chicken and cheesy goodness wrapped in soft tortillas brings back memories of family gatherings centered around hearty meals and happy conversations.

Time spent in the kitchen is more than just cooking; it’s about making memories with those you love. This recipe is perfect for a cozy family dinner or a weekend gathering with friends.

Why This Works

Chicken Enchiladas with Homemade Red Enchilada Sauce

This Chicken Enchiladas recipe shines for its simplicity and heartiness. With just a few ingredients and little time, you can create a dish that feels like a celebration. Your family will relish the vibrant flavors of homemade red enchilada sauce paired with tender tortillas.

The best part? This recipe is designed to save you time. You can prep the enchiladas ahead and pop them in the oven when it’s time to eat. It makes dinner rush more manageable, leaving you with extra moments to spend with your loved ones.

Process Overview

“This is where the magic happens—when the aroma fills the kitchen.”

Making these enchiladas is a delightful journey through layers of flavor. You start with preparing a savory red enchilada sauce that will coat your chicken and tortillas in a glorious, rich flavor. Then you’ll assemble the enchiladas with swirling motions of joy. Finally, a beautiful layer of cheese melts over the top, creating a golden crust that everyone will love.

Ingredients

Here’s what you’ll need to make delicious Chicken Enchiladas:

  • 2 cups cooked shredded chicken
    Tip: You can use leftover rotisserie chicken to save time and enhance the flavor.

  • 8 flour tortillas
    Tip: Choose larger tortillas for easier rolling; they hold more fillings!

  • 2 cups grated cheese (cheddar or Monterey Jack)
    Tip: Mixing half cheddar and half Monterey Jack elevates the flavor and texture.

  • 1 can (15 oz) tomato sauce
    Tip: Look for no-salt-added options if you’re watching your sodium intake.

  • 2 tablespoons chili powder
    Tip: Adjust the amount to your taste—add more for extra warmth!

  • 1 teaspoon cumin
    Tip: Purchasing whole cumin seeds and grinding them fresh gives a deeper flavor.

  • 1 teaspoon garlic powder
    Tip: You can substitute with fresh garlic if you prefer a stronger garlic taste.

  • 1 teaspoon onion powder
    Tip: Use finely chopped onions for added texture and sweetness.

  • Salt and pepper to taste
    Tip: Taste your sauce before adding salt; the cheese adds flavor too.

  • 1/4 cup chopped cilantro (optional)
    Tip: Cilantro adds a refreshing brightness; you can also use parsley as an alternative.

  • Sour cream (for serving, optional)
    Tip: A dollop of sour cream balances the spiciness and adds creaminess.

Directions

  1. Preheat the oven to 350°F (175°C).
    This sets the stage for baking those enchiladas to perfection.

  2. In a saucepan, combine the tomato sauce, chili powder, cumin, garlic powder, onion powder, salt, and pepper. Simmer for 10 minutes to create the enchilada sauce.
    Allow the spices to bloom, filling your kitchen with a delightful aroma.

  3. Spread a thin layer of the enchilada sauce on the bottom of a baking dish.
    This prevents the tortillas from sticking and adds flavor to the base of your dish.

  4. In each tortilla, place a portion of shredded chicken, cheese, and a spoonful of enchilada sauce. Roll up the tortillas and place them seam-side down in the baking dish.
    Fill them generously—the more flavor, the better!

  5. Pour the remaining enchilada sauce over the top and sprinkle with more cheese.
    The layer of cheese creates a beautiful golden crust while keeping everything moist.

  6. Cover with foil and bake for 20 minutes, then remove the foil and bake for an additional 10 minutes until bubbly and golden.
    The process transforms the dish into a creamy, comforting delight.

  7. Garnish with chopped cilantro and serve hot with sour cream if desired.
    A sprinkle of cilantro just before serving makes the dish look vibrant and inviting.

Serving

Chicken Enchiladas with Homemade Red Enchilada Sauce

When it comes to serving Chicken Enchiladas, think family-style. Place the baking dish at the center of the table and let everyone help themselves. Accompany the dish with bowls of sour cream, additional cheese, and chopped cilantro for personal customization. Enjoy the lively chatter and laughter around the table, as everyone delights in their very own cheesy enchilada creation.

Storage

For leftovers, let the enchiladas cool completely before storing them in an airtight container in the fridge. They can be kept for up to 3 days. When you want to reheat, place them uncovered in the oven at 350°F for about 15-20 minutes. For individual portions, a microwave works too, but the oven gives a better texture on the cheese.

Kitchen Notes

  • Shredded chicken shortcut: Buy pre-cooked or rotisserie chicken.
  • Make ahead: Assemble the enchiladas, cover, and refrigerate before baking—perfect for busy nights.
  • Frozen enchiladas: You can freeze assembled enchiladas for up to 3 months. Just add extra time when baking from frozen.
  • Sauce substitutions: Store-bought enchilada sauce can save time if you’re in a pinch.
  • One pot wonder: Consider using a large skillet to prepare the sauce and bake the enchiladas in the same pot for easier cleanup.

Variations

  • Vegetarian: Substitute chicken with black beans or sautéed vegetables like bell peppers and zucchini.
  • For the kiddos: Swap out the spices in the sauce for mild seasoning, making it friendly for little ones. Use cheese only in the filling if you need to tone down the flavors.
  • Gluten-free: Use corn tortillas in place of flour tortillas for a gluten-free alternative.
  • Extra spicy: Add diced jalapeños into the filling or increase the chili powder for more heat.

FAQ

1. Can I use other types of meat?
Yes! Ground beef, pork, or turkey all work wonderfully as substitutes.

2. How can I make the sauce smoother?
You can blend the sauce ingredients before simmering for a smoother texture.

3. Can I double this recipe?
Absolutely! Just ensure to use a larger baking dish and adjust cooking time slightly.

4. What’s the best way to reheat leftovers?
The oven gives the best fluffy texture, but microwaving is a quick alternative.

5. Can I prep this meal the day before?
Yes! Assemble everything and refrigerate until you are ready to bake it the next day.

As you create these Chicken Enchiladas with Homemade Red Enchilada Sauce, remember, it’s more than just a meal. It brings warmth, love, and togetherness to your table. These recipes become part of your family’s story, nurturing both body and soul. Happy cooking!

Chicken Enchiladas

Prep Time 20 minutes
Cook Time 30 minutes
Total Time 50 minutes
Servings 8 servings
Calories 350
A hearty and flavorful recipe for Chicken Enchiladas with homemade red enchilada sauce, perfect for family dinners.

Ingredients

Main Ingredients

  • 2 cups cooked shredded chicken (You can use leftover rotisserie chicken to save time.)
  • 8 pieces flour tortillas (Choose larger tortillas for easier rolling.)
  • 2 cups grated cheese (cheddar or Monterey Jack) (Mixing half cheddar and half Monterey Jack elevates the flavor.)
  • 1 can (15 oz) tomato sauce (Look for no-salt-added options if you’re watching your sodium intake.)
  • 2 tablespoons chili powder (Adjust the amount to your taste.)
  • 1 teaspoon cumin (Purchasing whole cumin seeds and grinding them fresh gives a deeper flavor.)
  • 1 teaspoon garlic powder (You can substitute with fresh garlic for a stronger taste.)
  • 1 teaspoon onion powder (Use finely chopped onions for added texture.)
  • to taste Salt and pepper (Taste your sauce before adding salt.)
  • 1/4 cup chopped cilantro (optional) (Cilantro adds brightness; parsley can be used as an alternative.)
  • Sour cream (for serving, optional) (Balances the spiciness and adds creaminess.)

Instructions 

Preparation

  • Preheat the oven to 350°F (175°C).
  • In a saucepan, combine the tomato sauce, chili powder, cumin, garlic powder, onion powder, salt, and pepper. Simmer for 10 minutes to create the enchilada sauce.
  • Spread a thin layer of the enchilada sauce on the bottom of a baking dish.
  • In each tortilla, place a portion of shredded chicken, cheese, and a spoonful of enchilada sauce. Roll up the tortillas and place them seam-side down in the baking dish.
  • Pour the remaining enchilada sauce over the top and sprinkle with more cheese.
  • Cover with foil and bake for 20 minutes, then remove the foil and bake for an additional 10 minutes until bubbly and golden.
  • Garnish with chopped cilantro and serve hot with sour cream if desired.

Notes

For leftovers, let the enchiladas cool completely before storing in an airtight container. They can be kept for up to 3 days. Reheat uncovered in the oven at 350°F for about 15-20 minutes. You can freeze assembled enchiladas for up to 3 months. Consider using a large skillet to prepare the sauce and bake in the same pot for easier cleanup.
Calories: 350kcal
Course: Dinner, Main Course
Cuisine: Mexican
Keyword: Chicken Enchiladas, Comfort Food, Enchilada Sauce, Family Dinner, Hearty Meal

Chicken Al Pastor

I can still smell it now. The sweet tang of pineapple mingling with warm spices, the sizzle as the chicken hits the hot grill. The kitchen fills with that cozy, familiar sound that tells everyone dinner is almost ready.

This Chicken Al Pastor recipe is about more than flavor. It is about easy prep and joyful family meals. If you like bright, bold tacos that assemble quickly, you will love this. I often serve it alongside a quick salad like my avocado chicken salad when I want a green side. It keeps dinner simple and happy.

Why this works

Chicken Al Pastor

Chicken Al Pastor hits the sweet spot between fast and flavorful. The pineapple juice tenderizes the meat while adding brightness. A little apple cider vinegar balances the sweetness and helps the spices sink in.

This recipe saves time without losing depth of flavor. Marinate once, cook quickly, and serve family-style. If you need other easy weeknight chicken ideas, try my balsamic baked chicken breast for a different but equally simple dinner.

It is also very forgiving. You can marinate a short time or overnight and still get great results. That flexibility makes it perfect for busy evenings and small celebrations.

Process Overview

“This is where the magic happens—when the aroma fills the kitchen.”

The process is straightforward. Mix a bright, spiced marinade, let the chicken soak up the flavor, then grill. Finish with quick grilled pineapple and assemble warm tacos.

If you like step-by-step pictures or similar marinades, I have a post that walks through a few helpful techniques with simple swaps in case you are short on ingredients. See my avocado chicken egg salad post for ideas on cutting time without losing taste.

This method is kid-friendly and adaptable. You can pull apart the cooked chicken for tacos, bowls, or salads. It pairs well with plain rice or charred corn for picky eaters.

Ingredients

  • 2 lbs chicken thighs
  • 1 cup pineapple juice
  • 1/4 cup apple cider vinegar
  • 2 tablespoons olive oil
  • 2 tablespoons adobo sauce
  • 1 tablespoon chili powder
  • 1 tablespoon cumin
  • 1 teaspoon smoked paprika
  • Salt and pepper to taste
  • 1 cup fresh pineapple, chopped
  • Corn tortillas for serving
  • Toppings: onion, cilantro, lime

Lily’s personal tips for toppings:

  • Onion: Finely dice a small white onion and soak for 5 minutes in cold water if raw onion is too strong for your kids. This softens the bite while keeping crunch.
  • Cilantro: Chop it just before serving to keep the color and fresh flavor. If your family does not love cilantro, try chopped parsley for a mild alternative.
  • Lime: Cut wedges and let everyone squeeze to taste. A little lime brightens every bite and invites the whole family to customize.

If you want a lower sodium option, reduce added salt and use low-sodium adobo or rinse canned sauces. For a glaze-like finish, reserve a tablespoon of marinade, boil it briefly, and brush it on the chicken in the last minute of grilling.

For more ways to use leftover shredded chicken in salads and wraps, check my avocado chicken salad lettuce wraps post.

Directions

  1. In a bowl, mix pineapple juice, apple cider vinegar, olive oil, adobo sauce, chili powder, cumin, smoked paprika, salt, and pepper.

    • Take a moment to whisk everything well. This is your flavor base, and a good mix means even seasoning. If you have little helpers, let them add the spices while you stir.
  2. Marinate the chicken in the mixture for at least 30 minutes, preferably overnight.

    • Overnight gives the best flavor and tenderness. If you only have 30 minutes, that still works. Place the bowl in the fridge, or use a resealable bag to save space.
  3. Preheat the grill and cook the chicken until fully cooked, about 6-7 minutes per side.

    • Aim for medium-high heat so the outside chars slightly while the inside stays juicy. Use a meat thermometer if you like; the safe internal temperature is 165°F. Trust your grill, but check early the first time you try this recipe.
  4. Remove chicken from grill and let it rest before slicing.

    • Rest for 5 minutes to keep juices locked inside. Resting makes the slices tender and easier for little hands to pick up.
  5. Grill the fresh pineapple chunks until caramelized.

    • Use the same grill for quick char and juice. Pineapple takes 1 to 2 minutes per side on hot grates. The caramel adds a lovely sweet note that kids and grownups both enjoy.
  6. Serve the sliced chicken in corn tortillas with grilled pineapple and desired toppings.

    • Warm the tortillas on the grill or in a dry skillet for a minute per side. Lay everything out family-style and let everyone build their own tacos. This is a fun way to get kids engaged in dinner.

If you like pulled or chopped chicken, slice and toss with a few spoonfuls of leftover marinade that you boiled for safety. That keeps extra flavor while you assemble tacos.

Serving

Chicken Al Pastor

Serve Chicken Al Pastor family-style on a big platter. Arrange the sliced chicken, grilled pineapple, warm corn tortillas, and bowls of toppings. Let everyone build their own tacos. This keeps the meal casual and lets each person pick what they like.

For sides, a simple cabbage slaw or warm beans works well. If you want a green salad, my Asian chicken cranberry salad pairs beautifully and adds crunch.

Set out small plates, napkins, and lime wedges. The kids will love stacking pineapple with chicken, and adults will enjoy the bright acidity of the lime. Keep extra salsa and hot sauce on the table for people who like more heat.

Storage

Refrigerator: Store cooled chicken in an airtight container for up to 4 days. Keep the grilled pineapple in a separate container to avoid soggy chicken. Tortillas will stay good in a sealed bag for a few days.

Freezer: You can freeze cooked, sliced chicken for up to 3 months. Place it in a freezer-safe bag, squeeze out excess air, and label it with the date.

Reheating: Reheat gently to keep the chicken moist. Use a skillet over medium heat with a splash of oil or a few tablespoons of water and a lid to steam. You can also reheat in a 350°F oven for 10 to 12 minutes. Avoid high heat microwaving for long stretches because it can dry the chicken.

If you stored the pineapple, warm it briefly in a skillet before serving to bring back some of the caramelized flavor.

Kitchen Notes

  • Make extra marinade for bowls and leftovers by saving a small portion and boiling it for a minute before use.
  • For faster prep, butterfly and flatten the thighs so they cook evenly in less time.
  • Use boneless, skinless chicken thighs for the most tender results and quick grilling.
  • If you do not have a grill, a hot cast iron skillet gives a great sear. Finish in the oven if needed.
  • To keep tortillas soft, wrap them in a clean kitchen towel after warming and place in a low oven until ready to serve.

Variations

  • For picky eaters: Serve the unseasoned chicken on the side for those who prefer plain meat. Offer pineapple and toppings separately.
  • For a lighter option: Use boneless, skinless chicken breasts and reduce marinating time. Watch closely to avoid dryness.
  • For a keto-friendly plate: Skip the tortillas and serve chicken and pineapple over a bed of greens with avocado.
  • For smoky flavor: Add a touch of chipotle powder or use smoked paprika on the pineapple for more depth.
  • For an oven-friendly method: Roast marinated chicken on a sheet pan at 425°F for 18 to 20 minutes, turning once, until the internal temperature reaches 165°F.

FAQ

Q: Can I use chicken breasts instead of thighs?
A: Yes. Chicken breasts work fine. They cook faster, so watch them closely and check internal temperature to avoid drying.

Q: How long can I marinate the chicken?
A: You can marinate for 30 minutes to 24 hours. Longer gives more flavor, but over 24 hours can break down the meat too much.

Q: Is adobo sauce spicy?
A: Adobo sauce has a rich, smoky flavor and moderate heat. Start with less if you are sensitive to spice and add more after tasting.

Q: Can I make this inside on a stovetop?
A: Absolutely. Use a hot cast iron skillet and follow the same cooking times roughly. Finish in a 375°F oven if needed to reach 165°F.

Q: How do I make this kid-friendly?
A: Serve toppings on the side and offer plain tortillas or rice. Let kids build simple tacos with chicken and a little pineapple first, and add toppings as they like.

Conclusion

I hope this Chicken Al Pastor recipe brings warmth and ease to your table. It has been a favorite at our house for weeknights and weekend gatherings because it combines bright, family-friendly flavors with simple prep. If you want a quick, smoky take inspired by a fast casual favorite, check out this menu option from Chipotle’s Chicken al Pastor – Limited Time Only to compare flavors and ideas. For a tasty oven or sheet pan version, I also recommend this helpful recipe from Sheet Pan Chicken al Pastor (for Tacos, Burritos, and More!) which adapts well when you need a hands-off method.

Thanks for cooking with me. Gather around the table, let everyone build their own tacos, and enjoy the friendly chatter that comes with a meal made at home.

Chicken Al Pastor

Prep Time 30 minutes
Cook Time 20 minutes
Total Time 50 minutes
Servings 4 servings
Calories 350
A flavorful and easy Chicken Al Pastor recipe featuring marinated chicken thighs grilled to perfection, served with grilled pineapple and tacos, perfect for family meals.

Ingredients

For the Marinade

  • 1 cup pineapple juice
  • 1/4 cup apple cider vinegar
  • 2 tablespoons olive oil
  • 2 tablespoons adobo sauce
  • 1 tablespoon chili powder
  • 1 tablespoon cumin
  • 1 teaspoon smoked paprika
  • to taste Salt and pepper

For Grilling

  • 2 lbs chicken thighs (Boneless, skinless preferred)
  • 1 cup fresh pineapple, chopped
  • for serving Corn tortillas

Toppings

  • Onion (Finely diced, soak in cold water for mildness)
  • Cilantro (Chopped fresh before serving)
  • Lime (Cut into wedges)

Instructions 

Preparation

  • In a bowl, mix pineapple juice, apple cider vinegar, olive oil, adobo sauce, chili powder, cumin, smoked paprika, salt, and pepper.
  • Whisk everything well to combine for even seasoning.
  • Marinate the chicken in the mixture for at least 30 minutes, preferably overnight.

Cooking

  • Preheat the grill and cook the chicken for about 6-7 minutes per side until fully cooked.
  • Remove chicken from grill and let it rest for 5 minutes before slicing.
  • Grill the fresh pineapple chunks for 1-2 minutes per side until caramelized.
  • Serve the sliced chicken in corn tortillas with grilled pineapple and desired toppings.

Notes

Serve Chicken Al Pastor family-style for a casual dining experience. Store leftovers in airtight containers in the refrigerator for up to 4 days, or freeze for up to 3 months.
Calories: 350kcal
Course: Dinner, Main Course
Cuisine: Mexican
Keyword: Chicken Al Pastor, Family Meal, Grilled Chicken, Tacos, Weeknight Dinner

Easy Crockpot Chicken Fajitas

I can still remember the first time my kitchen smelled like slow-cooked peppers and warm spices. The sizzle of onions as I sliced them and the steady hum of the crockpot felt like the soundtrack of a busy, happy household. This Easy Crockpot Chicken Fajitas recipe has become a staple in my family for those evenings when everyone needs dinner and I need simplicity.

If you like fast weeknight solutions, take a peek through my quick and easy chicken category for more meals that feel homemade with very little fuss. This recipe is forgiving, family-friendly, and perfect for busy nights or relaxed weekends when you want to let the crockpot do the work.

Why this works

Easy Crockpot Chicken Fajitas

There are three simple reasons this recipe is a keeper. First, the crockpot does the heavy lifting. You get tender, shreddable chicken without watching a pot or tending a pan.

Second, the ingredients are pantry-friendly. You likely have a can of diced tomatoes and a fajita seasoning packet on hand. Third, the whole family loves it. Kids like the mild flavors, and adults can add toppings to suit their tastes.

If you need more crowd-pleasers for weeknights, try my roundup of the best 5 easy chicken recipes for additional ideas to rotate through your menu.

Process Overview

“This is where the magic happens—when the aroma fills the kitchen.”

This recipe keeps the method simple. Layer the chicken, add vegetables and tomatoes, sprinkle the fajita seasoning, and let low heat work its magic. In a few hours you have juicy shredded chicken ready to build into tortillas.

If you like creamy slow-cooker dinners, the technique is similar to my popular Marry Me Chicken, where slow cooking brings out deep flavor with minimal hands-on time.

Ingredients

  • 1 lb chicken breasts — Tip: Use boneless, skinless breasts for easy shredding. If you prefer more fat and flavor, thighs work well too.
  • 1 bell pepper (sliced) — Tip: Use a mix of colors for a pretty plate and slightly different sweetness. Remove seeds for a milder bite.
  • 1 onion (sliced) — Tip: Yellow or sweet onions soften beautifully in the crockpot and add natural sweetness.
  • 1 can diced tomatoes (14 oz) — Tip: Use fire-roasted diced tomatoes for a smokier flavor, or plain diced tomatoes for a brighter taste.
  • 1 packet fajita seasoning — Tip: Taste for salt. Some packets are saltier than others; you can use half and add more later if needed.
  • Tortillas (for serving) — Tip: Warm flour or corn tortillas on a skillet with a light brush of oil for the best mouthfeel.
  • Optional toppings: sour cream, cheese, cilantro — Tip: Sour cream cools the heat, shredded cheddar or Monterey Jack melts nicely, and cilantro adds fresh brightness.

If you want a soup or stew variation, these same flavor notes pair well with my white chicken chili soup ideas when you want more broth and fewer tortillas.

Directions

  1. Place the chicken breasts in the bottom of the crockpot.

    • Encouraging note: Arrange them in a single layer if you can. It’s okay if they overlap; they will cook down and shred easily.
  2. Add in the sliced bell pepper and onion.

    • Encouraging note: Scatter them over the chicken. The peppers and onions will soften and perfume the whole pot.
  3. Pour the diced tomatoes over the top.

    • Encouraging note: Let the juices coat the chicken. Those tomatoes will keep the meat moist and infuse flavor.
  4. Sprinkle the fajita seasoning evenly over everything.

    • Encouraging note: Rub the seasoning lightly into the vegetables and chicken for even taste. If you prefer less salt, use part of the packet.
  5. Cover and cook on low for 6-8 hours or on high for 3-4 hours.

    • Encouraging note: Low and slow gives more tender results, but high works when you are short on time. Set a timer and forget it until dinner.
  6. Once cooked, shred the chicken with two forks and stir everything to combine.

    • Encouraging note: Shred right in the crockpot to soak the meat in juices. This is the moment the dish really comes together.
  7. Serve in warm tortillas with desired toppings.

    • Encouraging note: Let everyone top their own fajitas at the table. It makes dinner playful and lets picky eaters choose what they like.

If you’d rather swap to a slightly different protein or method, you can adapt the same steps like I do in my slow-cooker chicken thighs recipe for creamier, richer results: creamy crockpot chicken thighs.

Serving

Easy Crockpot Chicken Fajitas

Serve family-style on the table. Place warm tortillas on one platter, shredded chicken in another, and bowls of toppings in the center. A simple tray with sour cream, shredded cheese, chopped cilantro, lime wedges, and a jar of pickled jalapeños keeps everyone happy.

For a complete meal, add a side of Mexican-style rice or a crisp green salad. Kids appreciate a plate with a little of everything, and adults will enjoy customizing their portions. Family-style serving keeps things relaxed and encourages second helpings.

Storage

Store leftovers in an airtight container in the fridge for up to 4 days. Keep tortillas and toppings separate to maintain texture. When reheating, use these tips:

  • Microwave: Place chicken in a microwave-safe dish, add a splash of water or broth, cover, and heat in 30-second intervals until warm.
  • Stovetop: Reheat in a skillet over medium heat with a splash of water. Stir frequently to avoid drying.
  • Freezing: Freeze cooked, shredded chicken in freezer bags for up to 3 months. Thaw overnight in the fridge before reheating.

If you plan to reheat in tortillas, warm the tortillas first. A too-hot filling can make a tortilla fall apart, so warm everything just enough.

Kitchen Notes

  • Shortcut: Use pre-sliced peppers and onions from the produce aisle to save 10 minutes.
  • Double batch: This recipe scales well. Double it in a larger crockpot for meal prep or a family gathering.
  • Make it smoky: Add a half teaspoon of smoked paprika or use fire-roasted tomatoes to add depth.
  • Low-sodium option: Use a low-sodium fajita mix or half the packet and season to taste at the end.
  • Slow release: If you will be out longer than planned, set the crockpot on the warm setting after cooking to keep the chicken safe and tender.

Variations

  • Mild for kids: Use just the tomatoes and a mild seasoning packet. Offer toppings like cheese and avocado to make it creamy and familiar.
  • Gluten-free: Use corn tortillas or serve over rice for a naturally gluten-free plate.
  • Whole30 or Paleo: Skip the tortillas and serve over cauliflower rice. Use a compliant fajita seasoning or make your own with chili powder, cumin, and garlic powder.
  • Low-carb/Keto: Serve over shredded lettuce or in lettuce cups with full-fat toppings for a satisfying low-carb meal.
  • Add beans: Stir in a can of drained black beans in the last 20 minutes on high to warm through for extra protein and fiber.

These tweaks let you adapt the recipe to picky eaters and special diets without losing the ease that makes this a weeknight hero.

FAQ

Can I use frozen chicken breasts?

Yes. You can start with frozen chicken breasts on the low setting, but allow extra cooking time. I recommend checking the internal temperature to ensure it reaches 165 °F.

Do I need to add any oil?

No. The tomatoes and the natural juices from the chicken and vegetables usually provide enough moisture. If you want a bit more flavor, drizzle a teaspoon of olive oil over the peppers before cooking.

Is fajita seasoning necessary?

The seasoning packet makes this super easy, but you can substitute 1 tablespoon chili powder, 1 teaspoon cumin, 1 teaspoon garlic powder, and a pinch of salt. Taste and adjust after shredding.

Can I make this ahead of time?

Absolutely. Cook it the day before, shred the chicken, and refrigerate. Gently reheat before serving and refresh the toppings. This makes weeknight dinners a breeze.

How do I keep the tortillas from tearing?

Warm them briefly on a dry skillet or wrap them in a damp cloth and microwave for 20 seconds. This softens them and helps them hold up to the juicy filling.

Conclusion

I hope this Easy Crockpot Chicken Fajitas recipe becomes one of your go-to weeknight meals. It is simple, forgiving, and made with family in mind. When the house fills with that warm aroma and everyone gathers around the table, you will know why slow-cooked dinners are so comforting.

For another slow cooker approach to fajitas, I like the clear step-by-step on Easy Slow Cooker Chicken Fajitas – CenterCutCook as a reference. If you are aiming for the simplest possible version with only a few ingredients, this take from Crockpot chicken fajitas recipe – Only 4 ingredients! – Eating on a Dime is a great companion idea.

Enjoy the flavors, and happy slow-cooking from Lily.

Crockpot Chicken Fajitas

Prep Time 10 minutes
Cook Time 6 hours
Total Time 6 hours 10 minutes
Servings 6 servings
Calories 300
A simple, delicious recipe for shredded chicken fajitas cooked in a crockpot with bell peppers, onions, and spices, perfect for busy weeknights.

Ingredients

Main Ingredients

  • 1 lb chicken breasts (Use boneless, skinless breasts for easy shredding.)
  • 1 each bell pepper (Use a mix of colors for a pretty plate.)
  • 1 each onion (Yellow or sweet onions soften beautifully.)
  • 14 oz can diced tomatoes (Use fire-roasted for a smokier flavor.)
  • 1 packet fajita seasoning (Taste for salt; some packets may be saltier.)
  • Tortillas for serving Tortillas (Warm flour or corn tortillas for best mouthfeel.)

Optional Toppings

  • sour cream (Cools the heat.)
  • cheese (Shredded cheddar or Monterey Jack melts nicely.)
  • cilantro (Adds fresh brightness.)

Instructions 

Preparation

  • Place the chicken breasts in the bottom of the crockpot.
  • Add in the sliced bell pepper and onion, scattering them over the chicken.
  • Pour the diced tomatoes over the top.
  • Sprinkle the fajita seasoning evenly over everything.
  • Cover and cook on low for 6-8 hours or on high for 3-4 hours.
  • Once cooked, shred the chicken with two forks and stir everything to combine.
  • Serve in warm tortillas with desired toppings.

Notes

Store leftovers in an airtight container in the fridge for up to 4 days. Reheat using microwave or stovetop. For freezing, store in freezer bags for up to 3 months. Warm tortillas before serving.
Calories: 300kcal
Course: Dinner, Main Course
Cuisine: American, Mexican
Keyword: Comfort Food, Crockpot Chicken Fajitas, Easy Fajitas, Slow Cooker Chicken, Weeknight Dinner

Al Pastor Marinade

There’s something truly special about the smells that fill a kitchen when you’re marinating meat. The rich aroma of spices mingles with the sweetness of citrus, creating a symphony of scents that beckons family and friends to gather around. You can hear the buzz of conversation and laughter as everyone anticipates the delicious meal ahead. Today, I’m excited to share a recipe that will bring all those delightful sensory experiences alive: Al Pastor Marinade.

Why this works

Al Pastor Marinade

This Al Pastor marinade is a game changer for busy families. With just a few simple ingredients, you can transform any cut of meat into a flavorful dish that everyone will love. It saves time and effort, making weeknight dinners a breeze. Plus, the marinade brings a blend of flavors that make every bite memorable.

Involving your family in the cooking process creates lasting memories, and with this marinade, you can easily do just that. Whether it’s a casual family dinner or a weekend gathering with friends, this marinade is sure to impress.

Process Overview

“This is where the magic happens—when the aroma fills the kitchen.”

As you blend the ingredients together, you’ll be amazed at how quickly this comes together. The transformation from raw ingredients to a flavorful marinade happens in just minutes. And the waiting is worth every second. Letting the meat soak in the marinade allows those tantalizing flavors to infuse deeply, ensuring a delicious meal every time.

Ingredients

Here’s what you’ll need to whip up this flavor-packed marinade:

  • 1 cup orange juice: Freshly squeezed juice is best for a vibrant flavor. It balances acidity and sweetness beautifully.

  • 4-6 smoky chiles (such as chipotle or guajillo): These add the signature smoky heat. Adjust the amount based on your family’s spice tolerance.

  • 1 tablespoon achiote paste: Achiote provides a subtle sweetness and vibrant color, elevating the dish visually and flavor-wise.

  • 4 cloves garlic: Fresh garlic offers a robust flavor. You can roast it for a smoother, sweeter taste.

  • 1 teaspoon cumin: This spice adds warmth and depth. Don’t skip it!

  • 1 tablespoon dried oregano: Oregano brightens the marinade and enhances the overall flavor profile.

  • 2 tablespoons vinegar: Use white or apple cider vinegar for a tangy kick that helps tenderize the meat.

  • 1 teaspoon salt: Essential for extracting and balancing flavors.

  • 1/2 teaspoon black pepper: Just enough to add a bit of bite.

  • 1 cup diced pineapple (optional): Adding pineapple provides sweetness and a lovely fruitiness that complements the spices.

Lily’s personal tips:

Using fresh ingredients is key for the best flavor. If you can, use organic oranges and fresh garlic. For smoky chiles, adjust according to your spice preference. If your family enjoys pineapple, adding it is a wonderful twist!

Directions

  1. In a blender, combine the orange juice, smoky chiles, achiote, garlic, cumin, oregano, vinegar, salt, and pepper.

    • Encouragement: This step is quick and easy. Let the blender do the work for you!
  2. Blend until smooth.

    • Encouragement: Don’t worry if it looks a little chunky; that just gives it character!
  3. Use the marinade to coat your choice of meat (such as pork or chicken) and let it marinate for at least 1 hour, preferably overnight.

    • Encouragement: The longer it marinates, the more flavorful your meat will be. Put it in the fridge and forget about it for a while!
  4. Cook the marinated meat on a grill or stovetop until fully cooked.

    • Encouragement: Imagine the sizzle as your meat cooks! Use a meat thermometer to ensure it’s perfectly done.
  5. Serve in tacos with your favorite toppings.

    • Encouragement: Everyone can personalize their tacos with toppings, making it a fun family meal.

Serving

Al Pastor Marinade

When it’s time to serve, set up a taco bar! Lay out tortillas, chopped cilantro, diced onions, fresh lime wedges, and any other toppings your family enjoys. This way, everyone can build their own tacos just the way they like them. It’s a fun and interactive way to dine.

Storage

If you have any leftovers, store the marinated meat in an airtight container in the fridge. It will keep for up to three days. If the flavors have deepened even more overnight, consider reheating it in a skillet with a splash of orange juice to keep it moist. Just remember to heat until it’s heated through – about five minutes should do the trick.

Kitchen Notes

Here are some quick shortcuts to make your cooking experience smoother:

  • Make it ahead: Prepare the marinade a day or two in advance. It saves time and can taste even better after sitting.

  • Double the recipe: Make extra marinades to have on hand for last-minute meals.

  • Use leftovers creatively: Turn leftover meat into burritos, salads, or quesadillas for a quick lunch.

  • Freeze marinated meat: It can be frozen prior to cooking in a ziplock bag for up to three months. Just thaw overnight when you’re ready to cook.

  • Experiment with different meats: This marinade isn’t just for pork and chicken – try it on shrimp or even tofu for a vegetarian twist.

Variations

Not every family enjoys the same flavors. Here are a few tweaks you can try:

  • Picky eaters: Reduce the amount of chiles or omit them entirely. The orange juice and achiote still deliver great flavor.

  • Gluten-free: This recipe is naturally gluten-free. Just ensure your tortillas or other accompaniments are also GF.

  • Plant-based option: Use jackfruit or tofu in place of meat for a vegan-friendly meal.

  • Herb twist: Consider adding fresh cilantro to the marinade for additional freshness.

  • Citrus variety: Switch orange juice for lime or grapefruit juice for a different citrusy kick.

FAQ

1. Can I marinate the meat for too long?
Yes, while marinating overnight is great, marinating for more than 24 hours can make the meat mushy.

2. Can I use this marinade for grilling?
Absolutely! Just ensure to monitor the grill to prevent flare-ups from the sugars in the marinade.

3. What is achiote?
Achiote is a paste made from annatto seeds. It provides color and flavor, and you can find it in grocery stores or Latin markets.

4. Is this recipe spicy?
It can be, depending on the amount of smoky chiles used. Adjust the quantity to suit your family’s taste buds.

5. What should I serve with Al Pastor tacos?
Suggestions include Mexican rice, grilled corn, or a fresh salad. You can also serve with traditional sides like refried beans.

Conclusion

Cooking is a beautiful way to bond with loved ones, and this Al Pastor Marinade is the perfect recipe to gather around the table. The vibrant flavors and simple preparation make it a favorite for both busy weeknights and special occasions. I hope you enjoy making it as much as I do! Celebrate those moments in the kitchen, knowing that delicious meals can foster connection and create lasting memories. Happy cooking!

Al Pastor Marinade

Prep Time 10 minutes
Total Time 1 hour 10 minutes
Servings 6 servings
Calories 150
A flavorful marinade that transforms any cut of meat with aromatic spices and citrus, perfect for busy families and gatherings.

Ingredients

For the marinade

  • 1 cup orange juice (Freshly squeezed juice is best for vibrant flavor.)
  • 4-6 pieces smoky chiles (such as chipotle or guajillo) (Adjust according to spice tolerance.)
  • 1 tablespoon achiote paste (Adds sweetness and vibrant color.)
  • 4 cloves garlic (Fresh garlic offers a robust flavor; can be roasted.)
  • 1 teaspoon cumin (Adds warmth and depth.)
  • 1 tablespoon dried oregano (Brightens the marinade.)
  • 2 tablespoons vinegar (White or apple cider for tangy kick.)
  • 1 teaspoon salt (Essential for flavor balance.)
  • 1/2 teaspoon black pepper (Adds a bit of bite.)
  • 1 cup diced pineapple (optional) (Adds sweetness and fruitiness.)

Instructions 

Preparation

  • In a blender, combine orange juice, smoky chiles, achiote paste, garlic, cumin, oregano, vinegar, salt, and pepper.
  • Blend until smooth; don't worry if it looks a little chunky.
  • Use the marinade to coat your choice of meat (such as pork or chicken) and let it marinate for at least 1 hour, preferably overnight.

Cooking

  • Cook the marinated meat on a grill or stovetop until fully cooked.
  • Serve in tacos with your favorite toppings.

Notes

Using fresh ingredients is key for the best flavor. Consider making the marinade a day or two in advance, and adjust the chiles based on your spice preference. Store leftovers in an airtight container in the fridge for up to three days.
Calories: 150kcal
Course: Condiment, Marinade
Cuisine: Mexican
Keyword: Al Pastor, Easy Recipe, Family Meal, Marinade, Tacos

Blackstone Chicken Fajitas

There’s something magical happening in the kitchen when you make Blackstone Chicken Fajitas. The smell of sizzling chicken mingles with the sweet aroma of bell peppers. You hear the sizzle and pop as everything comes together. It’s a beautiful way to spend time with your family. Gathering around the table for a homemade meal is a moment worth savoring. With this simple recipe, you can bring everyone together for a delicious dinner that meets them with warmth and smiles.

Why This Works

Blackstone Chicken Fajitas

This recipe is a true family-friendly gem. It’s quick, flavorful, and can be adapted to suit everyone’s tastes. The Blackstone griddle allows you to prepare a meal that feels special without spending hours in the kitchen. Plus, chicken thighs are juicy and forgiving, making them perfect for busy weeknights or relaxed weekends.

With just a handful of ingredients and minimal prep time, you create a beautifully vibrant dish that brings people back to the table. You’ll find that making these fajitas is not just about the meal, but also about the time you spend with your loved ones.

Process Overview

“This is where the magic happens—when the aroma fills the kitchen.”

Preparing Blackstone Chicken Fajitas is straightforward and enjoyable. The process involves marinating the chicken, sautéing the veggies, and finally, assembling the fajitas. Each step builds on the last, creating an incredible medley of flavors and textures. You’ll love how easily this comes together and the delightful explosion of taste with every bite.

Ingredients

To create this tantalizing dish, gather the following ingredients:

  • 1/4 cup + 1 tablespoon extra virgin olive oil (divided)
  • 2 tablespoons lime juice
  • 3 teaspoons chili powder
  • 3 teaspoons ground cumin
  • 1 1/2 teaspoons kosher salt
  • 1 teaspoon paprika (smoked paprika, if you can find it)
  • 1 teaspoon onion powder
  • 1 teaspoon garlic powder (smoked garlic powder, if you can find it)
  • 1 teaspoon dried oregano leaves
  • 1/4 teaspoon ground black pepper
  • 1/8 teaspoon ground cayenne pepper
  • 6-8 boneless, skinless chicken thighs
  • 1/2 red onion (sliced)
  • 1/2 yellow onion (sliced)
  • 3 bell peppers (red, green, orange, sliced)
  • 1 tablespoon garlic (minced)
  • 2 tablespoons fajita seasoning
  • Additional kosher salt and ground black pepper (to taste)

For the Cilantro Lime Sauce:

  • 3/4 cup plain Greek yogurt
  • 1/4 cup mayo
  • 2-4 tablespoons lime juice
  • 1 tablespoon light olive oil
  • Zest of 1 lime
  • 1/4 cup fresh cilantro (chopped)
  • 1/4 teaspoon kosher salt
  • 1/8 teaspoon ground black pepper

To serve:

  • Tortillas of your choice (warmed)
  • Lime wedges
  • Fresh cilantro leaves
  • Sour cream (optional)
  • Guacamole (optional)

Note: You can customize this dish to your family’s taste. Choose colorful bell peppers for a vibrant plate and use a mix of toppings to please everyone.

Directions

Prep Fajita Chicken

  1. In a small bowl, combine 1/4 cup olive oil, 2 tablespoons lime juice, 3 teaspoons chili powder, 3 teaspoons ground cumin, 1 1/2 teaspoons kosher salt, 1 teaspoon paprika, 1 teaspoon onion powder, 1 teaspoon garlic powder, 1 teaspoon dried oregano, 1/4 teaspoon black pepper, and 1/8 teaspoon cayenne pepper. Whisk to combine.

  2. Place 6-8 boneless, skinless chicken thighs in a medium bowl. Pour the marinade over the chicken and toss to coat. Set aside.

Tip: If you have time, marinate the chicken for an hour or overnight for more flavor.

Prep Fajita Veggies

  1. In a large bowl, combine the red onions, yellow onions, bell peppers, garlic, and fajita seasoning. Set aside.

Tip: Use a mandoline slicer for perfectly even vegetables.

Cilantro Lime Sauce

  1. Add the ingredients for the Cilantro Lime Sauce to a small food processor. Blend until smooth. Transfer to a small bowl, cover, and place in the refrigerator until ready to use.

Tip: Make this sauce a day ahead to let the flavors meld together beautifully.

Cook Chicken

  1. Drizzle approximately 1 tablespoon of olive oil over the flat top of your Blackstone. Move around the cooking surface to coat.

  2. Place the marinated chicken in the oil and let it cook for 3-4 minutes per side or until it reaches an internal temperature of about 162°F.

  3. The chicken will continue to cook as it rests, reaching 165°F during that time. Add additional olive oil as needed while cooking. Transfer the chicken to a plate to rest.

Tip: Let the chicken rest for a few minutes before slicing to maintain juiciness.

Cook Veggies

  1. While the chicken rests, you can cook the veggies. Clean the flat top if desired, but it’s not necessary.

  2. Add a tablespoon of olive oil to the flat top and add the veggies. Move them around until soft yet firm, around 3-5 minutes. Transfer them to a plate when done.

Tip: Don’t overcrowd the griddle; it helps everything cook evenly.

Slice Chicken

  1. After the chicken has rested, slice it into 1/2 inch thick strips, or cut into bite-sized pieces if preferred.

Tip: For a more rustic look, consider shredding the chicken with two forks.

Serve

  1. Place the fajita veggies on a warm tortilla. Top with sliced chicken, a drizzle of Cilantro Lime Sauce, fresh chopped cilantro, and a squeeze of fresh lime juice.

Enjoy every bite and the family togetherness this meal brings!

Serving

Blackstone Chicken Fajitas

Serving Blackstone Chicken Fajitas family-style creates a warm atmosphere. You can place all the components in the center of the table and let everyone build their own fajitas. This approach makes dinner interactive and enjoyable. Allow everyone to customize their tortillas with extra lime juice, cilantro, or a spoonful of guacamole.

Encourage kids to get involved. They can help with toppings or rolling their own fajitas, making it a fun family activity.

Storage

These fajitas are best enjoyed fresh but can be stored properly. Store leftover chicken, veggies, and sauce separately in airtight containers. They will last in the fridge for up to 3 days.

To reheat, you can warm the chicken and veggies in a skillet over low heat until heated through. Avoid using the microwave, if possible, to retain texture.

Kitchen Notes

  • Quick marinade: No time to marinate? Simply toss the chicken in the spices right before cooking for a quicker version.
  • Pre-slice veggies: Prepare your veggies in advance and store them in the fridge to save time.
  • Use pre-made spice blends: If you’re short on time, pre-made fajita seasoning works in a pinch.
  • Tortilla choice: Try different wraps like whole wheat, spinach, or corn tortillas for variety.
  • Make it a salad: If you prefer a low-carb option, turn your fajitas into a vibrant salad.

Variations

Picky eaters in your family? No problem. Here are some easy tweaks:

  • Swap chicken thighs for chicken breasts if preferred.
  • Use zucchini or mushrooms as substitutes for bell peppers.
  • For a vegetarian option, replace chicken with marinated and grilled tofu.
  • Customize spice levels by adjusting the cayenne pepper or using milder spices.
  • Serve with whole grain tortillas or lettuce wraps for gluten-free options.

FAQ

Q1: Can I use frozen chicken thighs for this recipe?
Yes, but thaw them completely before marinating and cooking for even results.

Q2: What can I substitute if I don’t have a Blackstone?
You can use a large skillet or grill pan on your stovetop.

Q3: How spicy are these fajitas?
The spice level depends on your taste—adjust cayenne to your family’s preference.

Q4: Can I double the recipe?
Absolutely! Just ensure you have enough cooking space and time on your hands.

Q5: Is the Cilantro Lime Sauce necessary?
While the fajitas are tasty on their own, the sauce enhances flavor and creaminess. You can skip it if you prefer.

Conclusion

Making Blackstone Chicken Fajitas is a delightful way to create cherished family moments around the dinner table. It’s not merely about the food but the laughter and conversation shared along the way. So gather your loved ones, enjoy the process, and relish the colorful result. Here’s to family dinners filled with warmth, love, and delicious flavors!

Blackstone Chicken Fajitas

Prep Time 20 minutes
Cook Time 20 minutes
Total Time 40 minutes
Servings 4 servings
Calories 550
A quick and delicious family-friendly recipe for chicken fajitas made on a Blackstone griddle, bringing together flavors of marinated chicken, vibrant bell peppers, and a zesty cilantro lime sauce.

Ingredients

For the Chicken and Marinade

  • 1 cup 1/4 cup + 1 tablespoon extra virgin olive oil (divided)
  • 2 tablespoons lime juice
  • 3 teaspoons chili powder
  • 3 teaspoons ground cumin
  • 1.5 teaspoons kosher salt
  • 1 teaspoon paprika (smoked paprika, if you can find it)
  • 1 teaspoon onion powder
  • 1 teaspoon garlic powder (smoked garlic powder, if you can find it)
  • 1 teaspoon dried oregano leaves
  • 0.25 teaspoon ground black pepper
  • 0.125 teaspoon ground cayenne pepper
  • 6-8 pieces boneless, skinless chicken thighs
  • 0.5 pieces red onion (sliced)
  • 0.5 pieces yellow onion (sliced)
  • 3 pieces bell peppers (red, green, orange, sliced)
  • 1 tablespoon garlic (minced)
  • 2 tablespoons fajita seasoning
  • to taste Additional kosher salt and ground black pepper

For the Cilantro Lime Sauce

  • 3/4 cup plain Greek yogurt
  • 1/4 cup mayo
  • 2-4 tablespoons lime juice
  • 1 tablespoon light olive oil
  • 1 pieces Zest of 1 lime
  • 1/4 cup fresh cilantro (chopped)
  • 1/4 teaspoon kosher salt
  • 1/8 teaspoon ground black pepper

To Serve

  • Tortillas of your choice (warmed)
  • Lime wedges
  • Fresh cilantro leaves
  • Sour cream (optional)
  • Guacamole (optional)

Instructions 

Prep Fajita Chicken

  • In a small bowl, combine 1/4 cup olive oil, 2 tablespoons lime juice, 3 teaspoons chili powder, 3 teaspoons ground cumin, 1 1/2 teaspoons kosher salt, 1 teaspoon paprika, 1 teaspoon onion powder, 1 teaspoon garlic powder, 1 teaspoon dried oregano, 1/4 teaspoon black pepper, and 1/8 teaspoon cayenne pepper. Whisk to combine.
  • Place 6-8 boneless, skinless chicken thighs in a medium bowl. Pour the marinade over the chicken and toss to coat. Set aside.
  • Tip: If you have time, marinate the chicken for an hour or overnight for more flavor.

Prep Fajita Veggies

  • In a large bowl, combine the red onions, yellow onions, bell peppers, garlic, and fajita seasoning. Set aside.
  • Tip: Use a mandoline slicer for perfectly even vegetables.

Cilantro Lime Sauce

  • Add the ingredients for the Cilantro Lime Sauce to a small food processor. Blend until smooth. Transfer to a small bowl, cover, and place in the refrigerator until ready to use.
  • Tip: Make this sauce a day ahead to let the flavors meld together beautifully.

Cook Chicken

  • Drizzle approximately 1 tablespoon of olive oil over the flat top of your Blackstone. Move around the cooking surface to coat.
  • Place the marinated chicken in the oil and let it cook for 3-4 minutes per side or until it reaches an internal temperature of about 162°F.
  • The chicken will continue to cook as it rests, reaching 165°F during that time. Add additional olive oil as needed while cooking. Transfer the chicken to a plate to rest.
  • Tip: Let the chicken rest for a few minutes before slicing to maintain juiciness.

Cook Veggies

  • While the chicken rests, you can cook the veggies. Clean the flat top if desired, but it’s not necessary.
  • Add a tablespoon of olive oil to the flat top and add the veggies. Move them around until soft yet firm, around 3-5 minutes. Transfer them to a plate when done.
  • Tip: Don’t overcrowd the griddle; it helps everything cook evenly.

Slice Chicken

  • After the chicken has rested, slice it into 1/2 inch thick strips, or cut into bite-sized pieces if preferred.
  • Tip: For a more rustic look, consider shredding the chicken with two forks.

Serve

  • Place the fajita veggies on a warm tortilla. Top with sliced chicken, a drizzle of Cilantro Lime Sauce, fresh chopped cilantro, and a squeeze of fresh lime juice.
  • Enjoy every bite and the family togetherness this meal brings!

Notes

Serving Blackstone Chicken Fajitas family-style creates a warm atmosphere. Let everyone build their own fajitas, customizing them with extra lime juice, cilantro, or guacamole. Encourage kids to help with toppings or rolling their own fajitas, making it a fun family activity. These fajitas are best enjoyed fresh but can be stored in airtight containers in the fridge for up to 3 days. To reheat, warm the chicken and veggies in a skillet over low heat.
Calories: 550kcal
Course: Dinner, Main Course
Cuisine: Mexican
Keyword: Blackstone Chicken, Chicken Fajitas, Easy Recipe, Fajita Recipe, Family Dinner

Mexican Chicken Marinade

As you enter the kitchen, the aroma of spices dances in the air, creating a warm and inviting atmosphere. The sound of sizzling chicken on the grill fills your ears, promising a meal that is both satisfying and flavorful. Cooking is not just about making food; it’s about bringing people together. This Mexican Chicken Marinade is perfect for those busy weeknights or special family gatherings. Let’s dive into this easy recipe that everyone will love.

Why This Works

Mexican Chicken Marinade

This Mexican Chicken Marinade is a family favorite for many reasons. First, it infuses the chicken with incredible flavors that can transform a simple dish into something extraordinary. The zesty lime, warm spices, and rich flavors make every bite stand out.

What’s even better is the time-saving aspect of this recipe. It requires minimal active cooking time, allowing you to focus on other tasks. You can marinate the chicken in advance and grill it when you’re ready to eat.

Process Overview

“This is where the magic happens—when the aroma fills the kitchen.”

The process begins by whisking together a few simple, yet flavorful ingredients. Once the marinade is prepared, coat the chicken thoroughly and let it soak in the flavors. This step can be done ahead of time, making your cooking experience even smoother and more enjoyable.

As you grill the marinated chicken, the pleasant sounds of sizzling will fill your kitchen, making everyone eager for mealtime.

Ingredients

To create this delightful Mexican Chicken Marinade, you will need the following ingredients:

  • 1/4 cup olive oil

    • I love using olive oil for its rich flavor and health benefits. It keeps the chicken moist while it cooks.
  • 1/4 cup lime juice

    • Fresh lime juice is best, but bottled works in a pinch. The acidity helps tenderize the chicken.
  • 2 tablespoons chili powder

    • This adds a wonderful warmth to the marinade. You can adjust the amount to your preference.
  • 1 tablespoon ground cumin

    • Cumin brings a unique earthy flavor. It’s essential for that authentic Mexican taste.
  • 1 teaspoon smoked paprika

    • This gives a smoky depth to the chicken. You’ll love the flavor it adds while grilling.
  • 1 teaspoon garlic powder

    • Garlic is a must for its aromatic qualities. It enhances the overall taste.
  • 1 teaspoon onion powder

    • Similar to garlic, onion powder adds a savory note that complements the other spices.
  • 1/2 teaspoon salt

    • Salt enhances the flavors in the marinade. You can adjust this based on your dietary needs.
  • 1/4 teaspoon black pepper

    • A touch of black pepper adds a gentle heat.
  • 2 pounds chicken (breasts or thighs)

    • I prefer thighs for their juiciness, but breasts work just as well. Choose according to your family’s preference.

Directions

  1. In a bowl, whisk together the olive oil, lime juice, chili powder, cumin, smoked paprika, garlic powder, onion powder, salt, and pepper.

    • Make sure everything is well combined. The aromas will already be enticing.
  2. Place the chicken in a resealable plastic bag or a shallow dish.

    • If you use a bag, squeeze out excess air to help the marinade coat the chicken evenly.
  3. Pour the marinade over the chicken, ensuring it is well coated.

    • Use your hands to mix everything together, ensuring each piece is covered in flavor.
  4. Seal the bag or cover the dish, and refrigerate for at least 1 hour, up to overnight.

    • The longer it marinates, the more flavorful it will become.
  5. Preheat grill to medium-high heat.

    • Make sure the grill is hot to get those lovely grill marks.
  6. Remove chicken from marinade and discard the leftover marinade.

    • Safety first! Don’t reuse the marinade since it has come into contact with raw chicken.
  7. Grill chicken for 6-7 minutes on each side, or until cooked through.

    • Use a meat thermometer to ensure the chicken is at least 165°F for safe eating.
  8. Let rest for a few minutes, then slice and serve.

    • This resting time helps the juices redistribute, making the chicken even more tender.

Serving

Mexican Chicken Marinade

Serving this grilled Mexican chicken family-style is a delight. Arrange the sliced chicken on a large platter and let everyone dig in. You can serve it with a variety of sides like rice, grilled vegetables, or fresh salads. Some warm tortillas on the side can also turn this dish into delicious tacos. Don’t forget to add fresh toppings like avocado, salsa, or cilantro to elevate the flavors even more. Family meals are about connection, and I encourage you to enjoy every bite together.

Storage

If you have leftovers, you can store them in an airtight container in the fridge for up to 3 days. Reheat the chicken in the microwave or on the stovetop until warmed through. You can also use this chicken as a flavorful addition to salads, wraps, or grain bowls.

Kitchen Notes

  • Use fresh herbs like cilantro as an extra punch of flavor.
  • For a spicier kick, add some cayenne pepper to the marinade.
  • Consider marinating shrimp or pork using the same marinade for variety.
  • If you’re short on time, marinating for just 30 minutes still yields great results.
  • Double the marinade to use on vegetables for grilling, too.

Variations

If you have picky eaters or special diets in the family, here are some ways to modify this recipe:

  • For non-meat eaters: Use the same marinade on firm tofu or portobello mushrooms for a vegan option.
  • For gluten-free diets: This recipe is naturally gluten-free but always check any spices used.
  • For kids: Reduce the chili powder and add a touch of honey for a sweeter marinade.
  • For a zesty twist: Add some orange juice in place of part of the lime for a citrusy flavor.
  • For low-sodium diets: You can omit the salt and use fresh herbs for flavor instead.

FAQ

1. Can I use frozen chicken?
Yes, you can use frozen chicken. Just thaw it first and then marinate.

2. How long can I marinate chicken?
For best results, marinate chicken for at least 1 hour, but you can go up to overnight for deeper flavor.

3. Can I bake the chicken instead of grilling?
Absolutely. Bake at 400°F for about 25-30 minutes, depending on the thickness of the chicken.

4. Can I freeze the marinated chicken?
Yes, you can freeze the marinated chicken for up to 3 months. Just ensure it’s sealed well and try to remove air from the storage bag.

5. What should I serve with this chicken?
You can serve it with rice, grilled veggies, or in tacos with toppings like salsa and avocado.

As you finish up this delightful Mexican Chicken Marinade, remember that cooking is more than just preparing food. It’s a moment to connect, share, and enjoy with your loved ones. May your kitchen be filled with laughter, warmth, and, of course, delicious meals!

Mexican Chicken Marinade

Prep Time 15 minutes
Cook Time 15 minutes
Total Time 30 minutes
Servings 6 servings
Calories 320
This flavorful Mexican Chicken Marinade infuses chicken with zesty lime and warm spices for a deliciously satisfying meal that’s perfect for family gatherings or busy weeknights.

Ingredients

For the Marinade

  • 1/4 cup olive oil (Keeps the chicken moist.)
  • 1/4 cup lime juice (Fresh is best to tenderize the chicken.)
  • 2 tablespoons chili powder (Adjust the amount for spice preference.)
  • 1 tablespoon ground cumin (Essential for authentic flavor.)
  • 1 teaspoon smoked paprika (Adds a smoky depth.)
  • 1 teaspoon garlic powder (Enhances overall taste.)
  • 1 teaspoon onion powder (Adds a savory note.)
  • 1/2 teaspoon salt (Enhances flavors; adjust to taste.)
  • 1/4 teaspoon black pepper (Adds gentle heat.)
  • 2 pounds chicken (breasts or thighs) (Thighs are juicier; use according to preference.)

Instructions 

Preparation

  • In a bowl, whisk together the olive oil, lime juice, chili powder, cumin, smoked paprika, garlic powder, onion powder, salt, and pepper.
  • Place the chicken in a resealable plastic bag or a shallow dish.
  • Pour the marinade over the chicken, ensuring it is well coated. Use hands to mix thoroughly.
  • Seal the bag or cover the dish, and refrigerate for at least 1 hour, up to overnight.

Cooking

  • Preheat grill to medium-high heat.
  • Remove chicken from marinade and discard leftover marinade.
  • Grill chicken for 6-7 minutes on each side, or until cooked through to an internal temperature of 165°F.
  • Let rest for a few minutes, then slice and serve.

Notes

If you have leftovers, store in an airtight container for up to 3 days. Reheat in the microwave or stovetop. Fresh herbs like cilantro add extra flavor. For variety, marinate shrimp or use the marinade on firm tofu or portobello mushrooms.
Calories: 320kcal
Course: Dinner, Grilling, Main Course
Cuisine: Mexican
Keyword: chicken marinade, easy recipes, Family Meals, Grilled Chicken, Mexican chicken

Street Corn Chicken Rice Bowl

There’s something truly special about the smell of grilled chicken mingling with sweet corn in your kitchen. You can hear the gentle sizzle as the chicken cooks, and the aroma wraps around you like a warm hug. This sensory delight sets the perfect stage for a comforting family dinner. With a little preparation, you can create a satisfying meal that brings everyone together, yet is quick enough to fit into your busy schedule.

Why This Works

Street Corn Chicken Rice Bowl

This Street Corn Chicken Rice Bowl is not just a meal; it’s a celebration of flavors and family time. It combines delicious ingredients that not only please the palate but also make you feel good. The creamy texture of the mayonnaise and cotija cheese, along with the bright crunch of corn and avocado, creates a delightful contrast.

Best of all, it’s a one-bowl dish, making cleanup a breeze. You can prepare it in under 30 minutes, which is a relief when life gets hectic. This recipe is perfect for busy weeknights or relaxed weekends when you want to share laughter and stories over dinner.

Process Overview

“This is where the magic happens—when the aroma fills the kitchen.”

As you gather your ingredients and follow along, you’ll find that this recipe is as simple as it is delightful. The steps flow smoothly, and you’ll feel accomplished as the vibrant colors of the bowl come together. With each ingredient you add, the kitchen comes alive with wonderful scents that will have your family excited for dinner.

Ingredients

  • 2 cups cooked rice: Leftover rice works great and makes preparation even faster.
  • 1 cup grilled chicken, diced: Use rotisserie chicken for an even quicker option.
  • 1 cup corn (fresh, canned, or frozen): If using frozen corn, thaw it beforehand for optimal texture.
  • 1/2 cup mayonnaise: Homemade mayo can add an extra layer of flavor.
  • 1/2 cup cotija cheese, crumbled: Feta cheese can serve as a tasty substitute if cotija is unavailable.
  • 1 avocado, sliced: Choose ripe avocados for a creamy texture.
  • 1 lime, juiced: Freshly squeezed is best for that vibrant citrus punch.
  • 1 tsp chili powder: Adjust this to your family’s spice preference.
  • Salt and pepper to taste: Essential for enhancing all the flavors.
  • Chopped cilantro for garnish: A refreshing finish that brightens the dish.

By following these tips for each ingredient, you can adapt the recipe to your family’s preferences while ensuring a delicious outcome.

Directions

  1. In a large mixing bowl, combine the cooked rice and grilled chicken. This is a great time to involve your kids in the kitchen. They can help mix the base, making it a fun family activity.

  2. Stir in the corn, mayonnaise, cotija cheese, lime juice, and chili powder. Mix well until everything is evenly coated. Take a moment to appreciate the colors and textures as you stir.

  3. Season with salt and pepper to taste. Remember, starting with a little is better; you can always add more later.

  4. Serve in bowls topped with avocado slices and chopped cilantro. Enjoy as a light meal or make ahead for later. Keep in mind how lovely it’ll look on your dining table stacked with family favorites, inviting everyone to dig in.

Serving

Street Corn Chicken Rice Bowl

When it’s time to serve, consider making it family-style. Place the big bowl of the Street Corn Chicken Rice Bowl right in the center of the table so everyone can help themselves. You can also set up a toppings bar for extra fun. Think additional lime wedges, more cilantro, or even some hot sauce for those who like a kick. This adds a personal touch and lets each family member customize their bowl.

Storage

This dish keeps well in the refrigerator for up to three days. Store it in an airtight container to maintain freshness. When you’re ready to eat, simply reheat portions in the microwave until warmed through. If the rice has dried out slightly, add a splash of chicken broth or water to bring it back to life.

Kitchen Notes

  • Pre-cook your rice in advance to save time.
  • Use leftover grilled chicken or rotisserie chicken to speed things up.
  • Fresh corn is great in summer but feel free to use canned or frozen for year-round convenience.
  • A squeeze of lemon or lime just before serving brightens the flavors significantly.
  • Keep your avocado from browning by squeezing some lime juice over it right after slicing.

Variations

If you have picky eaters or want to cater to different diets, here are a few tweaks to consider:

  • Substitute brown rice or quinoa for a healthier grain option.
  • Make it vegetarian by removing the chicken and adding black beans and extra vegetables like bell peppers or zucchini.
  • Use Greek yogurt instead of mayonnaise for a lighter version.
  • For gluten-free, ensure your mayonnaise and other packaged items are certified gluten-free.

FAQ

  1. Can I use leftover rice?
    Yes! Leftover rice works perfectly and saves time.

  2. What can I substitute for cotija cheese?
    Feta cheese or even mozzarella can be great alternatives.

  3. Can I make this ahead of time?
    Absolutely! It can be made a few hours in advance. Just add the avocado just before serving to keep it fresh.

  4. Is this recipe spicy?
    It is mildly spiced with chili powder. If you’d like more heat, add hot sauce or extra chili powder.

  5. How do I store leftovers?
    Place leftovers in an airtight container in the fridge for up to three days.

Conclusion

Cooking is about nurturing your loved ones, and this Street Corn Chicken Rice Bowl brings people together around the table. It’s a recipe that combines flavor, comfort, and simplicity, making it both an everyday meal and a special occasion dish. So gather your family, enjoy the process, and savor each delicious bite.

Street Corn Chicken Rice Bowl

Prep Time 10 minutes
Cook Time 20 minutes
Total Time 30 minutes
Servings 4 servings
Calories 450
A comforting one-bowl meal featuring grilled chicken, corn, and creamy mayo, perfect for busy weeknights or family gatherings.

Ingredients

Main Ingredients

  • 2 cups cooked rice (Leftover rice works great and makes preparation even faster.)
  • 1 cup grilled chicken, diced (Use rotisserie chicken for an even quicker option.)
  • 1 cup corn (Fresh, canned, or frozen; thaw frozen corn beforehand.)
  • 1/2 cup mayonnaise (Homemade mayo can add an extra layer of flavor.)
  • 1/2 cup cotija cheese, crumbled (Feta cheese can serve as a substitute if cotija is unavailable.)
  • 1 whole avocado, sliced (Choose ripe avocados for a creamy texture.)
  • 1 whole lime, juiced (Freshly squeezed is best.)
  • 1 tsp chili powder (Adjust this to your family’s spice preference.)
  • to taste salt and pepper (Essential for enhancing all the flavors.)
  • for garnish chopped cilantro (A refreshing finish that brightens the dish.)

Instructions 

Preparation

  • In a large mixing bowl, combine the cooked rice and grilled chicken. Involve your kids in the kitchen for a fun family activity.
  • Stir in the corn, mayonnaise, cotija cheese, lime juice, and chili powder. Mix well until everything is evenly coated.
  • Season with salt and pepper to taste. Start with a little; you can always add more later.

Serving

  • Serve in bowls topped with avocado slices and chopped cilantro. Enjoy as a light meal or make ahead for later.

Notes

This dish keeps well in the refrigerator for up to three days. Store it in an airtight container. Reheat portions in the microwave when ready to eat, adding a splash of chicken broth or water if needed.
Calories: 450kcal
Course: Dinner, Main Course
Cuisine: American, Mexican
Keyword: Family Dinner, Grilled Chicken, One-Bowl Dish, Quick Meal, Street Corn Chicken Rice Bowl

Chicken Street Tacos

There’s something magical about a bustling kitchen filled with the scents of spices and sizzling chicken. The sound of the grill sizzling as it cooks the chicken fills the air, promising a meal that will bring everyone together. Today, we’re diving into a recipe that captures this very essence—Chicken Street Tacos. This dish is not just delicious; it’s also a way to gather your family for a wonderful mealtime experience.

Why This Works

Chicken Street Tacos

Chicken Street Tacos are the perfect choice for busy families. They come together quickly and use simple ingredients that pack in tons of flavor. You can marinate the chicken while preparing other items, saving precious time. The assembly is quick and fun, letting everyone customize their tacos with their favorite toppings. This dish encourages family interaction, making dinner a team effort. When we gather around the table, sharing stories and laughter over a delicious meal, we create memories that last a lifetime.

Process Overview

“This is where the magic happens—when the aroma fills the kitchen.”

Cooking these tacos is straightforward. You’ll marinate the chicken, grill it to perfection, warm the tortillas, and assemble your tacos. With each step, the delicious smells of spices and grilled chicken will fill your kitchen, ready to invite everyone to the table.

Ingredients

Here’s what you’ll need to whip up these scrumptious Chicken Street Tacos:

  • Chicken breasts: Aim for about 1 pound. Look for fresh, boneless pieces for easy grilling.
  • Corn tortillas: 8 tortillas will hold all the delicious fillings. Choose soft, small ones for the classic street taco experience.
  • Onion: 1 medium onion, diced. A white or yellow onion will add the right flavors.
  • Cilantro: Fresh cilantro for garnish. This herb adds brightness to your dish.
  • Lime: 1 lime, cut into wedges for squeezing. Fresh juice will enhance all the flavors.
  • Olive oil: 2 tablespoons for marinating the chicken. It helps the spices stick and keeps the chicken juicy.
  • Salt: 1 teaspoon to season the chicken beautifully.
  • Pepper: 1/2 teaspoon, freshly cracked for the best taste.
  • Cumin: 1 teaspoon to add warm, earthy flavors.
  • Chili powder: 1 teaspoon for a mild kick. Adjust according to your spice preference.

Lily’s Tips:

  • Choose chicken breasts that are similar in size for even cooking.
  • Warm tortillas wrapped in a clean kitchen towel to keep them soft and pliable.
  • Add extra lime juice to your finished tacos for a burst of flavor.

Directions

  1. Marinate the chicken breasts. In a mixing bowl, combine the chicken with olive oil, salt, pepper, cumin, and chili powder. Coat the chicken well. Let it marinate for at least 30 minutes. While you wait, you can prep your toppings. This step will make your chicken flavorful and juicy—trust me, it is worth the wait!

  2. Grill the chicken. Preheat your grill or grill pan over medium-high heat. Add the marinated chicken to the hot surface. Grill for about 6-7 minutes per side or until the internal temperature reaches 165°F. The grilling time may vary depending on thickness, so use a meat thermometer to be sure. The smoky flavor will be absolutely mouthwatering.

  3. Let the chicken rest. After grilling, allow the chicken to rest for a few minutes. This helps the juices redistribute, keeping your chicken tender. Slicing it while it’s still hot will make it easier and more enjoyable.

  4. Warm the corn tortillas. Heat a skillet over medium heat and warm the tortillas for about 30 seconds on each side until they become pliable and lightly toasted. This will enhance their flavor and give a little crunch.

  5. Assemble the tacos. Place sliced chicken in the warmed corn tortillas. Top each taco with diced onion, chopped cilantro, and a squeeze of lime juice. Get creative with how much you add—everyone loves a personalized taco!

  6. Serve immediately. Place the tacos on a platter and enjoy them while they are warm. Gather around the table, and enjoy the fruits of your labor together.

Serving

Chicken Street Tacos

Serving Chicken Street Tacos family-style makes them even more enjoyable. Place all the components on the table so everyone can build their own tacos. This approach turns dinner into a fun assembly line, allowing everyone to customize their meal to their liking. Set out bowls of extra toppings like hot sauce, diced tomatoes, or avocado for those who want to get creative.

Storage

Leftovers can be stored in an airtight container in the fridge for up to three days. When you’re ready to enjoy them again, reheat the chicken in the microwave or on a skillet over low heat until warmed through. Warm the tortillas separately before assembling again to reclaim that fresh taco experience.

Kitchen Notes

  • Batch Cooking: Make extra chicken to use in salads or sandwiches throughout the week.
  • Freezing: You can freeze marinated chicken for future quick meals. Just thaw before grilling.
  • Tortilla Substitutes: If you run out of corn tortillas, flour tortillas work too.
  • Use Leftover Chicken: Cooked chicken can be used in various recipes, such as quesadillas or salads.
  • Prep Ahead: Marinate chicken the night before for a super quick dinner.

Variations

These Chicken Street Tacos can easily be adapted for different diets and tastes. Here are a few ideas:

  • For Picky Eaters: Skip the onions and cilantro if someone is not a fan. Instead, offer toppings like shredded cheese or diced bell peppers.
  • Vegetarian Option: Substitute chicken with grilled zucchini or portobello mushrooms for a tasty vegetarian taco.
  • Taco Bar for Kids: Set up a taco bar with their favorite toppings—think cheese, guacamole, and even black beans.
  • Heat it Up: Add jalapeños or a spicy salsa for those who love more heat.
  • Gluten-Free: Use corn tortillas, which are naturally gluten-free, perfect for those with dietary restrictions.

FAQ

1. Can I marinate the chicken overnight?
Absolutely! Marinating overnight can enhance the flavors even more.

2. What type of grill is best for this recipe?
A gas grill, charcoal grill, or grill pan on the stove will all work well.

3. How can I tell when the chicken is done?
The internal temperature should reach 165°F for safe consumption.

4. Can I use frozen chicken?
Yes, but it’s best to thaw it first, and ensure you marinate it thoroughly before cooking.

5. What can I serve on the side?
Black beans, rice, or a fresh salad complement these tacos beautifully.

In conclusion, bringing Chicken Street Tacos to your dinner table is a wonderful way to bond with loved ones. The aroma, the flavors, and the interactions around the table create a warm and inviting atmosphere. Enjoy the cooking process, the family time that follows, and the delicious meal that you’ve created together. Happy cooking!

Chicken Street Tacos

Prep Time 30 minutes
Cook Time 15 minutes
Total Time 45 minutes
Servings 4 servings
Calories 250
Delicious Chicken Street Tacos perfect for family gatherings, allowing everyone to customize with their favorite toppings.

Ingredients

Main ingredients

  • 1 pound chicken breasts (Look for fresh, boneless pieces for easy grilling.)
  • 8 pieces corn tortillas (Choose soft, small ones for the classic street taco experience.)
  • 1 medium onion, diced (A white or yellow onion will add the right flavors.)
  • to taste fresh cilantro (Adds brightness to your dish.)
  • 1 whole lime, cut into wedges (Fresh juice enhances all the flavors.)

Marinade ingredients

  • 2 tablespoons olive oil (Helps the spices stick and keeps the chicken juicy.)
  • 1 teaspoon salt (To season the chicken beautifully.)
  • 1/2 teaspoon freshly cracked pepper (For the best taste.)
  • 1 teaspoon cumin (Adds warm, earthy flavors.)
  • 1 teaspoon chili powder (For a mild kick.)

Instructions 

Preparation

  • Marinate the chicken breasts. In a mixing bowl, combine chicken with olive oil, salt, pepper, cumin, and chili powder. Coat the chicken well and let it marinate for at least 30 minutes.
  • While the chicken is marinating, prepare your toppings such as diced onion, chopped cilantro, and lime wedges.

Cooking

  • Preheat your grill or grill pan over medium-high heat. Add the marinated chicken to the hot surface and grill for about 6-7 minutes per side, or until the internal temperature reaches 165°F.
  • After grilling, allow the chicken to rest for a few minutes to help the juices redistribute.

Assembly

  • Heat a skillet over medium heat and warm the corn tortillas for about 30 seconds on each side until pliable and lightly toasted.
  • Place sliced chicken in the warmed corn tortillas, then top each taco with diced onion, chopped cilantro, and a squeeze of lime juice.

Serving

  • Serve the tacos immediately while they are warm on a platter. Allow everyone to customize their tacos with extra toppings.

Notes

Leftovers can be stored in an airtight container in the fridge for up to three days. Reheat the chicken before serving. Marinate chicken the night before for an even quicker dinner.
Calories: 250kcal
Course: Dinner, Main Course
Cuisine: Mexican
Keyword: chicken tacos, Easy Dinner, Family Recipe, Grilled Chicken, Street Tacos