Tag

easy dinner

Browsing

Grilled Chicken Breast

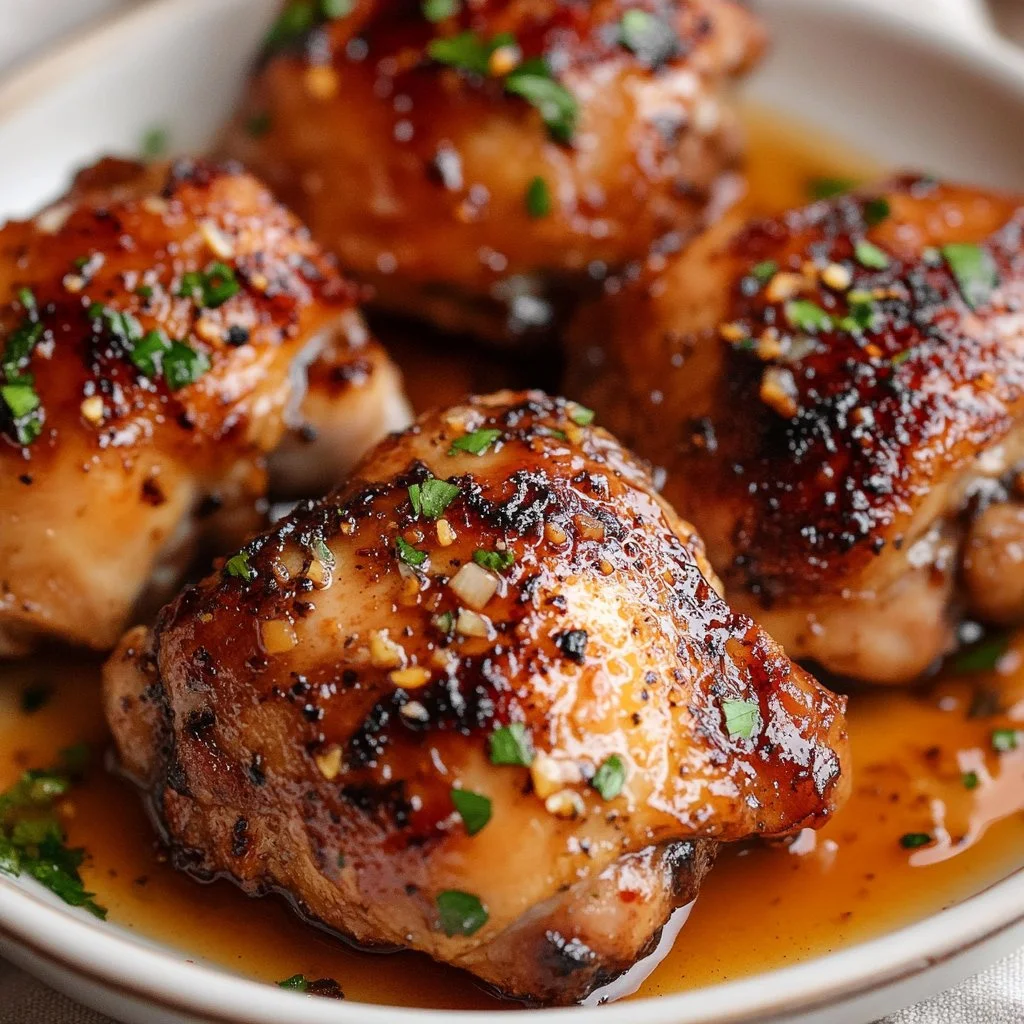
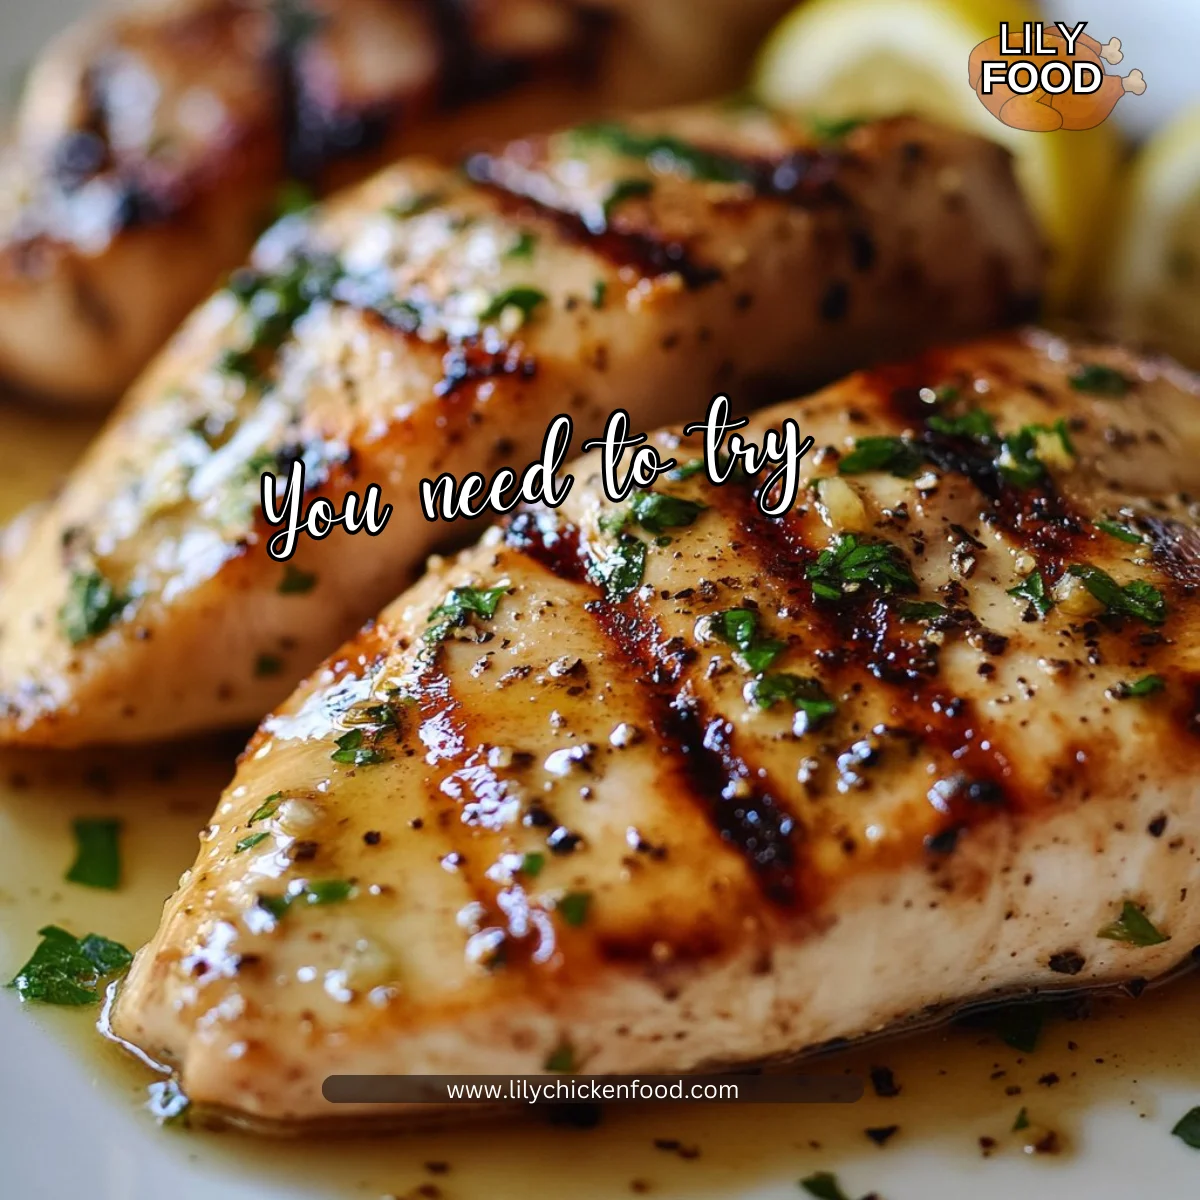
I can still hear the sizzle. The lemon and garlic hit the air, and the kitchen smells like home. When the grill starts to sing, the family drifts in, drawn by the promise of something simple and perfect for dinner.

I have learned a few tricks over the years from cooking for my family every night. If you want a shortcut for busy evenings, try these grilled chicken breasts alongside my favorite recipe for air fryer chicken breasts. They pair beautifully and keep dinner varied.

Why this works

Grilled Chicken Breast

This recipe balances flavor and speed. The marinade is simple but bright, and it does not need hours to work. That makes it ideal for weeknights and for families that like reliable meals without fuss.

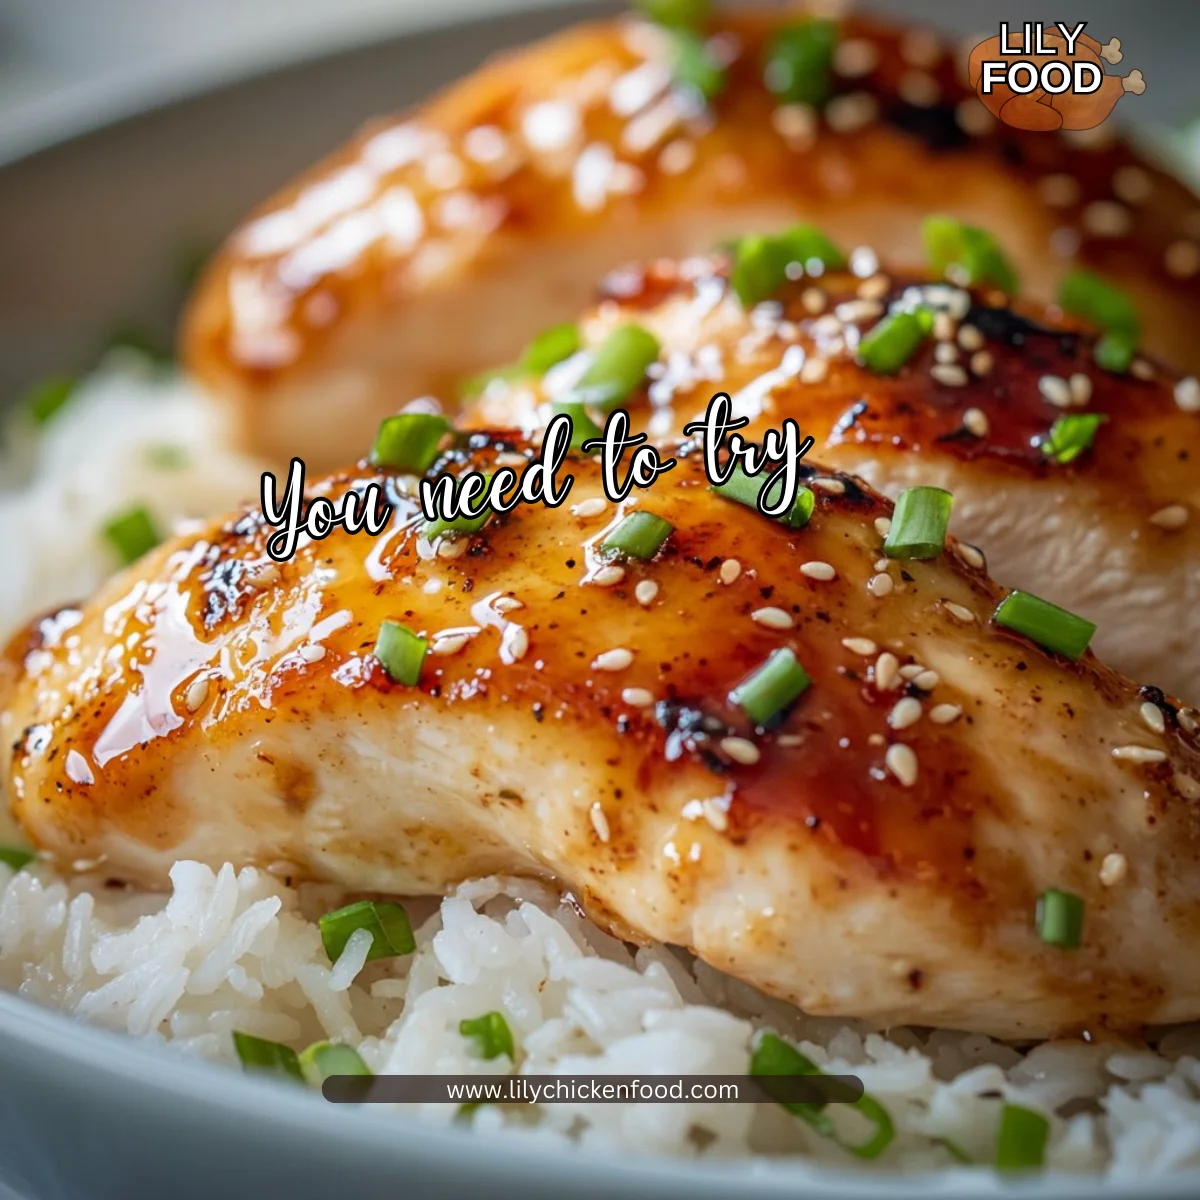
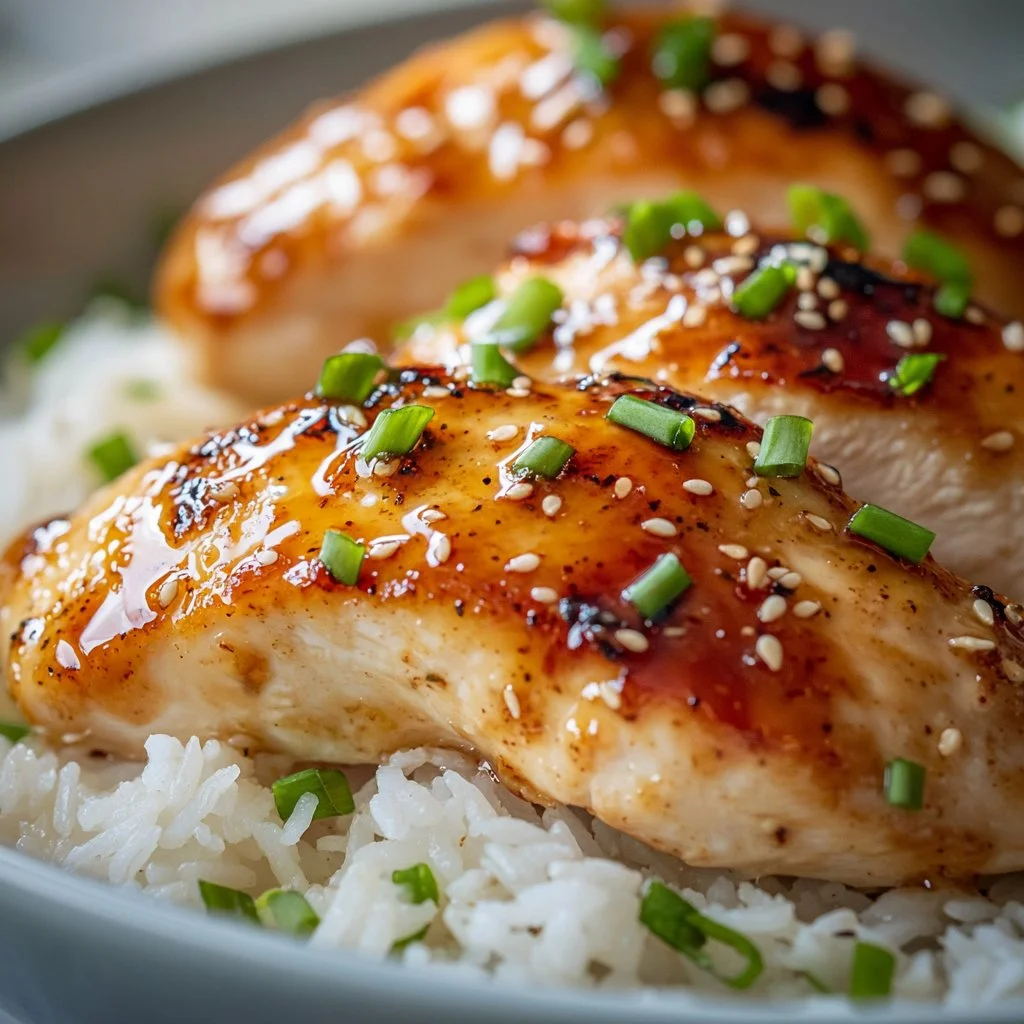
The chicken cooks quickly on a hot grill. A short sear locks juices in and gives you a golden crust. Children and adults both love the mild lemon-garlic flavor, and it pairs easily with many side dishes.

If you are collecting easy family favorites, this method fits into meal planning and leftovers. For more ideas that keep weeknights easy, see my list of deliciously easy chicken breast recipes that the whole family will accept.

Process Overview

“This is where the magic happens—when the aroma fills the kitchen.”

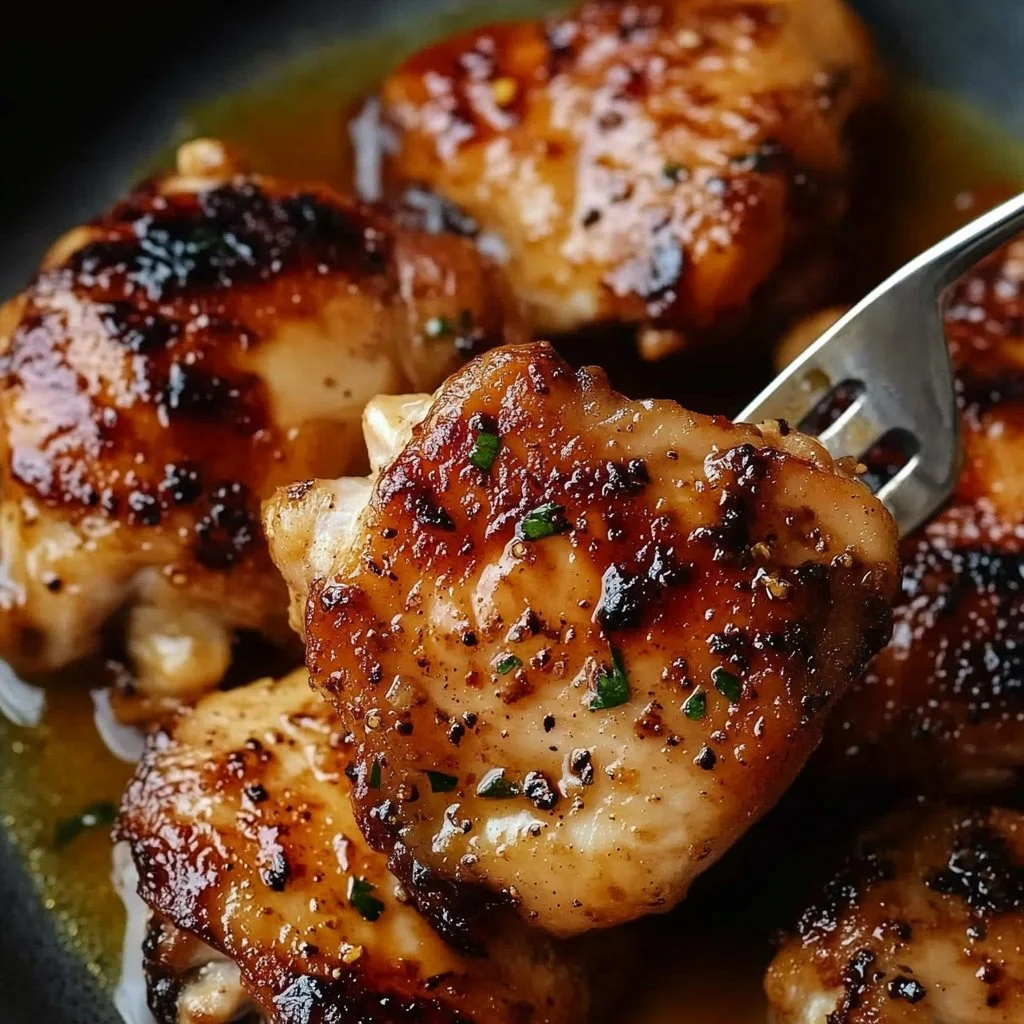
Start with a simple marinade and give the chicken a little time to rest. Heat the grill to medium-high so you get a strong sear. Flip once and use an instant-read thermometer to check for 165°F. Let the breasts rest before slicing to keep them juicy.

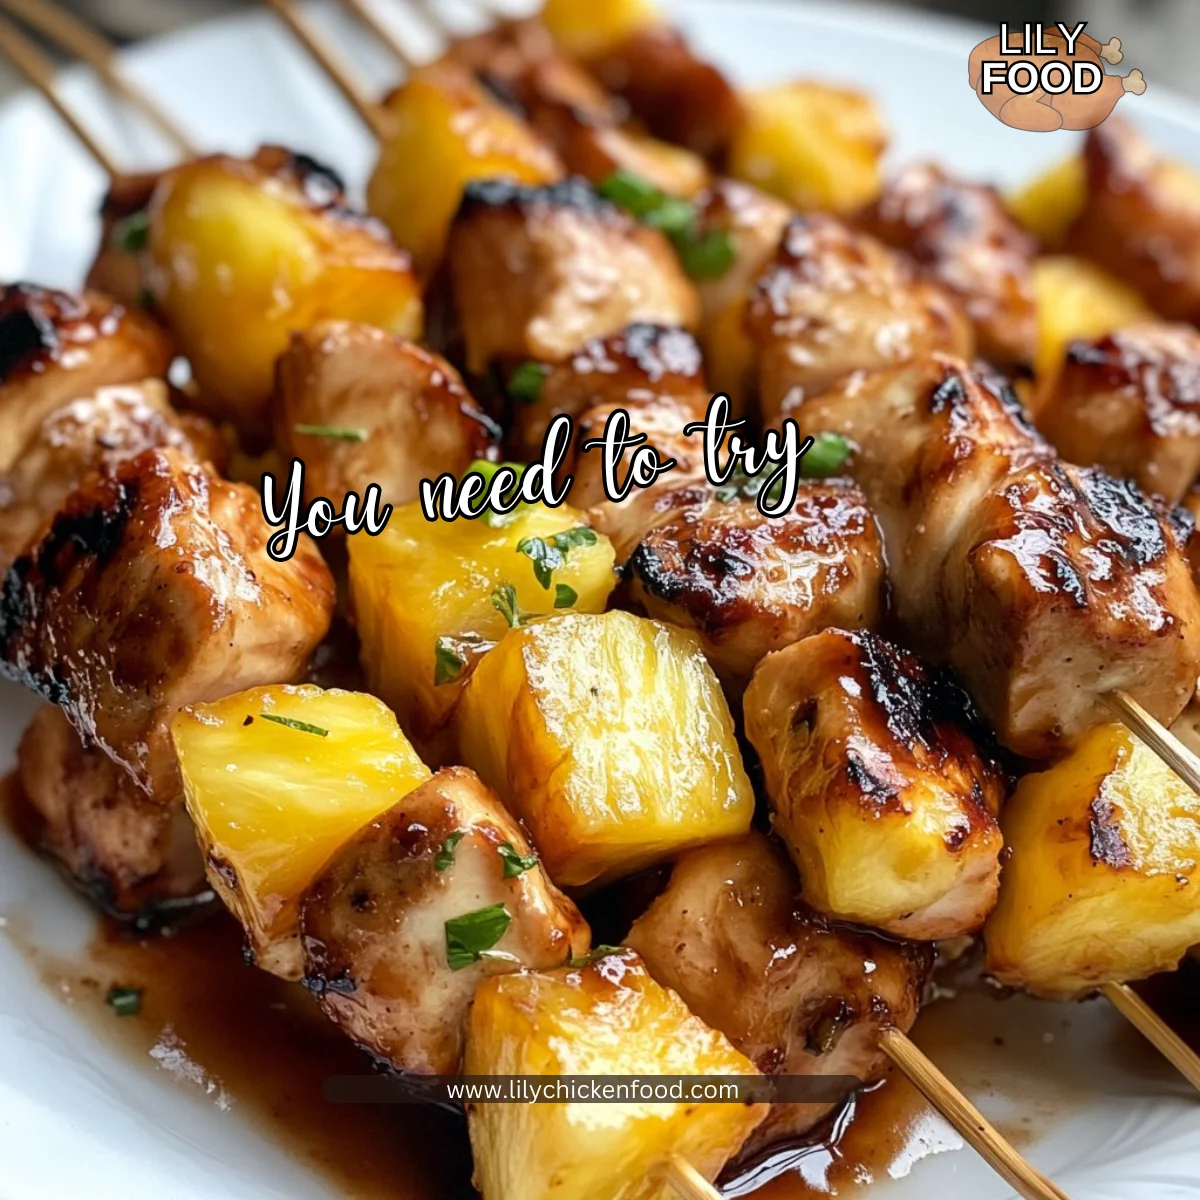
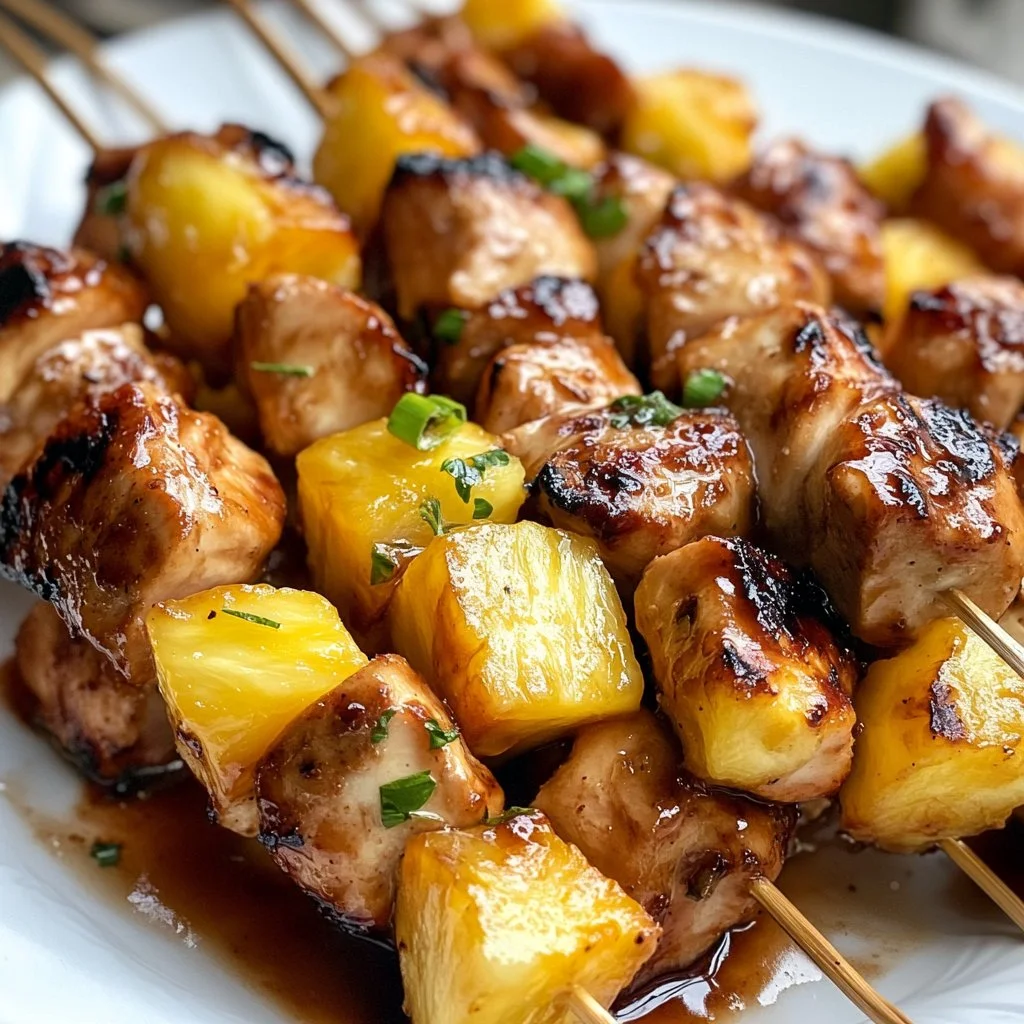
If you like skewers or small pieces for picky eaters, you might enjoy my approach to Asian chicken skewers, which follow some of the same grilling rules.

Ingredients

  • 4 chicken breasts
    Tip: Choose even-sized breasts or pound them gently to a uniform thickness. That helps them cook evenly and avoids dry edges.

  • 1/4 cup olive oil
    Tip: Good extra virgin olive oil adds flavor, but you can use regular olive oil for higher heat stability when grilling.

  • 2 tablespoons lemon juice
    Tip: Fresh lemon juice brightens the marinade. Bottle lemon juice works in a pinch, but fresh gives a cleaner flavor.

  • 2 cloves garlic, minced
    Tip: Mince garlic finely so it infuses the oil. For a milder garlic note, grate it with a microplane.

  • 1 teaspoon dried oregano
    Tip: Dried oregano is concentrated. Use fresh oregano if you have it, but increase the amount by about three times.

  • Salt and pepper to taste
    Tip: Season generously. Salt brings the flavors forward and helps the meat hold moisture while it cooks.

Personal note: I like to taste the marinade before adding chicken. If the lemon feels too sharp, add a pinch of sugar or a little more oil to balance it. For a deeper savory note, a splash of soy sauce or a dab of mustard works well.

For a different baked flavor profile, my balsamic baked chicken breast recipe uses similar seasoning ideas but changes the cooking method.

Directions

  1. In a bowl, whisk together olive oil, lemon juice, garlic, oregano, salt, and pepper.
    Note: Whisk until the mixture looks a little emulsified. Taste a small drop and adjust salt or lemon. You are building flavor, and this step is forgiving.

  2. Add the chicken breasts to the marinade and let it sit for at least 30 minutes.
    Note: If you have more time, 2 hours is fine in the fridge. Even 30 minutes gives the chicken a lift. Pat the chicken dry before grilling to get a good sear.

  3. Preheat the grill to medium-high heat.
    Note: Aim for a grill surface temperature around 400°F to 450°F. Clean grates and a light oiling prevent sticking. Use tongs and a spatula for safe handling.

  4. Grill the chicken for 6-7 minutes on each side or until fully cooked (internal temperature reaches 165°F).
    Note: Resist flipping too often. One flip gives a clean sear. Use an instant-read thermometer in the thickest part to confirm 165°F. If a thinner area reaches temp sooner, remove it earlier.

  5. Remove from the grill and let rest for a few minutes before serving.
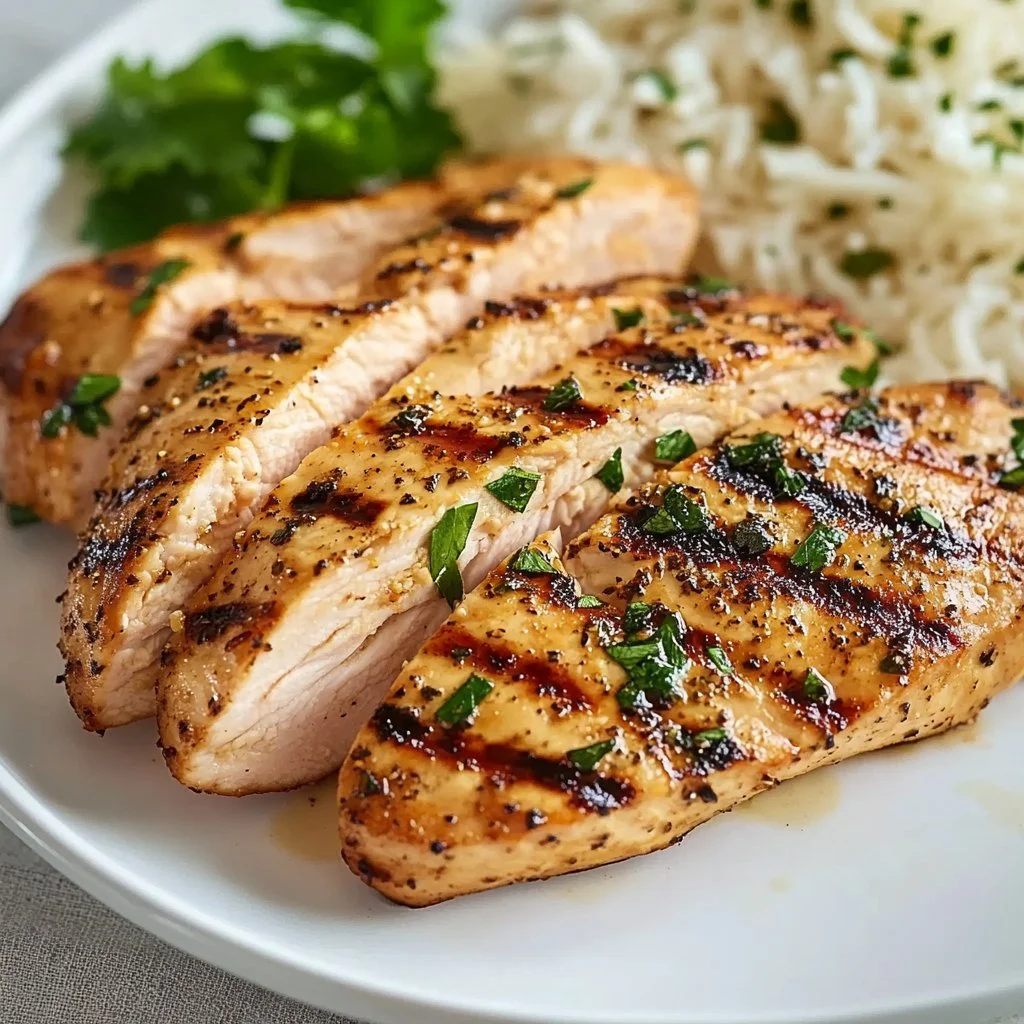
    Note: Resting for 5 minutes lets the juices redistribute. Slice across the grain for tender pieces. This step is simple but essential for juicy chicken.

A friendly tip: If you are short on time, you can marinate while you preheat the grill and prep sides. The whole process moves quickly once everything is ready.

For a creamy finish or to pair with mashed sides, try serving it with flavors similar to my creamy garlic parmesan chicken. The textures and flavors complement each other.

Serving

Grilled Chicken Breast

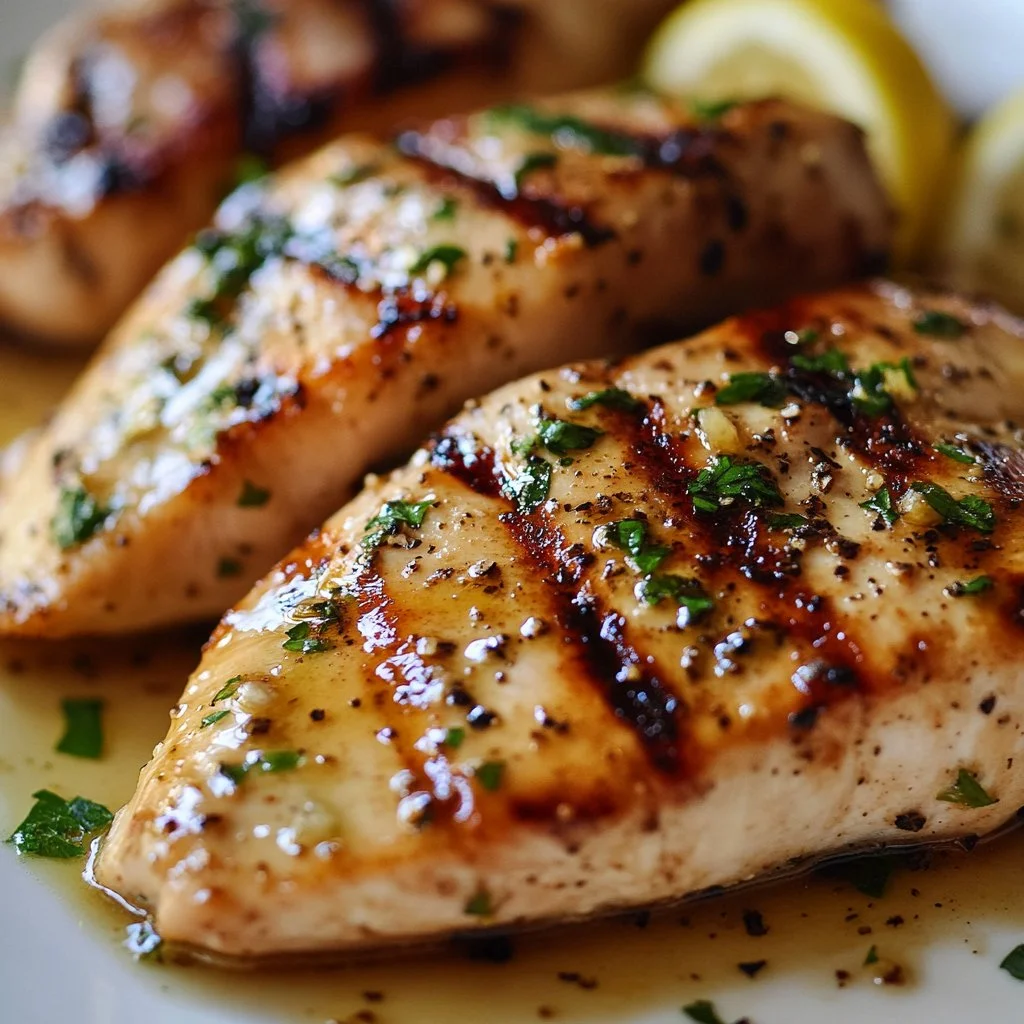
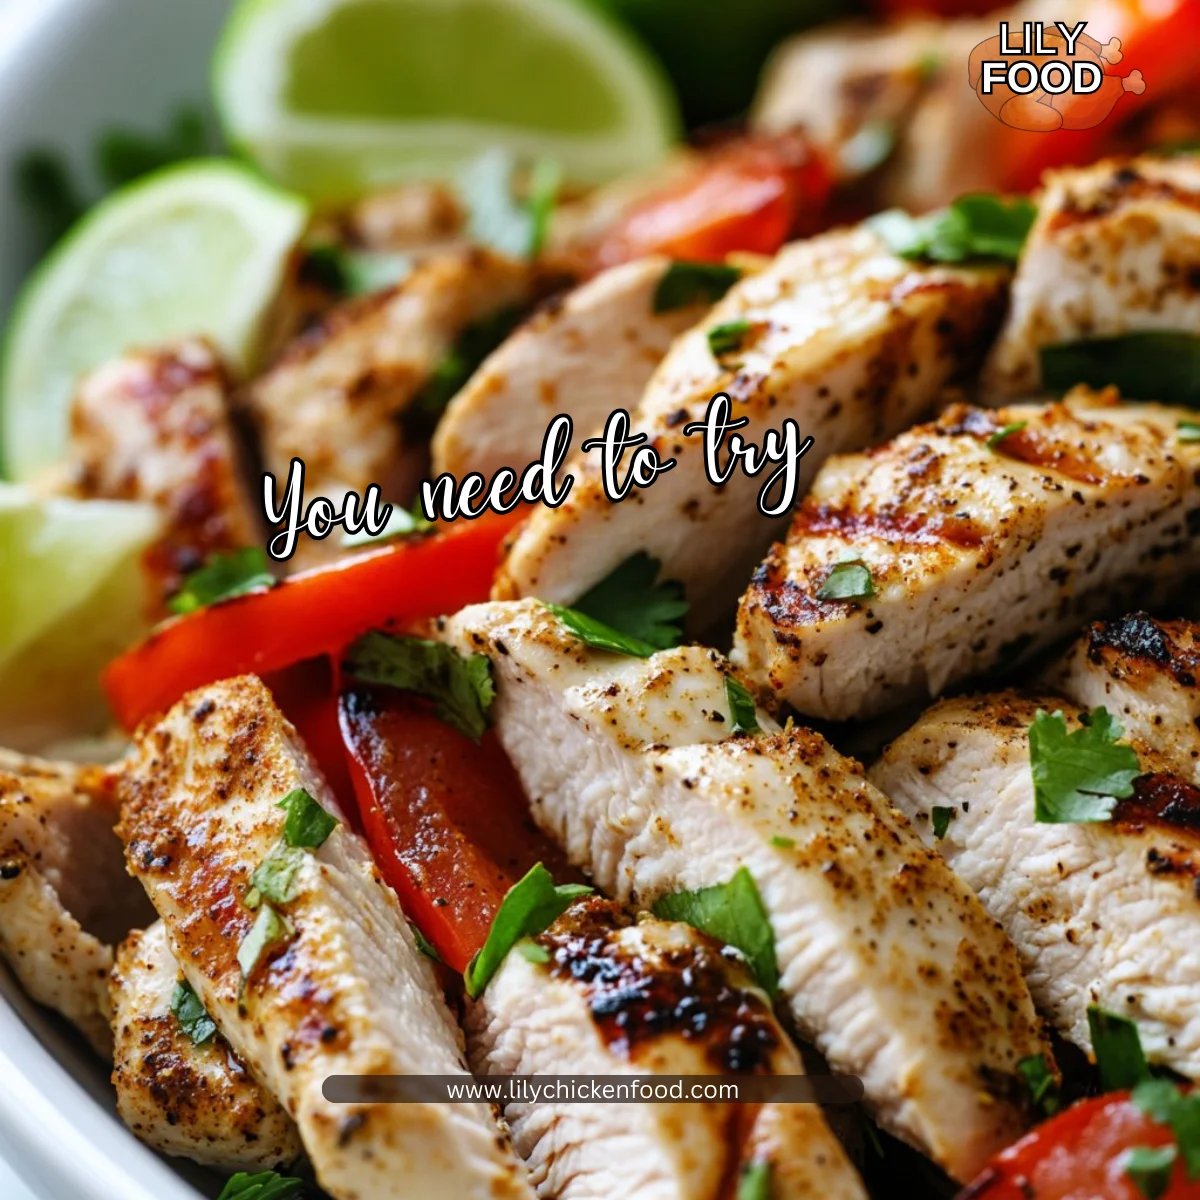
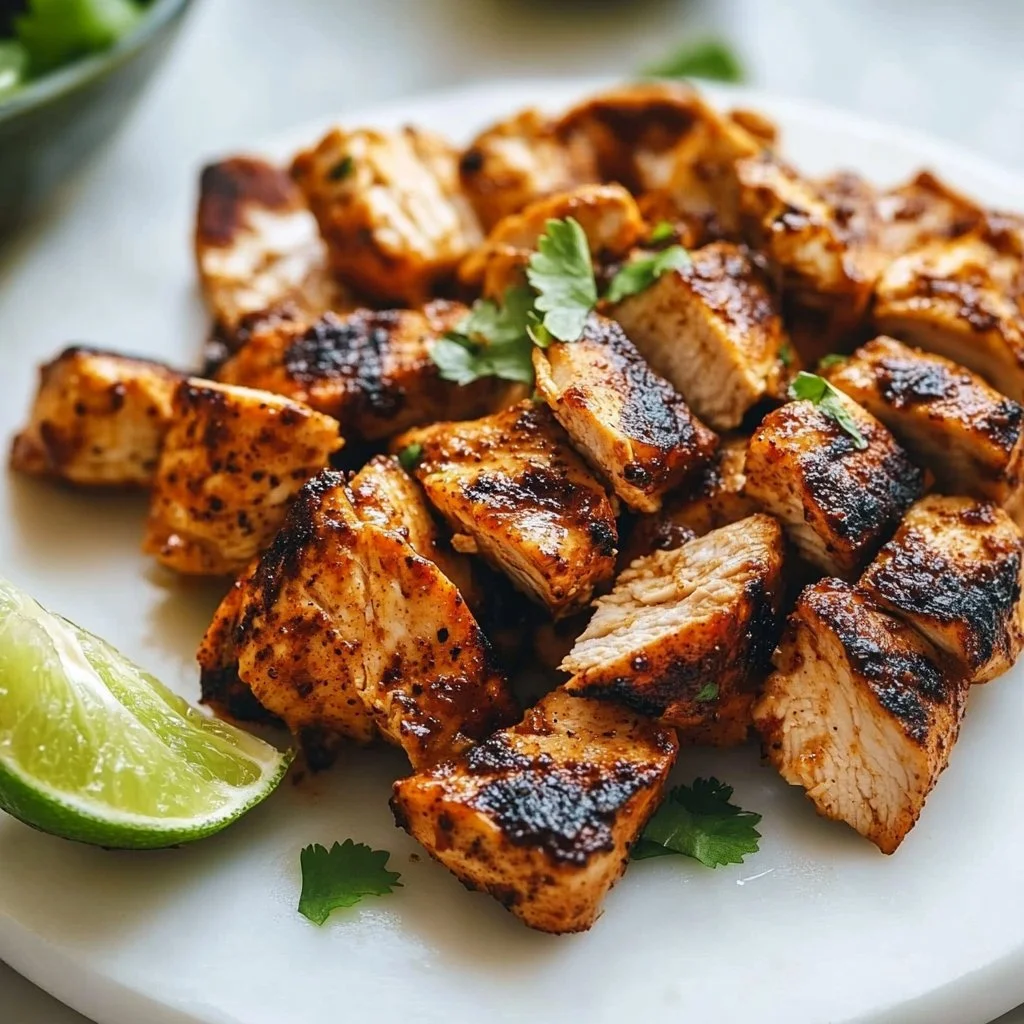
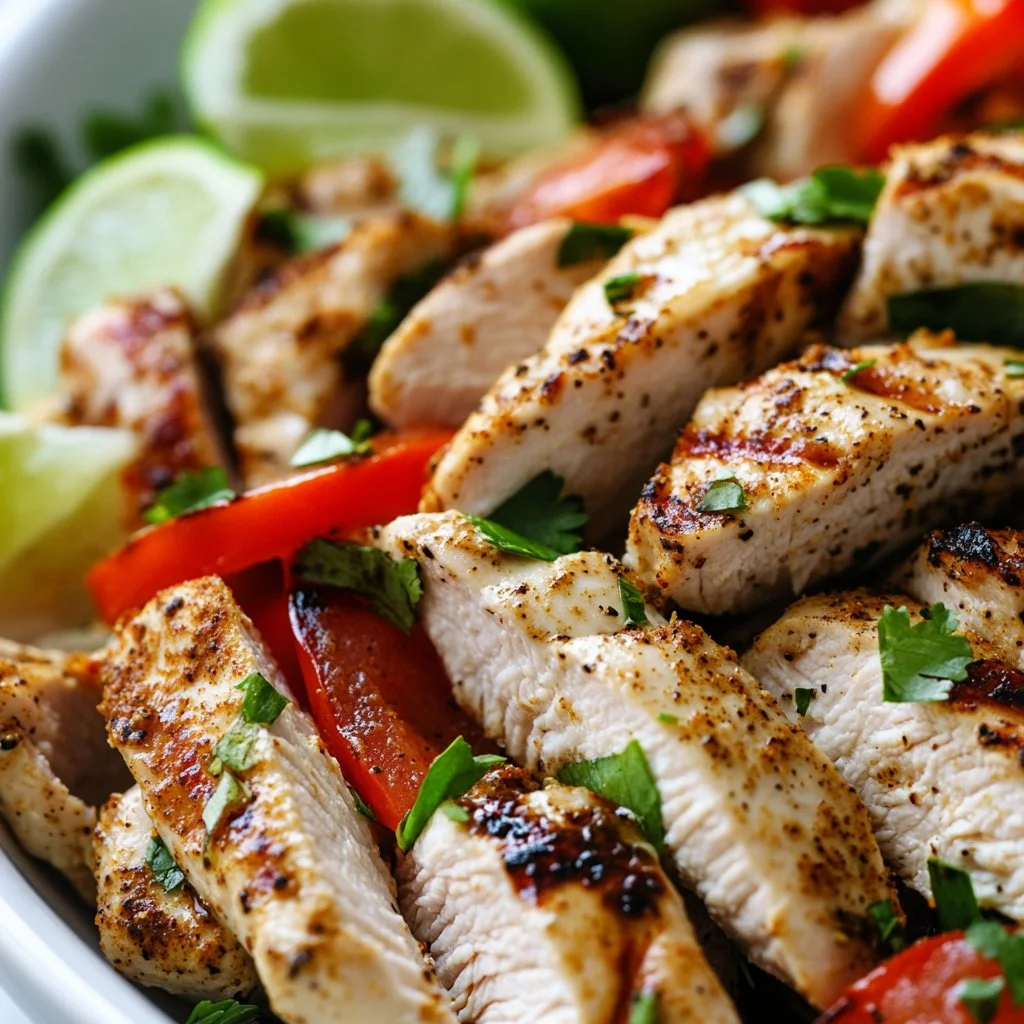
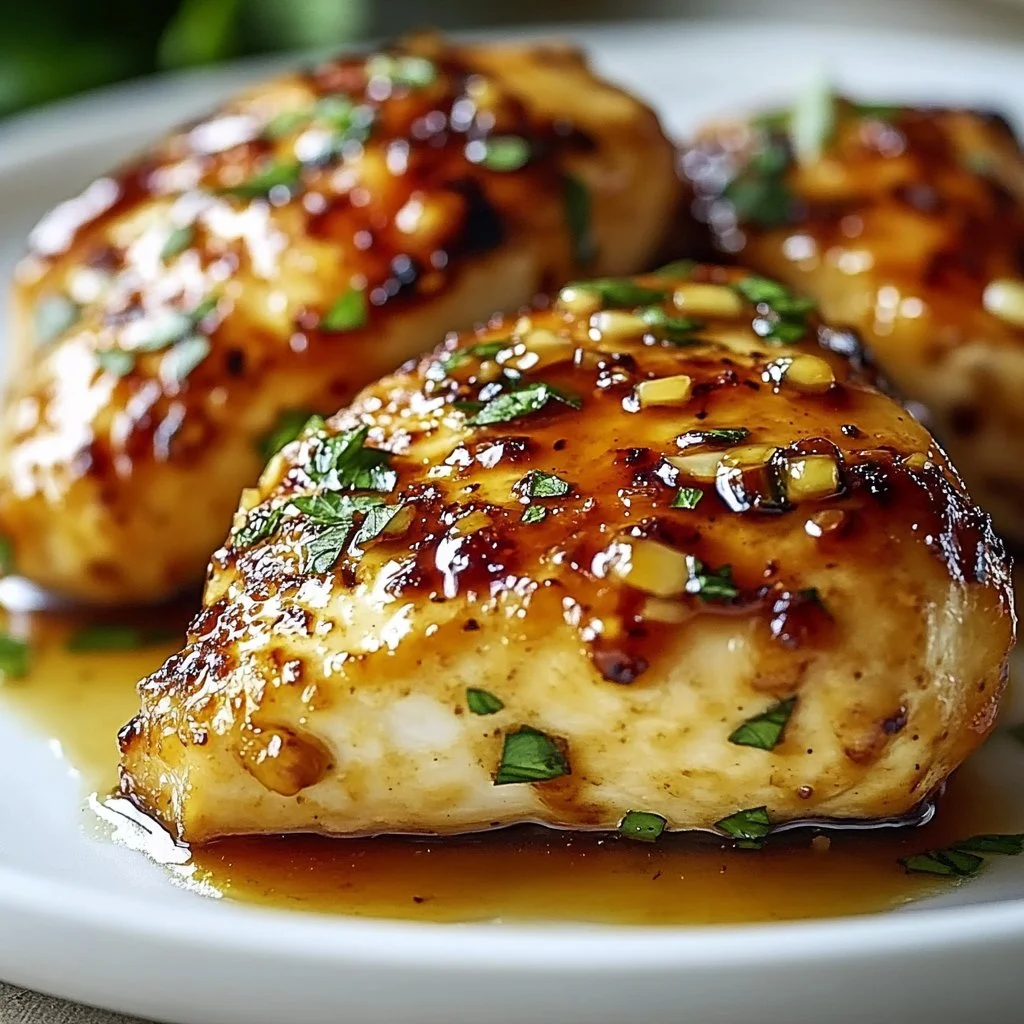
Serve family-style on a large platter. Arrange the sliced breasts in a single layer and drizzle any resting juices or a little extra olive oil on top. Garnish with lemon wedges and a sprinkle of chopped parsley.

This chicken works with many sides. Try a simple green salad, roasted vegetables, or quick couscous. For a complete comfort meal, place the platter in the middle of the table and let everyone help themselves.

For picky eaters, slice the chicken thinly and place it next to a few dipping options. Mild ranch, plain yogurt, or a squeeze of lemon can make it more appealing to younger palates.

Storage

Refrigerator: Store leftover grilled chicken in an airtight container for up to 4 days. Slice before storing to make reheating faster and more even.

Freezer: For longer storage, wrap the cooled chicken tightly and freeze for up to 3 months. Thaw overnight in the fridge before reheating.

Reheating: Reheat gently to avoid drying. Use a low oven at 300°F for 10 to 15 minutes, or reheat slices in a skillet over medium-low heat with a splash of chicken broth or water. Microwaves work in a pinch; cover the chicken and reheat in 30 second bursts to keep moisture.

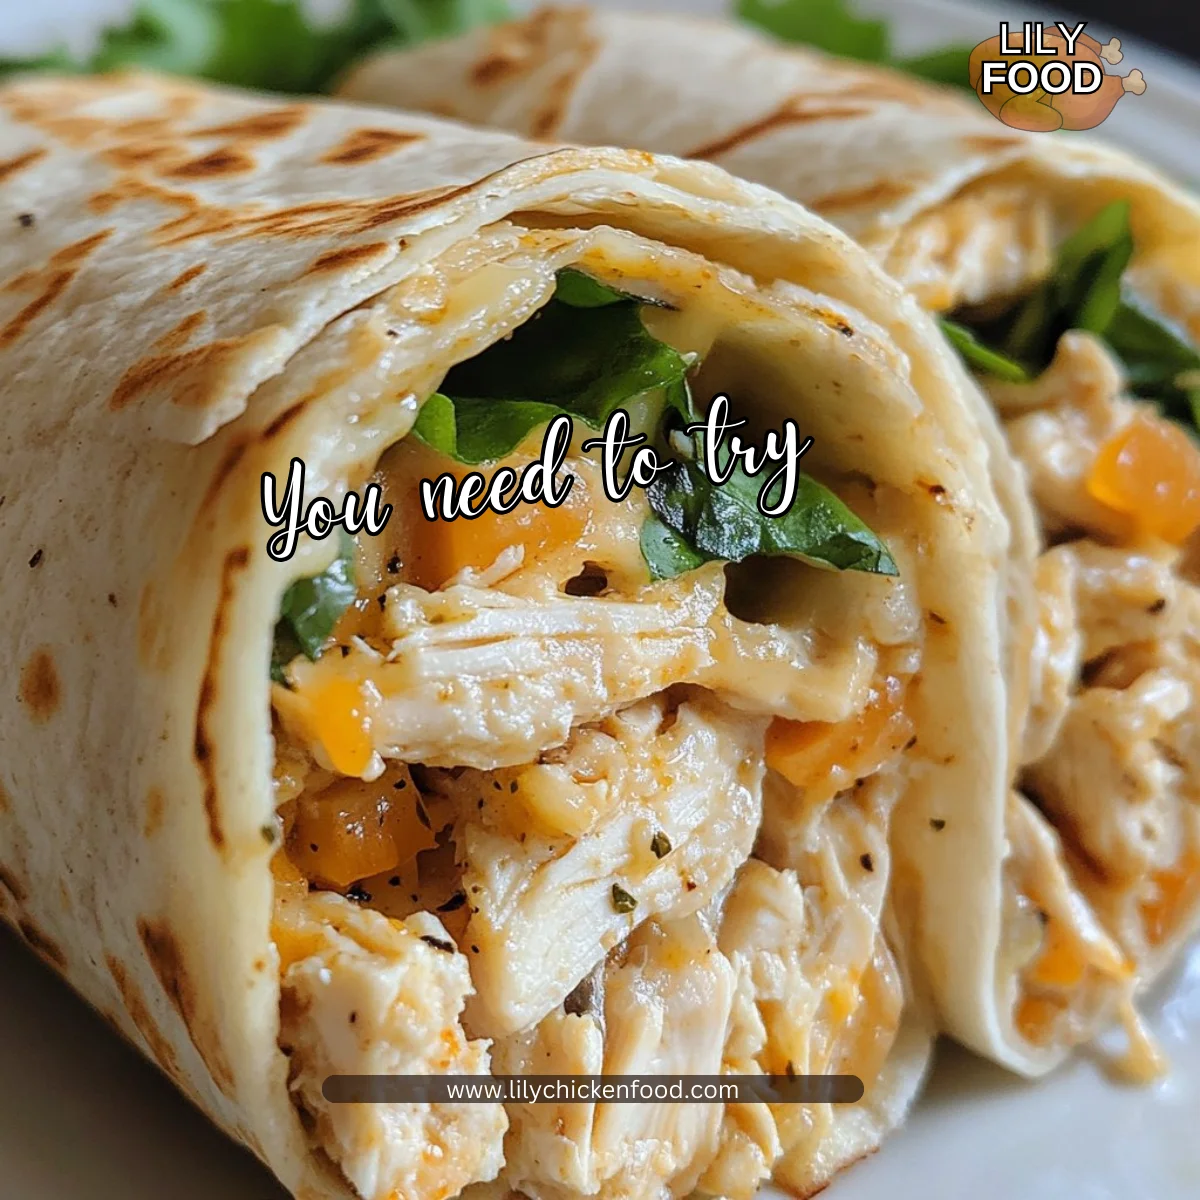
Tip: Use leftover chicken cold in salads and sandwiches. It tastes fresh and saves time when school lunches or quick dinners are needed.

Kitchen Notes

  • Shortcut: Pound breasts to even thickness to cut cooking time and ensure even doneness.
  • Equipment: An instant-read thermometer removes guesswork and prevents overcooking.
  • Time saver: Marinate in a sealable bag to get full flavor with less cleanup.
  • Safety: Always wash hands and surfaces after handling raw chicken.
  • Double duty: Cook extra for meal prep. Use leftovers in wraps, salads, or quick pasta for the week.

Variations

  • For picky eaters: Slice the breasts into thin strips before grilling and serve with a mild dipping sauce. Small pieces cook quickly and usually get easier acceptance from children.
  • Low-carb option: Serve over mixed greens with avocado and a drizzle of vinaigrette instead of starchy sides.
  • Paleo or Whole30: Use the same marinade but confirm your oil and seasonings fit the plan. Skip any added sugars or non-compliant sauces.
  • Herb-forward: Swap oregano for fresh rosemary and thyme for a more aromatic profile.
  • Spicy twist: Add 1/2 teaspoon of smoked paprika and a pinch of red pepper flakes for heat.

These small changes keep the core method while meeting different diet needs in your home.

FAQ

Q: How do I know the chicken is cooked without a thermometer?
A: Look for clear juices and firm texture. Slice the thickest part; it should be white with no pink. I still recommend an instant-read thermometer for safety and consistency.

Q: Can I use bone-in chicken breasts instead?
A: Yes, but plan for a longer cook time. Bone-in pieces take more time to reach 165°F. Use indirect heat after searing to finish them evenly.

Q: Is it safe to marinate overnight?
A: Yes. Overnight marinating is safe in the refrigerator and can deepen flavor. Avoid marinating at room temperature.

Q: Can I grill this on a stovetop grill pan?
A: Absolutely. Preheat the pan and follow the same timing. You may need slightly more time and should watch for hot spots.

Q: What sides pair best for a family meal?
A: Simple sides like roasted potatoes, steamed green beans, or a big salad work well. The goal is to keep it easy so you can enjoy time with your family.

Conclusion

I hope this grilled chicken becomes one of your go-to recipes for busy nights and relaxed weekend meals. If you want another tested technique from a chef, take a look at Once Upon a Chef’s guide to perfectly grilled chicken breasts for extra tips on timing and seasoning.

For a flavor-forward take that many home cooks love, check out this Delish recipe for the best grilled chicken breast to compare seasonings and methods.

Thanks for cooking with me. Enjoy that first bite when the kitchen fills with that lemon-garlic scent and everyone comes running.

Grilled Lemon Garlic Chicken Breasts

Prep Time 30 minutes
Cook Time 15 minutes
Total Time 45 minutes
Servings 4 servings
Calories 250
A quick and flavorful grilled chicken recipe that features a bright lemon-garlic marinade, perfect for busy weeknight dinners.

Ingredients

For the Marinade

  • 1/4 cup olive oil (Good extra virgin olive oil adds flavor.)
  • 2 tablespoons lemon juice (Fresh lemon juice brightens the marinade.)
  • 2 cloves garlic, minced (Mince finely for better infusion.)
  • 1 teaspoon dried oregano (Use fresh oregano if available, increasing the amount.)
  • to taste salt and pepper (Season generously.)

Main Ingredients

  • 4 pieces chicken breasts (Choose even-sized breasts or pound to an even thickness.)

Instructions 

Marinade Preparation

  • In a bowl, whisk together olive oil, lemon juice, garlic, oregano, salt, and pepper.
  • Add the chicken breasts to the marinade and let it sit for at least 30 minutes, or up to 2 hours in the fridge.

Grilling

  • Preheat the grill to medium-high heat (around 400°F to 450°F).
  • Grill the chicken for 6-7 minutes on each side or until fully cooked (internal temperature reaches 165°F).
  • Remove from the grill and let rest for a few minutes before serving.

Serving

  • Serve family-style on a large platter with sliced breasts and any resting juices or extra olive oil on top, garnished with lemon wedges.

Notes

Store leftovers in an airtight container for up to 4 days. Can be frozen for up to 3 months.
Calories: 250kcal
Course: Dinner, Main Course
Cuisine: American
Keyword: Easy Chicken Recipe, Family Recipe, Grilled Chicken, Lemon Garlic Chicken, Quick Dinner

Easy Hawaiian Chicken Kabobs

I can smell the sweet pineapple and warm soy-like notes as I tie my apron. The grill hisses when it meets the glaze, and the kitchen fills with a lively sound that makes everyone look up from their day. These kabobs are one of my favorite ways to turn a weeknight into a small celebration.

If you are planning a busy night, my roundup of best 5 easy chicken recipes for weeknight dinners will give you more ideas for quick family meals. I wrote those with the same goal I have here: simple steps, big flavor, and little fuss.

Why this works

Easy Hawaiian Chicken Kabobs

This recipe balances sweet, savory, and a touch of heat in a way that kids and grown-ups can enjoy together. It uses a short marinade, a quick homemade sauce, and simple skewers that make cooking and cleaning faster. That time-saving combo is what keeps this in my regular rotation.

If you love quick wins in the kitchen, check my quick and easy chicken collection for more family-friendly ideas. These kabobs are especially good when you want dinner ready without late-night stress.

Process Overview

“This is where the magic happens—when the aroma fills the kitchen.”

Start by making the sauce on the stove. While it simmers and cools, prep the chicken and pineapple. Then you grill, baste, and serve. The work moves in clear stages so you can include kids or a partner in the prep.

I find that dividing the steps into sauce, marinating, skewering, and grilling keeps the whole process calm. Each step is short, and you can do small tasks while the sauce simmers.

A quick note on timing

Allow about 1 hour for marinade and 20 minutes active cooking. If you want more simplicity, let the sauce double as a glaze and dip to cut down on dishes.

Ingredients

  • 3/4 cup pineapple juice
    Lily’s tip: Use juice from the can if you have it. Fresh is fine too, but canned juice keeps the flavor consistent.

  • 1/2 cup coconut aminos
    Lily’s tip: Coconut aminos add a mild umami flavor without as much salt as soy. If you need a gluten-free option, this is a great swap.

  • 1/2 cup ketchup
    Lily’s tip: Regular ketchup helps thicken the sauce and add a hint of tomato sweetness. Use a brand your family likes.

  • 1/2 cup brown sugar
    Lily’s tip: Light or dark both work. Brown sugar helps the glaze caramelize on the grill.

  • 2 tablespoons Frank’s Red Hot sauce
    Lily’s tip: This gives a gentle kick. Reduce to 1 tablespoon for milder heat, or leave it out entirely for conservative palates.

  • 1 tablespoon minced garlic
    Lily’s tip: Fresh minced garlic brightens the sauce. Use jarred if you are in a rush.

  • 1 tablespoon minced ginger
    Lily’s tip: Fresh ginger gives a warm, zesty edge. Ground ginger will work in a pinch.

  • 1 1/2 lbs chicken thighs (skinless and boneless)
    Lily’s tip: Thighs stay juicy and grill well. If you prefer breast, see my notes below.

  • 20 oz can pineapple chunks
    Lily’s tip: Drain the pineapple and pat it dry. That reduces flare-ups on the grill.

  • 6 kabob skewers
    Lily’s tip: If using wooden skewers, soak them in water for 20 minutes before grilling to prevent burning.

  • Sea salt (to taste)
    Lily’s tip: Add a pinch before grilling and adjust after a taste.

  • Black pepper (to taste)
    Lily’s tip: Freshly ground gives the best flavor. A little goes a long way with the sweet sauce.

If you want more chicken breast based recipes or to swap proteins, I have a guide with easy ideas at deliciously easy chicken breast recipes to try tonight.

Directions

  1. In a saucepan, combine pineapple juice, coconut aminos, ketchup, brown sugar, Frank’s Red Hot sauce, garlic, and ginger. Bring to a boil, then reduce the heat and let it simmer for 10-12 minutes until the sauce thickens.

    • Encouragement: Watch the sauce as it simmers and stir occasionally. The smell will let you know it is ready. This step makes a simple, glossy glaze your family will love.
  2. While the sauce cools, cut the chicken into bite-sized pieces and place them in a large bowl. Add a few spoonfuls of the sauce, seal the bag, and massage to evenly coat the chicken. Let it marinate in the refrigerator for at least an hour.

    • Encouragement: You do not need to over-marinate. One hour gives great flavor and keeps dinner on schedule. If you are pressed for time, even 30 minutes helps.
  3. Drain the pineapple and cut pieces similar in size to the chicken. Thread the chicken and pineapple onto six skewers, then season with sea salt and pepper.

    • Encouragement: Alternate chicken and pineapple so every bite has balance. If little hands want to help, let them thread the pineapple while you handle the raw chicken.
  4. Preheat the grill to medium-high heat. Cook the kabobs for 10-12 minutes, turning occasionally and brushing with sauce.

    • Encouragement: Keep a hand on the brush and baste a few times for a sticky, caramelized finish. Turn gently so the kabobs cook evenly and stay intact.
  5. Serve with the remaining sauce on the side for dipping.

    • Encouragement: Set the platter in the middle and let everyone take what they want. I promise the dipping sauce disappears fast.

If you want more quick grill ideas, try my rotisserie chicken recipes for busy weeknights for other weeknight crowd-pleasers.

Serving

Easy Hawaiian Chicken Kabobs

These kabobs shine when you serve family-style. Lay them on a large platter over a bed of steamed rice or coconut rice. Add a simple green salad or a tray of grilled veggies to keep the meal colorful.

For kids, slice the chicken off the skewers and serve with small bowls of sauce for dipping. For adults, offer lime wedges and a sprinkle of chopped cilantro to brighten each plate.

Set out plates and serving utensils so everyone can reach the platter. Let family members assemble their own bowls. It makes dinner feel casual, lively, and shared.

Storage

Store leftover chicken and pineapple in an airtight container in the refrigerator for up to 3 days. Keep extra sauce in a separate jar to avoid soggy pieces.

To reheat, place kabobs on a sheet pan and warm in a 375°F oven for about 8-10 minutes. You can also reheat gently on the grill over medium heat, turning often until heated through.

If you end up with more sauce than you need, it freezes well in ice cube trays for quick portions to glaze future meals. For a comforting use of leftovers, try a recipe that reinvents cooked chicken, like my leftover rotisserie chicken noodle soup, which is a great way to stretch dinner into lunch.

Kitchen Notes

  • Soak wooden skewers for 20 minutes to prevent burning and split them evenly for safe grilling.
  • Use a thermometer to check the chicken reaches 165°F for safety and consistent doneness.
  • Make the sauce ahead and refrigerate. It keeps for 5 days and saves time on busy nights.
  • If flare-ups occur, move kabobs to a cooler side of the grill and finish with indirect heat.
  • Double the sauce if you want extra for dipping and freezing.

Variations

  • For picky eaters: Reduce or omit the Frank’s Red Hot sauce. Add a bit more brown sugar to balance each bite.
  • For a lower-sugar option: Cut brown sugar to 1/4 cup and add a splash of orange juice or a teaspoon of honey substitute.
  • For a gluten-free meal: Coconut aminos already keep this friendly. Double-check your ketchup and other condiments.
  • For vegetarians: Swap chicken for firm tofu or thick slices of portobello mushroom. Press tofu to remove moisture and marinate a bit longer.
  • For a smoky twist: Add a teaspoon of smoked paprika to the sauce or finish kabobs over wood chips for added aroma.

FAQ

Q: Can I use chicken breast instead of thighs?
A: Yes. Chicken breast works fine. Cut into even pieces and watch closely on the grill to avoid drying. If you want more breast-based ideas, see my chicken breast recipes linked above.

Q: How long should I marinate the chicken?
A: At least 1 hour is best. You can marinate up to 8 hours in the refrigerator. Overnight can make the chicken very tender but may change the texture slightly.

Q: Can I bake these instead of grilling?
A: Absolutely. Arrange the skewers on a broiler pan and bake at 425°F for 12-15 minutes, turning and basting once. Finish under the broiler for 1-2 minutes if you want extra caramelization.

Q: Is the sauce spicy?
A: The sauce has a mild heat from Frank’s Red Hot sauce. Reduce or omit it for a children-friendly version. The sweetness balances the spice so it rarely feels overpowering.

Q: How do I prevent soggy kabobs?
A: Drain and pat the pineapple dry before skewering. Avoid overcrowding the skewers so heat circulates and you get a nice char.

Conclusion

I hope this Easy Hawaiian Chicken Kabobs recipe brings your family around the table with smiles. The glaze is simple, the steps are friendly, and the result is a weeknight meal that feels special. For another take on Hawaiian-style kabobs and ideas for summer grilling, check this Hawaiian Chicken Kebabs (with Pineapple!) guide from Cooking Classy. If you want a similar recipe with helpful tips and photos, see the Hawaiian Chicken Kabobs Recipe at She Wears Many Hats for more inspiration.

Thanks for cooking with me. Send a photo of your kabobs if you try them. I love to hear how dinner turned out.

Hawaiian Chicken Kabobs

Prep Time 1 hour
Cook Time 20 minutes
Total Time 1 hour 20 minutes
Servings 6 servings
Calories 350
These Easy Hawaiian Chicken Kabobs are a delightful blend of sweet and savory flavors featuring grilled chicken and pineapple, perfect for a weeknight meal.

Ingredients

For the marinade and sauce

  • 3/4 cup pineapple juice (Use juice from the can if you have it. Fresh is fine too, but canned juice keeps the flavor consistent.)
  • 1/2 cup coconut aminos (Coconut aminos add a mild umami flavor without as much salt as soy. If you need a gluten-free option, this is a great swap.)
  • 1/2 cup ketchup (Regular ketchup helps thicken the sauce and add a hint of tomato sweetness. Use a brand your family likes.)
  • 1/2 cup brown sugar (Light or dark both work. Brown sugar helps the glaze caramelize on the grill.)
  • 2 tablespoons Frank’s Red Hot sauce (This gives a gentle kick. Reduce to 1 tablespoon for milder heat, or leave it out entirely for conservative palates.)
  • 1 tablespoon minced garlic (Fresh minced garlic brightens the sauce. Use jarred if you are in a rush.)
  • 1 tablespoon minced ginger (Fresh ginger gives a warm, zesty edge. Ground ginger will work in a pinch.)

For the kabobs

  • 1.5 lbs chicken thighs (skinless and boneless) (Thighs stay juicy and grill well. If you prefer breast, see my notes below.)
  • 20 oz can pineapple chunks (Drain the pineapple and pat it dry. That reduces flare-ups on the grill.)
  • 6 pieces kabob skewers (If using wooden skewers, soak them in water for 20 minutes before grilling to prevent burning.)
  • to taste pinch sea salt (Add a pinch before grilling and adjust after a taste.)
  • to taste pinch black pepper (Freshly ground gives the best flavor. A little goes a long way with the sweet sauce.)

Instructions 

Make the Sauce

  • In a saucepan, combine pineapple juice, coconut aminos, ketchup, brown sugar, Frank’s Red Hot sauce, garlic, and ginger. Bring to a boil, then reduce the heat and let it simmer for 10-12 minutes until the sauce thickens.
  • Watch the sauce as it simmers and stir occasionally. The smell will let you know it is ready. This step makes a simple, glossy glaze your family will love.

Marinate the Chicken

  • While the sauce cools, cut the chicken into bite-sized pieces and place them in a large bowl. Add a few spoonfuls of the sauce, seal the bag, and massage to evenly coat the chicken. Let it marinate in the refrigerator for at least an hour.
  • You do not need to over-marinate. One hour gives great flavor and keeps dinner on schedule. If you are pressed for time, even 30 minutes helps.

Prepare the Kabobs

  • Drain the pineapple and cut pieces similar in size to the chicken. Thread the chicken and pineapple onto six skewers, then season with sea salt and pepper.
  • Alternate chicken and pineapple so every bite has balance. If little hands want to help, let them thread the pineapple while you handle the raw chicken.

Grill the Kabobs

  • Preheat the grill to medium-high heat. Cook the kabobs for 10-12 minutes, turning occasionally and brushing with sauce.
  • Keep a hand on the brush and baste a few times for a sticky, caramelized finish. Turn gently so the kabobs cook evenly and stay intact.

Serve

  • Serve with the remaining sauce on the side for dipping.
  • Set the platter in the middle and let everyone take what they want. I promise the dipping sauce disappears fast.

Notes

Store leftover chicken and pineapple in an airtight container in the refrigerator for up to 3 days. Keep extra sauce in a separate jar to avoid soggy pieces. To reheat, place kabobs on a sheet pan and warm in a 375°F oven for about 8-10 minutes. You can also reheat gently on the grill over medium heat, turning often until heated through. If you end up with more sauce than you need, it freezes well in ice cube trays for quick portions to glaze future meals.
Calories: 350kcal
Course: Dinner, Main Course
Cuisine: American, Hawaiian
Keyword: Easy Chicken Dinner, Family-Friendly Recipes, Grilled Kabobs, Hawaiian Chicken Kabobs, weeknight meals

Chicken Taco Marinade

As the sun sets and the kitchen fills with warm light, the savory aroma of a chicken taco marinade awakens the senses. You can hear the gentle sizzle as the chicken hits the grill, signaling a delightful meal ahead. The smell draws in your loved ones, anticipation building for the delicious dinner that awaits. This chicken taco marinade is all about creating memories around the dinner table, bringing family together with every bite.

Why This Works

Chicken Taco Marinade

This chicken taco marinade is a family favorite for many reasons. First, it’s packed with flavor. The spice blend pairs beautifully with the juicy chicken, creating a taste that everyone will love. Second, it’s time-saving. You can whip up the marinade in just a few minutes, allowing busy families to enjoy a home-cooked meal without extensive preparation. It’s perfect for a weeknight dinner or a fun weekend gathering. Simply marinate the chicken and let it work its magic while you prepare your favorite taco fixings. You’ll be amazed at how easy it can be to bring the fiesta home.

Process Overview

“This is where the magic happens—when the aroma fills the kitchen.”

The process of making this chicken taco marinade is straightforward and enjoyable. Start by gathering your ingredients and taking a moment to appreciate the vibrant colors and fresh scents. Mixing the marinade is a quick task, and once the chicken is coated, the flavors can meld together beautifully. You’ll soon find that the time spent marinating is well worth it when you take that first bite of your grilled chicken.

Ingredients

To make the best chicken taco marinade, here’s what you’ll need:

  • Chicken Breasts or Thighs: Choose skinless, boneless chicken breasts or thighs. They cook evenly and absorb the marinade beautifully. Thighs are juicier and offer more flavor, while breasts are leaner.

  • Taco Spice Blend: Use your favorite store-bought blend or make your own. A mix of chili powder, cumin, garlic powder, and paprika works wonders and is always a hit. Adjust the spices based on your family’s taste preferences.

  • Olive Oil: This adds moisture and helps the spices cling to the chicken. Extra virgin olive oil is a great choice, enhancing the overall flavor.

  • Fresh Lime Juice: Lime juice brightens the marinade, adding a refreshing zing. Use fresh limes for the best taste, as bottled lime juice can be too acidic.

Directions

  1. In a bowl, mix the taco spice blend with olive oil and fresh lime juice. Take a moment to appreciate the vibrant colors and enticing smells of your mixture. This is where the magic happens.

  2. Add the chicken breasts or thighs to the marinade, ensuring they are well coated. Use your hands to get in there; it’s a fun and satisfying step. You want each piece to soak up all that delicious flavor.

  3. Marinate for at least 30 minutes to 2 hours. If time allows, let it sit in the fridge longer for even more flavor. This is a great time to set the table or prep your favorite taco toppings.

  4. Grill the marinated chicken until fully cooked, about 6-7 minutes per side, depending on thickness. Listen for that satisfying sizzle! You want an internal temperature of 165°F for safe eating.

  5. Serve in tacos with your favorite toppings, like fresh salsa, avocado, or shredded cheese. Encourage everyone to build their perfect taco, creating a fun and interactive dining experience.

Serving

Chicken Taco Marinade

To serve this chicken taco dish family-style, lay everything out on the table. Use bright, colorful plates for the tacos and bowls for the toppings. Let each person assemble their own tacos. This not only makes dinner more enjoyable, but it also allows everyone to customize their experience. Whether it’s a little extra cheese or a spicy salsa, everyone can craft their ideal dish.

Storage

If you have leftovers (though they are rare), store the marinated chicken in an airtight container in the fridge for up to 3 days. When reheating, do so gently to retain moisture, as dry chicken is never pleasing. You can reheat in the oven at 350°F or briefly in a skillet on medium heat. Adding a splash of water or broth can help keep it moist.

Kitchen Notes

  • Batch Preparation: Make a double batch of this marinade and freeze half for later use. It’s a great time-saver for busy nights.

  • Slow Cooker Option: If you prefer, you can cook the marinated chicken in a slow cooker on low for 4-6 hours. Shred it for easy tacos.

  • Prep Ahead: Marinating the chicken the night before makes for an effortless dinner the next day.

  • Use Skewers: For a fun twist, cut the chicken into cubes, marinate, and then skewer them for grilling or broiling.

  • Custom Spice Level: Adjust the spice level by adding a pinch of cayenne or using a mild/more robust taco spice blend based on your family’s preferences.

Variations

If you have picky eaters or specific dietary needs, there are plenty of ways to tweak this marinade:

  • Vegetarian Option: Use the marinade on firm tofu or portobello mushrooms. They absorb flavors nicely and grill well.

  • Low-Carb: Serve the grilled chicken wrapped in lettuce leaves instead of tortillas.

  • Different Proteins: Try this marinade on pork or shrimp. Both are fantastic choices that take on the spices beautifully.

  • Add Fresh Herbs: If your family enjoys different herbs, add fresh cilantro or oregano to the marinade for an extra layer of flavor.

  • For Kids: Make a mild version of the marinade for the kids. Serve it alongside taco toppings so they can build their tacos just how they like.

FAQ

1. How long should I marinate the chicken?

You can marinate the chicken for as little as 30 minutes, but for maximum flavor, aim for 2 hours or even overnight.

2. Can I use bone-in chicken?

Yes, you can! Just ensure you adjust the cooking time to fully cook the chicken. Aim for an internal temperature of 165°F.

3. What are some good toppings for chicken tacos?

Fresh avocado, pico de gallo, shredded lettuce, cheese, sour cream, and jalapeños are always popular options.

4. Can I bake the marinated chicken instead of grilling?

Absolutely! Preheat your oven to 400°F. Place the chicken on a baking sheet and bake for about 20-25 minutes until fully cooked.

5. How can I make this marinade spicier?

Add diced jalapeños, cayenne pepper, or a splash of hot sauce to amp up the heat.

As you wrap up your week and gather with your family, remember that meals shared together leave lasting impressions. This chicken taco marinade brings flavor, love, and laughter around the dinner table. Embrace the moments spent cooking and eating together—it’s what makes a house a home. Happy cooking!

Chicken Taco Marinade

Prep Time 10 minutes
Cook Time 15 minutes
Total Time 25 minutes
Servings 4 servings
Calories 300
A flavorful chicken taco marinade that brings family together with every bite, perfect for weeknight dinners or fun gatherings.

Ingredients

For the Marinade

  • 1/4 cup olive oil (Extra virgin is preferred for enhanced flavor.)
  • 1/4 cup fresh lime juice (Use fresh limes for the best taste.)
  • 2 tablespoons taco spice blend (Use a store-bought blend or homemade with chili powder, cumin, garlic powder, and paprika.)

For the Chicken

  • 4 pieces skinless, boneless chicken breasts or thighs (Thighs are juicier, while breasts are leaner.)

Instructions 

Preparation

  • In a bowl, mix the taco spice blend with olive oil and fresh lime juice.
  • Add the chicken breasts or thighs to the marinade, ensuring they are well coated.
  • Marinate for at least 30 minutes to 2 hours, or longer for more flavor.

Cooking

  • Grill the marinated chicken until fully cooked, about 6-7 minutes per side, ensuring an internal temperature of 165°F.
  • Serve in tacos with your favorite toppings.

Notes

For a fun and interactive dining experience, lay out taco ingredients for assembly at the table. You can batch prepare the marinade and freeze half for later use.
Calories: 300kcal
Course: Dinner, Main Course
Cuisine: Mexican
Keyword: Chicken Taco Marinade, Easy Dinner, Grilled Chicken, Taco Recipe

Pesto Bruschetta Chicken

I love the enticing smell of herbs and roasted chicken wafting through the kitchen. As it fills the air, the soft sound of sizzling and bubbling makes me feel at home. Cooking together as a family always creates lasting memories. Today, I want to share a simple yet delightful recipe: Pesto Bruschetta Chicken. It’s perfect for a weeknight dinner or a casual get-together.

Why This Works

Pesto Bruschetta Chicken

This recipe hits all the right notes for busy families. First, it’s quick to put together, requiring minimal prep time while offering maximum flavor. The bright and fresh pesto mixed with juicy cherry tomatoes elevates each bite.

Not only does this dish taste amazing, but it’s also a visually stunning centerpiece for your table. It invites everyone to gather ‘round, share stories, and enjoy a comforting meal together. With a handful of ingredients, you get a delightful, nutritious dinner that satisfies the whole family.

Process Overview

“This is where the magic happens—when the aroma fills the kitchen.”

Every step in this recipe leads you to a cozy evening with your loved ones. You’ll be amazed at how quickly your kitchen transforms into a warm haven of delight.

Ingredients

To make Pesto Bruschetta Chicken, you will need:

  • 4 boneless, skinless chicken breasts
    Tip: Look for breasts that are uniform in size for even cooking.

  • 1 cup pesto sauce
    Tip: Homemade pesto is fantastic, but store-bought works well too for convenience.

  • 1 cup cherry tomatoes, halved
    Tip: Choose vibrant, firm tomatoes for the best flavor and color.

  • 1/2 cup mozzarella cheese, shredded
    Tip: Fresh mozzarella adds a wonderfully creamy texture if you can find it.

  • Salt and pepper to taste
    Tip: Season generously for added flavor.

  • Fresh basil for garnish
    Tip: Pluck the leaves just before serving for the freshest taste.

Directions

  1. Preheat the oven to 375°F (190°C).
    Preheating your oven ensures the chicken cooks evenly.

  2. Season the chicken breasts with salt and pepper.
    This simple step enhances the chicken’s natural flavor.

  3. Place the chicken in a baking dish and spread the pesto sauce evenly on top.
    The pesto will create a beautiful, flavorful crust on the chicken.

  4. Scatter the halved cherry tomatoes over the chicken.
    Their sweetness will infuse into the chicken as it bakes.

  5. Sprinkle shredded mozzarella cheese on top of the tomatoes.
    As it melts, it creates a gooey, delicious layer over the dish.

  6. Bake for 25-30 minutes or until the chicken is cooked through and no longer pink in the center.
    A meat thermometer should read 165°F for perfectly cooked chicken.

  7. Remove from the oven and let it rest for a few minutes.
    Letting it rest keeps the juices locked in.

  8. Garnish with fresh basil before serving.
    A sprinkle of basil makes everything better and adds brightness to the dish!

Serving

Pesto Bruschetta Chicken

Serving this dish is all about family-style enjoyment. Place the baking dish right in the center of the table. Let everyone serve themselves on their plates, savoring the beautiful combination of chicken, gooey cheese, and cherry tomatoes. Pair it with some crusty bread or a fresh salad for a complete meal that everyone will love.

Storage

If you have leftovers (which are rare with this tasty dish), store them in an airtight container in the fridge. They will last up to three days. When you’re ready to enjoy them again, reheat the chicken in the oven at 350°F (175°C) until warmed through. This will help to maintain the chicken’s juiciness. You can also microwave it, but be careful not to overcook it.

Kitchen Notes

Here are a few shortcuts to make your cooking experience even smoother:

  • Buy pre-cooked chicken or rotisserie chicken to save time.
  • Use store-bought pesto to simplify preparation.
  • Chop tomatoes and prepare everything in advance.
  • Add a dash of red pepper flakes to the pesto for a hint of heat.
  • Serve any leftovers over pasta for a quick lunch the next day.

Variations

Here are some possible tweaks for picky eaters or different diets:

  • For a vegetarian version, swap chicken for slices of eggplant or portobello mushrooms.
  • Add spinach or arugula to the cherry tomatoes for an extra dose of greens.
  • To make it gluten-free, ensure your pesto and any bread you serve are labeled gluten-free.
  • Use different herbs like cilantro or parsley if you want to change up the flavor profile.
  • For dairy-free, use vegan cheese or omit dairy altogether.

FAQ

1. Can I use frozen chicken breasts?
Yes, but make sure to thaw them first for even cooking.

2. What can I serve with this chicken?
Serve with a simple salad or garlic bread for a complete meal.

3. How do I know the chicken is cooked through?
Use a meat thermometer to check that it reaches 165°F.

4. Can I make this dish ahead of time?
Absolutely! Prepare the chicken and toppings in advance, then bake it just before serving.

5. Can I freeze the leftovers?
Yes, you can freeze the cooked chicken for up to three months. Let it thaw in the fridge before reheating.

Conclusion

Pesto Bruschetta Chicken is more than just a meal; it’s a way to bring your family together. As you enjoy each bite, remember the joy of connecting over home-cooked food. I hope this recipe fills your kitchen with warmth and delightful memories. Happy cooking!

Pesto Bruschetta Chicken

Prep Time 15 minutes
Cook Time 30 minutes
Total Time 45 minutes
Servings 4 servings
Calories 450
A simple and delightful chicken dish topped with fresh pesto, juicy cherry tomatoes, and gooey mozzarella cheese, perfect for weeknight dinners or gatherings.

Ingredients

Main Ingredients

  • 4 pieces boneless, skinless chicken breasts (Look for breasts that are uniform in size for even cooking.)
  • 1 cup pesto sauce (Homemade pesto is fantastic, but store-bought works well too for convenience.)
  • 1 cup cherry tomatoes, halved (Choose vibrant, firm tomatoes for the best flavor and color.)
  • 1/2 cup mozzarella cheese, shredded (Fresh mozzarella adds a wonderfully creamy texture if you can find it.)
  • to taste salt and pepper (Season generously for added flavor.)
  • Fresh basil for garnish (Pluck the leaves just before serving for the freshest taste.)

Instructions 

Preparation

  • Preheat the oven to 375°F (190°C). Preheating your oven ensures the chicken cooks evenly.
  • Season the chicken breasts with salt and pepper. This simple step enhances the chicken's natural flavor.
  • Place the chicken in a baking dish and spread the pesto sauce evenly on top. The pesto will create a beautiful, flavorful crust on the chicken.
  • Scatter the halved cherry tomatoes over the chicken. Their sweetness will infuse into the chicken as it bakes.
  • Sprinkle shredded mozzarella cheese on top of the tomatoes. As it melts, it creates a gooey, delicious layer over the dish.

Cooking

  • Bake for 25-30 minutes or until the chicken is cooked through and no longer pink in the center. A meat thermometer should read 165°F for perfectly cooked chicken.
  • Remove from the oven and let it rest for a few minutes. Letting it rest keeps the juices locked in.
  • Garnish with fresh basil before serving. A sprinkle of basil makes everything better and adds brightness to the dish!

Notes

Serve this dish family-style straight from the baking dish. Pair it with crusty bread or a fresh salad for a complete meal. Leftovers can be stored in an airtight container in the fridge for up to three days.
Calories: 450kcal
Course: Dinner, Main Course
Cuisine: Italian
Keyword: Easy Chicken Recipes, Family Dinner, Pesto Bruschetta Chicken, quick chicken recipe, Weeknight Meal

Sheet Pan Chicken Pitas with Herby Ranch

The kitchen feels alive as you gather your ingredients for Sheet Pan Chicken Pitas with Herby Ranch. You can almost hear the comforting sizzle of chicken and vegetables roasting in the oven. The warm scents of garlic, paprika, and herbs fill the air, making it hard to wait. This is food made for sharing, a meal that brings everyone together.

Why This Works

Sheet Pan Chicken Pitas with Herby Ranch

Sheet Pan Chicken Pitas with Herby Ranch is a breeze to prepare. In today’s busy world, finding time to cook can be a challenge. This recipe is perfect for families or anyone looking to save time. You make everything on one pan, which means less cleanup and more time enjoying your meal. The chicken and vegetables cook together, soaking up all the flavors. Plus, they’re stuffed into warm pitas that are so easy to eat.

Process Overview

“This is where the magic happens—when the aroma fills the kitchen.”

In less than an hour, you can have a full meal ready to serve. You simply prepare the ingredients, roast them on a sheet pan, and then package them into pitas. It’s a straightforward process that lets everyone assemble their own meal at the table. That not only brings some fun to dinner but also allows everyone to customize their pitas with their favorite toppings.

Ingredients

  • 2 pieces chicken breasts, boneless, skinless
    These roast quickly and slice beautifully for stuffing pitas.

  • 1 tablespoon olive oil
    Helps the chicken and vegetables brown and keeps everything juicy.

  • to taste salt and pepper
    Essential for seasoning and bringing out natural flavors.

  • 1 teaspoon garlic powder
    Gives a warm, savory backbone without overpowering.

  • 1 teaspoon paprika
    Adds color and a subtle smoky sweetness.

  • 1 cup mixed vegetables (bell peppers, onions, zucchini)
    A colorful mix that roasts into tender, caramelized bites.

  • 1/2 cup Greek yogurt
    The creamy base for the herby ranch, tangy and smooth.

  • 1 tablespoon ranch seasoning mix
    All the classic ranch flavors concentrated for convenience.

  • to taste fresh herbs (parsley, dill)
    Bright, aromatic, and they lift the whole dish.

  • 4 pieces pitas
    Soft or slightly toasted to cradle the filling.

Lily’s Personal Tips:

  • Chicken Breasts: Look for even thickness in the breasts. This ensures they cook evenly.
  • Olive Oil: Investing in good quality oil can enhance the flavors of your dish.
  • Salt and Pepper: Season generously, but remember that you can always add more later.
  • Garlic Powder: Use fresh garlic if you prefer. Just mince about 2 cloves.
  • Fresh Herbs: Chop them just before serving for maximum aroma and freshness.

Directions

Preparation:

  1. Preheat your oven to 400°F.
    This temperature is perfect for roasting.

  2. Prepare the chicken. Pat the chicken dry with a paper towel and place it on a cutting board.
    Drying helps the chicken sear nicely.

  3. Drizzle the olive oil over the chicken and season with salt, pepper, garlic powder, and paprika.
    This step preps the chicken to soak in all the savory goodness.

  4. Chop the mixed vegetables into bite-sized pieces.
    Try to keep the pieces similar in size for even cooking.

  5. Toss the vegetables with a drizzle of olive oil, salt, and pepper in a bowl.
    This makes sure they are all seasoned well.

Cooking:
6. Spread the seasoned vegetables on one side of a large sheet pan.
Make sure they have enough space to roast, not steam.

  1. Place the seasoned chicken breasts on the other side of the pan.
    This helps keep flavors contained while everything cooks together.

  2. Roast in the oven for 25-30 minutes or until the chicken reaches an internal temperature of 165°F and the vegetables are tender.
    Your kitchen will smell amazing!

  3. Once cooked, let the chicken rest for a few minutes before slicing it into strips.
    Resting lets the juices redistribute for a juicier bite.

Serving:
10. For serving, layer the chicken and roasted vegetables inside warm pitas.
Encourage everyone to customize their own pitas.

  1. Mix Greek yogurt with ranch seasoning and fresh herbs to create a delicious sauce.
    Drizzle this over each pita for a creamy finish.

  2. Serve the pitas family-style on a big platter, letting everyone dig in.
    Gather around the table and enjoy together.

Serving

Sheet Pan Chicken Pitas with Herby Ranch

Serving this dish family-style can turn dinner into an event. Place a platter of pitas, chicken, and vegetables in the middle of the table. Have bowls of the herby ranch sauce and fresh herbs at the side. Everyone can create their own pitas, making it a fun and interactive meal. This also encourages conversations and quality time with each other.

Storage

If you have leftovers, store the chicken, vegetables, and pita separately in airtight containers. These can be refrigerated for up to three days. When you’re ready to enjoy them again, just reheat everything in the oven at 350°F until warmed through. This helps to retain the best flavor and texture.

Kitchen Notes

  • Cut vegetables ahead of time to save on prep.
  • Use a rotisserie chicken for a quicker option.
  • Wrap pitas in aluminum foil and warm them in the oven.
  • Pre-mix the ranch yogurt sauce in advance and store in the fridge.
  • Use an instant-read thermometer for perfectly cooked chicken every time.

Variations

  • Vegetarian Option: Swap the chicken for chickpeas or extra vegetables.
  • Gluten-Free: Use gluten-free pitas or serve the filling over a bed of greens.
  • Picky Eaters: Let the kids choose their own vegetables or omit certain ingredients.
  • Spicy Kick: Add some diced jalapeños to the veggies or a dash of hot sauce.
  • Different Proteins: Substitute chicken with turkey, tofu, or shrimp.

FAQ

1. Can I make this ahead of time?
Yes, you can prepare everything in advance. However, it’s best to assemble the pitas right before serving for the freshest taste.

2. What other vegetables can I use?
Feel free to use whatever you have on hand. Carrots, broccoli, and asparagus also work well.

3. Can I use store-bought ranch dressing?
Absolutely! If you’re short on time, store-bought ranch dressing is a quick and easy option.

4. How do I know if the chicken is cooked?
Use a meat thermometer to check that it reaches an internal temperature of 165°F.

5. Can I freeze the leftovers?
While it’s best fresh, you can freeze the chicken and vegetables. Thaw before reheating.

As you finish up dinner and everyone is satisfied, remember the difference a homemade meal can make in bringing families together. Sheet Pan Chicken Pitas with Herby Ranch isn’t just a recipe; it’s a chance to create memories over a delicious meal. Enjoy every bite and the smiles that follow.

Sheet Pan Chicken Pitas with Herby Ranch

Prep Time 15 minutes
Cook Time 30 minutes
Total Time 45 minutes
Servings 4 servings
Calories 400
A quick and fun meal featuring roasted chicken and vegetables stuffed into warm pitas with a creamy herby ranch sauce.

Ingredients

Main Ingredients

  • 2 pieces chicken breasts, boneless, skinless (These roast quickly and slice beautifully for stuffing pitas.)
  • 1 tablespoon olive oil (Helps the chicken and vegetables brown and keeps everything juicy.)
  • to taste salt and pepper (Essential for seasoning and bringing out natural flavors.)
  • 1 teaspoon garlic powder (Gives a warm, savory backbone without overpowering.)
  • 1 teaspoon paprika (Adds color and a subtle smoky sweetness.)
  • 1 cup mixed vegetables (bell peppers, onions, zucchini) (A colorful mix that roasts into tender, caramelized bites.)
  • 1/2 cup Greek yogurt (The creamy base for the herby ranch, tangy and smooth.)
  • 1 tablespoon ranch seasoning mix (All the classic ranch flavors concentrated for convenience.)
  • to taste fresh herbs (parsley, dill) (Bright, aromatic, and they lift the whole dish.)
  • 4 pieces pitas (Soft or slightly toasted to cradle the filling.)

Instructions 

Preparation

  • Preheat your oven to 400°F.
  • Prepare the chicken. Pat the chicken dry with a paper towel and place it on a cutting board.
  • Drizzle the olive oil over the chicken and season with salt, pepper, garlic powder, and paprika.
  • Chop the mixed vegetables into bite-sized pieces.
  • Toss the vegetables with a drizzle of olive oil, salt, and pepper in a bowl.

Cooking

  • Spread the seasoned vegetables on one side of a large sheet pan.
  • Place the seasoned chicken breasts on the other side of the pan.
  • Roast in the oven for 25-30 minutes or until the chicken reaches an internal temperature of 165°F and the vegetables are tender.
  • Once cooked, let the chicken rest for a few minutes before slicing it into strips.

Serving

  • For serving, layer the chicken and roasted vegetables inside warm pitas.
  • Mix Greek yogurt with ranch seasoning and fresh herbs to create a delicious sauce.
  • Serve the pitas family-style on a big platter, letting everyone dig in.

Notes

If you have leftovers, store the chicken, vegetables, and pita separately in airtight containers. These can be refrigerated for up to three days. When you’re ready to enjoy them again, just reheat everything in the oven at 350°F until warmed through. Cut vegetables ahead of time to save on prep.
Calories: 400kcal
Course: Dinner, Main Course
Cuisine: American, Mediterranean
Keyword: Easy Dinner, Family Meal, Herby Ranch, Pitas, Sheet Pan Chicken

Honey Garlic Chicken Breasts

The smell of honey and garlic wafts through the air, creating a warm and inviting atmosphere in your kitchen. You hear the gentle sizzle of chicken breasts cooking, a sound that signals deliciousness is on the way. As you prepare to gather your family around the table, you know that this Honey Garlic Chicken Breasts recipe will not only satisfy their appetites but also fill their hearts with love.

Why This Works

Honey Garlic Chicken Breasts

This recipe is a true winner for busy families. It’s quick, simple, and requires minimal ingredients, yet it packs a flavor punch that everyone will love. With just a little bit of time for marinating, you can transform ordinary chicken breasts into a mouthwatering dish.

Imagine the joy on your family’s faces as they take their first bites. The sweet and savory combination of honey and garlic makes this dish a crowd-pleaser. Not to mention, it works wonderfully for weeknight dinners or even for special occasions. Time-saving and delicious? Sign me up!

Process Overview

“This is where the magic happens—when the aroma fills the kitchen.”

The process is straightforward. You mix a few ingredients to create the marinade, let the chicken soak up those flavors for a little while, then cook it to juicy perfection. The key is in the marinade—this is where the magic happens. Before you know it, you’ll be serving a delightful meal that looks as good as it tastes.

Ingredients

  • 2 chicken breasts
  • 1/4 cup honey
  • 2 cloves garlic, minced
  • 1 tablespoon soy sauce
  • 1 tablespoon olive oil
  • Salt and pepper to taste
  • Rice or vegetables for serving

Here are a few personal tips for each ingredient:

  • Chicken Breasts: Look for fresh, skinless chicken breasts. If they’re thick, consider pounding them to ensure even cooking.
  • Honey: Use a good quality honey for sweeter depth. Local honey is often the best choice.
  • Garlic: Freshly minced garlic adds a punch to the dish. Don’t skip this step!
  • Soy Sauce: Opt for low-sodium soy sauce if you want to keep the salt content in check.
  • Olive Oil: Extra virgin olive oil will provide a lovely flavor.
  • Salt and Pepper: Taste as you go. A little seasoning can make a big difference.
  • Rice or Vegetables: For a quick meal, pre-cooked rice works well. Steam or roast veggies for a nutritious side.

Directions

  1. In a bowl, mix together honey, minced garlic, soy sauce, olive oil, salt, and pepper. Whisk until combined. Remember, this mixture is the star of the dish.
  2. Coat the chicken breasts in the honey garlic mixture and let marinate for at least 30 minutes. If you have more time, marinating longer will deepen the flavors!
  3. Preheat a skillet over medium heat. Cook the marinated chicken breasts for about 5-7 minutes on each side or until cooked through. The sizzling sound tells you they are cooking just right.
  4. Serve with fluffy rice or crisp vegetables. Your family will love how the sauce clings to every bite.

Serving

Honey Garlic Chicken Breasts

To serve this dish family-style, place the chicken breasts on a large platter and drizzle any remaining sauce over them. Pair with a bowl of fluffy rice and freshly steamed vegetables. Allow everyone to help themselves. This encourages connection and conversation at the table, which is what family mealtime is all about.

Storage

Leftover Honey Garlic Chicken can be stored in an airtight container in the fridge for up to 3 days. When reheating, use a microwave for a quick lunch or reheat in a skillet over low heat to retain taste and texture. For longer storage, consider freezing the cooked chicken for up to a month. Just thaw it in the fridge before reheating.

Kitchen Notes

  • Prep Time: To save time, prep the chicken and marinade the night before.
  • Multi-tasking: While the chicken is marinating, get your sides ready to save time.
  • One-skillet Meal: You can cook veggies in the same skillet after the chicken for easy cleanup and extra flavor.
  • Make it Spicy: Add a pinch of red pepper flakes to the marinade for a kick.
  • Double the Recipe: Make extra chicken for meal prep.

Variations

  • For Picky Eaters: If your family is not fond of garlic, you can reduce the amount or replace it with ginger.
  • Gluten-Free: Use tamari instead of regular soy sauce.
  • Paleo-Friendly: Substitute honey with maple syrup.
  • Herbed Chicken: Add fresh herbs like rosemary or thyme to elevate the flavors.
  • Faster Cooking: Cut the chicken into strips for quicker cooking.

FAQ

  1. Can I use chicken thighs instead of breasts?
    Yes, chicken thighs work wonderfully as they are juicy and flavorful.

  2. Can I make this dish ahead of time?
    You can marinate the chicken beforehand and store it in the fridge. Cook it just before serving.

  3. What can I serve with Honey Garlic Chicken?
    It pairs well with rice, noodles, or a fresh salad.

  4. How do I know when the chicken is done?
    The internal temperature should reach 165°F for safe consumption.

  5. Can I use bone-in chicken?
    Yes, but cook times will vary. Adjust your cooking time to ensure they are fully cooked.

As you finish preparing this Honey Garlic Chicken, remember that cooking is not just about food. It’s about creating memories, sharing laughter, and nurturing your loved ones. This dish is not only delicious but also embodies the love you put into every meal. Enjoy it with family, and relish in the joy of sharing good food together.

Honey Garlic Chicken Breasts

Prep Time 30 minutes
Cook Time 15 minutes
Total Time 45 minutes
Servings 4 servings
Calories 350
A quick and delicious recipe featuring marinated chicken breasts cooked in a sweet and savory honey garlic sauce, perfect for busy weeknights or special occasions.

Ingredients

For the marinade

  • 1/4 cup honey (Use a good quality honey for deeper sweetness.)
  • 2 cloves garlic, minced (Freshly minced garlic adds a punch to the dish.)
  • 1 tablespoon soy sauce (Opt for low-sodium if desired.)
  • 1 tablespoon olive oil (Use extra virgin for better flavor.)
  • to taste Salt and pepper (Season according to preference.)

For the main ingredients

  • 2 pieces chicken breasts (Look for fresh, skinless chicken. Pound if thick.)
  • for serving Rice or vegetables (Pre-cooked rice or steamed vegetables are recommended.)

Instructions 

Preparation

  • In a bowl, mix together honey, minced garlic, soy sauce, olive oil, salt, and pepper. Whisk until combined.
  • Coat the chicken breasts in the honey garlic mixture and let marinate for at least 30 minutes.

Cooking

  • Preheat a skillet over medium heat.
  • Cook the marinated chicken breasts for about 5-7 minutes on each side or until cooked through.
  • Serve with rice or vegetables, drizzling any remaining sauce over the chicken.

Notes

Leftover chicken can be stored in an airtight container in the fridge for up to 3 days. For longer storage, freeze cooked chicken for up to a month.
Calories: 350kcal
Course: Dinner, Main Course
Cuisine: American, Family
Keyword: Chicken Breasts, Easy Recipe, Family Meal, Honey Garlic Chicken, Quick Dinner

Cheesy Garlic Chicken Wraps

There’s something magical about the smell of garlic bubbling in butter and cheese melding together. As you stand in your kitchen, the sounds of sizzling and the gentle pop of melting cheese fill the air. It’s a symphony that brings family together, and today’s recipe is all about that magic—Cheesy Garlic Chicken Wraps.

These wraps are not just delicious; they’re also quick to make, making them perfect for busy weeknights. Imagine the joy on your family’s faces when they take their first bite. Let’s dive into this easy and mouthwatering dish that can brighten any dinner table.

Why This Works

Cheesy Garlic Chicken Wraps

Family dinners should be simple, beautiful, and filled with flavors. That’s exactly what these Cheesy Garlic Chicken Wraps deliver. They come together without fuss, sparing you hours in the kitchen while still impressing everyone at the dinner table.

You can use leftover chicken, saving time and reducing waste. Each wrap can be customized, ensuring that everyone gets something they love. This dish encourages family time around the dinner table, whether it’s a casual family night or entertaining friends.

Process Overview

“This is where the magic happens—when the aroma fills the kitchen.”

Each step in making these wraps is straightforward. From combining the simple ingredients to cooking them to golden perfection, this recipe is designed to bring ease into your kitchen. You’ll find that it requires very little prep and cooks quickly, leaving you more time to enjoy with your loved ones.

Ingredients

Gather these key ingredients to create your Cheesy Garlic Chicken Wraps:

  • 2 cups cooked chicken, shredded
  • 1 cup shredded cheese (cheddar or mozzarella)
  • 1/4 cup cream cheese
  • 2 cloves garlic, minced
  • 1 teaspoon garlic powder
  • 1 teaspoon onion powder
  • Salt and pepper to taste
  • 4 low-carb tortillas or wraps

Optional toppings to consider:

  • Lettuce: Adds a fresh crunch. I recommend using iceberg for its crispness.
  • Tomatoes: Slices of fresh tomato bring juiciness. Choose grape tomatoes for a sweet touch.
  • Avocado: Provides creaminess and healthy fats. Slice it just before serving to prevent browning.
  • Salsa: A tangy kick that complements the wraps beautifully. Pick your favorite flavor.
  • Sour cream: Adds richness and coolness. A dollop on top elevates each bite.

Directions

  1. In a mixing bowl, combine the shredded chicken, shredded cheese, cream cheese, minced garlic, garlic powder, onion powder, salt, and pepper. Mix well until everything is evenly coated. This is your cheesy filling that will save dinner.

  2. Lay a low-carb tortilla on a flat surface. Place a generous amount of the chicken mixture on the tortilla. Don’t skimp; this is the heart of your wrap.

  3. Add any additional toppings like lettuce or tomatoes if desired. Get creative and use what your family loves!

  4. Roll the tortilla tightly to form a wrap. Tuck in the sides to keep everything from falling out.

  5. Repeat for the remaining tortillas. Each wrap should feel like a little hug of deliciousness.

  6. Heat a skillet over medium heat and place the wraps seam side down. Cook for about 3-4 minutes on each side or until golden brown and the cheese has melted. Listen for that satisfying sizzle!

  7. Serve warm and enjoy your cheesy garlic chicken wraps! These are sure to become a favorite.

Serving

Cheesy Garlic Chicken Wraps

Serving these wraps family-style creates a warm, inviting atmosphere at the dinner table. Place them on a large platter, and let everyone help themselves. You can offer a bowl of fresh toppings on the side for a personalized touch. This not only encourages sharing but also turns dinnertime into a fun experience for the whole family.

Storage

If you have any leftovers (which might be a rarity), you can store them in an airtight container in the fridge. They’ll last for up to three days.

To reheat, simply place them back in a skillet over medium heat for about 5 minutes on each side until heated through. This will help keep the wrap crispy and delicious. You can also microwave them for quicker reheating, but the skillet method is best for keeping that crispy texture.

Kitchen Notes

Here are some handy shortcuts to make this recipe even easier:

  • Pre-Cooked Chicken: Use a rotisserie chicken from the store for an even quicker prep time.
  • Frozen Garlic: If you often cook with garlic, consider keeping frozen minced garlic on hand. It saves time and makes for easy cooking.
  • Mix Ahead: You can combine the filling ingredients a day in advance and store them in the fridge. Just fill and wrap when you’re ready to cook.
  • Meal Prep Idea: Make a double batch and freeze some wraps for a future busy night. Just thaw in the fridge overnight before cooking.
  • Kids in the Kitchen: Let your little ones help by rolling their own wraps. It’s a fun activity that encourages them to be involved in meal prep.

Variations

Not everyone in your family may share the same taste, and that’s okay. Here are a few tweaks to cater to picky eaters or different diets:

  • Swap the Protein: Use shredded beef or pork if chicken isn’t a favorite.
  • Make it Vegetarian: Replace the chicken with roasted vegetables like bell peppers, zucchini, and mushrooms.
  • Gluten-Free Option: Use gluten-free tortillas or lettuce wraps instead of regular ones.
  • Spice it Up: Add some jalapeños or a sprinkle of chili powder for those who enjoy a little heat.
  • Dairy-Free Version: Substitute cream cheese with a dairy-free alternative and use vegan cheese for the filling.

FAQ

1. Can I use uncooked chicken?
Yes, you can. Just cook the chicken fully before shredding and mixing with the other ingredients.

2. How can I make this recipe spicier?
You can add hot sauce to the filling or include sliced jalapeños as toppings before wrapping.

3. Can I bake these wraps instead of frying?
Absolutely! Preheat your oven to 350°F, place the wraps on a baking sheet, and bake for about 10-15 minutes until crispy.

4. What kind of cheese works best?
Cheddar and mozzarella are the most popular choices, but you can also experiment with pepper jack for a spicy kick.

5. How do I make this recipe ahead of time?
You can prepare the filling a day ahead and refrigerate it. Assemble the wraps just before you are ready to cook them for the best flavor and texture.

Conclusion

With Cheesy Garlic Chicken Wraps, you transform simple ingredients into an extraordinary meal. The warmth of melted cheese and the flavor of garlic combined with the vibrant toppings can bring smiles to your family’s faces. Remember, cooking together and sharing delightful meals creates treasured moments. Embrace the joy of family dining and make these wraps a staple in your home. Enjoy cooking, and even more, enjoy gathering around the table.

Cheesy Garlic Chicken Wraps

Prep Time 15 minutes
Cook Time 8 minutes
Total Time 23 minutes
Servings 4 servings
Calories 400
Delicious and quick-to-make wraps featuring shredded chicken, melted cheese, and garlic, perfect for busy weeknights and family gatherings.

Ingredients

Main Ingredients

  • 2 cups cooked chicken, shredded (Use leftover chicken for convenience.)
  • 1 cup shredded cheese (cheddar or mozzarella)
  • 1/4 cup cream cheese
  • 2 cloves garlic, minced (Can use frozen minced garlic.)
  • 1 teaspoon garlic powder
  • 1 teaspoon onion powder
  • Salt and pepper, to taste
  • 4 pieces low-carb tortillas or wraps

Optional Toppings

  • Lettuce (Iceberg is recommended for its crispness.)
  • Tomatoes (Grape tomatoes add a sweet touch.)
  • Avocado (Slice just before serving to prevent browning.)
  • Salsa (Choose your favorite flavor.)
  • Sour cream (A dollop elevates each bite.)

Instructions 

Preparation

  • In a mixing bowl, combine the shredded chicken, shredded cheese, cream cheese, minced garlic, garlic powder, onion powder, salt, and pepper. Mix well until everything is evenly coated.
  • Lay a low-carb tortilla on a flat surface and place a generous amount of the chicken mixture on the tortilla.
  • Add any additional toppings like lettuce or tomatoes if desired.
  • Roll the tortilla tightly to form a wrap, tucking in the sides to keep everything from falling out.

Cooking

  • Heat a skillet over medium heat and place the wraps seam side down.
  • Cook for about 3-4 minutes on each side or until golden brown and the cheese has melted.

Serving

  • Serve warm on a large platter, allowing everyone to help themselves along with a bowl of fresh toppings.

Notes

Store leftovers in an airtight container in the fridge for up to three days. Reheat in a skillet for the best texture.
Calories: 400kcal
Course: Dinner, Main Course
Cuisine: American
Keyword: Cheesy Garlic Chicken Wraps, Chicken Wraps, Easy Recipe, Family Dinner, Quick Meal

Blackstone Chicken Thighs

There’s something special about the smell of chicken thighs sizzling on a hot grill. The sound of that satisfying sear fills the kitchen with mouth-watering anticipation. When you bring a dish like Blackstone Chicken Thighs to the table, you’re not just serving dinner. You’re creating moments, memories, and most of all, joy for your family.

But let’s face it, we all lead busy lives. Finding a dish that’s not only delicious but also time-saving is essential. Blackstone Chicken Thighs checks all the boxes. This dish is packed with flavor, easy to prepare, and perfect for family gatherings. Whether it’s a weeknight meal or a weekend feast, this recipe is a winner.

Why This Works

Blackstone Chicken Thighs

Blackstone Chicken Thighs are a fantastic choice for family meals because they are versatile and quick. Chicken thighs are juicy and flavorful, making them ideal for grilling. The Blackstone griddle makes it easy to cook multiple portions at once, so you can spend less time in the kitchen and more time with loved ones.

Plus, the ingredients are simple and straightforward. You’ll likely have most of them on hand already, making this dish a go-to in your meal rotation. Once you try it, you’ll see why families everywhere are falling in love with this recipe.

Process Overview

“This is where the magic happens—when the aroma fills the kitchen.”

The process begins with marinating the chicken thighs, letting them soak up a blend of soy sauce and garlic. After marinating, it’s all about cooking them on a hot griddle. This method locks in moisture and flavor, giving you tender and juicy chicken every time. Lastly, we let the chicken rest, allowing the juices to settle in. This step ensures you’ve got the juiciest bite possible.

Ingredients

Here’s what you’ll need for Blackstone Chicken Thighs:

  • 6 boneless, skinless chicken thighs
  • 1/4 cup + 2 tablespoons soy sauce (divided)
    • Lily’s tip: Use low-sodium soy sauce if you’re watching salt intake.
  • 2 tablespoons butter
    • Lily’s tip: Use unsalted butter for better control over your dish’s saltiness.
  • 2 teaspoons garlic (minced)
    • Lily’s tip: Fresh garlic makes a noticeable difference in flavor. If using jarred, adjust for taste.
  • Extra virgin olive oil (sub avocado oil if desired)
    • Lily’s tip: Avocado oil has a higher smoke point, making it great for grilling.
  • Kosher salt & ground black pepper
    • Lily’s tip: Season generously, but taste before adding too much. You can always add more.

Directions

  1. Marinate Chicken: Place chicken in a glass bowl and add 1/4 cup soy sauce. Toss to coat. Set aside while you prep the remaining items. This step adds flavor and tenderness, so don’t skip it.

  2. Garlic Butter: Combine 2 tablespoons butter and 2 teaspoons garlic in a small bowl; set aside. This buttery goodness will elevate the flavor of your meal.

  3. Cook Chicken: Bring your flat-top to medium-high heat. Add a tablespoon of olive oil and spread it out over the cooktop. Place marinated chicken thighs on the hot grill. Season with kosher salt and ground black pepper. Close the lid and let it cook for 2-3 minutes.

    When you open the lid, drizzle a little soy sauce on top of the chicken and add approximately 1 tablespoon of garlic butter. Close the lid and let it cook for another minute or two. When ready, flip the chicken. Season the other side with salt and pepper, add 1 tablespoon of garlic butter, and drizzle with a little more soy sauce. Let cook until the chicken reaches an internal temperature of 162°F. Feel free to flip back and forth a bit until fully cooked.

  4. Rest Chicken: Transfer the chicken to a plate and let it rest. The internal temperature will continue to rise, reaching 165°F while it rests. Slice or cut into bite-sized pieces. This is where you decide how you want to serve it—there are so many delicious options!

Serving

Blackstone Chicken Thighs

For a family-style meal, serve the Blackstone Chicken Thighs alongside fresh veggies, fluffy rice, or even in warm tortillas for chicken tacos. You can create a taco bar with toppings like salsa, guacamole, and fresh cilantro. Encourage everyone to customize their plates; it ignites conversation and laughter around the dinner table.

Storage

After enjoying this meal, store any leftovers in an airtight container in the refrigerator. They will keep well for up to 3 days. To reheat, pop them in the microwave or on the stovetop until warmed through. You can add a splash of chicken broth to prevent drying out.

Kitchen Notes

  • Prep Ahead: Marinate the chicken the night before for even more flavor.
  • Quick Cook: Use a meat thermometer for perfect doneness every time.
  • Griddle Care: Pre-heat your Blackstone well to prevent sticking.
  • Make it a Meal: Pair with steamed vegetables to add color and nutrition.
  • Leftover Magic: Use leftover chicken in salads or wraps for lunch the next day.

Variations

If you have picky eaters or different diet preferences, you can easily tweak this recipe.

  • For children: Serve plain grilled chicken and let them add sauces or toppings, allowing them to customize their meal.
  • For low-carb diets: Skip the tortillas and serve the chicken over a bed of leafy greens or cauliflower rice.
  • Spicy version: Add red pepper flakes or a dash of hot sauce to the chicken before grilling for a kick.
  • Herb-infused: Add fresh herbs like rosemary or thyme to the marinade for a different flavor profile.
  • Vegetarian Option: Substitute chicken with firm tofu, marinate it the same way, and grill until crispy on the outside.

FAQ

  1. Can I use chicken breasts instead of thighs?

    • Yes, but keep in mind that chicken breasts can dry out more easily. Adjust cooking time to prevent overcooking.
  2. What’s the best way to check if the chicken is done?

    • Use a meat thermometer. The internal temperature should reach 165°F for safe consumption.
  3. Can I marinate overnight?

    • Absolutely! Marinating overnight enhances the flavor.
  4. Can I use a gas grill instead?

    • Yes, just make sure to preheat the grill and grease grates to prevent sticking.
  5. What should I serve with these chicken thighs?

    • They pair well with rice, salads, roasted vegetables, or in tacos.

In conclusion, Blackstone Chicken Thighs are more than just a meal—they’re a way to gather around the table and connect with family. I hope this recipe brings warmth and joy to your kitchen. Remember, cooking is all about love, and the best memories are made over shared meals. Enjoy!

Blackstone Chicken Thighs

Prep Time 30 minutes
Cook Time 10 minutes
Total Time 40 minutes
Servings 4 servings
Calories 320
Deliciously marinated chicken thighs cooked on a Blackstone griddle, perfect for family meals and gatherings.

Ingredients

For the marinade

  • 6 pieces boneless, skinless chicken thighs
  • 0.25 cup soy sauce (Use low-sodium soy sauce if watching salt intake.)

For cooking

  • 2 tablespoons butter (Use unsalted butter for better control over the dish's saltiness.)
  • 2 teaspoons garlic (minced) (Fresh garlic makes a noticeable difference in flavor.)
  • 1 tablespoon extra virgin olive oil (Sub avocado oil if desired for a higher smoke point.)
  • to taste Kosher salt & ground black pepper (Season generously, but taste before adding too much.)

Instructions 

Preparation

  • Marinate Chicken: Place chicken in a glass bowl and add 1/4 cup soy sauce. Toss to coat.
  • Garlic Butter: Combine 2 tablespoons butter and 2 teaspoons garlic in a small bowl; set aside.

Cooking

  • Bring your flat-top to medium-high heat. Add a tablespoon of olive oil and spread it over the cooktop.
  • Place marinated chicken thighs on the hot grill. Season with kosher salt and ground black pepper. Close the lid and let it cook for 2-3 minutes.
  • Open the lid, drizzle a little soy sauce on top, and add approximately 1 tablespoon of garlic butter. Close the lid and let it cook for another minute or two.
  • Flip the chicken, season the other side, and add 1 tablespoon of garlic butter and more soy sauce. Cook until the chicken reaches an internal temperature of 162°F.

Resting

  • Transfer the chicken to a plate and let it rest. It will continue to cook to reach 165°F while resting.
  • Slice or cut into bite-sized pieces and serve.

Notes

Serve alongside fresh veggies, fluffy rice, or in warm tortillas for chicken tacos. Store leftovers in an airtight container for up to 3 days.
Calories: 320kcal
Course: Dinner, Main Course
Cuisine: American
Keyword: Blackstone Chicken Thighs, Easy Recipe, Family Meal, Grilled Chicken, Quick Dinner

Blackstone Chicken Fajitas

There’s something magical happening in the kitchen when you make Blackstone Chicken Fajitas. The smell of sizzling chicken mingles with the sweet aroma of bell peppers. You hear the sizzle and pop as everything comes together. It’s a beautiful way to spend time with your family. Gathering around the table for a homemade meal is a moment worth savoring. With this simple recipe, you can bring everyone together for a delicious dinner that meets them with warmth and smiles.

Why This Works

Blackstone Chicken Fajitas

This recipe is a true family-friendly gem. It’s quick, flavorful, and can be adapted to suit everyone’s tastes. The Blackstone griddle allows you to prepare a meal that feels special without spending hours in the kitchen. Plus, chicken thighs are juicy and forgiving, making them perfect for busy weeknights or relaxed weekends.

With just a handful of ingredients and minimal prep time, you create a beautifully vibrant dish that brings people back to the table. You’ll find that making these fajitas is not just about the meal, but also about the time you spend with your loved ones.

Process Overview

“This is where the magic happens—when the aroma fills the kitchen.”

Preparing Blackstone Chicken Fajitas is straightforward and enjoyable. The process involves marinating the chicken, sautéing the veggies, and finally, assembling the fajitas. Each step builds on the last, creating an incredible medley of flavors and textures. You’ll love how easily this comes together and the delightful explosion of taste with every bite.

Ingredients

To create this tantalizing dish, gather the following ingredients:

  • 1/4 cup + 1 tablespoon extra virgin olive oil (divided)
  • 2 tablespoons lime juice
  • 3 teaspoons chili powder
  • 3 teaspoons ground cumin
  • 1 1/2 teaspoons kosher salt
  • 1 teaspoon paprika (smoked paprika, if you can find it)
  • 1 teaspoon onion powder
  • 1 teaspoon garlic powder (smoked garlic powder, if you can find it)
  • 1 teaspoon dried oregano leaves
  • 1/4 teaspoon ground black pepper
  • 1/8 teaspoon ground cayenne pepper
  • 6-8 boneless, skinless chicken thighs
  • 1/2 red onion (sliced)
  • 1/2 yellow onion (sliced)
  • 3 bell peppers (red, green, orange, sliced)
  • 1 tablespoon garlic (minced)
  • 2 tablespoons fajita seasoning
  • Additional kosher salt and ground black pepper (to taste)

For the Cilantro Lime Sauce:

  • 3/4 cup plain Greek yogurt
  • 1/4 cup mayo
  • 2-4 tablespoons lime juice
  • 1 tablespoon light olive oil
  • Zest of 1 lime
  • 1/4 cup fresh cilantro (chopped)
  • 1/4 teaspoon kosher salt
  • 1/8 teaspoon ground black pepper

To serve:

  • Tortillas of your choice (warmed)
  • Lime wedges
  • Fresh cilantro leaves
  • Sour cream (optional)
  • Guacamole (optional)

Note: You can customize this dish to your family’s taste. Choose colorful bell peppers for a vibrant plate and use a mix of toppings to please everyone.

Directions

Prep Fajita Chicken

  1. In a small bowl, combine 1/4 cup olive oil, 2 tablespoons lime juice, 3 teaspoons chili powder, 3 teaspoons ground cumin, 1 1/2 teaspoons kosher salt, 1 teaspoon paprika, 1 teaspoon onion powder, 1 teaspoon garlic powder, 1 teaspoon dried oregano, 1/4 teaspoon black pepper, and 1/8 teaspoon cayenne pepper. Whisk to combine.

  2. Place 6-8 boneless, skinless chicken thighs in a medium bowl. Pour the marinade over the chicken and toss to coat. Set aside.

Tip: If you have time, marinate the chicken for an hour or overnight for more flavor.

Prep Fajita Veggies

  1. In a large bowl, combine the red onions, yellow onions, bell peppers, garlic, and fajita seasoning. Set aside.

Tip: Use a mandoline slicer for perfectly even vegetables.

Cilantro Lime Sauce

  1. Add the ingredients for the Cilantro Lime Sauce to a small food processor. Blend until smooth. Transfer to a small bowl, cover, and place in the refrigerator until ready to use.

Tip: Make this sauce a day ahead to let the flavors meld together beautifully.

Cook Chicken

  1. Drizzle approximately 1 tablespoon of olive oil over the flat top of your Blackstone. Move around the cooking surface to coat.

  2. Place the marinated chicken in the oil and let it cook for 3-4 minutes per side or until it reaches an internal temperature of about 162°F.

  3. The chicken will continue to cook as it rests, reaching 165°F during that time. Add additional olive oil as needed while cooking. Transfer the chicken to a plate to rest.

Tip: Let the chicken rest for a few minutes before slicing to maintain juiciness.

Cook Veggies

  1. While the chicken rests, you can cook the veggies. Clean the flat top if desired, but it’s not necessary.

  2. Add a tablespoon of olive oil to the flat top and add the veggies. Move them around until soft yet firm, around 3-5 minutes. Transfer them to a plate when done.

Tip: Don’t overcrowd the griddle; it helps everything cook evenly.

Slice Chicken

  1. After the chicken has rested, slice it into 1/2 inch thick strips, or cut into bite-sized pieces if preferred.

Tip: For a more rustic look, consider shredding the chicken with two forks.

Serve

  1. Place the fajita veggies on a warm tortilla. Top with sliced chicken, a drizzle of Cilantro Lime Sauce, fresh chopped cilantro, and a squeeze of fresh lime juice.

Enjoy every bite and the family togetherness this meal brings!

Serving

Blackstone Chicken Fajitas

Serving Blackstone Chicken Fajitas family-style creates a warm atmosphere. You can place all the components in the center of the table and let everyone build their own fajitas. This approach makes dinner interactive and enjoyable. Allow everyone to customize their tortillas with extra lime juice, cilantro, or a spoonful of guacamole.

Encourage kids to get involved. They can help with toppings or rolling their own fajitas, making it a fun family activity.

Storage

These fajitas are best enjoyed fresh but can be stored properly. Store leftover chicken, veggies, and sauce separately in airtight containers. They will last in the fridge for up to 3 days.

To reheat, you can warm the chicken and veggies in a skillet over low heat until heated through. Avoid using the microwave, if possible, to retain texture.

Kitchen Notes

  • Quick marinade: No time to marinate? Simply toss the chicken in the spices right before cooking for a quicker version.
  • Pre-slice veggies: Prepare your veggies in advance and store them in the fridge to save time.
  • Use pre-made spice blends: If you’re short on time, pre-made fajita seasoning works in a pinch.
  • Tortilla choice: Try different wraps like whole wheat, spinach, or corn tortillas for variety.
  • Make it a salad: If you prefer a low-carb option, turn your fajitas into a vibrant salad.

Variations

Picky eaters in your family? No problem. Here are some easy tweaks:

  • Swap chicken thighs for chicken breasts if preferred.
  • Use zucchini or mushrooms as substitutes for bell peppers.
  • For a vegetarian option, replace chicken with marinated and grilled tofu.
  • Customize spice levels by adjusting the cayenne pepper or using milder spices.
  • Serve with whole grain tortillas or lettuce wraps for gluten-free options.

FAQ

Q1: Can I use frozen chicken thighs for this recipe?
Yes, but thaw them completely before marinating and cooking for even results.

Q2: What can I substitute if I don’t have a Blackstone?
You can use a large skillet or grill pan on your stovetop.

Q3: How spicy are these fajitas?
The spice level depends on your taste—adjust cayenne to your family’s preference.

Q4: Can I double the recipe?
Absolutely! Just ensure you have enough cooking space and time on your hands.

Q5: Is the Cilantro Lime Sauce necessary?
While the fajitas are tasty on their own, the sauce enhances flavor and creaminess. You can skip it if you prefer.

Conclusion

Making Blackstone Chicken Fajitas is a delightful way to create cherished family moments around the dinner table. It’s not merely about the food but the laughter and conversation shared along the way. So gather your loved ones, enjoy the process, and relish the colorful result. Here’s to family dinners filled with warmth, love, and delicious flavors!

Blackstone Chicken Fajitas

Prep Time 20 minutes
Cook Time 20 minutes
Total Time 40 minutes
Servings 4 servings
Calories 550
A quick and delicious family-friendly recipe for chicken fajitas made on a Blackstone griddle, bringing together flavors of marinated chicken, vibrant bell peppers, and a zesty cilantro lime sauce.

Ingredients

For the Chicken and Marinade

  • 1 cup 1/4 cup + 1 tablespoon extra virgin olive oil (divided)
  • 2 tablespoons lime juice
  • 3 teaspoons chili powder
  • 3 teaspoons ground cumin
  • 1.5 teaspoons kosher salt
  • 1 teaspoon paprika (smoked paprika, if you can find it)
  • 1 teaspoon onion powder
  • 1 teaspoon garlic powder (smoked garlic powder, if you can find it)
  • 1 teaspoon dried oregano leaves
  • 0.25 teaspoon ground black pepper
  • 0.125 teaspoon ground cayenne pepper
  • 6-8 pieces boneless, skinless chicken thighs
  • 0.5 pieces red onion (sliced)
  • 0.5 pieces yellow onion (sliced)
  • 3 pieces bell peppers (red, green, orange, sliced)
  • 1 tablespoon garlic (minced)
  • 2 tablespoons fajita seasoning
  • to taste Additional kosher salt and ground black pepper

For the Cilantro Lime Sauce

  • 3/4 cup plain Greek yogurt
  • 1/4 cup mayo
  • 2-4 tablespoons lime juice
  • 1 tablespoon light olive oil
  • 1 pieces Zest of 1 lime
  • 1/4 cup fresh cilantro (chopped)
  • 1/4 teaspoon kosher salt
  • 1/8 teaspoon ground black pepper

To Serve

  • Tortillas of your choice (warmed)
  • Lime wedges
  • Fresh cilantro leaves
  • Sour cream (optional)
  • Guacamole (optional)

Instructions 

Prep Fajita Chicken

  • In a small bowl, combine 1/4 cup olive oil, 2 tablespoons lime juice, 3 teaspoons chili powder, 3 teaspoons ground cumin, 1 1/2 teaspoons kosher salt, 1 teaspoon paprika, 1 teaspoon onion powder, 1 teaspoon garlic powder, 1 teaspoon dried oregano, 1/4 teaspoon black pepper, and 1/8 teaspoon cayenne pepper. Whisk to combine.
  • Place 6-8 boneless, skinless chicken thighs in a medium bowl. Pour the marinade over the chicken and toss to coat. Set aside.
  • Tip: If you have time, marinate the chicken for an hour or overnight for more flavor.

Prep Fajita Veggies

  • In a large bowl, combine the red onions, yellow onions, bell peppers, garlic, and fajita seasoning. Set aside.
  • Tip: Use a mandoline slicer for perfectly even vegetables.

Cilantro Lime Sauce

  • Add the ingredients for the Cilantro Lime Sauce to a small food processor. Blend until smooth. Transfer to a small bowl, cover, and place in the refrigerator until ready to use.
  • Tip: Make this sauce a day ahead to let the flavors meld together beautifully.

Cook Chicken

  • Drizzle approximately 1 tablespoon of olive oil over the flat top of your Blackstone. Move around the cooking surface to coat.
  • Place the marinated chicken in the oil and let it cook for 3-4 minutes per side or until it reaches an internal temperature of about 162°F.
  • The chicken will continue to cook as it rests, reaching 165°F during that time. Add additional olive oil as needed while cooking. Transfer the chicken to a plate to rest.
  • Tip: Let the chicken rest for a few minutes before slicing to maintain juiciness.

Cook Veggies

  • While the chicken rests, you can cook the veggies. Clean the flat top if desired, but it’s not necessary.
  • Add a tablespoon of olive oil to the flat top and add the veggies. Move them around until soft yet firm, around 3-5 minutes. Transfer them to a plate when done.
  • Tip: Don’t overcrowd the griddle; it helps everything cook evenly.

Slice Chicken

  • After the chicken has rested, slice it into 1/2 inch thick strips, or cut into bite-sized pieces if preferred.
  • Tip: For a more rustic look, consider shredding the chicken with two forks.

Serve

  • Place the fajita veggies on a warm tortilla. Top with sliced chicken, a drizzle of Cilantro Lime Sauce, fresh chopped cilantro, and a squeeze of fresh lime juice.
  • Enjoy every bite and the family togetherness this meal brings!

Notes

Serving Blackstone Chicken Fajitas family-style creates a warm atmosphere. Let everyone build their own fajitas, customizing them with extra lime juice, cilantro, or guacamole. Encourage kids to help with toppings or rolling their own fajitas, making it a fun family activity. These fajitas are best enjoyed fresh but can be stored in airtight containers in the fridge for up to 3 days. To reheat, warm the chicken and veggies in a skillet over low heat.
Calories: 550kcal
Course: Dinner, Main Course
Cuisine: Mexican
Keyword: Blackstone Chicken, Chicken Fajitas, Easy Recipe, Fajita Recipe, Family Dinner

Blackstone Hot Honey BBQ Chicken Quesadillas

There’s something magical about the sounds and aromas that fill the kitchen when you cook for your family. The sizzling sound of chicken hitting a hot griddle mixes with the sweet and smoky aroma of BBQ sauce and hot honey. You know it is going to be a delicious meal that everyone will love.

Today, I’m excited to share with you a fantastic recipe for Blackstone Hot Honey BBQ Chicken Quesadillas. This dish not only brings bold flavors but also makes weeknight dinners a breeze. Let’s dive into this mouthwatering meal that your family will ask for again and again.

Why This Works

Blackstone Hot Honey BBQ Chicken Quesadillas

The beauty of these quesadillas is how simple they are to prepare. With just a few ingredients and minimal prep time, you can create a satisfying dinner that the family will adore. It’s perfect for busy weeknights or even lazy weekends.

Using the Blackstone griddle adds a special touch. It cooks everything evenly and quickly. Plus, it can handle larger portions, making it perfect for those evenings when the whole family gathers around the table. You’ll appreciate the convenience, and your loved ones will enjoy the delicious flavors while spending quality time together.

Process Overview

“This is where the magic happens—when the aroma fills the kitchen.”

Getting started on these quesadillas is straightforward. We will grill chicken thighs for a rich, juicy filling, then pile them onto tortillas with cheese and drizzles of BBQ sauce and hot honey. A quick flip on the griddle brings everything together, and soon you’ll hear the satisfying crunch as you slice into each gooey, cheesy quesadilla.

Ingredients

To whip up these delightful quesadillas, you will need:

  • Cooking oil of choice (like olive oil or vegetable oil)
  • 1 pound boneless, skinless chicken thighs (or chicken breasts)
  • Kosher salt
  • Pepper
  • BBQ seasoning blend
  • 3 tablespoons BBQ sauce (plus more to drizzle in quesadillas)
  • 2 tablespoons hot honey (plus more to drizzle in quesadillas)
  • 4 large burrito-size flour tortillas
  • 3 cups shredded cheese of choice (cheddar or Mexican blend works well)
  • 1/2 cup chopped cilantro (optional)

Optional toppings:

  • Sour cream for a cool contrast
  • Jalapenos for those who love a little heat

If you want the best results, I recommend using chicken thighs. They stay moist and flavorful. If your family prefers chicken breasts, those will work, too, but I suggest a dip in some extra BBQ sauce to keep them juicy.

Directions

  1. Preheat the griddle to medium. Let it heat up nicely, as this ensures that your quesadillas will have that perfect golden-brown crust.

  2. Add your cooking oil, then add the chicken thighs. Season them generously with kosher salt, pepper, and BBQ seasoning. Cook for about 6 minutes, mixing a few times with spatulas to cook them evenly. This step releases amazing aromas; it is all about layering those delicious flavors.

  3. Add 3 tablespoons of BBQ sauce and 2 tablespoons of hot honey to the chicken. Stir everything together and cook for another 2 minutes. The combination of BBQ and honey creates a sticky glaze that coats the chicken beautifully.

  4. Remove the chicken from the griddle. Take a moment to scrape it clean, then lower the heat to medium-low.

  5. Add a little more cooking oil to the griddle and lay the tortillas flat. On one side of each tortilla, sprinkle half of the cheese. Then, add the cooked chicken mixture, drizzle a little more BBQ sauce and hot honey, and sprinkle on cilantro if you’re using it. Pile on the remaining cheese.

  6. Fold the empty side of each tortilla over the filled side. Cook the quesadillas for about one to two minutes on each side, or until the cheese is melted and the tortillas are crisped to your liking. The sound of crisping tortillas is music to a cook’s ears.

  7. Serve the quesadillas with sour cream and jalapenos if desired. These bright toppings balance the sweetness of the honey and enhance the overall flavor profile.

Serving

Blackstone Hot Honey BBQ Chicken Quesadillas

When it’s time to serve, I love to cut the quesadillas into wedges and arrange them on a big platter in the center of the table. This creates a fun, family-style meal where everyone can help themselves. The warm cheese and smoky chicken will surely have your family gathering around for seconds. Pair these gorgeous quesadillas with a simple green salad or some fresh veggies on the side for a complete meal.

Storage

If you happen to have leftovers, you can store them in an airtight container in the refrigerator for up to three days. When you’re ready to enjoy them again, reheat in the oven at 350°F for about 10 minutes to regain that crispy texture. You can also use a microwave, but the oven will keep that delightful crunch.

Kitchen Notes

Here are some shortcuts and tips to make this dish even easier:

  • Cook Chicken in Advance: This is a great meal prep option. You can grill or bake chicken ahead of time and store it in the fridge.
  • Use Pre-Shredded Cheese: Save time by using pre-shredded cheese, which melts just as well.
  • Skip the BBQ Sauce: If you’re short on time, feel free to use store-bought grilled BBQ chicken instead.
  • Add Vegetables: Sauté some bell peppers and onions alongside the chicken for added freshness.
  • Make Smaller Quesadillas: Use smaller tortillas for kid-friendly, portion-controlled meals.

Variations

Picky eaters or those on specific diets may appreciate these simple tweaks:

  • Vegetarian Option: Substitute the chicken with black beans or grilled vegetables for a filling vegetarian quesadilla.
  • Dairy-Free: Use dairy-free cheese or omit cheese entirely for those sensitive to dairy.
  • Gluten-Free: Opt for gluten-free tortillas to make this meal gluten-free.
  • Add More Heat: If your family loves spice, add sliced jalapenos into the quesadilla filling or drizzle with additional hot honey.
  • Taco Flavor: Swap the BBQ sauce and hot honey for taco seasoning for a fun twist on the flavors.

FAQ

  1. Can I use chicken breasts instead of thighs?
    Yes, but keep in mind that chicken breasts can dry out more easily. Be sure to monitor the cooking time closely.

  2. What if I don’t have a griddle?
    You can easily make these quesadillas in a skillet on the stovetop. Just ensure it’s heated adequately before adding your ingredients.

  3. How can I make this dish ahead of time?
    You can prepare the chicken and store it in the fridge. Assemble quesadillas and cook when ready to serve.

  4. Can I freeze these quesadillas?
    Yes, cooked quesadillas can be frozen. Wrap them tightly in plastic wrap and store in a freezer bag for up to two months.

  5. What else can I serve with these quesadillas?
    A fresh salsa, guacamole, or a simple corn salad would complement these beautifully.

Conclusion

Making Blackstone Hot Honey BBQ Chicken Quesadillas is an experience filled with warmth, flavors, and cherished moments with your family. The quick cooking process and satisfying results are sure to become a staple in your kitchen. As you gather around the table, you’ll create lasting memories with your loved ones over this comforting dish. I hope you enjoy making and sharing these quesadillas as much as my family does!

Blackstone Hot Honey BBQ Chicken Quesadillas

Prep Time 10 minutes
Cook Time 15 minutes
Total Time 25 minutes
Servings 4 servings
Calories 500
Delicious quesadillas filled with juicy chicken thighs, cheese, BBQ sauce, and hot honey, perfect for weeknight dinners.

Ingredients

Main Ingredients

  • 1 pound boneless, skinless chicken thighs (You can also use chicken breasts.)
  • 3 tablespoons BBQ sauce (Plus more to drizzle in quesadillas.)
  • 2 tablespoons hot honey (Plus more to drizzle in quesadillas.)
  • 4 large burrito-size flour tortillas
  • 3 cups shredded cheese (Cheddar or Mexican blend works well.)
  • 1/2 cup chopped cilantro (Optional ingredient.)

Seasoning

  • to taste Kosher salt
  • to taste Pepper
  • to taste BBQ seasoning blend

Optional Toppings

  • as desired Sour cream (For a cool contrast.)
  • as desired Jalapenos (For those who love a little heat.)

Instructions 

Preparation

  • Preheat the griddle to medium.
  • Add cooking oil to the griddle, then add the chicken thighs.
  • Season the chicken generously with kosher salt, pepper, and BBQ seasoning.
  • Cook for about 6 minutes, stirring occasionally.
  • Add 3 tablespoons of BBQ sauce and 2 tablespoons of hot honey to the chicken and cook for another 2 minutes.
  • Remove the chicken from the griddle and scrape it clean.
  • Lower the heat to medium-low and add more cooking oil to the griddle.

Cooking

  • Lay the tortillas flat on the griddle.
  • On one side of each tortilla, sprinkle half of the cheese, then add the chicken mixture, drizzle more BBQ sauce and hot honey, and sprinkle with cilantro.
  • Pile on the remaining cheese.
  • Fold the empty side of each tortilla over the filled side.
  • Cook the quesadillas for about 1-2 minutes on each side, or until the cheese is melted and tortillas are crisped to your liking.
  • Serve with sour cream and jalapenos if desired.

Notes

Store leftovers in an airtight container in the refrigerator for up to three days. Reheat in the oven for 10 minutes at 350°F to restore crispiness.
Calories: 500kcal
Course: Dinner, Main Course
Cuisine: American
Keyword: BBQ Chicken, Family Meal, Griddle Recipes, Hot Honey, Quesadillas