Tag

dinner ideas

Browsing

Chicken Enchiladas

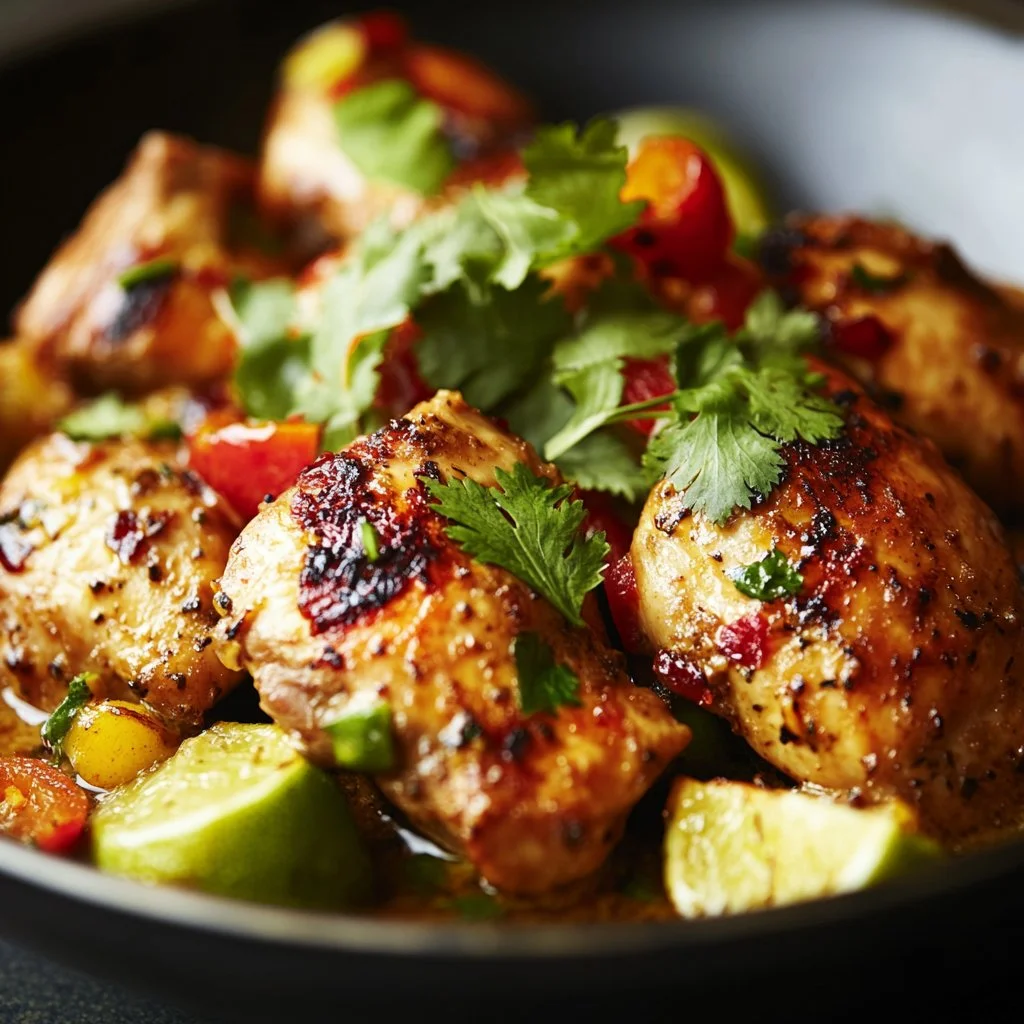
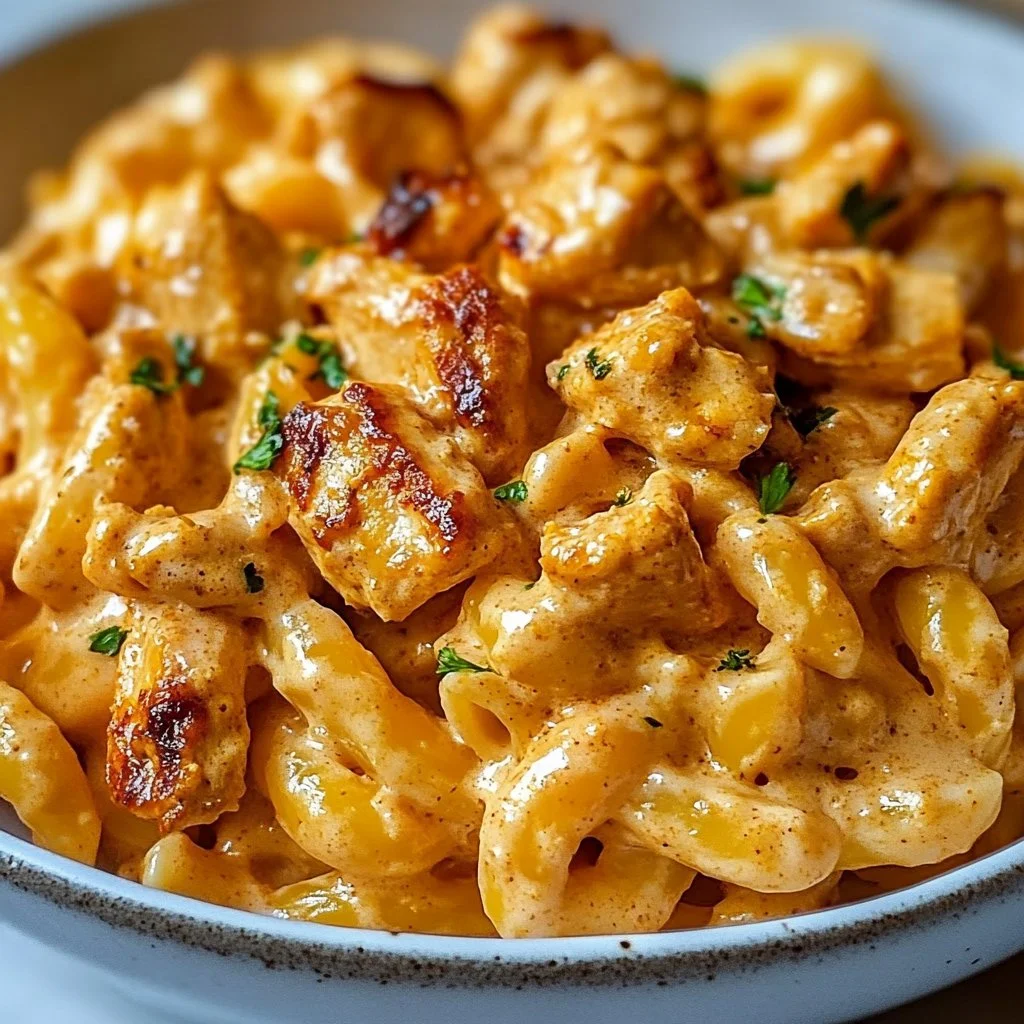
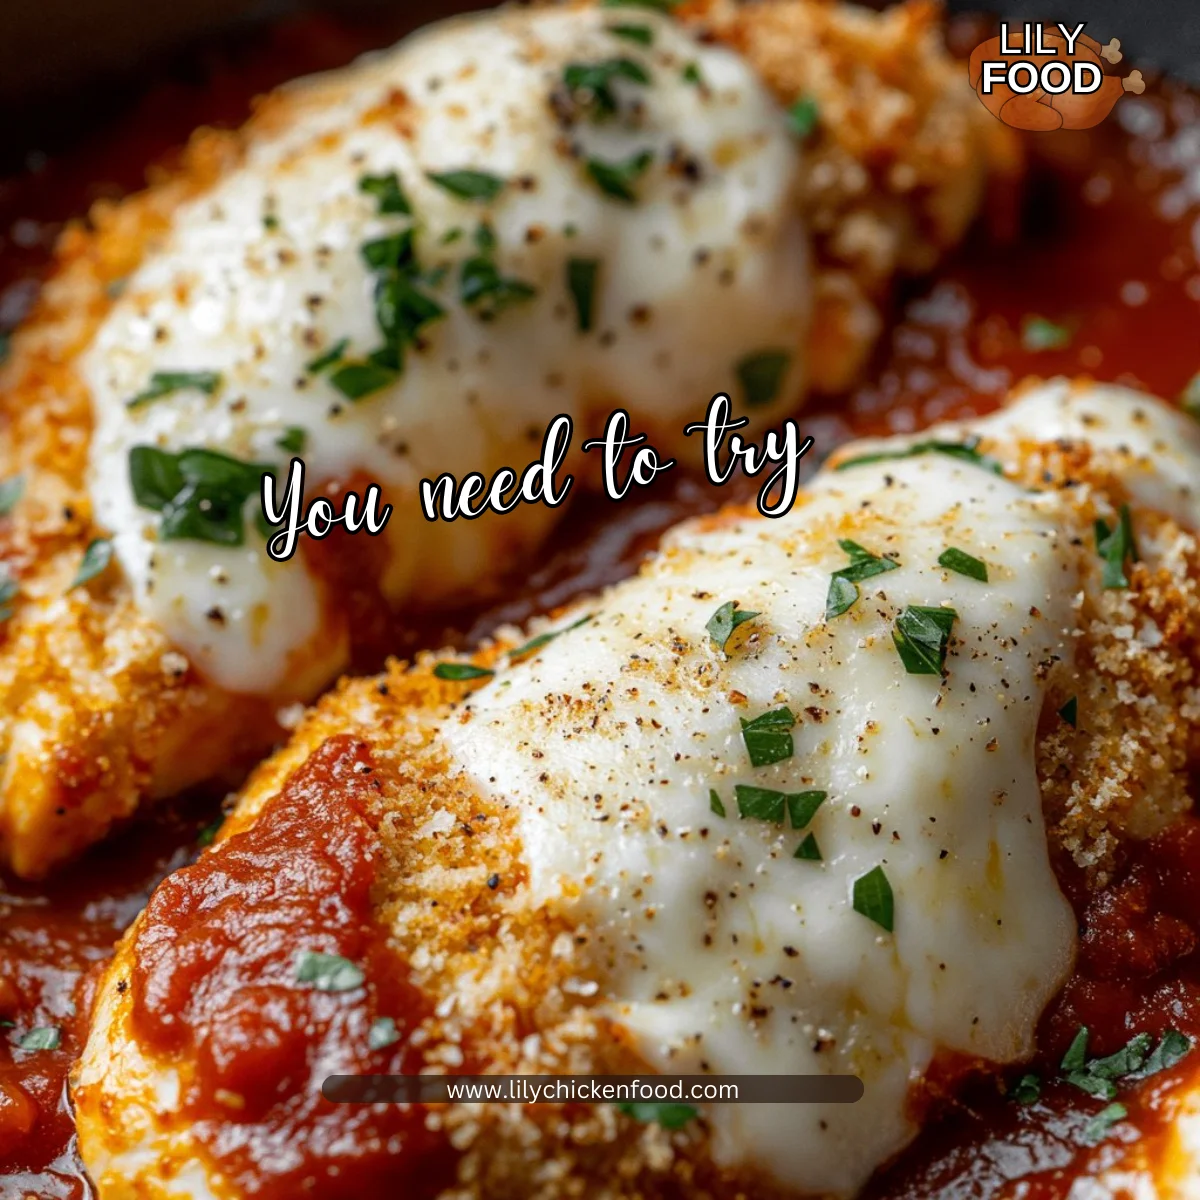
There’s something special about the smell of chicken enchiladas wafting through the kitchen. You know that sound—the bubbling of sauce, the sizzling of melted cheese, and the gentle hum of family chatter. As soon as dinner is near, the whole house fills with warmth, anticipation, and the promise of a delicious meal.

Chicken enchiladas are more than just a recipe; they are a family tradition. They bring us together, create joyful memories, and are loved by both young and old alike. Here is how to make them easily and satisfyingly.

Why This Works

Chicken Enchiladas

Chicken enchiladas are a perfect dish for busy families. With a little prep, you can assemble everything in one evening and let the oven do its magic. These enchiladas are comforting, filling, and ready in about 30 minutes from start to finish.

You can easily scale the recipe up for larger gatherings or small enough for an intimate family dinner. They are versatile; serve them with toppings your family enjoys, making meal times both enjoyable and personal.

Process Overview

“This is where the magic happens—when the aroma fills the kitchen.”

Making chicken enchiladas is a step-by-step journey that anyone can follow. You mix, fill, and bake, allowing all those wonderful flavors to blend together. I can assure you that the time spent preparing these enchiladas will be worth every minute when you see the joy on your family’s faces.

Ingredients

Here’s what you will need:

  • 2 cups cooked shredded chicken
  • 8 flour tortillas
  • 1 cup shredded cheese (cheddar or Monterey Jack)
  • 1 cup sour cream
  • 1 can cream of chicken soup
  • 1/2 cup chicken broth
  • 1 teaspoon garlic powder
  • 1 teaspoon onion powder
  • Salt and pepper to taste
  • Chopped green onions for garnish

Lily’s Personal Tips:

  • Chicken: I use rotisserie chicken for convenience. It saves time and adds flavor.
  • Tortillas: Flour tortillas are soft and easy to roll. They hold the filling well.
  • Cheese: Choose your family’s favorite cheese to make it even more enjoyable.
  • Soup: Cream of chicken soup adds richness. Try low-fat options if you’re looking for a lighter dish.
  • Broth: This will thin out the sauce. You can use homemade broth for extra flavor.

Directions

  1. Preheat your oven to 350°F (175°C).

    • This step ensures everything cooks evenly.
  2. In a mixing bowl, combine shredded chicken, garlic powder, onion powder, salt, and pepper.

    • Mix well to ensure the chicken is seasoned throughout.
  3. In a separate bowl, mix together sour cream, cream of chicken soup, and chicken broth until smooth.

    • Make sure it’s creamy; this will be the sauce that makes your enchiladas divine.
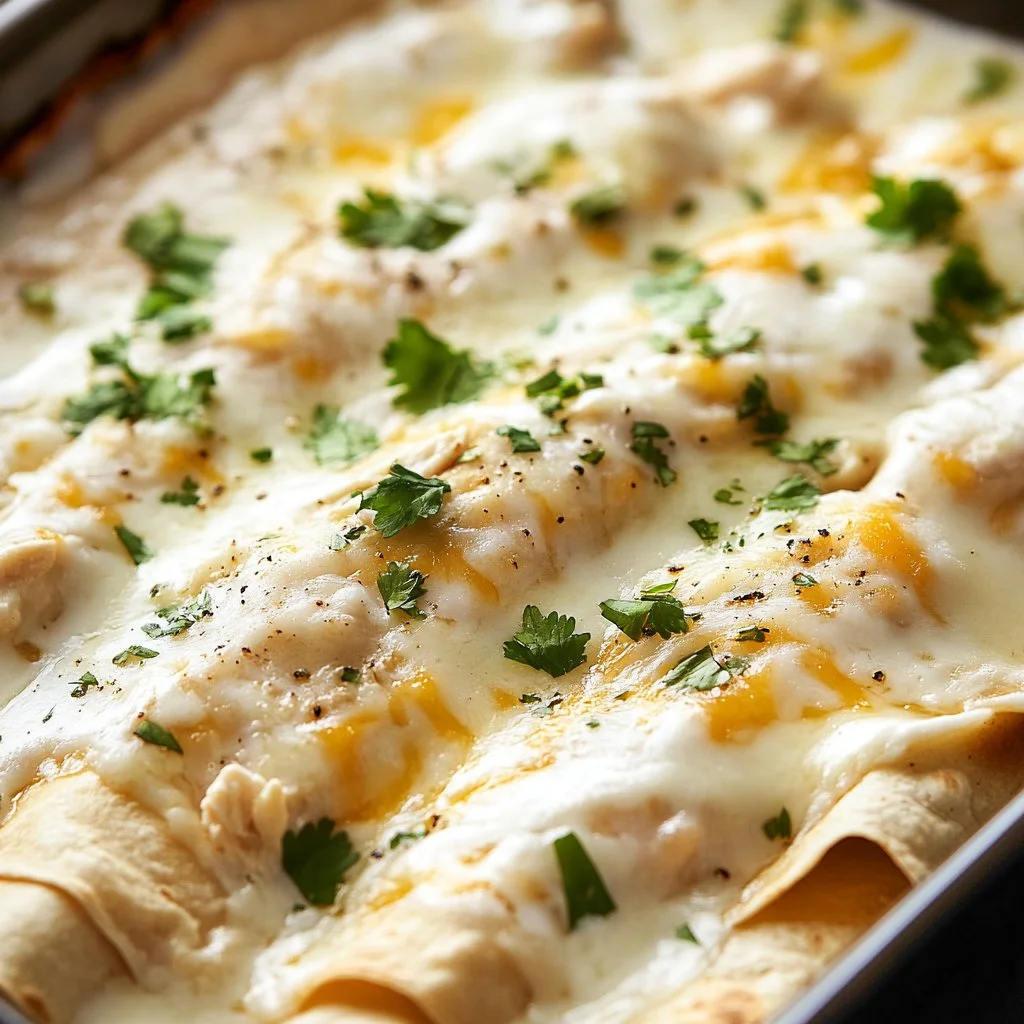
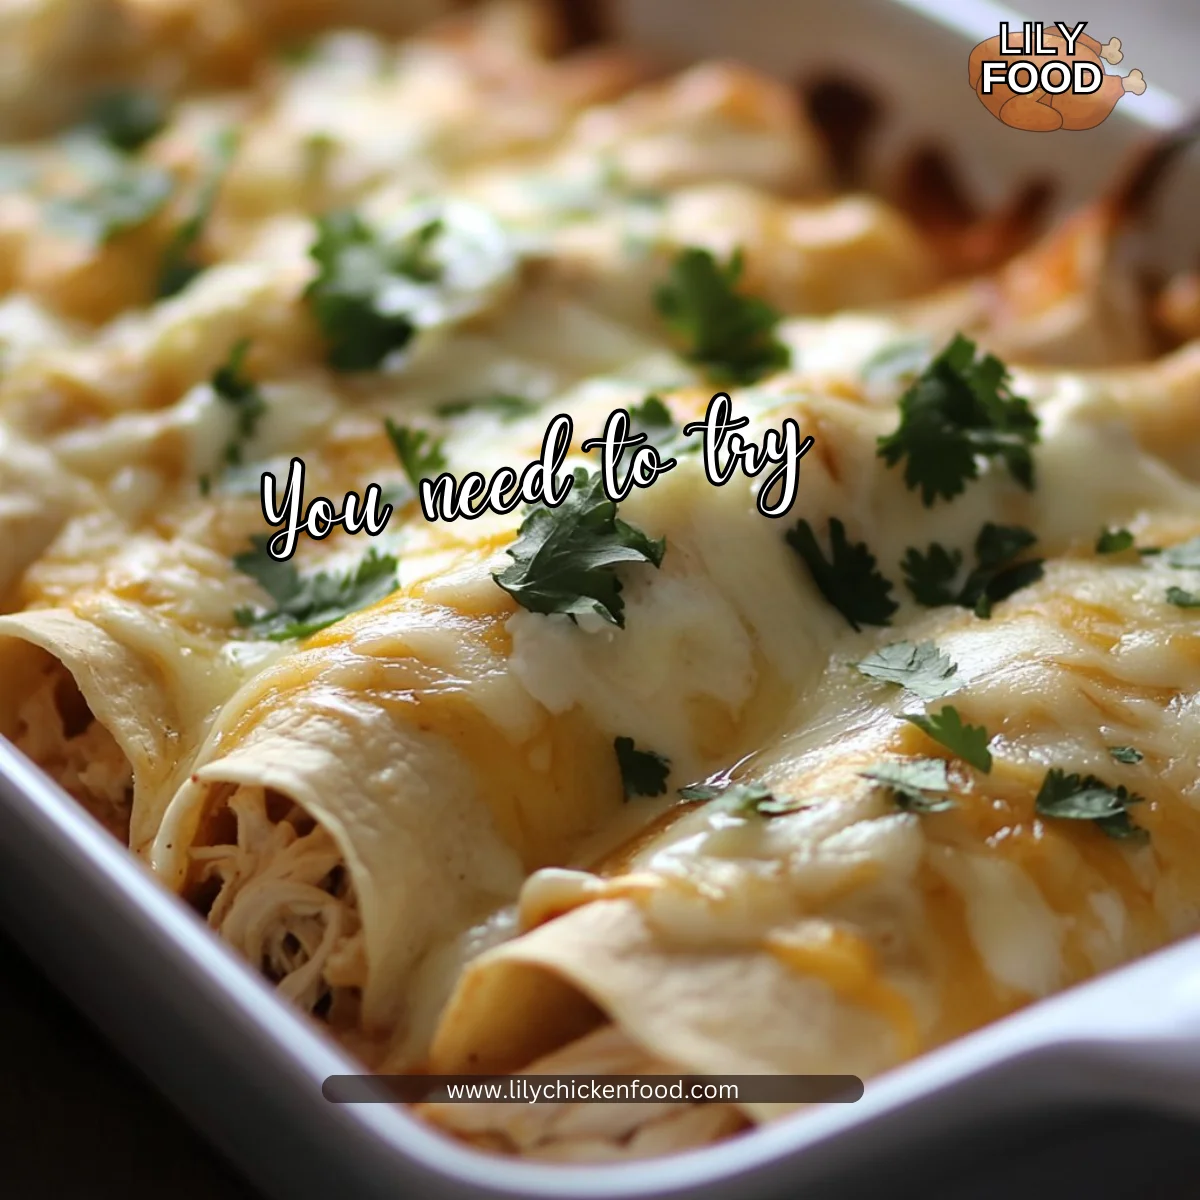
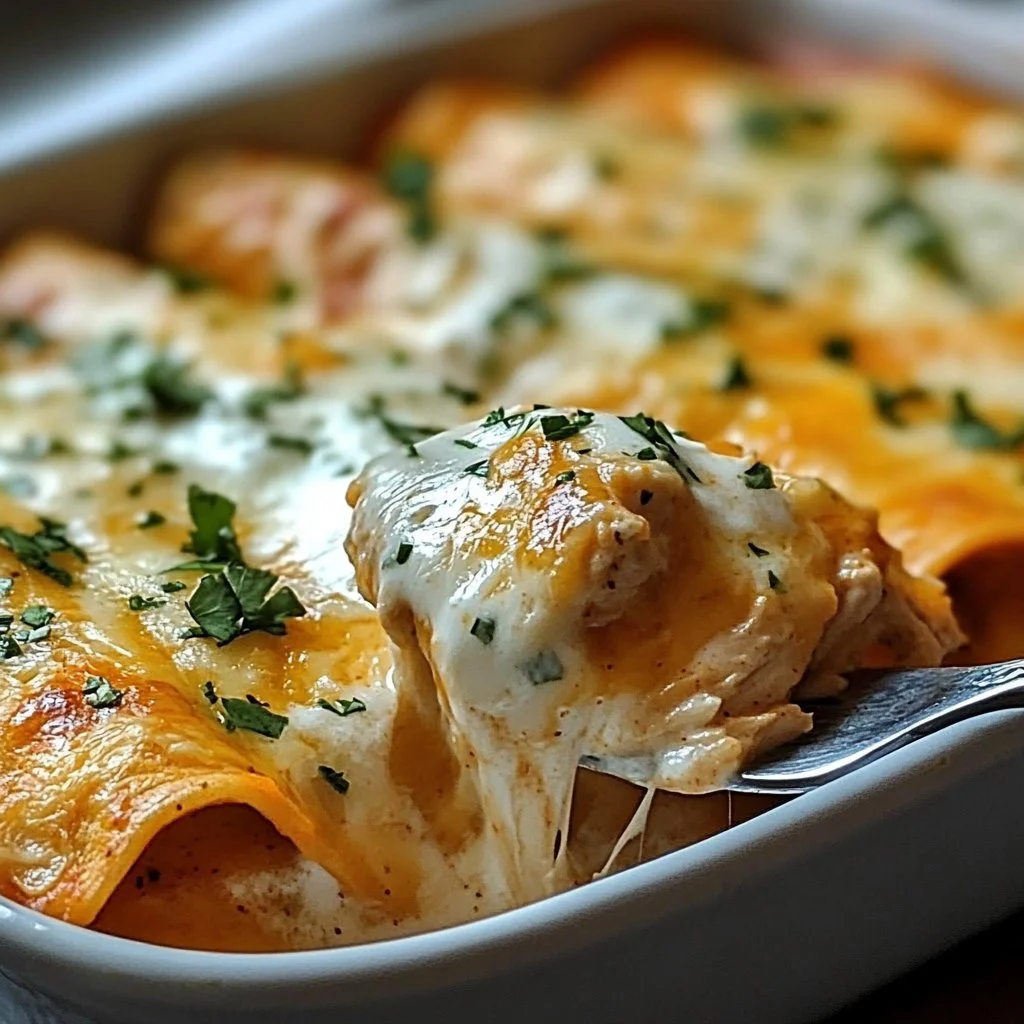
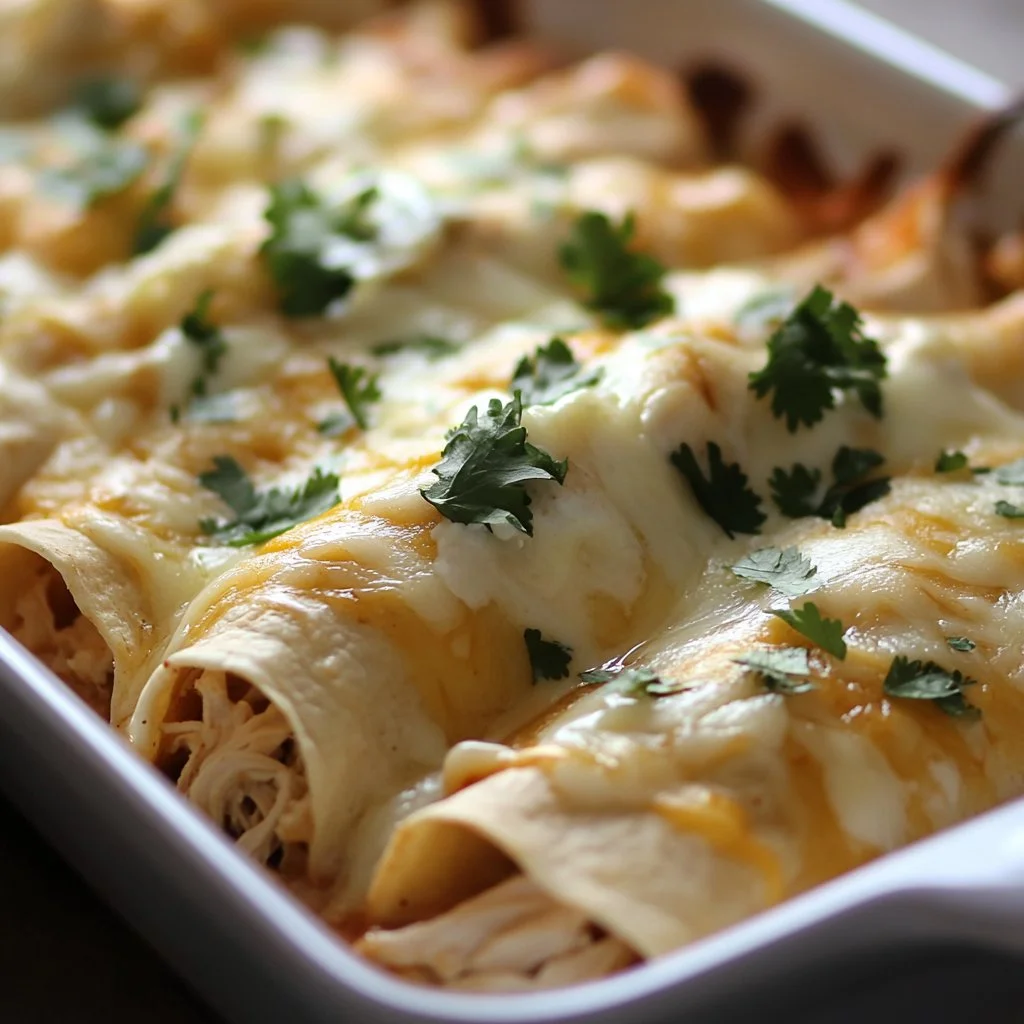
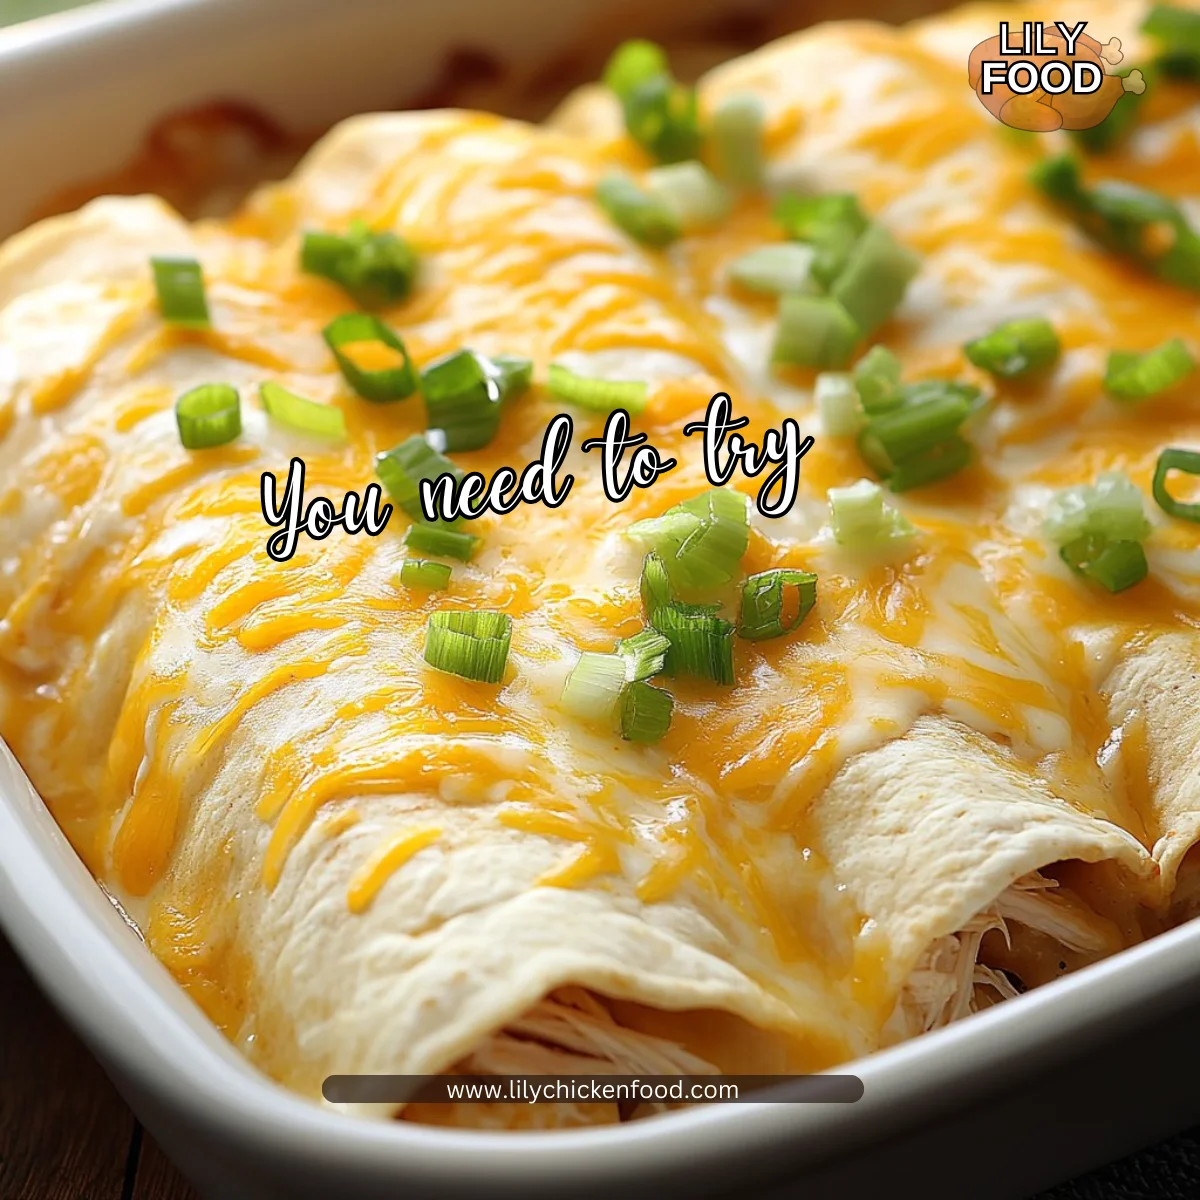
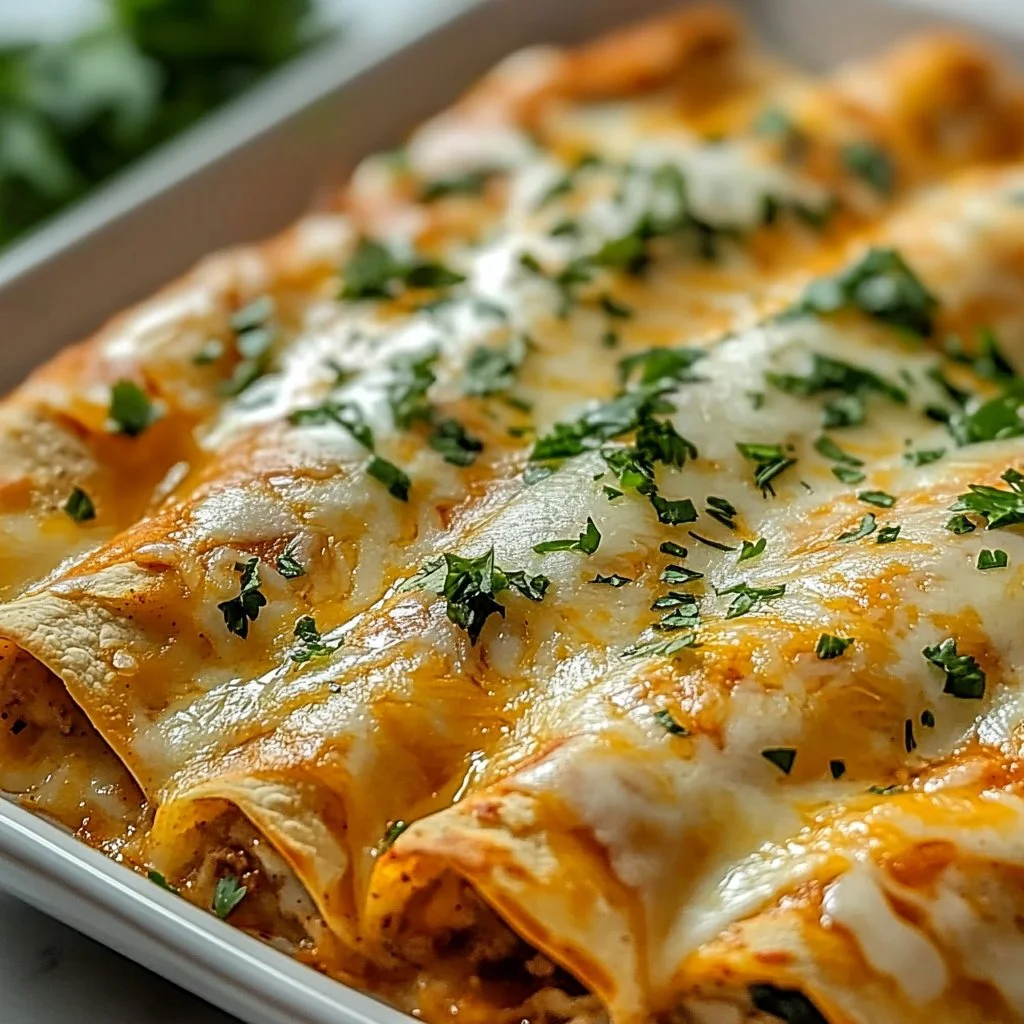
  4. Take a tortilla, fill it with a portion of the chicken mixture, and sprinkle some cheese, then roll it up and place it seam-side down in a greased baking dish.

    • Don’t overfill the tortillas to prevent spills.
  5. Repeat with all tortillas and fill the baking dish.

    • Arrange them snugly for an appealing presentation.
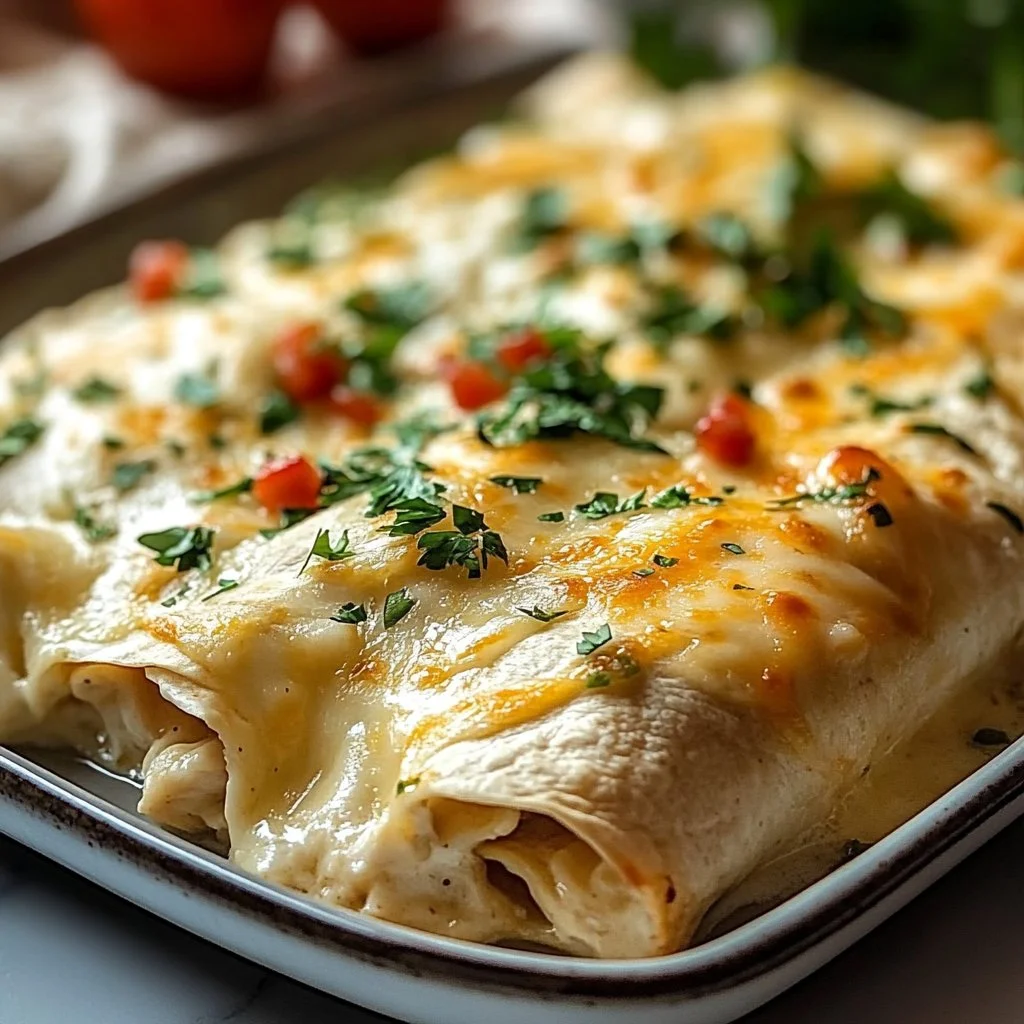
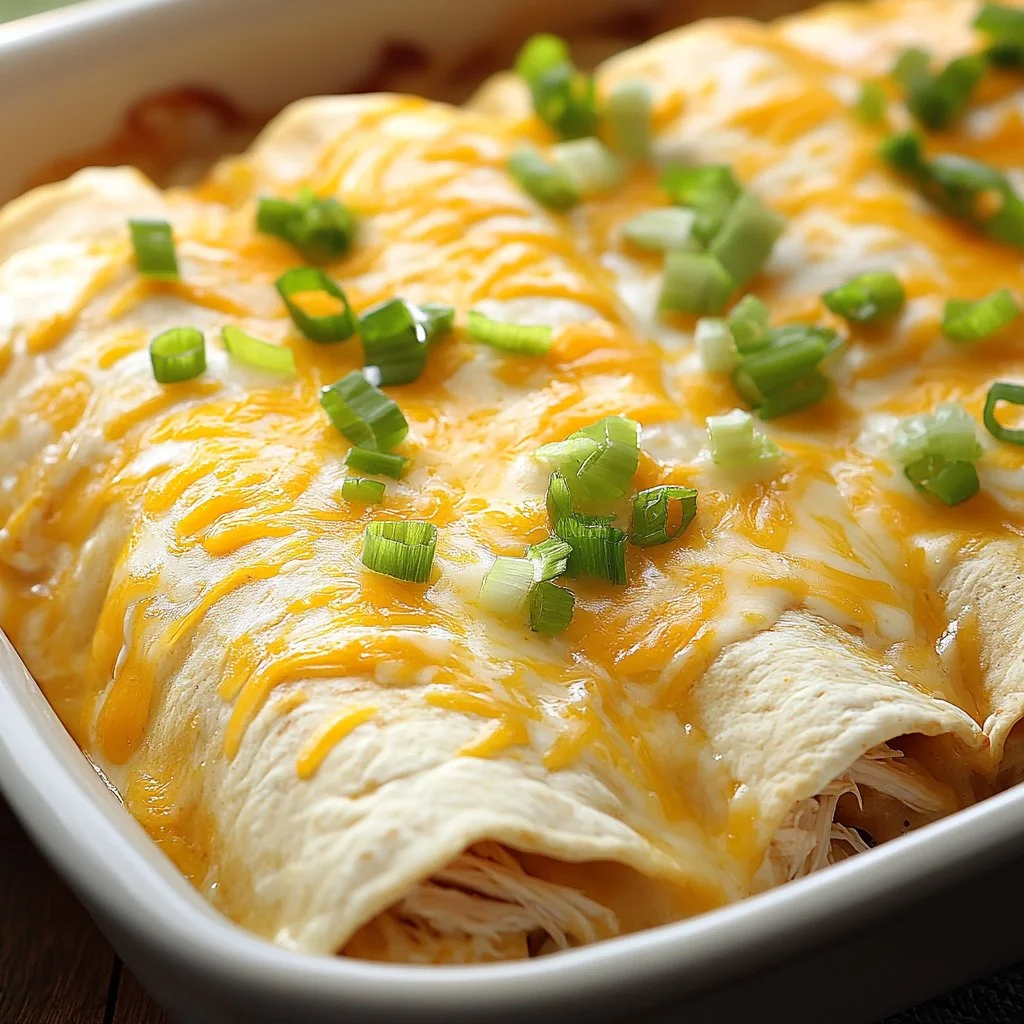
  6. Pour the remaining sour cream mixture over the top of the enchiladas and sprinkle with the remaining cheese.

    • This is what will make your enchiladas come out bubbly and golden.
  7. Bake in the preheated oven for 20-25 minutes or until bubbly and golden.

    • Keep an eye on them. You want a nice golden color, not burnt.
  8. Garnish with chopped green onions before serving.

    • The fresh green onions add a lovely touch to the dish.

Serving

Chicken Enchiladas

When it comes time to serve, place the baking dish in the center of the table. This meal is best enjoyed family-style. Allow everyone to serve themselves, making it a fun and engaging experience. Pair these enchiladas with a simple salad or some Mexican rice to round out the meal.

Don’t forget to keep a few extra toppings nearby, like salsa, guacamole, or additional cheese. These can elevate the meal even further and cater to individual tastes.

Storage

Leftovers can be stored in an airtight container in the refrigerator for up to 3 days. When reheating, place them in the oven at 350°F (175°C) to maintain that creamy texture. If the enchiladas seem dry, drizzle with a bit of chicken broth or water before covering with foil to help keep them moist as they heat.

Kitchen Notes

  • Use Pre-Cooked Chicken: Rotisserie chicken or even leftover chicken works best and saves time.
  • Prep Ahead: Assemble the enchiladas ahead of time and store them in the fridge until you’re ready to bake.
  • Frozen Option: You can freeze them unbaked. Just wrap well and bake from frozen, adding an extra 10-15 minutes to the bake time.
  • Double the Batch: This recipe doubles easily, so make more for family gatherings.
  • Microwave Method: If you’re short on time, you can microwave your assembled enchiladas. Cover with a damp paper towel and heat in intervals.

Variations

  • Vegetarian Option: Substitute the chicken with black beans, sautéed bell peppers, and zucchini for a delicious veggie version.
  • Spicy Twist: Add diced jalapeños to the chicken mixture for an extra kick.
  • Different Sauces: Use green enchilada sauce instead of the creamy mixture if you prefer a spicier, more traditional flavor.
  • Cheese Choices: Try pepper jack cheese for a spicier bite.
  • Gluten-Free Tortillas: Use corn tortillas for those with gluten sensitivities.

FAQ

  1. Can I make enchiladas ahead of time?
    Yes, you can prepare and assemble them a day in advance, then bake when ready to serve.

  2. What can I serve with chicken enchiladas?
    They pair well with Mexican rice, beans, guacamole, or a fresh salad.

  3. Can I use a different type of meat?
    Absolutely, shredded beef or turkey work just as well.

  4. How do I keep my tortillas from falling apart?
    Warm the tortillas in a hot skillet for a few seconds or in the microwave for a few seconds to make them more pliable.

  5. Are these enchiladas freezer-friendly?
    Yes! Assemble them uncooked, wrap tightly, and freeze.

As you finish making these chicken enchiladas, take a moment to appreciate what you’ve created. Gathering around the table with loved ones to enjoy a hearty meal is what home is all about. With every bite, you’re not just sharing food but moments and memories that will last a lifetime. Enjoy!

Chicken Enchiladas

Prep Time 10 minutes
Cook Time 25 minutes
Total Time 35 minutes
Servings 6 servings
Calories 300
Easy and satisfying chicken enchiladas that blend comforting flavors and create joyful family memories.

Ingredients

Main Ingredients

  • 2 cups cooked shredded chicken (Rotisserie chicken is convenient.)
  • 8 pieces flour tortillas (Soft and easy to roll.)
  • 1 cup shredded cheese (cheddar or Monterey Jack) (Use your family's favorite cheese.)
  • 1 cup sour cream
  • 1 can cream of chicken soup (Adds richness; low-fat options available.)
  • 1/2 cup chicken broth (Thin out the sauce, homemade recommended.)
  • 1 teaspoon garlic powder
  • 1 teaspoon onion powder
  • to taste Salt and pepper
  • as needed Chopped green onions for garnish (Add a fresh touch.)

Instructions 

Preparation

  • Preheat your oven to 350°F (175°C).
  • In a mixing bowl, combine shredded chicken, garlic powder, onion powder, salt, and pepper. Mix well.
  • In a separate bowl, mix together sour cream, cream of chicken soup, and chicken broth until smooth.

Assembly

  • Take a tortilla, fill it with a portion of the chicken mixture, sprinkle some cheese, roll it up and place it seam-side down in a greased baking dish.
  • Repeat with all tortillas and fill the baking dish snugly.
  • Pour the remaining sour cream mixture over the top and sprinkle with the remaining cheese.

Baking

  • Bake in the preheated oven for 20-25 minutes or until bubbly and golden.
  • Garnish with chopped green onions before serving.

Notes

Leftovers can be stored in an airtight container for up to 3 days. When reheating, place in the oven at 350°F (175°C).
Calories: 300kcal
Course: Dinner, Main Course
Cuisine: Mexican
Keyword: Chicken Enchiladas, Comfort Food, Easy Dinner, Family Meal, quick recipe

Creamy White Chicken Enchiladas

The smell of sizzling butter fills the kitchen, inviting everyone to gather around. You hear the soft sound of chicken being shredded and the gentle mixing of ingredients. It’s not just a meal; it’s a comforting experience that brings the family together. Creamy White Chicken Enchiladas are a warm, delightful dish that’s perfect for weeknight dinners or cozy gatherings. With a simple method and comforting flavors, you can set the stage for wonderful moments at the dining table.

Why this works

Creamy White Chicken Enchiladas

These creamy white chicken enchiladas hit all the right notes for family mealtime. You can easily whip them up using leftover chicken or store-bought rotisserie chicken, saving you valuable time. The flavorful filling wrapped in soft tortillas and smothered in a velvety white sauce is sure to please even the pickiest eaters. Plus, this recipe makes a generous portion, so leftovers are a delightful bonus for busy days ahead.

Process Overview

“This is where the magic happens—when the aroma fills the kitchen.”

The process of making these enchiladas is straightforward and enjoyable. First, you create a smooth white sauce that acts as the perfect base. Next, you mix the delicious filling and wrap it all up in soft tortillas. Finally, those wrapped beauties are drenched in more white sauce, sprinkled with cheese, and baked until bubbly and golden. The kitchen comes alive with the smells of savory chicken and melted cheese, making your family even more eager for dinner.

Ingredients

Here’s what you’ll need to create these mouthwatering enchiladas:

  • 8-10 medium flour tortillas
  • 3 cups cooked shredded chicken (rotisserie works great)
  • 2 cups shredded Monterey Jack cheese (divided)
  • 1 cup shredded cheddar cheese (divided)
  • 1/2 cup diced green chiles (canned or fresh)
  • 1/4 cup chopped fresh cilantro
  • 1 small onion (diced)
  • 3 tablespoons butter (for white sauce)
  • 3 tablespoons all-purpose flour (for roux)
  • 2 cups chicken broth (for white sauce)
  • 1 cup sour cream (room temperature)
  • 1/2 teaspoon cumin (ground)
  • Salt and pepper to taste

Lily’s Tips: Use a rotisserie chicken not just for convenience but also for added flavor. Let your sour cream come to room temperature for easier mixing. Adjust the amount of green chiles based on your family’s spice preference.

Directions

  1. Melt butter in a large saucepan over medium heat. This step creates a rich base for your sauce.
  2. Whisk in flour and cook for 1 minute, stirring constantly, until it forms a smooth paste and turns light golden. This creates the foundation for your velvety white sauce.
  3. Gradually add chicken broth to the roux, whisking constantly to prevent lumps. Keep whisking until the sauce thickens and becomes smooth, about 3-4 minutes. Remove from heat and stir in sour cream, cumin, salt, and pepper until perfectly combined. Taste and adjust seasonings as needed.
  4. In a mixing bowl, combine shredded chicken, diced onion, green chiles, cilantro, and 1 cup of the cheese mixture. Mix thoroughly to create a well-distributed filling that delivers flavor in every bite. Don’t be afraid to get in there with your hands for better mixing.
  5. Preheat oven to 350°F. Spread a thin layer of white sauce in the bottom of a greased 9×13 baking dish. This keeps the enchiladas from sticking.
  6. Place about 1/3 cup chicken mixture down the center of each tortilla, roll tightly, and arrange seam-side down in the prepared dish. Take your time rolling; tightly wrapped enchiladas will hold their shape better.
  7. Pour the remaining white sauce evenly over rolled enchiladas, ensuring they’re completely covered. Sprinkle remaining Monterey Jack and cheddar cheese over the top for that golden, bubbly finish.
  8. Bake uncovered at 350°F for 25-30 minutes until sauce is bubbling around the edges and cheese is melted and golden brown. Remove from oven and let rest for 5 minutes before serving to allow sauce to set properly. Your patience will reward you with perfect enchiladas.

Serving

Creamy White Chicken Enchiladas

Serve these creamy white chicken enchiladas family-style. Place the casserole dish at the center of the table, and let everyone help themselves. Pair them with a simple side salad or some Mexican rice for a complete meal. If you have anyone in your family who loves spice, consider putting out some hot sauce for them to drizzle on top.

Storage

These enchiladas store beautifully. If you have leftovers, place them in an airtight container and refrigerate for up to 3 days. When you’re ready to enjoy them again, simply reheat in the oven at 350°F for about 15-20 minutes until warmed through. You can also microwave individual portions, but the oven keeps them from getting too soggy.

Kitchen Notes

  • Shortcut Sauce: Use store-bought white sauce for a faster option.
  • Frozen Enchiladas: Prepare the dish, cover well, and freeze before baking for up to three months. Bake from frozen, adding an additional 10-15 minutes.
  • Rotisserie Chicken: This is a major time-saver and adds great flavor.
  • Cheese Variety: Feel free to mix up the cheese. Pepper jack or a Mexican blend can add a nice kick.
  • Prep Ahead: You can assemble the enchiladas earlier in the day and refrigerate before baking.

Variations

Here are a few ideas to personalize your creamy white chicken enchiladas:

  • Vegetarian Option: Swap the chicken for black beans or sautéed vegetables like mushrooms, zucchini, and spinach.
  • Low-Carb Twist: Use cauliflower tortillas or zucchini slices instead of flour tortillas.
  • Different Proteins: Ground turkey or pork can make a delicious alternative to chicken.
  • Kid-Friendly: Reduce the spices and stick with plain cheese enchiladas for picky eaters.
  • Dairy-Free: Use plant-based cream, non-dairy cheese, and replace butter with olive oil.

FAQ

1. Can I use tortillas other than flour?
Yes, corn tortillas work fine but may require softening before filling.

2. How can I make these spicier?
Add diced jalapeños to the filling or use hotter green chiles.

3. Can I make these ahead of time?
Absolutely! Assemble them and store in the fridge for up to 24 hours before baking.

4. What should I do if my sauce is too thick?
Add a bit more chicken broth or sour cream to reach your desired consistency.

5. Can I freeze these enchiladas?
Yes, they freeze very well. Just be sure to cover them tightly before freezing.

As you prepare this dish, allow the process to become a joyful family event. Cooking together can create lasting memories. Enjoy the rich flavor and creamy texture of these enchiladas, and relish the smiles around the table. This meal is about nurturing love and connection through food. Happy cooking!

Creamy White Chicken Enchiladas

Prep Time 30 minutes
Cook Time 30 minutes
Total Time 1 hour
Servings 8 servings
Calories 450
A comforting dish perfect for weeknight dinners, featuring soft tortillas filled with flavorful shredded chicken and smothered in a velvety white sauce.

Ingredients

For the enchiladas

  • 8-10 medium flour tortillas
  • 3 cups cooked shredded chicken (rotisserie works great)
  • 2 cups shredded Monterey Jack cheese (divided)
  • 1 cup shredded cheddar cheese (divided)
  • 1/2 cup diced green chiles (canned or fresh)
  • 1/4 cup chopped fresh cilantro
  • 1 small onion (diced)

For the white sauce

  • 3 tablespoons butter (for white sauce)
  • 3 tablespoons all-purpose flour (for roux)
  • 2 cups chicken broth (for white sauce)
  • 1 cup sour cream (room temperature)
  • 1/2 teaspoon cumin (ground)
  • Salt and pepper (to taste)

Instructions 

Preparation

  • Melt butter in a large saucepan over medium heat.
  • Whisk in flour and cook for 1 minute, stirring constantly, until it forms a smooth paste and turns light golden.
  • Gradually add chicken broth to the roux, whisking constantly to prevent lumps.
  • Whisk until the sauce thickens and becomes smooth, about 3-4 minutes.
  • Remove from heat and stir in sour cream, cumin, salt, and pepper until well combined.
  • In a mixing bowl, combine shredded chicken, diced onion, green chiles, cilantro, and 1 cup of the cheese mixture.
  • Mix thoroughly to create a well-distributed filling.

Assembly

  • Preheat oven to 350°F.
  • Spread a thin layer of white sauce in the bottom of a greased 9x13 baking dish.
  • Place about 1/3 cup chicken mixture down the center of each tortilla, roll tightly, and arrange seam-side down in the prepared dish.
  • Pour the remaining white sauce evenly over rolled enchiladas.
  • Sprinkle remaining Monterey Jack and cheddar cheese over the top.

Baking

  • Bake uncovered at 350°F for 25-30 minutes until sauce is bubbling and cheese is melted and golden brown.
  • Remove from oven and let rest for 5 minutes before serving.

Notes

These enchiladas can be served family-style. Store leftovers in an airtight container for up to 3 days. You can also freeze them before baking for up to three months.
Calories: 450kcal
Course: Dinner, Main Course
Cuisine: Mexican
Keyword: Chicken Enchiladas, Comfort Food, Creamy White Chicken Enchiladas, Easy Recipe, Family Dinner

Pin by Jayne Rawlings on Food | Chicken dishes recipes, Peruvian recipes, Chicken recipes

The kitchen greets you with warm steam and bright citrus notes. The scent of garlic, cumin, and roasted chicken fills the air. I hear the soft clink of a spoon against a pan and the gentle chatter of family in the next room.

This recipe, a beloved pin by Jayne Rawlings, brings those familiar kitchen sounds to life. It is simple enough for weeknights and special enough for Sunday dinner. If you love comforting chicken dishes, you may also enjoy my roundup of hearty chicken and spinach recipes that pair well with this meal.

Why this works

Pin by Jayne Rawlings on Food | Chicken dishes recipes, Peruvian recipes, Chicken recipes

Peruvian-inspired flavors are all about balance. Bright citrus and spicy peppers lift the savory chicken. A quick marinade does most of the work and lets the oven finish the dish with a golden crust and tender meat.

This recipe saves time because most of the active work happens up front. Marinate, sear, and bake. The oven does the rest while you set the table and help the kids with homework. If you need a speedy weeknight option, try my 30-minute baked chicken thighs for a similar hands-off approach.

Process Overview

“This is where the magic happens—when the aroma fills the kitchen.”

At its heart, this recipe is a triangle of flavor: citrus for brightness, spices for warmth, and slow heat for tenderness. We build the flavors in three stages.

  1. Marinate to infuse bright and savory notes.
  2. Sear to lock in juices and add color.
  3. Bake until just cooked and resting to redistribute juices.

This method keeps the chicken moist and full of flavor every time.

Ingredients

Below I list the ingredients and add a personal tip for each one. These tips come from years of cooking for my family and testing small changes to improve texture and taste.

  • 2.5 pounds bone-in, skin-on chicken thighs or breasts, about 6 pieces
    • Tip: I prefer thighs for richer flavor and forgiving texture. If using breasts, pound slightly thinner for even cooking.
  • 1/3 cup fresh lime juice, about 2 limes
    • Tip: Fresh juice beats bottled every time. It brightens the dish without bitterness.
  • 1/4 cup orange juice, fresh or store
    • Tip: A little orange mellows the lime and creates a nice glaze.
  • 4 cloves garlic, minced
    • Tip: Mince fine so garlic disperses through the marinade and cooks evenly.
  • 2 teaspoons ground cumin
    • Tip: Toast whole cumin briefly in a dry pan, then grind for a warmer, fresher taste.
  • 1 teaspoon smoked paprika
    • Tip: Smoked paprika adds a subtle roast note without adding heat.
  • 1/2 to 1 teaspoon crushed red pepper flakes
    • Tip: Start with 1/2 teaspoon for kids or add more for adults who like a kick.
  • 1 teaspoon kosher salt
    • Tip: Use kosher salt for consistent seasoning. Adjust to taste if you use table salt.
  • 1/2 teaspoon black pepper
    • Tip: Freshly cracked pepper has more aroma than pre-ground.
  • 1/4 cup olive oil
    • Tip: Use a good quality extra virgin olive oil for flavor and a better sear.
  • 2 tablespoons chopped fresh cilantro
    • Tip: Add most at the end to keep color and fresh flavor.
  • 1 small yellow onion, thinly sliced
    • Tip: Caramelized onions add sweetness. Slice thin so they soften during baking.
  • 1 small jalapeño, seeded and thinly sliced, optional
    • Tip: Keep the seeds for heat. Remove them for milder taste.
  • 1 tablespoon honey or brown sugar
    • Tip: A touch of sweetness helps caramelize the skin during roasting.

Directions

  1. Make the marinade. In a medium bowl, whisk lime juice, orange juice, garlic, cumin, smoked paprika, red pepper flakes, salt, pepper, olive oil, and honey until smooth.
    • Encouraging note: Whisk until the marinade smells bright. This step wakes up the spices.
  2. Add the chicken and onions. Place the chicken pieces in a large zip-top bag or shallow baking dish. Pour the marinade over the chicken and toss to coat. Add sliced onion and jalapeño if using.
    • Encouraging note: Let the chicken get comfortable in the marinade. An hour is great, but overnight is best.
  3. Marinate in the fridge for at least 1 hour and up to 12 hours. Turn the bag once so every piece gets a turn.
    • Encouraging note: This is the easy part. Use this time to prepare sides or set the table.
  4. Preheat the oven to 425°F. Heat a large ovenproof skillet over medium-high heat and add a tablespoon of olive oil.
    • Encouraging note: A hot pan gives a quick sear and beautiful color.
  5. Sear the chicken. Remove chicken from the marinade, letting excess drip off. Place skin-side down in the hot skillet. Sear 3 to 4 minutes until golden brown. Turn and sear the other side for 2 minutes.
    • Encouraging note: Resist the urge to move the chicken. Let the crust form.
  6. Add onions and remaining marinade. Spoon the onions around the chicken and pour any leftover marinade over the pieces.
    • Encouraging note: The onions help shield the chicken and add sweet, roasted flavor.
  7. Bake in the preheated oven for 20 to 25 minutes, until the internal temperature reaches 165°F for breasts and 175°F for thighs at the thickest part.
    • Encouraging note: Use an instant-read thermometer. It takes the guesswork out of dinner.
  8. Rest the chicken. Remove the skillet and let the chicken rest 5 to 8 minutes before serving. Sprinkle chopped cilantro on top.
    • Encouraging note: Resting keeps the juices inside the meat for moist, tender bites.
  9. Optional glaze. If you want a glossy finish, spoon the pan juices over the chicken before serving, or broil for 1 to 2 minutes to crisp the skin.
    • Encouraging note: Keep a close eye if broiling. It adds a nice finish in just minutes.
  10. Serve family-style and enjoy the smiles around the table.
    • Encouraging note: Invite everyone to dig in and share what they love about the meal.

While you are prepping sides, you might enjoy pairing this with comfort dishes like my white chicken chili ideas for a heartier table.

Serving

Pin by Jayne Rawlings on Food | Chicken dishes recipes, Peruvian recipes, Chicken recipes

Serve this chicken family-style on a large platter. Pile the chicken pieces in the center with the roasted onions and spoon the pan juices over the top. Add lime wedges on the side for extra brightness.

For side dishes, think simple and nourishing. Roasted sweet potatoes, steamed rice, or a crisp green salad work beautifully. I often set out bowls of warm rice, sliced avocado, and chopped cilantro so everyone can customize their plate.

If you want a festive touch, serve with warm corn tortillas. Guests can make small tacos with roasted chicken, onions, and a squeeze of lime. This keeps the meal interactive and fun for kids.

Storage

Fridge: Store cooled chicken in an airtight container for up to 4 days. Keep pan juices in a separate small container to spoon over when reheating.

Freezer: For longer storage, remove the chicken from the bones, wrap tightly, and freeze for up to 3 months. Label with the date.

Reheating: Reheat gently to keep the chicken moist. My favorite method is using a low oven. Preheat to 300°F, place chicken in a baking dish, add a splash of chicken broth or reserved pan juices, cover with foil, and heat 15 to 20 minutes until warm.

Microwave: If you are short on time, microwave on medium power in 30 second bursts. Add a damp paper towel over the chicken to retain moisture.

Safety tip: Always reheat to an internal temperature of 165°F.

Kitchen Notes

  • Use a heavy ovenproof skillet to go from stovetop to oven without changing pans.
  • Marinate overnight for the deepest flavor if you plan ahead.
  • If you skip searing, the dish still tastes great but will lack the browned crust that kids notice first.
  • Make extra sauce by simmering reserved pan juices with a teaspoon of cornstarch to thicken.
  • For easier cleanup, line the baking dish with foil or use a disposable pan when feeding a crowd.

You may find more weeknight shortcuts and family favorites listed among my easy chicken breast recipes.

Variations

  • For picky eaters: Reduce or omit the jalapeño and red pepper flakes. Use only lime and a touch of paprika for familiar flavors.
  • For low-sodium needs: Cut the salt in half and add a squeeze more lime at the end to lift the flavor.
  • For a gluten-free meal: This recipe is naturally gluten-free. Ensure your pantry staples like paprika and any added broths are certified gluten-free.
  • For a dairy-free plate: This recipe contains no dairy. Serve with dairy-free sides like avocado salad or roasted vegetables.
  • For a spicier version: Add a tablespoon of aji amarillo paste or an extra jalapeño for authentic Peruvian heat.

If you want a different comfort pairing, try combining this chicken with pasta or casseroles from my chicken macaroni favorites.

FAQ

Q: Can I use boneless, skinless chicken?
A: Yes. Boneless, skinless chicken cooks faster. Pound breasts to even thickness and reduce baking time by 5 to 8 minutes. Use an instant-read thermometer to confirm doneness.

Q: How long can I marinate the chicken?
A: You can marinate from 1 hour up to 12 hours. Acidic marinades break down protein over long times. I prefer 2 to 8 hours for best texture.

Q: Can I make this on the grill?
A: Absolutely. Sear the chicken over direct heat to get grill marks, then move to indirect heat until the internal temperature reaches the safe range. Watch closely to avoid flare-ups.

Q: Is there a nonalcoholic way to add depth like a splash of white wine might?
A: Yes. Add a teaspoon of low-sodium chicken broth concentrate or a splash of apple cider vinegar for depth without alcohol.

Q: Can I double the recipe for a crowd?
A: Yes. Use two pans or a large sheet pan. Do not overcrowd the chicken; it will steam instead of roast. Stagger pans in the oven if needed and rotate for even browning.

Conclusion

I hope this recipe brings warmth to your table and becomes a new family favorite. I use tested techniques and family feedback to keep weeknight dinners both simple and memorable.

If you enjoy learning about the people behind recipes, you might like this piece on people and their recipes for more culinary stories. For background on how meat has been used in cooking traditions over time, this page about the history of meat on The Food Timeline is a great reference.

Thank you for cooking with me. Gather your people, share the meal, and savor the small moments.

Peruvian-Inspired Roasted Chicken Thighs

Prep Time 1 hour 30 minutes
Cook Time 25 minutes
Total Time 1 hour 55 minutes
Servings 6 pieces
Calories 400
A comforting and flavorful dish featuring marinated chicken thighs seared for a golden crust and baked to tender perfection, perfect for any weeknight or special occasion.

Ingredients

Main Ingredients

  • 2.5 pounds bone-in, skin-on chicken thighs or breasts (Prefer thighs for richer flavor and forgiving texture.)
  • 1/3 cup fresh lime juice (Fresh juice beats bottled every time.)
  • 1/4 cup orange juice (A little orange mellows the lime.)
  • 4 cloves garlic, minced (Mince fine so garlic disperses through the marinade.)
  • 2 teaspoons ground cumin (Toast whole cumin briefly in a pan for a fresher taste.)
  • 1 teaspoon smoked paprika (Adds a subtle roast note without adding heat.)
  • 1/2 to 1 teaspoon crushed red pepper flakes (Start with 1/2 teaspoon for kids or add more for adults.)
  • 1 teaspoon kosher salt (Adjust to taste if you use table salt.)
  • 1/2 teaspoon black pepper (Freshly cracked pepper has more aroma.)
  • 1/4 cup olive oil (Use good quality extra virgin for flavor.)
  • 2 tablespoons chopped fresh cilantro (Add most at the end for fresh flavor.)
  • 1 small yellow onion, thinly sliced (Caramelized onions add sweetness.)
  • 1 small jalapeño, seeded and thinly sliced (Keep the seeds for heat, remove for milder taste.)
  • 1 tablespoon honey or brown sugar (Helps caramelize the skin during roasting.)

Instructions 

Making the Marinade

  • In a medium bowl, whisk lime juice, orange juice, garlic, cumin, smoked paprika, red pepper flakes, salt, pepper, olive oil, and honey until smooth.

Marinating the Chicken

  • Place the chicken pieces in a large zip-top bag or shallow baking dish. Pour the marinade over the chicken and toss to coat. Add sliced onion and jalapeño if using.
  • Marinate in the fridge for at least 1 hour and up to 12 hours.

Searing and Baking

  • Preheat the oven to 425°F. Heat a large ovenproof skillet over medium-high heat and add a tablespoon of olive oil.
  • Remove chicken from the marinade, letting excess drip off. Place skin-side down in the hot skillet. Sear for 3 to 4 minutes until golden brown.
  • Turn and sear the other side for 2 minutes.
  • Spoon the onions around the chicken and pour any leftover marinade over the pieces.
  • Bake in the preheated oven for 20 to 25 minutes, until the internal temperature reaches 165°F for breasts and 175°F for thighs.

Resting and Serving

  • Remove the skillet and let the chicken rest for 5 to 8 minutes before serving. Sprinkle chopped cilantro on top.
  • Spoon the pan juices over the chicken before serving, or broil for 1 to 2 minutes to crisp the skin.

Notes

Store cooled chicken in an airtight container for up to 4 days. For longer storage, freeze for up to 3 months. Reheat gently to keep the chicken moist.
Calories: 400kcal
Course: Dinner, Main Course
Cuisine: Latin American, Peruvian
Keyword: Comfort Food, Easy Chicken Recipe, Roasted Chicken, Weeknight Dinner

Honey Lime Chicken

I can smell honey warming in the pan as I step into the kitchen. The lime brightens the air. The sizzle of garlic hitting warm oil makes the whole house feel like home.

This Honey Lime Chicken is one of those recipes that sounds fancy but is simple enough for a busy weeknight. My kids ask for it again and again, and I love that it comes together with little fuss. If you enjoy bold weeknight flavors, you might also like my other baked chicken favorite for family dinners that pairs well with mashed potatoes.

Why this works

Honey Lime Chicken

This recipe balances sweet, tangy, and a touch of heat. The honey caramelizes on the skin while lime cuts the richness. Garlic and soy sauce give it a familiar savory base that kids and adults both enjoy.

It saves time without sacrificing flavor. You can mix the marinade in one bowl and use a single baking sheet for easy cleanup. That makes it perfect for busy weeknights or casual family gatherings.

If you like smoky undertones, this method also translates well to the grill. For a grilled version with similar family-friendly appeal, try my easy skewer method for summer cookouts that keeps things simple and juicy.

Process Overview

“This is where the magic happens—when the aroma fills the kitchen.”

The process is straightforward. You rub garlic on the chicken, toss it with a quick honey lime marinade, bake until tender, and finish under the broiler for crisp skin. The whole routine is hands-on for just a few minutes and then mostly hands-off while the oven does its work.

I always tell families to use that oven time to set the table, steam a side, or get the kids to wash up. The result is a warm meal and a relaxed finish.

Ingredients

  1. 1 lb (500g) chicken thighs, deboned, skin-on
    Lily’s tip: Skin-on thighs get wonderfully crisp under the broiler. If you prefer less fat, trim excess skin but keep a little for flavor.

  2. 3 cloves garlic, minced
    Lily’s tip: Rub one clove across the chicken first for an extra garlic boost. Fresh garlic makes the sauce bright and aromatic.

  3. 2 tablespoons honey
    Lily’s tip: Use runny honey for easy mixing. If your honey is thick, warm it briefly to make mixing easier.

  4. 1.5 tablespoon soy sauce
    Lily’s tip: Regular soy sauce works well. For lower sodium, use a reduced-sodium variety but taste and adjust salt.

  5. 2 tablespoons lime juice
    Lily’s tip: Freshly squeezed lime juice gives a bright, clean acidity you cannot get from bottled juice.

  6. 3 dashes cayenne pepper
    Lily’s tip: Start light. You can always add more after cooking if your family likes heat.

  7. 1 big pinch salt
    Lily’s tip: Salt balances the sweetness. Use kosher salt for a cleaner flavor.

  8. Parsley, chopped, for garnish
    Lily’s tip: Fresh parsley adds a pop of color and freshness. Cilantro can be swapped in for a different herb note.

  9. Lime wedges, for serving
    Lily’s tip: A squeeze of lime at the end wakes up the whole dish. Keep wedges ready on the table for everyone to adjust to taste.

If you ever have leftovers, try shredding the cold chicken into a salad for lunch the next day. For a bright salad idea using citrus and crunchy greens, see my light chicken salad suggestion that turns leftovers into a quick meal.

Directions

  1. Preheat the oven to 400°F (207°C).
    Encouraging note: A hot oven helps the skin get crispy, so don’t skip preheating.

  2. Rub the minced garlic on the chicken thighs with your hands.
    Encouraging note: This step smells amazing. The garlic presses into the meat and flavors it deeply.

  3. Add honey, soy sauce, lime juice, cayenne pepper, and salt to the chicken. Stir to combine well.
    Encouraging note: Make sure every piece is coated. Taste a tiny bit of the mix if you like to fine-tune the balance.

  4. Transfer the chicken and the honey mixture to a baking sheet lined with aluminum foil. Cover the chicken with aluminum foil to prevent burning.
    Encouraging note: Lining the sheet makes cleanup fast. Covering keeps the sauce from scorching while the thighs cook through.

    Pro tip: Double the marinade if you want it to be more “saucy.” This makes great leftovers and extra sauce for rice.

  5. Bake the chicken for 20 minutes, or until cooked. If the sauce pools at the bottom of the foil, spoon and brush the sauce over the chicken.
    Encouraging note: Use a meat thermometer if you want precision. Chicken thighs are safe at 165°F. Basting keeps flavors concentrated.

  6. Broil the chicken for 1 minute or until the chicken skin is charred.
    Encouraging note: Watch closely during broiling. One minute can be enough, and that quick char gives beautiful color and texture.

  7. Remove from heat, garnish with parsley. Squeeze the lime wedges over the chicken before serving.
    Encouraging note: A final squeeze of lime brightens every bite. Let the chicken rest two minutes before serving so juices settle.

If you prefer a grilled finish, you can transfer the sauced thighs to a hot grill for a couple of minutes per side. For more grilling techniques and skewers that work well with honey-based sauces, see my step-by-step skewers guide for grilling tips that keep chicken juicy.

Serving

Honey Lime Chicken

Serve this Honey Lime Chicken family-style right from the baking sheet or on a large platter. Place lime wedges and extra chopped parsley on the side so everyone can add their favorite touch.

I love pairing this with simple sides: steamed rice, roasted vegetables, or a bright green salad. For a heartier meal, roasted garlic potatoes are a great match. If you want a ready-for-weeknight pairing, try my garlic parmesan potato idea for comfort and crunch that complements honey-forward chicken.

Lay out bowls of sides and let the family serve themselves. Kids often enjoy placing a lime wedge on their own plate. That small ritual makes dinner feel special.

Storage

Refrigerator: Place cooled chicken in an airtight container. Eat within 3 to 4 days. The sauce soaks into the meat overnight and tastes even better the next day.

Freezer: If you want to freeze, wrap portions tightly and freeze for up to 2 months. Thaw in the fridge overnight before reheating.

Reheating: Reheat covered in a 350°F oven until warmed through, about 10 to 15 minutes depending on portion size. For crisp skin, finish with 1 minute under the broiler.

Leftovers idea: Shred cooled chicken and warm briefly in a skillet with a splash of water or broth and an extra squeeze of lime. It makes a great filling for tacos, bowls, or salads.

Kitchen Notes

  • Use parchment or foil on your baking sheet for quick cleanup and less scrubbing.
  • If you do not have a broiler, increase oven temperature to 425°F for the last 5 minutes to help crisp the skin.
  • Let the chicken rest 2 minutes before slicing to keep it juicy.
  • Taste the marinade before adding salt. Soy sauce can be salty; adjust accordingly.
  • If you prefer milder garlic, sauté the minced garlic gently before adding to the sauce for a softer flavor.

Variations

  • For picky eaters: Reduce cayenne to 1 dash and offer lime wedges on the side. Serve with a mild starch like plain rice or buttered noodles.
  • Low-sodium option: Use reduced-sodium soy sauce and taste before adding extra salt. Increase lime to keep brightness.
  • Gluten-free: Use tamari instead of soy sauce and confirm your honey is pure and uncontaminated.
  • Paleo-friendly: Replace soy sauce with coconut aminos and keep the honey or substitute a bit of maple syrup if desired.
  • Quick stovetop finish: If you prefer, cook thighs skin-side down in a hot skillet for 6 to 8 minutes, flip, and finish in a 400°F oven for 8 to 10 minutes.

FAQ

Can I use chicken breasts instead of thighs?

Yes. Chicken breasts will cook faster and can dry out more easily. Reduce baking time and watch closely. Consider brining breasts briefly or using a meat thermometer to avoid overcooking.

Is this recipe safe for small children?

Yes. Reduce or omit the cayenne for young children. The honey and lime flavors are mild and generally kid-friendly.

How do I make the sauce thicker?

Simmer the sauce in a small saucepan for a few minutes before adding to the chicken. This reduces water and concentrates the flavors for a thicker glaze.

Can I marinate the chicken ahead of time?

Absolutely. Marinate up to 4 hours in the refrigerator for extra flavor. For best texture, do not marinate much longer than that as the lime can begin to break down the meat.

What can I serve with this for a quick weeknight meal?

Serve with steamed rice, roasted broccoli, or a simple green salad. A warm grain like quinoa or farro also pairs nicely.

Conclusion

Thank you for cooking with me today. I hope this recipe becomes a go-to for your weeknight dinners and family gatherings. If you want a version with more bold, fresh flavors, you might enjoy this similar take with cilantro and honey on chicken thighs that inspired my sauce technique Honey Lime Chicken Thighs – Julia’s Album. For another family favorite that balances sweet and tangy in a simple pan-baked dish, take a look at this easy honey lime recipe Honey Lime Chicken Recipe – Fountain Avenue Kitchen.

Happy cooking, and remember that the best dishes are the ones shared around the table.

Honey Lime Chicken

Prep Time 10 minutes
Cook Time 25 minutes
Total Time 35 minutes
Servings 4 servings
Calories 350
A simple yet flavorful dish that combines sweet honey, tangy lime, and savory garlic, perfect for busy weeknights.

Ingredients

Main Ingredients

  • 1 lb chicken thighs, deboned, skin-on (Skin-on thighs get wonderfully crisp under the broiler.)
  • 3 cloves garlic, minced (Rub one clove across the chicken for an extra garlic boost.)
  • 2 tablespoons honey (Use runny honey for easy mixing.)
  • 1.5 tablespoons soy sauce (Regular soy sauce works well; use reduced-sodium for lower sodium.)
  • 2 tablespoons lime juice (Freshly squeezed gives a bright acidity.)
  • 3 dashes cayenne pepper (Start light; add more after cooking if desired.)
  • 1 big pinch salt (Salt balances the sweetness.)
  • parsley, chopped, for garnish (Fresh parsley adds a pop of color and freshness.)
  • lime wedges, for serving (A squeeze of lime wakes up the dish.)

Instructions 

Preparation

  • Preheat the oven to 400°F (207°C).
  • Rub the minced garlic on the chicken thighs.
  • Add honey, soy sauce, lime juice, cayenne pepper, and salt to the chicken. Stir to combine well.

Cooking

  • Transfer the chicken and honey mixture to a baking sheet lined with aluminum foil. Cover with aluminum foil.
  • Bake for 20 minutes or until cooked through.
  • Broil the chicken for 1 minute or until the skin is charred.
  • Remove from heat, garnish with parsley, and squeeze lime wedges over the chicken before serving.

Notes

For leftovers, shred the cold chicken into a salad. Store in the refrigerator for 3-4 days or freeze for up to 2 months.
Calories: 350kcal
Course: Dinner, Main Course
Cuisine: American
Keyword: Chicken Recipes, Easy Dinner, Family-Friendly, Honey Lime Chicken, Weeknight Meal

Creamy Cowboy Butter Chicken Pasta

There’s something truly special about cooking for the ones we love. The sound of pots clanking, the gentle sizzle of ingredients hitting a hot skillet, and the heavenly aroma that fills the kitchen all combine to create a warm, inviting atmosphere. One recipe that perfectly embodies this is Creamy Cowboy Butter Chicken Pasta. It’s a dish that brings comfort and joy, making it ideal for family dinners where everyone gathers around the table.

Why This Works

Creamy Cowboy Butter Chicken Pasta

Creamy Cowboy Butter Chicken Pasta is a winner for several reasons. First, it’s simple and quick to prepare, perfect for those busy weeknights when you want a delicious meal without too much fuss. This dish combines juicy chicken, comforting pasta, and a rich, creamy sauce that the whole family will love.

It also saves time in the kitchen. By using one skillet for both the chicken and sauce, you minimize cleanup while maximizing flavor. Time spent in the kitchen should be filled with laughter and love, not stress. This recipe makes sure of that.

Process Overview

“This is where the magic happens—when the aroma fills the kitchen.”

Gather your ingredients, put on some upbeat music, and get ready for a culinary adventure. Cooking this dish is a delight from start to finish as fragrant garlic mingles with warm butter and rich cream. Each step brings you closer to creating a meal that your family will remember and love.

Ingredients

  • 4 boneless, skinless chicken breasts (about 1.5 lbs): Look for chicken that is plump and has a nice pink color. This means it’s fresh and will stay juicy when cooked.
  • 8 oz fettuccine or penne pasta: Choose your family’s favorite pasta shape. Fettuccine works beautifully with the sauce, but penne has that great ability to hold onto the creamy goodness.
  • 3 tbsp unsalted butter: I prefer unsalted so I can control the seasoning. You can always add salt, but you can’t take it away.
  • 1 cup heavy cream: This is what makes the sauce ultra-smooth and luscious. Don’t skimp on quality; it makes a difference.
  • 4 cloves fresh garlic, minced: Fresh garlic is key. It adds an incredible depth of flavor that jarred garlic just can’t compete with.
  • 2 tsp Italian seasoning: A good, balanced mix of herbs will elevate the dish. Look for a blend that includes basil, oregano, and thyme.
  • Salt and pepper to taste: Simple but essential. Proper seasoning will bring out all the flavors in your creamy sauce.

Directions

  1. Cook the Pasta: Boil salted water in a large pot. Add pasta and cook until al dente. This usually takes about 8-10 minutes. Drain and set aside.

    • Tip: Remember to reserve a cup of pasta water in case you need to thin the sauce later on.
  2. Sauté the Chicken: In a skillet over medium heat, melt 2 tablespoons of butter. Season chicken with salt, pepper, and Italian seasoning.

    • Cook for about 6-7 minutes per side until golden brown and cooked through. Remove from the skillet and let rest.
    • Encouragement: Your patience will pay off here. Letting the chicken rest allows the juices to redistribute.
  3. Make the Sauce: In the same skillet, melt the remaining butter over medium heat. Sauté minced garlic until fragrant, about 1 minute.

    • Add the heavy cream and stir until the sauce slightly thickens.
    • Pro tip: Stir continuously to ensure the garlic doesn’t burn. The aroma will be incredible!
  4. Combine: Slice the rested chicken into bite-sized pieces and return it to the skillet with the drained pasta.

    • Toss gently in the sauce until everything is well coated.
    • Encouragement: Don’t rush this step. Make sure every piece of pasta is drenched in creamy goodness.
  5. Serve: Plate generously and garnish with extra Italian seasoning or freshly grated Parmesan if desired.

    • Note: I love serving it hot with a sprinkle of fresh herbs for added color and flavor!

Serving

Creamy Cowboy Butter Chicken Pasta

Family-style serving is the way to go for this dish. Serve the creamy pasta right from the skillet at the table. This not only keeps the pasta warm but also invites everyone to dig in with their own plates. It’s a gathering experience that makes the meal feel special.

Encourage everyone to take their favorite portion. This can turn a simple weeknight meal into an enjoyable occasion where family stories and laughter flow as freely as the pasta.

Storage

This dish holds up well for leftovers, which is a true gift during busy weeks. Store any remaining pasta in an airtight container in the fridge for up to 3 days. When reheating, add a splash of reserved pasta water or a little more cream to bring back some creaminess.

You can either microwave individual portions or gently reheat in a pan on the stove over low heat. Just be cautious not to let it boil, as this could make the pasta mushy.

Kitchen Notes

Here are some handy shortcuts to save time:

  • Use pre-minced garlic found in jars. It might not be as flavorful, but it can speed up your cooking time.
  • Cook extra chicken breasts at the beginning of the week. Use them in salads or wraps later.
  • Swap out fettuccine for whole wheat or gluten-free pasta for a healthier option.
  • Add veggies like spinach or steamed broccoli to boost nutrition and flavor.
  • Prepare the sauce ahead of time. Just reheat it when you’re ready to serve.

Variations

This dish is versatile, allowing you to cater to different tastes:

  • Picky Eaters: If someone in your family doesn’t like garlic, reduce the amount or add it as a side.
  • Vegetarian Option: Substitute the chicken with sautéed mushrooms or grilled zucchini for a hearty, meatless meal.
  • Spicy Kick: Add red pepper flakes or a splash of hot sauce to the cream sauce for those who like some heat.
  • Different Proteins: Shrimp or sausage can be great alternatives to chicken. Adjust cooking times appropriately.
  • Dairy-Free: Use coconut cream and dairy-free butter for a lighter, dairy-free alternative.

FAQ

1. Can I use frozen chicken?
Yes, but it’s better if you thaw it first. Cook just until no longer pink inside.

2. How can I make this dish lighter?
You can use half-and-half instead of heavy cream or reduce the amount of butter.

3. Is this meal kid-friendly?
Absolutely! The creamy sauce and pasta are usually hits with kids. Adapt seasonings to their taste.

4. What makes this sauce so creamy?
Heavy cream provides the rich texture. It’s what ensures every bite is decadent.

5. Can I prep this earlier in the day?
Yes! Cook everything in the morning and just reheat when you’re ready to serve.

In closing, Creamy Cowboy Butter Chicken Pasta is more than just a meal. It’s an opportunity to connect with family and share moments that will linger in memory. Cooking should feel joyful, and this dish does just that. Enjoy the magic that happens in your kitchen. Gather the family, whip up this recipe, and experience the warmth and love that good food brings.

Creamy Cowboy Butter Chicken Pasta

Prep Time 10 minutes
Cook Time 20 minutes
Total Time 30 minutes
Servings 4 servings
Calories 600
A comforting dish combining juicy chicken, pasta, and a rich, creamy sauce, ideal for family dinners.

Ingredients

Main Ingredients

  • 1.5 lbs boneless, skinless chicken breasts (Look for chicken that is plump and has a nice pink color.)
  • 8 oz fettuccine or penne pasta (Choose your family’s favorite pasta shape.)
  • 3 tbsp unsalted butter (I prefer unsalted for better control of seasoning.)
  • 1 cup heavy cream (Use high-quality cream for best results.)
  • 4 cloves fresh garlic, minced (Fresh garlic adds incredible depth of flavor.)
  • 2 tsp Italian seasoning (Look for a blend that includes basil, oregano, and thyme.)
  • to taste salt and pepper (Essential for enhancing flavors.)

Instructions 

Cooking the Pasta

  • Boil salted water in a large pot. Add pasta and cook until al dente, about 8-10 minutes. Drain and set aside.

Sautéing the Chicken

  • In a skillet over medium heat, melt 2 tablespoons of butter. Season chicken with salt, pepper, and Italian seasoning.
  • Cook for about 6-7 minutes per side until golden brown and cooked through. Remove from the skillet and let rest.

Making the Sauce

  • In the same skillet, melt the remaining butter over medium heat. Sauté minced garlic until fragrant, about 1 minute.
  • Add the heavy cream and stir until the sauce slightly thickens.

Combining

  • Slice the rested chicken into bite-sized pieces and return it to the skillet with the drained pasta.
  • Toss gently in the sauce until everything is well coated.

Serving

  • Plate generously and garnish with extra Italian seasoning or freshly grated Parmesan if desired.

Notes

Serve family-style right from the skillet for a special gathering experience. Leftovers can be stored for up to 3 days.
Calories: 600kcal
Course: Dinner, Main Course
Cuisine: American
Keyword: Chicken, Comfort Food, Creamy sauce, Family Dinner, Pasta

No Peek Chicken Casserole

I can still smell it. The warm, savory steam that rolls out when I lift the foil makes the whole house feel like a hug. The gentle tick of the oven timer becomes part of a quiet rhythm as I set the table. Kids drop backpacks and come running at the first whiff.

I am Lily, a mom who cooks weeknight meals that bring the family together. I have been writing about simple, comforting dishes for years. If you love easy, reliable recipes, you might enjoy how this casserole pairs with my other warm favorites, like this my chicken noodle soup for chilly nights.

Why this works

No Peek Chicken Casserole

This casserole is a family favorite because it cooks itself while you get things done. The rice and soups create a steaming, flavor-packed base that keeps the chicken moist. The onion soup mix gives a seasoned crust without extra effort.

It saves time and mind space. Pop it in the oven and go about homework, errands, or folding laundry. For busy weeknights, nothing beats a dish that needs one pan and almost no babysitting.

If you want a reminder of classic comfort that everyone recognizes, try pairing leftovers with a simple salad or a slice of crusty bread. For a different comforting soup to serve alongside, see my classic chicken noodle soup notes.

Process Overview

“This is where the magic happens—when the aroma fills the kitchen.”

I like to think of this as a steam bath for the chicken. The rice slowly absorbs the soup flavors. The sealed foil creates a mini oven that cooks everything evenly. The result is tender chicken and perfectly cooked rice.

If you worry about timing, this is forgiving. The long bake time softens the rice fully and makes shredding easy if you want to serve the chicken that way. For a brighter garlic or ginger lift, I sometimes follow techniques I use in my ginger garlic version and add a squeeze of lemon to finish.

Ingredients

  • 4 boneless, skinless chicken breasts
    • Tip from Lily: Choose similar-sized breasts so they cook evenly. If one is much thicker, slice it horizontally.
  • 1 cup long-grain white rice
    • Tip from Lily: Rinse the rice quickly if you want less starch. Long-grain gives a light, separate texture.
  • 1 can (10.5 oz) cream of mushroom soup
    • Tip from Lily: Use a full-fat or reduced-sodium version based on your taste. The soup carries most of the savory base.
  • 1 can (10.5 oz) cream of chicken soup
    • Tip from Lily: Mixing both soups gives depth. If you prefer, swap cream of celery for a milder taste.
  • 1 1/4 cups water
    • Tip from Lily: Use warm water to help the soups blend smoothly and to reduce bake time variance.
  • 1 packet onion soup mix
    • Tip from Lily: Sprinkle evenly so each bite gets a bit of onion flavor. It forms a nice coating on the chicken.
  • Salt and pepper to taste
    • Tip from Lily: Season lightly before baking and re-season on the plate if needed. Salt level depends on the soup brand.

If you often cook from pantry staples, this recipe is a perfect example of pantry-meets-weeknight. For quick substitutions and using leftover rotisserie meat, see my leftover rotisserie chicken tips for ideas.

Directions

1️⃣ Preheat the oven to 350°F (175°C).

  • Encouraging note: Take a minute to preheat so the casserole starts cooking right away. I like to set the timer and breathe for a second.

2️⃣ Mix the base: In a large bowl, combine the rice, cream of mushroom soup, cream of chicken soup, and water. Stir until well-mixed.

  • Encouraging note: Stir until the mixture is smooth. You can give it a little extra swirl if the soups are thick. This is a quick, satisfying step.

3️⃣ Prepare the baking dish: Grease a 9×13-inch baking dish and pour in the rice and soup mixture, spreading it evenly over the bottom.

  • Encouraging note: Greasing prevents sticking and helps clean-up. Use a little butter or cooking spray so the rice slides out easily.

4️⃣ Add the chicken: Place the chicken breasts on top of the rice mixture and season with salt and pepper.

  • Encouraging note: Space the chicken pieces evenly so the steam circulates. A gentle press into the rice helps them nestle and cook evenly.

5️⃣ Top with onion soup mix: Sprinkle the packet of onion soup mix evenly over the chicken, ensuring each piece is well-coated.

  • Encouraging note: The onion mix forms a flavorful crust. If you have picky eaters, you can split the dish and only top half with the mix.

6️⃣ Cover tightly: Cover the dish tightly with aluminum foil. It’s crucial to keep it sealed to trap the steam, which will cook the rice and chicken to perfection.

  • Encouraging note: Press the foil close to the dish to keep steam in. This is the secret to moist, tender chicken without extra fuss.

7️⃣ Bake: Place the dish in the oven and bake for 1 hour and 30 minutes. Resist the temptation to peek during cooking—keeping the foil sealed is key!

  • Encouraging note: Set a timer and trust the process. This long bake softens the rice perfectly and gives you time to finish other tasks.

8️⃣ Rest and serve: Once done, remove the casserole from the oven and let it rest for a few minutes before serving. Enjoy the rich, savory flavors and tender chicken.

  • Encouraging note: Letting it rest helps the rice finish absorbing liquids and makes serving neater. Use two forks to shred chicken if you like it mixed in.

For more step-by-step ideas on homemade broths and comfort pairings, check my homemade chicken noodle soup guide, which pairs well with this casserole on a chilly night.

Serving

No Peek Chicken Casserole

Serve this casserole family-style straight from the baking dish. Place the dish in the center of the table and pass bowls for seconds. The smell invites conversation and slow, relaxed bites.

Simple sides work best. Steam green beans, a mixed salad, or roasted carrots keep the meal balanced. If you want a crunchy contrast, a small bowl of toast points or crackers is lovely.

For picky eaters, shred the chicken and let them spoon rice separately. Presentation matters with kids, so set out small bowls of grated cheese, ranch, or steamed peas to customize plates.

Storage

Store leftover casserole in an airtight container in the fridge for up to 4 days. The rice will firm up a bit, but reheating brings it back.

To reheat in the oven, cover and bake at 350°F for 20 to 30 minutes until warmed through. For a faster option, reheat single servings in the microwave for 2 to 3 minutes, stirring halfway.

If you want to freeze, portion into freezer-safe containers. Freeze for up to 3 months. Thaw overnight in the fridge before reheating. Add a splash of water when reheating from frozen to restore moisture.

Kitchen Notes

  • Use even-sized chicken pieces for uniform cooking.
  • If your family prefers brown rice, choose another method. Brown rice needs more water and time.
  • Low-sodium soup is a good swap if you watch salt. Taste and adjust after baking.
  • For easier clean-up, line the baking dish with foil before adding the mixture.
  • If someone in your family cannot have mushrooms, substitute an extra can of cream of chicken or cream of celery.

Variations

  • Cheesy top: Add 1 cup shredded cheddar in the last 10 minutes of baking for a melty finish.
  • Vegetables: Stir 1 cup frozen peas or mixed vegetables into the rice mixture before baking for extra color.
  • Lighter version: Use reduced-fat soups and cut the bake time by 10 minutes, checking for doneness.
  • Gluten-free: Use gluten-free condensed soups labeled as such and confirm your onion soup mix is gluten-free.
  • Picky eaters: Make one half plain rice and chicken, and the other half with the onion packet.

FAQ

Q: Can I use chicken thighs instead of breasts?
A: Yes. Bone-in thighs will change cook time slightly. Use boneless thighs for similar timing. They stay juicy and can give more flavor.

Q: Is it okay to peek during baking?
A: Try not to. Lifting the foil lets steam escape and can undercook the rice. If you must check, do it quickly and reseal tightly.

Q: Can I reduce the bake time?
A: Not safely. The long bake allows the rice to fully absorb liquid and the chicken to cook gently. Shortening time risks undercooked rice.

Q: My rice turned out too soft. What happened?
A: Using too much water or cooking at too low a temperature can over-soften rice. Measure water carefully and keep oven at 350°F.

Q: Can I double the recipe for a crowd?
A: Yes. Use two baking dishes with the same depth. Avoid overcrowding one pan, which can alter cooking times.

Conclusion

Thank you for letting me share this No Peek Chicken Casserole. It has saved many of my busy evenings and filled my table with full, happy bellies. For a classic take on this recipe, you can compare notes with the original No Peek Chicken Casserole at The Country Cook and a similar variation at No-Peek Chicken and Rice from Plain Chicken. Try it on a weeknight and notice how it changes the rhythm of your evening.

No Peek Chicken Casserole

Prep Time 10 minutes
Cook Time 1 hour 30 minutes
Total Time 1 hour 40 minutes
Servings 6 servings
Calories 320
A comforting, hands-off casserole that brings the family together, featuring tender chicken, flavorful rice, and creamy soup.

Ingredients

Main Ingredients

  • 4 pieces boneless, skinless chicken breasts (Choose similar-sized breasts for even cooking.)
  • 1 cup long-grain white rice (Rinse quickly for less starch.)
  • 1 can cream of mushroom soup (10.5 oz) (Use full-fat or reduced-sodium version.)
  • 1 can cream of chicken soup (10.5 oz) (Mixing both soups gives depth.)
  • 1.25 cups water (Use warm water for smoother blending.)
  • 1 packet onion soup mix (Sprinkle evenly for flavor.)
  • to taste salt and pepper (Season lightly before baking.)

Instructions 

Preparation

  • Preheat the oven to 350°F (175°C).
  • In a large bowl, combine the rice, cream of mushroom soup, cream of chicken soup, and water. Stir until well-mixed.
  • Grease a 9×13-inch baking dish and pour in the rice and soup mixture, spreading it evenly over the bottom.
  • Place the chicken breasts on top of the rice mixture and season with salt and pepper.
  • Sprinkle the packet of onion soup mix evenly over the chicken, ensuring each piece is well-coated.
  • Cover the dish tightly with aluminum foil.
  • Bake the casserole for 1 hour and 30 minutes.
  • Once done, remove the casserole from the oven and let it rest for a few minutes before serving.

Notes

Serve family-style from the baking dish, with simple sides like steamed green beans or mixed salad. Store leftovers in the fridge for up to 4 days, or freeze for up to 3 months.
Calories: 320kcal
Course: Dinner, Main Course
Cuisine: American, Comfort Food
Keyword: Casserole, Chicken, Easy Dinner, Family Meal, Weeknight Recipe

Smothered Chicken and Rice

I remember the first time I made this smothered chicken and rice for my family. The kitchen filled with a warm, savory smell that made my kids come running. You could hear the gentle simmer of the sauce and the soft clink of spoons as everyone waited to taste it.

This recipe is the kind I turn to when I want a comforting weeknight dinner that feeds the whole family and gives me time to breathe. If you like simple one-skillet meals, you might also enjoy my take on Greek Chicken and Lemon Rice, which is another family favorite.

Why this works

Smothered Chicken and Rice

There are a few reasons this dish becomes a fast favorite. First, it cooks in one pan. That means fewer dishes and more time at the table with people you love. Second, the rice soaks up the savory broth and cream of mushroom soup, creating a gentle sauce that keeps the chicken juicy.

If you are short on time, this recipe is forgiving. You can brown the chicken while the rice starts to simmer and finish the dish with the lid on. If your crew likes a hint of sweetness or tropical flavor, try my version inspired by Pineapple Chicken and Rice for a fun twist.

Family and time-saving benefits

This is a meal that stretches well. Leftovers are easy to reheat, and the flavors deepen overnight. It is perfect for busy evenings, picky eaters, and anyone who wants a warm, welcoming dinner without drama.

Process Overview

“This is where the magic happens—when the aroma fills the kitchen.”

I like to think of this as three simple stages: brown, simmer, and rest. Brown the chicken to get a little crust and flavor. Add vegetables and liquids to build the base. Simmer with rice until everything is tender. Let it rest a few minutes before serving so the juices settle and the rice finishes steaming.

If you follow these stages, you will end up with tender chicken and rice that tastes like you spent all afternoon, even when you did not.

Ingredients

  • 2 chicken breasts
    • Lily tip: Use boneless, skinless breasts for fast cooking. Pound them to an even thickness so they cook evenly.
  • 1 cup rice
    • Lily tip: Long grain white rice cooks in about 20 minutes. If you use brown rice, increase cooking time and liquid.
  • 2 cups chicken broth
    • Lily tip: Low sodium broth gives you control over salt. Taste and adjust at the end.
  • 1 onion, diced
    • Lily tip: Yellow or sweet onions both work. Dice uniformly for even cooking.
  • 2 garlic cloves, minced
    • Lily tip: Fresh garlic gives the best aroma. Add at the right time to avoid burning.
  • 1 cup cream of mushroom soup
    • Lily tip: This adds creaminess and depth. If you prefer, use cream of chicken for a milder flavor.
  • Salt and pepper to taste
    • Lily tip: Season in layers. Salt when you brown the chicken, then taste the final dish and adjust.
  • Olive oil
    • Lily tip: Use a couple tablespoons for browning. Extra virgin is fine, but a light olive oil gives a higher smoke point.

If you like, you can also add a splash of white wine when you deglaze the skillet, or stir in some frozen peas at the end for color and nutrition. For inspiration on mixing protein and rice comfort foods, see my post about Bang Bang Chicken Crispy Rice Salad.

Directions

  1. In a skillet, heat olive oil over medium heat.
    • Encouraging note: Let the oil warm up until it shimmers. This helps get a nice sear on the chicken.
  2. Season chicken breasts with salt and pepper, then brown them in the skillet for about 5-7 minutes on each side.
    • Encouraging note: Brown until golden. If the chicken sticks, give it another minute and try again. Patience pays off.
  3. Remove chicken from the skillet and set aside.
    • Encouraging note: This makes room to build flavor in the same pan. No need to wash between steps.
  4. In the same skillet, add diced onion and minced garlic, sautéing until the onion is translucent.
    • Encouraging note: Stir gently and breathe in that smell. The softened onion is the foundation of the sauce.
  5. Stir in the cream of mushroom soup and chicken broth, bringing it to a simmer.
    • Encouraging note: Scrape up any browned bits from the bottom of the pan. They add deep, savory flavor.
  6. Add the rice and mix well.
    • Encouraging note: Make sure the rice is evenly distributed so it cooks uniformly. Remember to keep the heat gentle.
  7. Place the browned chicken breasts on top of the rice mixture.
    • Encouraging note: Nestle them in so they steam with the rice and stay juicy.
  8. Cover and let it cook on low heat for about 20 minutes or until the rice is cooked and chicken is tender.
    • Encouraging note: Do not lift the lid often. Let the steam do its work. If you used thicker breasts, check for doneness with a meat thermometer at 165 °F.
  9. Serve hot.
    • Encouraging note: Let it rest a few minutes so the rice finishes absorbing any remaining liquid. Then bring it to the table and watch faces light up.

A quick tip: If you want a golden top, remove the lid with 5 minutes left and let the heat rise slightly. For a creamier finish, stir a tablespoon of butter before serving. For ideas about other comforting skillet dinners, you might like my BBQ Chicken Mac and Cheese post.

Serving

Smothered Chicken and Rice

Serve this dish family-style right from the skillet. Place it on a trivet in the center of the table with a couple of serving spoons. Add a simple green salad and warm dinner rolls to round out the meal.

Garnish ideas

A sprinkle of chopped parsley or a few thinly sliced green onions brightens the plate. For a little tang, add a squeeze of lemon or a spoonful of plain yogurt on the side. Kids often like a little grated cheese on top.

Make it feel special by bringing out the favorite side dishes. A bowl of roasted vegetables, steamed broccoli, or a simple cucumber salad pairs nicely.

Storage

Leftovers store well in the refrigerator. Place the cooled dish in an airtight container and use within 3 to 4 days. For longer storage, freeze portions in freezer-safe containers for up to 3 months.

Reheating tips

  • Stovetop: Warm gently over low heat with a splash of chicken broth or water to revive the rice. Stir occasionally until hot.
  • Microwave: Cover and heat in 1-minute intervals, stirring between each interval for even warming. Add a little liquid if it looks dry.
  • Oven: Place in a covered baking dish at 350 °F until heated through, about 20 minutes for a large portion.

Always check that the chicken reaches 165 °F when reheating. Use your nose and eyes for quality checks. If anything smells off, discard it.

Kitchen Notes

  • Ready in 45 minutes total: 10 to brown, 20 to simmer, plus prep time.
  • Use a heavy skillet with a tight-fitting lid for even cooking and minimal evaporation.
  • Swap cream of mushroom soup with cream of chicken or homemade white sauce for a fresher flavor.
  • To speed up prep, dice onions and mince garlic the night before and store in the fridge.
  • For extra flavor, add a teaspoon of smoked paprika or a pinch of dried thyme when sautéing the onion.

These shortcuts save time and keep the dish reliable. I often double the recipe and freeze half for a future busy night.

Variations

  • Kid-friendly: Leave out strong spices and serve with a side of ketchup or a simple gravy. Add a handful of frozen peas or corn for color.
  • Low-carb: Replace rice with cauliflower rice. Reduce the broth slightly and check often to avoid soggy cauliflower.
  • Gluten-free: Ensure the cream of mushroom soup is labeled gluten-free or make a homemade white sauce with cornstarch.
  • Dairy-free: Use a dairy-free cream soup alternative or make a creamy base with blended cashews and warm broth.
  • Protein swap: Use boneless chicken thighs if you prefer more flavor. Adjust cooking time to ensure they reach 165 °F.

If you want a baked finish, transfer the skillet to a 375 °F oven for 10 minutes after simmering. For different family meals that blend comfort and convenience, see my version of Cheesy Ground Beef and Rice Casserole for ideas you can adapt.

FAQ

Q: Can I use chicken thighs instead of breasts?
A: Yes. Boneless thighs stay more forgiving and add extra flavor. Reduce cooking time slightly if they are thinner.

Q: What type of rice should I use?
A: Long grain white rice works best for the 20-minute simmer. Brown rice will need more liquid and a longer cook time.

Q: Can I make this in the oven?
A: You can. After browning and combining ingredients, cover and bake at 350 °F for about 25 to 30 minutes, or until rice and chicken are done.

Q: How do I know when the chicken is fully cooked?
A: Use a meat thermometer. The internal temperature should reach 165 °F. If you do not have a thermometer, cut into the thickest part and make sure the juices run clear.

Q: Is this freezer friendly?
A: Yes. Cool completely and freeze in portions. Thaw overnight in the refrigerator before reheating gently.

Conclusion

I hope this smothered chicken and rice becomes a go-to in your home like it did in mine. It is one of those comforting meals that makes the kitchen feel cozy and the family gather close. If you enjoy rich, creamy chicken dinners, you might also like the recipe for Creamy Smothered Chicken Thighs for another comforting option. For a one-pan take that is similar in spirit, check out Smothered Chicken and Rice (ONE Pan!).

Thank you for letting me share this recipe. Put on some music, let the smells fill the house, and enjoy dinner with the people you love.

Smothered Chicken and Rice

Prep Time 10 minutes
Cook Time 30 minutes
Total Time 40 minutes
Servings 4 servings
Calories 450
A comforting one-pan meal featuring tender chicken breasts simmered with rice in a savory broth and creamy sauce, perfect for a family dinner.

Ingredients

Main Ingredients

  • 2 pieces chicken breasts (Use boneless, skinless breasts for fast cooking. Pound them to an even thickness.)
  • 1 cup rice (Long grain white rice cooks in about 20 minutes. If using brown rice, increase cooking time and liquid.)
  • 2 cups chicken broth (Low sodium broth gives you control over salt.)
  • 1 piece onion, diced (Yellow or sweet onions both work. Dice uniformly for even cooking.)
  • 2 cloves garlic, minced (Fresh garlic provides the best aroma.)
  • 1 cup cream of mushroom soup (This adds creaminess and depth; can substitute with cream of chicken.)
  • to taste salt and pepper (Season in layers; taste and adjust at the end.)
  • 2 tablespoons olive oil (Good for browning; use extra virgin or light olive oil for a higher smoke point.)

Instructions 

Preparation

  • In a skillet, heat olive oil over medium heat until it shimmers.
  • Season chicken breasts with salt and pepper, then brown them in the skillet for about 5-7 minutes on each side until golden.
  • Remove chicken from the skillet and set aside.
  • In the same skillet, add diced onion and minced garlic, sautéing until the onion is translucent.

Cooking

  • Stir in the cream of mushroom soup and chicken broth, bringing it to a simmer.
  • Add the rice and mix well to ensure it is evenly distributed.
  • Place the browned chicken breasts on top of the rice mixture, cover, and let it cook on low heat for about 20 minutes or until the rice is cooked and chicken is tender.

Serving

  • Serve hot, letting it rest a few minutes before serving for the rice to finish absorbing remaining liquid.

Notes

For a golden top, remove the lid with 5 minutes left. For a creamier finish, stir in a tablespoon of butter before serving. Leftovers can be stored for 3-4 days in the refrigerator or frozen for up to 3 months.
Calories: 450kcal
Course: Dinner, Main Course
Cuisine: American
Keyword: Comfort Food, One-Pan Meal, Smothered Chicken

Coconut Chicken & Rice

The kitchen smells like warm coconut and toasted garlic. Pots clink gently on the stove. I love that quiet moment when a simple dinner turns into something comforting for the whole family.

This Coconut Chicken & Rice recipe is one of those meals. It fills the house with a cozy aroma and brings everyone to the table. If you enjoy easy weeknight dinners with big flavor, you might also like my Bang Bang Chicken Crispy Rice Salad, which uses the same family-friendly mindset.

Why this works

Coconut Chicken & Rice

This recipe works because it combines tender chicken, creamy coconut, and fluffy jasmine rice in one comforting plate. The liquid ratio keeps the chicken juicy and the rice soft. It is forgiving, which matters when kids are hungry and parents are busy.

It also saves time. You can brown the chicken while the rice starts. Then a short simmer finishes both elements without much babysitting. For more weeknight rice bowls that use similar shortcuts, check out my Chicken Sweet Potato Rice Bowl for another quick family meal idea.

The flavors are familiar and mild. That makes it easy to please picky eaters while still offering a dish adults enjoy. Small swaps and additions let you tailor heat, herbs, and texture without losing the heart of the recipe.

Process Overview

“This is where the magic happens—when the aroma fills the kitchen.”

Start by browning the chicken to build flavor. Then add the coconut milk and broth to create a silky cooking liquid. Simmer gently so the chicken cooks through and absorbs the coconut flavor.

While the chicken simmers, rinse and cook jasmine rice. Cooking the rice separately lets you make it extra fluffy. If you prefer everything in one pan, you can follow one-pan recipes like my French Onion Chicken Rice Bake for a different approach.

A brief rest after cooking helps the juices settle in the chicken. Garnish with fresh cilantro for brightness and a pop of color.

Ingredients

  • 2 chicken breasts
    Lily tip: Choose boneless, skinless breasts about 6-8 oz each for even cooking. Pound lightly if one is much thicker so they finish at the same time.

  • 1 cup jasmine rice
    Lily tip: Rinse the rice until the water runs clear to remove excess starch. This keeps the rice fluffy, not sticky.

  • 1 cup coconut milk
    Lily tip: Use full-fat coconut milk for the creamiest sauce. If you prefer lighter, use a reduced-fat version, but the sauce will be slightly thinner.

  • 1 cup chicken broth
    Lily tip: Low-sodium broth gives you control over seasoning. Taste near the end and add salt if needed.

  • 1 small onion, diced
    Lily tip: Yellow or sweet onion works best for a mellow base. Dice small so it softens quickly.

  • 2 cloves garlic, minced
    Lily tip: Fresh garlic gives the best aroma. If you are short on time, jarred minced garlic works in a pinch.

  • 1 tablespoon olive oil
    Lily tip: Use a neutral-tasting oil if you want a cleaner coconut flavor. Olive oil is great for browning and adds a homey note.

  • Salt and pepper to taste
    Lily tip: Season in stages. A little at the start and a final check before serving keeps the flavors balanced.

  • Fresh cilantro for garnish
    Lily tip: Add cilantro just before serving. It brightens the rich coconut sauce and makes the dish look inviting.

If you like citrus brightness with coconut, keep a lime nearby for squeezing at the table.

For more rice-based chicken recipes and inspiration, I often refer to ideas like my Greek Chicken and Lemon Rice. It helps when planning multiple weeknight menus that share pantry staples.

Directions

  1. Heat olive oil in a large skillet over medium heat.
    Encouragement: Warm the pan until the oil shimmers so the chicken gets a nice golden crust.

  2. Add diced onion and minced garlic, sautéing until soft.
    Encouragement: Stir often and enjoy the smell. Soft onions and garlic make a lovely base.

  3. Season chicken breasts with salt and pepper, then add to the skillet. Cook until golden brown on both sides, about 5 minutes per side.
    Encouragement: Resist the urge to move the chicken too much. Let it develop a good sear for better flavor.

  4. Pour in coconut milk and chicken broth. Bring to a simmer.
    Encouragement: The sauce will look creamy and inviting. Scrape the pan to lift any brown bits for extra flavor.

  5. Reduce heat to low, cover the skillet, and let cook for 15-20 minutes, or until the chicken is cooked through.
    Encouragement: Check for an internal temperature of 165°F to ensure safety. A few minutes past the timer may be needed for thicker pieces.

  6. Meanwhile, rinse jasmine rice and cook according to package instructions.
    Encouragement: Take a moment to fluff the rice with a fork and keep it warm under a lid until the chicken is ready.

  7. Serve the chicken over fluffy rice, garnished with fresh cilantro.
    Encouragement: Slice the chicken across the grain for tender bites and spoon extra sauce over the rice for full flavor.

If you want to add a crunchy element, serve with toasted coconut flakes or chopped peanuts on the side. For recipe variations that use ground chicken and different seasonings, my Ground Chicken Fried Rice shows how versatile ground poultry can be.

Timing and temperature notes

Plan for about 30 to 40 minutes from start to finish. Browning takes about 10 minutes, simmering 15 to 20 minutes, and rice about 15 to 20 minutes. Always use a meat thermometer to confirm the chicken reaches 165°F.

Serving

Coconut Chicken & Rice

Family-style idea

Serve this dish in a wide shallow bowl or on a large platter. Place the rice first, then lay the chicken on top. Spoon the coconut sauce around the edges so everyone can choose how saucy they want their plate.

I like to put lime wedges, extra cilantro, and a small bowl of chopped chili flakes on the table. This lets family members customize their bowls. For a simple vegetable side, steam broccoli or snap peas for color and crunch.

Offer plates and spoons so kids can scoop rice and sauce easily. A small salad on the side makes the meal feel complete without adding hassle.

Storage

Cool any leftovers quickly and store in airtight containers. Refrigerate for up to 3 days. The rice can absorb more liquid over time, so you may notice a thicker sauce after storing.

To reheat stovetop: Add a splash of water or broth and warm gently over low heat until heated through. This helps loosen the sauce and revives the rice texture.

To reheat microwave: Place the portion in a microwave-safe dish. Add a tablespoon or two of water or broth, cover loosely, and heat in 60 second bursts, stirring between intervals.

Do not refreeze cooked chicken and rice after refrigeration. Reheat only once to keep food safety on track.

Kitchen Notes

  • Shortcut: Use pre-minced garlic and pre-diced onion from the fridge section to cut prep time by 5 minutes.
  • Shortcut: Make the rice in a rice cooker while you cook the chicken. It frees you to watch the skillet.
  • Shortcut: Double the sauce and freeze extra in ice cube trays for single-serving sauce boosts later.
  • Shortcut: Swap coconut milk cartons for shelf-stable cans if you like to keep long-lasting pantry items.
  • Shortcut: If you have leftover rotisserie chicken, shred it and add it in at step 4 to cut cooking time.

These small shortcuts help on busy nights without sacrificing the dish’s heart. They also make this recipe friendly for new cooks.

Variations

  • For picky eaters: Reduce the onion amount and serve the sauce on the side. Keep cilantro optional. Serve plain rice and chicken first, then offer the sauce for dipping.
  • For more veggies: Add diced bell pepper or frozen peas into the sauce during the final 5 minutes of simmering. They add color and nutrients without extra work.
  • For a spicy kick: Stir in 1/2 teaspoon red pepper flakes or a tablespoon of sriracha to the sauce at step 4. Taste and add more if you like it hot.
  • Keto or low-carb option: Skip the rice and serve the coconut chicken over cauliflower rice or steamed zucchini ribbons.
  • Vegan adaptation: Replace chicken with firm tofu or tempeh, and use vegetable broth. Brown the tofu well before simmering to build flavor.

Small tweaks let this recipe fit many diets and preferences while keeping the core comforting flavor.

FAQ

Q: Can I use bone-in chicken?
A: Yes. Bone-in pieces will need more time to cook. Simmer covered for 25 to 30 minutes and check for a 165°F temperature at the thickest part near the bone.

Q: Can I make this in a slow cooker?
A: You can. Brown the chicken first for better flavor, then add to the slow cooker with coconut milk and broth. Cook on low for 3 to 4 hours or on high for 1.5 to 2 hours. Add delicate herbs at the end.

Q: Is coconut milk safe for people with nut allergies?
A: Coconut is classified differently than tree nuts, but some people with tree nut allergies react to coconut. Check with your family members and choose alternatives if needed, like creamy oat milk with a bit of coconut extract for flavor.

Q: How do I prevent the rice from getting mushy?
A: Rinse the rice, use the correct water ratio on the package, and avoid overcooking. Fluff with a fork and serve immediately for the best texture.

Q: Can I prepare this ahead for meal prep?
A: Yes. Cook rice and chicken separately and store in meal prep containers. Add fresh cilantro and lime on the day you eat it. Reheat gently and add a splash of broth to refresh the sauce.

Conclusion

I hope this Coconut Chicken & Rice becomes one of your go-to family dinners. It is simple, comforting, and kind to busy weeknights. If you want a glazed twist, I recommend checking out a lovely variation on a glazed coconut chicken and rice for inspiration. For a lighter, bowl-style version with similar flavors, take a look at the healthier take found at Skinnytaste’s Coconut Chicken Rice Bowl.

Thanks for cooking with me. Come back soon for more family-friendly recipes and kitchen tips.

Coconut Chicken & Rice

Prep Time 10 minutes
Cook Time 25 minutes
Total Time 40 minutes
Servings 4 servings
Calories 550
This comforting Coconut Chicken & Rice recipe combines tender chicken, creamy coconut, and fluffy jasmine rice to create a warm and inviting meal that pleases both kids and adults.

Ingredients

Main ingredients

  • 2 breasts chicken breasts (Choose boneless, skinless breasts about 6-8 oz each for even cooking. Pound lightly if one is much thicker.)
  • 1 cup jasmine rice (Rinse the rice until the water runs clear to remove excess starch.)
  • 1 cup coconut milk (Use full-fat coconut milk for the creamiest sauce.)
  • 1 cup chicken broth (Low-sodium broth gives you control over seasoning.)
  • 1 small onion, diced (Use yellow or sweet onion for a mellow base.)
  • 2 cloves garlic, minced (Fresh garlic gives the best aroma.)
  • 1 tablespoon olive oil (Use a neutral oil for a cleaner coconut flavor.)
  • to taste Salt and pepper (Season in stages for balanced flavors.)
  • for garnish Fresh cilantro (Add just before serving for brightness.)

Instructions 

Cooking

  • Heat olive oil in a large skillet over medium heat.
  • Add diced onion and minced garlic, sautéing until soft.
  • Season chicken breasts with salt and pepper, then add to the skillet. Cook until golden brown on both sides, about 5 minutes per side.
  • Pour in coconut milk and chicken broth. Bring to a simmer.
  • Reduce heat to low, cover, and let cook for 15-20 minutes, or until the chicken is cooked through.
  • Meanwhile, rinse jasmine rice and cook according to package instructions.
  • Serve the chicken over fluffy rice, garnished with fresh cilantro.

Notes

For a spicy kick, stir in red pepper flakes or sriracha to the sauce. For a low-carb option, serve over cauliflower rice or steamed zucchini.
Calories: 550kcal
Course: Dinner, Main Course
Cuisine: Asian, Family-Friendly
Keyword: Coconut Chicken, Easy Dinner, family-friendly recipe, Jasmine Rice, One-Pan Meal

Chicken Enchiladas with Sour Cream Sauce

I can still smell the warm tortillas and the tang of sour cream sauce when I walk into the kitchen. The soft sizzle of cheese melting under a warm oven light feels like a cozy hug. These moments make weeknight dinners feel special.

This Chicken Enchiladas with Sour Cream Sauce recipe is one I turn to when the family needs comfort and the clock is against us. If you like bold, saucy chicken dinners, you might also enjoy my chicken shawarma with garlic sauce for another easy weeknight option.

Why this works

Chicken Enchiladas with Sour Cream Sauce

This recipe balances creamy sauce and tender chicken in a way that feeds a crowd and keeps cleanup simple. It reheats beautifully and serves well family-style, so you can spend less time at the stove and more time at the table.

Using cooked shredded chicken saves time and lets the sauce do the heavy lifting. If you need a one-pan weeknight hero, my one-pan juicy chicken with balsamic sauce is another dish that follows this save-time, feed-everyone approach.

Process Overview

“This is where the magic happens—when the aroma fills the kitchen.”

The method is straightforward. You mix the shredded chicken with a little cheese and spices, roll it in tortillas, and top everything with a smooth sour cream and cream-of-chicken sauce. Bake until bubbly and golden. The oven does most of the work while you set the table and call everyone to dinner.

Ingredients

  • 2 cups cooked shredded chicken
    • Lily’s tip: Rotisserie chicken works great. If you have leftover roasted chicken, shred it while the oven warms.
  • 8 flour tortillas
    • Lily’s tip: Use medium flour tortillas so they roll easily. Warm them briefly in the microwave to prevent cracking.
  • 1 cup shredded cheese (cheddar or Mexican blend)
    • Lily’s tip: A mix of sharp cheddar and Monterey Jack gives good melting and flavor.
  • 1 can cream of chicken soup
    • Lily’s tip: Shake the can well. If you prefer less sodium, use a low-sodium version.
  • 1 cup sour cream
    • Lily’s tip: Full-fat sour cream makes a silkier sauce, but a light version works in a pinch.
  • 1 cup chicken broth
    • Lily’s tip: Use homemade or low-sodium broth. If the sauce seems thin, reduce the broth slightly.
  • 1 teaspoon garlic powder
    • Lily’s tip: Garlic powder gives steady flavor. For fresh garlic, use one clove minced.
  • 1 teaspoon onion powder
    • Lily’s tip: Onion powder blends into the sauce better than raw onions for this recipe.
  • 1 teaspoon cumin
    • Lily’s tip: Cumin adds warmth. Adjust to your family’s taste.
  • Salt and pepper to taste
    • Lily’s tip: Start light and taste the chicken filling before rolling.
  • Chopped cilantro (for garnish)
    • Lily’s tip: Add just before serving to keep it bright and fresh.

If you like heartier filling, add a half cup of cooked black beans or corn to the shredded chicken before rolling. For extra texture, mix in a few tablespoons of diced green chiles.

Directions

  1. Preheat your oven to 350°F (175°C).

    • Encouragement: Warming the oven first saves time later. You are off to a great start.
  2. In a bowl, mix the cooked shredded chicken, half of the cheese, garlic powder, onion powder, cumin, salt, and pepper.

    • Encouragement: Taste a small spoonful to check seasoning. A well-seasoned filling makes all the difference.
  3. Spoon a portion of the chicken mixture into each tortilla, roll them up, and place in a greased baking dish.

    • Encouragement: Don’t worry about perfection. Tuck the ends in and line them snugly so they stay together while baking.
  4. In another bowl, whisk together the cream of chicken soup, sour cream, and chicken broth. Pour this sauce over the rolled tortillas.

    • Encouragement: Pour slowly to evenly coat each roll. The sauce will keep them moist and comforting.
  5. Sprinkle the remaining cheese on top.

    • Encouragement: A little extra cheese makes the meal feel like a celebration. Go ahead and add a generous sprinkle.
  6. Bake for 20-25 minutes until heated through and bubbly.

    • Encouragement: Let the oven work its magic. The bubbling surface and melted cheese tell you it’s ready.
  7. Garnish with chopped cilantro and serve.

    • Encouragement: Fresh cilantro and a squeeze of lime brighten every bite. Gather everyone and enjoy.

If you want a small shortcut, use a store-bought rotisserie chicken to speed up step two. For a lighter touch, swap one cup of sour cream for Greek yogurt.

During the rolling step you can line the tortillas tightly in the dish so they support each other. If you are feeding picky eaters, leave the sauce on the side and let everyone spoon it on their own portion.

Serving

Chicken Enchiladas with Sour Cream Sauce

Serve the enchiladas family-style in the baking dish on the center of the table. Add bowls of extra sour cream, chopped tomatoes, sliced avocado, or pickled jalapeños so everyone can customize their plate.

Pair with a simple green salad and some warm rice for a complete meal. Let the kids help top their own plates. It turns dinner into a small celebration and keeps mealtime relaxed.

Storage

Store leftovers in an airtight container in the refrigerator for up to 3 days. To reheat, place single servings on a microwave-safe plate and heat for 1 to 2 minutes until warm. You can also reheat in a 325°F oven for 10 to 15 minutes covered with foil to keep the enchiladas moist.

If you want to freeze portions, wrap individual pieces in foil and place them in a freezer bag for up to 2 months. Thaw in the refrigerator overnight and reheat in the oven for best texture.

For quick weeknight prep, I sometimes double the recipe and freeze half. When you are ready to enjoy, pull a tray out of the freezer the night before and let it thaw in the refrigerator.

Also helpful is this slow-cooker idea for busy days: if you enjoy slow-simmered flavors, see my crockpot white chicken chili with cream cheese for another make-ahead favorite.

Kitchen Notes

  • Prep tortillas right before rolling. A short microwave wrap or quick pan warm prevents splitting.
  • Use rotisserie chicken to cut prep time to under 10 minutes.
  • If the sauce is too thick, add up to a quarter cup more broth to reach your preferred consistency.
  • For crispier tops, remove foil in the last 5 minutes of baking and broil briefly while watching carefully.
  • Save time by shredding chicken with two forks while it is still slightly warm.

Variations

  • For picky eaters: Leave sauce on the side and let them top their own enchiladas. You can also make smaller "enchilada roll-ups" for little hands.
  • For a lighter version: Substitute Greek yogurt for half the sour cream and use low-fat cheese.
  • For vegetarian: Replace chicken with seasoned black beans and roasted sweet potatoes. The sour cream sauce still works beautifully.
  • For extra heat: Add a diced jalapeño to the chicken mixture or sprinkle crushed red pepper into the sauce.
  • For a Mexican-style twist: Stir in a half cup of salsa verde into the sauce for tang and brightness, and top with sliced radishes.

If you love experimenting with chicken recipes, you might also like my slow and comforting easy crockpot chicken thighs with creamy gravy.

FAQ

Can I use corn tortillas instead of flour?

Yes. Corn tortillas work fine. Warm them briefly in a damp towel so they do not break. They will have a different texture and a slightly stronger corn flavor.

Can I make these ahead of time?

Yes. Assemble the enchiladas up to the baking step and keep them covered in the refrigerator for up to 24 hours. When ready, bake as directed, adding a few extra minutes if they are cold.

Is there a gluten-free option?

Yes. Use certified gluten-free corn tortillas and check the label on the cream of chicken soup for gluten. Some brands have a gluten-free version or you can make a simple white sauce with gluten-free flour.

How can I make this spicier without overpowering kids?

Add a mild green salsa or a small amount of finely diced mild green chiles. Keep the heat on the side so each person can choose their level.

What is the best way to shred chicken quickly?

Use two forks, or pulse cooked chicken in a food processor with quick bursts. If you prefer hand-shredded texture, use forks for a more rustic feel. For a different flavor profile, try shredding chicken that has been roasted with simple spices.

For a different crowd-pleasing chicken dinner, try my recipe for chicken kofta with creamy garlic yogurt sauce when you want meatballs on a weeknight.

Conclusion

I hope this Chicken Enchiladas with Sour Cream Sauce becomes a weeknight favorite in your home. It is forgiving, creamy, and made to bring people together around the table. For a slightly different take and more tips, I like the detailed classic version at Sour Cream Chicken Enchiladas – New Mexican Foodie. If you want another regional take on the same comforting dish, this version has helpful notes at Sour Cream Chicken Enchiladas – Midwexican.

Thanks for cooking with me. Wrap a warm tortilla, call the family, and enjoy the little moments that make dinner memorable.

Chicken Enchiladas with Sour Cream Sauce

Prep Time 15 minutes
Cook Time 25 minutes
Total Time 40 minutes
Servings 6 servings
Calories 450
A comforting recipe perfect for weeknight dinners, combining creamy sauce and tender chicken wrapped in warm tortillas.

Ingredients

Main Ingredients

  • 2 cups cooked shredded chicken (Rotisserie chicken works great.)
  • 8 pieces flour tortillas (Use medium flour tortillas so they roll easily.)
  • 1 cup shredded cheese (cheddar or Mexican blend) (A mix of sharp cheddar and Monterey Jack gives good melting and flavor.)
  • 1 can cream of chicken soup (Shake the can well. Low-sodium version can be used.)
  • 1 cup sour cream (Full-fat sour cream makes a silkier sauce.)
  • 1 cup chicken broth (Use homemade or low-sodium broth.)
  • 1 teaspoon garlic powder (For fresh garlic, use one clove minced.)
  • 1 teaspoon onion powder (Onion powder blends into the sauce better.)
  • 1 teaspoon cumin (Adjust to your family's taste.)
  • to taste Salt and pepper (Start light and taste the chicken filling before rolling.)
  • to garnish Chopped cilantro (Add just before serving to keep it bright.)

Instructions 

Preparation

  • Preheat your oven to 350°F (175°C).
  • In a bowl, mix the cooked shredded chicken, half of the cheese, garlic powder, onion powder, cumin, salt, and pepper.
  • Spoon a portion of the chicken mixture into each tortilla, roll them up, and place in a greased baking dish.
  • In another bowl, whisk together the cream of chicken soup, sour cream, and chicken broth. Pour this sauce over the rolled tortillas.
  • Sprinkle the remaining cheese on top.

Cooking

  • Bake for 20-25 minutes until heated through and bubbly.
  • Garnish with chopped cilantro and serve.

Notes

Store leftovers in an airtight container for up to 3 days. For freezing, wrap in foil and place in a freezer bag for up to 2 months.
Calories: 450kcal
Course: Dinner, Main Course
Cuisine: Mexican
Keyword: Chicken Enchiladas, Comfort Food, Easy Recipe, Sour Cream Sauce, Weeknight Dinner

Ultimate Chicken Parmesan

I step into the kitchen and the air changes. The warm scent of garlic and tomato greets me, soft and familiar. Pans clink. The oven hums. That sound means comfort is on its way.

This Ultimate Chicken Parmesan is the recipe I reach for when I want something that feels special but stays simple. I make it for weeknight dinners and Sunday gatherings. If you want a similar weeknight version, try my classic Chicken Parmesan recipe for a quicker twist.

Why this works

Ultimate Chicken Parmesan

This dish hits three notes every family loves. Crispy, golden chicken on the outside. Bright, tangy marinara. Gooey, bubbling cheese that pulls apart with a fork. It is comfort and celebration all on one plate.

It saves time without losing flavor. Browning in a skillet locks in juices so the oven only needs to finish the cooking. That cuts total hands-on time and keeps things moist. For other crowd-pleasers with similar flavor profiles, you might like my creamy garlic Parmesan chicken for a softer, saucier option.

This recipe also stretches well. Make two pans and freeze one, or use leftovers in sandwiches. If you want a slow cooker twist for busy days, see my crockpot garlic Parmesan chicken thighs for another easy approach.

Process Overview

“This is where the magic happens—when the aroma fills the kitchen.”

We brown, bake, and melt. Browning gives a crisp crust that stands up to sauce. Baking finishes the chicken gently and melts the cheese to a perfect golden top. It is simple, dependable, and lovely for family dinners.

Along the way I remind myself to trust the timing and enjoy the smells. If you prefer a skillet-only method, the flavors stay true and you can adapt by following the technique in my garlic Parmesan chicken and potatoes skillet for similar results in one pan.

Ingredients

  • 4 boneless, skinless chicken breasts
    • Lily’s tip: Pound each breast to an even thickness so they cook evenly. A zip-top bag and a rolling pin work great.
  • 1 cup breadcrumbs
    • Lily’s tip: Use plain or Italian-style breadcrumbs. For crunch, add 1/4 cup panko to the mix.
  • 1/2 cup grated Parmesan cheese
    • Lily’s tip: Freshly grated Parmesan melts better and gives brighter flavor than pre-grated.
  • 1 teaspoon Italian seasoning
    • Lily’s tip: Mix with salt and pepper, and add a pinch of red pepper flakes if the family likes a little heat.
  • 2 cups marinara sauce
    • Lily’s tip: Use a good-quality jarred sauce or make a simple tomato sauce. Warm it slightly before pouring over the chicken.
  • 1 1/2 cups shredded mozzarella cheese
    • Lily’s tip: Whole milk mozzarella gives creamier melt. Freshly shredded melts smoother than pre-shredded.
  • Salt and pepper to taste
    • Lily’s tip: Season both sides of the chicken before breading for balanced flavor.
  • Olive oil for cooking
    • Lily’s tip: Use enough oil to coat the skillet. A medium-high heat helps create a golden crust quickly.

These basic pantry items come together easily. Assemble them before you start to keep the process calm and steady.

Directions

  1. Preheat the oven to 375°F (190°C).
    • Encouraging note: Give the oven a few minutes to reach temperature so the chicken finishes evenly. Pour a cup of tea while it warms.
  2. In a shallow dish, mix breadcrumbs, Parmesan cheese, Italian seasoning, salt, and pepper.
    • Encouraging note: Take a moment to taste a pinch. Adjust the seasoning so it sings. This mix is the flavor coat for your chicken.
  3. Coat each chicken breast in the breadcrumb mixture, pressing to adhere.
    • Encouraging note: Press firmly so the crumbs stick. If a spot looks thin, press again. It will crisp up nicely in the pan.
  4. Heat olive oil in a large skillet over medium heat. Cook chicken until golden brown on both sides, about 4 minutes per side.
    • Encouraging note: Work in batches if needed. A golden crust sets the foundation for a juicy chicken under the sauce.
  5. Transfer the chicken to a baking dish. Pour marinara sauce over the chicken and top with mozzarella cheese.
    • Encouraging note: Be generous with sauce for extra comfort. A spoonful more will keep everything moist and flavorful.
  6. Bake in the preheated oven for 20-25 minutes, until the chicken is cooked through and the cheese is bubbly.
    • Encouraging note: Use a meat thermometer if you like. Chicken is done at 165°F. Let the cheese bubble and brown a touch.
  7. Serve hot with additional marinara sauce if desired.
    • Encouraging note: Let the pan rest 3 to 5 minutes before serving. It helps the juices settle and makes slicing neat.

If you want a one-pan shortcut, sear and then cover the skillet to finish in the oven. For a crispier top, broil for 1-2 minutes at the end, watching closely so the cheese does not burn.

Serving

Ultimate Chicken Parmesan

Serve this family-style on a large platter so everyone can help themselves. Add a big bowl of pasta tossed with a little olive oil and garlic, or keep it low-carb with a green salad and roasted vegetables.

I like to place bowls of extra marinara and grated Parmesan on the table. Little touches let everyone customize their plate. For a playful weeknight switch, serve slices of chicken on soft rolls for simple chicken Parmesan sandwiches. Looking for a spicy side? My Bang Bang Chicken Bowl adds a bright, punchy contrast for adventurous eaters.

Storage

Refrigerator: Store leftover chicken in an airtight container for up to 3 days. Keep sauce separate if you want to avoid sogginess.

Freezer: Freeze portions in a freezer-safe container for up to 2 months. Thaw overnight in the fridge before reheating.

Reheating: Reheat in a 350°F oven for 15-20 minutes to keep the crust crisp. If you are short on time, microwave in short bursts, then finish under the broiler for a minute to revive the exterior.

Label containers with the date so you know when to use them. These simple steps make leftovers taste almost as good as fresh.

Kitchen Notes

  • Shortcut breading: Use seasoned panko for extra crunch and skip the Parmesan in the mix if you add it later for more flavor layering.
  • Make ahead: Bread the chicken and store on a tray covered in the fridge for up to 1 day. This saves time on busy nights.
  • Sauce swap: Use a chunky marinara for texture or a smooth tomato-basil sauce for a refined finish.
  • Double batch: Cook twice the chicken and freeze half. Reheat for quick weeknight meals when life gets busy.
  • Kid-friendly: Keep one pan plain with just cheese for picky eaters, and add herbs or red pepper flakes to a second pan for adults.

These tips help you adapt the recipe to your schedule and taste preferences without stress.

Variations

  • Low-carb: Replace breadcrumbs with almond flour or crushed pork rinds. Serve with roasted vegetables instead of pasta.
  • Gluten-free: Use gluten-free breadcrumbs or crushed gluten-free crackers. Ensure your marinara is gluten-free.
  • Lighter version: Skip the pan-frying step. Bake breaded chicken at 425°F for 18-22 minutes to get a lighter crust.
  • Extra cheesy: Mix shredded mozzarella and fontina for a richer, creamier top.
  • Herb-forward: Add fresh basil and oregano under the cheese for a burst of fresh flavor.

Each variation keeps the heart of the dish while accommodating diets and picky eaters. Trust your kitchen and your family’s preferences.

FAQ

Q: Can I use chicken thighs instead of breasts?

A: Yes. Boneless, skinless chicken thighs work well and stay juicy. Reduce baking time slightly and check for doneness at 165°F. Thighs add a richer flavor that many families love.

Q: How do I avoid soggy breading?

A: Brown the chicken well in the skillet to set the crust before adding sauce. Use slightly warm, not hot, sauce when spooning it on. Finish in the oven just long enough to cook through and melt the cheese.

Q: Can I prepare this ahead for guests?

A: Absolutely. Bread and pan-sear the chicken the day before, then refrigerate. On the day, assemble, add sauce and cheese, and bake. This reduces hands-on time when guests arrive.

Q: What sides pair best with Chicken Parmesan?

A: Classic choices are spaghetti with olive oil and garlic, Caesar salad, or garlic bread. Roasted green beans or a simple mixed greens salad are lighter complements.

Q: Is there a vegetarian alternative?

A: Use thick eggplant slices or large portobello mushrooms in place of chicken. Bread, brown, and bake them the same way. Eggplant Parmesan is a delicious vegetarian cousin.

Conclusion

I hope this Ultimate Chicken Parmesan becomes a warm, reliable recipe in your home. It has been a go-to for my family because it delivers comfort without fuss and stretches to feed hungry housefuls. For inspiration on classic techniques and another family-style version, check out this thoughtful write-up on The Best Chicken Parmigiana (Family Recipe) | A Simple Palate. If you like a step-by-step video and a trusted tested method, take a look at this detailed guide for Chicken Parmesan Recipe (with Video) – Allrecipes.

Happy cooking, and save a slice for someone you love.

Ultimate Chicken Parmesan

Prep Time 15 minutes
Cook Time 25 minutes
Total Time 40 minutes
Servings 4 servings
Calories 480
A simple yet special dish featuring crispy chicken, vibrant marinara, and gooey cheese, perfect for weeknight dinners or gatherings.

Ingredients

For the chicken

  • 4 pieces boneless, skinless chicken breasts (Pound each breast to an even thickness for even cooking.)
  • 1 cup breadcrumbs (Use plain or Italian-style breadcrumbs. Add 1/4 cup panko for extra crunch.)
  • 1/2 cup grated Parmesan cheese (Freshly grated Parmesan melts better.)
  • 1 teaspoon Italian seasoning (Mix with salt and pepper; add red pepper flakes for some heat.)
  • 2 cups marinara sauce (Use high-quality jarred or homemade; warm slightly before use.)
  • 1 1/2 cups shredded mozzarella cheese (Whole milk mozzarella gives a creamier melt.)
  • to taste salt and pepper (Season both sides of the chicken before breading.)
  • as needed tablespoons olive oil (Coat skillet for frying.)

Instructions 

Preparation

  • Preheat the oven to 375°F (190°C).
  • In a shallow dish, mix breadcrumbs, Parmesan cheese, Italian seasoning, salt, and pepper.
  • Coat each chicken breast in the breadcrumb mixture, pressing to adhere.

Cooking

  • Heat olive oil in a large skillet over medium heat. Cook chicken until golden brown on both sides, about 4 minutes per side.
  • Transfer the chicken to a baking dish. Pour marinara sauce over the chicken and top with mozzarella cheese.
  • Bake in the preheated oven for 20-25 minutes, until the chicken is cooked through and the cheese is bubbly.
  • Serve hot with additional marinara sauce if desired.

Notes

This dish can be adapted for freezing and reheating. Serve with pasta or a green salad.
Calories: 480kcal
Course: Dinner, Main Course
Cuisine: Italian
Keyword: Baked Chicken, Cheesy Chicken, Chicken Parmesan, Comfort Food, Family Dinner