Tag

Chicken Dishes

Browsing

Peruvian Grilled Chicken with Creamy Green Sauce | Chicken dishes recipes, Peruvian recipes, Chicken recipes

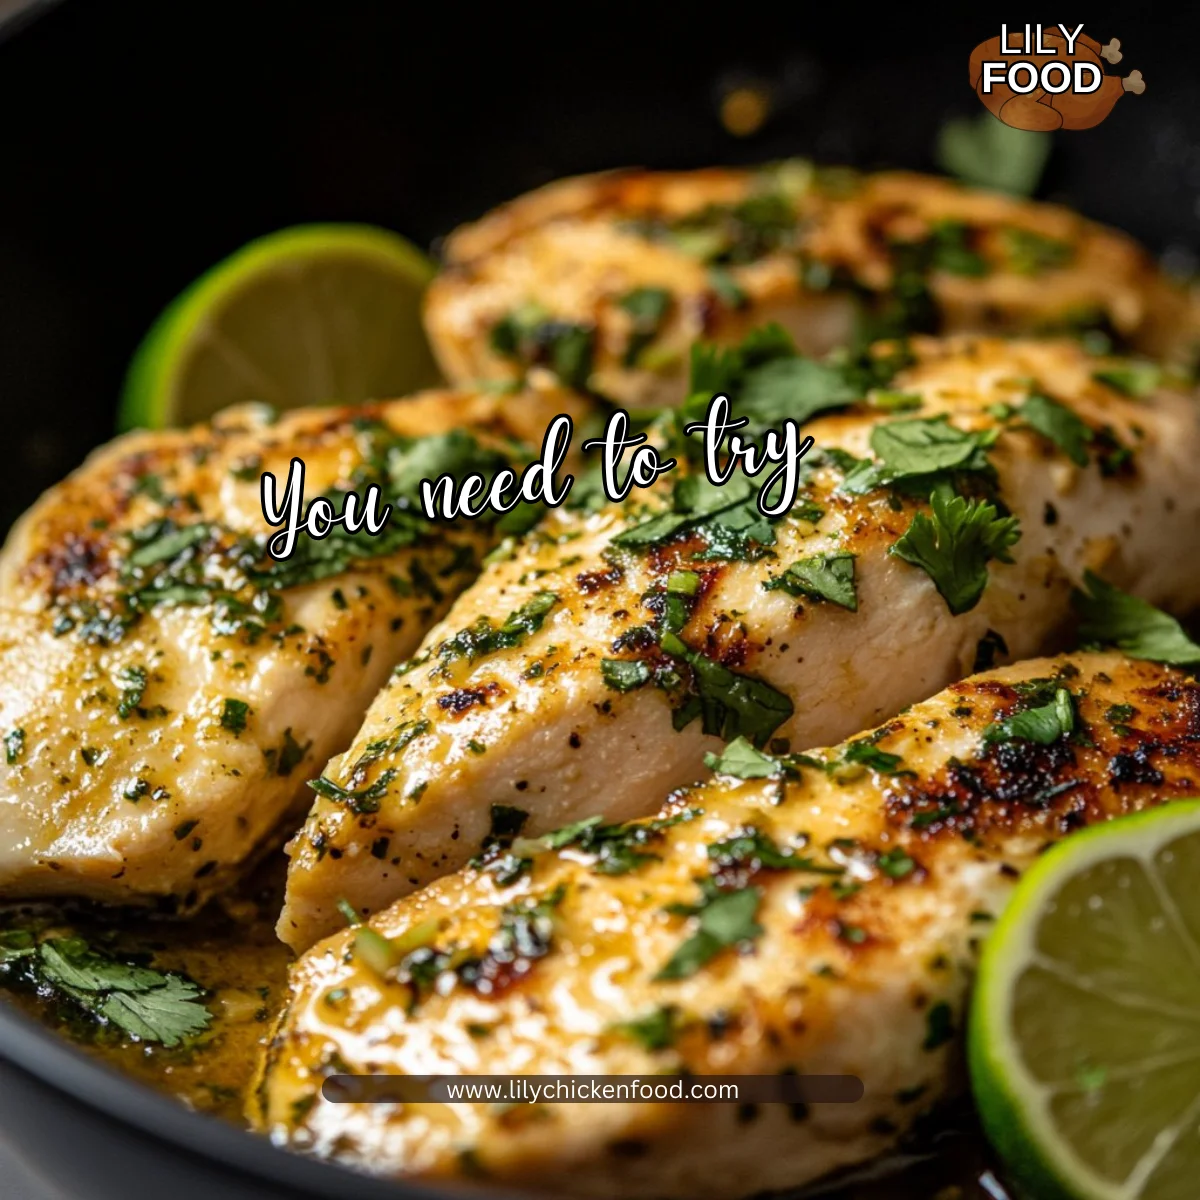
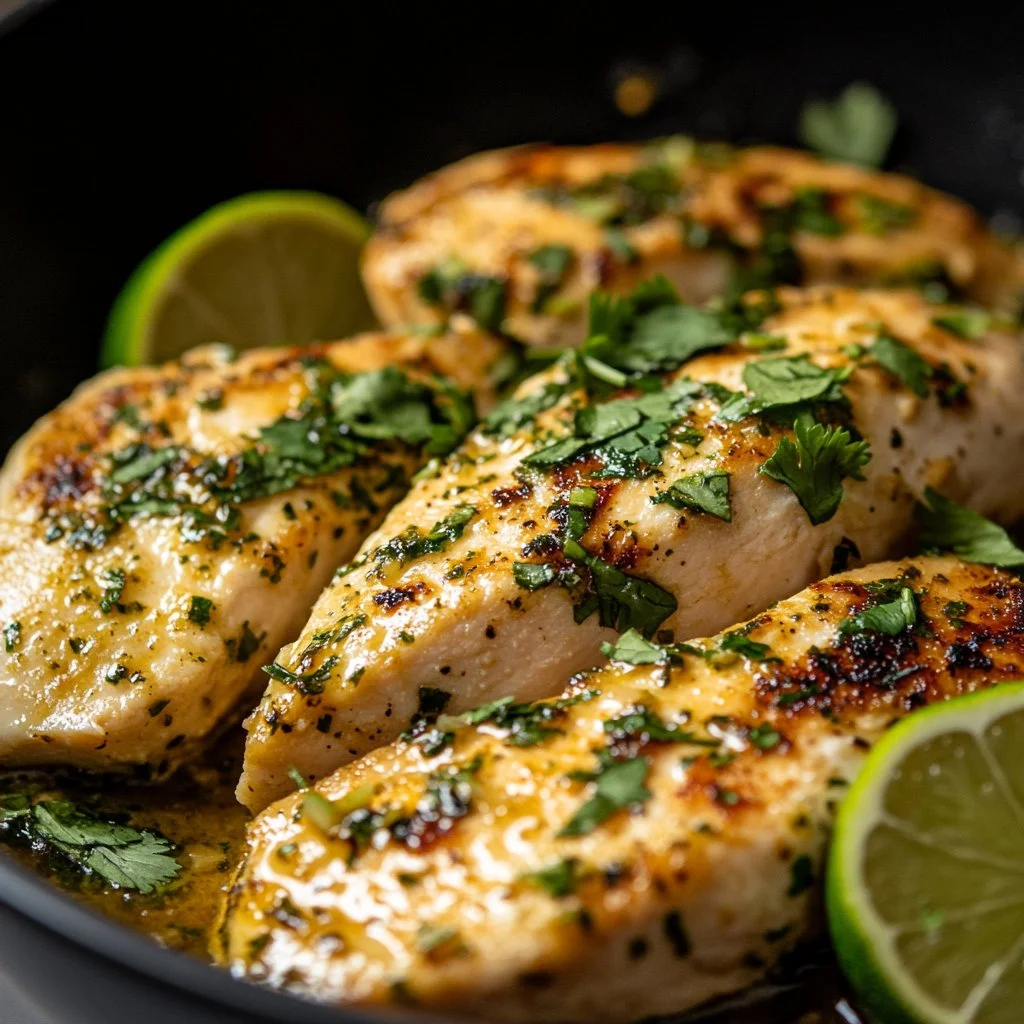
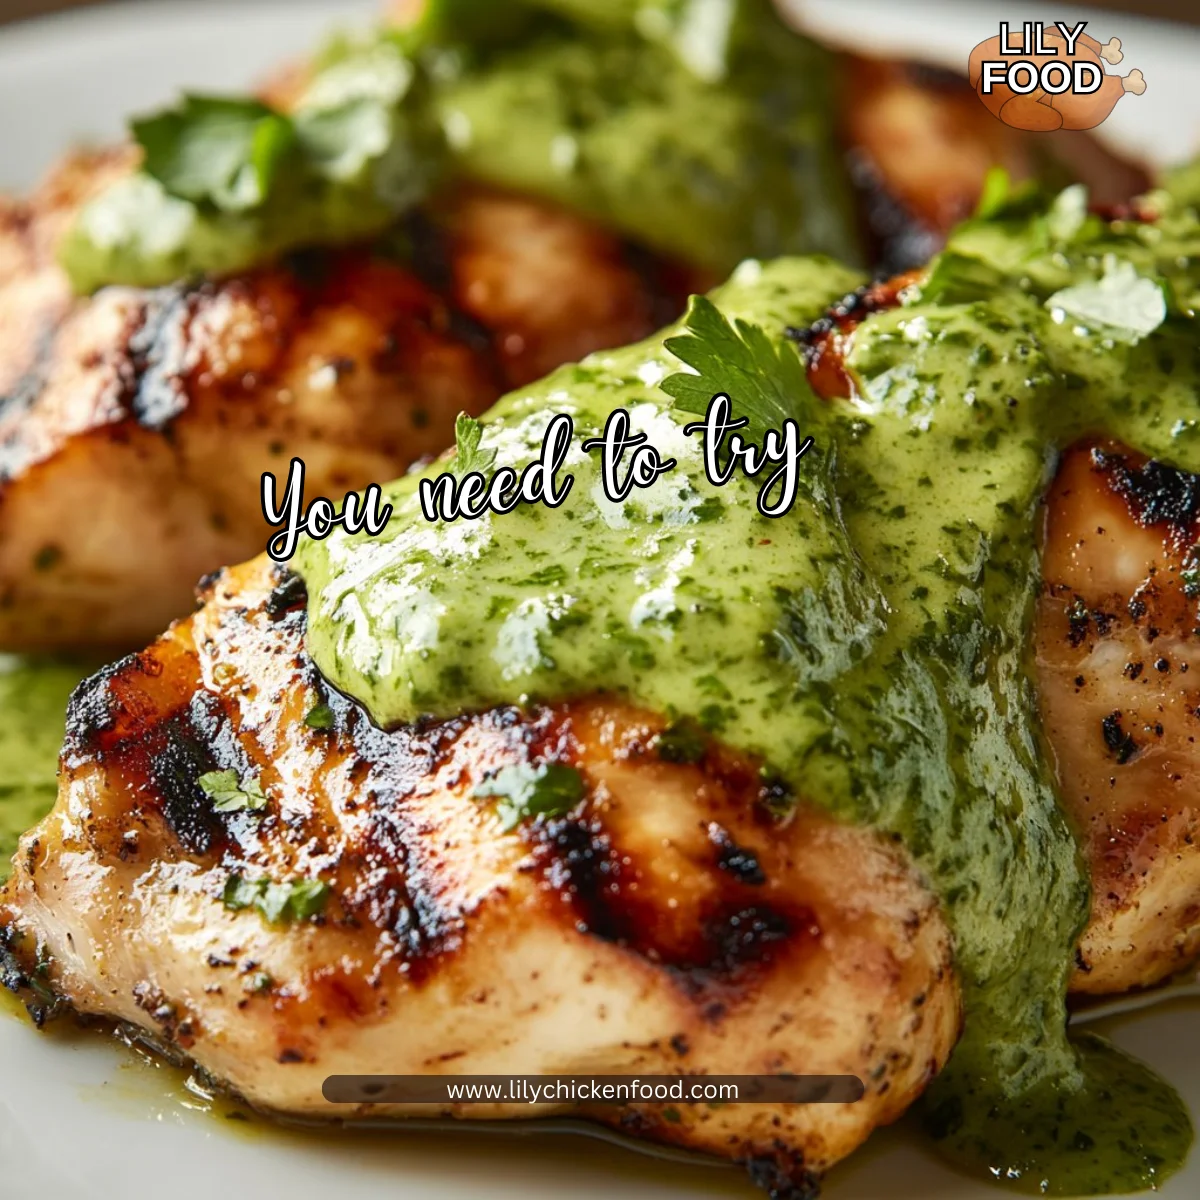
Peruvian Grilled Chicken with Creamy Green Sauce wakes up the kitchen the minute the marinade hits the pan. I love the smell of garlic, cumin, and lime as they sizzle. The sound of the grill adds the kind of background rhythm that makes any weekday feel like a celebration.

This recipe is a family favorite in my house. It is bright, simple, and forgiving. If you are new to grilling or feeding a picky crew, you will find this dish both comforting and exciting.

I keep a living version of this post on my site for quick reference, especially when I’m cooking for company: Peruvian grilled chicken recipe page.

Why this works

Peruvian Grilled Chicken with Creamy Green Sauce | Chicken dishes recipes, Peruvian recipes, Chicken recipes

Peruvian grilled chicken blends bold flavors with straightforward technique. The marinade tenderizes the meat while the green sauce gives a cooling, creamy contrast. That balance makes it perfect for a busy family night.

This dish saves time because you can marinate ahead and grill quickly. I often toss a tray into the fridge in the morning and grill at dinner time. If your family likes bold sauces, try pairing this with my chicken kofta with creamy garlic yogurt sauce for another weeknight option.

It scales well for a crowd. Roast a few extra drumsticks and you have leftovers that reheat beautifully.

Process Overview

“This is where the magic happens—when the aroma fills the kitchen.”

You will marinate, grill, and blend a bright sauce. Marinating for at least one hour helps flavor penetrate the chicken. Grill over medium-high heat until the skin is crisp and the inside hits 165°F.

If you prefer a different grilling style, my method for quick skewers is a good reference: easy grilled Asian chicken skewers with honey garlic sauce. The timing tips there are handy when you want fast, even cooking.

I recommend prepping the sauce while the chicken rests after grilling. The resting time locks in juices and gives you a calm moment to finish the table.

Ingredients

Below is a clear, family-tested list with my personal tips for each item. These tips come from years of cooking and feeding my children and friends.

  • 4 lbs bone-in, skin-on chicken pieces (thighs and drumsticks). Tip: I prefer dark meat for juiciness. If you use breasts, reduce grill time and check temperature early.
  • 1/2 Cup olive oil. Tip: Choose a mild olive oil for a cleaner flavor.
  • 1/3 Cup fresh lime juice (about 2 limes). Tip: Fresh juice brightens the marinade; bottled juice lacks the same lift.
  • 6 garlic cloves, smashed. Tip: Smash then finely mince for even distribution.
  • 1 tablespoon ground cumin. Tip: Toast briefly in a dry pan for 30 seconds to deepen flavor if you have a minute.
  • 1 tablespoon smoked paprika. Tip: Smoked paprika adds warmth without heat. Use sweet paprika if you want less smokiness.
  • 2 teaspoons kosher salt. Tip: Use measured salt, then taste the sauce and adjust if needed.
  • 1 teaspoon black pepper. Tip: Freshly ground gives the best aroma.
  • 2 tablespoons chopped fresh oregano or 1 teaspoon dried. Tip: I keep oregano in a little jar in my fridge when I buy fresh; it lasts longer that way.

For the creamy green sauce

  • 1 Cup packed fresh cilantro leaves, stems trimmed. Tip: Cilantro is the bright core of this sauce. If you need to swap, parsley works but the flavor shifts.
  • 1 small jalapeño, seeds removed for mild heat. Tip: Leave a few seeds if you like a kick.
  • 1/2 Cup mayonnaise. Tip: Use a good-quality mayo for creaminess. For a lighter version see Variations.
  • 1/4 Cup sour cream or Greek yogurt. Tip: Greek yogurt adds tang and cuts richness.
  • 2 tablespoons fresh lime juice. Tip: Add after blending and taste for balance.
  • 2 garlic cloves. Tip: Roast a clove for a mellow hint if children are sensitive to raw garlic.
  • 1/4 Cup olive oil. Tip: Emulsify slowly into the blender for silky texture.
  • Salt and black pepper to taste.

If you like a more indulgent version, try this approach for a crispier crust: Parmesan crusted chicken with creamy garlic sauce offers a different but complementary family favorite.

Directions

  1. Mix the marinade. In a bowl, whisk olive oil, lime juice, garlic, cumin, smoked paprika, oregano, salt, and pepper. Note: Smelling the mix should make you smile. That aroma is the promise of dinner.

  2. Marinate the chicken. Place chicken in a large zip-top bag or shallow dish. Pour marinade over, massaging it into the skin. Refrigerate for at least 1 hour and up to 8 hours. Encouragement: Even 1 hour will give wonderful flavor. Overnight is okay but 8 hours is ideal.

  3. Prepare the grill. Heat your grill to medium-high, about 400°F. Clean and oil the grates. Note: A hot clean grate gives you those lovely grill marks and fewer sticking problems.

  4. Grill the chicken. Remove chicken from the marinade, letting excess drip off. Place skin-side down. Grill 6 to 8 minutes per side for thighs and drumsticks, flipping once, until the internal temperature reads 165°F near the bone. Encouragement: Flip gently and let the grill do the work. Patience pays off with crispy skin.

  5. Rest the chicken. Transfer to a plate and tent loosely with foil for 5 to 8 minutes. Note: Resting keeps chicken juicy. This is also the time to blend the sauce.

  6. Make the creamy green sauce. In a blender, combine cilantro, jalapeño, mayonnaise, sour cream, lime juice, garlic, and olive oil. Blend until smooth. Taste and season with salt and pepper. Encouragement: A quick blend makes the sauce bright and silky. Add a splash of water if it’s too thick.

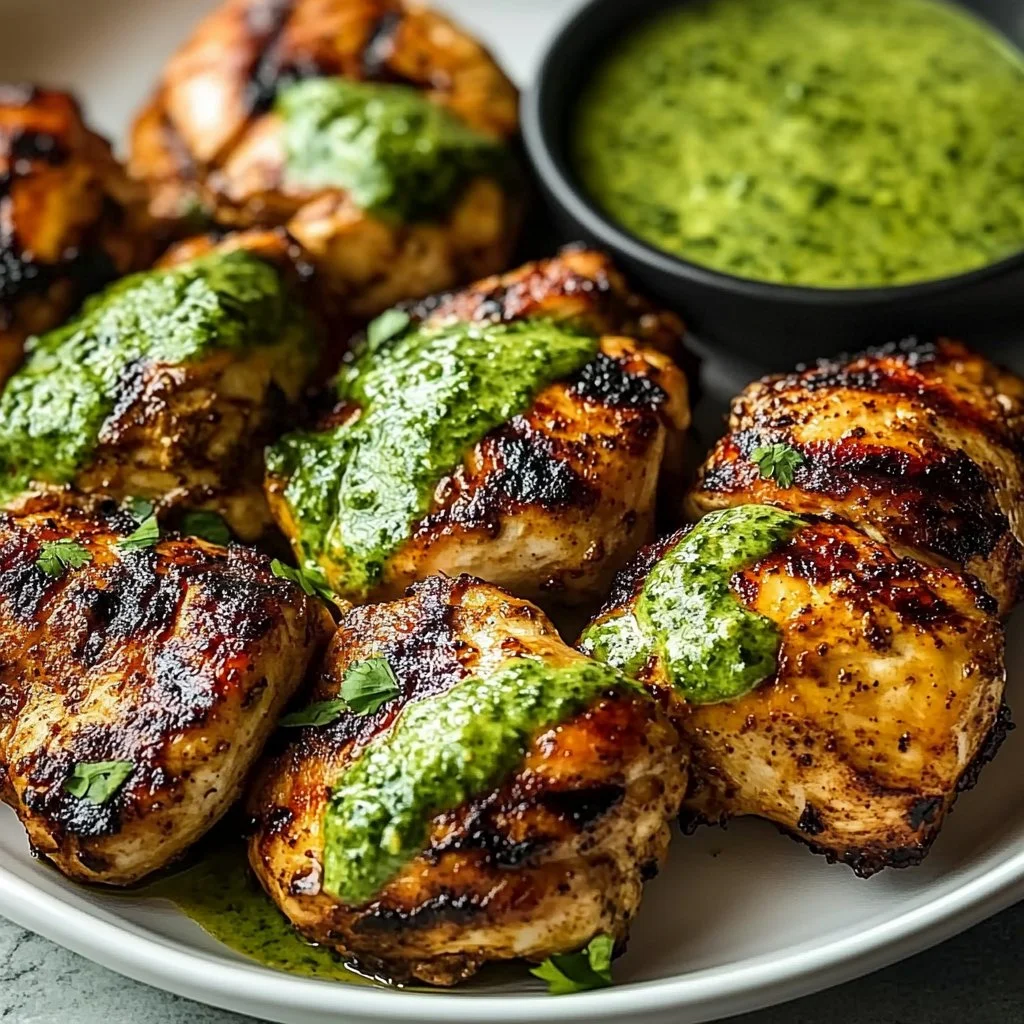
  7. Serve. Spoon the creamy green sauce over the chicken or place it in a bowl for dipping. Tip: Offer extra lime wedges for squeezing at the table. If your family loves layered Mexican flavors, this chicken pairs well with my chicken enchiladas with sour cream sauce on nights when you want more variety.

You did it. This is the moment to gather everyone, bring plates to the table, and enjoy the reward of simple, flavorful cooking.

Serving

Peruvian Grilled Chicken with Creamy Green Sauce | Chicken dishes recipes, Peruvian recipes, Chicken recipes

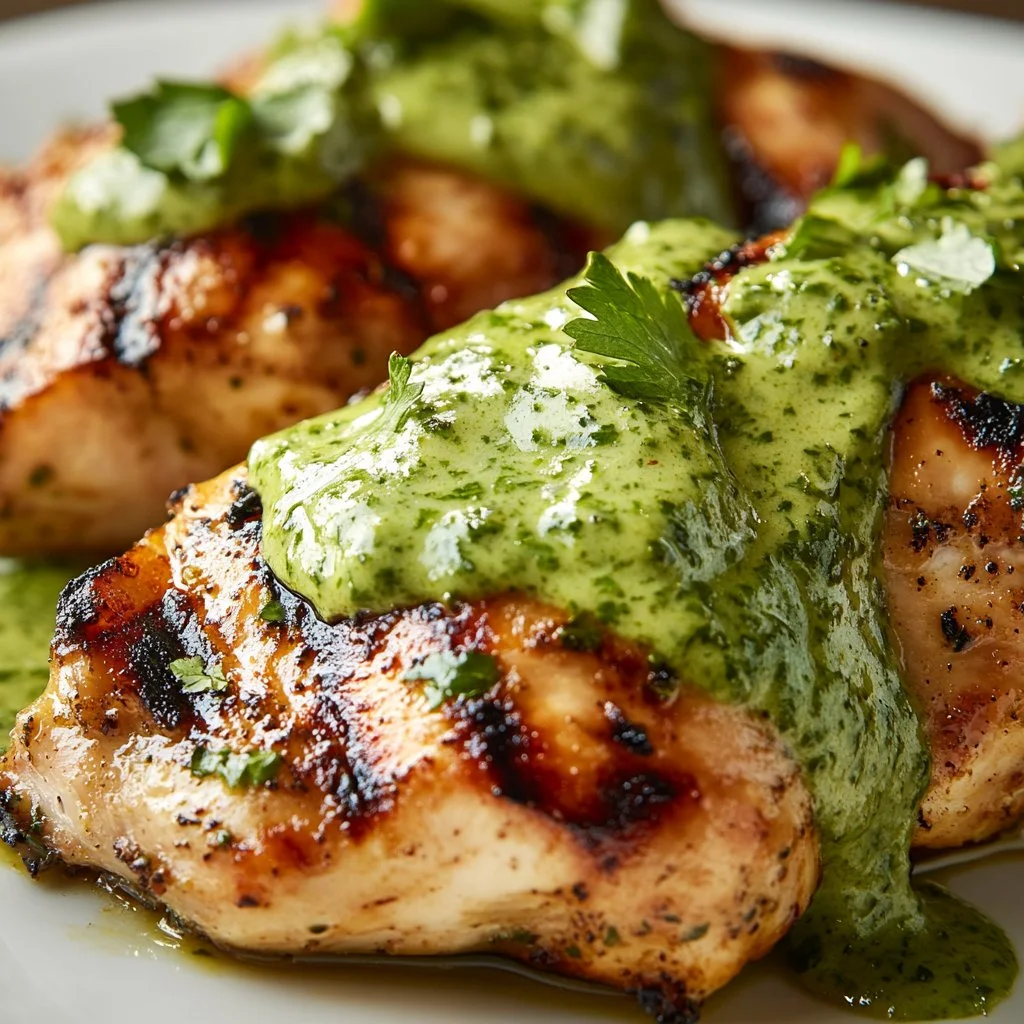
Serve this Peruvian grilled chicken family-style on a large platter. Arrange the pieces skin-side up so the grill marks are visible. Spoon a generous amount of creamy green sauce down the center and let everyone help themselves.

Sides that please a crowd include roasted potatoes, a simple green salad, and steamed rice. I like to put out bowls of sliced avocados and warm tortillas so kids can build their own plates.

For a festive touch, scatter chopped cilantro and a few lime halves across the platter. Encourage family members to squeeze fresh lime over their pieces for the last burst of brightness.

Storage

Fridge: Store leftover chicken in an airtight container in the refrigerator for up to 3 days. Place the sauce in a separate sealed jar for up to 4 days.

Freeze: You can freeze cooked chicken for up to 3 months. Wrap pieces tightly in foil and place in a freezer bag. Label with the date.

Reheat: To reheat gently, preheat oven to 350°F and warm chicken on a baking sheet for 10 to 15 minutes until heated through. For crisp skin, place under the broiler for 1 to 2 minutes, watching closely. Reheat the sauce in a small bowl at room temperature or very briefly in the microwave, stirring often.

Safety tip: Always reheat to an internal temperature of 165°F when serving leftovers to children and older adults.

Kitchen Notes

  • Use a meat thermometer for reliability. It takes the guesswork out of doneness.
  • Trim excess fat from chicken pieces for less flare-up on the grill.
  • If you do not have a grill, cook on an indoor grill pan or roast at 425°F for 25 to 35 minutes, turning once.
  • Prep the sauce in the morning and keep chilled until serving to save time.
  • Double the sauce if you like extra for dipping or drizzling.

Variations

  • Kid-friendly mild version: Remove the seeds from the jalapeño and use half the amount. Substitute Greek yogurt for part of the mayonnaise to lighten the flavor.
  • Dairy-free: Use vegan mayonnaise and coconut yogurt or more olive oil instead of sour cream.
  • Spicy lovers: Keep the jalapeño seeds or add a small serrano pepper to the sauce.
  • Quick stovetop: Sear the chicken in a cast-iron skillet over medium-high heat for a charred crust, then finish in a 400°F oven for 15 to 20 minutes.
  • Herb swap: Replace half the cilantro with parsley for a different green flavor that some picky eaters prefer.

FAQ

Q: Can I use boneless chicken breasts?
A: Yes. Reduce the grilling time and watch the internal temperature closely. Breasts cook faster. Aim for 160°F and rest to reach 165°F.

Q: How long can I marinate the chicken?
A: Marinate for at least 1 hour and up to 8 hours. Acidic marinades can start to change texture if left much longer than 8 hours.

Q: Is the sauce freezer-safe?
A: I do not recommend freezing the sauce. Creamy sauces with dairy separate when frozen and thawed. Keep it in the refrigerator up to 4 days for best quality.

Q: Can I make the sauce without a blender?
A: Yes. Chop the cilantro and jalapeño very finely, mince the garlic, and whisk everything vigorously. It will be chunkier but still tasty.

Q: What side dishes pair best with this chicken?
A: Simple sides work best. Rice, roasted vegetables, a crisp salad, or warm tortillas all pair nicely and keep the meal family-friendly.

Conclusion

I hope this Peruvian grilled chicken with creamy green sauce brings warmth and joy to your table. It is one of those recipes that looks and tastes like effort but comes together with simple steps and honest ingredients. If you want to compare versions or see another take on this classic, I often read the plating notes in the Platings + Pairings Peruvian Chicken with Green Sauce article for plating ideas. For a slightly different creamy twist, I also enjoy reviewing the techniques in the Half Baked Harvest Peruvian Chicken with Creamy Green Sauce post.

Thank you for cooking with me. Gather the family, pass the sauce, and make a little extra for tomorrow.

Peruvian Grilled Chicken with Creamy Green Sauce

Prep Time 1 hour
Cook Time 20 minutes
Total Time 1 hour 20 minutes
Servings 6 servings
Calories 400
A bright and flavorful grilled chicken dish marinated with garlic, cumin, and lime, served with a creamy green sauce that's perfect for family meals.

Ingredients

For the marinade

  • 4 lbs bone-in, skin-on chicken pieces (thighs and drumsticks) (Prefer dark meat for juiciness.)
  • 1/2 Cup olive oil (Choose a mild olive oil for a cleaner flavor.)
  • 1/3 Cup fresh lime juice (about 2 limes) (Fresh juice brightens the marinade.)
  • 6 cloves garlic, smashed (Smash then finely mince for even distribution.)
  • 1 tablespoon ground cumin (Toast briefly in a dry pan for deeper flavor.)
  • 1 tablespoon smoked paprika (Adds warmth without heat.)
  • 2 teaspoons kosher salt (Use measured salt, then adjust as needed.)
  • 1 teaspoon black pepper (Freshly ground for the best aroma.)
  • 2 tablespoons chopped fresh oregano (Or 1 teaspoon dried.)

For the creamy green sauce

  • 1 Cup packed fresh cilantro leaves, stems trimmed (Cilantro is the bright core of this sauce.)
  • 1 small jalapeño, seeds removed (Leave a few seeds for mild heat.)
  • 1/2 Cup mayonnaise (Use a good-quality mayo for creaminess.)
  • 1/4 Cup sour cream or Greek yogurt (Greek yogurt adds tang.)
  • 2 tablespoons fresh lime juice (Add after blending and taste for balance.)
  • 2 cloves garlic (Roast for a mellow hint if sensitive to raw garlic.)
  • 1/4 Cup olive oil (Emulsify slowly for silky texture.)
  • to taste salt and black pepper

Instructions 

Preparation

  • Mix the marinade by whisking olive oil, lime juice, garlic, cumin, smoked paprika, oregano, salt, and pepper in a bowl.
  • Marinate the chicken in a zip-top bag or shallow dish for at least 1 hour, ideally up to 8 hours.
  • Prepare the grill by heating it to medium-high (about 400°F) and cleaning the grates.

Grilling

  • Remove chicken from the marinade, letting excess drip off, and grill skin-side down for 6 to 8 minutes per side until the internal temperature reaches 165°F.
  • Rest the chicken for 5 to 8 minutes tented with foil before making the sauce.

Making the Sauce

  • In a blender, combine cilantro, jalapeño, mayonnaise, sour cream, lime juice, garlic, and olive oil. Blend until smooth.
  • Taste and season with salt and pepper as needed.

Serving

  • Serve the chicken on a large platter with the creamy green sauce either spooned over it or in a bowl for dipping.

Notes

Store leftovers in an airtight container for up to 3 days and sauce separately for up to 4 days. Can freeze cooked chicken for up to 3 months.
Calories: 400kcal
Course: Dinner, Main Course
Cuisine: Latin American, Peruvian
Keyword: Creamy sauce, Easy Dinner, Family Recipe, Grilled Chicken, Marinade

Pesto Bruschetta Chicken

I love the enticing smell of herbs and roasted chicken wafting through the kitchen. As it fills the air, the soft sound of sizzling and bubbling makes me feel at home. Cooking together as a family always creates lasting memories. Today, I want to share a simple yet delightful recipe: Pesto Bruschetta Chicken. It’s perfect for a weeknight dinner or a casual get-together.

Why This Works

Pesto Bruschetta Chicken

This recipe hits all the right notes for busy families. First, it’s quick to put together, requiring minimal prep time while offering maximum flavor. The bright and fresh pesto mixed with juicy cherry tomatoes elevates each bite.

Not only does this dish taste amazing, but it’s also a visually stunning centerpiece for your table. It invites everyone to gather ‘round, share stories, and enjoy a comforting meal together. With a handful of ingredients, you get a delightful, nutritious dinner that satisfies the whole family.

Process Overview

“This is where the magic happens—when the aroma fills the kitchen.”

Every step in this recipe leads you to a cozy evening with your loved ones. You’ll be amazed at how quickly your kitchen transforms into a warm haven of delight.

Ingredients

To make Pesto Bruschetta Chicken, you will need:

  • 4 boneless, skinless chicken breasts
    Tip: Look for breasts that are uniform in size for even cooking.

  • 1 cup pesto sauce
    Tip: Homemade pesto is fantastic, but store-bought works well too for convenience.

  • 1 cup cherry tomatoes, halved
    Tip: Choose vibrant, firm tomatoes for the best flavor and color.

  • 1/2 cup mozzarella cheese, shredded
    Tip: Fresh mozzarella adds a wonderfully creamy texture if you can find it.

  • Salt and pepper to taste
    Tip: Season generously for added flavor.

  • Fresh basil for garnish
    Tip: Pluck the leaves just before serving for the freshest taste.

Directions

  1. Preheat the oven to 375°F (190°C).
    Preheating your oven ensures the chicken cooks evenly.

  2. Season the chicken breasts with salt and pepper.
    This simple step enhances the chicken’s natural flavor.

  3. Place the chicken in a baking dish and spread the pesto sauce evenly on top.
    The pesto will create a beautiful, flavorful crust on the chicken.

  4. Scatter the halved cherry tomatoes over the chicken.
    Their sweetness will infuse into the chicken as it bakes.

  5. Sprinkle shredded mozzarella cheese on top of the tomatoes.
    As it melts, it creates a gooey, delicious layer over the dish.

  6. Bake for 25-30 minutes or until the chicken is cooked through and no longer pink in the center.
    A meat thermometer should read 165°F for perfectly cooked chicken.

  7. Remove from the oven and let it rest for a few minutes.
    Letting it rest keeps the juices locked in.

  8. Garnish with fresh basil before serving.
    A sprinkle of basil makes everything better and adds brightness to the dish!

Serving

Pesto Bruschetta Chicken

Serving this dish is all about family-style enjoyment. Place the baking dish right in the center of the table. Let everyone serve themselves on their plates, savoring the beautiful combination of chicken, gooey cheese, and cherry tomatoes. Pair it with some crusty bread or a fresh salad for a complete meal that everyone will love.

Storage

If you have leftovers (which are rare with this tasty dish), store them in an airtight container in the fridge. They will last up to three days. When you’re ready to enjoy them again, reheat the chicken in the oven at 350°F (175°C) until warmed through. This will help to maintain the chicken’s juiciness. You can also microwave it, but be careful not to overcook it.

Kitchen Notes

Here are a few shortcuts to make your cooking experience even smoother:

  • Buy pre-cooked chicken or rotisserie chicken to save time.
  • Use store-bought pesto to simplify preparation.
  • Chop tomatoes and prepare everything in advance.
  • Add a dash of red pepper flakes to the pesto for a hint of heat.
  • Serve any leftovers over pasta for a quick lunch the next day.

Variations

Here are some possible tweaks for picky eaters or different diets:

  • For a vegetarian version, swap chicken for slices of eggplant or portobello mushrooms.
  • Add spinach or arugula to the cherry tomatoes for an extra dose of greens.
  • To make it gluten-free, ensure your pesto and any bread you serve are labeled gluten-free.
  • Use different herbs like cilantro or parsley if you want to change up the flavor profile.
  • For dairy-free, use vegan cheese or omit dairy altogether.

FAQ

1. Can I use frozen chicken breasts?
Yes, but make sure to thaw them first for even cooking.

2. What can I serve with this chicken?
Serve with a simple salad or garlic bread for a complete meal.

3. How do I know the chicken is cooked through?
Use a meat thermometer to check that it reaches 165°F.

4. Can I make this dish ahead of time?
Absolutely! Prepare the chicken and toppings in advance, then bake it just before serving.

5. Can I freeze the leftovers?
Yes, you can freeze the cooked chicken for up to three months. Let it thaw in the fridge before reheating.

Conclusion

Pesto Bruschetta Chicken is more than just a meal; it’s a way to bring your family together. As you enjoy each bite, remember the joy of connecting over home-cooked food. I hope this recipe fills your kitchen with warmth and delightful memories. Happy cooking!

Pesto Bruschetta Chicken

Prep Time 15 minutes
Cook Time 30 minutes
Total Time 45 minutes
Servings 4 servings
Calories 450
A simple and delightful chicken dish topped with fresh pesto, juicy cherry tomatoes, and gooey mozzarella cheese, perfect for weeknight dinners or gatherings.

Ingredients

Main Ingredients

  • 4 pieces boneless, skinless chicken breasts (Look for breasts that are uniform in size for even cooking.)
  • 1 cup pesto sauce (Homemade pesto is fantastic, but store-bought works well too for convenience.)
  • 1 cup cherry tomatoes, halved (Choose vibrant, firm tomatoes for the best flavor and color.)
  • 1/2 cup mozzarella cheese, shredded (Fresh mozzarella adds a wonderfully creamy texture if you can find it.)
  • to taste salt and pepper (Season generously for added flavor.)
  • Fresh basil for garnish (Pluck the leaves just before serving for the freshest taste.)

Instructions 

Preparation

  • Preheat the oven to 375°F (190°C). Preheating your oven ensures the chicken cooks evenly.
  • Season the chicken breasts with salt and pepper. This simple step enhances the chicken's natural flavor.
  • Place the chicken in a baking dish and spread the pesto sauce evenly on top. The pesto will create a beautiful, flavorful crust on the chicken.
  • Scatter the halved cherry tomatoes over the chicken. Their sweetness will infuse into the chicken as it bakes.
  • Sprinkle shredded mozzarella cheese on top of the tomatoes. As it melts, it creates a gooey, delicious layer over the dish.

Cooking

  • Bake for 25-30 minutes or until the chicken is cooked through and no longer pink in the center. A meat thermometer should read 165°F for perfectly cooked chicken.
  • Remove from the oven and let it rest for a few minutes. Letting it rest keeps the juices locked in.
  • Garnish with fresh basil before serving. A sprinkle of basil makes everything better and adds brightness to the dish!

Notes

Serve this dish family-style straight from the baking dish. Pair it with crusty bread or a fresh salad for a complete meal. Leftovers can be stored in an airtight container in the fridge for up to three days.
Calories: 450kcal
Course: Dinner, Main Course
Cuisine: Italian
Keyword: Easy Chicken Recipes, Family Dinner, Pesto Bruschetta Chicken, quick chicken recipe, Weeknight Meal

Coconut Lime Chicken

There’s something truly magical about the kitchen when you’re preparing a meal for your family. The sizzling sound of chicken hitting the hot skillet fills the room, blending beautifully with the sweet aroma of coconut and the zesty scent of lime. It’s a symphony for the senses, inviting and warm, promising nourishment and love. Today, I’m excited to share a delightful recipe for Coconut Lime Chicken. This dish is perfect for a cozy family dinner, offering vibrant flavors that everyone will enjoy.

Why this works

Coconut Lime Chicken

Coconut Lime Chicken is a fantastic choice for busy families. It leverages simple, fresh ingredients that come together quickly. The recipe is straightforward, making it perfect for an after-work dinner. Plus, the combination of coconut milk and lime creates a flavorful sauce that elevates the chicken into something special. You can have a delicious meal ready in just about 30 minutes, giving you more time to enjoy the evening with your loved ones.

Process Overview

“This is where the magic happens—when the aroma fills the kitchen.”

The process for making Coconut Lime Chicken is simple yet rewarding. You start by seasoning and searing the chicken, locking in those delicious flavors. Next, you’ll create a creamy coconut lime sauce that envelops the chicken, infusing it with moisture and zest. It’s straightforward enough for even novice cooks to feel like culinary stars.

Ingredients

Here’s what you will need for Coconut Lime Chicken:

  • 4 chicken breasts: Look for boneless, skinless chicken to keep it tender and easy to cook.
  • 1 cup coconut milk: Choose full-fat coconut milk for a creamier sauce that adds richness.
  • 1 lime (juiced and zested): Fresh lime juice will provide the best flavor.
  • 1/2 cup cilantro (chopped): If you’re not a fan of cilantro, parsley is a great substitute.
  • 2 cloves garlic (minced): Fresh garlic brings out the best flavor; avoid jarred if possible.
  • 1 tablespoon olive oil: Extra virgin olive oil works wonders for searing the chicken.
  • Salt and pepper to taste: Season generously for the best flavor.

Lily’s Personal Tips:

  • When selecting chicken, try to get breasts that are all a similar size for even cooking.
  • Always shake the can of coconut milk before measuring to ensure it’s well-mixed.
  • Save any leftover lime zest for adding to other dishes or even baked goods.
  • Fresh cilantro can be strong for some, so adjust the amount to your taste.
  • Mince garlic just before cooking to keep its natural oils intact and boost the flavor.

Directions

Let’s get cooking! Follow these easy steps to make your Coconut Lime Chicken:

  1. Preheat your oven to 375°F (190°C). This ensures your oven is hot and ready when it’s time to bake the chicken.

  2. Season the chicken breasts with salt and pepper. Don’t be shy; this layer of seasoning is what makes the chicken flavorful.

  3. Heat olive oil in a skillet over medium heat and add minced garlic, cooking until fragrant. This should take about 30 seconds. Your kitchen will smell amazing!

  4. Add the chicken breasts to the skillet and sear on both sides until golden brown, about 4-5 minutes per side. You want a nice crust to form.

  5. In a bowl, mix coconut milk, lime juice, lime zest, and chopped cilantro. This creamy mixture is what makes the dish shine, so whisk it well.

  6. Pour the coconut mixture over the chicken in the skillet. The chicken should be mostly covered; this will keep it moist.

  7. Transfer the skillet to the oven and bake for about 20 minutes, or until the chicken is cooked through. Use a meat thermometer for safety; it should read 165°F inside.

  8. Serve hot and enjoy! Take your time, savor each bite, and share with your family.

Serving

Coconut Lime Chicken

For a family-style meal, serve the Coconut Lime Chicken straight from the skillet. This adds an inviting touch to your table. You can pair it with steamed rice or quinoa to soak up that delicious coconut sauce. Add a side of sautéed vegetables or a fresh salad to round out the meal. Let everyone dig in and enjoy each other’s company over this delightful dish.

Storage

If you have leftovers (which is rare, but it happens!), store the Coconut Lime Chicken in an airtight container in the fridge. It will keep well for 3-4 days. To reheat, place it in the oven at 350°F (175°C) until warmed through. You can also microwave it, but be sure to cover it to prevent moisture loss.

Kitchen Notes

Here are some helpful shortcuts to make your cooking experience even easier:

  • Use pre-minced garlic from a jar to save time if you’re in a hurry.
  • Cook extra chicken and use it for meal prep throughout the week.
  • Feel free to double the coconut lime sauce for added flavor.
  • If you’re short on time, you can use chicken tenderloins, which cook faster.
  • Punctuate your meal with a fresh fruit salad for dessert. It complements the flavors nicely.

Variations

Not everyone has the same tastes, and that’s okay! Here are some tweaks you can make for picky eaters or dietary differences:

  • For those avoiding dairy, ensure to use dairy-free coconut milk, as this recipe already does.
  • If lime isn’t a family favorite, you can substitute it with lemon for a slightly different flavor.
  • Add some spice by incorporating red pepper flakes or diced jalapeños to the coconut sauce.
  • For a lighter sauce, reduce the amount of coconut milk and add chicken broth for flavor without the creaminess.
  • You can also try this recipe with shrimp or tofu for a vegetarian option, adjusting the cook time accordingly.

FAQ

1. Can I prepare this recipe ahead of time?
Yes! You can marinate the chicken in the coconut lime mixture for a couple of hours or overnight. Just bake it when you’re ready to eat.

2. What can I serve with Coconut Lime Chicken?
This dish pairs beautifully with rice, quinoa, or a fresh salad. Think about some roasted veggies for a complete meal.

3. How do I know when my chicken is cooked through?
Using a meat thermometer is the safest way. Chicken should reach an internal temperature of 165°F.

4. Can I freeze the leftovers?
Absolutely! Just keep it in a freezer-safe container. It will last for up to 2 months in the freezer.

5. How can I make this dish spicier?
Feel free to add some diced jalapeños or a pinch of cayenne pepper to the coconut lime mixture before baking.

Conclusion

Cooking has a way of bringing families together, and Coconut Lime Chicken is no exception. Whether you’re whipping it up on a busy weeknight or serving it for a special occasion, this dish offers warmth and goodness in every bite. I hope you enjoy making it as much as I do. Happy cooking!

Coconut Lime Chicken

Prep Time 10 minutes
Cook Time 20 minutes
Total Time 30 minutes
Servings 4 servings
Calories 450
A delightful dish featuring tender chicken breasts smothered in a creamy coconut lime sauce, perfect for a cozy family dinner.

Ingredients

Main Ingredients

  • 4 pieces boneless, skinless chicken breasts (Look for uniform size for even cooking.)
  • 1 cup coconut milk (Use full-fat for a creamier sauce.)
  • 1 piece lime (juiced and zested) (Fresh juice is recommended.)
  • 1/2 cup cilantro (chopped) (Substitute with parsley if desired.)
  • 2 cloves garlic (minced) (Fresh garlic enhances flavor.)
  • 1 tablespoon olive oil (Extra virgin is best for searing.)
  • Salt and pepper to taste (Season generously.)

Instructions 

Preparation

  • Preheat your oven to 375°F (190°C).
  • Season the chicken breasts with salt and pepper.
  • Heat olive oil in a skillet over medium heat and add minced garlic, cooking until fragrant, about 30 seconds.

Cooking

  • Add the chicken breasts to the skillet and sear on both sides until golden brown, about 4-5 minutes per side.
  • In a bowl, mix coconut milk, lime juice, lime zest, and chopped cilantro.
  • Pour the coconut mixture over the chicken in the skillet, ensuring the chicken is mostly covered.
  • Transfer the skillet to the oven and bake for about 20 minutes, or until the chicken is cooked through at an internal temperature of 165°F.

Serving

  • Serve hot with steamed rice or quinoa and enjoy!

Notes

Store leftovers in an airtight container in the fridge for 3-4 days. Reheat in the oven or microwave.
Calories: 450kcal
Course: Dinner, Main Course
Cuisine: Asian, Family
Keyword: Coconut Lime Chicken, Comfort Food, Easy Dinner, Family Meal, quick recipe

Cheesy Garlic Chicken Wraps

There’s something magical about the smell of garlic bubbling in butter and cheese melding together. As you stand in your kitchen, the sounds of sizzling and the gentle pop of melting cheese fill the air. It’s a symphony that brings family together, and today’s recipe is all about that magic—Cheesy Garlic Chicken Wraps.

These wraps are not just delicious; they’re also quick to make, making them perfect for busy weeknights. Imagine the joy on your family’s faces when they take their first bite. Let’s dive into this easy and mouthwatering dish that can brighten any dinner table.

Why This Works

Cheesy Garlic Chicken Wraps

Family dinners should be simple, beautiful, and filled with flavors. That’s exactly what these Cheesy Garlic Chicken Wraps deliver. They come together without fuss, sparing you hours in the kitchen while still impressing everyone at the dinner table.

You can use leftover chicken, saving time and reducing waste. Each wrap can be customized, ensuring that everyone gets something they love. This dish encourages family time around the dinner table, whether it’s a casual family night or entertaining friends.

Process Overview

“This is where the magic happens—when the aroma fills the kitchen.”

Each step in making these wraps is straightforward. From combining the simple ingredients to cooking them to golden perfection, this recipe is designed to bring ease into your kitchen. You’ll find that it requires very little prep and cooks quickly, leaving you more time to enjoy with your loved ones.

Ingredients

Gather these key ingredients to create your Cheesy Garlic Chicken Wraps:

  • 2 cups cooked chicken, shredded
  • 1 cup shredded cheese (cheddar or mozzarella)
  • 1/4 cup cream cheese
  • 2 cloves garlic, minced
  • 1 teaspoon garlic powder
  • 1 teaspoon onion powder
  • Salt and pepper to taste
  • 4 low-carb tortillas or wraps

Optional toppings to consider:

  • Lettuce: Adds a fresh crunch. I recommend using iceberg for its crispness.
  • Tomatoes: Slices of fresh tomato bring juiciness. Choose grape tomatoes for a sweet touch.
  • Avocado: Provides creaminess and healthy fats. Slice it just before serving to prevent browning.
  • Salsa: A tangy kick that complements the wraps beautifully. Pick your favorite flavor.
  • Sour cream: Adds richness and coolness. A dollop on top elevates each bite.

Directions

  1. In a mixing bowl, combine the shredded chicken, shredded cheese, cream cheese, minced garlic, garlic powder, onion powder, salt, and pepper. Mix well until everything is evenly coated. This is your cheesy filling that will save dinner.

  2. Lay a low-carb tortilla on a flat surface. Place a generous amount of the chicken mixture on the tortilla. Don’t skimp; this is the heart of your wrap.

  3. Add any additional toppings like lettuce or tomatoes if desired. Get creative and use what your family loves!

  4. Roll the tortilla tightly to form a wrap. Tuck in the sides to keep everything from falling out.

  5. Repeat for the remaining tortillas. Each wrap should feel like a little hug of deliciousness.

  6. Heat a skillet over medium heat and place the wraps seam side down. Cook for about 3-4 minutes on each side or until golden brown and the cheese has melted. Listen for that satisfying sizzle!

  7. Serve warm and enjoy your cheesy garlic chicken wraps! These are sure to become a favorite.

Serving

Cheesy Garlic Chicken Wraps

Serving these wraps family-style creates a warm, inviting atmosphere at the dinner table. Place them on a large platter, and let everyone help themselves. You can offer a bowl of fresh toppings on the side for a personalized touch. This not only encourages sharing but also turns dinnertime into a fun experience for the whole family.

Storage

If you have any leftovers (which might be a rarity), you can store them in an airtight container in the fridge. They’ll last for up to three days.

To reheat, simply place them back in a skillet over medium heat for about 5 minutes on each side until heated through. This will help keep the wrap crispy and delicious. You can also microwave them for quicker reheating, but the skillet method is best for keeping that crispy texture.

Kitchen Notes

Here are some handy shortcuts to make this recipe even easier:

  • Pre-Cooked Chicken: Use a rotisserie chicken from the store for an even quicker prep time.
  • Frozen Garlic: If you often cook with garlic, consider keeping frozen minced garlic on hand. It saves time and makes for easy cooking.
  • Mix Ahead: You can combine the filling ingredients a day in advance and store them in the fridge. Just fill and wrap when you’re ready to cook.
  • Meal Prep Idea: Make a double batch and freeze some wraps for a future busy night. Just thaw in the fridge overnight before cooking.
  • Kids in the Kitchen: Let your little ones help by rolling their own wraps. It’s a fun activity that encourages them to be involved in meal prep.

Variations

Not everyone in your family may share the same taste, and that’s okay. Here are a few tweaks to cater to picky eaters or different diets:

  • Swap the Protein: Use shredded beef or pork if chicken isn’t a favorite.
  • Make it Vegetarian: Replace the chicken with roasted vegetables like bell peppers, zucchini, and mushrooms.
  • Gluten-Free Option: Use gluten-free tortillas or lettuce wraps instead of regular ones.
  • Spice it Up: Add some jalapeños or a sprinkle of chili powder for those who enjoy a little heat.
  • Dairy-Free Version: Substitute cream cheese with a dairy-free alternative and use vegan cheese for the filling.

FAQ

1. Can I use uncooked chicken?
Yes, you can. Just cook the chicken fully before shredding and mixing with the other ingredients.

2. How can I make this recipe spicier?
You can add hot sauce to the filling or include sliced jalapeños as toppings before wrapping.

3. Can I bake these wraps instead of frying?
Absolutely! Preheat your oven to 350°F, place the wraps on a baking sheet, and bake for about 10-15 minutes until crispy.

4. What kind of cheese works best?
Cheddar and mozzarella are the most popular choices, but you can also experiment with pepper jack for a spicy kick.

5. How do I make this recipe ahead of time?
You can prepare the filling a day ahead and refrigerate it. Assemble the wraps just before you are ready to cook them for the best flavor and texture.

Conclusion

With Cheesy Garlic Chicken Wraps, you transform simple ingredients into an extraordinary meal. The warmth of melted cheese and the flavor of garlic combined with the vibrant toppings can bring smiles to your family’s faces. Remember, cooking together and sharing delightful meals creates treasured moments. Embrace the joy of family dining and make these wraps a staple in your home. Enjoy cooking, and even more, enjoy gathering around the table.

Cheesy Garlic Chicken Wraps

Prep Time 15 minutes
Cook Time 8 minutes
Total Time 23 minutes
Servings 4 servings
Calories 400
Delicious and quick-to-make wraps featuring shredded chicken, melted cheese, and garlic, perfect for busy weeknights and family gatherings.

Ingredients

Main Ingredients

  • 2 cups cooked chicken, shredded (Use leftover chicken for convenience.)
  • 1 cup shredded cheese (cheddar or mozzarella)
  • 1/4 cup cream cheese
  • 2 cloves garlic, minced (Can use frozen minced garlic.)
  • 1 teaspoon garlic powder
  • 1 teaspoon onion powder
  • Salt and pepper, to taste
  • 4 pieces low-carb tortillas or wraps

Optional Toppings

  • Lettuce (Iceberg is recommended for its crispness.)
  • Tomatoes (Grape tomatoes add a sweet touch.)
  • Avocado (Slice just before serving to prevent browning.)
  • Salsa (Choose your favorite flavor.)
  • Sour cream (A dollop elevates each bite.)

Instructions 

Preparation

  • In a mixing bowl, combine the shredded chicken, shredded cheese, cream cheese, minced garlic, garlic powder, onion powder, salt, and pepper. Mix well until everything is evenly coated.
  • Lay a low-carb tortilla on a flat surface and place a generous amount of the chicken mixture on the tortilla.
  • Add any additional toppings like lettuce or tomatoes if desired.
  • Roll the tortilla tightly to form a wrap, tucking in the sides to keep everything from falling out.

Cooking

  • Heat a skillet over medium heat and place the wraps seam side down.
  • Cook for about 3-4 minutes on each side or until golden brown and the cheese has melted.

Serving

  • Serve warm on a large platter, allowing everyone to help themselves along with a bowl of fresh toppings.

Notes

Store leftovers in an airtight container in the fridge for up to three days. Reheat in a skillet for the best texture.
Calories: 400kcal
Course: Dinner, Main Course
Cuisine: American
Keyword: Cheesy Garlic Chicken Wraps, Chicken Wraps, Easy Recipe, Family Dinner, Quick Meal

Garlic Butter Chicken and Bowtie Pasta

There’s something wonderfully comforting about the smell of garlic and butter wafting through the kitchen. It’s that warm, inviting aroma that calls everyone in the house. As you stir together the ingredients, you can hear the soft bubbling of the sauce, combined with the gentle simmer of the pasta. This is the perfect backdrop to a family meal that feels special and tastes divine. Today, I’m sharing one of my family’s favorites: Garlic Butter Chicken and Bowtie Pasta.

Why This Works

Garlic Butter Chicken and Bowtie Pasta

This recipe is a fantastic blend of rich flavors and textures that your whole family will love. Garlic butter? Yes, please. Tender chicken perfectly coated in creamy sauce? It’s like a warm hug on a plate.

Not only does this dish taste incredible, but it’s also quick to prepare. With just a few ingredients and a straightforward cooking method, you’ll have dinner ready in no time. This is ideal for busy weeknights when you want to serve something delicious without spending hours in the kitchen.

Process Overview

“This is where the magic happens—when the aroma fills the kitchen.”

Cooking this Garlic Butter Chicken and Bowtie Pasta is truly an enjoyable experience. It brings your family together—from the delightful scents that fill your home to the smiles on their faces when they dig into a warm, hearty meal. You’ll love how this simple process transforms everyday ingredients into something extraordinary. Let’s get started!

Ingredients

For this recipe, you will need:

  • 2 chicken breasts
  • 8 oz bowtie pasta
  • 4 cloves garlic, minced
  • 1/2 cup butter
  • 1 cup heavy cream
  • 1 cup chicken broth
  • 1/2 cup Parmesan cheese
  • Salt and pepper to taste
  • Fresh parsley for garnish

Lily’s Tips:

  • Chicken Breasts: Look for ones that are plump and of even size for even cooking.
  • Bowtie Pasta: This shape holds onto the sauce beautifully.
  • Garlic: Fresh garlic is a must. It provides the best flavor.
  • Butter: Use unsalted butter for more control over the saltiness of the dish.
  • Parmesan Cheese: Freshly grated cheese melts better than pre-packaged varieties.

Directions

  1. Cook the bowtie pasta according to package instructions; drain and set aside.
    Note: Don’t forget to save a bit of pasta water. It can help adjust the sauce later if needed.

  2. In a large skillet, melt butter over medium heat.
    This step sets the stage for all the rich flavors to come. Just watch it melt into a beautiful golden hue.

  3. Add minced garlic and sauté until fragrant.
    The smell of sautéing garlic is magic in the kitchen. Make sure not to burn it—keep an eye on it as it cooks.

  4. Add chicken breasts and cook until browned and cooked through.
    Turn them a couple of times to get an even golden crust. This will seal in the juices.

  5. Remove chicken from skillet and slice.
    Letting the chicken rest for a few minutes before slicing ensures it stays juicy.

  6. In the same skillet, add chicken broth and heavy cream; bring to a simmer.
    The beauty of one-pan meals is the flavor buildup in the skillet. Scrape any tasty bits off the bottom.

  7. Stir in Parmesan cheese, salt, and pepper.
    Watch as everything comes together into a creamy, cheesy sauce—it’s dreamy!

  8. Add cooked pasta and sliced chicken to the sauce; mix well.
    This is where you can really get everyone involved. Have the kids help stir.

  9. Serve hot, garnished with fresh parsley.
    The pop of green looks lovely and adds a fresh touch to the rich dish.

Serving

Garlic Butter Chicken and Bowtie Pasta

When it comes to serving Garlic Butter Chicken and Bowtie Pasta, make it family-style. Present it in a large bowl and let everyone help themselves. You can sprinkle a bit more Parmesan cheese on top for those who love a cheesy finish.

Don’t forget to pair this dish with a simple side salad or some steamed vegetables to balance out the meal. Enjoy the laughter and conversations around the table as everyone digs in.

Storage

If you have leftovers (which is rare, but it happens!), store the Garlic Butter Chicken and Bowtie Pasta in an airtight container in the fridge. It should be good for 3 to 4 days.

When reheating, do so gently in a skillet over low heat. Add a splash of chicken broth or cream to revive the sauce and keep it creamy.

Kitchen Notes

Here are some handy shortcuts to keep in mind:

  • Meal Prep: Cook the chicken and make the sauce ahead of time. Store it separately for up to two days.
  • Pasta Cooking: Remember to add salt to your pasta water for added flavor.
  • Frozen Chicken: Use frozen chicken breasts; just increase the cooking time.
  • One-Pot Wonder: Instead of cooking pasta separately, you can cook the pasta in the sauce with added water.
  • Herbs: Fresh herbs like thyme or basil can add extra flavor if you have them on hand.

Variations

This recipe can easily adapt to suit different tastes:

  • Picky Eaters: Cut the chicken into smaller pieces or treat them to a fun shape pasta.
  • Healthier Option: Use whole wheat or gluten-free pasta to fit dietary needs.
  • Veggie Boost: Add in spinach or cherry tomatoes for extra nutrients.
  • Low-Carb: Substitute pasta with zucchini noodles or spaghetti squash for a lighter meal.
  • Spice it Up: Add a pinch of red pepper flakes to the garlic for a kick.

FAQ

1. Can I use other types of pasta?
Yes, feel free to substitute any pasta you have on hand. Just adjust the cooking time as necessary.

2. Is there a vegetarian version of this dish?
Absolutely! Swap out the chicken for sautéed mushrooms or a plant-based protein.

3. How can I make it dairy-free?
Use a dairy-free butter alternative and substitute the heavy cream with coconut cream or a plant-based cream.

4. Can I freeze leftovers?
Yes, but keep in mind the pasta may become a bit soft upon thawing. It’s best to freeze the sauce and chicken separately.

5. What can I serve with this dish?
A green salad, garlic bread, or steamed veggies are excellent options for side dishes.

As you finish up the meal, take a moment to savor the joy that comes with sharing a homemade dinner. Cooking can be a beautiful way to bond with loved ones, creating not just food but also lasting memories. Enjoy your Garlic Butter Chicken and Bowtie Pasta, and cherish those precious family moments at the table.

Garlic Butter Chicken and Bowtie Pasta

Prep Time 10 minutes
Cook Time 20 minutes
Total Time 30 minutes
Servings 4 servings
Calories 600
A comforting and quick family meal featuring tender chicken in a creamy garlic butter sauce, served with bowtie pasta.

Ingredients

Main Ingredients

  • 2 pieces chicken breasts (Look for plump, even-sized breasts for even cooking.)
  • 8 oz bowtie pasta (This shape holds onto the sauce beautifully.)
  • 4 cloves garlic, minced (Fresh garlic is a must for the best flavor.)
  • 1/2 cup butter (Use unsalted for better control over seasoning.)
  • 1 cup heavy cream (Provides a rich, creamy texture.)
  • 1 cup chicken broth (Adds depth to the sauce.)
  • 1/2 cup Parmesan cheese (Freshly grated melts better than pre-packaged.)
  • Salt and pepper to taste
  • Fresh parsley for garnish (Adds freshness and color.)

Instructions 

Cooking Pasta

  • Cook the bowtie pasta according to package instructions; drain and set aside. Save a bit of pasta water for the sauce if needed.

Preparing Sauce

  • In a large skillet, melt butter over medium heat.
  • Add minced garlic and sauté until fragrant, being careful not to burn it.
  • Add chicken breasts and cook until browned and cooked through, turning a couple of times.
  • Remove chicken from skillet and let it rest for a few minutes before slicing.
  • In the same skillet, add chicken broth and heavy cream; bring to a simmer.
  • Stir in Parmesan cheese, salt, and pepper, mixing until well combined.
  • Add cooked pasta and sliced chicken to the sauce; mix well and serve hot, garnished with fresh parsley.

Notes

For serving, present in a large bowl. Pair with a side salad or steamed vegetables. Leftovers can be stored in an airtight container for 3 to 4 days.
Calories: 600kcal
Course: Dinner, Main Course
Cuisine: American, Family
Keyword: Comfort Food, Family Meal, Garlic Butter Chicken, Pasta, Quick Dinner

Bang Bang Chicken

The first thing you notice is the sweet, tangy aroma of the sauce, bright with lime and a touch of chili. You hear the light sizzle of chicken as it hits the hot skillet. The kitchen feels alive and comforting. This Bang Bang Chicken comes together fast, and it fills the house with a scent that makes everyone wander toward the table.

If you love a quick family meal that tastes special, you will like this version. I often serve it over rice or tuck it into sliders for lunchboxes. For another fun way to build a meal, try my Bang Bang Chicken Bowl ultimate recipe for inspiration: Bang Bang Chicken Bowl ultimate recipe.

Why this works

Bang Bang Chicken

This recipe balances creaminess, sweetness, heat, and crunch in a way kids and adults both enjoy. The mayonnaise smooths the heat, while sweet chili sauce and sriracha add layers of flavor. Panko gives a satisfying crunch without heavy batter.

Beyond flavor, this dish saves time. It uses diced chicken for quick, even cooking. That makes it perfect for busy weeknights when you want something homemade that feels a little special. If you want a crunchy salad option with a similar vibe, check my Bang Bang Chicken Crispy Rice Salad for a related weeknight idea: Bang Bang Chicken Crispy Rice Salad.

Process Overview

“This is where the magic happens—when the aroma fills the kitchen.”

You will make a simple, creamy sauce, coat the diced chicken in panko, pan-cook until golden, and toss everything together. The steps are straightforward and forgiving. You can double the sauce easily, which I often do because it keeps well and many people reach for seconds.

Ingredients

  • 1 lb chicken breasts, diced
    Lily tip: Use evenly sized pieces so they cook at the same rate. If you buy thin cut breasts, slice them into uniform cubes.

  • 1/2 cup mayonnaise
    Lily tip: Full fat mayo gives the creamiest texture. If you prefer lighter, use light mayonnaise but expect a thinner sauce.

  • 1/4 cup sweet chili sauce
    Lily tip: This adds sweetness and a fruity chili flavor. Taste as you go because brands vary in heat and sweetness.

  • 2 tablespoons sriracha
    Lily tip: Adjust to your family’s heat tolerance. Start with 1 tablespoon for kids, then add more for adults.

  • 1 tablespoon soy sauce
    Lily tip: Use low sodium if you watch salt. It helps round out the sweet-sour profile.

  • 1 tablespoon lime juice
    Lily tip: Fresh lime brightens the sauce. If fresh is not available, bottled juice works in a pinch.

  • 1/2 cup panko breadcrumbs
    Lily tip: Panko gives the best crunch. For extra crisp, toast the panko briefly in the pan before coating.

  • Green onions, for garnish
    Lily tip: Slice thinly on the bias for a pretty finish and fresh bite.

  • Salt and pepper to taste
    Lily tip: Season the chicken lightly before breading. You can always finish with a pinch more after tossing in sauce.

For a playful twist, you can mix a little toasted sesame oil into the sauce for a nutty note. If you want to turn this into a sandwich, the Bang Bang Chicken Sliders recipe shows how sliders make the meal portable and kid-friendly: Bang Bang Chicken Sliders recipe.

Directions

  1. In a bowl, combine mayonnaise, sweet chili sauce, sriracha, soy sauce, and lime juice to create the sauce.
    Encouragement: Taste and tweak now. A splash more lime will brighten it, and a touch more sriracha will warm it up.

  2. Season the chicken with salt and pepper.
    Encouragement: Be gentle with salt. You can add a little more later after tasting the sauced chicken.

  3. Dredge the chicken pieces in panko breadcrumbs.
    Encouragement: Press the panko on so it sticks, and let any loose crumbs fall off. This helps get a golden crust.

  4. Heat oil in a skillet over medium heat, and cook the chicken until golden brown and fully cooked.
    Encouragement: Cook in a single layer without crowding. Flip once for a nice crust. Chicken is done at 165°F internal temperature.

  5. Toss the cooked chicken in the sauce until evenly coated.
    Encouragement: Do this off heat so the sauce stays creamy. If you like it saucier, add a little extra mayo and sweet chili sauce.

  6. Serve hot, garnished with chopped green onions.
    Encouragement: Serve immediately for the best crunch. If you need to hold it, keep chicken warm in a low oven and add sauce just before serving.

If you want to adapt for oven-baking instead of skillet cooking, my method for oven-baked boneless skinless chicken thighs shows timing and temperature ideas you can borrow: 30-min oven baked boneless skinless chicken thighs.

Serving

Bang Bang Chicken

Serve this Bang Bang Chicken family-style for a relaxed meal. Place a big bowl of steamed rice on the table, a platter of the sauced chicken, and small bowls of sliced cucumber and carrots for crunch. Let everyone build their own plates. It keeps dinner casual and fun.

You can also tuck the chicken into soft buns, spoon it over a bed of greens, or pile it on crispy rice for texture variation. A simple side of roasted broccoli or a quick cucumber salad balances the richness.

For a different bowl idea that pairs well with this saucy chicken, try my 30-minute teriyaki chicken bowl for inspiration on family-friendly bowls: 30-minute teriyaki chicken bowl.

Storage

Refrigerator: Store leftovers in an airtight container for up to 3 days. Keep sauce and chicken together if you plan to reheat gently. If you separate them, spoon sauce over after reheating.

Reheating: Reheat in a skillet over medium-low heat for best texture. Add a splash of water or a teaspoon of oil to loosen the sauce. You can also reheat in a 350°F oven for about 10 minutes. Microwaving works for speed, but the panko will soften.

Freezing: I do not recommend freezing sauced chicken. If you want to freeze, freeze the cooked chicken without sauce, then thaw and toss with fresh sauce after reheating.

Food safety: Always reheat to at least 165°F. Use a thermometer to check if you are unsure.

Kitchen Notes

  • Use a nonstick or well-seasoned skillet for easy flipping and cleanup.
  • Toast panko for extra crunch and a nutty flavor if you have a little extra time.
  • Double the sauce and keep extra in the fridge. It makes great dipping sauce for veggies.
  • For faster prep, buy pre-diced chicken or use a kitchen shears method to cut strips quickly.
  • Make the sauce ahead of time and store it in a jar. It will keep flavors melded for up to 3 days.

Variations

  • Picky eaters: Reduce the sriracha to 1 teaspoon or leave it off. Serve sauce on the side for dipping.
  • Gluten free: Use gluten-free panko or crushed gluten-free cornflakes as the coating and tamari instead of soy sauce.
  • Lower fat: Use light mayonnaise and bake the panko-coated chicken on a parchment-lined sheet at 425°F for 12 to 15 minutes.
  • Spicy fans: Add a teaspoon of chili garlic sauce or a pinch of cayenne to the sauce for extra kick.
  • Make it vegetarian: Swap in bite-sized cauliflower florets or tofu cubes, coat in panko, and cook until crisp before tossing in sauce.

FAQ

Q: Can I make the sauce ahead of time?

Yes. The sauce stores well in the refrigerator for up to 3 days in a sealed container. Taste before using and brighten with a little lime juice if needed.

Q: What is the best oil for frying the chicken?

Use a neutral oil with a high smoke point, such as canola, vegetable, or peanut oil. Olive oil works in a pinch but has a lower smoke point and a stronger flavor.

Q: How do I keep the panko crunchy after saucing?

The chicken will soften after tossing in sauce. To keep some crunch, reserve a small amount of toasted panko and sprinkle it on top just before serving.

Q: Can I make this in an air fryer?

Yes. Lightly spray the panko-coated pieces with oil and air fry at 400°F for about 8 to 10 minutes, shaking halfway through. Check for 165°F internal temperature.

Q: Is this safe for meal prep?

Absolutely. Store chicken and sauce together if you will reheat it in a skillet. If you prefer crunch, store them separately and mix when reheating or just before serving.

Conclusion

Thanks for cooking with me. I hope this Bang Bang Chicken becomes one of your go-to family meals. If you want another take on this dish from a home food stylist perspective, see the Bang Bang Chicken Recipe at Simple Home Edit for more ideas: Bang Bang Chicken Recipe at Simple Home Edit. For a tried and tested crispy version with different technique notes, I also recommend the Kitchn’s detailed Bang Bang Chicken Recipe: Bang Bang Chicken Recipe at The Kitchn.

Happy cooking, and remember to savor the moments around the table.

Bang Bang Chicken

Prep Time 15 minutes
Cook Time 15 minutes
Total Time 30 minutes
Servings 4 servings
Calories 450
This Bang Bang Chicken features a sweet and tangy sauce coating tender, crispy chicken, perfect for quick family meals.

Ingredients

For the Chicken

  • 1 lb chicken breasts, diced (Use evenly sized pieces for uniform cooking.)
  • 1/2 cup mayonnaise (Full fat mayo gives the creamiest texture.)
  • 1/4 cup sweet chili sauce (Taste as you go; brands vary in heat and sweetness.)
  • 2 tablespoons sriracha (Adjust based on family’s heat tolerance.)
  • 1 tablespoon soy sauce (Use low sodium if watching salt.)
  • 1 tablespoon lime juice (Fresh lime brightens the sauce.)
  • 1/2 cup panko breadcrumbs (Panko provides the best crunch.)
  • Green onions, for garnish (Slice thinly for garnish.)
  • Salt and pepper (To taste.)

Instructions 

Preparation

  • In a bowl, combine mayonnaise, sweet chili sauce, sriracha, soy sauce, and lime juice to create the sauce. Taste and adjust seasonings.
  • Season the diced chicken with salt and pepper.
  • Dredge the chicken pieces in panko breadcrumbs, pressing to adhere.

Cooking

  • Heat oil in a skillet over medium heat and cook the chicken until golden brown and fully cooked, about 5-7 minutes.
  • Toss the cooked chicken in the sauce off heat until evenly coated.

Serving

  • Serve hot, garnished with sliced green onions.

Notes

Serve over rice or in sliders. Store leftovers in an airtight container for up to 3 days. Reheat gently in a skillet for best texture.
Calories: 450kcal
Course: Dinner, Main Course
Cuisine: American, Asian
Keyword: Bang Bang Chicken, Chicken Recipe, Comfort Food, Family Meal, Quick Dinner

Crockpot Chicken and Sweet Potatoes

As you step into the kitchen, the sound of the crockpot gently bubbling is music to your ears. The sweet aroma of chicken and sweet potatoes fills the air, warming your heart and inviting your loved ones to gather around the table. You know that in just a few hours, you’ll have a comforting meal ready to serve, one that brings a smile to everyone’s face.

Why This Works

Crockpot Chicken and Sweet Potatoes

This crockpot chicken and sweet potatoes recipe is a family favorite. It’s simple, delicious, and perfect for busy weeknights. The beauty of this dish lies in its ability to blend flavors seamlessly over hours of cooking.

Using the crockpot saves you time without sacrificing quality. As the chicken cooks, it becomes tender and juicy, while the sweet potatoes absorb all the flavors. Your family will appreciate a hearty meal that warms not just their stomachs, but their hearts.

Process Overview

“This is where the magic happens—when the aroma fills the kitchen.”

Cooking in a crockpot is both convenient and rewarding. The first step is a quick prep, then you can walk away and let the slow cooker do its job. As the hours go by, you’ll be rewarded with an enticing smell that makes everyone excited for dinner.

Ingredients

To make this dish, here’s what you’ll need:

  • 4 boneless, skinless chicken breasts
    Tip: Look for chicken that feels moist and smells fresh. This will ensure the best flavor and texture.

  • 2 large sweet potatoes, peeled and cubed
    Tip: Sweet potatoes should be firm with smooth skin. A little sweetness makes everything better!

  • 1 onion, chopped
    Tip: Any type of onion will work, but yellow onions tend to be sweeter.

  • 2 cloves garlic, minced
    Tip: Fresh garlic always adds a richer flavor than powdered.

  • 1 teaspoon paprika
    Tip: Smoked paprika gives a wonderful depth of flavor, if you have it on hand.

  • Salt and pepper to taste
    Tip: Seasoning ensures that all the flavors pop; don’t be shy!

  • 1 cup chicken broth
    Tip: Homemade broth is great if you have some, but store-bought works too!

  • Fresh parsley for garnish (optional)
    Tip: A sprinkle of parsley adds a fresh touch to the dish and enhances the visual appeal.

Directions

  1. Place the cubed sweet potatoes and chopped onion in the bottom of the crockpot.
    Start with a solid base. The sweet potatoes will soak up that delicious chicken flavor.

  2. Lay the chicken breasts on top of the veggies.
    This way, the chicken juices will drip down, making everything even more flavorful.

  3. Sprinkle with minced garlic, paprika, salt, and pepper.
    These seasonings create a beautiful aroma that will make your kitchen come alive.

  4. Pour the chicken broth over the top.
    This adds moisture to keep everything nice and tender as it cooks.

  5. Cover and cook on low for 6-7 hours or on high for 4-5 hours, until the chicken is cooked through and tender.
    Trust the process; the low slow method yields the best results.

  6. Shred the chicken with two forks and mix it with the vegetables before serving.
    Shredding the chicken allows it to blend beautifully with the sweet potatoes and onions.

  7. Garnish with fresh parsley if desired.
    This final touch completes your dish, adding color and freshness.

Serving

Crockpot Chicken and Sweet Potatoes

Serving this meal family-style is the way to go. Place the entire crockpot in the center of the table and let everyone help themselves. Consider offering a side of crusty bread to scoop up the delicious sauce and veggies. This creates a shared experience, encouraging laughter and connection around the table.

Storage

This crockpot chicken and sweet potatoes dish stores well. Leftovers can be kept in an airtight container in the fridge for up to 3 days. When reheating, add a splash of chicken broth to keep everything moist and flavorful. You can also freeze individual portions for up to 3 months. Just make sure to use freezer-safe containers.

Kitchen Notes

  • Prep Ahead: Chop the vegetables the night before to save time.
  • Use Leftovers: Shred any leftover chicken for sandwiches or salads.
  • Make it Spicy: Add red pepper flakes for some heat.
  • Switch Up the Veggies: You can add carrots or bell peppers for added flavor.
  • Quick Clean-Up: Lining your crockpot with a special liner will help with easy clean-up.

Variations

If you have picky eaters, consider these tweaks:

  • Swap the Chicken: Use turkey cutlets or even tofu for a plant-based option.
  • Different Seasoning: Experiment with Italian seasoning for a different flavor profile.
  • Change the Veggies: Use regular potatoes or even carrots if sweet potatoes aren’t popular.
  • Dairy-Free: Substitute chicken broth with vegetable broth to cater to different diets.

FAQ

  1. Can I use frozen chicken?
    Yes, but you need to increase the cooking time by about an hour.

  2. What can I serve with this dish?
    A simple salad or some steamed broccoli would be great compliments.

  3. Is there an alternative to paprika?
    Yes, you can use cayenne for heat or skip it entirely for a neutral flavor.

  4. Can I cook this on the stove instead?
    Absolutely! Just simmer on low heat in a pot for about 1-2 hours, stirring occasionally.

  5. How do I know when the chicken is done?
    The internal temperature should reach 165°F, and it should shred easily.

Conclusion

As the day winds down, gather your loved ones around the table. Share stories, laughter, and this delicious crockpot chicken and sweet potatoes meal. It’s a dish that nourishes both body and soul, bringing everyone closer together. Remember, the best meals are those made with love. Enjoy!

Crockpot Chicken and Sweet Potatoes

Prep Time 15 minutes
Cook Time 6 hours 30 minutes
Total Time 6 hours 45 minutes
Servings 6 servings
Calories 400
A simple and comforting crockpot recipe featuring tender chicken and sweet potatoes, perfect for busy weeknights.

Ingredients

Main Ingredients

  • 4 pieces boneless, skinless chicken breasts (Look for chicken that feels moist and smells fresh.)
  • 2 large sweet potatoes, peeled and cubed (Sweet potatoes should be firm with smooth skin.)
  • 1 medium onion, chopped (Any type of onion will work, but yellow onions tend to be sweeter.)
  • 2 cloves garlic, minced (Fresh garlic adds a richer flavor than powdered.)
  • 1 teaspoon paprika (Smoked paprika gives a wonderful depth of flavor.)
  • Salt and pepper to taste (Seasoning ensures that all the flavors pop.)
  • 1 cup chicken broth (Homemade broth is great, but store-bought works too.)
  • Fresh parsley for garnish (optional) (Adds a fresh touch and enhances visual appeal.)

Instructions 

Preparation

  • Place the cubed sweet potatoes and chopped onion in the bottom of the crockpot.
  • Lay the chicken breasts on top of the veggies.
  • Sprinkle with minced garlic, paprika, salt, and pepper.
  • Pour the chicken broth over the top.
  • Cover and cook on low for 6-7 hours or on high for 4-5 hours, until the chicken is cooked through and tender.
  • Shred the chicken with two forks and mix it with the vegetables before serving.
  • Garnish with fresh parsley if desired.

Notes

Leftovers can be kept in an airtight container in the fridge for up to 3 days. Reheat with a splash of chicken broth. Freeze individual portions for up to 3 months.
Calories: 400kcal
Course: Dinner, Main Course
Cuisine: American, Comfort Food
Keyword: Comforting Recipes, Crockpot Chicken, Easy Dinner, Family Meal

Garlic Herb Chicken

The kitchen fills with the warm scent of garlic and butter. I hear the soft sizzle as the chicken hits the hot pan and feel a small thrill that dinner is coming together.

This recipe is the kind that turns a busy weeknight into a cozy family moment. The sounds, smells, and the sticky glaze make everyone pause and take notice. Let me show you how to make a dish your people will ask for again and again.

Why this works

Garlic Herb Chicken

Family meals need to be easy and reliable. This Garlic Herb Chicken gives you both. The sear locks in juices quickly, so the chicken stays tender without long cook times. The pan sauce uses the drippings to make big flavor from simple steps.

It saves time and cleanup. You sear, make the sauce in the same pan, and serve on mashed potatoes for a one-skillet feel with a comfort-food finish. It is also flexible for picky eaters and busy schedules.

This is a go-to weeknight recipe that still feels a little special. You can prep ahead or finish at the last minute while everyone sets the table.

Process Overview

“This is where the magic happens—when the aroma fills the kitchen.”

I like to think of the process as three simple parts. Season and sear, make the sauce, and pair with creamy mashed potatoes. Each step builds flavor, and the pan sauce brings everything together.

Work confidently. Follow the steps and trust your senses. A quick temperature check and a few minutes of attention will reward you with juicy chicken and a glossy glaze.

Ingredients

  • 4 boneless skinless chicken breasts

    • Tip: If breasts are uneven, pound them to even thickness so they cook at the same rate. That keeps the center from drying out.
  • 3 tablespoons olive oil

    • Tip: Use a good quality olive oil for searing and flavor. Heat until shimmering before adding the chicken to get a golden crust.
  • 4 cloves garlic, minced

    • Tip: Mince fresh garlic or press it for more aroma. Add it to the herb rub rather than the hot oil to avoid burning.
  • 2 tablespoons fresh parsley, chopped

    • Tip: Chop parsley just before using for bright color and fresh flavor. Save a little for garnish.
  • 1 tablespoon fresh thyme leaves

    • Tip: Strip thyme leaves from the stems with your fingers. Fresh thyme gives a subtle earthy lift that pairs well with garlic.
  • 2 tablespoons butter

    • Tip: Add butter toward the end of searing for basting. Clarified butter can handle higher heat but regular butter adds a lovely nutty browning.
  • 1 cup chicken broth

    • Tip: Use low-sodium broth so you control the salt. If you only have bouillon, dissolve a small amount in hot water.
  • 2 pounds russet potatoes

    • Tip: Russets make creamy, fluffy mashed potatoes. Cut to even chunks so they cook evenly.
  • 1/2 cup heavy cream

    • Tip: Warm the cream slightly before adding to the potatoes for a silkier mash and to avoid cooling them down.
  • 2 tablespoons brown sugar

    • Tip: Brown sugar helps balance the balsamic and gives a sticky, caramelized finish. Use light or dark based on your taste.
  • 1 tablespoon balsamic vinegar

    • Tip: A good balsamic adds bright acidity to the sauce. Add it slowly and taste as the sauce reduces.

Each ingredient plays a clear role. The herbs season the meat, the butter enriches the sauce, and the potatoes create the cozy base. You can find most of these at any grocery store, and they keep well if you want to batch prep.

Directions

  1. Pat the chicken breasts dry with paper towels and season generously with salt and pepper on both sides. In a small bowl, combine minced garlic, chopped parsley, and thyme leaves. Rub this herb mixture all over the chicken breasts, pressing gently so it adheres to the meat. Let the chicken rest at room temperature for 10 minutes to allow the flavors to penetrate.

    • Encouragement: This short rest makes a big difference. Take a moment to breathe and set the table.
  2. Heat olive oil in a large skillet over medium-high heat until shimmering. Carefully place the chicken breasts in the pan and sear without moving them for 5-6 minutes until a deep golden-brown crust forms.

    • Encouragement: Let the pan do the work. A steady sear creates that beautiful color and flavor.
  3. Flip the chicken and cook for another 5-6 minutes. Add butter to the pan and baste the chicken with the melted butter and pan juices. Once the internal temperature reaches 165 degrees Fahrenheit, transfer chicken to a plate and tent with foil.

    • Encouragement: Use a quick-read thermometer. When it hits 165 degrees Fahrenheit, you know it is safe and juicy. Tenting helps the juices settle.
  4. In the same skillet with the remaining drippings, add brown sugar and balsamic vinegar. Stir continuously over medium heat until the sugar dissolves and begins to caramelize, about 2 minutes. Pour in chicken broth and scrape up any browned bits from the bottom of the pan. Bring to a simmer and cook for 5-7 minutes until the sauce reduces by half and becomes slightly syrupy. Taste and adjust seasoning with salt and pepper.

    • Encouragement: Scraping up the browned bits transforms the sauce. Keep an eye on the reduction so it does not get too thick.
  5. While the chicken cooks, peel and cut the potatoes into evenly sized chunks. Place them in a large pot and cover with cold salted water. Bring to a boil over high heat, then reduce to a simmer and cook for 15-20 minutes until the potatoes are fork-tender. Drain thoroughly and return the potatoes to the pot. Add butter and heavy cream, then mash until smooth and creamy. Season with salt and pepper to taste.

    • Encouragement: Taste the potatoes as you season them. A final little pinch of salt can brighten the whole dish.
  6. Spoon a generous portion of mashed potatoes onto each plate, creating a bed for the chicken. Place one chicken breast on top of the mashed potatoes. Drizzle the reduced pan sauce generously over the chicken and around the plate. Garnish with additional fresh herbs if desired. Serve immediately while hot, ensuring each guest gets plenty of that delicious sticky glaze.

    • Encouragement: Serve hot and smile. This meal brings comfort and cheers at the table.

Follow these steps and you will have tender chicken, a glossy sauce, and creamy potatoes in about 40 minutes total. The sauce is the finish that makes it feel special.

Serving

Garlic Herb Chicken

Serve family-style on a large platter or plate individually over mashed potatoes. Place the mashed potatoes on the platter first, then arrange the chicken breasts on top. Spoon the sauce over everything so the glaze pools around the potatoes.

For a weeknight, set the platter in the center of the table and let everyone help themselves. For a small gathering, plate individually and add a sprig of parsley for color.

Add a simple side of steamed green beans or a crisp salad to round the meal. Warm dinner rolls or crusty bread are perfect for soaking up extra sauce.

Storage

Keep leftovers in an airtight container in the refrigerator for up to 3 days. Store sauce in a separate container if possible. This makes reheating easier and prevents the potatoes from soaking up too much sauce.

To reheat the chicken, place it in a skillet over low heat with a splash of chicken broth. Cover and warm gently until heated through. This keeps the meat tender better than the microwave.

Reheat mashed potatoes in a pot with a splash of cream or milk over low heat. Stir often until warmed. If using the microwave, add a little cream and cover to retain moisture.

Freeze cooked chicken and sauce in a freezer-safe container for up to 2 months. Thaw overnight in the refrigerator before reheating.

Kitchen Notes

  • Use a heavy-bottomed skillet for even searing and easy deglazing.
  • If chicken breasts are thick, halve them horizontally for faster cooking.
  • Warm the plates in the oven for a few minutes to keep the meal hot a little longer.
  • Swap russets for Yukon Golds if you prefer a naturally creamier potato.
  • Make the sauce ahead and reheat gently to save time on busy nights.

Variations

  • For picky eaters: Leave the herbs out of half the chicken or serve the sauce on the side.
  • Low-carb option: Skip the mashed potatoes and serve over roasted cauliflower mash.
  • Creamy version: Stir a spoonful of cream into the pan sauce for a richer finish.
  • Herb swap: Use rosemary instead of thyme for a woodsy flavor.
  • Make it spicy: Add a pinch of red pepper flakes to the herb rub or sauce for heat.

These variations keep the core recipe intact while letting you adapt to tastes and diets. Small swaps can make a big difference in how the family receives the dish.

FAQ

Q: Can I use bone-in chicken?
A: Yes. Bone-in will take longer to cook. Allow extra time and check the temperature near the bone for 165 degrees Fahrenheit.

Q: How do I prevent the garlic from burning?
A: Keep garlic in the herb rub and add it to the pan at a lower heat if you want to cook it in oil. Burning occurs at high heat, so watch closely.

Q: Can I make the sauce without sugar?
A: Yes. Omit the brown sugar and add a touch more balsamic for acidity. The sauce will be less caramelized but still flavorful.

Q: Is there a gluten-free version?
A: Absolutely. All ingredients here are naturally gluten-free. Just verify your chicken broth if you buy commercial brands.

Q: How do I know when the sauce is done?
A: It should reduce until it lightly coats the back of a spoon and has a glossy, slightly syrupy texture.

Conclusion

I hope this Garlic Herb Chicken brings warmth to your table. It is simple enough for a busy weeknight and special enough for guests. The pan sauce and mashed potatoes make it feel like a full meal with minimal fuss.

If you want a quicker creamy take, I like this 15-minute creamy garlic herb chicken from My Life In An Apron for when time is tight. For another lovely version that uses a garlic herb butter sauce, see the recipe at Chisel & Fork for extra inspiration.

Thank you for cooking with me. Gather your people, set the table, and enjoy a warm meal made with care.

Garlic Herb Chicken

Prep Time 10 minutes
Cook Time 30 minutes
Total Time 40 minutes
Servings 4 servings
Calories 540
A cozy, easy weeknight meal featuring tender chicken breasts seared to perfection and served over creamy mashed potatoes with a sticky pan sauce.

Ingredients

For the Chicken

  • 4 pieces boneless skinless chicken breasts (If breasts are uneven, pound them to even thickness.)
  • 3 tablespoons olive oil (Use a good quality olive oil for flavor.)
  • 4 cloves garlic, minced (Mince fresh garlic or press it for more aroma.)
  • 2 tablespoons fresh parsley, chopped (Chop just before using for bright color.)
  • 1 tablespoon fresh thyme leaves (Fresh thyme gives a subtle earthy lift.)
  • 2 tablespoons butter (Add toward the end of searing for basting.)
  • 1 cup chicken broth (Use low-sodium broth for better control of salt.)

For the Mashed Potatoes

  • 2 pounds russet potatoes (Cut into even chunks to cook evenly.)
  • 1/2 cup heavy cream (Warm slightly before adding for a silkier mash.)
  • 2 tablespoons brown sugar (Helps balance the balsamic and gives a sticky finish.)
  • 1 tablespoon balsamic vinegar (Adds bright acidity to the sauce.)

Instructions 

Preparation

  • Pat the chicken breasts dry with paper towels and season with salt and pepper on both sides.
  • In a small bowl, combine minced garlic, chopped parsley, and thyme leaves. Rub this herb mixture all over the chicken breasts.
  • Let the chicken rest at room temperature for 10 minutes.

Cooking the Chicken

  • Heat olive oil in a large skillet over medium-high heat until shimmering.
  • Place the chicken breasts in the pan and sear for 5-6 minutes until golden brown.
  • Flip and cook for another 5-6 minutes. Add butter and baste the chicken.
  • Check internal temperature; once it reaches 165°F, transfer to a plate and tent with foil.

Making the Sauce

  • In the same skillet, add brown sugar and balsamic vinegar. Stir until the sugar dissolves.
  • Pour in chicken broth, scrape browned bits, and bring to a simmer. Cook for 5-7 minutes until slightly syrupy.

Preparing the Mashed Potatoes

  • Peel and cut the potatoes into chunks and boil in salted water for 15-20 minutes until fork-tender.
  • Drain and return potatoes to the pot. Add butter and heavy cream, then mash until smooth.
  • Season with salt and pepper to taste.

Serving

  • Spoon a generous portion of mashed potatoes onto each plate, place chicken on top, and drizzle with sauce.
  • Garnish with fresh herbs if desired and serve immediately.

Notes

Leftovers can be stored in the refrigerator for up to 3 days. Sauce can be stored separately for reheating.
Calories: 540kcal
Course: Dinner, Main Course
Cuisine: American
Keyword: Comfort Food, Easy weeknight meal, Family Dinner, Garlic Herb Chicken, One-skillet meal