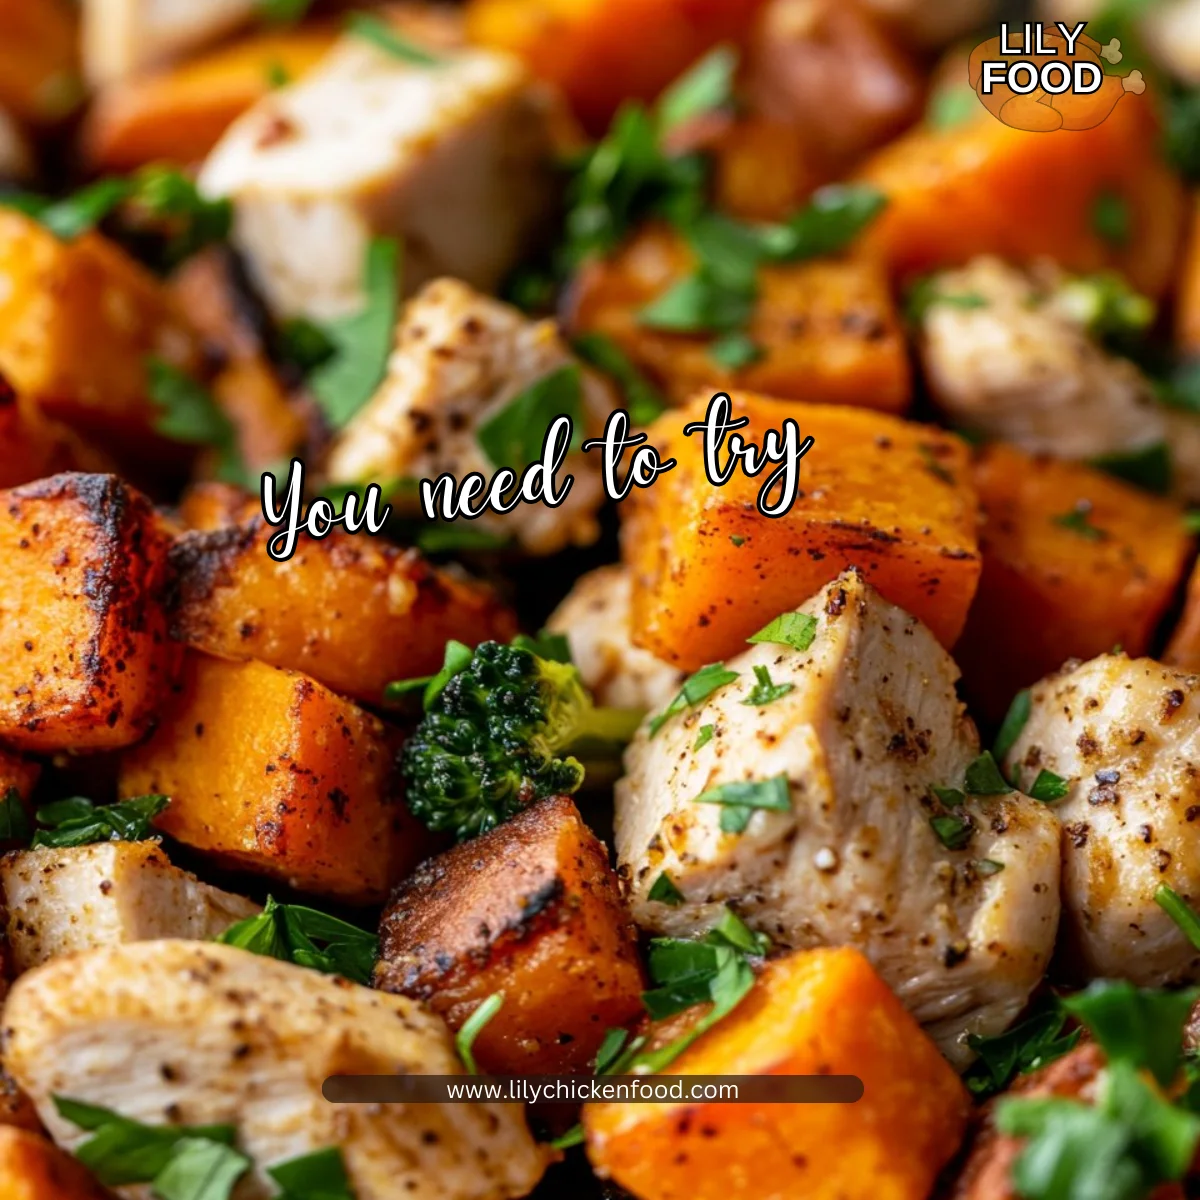
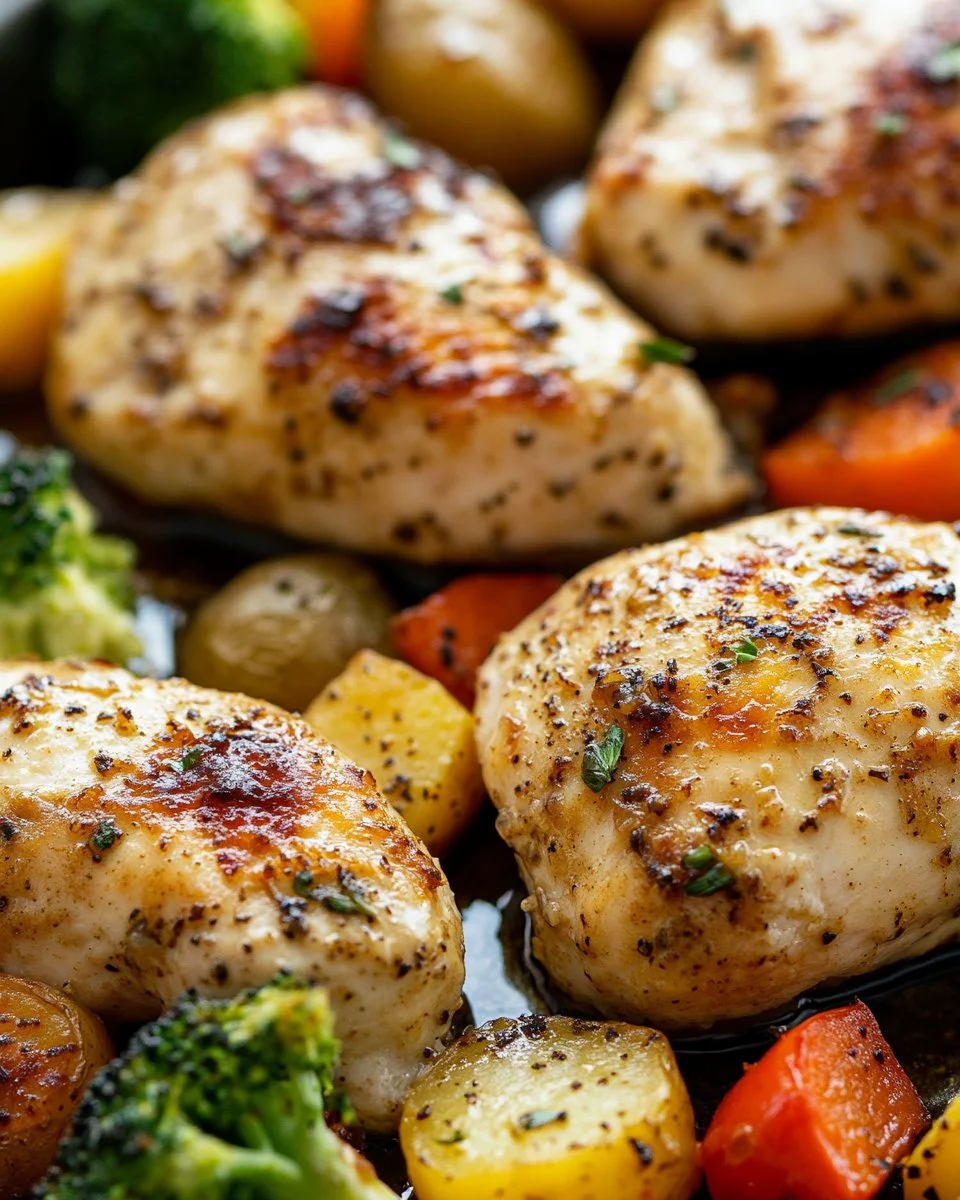
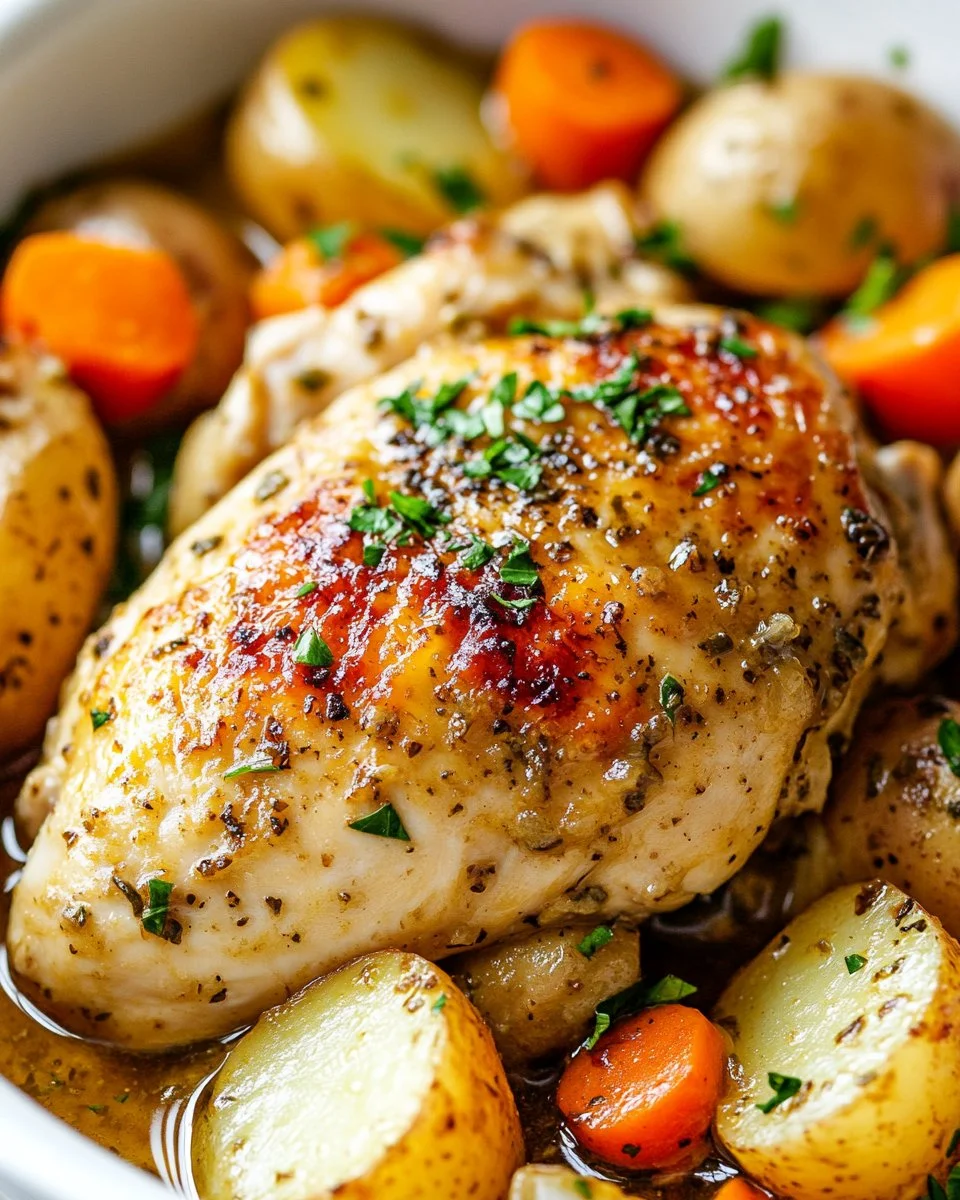
The smell of roasted sweet potatoes and seasoned chicken fills the air. You can hear the sizzling of the chicken as it cooks in the oven, bringing a sense of comfort and warmth. This is not just a meal; it’s a family gathering around the dinner table. Today, I’m excited to share a Chicken and Sweet Potato Meal Prep that is perfect for busy weeks. Not only is this dish delicious, but it’s also packed with nutrients, making it a family favorite that you’ll want to make again and again.
Why This Works
This Chicken and Sweet Potato Meal Prep recipe is a lifesaver. Between busy schedules, after-school activities, and the rush of daily life, who has time to cook every single night? This recipe allows you to cook once and enjoy delicious meals throughout the week.
The combination of chicken and sweet potatoes is not only satisfying but also nutritious. Sweet potatoes are rich in vitamins and minerals, while chicken is a great source of protein. This meal prep is perfect for families who want to eat healthy without sacrificing flavor or time. You can store your meals in individual containers, making it easy to grab and go when you need to.
Process Overview
“This is where the magic happens—when the aroma fills the kitchen.”
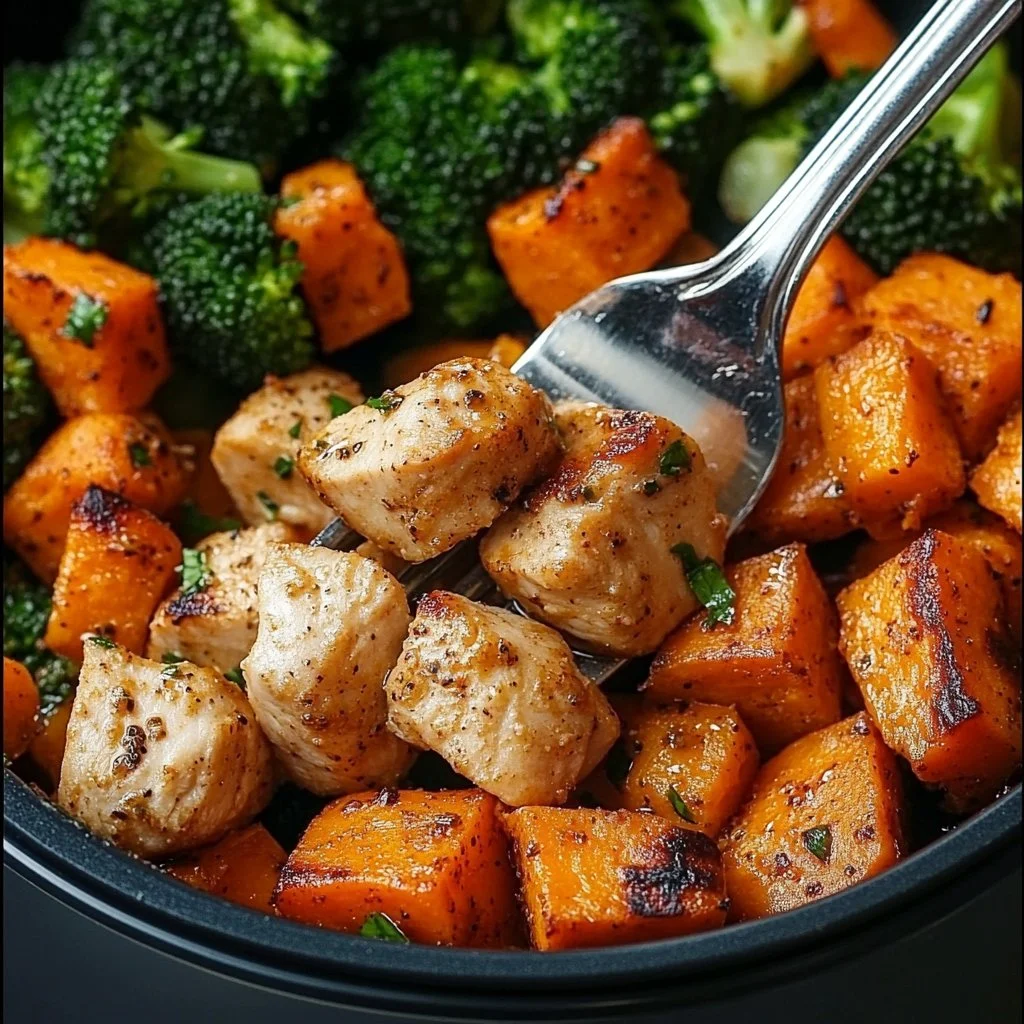
Meal prep is all about making life simpler in the kitchen. You can take an hour or so to prepare this dish, and the rewards will last you all week. Roasting the chicken and sweet potatoes together promotes flavor melding, and the broccoli adds a pop of green to your meals.
Your kitchen will transform into a haven of scents that will get the whole family excited about eating healthy.
Ingredients
Gather these simple ingredients for a hassle-free cooking experience:
2 pounds chicken breast, diced Tip: Choose fresh chicken for the best flavor. If using frozen, be sure to thaw thoroughly before cooking.
4 medium sweet potatoes, cubed Tip: Be sure to peel them for a smoother texture, or leave the skin on for additional nutrients.
1 tablespoon olive oil Tip: A good quality olive oil enhances the flavor of the chicken and sweet potatoes.
1 teaspoon garlic powder Tip: Garlic powder is a quick way to add flavor. If you have fresh garlic, use that for an even stronger taste.
1 teaspoon paprika Tip: Smoked paprika can add a nice smoky flavor, which pairs beautifully with sweet potatoes.
1 teaspoon salt Tip: Adjust the salt based on your family’s taste preferences; you can always add more later.
1/2 teaspoon black pepper Tip: Freshly ground black pepper is more flavorful than pre-ground.
2 cups broccoli florets Tip: Fresh or frozen broccoli works; just adjust the cooking time slightly if using frozen.
1/4 cup fresh parsley, chopped Tip: Fresh herbs brighten up any dish. You can substitute with cilantro or thyme if you prefer.
Directions
Preheat your oven to 400°F (200°C). This is the first step to ensuring your meal cooks evenly.
In a large bowl, combine the diced chicken, cubed sweet potatoes, olive oil, garlic powder, paprika, salt, and black pepper. Mix well. Get your hands in there! This is part of the fun.
Spread the mixture onto a baking sheet in a single layer. A single layer ensures even cooking and browning.
Bake for 25-30 minutes or until the chicken is cooked through and sweet potatoes are tender. You want to see that lovely golden brown color on the edges.
In the last 10 minutes of baking, add the broccoli florets to the baking sheet. This way, the broccoli stays bright and crisp, which adds color to your meal.
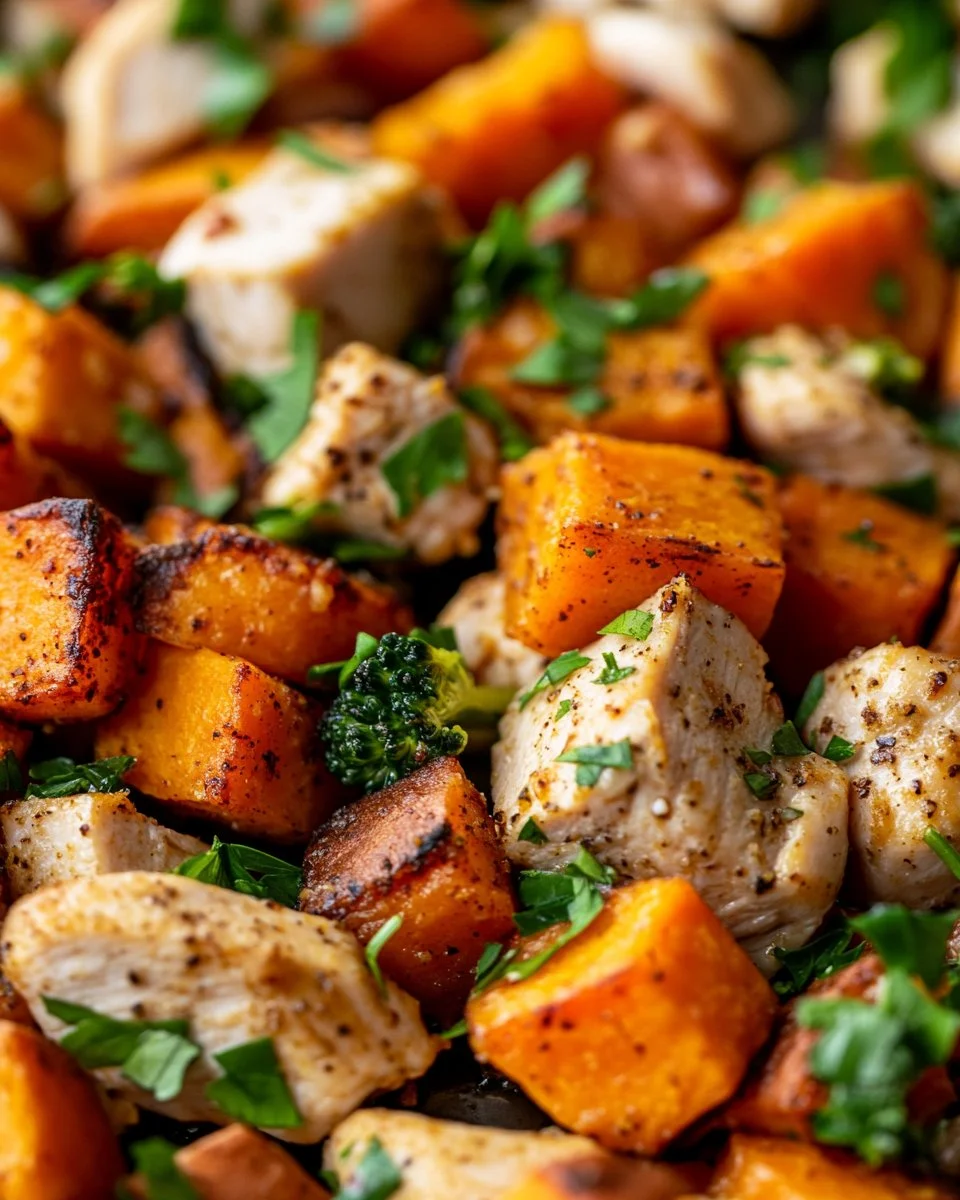
Remove from the oven, garnish with chopped parsley, and let cool before portioning. Letting it cool makes it easier to pack away into containers.
Serving
To serve this meal, I recommend family-style plating. You can set everything out on the table, letting everyone fill their plates. This fosters a sense of togetherness and allows your family members to choose their portions.
Pair this meal with a light salad or some whole-grain bread if you like. It’s all about making it a complete and satisfying dinner for everyone to enjoy.
Storage
For proper storage, let the meal cool completely before transferring it to airtight containers. You can keep these meals in the fridge for up to five days. When reheating, simply microwave them for about 2-3 minutes until they are warmed through.
If you want to freeze some portions, it’s best to do so before adding the broccoli. Freeze in single-serve containers, and they’ll last for about 3 months. To reheat, defrost in the fridge overnight and then microwave.
Kitchen Notes
Pre-chop the sweet potatoes and chicken the night before to save time on cooking day.
Use parchment paper on your baking sheet for easy cleanup.
Experiment with spices according to your family’s preferences.
Swap out the veggies based on what’s in season or on sale.
Invest in good-quality meal prep containers for better storage.
Variations
Are there picky eaters in your family? No problem! Here are some tweaks to make this dish more appealing:
Substitute chicken with turkey or even firm tofu for a vegetarian option.
Try different protein options like shrimp or sausage.
For the sweet potatoes, use butternut squash or pumpkin for a different flavor.
If broccoli isn’t a hit, add green beans or snap peas instead.
For a spicier kick, add chili powder or red pepper flakes in the mix.
FAQ
1. Can I use other vegetables?
Absolutely! Feel free to mix in your family’s favorite veggies. Carrots and bell peppers work great, too.
2. How can I make this gluten-free?
This recipe is naturally gluten-free, just ensure any spices used are gluten-free as well.
3. Can I prep this dish in advance?
Yes, it’s perfect for meal prep! Just prepare ahead of time and store in the fridge.
4. Can I use frozen chicken?
You can, but make sure it’s thawed completely for even cooking.
5. How do I know when the chicken is fully cooked?
The internal temperature should reach 165°F. Use a meat thermometer for accuracy.
Conclusion
Cooking doesn’t have to be a chore. With this Chicken and Sweet Potato Meal Prep, you’re not just making a meal; you’re creating a wonderful family experience. Your kitchen will fill with delightful aromas, and your family will gather around the table, enjoying nourishing food together. So, roll up your sleeves and enjoy the process. Happy cooking!
This nutritious Chicken and Sweet Potato Meal Prep is perfect for busy weeks, allowing you to enjoy healthy meals without sacrificing flavor.
Ingredients
Main Ingredients
2poundschicken breast, diced(Choose fresh chicken for the best flavor. If using frozen, be sure to thaw thoroughly before cooking.)
4mediumsweet potatoes, cubed(Peel for a smoother texture, or leave skin on for additional nutrients.)
1tablespoonolive oil(A good quality olive oil enhances flavor.)
1teaspoongarlic powder(Use fresh garlic for an even stronger taste.)
1teaspoonpaprika(Smoked paprika can add a nice smoky flavor.)
1teaspoonsalt(Adjust based on taste preferences.)
1/2teaspoonblack pepper(Freshly ground is more flavorful.)
2cupsbroccoli florets(Fresh or frozen works; adjust cooking time if using frozen.)
1/4cupfresh parsley, chopped(Substitute with cilantro or thyme if preferred.)
Instructions
Preparation
Preheat your oven to 400°F (200°C).
In a large bowl, combine the diced chicken, cubed sweet potatoes, olive oil, garlic powder, paprika, salt, and black pepper. Mix well.
Spread the mixture onto a baking sheet in a single layer.
Cooking
Bake for 25-30 minutes or until the chicken is cooked through and sweet potatoes are tender.
In the last 10 minutes of baking, add the broccoli florets to the baking sheet.
Remove from the oven, garnish with chopped parsley, and let cool before portioning.
Notes
For proper storage, let the meal cool completely before transferring to airtight containers. Store in fridge for up to 5 days or freeze portions for about 3 months. Experiment with spices and substitute veggies based on what's in season.
Calories: 400kcal
Course: Dinner, Main Course
Cuisine: American, Healthy
Keyword: Chicken, Family Recipe, Healthy Dinner, meal prep, Sweet Potatoes
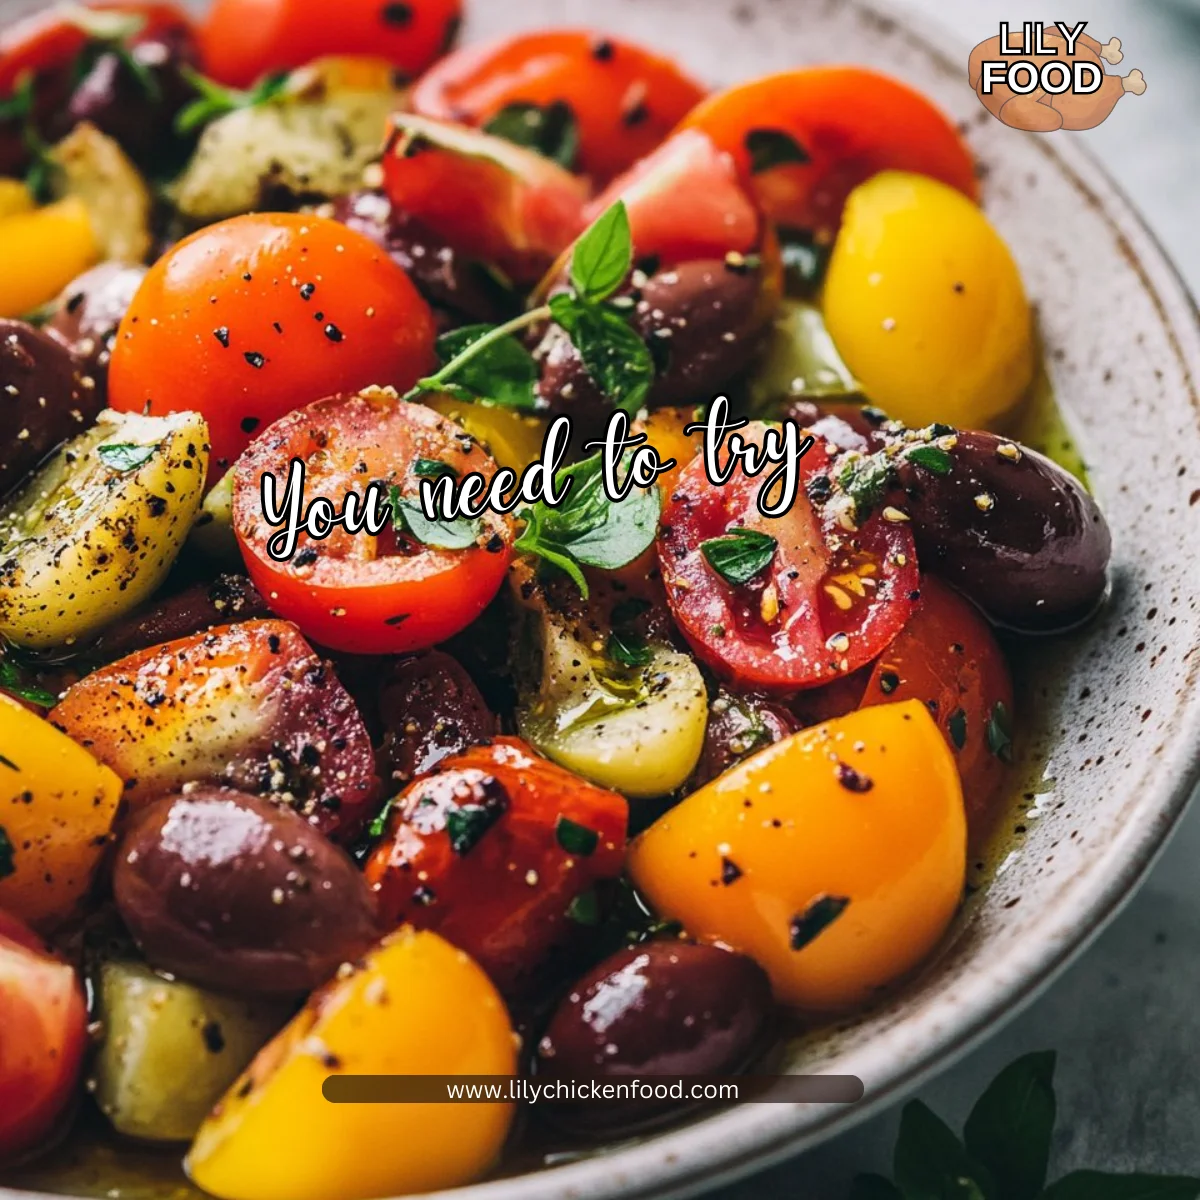
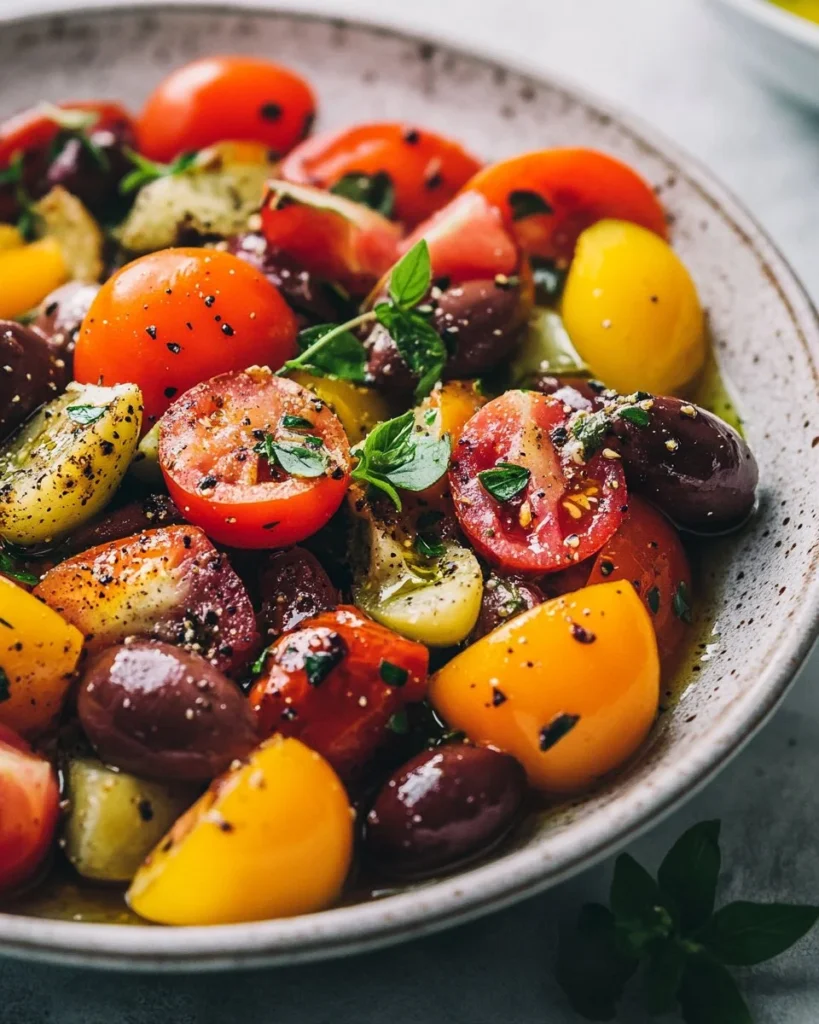
There’s something special about gathering in the kitchen. The warmth of the oven, the soft sizzle from the skillet, and the smell of fresh herbs wafting through the air signal the start of a wonderful family meal. Cooking is a symphony of sights, sounds, and smells, all coming together to create something delightful. And today, we’re diving into a Mediterranean salad that’s as vibrant as it is nourishing.
Why This Works
This Mediterranean salad is a game changer for busy families. It’s quick to throw together, bursting with flavor, and packed with nutrition. It showcases the goodness of fresh ingredients that not only please the palates of adults but also delight kids.
By prepping the ingredients ahead of time, you can serve this in under 30 minutes, making it an ideal choice for weeknight dinners or lunches. You’ll enjoy quality time with your loved ones, creating memories as you gather around the table to share a delicious meal.
Process Overview
“This is where the magic happens—when the aroma fills the kitchen.”
Crafting this Mediterranean salad is straightforward and rewarding. It involves chopping, mixing, and dressing, allowing you to enjoy the process as much as the end product. Each step builds anticipation and leads to a dish that’s fresh, flavorful, and beautiful.
Ingredients
Here’s what you’ll need to create this incredible Mediterranean salad, along with some of my personal tips.
2 cups cherry tomatoes, halved
Use a mix of colors for a more vibrant dish.
1 cucumber, diced
Choose an English cucumber for fewer seeds and a crisper texture.
1 bell pepper (any color), diced
Bell peppers add sweetness and crunch.
1/2 red onion, thinly sliced
Soak the sliced onion in cold water for a few minutes to mellow the flavor.
1 cup Kalamata olives, pitted and halved
They bring a delicious briny flavor.
1 cup feta cheese, crumbled (optional)
Use a block of feta for a creamier texture; crumble it yourself for freshness.
1/4 cup fresh parsley, chopped
Fresh parsley elevates the flavor; use flat-leaf for the best taste.
1/4 cup extra virgin olive oil
A good quality oil makes a significant difference in flavor.
2 tablespoons red wine vinegar
This adds brightness and balances the richness of the olive oil.
Salt and pepper to taste
Season gradually; you can always add more.
Directions
Prepare the Ingredients
Start by washing all your fresh produce. This is an exciting step as all the colors come together.
Chop the Vegetables
Dice the tomatoes, cucumber, bell pepper, and onion. Aim for uniform sizes for even mixing.
Combine in a Bowl
In a large mixing bowl, combine the cherry tomatoes, cucumber, bell pepper, red onion, and olives. It is satisfying to see the vibrant colors blend together.
Add Cheese and Herbs
Gently fold in the feta and parsley. The addition of feta spreads creaminess throughout the salad.
Prepare the Dressing
In a small bowl, whisk together the olive oil, red wine vinegar, salt, and pepper. This simple dressing pulls all the flavors together.
Dress the Salad
Pour the dressing over the salad and toss gently. The aroma will be delightful, enticing everyone in the home.
Taste and Adjust
Take a moment to taste and adjust the seasoning if needed. This is where you can make it your own.
Serve
Transfer to a serving platter or bowl. Enjoy the look of happiness on your family’s faces as they see this colorful meal.
Serving
To serve this Mediterranean salad family-style, arrange it on a large platter. This encourages sharing and brings everyone together around the table. You can also offer extra feta and olives on the side for those who want more. Pair it with grilled chicken or fish for a complete meal.
Storage
This salad is best enjoyed fresh but can hold up for a few days in the fridge. Store it in an airtight container to keep it crisp. If you have leftovers, feel free to add them to a wrap or sandwich for a tasty lunch. When reheating, add a drizzle of fresh olive oil for an extra burst of flavor.
Kitchen Notes
Batch Prep Ahead: Chop your vegetables ahead of time and store them in the fridge for quick access.
Dress Right Before Serving: To prevent sogginess, toss the salad with dressing right before serving.
Taste Test: Always taste your dressing before adding it to the salad, adjusting as needed.
Use Leftover Ingredients: This salad is great for using up any vegetables you have in your fridge.
Make it a Meal: Add protein like grilled chicken, chickpeas, or quinoa to make this a complete dish.
Variations
Picky Eaters: For kids who may be hesitant about certain veggies, try substituting cucumber with sweet corn and use mild cheese like mozzarella instead of feta.
Vegan Option: Omit the feta, or substitute with a plant-based cheese to keep it dairy-free.
Gluten-Free: This salad is naturally gluten-free, making it an excellent option for those following a gluten-free diet.
Extra Crunch: Add some chopped walnuts or sunflower seeds for a delightful crunch.
Herb Swaps: Swap parsley for basil or cilantro based on your family’s preferences for a different flavor profile.
FAQ
1. Can I make this salad the day before?
While it’s best fresh, you can prepare the ingredients a day in advance and mix them just before serving.
2. What can I use instead of Kalamata olives?
Any pitted olives will work! Green olives or even black olives will fit well in this salad.
3. How long will leftovers last?
If stored properly, leftovers can last for about 3 days in the refrigerator.
4. Can I add pasta to this salad?
Absolutely! Adding cooked pasta can turn it into a hearty meal. Just toss in the pasta after it cools down.
5. What’s the best way to chop vegetables quickly?
Using a sharp knife and a cutting board allows for safe and efficient chopping. You can also use a food processor for even quicker prep.
As you finish your culinary adventure, remember that meals made with love are the most memorable. Enjoy every bite of this Mediterranean salad, and savor the moments spent with your family around the table. Happy cooking!
A vibrant and nourishing Mediterranean salad that is quick to prepare, bursting with flavors, and enjoyable for both adults and kids alike.
Ingredients
Fresh Vegetables
2cupscherry tomatoes, halved(Use a mix of colors for a more vibrant dish.)
1piececucumber, diced(Choose an English cucumber for fewer seeds and a crisper texture.)
1piecebell pepper (any color), diced(Bell peppers add sweetness and crunch.)
1/2piecered onion, thinly sliced(Soak the sliced onion in cold water for a few minutes to mellow the flavor.)
Salad Add-Ins
1cupKalamata olives, pitted and halved(They bring a delicious briny flavor.)
1cupfeta cheese, crumbled(Use a block of feta for a creamier texture; crumble it yourself for freshness.)
1/4cupfresh parsley, chopped(Use flat-leaf for the best taste.)
Dressing Ingredients
1/4cupextra virgin olive oil(A good quality oil makes a significant difference in flavor.)
2tablespoonsred wine vinegar(This adds brightness and balances the richness of the olive oil.)
to tastesalt and pepper(Season gradually; you can always add more.)
Instructions
Preparation
Start by washing all your fresh produce.
Dice the tomatoes, cucumber, bell pepper, and onion, aiming for uniform sizes for even mixing.
Mixing
In a large mixing bowl, combine the cherry tomatoes, cucumber, bell pepper, red onion, and olives.
Gently fold in the feta and parsley.
Dressing
In a small bowl, whisk together the olive oil, red wine vinegar, salt, and pepper.
Pour the dressing over the salad and toss gently.
Taste and adjust the seasoning if needed.
Serving
Transfer to a serving platter or bowl, and enjoy!
Notes
This salad is best enjoyed fresh but can hold up for a few days in the fridge. Store it in an airtight container to keep it crisp. Dress right before serving to avoid sogginess.
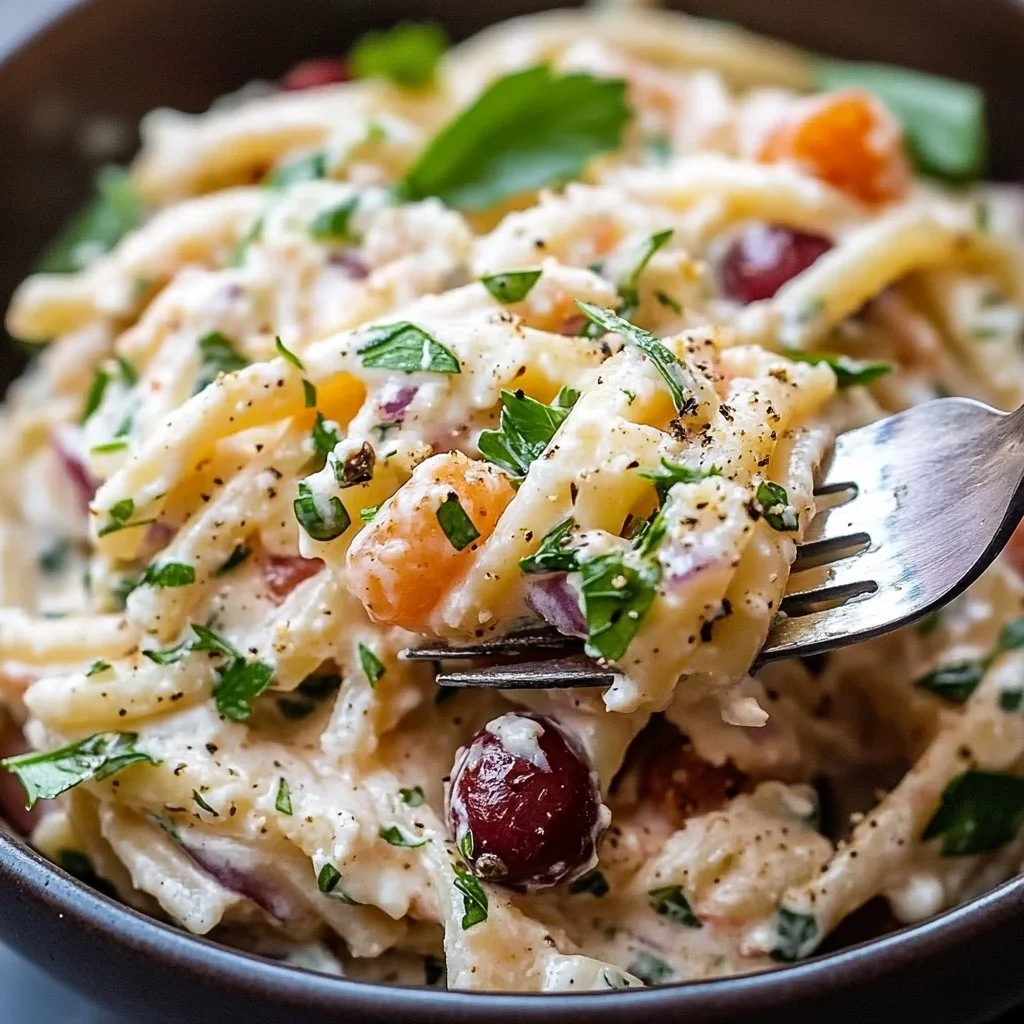
When I think about comfort food, one dish stands out: chicken salad. The sound of chopping ingredients and the mixing of creamy dressing can transport you to a place of warmth and joy. The moment you peel open the container of a rotisserie chicken, the savory aroma fills the kitchen, promising a delightful meal ahead. Today, I’m excited to share my version of a homemade Costco chicken salad recipe, a family favorite that’s quick to prepare and utterly satisfying.
Why This Works
This chicken salad recipe truly shines in the realm of family meals. With just a few simple ingredients, you can whip up a delicious dish that appeals to all ages. The use of a cooked rotisserie-style chicken saves precious time, allowing you to focus on spending quality moments with your loved ones rather than slaving over the stove. With the vibrant crunch of celery and the creaminess of the dressing, every bite is a little celebration. Plus, it’s versatile enough to serve as lunch, dinner, or even a side dish at gatherings.
Process Overview
“This is where the magic happens—when the aroma fills the kitchen.”
In just a few easy steps, you’ll have a bowl of chicken salad that’s satisfying and full of flavor. The combination of rotisserie chicken, creamy dressing, and fresh vegetables creates a dish that’s both comforting and refreshing. Let’s get started on this delectable journey.
Ingredients
To make this homemade chicken salad, you’ll need:
3-pound cooked rotisserie-style chicken (shredded): Look for plain or herb-seasoned varieties. Shredding it yourself allows for a personal touch.
1/2 cup mayonnaise: For a lighter twist, consider avocado or Greek yogurt.
1/2 cup sour cream: You can easily use dairy-free alternatives, like cashew cream or coconut yogurt, if needed.
2 tablespoons white wine vinegar: This adds a zesty kick that brightens the flavors.
1/2 lemon, juiced (about 1 tablespoon): Freshly squeezed lemon juice enhances the salad’s freshness.
1/2 teaspoon sea salt: Use this to balance out the flavors in the dish.
2 teaspoons sugar (optional for sugar-free diets): If you prefer a touch of sweetness, this is a nice addition.
6 celery ribs (finely diced): Celery adds a satisfying crunch and freshness.
1/2 white onion (finely diced): This melds beautifully and adds a slight sweetness when mixed with the dressing.
Directions
Shred the Chicken: Begin by shredding your cooked chicken. If you have a food processor, pulse the chicken in small batches for a finer texture. Otherwise, you can use two forks or chop it finely with a knife. Place the shredded chicken in a large bowl and set it aside while you prepare the dressing.
Make the Dressing: In a medium bowl, whisk together the mayonnaise, sour cream, white wine vinegar, and lemon juice. Add the salt and sugar, then stir until smooth. This creamy dressing brings all the ingredients together and ensures a cohesive flavor in every bite.
Combine Ingredients: Pour the dressing over the shredded chicken. Gently add in the diced celery and onion. Mix everything thoroughly until the dressing is evenly distributed. This step ensures every bite is packed with flavor.
Chill and Marinate: Refrigerate the salad for at least an hour to allow the flavors to meld together. Serve it cold, and enjoy its refreshed, tangy taste. It’s even better the next day when the ingredients have had time to fully infuse!
Serving: For a family-style presentation, serve it in a large bowl, offering your favorite crackers or whole grain bread on the side. Let everyone build their perfect bite, making meal prep feel special.
Storage
Your homemade chicken salad will keep in the fridge for up to three days. To maintain its quality, store it in an airtight container. If you know you will have leftovers, consider reserving some of the dressing to add fresh just before serving. This keeps that delightful creaminess intact, even after a day or two.
Kitchen Notes
Shred in Advance: If you know a busy day is coming, shred the chicken the night before. This way, you’ll only need to mix the ingredients when you’re ready to assemble the salad.
Using Leftovers: Turn leftover chicken or turkey into this salad for a quick meal.
Dressing Variations: Experiment with Greek yogurt instead of sour cream for a tangy twist or substitute vinegar with lemon juice for a milder flavor.
Add Crunch: A handful of grapes or diced apples can add a sweet surprise and crunch.
Portable Lunch: Pack it in a mason jar for a healthy on-the-go meal.
Variations
If you’re serving picky eaters or adhering to specific dietary lifestyles, this chicken salad is adaptable:
For Kids: Remove the onions or substitute with finely grated carrots for a sweeter, more appealing texture.
Low Carb: Use Greek yogurt instead of mayonnaise for a lighter option.
Dairy-Free: Use dairy-free mayonnaise and sour cream options for a completely dairy-free solution.
Herby Twist: Add fresh herbs like dill, parsley, or tarragon for a burst of extra flavor.
Spicy Kick: Mix in a teaspoon of sriracha or diced jalapeños for a tantalizing twist.
FAQ
1. Can I use a different type of chicken?
Yes, feel free to use any cooked chicken, such as grilled or poached, but rotisserie gives a great flavor.
2. How long can leftovers be kept?
The chicken salad is best enjoyed within three days when stored properly in the fridge.
3. Can I freeze chicken salad?
I do not recommend freezing chicken salad, as the texture of the mayonnaise and sour cream may change upon thawing.
4. Can I add fruit?
Absolutely! Grapes, apples, or even dried cranberries can add a refreshing sweetness that pairs well with the savory chicken.
5. Is this recipe gluten-free?
Yes, it is naturally gluten-free, but be sure to check your mayonnaise and other ingredients for gluten content.
Conclusion
Creating a homemade chicken salad is a simple yet rewarding task that can bring your family together around the table. With its flexible ingredients and quick preparation, this meal is not just about filling your stomach; it’s about sharing moments and creating memories. I hope this recipe for homemade Costco chicken salad inspires you to cook and bring loved ones into your kitchen. Enjoy the journey of flavors, and know that every meal shared is a step towards stronger family bonds.
Shred the chicken using a food processor or by hand with two forks. Place in a large bowl and set aside.
In a medium bowl, whisk together mayonnaise, sour cream, white wine vinegar, lemon juice, salt, and sugar until smooth.
Pour the dressing over the shredded chicken, then gently add diced celery and onion. Mix until evenly distributed.
Refrigerate the salad for at least an hour to allow flavors to meld.
Serve chilled, with crackers or bread for a family-style presentation.
Notes
Store chicken salad in an airtight container in the fridge for up to three days. Reserve some dressing for leftovers to maintain creaminess. Shred the chicken in advance for quick assembly.
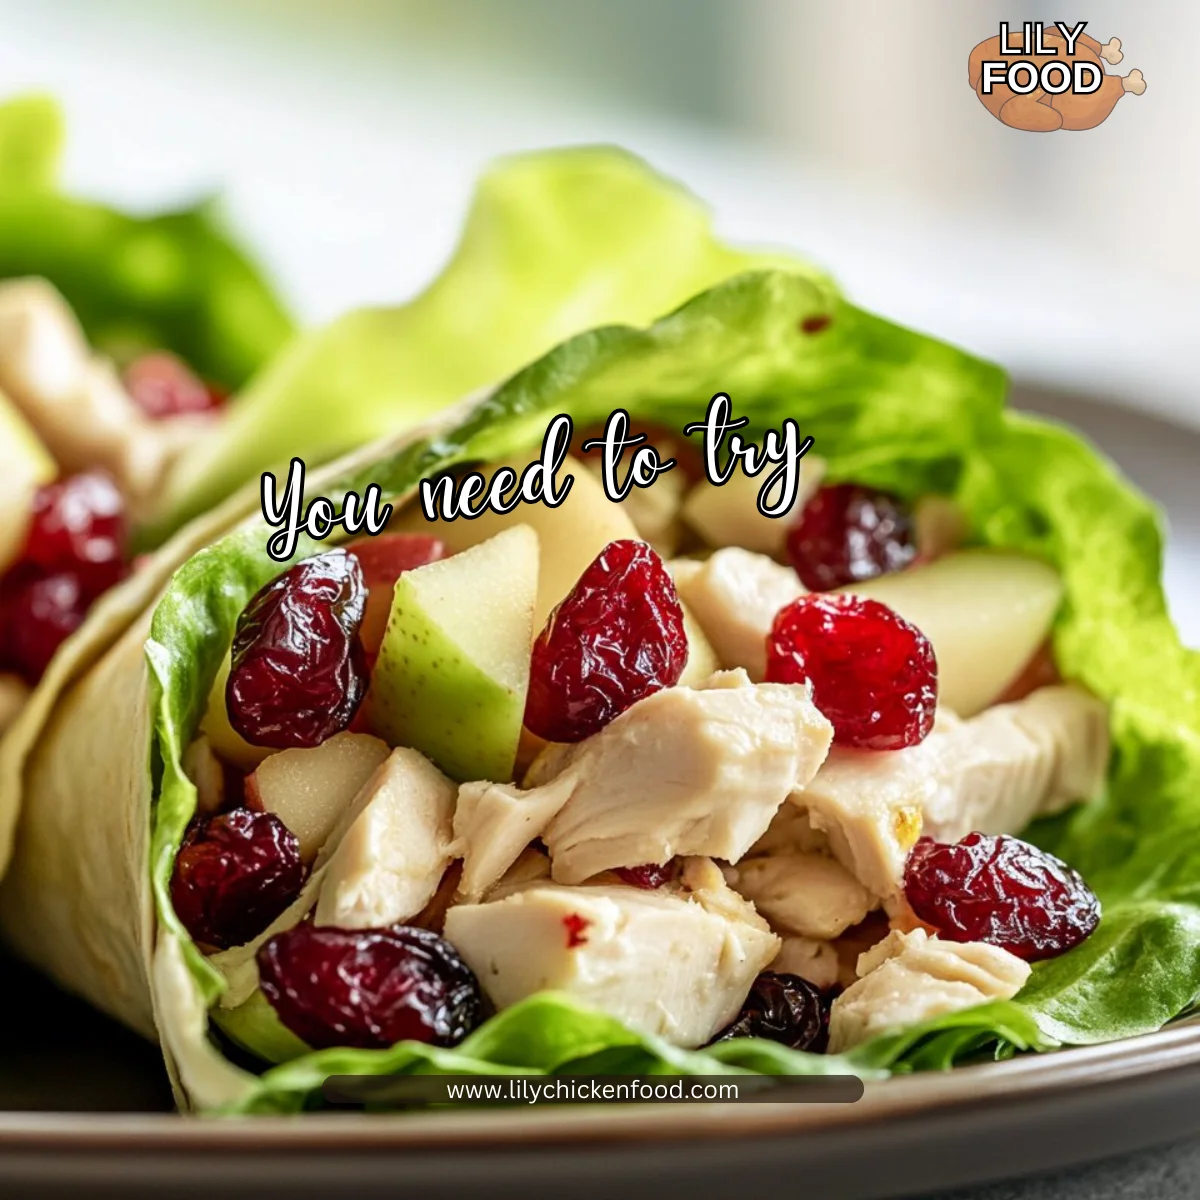
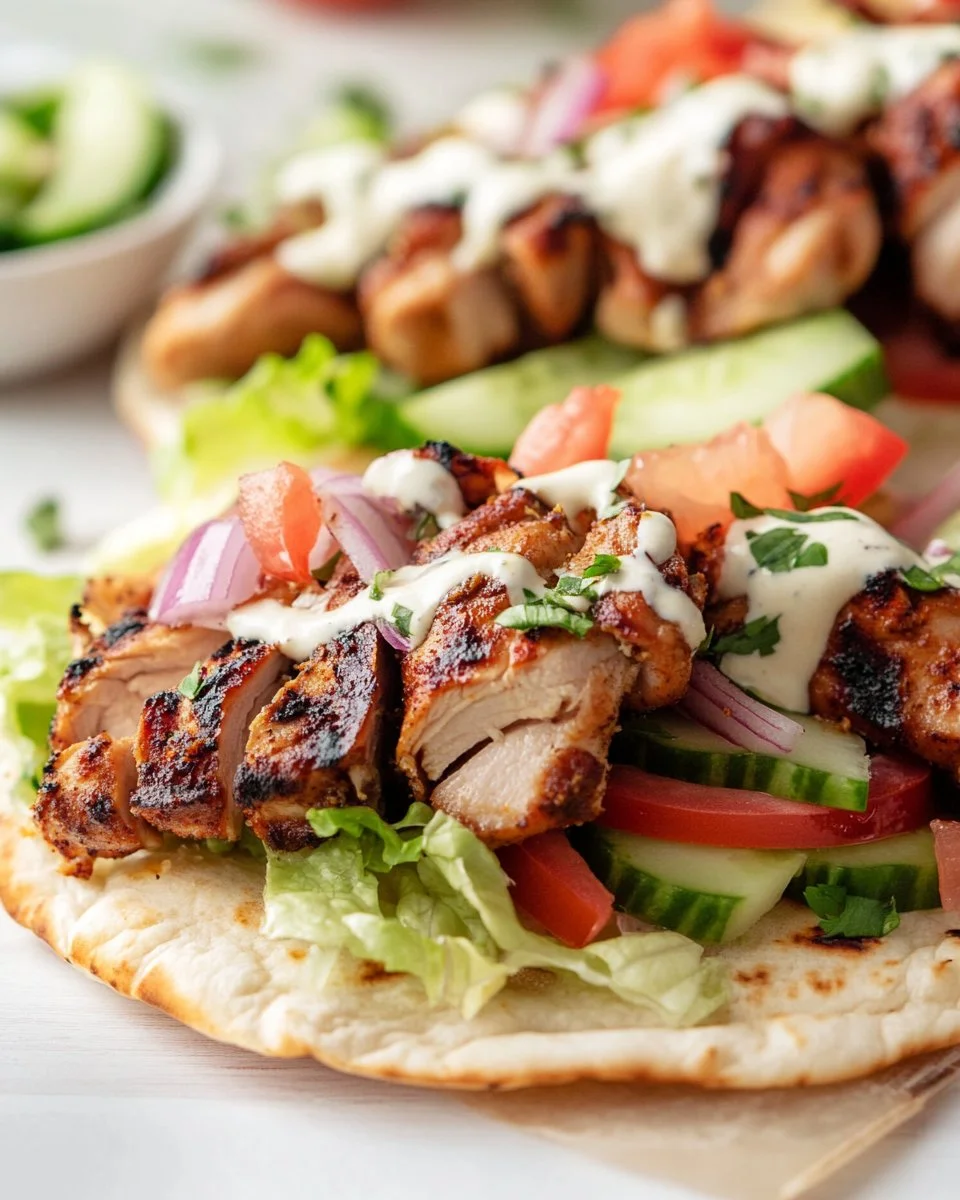
There’s something magical about the smell of a warm kitchen filled with the aroma of delicious food. The sound of chopping, simmering, and sizzling fills the air, creating a cozy atmosphere that beckons families to come together. Today, I want to share with you a wonderful recipe that captures that essence beautifully: Cranberry Chicken Wraps. These wraps are not only flavorful and satisfying but also quick to prepare, making them perfect for busy weeknights.
Why This Works
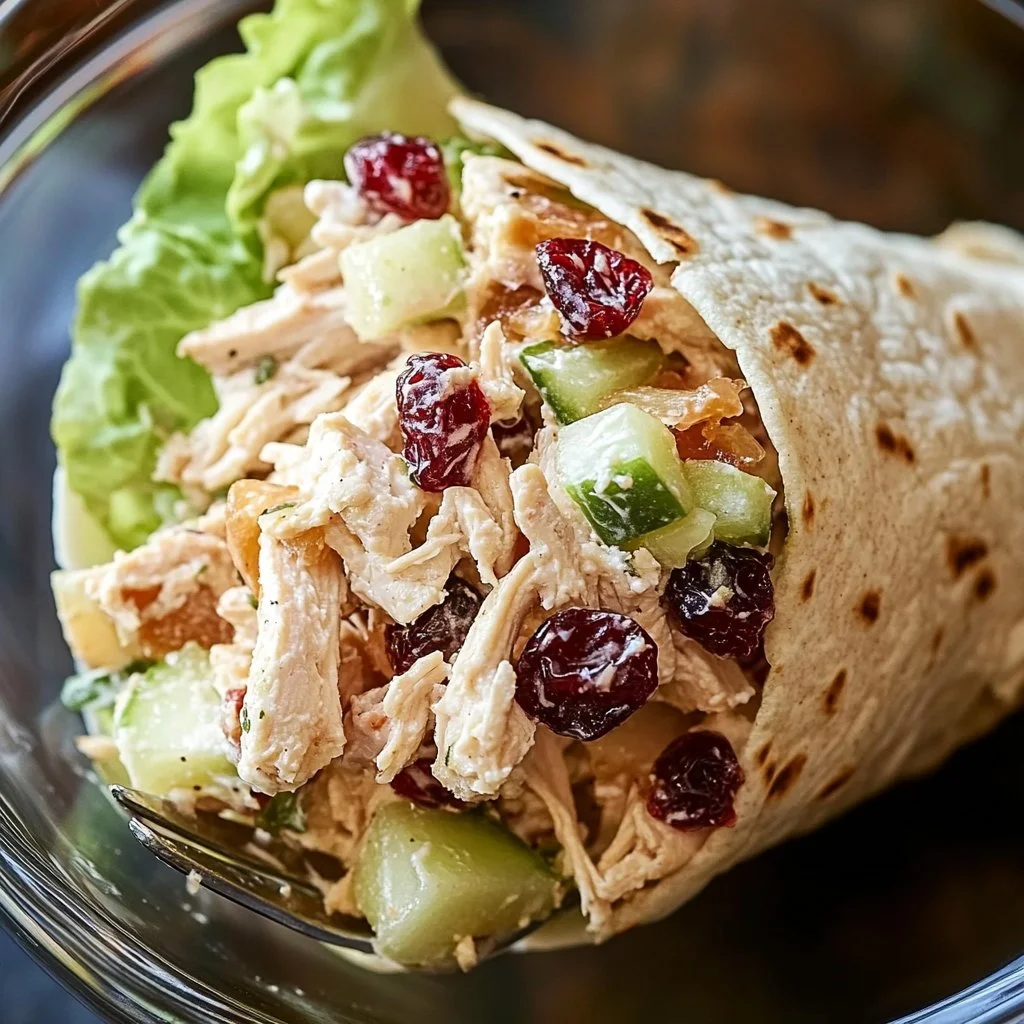
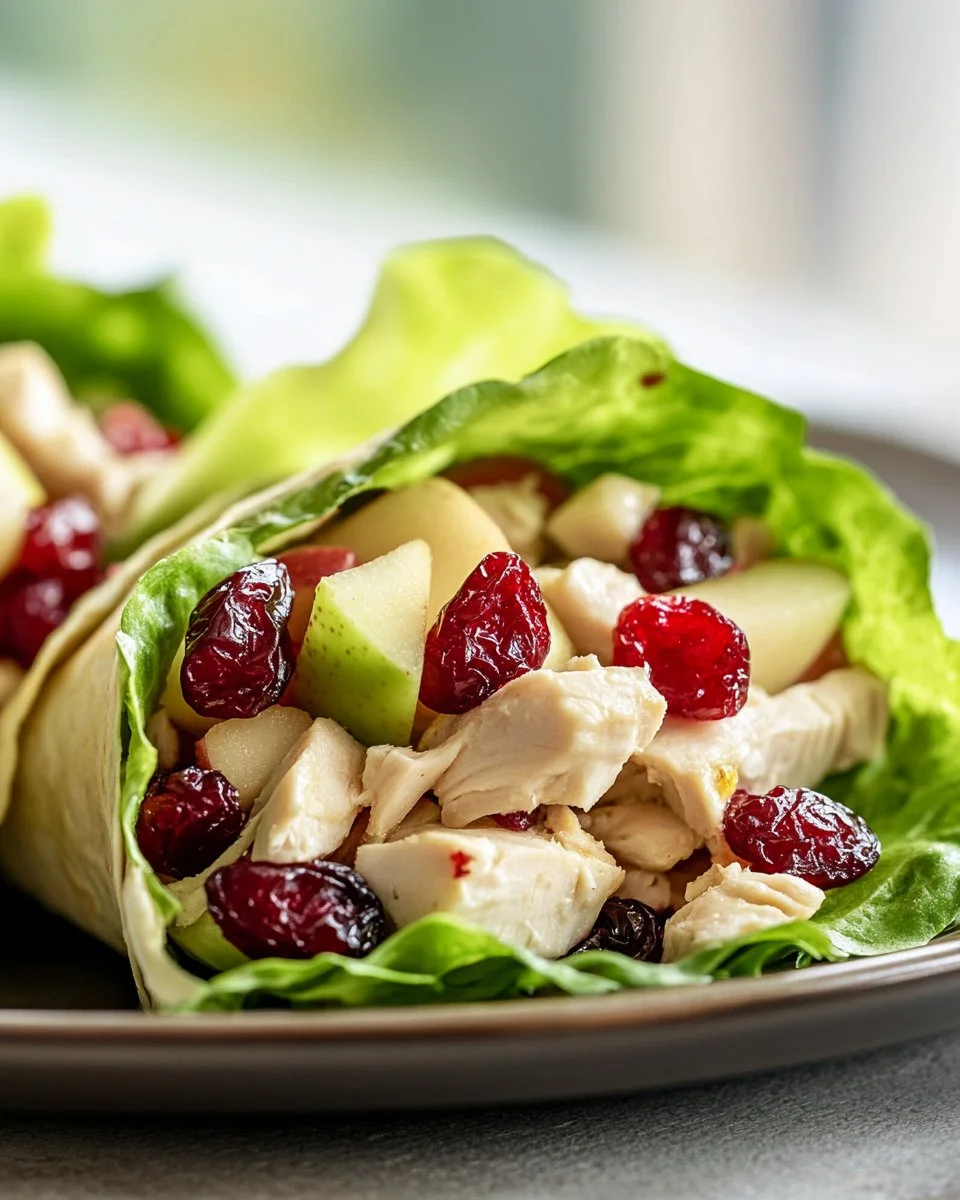
Cranberry Chicken Wraps are an ideal family meal for many reasons. First, they offer a delightful combination of flavors and textures. The sweet tang of cranberries pairs with tender chicken, crunchy apple, and crispy celery, all wrapped up in a fresh lettuce leaf or a soft tortilla.
Plus, the best part is how quick they are to put together. You can whip up these wraps in under 30 minutes. This means more time spent with your loved ones rather than in the kitchen. Everybody can pitch in and help, making it a fun, collaborative meal prep experience.
Process Overview
“This is where the magic happens—when the aroma fills the kitchen.”
As you gather the ingredients, imagine the excitement of your family as they anticipate a delicious dinner. The process is straightforward: mix, wrap, and serve. Let’s dive into those mouthwatering ingredients that make these wraps sing.
Ingredients
2 cups cooked chicken, shredded
1/2 cup dried cranberries
1 apple, diced
1/2 cup celery, chopped
1/4 cup mayonnaise
1 teaspoon Dijon mustard
Salt and pepper to taste
4 large lettuce leaves or tortillas (Lily’s Tip: If using lettuce, try romaine for a sturdy wrap. If tortillas, consider whole grain for added fiber.)
These ingredients not only offer a fabulous taste but also provide a healthy balance of protein, fruit, and vegetables.
Directions
In a bowl, combine the shredded chicken, cranberries, diced apple, and chopped celery. Mix well.
Encouragement: This step is a great opportunity for kids to practice their mixing skills!
In another bowl, mix together the mayonnaise, Dijon mustard, salt, and pepper.
Encouragement: Don’t worry if a little mustard stains the bowl. That just means you’re getting creative!
Pour the dressing over the chicken mixture and toss to combine.
Encouragement: Give it a good toss! You want every piece to be coated with that creamy goodness.
Place a portion of the mixture in the center of each lettuce leaf or tortilla.
Encouragement: Think of it like building a nest for the filling. Keeping it in the center helps with rolling.
Roll up tightly, then slice in half and serve.
Encouragement: You can do this! The wraps will hold together beautifully and look impressive on your dinner table.
Serving
For a family-style presentation, arrange the wraps on a large platter. You can serve them alongside a fresh green salad for a complete meal.
Consider placing a few extra toppings in small bowls on the side, like sliced almonds or extra cranberries. This way, everyone can customize their wraps to their liking. Family meals should be all about togetherness and personal touch.
Storage
If you happen to have any leftovers (which is rare but can happen), store them in an airtight container in the refrigerator. They can typically last for about 2-3 days.
Reheating is quite simple. While the chicken wrap filling can be enjoyed cold, if you prefer it warm, place it in the microwave for about 30 seconds to a minute. Just watch that you don’t heat it too long; you want it warm but not overcooked!
Kitchen Notes
Use leftover chicken for a time-saver.
Add a splash of lemon juice to the chicken mixture for extra freshness.
Swap out the mayonnaise for Greek yogurt for a lighter option.
Make it gluten-free by using lettuce wraps instead of tortillas.
Get creative with your add-ins, using whatever veggies you have on hand!
Variations
If you have picky eaters, there are plenty of ways to customize the recipe. For a creamier wrap, you can add avocado slices inside. If someone prefers a spicier twist, try adding some salsa or diced jalapeños.
For those following a specific diet, consider using a protein like tofu instead of chicken or substituting the apples with diced pears for a different flavor twist.
FAQ
Can I use rotisserie chicken?
Absolutely! It’s a great shortcut and adds delicious flavor.
How do I make this recipe vegan?
Substitute chicken with chickpeas or tofu and use vegan mayonnaise.
What kind of tortillas work best?
Whole wheat or spinach tortillas add added flavor and nutrition.
Can I freeze these wraps?
While the filling freezes well, it’s best to wrap them fresh as the textures will change once frozen.
How do I add more veggies?
Chopped bell peppers or shredded carrots work beautifully in this recipe!
Conclusion
As you gather around the table to enjoy these Cranberry Chicken Wraps, remember that food is more than just a meal; it’s a way to connect with one another. These wraps are simple yet full of flavor, making them a perfect choice for any family dinner.
I hope you enjoy making and sharing these wraps with your loved ones. Happy cooking!
Quick and flavorful Cranberry Chicken Wraps that combine tender chicken with sweet cranberries, crunchy apple, and crispy celery, all wrapped in lettuce or tortillas. Perfect for busy weeknights.
Ingredients
Main Ingredients
2cupscooked chicken, shredded(Use leftover chicken for a time-saver.)
1/2cupdried cranberries
1unitapple, diced(Consider dicing pears for a variation.)
1/2cupcelery, chopped(Chopped bell peppers or shredded carrots work beautifully.)
1/4cupmayonnaise(Greek yogurt can be used for a lighter option.)
1teaspoonDijon mustard
to tasteSalt and pepper
4largelettuce leaves or tortillas(If using lettuce, romaine works well; for tortillas, consider whole grain.)
Instructions
Preparation
In a bowl, combine the shredded chicken, cranberries, diced apple, and chopped celery. Mix well.
In another bowl, mix together the mayonnaise, Dijon mustard, salt, and pepper.
Pour the dressing over the chicken mixture and toss to combine.
Place a portion of the mixture in the center of each lettuce leaf or tortilla.
Roll up tightly, then slice in half and serve.
Notes
For family-style presentation, arrange the wraps on a platter with toppings on the side. Store leftovers in an airtight container; they last 2-3 days in the fridge. Microwave for warming if desired.
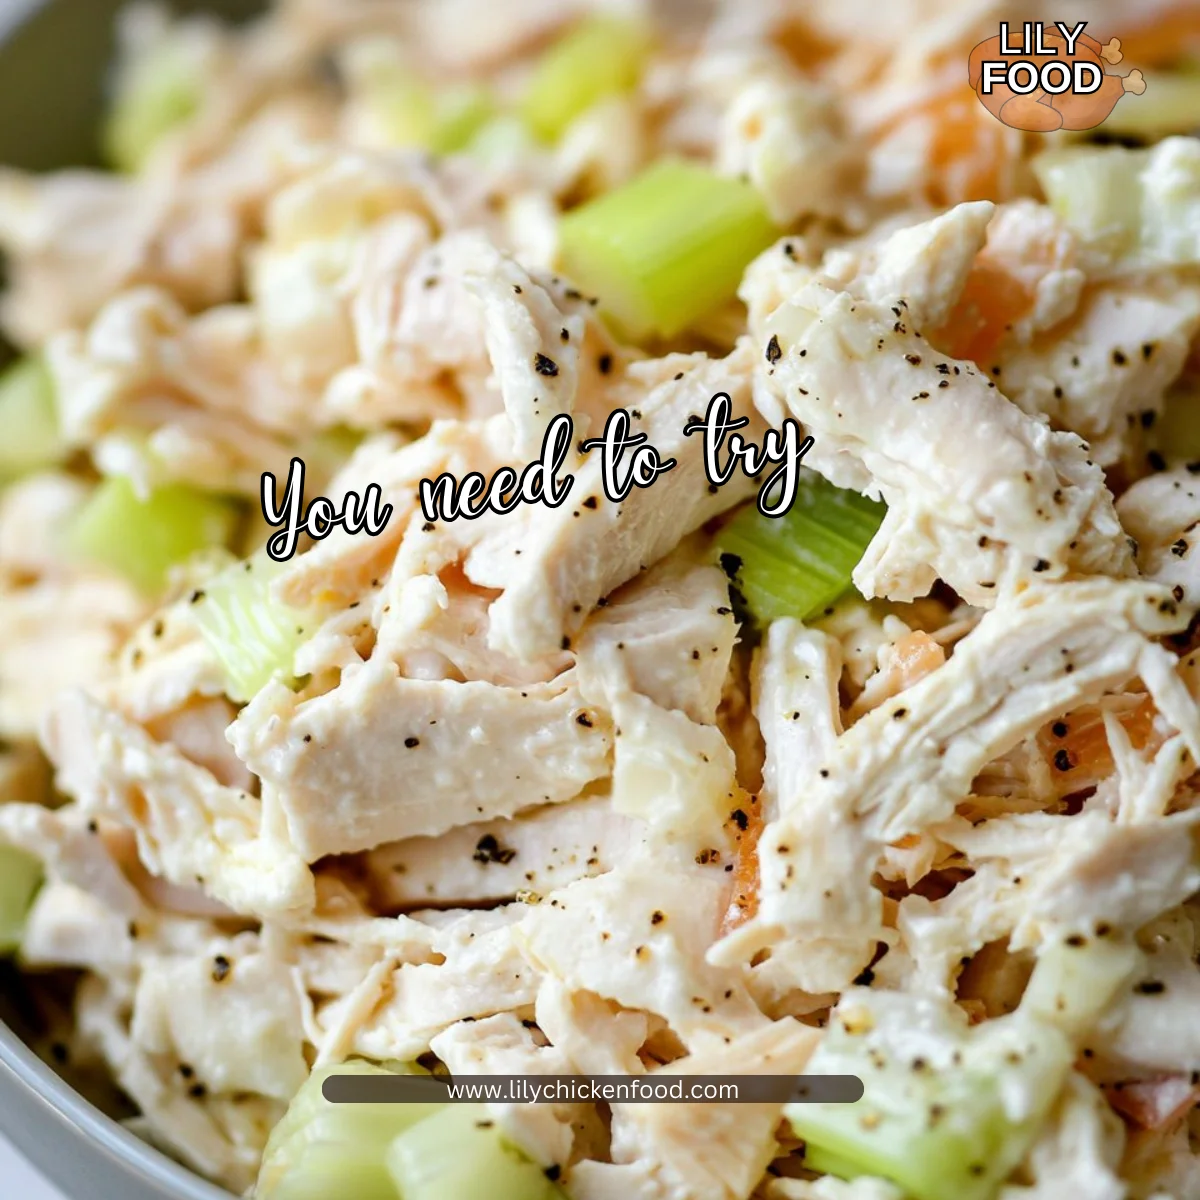
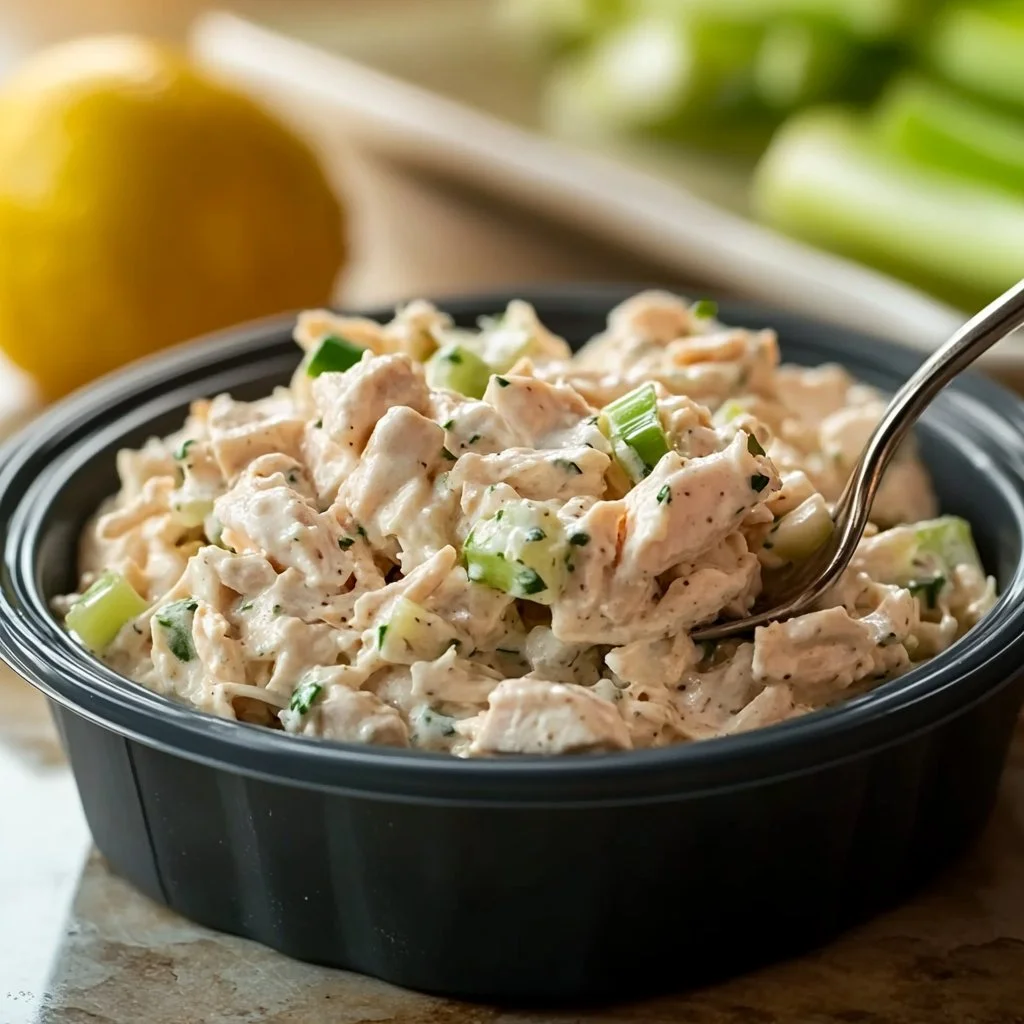
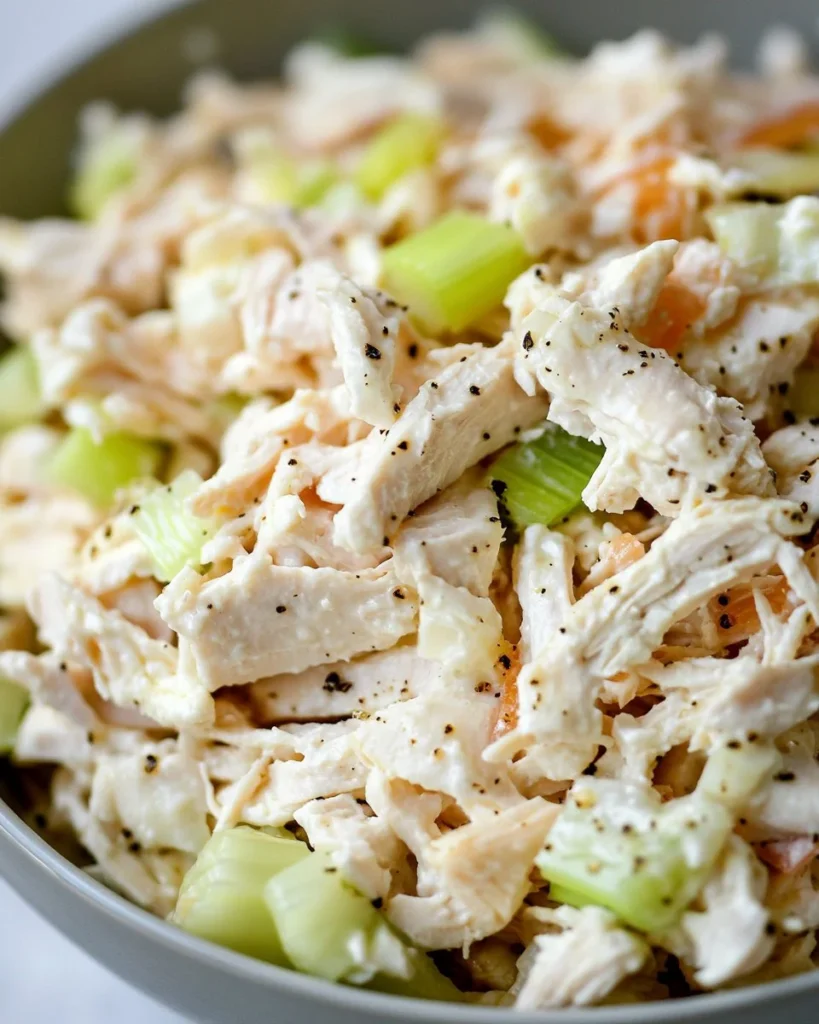
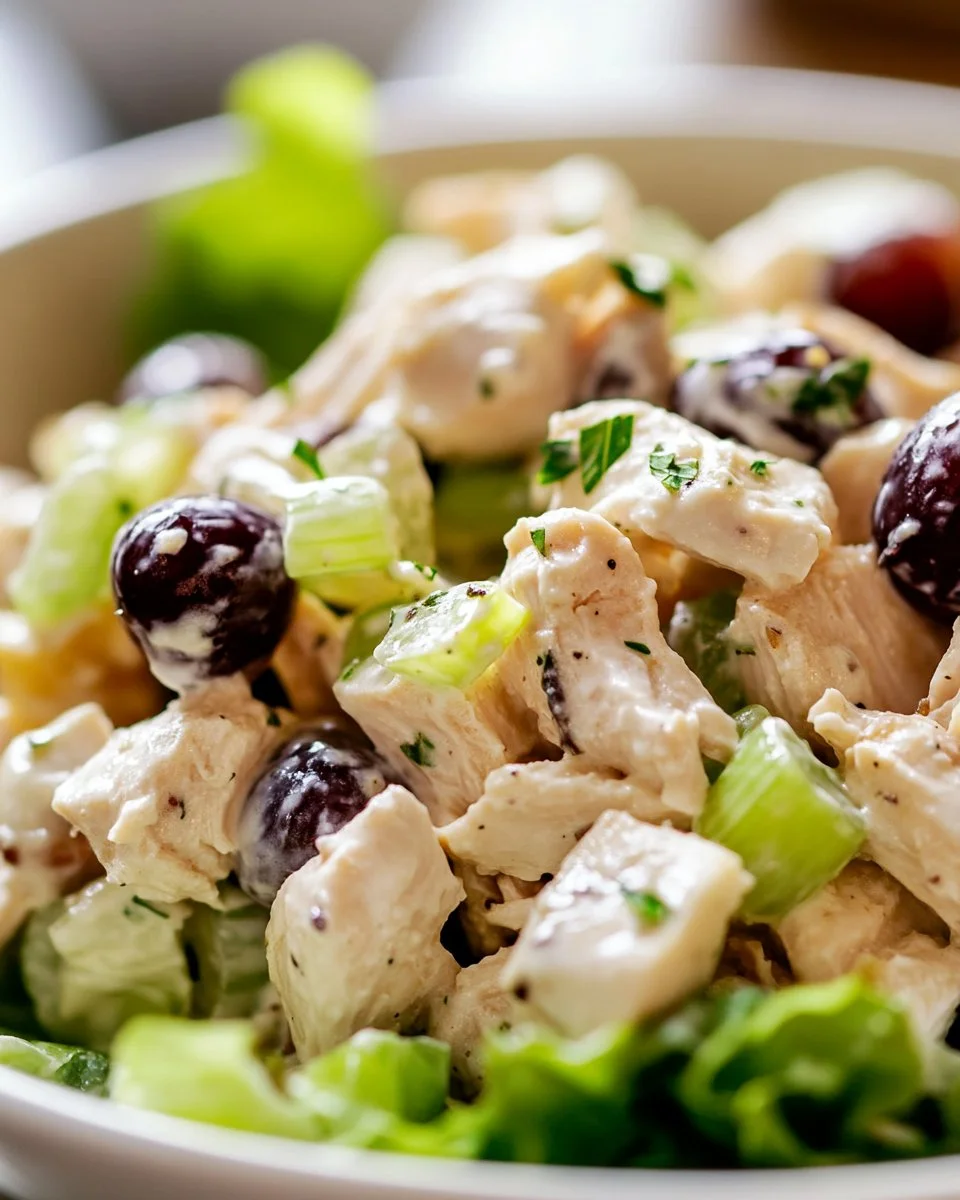
The warm aroma of a freshly made chicken salad wafts through the kitchen. The sound of chopping vegetables and the gentle clinking of mixing bowls create a comforting symphony. It reminds us that good food brings family together. This Classic Chicken Salad is not just a meal; it’s a time-honored recipe that’s made for sharing and enjoying.
Why This Works
This classic recipe shines because it is simple yet delicious. Chicken salad can be made in under 30 minutes, saving you time on busy days. It’s perfect for lunch boxes or quick dinners. The combination of flavors is refreshing, making it appealing to both adults and children alike. When you gather your family around the table, this dish sparks conversations and creates lasting memories.
Process Overview
“This is where the magic happens—when the aroma fills the kitchen.”
Getting the ingredients together and creating this dish is a fun task. You will experience the joy of preparing a meal that is not only nourishing but also comforting. The sounds of chopping and mixing add to the homey atmosphere, making everyone feel welcome and loved. Each step you take brings you closer to enjoying a delightful meal.
Ingredients
Here’s what you will need to create your Classic Chicken Salad:
2 cups cooked, diced chicken: You can use rotisserie chicken for a quick option or boil and shred your own.
1/2 cup mayonnaise: Opt for full-fat for creaminess or Greek yogurt for a lighter version.
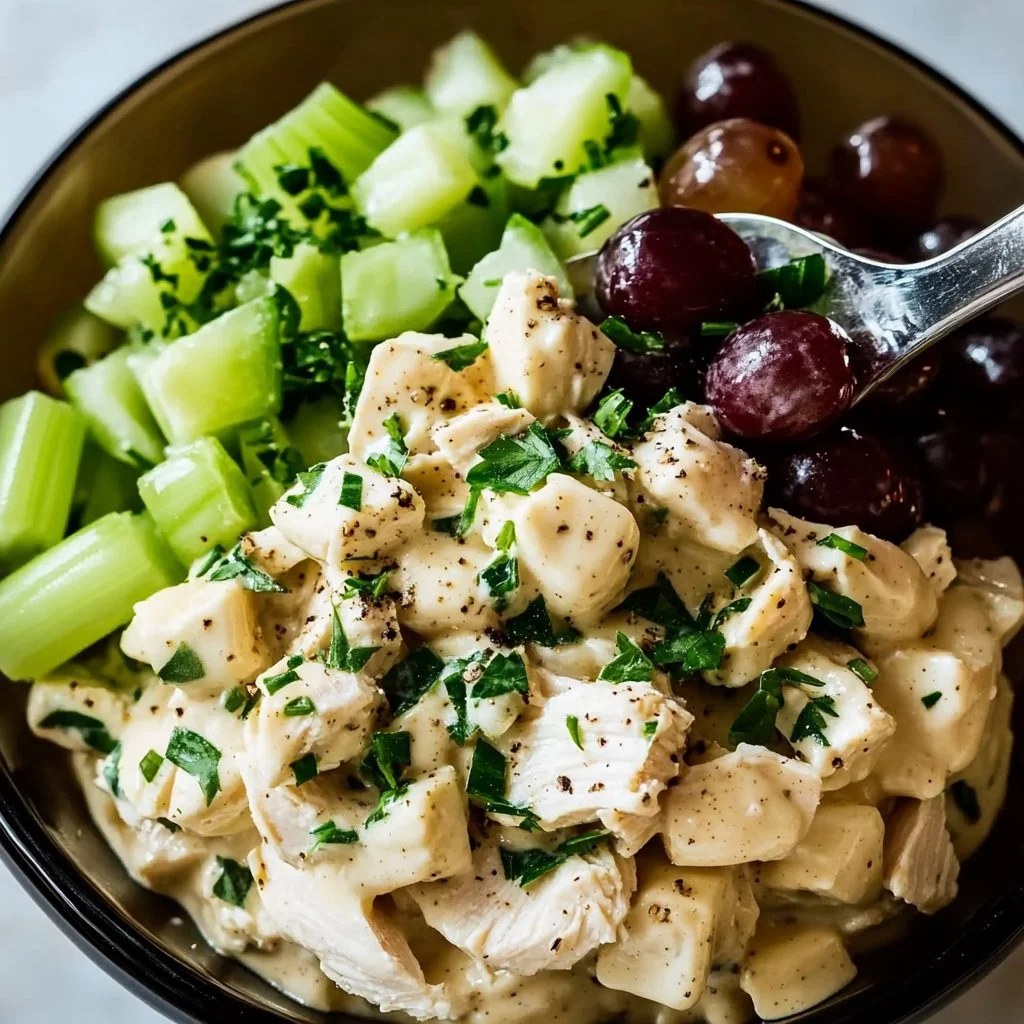
1 cup diced celery: Adds a nice crunch; fresh celery is best for flavor.
1/4 cup chopped green onion: Use the green tops for a milder flavor, or the white parts for a bit more bite.
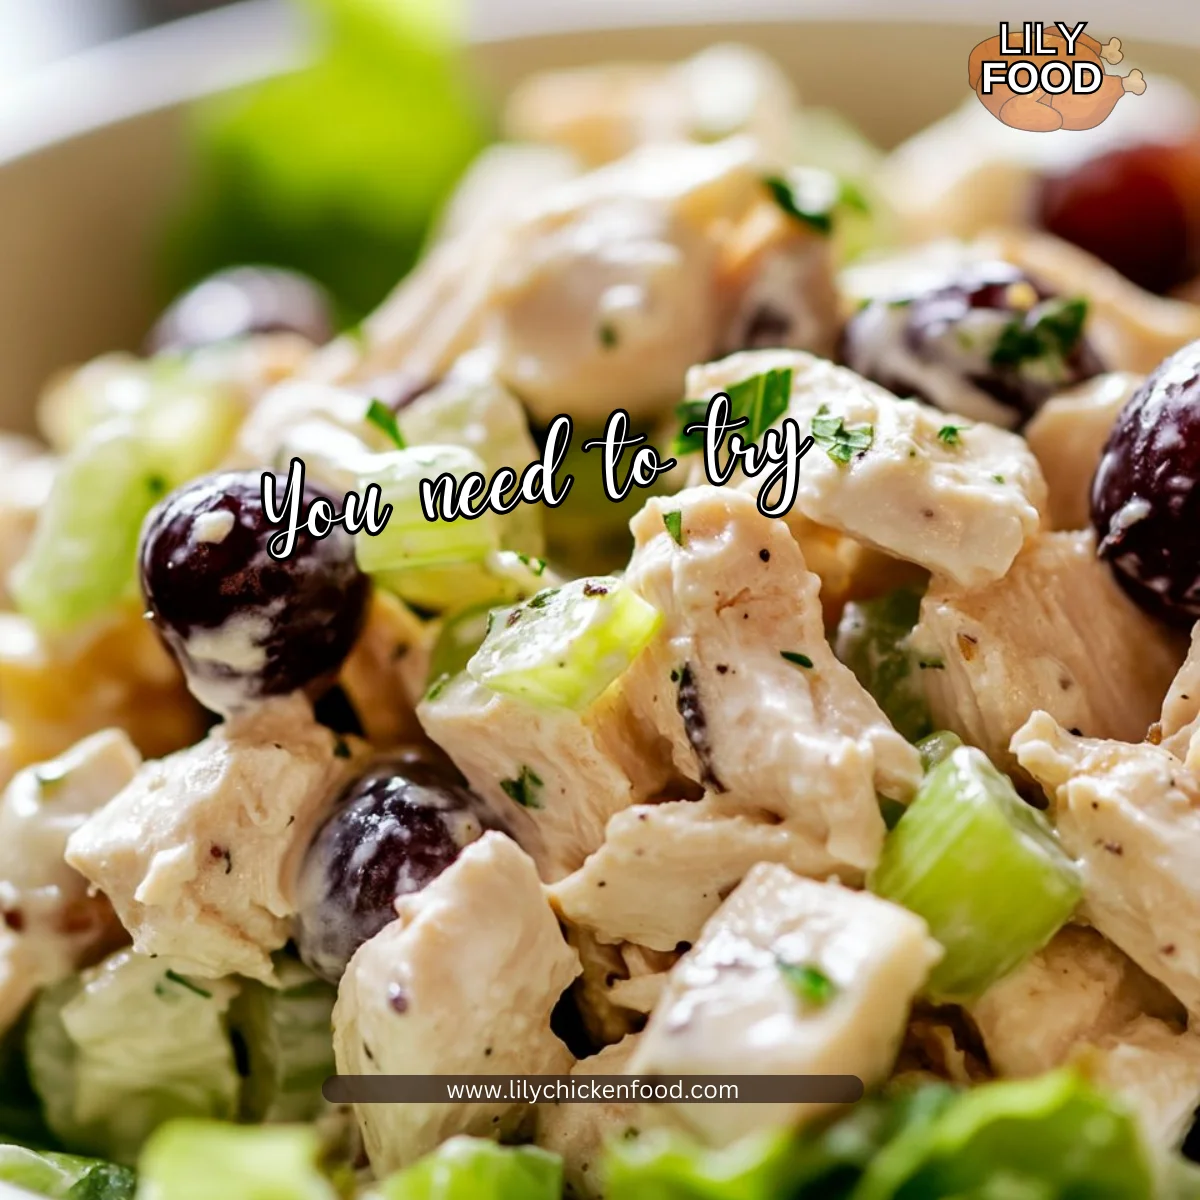
1 cup halved grapes: Red or green grapes work well. They add sweetness and color.
1/4 cup chopped fresh herbs (like parsley or dill): This elevates the dish’s flavor. Fresh herbs make a difference.
Salt and pepper to taste: Season gradually; you can always add more.
Gathering these fresh ingredients will fill your kitchen with delightful scents and make the cooking process all the more enjoyable.
Directions
In a large bowl, combine the diced chicken. If you are using rotisserie chicken, this is where the convenience comes in.
Add the mayonnaise. Stir it in gently but thoroughly. Ensure every piece of chicken is coated for the best flavor.
Next, incorporate the diced celery. This will add the perfect crunch to your salad.
Mix in the chopped green onion. The fresh flavor will brighten up the dish.
Add the halved grapes. They will provide a delightful burst of sweetness.
Finally, toss in the chopped herbs. This is your chance to experiment with flavors.
Season with salt and pepper to taste. Don’t rush this step; it can make a big difference.
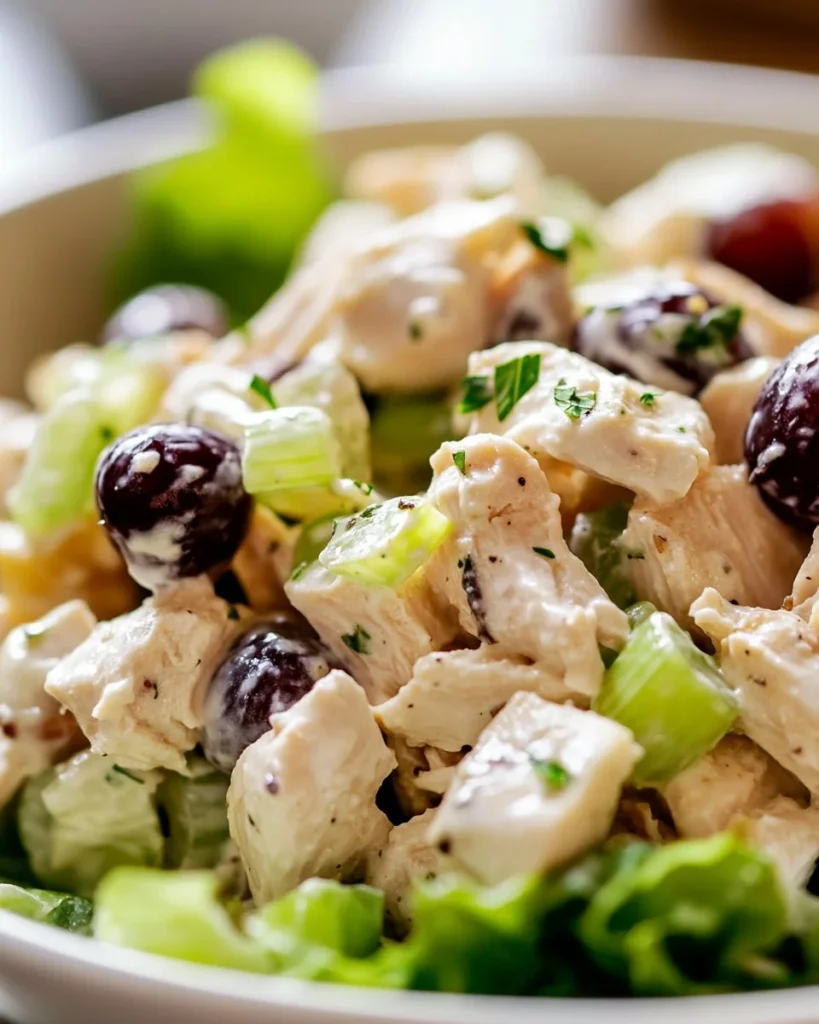
Serve chilled, either as a sandwich filling or on a bed of lettuce.
Cooking this Classic Chicken Salad is about bringing comfort and joy to your family. Take your time and enjoy the process.
Serving
Serving this salad family-style can spark conversations around the table. Place a large bowl of chicken salad in the center and let everyone help themselves. Serve it with different bread types for sandwiches or simply on lettuce leaves for a lighter option. Adding some sliced tomatoes or pickles on the side is a great way to enhance the meal.
Storage
This chicken salad is best served fresh but can be stored in the refrigerator for up to 3 days. Store it in an airtight container to maintain freshness. If you have leftovers, try to keep it separate from your bread until ready to serve. This way, you will avoid sogginess. If you prefer a warm lunch, you could always add it to a wrap and warm it up in a skillet.
Kitchen Notes
Here are some shortcuts to speed up your chicken salad preparation:
Use rotisserie chicken for faster prep.
Pre-chop your vegetables ahead of time and store them in the fridge.
Use a food processor for quick chopping of herbs and vegetables.
Swap mayo for Greek yogurt to save on calories without sacrificing taste.
Make a double batch and freeze half for a quick meal later.
Variations
This recipe is versatile. Here are some tweaks for picky eaters or specific diets:
Picky Eaters: Leave out the grapes or green onions. You can substitute with diced apples for a sweet crunch.
Gluten-Free: Serve on gluten-free bread or lettuce wraps.
Low-Carb/Keto: Skip the grapes and serve atop a salad or in avocados.
Mediterranean Style: Add olives, cucumbers, and feta cheese for a twist.
Vegan/Vegetarian: Substitute chicken with chickpeas or tofu, and use vegan mayo.
FAQ
Can I use leftover chicken for this salad?
Yes, leftover chicken works great. It’s a perfect way to use up extra meat.
How long can I store chicken salad?
You can store it in the fridge for up to 3 days. Keep it in an airtight container.
Can I freeze chicken salad?
It is not recommended to freeze chicken salad, as the texture may change upon thawing.
What should I serve with this chicken salad?
It goes well with bread, crackers, or lettuce. You can also pair it with soup.
Can I make this salad ahead of time?
Absolutely! It’s a great make-ahead dish. Just store it in the fridge until you are ready to serve.
Conclusion
As you gather around the table with your loved ones, this Classic Chicken Salad becomes more than just a meal. It evokes warmth and comfort, helping you create lasting memories. Don’t rush the process of making this dish; enjoy each step and savor the flavors. Remember, it’s not just about the food; it’s about the love shared while preparing and enjoying it. So, take a moment, breathe in the aroma, and make this dish your own. Enjoy!
A simple yet delicious chicken salad that's perfect for lunch boxes or quick dinners, made with fresh ingredients and a mix of flavors that appeal to both adults and children.
Ingredients
Main Ingredients
2cupscooked, diced chicken(You can use rotisserie chicken for a quick option or boil and shred your own.)
1/2cupmayonnaise(Opt for full-fat for creaminess or Greek yogurt for a lighter version.)
1cupdiced celery(Adds a nice crunch; fresh celery is best for flavor.)
1/4cupchopped green onion(Use the green tops for a milder flavor, or the white parts for a bit more bite.)
1cuphalved grapes(Red or green grapes work well. They add sweetness and color.)
1/4cupchopped fresh herbs(Like parsley or dill; this elevates the dish’s flavor. Fresh herbs make a difference.)
to tastesalt and pepper(Season gradually; you can always add more.)
Instructions
Preparation
In a large bowl, combine the diced chicken. If you are using rotisserie chicken, this is where the convenience comes in.
Add the mayonnaise. Stir it in gently but thoroughly. Ensure every piece of chicken is coated for the best flavor.
Next, incorporate the diced celery. This will add the perfect crunch to your salad.
Mix in the chopped green onion. The fresh flavor will brighten up the dish.
Add the halved grapes. They will provide a delightful burst of sweetness.
Finally, toss in the chopped herbs. This is your chance to experiment with flavors.
Season with salt and pepper to taste. Don't rush this step; it can make a big difference.
Serve chilled, either as a sandwich filling or on a bed of lettuce.
Notes
This chicken salad is best served fresh but can be stored in the refrigerator for up to 3 days in an airtight container. If you have leftovers, try to keep it separate from your bread until ready to serve to avoid sogginess. For a warm lunch, add it to a wrap and warm it up in a skillet.
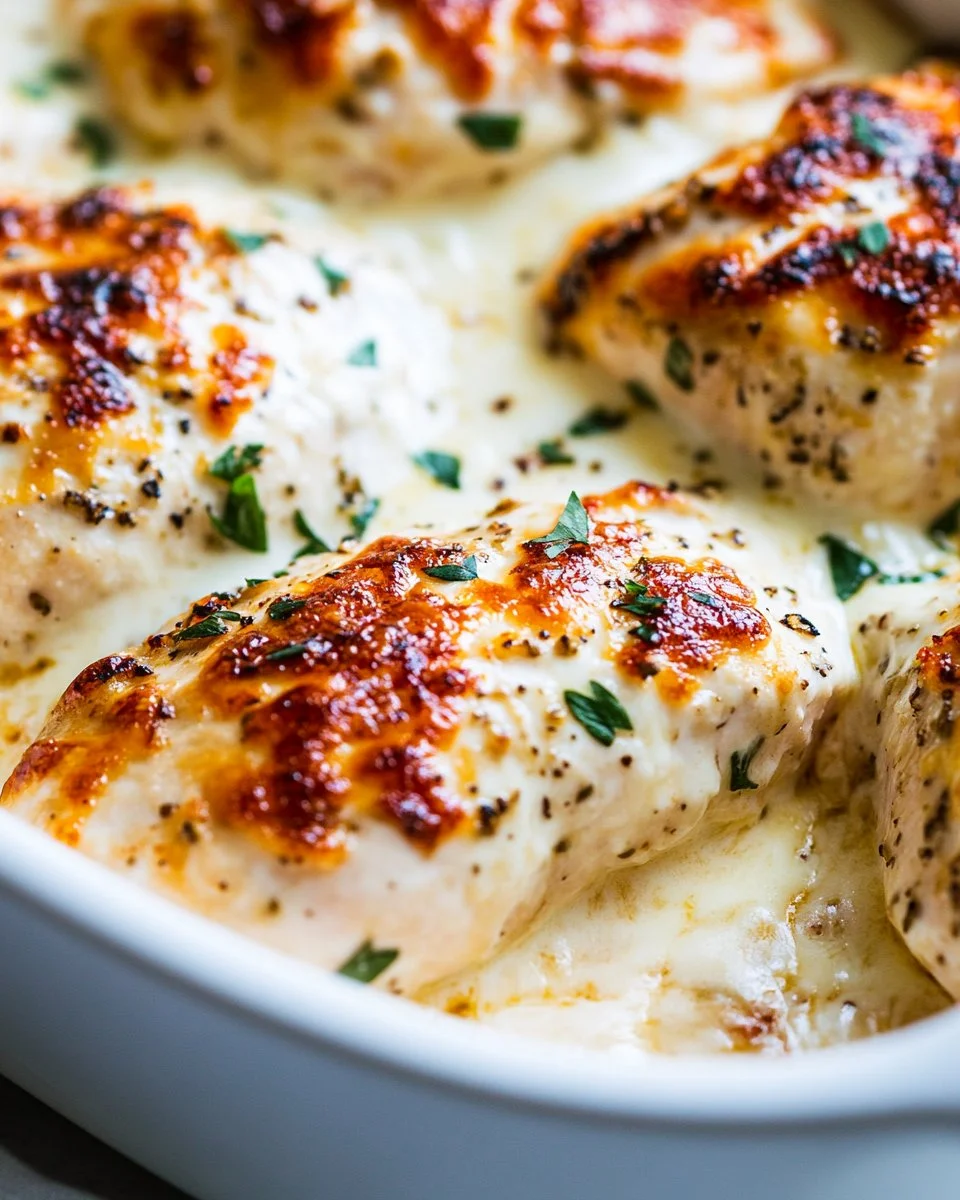
I can smell the warm spices already. The sound of a slow cooker humming in the kitchen means dinner is almost ready and the house feels like a hug. This Slow Cooker Cheesy Chicken Chili is one of those recipes that fills your home with comfort.
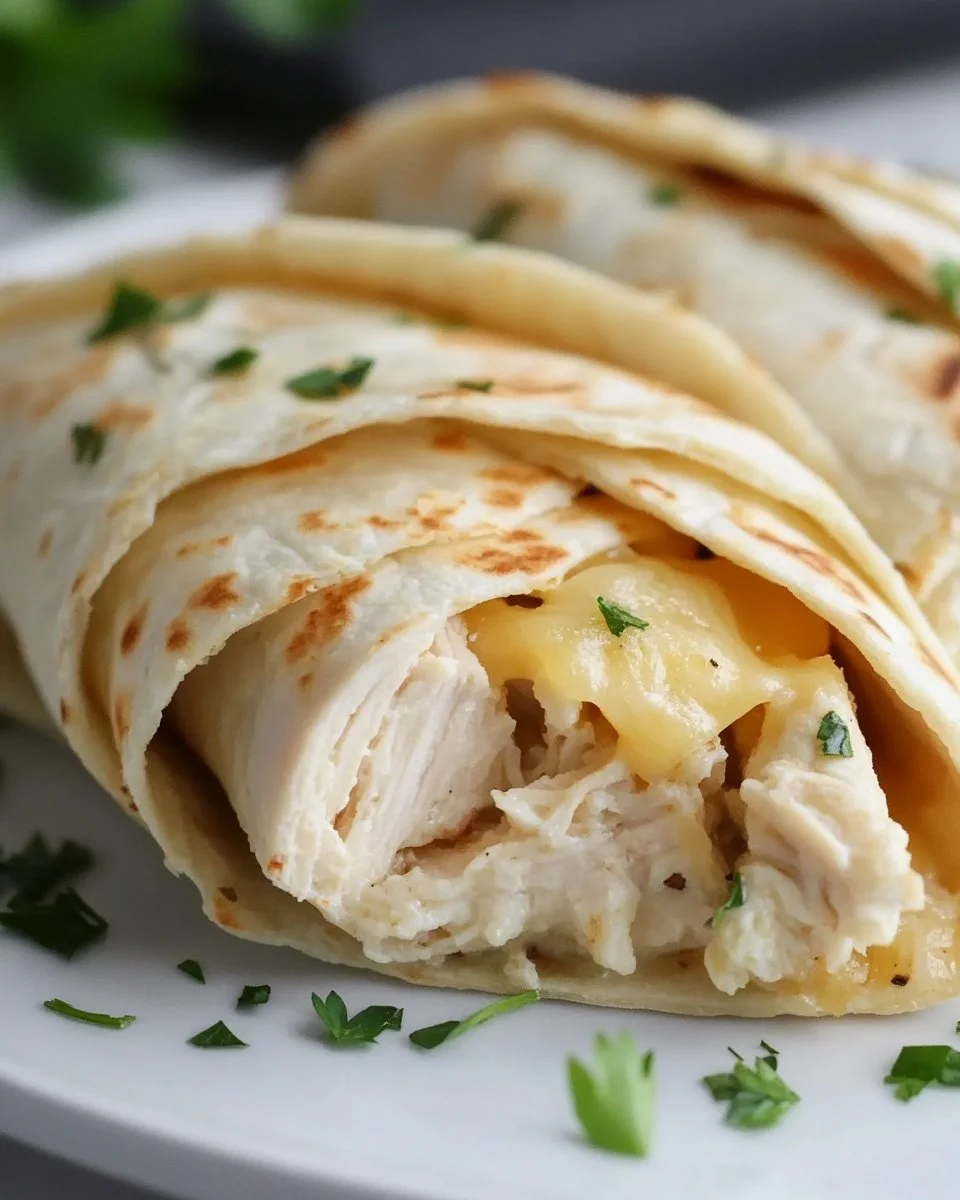
If you enjoy easy, family-friendly chicken dinners, you might also like my cheesy garlic chicken wraps for another weeknight idea.
Why this works
This recipe brings together simple pantry ingredients and a hands-off cooking method. The slow cooker does the heavy lifting, so you get tender chicken that soaks up tomato, spice, and cheesy creaminess. It is perfect for busy nights, school days, and relaxed weekends.
It is also very family-friendly. Kids love the cheesy texture and adults appreciate the bold flavors. If you like layered comfort dishes, try my smothered cheesy sour cream chicken for another crowd pleaser.
Because everything cooks low and slow, you can prep in the morning, run errands, and come back to a warm, ready meal. That time-saving freedom makes this a keeper for busy families.
Process Overview
“This is where the magic happens—when the aroma fills the kitchen.”
The process is simple. Brown or cook the bacon ahead if you like extra crisp texture. Layer ingredients in the slow cooker, let them mingle all day, then finish with cream cheese and shredded cheddar for the final creamy pull.
For a slightly different flavor profile the next time, check out my sweet chili glazed chicken thighs. Little changes to spices or toppings keep this chili interesting.
Ingredients
Below is the ingredient list with my personal tips for each item. Read the tips before you shop. They help make this chili even more family-friendly and foolproof.
2 chicken breasts
Tip: Use boneless, skinless breasts. If your family prefers dark meat, use thighs instead and reduce cook time by a little. Pat dry so seasoning sticks.
2 cans Rotel tomatoes with green chilis
Tip: Rotel adds a nice kick. If younger kids are tasting, choose the mild version.
2 cans black beans (drained and rinsed)
Tip: Rinse well to reduce sodium and any canned flavor. Drain in a colander and let sit a minute to remove excess liquid.
1 can corn
Tip: Drain the corn. You can use frozen corn if that is what you have on hand.
32 oz chicken broth
Tip: Use low-sodium broth so you can control the salt. If you want thicker chili, reduce broth by 1/2 cup.
1 packet dry ranch seasoning
Tip: This adds tang and depth. If you do not have ranch, use a teaspoon of onion powder and a pinch of dried dill.
8 slices cooked and crumble bacon
Tip: Cook bacon until crisp and crumble it. Reserve some crumbles as a garnish for extra crunch.
8 oz cream cheese (at room temperature )
Tip: Let the cream cheese sit on the counter for 30 minutes before adding. It melts smoother that way.
1 cup shredded cheddar cheese
Tip: Use sharp cheddar for bold flavor, or mild if kids prefer. Grate your own for better melting.
Salt and pepper to taste
Tip: Add salt sparingly at first. The bacon and broth add saltiness.
2 tbsp chili powder
Tip: Measure carefully. If your chili powder is very fresh, the flavor will be robust.
1 tbsp cumin
Tip: Cumin brings the warmth. Toast lightly in a dry pan first if you want a nuttier scent.
1 tbsp garlic powder
Tip: Garlic powder blends into the dish better than fresh garlic for long slow cooking.
Extra cheese
Tip: Keep a little extra shredded cheddar or a Mexican blend for topping at the table.
Fritos
Tip: Fritos add salt and crunch. Offer them on the side so chips do not go soggy in leftovers.
Hot Sauce (for serving )
Tip: Provide hot sauce at the table so everyone can adjust heat individually.
Before you start, gather everything so the morning rush does not steal your calm. If you want a quick weeknight twist, my 30-minute oven-baked boneless skinless chicken thighs are a fast protein option to pair with leftovers.
Directions
Begin with the chicken on the bottom, add all ingredients to the slow cooker except for cream cheese and cheddar cheese and toppings.
Encouragement: Lay the breasts flat and sprinkle the spices evenly. You will see how easy this is when ingredients stack together.
Set temperature to low and cook for 6-8 hours or high for 4 hours.
Encouragement: The low setting gives richer flavor. Put the lid on and go about your day. The kitchen will slowly fill with an inviting aroma.
Half way through cook time, add cream cheese.
Encouragement: Drop in chunks of room temperature cream cheese so it melts smoothly. Stir gently if you can, but do not over-stir. It will fold into a silky texture.
When ready to eat, shred chicken and add cheddar cheese. Let melt then serve with desired toppings.
Encouragement: Use two forks to shred right in the slow cooker for less cleanup. Stir in the cheddar so it melts into the chili, then top with bacon crumbles and extra cheese for a family-style finish.
Notes while cooking:
Taste before serving and adjust salt or heat. Add hot sauce if you want more kick.
If the chili looks too thin after shredding, set the slow cooker to high for 15-30 minutes with the lid off to thicken.
If you like one-pot dinner ideas, you may enjoy my cheesy garlic chicken wrap tips in the Kitchen Notes below.
Serving
Serve this cheesy chicken chili family-style in a large bowl right from the slow cooker. Bring out bowls and toppings and let everyone customize. Offer extra cheese, crumbled bacon, Fritos, and hot sauce at the table.
For a heartier meal, serve with cornbread or over steamed rice. For a lighter option, spoon into large lettuce cups for a crunchy contrast. Kids love it with chips on the side, while adults usually add a few drops of hot sauce.
Leftovers taste even better the next day. The flavors deepen overnight and the cream cheese keeps the chili luxuriously creamy.
Storage
Cool the chili to room temperature before storing. Place it in an airtight container and refrigerate for up to 4 days.
To reheat on the stove, warm gently over medium-low heat and stir frequently. Add a splash of chicken broth or water if it seems thick. To microwave, use a microwave-safe bowl and heat in 1-minute intervals, stirring between each, until warm.
For longer storage, freeze in freezer-safe containers for up to 3 months. Thaw overnight in the refrigerator before reheating. Note that texture may change slightly after freezing, but the flavor remains comforting.
Kitchen Notes
Prep ahead: Dice the bacon and measure spices the night before for faster morning assembly.
Browning tip: You do not need to brown the chicken, but searing for 2-3 minutes per side adds extra flavor if you have time.
Cream cheese handling: Cut into cubes so it melts evenly when added halfway through cooking.
Thickening shortcut: Stir in 1/4 cup masa harina or cornmeal at the end for a thicker, slightly corn-flavored chili.
Quick swap: Use shredded rotisserie chicken in the last hour to cut cook time in half.
And remember, small shortcuts keep dinner on the table faster without losing that homemade heart. For more quick chicken recipes, check out my cheesy garlic chicken wrap notes.
Variations
For picky eaters: Reduce chili powder to 1 tablespoon and omit hot sauce. Serve chips and cheese on the side so kids can customize bites.
Gluten-free: This recipe is naturally gluten-free if you use gluten-free ranch seasoning and check your canned ingredients.
Low carb: Skip the corn and serve over cauliflower rice. Use a low-carb chip or omit chips altogether.
Spicy: Add a chopped jalapeño or 1/2 teaspoon cayenne for extra heat.
Vegetarian option: Swap chicken for extra black beans and a can of diced potatoes. Use vegetable broth and omit bacon to make a hearty vegetarian chili.
Small switches make this recipe suit any family. Try one variation each week to find your favorite.
FAQ
Q: Can I use frozen chicken breasts?
A: Yes. If using frozen chicken breasts, cook on low for 8-9 hours or high for about 5 hours. Check that the chicken reaches 165 °F before shredding.
Q: Do I have to use cream cheese?
A: No. You can replace cream cheese with 1 cup sour cream added at the end of cooking. Add slowly and keep the heat low to prevent curdling.
Q: How can I make the chili thicker?
A: Shred the chicken and then cook uncovered on high for 15-30 minutes. You can also stir in 1/4 cup masa harina or cornstarch slurry and cook until thickened.
Q: Is this freezable?
A: Yes. Cool completely, then freeze in portion-sized containers for up to 3 months. Thaw overnight in the fridge before reheating.
Q: Can I double the recipe?
A: Yes. Use a large slow cooker and extend cook time slightly if needed. Make sure the cooker is no more than three-quarters full for even cooking.
Conclusion
I hope this Slow Cooker Cheesy Chicken Chili becomes a warm staple in your home. It is one of those dishes that brings everyone to the table and invites second helpings. If you want another version for inspiration, I referenced a similar take in the Slow Cooker Cheesy Chicken Chili Recipe – 3 Boys and a Dog. For a creamier, super-indulgent spin, I like the approach used in the Slow Cooker Cream Cheese Crack Chicken Chili as a helpful comparison.
Thanks for cooking with me. Fill your home with this cozy aroma and enjoy dinner with the people you love.
A comforting and easy slow-cooker dish featuring tender chicken, bold spices, and creamy cheese, perfect for family dinners.
Ingredients
Main Ingredients
2pieceschicken breasts(Boneless, skinless. Substitute thighs if preferred.)
2cansRotel tomatoes with green chilis(Choose mild for younger kids.)
2cansblack beans (drained and rinsed)(Rinse to reduce sodium.)
1cancorn(Drain or use frozen corn.)
32ozchicken broth(Use low-sodium broth for better control over salt.)
1packetdry ranch seasoning(For depth of flavor; substitute with onion powder and dill if unavailable.)
8slicescooked and crumbled bacon(Reserve some for garnishing.)
8ozcream cheese (at room temperature)(Let sit for 30 minutes before adding.)
1cupshredded cheddar cheese(Use sharp cheddar for more flavor.)
Salt and pepper to taste(Add sparingly.)
2tbspchili powder(Measure carefully.)
1tbspcumin(Toast lightly for nuttier scent.)
1tbspgarlic powder(Blends better than fresh garlic in slow cooking.)
Extra cheese(For toppings.)
Fritos(Serve on the side.)
Hot Sauce (for serving)(Provide at the table.)
Instructions
Preparation
Begin with the chicken on the bottom of the slow cooker, then add all other ingredients except for cream cheese and cheddar cheese.
Lay the chicken breasts flat and sprinkle the spices evenly over them.
Cooking
Set the temperature to low and cook for 6-8 hours, or high for about 4 hours.
Halfway through the cooking time, add the cream cheese in chunks.
Finishing Touches
When ready to eat, shred the chicken and stir in the cheddar cheese until melted.
Top with bacon crumbles and extra cheese before serving.
Notes
Taste before serving and adjust salt or heat. Leftovers taste better the next day. Store in an airtight container for up to 4 days, or freeze for up to 3 months.
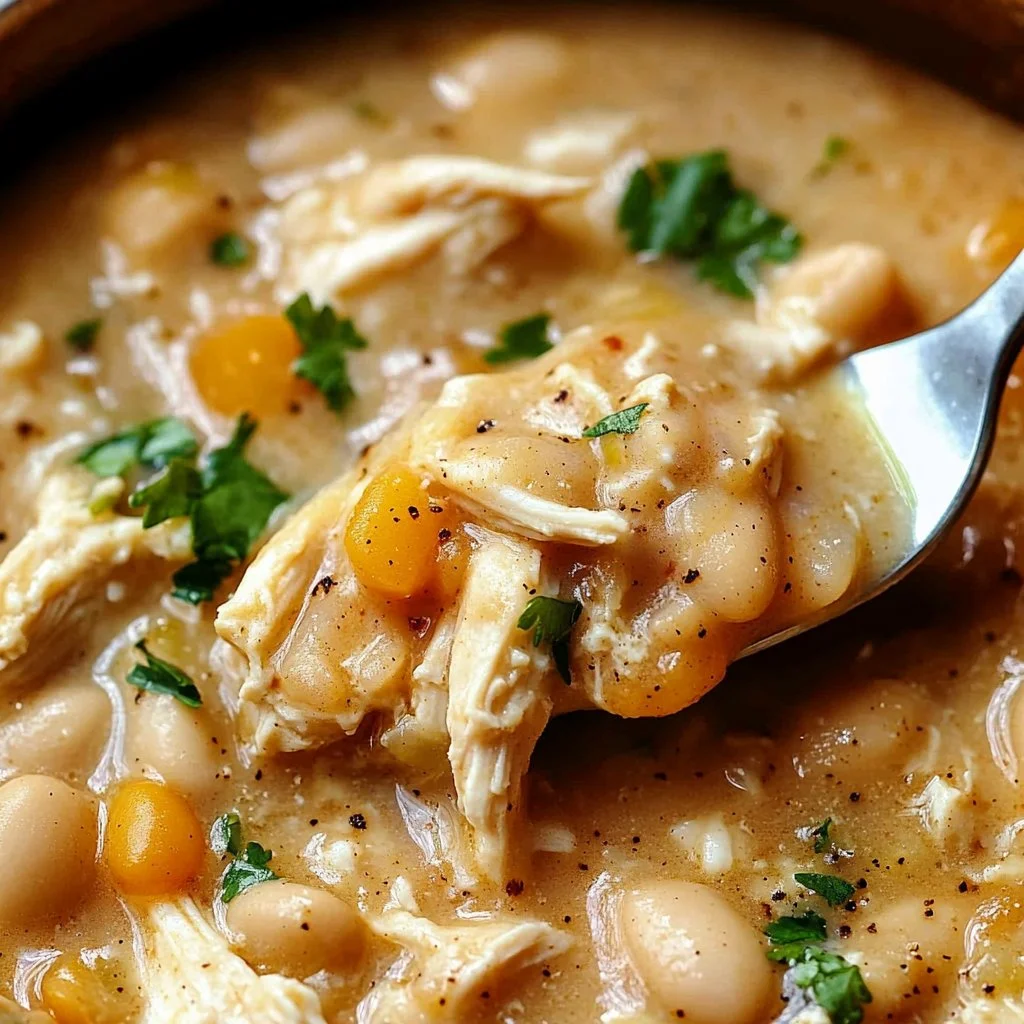
When I walk into the kitchen making this white chicken chili, the first thing I notice is the warm, savory smell. The garlic and onions hit the pan with a soft sizzle. It makes the whole house feel like a hug.
I started making this recipe on busy weeknights when my kids wanted something filling but simple. It is forgiving, family-friendly, and comes together fast. If you have a leftover roast or rotisserie bird, this chili becomes a true lifesaver. I also love pairing it with the oven-baked thighs from my weeknight roster for a heartier meal: easy oven-baked chicken thighs.
Why this works
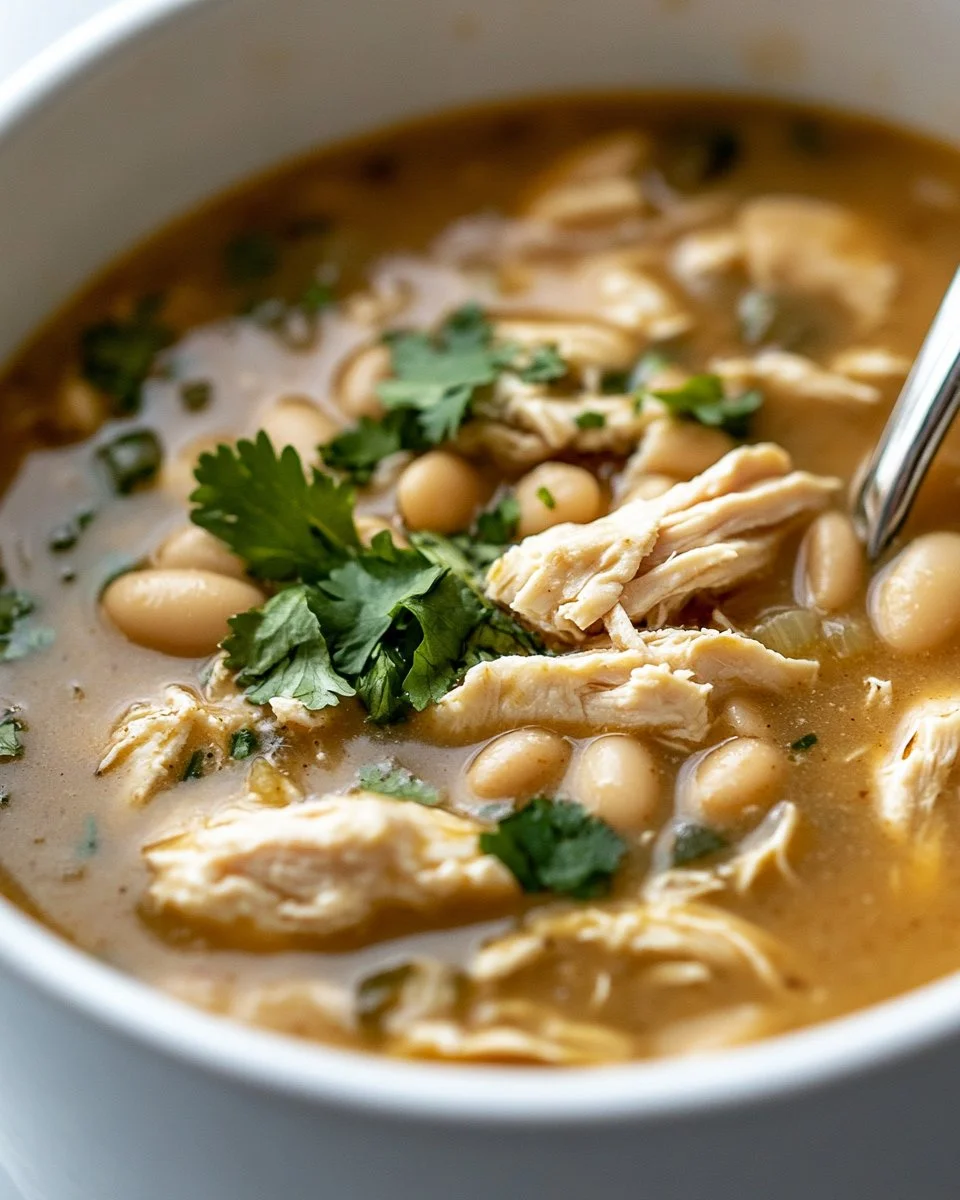
This white chicken chili balances creamy, spicy, and bright flavors. The beans and chicken give it body. The cream softens the spices. Together they make a soup that fills bowls and tummies.
It is family-friendly and time-saving. You can use cooked chicken from a roast, a rotisserie bird, or quick-cooked breasts. If you like a hands-off method, the flavors deepen while you do homework or prep a side salad. For another quick chicken option I use when I need dinner fast, try my air fryer chicken breasts recipe to get tender chicken in minutes: air fryer chicken breasts.
I test this recipe many times for flavor and consistency. I keep it mild for kids and add small bowls of toppings for adults who want extra heat. It cooks quickly and stores beautifully, which is perfect for busy families.
Process Overview
“This is where the magic happens—when the aroma fills the kitchen.”
The base is simple. Sauté onion and garlic in olive oil until soft and sweet. Add shredded cooked chicken, white beans, green chilies, and spices. Simmer in chicken broth so the flavors marry. Finish with cream for richness.
This method gives room for swaps. Use half-and-half instead of heavy cream to lighten it. Use more or less chilies to control heat. You can also blend a small portion of the beans for a thicker texture. For a heartier bowl try pairing with a creamy recipe like my bang bang chicken bowl for inspired sides: bang bang chicken bowl.
Ingredients
I list each ingredient with a quick tip so you can personalize the chili to your family.
2 tablespoons olive oil.
Tip: Use a good quality olive oil for flavor. If you prefer, use avocado oil for a higher smoke point.
1 onion, diced.
Tip: Yellow onion gives sweetness when cooked. Dice finely for even cooking and a smooth texture kids will accept.
2 cloves garlic, minced.
Tip: Fresh garlic beats jarred in flavor. Mince or press and add to the pan once the onion softens to avoid burning.
1 pound boneless, skinless chicken breasts, cooked and shredded.
Tip: Cook and shred the chicken ahead to save time. Use rotisserie chicken for a shortcut or poach breasts gently in broth.
1 can (15 oz) white beans, drained and rinsed.
Tip: Cannellini or great northern beans both work. Rinse to remove canning liquid and reduce sodium.
1 can (4 oz) diced green chilies.
Tip: Mild green chilies are family-friendly. Use hot green chilies or a chopped jalapeño if you want more kick.
4 cups chicken broth.
Tip: Use low-sodium broth so you control the salt. If you have homemade broth, this adds extra depth.
1 teaspoon ground cumin.
Tip: Toast in the pan briefly for extra aroma. Cumin gives a warm, earthy base to the chili.
1 teaspoon chili powder.
Tip: Adjust to your taste. A mild chili powder keeps it kid-friendly. Swap in smoked paprika for a different flavor.
Salt and pepper to taste.
Tip: Add less at first and adjust after simmering. The beans and broth may already contain salt.
1 cup heavy cream or half-and-half.
Tip: Heavy cream makes it rich and velvety. Half-and-half lightens the dish while keeping creaminess.
Chopped cilantro for garnish.
Tip: Add cilantro at the end for brightness. If your family is split on cilantro, serve it on the side.
Directions
In a large pot, heat the olive oil over medium heat.
Encouragement: Let the oil warm but not smoke. This sets a good base for onion flavor.
Add the onion and garlic, sautéing until softened, about 5 minutes.
Encouragement: Stir gently and watch for a translucent look. Do not rush this step. It builds the chili’s flavor.
Stir in the shredded chicken, white beans, green chilies, chicken broth, cumin, chili powder, salt, and pepper.
Encouragement: Mix well so the spices coat everything. Smell the pan and take a little taste to judge seasoning.
Bring to a simmer and cook for about 15 minutes.
Encouragement: Keep a gentle simmer. This gives time for the flavors to marry without overcooking the chicken.
Stir in the heavy cream, and cook for an additional 5 minutes.
Encouragement: Warm through but do not boil hard after adding cream. Taste and adjust salt and pepper now.
Serve hot, garnished with chopped cilantro.
Encouragement: Let family help with toppings. A little shredded cheese or tortilla chips makes it extra fun.
Serving
Serve this chili family-style in a large bowl set in the center of the table. Place small bowls of toppings so everyone can customize their bowl. I like to offer shredded cheddar, a squeeze of lime, extra chopped cilantro, and tortilla chips.
For a heartier meal, spoon chili over rice or into baked potatoes. You can also ladle it into warm bowls with crusty bread on the side. If you need a party-friendly approach, set up a chili bar and let guests choose their favorites.
If you want a lighter meal, serve with a simple green salad and warm tortillas. For nights where everyone is hungry, set out cornbread and watch it disappear.
Storage
Refrigerator: Cool the chili to room temperature, then store in an airtight container. It keeps well for 3 to 4 days.
Freezer: Cool fully and freeze in portions. Use freezer-safe containers and leave a little headroom. It stores for up to 3 months. Thaw overnight in the fridge before reheating.
Reheating: Reheat gently on the stovetop over low heat. Add a splash of broth or water if it seems thick. Microwave in 1-minute intervals, stirring between each session.
Make-ahead tip: You can cook the base without cream and refrigerate it. When ready to serve, reheat and stir in the cream at the end. This keeps the cream from breaking during storage.
Kitchen Notes
Shortcut: Use shredded rotisserie chicken to save 15 to 20 minutes.
Swap: Half the beans blended and half whole gives a creamier texture without extra cream.
Spice control: Start with half the chili powder if cooking for kids and add more to bowls for adults.
Thickening trick: If the chili is too thin, mash a few beans against the pot side and stir to thicken.
Quick garnish tray: Pre-chop cilantro, shred cheese, and set out lime wedges to speed family dinners.
Variations
Picky eaters: Omit green chilies and serve with a small bowl of mild salsa for dipping. You can also leave the cream out and add a dollop of sour cream per bowl.
Gluten-free: This recipe is naturally gluten-free. Double-check your chili powder if sensitive.
Dairy-free: Use coconut milk or a full-fat non-dairy creamer instead of heavy cream. Coconut will change the flavor slightly but keeps the chili creamy.
Low-carb: Skip the beans and add extra shredded chicken and a few extra cups of diced zucchini. Adjust seasoning and simmer until the zucchini softens.
Kid-friendly bowl: Serve with rice, shredded cheese, and a side of steamed veggies. For a fun twist, make mini chili bowls by hollowing small bread rolls and filling them.
For a slider-style family crowd pleaser, pair your chili night with my bang bang chicken sliders to please different tastes: bang bang chicken sliders.
FAQ
Q: Can I use frozen chicken?
A: Yes. Thaw and cook first, or simmer small frozen breasts in broth until cooked through. Shred after cooking. This works well when you forget to thaw overnight.
Q: Can I make this in a slow cooker?
A: Absolutely. Sauté the onion and garlic first. Then add all ingredients except cream to the slow cooker. Cook on low for 3 to 4 hours. Stir in cream at the end and heat through.
Q: How can I make it spicier?
A: Add a chopped jalapeño when sautéing the onion or stir in a few dashes of hot sauce to each serving. Roasted poblano peppers also add a smoky heat.
Q: Is there a vegetarian version?
A: Yes. Swap the chicken for extra beans or cooked diced sweet potato. Use vegetable broth instead of chicken broth and finish with cream or a dairy-free alternative.
Q: Why did my cream separate when I reheated the chili?
A: High heat can cause cream to split. Reheat gently over low heat and stir constantly. If you must microwave, do it in short bursts and stir between intervals.
Final tips: taste as you go, adjust seasonings slowly, and keep toppings on the table so everyone can customize their bowl. If you like experimenting, try adding a squeeze of lime at the end for brightness.
Conclusion
Thanks for cooking along with me. I hope this white chicken chili becomes a regular in your weeknight rotation. It warms the kitchen, feeds hungry hands, and is forgiving enough for busy families. If you want a version with extra layers of flavor and detailed steps, you might enjoy this thorough take on the recipe from White Chicken Chili (BEST EVER!) – Cooking Classy. For another creamy, family-style approach, this recipe gives a nice alternative perspective: White Chicken Chili – Tastes Better From Scratch.
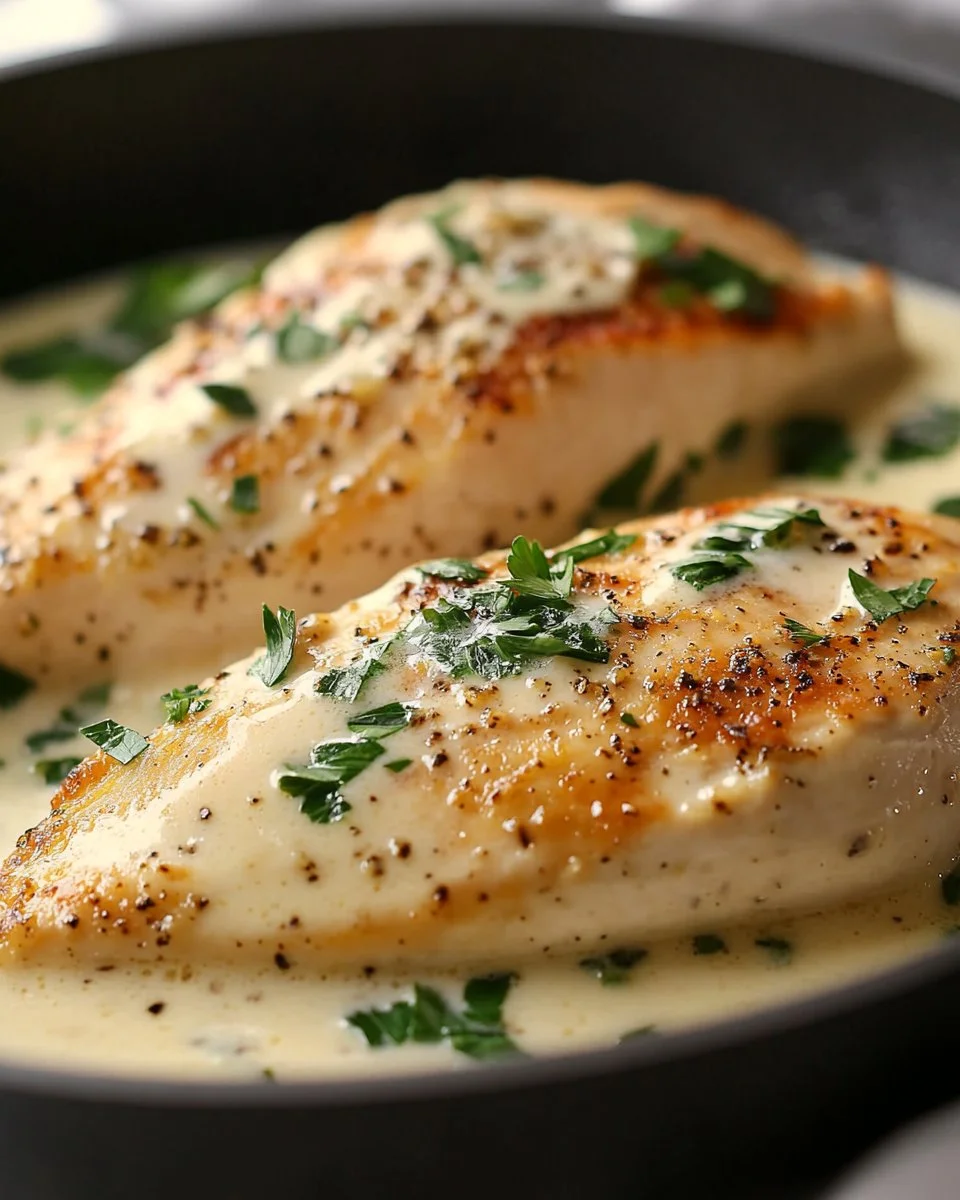
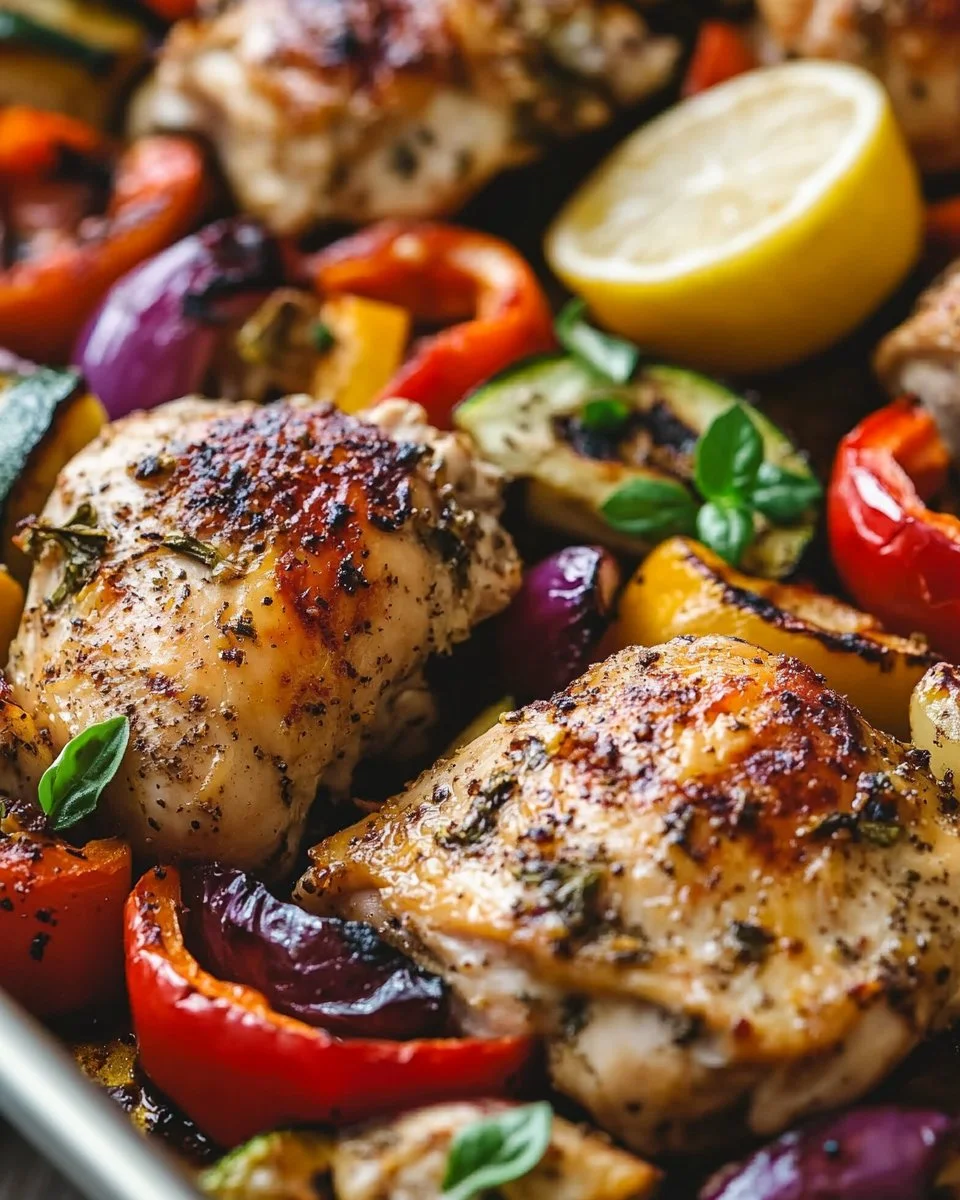
The kitchen smells like garlic and warm tomatoes. I hear the soft sizzle of chicken browning in the skillet and my kids calling from the hallway. That sound tells me we are close to a family meal everyone will love.
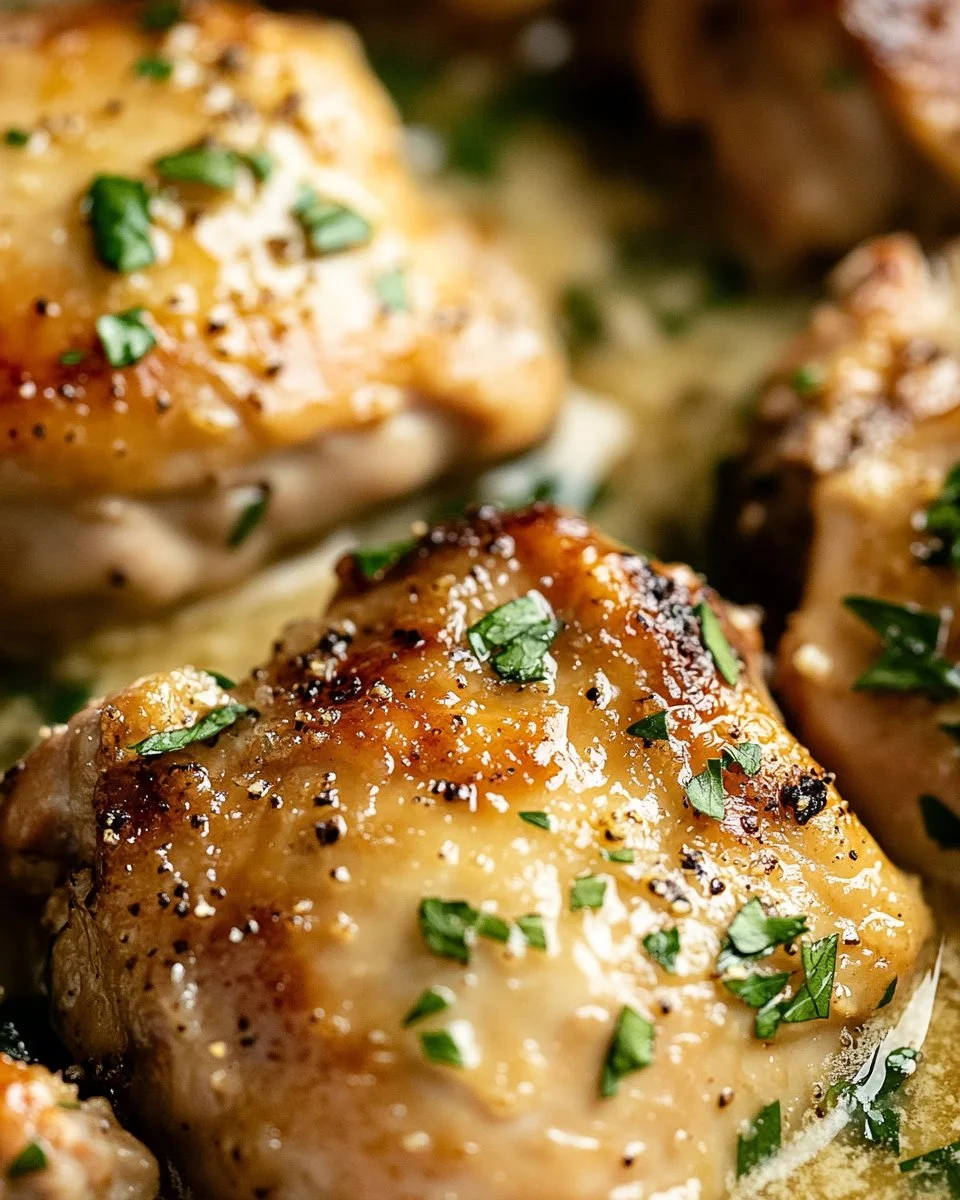
This Whole30 Marry Me Chicken recipe has become a weeknight favorite at my house. It’s simple, family-friendly, and the sauce is so silky that even picky eaters ask for seconds. If you want a comforting, Whole30-approved dinner that feels a little fancy without extra effort, you are in the right place. For more ideas with similar flavors, check out my Marry Me Chicken page which has tips I use at home.
Why this works
This recipe hits the sweet spot between fast and impressive. The chicken cooks quickly, and the sauce comes together while the chicken rests. The whole process is designed to save time, which matters when you are juggling kids, homework, and everything else.
The coconut cream makes a rich, dairy-free base that feels indulgent. Sun-dried tomatoes and basil add bright, Mediterranean flavor. It’s a dish that feels special but is simple enough to make on a busy weeknight. If you love Mediterranean flavors, explore more from my Mediterranean recipes collection for other family favorites.
What your family will thank you for
The sauce clings to each piece of chicken, so every bite tastes complete. You can serve this family style on the table and let everyone help themselves. Little hands and big appetites both get what they need. It’s a time-saver, a crowd-pleaser, and a keeper for your regular rotation.
Process Overview
“This is where the magic happens—when the aroma fills the kitchen.”
The technique is straightforward. Brown chicken, whisk a simple broth and arrowroot mix, melt in the coconut cream, and simmer until silky. While the chicken cooks, your sauce comes together in a few easy steps. If you like creamy garlic flavors, this method will feel familiar. I often borrow a trick from my creamy garlic parmesan chicken breast recipe and keep a small splash of broth ready to adjust the sauce consistency.
Ingredients
2 tablespoons olive oil (or avocado oil)
Lily’s tip: Use avocado oil if you prefer a neutral taste. I keep both oils on hand and reach for olive oil when I want a little extra flavor.
1.5 pounds boneless skinless chicken breast (cut into 1" cubes)
Lily’s tip: Cut the chicken into even cubes so they cook at the same rate. I pound larger breasts slightly before dicing to keep pieces uniform.
2 teaspoons garlic salt (or salt, divided)
Lily’s tip: Garlic salt gives an extra savory lift. If you use plain salt, add a pinch of garlic powder for the same effect.
1/2 teaspoon black pepper
Lily’s tip: Freshly cracked pepper adds brightness. Grind it just before cooking for the best flavor.
1 tablespoon fresh minced garlic
Lily’s tip: Fresh garlic truly makes a difference. Mince it finely so it disperses easily through the sauce.
1 13.66 ounce can full-fat unsweetened canned coconut cream (chilled; solid part only)
Lily’s tip: Chill the can overnight so the cream separates cleanly. Use only the solid white part for a rich, creamy sauce. I save the liquid in a jar for smoothies.
1 cup chicken broth
Lily’s tip: Use low-sodium broth so you can control the salt. Homemade broth works great and deepens the flavor.
1/4 cup nutritional yeast
Lily’s tip: Nutritional yeast adds a savory, slightly cheesy depth without dairy. Toast it briefly in the pan if you want a nuttier note.
1 teaspoon dried oregano
Lily’s tip: Oregano pairs perfectly with sun-dried tomatoes. If you have fresh oregano, use 1 tablespoon chopped.
1-2 tablespoons arrowroot or potato starch
Lily’s tip: Arrowroot gives the cleanest shine to the sauce. Start with 1 tablespoon and add more only if needed.
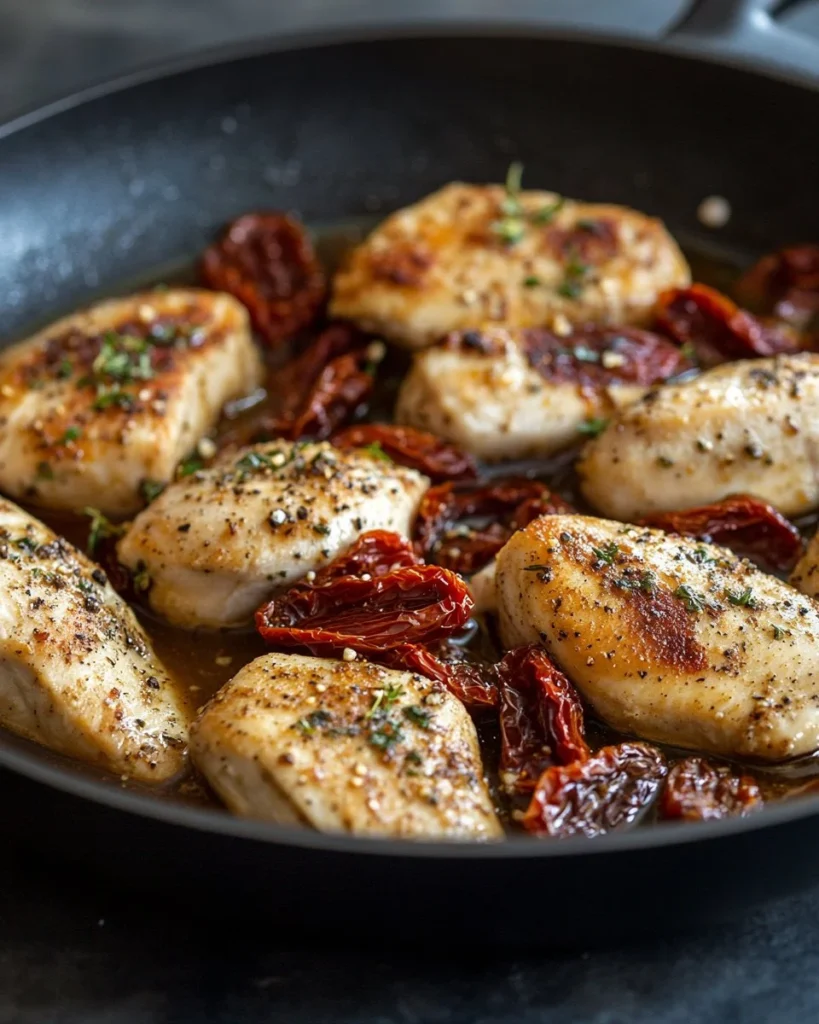
1 8-ounce jar sun-dried tomatoes (drained, blotted dry, and chopped (about a 1/3 cup chopped))
Lily’s tip: My boys do not like large chunks of these tomatoes, so I finely chop them. Blot all oil off well, or the final dish may become oily.
0.5 ounces fresh basil (Optional but recommended)
Lily’s tip: Fresh basil brightens the whole dish. Tear it with your hands and stir in at the end to keep the aroma fresh.
In a large skillet, heat the olive oil over medium heat.
Encouraging note: Heat the oil until it shimmers. This prevents sticking and gives the chicken a lovely sear.
Once the oil is hot, add the cubed chicken breasts and sprinkle with 1 teaspoon salt and 1/2 teaspoon pepper.
Encouraging note: Spread the chicken in an even layer. Don’t crowd the pan or the pieces will steam instead of browning.
Cook for about 5-7 minutes, or until they’re golden brown and cooked through.
Encouraging note: Flip gently so the pieces brown on each side. Use a fork to check doneness. Your family will love the golden edges.
Add the minced garlic for the last minute of cooking, cooking until just fragrant.
Encouraging note: Garlic burns quickly. Stir it in at the end and smell how the kitchen fills with warmth. This is a moment that makes everyone gather.
While the chicken is cooking, make the sauce. In a medium mixing bowl, whisk together the chicken broth, nutritional yeast, dried oregano, remaining 1 teaspoon salt, and only 1 tablespoon of the starch.
Encouraging note: Whisk until smooth. This simple mix will thicken the sauce gently and add savory flavor.
Drain, blot dry, and chop the sun-dried tomatoes. My boys don’t like large chunks of these tomatoes, so I finely chop them, but that’s up to you. But, be sure to blot the oil off well, or your final dish will be oily!
Encouraging note: Take a minute to pat them dry. It makes the sauce silkier and keeps the flavor balanced.
Once the chicken is cooked, add the sun-dried tomatoes to the pan. Stir to combine. Then, add ONLY the white solid part of the chilled coconut cream (set aside the opaque liquid, you won’t use it in this recipe – great for smoothies!). Mix until it has melted. Add the chicken broth mixture.
Encouraging note: Add the coconut cream in pieces so it melts evenly. It will turn into a luxurious base for the sauce.
Bring the sauce to a boil then simmer until thickened, about 5 minutes, or until it reaches your desired consistency. If sauce is not thick enough, combine 1 additional tablespoon starch with 1 additional tablespoon broth, whisking until smooth. If it is too thick, add a 1/4-1/2 cup additional chicken broth. Add to pan, stirring in immediately, and cooking until sauce thickens as desired.
Encouraging note: Taste as you go and adjust. Thick, spoonable sauce is perfect for serving with veggies or cauliflower rice.
Add additional salt to taste then serve your Marry Me Chicken with a side of your favorite veggies or over a bed of steamed cauliflower rice for a complete Whole30 dinner.
Encouraging note: Finish with torn basil and a sprinkle of extra nutritional yeast if you like. Your family will notice the love in every bite.
If you want an even simpler hands-off option for busy days, I sometimes adapt the flavors into a slow cooker as I mention in my crockpot garlic parmesan chicken thighs post.
Serving
Serve this Marry Me Chicken family-style in a shallow bowl or on a large platter. Garnish with torn basil and a few extra sun-dried tomato pieces for color. For a Whole30 plate, spoon it over steamed cauliflower rice and add a side of roasted broccoli or a big green salad.
If you are feeding kids, offer the sauce on the side so picky eaters can choose. My boys love the chicken plain, but the adults always pile on the sauce. Make a simple tray with veggies, rice, and bowls so everyone builds their own plate.
Storage
Fridge: Store leftover chicken and sauce in an airtight container for 3 to 4 days. Let it cool before sealing.
Reheat: Gently reheat on the stove over low heat with a splash of chicken broth to loosen the sauce. Microwave in 30 second bursts, stirring between intervals.
Freezer: You can freeze the cooked chicken and sauce for up to 3 months. Thaw overnight in the fridge and reheat slowly to maintain creaminess.
Tip: Add fresh basil after reheating. Herbs lose brightness with heat, so saving some for the end revives the dish.
Kitchen Notes
Use the reserved coconut water in smoothies or curries. It’s great for a morning protein smoothie.
If you want a smoother sauce, strain the sun-dried tomatoes before adding.
For more depth, sauté a small diced onion with the chicken for the first few minutes.
Arrowroot thickens best when mixed first with cold liquid. Never add it directly to hot sauce or it can clump.
Make a double batch of sauce and freeze half. It saves time on a busy weeknight.
Variations
For picky eaters: Leave the sun-dried tomatoes on the side. Some kids prefer the chicken plain with a side of sauce.
Lower sodium: Use low-sodium broth and reduce added salt to taste.
Paleo swap: Use avocado oil and arrowroot as instructed for a paleo-friendly outcome.
Extra veggies: Fold in baby spinach at the end until wilted for a green boost.
Protein swap: Try the same sauce with leftover roast chicken, turkey breast, or sautéed shrimp.
FAQ
Q: Can I use canned coconut milk instead of coconut cream?
A: You can, but use the thickest, full-fat canned coconut milk and chill it so the cream separates. Scoop only the solid part for the richest texture.
Q: My sauce is grainy after adding starch. What happened?
A: That usually means the starch was not mixed with cold liquid first. Whisk it into cold broth before adding or make a slurry with extra chicken broth.
Q: Can I make this dairy-free but not Whole30?
A: Yes. This recipe is naturally dairy-free. You can add grated Parmesan after cooking if you are not following Whole30.
Q: Will this work with chicken thighs?
A: Boneless thighs work beautifully. They stay juicy and may need a minute or two longer to brown.
Q: Is nutritional yeast necessary?
A: It adds savory complexity. If you do not have it, add a teaspoon of tomato paste or a splash of coconut aminos for extra umami.
Conclusion
Thank you for cooking along with me. I hope this Whole30 Marry Me Chicken becomes a cozy, reliable meal in your home the way it has in mine. If you want to compare variations or the original inspiration, see Whole Food For 7’s Whole30 Marry Me Chicken recipe and this carefully tested version at 40 Aprons Whole30 Marry Me Chicken (Paleo, Dairy Free). Happy cooking, and enjoy that wonderful kitchen scent when the sauce comes together.
This Whole30 Marry Me Chicken recipe is a simple, family-friendly dish featuring succulent chicken in a rich, tomato-based sauce infused with garlic and coconut cream.
Ingredients
Main Ingredients
2tablespoonsolive oil (or avocado oil)(Use avocado oil for a neutral taste.)
1.5poundsboneless skinless chicken breast (cut into 1" cubes)(Cut chicken into even cubes for uniform cooking.)
2teaspoonsgarlic salt (or salt, divided)(Garlic salt gives extra savory lift.)
1/2teaspoonblack pepper(Use freshly cracked pepper for better flavor.)
1tablespoonfresh minced garlic(Mince finely for better flavor distribution.)
1canfull-fat unsweetened canned coconut cream (chilled; solid part only)(Chill overnight for best results.)
1cupchicken broth(Preferably low-sodium broth.)
1/4cupnutritional yeast(Adds a savory, cheesy depth.)
1teaspoondried oregano(Use fresh oregano if available.)
1-2tablespoonsarrowroot or potato starch(Start with 1 tablespoon, adjust for thickness.)
1jarsun-dried tomatoes (drained, chopped)(Finely chop to avoid large chunks.)
0.5ouncesfresh basil(Recommended for garnish.)
Instructions
Cooking Chicken
In a large skillet, heat the olive oil over medium heat until it shimmers.
Add the cubed chicken breasts and sprinkle with 1 teaspoon salt and 1/2 teaspoon pepper.
Cook for about 5-7 minutes, or until golden brown and cooked through.
Add the minced garlic for the last minute of cooking, until just fragrant.
Making the Sauce
While the chicken is cooking, whisk together chicken broth, nutritional yeast, dried oregano, remaining salt, and 1 tablespoon of starch in a medium bowl.
Drain, blot dry, and chop the sun-dried tomatoes.
Once the chicken is cooked, add sun-dried tomatoes to the pan, then the white solid part of the chilled coconut cream, mixing until melted.
Add the chicken broth mixture and bring to a boil, then simmer until thickened, about 5 minutes.
Adjust the sauce thickness as needed with additional starch or broth.
Serving
Serve your Marry Me Chicken with a side of veggies or over steamed cauliflower rice.
Garnish with torn basil and a sprinkle of extra nutritional yeast if desired.
Notes
Store leftovers in an airtight container for 3-4 days. Reheat gently. You can freeze for up to 3 months.
Calories: 480kcal
Course: Dinner, Main Course
Cuisine: Mediterranean, Whole30
Keyword: Comfort Food, Family Meal, Healthy Dinner, Marry Me Chicken, Whole30 Chicken
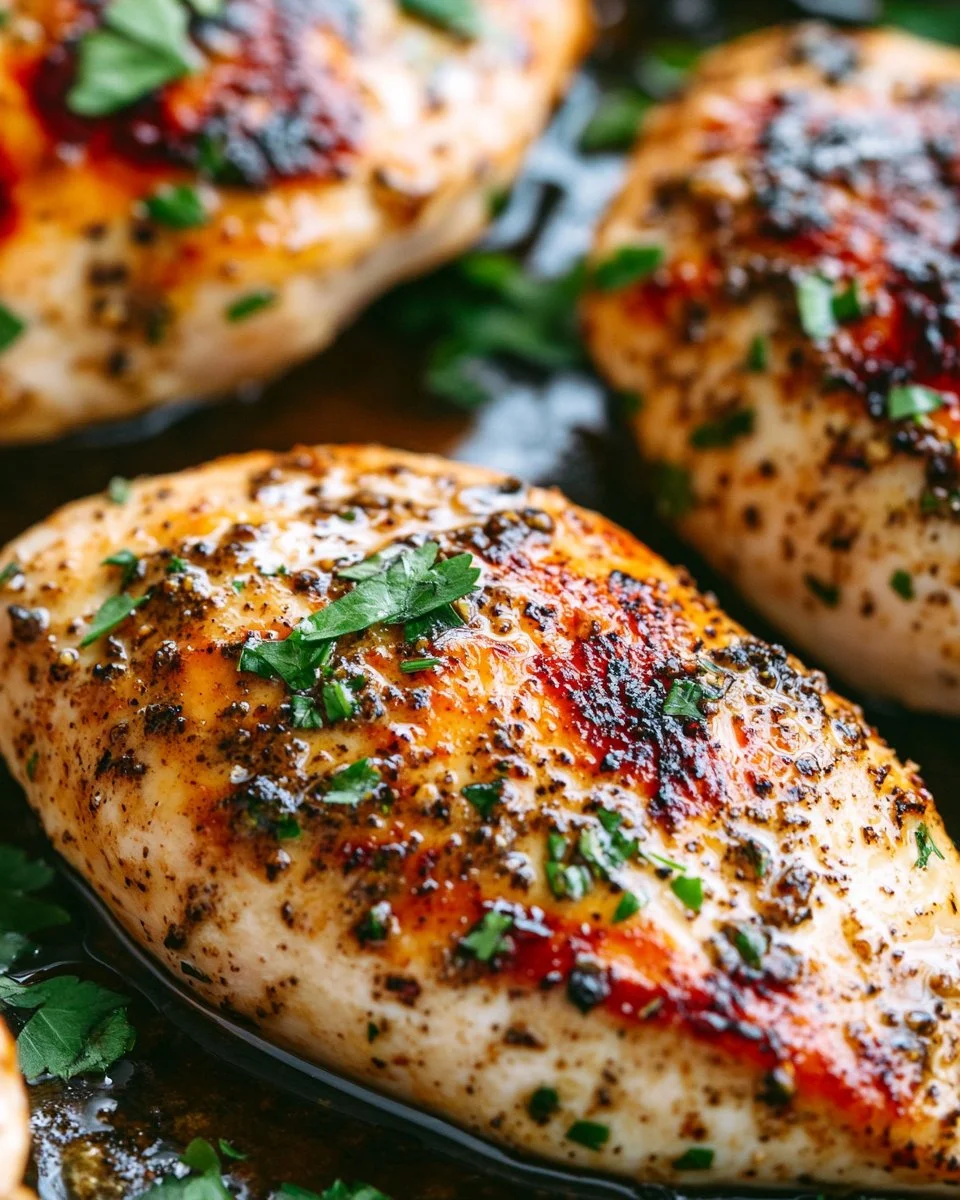
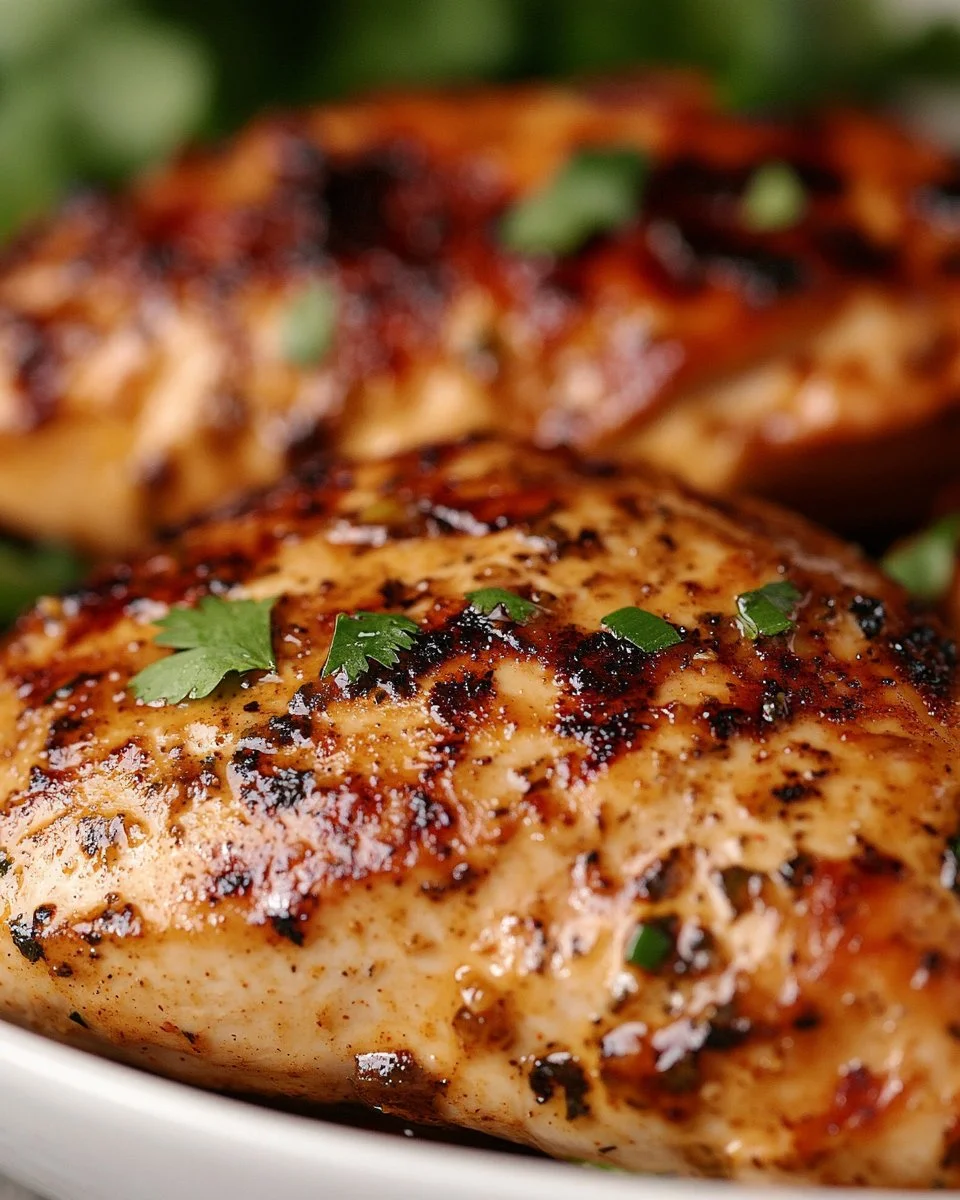
The kitchen smells warm and inviting. You can hear the soft sizzle when the seasoning hits the hot air fryer basket. That sound means dinner is on its way, and the whole house perks up.
I remember the first time I used an air fryer for a weeknight chicken dinner. The kids came running for the smell. The chicken came out juicy, with a light crisp on the outside, and we had time to sit down together without rushing. That simple victory is what I want to share with you.
Why this works
Air frying is a family-friendly way to cook chicken breasts that saves time and keeps things simple. The air fryer uses hot circulating air to create a crispy outside and a tender inside. That means less oil, less mess, and faster clean up.
I test recipes in my home kitchen with my family. Over the years I have found the right temperatures and timing that give consistent results. This method keeps the centers juicy while giving a pleasant golden exterior that everyone at the table will love.
This recipe is perfect for busy nights. You can season the chicken ahead, pop it in the basket, and get side dishes ready while it cooks. It gives you more time to talk, set the table, and enjoy the meal together.
Process Overview
“This is where the magic happens—when the aroma fills the kitchen.”
The process is straightforward. You preheat the air fryer, season the chicken, place it in a single layer, and cook until the internal temperature reaches 165°F. The cooking window is short enough to keep the meat juicy and long enough to develop a nice color.
I recommend using an instant read thermometer. It is the most reliable way to know your chicken is done. Resting the chicken for a few minutes after cooking lets the juices redistribute. That small pause makes a noticeable difference.
Quick timeline
Prep and seasoning: 5 to 10 minutes.
Cook time: 12 to 15 minutes depending on thickness.
Rest: 3 to 5 minutes.
Total time: About 25 minutes from start to table.
Ingredients
4 chicken breasts
Tip: Use even-sized breasts for even cooking. If one is much thicker, pound it gently to match the others.
2 tablespoons olive oil
Tip: Olive oil helps the seasoning stick and promotes browning. You only need a light coating.
1 teaspoon garlic powder
Tip: Garlic powder gives a steady savory base. For fresh garlic, use one small clove minced, but remember it browns faster.
1 teaspoon onion powder
Tip: Onion powder adds depth without adding moisture. It blends well with the garlic and paprika.
1 teaspoon paprika
Tip: Paprika gives color and a mild smoky flavor. Use smoked paprika for a deeper taste, or sweet paprika if you prefer mildness.
Salt and pepper to taste
Tip: I use about 3/4 teaspoon kosher salt and 1/4 teaspoon black pepper for four breasts, then adjust to personal taste. Season both sides.
Personal note: I often double the seasoning when I make extra chicken for salads or meal prep. It holds up well in leftovers and freezes nicely.
Directions
Preheat the air fryer to 380°F (190°C).
Encouragement: Preheating gives you a consistent start and helps the outside crisp quickly. Take a moment to set the table or chop a quick side salad.
In a bowl, mix the olive oil, garlic powder, onion powder, paprika, salt, and pepper.
Encouragement: Use your hands or a spoon to combine until it looks spreadable. Smelling the seasoning mix is one of my favorite parts.
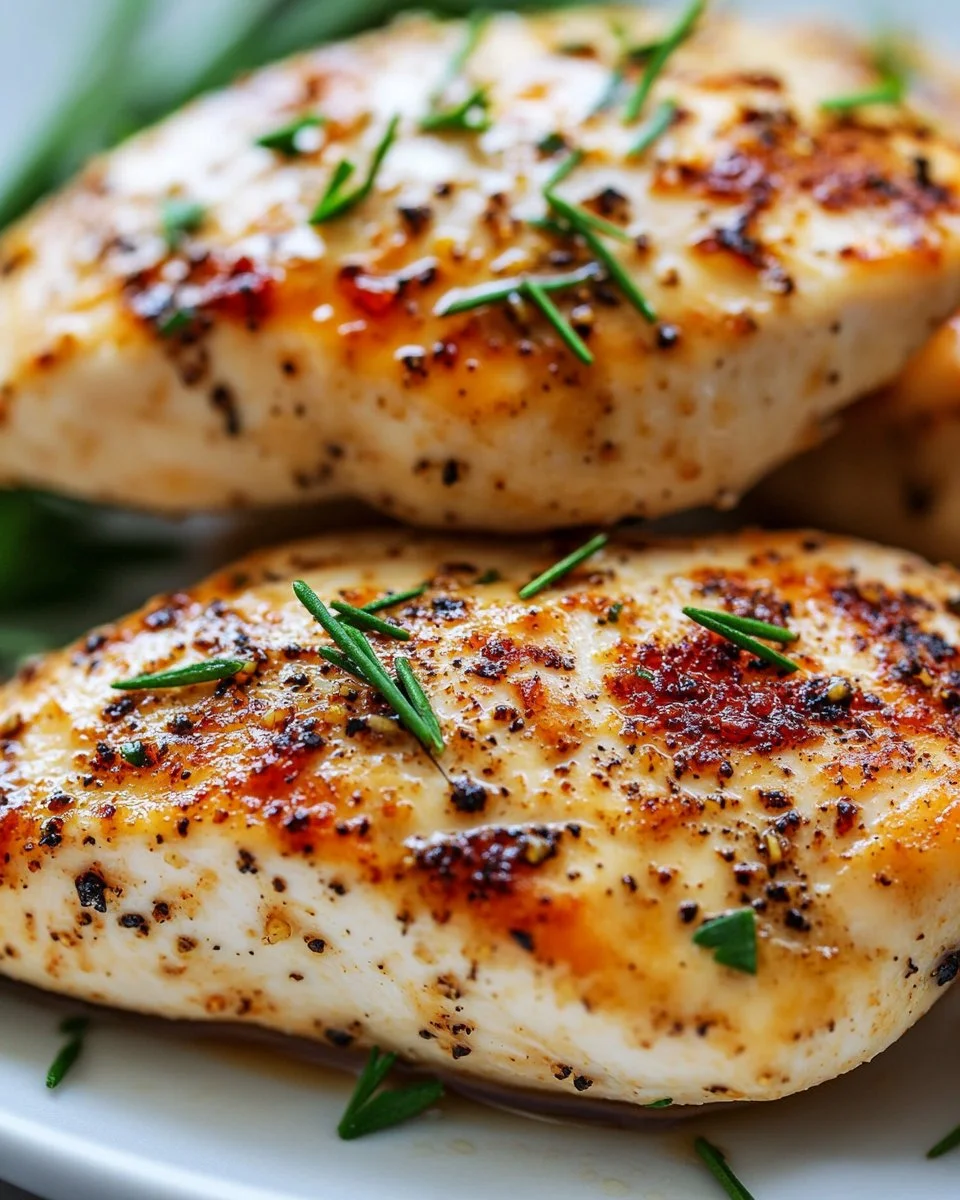
Coat the chicken breasts evenly with the seasoning mixture.
Encouragement: Rub the mixture into both sides. A little patience here means every bite will be flavorful.
Place the chicken breasts in the air fryer basket in a single layer.
Encouragement: Give each breast a little room. Crowding the basket can reduce air flow and affect crisping. If needed, cook in batches.
Cook for 12-15 minutes, flipping halfway through, until the chicken is cooked through and reaches an internal temperature of 165°F (75°C).
Encouragement: Check with an instant read thermometer. When it hits 165°F, you know it is safe and perfectly juicy. Thicker breasts may need the full 15 minutes.
Allow to rest for a few minutes before slicing and serving.
Encouragement: Resting is not wasted time. It allows the juices to redistribute so the slices remain moist. Use those few minutes to finish a side or pour drinks.
Serving
Slice the chicken against the grain and place it on a large platter for family-style serving. This way everyone can take the number of slices they prefer. It makes dinner feel relaxed and communal.
Pairings I love:
Steamed green beans and roasted sweet potatoes for a balanced plate.
Mixed greens with a lemon vinaigrette for a lighter meal.
Rice bowls with roasted vegetables and a drizzle of your favorite sauce for a kid-friendly option.
For picky eaters, keep a small bowl of ketchup or BBQ sauce on the table. For adults, offer a light chimichurri or garlic yogurt sauce on the side. Let everyone customize their plate. That way the meal is flexible and everyone gets something they enjoy.
Storage
Cool the chicken to room temperature for no more than two hours before refrigerating. Store in an airtight container.
Refrigerator: Keeps well for 3 to 4 days. Slice it before storing for quick reheating or to use in salads and sandwiches.
Freezer: Wrap each breast tightly in plastic wrap and place in a freezer bag. Freeze up to 3 months. Thaw overnight in the refrigerator before reheating.
Reheat tips:
Air fryer: 350°F for 3 to 5 minutes. This restores some crispness while keeping the inside moist.
Oven: 325°F for about 10 minutes covered with foil, depending on thickness.
Microwave: Use short 20 to 30 second bursts to avoid drying. Add a splash of water and cover with a microwave-safe lid to retain moisture.
Label containers with the date so you always know what is freshest. I keep a small permanent marker and masking tape handy for quick labeling.
Kitchen Notes
Use an instant read thermometer for consistent results.
If breasts are uneven, fold the thin end under to even the thickness or gently pound to match.
Lightly oil the basket or spray with a nonstick spray if your model tends to stick.
Cook in one layer. If you must cook in batches, keep finished pieces loosely tented with foil to stay warm.
Try to handle the chicken as little as possible after cooking to preserve juices.
Variations
Kid-friendly mild: Reduce the paprika and add a pinch of brown sugar for a slightly sweet glaze kids enjoy.
BBQ style: Brush with 2 tablespoons of your favorite BBQ sauce in the last 2 minutes of cooking for a sticky finish.
Lemon herb: Add 1 teaspoon dried oregano and replace paprika with lemon zest for a bright flavor.
Spicy: Add 1/2 teaspoon cayenne pepper or 1 teaspoon chili powder to the seasoning mix for heat.
Keto and low carb: Serve over cauliflower rice or with roasted broccoli for a filling low-carb meal.
Gluten-free: This recipe is naturally gluten-free. Check your seasonings and sauces to confirm they are labeled gluten-free if sensitivity is a concern.
Mix and match these tweaks to suit your family. Small changes can keep this recipe fresh and interesting over time.
FAQ
Q: Can I use frozen chicken breasts?
A: It is better to thaw before cooking for the most even result. If you must cook from frozen, increase the time and check the internal temperature often. Make sure it reaches 165°F.
Q: How do I stop chicken from drying out?
A: Use even thickness, do not overcook, and rest the chicken after cooking. An instant read thermometer is the best tool to prevent overcooking.
Q: Can I bread the chicken for a crunchy coating?
A: Yes. Lightly coat the breasts in a beaten egg and then a mixture of panko and seasonings. Spray the breading with oil and air fry at the same temperature, watching closely for browning.
Q: What if my air fryer runs hot or cool?
A: All air fryers run a little differently. Start checking at the lower end of the time range. Make notes of timing for your model so you get consistent results.
Q: Can I double the recipe for a larger family?
A: Yes, but do not crowd the basket. Cook in batches if needed. Keep finished pieces loosely covered to stay warm while the next batch cooks.
Conclusion
I hope this recipe becomes a go-to for your family weeknights. It is simple, reliable, and flexible enough to please kids and adults alike. Cooking should make you smile, not add stress, and this air fryer method gives you more time together around the table.
This air fryer chicken recipe delivers juicy, tender chicken breasts with a crispy exterior, perfect for family dinners with quick prep and cook times.
Ingredients
Main ingredients
4pieceschicken breasts(Use even-sized breasts for even cooking. If one is much thicker, pound it gently to match the others.)
2tablespoonsolive oil(Helps the seasoning stick and promotes browning. You only need a light coating.)
1teaspoongarlic powder(Gives a steady savory base. For fresh garlic, use one small clove minced.)
1teaspoononion powder(Adds depth without adding moisture.)
1teaspoonpaprika(For color and mild smoky flavor.)
to tastesalt and pepper(Use about 3/4 teaspoon kosher salt and 1/4 teaspoon black pepper for four breasts.)
Instructions
Preparation
Preheat the air fryer to 380°F (190°C).
In a bowl, mix the olive oil, garlic powder, onion powder, paprika, salt, and pepper.
Coat the chicken breasts evenly with the seasoning mixture.
Place the chicken breasts in the air fryer basket in a single layer.
Cooking
Cook for 12-15 minutes, flipping halfway through, until the chicken is cooked through and reaches an internal temperature of 165°F (75°C).
Allow to rest for a few minutes before slicing and serving.
Serving
Slice the chicken against the grain and place it on a large platter for family-style serving.
Notes
Cool the chicken to room temperature for no more than two hours before refrigerating. Store in an airtight container for 3-4 days. For freezing, wrap each breast tightly and freeze up to 3 months.
If you're like me and often find yourself scrambling for dinner ideas after a long day, you're in for a treat! I've gathered my favorite quick and delicious chicken dinner recipes that not only save me time but also satisfy my cravings. From comforting Mini Chicken Pot Pies to zesty Chicken Shawarma with Garlic Sauce, this list will inspire you to whip up meals your family will love. Whether you have a slow cooker, an oven, or an air fryer, I’ve got something for everyone. Get ready to discover easy, mouth-watering dishes that will have you saying goodbye to takeout and hello to homemade goodness.
1. Mini Chicken Pot Pies
Picture this: the rich aroma of buttery chicken wafts through the air, and suddenly, the chaos of the day fades away. Mini chicken pot pies are not just meals; they are heartwarming bites that bring families together, turning any ordinary night into a delectable celebration. These quick-baking treasures are perfect for kids and adults alike, offering comfort in every flaky layer. If you're searching for easy, family-friendly recipes that keep everyone asking for seconds, dive into our delicious take on mini chicken pot pies and discover the joy they bring to the dinner table!
Step into a world of intoxicating aromas and mouthwatering flavors with this Chicken Shawarma with Garlic Sauce recipe! Perfect for busy weeknights or leisurely Sunday dinners, this dish combines tender grilled chicken with a silky garlic sauce that elevates every bite. As a professional food blogger and mom, I cherish meals that not only bring the family together but also fill the home with warmth and spice. Dive into this recipe to discover how easy it is to create savory Middle Eastern cuisine right in your own kitchen!
Get ready to fill your kitchen with the mouthwatering aroma of Crock Pot Angel Chicken—a dish that feels like a warm hug on a busy day. This creamy, dreamy recipe is the perfect blend of comfort and convenience, making it an ideal choice for family dinners or when you're entertaining friends. Dive into this recipe and discover how to create a meal that effortlessly impresses while keeping your evenings stress-free. Plus, if you're looking for another flavorful option, don't miss the opportunity to try my Bang Bang Chicken Sliders for an exciting twist!
Imagine walking into your kitchen to the irresistible aroma of oven-baked chicken, golden and glistening, just waiting to be savored. This foolproof recipe is not just for gourmet chefs; it’s designed for anyone looking to whip up a delicious meal on a busy weeknight or a laid-back Sunday. With simple, reliable techniques that guarantee juicy results, you'll impress your family and make dinner feel special without the stress. Ready to bring warmth and flavor to your table? Dive into this easy, delectable oven-baked chicken breast recipe and discover your new favorite dinner solution!
Imagine walking into a home filled with the warm, inviting aroma of perfectly cooked chicken, enticing your family to gather around the dinner table. With air frying, you can achieve juicy chicken breasts that boast a delightful crispness on the outside, all while saving time and effort during busy weeknights. In this article, we'll explore the magic of air frying, sharing tips and tricks that make this cooking method a game-changer for your family meals, so you can enjoy delicious food and precious moments together without the hassle.
Imagine walking into your kitchen, greeted by the mouthwatering aroma of garlic and butter—this is the magic of Cheesy Garlic Chicken Wraps! Perfect for busy weeknights, this easy recipe transforms simple ingredients into a family favorite that’s packed with flavor and delight. Whether you're looking for a quick dinner idea or just want to impress your loved ones with a dish that feels indulgent yet effortless, these wraps are a delicious solution that will have everyone asking for seconds. Get ready to roll up some comfort food goodness!
Get ready to transform your weeknight dinners with the ultimate comfort food: Smothered Cheesy Sour Cream Chicken! Imagine the rich aroma of garlic and sour cream wafting through your kitchen, inviting everyone to gather for a meal that's both easy to prepare and utterly satisfying. This recipe not only guarantees cheesy goodness but also makes you feel like a culinary hero with minimal effort. If you’re on the lookout for quick, crowd-pleasing dishes, this cheesy delight is just the beginning—check out my Bang Bang Chicken Sliders for another hassle-free hit! Dive into this delicious recipe and elevate your dinner table tonight!
There's nothing like the aroma of garlic and butter wafting through your kitchen to make you feel right at home. With this Sheet Pan Garlic Butter Chicken and Veggies recipe, you can whip up a comforting meal that delights both the senses and your taste buds—all with minimal effort. Perfect for busy weeknights, this dish not only brings a burst of flavor but also serves as a one-pan solution for hassle-free clean-up. Dive in to discover how you can create a cozy culinary experience that your whole family will love!
Imagine coming home to the warm, inviting aroma of a savory dish that practically makes dinner time feel like a cozy gathering. With my Easy Crock Pot Crack Chicken, you can effortlessly whip up a family-friendly meal that's bursting with flavor and comfort. After over 15 years of testing recipes, I promise this delightful dish combines creamy cheddar, zesty ranch, and tender chicken, requiring minimal effort for maximum taste. Dive into this article to discover how to bring everyone together at the table with ease, and explore tips that ensure your kitchen will be filled with the mouthwatering scents of homemade happiness.
10. Cowboy Butter Lemon Bowtie Chicken with Broccoli
Get ready to elevate your weeknight dinner game with Cowboy Butter Lemon Bowtie Chicken with Broccoli! In just under 30 minutes, you can whip up a vibrant dish brimming with bold flavors, buttery goodness, and colorful veggies that the whole family will adore. This recipe not only delivers on taste but also ensures a quick cleanup, making it the perfect solution for busy evenings when comfort food is a must. Dive into this delightful culinary experience and discover how to create a meal that not only nourishes the body but also brings everyone together around the table.
Get ready to transform your busy weeknights into memorable family feasts with this irresistible Garlic Herb Chicken recipe. Picture the warm aroma of garlic and butter filling your kitchen as the golden-brown chicken sizzles in the pan, creating a dish that your loved ones will crave again and again. Not only is this recipe simple and reliable, but it also promises to bring everyone to the table, turning dinner into a cozy gathering. Dive in to discover how to create a meal that's both delightful and easy to prepare—perfect for any occasion!
Imagine walking into your kitchen, greeted by the warm, inviting aroma of Greek chicken sizzling on the stove, infused with zesty lemon and fragrant oregano. This easy-to-make dish doesn’t just satisfy your hunger; it wraps your loved ones in a comforting embrace, making dinner time feel special. Dive into this Greek Chicken and Lemon Rice recipe, where simplicity meets vibrant flavors, and discover a meal that will have everyone asking for seconds—and maybe even the recipe!
Imagine walking into your kitchen to the irresistible aroma of garlic and butter wafting through the air, promising a delicious dinner that practically cooks itself. This Garlic Butter Chicken Crockpot Recipe not only offers tender, flavorful chicken in just six hours but also creates a cozy family atmosphere with minimal effort. Perfect for busy weeknights, this dish is a game-changer that brings everyone together around the table. Dive into this easy-to-follow recipe and discover how to turn simple ingredients into a heartwarming meal your loved ones will crave!
14. Bang Bang Chicken Bowl: An Incredible Ultimate Recipe for 2023
Get ready to elevate your weeknight dinners with the irresistible Bang Bang Chicken Bowl! This ultimate recipe combines the mouthwatering flavors of succulent chicken, fresh veggies, and a rich, glossy sauce, all served over fluffy rice. Whether you’re catering to picky eaters or juggling a busy schedule, this dish promises to be a family favorite that comes together in no time. Dive into the article to discover step-by-step instructions and tips that will not only simplify your cooking process but also satisfy everyone at your table.
If you're on the hunt for a cozy dinner that combines comfort and convenience, look no further than this Creamy Garlic Parmesan Chicken Breast recipe! With its irresistible aroma of garlic and butter wafting through your home, this dish not only tantalizes your taste buds but also serves up a hearty serving of nostalgia. Perfect for busy weeknights, the one-pan preparation means less time cleaning and more time enjoying a delicious meal with loved ones. Dive into this article to discover just how easy it is to whip up this delightful dinner that feels like a warm hug on a plate!
Picture this: the aroma of caramelized onions fills your kitchen as golden-brown chicken simmers alongside creamy rice, all wrapped in a deliciously cheesy topping. This French Onion Chicken Rice Bake is not just a meal; it's a warm embrace after a hectic day, designed to nourish both body and soul. With simple ingredients and an easy preparation method, this recipe ensures that even on your busiest weeknights, you can serve up comfort food that’s sure to become a family favorite. Dive into this article and discover how to make this heartwarming dish that brings joy to your dinner table!
Get ready to transform your dinner routine with this mouthwatering Greek sheet pan chicken recipe! As it bakes, your kitchen will be filled with the tantalizing aroma of zesty lemon and savory oregano, creating an inviting atmosphere that beckons family to the table. Packed with flavor and colorful roasted vegetables, this one-pan meal not only saves time on cleanup but also guarantees a comforting dinner option that feels like home. Dive into the full article for a step-by-step guide to making this deliciously simple dish that will have everyone asking for seconds!
Imagine stepping into your kitchen to the warm, inviting aroma of garlic and cheese, as golden-brown chicken thighs bubble away in the oven. This creamy oven-baked chicken thighs recipe is not just a dish—it's a cozy family gathering waiting to happen! With simple ingredients and no complicated techniques, you'll learn to create a meal that feels like a comforting hug on a plate. Ready to impress your loved ones with a dinner that’s as delicious as it is easy? Let’s dive into the steps that will make your mealtime a special occasion!
Get ready to transform your weeknight dinners with our 30-minute oven-baked boneless skinless chicken thighs! With the irresistible aroma of garlic and paprika filling your kitchen, this recipe delivers tender, juicy chicken that’s both simple and quick to prepare. Perfect for busy families, it not only saves you time but also allows you to enjoy those precious moments together at the dinner table, whether it's helping with homework or sharing stories from the day. Dive into this deliciously easy dish that promises flavor without the fuss!
Get ready to elevate your weeknight dinners with a dish that's as easy to make as it is delicious: Sweet Chili Glazed Chicken Thighs. Imagine the aroma of juicy, caramelized chicken filling your kitchen, all thanks to an effortless air fryer prep. This recipe delivers that crave-worthy takeout taste without the hassle, making it a perfect choice for busy families. With a sticky glaze that’s full of flavor and a tender, forgiving texture, you’ll have your kids asking for seconds. Dive into this culinary delight and bring the taste of your favorite restaurant right to your table tonight!
If you're craving a cozy, soul-warming dinner that the whole family will love, look no further than Creamy Garlic Mushroom Chicken Thighs. This delightful recipe combines tender chicken thighs, earthy mushrooms, and a luscious garlic cream sauce, filling your kitchen with irresistible aromas. Perfect for a weekday meal or a special occasion, this dish guarantees not only a satisfying dining experience but also the joy of gathering everyone around the table. Dive in to discover how to create this culinary hug and elevate your family dinner tonight!
22. Easy Crockpot Chicken Thighs with Creamy Gravy
Imagine walking into your home after a long day to the enticing aroma of slow-cooked chicken thighs bathed in creamy gravy, ready to serve. This effortless recipe is designed for busy families looking to transform ordinary weeknight dinners into something special without the hassle. Join me, Lily, as I guide you through this simple yet satisfying crockpot dish that promises both flavor and ease, making your meal prep a breeze. Say goodbye to mealtime stress and hello to comforting moments around the table!
Imagine walking into your kitchen and being enveloped by the warm, inviting aroma of garlic and butter, signaling that dinner is nearly ready. This Crockpot Garlic Parmesan Chicken Thighs recipe not only tantalizes the senses but also brings loved ones together around the table for cozy conversations. As a busy mom and food blogger, I cherish meals that effortlessly blend flavor and ease, allowing me to focus on family while savoring every delicious bite. Dive into this recipe to discover how simple ingredients can create a comforting, crowd-pleasing dish that makes mealtime magical.
Warm up your weeknights with a bowl of Classic Chicken Tortilla Soup that not only comforts the soul but also brings the family together. As a seasoned home cook and food blogger, I've crafted this recipe based on a decade of cherished family dinners, where the enticing aroma of spices and chicken fills the air with love and warmth. Discover how to create a simple yet flavorful dish that transforms any evening into a cozy gathering, and learn the secrets that make this soup a staple in our home. Dive in for a delightful recipe that promises to become a beloved favorite in yours too!
Picture this: the warm, savory aroma of Homemade Crockpot Chicken Tortilla Soup wafting through your kitchen, wrapping you in a comforting embrace as it bubbles away in the background. This delightful dish is the epitome of easy weeknight meals, combining vibrant flavors and hearty ingredients that bring family and friends together. With minimal prep and a chance for the flavors to deepen as it cooks, this recipe is a win for anyone seeking a nourishing, stress-free dinner option. Ready to find out how to create this cozy staple in your own home? Dive into our guide for a taste of comfort that’s just a click away!
If you’re looking to elevate your weeknight dinners, this easy Mexican chicken marinade is your new secret weapon! Imagine the bold flavors of lime, smoked paprika, and fresh herbs transforming ordinary chicken into a sizzling sensation that tantalizes the taste buds. Perfect for busy families, this quick and reliable recipe promises to bring smiles to the dinner table, whether you're feeding adventurous kids or busy adults. Dive into the full article for a simple marinade that will make any meal feel like a fiesta!
There's something truly magical about the aroma of warm tortillas and melted cheese wafting through the kitchen, ready to transform a typical weeknight into a family fiesta. Dive into this easy and delightful chicken chimichanga recipe that combines simplicity with flavor, proving that delicious meals can fit seamlessly into your busy life. With sizzling fillings and a golden, crispy exterior, these chimichangas are not just a treat for the taste buds, but also a wonderful opportunity to create lasting memories around the dinner table. Discover how to bring a touch of celebration into your home with this scrumptious dish!
Get ready to elevate your weeknight dinners with these mouthwatering green chicken enchiladas! Bursting with the rich flavors of roasted garlic and zesty green salsa, this dish is not just a meal; it’s a warm embrace after a long day. Perfectly simple and satisfying, these enchiladas are sure to become a go-to recipe in your home, whether you serve them with a light salad or complement them with your favorite sides. Click through to discover the full recipe and treat your family to a cozy dinner that feels just like home!
Get ready to savor weeknight dinners with a burst of flavor! These Green Chile Pepper Jack Chicken Enchiladas are not just a meal; they’re a warm invitation to gather around the table and enjoy hearty, home-cooked goodness. With their cheesy filling and zesty kick, this easy-to-follow recipe combines comfort and convenience, making it perfect for busy evenings or leisurely family gatherings. Discover how to create a dish that will have everyone asking for seconds and turning your kitchen into the heart of your home!
If you're craving a comforting meal that brings back fond memories of family gatherings, look no further than Chi-Chi's Baked Chicken Chimichangas. These delightful handheld wonders are not only easy to whip up but also packed with mouthwatering flavors that will leave everyone at the table asking for seconds. With their warm tortillas, savory spiced chicken, and gooey cheese, these chimichangas are the ultimate crowd-pleaser, perfect for busy nights or casual get-togethers. Dive into this recipe to transform your kitchen into a haven of delicious aromas and satisfied smiles!