Tag

comfort food

Browsing

Cowboy Butter Lemon Bowtie Chicken with Broccoli

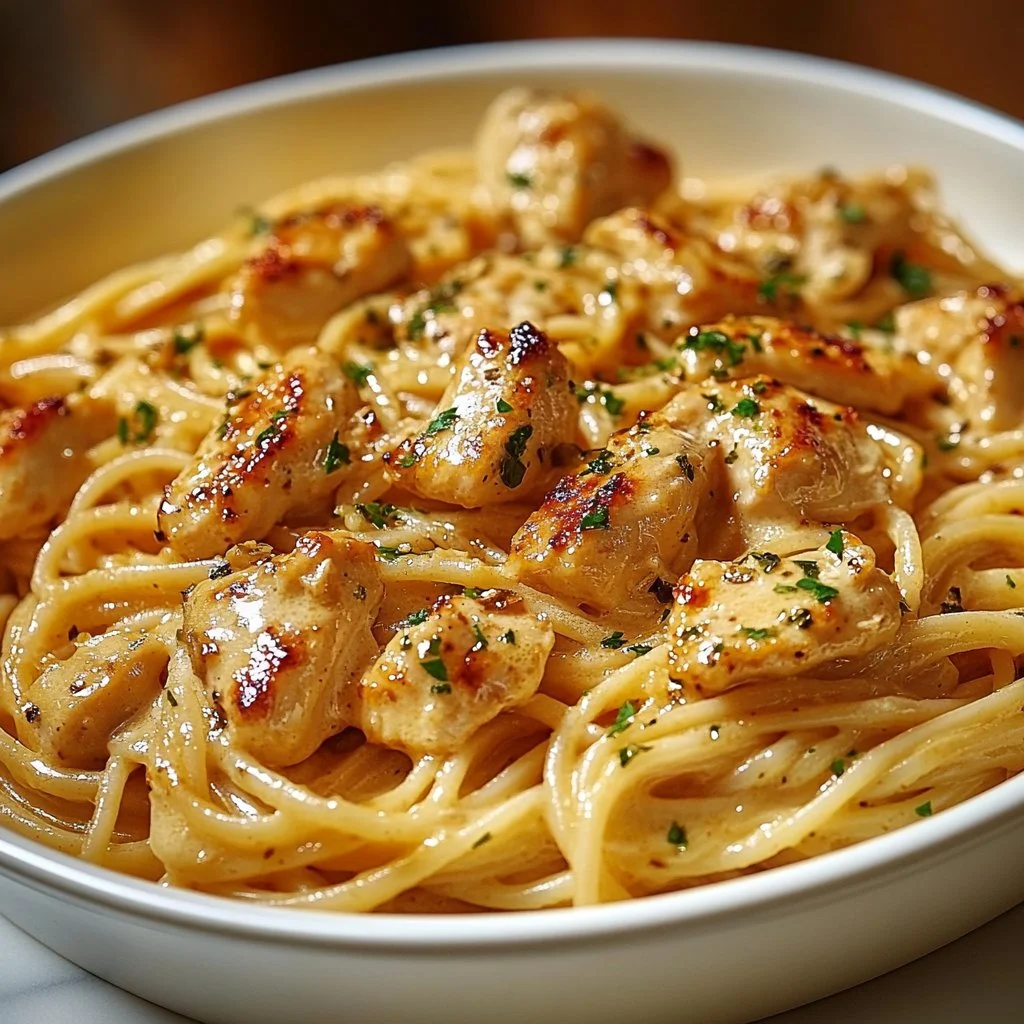
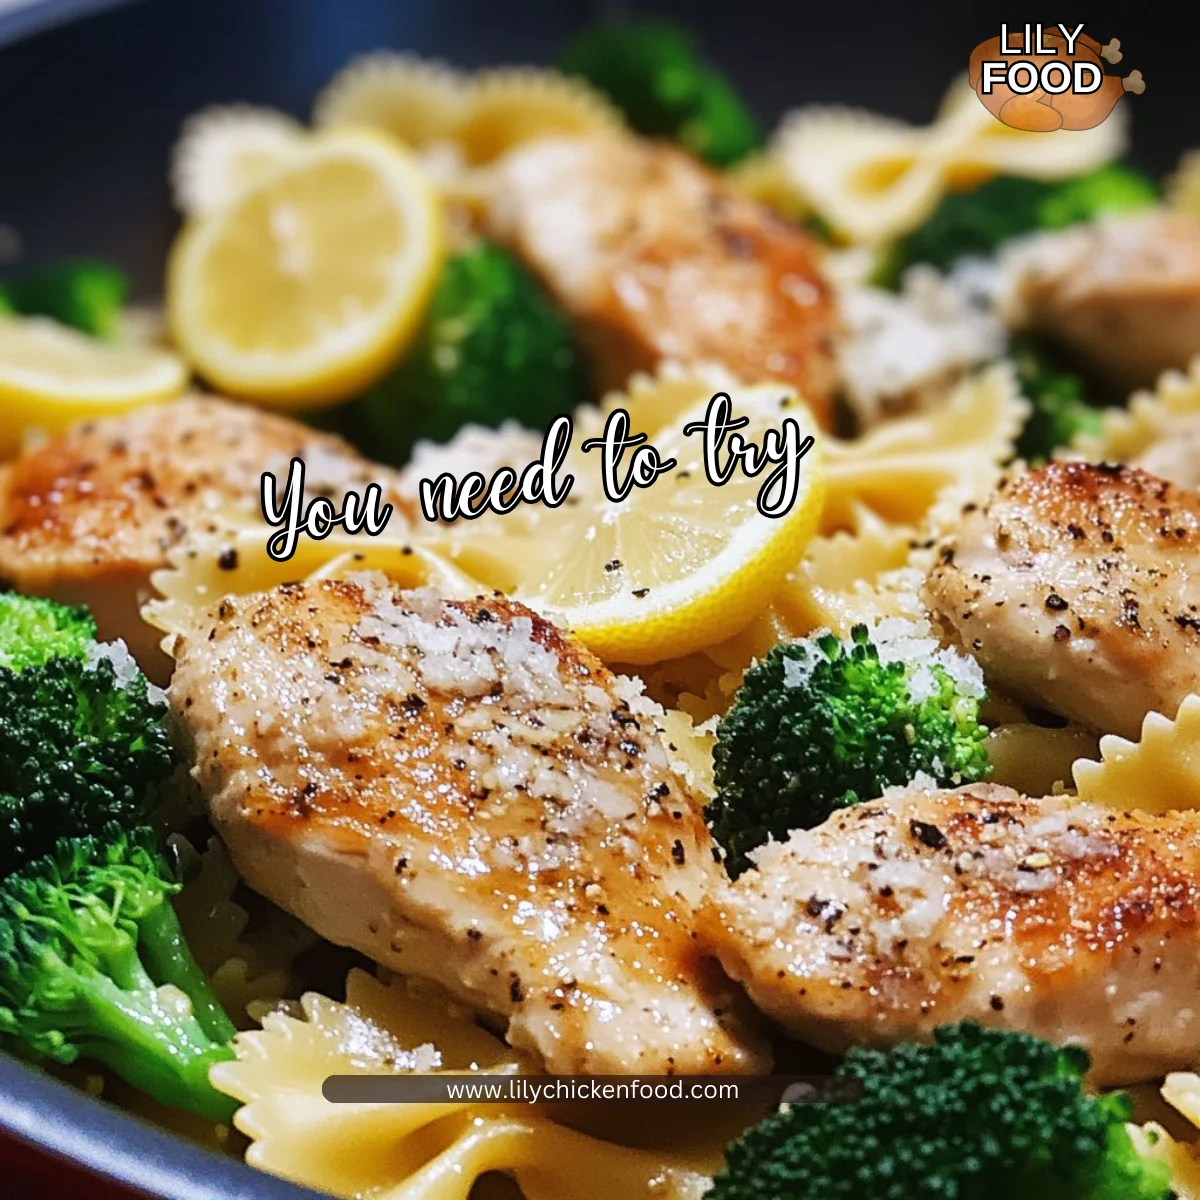
There is something about the smell of butter, garlic, and lemon that makes a kitchen feel like home. I can almost hear the soft simmer of sauce and the happy chatter at the table as this recipe comes together. The sound of a skillet singing as chicken browns is a family signal that dinner is ready.

I first made this Cowboy Butter Lemon Bowtie Chicken with Broccoli on a busy weeknight when everyone wanted something warm and comforting. It is forgiving, quick, and loved by kids and adults. If you want the printable, tested version I developed over time, you can find my kitchen-tested Cowboy Butter Lemon Bowtie Chicken with Broccoli recipe on my site.

Why this works

Cowboy Butter Lemon Bowtie Chicken with Broccoli

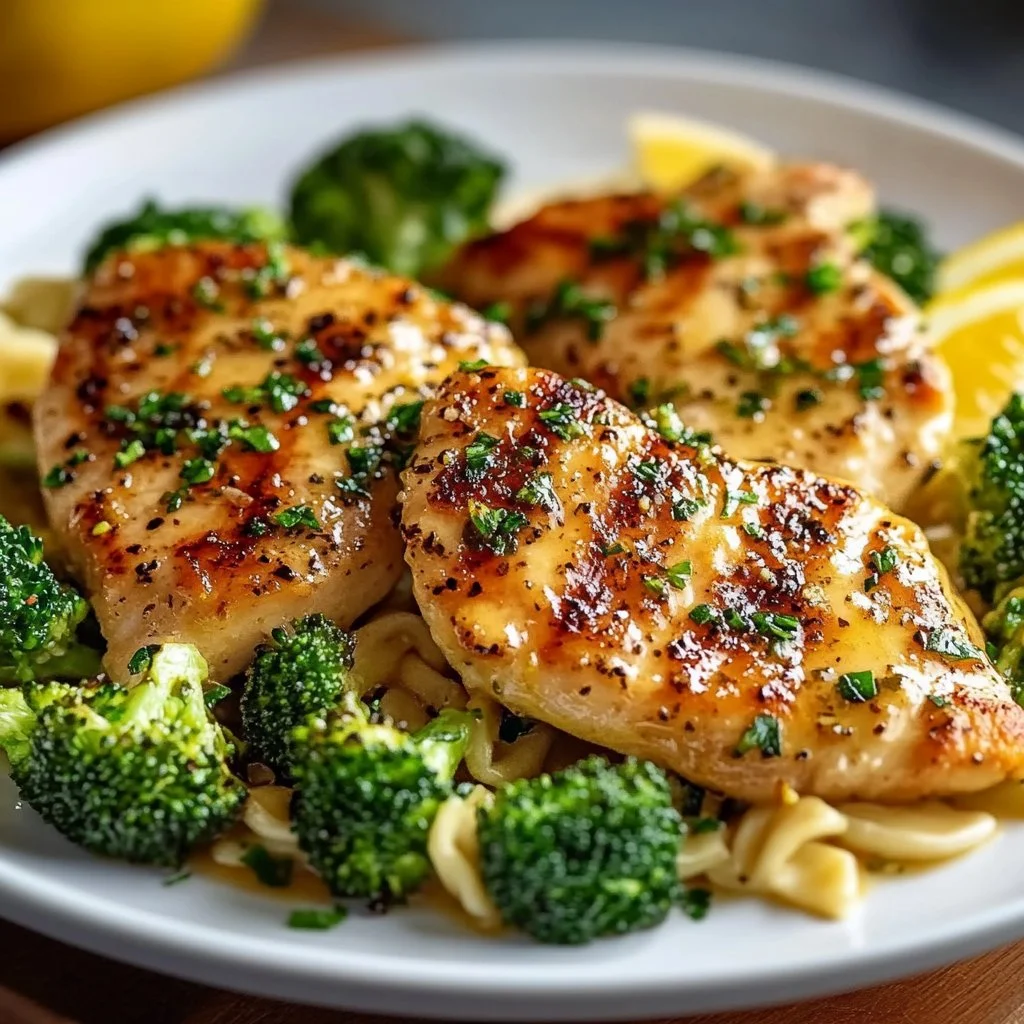
This dish works because it balances speed and flavor. The bowtie pasta cooks fast. The chicken browns quickly in butter and garlic. Bright lemon lifts the whole plate. Broccoli adds color and a fresh bite that kids usually accept when it meets buttery sauce.

It is a time saver for weeknights and a crowd pleaser for Sunday dinner. If you love a simple grilled twist, you might also enjoy my take on grilled chicken skewers with cowboy butter for backyard gatherings.

The method is straightforward. You can finish it in the time it takes to boil pasta. The cleanup is friendly, and leftovers reheat even better the next day.

Process Overview

“This is where the magic happens—when the aroma fills the kitchen.”

I teach home cooks to move in three parts: pasta, protein, and sauce. While the pasta cooks, brown the chicken, then bring everything together in the skillet with butter, garlic, and lemon. The pace keeps the food hot and the flavors bright.

I often prep the broccoli while the pasta boils. That little multitask saves time and keeps things relaxed. For another hands-on lemon butter dinner idea, try my simple baked lemon butter chicken for nights when you want to put something in the oven.

Ingredients

  • 8 oz bowtie pasta
    Lily tip: Use good quality pasta. Measure by weight if you can for consistent portions. If you only have a cup measure, 8 oz is about 2 cups dry bowties.

  • 2 chicken breasts, diced
    Lily tip: Cut the chicken into even pieces so they cook at the same rate. Pat dry before seasoning for better browning.

  • 2 cups broccoli florets
    Lily tip: Trim broccoli into bite-size pieces so kids can eat them easily. If you like softer veg, steam a minute before adding to the skillet.

  • 1/4 cup butter
    Lily tip: Unsalted butter lets you control salt. If using salted, reduce added salt a touch.

  • 2 cloves garlic, minced
    Lily tip: Fresh garlic gives the best flavor. Mince finely so it melts into the sauce and does not leave big bites.

  • 1 lemon, juiced
    Lily tip: Fresh juice brightens the dish more than bottled lemon. Squeeze into a small bowl and remove seeds before adding.

  • 1 tsp lemon zest
    Lily tip: Zest before juicing. Use a microplane for fine zest that blends into the sauce.

  • Salt and pepper to taste
    Lily tip: Season in steps. Add a little when cooking chicken, then adjust at the end.

  • Parmesan cheese for serving (optional)
    Lily tip: Freshly grated parmesan adds a salty, nutty finish. Offer it at the table so family members can choose.

If you like the comfort of pasta with buttery sauces, you may also enjoy my garlic butter chicken and bowtie pasta for a similar cozy dinner. See my notes here: garlic butter chicken and bowtie pasta.

Directions

  1. Cook the bowtie pasta according to package instructions. Drain and set aside.
    Encouragement: Let the pasta cook to just tender. Overcooked pasta will get soft when tossed with the sauce, so keep an eye on it.

  2. In a large skillet, melt the butter over medium heat.
    Encouragement: Let the butter foam and turn lightly golden. That little nutty flavor will deepen the dish.

  3. Add the diced chicken and season with salt and pepper. Cook until the chicken is browned and cooked through, about 6-7 minutes.
    Encouragement: Keep the pan warm but not hot enough to burn the butter. Stir a few times so the chicken browns evenly.

  4. Add the minced garlic and cook for an additional 1 minute until fragrant.
    Encouragement: Garlic cooks fast. Smell it and you will know it is ready. Do not let it brown too much.

  5. Stir in the broccoli florets and cook for 2-3 minutes until they are tender.
    Encouragement: The broccoli should stay slightly crisp to give a fresh contrast. If your family prefers softer vegetables, cook an extra minute.

  6. Add the cooked pasta to the skillet along with the lemon juice and lemon zest. Toss everything together until well combined.
    Encouragement: Toss gently to coat every bowtie with buttery lemon goodness. Taste and adjust salt and pepper.

  7. Serve hot, topped with Parmesan cheese if desired.
    Encouragement: Bring the skillet to the table or plate it family-style. A final squeeze of lemon brightens each serving.

I like to taste along the way and encourage you to do the same. A little extra lemon or a pinch of salt makes a big difference and helps you tailor the dish to your family.

Serving

Cowboy Butter Lemon Bowtie Chicken with Broccoli

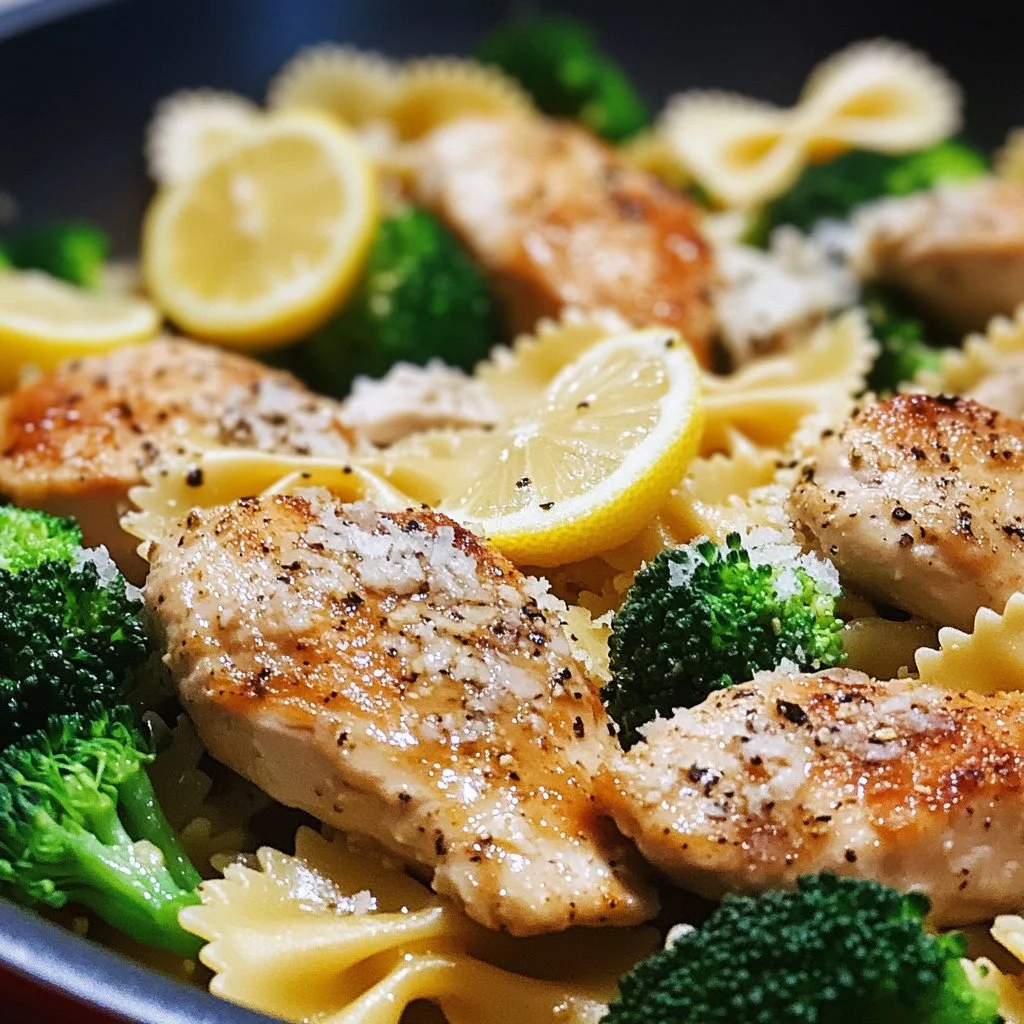
Serve this meal family-style on a large shallow bowl so everyone can help themselves. The bowties hold sauce in their folds, and the diced chicken is perfect for little hands. Pass parmesan at the table so each person can add as much as they like.

Add a simple green salad or crusty bread if you want to stretch the meal a bit. For a fun family night, set out toppings like extra lemon wedges, chopped parsley, or red pepper flakes so each person can customize their plate.

If you want another flavor-packed bowl with fresh sides, my lemon chili grilled chicken bowls with cucumber salad and hummus make a bright seasonal option. Try that variation here: lemon chili grilled chicken bowls with fresh cucumber salad and hummus.

Storage

Leftovers store well in an airtight container in the refrigerator for up to 3 days. The broccoli will soften with time but the flavors remain lovely.

To reheat, warm gently in a skillet over low heat with a splash of water or a teaspoon of butter to revive the sauce. Microwave in 30 second bursts, stirring between, to avoid overcooking the chicken and pasta.

If you want to freeze portions, place cooled food into freezer-safe containers. Freeze for up to 2 months. Thaw overnight in the refrigerator and reheat gently in a skillet for best texture.

Kitchen Notes

  • Prep ahead: Dice the chicken and chop the broccoli the night before to save time on busy evenings.
  • One-pan cleanup: Use the same skillet to brown chicken and finish the pasta. It saves dishes and keeps flavors concentrated.
  • Pasta timing: Start the pasta before you cook the chicken so everything finishes together.
  • Swap the broccoli: If broccoli is not available, use asparagus, peas, or green beans for bright color and crunch.
  • Kid-friendly trick: Toss a small portion of pasta with just butter and parmesan for picky eaters, then mix in chicken and broccoli for everyone else.

Variations

  • For picky eaters: Remove the broccoli and add corn or peas. Keep flavors simple and add veggies in steps they like.
  • Low carb option: Replace bowtie pasta with cooked cauliflower rice or zucchini ribbons. Keep the same lemon butter sauce.
  • Gluten free: Use your favorite gluten free bowtie pasta and check labels on any processed ingredients.
  • Herb boost: Add chopped parsley or basil at the end for a fresh herbal lift.
  • Spicy version: Stir in a pinch of red pepper flakes or a splash of hot sauce for heat.

These small changes let you adapt the recipe to different diets and family tastes while keeping the core flavors.

FAQ

Q: Can I use chicken thighs instead of breasts?
A: Yes. Boneless skinless thighs work well and stay juicy. Cut into uniform pieces and adjust cooking time if needed.

Q: Can I make this dairy free?
A: Yes. Swap butter for a dairy free butter or olive oil. Finish with nutritional yeast instead of parmesan if you want a cheesy note.

Q: How do I keep the chicken from drying out?
A: Dice the chicken into even pieces and do not overcook. Cook until just done and remove from heat when the center is no longer pink.

Q: Can I make this ahead of time for guests?
A: You can partially assemble ingredients ahead. Cook pasta and chicken, then store separately. Reheat and toss together before serving to keep textures fresh.

Q: What should I serve with this for a balanced meal?
A: A simple side salad or steamed green beans are great. Bread or rolls round it out if you want more comfort food.

Conclusion

Thank you for letting me share this family favorite. I hope it becomes a quick weeknight hero in your home and a scent that brings everyone to the table. If you want to compare this version with other tested recipes, you can find the original inspiration on Cowboy Butter Lemon Bowtie Chicken with Broccoli – Umami and a classic lemon chicken and broccoli bowtie approach at Lemon Chicken with Broccoli & Bow Ties Recipe | Ina Garten.

Happy cooking,
Lily

Cowboy Butter Lemon Bowtie Chicken with Broccoli

Prep Time 15 minutes
Cook Time 15 minutes
Total Time 30 minutes
Servings 4 servings
Calories 450
A quick and comforting recipe featuring bowtie pasta, chicken, and broccoli in a buttery lemon sauce, perfect for weeknight dinners.

Ingredients

Main Ingredients

  • 8 oz bowtie pasta (Use good quality pasta.)
  • 2 pieces chicken breasts, diced (Cut into even pieces for uniform cooking.)
  • 2 cups broccoli florets (Trim into bite-size pieces for easier eating.)
  • 1/4 cup butter (Unsalted butter for better salt control.)
  • 2 cloves garlic, minced (Fresh garlic gives the best flavor.)
  • 1 unit lemon, juiced (Fresh juice brightens the dish.)
  • 1 tsp lemon zest (Zest before juicing for a fine blend.)
  • Salt and pepper to taste (Season in steps for best flavor.)
  • Parmesan cheese for serving (optional) (Freshly grated adds a salty finish.)

Instructions 

Cooking Pasta

  • Cook the bowtie pasta according to package instructions. Drain and set aside.

Cooking Chicken

  • In a large skillet, melt the butter over medium heat.
  • Add the diced chicken and season with salt and pepper. Cook until browned and cooked through, about 6-7 minutes.
  • Add the minced garlic and cook for an additional 1 minute until fragrant.
  • Stir in the broccoli florets and cook for 2-3 minutes until tender.

Combining and Serving

  • Add the cooked pasta to the skillet along with the lemon juice and lemon zest. Toss everything together until well combined.
  • Serve hot, topped with Parmesan cheese if desired.

Notes

Leftovers can be stored in an airtight container in the refrigerator for up to 3 days. Reheat gently to revive the sauce.
Calories: 450kcal
Course: Dinner, Main Course
Cuisine: American, Comfort Food
Keyword: Broccoli, Chicken, Lemon, Pasta, Quick Dinner

Green Chicken Enchiladas

There’s something special about the hustle and bustle of a kitchen, especially when the air is filled with the savory smell of chicken enchiladas baking in the oven. You can hear the gentle bubbling as the sauce simmers and the cheese melts to perfection. This is not just another meal; it’s a delightful experience for the whole family. As you slice into these green chicken enchiladas, the vibrant colors and inviting aromas draw everyone to the table. Let’s dive into this scrumptious recipe that promises to brighten any weeknight dinner.

Why This Works

Green Chicken Enchiladas

Family meals are about connection. Green chicken enchiladas not only bring delicious flavors to the table but also save time and hassle in the kitchen. With a few simple ingredients and straightforward steps, you can whip up a dish that delights everyone, from the youngest eaters to the pickiest of them. Whether you are feeding a large family or just a couple of busy, hungry folks, these enchiladas come together quickly and deliver the comfort of home-cooked goodness.

Process Overview

“This is where the magic happens—when the aroma fills the kitchen.”

Cooking enchiladas is a great way to enjoy the process while creating lasting memories. The steps are easy to follow, requiring minimal prep time. You’ll chop, mix, roll, and bake, all while the wonderful scents transform your home into a cozy haven. Gather everyone around, because once you start cooking, they’ll be eagerly anticipating a delicious meal.

Ingredients

Here’s what you’ll need for these mouthwatering green chicken enchiladas:

  • 2 cups cooked chicken, shredded
    Tip: Use leftover rotisserie chicken to save time.

  • 8 corn or flour tortillas
    Tip: If using corn tortillas, warm them up on a skillet for a few seconds to prevent them from tearing.

  • 2 cups green salsa
    Tip: Go for your favorite store-bought brand for convenience, or make your own for a fresh twist.

  • 1 cup shredded cheese (cheddar or Monterey Jack)
    Tip: Mix cheeses for a richer flavor.

  • 1/2 cup sour cream
    Tip: Use Greek yogurt as a healthy alternative.

  • 1/4 cup chopped cilantro
    Tip: Add more or less based on your taste preference.

  • Salt and pepper to taste
    Tip: Don’t be afraid to taste as you go to ensure a balanced flavor.

Directions

  1. Preheat the oven to 350°F (175°C).
    Starting with a preheated oven guarantees a quicker cook time and perfectly melted cheese.

  2. In a bowl, mix shredded chicken with half of the green salsa, salt, and pepper.
    Taste the mixture to adjust the seasoning; this is your chance to make it just right.

  3. Lay a tortilla flat, add a portion of the chicken mixture, roll it up, and place it seam-side down in a baking dish.
    Don’t worry if your rolls aren’t perfect; they’ll still turn out delicious!

  4. Repeat with remaining tortillas.
    Take your time; the more care you put into rolling, the better they’ll hold up during baking.

  5. Pour the remaining salsa over the enchiladas and sprinkle with cheese.
    This step adds extra flavor and helps achieve that golden, bubbly cheese on top.

  6. Bake for 20-25 minutes, or until heated through and cheese is melted.
    Keep an eye on them; you want that perfect golden hue without burning.

  7. Serve with sour cream and cilantro on top.
    A simple dollop of sour cream adds a creamy contrast to the spiciness of the salsa.

Serving

Green Chicken Enchiladas

These green chicken enchiladas make a fantastic family-style dish. Serve them right from the baking dish, allowing everyone to indulge at their own pace. You could also offer additional toppings like diced avocados, lime wedges, or chopped green onions for everyone to customize their plates. Encouraging your family to serve themselves can create a fun and relaxed mealtime atmosphere.

Storage

Leftovers can be a lifesaver on busy nights. To store, cover the baking dish tightly with plastic wrap or transfer the enchiladas to an airtight container. They will keep in the fridge for up to three days.

To reheat, preheat your oven to 350°F (175°C) and bake until warmed through, about 15-20 minutes. You can also reheat in the microwave, but be sure to cover the dish to retain moisture.

Kitchen Notes

  • Prep Ahead: You can assemble the enchiladas a day in advance, store them in the fridge, and bake when ready to serve.

  • Meal Prep: Double the recipe and freeze one batch for a quick future meal.

  • Chop Once: Cut all your veggies and cilantro ahead of time for quicker assembly.

  • Utilize Leftovers: Any leftover ingredients can be tossed into salads or wraps the next day.

  • Use One Bowl: Mix your ingredients in one bowl for less mess and easier cleanup.

Variations

Not everyone enjoys green salsa or specific fillings. Here are a few ideas to cater to the entire family:

  • For Picky Eaters: Swap out the green salsa for a mild red salsa and use ground beef or turkey if chicken isn’t a hit.

  • Vegetarian Option: Substitute shredded chicken with black beans, zucchini, and corn. Just be sure to add some extra spices to keep it flavorful.

  • Gluten-Free: Use gluten-free tortillas to offer a safe option for family members with gluten sensitivities.

  • Dairy-Free: Replace cheese and sour cream with dairy-free alternatives made from nuts or soy.

  • Spicy Twist: Add jalapeños or diced green chilies to kick the flavor up a notch.

FAQ

  1. Can I use frozen chicken?
    Yes, you can cook frozen chicken directly in the pressure cooker or slow cooker; just ensure it’s fully cooked before shredding.

  2. What if I don’t have green salsa?
    You can make a simple green sauce with tomatillos, cilantro, and a dash of lime juice if you have the ingredients on hand.

  3. Can I prepare these enchiladas without baking?
    Yes! You can serve them fresh without baking; simply heat the ingredients and roll them up.

  4. How can I make this dish spicier?
    Add diced jalapeños or use spicy salsa to give your enchiladas a flavorful kick.

  5. Are leftovers good for lunch?
    Absolutely! They make an excellent and quick reheatable lunch option filled with protein and flavor.

In the end, this recipe for green chicken enchiladas brings not just a meal to your family but a warmth that radiates from the kitchen. Feel free to make it your own by adding personal touches or adapting it to fit your family’s preferences. Cooking should be enjoyable and filled with love as much as it is about the food itself. Happy cooking!

Green Chicken Enchiladas

Prep Time 15 minutes
Cook Time 25 minutes
Total Time 40 minutes
Servings 6 servings
Calories 400
Delicious green chicken enchiladas that bring comfort and flavor to any family meal, perfect for busy weeknights.

Ingredients

Main Ingredients

  • 2 cups cooked chicken, shredded (Use leftover rotisserie chicken to save time.)
  • 8 pieces corn or flour tortillas (If using corn tortillas, warm them up on a skillet for a few seconds to prevent them from tearing.)
  • 2 cups green salsa (Go for your favorite store-bought brand for convenience, or make your own for a fresh twist.)
  • 1 cup shredded cheese (cheddar or Monterey Jack) (Mix cheeses for a richer flavor.)
  • 1/2 cup sour cream (Use Greek yogurt as a healthy alternative.)
  • 1/4 cup chopped cilantro (Add more or less based on your taste preference.)
  • Salt and pepper to taste (Don’t be afraid to taste as you go to ensure a balanced flavor.)

Instructions 

Preparation

  • Preheat the oven to 350°F (175°C).
  • In a bowl, mix shredded chicken with half of the green salsa, salt, and pepper.
  • Lay a tortilla flat, add a portion of the chicken mixture, roll it up, and place it seam-side down in a baking dish.
  • Repeat with remaining tortillas.

Baking

  • Pour the remaining salsa over the enchiladas and sprinkle with cheese.
  • Bake for 20-25 minutes, or until heated through and cheese is melted.
  • Serve with sour cream and cilantro on top.

Notes

Encourage family-style serving right from the baking dish. Leftovers can be stored in the fridge for up to three days, and reheated in the oven or microwave.
Calories: 400kcal
Course: Dinner, Main Course
Cuisine: Mexican
Keyword: Chicken Enchiladas, Comfort Food, Enchiladas, Family Dinner, green salsa

Easy Creamy White Chicken Enchiladas

There’s something special about stepping into a kitchen filled with the warm scent of buttery goodness, spices, and creamy comfort. The sounds of sizzling, stirring, and laughter blend together to create a symphony that feels like home. Today, I’m excited to share an easy recipe for creamy white chicken enchiladas with you. This dish is as delightful to make as it is to enjoy; it is perfect for family gatherings or a cozy weeknight dinner.

Why This Works

Easy Creamy White Chicken Enchiladas

These enchiladas are a true time-saver, making dinner more enjoyable without the hassle. They can be assembled quickly and pop into the oven while you wrap up your day. Using rotisserie chicken cuts down your prep time, leaving you with more moments to spend with your loved ones. Creamy and cheesy with just the right amount of seasoning, these enchiladas are sure to bring smiles all around the table.

Process Overview

“This is where the magic happens—when the aroma fills the kitchen.”

As you cook, the kitchen will come alive. The gentle bubbling of the sauce, the melting of cheese, and the warmth enveloping every bite create a cozy atmosphere. Let’s dive into the wonderful process of making these creamy white chicken enchiladas together.

Ingredients

Here’s what you’ll need for these scrumptious enchiladas:

  • 8 flour tortillas (soft taco size): Choose fresh ones for the best taste.
  • 3 cups shredded chicken (I use rotisserie): Saves time and adds flavor.
  • 2 cups shredded Monterey Jack cheese (or Pepper Jack): Creamy, melty goodness.
  • 4 ounces softened cream cheese: Adds richness—let it sit at room temperature for easy mixing.
  • 2 tsp garlic powder: A must-have for that lovely aroma.
  • 3 tbsp butter: For a rich, flavorful sauce.
  • 3 tbsp flour: Helps thicken the sauce perfectly.
  • 1 tbsp taco seasoning (NOT the whole packet): Just enough to add a kick.
  • 1 (14.5oz) can of chicken broth (2 cups): A flavorful base for the sauce.
  • 3/4 cup sour cream: Creamy delight that pulls the dish together.
  • 1 (4oz) can of diced green chiles: Optional, but it adds a wonderful flavor.

Directions

Ready to cook? Here’s how to make these easy creamy white chicken enchiladas:

  1. Preheat the oven to 350°F and grease a 9×13 baking dish. This is your cozy baking space.

  2. In a medium-size bowl, mix the chicken with the cream cheese, garlic powder, and HALF of the shredded cheese (about 1 cup). This combination is unbeaten. The creamy texture will make rolling the enchiladas easy.

  3. Evenly stuff the mixture into your flour tortillas and place them into your prepared pan. Don’t worry if they get a little messy; it’s all part of the fun.

  4. In a saucepan over medium heat, melt the butter and then stir in the flour and taco seasoning. Cooking the flour helps get rid of the raw taste.

  5. Add the chicken broth and whisk until smooth; allow the mixture to heat up for a few minutes until warm. It will start to smell fantastic and thicken a bit.

  6. Add 1/2 a cup of the shredded cheese and whisk until well incorporated. This is where the creaminess begins.

  7. Stir in the sour cream and can of chiles; whisk for just a minute or until the sour cream is completely dissolved, but do not allow it to boil. Keep an eye on this—you’re almost there!

  8. Pour the sauce over the enchiladas and top with the remaining cheese. Look at that gooey goodness!

  9. Bake for 22-25 minutes and then switch the broiler on for a few minutes to brown the cheese. This is where the magic really happens—it will bubble and turn golden!

The adults in the family like to serve these with hot sauce. Refried beans and Spanish rice are also delicious on the side. You’ll find that this dish is a crowd-pleaser.

Serving

Easy Creamy White Chicken Enchiladas

Serve these creamy white chicken enchiladas family-style. Just place the dish in the center of the table and let everyone dig in. You can garnish with some fresh cilantro or even a squeeze of lime for a zesty touch. Pair with your favorite sides for a complete meal.

Storage

Leftovers? No problem! Allow the enchiladas to cool completely before covering them tightly with foil or transferring them to an airtight container. They will keep well in the fridge for up to 3 days. When you’re ready to enjoy them again, simply reheat in the oven at 350°F until heated through. You can also pop them in the microwave for a quicker option, though the oven will help keep that wonderful crispy topping intact.

Kitchen Notes

Here are a few shortcuts to make your cooking even easier:

  • Use store-bought rotisserie chicken—it saves time and adds flavor.
  • Prepare the filling ahead of time and let it sit in the fridge until you’re ready to assemble.
  • Use pre-shredded cheese; it saves time and ensures a perfectly melted topping.
  • If you’re tight on time, consider using flour tortillas from a store. Fresh ones taste great, but the ones in the freezer section work in a pinch.
  • Don’t hesitate to double the recipe. They freeze well and make for a great future meal.

Variations

If you have picky eaters or want to adapt for different diets, here are some tweaks:

  • For spice lovers: Add some diced jalapeños or a dash of hot sauce to the filling.
  • For a vegetarian option: Replace the chicken with black beans or sautéed veggies.
  • Dairy-free: Use dairy-free alternatives for cheese and sour cream.
  • For kids: Leave out the green chiles and spice and serve with their favorite side dishes.
  • Gluten-free: Opt for gluten-free tortillas and adjust your flour in the sauce accordingly.

FAQ

  1. Can I freeze these enchiladas?
    Yes, they freeze very well. Just make sure they are completely cooled and use an airtight container.

  2. Can I use corn tortillas instead of flour?
    Absolutely, but you may want to soften them before rolling to prevent cracking.

  3. What is a good side dish to serve with these?
    Refried beans and Spanish rice are great options. You can also serve a fresh salad.

  4. Can I make this dish ahead of time?
    Yes, you can prepare everything and assemble it in advance, then bake when you’re ready.

  5. How can I make this dish spicier?
    You can add more taco seasoning or some chopped green chiles to the filling for an extra kick.

In closing, I hope these easy creamy white chicken enchiladas bring joy to your table. They’re a delicious way to gather family and friends, creating memories over a comforting meal. Enjoy the process, embrace the aromas, and above all, savor each delightful bite. Happy cooking!

Creamy White Chicken Enchiladas

Prep Time 15 minutes
Cook Time 30 minutes
Total Time 45 minutes
Servings 6 servings
Calories 450
A delightful and creamy dish that brings comfort and smiles to your family dinner table.

Ingredients

Main Ingredients

  • 8 pieces flour tortillas (soft taco size) (Choose fresh ones for the best taste.)
  • 3 cups shredded chicken (rotisserie) (Saves time and adds flavor.)
  • 2 cups shredded Monterey Jack cheese (or Pepper Jack) (Creamy, melty goodness.)
  • 4 ounces softened cream cheese (Adds richness; let it sit at room temperature for easy mixing.)
  • 2 teaspoons garlic powder (A must-have for that lovely aroma.)

Sauce Ingredients

  • 3 tablespoons butter (For a rich, flavorful sauce.)
  • 3 tablespoons flour (Helps thicken the sauce perfectly.)
  • 1 tablespoon taco seasoning (Just enough to add a kick.)
  • 1 can chicken broth (14.5oz; 2 cups) (A flavorful base for the sauce.)
  • 3/4 cup sour cream (Creamy delight that pulls the dish together.)
  • 1 can diced green chiles (4oz) (Optional; adds wonderful flavor.)

Instructions 

Preparation

  • Preheat the oven to 350°F and grease a 9x13 baking dish.
  • In a medium-size bowl, mix the chicken with the cream cheese, garlic powder, and HALF of the shredded cheese (about 1 cup).
  • Evenly stuff the mixture into your flour tortillas and place them into your prepared pan.

Cooking

  • In a saucepan over medium heat, melt the butter and then stir in the flour and taco seasoning.
  • Add the chicken broth and whisk until smooth; allow the mixture to heat up for a few minutes until warm.
  • Add 1/2 a cup of the shredded cheese and whisk until well incorporated.
  • Stir in the sour cream and can of chiles; whisk for just a minute or until the sour cream is completely dissolved, but do not allow it to boil.
  • Pour the sauce over the enchiladas and top with the remaining cheese.
  • Bake for 22-25 minutes and then switch the broiler on for a few minutes to brown the cheese.

Notes

Allow leftovers to cool completely before covering them tightly or transferring to an airtight container. They will keep well in the fridge for up to 3 days. Reheat in the oven at 350°F for best results.
Calories: 450kcal
Course: Dinner, Main Course
Cuisine: Comfort Food, Mexican
Keyword: Chicken Enchiladas, Comfort Food, Creamy Enchiladas, Easy Dinner, Family Recipe

Chicken Enchiladas

There’s something special about the smell of chicken enchiladas wafting through the kitchen. You know that sound—the bubbling of sauce, the sizzling of melted cheese, and the gentle hum of family chatter. As soon as dinner is near, the whole house fills with warmth, anticipation, and the promise of a delicious meal.

Chicken enchiladas are more than just a recipe; they are a family tradition. They bring us together, create joyful memories, and are loved by both young and old alike. Here is how to make them easily and satisfyingly.

Why This Works

Chicken Enchiladas

Chicken enchiladas are a perfect dish for busy families. With a little prep, you can assemble everything in one evening and let the oven do its magic. These enchiladas are comforting, filling, and ready in about 30 minutes from start to finish.

You can easily scale the recipe up for larger gatherings or small enough for an intimate family dinner. They are versatile; serve them with toppings your family enjoys, making meal times both enjoyable and personal.

Process Overview

“This is where the magic happens—when the aroma fills the kitchen.”

Making chicken enchiladas is a step-by-step journey that anyone can follow. You mix, fill, and bake, allowing all those wonderful flavors to blend together. I can assure you that the time spent preparing these enchiladas will be worth every minute when you see the joy on your family’s faces.

Ingredients

Here’s what you will need:

  • 2 cups cooked shredded chicken
  • 8 flour tortillas
  • 1 cup shredded cheese (cheddar or Monterey Jack)
  • 1 cup sour cream
  • 1 can cream of chicken soup
  • 1/2 cup chicken broth
  • 1 teaspoon garlic powder
  • 1 teaspoon onion powder
  • Salt and pepper to taste
  • Chopped green onions for garnish

Lily’s Personal Tips:

  • Chicken: I use rotisserie chicken for convenience. It saves time and adds flavor.
  • Tortillas: Flour tortillas are soft and easy to roll. They hold the filling well.
  • Cheese: Choose your family’s favorite cheese to make it even more enjoyable.
  • Soup: Cream of chicken soup adds richness. Try low-fat options if you’re looking for a lighter dish.
  • Broth: This will thin out the sauce. You can use homemade broth for extra flavor.

Directions

  1. Preheat your oven to 350°F (175°C).

    • This step ensures everything cooks evenly.
  2. In a mixing bowl, combine shredded chicken, garlic powder, onion powder, salt, and pepper.

    • Mix well to ensure the chicken is seasoned throughout.
  3. In a separate bowl, mix together sour cream, cream of chicken soup, and chicken broth until smooth.

    • Make sure it’s creamy; this will be the sauce that makes your enchiladas divine.
  4. Take a tortilla, fill it with a portion of the chicken mixture, and sprinkle some cheese, then roll it up and place it seam-side down in a greased baking dish.

    • Don’t overfill the tortillas to prevent spills.
  5. Repeat with all tortillas and fill the baking dish.

    • Arrange them snugly for an appealing presentation.
  6. Pour the remaining sour cream mixture over the top of the enchiladas and sprinkle with the remaining cheese.

    • This is what will make your enchiladas come out bubbly and golden.
  7. Bake in the preheated oven for 20-25 minutes or until bubbly and golden.

    • Keep an eye on them. You want a nice golden color, not burnt.
  8. Garnish with chopped green onions before serving.

    • The fresh green onions add a lovely touch to the dish.

Serving

Chicken Enchiladas

When it comes time to serve, place the baking dish in the center of the table. This meal is best enjoyed family-style. Allow everyone to serve themselves, making it a fun and engaging experience. Pair these enchiladas with a simple salad or some Mexican rice to round out the meal.

Don’t forget to keep a few extra toppings nearby, like salsa, guacamole, or additional cheese. These can elevate the meal even further and cater to individual tastes.

Storage

Leftovers can be stored in an airtight container in the refrigerator for up to 3 days. When reheating, place them in the oven at 350°F (175°C) to maintain that creamy texture. If the enchiladas seem dry, drizzle with a bit of chicken broth or water before covering with foil to help keep them moist as they heat.

Kitchen Notes

  • Use Pre-Cooked Chicken: Rotisserie chicken or even leftover chicken works best and saves time.
  • Prep Ahead: Assemble the enchiladas ahead of time and store them in the fridge until you’re ready to bake.
  • Frozen Option: You can freeze them unbaked. Just wrap well and bake from frozen, adding an extra 10-15 minutes to the bake time.
  • Double the Batch: This recipe doubles easily, so make more for family gatherings.
  • Microwave Method: If you’re short on time, you can microwave your assembled enchiladas. Cover with a damp paper towel and heat in intervals.

Variations

  • Vegetarian Option: Substitute the chicken with black beans, sautéed bell peppers, and zucchini for a delicious veggie version.
  • Spicy Twist: Add diced jalapeños to the chicken mixture for an extra kick.
  • Different Sauces: Use green enchilada sauce instead of the creamy mixture if you prefer a spicier, more traditional flavor.
  • Cheese Choices: Try pepper jack cheese for a spicier bite.
  • Gluten-Free Tortillas: Use corn tortillas for those with gluten sensitivities.

FAQ

  1. Can I make enchiladas ahead of time?
    Yes, you can prepare and assemble them a day in advance, then bake when ready to serve.

  2. What can I serve with chicken enchiladas?
    They pair well with Mexican rice, beans, guacamole, or a fresh salad.

  3. Can I use a different type of meat?
    Absolutely, shredded beef or turkey work just as well.

  4. How do I keep my tortillas from falling apart?
    Warm the tortillas in a hot skillet for a few seconds or in the microwave for a few seconds to make them more pliable.

  5. Are these enchiladas freezer-friendly?
    Yes! Assemble them uncooked, wrap tightly, and freeze.

As you finish making these chicken enchiladas, take a moment to appreciate what you’ve created. Gathering around the table with loved ones to enjoy a hearty meal is what home is all about. With every bite, you’re not just sharing food but moments and memories that will last a lifetime. Enjoy!

Chicken Enchiladas

Prep Time 10 minutes
Cook Time 25 minutes
Total Time 35 minutes
Servings 6 servings
Calories 300
Easy and satisfying chicken enchiladas that blend comforting flavors and create joyful family memories.

Ingredients

Main Ingredients

  • 2 cups cooked shredded chicken (Rotisserie chicken is convenient.)
  • 8 pieces flour tortillas (Soft and easy to roll.)
  • 1 cup shredded cheese (cheddar or Monterey Jack) (Use your family's favorite cheese.)
  • 1 cup sour cream
  • 1 can cream of chicken soup (Adds richness; low-fat options available.)
  • 1/2 cup chicken broth (Thin out the sauce, homemade recommended.)
  • 1 teaspoon garlic powder
  • 1 teaspoon onion powder
  • to taste Salt and pepper
  • as needed Chopped green onions for garnish (Add a fresh touch.)

Instructions 

Preparation

  • Preheat your oven to 350°F (175°C).
  • In a mixing bowl, combine shredded chicken, garlic powder, onion powder, salt, and pepper. Mix well.
  • In a separate bowl, mix together sour cream, cream of chicken soup, and chicken broth until smooth.

Assembly

  • Take a tortilla, fill it with a portion of the chicken mixture, sprinkle some cheese, roll it up and place it seam-side down in a greased baking dish.
  • Repeat with all tortillas and fill the baking dish snugly.
  • Pour the remaining sour cream mixture over the top and sprinkle with the remaining cheese.

Baking

  • Bake in the preheated oven for 20-25 minutes or until bubbly and golden.
  • Garnish with chopped green onions before serving.

Notes

Leftovers can be stored in an airtight container for up to 3 days. When reheating, place in the oven at 350°F (175°C).
Calories: 300kcal
Course: Dinner, Main Course
Cuisine: Mexican
Keyword: Chicken Enchiladas, Comfort Food, Easy Dinner, Family Meal, quick recipe

Chicken Enchiladas with Homemade Red Enchilada Sauce

The warm, inviting scents of spices and roasted chicken fill the air. As you enter the kitchen, you hear a gentle simmering sound coming from the stove. It’s the beginning of an exciting family dinner—homemade Chicken Enchiladas with Red Enchilada Sauce. The combination of savory shredded chicken and cheesy goodness wrapped in soft tortillas brings back memories of family gatherings centered around hearty meals and happy conversations.

Time spent in the kitchen is more than just cooking; it’s about making memories with those you love. This recipe is perfect for a cozy family dinner or a weekend gathering with friends.

Why This Works

Chicken Enchiladas with Homemade Red Enchilada Sauce

This Chicken Enchiladas recipe shines for its simplicity and heartiness. With just a few ingredients and little time, you can create a dish that feels like a celebration. Your family will relish the vibrant flavors of homemade red enchilada sauce paired with tender tortillas.

The best part? This recipe is designed to save you time. You can prep the enchiladas ahead and pop them in the oven when it’s time to eat. It makes dinner rush more manageable, leaving you with extra moments to spend with your loved ones.

Process Overview

“This is where the magic happens—when the aroma fills the kitchen.”

Making these enchiladas is a delightful journey through layers of flavor. You start with preparing a savory red enchilada sauce that will coat your chicken and tortillas in a glorious, rich flavor. Then you’ll assemble the enchiladas with swirling motions of joy. Finally, a beautiful layer of cheese melts over the top, creating a golden crust that everyone will love.

Ingredients

Here’s what you’ll need to make delicious Chicken Enchiladas:

  • 2 cups cooked shredded chicken
    Tip: You can use leftover rotisserie chicken to save time and enhance the flavor.

  • 8 flour tortillas
    Tip: Choose larger tortillas for easier rolling; they hold more fillings!

  • 2 cups grated cheese (cheddar or Monterey Jack)
    Tip: Mixing half cheddar and half Monterey Jack elevates the flavor and texture.

  • 1 can (15 oz) tomato sauce
    Tip: Look for no-salt-added options if you’re watching your sodium intake.

  • 2 tablespoons chili powder
    Tip: Adjust the amount to your taste—add more for extra warmth!

  • 1 teaspoon cumin
    Tip: Purchasing whole cumin seeds and grinding them fresh gives a deeper flavor.

  • 1 teaspoon garlic powder
    Tip: You can substitute with fresh garlic if you prefer a stronger garlic taste.

  • 1 teaspoon onion powder
    Tip: Use finely chopped onions for added texture and sweetness.

  • Salt and pepper to taste
    Tip: Taste your sauce before adding salt; the cheese adds flavor too.

  • 1/4 cup chopped cilantro (optional)
    Tip: Cilantro adds a refreshing brightness; you can also use parsley as an alternative.

  • Sour cream (for serving, optional)
    Tip: A dollop of sour cream balances the spiciness and adds creaminess.

Directions

  1. Preheat the oven to 350°F (175°C).
    This sets the stage for baking those enchiladas to perfection.

  2. In a saucepan, combine the tomato sauce, chili powder, cumin, garlic powder, onion powder, salt, and pepper. Simmer for 10 minutes to create the enchilada sauce.
    Allow the spices to bloom, filling your kitchen with a delightful aroma.

  3. Spread a thin layer of the enchilada sauce on the bottom of a baking dish.
    This prevents the tortillas from sticking and adds flavor to the base of your dish.

  4. In each tortilla, place a portion of shredded chicken, cheese, and a spoonful of enchilada sauce. Roll up the tortillas and place them seam-side down in the baking dish.
    Fill them generously—the more flavor, the better!

  5. Pour the remaining enchilada sauce over the top and sprinkle with more cheese.
    The layer of cheese creates a beautiful golden crust while keeping everything moist.

  6. Cover with foil and bake for 20 minutes, then remove the foil and bake for an additional 10 minutes until bubbly and golden.
    The process transforms the dish into a creamy, comforting delight.

  7. Garnish with chopped cilantro and serve hot with sour cream if desired.
    A sprinkle of cilantro just before serving makes the dish look vibrant and inviting.

Serving

Chicken Enchiladas with Homemade Red Enchilada Sauce

When it comes to serving Chicken Enchiladas, think family-style. Place the baking dish at the center of the table and let everyone help themselves. Accompany the dish with bowls of sour cream, additional cheese, and chopped cilantro for personal customization. Enjoy the lively chatter and laughter around the table, as everyone delights in their very own cheesy enchilada creation.

Storage

For leftovers, let the enchiladas cool completely before storing them in an airtight container in the fridge. They can be kept for up to 3 days. When you want to reheat, place them uncovered in the oven at 350°F for about 15-20 minutes. For individual portions, a microwave works too, but the oven gives a better texture on the cheese.

Kitchen Notes

  • Shredded chicken shortcut: Buy pre-cooked or rotisserie chicken.
  • Make ahead: Assemble the enchiladas, cover, and refrigerate before baking—perfect for busy nights.
  • Frozen enchiladas: You can freeze assembled enchiladas for up to 3 months. Just add extra time when baking from frozen.
  • Sauce substitutions: Store-bought enchilada sauce can save time if you’re in a pinch.
  • One pot wonder: Consider using a large skillet to prepare the sauce and bake the enchiladas in the same pot for easier cleanup.

Variations

  • Vegetarian: Substitute chicken with black beans or sautéed vegetables like bell peppers and zucchini.
  • For the kiddos: Swap out the spices in the sauce for mild seasoning, making it friendly for little ones. Use cheese only in the filling if you need to tone down the flavors.
  • Gluten-free: Use corn tortillas in place of flour tortillas for a gluten-free alternative.
  • Extra spicy: Add diced jalapeños into the filling or increase the chili powder for more heat.

FAQ

1. Can I use other types of meat?
Yes! Ground beef, pork, or turkey all work wonderfully as substitutes.

2. How can I make the sauce smoother?
You can blend the sauce ingredients before simmering for a smoother texture.

3. Can I double this recipe?
Absolutely! Just ensure to use a larger baking dish and adjust cooking time slightly.

4. What’s the best way to reheat leftovers?
The oven gives the best fluffy texture, but microwaving is a quick alternative.

5. Can I prep this meal the day before?
Yes! Assemble everything and refrigerate until you are ready to bake it the next day.

As you create these Chicken Enchiladas with Homemade Red Enchilada Sauce, remember, it’s more than just a meal. It brings warmth, love, and togetherness to your table. These recipes become part of your family’s story, nurturing both body and soul. Happy cooking!

Chicken Enchiladas

Prep Time 20 minutes
Cook Time 30 minutes
Total Time 50 minutes
Servings 8 servings
Calories 350
A hearty and flavorful recipe for Chicken Enchiladas with homemade red enchilada sauce, perfect for family dinners.

Ingredients

Main Ingredients

  • 2 cups cooked shredded chicken (You can use leftover rotisserie chicken to save time.)
  • 8 pieces flour tortillas (Choose larger tortillas for easier rolling.)
  • 2 cups grated cheese (cheddar or Monterey Jack) (Mixing half cheddar and half Monterey Jack elevates the flavor.)
  • 1 can (15 oz) tomato sauce (Look for no-salt-added options if you’re watching your sodium intake.)
  • 2 tablespoons chili powder (Adjust the amount to your taste.)
  • 1 teaspoon cumin (Purchasing whole cumin seeds and grinding them fresh gives a deeper flavor.)
  • 1 teaspoon garlic powder (You can substitute with fresh garlic for a stronger taste.)
  • 1 teaspoon onion powder (Use finely chopped onions for added texture.)
  • to taste Salt and pepper (Taste your sauce before adding salt.)
  • 1/4 cup chopped cilantro (optional) (Cilantro adds brightness; parsley can be used as an alternative.)
  • Sour cream (for serving, optional) (Balances the spiciness and adds creaminess.)

Instructions 

Preparation

  • Preheat the oven to 350°F (175°C).
  • In a saucepan, combine the tomato sauce, chili powder, cumin, garlic powder, onion powder, salt, and pepper. Simmer for 10 minutes to create the enchilada sauce.
  • Spread a thin layer of the enchilada sauce on the bottom of a baking dish.
  • In each tortilla, place a portion of shredded chicken, cheese, and a spoonful of enchilada sauce. Roll up the tortillas and place them seam-side down in the baking dish.
  • Pour the remaining enchilada sauce over the top and sprinkle with more cheese.
  • Cover with foil and bake for 20 minutes, then remove the foil and bake for an additional 10 minutes until bubbly and golden.
  • Garnish with chopped cilantro and serve hot with sour cream if desired.

Notes

For leftovers, let the enchiladas cool completely before storing in an airtight container. They can be kept for up to 3 days. Reheat uncovered in the oven at 350°F for about 15-20 minutes. You can freeze assembled enchiladas for up to 3 months. Consider using a large skillet to prepare the sauce and bake in the same pot for easier cleanup.
Calories: 350kcal
Course: Dinner, Main Course
Cuisine: Mexican
Keyword: Chicken Enchiladas, Comfort Food, Enchilada Sauce, Family Dinner, Hearty Meal

Chicken Adobo

The kitchen smells like warm vinegar and garlic, and the gentle hiss of simmering sauce feels like a welcome song. I often catch my kids peeking in the doorway when the aroma starts to fill the house. That sound of family gathering is part of why I love making chicken adobo.

This recipe is one I return to when I want comfort food that is simple and true. If you enjoy quick weeknight meals, you might also like my recipe for 30-min oven baked boneless skinless chicken thighs, which shares the same homey spirit and simple prep.

Why this works

Chicken Adobo

Family Friendly and Time Saving

Chicken adobo uses pantry staples and gentle cooking that lets flavors develop without fuss. It is forgiving, so even busy weeknights become a celebration. Marinating for a short time gives the meat an instant lift, and the slow simmer makes the chicken tender enough for little hands to enjoy.

This dish stretches well and tastes even better the next day, making it perfect for leftovers and batch cooking. If your week needs more easy wins, try pairing it with a quick rice bowl like my 30-minute teriyaki chicken bowl for another family favorite.

Process Overview

“This is where the magic happens—when the aroma fills the kitchen.”

I like to think of adobo as a gentle balance of savory and bright. You marinate, then simmer. The sauce reduces and glazes the chicken. The steps are clear, and each one adds a layer of flavor. If you are curious about adapting cooking methods, I sometimes shift to an oven finish or use my air fryer for crispier skin when time allows. For those methods, see my notes about air fryer chicken breasts for helpful timing ideas.

Ingredients

  • 2 lbs chicken
    • Tip: Use bone-in, skin-on thighs for extra flavor and tenderness. If you prefer white meat, breasts work too but watch the cooking time.
  • 1 cup soy sauce
    • Tip: Use a low-sodium soy sauce if you want more control over salt. Taste before adding extra.
  • 1 cup vinegar
    • Tip: Cane vinegar or white vinegar both work. Apple cider vinegar gives a softer tang.
  • 6 cloves garlic, minced
    • Tip: Fresh garlic adds bright heat. If you are making a big batch, you can double the garlic for a bolder profile.
  • 2 bay leaves
    • Tip: Bay leaves add savory depth. Remove them before serving.
  • 1 teaspoon black peppercorns
    • Tip: Whole peppercorns give gentle heat while simmering. Crush a few at the table if you want more zip.
  • 1 tablespoon sugar
    • Tip: Sugar balances the acidity. Brown or white sugar both work. Start with a tablespoon and adjust to taste.
  • 1 onion, sliced
    • Tip: Yellow onion softens and adds natural sweetness. Slice thick so it holds up during simmering.
  • 1 cup water
    • Tip: This keeps the sauce glossy and controls salt intensity. Add more if you want more sauce.
  • Salt to taste
    • Tip: Salt at the end so you can adjust after reduction.

My kitchen tests have shown that these simple amounts give a reliably balanced sauce that pleases adults and kids alike. If you want a deeper caramelized finish, you can reduce the sauce further at the end.

Directions

  1. In a bowl, combine soy sauce, vinegar, garlic, bay leaves, peppercorns, sugar, and onion. Marinate the chicken in this mixture for at least 30 minutes.
    • Encourage: Give it time to soak in the flavors. If you are short on time, even 30 minutes will help. I sometimes marinate overnight on the weekend.
  2. Heat a pan over medium heat and add the marinated chicken with the marinade.
    • Encourage: Lay the pieces skin side down first if using skin-on chicken. Listen for a gentle sizzle. This step helps render fat and build flavor.
  3. Add water and bring to a boil.
    • Encourage: Boiling wakes up all the aromatics. Stay nearby so you can adjust the heat if the pot tries to bubble over.
  4. Reduce heat and simmer for 30-40 minutes until the chicken is cooked and tender.
    • Encourage: Simmer low and slow. The chicken becomes tender and the sauce mellows. I stir gently now and then and spoon the sauce over the pieces.
  5. Taste and adjust seasoning with salt if necessary.
    • Encourage: Tasting is my favorite part. Add a pinch of salt if it needs it, or a touch more sugar if it feels too sharp.
  6. Serve hot over rice.
    • Encourage: Spoon sauce over both chicken and rice. Let the family dig in together for a cozy meal.

If you want a crisp finish, lift the chicken pieces out and broil them on a baking sheet for 3 to 5 minutes until the skin browns. Or transfer to an air fryer for a few minutes to tighten the skin; check my guide for air fryer chicken skewers for timing ideas when cooking smaller pieces.

Serving

Chicken Adobo

Serve this adobo family-style in the center of the table. A big bowl of steamed white rice is the perfect partner. Add simple sides like steamed greens, a crisp cucumber salad, or fried plantains for a bit of sweetness.

For a casual weeknight, place the platter in the middle and let everyone serve themselves. This keeps things relaxed and encourages conversation. If you want to dress it up, garnish with chopped scallions and a few toasted sesame seeds.

If you have little ones, shred a few tender thighs and plate them with a milder drizzle of sauce. For older kids and adults, offer lime wedges or crushed peppercorns at the table.

To add a playful twist, make rice bowls with a soft-cooked egg and pickled vegetables. The mixture of textures makes every bite interesting and helps picky eaters sample new flavors. For other family bowl ideas, you might enjoy my take on air fryer chicken wings nights when you want party-style food.

Storage

Store leftover adobo in an airtight container in the refrigerator for up to 4 days. The flavors mature and often taste better the next day.

To reheat, warm gently on the stove over low heat with a splash of water. Cover the pan and heat until the chicken reaches a safe temperature. If you prefer, reheat single servings in the microwave for 1 to 2 minutes, stirring halfway through.

For longer storage, freeze portions in freezer-safe containers for up to 3 months. Thaw overnight in the refrigerator before reheating. When reheating from frozen, defrost fully and warm slowly to preserve texture.

Kitchen Notes

  • Use bone-in thighs for the juiciest results. They hold up in the sauce and stay tender.
  • If you want a darker, richer sauce, remove the chicken at the end and reduce the sauce over medium heat until glossy.
  • Swap vinegar types to change the profile. Apple cider vinegar is milder, white vinegar gives a brighter tang.
  • For less salt, use low-sodium soy sauce and add salt to taste after reduction.
  • If you want a spicy kick, add sliced chilies or a pinch of red pepper flakes during simmering.

These small shortcuts save time and keep dinner stress free. Over the years, I have learned which tweaks give the most consistent results for busy families.

Variations

  • Kid friendly: Reduce the vinegar to 3/4 cup and add an extra tablespoon of sugar. This keeps tang gentle and sweet.
  • Spicy: Add 1 to 2 sliced chilies or 1/2 teaspoon red pepper flakes during the simmer.
  • Low sodium: Use low-sodium soy sauce and skip added salt until the end of cooking.
  • Oven finish: After simmering, transfer to a 400 °F oven for 10 minutes to brown the top. Watch carefully to avoid burning.
  • Vegetarian option: Simmer tofu or seitan in the adobo sauce and reduce until the sauce coats the pieces.

Each of these variations keeps the spirit of adobo while tailoring it to your family’s needs. I often mix approaches depending on what my kids will eat that night.

FAQ

What cut of chicken is best for adobo?

Bone-in, skin-on thighs are ideal for flavor and tenderness. If you prefer white meat, use breasts but reduce simmer time to prevent drying.

Can I make this ahead of time?

Yes. Adobo tastes great the next day. Store in the fridge for up to 4 days or freeze portions for up to 3 months.

Is vinegar necessary?

Yes. Vinegar gives adobo its signature bright note. You can adjust the amount to your taste, but do not omit it.

Can I use a slow cooker?

Yes. Brown the chicken first if you like, then add the marinade and cook on low for 4 to 6 hours. The sauce will be milder, so taste before serving.

How can I thicken the sauce?

Remove the chicken and reduce the sauce over medium heat until it reaches a glaze. You can also whisk in a teaspoon of cornstarch mixed with a tablespoon of water for a quicker finish.

Conclusion

I hope this recipe brings warmth and ease to your table. Chicken adobo is a recipe that welcomes family, conversation, and second helpings. If you want to explore traditional and modern takes on this classic, this guide from Filipino Chicken Adobo (Flavour Kapow!) – RecipeTin Eats offers a well-tested perspective, and this version on Chicken Adobo – Food52 provides useful technique notes and variations.

Thank you for cooking with me. Leave a note about how your family liked it, and tell me which tweaks made it a keeper in your home.

Chicken Adobo

Prep Time 30 minutes
Cook Time 40 minutes
Total Time 1 hour 10 minutes
Servings 4 servings
Calories 480
A comforting and simple Filipino dish where chicken is marinated and simmered in a tangy and savory sauce made with soy sauce, vinegar, and spices, perfect for family meals.

Ingredients

Main Ingredients

  • 2 lbs chicken (Use bone-in, skin-on thighs for extra flavor and tenderness.)
  • 1 cup soy sauce (Use low-sodium soy sauce if desired.)
  • 1 cup vinegar (Cane or white vinegar work; apple cider vinegar gives a softer tang.)
  • 6 cloves garlic, minced (Fresh garlic adds bright heat; double for bolder flavor.)
  • 2 pieces bay leaves (Add savory depth; remove before serving.)
  • 1 teaspoon black peppercorns (Whole peppercorns provide gentle heat.)
  • 1 tablespoon sugar (Balances acidity; adjust to taste.)
  • 1 piece onion, sliced (Yellow onion adds natural sweetness.)
  • 1 cup water (Keeps sauce glossy; add more for extra sauce.)
  • to taste Salt (Adjust saltiness after cooking.)

Instructions 

Marinating

  • In a bowl, combine soy sauce, vinegar, garlic, bay leaves, peppercorns, sugar, and onion. Marinate the chicken in this mixture for at least 30 minutes.

Cooking

  • Heat a pan over medium heat and add the marinated chicken with the marinade.
  • Add water and bring to a boil.
  • Reduce heat and simmer for 30-40 minutes until the chicken is cooked and tender.
  • Taste and adjust seasoning with salt if necessary.
  • Serve hot over rice.

Crisping (Optional)

  • For a crisp finish, lift the chicken pieces out and broil them on a baking sheet for 3 to 5 minutes until the skin browns.

Notes

Serve family-style in the center of the table. Ideal paired with steamed white rice, steamed greens, or fried plantains. Store leftovers in an airtight container in the refrigerator for up to 4 days or freeze for longer storage.
Calories: 480kcal
Course: Dinner, Main Course
Cuisine: Filipino
Keyword: Chicken Adobo, Comfort Food, Easy Recipe, Family Dinner, One Pot Meal

Garlic Butter Chicken Linguine

There’s something enchanting about the smells that waft through the kitchen when you cook. The sizzle of chicken meets the mild crunch of garlic, creating a melody that makes your heart warm. When your family gathers around the dinner table and enjoys a hearty plate of Garlic Butter Chicken Linguine, you feel the love and togetherness in every bite. This recipe is easy and quick, perfect for those busy weeknights when you crave something comforting yet special.

Why This Works
Garlic Butter Chicken Linguine

Garlic Butter Chicken Linguine is a dish that brings the family together without consuming your entire evening. In just about 30 minutes, you can have a delightful meal that almost undoubtedly pleases everyone. The robust garlic flavor paired with tender chicken and silky linguine makes this recipe a hit, even with picky eaters.

By using simple ingredients and straightforward techniques, you’ll save time and create lasting memories around the dinner table. It is family-friendly, budget-conscious, and above all, a breeze to whip up. It’s these kinds of meals that make busy lives feel a little slower.

Process Overview

“This is where the magic happens—when the aroma fills the kitchen.”

As you gather your ingredients, you might even feel a little excitement bubbling inside. Preparing Garlic Butter Chicken Linguine is not just about putting food on the table; it’s about creating an atmosphere of warmth and love for your family. Imagine each step, from melting butter to adding the minced garlic and hearing that irresistible sizzle. That’s where the fun begins.

Ingredients

For this Garlic Butter Chicken Linguine, you will need:

  • 2 chicken breasts
    • Opt for organic chicken if you can.
  • 3 tablespoons butter
    • Use unsalted butter for better control over salt levels.
  • 4 cloves garlic, minced
    • Fresh garlic will give the best flavor.
  • 1 teaspoon red pepper flakes
    • Adjust based on your family’s spice tolerance.
  • 8 ounces linguine
    • You can substitute with whole wheat or gluten-free.
  • Salt and pepper to taste
    • Freshly ground black pepper adds more flavor.
  • Parmesan cheese for serving
    • A sprinkling of freshly grated makes it even better.
  • Fresh parsley for garnish
    • Chop it finely to up the presentation.

Directions

  1. Cook the linguine according to package instructions. Drain and set aside.

    • Make sure to reserve a little pasta water before draining. It helps in creating a creamy sauce later.
  2. In a large skillet, melt the butter over medium heat.

    • Keep an eye on it, so it doesn’t brown too much; you want just enough to flavor the chicken.
  3. Add the minced garlic and red pepper flakes, sauté until fragrant.

    • You should be able to smell the garlic wafting through your kitchen; it’s an excellent sign you’re on the right path.
  4. Season the chicken breasts with salt and pepper, then add them to the skillet. Cook until the chicken is browned and cooked through, about 5-7 minutes per side.

    • Flip them once you see a nice golden crust; that’s where all that flavor is.
  5. Remove the chicken from the skillet and slice it.

    • Let it rest for a minute before slicing to keep the juices inside.
  6. Add the cooked linguine to the skillet, tossing to coat in the garlicky butter.

    • If it seems a little dry, splash in that reserved pasta water to loosen it up.
  7. Serve the linguine topped with sliced chicken, grated Parmesan cheese, and fresh parsley.

    • Make it nice and pretty; a well-plated dish makes everyone feel special.

Serving
Garlic Butter Chicken Linguine

Serving Garlic Butter Chicken Linguine family-style can be an enjoyable experience. Place the pasta in a large serving bowl and let everyone help themselves. This not only turns dinner into a shared event but also fosters conversation and connection. As everyone fills their plates, it’s a wonderful time to share stories of the day or even plan the next family get-together.

Consider setting up a little “toppings bar” with extra Parmesan and red pepper flakes on the side. You can even add a green salad to complement the meal and balance the flavors.

Storage

If you happen to have leftovers (which isn’t likely), store the pasta in an airtight container in the fridge. It can last for up to three days, but it’s best enjoyed within the first two. To reheat, add a splash of water or chicken broth to keep the noodles from drying out. You can heat it in a skillet over medium heat, stirring occasionally, to maintain that delightful garlicky flavor.

Kitchen Notes

Here are five shortcuts to make this recipe even easier:

  • Use pre-cooked rotisserie chicken if you’re short on time. Just add it to the skillet to warm up.
  • Substitute melted margarine if you cannot use butter due to dietary restrictions.
  • Feel free to use frozen minced garlic to save time on prep.
  • If you want a veggie boost, toss in some spinach or cherry tomatoes with the garlic.
  • Pre-cook the linguine and store it in the fridge for a quick cook during busy evenings.

Variations

Sometimes, you must cater to various tastes in your household. Here are some tweaks you can make:

  • For picky eaters, try substituting chicken with shrimp or even tofu for a vegetarian option.
  • If someone in your family is avoiding carbs, spiralized zucchini or spaghetti squash could serve as a great substitute for linguine.
  • You can add in other vegetables such as bell peppers or broccoli for a colorful presentation and added nutrients.
  • If someone prefers a thicker sauce, mix in a splash of heavy cream or even cream cheese while tossing the pasta in the skillet.
  • Experiment using different cheeses like feta or gouda if Parmeran isn’t available.

FAQ

  1. Can I use a different pasta?
    Yes! Any long pasta works, such as spaghetti or fettuccine.

  2. Is this meal freezer-friendly?
    While it is edible after freezing, the texture might change. It’s best enjoyed fresh.

  3. What wine pairs well with this dish?
    A nice white wine like Sauvignon Blanc complements garlic and chicken beautifully.

  4. Can I make this dish ahead of time?
    You can prepare the chicken and sauce beforehand, and then quickly toss in the pasta before serving.

  5. How can I make it more garlicky?
    You can add more cloves of garlic or even roasted garlic for a sweeter flavor.

Conclusion

As the evening winds down and your family enjoys their plates of Garlic Butter Chicken Linguine, take a moment to appreciate the warmth and joy of family meals. This recipe is simple yet filled with rich flavors, and it brings loved ones together. Cooking is about more than just preparing food; it’s about nurturing relationships and creating lasting memories. So roll up your sleeves and bring this delicious dish to your table. You’re bound to create smiles all around.

Garlic Butter Chicken Linguine

Prep Time 10 minutes
Cook Time 20 minutes
Total Time 30 minutes
Servings 4 servings
Calories 550
A comforting and quick family meal featuring tender chicken, silky linguine, and robust garlic flavor, perfect for busy weeknights.

Ingredients

Main Ingredients

  • 2 pieces chicken breasts (Opt for organic chicken if you can.)
  • 3 tablespoons butter (Use unsalted butter for better control over salt levels.)
  • 4 cloves garlic, minced (Fresh garlic will give the best flavor.)
  • 1 teaspoon red pepper flakes (Adjust based on your family's spice tolerance.)
  • 8 ounces linguine (You can substitute with whole wheat or gluten-free.)
  • to taste Salt and pepper (Freshly ground black pepper adds more flavor.)
  • for serving Parmesan cheese (A sprinkling of freshly grated makes it even better.)
  • for garnish Fresh parsley (Chop it finely to up the presentation.)

Instructions 

Cooking the Linguine

  • Cook the linguine according to package instructions. Drain and set aside.
  • Make sure to reserve a little pasta water before draining to help create a creamy sauce later.

Cooking the Chicken

  • In a large skillet, melt the butter over medium heat. Keep an eye on it to prevent browning too much.
  • Add the minced garlic and red pepper flakes, sauté until fragrant.
  • Season the chicken breasts with salt and pepper, then add them to the skillet. Cook until browned and cooked through, about 5-7 minutes per side.
  • Remove the chicken from the skillet and slice it after letting it rest for a minute.

Combining Ingredients

  • Add the cooked linguine to the skillet, tossing to coat in the garlicky butter. Splash in reserved pasta water if needed.
  • Serve topped with sliced chicken, grated Parmesan cheese, and fresh parsley.

Notes

Serving Garlic Butter Chicken Linguine family-style can enhance the meal experience. Provide a toppings bar with extra Parmesan and red pepper flakes. Leftovers can be stored in an airtight container for up to three days.
Calories: 550kcal
Course: Dinner, Main Course
Cuisine: Italian
Keyword: Chicken, Comfort Food, Garlic, Pasta, Quick Dinner

Cheesy Garlic Chicken Wraps

There’s something magical about the smell of garlic bubbling in butter and cheese melding together. As you stand in your kitchen, the sounds of sizzling and the gentle pop of melting cheese fill the air. It’s a symphony that brings family together, and today’s recipe is all about that magic—Cheesy Garlic Chicken Wraps.

These wraps are not just delicious; they’re also quick to make, making them perfect for busy weeknights. Imagine the joy on your family’s faces when they take their first bite. Let’s dive into this easy and mouthwatering dish that can brighten any dinner table.

Why This Works

Cheesy Garlic Chicken Wraps

Family dinners should be simple, beautiful, and filled with flavors. That’s exactly what these Cheesy Garlic Chicken Wraps deliver. They come together without fuss, sparing you hours in the kitchen while still impressing everyone at the dinner table.

You can use leftover chicken, saving time and reducing waste. Each wrap can be customized, ensuring that everyone gets something they love. This dish encourages family time around the dinner table, whether it’s a casual family night or entertaining friends.

Process Overview

“This is where the magic happens—when the aroma fills the kitchen.”

Each step in making these wraps is straightforward. From combining the simple ingredients to cooking them to golden perfection, this recipe is designed to bring ease into your kitchen. You’ll find that it requires very little prep and cooks quickly, leaving you more time to enjoy with your loved ones.

Ingredients

Gather these key ingredients to create your Cheesy Garlic Chicken Wraps:

  • 2 cups cooked chicken, shredded
  • 1 cup shredded cheese (cheddar or mozzarella)
  • 1/4 cup cream cheese
  • 2 cloves garlic, minced
  • 1 teaspoon garlic powder
  • 1 teaspoon onion powder
  • Salt and pepper to taste
  • 4 low-carb tortillas or wraps

Optional toppings to consider:

  • Lettuce: Adds a fresh crunch. I recommend using iceberg for its crispness.
  • Tomatoes: Slices of fresh tomato bring juiciness. Choose grape tomatoes for a sweet touch.
  • Avocado: Provides creaminess and healthy fats. Slice it just before serving to prevent browning.
  • Salsa: A tangy kick that complements the wraps beautifully. Pick your favorite flavor.
  • Sour cream: Adds richness and coolness. A dollop on top elevates each bite.

Directions

  1. In a mixing bowl, combine the shredded chicken, shredded cheese, cream cheese, minced garlic, garlic powder, onion powder, salt, and pepper. Mix well until everything is evenly coated. This is your cheesy filling that will save dinner.

  2. Lay a low-carb tortilla on a flat surface. Place a generous amount of the chicken mixture on the tortilla. Don’t skimp; this is the heart of your wrap.

  3. Add any additional toppings like lettuce or tomatoes if desired. Get creative and use what your family loves!

  4. Roll the tortilla tightly to form a wrap. Tuck in the sides to keep everything from falling out.

  5. Repeat for the remaining tortillas. Each wrap should feel like a little hug of deliciousness.

  6. Heat a skillet over medium heat and place the wraps seam side down. Cook for about 3-4 minutes on each side or until golden brown and the cheese has melted. Listen for that satisfying sizzle!

  7. Serve warm and enjoy your cheesy garlic chicken wraps! These are sure to become a favorite.

Serving

Cheesy Garlic Chicken Wraps

Serving these wraps family-style creates a warm, inviting atmosphere at the dinner table. Place them on a large platter, and let everyone help themselves. You can offer a bowl of fresh toppings on the side for a personalized touch. This not only encourages sharing but also turns dinnertime into a fun experience for the whole family.

Storage

If you have any leftovers (which might be a rarity), you can store them in an airtight container in the fridge. They’ll last for up to three days.

To reheat, simply place them back in a skillet over medium heat for about 5 minutes on each side until heated through. This will help keep the wrap crispy and delicious. You can also microwave them for quicker reheating, but the skillet method is best for keeping that crispy texture.

Kitchen Notes

Here are some handy shortcuts to make this recipe even easier:

  • Pre-Cooked Chicken: Use a rotisserie chicken from the store for an even quicker prep time.
  • Frozen Garlic: If you often cook with garlic, consider keeping frozen minced garlic on hand. It saves time and makes for easy cooking.
  • Mix Ahead: You can combine the filling ingredients a day in advance and store them in the fridge. Just fill and wrap when you’re ready to cook.
  • Meal Prep Idea: Make a double batch and freeze some wraps for a future busy night. Just thaw in the fridge overnight before cooking.
  • Kids in the Kitchen: Let your little ones help by rolling their own wraps. It’s a fun activity that encourages them to be involved in meal prep.

Variations

Not everyone in your family may share the same taste, and that’s okay. Here are a few tweaks to cater to picky eaters or different diets:

  • Swap the Protein: Use shredded beef or pork if chicken isn’t a favorite.
  • Make it Vegetarian: Replace the chicken with roasted vegetables like bell peppers, zucchini, and mushrooms.
  • Gluten-Free Option: Use gluten-free tortillas or lettuce wraps instead of regular ones.
  • Spice it Up: Add some jalapeños or a sprinkle of chili powder for those who enjoy a little heat.
  • Dairy-Free Version: Substitute cream cheese with a dairy-free alternative and use vegan cheese for the filling.

FAQ

1. Can I use uncooked chicken?
Yes, you can. Just cook the chicken fully before shredding and mixing with the other ingredients.

2. How can I make this recipe spicier?
You can add hot sauce to the filling or include sliced jalapeños as toppings before wrapping.

3. Can I bake these wraps instead of frying?
Absolutely! Preheat your oven to 350°F, place the wraps on a baking sheet, and bake for about 10-15 minutes until crispy.

4. What kind of cheese works best?
Cheddar and mozzarella are the most popular choices, but you can also experiment with pepper jack for a spicy kick.

5. How do I make this recipe ahead of time?
You can prepare the filling a day ahead and refrigerate it. Assemble the wraps just before you are ready to cook them for the best flavor and texture.

Conclusion

With Cheesy Garlic Chicken Wraps, you transform simple ingredients into an extraordinary meal. The warmth of melted cheese and the flavor of garlic combined with the vibrant toppings can bring smiles to your family’s faces. Remember, cooking together and sharing delightful meals creates treasured moments. Embrace the joy of family dining and make these wraps a staple in your home. Enjoy cooking, and even more, enjoy gathering around the table.

Cheesy Garlic Chicken Wraps

Prep Time 15 minutes
Cook Time 8 minutes
Total Time 23 minutes
Servings 4 servings
Calories 400
Delicious and quick-to-make wraps featuring shredded chicken, melted cheese, and garlic, perfect for busy weeknights and family gatherings.

Ingredients

Main Ingredients

  • 2 cups cooked chicken, shredded (Use leftover chicken for convenience.)
  • 1 cup shredded cheese (cheddar or mozzarella)
  • 1/4 cup cream cheese
  • 2 cloves garlic, minced (Can use frozen minced garlic.)
  • 1 teaspoon garlic powder
  • 1 teaspoon onion powder
  • Salt and pepper, to taste
  • 4 pieces low-carb tortillas or wraps

Optional Toppings

  • Lettuce (Iceberg is recommended for its crispness.)
  • Tomatoes (Grape tomatoes add a sweet touch.)
  • Avocado (Slice just before serving to prevent browning.)
  • Salsa (Choose your favorite flavor.)
  • Sour cream (A dollop elevates each bite.)

Instructions 

Preparation

  • In a mixing bowl, combine the shredded chicken, shredded cheese, cream cheese, minced garlic, garlic powder, onion powder, salt, and pepper. Mix well until everything is evenly coated.
  • Lay a low-carb tortilla on a flat surface and place a generous amount of the chicken mixture on the tortilla.
  • Add any additional toppings like lettuce or tomatoes if desired.
  • Roll the tortilla tightly to form a wrap, tucking in the sides to keep everything from falling out.

Cooking

  • Heat a skillet over medium heat and place the wraps seam side down.
  • Cook for about 3-4 minutes on each side or until golden brown and the cheese has melted.

Serving

  • Serve warm on a large platter, allowing everyone to help themselves along with a bowl of fresh toppings.

Notes

Store leftovers in an airtight container in the fridge for up to three days. Reheat in a skillet for the best texture.
Calories: 400kcal
Course: Dinner, Main Course
Cuisine: American
Keyword: Cheesy Garlic Chicken Wraps, Chicken Wraps, Easy Recipe, Family Dinner, Quick Meal

Chipotle Honey Chicken Thighs with Smoked Gouda Mashed Potatoes

There’s something truly magical about cooking at home. The delicious aromas swirl around the kitchen, wrapping you in a warm embrace. The sizzling sound of the chicken searing makes your heart race with anticipation. Today, we’ll be preparing a delightful dish that brings family together: Chipotle Honey Chicken Thighs served with Smoked Gouda Mashed Potatoes.

Why This Works

Chipotle Honey Chicken Thighs with Smoked Gouda Mashed Potatoes

This recipe is a beautiful blend of flavors and textures that your family will love. The smoky heat of chipotle combined with the sweetness of honey creates a mouth-watering marinade for the chicken. You can prep everything in just over an hour, making it a perfect weeknight dinner. Plus, all those flavors come together effortlessly, leaving you more time to spend with your loved ones.

Process Overview

“This is where the magic happens—when the aroma fills the kitchen.”

The process for this dish is straightforward and rewarding. Start by marinating the chicken, allowing the flavors to mingle and deepen. Once the chicken is cooking, you can whip up the creamy smoked Gouda mashed potatoes. It’ll seem like an elegant meal, but it’s really quite simple, perfect for families on a busy evening.

Ingredients

Let’s gather everything we need for our culinary creation:

  • 4 chicken thighs – Look for skinless thighs if you want a lighter option, but bone-in thighs give great flavor.
  • 2 tablespoons chipotle in adobo sauce – This adds a wonderful smoky kick. Adjust the amount to your spice preference.
  • 2 tablespoons honey – The sweet touch that balances out the heat.
  • 1 tablespoon olive oil – Helps the chicken crisp up beautifully.
  • Salt and pepper to taste – Essential for seasoning every layer of flavor.
  • 2 cups potatoes, peeled and cubed – Choose Russett or Yukon Gold potatoes for the creamiest mash.
  • 1/2 cup milk – Whole milk offers the richest flavor.
  • 1/2 cup smoked Gouda cheese, shredded – If you love cheese, don’t hold back!
  • 2 tablespoons butter – A little extra creaminess and flavor for the potatoes.

Directions

  1. In a bowl, mix chipotle in adobo, honey, olive oil, salt, and pepper. Marinade chicken thighs in the mixture for at least 30 minutes. This marinating time allows the chicken to soak in all those fabulous flavors; it’ll be worth the wait.

  2. Preheat grill or skillet to medium-high heat and cook chicken thighs for 6-7 minutes per side, or until cooked through. Listen for that satisfying sizzle as you place the chicken on the grill; it’s a good sign!

  3. Meanwhile, boil potatoes in a large pot of salted water until tender, about 15-20 minutes. Drain and return to the pot. Don’t rush this step—perfectly cooked potatoes will make all the difference in your mash!

  4. Add milk, smoked Gouda, and butter to the potatoes. Mash until creamy and season with salt and pepper. If you like your mash extra creamy, just keep mashing; you can even add a splash more of milk if needed!

  5. Serve chicken thighs over the smoked Gouda mashed potatoes. The vibrant colors and delicious smells will have everyone gathered around the table in no time!

Serving

Chipotle Honey Chicken Thighs with Smoked Gouda Mashed Potatoes

To serve this meal family-style, place the mashed potatoes in a large bowl at the center of the table and top them with the juicy chipotle honey chicken thighs. You can add a sprinkle of chopped green onions or fresh herbs for a pop of color. This beautiful presentation makes it easy for everyone to take their portions while enjoying the time together.

Storage

Leftovers can be stored in an airtight container in the fridge for up to 3 days. When you’re ready to enjoy them again, simply reheat the chicken in a skillet over medium heat and warm the mashed potatoes in the microwave, adding a splash of milk if they’ve thickened up.

Kitchen Notes

  • Use a meat thermometer: Chicken should reach an internal temperature of 165°F for safety.
  • Prep ahead: You can marinate the chicken thighs the night before to save time.
  • Ditch the boil: If you have an Instant Pot, you can cook the potatoes there for a faster option.
  • Mix in some veggies: Steam green beans or broccoli for a nutritious side that cooks quickly.
  • Make it cheesy: For an even richer flavor, add more shredded Gouda to the potatoes or top with Parmesan.

Variations

If you have picky eaters or need different diets, here are some tweaks to keep everyone happy:

  • For kids: Reduce the chipotle sauce for a milder flavor or substitute it with a BBQ sauce.
  • Vegetarian option: Swap out chicken for marinated grilled portobello mushrooms or tofu.
  • Low-carb: Instead of potatoes, try cauliflower for a lighter mash.
  • Gluten-free: This recipe is naturally gluten-free, but always double-check your ingredients.
  • Extra spice: Add more chipotle or some cayenne for those who enjoy things hot!

FAQ

  1. Can I use chicken breasts instead of thighs?
    Yes, but chicken breasts can dry out. Consider marinating them a bit longer or cooking them at a lower temperature.

  2. How do I make this dish in advance?
    You can marinate the chicken and prepare the potatoes ahead of time. Just refrigerate and cook when ready.

  3. What can I serve this with?
    A simple green salad or steamed vegetables balance this hearty dish perfectly.

  4. Can I freeze the leftovers?
    Yes, you can freeze the chicken and mashed potatoes in separate containers for up to 3 months.

  5. What if I don’t have smoked Gouda?
    Any cheese you enjoy could work, such as cheddar or Monterey Jack.

Cooking together is what makes memories last. This Chipotle Honey Chicken Thighs with Smoked Gouda Mashed Potatoes dish is perfect for family dinners and special occasions alike. So pull everyone into the kitchen, enjoy the aromas, the sounds, and the laughter that fills your home. Happy cooking!

Chipotle Honey Chicken Thighs

Prep Time 30 minutes
Cook Time 25 minutes
Total Time 55 minutes
Servings 4 servings
Calories 650
A delightful dish featuring smoky chipotle chicken thighs served with creamy smoked Gouda mashed potatoes, perfect for family dinners.

Ingredients

For the Chicken

  • 4 pieces chicken thighs (Look for skinless thighs for a lighter option.)
  • 2 tablespoons chipotle in adobo sauce (Adjust to your spice preference.)
  • 2 tablespoons honey (Balances out the heat.)
  • 1 tablespoon olive oil (Helps the chicken crisp up.)
  • to taste salt and pepper (Essential for seasoning.)

For the Mashed Potatoes

  • 2 cups potatoes, peeled and cubed (Russett or Yukon Gold for creaminess.)
  • 1/2 cup milk (Whole milk for the richest flavor.)
  • 1/2 cup smoked Gouda cheese, shredded (Feel free to add more for richer flavor.)
  • 2 tablespoons butter (Adds creaminess to the mash.)

Instructions 

Marinating the Chicken

  • In a bowl, mix chipotle in adobo, honey, olive oil, salt, and pepper. Marinade chicken thighs in the mixture for at least 30 minutes.

Cooking the Chicken

  • Preheat grill or skillet to medium-high heat and cook chicken thighs for 6-7 minutes per side, or until cooked through.

Preparing the Mashed Potatoes

  • Boil potatoes in a large pot of salted water until tender, about 15-20 minutes.
  • Drain and return potatoes to the pot. Add milk, smoked Gouda, and butter. Mash until creamy and season with salt and pepper.
  • For extra creaminess, keep mashing and add a splash more of milk if needed.

Serving the Dish

  • Serve chicken thighs over the smoked Gouda mashed potatoes, garnished with chopped green onions or fresh herbs if desired.

Notes

Leftovers can be stored in an airtight container in the fridge for up to 3 days. Reheat chicken in a skillet and mashed potatoes in the microwave, adding a splash of milk if necessary.
Calories: 650kcal
Course: Dinner, Main Course
Cuisine: American, Comfort Food
Keyword: Chicken Recipe, Chipotle Honey Chicken, Comfort Food, Family Dinner, Smoked Gouda Mashed Potatoes

Street Corn Chicken Rice Bowl

There’s something truly special about the smell of grilled chicken mingling with sweet corn in your kitchen. You can hear the gentle sizzle as the chicken cooks, and the aroma wraps around you like a warm hug. This sensory delight sets the perfect stage for a comforting family dinner. With a little preparation, you can create a satisfying meal that brings everyone together, yet is quick enough to fit into your busy schedule.

Why This Works

Street Corn Chicken Rice Bowl

This Street Corn Chicken Rice Bowl is not just a meal; it’s a celebration of flavors and family time. It combines delicious ingredients that not only please the palate but also make you feel good. The creamy texture of the mayonnaise and cotija cheese, along with the bright crunch of corn and avocado, creates a delightful contrast.

Best of all, it’s a one-bowl dish, making cleanup a breeze. You can prepare it in under 30 minutes, which is a relief when life gets hectic. This recipe is perfect for busy weeknights or relaxed weekends when you want to share laughter and stories over dinner.

Process Overview

“This is where the magic happens—when the aroma fills the kitchen.”

As you gather your ingredients and follow along, you’ll find that this recipe is as simple as it is delightful. The steps flow smoothly, and you’ll feel accomplished as the vibrant colors of the bowl come together. With each ingredient you add, the kitchen comes alive with wonderful scents that will have your family excited for dinner.

Ingredients

  • 2 cups cooked rice: Leftover rice works great and makes preparation even faster.
  • 1 cup grilled chicken, diced: Use rotisserie chicken for an even quicker option.
  • 1 cup corn (fresh, canned, or frozen): If using frozen corn, thaw it beforehand for optimal texture.
  • 1/2 cup mayonnaise: Homemade mayo can add an extra layer of flavor.
  • 1/2 cup cotija cheese, crumbled: Feta cheese can serve as a tasty substitute if cotija is unavailable.
  • 1 avocado, sliced: Choose ripe avocados for a creamy texture.
  • 1 lime, juiced: Freshly squeezed is best for that vibrant citrus punch.
  • 1 tsp chili powder: Adjust this to your family’s spice preference.
  • Salt and pepper to taste: Essential for enhancing all the flavors.
  • Chopped cilantro for garnish: A refreshing finish that brightens the dish.

By following these tips for each ingredient, you can adapt the recipe to your family’s preferences while ensuring a delicious outcome.

Directions

  1. In a large mixing bowl, combine the cooked rice and grilled chicken. This is a great time to involve your kids in the kitchen. They can help mix the base, making it a fun family activity.

  2. Stir in the corn, mayonnaise, cotija cheese, lime juice, and chili powder. Mix well until everything is evenly coated. Take a moment to appreciate the colors and textures as you stir.

  3. Season with salt and pepper to taste. Remember, starting with a little is better; you can always add more later.

  4. Serve in bowls topped with avocado slices and chopped cilantro. Enjoy as a light meal or make ahead for later. Keep in mind how lovely it’ll look on your dining table stacked with family favorites, inviting everyone to dig in.

Serving

Street Corn Chicken Rice Bowl

When it’s time to serve, consider making it family-style. Place the big bowl of the Street Corn Chicken Rice Bowl right in the center of the table so everyone can help themselves. You can also set up a toppings bar for extra fun. Think additional lime wedges, more cilantro, or even some hot sauce for those who like a kick. This adds a personal touch and lets each family member customize their bowl.

Storage

This dish keeps well in the refrigerator for up to three days. Store it in an airtight container to maintain freshness. When you’re ready to eat, simply reheat portions in the microwave until warmed through. If the rice has dried out slightly, add a splash of chicken broth or water to bring it back to life.

Kitchen Notes

  • Pre-cook your rice in advance to save time.
  • Use leftover grilled chicken or rotisserie chicken to speed things up.
  • Fresh corn is great in summer but feel free to use canned or frozen for year-round convenience.
  • A squeeze of lemon or lime just before serving brightens the flavors significantly.
  • Keep your avocado from browning by squeezing some lime juice over it right after slicing.

Variations

If you have picky eaters or want to cater to different diets, here are a few tweaks to consider:

  • Substitute brown rice or quinoa for a healthier grain option.
  • Make it vegetarian by removing the chicken and adding black beans and extra vegetables like bell peppers or zucchini.
  • Use Greek yogurt instead of mayonnaise for a lighter version.
  • For gluten-free, ensure your mayonnaise and other packaged items are certified gluten-free.

FAQ

  1. Can I use leftover rice?
    Yes! Leftover rice works perfectly and saves time.

  2. What can I substitute for cotija cheese?
    Feta cheese or even mozzarella can be great alternatives.

  3. Can I make this ahead of time?
    Absolutely! It can be made a few hours in advance. Just add the avocado just before serving to keep it fresh.

  4. Is this recipe spicy?
    It is mildly spiced with chili powder. If you’d like more heat, add hot sauce or extra chili powder.

  5. How do I store leftovers?
    Place leftovers in an airtight container in the fridge for up to three days.

Conclusion

Cooking is about nurturing your loved ones, and this Street Corn Chicken Rice Bowl brings people together around the table. It’s a recipe that combines flavor, comfort, and simplicity, making it both an everyday meal and a special occasion dish. So gather your family, enjoy the process, and savor each delicious bite.

Street Corn Chicken Rice Bowl

Prep Time 10 minutes
Cook Time 20 minutes
Total Time 30 minutes
Servings 4 servings
Calories 450
A comforting one-bowl meal featuring grilled chicken, corn, and creamy mayo, perfect for busy weeknights or family gatherings.

Ingredients

Main Ingredients

  • 2 cups cooked rice (Leftover rice works great and makes preparation even faster.)
  • 1 cup grilled chicken, diced (Use rotisserie chicken for an even quicker option.)
  • 1 cup corn (Fresh, canned, or frozen; thaw frozen corn beforehand.)
  • 1/2 cup mayonnaise (Homemade mayo can add an extra layer of flavor.)
  • 1/2 cup cotija cheese, crumbled (Feta cheese can serve as a substitute if cotija is unavailable.)
  • 1 whole avocado, sliced (Choose ripe avocados for a creamy texture.)
  • 1 whole lime, juiced (Freshly squeezed is best.)
  • 1 tsp chili powder (Adjust this to your family’s spice preference.)
  • to taste salt and pepper (Essential for enhancing all the flavors.)
  • for garnish chopped cilantro (A refreshing finish that brightens the dish.)

Instructions 

Preparation

  • In a large mixing bowl, combine the cooked rice and grilled chicken. Involve your kids in the kitchen for a fun family activity.
  • Stir in the corn, mayonnaise, cotija cheese, lime juice, and chili powder. Mix well until everything is evenly coated.
  • Season with salt and pepper to taste. Start with a little; you can always add more later.

Serving

  • Serve in bowls topped with avocado slices and chopped cilantro. Enjoy as a light meal or make ahead for later.

Notes

This dish keeps well in the refrigerator for up to three days. Store it in an airtight container. Reheat portions in the microwave when ready to eat, adding a splash of chicken broth or water if needed.
Calories: 450kcal
Course: Dinner, Main Course
Cuisine: American, Mexican
Keyword: Family Dinner, Grilled Chicken, One-Bowl Dish, Quick Meal, Street Corn Chicken Rice Bowl