Category

Mediterranean & Flavor-Packed Chicken

Category

Lemon Chicken Romano

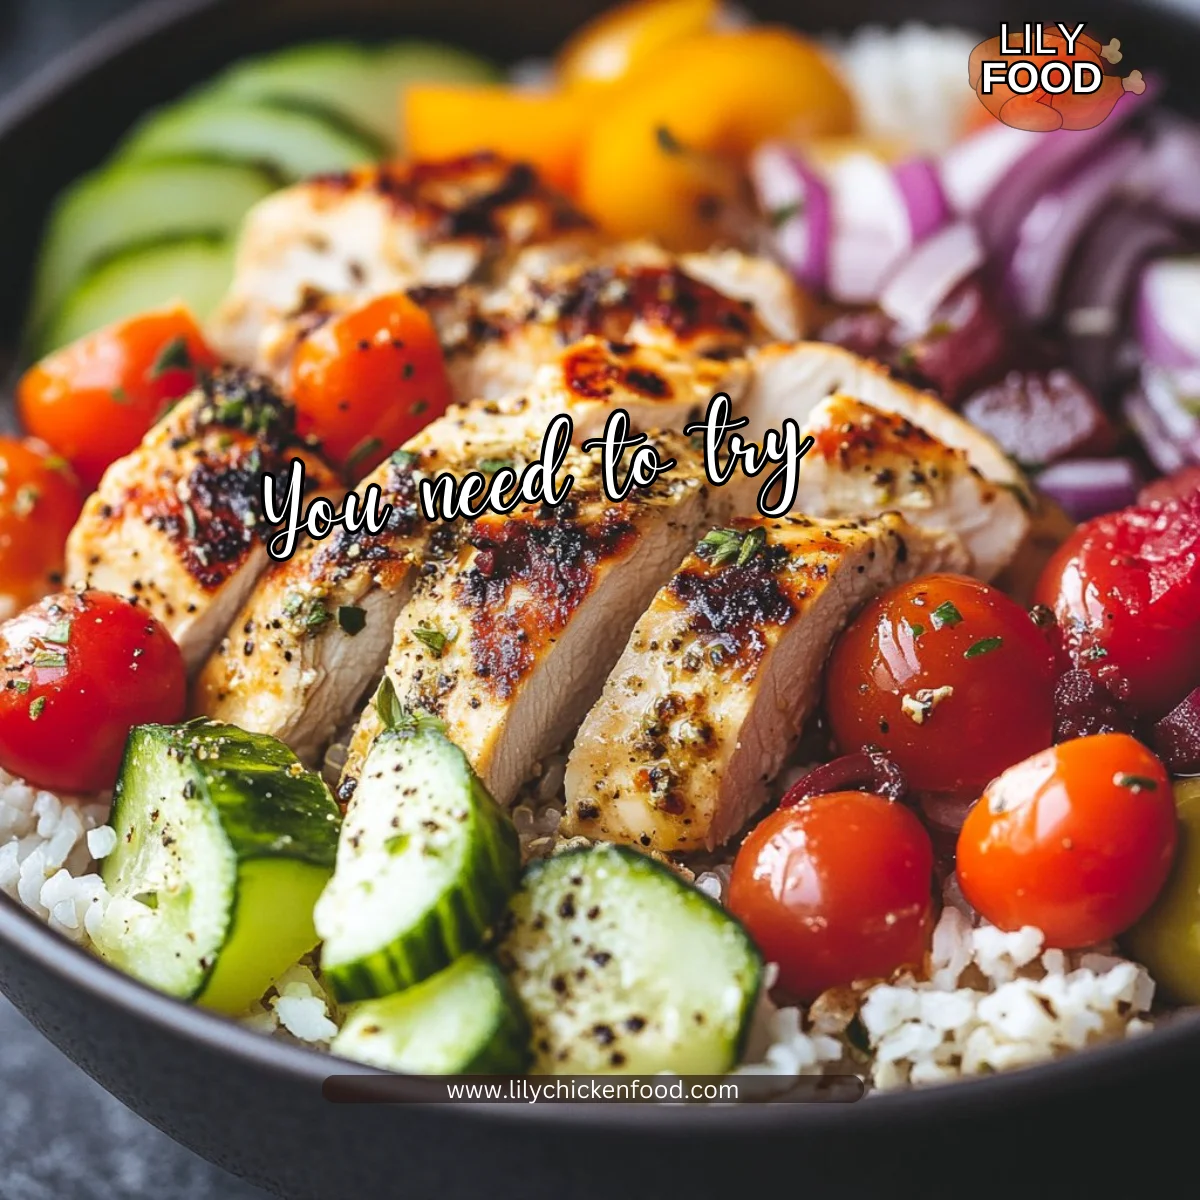
There is something truly special about the smell of food cooking in the kitchen. The sizzle of chicken hitting a hot pan fills the air, mingling with the bright zest of lemon. This Lemon Chicken Romano recipe is a delightful blend of flavors that can easily turn a weekday dinner into a memorable family feast. As you let this dish come together, you’ll hear the gentle sounds of your family gathering around the dining table, excited for a taste of what’s cooking.

Why This Works

Lemon Chicken Romano

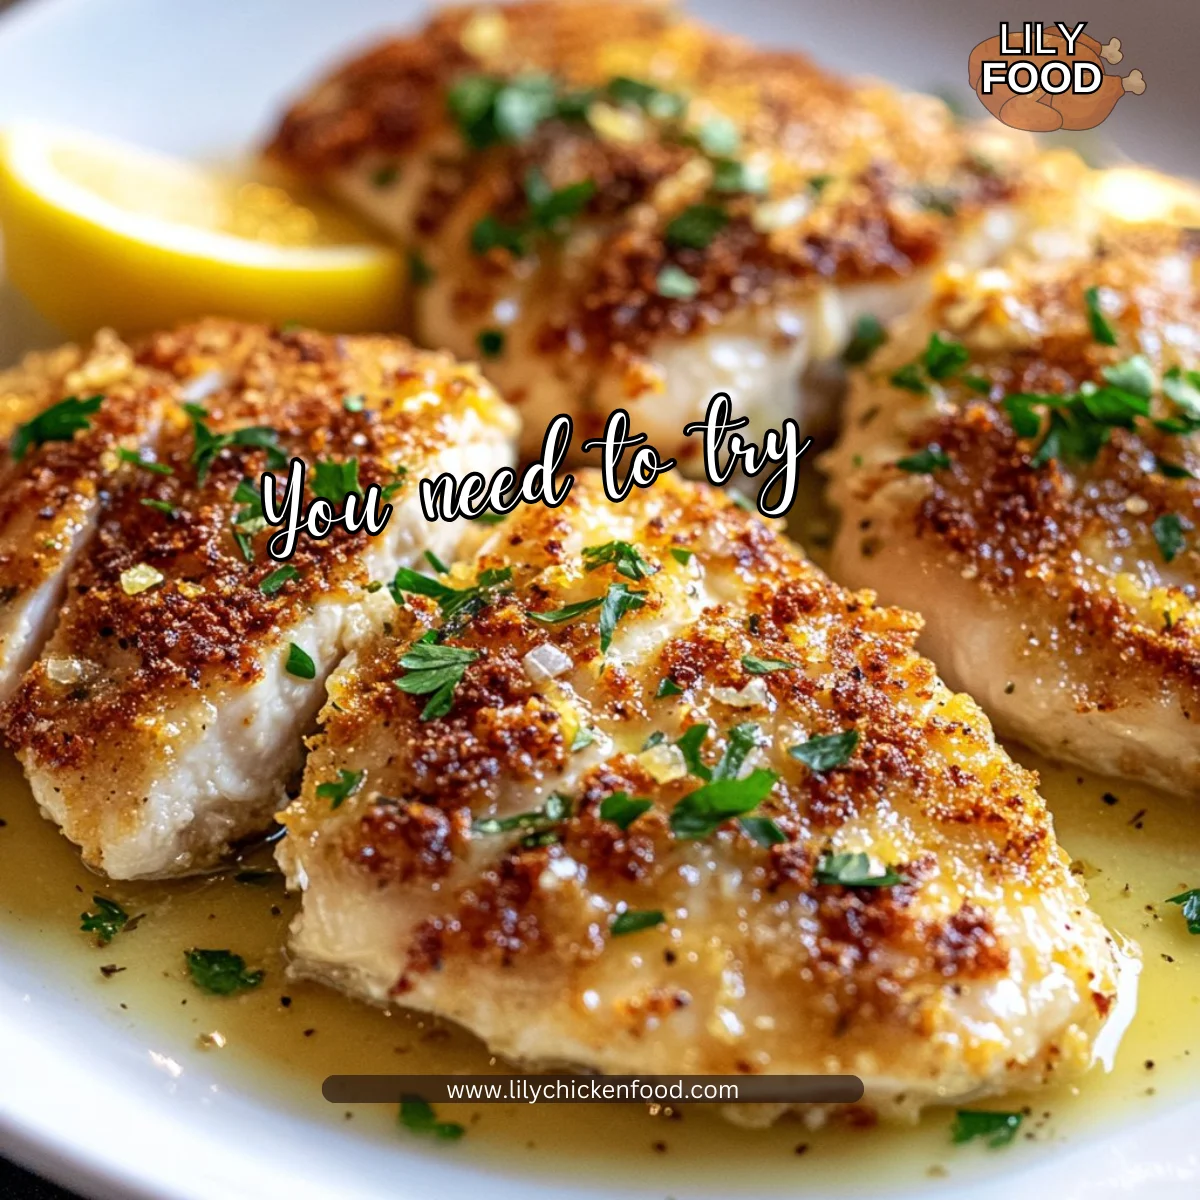
This Lemon Chicken Romano is not just a delicious meal; it’s a dish that brings families together. The crispy chicken coated with flavorful breadcrumbs and Romano cheese is sure to get everyone at the table eager to dig in. It’s a time-saver as well; the preparation and cooking times are short. In about 30 minutes, you can serve up a meal that feels special but is easy enough for any night of the week.

Gathering around the table to enjoy good food is about more than just filling stomachs. It allows families to share stories and build connections. This recipe makes that easy, letting you focus on each other rather than the cooking.

Process Overview

“This is where the magic happens—when the aroma fills the kitchen.”

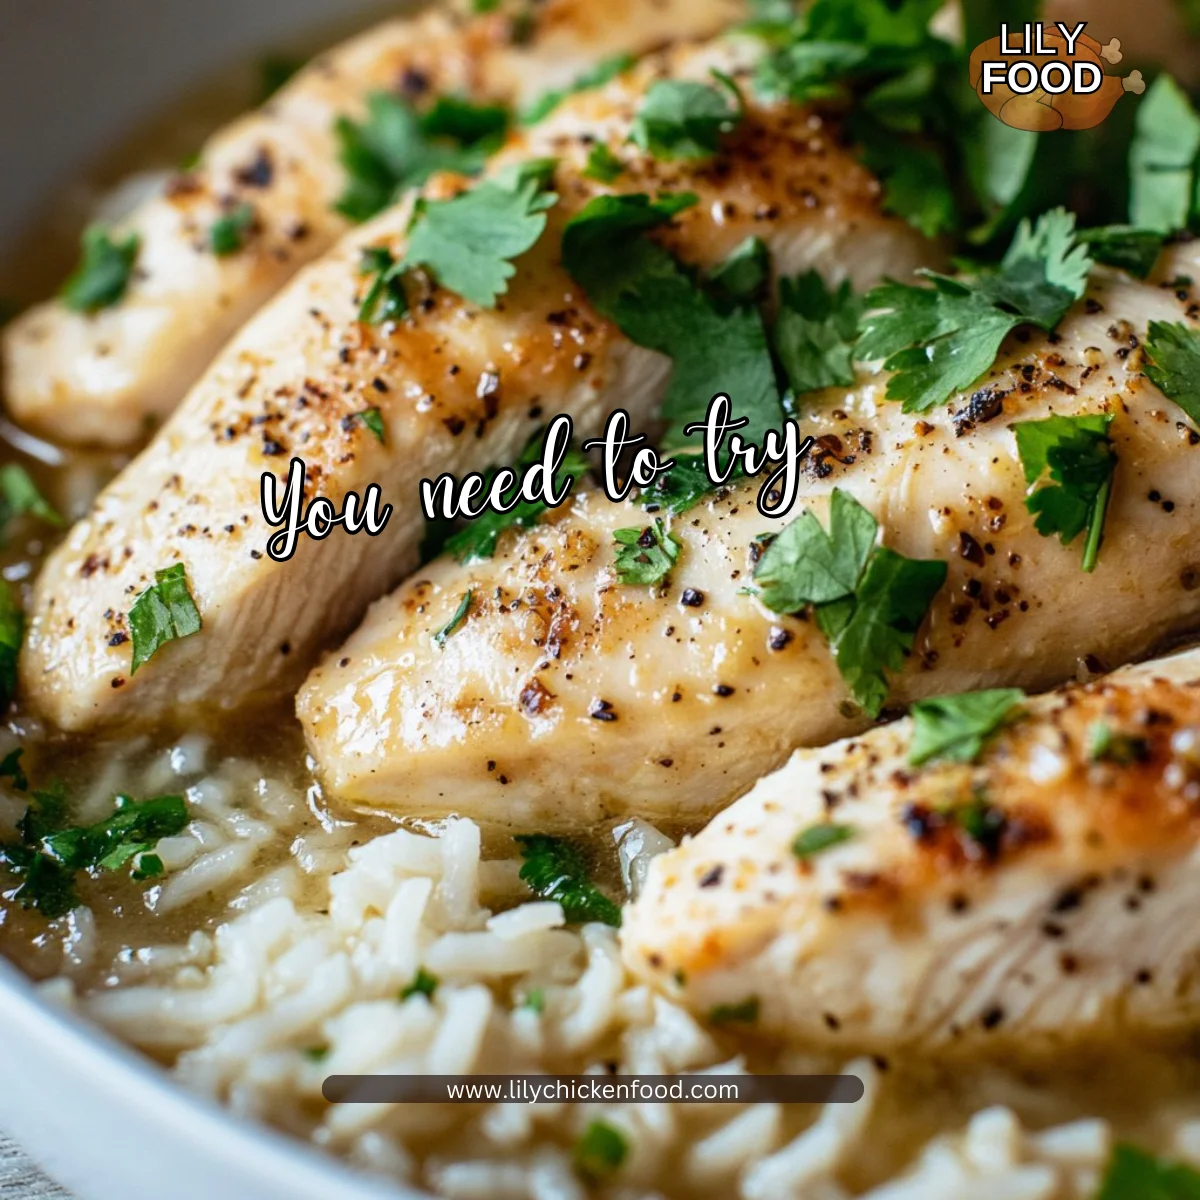
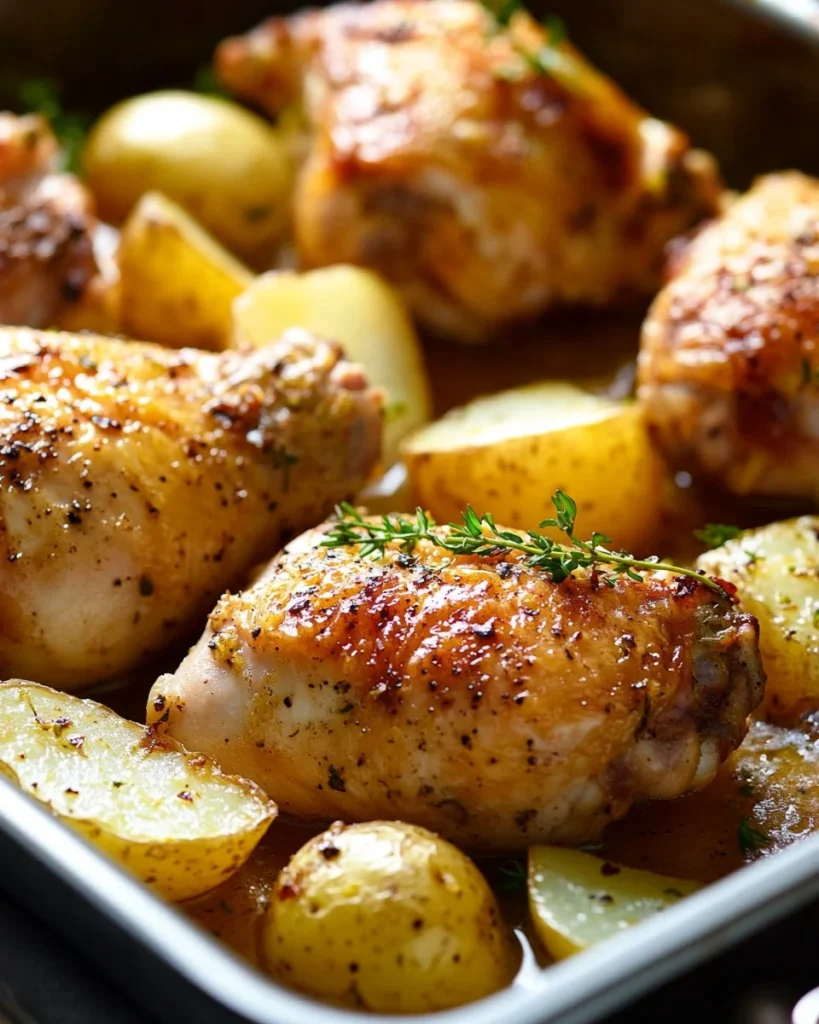
Cooking Lemon Chicken Romano is a simple process that results in a rich and fragrant meal. You’ll begin by preparing the chicken and letting it bake or fry until golden and crispy. In the background, you will create a light lemon sauce that not only enhances the flavor but also brings a zesty brightness to the dish.

The ease of the recipe ensures everyone, from kids to adults, can find joy in the experience. As the chicken cooks, you can set the table, serve some sides, and share moments with your family.

Ingredients

  1. 4 chicken breasts – Choose boneless and skinless for a quick cook.
  2. 1 cup breadcrumbs – You can use store-bought or make your own for freshness.
  3. 1/2 cup grated Romano cheese – It adds a delightful salty bite to the dish.
  4. 2 eggs – Free-range eggs add richer flavor.
  5. 1 lemon (zested and juiced) – Use fresh for the best flavor.
  6. 2 cloves garlic (minced) – It brings warmth and depth to the sauce.
  7. Salt and pepper to taste – Don’t forget this crucial seasoning step.
  8. Olive oil for cooking – Extra virgin olive oil is always a great choice.
  9. Fresh parsley for garnish – This adds a pop of color and freshness.

Lily’s personal tips:

  • When selecting chicken, look for even thickness to ensure even cooking.
  • For a crunchy texture, consider using panko breadcrumbs.
  • Use organic lemons to get the most vibrant zest.
  • Make sure to season every layer of your food for the best taste.
  • Fresh parsley not only looks great but adds bright flavor.

Directions

  1. Preheat the oven to 400°F (200°C) or heat olive oil in a frying pan over medium heat. This first step sets the stage for a lovely meal.
  2. In a shallow bowl, beat the eggs and mix in lemon zest, salt, and pepper. In another bowl, combine breadcrumbs and Romano cheese. This dual-bowl strategy keeps things organized and helps the flavors shine.
  3. Dip each chicken breast into the egg mixture, then coat it with the breadcrumb and cheese mixture. Make sure every inch is covered! This is where you build that tasty crust.
  4. Place the coated chicken on a baking sheet or directly in the frying pan. If baking, consider lining the sheet for easy cleanup.
  5. Bake for 20-25 minutes or fry until golden brown and cooked through, about 6-7 minutes per side. You’ll know it’s ready when it’s golden and the kitchen smells divine.
  6. In a small saucepan, combine lemon juice, minced garlic, and additional olive oil, heating gently. This sauce is the finishing touch that takes the dish over the top.
  7. Drizzle the lemon sauce over the crispy chicken and garnish with fresh parsley. Presenting your meal with garnishes makes it feel extra special.
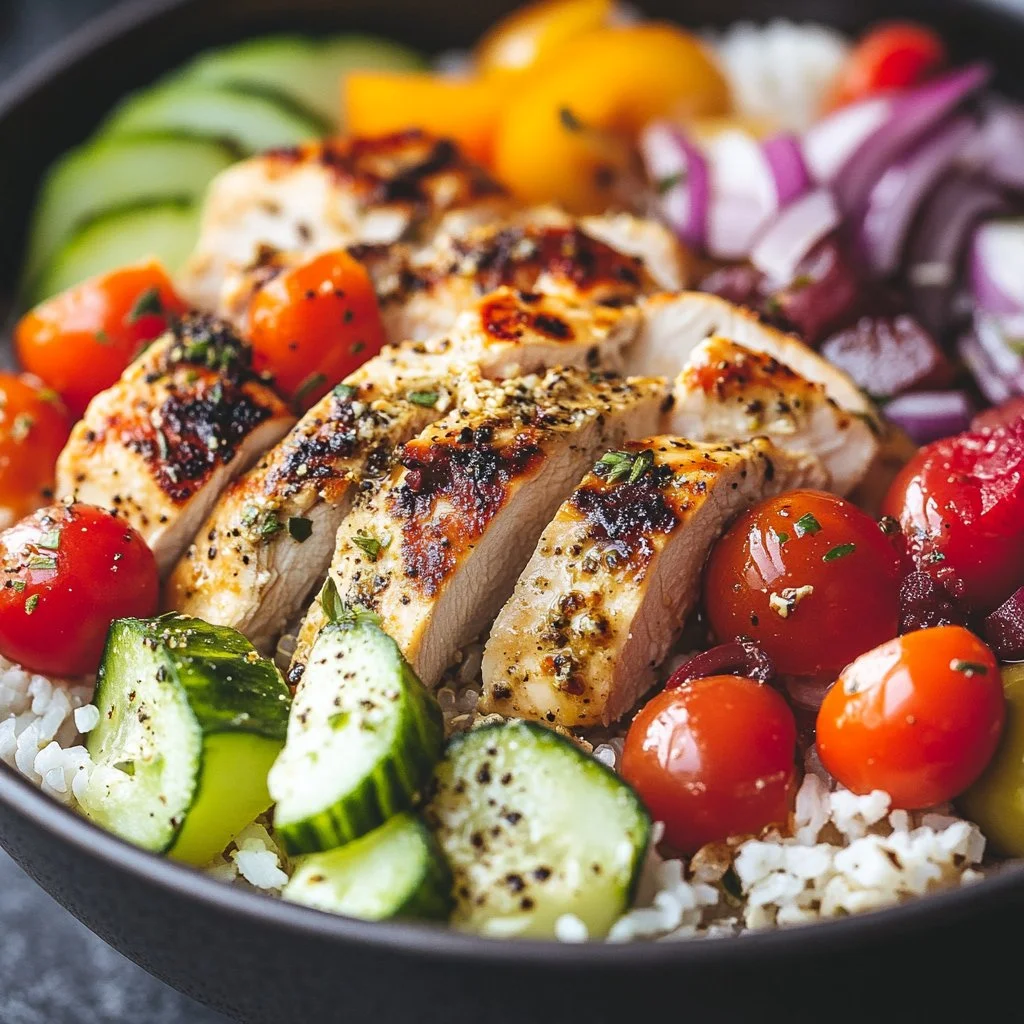
  8. Serve the chicken with pasta, rice, or roasted vegetables. Choose sides that your family loves!

Serving

Lemon Chicken Romano

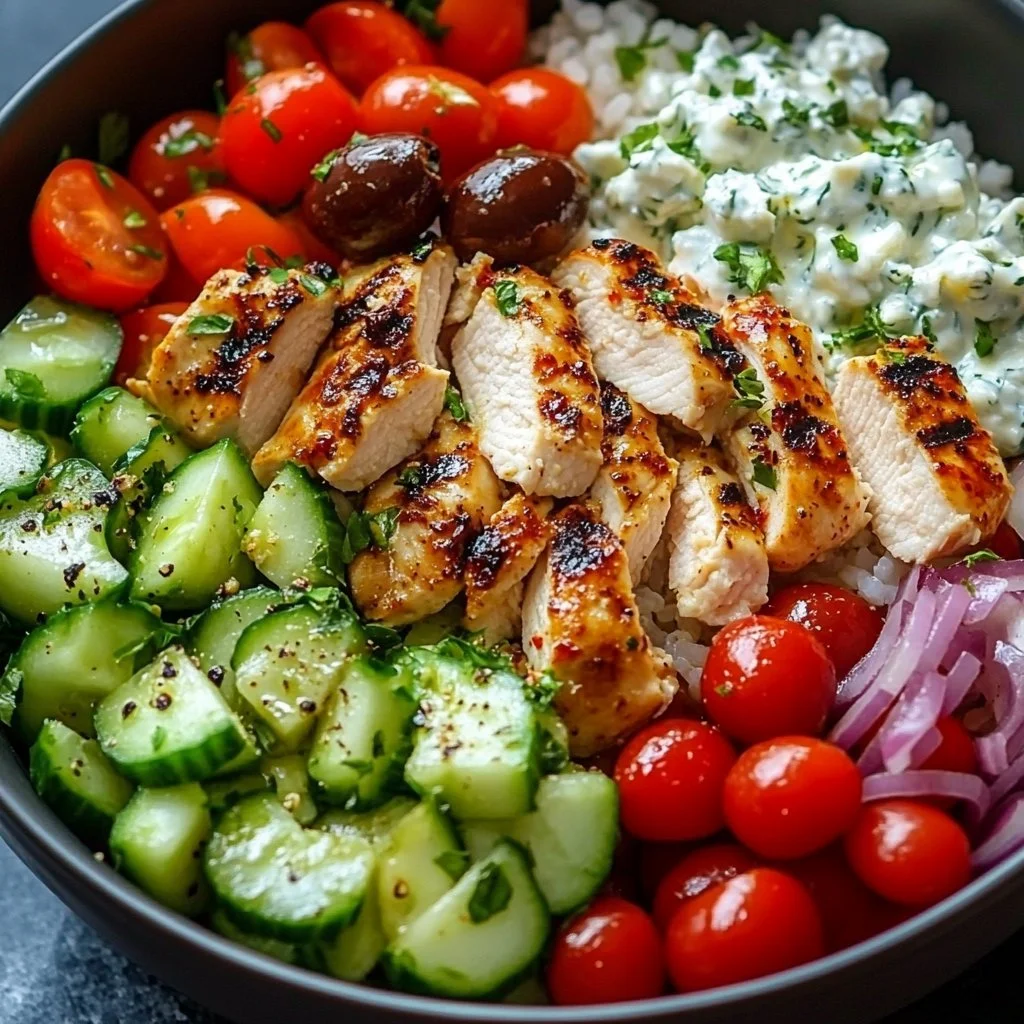
Nothing brings people together like a family-style meal. Arrange the Lemon Chicken Romano on a large serving platter. Surround it with vibrant side dishes. Encourage everyone to help themselves. This communal aspect makes for laughter and conversation, setting the stage for wonderful family memories.

Storage

If you happen to have leftovers, which I rarely do, store the chicken in an airtight container in the fridge. It will be good for about 3 days. To reheat, place the chicken on a baking sheet and warm it in the oven at 350°F (175°C) until heated through. This helps retain the chicken’s crispy texture. You can also warm it in the microwave, but the texture may not be the same.

Kitchen Notes

  • Prep Ahead: You can coat the chicken early in the day and store it in the fridge until you’re ready to cook.
  • Shortcuts: Buy pre-grated Romano cheese and pre-minced garlic to save time.
  • Less Mess: Use one hand for wet ingredients and one for dry, making breading easier and less messy.
  • Uniform Cooking: Pound the chicken to an even thickness for even cooking.
  • Baking Sheet: Use a non-stick baking mat or spray the baking sheet with olive oil for easy cleanup.

Variations

If you have picky eaters or dietary restrictions, there are plenty of ways to customize this dish:

  • For gluten-free diets, substitute breadcrumbs with gluten-free options or crushed almonds.
  • Consider adding a handful of spinach to the lemon sauce for added nutrition.
  • Swap out Romano cheese for parmesan or a dairy-free alternative if you want to cater to lactose intolerance.
  • Add herbs like thyme or oregano to the breadcrumb mix for a different herbal profile.
  • Change the flavor by adding red pepper flakes to the lemon sauce for a kick.

FAQ

  1. Can I use chicken thighs instead of breasts?
    Yes, chicken thighs will work wonderfully. They will be juicier, but make sure they are cooked to an internal temperature of 165°F (75°C).

  2. What sides pair well with this dish?
    Serve with pasta, rice, or a fresh green salad. Roasted vegetables complement the lemon’s brightness nicely.

  3. Can I make this dish in advance?
    You can bread the chicken in advance and store it in the refrigerator before baking or frying. It saves time for dinner.

  4. Is this suitable for freezing?
    Yes, freeze the uncooked breaded chicken. Just be sure to use it within 3 months for the best quality.

  5. Can I use dried herbs instead of fresh?
    Certainly! However, dried herbs are more potent. Use a third of the amount if you are substituting fresh for dried.

As you gather around the dinner table with your family, remember that sharing food is about sharing love. This Lemon Chicken Romano is not just a meal; it’s a chance to reconnect and create memories. Enjoy cooking, savor the flavors, and cherish every bite. Cooking doesn’t have to be complicated; it can be simple and rewarding, just like the love shared around your family table.

Lemon Chicken Romano

Prep Time 15 minutes
Cook Time 25 minutes
Total Time 40 minutes
Servings 4 servings
Calories 400
A delightful blend of crispy chicken, flavorful breadcrumbs, and zesty lemon sauce that brings families together around the dinner table.

Ingredients

For the Chicken

  • 4 pieces chicken breasts, boneless and skinless (Choose even thickness for uniform cooking.)
  • 1 cup breadcrumbs (Store-bought or homemade for freshness.)
  • 1/2 cup grated Romano cheese (Adds a delightful salty bite.)
  • 2 pieces eggs (Free-range eggs add richer flavor.)
  • 1 piece lemon, zested and juiced (Use fresh for the best flavor.)
  • 2 cloves garlic, minced (Brings warmth and depth to the sauce.)
  • to taste salt (Crucial for seasoning.)
  • to taste pepper (Crucial for seasoning.)
  • as needed olive oil for cooking (Extra virgin for the best flavor.)
  • to garnish fresh parsley (Adds color and freshness.)

Instructions 

Preparation

  • Preheat the oven to 400°F (200°C) or heat olive oil in a frying pan over medium heat.
  • In a shallow bowl, beat the eggs and mix in lemon zest, salt, and pepper.
  • In another bowl, combine breadcrumbs and Romano cheese.
  • Dip each chicken breast into the egg mixture, then coat it with the breadcrumb and cheese mixture.
  • Place the coated chicken on a baking sheet or in the frying pan.

Cooking

  • Bake for 20-25 minutes or fry until golden brown and cooked through, about 6-7 minutes per side.
  • In a small saucepan, combine lemon juice, minced garlic, and additional olive oil, heating gently.
  • Drizzle the lemon sauce over the crispy chicken and garnish with fresh parsley.

Serving

  • Arrange the Lemon Chicken Romano on a large serving platter and serve with pasta, rice, or roasted vegetables.

Notes

You can coat the chicken early in the day and store it in the fridge until ready to cook. Use panko breadcrumbs for crunch and pound chicken to an even thickness for uniform cooking. Store leftovers in an airtight container for up to 3 days.
Calories: 400kcal
Course: Dinner, Main Course
Cuisine: Italian
Keyword: Chicken Romano, Crispy Chicken, Easy Recipe, Family Dinner, Lemon Chicken

Greek Chicken Bowls

The kitchen is alive with the warm scent of grilled chicken and fresh vegetables. You can hear the sizzle of the chicken as it sears on the grill, and the gentle chopping of crisp cucumbers and juicy tomatoes fills the air. Preparing Greek Chicken Bowls is more than just cooking; it’s about creating a meal that brings the family together. It’s a dish that nourishes both body and soul, making even the busy weeknights feel special.

Why This Works

Greek Chicken Bowls

Greek Chicken Bowls are perfect for busy families. With just a few ingredients, you can whip up a wholesome dinner that’s both delicious and filling. The best part is that it doesn’t take much time to prepare. Marinating the chicken ahead of time can save you precious minutes on a hectic evening. Plus, the vibrant colors and fresh flavors appeal to everyone, making it a hit at the dinner table.

What I love about these bowls is their versatility. You can customize them to suit your family’s tastes. Even if someone is a picky eater, you can easily swap ingredients to meet their preferences. This dish also encourages everyone to get involved in prepping—chopping veggies, arranging toppings, and even drizzling on that tzatziki sauce. It really becomes a family affair in every sense!

Process Overview

“This is where the magic happens—when the aroma fills the kitchen.”

Preparing Greek Chicken Bowls is a delightful process that gently unfolds in stages. The marinated chicken gets grilled to perfection, and while it rests, you can prepare the colorful toppings. Layering all the components in a bowl creates a beautiful presentation that everyone will appreciate. With each bite, you’ll be reminded of sun-soaked Mediterranean days.

Ingredients

To make these Greek Chicken Bowls, gather the following ingredients:

  • 2 cups cooked rice or quinoa: This makes a hearty base. Quinoa adds extra protein, while rice offers a comforting familiarity.
  • 1 lb chicken breasts, marinated and grilled: Chicken is lean and soaks up flavors beautifully.
  • 1 cup cherry tomatoes, halved: These add sweetness and a burst of color.
  • 1 cucumber, diced: Crisp and refreshing, cucumbers balance the richness of the chicken.
  • 1 red onion, thinly sliced: Sweet and tangy, red onions bring depth to the bowls.
  • 1 bell pepper, diced: Use any color bell pepper you love; they all taste great and add crunch.
  • 1 cup Kalamata olives, pitted: These olives provide a briny contrast that enhances the dish.
  • 1/2 cup feta cheese, crumbled: Feta offers a tangy creaminess that ties the flavors together.
  • 1/2 cup tzatziki sauce: This creamy yogurt sauce is a must for that authentic Greek taste.
  • Olive oil, for drizzling: Enhance flavors and keep the chicken moist.
  • Salt and pepper to taste: Simple but necessary for bringing out the best flavors.

Lily’s Personal Tips

  • Use day-old rice for better texture. It’s less sticky and holds up well in bowls.
  • Marinate the chicken in advance, even overnight if you can. The flavors deepen beautifully over time.
  • Opt for a mix of colored bell peppers for a vibrant dish.
  • If you prefer, try a non-fat Greek yogurt for a lighter tzatziki.
  • Don’t skip the feta; it’s key for that Greek flavor profile.

Directions

  1. Marinate chicken breasts in olive oil, lemon juice, garlic, and oregano for at least 30 minutes. This is where the magic starts. The longer you marinate, the more flavorful your chicken will be.
  2. Grill the marinated chicken until fully cooked, about 6-7 minutes per side. Let it rest before slicing. This helps to keep the juices locked in.
  3. In bowls, layer cooked rice or quinoa, sliced grilled chicken, cherry tomatoes, cucumber, red onion, bell pepper, and olives. Each layer adds its unique flair and taste.
  4. Drizzle with tzatziki sauce and sprinkle with feta cheese. The creamy tzatziki paired with the salty feta is heavenly.
  5. Season with salt and pepper to taste, and serve immediately. This meal is best enjoyed fresh, while all the ingredients are at their peak.

Serving

Greek Chicken Bowls

To serve these Greek Chicken Bowls family-style, create a beautiful spread on the table. Place each ingredient in bowls and allow everyone to build their own bowl. This way, you can accommodate varying tastes and preferences. Don’t hesitate to place some extra tzatziki and feta on the table, because who wouldn’t want more of that?

For added flair, consider accompanying your bowls with warm pita bread or a simple Greek salad on the side. Eating together while assembling your bowls makes for a joyful and interactive experience.

Storage

If you have leftovers, you’re in luck! Store the components separately in airtight containers in the refrigerator. The chicken stays fresh for about 3-4 days, while vegetables can last up to 2 days. When you’re ready to enjoy again, simply reheat the chicken in the microwave or on the stove. Keep the toppings fresh to enjoy that crisp texture.

Practical Fridge/Reheat Tips

  • Store ingredients separately to keep everything fresh longer.
  • Add a splash of water when reheating chicken to keep it juicy.
  • Wrap any leftover rice tightly to avoid drying out.
  • Don’t mix the tzatziki with the bowls until ready to eat to maintain its creaminess.
  • Revive sad, leftover veggies by quickly sautéing them before serving.

Kitchen Notes

  1. Use a grill pan if you don’t have an outdoor grill for a beautiful sear.
  2. Substitute the chicken for shrimp or tofu for a different protein option.
  3. Pre-cook rice or quinoa in bulk for faster meal prep.
  4. Try adding roasted veggies for an added depth of flavor.
  5. Freeze marinated chicken for an easy meal solution on busy days.

Variations

If you have picky eaters at home or family members with dietary restrictions, consider these tweaks:

  • Use grilled tempeh or chickpeas instead of chicken for a vegetarian option.
  • Swap the tzatziki for hummus if someone prefers that flavor.
  • Offer a side of roasted vegetables or grilled corn for added variety.
  • Use brown rice or cauliflower rice for a gluten-free base.
  • Adjust the toppings based on preferences; skip olives or feta if they are not a favorite.

FAQ

Q: Can I prepare the chicken in advance?
A: Yes! Marinated chicken can be stored in the refrigerator for up to 24 hours before cooking.

Q: What’s the best way to grill the chicken?
A: Preheat your grill to medium-high heat and avoid overcrowding the grill to achieve nice grill marks.

Q: Can I use other grains instead of rice or quinoa?
A: Absolutely! Farro, barley, or even couscous work great as alternatives.

Q: How do I make this dish vegan?
A: Use chickpeas or tofu, and swap tzatziki for a vegan tahini dressing.

Q: Can leftovers be frozen?
A: It’s best to freeze the chicken separately from the fresh vegetables. They can be frozen for up to 3 months.

In summary, Greek Chicken Bowls are a nourishing and colorful meal that can easily fit into your family’s busy schedule. The vibrant ingredients combine to create a dish that is sure to please. As you prepare this meal, think of the joy of gathering around the table with your loved ones, sharing stories, and creating memories one bowl at a time. Enjoy every bite and cherish the moments spent together!

Greek Chicken Bowls

Prep Time 30 minutes
Cook Time 14 minutes
Total Time 44 minutes
Servings 4 servings
Calories 570
A wholesome, customizable dish featuring marinated grilled chicken, fresh vegetables, and a delightful tzatziki sauce, perfect for busy weeknights.

Ingredients

Base

  • 2 cups cooked rice or quinoa (Quinoa adds extra protein, while rice offers comfort.)

Chicken

  • 1 lb chicken breasts, marinated and grilled (Marinate in olive oil, lemon juice, garlic, and oregano for at least 30 minutes.)

Vegetables

  • 1 cup cherry tomatoes, halved (Adds sweetness and color.)
  • 1 cucumber diced (Crisp and refreshing.)
  • 1 red onion thinly sliced (Brings sweet and tangy depth.)
  • 1 bell pepper diced (Any color bell pepper works; adds crunch.)
  • 1 cup Kalamata olives, pitted (Offers briny contrast.)

Toppings

  • 1/2 cup feta cheese, crumbled (Provides tangy creaminess.)
  • 1/2 cup tzatziki sauce (Essential for authentic Greek taste.)
  • to taste Olive oil, for drizzling (Enhances flavors and moisture.)
  • to taste Salt and pepper (Important for flavor enhancement.)

Instructions 

Preparation

  • Marinate chicken breasts in olive oil, lemon juice, garlic, and oregano for at least 30 minutes.
  • Grill the marinated chicken until fully cooked, about 6-7 minutes per side. Let it rest before slicing.

Assembly

  • In bowls, layer cooked rice or quinoa, sliced grilled chicken, cherry tomatoes, cucumber, red onion, bell pepper, and olives.
  • Drizzle with tzatziki sauce and sprinkle with feta cheese.
  • Season with salt and pepper to taste, and serve immediately.

Notes

For leftovers, store components separately. Chicken stays fresh for 3-4 days; veggies last up to 2 days. Don't mix tzatziki with bowls until serving to keep it creamy.
Calories: 570kcal
Course: Dinner, Main Course
Cuisine: Greek, Mediterranean
Keyword: Family Meal, Greek Chicken Bowls, Grilled Chicken, Healthy Dinner, quick recipe

Coconut Chicken & Rice

The kitchen smells like warm coconut and toasted garlic. Pots clink gently on the stove. I love that quiet moment when a simple dinner turns into something comforting for the whole family.

This Coconut Chicken & Rice recipe is one of those meals. It fills the house with a cozy aroma and brings everyone to the table. If you enjoy easy weeknight dinners with big flavor, you might also like my Bang Bang Chicken Crispy Rice Salad, which uses the same family-friendly mindset.

Why this works

Coconut Chicken & Rice

This recipe works because it combines tender chicken, creamy coconut, and fluffy jasmine rice in one comforting plate. The liquid ratio keeps the chicken juicy and the rice soft. It is forgiving, which matters when kids are hungry and parents are busy.

It also saves time. You can brown the chicken while the rice starts. Then a short simmer finishes both elements without much babysitting. For more weeknight rice bowls that use similar shortcuts, check out my Chicken Sweet Potato Rice Bowl for another quick family meal idea.

The flavors are familiar and mild. That makes it easy to please picky eaters while still offering a dish adults enjoy. Small swaps and additions let you tailor heat, herbs, and texture without losing the heart of the recipe.

Process Overview

“This is where the magic happens—when the aroma fills the kitchen.”

Start by browning the chicken to build flavor. Then add the coconut milk and broth to create a silky cooking liquid. Simmer gently so the chicken cooks through and absorbs the coconut flavor.

While the chicken simmers, rinse and cook jasmine rice. Cooking the rice separately lets you make it extra fluffy. If you prefer everything in one pan, you can follow one-pan recipes like my French Onion Chicken Rice Bake for a different approach.

A brief rest after cooking helps the juices settle in the chicken. Garnish with fresh cilantro for brightness and a pop of color.

Ingredients

  • 2 chicken breasts
    Lily tip: Choose boneless, skinless breasts about 6-8 oz each for even cooking. Pound lightly if one is much thicker so they finish at the same time.

  • 1 cup jasmine rice
    Lily tip: Rinse the rice until the water runs clear to remove excess starch. This keeps the rice fluffy, not sticky.

  • 1 cup coconut milk
    Lily tip: Use full-fat coconut milk for the creamiest sauce. If you prefer lighter, use a reduced-fat version, but the sauce will be slightly thinner.

  • 1 cup chicken broth
    Lily tip: Low-sodium broth gives you control over seasoning. Taste near the end and add salt if needed.

  • 1 small onion, diced
    Lily tip: Yellow or sweet onion works best for a mellow base. Dice small so it softens quickly.

  • 2 cloves garlic, minced
    Lily tip: Fresh garlic gives the best aroma. If you are short on time, jarred minced garlic works in a pinch.

  • 1 tablespoon olive oil
    Lily tip: Use a neutral-tasting oil if you want a cleaner coconut flavor. Olive oil is great for browning and adds a homey note.

  • Salt and pepper to taste
    Lily tip: Season in stages. A little at the start and a final check before serving keeps the flavors balanced.

  • Fresh cilantro for garnish
    Lily tip: Add cilantro just before serving. It brightens the rich coconut sauce and makes the dish look inviting.

If you like citrus brightness with coconut, keep a lime nearby for squeezing at the table.

For more rice-based chicken recipes and inspiration, I often refer to ideas like my Greek Chicken and Lemon Rice. It helps when planning multiple weeknight menus that share pantry staples.

Directions

  1. Heat olive oil in a large skillet over medium heat.
    Encouragement: Warm the pan until the oil shimmers so the chicken gets a nice golden crust.

  2. Add diced onion and minced garlic, sautéing until soft.
    Encouragement: Stir often and enjoy the smell. Soft onions and garlic make a lovely base.

  3. Season chicken breasts with salt and pepper, then add to the skillet. Cook until golden brown on both sides, about 5 minutes per side.
    Encouragement: Resist the urge to move the chicken too much. Let it develop a good sear for better flavor.

  4. Pour in coconut milk and chicken broth. Bring to a simmer.
    Encouragement: The sauce will look creamy and inviting. Scrape the pan to lift any brown bits for extra flavor.

  5. Reduce heat to low, cover the skillet, and let cook for 15-20 minutes, or until the chicken is cooked through.
    Encouragement: Check for an internal temperature of 165°F to ensure safety. A few minutes past the timer may be needed for thicker pieces.

  6. Meanwhile, rinse jasmine rice and cook according to package instructions.
    Encouragement: Take a moment to fluff the rice with a fork and keep it warm under a lid until the chicken is ready.

  7. Serve the chicken over fluffy rice, garnished with fresh cilantro.
    Encouragement: Slice the chicken across the grain for tender bites and spoon extra sauce over the rice for full flavor.

If you want to add a crunchy element, serve with toasted coconut flakes or chopped peanuts on the side. For recipe variations that use ground chicken and different seasonings, my Ground Chicken Fried Rice shows how versatile ground poultry can be.

Timing and temperature notes

Plan for about 30 to 40 minutes from start to finish. Browning takes about 10 minutes, simmering 15 to 20 minutes, and rice about 15 to 20 minutes. Always use a meat thermometer to confirm the chicken reaches 165°F.

Serving

Coconut Chicken & Rice

Family-style idea

Serve this dish in a wide shallow bowl or on a large platter. Place the rice first, then lay the chicken on top. Spoon the coconut sauce around the edges so everyone can choose how saucy they want their plate.

I like to put lime wedges, extra cilantro, and a small bowl of chopped chili flakes on the table. This lets family members customize their bowls. For a simple vegetable side, steam broccoli or snap peas for color and crunch.

Offer plates and spoons so kids can scoop rice and sauce easily. A small salad on the side makes the meal feel complete without adding hassle.

Storage

Cool any leftovers quickly and store in airtight containers. Refrigerate for up to 3 days. The rice can absorb more liquid over time, so you may notice a thicker sauce after storing.

To reheat stovetop: Add a splash of water or broth and warm gently over low heat until heated through. This helps loosen the sauce and revives the rice texture.

To reheat microwave: Place the portion in a microwave-safe dish. Add a tablespoon or two of water or broth, cover loosely, and heat in 60 second bursts, stirring between intervals.

Do not refreeze cooked chicken and rice after refrigeration. Reheat only once to keep food safety on track.

Kitchen Notes

  • Shortcut: Use pre-minced garlic and pre-diced onion from the fridge section to cut prep time by 5 minutes.
  • Shortcut: Make the rice in a rice cooker while you cook the chicken. It frees you to watch the skillet.
  • Shortcut: Double the sauce and freeze extra in ice cube trays for single-serving sauce boosts later.
  • Shortcut: Swap coconut milk cartons for shelf-stable cans if you like to keep long-lasting pantry items.
  • Shortcut: If you have leftover rotisserie chicken, shred it and add it in at step 4 to cut cooking time.

These small shortcuts help on busy nights without sacrificing the dish’s heart. They also make this recipe friendly for new cooks.

Variations

  • For picky eaters: Reduce the onion amount and serve the sauce on the side. Keep cilantro optional. Serve plain rice and chicken first, then offer the sauce for dipping.
  • For more veggies: Add diced bell pepper or frozen peas into the sauce during the final 5 minutes of simmering. They add color and nutrients without extra work.
  • For a spicy kick: Stir in 1/2 teaspoon red pepper flakes or a tablespoon of sriracha to the sauce at step 4. Taste and add more if you like it hot.
  • Keto or low-carb option: Skip the rice and serve the coconut chicken over cauliflower rice or steamed zucchini ribbons.
  • Vegan adaptation: Replace chicken with firm tofu or tempeh, and use vegetable broth. Brown the tofu well before simmering to build flavor.

Small tweaks let this recipe fit many diets and preferences while keeping the core comforting flavor.

FAQ

Q: Can I use bone-in chicken?
A: Yes. Bone-in pieces will need more time to cook. Simmer covered for 25 to 30 minutes and check for a 165°F temperature at the thickest part near the bone.

Q: Can I make this in a slow cooker?
A: You can. Brown the chicken first for better flavor, then add to the slow cooker with coconut milk and broth. Cook on low for 3 to 4 hours or on high for 1.5 to 2 hours. Add delicate herbs at the end.

Q: Is coconut milk safe for people with nut allergies?
A: Coconut is classified differently than tree nuts, but some people with tree nut allergies react to coconut. Check with your family members and choose alternatives if needed, like creamy oat milk with a bit of coconut extract for flavor.

Q: How do I prevent the rice from getting mushy?
A: Rinse the rice, use the correct water ratio on the package, and avoid overcooking. Fluff with a fork and serve immediately for the best texture.

Q: Can I prepare this ahead for meal prep?
A: Yes. Cook rice and chicken separately and store in meal prep containers. Add fresh cilantro and lime on the day you eat it. Reheat gently and add a splash of broth to refresh the sauce.

Conclusion

I hope this Coconut Chicken & Rice becomes one of your go-to family dinners. It is simple, comforting, and kind to busy weeknights. If you want a glazed twist, I recommend checking out a lovely variation on a glazed coconut chicken and rice for inspiration. For a lighter, bowl-style version with similar flavors, take a look at the healthier take found at Skinnytaste’s Coconut Chicken Rice Bowl.

Thanks for cooking with me. Come back soon for more family-friendly recipes and kitchen tips.

Coconut Chicken & Rice

Prep Time 10 minutes
Cook Time 25 minutes
Total Time 40 minutes
Servings 4 servings
Calories 550
This comforting Coconut Chicken & Rice recipe combines tender chicken, creamy coconut, and fluffy jasmine rice to create a warm and inviting meal that pleases both kids and adults.

Ingredients

Main ingredients

  • 2 breasts chicken breasts (Choose boneless, skinless breasts about 6-8 oz each for even cooking. Pound lightly if one is much thicker.)
  • 1 cup jasmine rice (Rinse the rice until the water runs clear to remove excess starch.)
  • 1 cup coconut milk (Use full-fat coconut milk for the creamiest sauce.)
  • 1 cup chicken broth (Low-sodium broth gives you control over seasoning.)
  • 1 small onion, diced (Use yellow or sweet onion for a mellow base.)
  • 2 cloves garlic, minced (Fresh garlic gives the best aroma.)
  • 1 tablespoon olive oil (Use a neutral oil for a cleaner coconut flavor.)
  • to taste Salt and pepper (Season in stages for balanced flavors.)
  • for garnish Fresh cilantro (Add just before serving for brightness.)

Instructions 

Cooking

  • Heat olive oil in a large skillet over medium heat.
  • Add diced onion and minced garlic, sautéing until soft.
  • Season chicken breasts with salt and pepper, then add to the skillet. Cook until golden brown on both sides, about 5 minutes per side.
  • Pour in coconut milk and chicken broth. Bring to a simmer.
  • Reduce heat to low, cover, and let cook for 15-20 minutes, or until the chicken is cooked through.
  • Meanwhile, rinse jasmine rice and cook according to package instructions.
  • Serve the chicken over fluffy rice, garnished with fresh cilantro.

Notes

For a spicy kick, stir in red pepper flakes or sriracha to the sauce. For a low-carb option, serve over cauliflower rice or steamed zucchini.
Calories: 550kcal
Course: Dinner, Main Course
Cuisine: Asian, Family-Friendly
Keyword: Coconut Chicken, Easy Dinner, family-friendly recipe, Jasmine Rice, One-Pan Meal

Creamy Chicken Salad with Celery and Herbs

I remember the first time I made this dish for my family. The smell of garlic and lemon hit the air and everyone paused what they were doing. Pans clinked. Little feet padded in the hallway. The kitchen felt alive in the best way.

This recipe is the kind of meal that soothes a busy weeknight. It cooks quickly, fills the house with a comforting aroma, and sits center stage on the table so everyone can help themselves. If you like simple comfort with bright flavors, you will love this one. For another lemon-forward favorite I often rotate in our weeknight lineup, try my baked lemon butter chicken for a slightly different take.

Why this works

Pin on Mains

This dish works for families because it balances speed, flavor, and ease. You get a juicy main, a quick sauce, and vegetables that cook right in the same pan. That means fewer dishes and more time to sit down together.

The method saves time without skimping on taste. A short sear locks in flavor. A simple pan sauce brings richness without fuss. Kids and adults both find it familiar and easy to love. If you need another fast and faithful chicken recipe for busy nights, my 30-minute oven baked boneless skinless chicken thighs are a lifesaver.

This is also a versatile template. Swap vegetables, add spices, or make it dairy-free. The bones of the recipe stay the same, so you can customize without relearning technique.

Process Overview

“This is where the magic happens—when the aroma fills the kitchen.”

In a few simple steps you will sear, deglaze, and finish in one skillet. The sear builds color and flavor. Deglazing lifts those fond bits into a glossy sauce. A short simmer brings everything together. That quick progression keeps the chicken tender and the veggies bright.

The whole process takes about 30 to 40 minutes from start to finish. That makes it perfect for weeknights and for nights when you want something homey and satisfying without a big time commitment.

Ingredients

  • 1 1/2 pounds boneless skinless chicken thighs, trimmed
  • Lily’s tip: Thighs stay juicy and are forgiving if you slightly overcook. I buy them in bulk and freeze what I will not use within three days.
  • 1 teaspoon salt and 1/2 teaspoon black pepper
  • Lily’s tip: Season both sides just before cooking. It helps build a better crust.
  • 2 tablespoons olive oil
  • Lily’s tip: Use a neutral or extra virgin olive oil for flavor. Heat the pan first so the oil does not burn.
  • 4 cloves garlic, minced
  • Lily’s tip: Fresh garlic gives the best pop. Add it after you sear the chicken so it does not burn.
  • 1 medium onion, thinly sliced
  • Lily’s tip: A sweet onion or yellow onion caramelizes nicely and adds body to the sauce.
  • 8 oz baby bella mushrooms, sliced
  • Lily’s tip: Mushrooms soak up flavor. If kids are picky, slice them thin so they blend in.
  • 1 cup low sodium chicken broth
  • Lily’s tip: Low sodium gives you control. Taste before adding more salt.
  • 1/3 cup dry white wine or extra chicken broth
  • Lily’s tip: Wine adds depth. If you avoid alcohol, use more broth and a squeeze of lemon.
  • 2 tablespoons butter
  • Lily’s tip: Swirl in at the end for shine and a silky mouthfeel.
  • 1 tablespoon fresh lemon juice
  • Lily’s tip: A little acid brightens the whole dish. Add at the end so it stays fresh.
  • 1/2 cup chopped parsley
  • Lily’s tip: Add half the parsley into the sauce and the rest as a garnish for color and freshness.
  • Optional vegetables: 2 cups baby spinach or 1 cup halved cherry tomatoes
  • Lily’s tip: Spinach wilts quickly. Tomatoes add a sweet pop that kids often love.

For more comforting family recipes that pair well with this one, I often turn to my collection of chicken and spinach recipes when I want an easy side.

Directions

  1. Pat the chicken thighs dry and season with 1 teaspoon salt and 1/2 teaspoon pepper.
  • Encouraging note: Dry meat sears better. Take a minute to pat them; it makes a visible difference.
  1. Heat 2 tablespoons olive oil in a large skillet over medium-high heat until shimmering.
  • Encouraging note: The pan should be hot but not smoking. That heat gives you a golden crust.
  1. Sear the chicken, 4 to 5 minutes per side, until nicely browned. Transfer to a plate.
  • Encouraging note: Do this in batches if needed. Overcrowding cools the pan and prevents browning.
  1. Add the onion and mushrooms to the pan. Cook 5 to 6 minutes until softened and starting to brown.
  • Encouraging note: Stir occasionally, scrape the bottom, and let the vegetables pick up those browned bits.
  1. Add garlic and cook 30 to 45 seconds until fragrant.
  • Encouraging note: Garlic cooks quickly. Keep an eye on it so it does not burn.
  1. Deglaze the pan with 1/3 cup white wine, scraping up the browned bits with a wooden spoon.
  • Encouraging note: The sizzle tells you you are building flavor. If you prefer no alcohol, use extra broth here.
  1. Pour in 1 cup chicken broth and bring to a gentle simmer.
  • Encouraging note: A simmer melds flavors without drying the chicken. Adjust heat as needed.
  1. Return the chicken to the skillet, nestling it into the sauce. Simmer 8 to 10 minutes, or until internal temperature reaches 165°F.
  • Encouraging note: A quick meat thermometer check takes the guesswork out of doneness.
  1. Stir in 2 tablespoons butter and 1 tablespoon lemon juice. Add spinach or cherry tomatoes if using and cook until just wilted or warmed.
  • Encouraging note: Butter and lemon brighten and finish the sauce. Taste and adjust salt.
  1. Sprinkle with 1/2 cup chopped parsley and serve.
  • Encouraging note: Fresh herbs make a big difference. A little garnish lifts the whole plate.

If you are serving this with pasta or rice, toss the finished sauce with a cup of cooked pasta or spoon it over mashed potatoes. For more cozy meal ideas that pair well with this sauce, I often reach for recipes from my list of chicken macaroni favorites.

Quick tips while you cook

  • Keep ingredients at hand so you can move smoothly from step to step.
  • Use a thermometer for consistent results.
  • Taste the sauce and tweak with salt, pepper, or a dash of lemon.

Serving

Pin on Mains

I serve this family-style right from the skillet. Place the pan on a trivet in the middle of the table. Set out plates, a basket of crusty bread, and a simple green salad.

For a family-friendly plate, spoon chicken and mushrooms over steamed rice, buttered noodles, or creamy mashed potatoes. Let everyone take what they like. Kids often go for extra sauce on their rice, so keep a ladle handy.

If you want a prettier presentation for guests, arrange chicken on a platter and spoon sauce over the top. Scatter extra parsley and a few lemon wedges for brightness.

Storage

To refrigerate, let the dish cool to room temperature then store in an airtight container for up to 4 days. The sauce keeps well and may taste even better the next day.

To freeze, place cooled portions in freezer-safe containers. Freeze up to 3 months. Thaw in the fridge overnight before reheating.

To reheat on the stove, warm gently over low heat with a splash of chicken broth to loosen the sauce. Reheat in the oven at 325°F in a covered dish until warmed through. Microwaving works for single servings; cover loosely and stir halfway through to ensure even heating.

Kitchen Notes

  • Use a heavy skillet for even heat and better browning.
  • Dry the chicken thoroughly for the best sear.
  • If mushrooms are not your thing, swap in diced bell peppers.
  • Taste the sauce before adding more salt; store-bought broth can be salty.
  • Leftover sauce makes a quick sandwich spread or pasta topper.

Variations

  • Picky eaters: Omit mushrooms and onions and add sliced carrots or peas to make it more familiar.
  • Low-carb option: Serve over cauliflower rice or a bed of sautéed greens.
  • Dairy-free: Skip the butter and finish with 1 tablespoon olive oil and extra lemon.
  • Spicy twist: Add 1/4 teaspoon red pepper flakes when you add the garlic.
  • Kid-friendly makeover: Shred the cooked chicken and mix with a little sauce to serve over buttered noodles.

If you like smoky, sweet flavors, try incorporating elements from my chipotle honey chicken thighs recipe to give a different spin that still appeals to family diners.

FAQ

Q: Can I use chicken breasts instead of thighs? A: Yes. Chicken breasts cook faster and can dry out more easily. Reduce simmer time and watch the internal temperature. Remove from heat at 160°F and rest to reach 165°F.

Q: Can I make this gluten-free? A: Absolutely. Use gluten-free broth and serve over rice or gluten-free pasta. The sauce is naturally gluten-free.

Q: How can I tell when the chicken is done without a thermometer? A: Cut into the thickest piece. The juices should run clear and the meat should be opaque. A thermometer is the most reliable method.

Q: Can I double the recipe for a larger family meal? A: Yes. Use a larger skillet or split into two pans. Avoid overcrowding to maintain a good sear.

Q: Will the sauce thicken if I leave it longer on the stove? A: Yes, simmering will reduce and thicken the sauce. If it reduces too much, add a splash of broth to loosen it.

Conclusion

I hope this recipe becomes a weeknight favorite in your home like it is in mine. It is forgiving, fast, and full of flavor. The way the kitchen fills with warmth and chatter while this cooks is one of my favorite parts of family dinners.

For the gear-minded who like to explore the practical side of mains and connectors, I found a helpful reference for a 9 Pin Mains to Throttle and Ebrake Breakout Cable that explains wiring in clear terms. If you need high current circular power connectors for a project, check the product details for the 3 Pin Mains Power AC/DC Circular High Current Connectors | LMV for technical specs and options.

Thanks for letting me share this recipe. I love hearing how your family makes it their own, so please come back and tell me what changes you made and what everyone thought.

One-Skillet Garlic Lemon Chicken Thighs

Prep Time 10 minutes
Cook Time 30 minutes
Total Time 40 minutes
Servings 4 servings
Calories 400
A quick and comforting one-skillet meal featuring juicy chicken thighs, garlic, and lemon, perfect for busy weeknights.

Ingredients

Main Ingredients

  • 1.5 pounds boneless skinless chicken thighs, trimmed (Thighs stay juicy and are forgiving if you slightly overcook.)
  • 1 teaspoon salt (Season both sides just before cooking.)
  • 0.5 teaspoon black pepper (Season both sides just before cooking.)
  • 2 tablespoons olive oil (Use a neutral or extra virgin olive oil for flavor.)
  • 4 cloves garlic, minced (Fresh garlic gives the best pop.)
  • 1 medium onion, thinly sliced (A sweet onion or yellow onion caramelizes nicely.)
  • 8 oz baby bella mushrooms, sliced (Mushrooms soak up flavor.)
  • 1 cup low sodium chicken broth (Low sodium gives you control.)
  • 1/3 cup dry white wine or extra chicken broth (Wine adds depth; substitute broth if preferred.)
  • 2 tablespoons butter (Swirl in at the end for shine.)
  • 1 tablespoon fresh lemon juice (A little acid brightens the dish.)
  • 0.5 cup chopped parsley (Add half into the sauce and use the rest as garnish.)
  • 2 cups baby spinach (optional) (Spinach wilts quickly.)
  • 1 cup halved cherry tomatoes (optional) (Tomatoes add a sweet pop.)

Instructions 

Preparation

  • Pat the chicken thighs dry and season with salt and pepper.
  • Heat olive oil in a large skillet over medium-high heat until shimmering.
  • Sear the chicken for 4 to 5 minutes per side until nicely browned. Transfer to a plate.
  • Add the onion and mushrooms to the pan, cooking for 5 to 6 minutes until softened and starting to brown.
  • Add garlic and cook for 30 to 45 seconds until fragrant.
  • Deglaze the pan with white wine, scraping up the browned bits with a wooden spoon.
  • Pour in chicken broth and bring to a gentle simmer.
  • Return the chicken to the skillet and nestle it into the sauce. Simmer for 8 to 10 minutes, or until the internal temperature reaches 165°F.
  • Stir in butter and lemon juice. Add spinach or cherry tomatoes and cook until just wilted or warmed.
  • Sprinkle with parsley and serve.

Notes

Serve family-style from the skillet with crusty bread and a green salad. Store in an airtight container for up to 4 days or freeze for up to 3 months.
Calories: 400kcal
Course: Dinner, Main Course
Cuisine: American, Comfort Food
Keyword: Chicken Thighs, Family-Friendly, Garlic Lemon Chicken, One-skillet meal, Quick Dinner

Lemon Chili Grilled Chicken Bowls with Fresh Cucumber Salad & Hummus — A Refreshing, Flavor-Packed Bowl You’ll Crave Again and Again

I can still smell the lemon as I write this. The sizzle of chicken hitting a hot grill. The quick chop of cucumber and the bright pop of cherry tomatoes as they tumble into a bowl. That is the kind of kitchen music that means dinner is going to bring people together.

This Lemon Chili Grilled Chicken Bowl with Fresh Cucumber Salad and Hummus grew from weeknight needs. I wanted something fast, healthy, and full of personality that my kids would eat. It turned into a family favorite we ask for on repeat. If you like bright flavors and simple steps, you will love this easy bowl. For a different weeknight lemon chicken idea, I also love my baked lemon butter chicken for cold nights.

Why this works

Lemon Chili Grilled Chicken Bowls with Fresh Cucumber Salad & Hummus — A Refreshing, Flavor-Packed Bowl You’ll Crave Again and Again

This bowl checks a lot of boxes for busy families. The marinade is quick but bold. The hummus gives creamy richness without mayo. The fresh cucumber salad adds crunch and brightness that keeps every bite interesting.

It is also forgiving. You can marinate for 20 minutes or up to 2 hours. You can grill whole breasts or dice them and use skewers. These choices save time and stretch to feed extra hungry kids. If you are short on time, this is a winner. If you want a similar fast dinner with big flavor, try my 30-minute teriyaki chicken bowl for another reliable weeknight meal.

Process Overview

“This is where the magic happens—when the aroma fills the kitchen.”

At a glance the method is simple. Marinate, grill, toss a fast cucumber salad, spread hummus, and assemble. The lemon and chili flakes keep the chicken bright and slightly spicy. The hummus creates a cozy base that ties it all together.

I test this bowl several ways: whole breast on the grill, diced chicken on skewers, and even quickly under the broiler when the weather keeps us indoors. Each version gives you the same balanced bowl in different cooking setups.

Ingredients

For the Chicken

  • 2 chicken breasts, diced (ou entiers si vous préférez griller avant de couper)
  • 1 tablespoon olive oil
  • 2 garlic cloves, minced
  • 1 tablespoon tomato paste
  • 1 tablespoon honey
  • 1 teaspoon chili flakes
  • 1 tablespoon lemon juice
  • Salt and black pepper, to taste
  • Fresh parsley, chopped (for garnish)

My tips

  • Use boneless, skinless breasts for quicker cooking. If you prefer, grill the breasts whole and slice after resting for juicier results.
  • Tomato paste adds depth and color. If you like a smokier flavor, add a pinch of smoked paprika.
  • Taste the marinade before you add the chicken. Adjust lemon and honey so it balances sweet and bright for your family.

For the Cucumber Salad

  • 1 cup diced cucumber
  • 1/2 cup chopped cherry tomatoes or red bell pepper
  • 1 teaspoon lemon juice
  • 1 tablespoon olive oil
  • Salt, to taste

My tips

  • English cucumber works great for a less seedy bite. For extra crunch, seed the cucumber before dicing.
  • Swap cherry tomatoes for red pepper if you have a tomato avoider at the table.

For the Bowl Base

  • 1/2 cup hummus (homemade or store-bought)
  • 1 teaspoon olive oil
  • 1/4 teaspoon smoked paprika or chili powder

My tips

  • A good hummus anchors the bowl. I often use store-bought to save time, but homemade hummus is a lovely upgrade.
  • Drizzle olive oil and a light sprinkle of smoked paprika for that restaurant feel. The paprika adds warmth and color.

For pairing

  • Serve with warm pita, rice, or a green salad. If you like lemon-forward grain bowls, consider pairing with my Greek chicken and lemon rice for a complete meal.

Directions

  1. Prep the Ingredients
    Dice the chicken (or leave the breasts whole for grilling), mince the garlic, and chop the cucumber, tomatoes, and herbs. Take a breath and enjoy the rhythm. Small prep steps make the rest come together quickly.

  2. Marinate the Chicken (version grillée)
    In a bowl, combine:

    • olive oil
    • garlic
    • tomato paste
    • honey
    • chili flakes
    • lemon juice
    • salt and pepper
      Add the chicken and coat well. Marinate 20–30 minutes (or up to 2 hours in the fridge).
      Note: If you have a busy afternoon, pop the chicken in the fridge and finish the salad right before dinner. The short marinade is powerful, so even quick marinating gives lots of flavor.
  3. Grill the Chicken (instead of skillet cooking)
    If grilling whole chicken breasts:

    • Preheat the grill to medium-high heat.
    • Grill the breasts 5–7 minutes per side, until cooked through (165°F).
    • Let rest, then dice into bite-sized pieces.
      If grilling diced chicken:
      Option A — Grill basket:
    • Add marinated chicken to a grill basket.
    • Grill 10–12 minutes, stirring occasionally.
      Option B — Skewers:
    • Thread chicken onto skewers and grill 3–4 minutes per side.
      Encouraging note: Grilling gives a smoky char that kids notice. If you are nervous about timing, use a thermometer and let the chicken rest a few minutes before cutting.
  4. Make the Cucumber Salad
    In a bowl, combine cucumber, tomatoes (or bell pepper), lemon juice, olive oil, and salt. Toss and set aside.
    Encouraging note: This salad is forgiving. Taste and adjust the lemon and salt. It brightens as it sits.

  5. Prepare the Hummus Base
    Spread hummus into the bottom of your bowl. Drizzle with olive oil and sprinkle paprika or chili powder on top.
    Encouraging note: Use the back of a spoon to make a small shallow well in the hummus. It holds juices from the chicken and keeps every forkful balanced.

  6. Assemble the Bowls
    Add the grilled lemon-chili chicken over the hummus. Top with the fresh cucumber salad. Finish with chopped parsley.
    Encouraging note: Let everyone build their own bowl at the table if you like. Kids love choosing extra veggies or a little more hummus.

  7. Serve
    Enjoy immediately as is, or pair with warm pita!
    Encouraging note: Serve family-style and let folks customize. Warm pita or steamed rice are great simple sides.

While you are cooking, I often think about how small evening rituals add comfort. This bowl is one of those rituals in our house.

For another make-ahead comfort option on busy nights, I sometimes prep the chicken marinade and use my slow cooker for a different weeknight dinner like crockpot white chicken chili.

Serving

Lemon Chili Grilled Chicken Bowls with Fresh Cucumber Salad & Hummus — A Refreshing, Flavor-Packed Bowl You’ll Crave Again and Again

Serve this bowl family-style for easy sharing. Lay out a few bowls or one big platter and let everyone scoop their portion. Offer warm pita wedges, a side of rice, or a simple green salad. Kids enjoy adding a little extra hummus or a sprinkle of parsley.

Presentation tip

  • Scoop hummus first, then chicken, then salad. The contrast in colors makes the bowl feel special without any fuss.
  • If you have lemon wedges, place them on the side. A quick squeeze livens the flavors for adults and kids who like extra tang.

Storage

Fridge

  • Store chicken and cucumber salad separately in airtight containers for up to 3 days.
  • Hummus keeps well for up to 5 days unopened, and 3-4 days once opened.

Reheat tips

  • Gently reheat chicken in a skillet over medium heat for 2-4 minutes until warmed through.
  • If reheating in the microwave, cover and heat in 30 second intervals to keep juices intact.
  • Add fresh cucumber salad just before serving so it stays crisp.

Make-ahead

  • Marinate the chicken the night before for an easy grill the next evening.
  • Chop cucumber and tomatoes in the morning and keep in the fridge, then toss with lemon and oil right before serving.

Kitchen Notes

  • Use a thermometer to check chicken reaches 165°F for safe and juicy results.
  • If you do not have a grill, a hot cast iron skillet gives great sear and flavor.
  • Swap chili flakes for cayenne if you want a sharper heat. Start small for kids.
  • Leftover chicken makes a great lunch on pita or tucked into a salad.
  • For a nut-free hummus, read labels or make your own with tahini alternatives.

If you love bold flavors with simple steps, this bowl fits right into a weekly rotation. For a sweet and playful dinner idea that kids sometimes prefer, see my sweet and spicy honey pepper chicken for a fun twist.

Variations

  • For picky eaters: Keep components separate on a plate. Let children choose hummus or plain pita.
  • Low-carb: Swap pita or rice for cauliflower rice or extra salad greens.
  • Vegan: Replace grilled chicken with spiced grilled tofu or roasted chickpeas and use vegan hummus.
  • Heat level: Reduce chili flakes to 1/4 teaspoon for mild flavor, or add a pinch more to the marinade for grown-up spice.
  • Mediterranean twist: Add olives, feta, and a drizzle of tzatziki for a different take.

FAQ

Q: Can I bake the chicken instead of grilling it?
A: Yes. Bake at 400°F for 18–22 minutes for whole breasts, or 12–15 minutes for diced pieces, until the internal temperature reaches 165°F. Let rest before slicing.

Q: Is hummus okay for kids?
A: Most kids enjoy hummus. It is creamy, mild, and high in protein. Start with small amounts if they are new to it and let them dip pita or cucumber.

Q: Can I make this bowl gluten-free?
A: Absolutely. Use gluten-free pita or serve over rice or salad greens. The recipe itself is naturally gluten-free if you avoid store-bought hummus with gluten additives.

Q: How long can I marinate the chicken?
A: Marinate for 20–30 minutes for quick flavor, or up to 2 hours. I do not recommend much longer for breasts, as the lemon can start to firm the texture.

Q: Can I prepare everything in advance?
A: Yes. Marinate the chicken and chop the salad veggies ahead. Store them separately and grill the chicken when ready. This makes dinner assembly fast and relaxed.

Conclusion

I hope this Lemon Chili Grilled Chicken Bowl becomes a family favorite for you. It is bright, comforting, and easy to adapt. For more bowl inspiration and easy swaps, check out this flavorful take on a shawarma-style bowl in the Easy and Healthy Trader Joe’s Chicken Shawarma Bowls Recipe. If you want fresh salad ideas to serve alongside or for lunch prep, I love the collection in 26 Delicious Meal-Worthy Salads to Make for Lunch or Dinner.

Thanks for cooking with me. Come back and tell me how your family liked this bowl.

Lemon Chili Grilled Chicken Bowl

Prep Time 30 minutes
Cook Time 15 minutes
Total Time 45 minutes
Servings 4 servings
Calories 550
A bright and flavorful bowl featuring marinated grilled chicken, fresh cucumber salad, and creamy hummus, perfect for busy weeknights.

Ingredients

For the Chicken

  • 2 pieces chicken breasts, diced (You can grill whole breasts if preferred.)
  • 1 tablespoon olive oil
  • 2 cloves garlic, minced
  • 1 tablespoon tomato paste (Adds depth and color.)
  • 1 tablespoon honey
  • 1 teaspoon chili flakes
  • 1 tablespoon lemon juice
  • Salt and black pepper, to taste
  • Fresh parsley, chopped (for garnish)

For the Cucumber Salad

  • 1 cup diced cucumber (English cucumber works great.)
  • 1/2 cup chopped cherry tomatoes or red bell pepper (Substitute if avoiding tomatoes.)
  • 1 teaspoon lemon juice
  • 1 tablespoon olive oil
  • Salt, to taste

For the Bowl Base

  • 1/2 cup hummus (homemade or store-bought) (A good hummus anchors the bowl.)
  • 1 teaspoon olive oil
  • 1/4 teaspoon smoked paprika or chili powder

Instructions 

Preparation

  • Dice the chicken (or leave the breasts whole for grilling), mince the garlic, and chop the cucumber, tomatoes, and herbs.

Marinate the Chicken

  • Add the chicken and coat well. Marinate for 20–30 minutes (or up to 2 hours in the fridge).

Grill the Chicken

  • Preheat the grill to medium-high heat.
  • If grilling whole chicken breasts, grill for 5–7 minutes per side until cooked through (165°F).
  • Let the chicken rest, then dice into bite-sized pieces. If using skewers, grill for 3–4 minutes per side.

Make the Cucumber Salad

  • In a bowl, combine cucumber, tomatoes (or bell pepper), lemon juice, olive oil, and salt.
  • Toss and set aside.

Prepare the Hummus Base

  • Spread hummus into the bottom of your bowl. Drizzle with olive oil and sprinkle paprika or chili powder on top.

Assemble the Bowls

  • Add the grilled lemon-chili chicken over the hummus. Top with the fresh cucumber salad.
  • Finish with chopped parsley.

Notes

Serve family-style for easy sharing and let everyone customize their bowls with extra veggies or hummus.
Calories: 550kcal
Course: Dinner, Main Course
Cuisine: Healthy, Mediterranean
Keyword: Cucumber Salad, Family Meal, Grilled Chicken, Lemon Chicken Bowl, Quick Dinner

Healthy Greek Salad with Chicken

I can still smell the lemon and oregano when I walk into my kitchen. The sizzle from the grill fades, and the steady clink of cutting boards and bowls fills the room. That mix of warm garlic and bright vinegar makes everyone pause and ask, "What smells so good?"

This Healthy Greek Salad with Chicken is one of those dishes that brings the whole family to the table. It keeps things light, tastes like summer, and comes together fast on busy weeknights. If you enjoy simple chicken salads, you might also like my homemade chicken salad with grapes for another family favorite.

Why this works

Healthy Greek Salad with Chicken

Family-friendly and time-saving

This recipe balances bright vegetables, salty olives, and tangy feta with lean protein. It satisfies both kids who want familiar flavors and adults who want something fresh and healthy. The dressing is quick to whisk, and the salad holds up well for a few hours without getting soggy.

Keeping dinner simple with a few reliable staples saves time and reduces evening stress. You can grill chicken on the weekend or use leftovers for meal prep. For another dependable recipe I use for busy nights, check out my best healthy chicken salad which follows similar principles.

Process Overview

“This is where the magic happens—when the aroma fills the kitchen.”

The steps are straightforward. Start with crisp greens, add colorful vegetables, and layer in grilled chicken for protein. A quick vinaigrette brings it together. You will find this approach is forgiving and easy to adapt.

If you like bold flavors in a salad, I sometimes borrow ideas from my Asian chicken cranberry salad for zest and texture. The general process of assembling and balancing ingredients is the same, and that consistency makes it easy to build new family favorites.

Ingredients

H3: What you need and tips from Lily

  • 2 cups romaine lettuce, chopped

    • Tip: Tear the outer leaves by hand for better texture. Chill the lettuce for 10 minutes before assembling for extra crunch.
  • 1 cup cherry tomatoes, halved

    • Tip: Use a mix of red and yellow cherry tomatoes for color. If tomatoes are very juicy, pat them dry to keep the salad from getting watery.
  • 1 cucumber, diced

    • Tip: I like English cucumbers because they have fewer seeds. If using regular cucumbers, scoop out the center seeds before dicing.
  • 1/4 red onion, thinly sliced

    • Tip: Soak the slices in cold water for 5 minutes to mellow the bite, especially if serving to children.
  • 1/2 cup Kalamata olives, pitted

    • Tip: Rinse lightly if the olives taste too briny. Chop them in half for easier bites with kids.
  • 1/2 cup feta cheese, crumbled

    • Tip: Use block feta crumbled by hand for creaminess. Reserve a little extra to sprinkle on top right before serving.
  • 1 pound grilled chicken breast, sliced

    • Tip: Grill with simple seasoning of olive oil, salt, and pepper. For added flavor, marinate in lemon juice and oregano for 20 minutes.
  • 2 tablespoons olive oil

    • Tip: Use extra virgin olive oil for the best flavor. Measure with a tablespoon for consistent dressing.
  • 1 tablespoon red wine vinegar

    • Tip: Taste and add a bit more vinegar if you like extra tang. White vinegar is not a substitute here.
  • 1 teaspoon dried oregano

    • Tip: Crush the oregano between your fingers before adding to release more aroma.
  • Salt and pepper to taste

    • Tip: Start modestly and adjust after tossing. Remember the feta and olives already add saltiness.

If you want a protein twist, swap the grilled chicken for roasted chickpeas or use leftover rotisserie in a pinch. For an egg-forward option, try my avocado chicken egg salad for a creamier family meal.

Directions

  1. In a large bowl, combine the romaine lettuce, cherry tomatoes, cucumber, red onion, Kalamata olives, and feta cheese.

    • Encouraging note: Take a moment to admire the colors. Kids will eat more when the plate looks bright and fun.
  2. In a small bowl, whisk together olive oil, red wine vinegar, oregano, salt, and pepper.

    • Encouraging note: Smell the vinaigrette as you whisk. The aroma tells you it’s coming together.
  3. Drizzle the dressing over the salad and toss to combine.

    • Encouraging note: Toss gently so the feta stays in nice crumbles. Taste and adjust seasoning before adding chicken.
  4. Top the salad with sliced grilled chicken.

    • Encouraging note: Arrange the chicken so each person can see the portions. Serve extra on the side for seconds.
  5. Serve immediately or store in the refrigerator for meal prep.

    • Encouraging note: If packing lunches, keep the dressing separate until ready to eat. This keeps the lettuce crisp and fresh.

If you prefer a heartier meal, warm the chicken and serve on top. For a faster weeknight version, cook the chicken in a skillet with a little oil for 6 to 8 minutes per side until the center reaches 165°F.

Serving

Healthy Greek Salad with Chicken

Serve this salad family-style on a large platter or in a shallow bowl so everyone can help themselves. Add crusty bread or warm pita on the side for sharing. For young children, prepare a small plated portion with the dressing lightly applied so it is not overwhelming.

Pair the salad with a simple grain like quinoa or a baked sweet potato for extra comfort. Pour the dressing into a small pitcher so guests can control how much they want.

For a picnic or potluck, transport the chopped veggies and chicken in separate containers and toss everything at the venue to keep it fresh and crisp.

If you want another creamy variation to serve for a weekend brunch, try my avocado chicken salad which pairs well with toasted bread and fruit.

Storage

Store the salad components separately for the best texture. Keep the dressing in a small airtight jar in the refrigerator for up to 5 days.

  • Prepared salad without dressing: store in an airtight container for 2 days.
  • Grilled chicken: refrigerate up to 3 to 4 days, or freeze for up to 3 months.
  • Reheating: Warm the chicken gently in a 350°F oven for 8 to 10 minutes or in the microwave for 45 to 60 seconds. Add warm chicken to cold salad right before serving.

If you toss the salad with dressing and have leftovers, eat them within 24 hours for the best texture. Refrigerate in a shallow container to cool quickly.

Kitchen Notes

  • Use a sharp chef knife and a large cutting board to speed up prep. Sharp knives make clean cuts and reduce time.
  • Grill extra chicken at the start of the week. It saves 15 to 20 minutes on busy nights.
  • Keep a jar of vinaigrette pre-made in the fridge. Shake and taste before using.
  • Swap in baby spinach or arugula for romaine for more greens variety.
  • If you need to stretch the meal, add a can of rinsed chickpeas for added fiber and volume.

Variations

  • For picky eaters: Serve the components separately on a platter and let each person build their own bowl. Keep olives and onions on the side.
  • Low-carb: Omit the tomatoes and add extra cucumbers and a handful of chopped walnuts for crunch.
  • Vegetarian: Replace chicken with grilled halloumi or roasted chickpeas for protein.
  • Gluten-free: This recipe is naturally gluten-free. Just pair with a certified gluten-free bread if you serve one.
  • Dairy-free: Skip the feta and add sliced avocado and toasted sunflower seeds for creaminess and texture.

FAQ

Q: Can I use store-bought rotisserie chicken?
A: Yes. Rotisserie chicken works well and cuts prep time. Slice or shred it before topping the salad.

Q: How do I stop the lettuce from getting soggy?
A: Keep the dressing separate until ready to serve. Store chopped lettuce in a paper towel-lined container to absorb excess moisture.

Q: Is this salad suitable for kids?
A: Absolutely. Serve the components separately if kids are picky. Use milder red onion or skip it for younger children.

Q: Can I make this ahead for meal prep?
A: Yes. Store the chicken and vegetables separately and combine them within 24 hours of eating. Keep dressing in its own container.

Q: What other proteins work well?
A: Salmon, shrimp, or marinated tofu all pair nicely. For a pantry-friendly option, use canned tuna in olive oil.

Conclusion

I hope this Healthy Greek Salad with Chicken becomes one of your go-to family meals. It brings fresh flavors, lean protein, and simple steps to a busy weeknight table. For more ideas on protein-packed Greek-style salads you can try, see FoodieCrush’s High-Protein Greek Chicken Salad for inspiration. If you want another healthy take with different seasoning and balance, check out Sweet Savory and Steph’s Healthy Greek Chicken Salad for more variety.

Enjoy the flavors, cherish the time around the table, and come back soon for another easy, family-friendly recipe.

Healthy Greek Salad with Chicken

Prep Time 15 minutes
Cook Time 10 minutes
Total Time 25 minutes
Servings 4 servings
Calories 350
A light and fresh salad featuring grilled chicken, vibrant vegetables, and a quick vinaigrette, perfect for busy weeknights.

Ingredients

Salad Ingredients

  • 2 cups romaine lettuce, chopped (Tear the outer leaves by hand for better texture. Chill for extra crunch.)
  • 1 cup cherry tomatoes, halved (Use a mix of red and yellow for color. Pat dry if very juicy.)
  • 1 cucumber, diced (Use English cucumbers for fewer seeds.)
  • 1/4 red onion, thinly sliced (Soak in cold water for 5 minutes to mellow the bite.)
  • 1/2 cup Kalamata olives, pitted (Rinse if too briny. Chop for easier bites.)
  • 1/2 cup feta cheese, crumbled (Use block feta for creaminess, reserve extra for topping.)
  • 1 pound grilled chicken breast, sliced (Marinate in lemon juice and oregano for added flavor.)

Dressing

  • 2 tablespoons olive oil (Use extra virgin olive oil for the best flavor.)
  • 1 tablespoon red wine vinegar (Add more for extra tang if desired.)
  • 1 teaspoon dried oregano (Crush before adding to release aroma.)
  • to taste salt and pepper (Adjust after tossing.)

Instructions 

Preparation

  • In a large bowl, combine the romaine lettuce, cherry tomatoes, cucumber, red onion, Kalamata olives, and feta cheese.
  • In a small bowl, whisk together olive oil, red wine vinegar, oregano, salt, and pepper.

Assembly

  • Drizzle the dressing over the salad and toss gently so the feta stays in nice crumbles.
  • Top the salad with sliced grilled chicken, arranging it for presentation.
  • Serve immediately or store components separately for meal prep.

Notes

Store salad components separately for best texture. Dressing can be made ahead and stored for up to 5 days.
Calories: 350kcal
Course: Main Course, Salad
Cuisine: Greek
Keyword: Chicken Salad, Family-Friendly, Healthy Greek Salad, meal prep, Quick Dinner

Chicken Kofta Garlic Yogurt Sauce

There’s something magical about the sounds of my family gathering around the dinner table, the gentle clinking of forks and plates harmonizing with laughter and playful banter. At that moment, the stress of the day melts away. I can smell the warm spices of Chicken Kofta in the air, blending harmoniously with the creamy garlic yogurt sauce that brings it all together. This dish weaves memories and flavors into a cozy, welcoming experience that feels just like home.

Why This Chicken Kofta Garlic Yogurt Sauce Feels Like Home

This Chicken Kofta with Garlic Yogurt Sauce doesn’t just fill our bellies; it fills our hearts. In our family kitchen, meals are not strict rituals but lively gatherings filled with love, laughter, and shared experiences. Chicken Kofta lands on our dinner table as a beloved tradition that honors both flavor and togetherness.

The aroma wafting from the grill brings nostalgia. I remember watching my grandmother effortlessly prepare koftas, her hands expertly molding the meat into perfect little shapes. This technique, combined with a vibrant, zesty yogurt sauce, creates an unbeatable duo. It feels special, yet it’s simple enough for a weeknight meal. As I serve this dish, I remind my kids about those warm kitchen memories—we’re not just cooking; we are creating lasting connections.

Why Chicken Kofta Garlic Yogurt Sauce is Our New Family Favorite

What makes this dish truly shine is its adaptability. Chicken Kofta Garlic Yogurt Sauce has swiftly become our go-to for busy weeknights and family gatherings. Together, we laugh, chat, and wrap up our busy day with this flavorful meal that’s simple yet satisfying.

Even my picky eaters find joy in this dish. The koftas are tender, and the garlic yogurt sauce is a delightful complement, bringing a fresh contrast that balances everything beautifully. I often get compliments from my kids, who ask if they can help make “the kofta with the tasty white sauce.” What more could a home cook ask for?

The Simple Magic Behind Chicken Kofta Garlic Yogurt Sauce

The beauty of Chicken Kofta lies in its simplicity. With just a handful of ingredients, it turns into something extraordinary. How can a dish made from ground chicken, spices, and a side of yogurt create such joy? The secret lies in the cooking process and how these flavors intertwine.

Not to mention, preparing this dish means minimal cleanup—an essential factor when I have little helpers around. The koftas can be grilled, baked, or pan-fried, whichever way suits your preference. Shaping and cooking them becomes an adventure for the kids, making it a fantastic activity to bond through food.

Why This Recipe Works for Our Busy, Joyful Nights

Life can get hectic, but this Chicken Kofta recipe is an absolute lifesaver. With a preparation time of about 20 minutes and cooking time around 12, you have a hearty meal ready in no time. This dish also allows me to be flexible. If I’m pressed for time, I make the kofta mixture earlier in the day and simply grill them when we’re ready to eat.

The great thing about this meal is it feels effortless yet looks impressive. Whether you have unexpected guests or simply want to enjoy a cozy family dinner, Chicken Kofta Garlic Yogurt Sauce can elevate any occasion without making you feel worn out.

Chicken Kofta Garlic Yogurt Sauce

How to Make Chicken Kofta Garlic Yogurt Sauce, The Heartwarming Way

Step-by-Step Overview: Keeping It Simple

Each time I make Chicken Kofta, I can’t help but feel a bit nostalgic. It’s a recipe filled with warmth, flavor, and stories shared around the table. As you prepare to follow along, know that it’s all about trusting your instincts. Cooking is about feeling the mixture in your hands, watching the colors come together, and anticipating the delicious aroma that will soon fill your kitchen.

Let me walk you through this delightful process. As you work your way through each step, pay attention to the texture and smell. They are signposts that guide you along the way, much like my grandmother’s kitchen always guided me.

“This is where the magic happens—when the aroma fills the kitchen and my kids come running in, asking ‘Is it ready yet?’”

Ingredients You’ll Need

Let’s gather what you need to make this delicious Chicken Kofta with Garlic Yogurt Sauce. Here’s a list of the simple ingredients that will bring this dish to life:

  • 500 grams ground chicken
  • 1 medium onion, finely chopped
  • 3 garlic cloves, minced
  • 1/4 cup fresh parsley, finely chopped
  • 1 teaspoon ground cumin
  • 1 teaspoon ground coriander
  • 1 teaspoon salt
  • 1/2 teaspoon ground black pepper
  • 1 cup plain yogurt
  • 2 tablespoons freshly squeezed lemon juice
  • Pinch of salt
  • 2 tablespoons olive oil

Don’t skip on the fresh herbs; they are absolutely the soul of this dish. The vibrant taste of parsley adds a refreshing note, while the spices work their magic. Use what you have on hand. This dish embraces creativity—it’s about enjoying the process and making it your own.

Step-by-Step Directions

  1. In a large bowl, combine the ground chicken, chopped onion, minced garlic, parsley, cumin, coriander, salt, and black pepper. Mix well until all the ingredients are thoroughly incorporated.
  2. Form the mixture into small oval-shaped koftas. Don’t worry if they’re not perfect. The love you put into shaping them is what truly matters.
  3. Preheat your grill, and brush it with olive oil to prevent sticking. This step is important; it helps those koftas develop a lovely golden brown crust—you’ll be surprised by how much flavor that brings.
  4. Grill the koftas for about 10–12 minutes. Turn them occasionally to ensure even cooking. You’ll know they’re done when they’re firm and take on a beautiful golden color.
  5. Meanwhile, in a separate bowl, mix the yogurt, lemon juice, and a pinch of salt to prepare the garlic yogurt sauce. This creamy sauce adds the perfect zest.
  6. Serve the grilled koftas with the garlic yogurt sauce on the side, inviting everyone to help themselves.

Each step is an opportunity to connect—mixing together, shaping the kofta, and enjoying the cooking process.

Serving Chicken Kofta Garlic Yogurt Sauce with Love

When it comes to serving Chicken Kofta, a family-style operation feels right. I like to place everything in the center of the table—platter of koftas, a bowl of the garlic yogurt sauce, maybe a few pita breads, and some vibrant veggies on the side. It’s an invitation for everyone to dive in.

Those first bites are often filled with laughter as we try to see who can make the best ‘kofta wrap’ using pita and sauce. It’s so much more than just food; it’s a moment of joy shared together. Each of my kids has their preferences—one loves extra sauce, while another can’t resist piling up fresh salad greens.

Chicken Kofta Garlic Yogurt Sauce

Storage & Reheat Tips (Keeping the Goodness)

If you find yourself with leftovers (if you can believe it), storing and reheating the Chicken Kofta is straightforward. Allow the koftas to cool completely before transferring them to an airtight container. They can be kept in the refrigerator for up to three days.

When you’re ready to enjoy them again, the microwave works for a quick lunch, but I recommend reheating them in the oven for a more satisfying texture. Heat your oven to 180°C (350°F) and place the koftas on a baking sheet for about 10 minutes, until warmed through. This helps retain that delightful juiciness without making them rubbery.

My Kitchen Notes & Shortcuts

Here are a few kitchen notes and tricks that I’ve picked up over time while making this recipe:

  • If you’re short on fresh herbs, dried herbs work. Use one-third of the amount as they are more concentrated in flavor.
  • To save time, consider making the kofta mixture ahead. It can last in the fridge for up to two days. The flavors only get better!
  • Let the kids help shape the koftas. It’s a fun way to get them involved in cooking and encourages their creativity.
  • If you want to tone down the garlic in the sauce, you can add a pinch of garlic powder instead, creating a milder flavor profile.
  • Experiment with spices. A dash of smoked paprika or chili powder can bring a new level of excitement to the flavor.

Family-Friendly Variations

Chicken Kofta Garlic Yogurt Sauce is versatile. Here are a few variations we love:

  • For a lighter version, swap ground chicken for turkey—a leaner option that holds up beautifully.
  • Have some leftover cooked vegetables? Chop them finely and mix them into the kofta for added nutrition and fiber.
  • Kids prefer meatballs? Shape the mixture into balls instead of oval koftas and bake them in a sauce for a twist.
  • Want to jazz it up? Add diced feta to the meat mixture for a tangy surprise inside each kofta.

Feel free to play with any of these ideas—this is your kitchen, and it’s all about bringing your family’s tastes into the mix.

FAQs About Chicken Kofta Garlic Yogurt Sauce

Can I make this ahead for a busy week?

Absolutely! You can prepare the kofta mixture a day early, allowing the flavors to deepen. If you know your week is hectic, forming them into koftas and freezing them can work wonders.

What if I don’t have ground chicken?

No worries! Ground turkey or even beef can be an excellent alternative. Just adjust the cooking times accordingly, as they may vary slightly.

Can I grill this on a stovetop grill pan?

Sure! A stovetop grill pan works just fine; just remember to keep the heat medium to prevent burning while you get those beautiful grill marks.

How can I make this dish spicier?

If your family enjoys heat, add a pinch of crushed red pepper flakes or a splash of hot sauce to the yogurt sauce. It brings a delightful kick.

Are leftovers good for lunch?

Definitely! The flavors hold up well, and they make for a quick and satisfying lunch option. Just serve them in a wrap or on a salad.

One Final Thought from My Kitchen

As you gather around the table to share this Chicken Kofta with Garlic Yogurt Sauce, remember that it’s more than just a recipe—it’s a chance to create memories, deepen connections, and fill your home with warmth. I hope this dish finds its way into your family’s laughter and stories. If it does, my grandmother’s kitchen is smiling.

Stay curious, stay creative, and happy cooking!

Chicken Kofta with Garlic Yogurt Sauce

Prep Time 20 minutes
Cook Time 12 minutes
Total Time 32 minutes
Servings 4 servings
Calories 450
This Chicken Kofta with Garlic Yogurt Sauce is a heartwarming family favorite, seamlessly blending tender spiced chicken and zesty yogurt sauce for a comforting meal.

Ingredients

For the Kofta

  • 500 grams ground chicken (The primary protein.)
  • 1 medium onion, finely chopped (Adds flavor and moisture.)
  • 3 cloves garlic, minced (For aromatic flavor.)
  • 1/4 cup fresh parsley, finely chopped (Provides freshness.)
  • 1 teaspoon ground cumin (Adds warmth to the dish.)
  • 1 teaspoon ground coriander (Enhances the flavor.)
  • 1 teaspoon salt
  • 1/2 teaspoon ground black pepper
  • 2 tablespoons olive oil (For grilling and moisture.)

For the Garlic Yogurt Sauce

  • 1 cup plain yogurt (Base for the sauce.)
  • 2 tablespoons freshly squeezed lemon juice (Adds acidity for brightness.)
  • 1 pinch salt (To taste.)

Instructions 

Preparation

  • In a large bowl, combine the ground chicken, chopped onion, minced garlic, parsley, cumin, coriander, salt, and black pepper. Mix well until all the ingredients are thoroughly incorporated.
  • Form the mixture into small oval-shaped koftas.

Cooking

  • Preheat your grill, and brush it with olive oil to prevent sticking.
  • Grill the koftas for about 10–12 minutes, turning them occasionally to ensure even cooking. They are done when firm and golden.

Making the Sauce

  • In a separate bowl, mix the yogurt, lemon juice, and a pinch of salt to prepare the sauce.

Serving

  • Serve the grilled koftas with the garlic yogurt sauce on the side.

Notes

Store leftovers in an airtight container in the refrigerator for up to three days. Reheat in the oven for optimal texture.
Calories: 450kcal
Course: Dinner, Main Course
Cuisine: Mediterranean
Keyword: Chicken Kofta, Comfort Food, Family Recipe, Garlic Yogurt Sauce, Grilled Chicken

Chicken Kofta with Creamy Garlic Yogurt Sauce

Start with the sound of laughter and the clinking of silverware, the children gathering around the table. There’s a joyful energy as they help set everything just right. You can smell something delicious simmering away, perhaps a recipe that warms the heart and brings everyone to the table after a busy day. Today, that dish is Chicken Kofta with Creamy Garlic Yogurt Sauce—an inviting meal that sparks connection and comfort.

Why This Chicken Kofta with Creamy Garlic Yogurt Sauce Feels Like Home

Chicken Kofta with Creamy Garlic Yogurt Sauce isn’t just a dish; it’s an experience that fills the home with warmth and delicious aromas. I can almost hear my children cheer when they know this is on the menu. Every bite brings a hug of flavor, combining the tenderness of the chicken with vibrant spices and the freshness of herbs. This meal lets us all gather, share stories, and savor a moment where everyone feels at home.

You see, growing up, my family had our traditions around dinner час. There was always a special touch that came with every meal. This recipe embodies that feeling—easy to prepare and sure to please both kids and adults alike. The combination of juicy kofta and creamy garlic yogurt sauce is simply irresistible and becomes a lovely memory shared around the dinner table.

The Simple Magic Behind Chicken Kofta with Creamy Garlic Yogurt Sauce

The magic of Chicken Kofta with Creamy Garlic Yogurt Sauce lies in its simplicity and flavor. This is one of those meals that may seem fancy but is surprisingly easy to whip up on a weeknight. It comes together quickly, allowing you to focus less on cooking and more on family. The familiar scents of garlic and cumin fill the air, guiding you through each step, almost as if you had your grandmother’s hand reassuring you along the way.

When busy nights roll around, I can rely on this dish to bring everyone together without fuss and without a mountain of dishes to clean afterward. The creamy garlic yogurt sauce is the star here, elevating the kofta and making it feel like a special occasion. The result? A meal that tastes like it took hours to prepare when it really didn’t.

Chicken Kofta with Creamy Garlic Yogurt Sauce

How to Make Chicken Kofta with Creamy Garlic Yogurt Sauce, The Heartwarming Way

Cooking Chicken Kofta with Creamy Garlic Yogurt Sauce doesn’t just fill your kitchen with wonderful smells; it creates a shared moment of joy. The process is not about perfection but about connection. As you mix the ingredients, feel free to get your hands in there. It’s a sensory experience filled with textures, colors, and delightful aromas.

Here’s an overview of what makes this recipe a breeze: you’ll combine ingredients, form them into shapes, cook them to golden perfection, and whip together a creamy yogurt sauce that will have everyone asking for seconds. Trust me, once you see the golden-brown kofta on your plate, you’ll feel proud of your creation!

“This is where the magic happens—when the aroma fills the kitchen and my kids come running in, asking ‘Is it ready yet?’”

Ingredients You’ll Need

Having simple, fresh ingredients on hand is key, and that’s where this recipe shines. Here’s what you’ll need to create this heartwarming dish:

  • 1 lb ground chicken
  • 1 small onion, finely chopped
  • 2 cloves garlic, minced (extra garlic for the sauce)
  • 1/4 cup fresh parsley, chopped (don’t skip the fresh herbs; they’re the soul of the dish)
  • 1 tsp ground cumin
  • 1 tsp ground coriander
  • 1/2 tsp paprika
  • Salt and pepper to taste
  • Wooden skewers (if you’re grilling)
  • 1 cup plain yogurt
  • 1 tbsp lemon juice
  • Salt to taste

These ingredients are not only easy to find but also give you the freedom to be creative. Use what you have in your fridge—maybe substitute cilantro for the parsley or skip the skewers altogether. You can easily tailor this to what suits your family best.

Step-by-Step Directions

Let’s get started! Follow these steps to create a delicious Chicken Kofta with Creamy Garlic Yogurt Sauce that’s sure to be a new family favorite:

  1. In a large bowl, combine ground chicken, chopped onion, minced garlic, parsley, cumin, coriander, paprika, salt, and pepper. Mix until well combined. Get your hands in there; it’s a fun part!

  2. Form the mixture into long, oval-shaped kofta and thread them onto wooden skewers. Think of it like shaping little logs filled with flavor.

  3. Preheat a grill or skillet over medium heat and cook the kofta for about 6-8 minutes on each side or until cooked through and browned. Let the kids help turn the kofta—it’s the fun bit!

  4. In another bowl, combine yogurt, minced garlic, lemon juice, and salt to make the creamy garlic yogurt sauce. A little sour and a lot creamy—what’s not to love?

  5. Serve the kofta hot with the yogurt sauce on the side. Drizzle that sauce generously; it brings everything together beautifully.

This method is straightforward, but the results are exceptional. The textures of the juicy kofta and the silky yogurt sauce complement each other perfectly, making every bite a delight.

Serving Chicken Kofta with Creamy Garlic Yogurt Sauce with Love

How we enjoy Chicken Kofta with Creamy Garlic Yogurt Sauce at home is part of its charm. I love to lay out the kofta in the center of the table alongside the creamy garlic yogurt sauce. I find that serving family-style allows everyone to dig in, choose their portions, and enjoy the meal together.

We might round out the meal with warm pita bread, a fresh salad, or some roasted veggies. Each family member has their favorite accompaniment—my daughter loves the kofta wrapped in pita, while my son prefers it straight from the skewer, dunked in the sauce. This dish becomes an opportunity for laughter and shared stories, surrounded by the warmth of family.

Chicken Kofta with Creamy Garlic Yogurt Sauce

Storage & Reheat Tips

Leftovers? Not a problem! To keep the goodness alive, store any uneaten kofta in an airtight container in the fridge. They can stay fresh for about three days, perfect for lunch the next day. When you’re ready to enjoy them again, the microwave is fine for a quick reheat, but if you have the time, popping them in the oven brings back that just-made warmth—around 350°F should do the trick for about 10-15 minutes.

My Kitchen Notes & Shortcuts

From my time spent experimenting and cooking with Chicken Kofta, I’ve gathered some notes and shortcuts that help me keep things smooth:

  • Prep Ahead: Mix the kofta ingredients a few hours before cooking for a quick meal later. The flavors will meld beautifully!
  • Make It a Family Affair: Let the kids help shape the kofta; it’s a great way to involve them in the process. They often get excited about their creations.
  • Swap Ingredients: If you’re low on chicken, turkey works well too. Just keep an eye on the cooking time, as it might vary slightly.
  • Add a Twist: Finely chopped bell peppers or zucchini mixed in with the kofta for a veggie boost add freshness without taking away from the dish.

These small adjustments can make a delightful difference while keeping cooking stress-free and enjoyable.

Family-Friendly Variations

Get creative! Here are some of my family’s favorite twists on Chicken Kofta with Creamy Garlic Yogurt Sauce:

  • Taco Style: Use the kofta as a filling for soft tacos. Add avocado, salsa, and shredded cheese for a fun twist.
  • Vegetarian Options: For non-meat eaters, you can try using chickpeas or lentils as a substitute. Just add spices and ground oats to hold everything together.
  • Spice It Up: If you like a bit of heat, add red pepper flakes or cayenne to the kofta mixture, providing an extra kick that adventurous eaters will love.

Let these suggestions inspire you to make your own variations. You can give this dish your family’s touch by incorporating fresh favorite ingredients.

FAQs About Chicken Kofta with Creamy Garlic Yogurt Sauce

Can I make this ahead for a busy week?

Absolutely! Preparing the kofta ahead of time allows all the flavors to mingle, and you can even freeze them, ready to cook when you need a quick meal.

What else can I serve with kofta?

These kofta pair well with various sides like couscous, rice pilaf, or simply a fresh salad to lighten up the meal.

How do I know when the kofta are cooked through?

The kofta should reach an internal temperature of 165°F. The outside will be pleasantly browned too!

One Final Thought from My Kitchen

I hope this Chicken Kofta with Creamy Garlic Yogurt Sauce finds its way into your family’s laughter and stories. Cooking is not just about putting food on the table; it’s about sharing experiences, connecting with loved ones, and other heartwarming moments. If this dish sparks joy in your kitchen, then my grandmother’s kitchen is smiling. Until next time, happy cooking!

Chicken Kofta with Creamy Garlic Yogurt Sauce

Prep Time 15 minutes
Cook Time 15 minutes
Total Time 30 minutes
Servings 4 servings
Calories 300
A heartwarming dish of juicy chicken kofta paired with a creamy garlic yogurt sauce, perfect for family gatherings and weeknight dinners.

Ingredients

For the Chicken Kofta

  • 1 lb ground chicken
  • 1 small onion, finely chopped
  • 2 cloves garlic, minced (Extra garlic for the sauce)
  • 1/4 cup fresh parsley, chopped (Don’t skip the fresh herbs; they’re the soul of the dish.)
  • 1 tsp ground cumin
  • 1 tsp ground coriander
  • 1/2 tsp paprika
  • Salt and pepper to taste
  • Wooden skewers (if you’re grilling)

For the Creamy Garlic Yogurt Sauce

  • 1 cup plain yogurt
  • 1 tbsp lemon juice
  • Salt to taste

Instructions 

Preparation

  • In a large bowl, combine ground chicken, chopped onion, minced garlic, parsley, cumin, coriander, paprika, salt, and pepper. Mix until well combined.
  • Form the mixture into long, oval-shaped kofta and thread them onto wooden skewers.
  • Preheat a grill or skillet over medium heat and cook the kofta for about 6-8 minutes on each side or until cooked through and browned.
  • In another bowl, combine yogurt, minced garlic, lemon juice, and salt to make the creamy garlic yogurt sauce.

Serving

  • Serve the kofta hot with the yogurt sauce on the side. Drizzle the sauce generously over the kofta.

Notes

Store leftovers in an airtight container in the fridge for about three days. Reheat in the microwave or oven at 350°F for about 10-15 minutes for best results.
Calories: 300kcal
Course: Dinner, Main Course
Cuisine: Mediterranean
Keyword: Chicken Kofta, Comfort Food, Creamy Yogurt Sauce, Easy Recipe, Family Meal

Quick Mediterranean Chicken Tacos

There’s something magical about the evening bustle in a family kitchen. The laughter from the living room drifts in as the kids set the table, their chatter rising and falling like a sweet song. Meanwhile, the enticing aroma of chicken sizzling in a skillet dances around the room, wrapping us all in comfort. This is the moment when we come together, ready to share not just a meal but stories, laughter, and love. Tonight, we’re diving into Quick Mediterranean Chicken Tacos, a dish that brings us all around the table and makes weeknight dinners feel special.

Why This Quick Mediterranean Chicken Tacos Feels Like Home

Quick Mediterranean Chicken Tacos isn’t just another recipe; it’s a beacon of flavor and familiarity. Picture a summer evening: warm air floating through the kitchen window, vibrant colors from the diced vegetables engaging your senses, and the lively chatter of your loved ones filling the space.

This dish combines simplicity and flavor, bringing a taste of the Mediterranean right to our dinner table. The zesty flavors, paired with tender chicken and fresh vegetables, make it feel like a special occasion, even on a busy weeknight. Each bite is a celebration, a nod to the gatherings of my past, and the joy of new memories waiting to be made.

One of the best parts? This recipe comes together quickly, leaving room for connection and conversation. My family loves to customize their tacos, making each dinner an opportunity for creativity. It’s that joy and sense of togetherness that transforms this meal into something truly special.

Why Quick Mediterranean Chicken Tacos is Our New Family Favorite

As the days grow longer and the evenings warmer, these tacos have become a staple in our home. They are versatile, making them perfect for any family. Whether you have picky eaters or adventurous palates, there’s something for everyone in this meal.

This dish also comes with the added bonus of minimal cleanup. With just one skillet and a couple of bowls, we spend less time washing dishes and more time enjoying each other’s company. Plus, the bite-sized fun of tacos encourages everyone to join in and assemble their own creations.

On nights when we need a quick yet delightful dinner, Quick Mediterranean Chicken Tacos never disappoint. They blend my love for easy cooking with the joy of bringing family together, making every meal an event worth savoring.

The Simple Magic Behind Quick Mediterranean Chicken Tacos

What makes this taco recipe so appealing? The answer lies in the beautiful balance of flavors and textures. Each ingredient has a role to play, creating a symphony that sings on your palate.

The chicken gets marinated in olive oil, oregano, and paprika, infusing each bite with warmth and depth. The fresh vegetables add a crunch that contrasts beautifully with the tender chicken. The rich crumbles of feta and the vibrant parsley provide bursts of flavor and color, reminding us of sun-dappled Mediterranean gardens.

This dish matters because it can come together in about 30 minutes, allowing for both hands-on family fun and a meal that satisfies without overwhelming the cook. It feels effortless, yet it always impresses, making it an excellent choice for anyone looking to reduce stress in the kitchen.

Quick Mediterranean Chicken Tacos

How to Make Quick Mediterranean Chicken Tacos, The Heartwarming Way

Cooking always brings a sense of joy and accomplishment, especially when you know how to keep it simple. Let’s walk through this delightful recipe that’s sure to become a regular in your household.

Step-by-Step Overview: Keeping It Simple

  1. In a bowl, combine olive oil, oregano, paprika, salt, and pepper. Add chicken breasts and marinate for 15 minutes.

    • Pro tip: Take this time to chop the veggies. The aroma of the marinade will make your kitchen smell divine.
  2. Heat a skillet over medium-high heat. Cook the chicken for 6-7 minutes on each side or until cooked through. Remove from the skillet and let rest before slicing.

    • Remember: A little browning adds flavor. Think about how grandma used to always say that the magic happens at the bottom of the pan.
  3. In the same skillet, warm the tortillas for a minute on each side.

    • Kids love helping here; let them take turns flipping the tortillas. It’s the fun bit!
  4. To assemble, place sliced chicken on each tortilla. Top with diced tomatoes, cucumber, red onion, and feta cheese. Garnish with fresh parsley.

    • Let everyone get involved in assembling their tacos. It makes the meal feel more festive.
  5. Serve immediately, and watch the smiles at the table.

    • The bright colors and enticing aroma will have everyone digging in quickly.

Ingredients You’ll Need

Gathering your ingredients is half the fun. Here’s what I typically use for this recipe:

  • 2 boneless, skinless chicken breasts
  • 2 tablespoons olive oil
  • 1 teaspoon oregano
  • 1 teaspoon paprika
  • Salt and pepper to taste
  • 4 small tortillas
  • 1 cup diced tomatoes
  • 1 cup cucumber, diced
  • 1/2 red onion, diced
  • 1/2 cup feta cheese, crumbled
  • Fresh parsley, for garnish

Don’t skip the fresh herbs; they are really the soul of this dish. Feel free to use what you have in your fridge. The beauty of these tacos lies in their flexibility—be creative, as this is not about perfection!

Serving Quick Mediterranean Chicken Tacos with Love

When it comes to serving Quick Mediterranean Chicken Tacos, we do it family-style, right in the center of the table. There’s something heartwarming about everyone helping themselves, customizing each taco to their liking.

As we gather ’round, I often set out extra bowls of toppings like avocado, olives, or even some spicy salsa for those who like a little kick. This way, everyone feels included, and we get to share our favorite flavors.

Sometimes I pair these tacos with a simple salad or roasted potatoes, allowing for more sharing and laughter. My kids always debate who gets to scoop the last of the feta cheese, a light-hearted moment that adds to the joy of the meal.

Quick Mediterranean Chicken Tacos

Storage & Reheat Tips (Keeping the Goodness)

If you find yourself with leftovers, don’t fret. Storing and reheating these tacos is simple and can keep the goodness alive for another day.

First, store leftover chicken and vegetables in airtight containers in the fridge. They will last about 3-4 days, making them perfect for quick lunches or skip-a-cooking nights.

When you’re ready to enjoy them again, you can warm them up in the microwave for a quick fix. However, if you crave that freshly made taste, the oven is your best bet. Simply pop the chicken in at 350°F for about 10 minutes. This way, it regains its juiciness and flavor.

My Kitchen Notes & Shortcuts

Here are a few tips I’ve learned while making Quick Mediterranean Chicken Tacos time and again:

  • Marinade Early: If you have the time, let the chicken marinate for a couple of hours to deepen the flavors. This can be a great way to prep ahead.
  • Mix It Up: Try adding different proteins like shrimp or chickpeas for variety. The spices work beautifully with many ingredients.
  • Involve the Kids: This is a fun dish for kids to help with! Let them chop veggies (with supervision), assemble their tacos, and create their flavor combinations.
  • Go Whole Wheat: If you want to make it a bit healthier, switch to whole wheat tortillas. They add a lovely, nutty flavor.
  • Always Garnish: A sprinkle of herbs can turn an ordinary-looking dish into something extraordinary. Don’t be shy with your garnishes.

Family-Friendly Variations

Creating variations of Quick Mediterranean Chicken Tacos is another layer of fun. Here are some ideas to make it your own:

  • Lean and Green: Swap the chicken for grilled veggies like bell peppers and zucchini for a lighter, vegetarian option. This can be fantastic for Meatless Mondays or when you’re looking to reduce meat intake.
  • Spicy Twist: Add sliced jalapeños or a splash of hot sauce for those who enjoy some heat.
  • Kid Favorites: If your little ones are hesitant about the veggies, consider adding a small dollop of hummus or guacamole for additional flavor and creaminess.
  • Zesty Dip: Pair these tacos with a quick yogurt-based sauce or tzatziki for a refreshing touch.

These variations invite exploration and creativity, making this dish even more personal to your family.

FAQs About Quick Mediterranean Chicken Tacos

Can I make this ahead for a busy week?
Absolutely! In fact, letting it sit for an hour allows the flavors to meld beautifully, just like an old family recipe. It’s a great way to kickstart busy weeks.

What if I don’t have some of the ingredients?
No worries at all! Use what you have. The beauty of cooking is making it your own. Even swapping chicken for a different protein works just fine.

Can I freeze the leftover chicken?
Yes! The chicken freezes well and can be stored in an airtight container for up to three months. Just make sure to label the jar, so it remembers where it came from.

One Final Thought from My Kitchen

As I close this chapter on Quick Mediterranean Chicken Tacos, I want to share my wish for your cooking adventures. I hope this dish brings as much joy and connection to your table as it does to mine. Whether it’s a regular weeknight or a special occasion, let the laughter, stories, and love flow as easily as the flavors. Until next time, happy cooking!

Quick Mediterranean Chicken Tacos

Prep Time 15 minutes
Cook Time 15 minutes
Total Time 30 minutes
Servings 4 servings
Calories 350
A quick and delightful family meal that combines tender marinated chicken with fresh vegetables, all wrapped in warm tortillas, creating a Mediterranean feast at home.

Ingredients

For the Chicken Marinade

  • 2 tablespoons olive oil
  • 1 teaspoon oregano
  • 1 teaspoon paprika
  • to taste salt and pepper

For the Tacos

  • 4 small tortillas (Warm them before serving)
  • 1 cup diced tomatoes
  • 1 cup cucumber, diced
  • 1/2 cup red onion, diced
  • 1/2 cup feta cheese, crumbled
  • for garnish fresh parsley (Don't skip the fresh herbs)

Instructions 

Preparation

  • In a bowl, combine olive oil, oregano, paprika, salt, and pepper. Add chicken breasts and marinate for 15 minutes.
  • Chop the veggies while the chicken marinates.

Cooking

  • Heat a skillet over medium-high heat. Cook the chicken for 6-7 minutes on each side or until cooked through. Remove from the skillet and let rest before slicing.
  • In the same skillet, warm the tortillas for a minute on each side.

Assembly

  • Place sliced chicken on each tortilla. Top with diced tomatoes, cucumber, red onion, and feta cheese. Garnish with fresh parsley.
  • Serve immediately and enjoy the meal.

Notes

Use what you have on hand for flexibility. Store leftovers in airtight containers for 3-4 days. Reheat in microwave or oven at 350°F for 10 minutes to regain juiciness.
Calories: 350kcal
Course: Dinner, Main Course
Cuisine: Mediterranean
Keyword: Chicken, Family-Friendly, Mediterranean Cuisine, Quick Dinner, Tacos

Lemon Garlic Chicken

There’s nothing quite like the smell of roasted chicken wafting through the kitchen. The garlic, lemon, and spices mingle together, creating a melody of flavors that sing of comfort and home. As the chicken sizzles in the oven, the family can hardly wait to gather around the table. This Lemon Garlic Chicken recipe is not just a dish; it’s a celebration of family time shared over a warm meal.

Why this works

Lemon Garlic Chicken

This Lemon Garlic Chicken recipe comes together quickly, making it perfect for busy weeknights or special family dinners. The beauty of this dish lies in its simplicity. With just a handful of ingredients, you can whip up a satisfying meal that everyone will love.

What’s more, the chicken’s crispy skin infused with lemon and garlic pairs beautifully with tender potatoes, making it a complete meal. You can throw it all together and let the oven do the work. So, whether you are a seasoned cook or a novice in the kitchen, this recipe will inspire confidence and bring everyone to the table.

Process Overview

“This is where the magic happens—when the aroma fills the kitchen.”

The process for making Lemon Garlic Chicken is straightforward. You start by preparing the chicken and potatoes, then season everything with aromatic spices. Once it’s in the oven, sit back and let the delicious smells fill your home. It truly makes cooking feel effortless and enjoyable.

Ingredients

To make this delightful Lemon Garlic Chicken, you will need the following ingredients:

  • 3½ pounds bone-in chicken (about 6 leg quarters)
  • 3 large potatoes (peeled and cut into chunks)
  • 1½ teaspoons garlic powder
  • 1½ teaspoons onion powder
  • 1½ teaspoons paprika
  • 1 teaspoon coriander powder
  • ½ teaspoon black pepper
  • 1½ teaspoons salt
  • ¼ teaspoon turmeric
  • 2 tablespoons extra virgin olive oil
  • 10 cloves garlic
  • ½ cup lemon juice
  • ⅓ cup extra virgin olive oil
  • ⅓ cup cold water
  • 1 teaspoon Aleppo pepper

Lily’s Tips:

  • Use high-quality chicken for the best flavor. Look for organic or free-range varieties when possible.
  • Choose Yukon Gold potatoes for their buttery texture; they hold up well during roasting.
  • Adjust the salt according to your preference, especially if you are watching your sodium intake.
  • Fresh garlic can enhance the dish even further; just mince it and mix it into the marinade.
  • For a burst of flavor, try adding some fresh herbs, like rosemary or thyme.

Directions

  1. Preheat your oven to 425°F.
  2. Clean the chicken and pat it dry using a paper towel. Add it to a 9×13 pan that’s lined with parchment paper.
  3. Add the peeled potatoes around the chicken in the pan.
  4. In a small bowl, mix the garlic powder, onion powder, paprika, coriander, salt, black pepper, and turmeric.
  5. Sprinkle the spice mixture all over the chicken and potatoes, making sure to get it under the skin for maximum flavor.
  6. Drizzle two tablespoons of olive oil over everything and rub it all over to coat.
  7. Pour the lemon juice, cold water, and Aleppo pepper into the pan, allowing the flavors to meld.
  8. Bake in the preheated oven, uncovered, for about 30 minutes, or until the chicken is golden brown and the juices run clear.

Encouraging Notes:

  • Don’t be afraid to get your hands dirty when rubbing the olive oil and spices onto the chicken. It’s all part of the cooking experience!
  • Keep an eye on the chicken as it cooks. Every oven is different, and you want the skin crispy, but not burnt.
  • If you like, baste the chicken with the pan juices halfway through cooking for extra moisture.

Serving

Lemon Garlic Chicken

Serving Lemon Garlic Chicken family-style makes for a cozy meal. Lay the chicken and potatoes out on a large platter. Encourage everyone to help themselves. Pair this dish with a simple green salad or steamed vegetables to round out the meal.

When you all sit down together, it fosters connection and conversation, making the meal much more than just food.

Storage

Leftovers can be just as delightful as the original meal. Store any leftover chicken and potatoes in an airtight container in the refrigerator for up to three days.

To reheat, place the chicken and potatoes on a baking sheet and warm them in a 350°F oven for about 15-20 minutes. You can also microwave them, but the oven gives the chicken its crispy skin back.

Kitchen Notes

  • Use Parchment Paper: It makes for effortless cooking and cleanup.
  • Cut Potatoes Evenly: This ensures they cook uniformly.
  • Marinate Ahead: For an even richer flavor, marinate the chicken for a few hours or overnight in the lemon-garlic mixture before cooking.
  • Opt for Bone-In Chicken: The bones add moisture and flavor to the meat.
  • Stock Up on Spices: Keep your spices fresh for the best flavor.

Variations

Cooking for picky eaters? Here are some tweaks to make this dish work for everyone:

  • Substitute Chicken Parts: Feel free to use chicken breasts if your family prefers white meat. Reduce baking time slightly for more tenderness.
  • Skip the Potatoes: If watching carbs, add steamed broccoli or green beans instead.
  • Add Different Spices: Experiment with your favorite spice blends, like Italian seasoning or even a dash of cumin for a different flavor profile.
  • Gluten-Free Option: This dish is naturally gluten-free, so it’s perfect for gluten-sensitive family members.
  • Herb Variation: Fresh herbs like thyme or parsley can be added right before serving for an added burst of flavor.

FAQ

  1. Can I use skinless chicken parts?
    Yes, but keep in mind that skinless chicken may be less flavorful and can dry out faster.

  2. What can I substitute for Aleppo pepper?
    If you don’t have Aleppo pepper, crushed red pepper flakes or a bit of cayenne can work as a substitute.

  3. Is it okay to prepare this dish ahead of time?
    Absolutely! You can prep everything, marinate it, and then put it in the fridge until you are ready to bake.

  4. Can this recipe be made in a slow cooker?
    Yes, you can cook this dish in a slow cooker on low for about 6 hours. Add the potatoes halfway through for optimal cooking.

  5. What side dishes pair well with Lemon Garlic Chicken?
    Green salads, roasted vegetables, and rice pilaf are great options to complement the dish.

Conclusion

Cooking Lemon Garlic Chicken is more than just a dinner recipe; it’s an opportunity to create lasting memories around your table. Share smiles, laughter, and stories as you gather to enjoy this heartwarming meal. Remember, the aromas and flavors will weave themselves into the fabric of your family traditions. Happy cooking!

Lemon Garlic Chicken

Prep Time 15 minutes
Cook Time 30 minutes
Total Time 45 minutes
Servings 6 servings
Calories 600
A delightful Lemon Garlic Chicken recipe that brings family together around a warm meal, infused with delicious flavors of lemon, garlic, and spices.

Ingredients

Main Ingredients

  • 3.5 pounds bone-in chicken (about 6 leg quarters) (Use high-quality chicken for the best flavor.)
  • 3 large potatoes (peeled and cut into chunks) (Choose Yukon Gold potatoes for best results.)
  • 10 cloves garlic (Fresh garlic adds additional flavor.)
  • 0.5 cup lemon juice (Use fresh lemon juice for optimal flavor.)
  • 0.33 cup extra virgin olive oil (Can be substituted with another high-quality oil.)
  • 0.33 cup cold water (Helps to meld the flavors.)

Spices

  • 1.5 teaspoons garlic powder
  • 1.5 teaspoons onion powder
  • 1.5 teaspoons paprika
  • 1 teaspoon coriander powder
  • 0.5 teaspoon black pepper
  • 1.5 teaspoons salt (Adjust according to preference.)
  • 0.25 teaspoon turmeric
  • 1 teaspoon Aleppo pepper (Can be substituted with crushed red pepper flakes.)

Instructions 

Preparation

  • Preheat your oven to 425°F.
  • Clean the chicken and pat it dry using a paper towel. Add it to a 9x13 pan that’s lined with parchment paper.
  • Add the peeled potatoes around the chicken in the pan.
  • In a small bowl, mix the garlic powder, onion powder, paprika, coriander, salt, black pepper, and turmeric.
  • Sprinkle the spice mixture all over the chicken and potatoes, making sure to get it under the skin for maximum flavor.
  • Drizzle two tablespoons of olive oil over everything and rub it all over to coat.
  • Pour the lemon juice, cold water, and Aleppo pepper into the pan, allowing the flavors to meld.

Cooking

  • Bake in the preheated oven, uncovered, for about 30 minutes, or until the chicken is golden brown and the juices run clear.

Notes

Don’t be afraid to get your hands dirty when rubbing the olive oil and spices onto the chicken. Keep an eye on the chicken as it cooks to ensure a crispy skin. If desired, baste the chicken with pan juices halfway through cooking for extra moisture.
Calories: 600kcal
Course: Dinner, Main Course
Cuisine: American
Keyword: Comfort Food, Easy Dinner, Family Meal, Lemon Garlic Chicken, Roasted Chicken