Category

Mediterranean & Flavor-Packed Chicken

Category

Easy High Protein Feta Chicken Salad

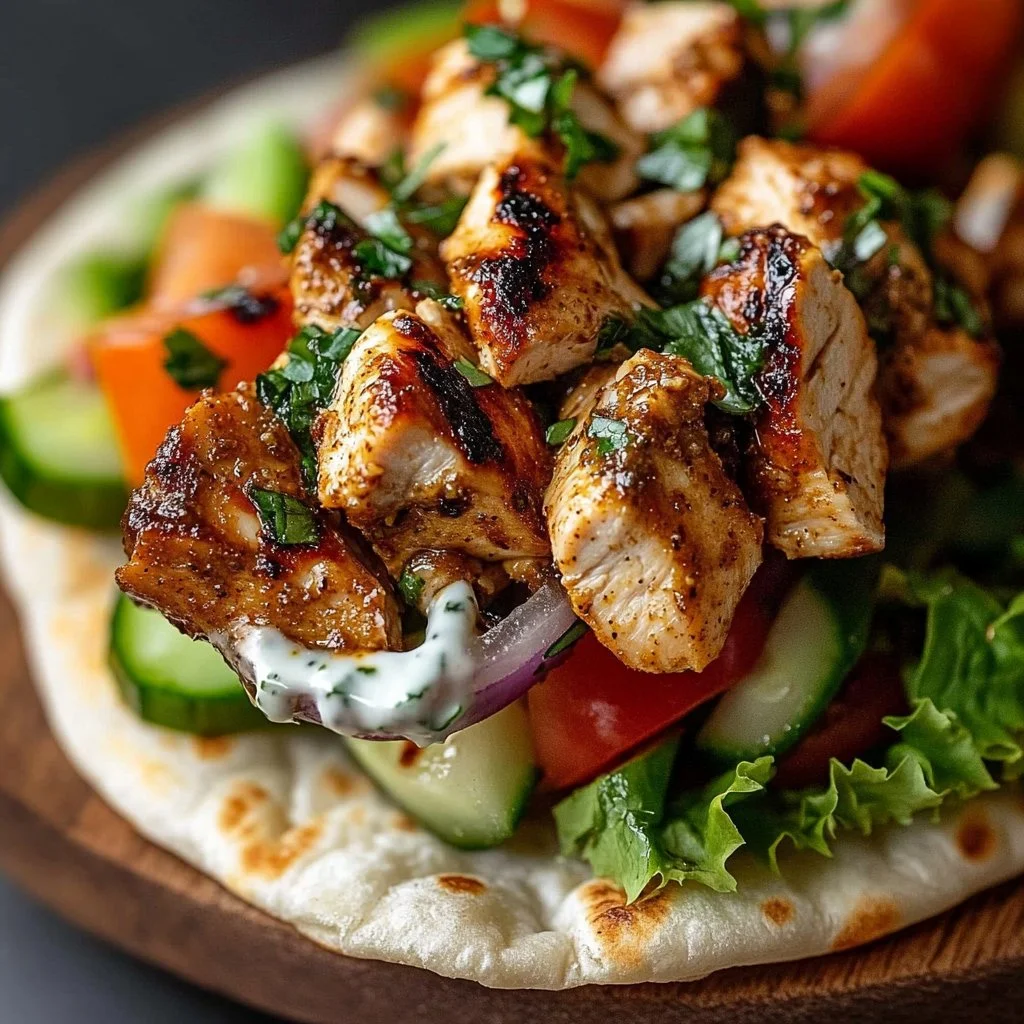
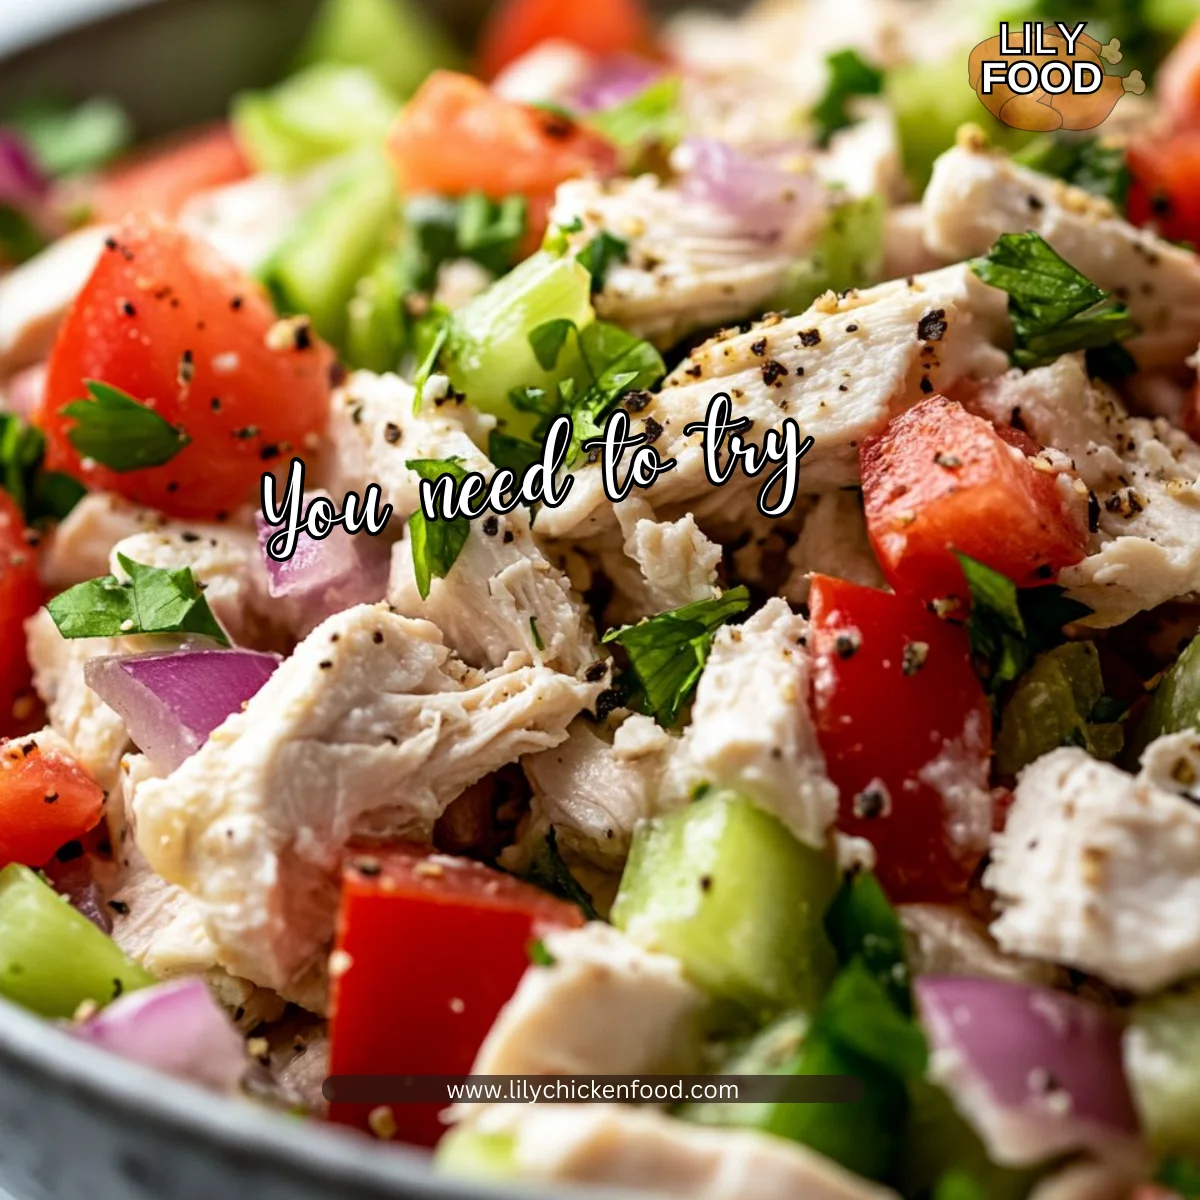
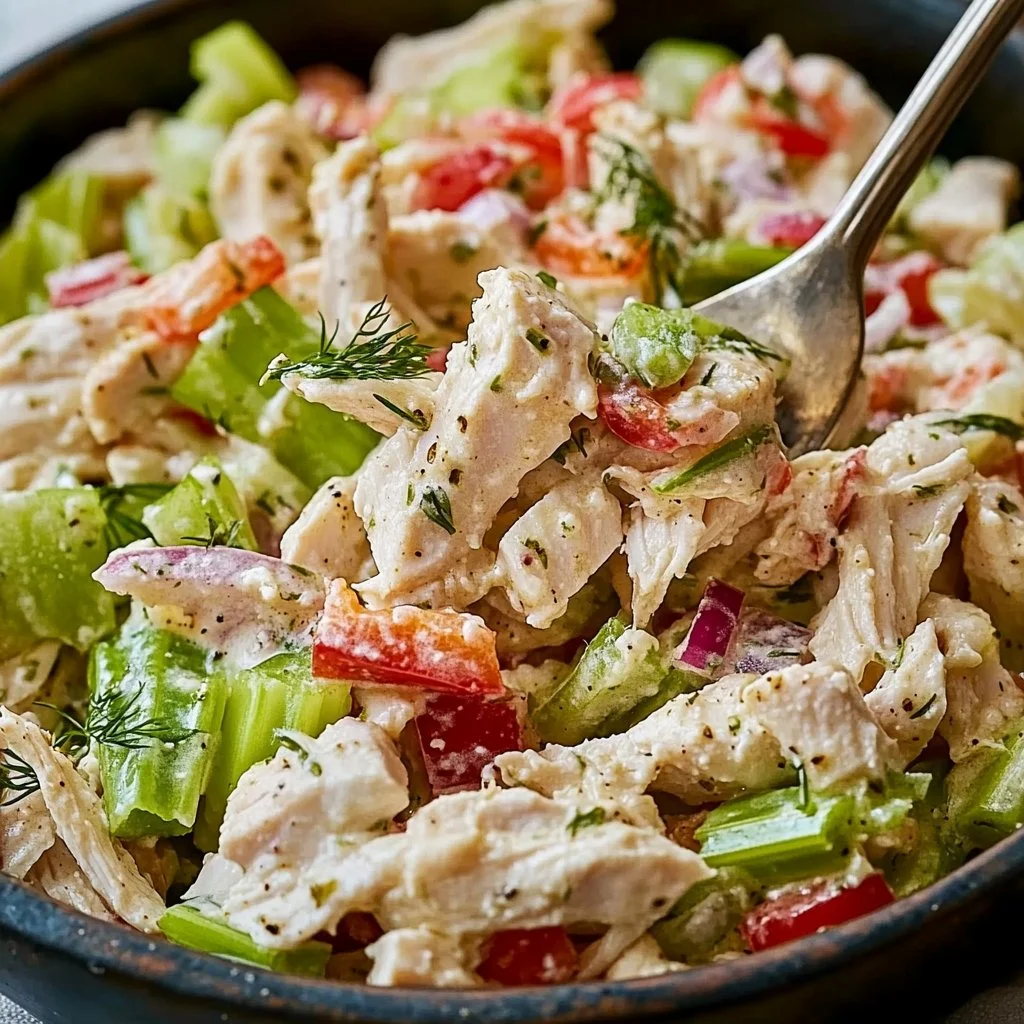
The smell of freshly cooked chicken fills the air, mixed with tangy feta and zesty peppers. It’s the sound of family coming together in the kitchen, laughter and chatter echoing off the walls. Cooking doesn’t just nourish our bodies; it nourishes our souls. Today, I’m excited to share a recipe that brings both flavor and protein to your table—a delightful Easy High Protein Feta Chicken Salad that the whole family will enjoy.

Why This Works
Easy High Protein Feta Chicken Salad

This salad is not only packed with protein but is also a fantastic meal prep option. With just a few simple ingredients, you can have a delicious dish ready in no time. It’s perfect for busy days when you still want to serve something healthy to your family.

Kids love it too, and that makes this recipe a winner in our household. You can transform the leftovers into wraps or sandwiches for lunch the next day. Not to mention, this dish is colorful and inviting, which makes it a hit on any table.

Process Overview

“This is where the magic happens—when the aroma fills the kitchen.”

Making this Easy High Protein Feta Chicken Salad is simple and rewarding. You start by gathering your ingredients, then combine them into a wonderful mix of flavors and textures. In no time, you’ll have a dish that not only satisfies the taste buds but also fills you up with wholesome goodness.

Ingredients

Here’s what you’ll need for this refreshing salad:

  1. 3 cups cooked shredded chicken

    • You can use rotisserie chicken for convenience, or cook your own. The more tender, the better!
  2. 1/4 cup diced celery

    • Adds a nice crunch. Use fresh celery for the best flavor.
  3. 1/4 cup red onion

    • For a bit of sharpness. Soaking the onion in cold water for a few minutes can mellow its flavor.
  4. 1/3 cup pepperocinis (chopped)

    • These bring a delightful tanginess that brightens every bite. Adjust the amount if you like it milder.
  5. 1/3 cup roasted red peppers (the jarred marinated kind, chopped)

    • These add sweetness and deepen the flavor profile. Make sure to drain them well.
  6. 1/4 cup mayo

    • This creaminess ties everything together. I recommend using a lighter mayo for a healthier option.
  7. 1/3 cup plain non-fat Greek yogurt

    • A protein booster that makes this salad creamy without adding a lot of fat.
  8. 1 tbsp hot honey

    • For a little kick. You can adjust the quantity based on your spice preference.
  9. 1 tbsp pepperoncini juice

    • This adds an extra zing. Be careful not to overdo it to keep the balance.
  10. 1 tbsp chopped fresh dill

    • Fresh herbs elevate the dish. If you don’t have fresh dill, use dried but cut back to one teaspoon.
  11. 1/2 tsp oregano

    • A lovely herb that complements the chicken beautifully.
  12. 1/2 tsp garlic powder

    • For a bit of savory depth. Fresh garlic would work too if finely minced.
  13. 1/2 tsp salt

    • Enhances the flavors of all the ingredients.
  14. 6 oz crumbled feta

    • The star of the show! Feta adds creaminess and a salty, rich flavor that you won’t want to skip.

With these simple ingredients, you are ready to create a mouth-watering salad that fits right into your family’s busy lifestyle.

Directions

Let’s get cooking! Follow these easy steps for the perfect feta chicken salad:

  1. In a large bowl, combine the cooked shredded chicken, diced celery, red onion, chopped pepperocinis, and roasted red peppers. Make sure everything is well distributed. This way, every bite is full of flavor.

  2. In a separate bowl, mix the mayo, Greek yogurt, hot honey, pepperoncini juice, chopped dill, oregano, garlic powder, and salt. This creamy dressing will bring the entire salad together beautifully. Give it a good whisk until it’s smooth.

  3. Pour the dressing over the chicken and vegetable mixture. Stir well until everything is evenly coated. Don’t rush; this is the key to a flavorful salad.

  4. Gently fold in the crumbled feta cheese. Be careful not to break it apart too much. You want those nice, creamy chunks.

  5. Taste and adjust seasoning if necessary. A little extra salt or pepper never hurt anyone!

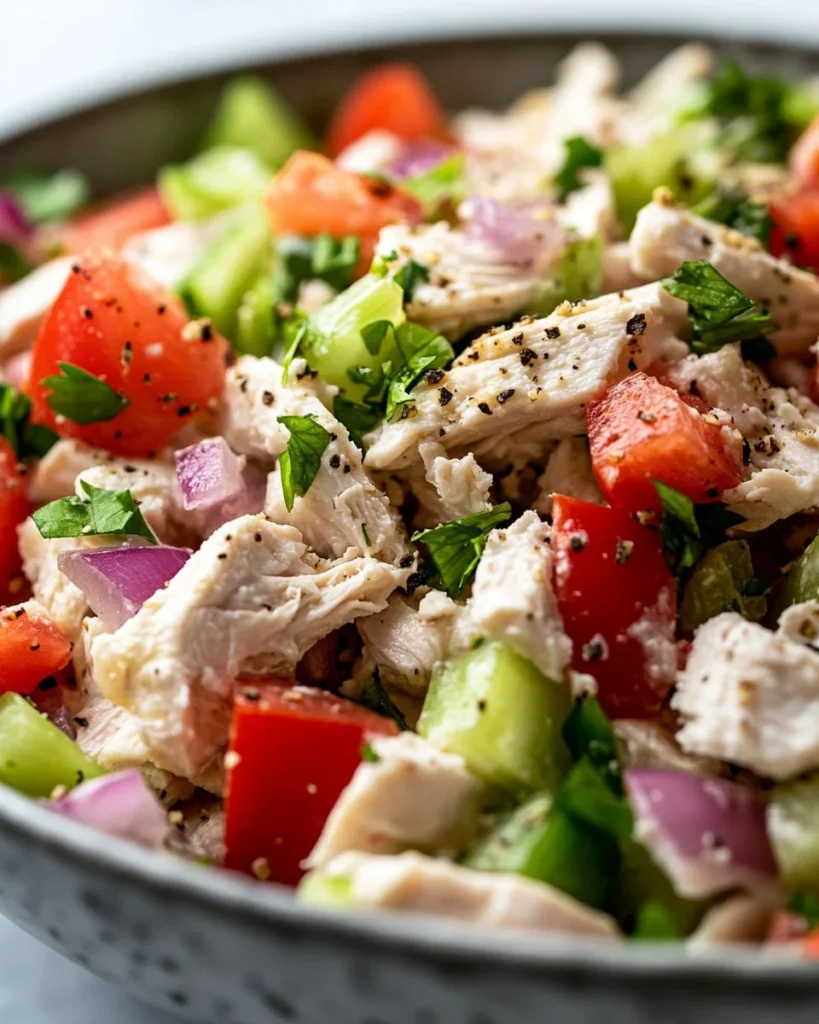
  6. Serve it fresh on a bed of greens, in a sandwich, or with your favorite crackers. Enjoy this hearty dish that’s sure to make your family smile!

Serving
Easy High Protein Feta Chicken Salad

This dish is perfect for family-style dining. Serve it in a large bowl so everyone can help themselves. You can pair it with a side of fresh veggies or a light green salad. It also goes great with whole grain crackers for an added crunch.

If you’re feeling creative, place the salad on a platter over a bed of mixed greens. You can also set out wraps and let each family member build their own. Kids love being part of the meal prep!

Storage

Leftover salad can be stored in an airtight container in the fridge for up to three days. When you’re ready to enjoy it again, scoop out what you need and hope for some leftovers to savor.

If you find it a bit dry after sitting in the fridge, add a touch more mayo or yogurt when you serve it. This will help restore its creaminess.

Kitchen Notes

Here are some shortcuts to speed up your cooking process:

  • Use rotisserie chicken: It saves time and effort. Just shred it up and you’re ready to go.

  • Pre-chop vegetables: If you have time during the week, chop your celery, onion, and peppers ahead of time and store them in the fridge.

  • Mix up the dressing in a jar: Combine the dressing ingredients in a jar and shake it up. It’s quick, and there’s less to clean!

  • Experiment with flavors: Add your favorite herbs or spices for a twist.

  • Double the batch: Make extra to have for the week. It’s perfect for lunch or a quick snack!

Variations

Taking care of picky eaters can be tricky. Here are a few tweaks:

  • Substitute the chicken: Use canned tuna or chickpeas for a different protein source. This makes it a great vegetarian option too!

  • Change the cheese: If feta isn’t a hit, try goat cheese or even shredded cheddar.

  • Add nuts or seeds: Throw in some sliced almonds or pumpkin seeds for an extra crunch.

  • Play with dressings: If yogurt-based sauces are a no-go, try a vinaigrette to keep it light.

  • Go low-carb: Serve it on lettuce wraps instead of bread for a refreshing twist.

FAQ

1. Can I make this salad ahead of time?
Absolutely! It stays fresh in the fridge for up to three days.

2. How can I make this dish gluten-free?
Simply serve it with gluten-free crackers or lettuce wraps instead of traditional bread.

3. What if I don’t have hot honey?
You can use regular honey if you prefer. Add a pinch of red pepper flakes for heat.

4. Can I use a different type of protein?
Yes, shredded turkey or even tofu can replace the chicken.

5. Is this dish suitable for meal prep?
Yes, it’s perfect for meal prep! Just portion it out into containers for the week.

Conclusion

Cooking together as a family can create beautiful memories. This Easy High Protein Feta Chicken Salad not only brings deliciousness to your table but is also a wonderful way to connect with your loved ones. Enjoy every bite together and remember, the best ingredient in any recipe is love. Happy cooking!

Feta Chicken Salad

Prep Time 15 minutes
Total Time 15 minutes
Servings 4 servings
Calories 350
A delicious and refreshing salad packed with protein, featuring tender chicken, tangy feta cheese, and vibrant vegetables, perfect for meal prep and family gatherings.

Ingredients

Main Ingredients

  • 3 cups cooked shredded chicken (Use rotisserie chicken for convenience.)
  • 1/4 cup diced celery (Use fresh celery for the best flavor.)
  • 1/4 cup red onion (Soak in cold water to mellow flavor.)
  • 1/3 cup pepperocinis (chopped) (Adjust amount for spiciness preference.)
  • 1/3 cup roasted red peppers (chopped) (Drain well before use.)
  • 1/4 cup mayo (Consider using lighter mayo for a healthier option.)
  • 1/3 cup plain non-fat Greek yogurt (Adds creaminess without much fat.)
  • 1 tbsp hot honey (Adjust quantity based on spice preference.)
  • 1 tbsp pepperoncini juice (Use carefully for balance.)
  • 1 tbsp chopped fresh dill (Dried dill can be used, reduce to 1 teaspoon.)
  • 1/2 tsp oregano (Complementary herb for chicken.)
  • 1/2 tsp garlic powder (Fresh garlic can be used, finely minced.)
  • 1/2 tsp salt (Enhances overall flavor.)
  • 6 oz crumbled feta (Adds creaminess and a rich flavor.)

Instructions 

Preparation

  • In a large bowl, combine the cooked shredded chicken, diced celery, red onion, chopped pepperocinis, and roasted red peppers. Make sure everything is well distributed.
  • In a separate bowl, mix the mayo, Greek yogurt, hot honey, pepperoncini juice, chopped dill, oregano, garlic powder, and salt. Whisk until smooth.
  • Pour the dressing over the chicken and vegetable mixture. Stir well until everything is evenly coated.
  • Gently fold in the crumbled feta cheese, taking care not to break it apart too much.
  • Taste and adjust seasoning if necessary.
  • Serve on a bed of greens, in a sandwich, or with crackers.

Notes

Leftover salad can be stored in an airtight container in the fridge for up to three days. If it becomes dry, add a touch more mayo or yogurt before serving.
Calories: 350kcal
Course: Lunch, Main Course, Salad
Cuisine: Mediterranean
Keyword: Chicken Salad, Feta Salad, Healthy Recipe, High Protein, meal prep

Easy Mediterranean diet recipes, healthy Mediterranean recipes, whole food recipes

There’s something special about gathering in the kitchen. The warmth of the oven, the soft sizzle from the skillet, and the smell of fresh herbs wafting through the air signal the start of a wonderful family meal. Cooking is a symphony of sights, sounds, and smells, all coming together to create something delightful. And today, we’re diving into a Mediterranean salad that’s as vibrant as it is nourishing.

Why This Works

Pin by Jessica Garcia on I N S A L A T A | Easy Mediterranean diet recipes, healthy Mediterranean recipes, whole food recipes

This Mediterranean salad is a game changer for busy families. It’s quick to throw together, bursting with flavor, and packed with nutrition. It showcases the goodness of fresh ingredients that not only please the palates of adults but also delight kids.

By prepping the ingredients ahead of time, you can serve this in under 30 minutes, making it an ideal choice for weeknight dinners or lunches. You’ll enjoy quality time with your loved ones, creating memories as you gather around the table to share a delicious meal.

Process Overview

“This is where the magic happens—when the aroma fills the kitchen.”

Crafting this Mediterranean salad is straightforward and rewarding. It involves chopping, mixing, and dressing, allowing you to enjoy the process as much as the end product. Each step builds anticipation and leads to a dish that’s fresh, flavorful, and beautiful.

Ingredients

Here’s what you’ll need to create this incredible Mediterranean salad, along with some of my personal tips.

  • 2 cups cherry tomatoes, halved
  • Use a mix of colors for a more vibrant dish.
  • 1 cucumber, diced
  • Choose an English cucumber for fewer seeds and a crisper texture.
  • 1 bell pepper (any color), diced
  • Bell peppers add sweetness and crunch.
  • 1/2 red onion, thinly sliced
  • Soak the sliced onion in cold water for a few minutes to mellow the flavor.
  • 1 cup Kalamata olives, pitted and halved
  • They bring a delicious briny flavor.
  • 1 cup feta cheese, crumbled (optional)
  • Use a block of feta for a creamier texture; crumble it yourself for freshness.
  • 1/4 cup fresh parsley, chopped
  • Fresh parsley elevates the flavor; use flat-leaf for the best taste.
  • 1/4 cup extra virgin olive oil
  • A good quality oil makes a significant difference in flavor.
  • 2 tablespoons red wine vinegar
  • This adds brightness and balances the richness of the olive oil.
  • Salt and pepper to taste
  • Season gradually; you can always add more.

Directions

  1. Prepare the Ingredients
  2. Start by washing all your fresh produce. This is an exciting step as all the colors come together.
  3. Chop the Vegetables
  4. Dice the tomatoes, cucumber, bell pepper, and onion. Aim for uniform sizes for even mixing.
  5. Combine in a Bowl
  6. In a large mixing bowl, combine the cherry tomatoes, cucumber, bell pepper, red onion, and olives. It is satisfying to see the vibrant colors blend together.
  7. Add Cheese and Herbs
  8. Gently fold in the feta and parsley. The addition of feta spreads creaminess throughout the salad.
  9. Prepare the Dressing
  10. In a small bowl, whisk together the olive oil, red wine vinegar, salt, and pepper. This simple dressing pulls all the flavors together.
  11. Dress the Salad
  12. Pour the dressing over the salad and toss gently. The aroma will be delightful, enticing everyone in the home.
  13. Taste and Adjust
  14. Take a moment to taste and adjust the seasoning if needed. This is where you can make it your own.
  15. Serve
  16. Transfer to a serving platter or bowl. Enjoy the look of happiness on your family’s faces as they see this colorful meal.

Serving

Pin by Jessica Garcia on I N S A L A T A | Easy Mediterranean diet recipes, healthy Mediterranean recipes, whole food recipes

To serve this Mediterranean salad family-style, arrange it on a large platter. This encourages sharing and brings everyone together around the table. You can also offer extra feta and olives on the side for those who want more. Pair it with grilled chicken or fish for a complete meal.

Storage

This salad is best enjoyed fresh but can hold up for a few days in the fridge. Store it in an airtight container to keep it crisp. If you have leftovers, feel free to add them to a wrap or sandwich for a tasty lunch. When reheating, add a drizzle of fresh olive oil for an extra burst of flavor.

Kitchen Notes

  • Batch Prep Ahead: Chop your vegetables ahead of time and store them in the fridge for quick access.
  • Dress Right Before Serving: To prevent sogginess, toss the salad with dressing right before serving.
  • Taste Test: Always taste your dressing before adding it to the salad, adjusting as needed.
  • Use Leftover Ingredients: This salad is great for using up any vegetables you have in your fridge.
  • Make it a Meal: Add protein like grilled chicken, chickpeas, or quinoa to make this a complete dish.

Variations

  • Picky Eaters: For kids who may be hesitant about certain veggies, try substituting cucumber with sweet corn and use mild cheese like mozzarella instead of feta.
  • Vegan Option: Omit the feta, or substitute with a plant-based cheese to keep it dairy-free.
  • Gluten-Free: This salad is naturally gluten-free, making it an excellent option for those following a gluten-free diet.
  • Extra Crunch: Add some chopped walnuts or sunflower seeds for a delightful crunch.
  • Herb Swaps: Swap parsley for basil or cilantro based on your family’s preferences for a different flavor profile.

FAQ

1. Can I make this salad the day before?

While it’s best fresh, you can prepare the ingredients a day in advance and mix them just before serving.

2. What can I use instead of Kalamata olives?

Any pitted olives will work! Green olives or even black olives will fit well in this salad.

3. How long will leftovers last?

If stored properly, leftovers can last for about 3 days in the refrigerator.

4. Can I add pasta to this salad?

Absolutely! Adding cooked pasta can turn it into a hearty meal. Just toss in the pasta after it cools down.

5. What’s the best way to chop vegetables quickly?

Using a sharp knife and a cutting board allows for safe and efficient chopping. You can also use a food processor for even quicker prep.

As you finish your culinary adventure, remember that meals made with love are the most memorable. Enjoy every bite of this Mediterranean salad, and savor the moments spent with your family around the table. Happy cooking!

Mediterranean Salad

Prep Time 15 minutes
Total Time 15 minutes
Servings 4 servings
Calories 250
A vibrant and nourishing Mediterranean salad that is quick to prepare, bursting with flavors, and enjoyable for both adults and kids alike.

Ingredients

Fresh Vegetables

  • 2 cups cherry tomatoes, halved (Use a mix of colors for a more vibrant dish.)
  • 1 piece cucumber, diced (Choose an English cucumber for fewer seeds and a crisper texture.)
  • 1 piece bell pepper (any color), diced (Bell peppers add sweetness and crunch.)
  • 1/2 piece red onion, thinly sliced (Soak the sliced onion in cold water for a few minutes to mellow the flavor.)

Salad Add-Ins

  • 1 cup Kalamata olives, pitted and halved (They bring a delicious briny flavor.)
  • 1 cup feta cheese, crumbled (Use a block of feta for a creamier texture; crumble it yourself for freshness.)
  • 1/4 cup fresh parsley, chopped (Use flat-leaf for the best taste.)

Dressing Ingredients

  • 1/4 cup extra virgin olive oil (A good quality oil makes a significant difference in flavor.)
  • 2 tablespoons red wine vinegar (This adds brightness and balances the richness of the olive oil.)
  • to taste salt and pepper (Season gradually; you can always add more.)

Instructions 

Preparation

  • Start by washing all your fresh produce.
  • Dice the tomatoes, cucumber, bell pepper, and onion, aiming for uniform sizes for even mixing.

Mixing

  • In a large mixing bowl, combine the cherry tomatoes, cucumber, bell pepper, red onion, and olives.
  • Gently fold in the feta and parsley.

Dressing

  • In a small bowl, whisk together the olive oil, red wine vinegar, salt, and pepper.
  • Pour the dressing over the salad and toss gently.
  • Taste and adjust the seasoning if needed.

Serving

  • Transfer to a serving platter or bowl, and enjoy!

Notes

This salad is best enjoyed fresh but can hold up for a few days in the fridge. Store it in an airtight container to keep it crisp. Dress right before serving to avoid sogginess.
Calories: 250kcal
Course: Light Meal, Salad, Side Dish
Cuisine: Healthy, Mediterranean
Keyword: Healthy Salad, Mediterranean Salad, Nourishing Salad, Quick Salad

Greek Sheet Pan Chicken

The kitchen wakes up first when this dish goes into the oven. You notice a bright lemon scent that mixes with warm oregano. The soft sizzle that starts on the sheet pan turns into a steady, comforting hum.

By the time the timer nears the end, you can hear small footsteps and the low murmur of family members gathering. The roasted vegetables send up caramelized notes. The chicken releases a rich, savory perfume that feels like home.

This Greek sheet pan chicken is one of those recipes that turns a busy weeknight into a moment. It is simple, soulful, and forgiving. It fills the house with familiar smells and brings everyone to the table.

Why this works

Greek Sheet Pan Chicken

This recipe works because it balances flavor, nutrition, and time. One pan means fewer dishes and more time to sit with your family. Olive oil, lemon, and oregano create a light but bold Mediterranean profile that appeals to picky eaters and adventurous palates alike.

The sheet pan method keeps everything together so the chicken flavors the vegetables and the vegetables add moisture to the chicken. Roasting at a consistent temperature lets sugars caramelize without drying out the meat. For busy families, a single tray that covers protein, veg, and seasoning is a small miracle.

I’ve cooked this style of meal countless times for my kids and friends. It reliably produces a satisfying dinner with minimal fuss, and it scales up easily for guests. If you want a comforting, family-friendly dinner with very little clean up, this is a go-to.

Process Overview

“This is where the magic happens—when the aroma fills the kitchen.”

The process is straightforward. You marinate, arrange, roast, and serve. Each stage enhances the final flavor: the quick lemon-oregano coating brightens the chicken, while the high roast temperature encourages caramelization on the vegetables.

You can prep the marinade and chop vegetables ahead of time. That means on a hectic day, your evening requires only a few minutes of hands-on work before the oven does the rest. The steps are forgiving, which helps you cook confidently.

Ingredients

  • 4 chicken thighs
    • Tip: Bone-in, skin-on thighs give the best texture and flavor. Trim excess fat if needed.
  • 2 cups mixed vegetables (bell peppers, zucchini, red onion, etc.)
    • Tip: Cut veggies to similar sizes so they roast evenly. Use what your family prefers.
  • 3 tablespoons olive oil
    • Tip: Use extra virgin for flavor, but any good olive oil will work. Toss evenly so everything browns.
  • 2 teaspoons dried oregano
    • Tip: If you have fresh oregano, use 1 tablespoon chopped for a brighter finish.
  • Juice of 1 lemon
    • Tip: Fresh lemon juice brightens the dish. Reserve a few wedges for serving.
  • Salt and pepper to taste
    • Tip: Season generously but taste after cooking. Chicken and roasted veg often need a final pinch.
  • Feta cheese (optional, for serving)
    • Tip: Crumble over the finished dish for a creamy, salty contrast. Omit for dairy-free families.

My personal note: Small choices make a difference. If you buy a whole chicken, you can use thighs and save the rest for another meal. I often double the vegetables because my kids love the charred peppers and onions.

Directions

  1. Preheat the oven to 400°F (200°C).

    • Encouragement: A hot oven is important here. While it heats, you can finish chopping and mixing. This short prep time feels satisfying.
  2. In a large bowl, combine the chicken thighs with olive oil, oregano, lemon juice, salt, and pepper.

    • Encouragement: Massage the marinade into the thighs so each piece is well coated. Let sit for 10 to 20 minutes if you have time; it deepens the flavor.
  3. Place the chicken on a sheet pan and scatter mixed vegetables around it.

    • Encouragement: Give the pieces a little space. Crowding can steam instead of roast. A single layer helps everything brown and crisp up.
  4. Roast in the oven for about 35-40 minutes, or until the chicken is cooked through and vegetables are caramelized.

    • Encouragement: Check at 30 minutes if your oven runs hot. The skin should be golden and the vegetables tender with browned edges. Use an instant-read thermometer if you like; chicken is safe at 165°F.
  5. Serve warm, optionally topped with feta cheese.

    • Encouragement: Let the pan rest 5 minutes before serving. Sprinkle feta and a squeeze of lemon over the top. Call everyone to the table and enjoy the simple, bright flavors together.

These directions are flexible. If you prefer a crispier skin, broil for 2 minutes at the end, watching closely. If you need the chicken to be extra moist, remove the vegetables a little earlier and let the chicken finish by itself.

Serving

Greek Sheet Pan Chicken

Serve this dish family-style right from the sheet pan. Place the pan in the center of the table with a trivet underneath. Provide serving spoons, a small bowl of lemon wedges, and a dish of crumbled feta for people to help themselves.

Pair the meal with a simple side like warm crusty bread or a quick couscous. A green salad or a bowl of olives keeps the Mediterranean theme. For little ones, plate smaller portions and offer plain rice or mashed potatoes if they need a familiar base.

Leftovers make a terrific lunch. I often slice the leftover chicken over a salad or toss the vegetables into an omelet. The flavors hold well, and reheated portions remain juicy if warmed properly.

Storage

Refrigerate within two hours of cooking. Store in an airtight container for up to 3 days. Keep the chicken and vegetables together or separate them if you plan to reheat differently.

To reheat in the oven, place onto a baking sheet at 350°F for 10-15 minutes until heated through. This method helps restore some crispness to the skin and re-caramelizes the vegetables.

For a quicker option, microwave on medium power in 30-second bursts, stirring between intervals. Add a splash of water or a drizzle of olive oil to keep the chicken moist. If freezing, wrap tightly and freeze for up to 2 months. Thaw overnight in the refrigerator before reheating.

Kitchen Notes

  • Use parchment paper or a silicone mat for easy cleanup and to prevent sticking.
  • If you prefer white meat, swap thighs for bone-in chicken breasts. Add a few extra minutes of cook time if needed.
  • Rotate the sheet pan halfway through cooking for more even browning.
  • For deeper flavor, marinate the chicken for up to 4 hours in the refrigerator.
  • Save pan drippings for a quick pan sauce. Deglaze with a little chicken stock and lemon, then spoon over the chicken.

These little tricks save time and lift the dish into something the whole family remembers.

Variations

  • Kid-Friendly: Use mild bell peppers, add sweet potato chunks, and reduce lemon slightly for a gentler tang.
  • Low-Carb: Double the non-starchy vegetables like zucchini and eggplant. Skip any starchy sides.
  • Gluten-Free: This dish is naturally gluten-free. Ensure any additional sides or seasoning blends are labeled gluten-free.
  • Dairy-Free: Omit the feta or offer a dairy-free crumbly cheese alternative for topping.
  • Spicy: Add 1/2 teaspoon crushed red pepper flakes to the marinade or a dusting of smoked paprika for a warm kick.

You can also switch herbs. Try a mix of thyme and rosemary for an earthy shift, or fresh dill for a brighter finish. These small swaps keep the base recipe familiar while tailoring it to your family’s tastes.

FAQ

Q: Can I use boneless chicken thighs or breasts?
A: Yes. Boneless thighs will cook a bit faster, usually around 25-30 minutes. Boneless chicken breasts may need about 25-30 minutes depending on thickness. Use an instant-read thermometer to ensure 165°F internal temperature.

Q: Can I make this for a crowd?
A: Absolutely. Use two sheet pans and rotate them in the oven if needed. You can also double the recipe and roast in batches. Keep cooked pans warm in a low oven until ready to serve.

Q: What vegetables work best?
A: Heartier vegetables like bell peppers, zucchini, red onion, cherry tomatoes, and small potatoes roast well together. Avoid watery vegetables like cucumbers that do not hold up to high heat.

Q: How do I prevent the chicken from drying out?
A: Choose bone-in, skin-on thighs for the most forgiving results. Do not overcook. Remove from the oven once the internal temperature reaches 165°F and let rest for 5 minutes.

Q: Can I prep this ahead of time?
A: Yes. Marinate the chicken and chop the vegetables up to 24 hours ahead. Store in separate airtight containers in the refrigerator and assemble just before roasting.

Conclusion

I hope this Greek sheet pan chicken becomes a weeknight favorite in your home. It is the kind of meal that brings comforting smells and easy conversation to the table, and it frees up time for the things that matter most.

For a slightly different but inspiring approach, I often compare notes with other cooks. I like the practical tips found in Downshiftology’s Greek Sheet Pan Chicken Dinner, and I also enjoy the flavor variations on The Mediterranean Dish’s Greek Sheet Pan Chicken.

Thanks for cooking with me. Put the pan on the table, invite everyone to serve themselves, and enjoy the little reunion that happens at dinner.

Greek Sheet Pan Chicken

Prep Time 20 minutes
Cook Time 40 minutes
Total Time 1 hour
Servings 4 servings
Calories 450
This Greek sheet pan chicken is a simple, flavorful weeknight meal that combines roasted chicken and vegetables seasoned with lemon and oregano, all in one pan for easy serving and minimal cleanup.

Ingredients

Main Ingredients

  • 4 pieces chicken thighs (Bone-in, skin-on thighs give the best texture and flavor. Trim excess fat if needed.)
  • 2 cups mixed vegetables (bell peppers, zucchini, red onion, etc.) (Cut veggies to similar sizes so they roast evenly. Use what your family prefers.)
  • 3 tablespoons olive oil (Use extra virgin for flavor, but any good olive oil will work. Toss evenly so everything browns.)
  • 2 teaspoons dried oregano (If you have fresh oregano, use 1 tablespoon chopped for a brighter finish.)
  • 1 piece lemon juice (Fresh lemon juice brightens the dish. Reserve a few wedges for serving.)
  • to taste salt and pepper (Season generously but taste after cooking. Chicken and roasted veg often need a final pinch.)
  • optional Feta cheese (Crumble over the finished dish for a creamy, salty contrast. Omit for dairy-free families.)

Instructions 

Preparation

  • Preheat the oven to 400°F (200°C).
  • In a large bowl, combine the chicken thighs with olive oil, oregano, lemon juice, salt, and pepper. Massage the marinade into the thighs so each piece is well coated.
  • Let sit for 10 to 20 minutes if you have time; it deepens the flavor.

Cooking

  • Place the chicken on a sheet pan and scatter mixed vegetables around it. Give the pieces a little space to help everything brown and crisp up.
  • Roast in the oven for about 35-40 minutes, or until the chicken is cooked through and vegetables are caramelized. Check at 30 minutes if your oven runs hot. The skin should be golden and the vegetables tender with browned edges.
  • Serve warm, optionally topped with feta cheese. Let the pan rest for 5 minutes before serving and sprinkle feta and a squeeze of lemon over the top.

Notes

Serve family-style right from the sheet pan. Pair with warm crusty bread or a green salad. Leftovers make a terrific lunch, and reheating them correctly retains moisture.
Calories: 450kcal
Course: Dinner, Main Course
Cuisine: Greek, Mediterranean
Keyword: Easy Dinner, Family Meal, Greek Chicken, Sheet Pan Chicken, Weeknight Cooking

Greek Chicken and Lemon Rice

The scent of lemon and oregano fills the air as the skillet sizzles gently on the stove. I love that sound, the little pops and sighs that mean dinner is underway. You can almost hear the family gathering, the clink of plates, the quiet questions about what smells so good.

This Greek chicken and lemon rice recipe is one of those meals that makes the whole kitchen feel like a hug. It is fragrant, simple, and comforting. I wrote this recipe after years of cooking for my kids and friends. It’s the kind of dish that keeps well, travels well to potlucks, and makes weeknights feel a lot less hectic.

Why this works

Greek Chicken and Lemon Rice

This dish hits the sweet spot between flavor and ease. The lemon brightens everything, while the oregano and garlic give a familiar, earthy taste that kids and adults both enjoy. The rice cooks in the same skillet as the chicken, so you get a pan full of flavor without extra dishes.

It also saves time and hands-on work. After a quick sear, the oven does the heavy lifting. That means you can tidy up, help with homework, or set the table while the oven finishes the job. For busy families, this one-pan approach keeps evenings peaceful and dinners delicious.

I test recipes for my family and my readers. Over the years I have learned small adjustments that make a difference. This version balances bright lemon with savory chicken and a tender, not mushy, rice texture.

Process Overview

“This is where the magic happens—when the aroma fills the kitchen.”

The process is simple. You season and sear the chicken to build flavor, then deglaze the pan with chicken broth and lemon. The rice simmers gently in that broth, soaking up all those browned bits and lemony notes. The oven finishes the cook so the chicken stays juicy and the rice cooks through evenly.

Cooking this way gives you a layered flavor profile with minimal effort. If you follow the steps, you will have a comforting, family-friendly meal in under an hour.

Ingredients

  • 4 boneless, skinless chicken breasts
    Lily’s tip: Choose similar-sized breasts so they cook evenly. If they are thick, pound them gently to an even thickness for quicker, more consistent cooking.

  • 2 tablespoons olive oil
    Lily’s tip: Use a good-quality extra virgin olive oil for flavor. If you need a higher smoke point, use light olive oil.

  • 1 teaspoon dried oregano
    Lily’s tip: Dried oregano is more concentrated than fresh. If you have fresh oregano, use 1 tablespoon chopped instead.

  • 1 teaspoon garlic powder
    Lily’s tip: Garlic powder adds gentle, even flavor. For a fresher note, add one crushed garlic clove to the pan when deglazing.

  • 1 teaspoon onion powder
    Lily’s tip: Onion powder boosts savory depth without adding texture. It is great when picky eaters do not like visible chopped onions.

  • 1 teaspoon lemon zest
    Lily’s tip: Zest a lemon before juicing it. The zest releases oils that brighten the dish more than juice alone.

  • 1/4 cup lemon juice
    Lily’s tip: Fresh lemon juice is best. Bottled works in a pinch but lacks brightness.

  • 2 cups chicken broth
    Lily’s tip: Use low-sodium broth so you can control the salt. If using homemade broth, taste it first and adjust salt later.

  • 1 cup long-grain rice
    Lily’s tip: Long-grain rice stays fluffy and separate. Rinse it under cold water to remove excess starch for a less sticky result.

  • 1/2 teaspoon salt
    Lily’s tip: This is a baseline. If your broth is already salted, reduce the added salt and taste before serving.

  • 1/4 teaspoon black pepper
    Lily’s tip: Freshly ground pepper makes a subtle difference. Add more at the table if someone likes a kick.

  • 1 tablespoon fresh parsley, chopped
    Lily’s tip: Parsley adds color and freshness at the end. Flat-leaf parsley works best for flavor.

I use simple pantry staples and fresh lemon for brightness. These ingredients keep well and are easy to find year-round. The tips come from years of cooking for children who prefer familiar textures and adults who like bold flavor.

Directions

  1. Preheat your oven to 375°F (190°C).
    Encouragement: Give yourself a moment to set the timer and gather ingredients while the oven warms. This little step starts the rhythm.

  2. Pat the chicken breasts dry with paper towels to remove any excess moisture.
    Encouragement: Dry chicken sears better. A quick pat ensures a golden crust.

  3. Rub both sides of each chicken breast with olive oil.
    Encouragement: The oil helps the seasonings stick and keeps the meat juicy. Be generous but not greasy.

  4. Season the chicken breasts with dried oregano, garlic powder, onion powder, lemon zest, salt, and black pepper.
    Encouragement: Press the seasoning gently into the meat. This is where flavor begins to build.

  5. Heat a large oven-safe skillet over medium-high heat.
    Encouragement: Give the skillet a minute to get hot. A properly heated pan creates a nice sear.

  6. Once the skillet is hot, add the seasoned chicken breasts to the skillet.
    Encouragement: Place the chicken away from you to avoid splatters. Hear that satisfying sizzle.

  7. Cook the chicken breasts for about 4-5 minutes on each side, or until golden brown.
    Encouragement: Resist the urge to move the chicken too soon. Let it form a crust for the best flavor.

  8. Once browned, remove the chicken from the skillet and set it aside on a plate.
    Encouragement: Do not worry if the chicken is not fully cooked. The oven will finish it while the rice cooks.

  9. Add the chicken broth to the skillet, scraping up any browned bits from the bottom of the pan with a wooden spoon.
    Encouragement: Those browned bits are flavor gold. Scrape them up to flavor the rice.

  10. Stir in the lemon juice and bring the broth to a simmer.
    Encouragement: The lemon brightens the whole pan. Let it bloom for a minute in the warm broth.

  11. Add the rice to the skillet, stirring to ensure the rice is evenly distributed.
    Encouragement: Spread the rice into an even layer so it cooks uniformly. Stirring helps it soak up the liquid.

  12. Place the chicken breasts back into the skillet on top of the rice.
    Encouragement: Nestle them gently so the rice cooks under the chicken and absorbs juices.

  13. Cover the skillet with a lid or foil and transfer it to the preheated oven.
    Encouragement: This is the hands-off part. Clean up while the oven does the rest.

  14. Bake for 20-25 minutes, or until the rice is cooked through and the chicken reaches an internal temperature of 165°F (74°C).
    Encouragement: Use a thermometer for peace of mind. The right temperature keeps chicken safe and tender.

  15. Remove the skillet from the oven and let it sit, covered, for 5 minutes.
    Encouragement: Resting helps the juices redistribute. It also makes serving neater.

  16. Sprinkle the chopped fresh parsley over the chicken and rice before serving.
    Encouragement: A fresh green touch makes the dish sing. Children often enjoy helping with this final step.

  17. Serve the chicken and lemon rice warm, garnished with additional parsley if desired.
    Encouragement: Call the family. This meal is best enjoyed fresh and shared around the table.

Follow these steps and you will have a flavorful, homey meal that feels special without a lot of fuss.

Serving

Greek Chicken and Lemon Rice

This recipe shines when served family-style. Bring the skillet to the table, place a bowl of lemon wedges nearby, and let everyone help themselves. The visual of the golden chicken resting on bright, lemony rice is inviting.

Pair it with a simple green salad or roasted vegetables. A side of steamed broccoli or a Greek salad keeps the meal balanced and colorful. For a little extra richness, offer crumbled feta at the table.

I like to serve this with warm pita or crusty bread. Guests enjoy scooping rice and sauce into bread for a satisfying bite. Serving family-style makes dinner feel less formal and more like the cozy gatherings I grew up with.

Storage

Cool leftovers promptly and store in an airtight container in the refrigerator for up to 3 days. The rice will continue to absorb liquid, so it may seem drier after refrigeration.

To reheat, add a splash of chicken broth or water to the skillet or microwave-safe dish to loosen the rice. Cover loosely and reheat in a 350°F oven for 10-12 minutes, or microwave on medium power in 1-minute bursts until hot. Add a squeeze of fresh lemon before serving to revive the brightness.

You can also freeze portions. Place cooled portions in freezer-safe containers and freeze for up to 2 months. Thaw overnight in the refrigerator before reheating as described.

Kitchen Notes

  • Use an oven-safe skillet so you can sear on the stovetop and finish in the oven without extra dishes.
  • Rinse long-grain rice under cold water to remove starch and keep grains separate.
  • If chicken breasts vary in size, slice thicker ones in half horizontally for even cooking.
  • Low-sodium broth gives you better control over the dish’s salt level. Taste before adding more salt.
  • A meat thermometer is a small tool that saves stress and avoids overcooking.

These shortcuts save time and keep flavor consistent. Over time, you will find little adjustments that fit your family’s tastes.

Variations

  • For picky eaters: Leave out the lemon zest in the seasoning mix and add lemon wedges at the table so each person can choose their level of tang.
  • For a low-carb option: Serve the seasoned chicken over cauliflower rice. Sear and finish in the oven as directed, but check cauliflower rice sooner as it cooks faster.
  • For extra vegetables: Stir 1 cup of diced bell peppers or peas into the rice before baking. They add color and nutrition without extra effort.
  • For a dairy twist: Sprinkle 1/2 cup crumbled feta over the dish in the last 5 minutes of baking so it softens but does not completely melt.
  • For a heartier meal: Use bone-in chicken thighs instead of breasts. Increase bake time to ensure thighs are cooked through and the internal temperature reaches 165°F.

These variations let you tailor the meal to diets, seasons, and pantry items. I often switch things up depending on what my kids will eat that week.

FAQ

Q: Can I use brown rice instead of long-grain white rice?
A: Yes, but brown rice needs more liquid and a longer cooking time. Use about 2 1/2 cups broth and increase oven time by 20-25 minutes. Check for tenderness.

Q: Can I make this on the stovetop only?
A: You can. After adding the rice and replacing the chicken, reduce heat to low, cover tightly, and simmer for 20-25 minutes until the rice is tender and the chicken reaches 165°F.

Q: How do I prevent the rice from sticking to the pan?
A: Use a well-heated skillet and scrape up browned bits before adding the liquid. Rinsing the rice helps too. Also watch liquid ratio closely and avoid lifting the lid often during baking.

Q: Is this recipe freezer friendly?
A: Yes. Cool the dish completely, portion into freezer-safe containers, and freeze for up to 2 months. Thaw overnight in the fridge before reheating.

Q: Can I use thighs instead of breasts for more flavor?
A: Absolutely. Bone-in thighs add richness. Brown them well, and increase oven time until they reach 165°F and the rice is tender.

Conclusion

I hope this Greek chicken and lemon rice becomes one of your go-to weeknight recipes. It is forgiving, full of flavor, and perfect for sharing around the table with people you love. Cooking for my family taught me that good meals do not have to be complicated to be memorable.

For another one-pot take with similar flavors, I like to compare versions and techniques from trusted recipe developers. You can see a bright, quick version at Julia’s Album Greek Chicken and Lemon Rice (30 Minutes, One-Pot) and a hearty approach at RecipeTin Eats One Pot Greek Chicken and Lemon Rice for inspiration.

Happy cooking from my kitchen to yours. Enjoy the aroma, the conversation, and the moments that happen over a shared plate.

Greek Chicken and Lemon Rice

Prep Time 10 minutes
Cook Time 25 minutes
Total Time 35 minutes
Servings 4 servings
Calories 450
A fragrant, one-pan meal featuring seasoned chicken breasts and lemon-infused rice that makes weeknight dinners comforting and easy.

Ingredients

Main Ingredients

  • 4 pieces boneless, skinless chicken breasts (Choose similar-sized breasts for even cooking.)
  • 2 tablespoons olive oil (A good-quality extra virgin olive oil is best.)
  • 1 teaspoon dried oregano (If using fresh, use 1 tablespoon chopped instead.)
  • 1 teaspoon garlic powder (For a fresher flavor, use one crushed garlic clove.)
  • 1 teaspoon onion powder (Boosts savory depth without adding texture.)
  • 1 teaspoon lemon zest (Zest before juicing for better flavor.)
  • 1/4 cup lemon juice (Fresh lemon juice is preferred.)
  • 2 cups chicken broth (Use low-sodium to control salt level.)
  • 1 cup long-grain rice (Rinse to remove excess starch.)
  • 1/2 teaspoon salt (Taste broth before adding additional salt.)
  • 1/4 teaspoon black pepper (Freshly ground adds more flavor.)
  • 1 tablespoon fresh parsley, chopped (Adds freshness and color just before serving.)

Instructions 

Preparation

  • Preheat your oven to 375°F (190°C).
  • Pat the chicken breasts dry with paper towels.
  • Rub both sides of each chicken breast with olive oil.
  • Season the chicken breasts with oregano, garlic powder, onion powder, lemon zest, salt, and pepper.
  • Heat a large oven-safe skillet over medium-high heat.
  • Once hot, add the seasoned chicken breasts to the skillet.
  • Cook the chicken for about 4-5 minutes on each side until golden brown.
  • Remove the chicken from the skillet and set aside.

Cooking

  • Add chicken broth to the skillet, scraping up any browned bits from the bottom.
  • Stir in the lemon juice and bring to a simmer.
  • Add the rice, stirring to ensure it is evenly distributed.
  • Place the chicken back into the skillet on top of the rice.
  • Cover with a lid or foil and transfer to the oven.
  • Bake for 20-25 minutes, until rice is cooked and chicken reaches an internal temperature of 165°F (74°C).
  • Remove from oven and let sit covered for 5 minutes.
  • Sprinkle with parsley before serving.

Serving

  • Serve warm, garnished with additional parsley if desired.

Notes

Cool leftovers promptly and store in an airtight container in the refrigerator for up to 3 days. The rice may seem drier after refrigeration. To reheat, add a splash of broth or water, cover, and heat in the oven or microwave.
Calories: 450kcal
Course: Dinner, Main Course
Cuisine: Greek
Keyword: Comfort Food, Family Meal, Greek Chicken, Lemon Rice, One-Pan Dinner

Chicken Shawarma with Garlic Sauce

The smell of warm spices hits you first. Cumin and paprika rise as the chicken sizzles and the kitchen comes alive. You hear the gentle hiss from the skillet and the soft chatter of family in the next room.

This Chicken Shawarma with Garlic Sauce recipe is one of my favorites to make for a busy weeknight or a relaxed Sunday dinner. As a professional food blogger and mom, I love a dish that brings my family together and fills the house with inviting aromas. If you are short on time but want full flavor, you are in the right place. For more fast family meals, I often draw inspiration from my collection of quick weeknight chicken ideas here.

Why this works

Chicken Shawarma with Garlic Sauce

This version of chicken shawarma keeps things simple and reliable. The spice mix is warm and familiar, and the olive oil helps the spices cling to the chicken so every bite is flavored. It is a time-saver because the marinade needs only 30 minutes for great results, and the chicken cooks quickly.

Family-style meals are at the heart of this recipe. Set out pita, veggies, and garlic sauce and let everyone build their own wraps. It makes dinner interactive and stress-free. If you love crispy edges on your chicken, you can also check my favorite air fryer tricks for getting great texture here.

Process Overview

“This is where the magic happens—when the aroma fills the kitchen.”

The method is straightforward. Marinate, cook, rest, slice, warm pita, and assemble. Each step is quick and rewarding, and the garlic sauce pulls everything together. For a playful twist that kids love, try serving smaller sandwich sliders inspired by my Bang Bang Chicken Sliders recipe here.

Ingredients

  • 1 lb chicken thighs, boneless and skinless
    Tip: Thighs stay juicy and handle the high heat well. Trim excess fat and pat dry for better browning.

  • 2 tablespoons olive oil
    Tip: Extra virgin olive oil adds fruitiness. Use a neutral oil if you plan to cook on very high heat.

  • 2 teaspoons ground cumin
    Tip: Toast in a dry pan for 30 seconds if you want a deeper aroma before mixing into the marinade.

  • 2 teaspoons ground paprika
    Tip: Sweet paprika gives color. Use smoked paprika for a smoky note if your kids tolerate it.

  • 1 teaspoon ground turmeric
    Tip: Turmeric adds color and warmth. Use fresh turmeric powder for the brightest hue.

  • 1 teaspoon ground coriander
    Tip: Coriander adds citrusy notes. If possible, grind whole seeds for more fragrance.

  • Salt and pepper, to taste
    Tip: I use 1 teaspoon kosher salt for this amount of chicken, then adjust after tasting.

  • 4 pita breads
    Tip: Warm them briefly on the skillet to make them more pliable and aromatic.

  • 1 cup lettuce, shredded
    Tip: Romaine or green leaf stay crisp and give a nice crunch.

  • 1 tomato, diced
    Tip: Choose a ripe, firm tomato. Drain excess seeds if you want less moisture.

  • 1/2 cucumber, sliced
    Tip: English cucumbers need no peeling. For extra crunch, slice thin and salt lightly.

  • 1/2 red onion, thinly sliced
    Tip: Soak sliced onion in cold water for 10 minutes if you want a milder bite.

  • 1/2 cup garlic sauce
    Tip: A creamy garlic sauce is essential. I often use a homemade toum or a jarred version on busy nights. For my preferred garlic method and extra tips, check my crunchy mozzarella wrap inspiration and sauce ideas here.

Directions

  1. In a bowl, mix olive oil, cumin, paprika, turmeric, coriander, salt, and pepper. Add chicken and coat well. Marinate for at least 30 minutes.
    Encouraging note: Even a short 30-minute soak lets the spices do their work. If you have more time, marinate overnight for deeper flavor.

  2. Preheat grill or skillet over medium-high heat. Cook chicken until browned and cooked through, about 5-7 minutes per side.
    Encouraging note: Use a hot pan for good color. You want a nice sear without overcooking, so keep an eye on the edges.

  3. Remove chicken and let rest for a few minutes, then slice.
    Encouraging note: Resting keeps the juices inside. Slice against the grain for tender pieces that are easier for kids to eat.

  4. Warm pita breads on the grill or in a skillet.
    Encouraging note: Warm, soft pita wraps better and smells amazing. Wrap stacked pitas in foil to keep them warm while you finish.

  5. Assemble shawarma by adding sliced chicken, lettuce, tomato, cucumber, and red onion to pita.
    Encouraging note: Let everyone choose their toppings. This is a great way to involve kids in assembly and reduce mealtime fuss.

  6. Drizzle garlic sauce on top and serve.
    Encouraging note: Finish with a squeeze of lemon or a sprinkle of parsley for brightness. Serve family-style and enjoy the smiles.

If you prefer to cook in the air fryer, you can adapt step 2 by checking my air fryer tips for cook times and crisping options here.

Serving

Chicken Shawarma with Garlic Sauce

Serve this shawarma family-style on a large board or platter. Place the warm pita in a basket or wrapped in foil, set the sliced chicken in the center, and bowl the garlic sauce, lettuce, tomatoes, cucumbers, and onions around it. This makes it easy for everyone to build their own wrap.

Add simple sides like a light salad, roasted potatoes, or pickled vegetables. For kids, cut the pita into smaller pieces and offer cucumber sticks on the side. A communal setup keeps dinner relaxed and friendly.

Storage

Leftovers store well and make great lunches. Place cooled chicken in an airtight container and refrigerate for up to 3 days. Keep the garlic sauce separate to prevent the pita from getting soggy.

To reheat, warm slices gently in a skillet over medium heat for 2 to 3 minutes, or pop them in the oven at 350° F for 5 to 7 minutes. If using an air fryer, 3 to 4 minutes at 350° F will refresh the edges without drying the meat. Reheat pita wrapped in foil or briefly on a hot skillet.

If you plan to meal prep, assemble bowls instead of wraps. Layer rice or greens, add warmed sliced chicken, and top with veggies and garlic sauce when ready to eat. For more make-ahead chicken ideas, I recommend my air fryer favorites here.

Kitchen Notes

  • Use boneless skinless thighs for juiciness and forgiving cooking times.
  • If you prefer white meat, chicken breasts work fine but reduce cook time slightly.
  • Make the garlic sauce in advance. It keeps the meal assembly quick.
  • Swap pita for flatbreads, wraps, or a simple rice bowl if you have picky eaters.
  • Double the recipe for easy leftovers that reheat well for lunches.

Variations

  • For picky eaters: Offer plain grilled chicken pieces alongside the spiced version. Serve toppings on the side so each person customizes their pita.
  • For low-carb: Serve over greens or cauliflower rice instead of pita. The flavors are unchanged and satisfying.
  • For a smoky twist: Use smoked paprika and finish the chicken with a quick broil to add char.
  • For spicy lovers: Add 1/4 teaspoon cayenne or a drizzle of hot sauce to the marinade.
  • For vegetarian guests: Swap chicken with grilled halloumi or roasted chickpeas seasoned with the same spice mix.

FAQ

Q: Can I use chicken breasts instead of thighs?
A: Yes. Chicken breasts will cook faster and can dry out if overcooked. Reduce cook time and check internal temperature for doneness.

Q: How long can I keep the garlic sauce in the fridge?
A: Homemade garlic sauce lasts about 1 week refrigerated. Store-bought brands often have longer shelf life; follow the label.

Q: Is this recipe spicy?
A: Not by default. The spices are aromatic rather than hot. You can add cayenne or chili flakes to the marinade for heat.

Q: Can I marinate the chicken overnight?
A: Absolutely. Overnight marinating deepens the flavor and is great for meal prep. Keep it covered in the fridge.

Q: Can I make this ahead for a party?
A: Yes. Cook the chicken ahead, slice, and warm just before serving. Set up a build-your-own station so guests can assemble wraps.

Conclusion

Thank you for cooking with me today. I hope this Chicken Shawarma with Garlic Sauce becomes a fast favorite in your weekly rotation. If you want a tried-and-true garlic sauce technique, I love the detailed toum method at Homemade Lebanese Toum recipe at Feel Good Foodie. For another reliable shawarma reference and extra inspiration, see the classic Chicken Shawarma guide at Chicken Shawarma recipe at RecipeTin Eats.

From my kitchen to yours, happy cooking and warm dinners around your table. — Lily

Chicken Shawarma with Garlic Sauce

Prep Time 30 minutes
Cook Time 15 minutes
Total Time 45 minutes
Servings 4 servings
Calories 450
A simple and flavorful chicken shawarma recipe served with garlic sauce, perfect for family-style meals.

Ingredients

Marinade Ingredients

  • 1 lb chicken thighs, boneless and skinless (Trim excess fat and pat dry for better browning.)
  • 2 tablespoons olive oil (Use extra virgin olive oil for added flavor.)
  • 2 teaspoons ground cumin (Toast in a dry pan for a deeper aroma.)
  • 2 teaspoons ground paprika (Sweet or smoked paprika can be used.)
  • 1 teaspoon ground turmeric (Use fresh turmeric powder for a brighter hue.)
  • 1 teaspoon ground coriander (Grind whole seeds for more fragrance.)
  • 1 teaspoon salt (Adjust after tasting.)
  • to taste none pepper (Use as per preference.)

Wrap Ingredients

  • 4 pieces pita breads (Warm them briefly for better folding.)
  • 1 cup lettuce, shredded (Romaine or green leaf recommended.)
  • 1 piece tomato, diced (Choose a ripe, firm one.)
  • 1/2 piece cucumber, sliced (English cucumbers need no peeling.)
  • 1/2 piece red onion, thinly sliced (Soak in cold water for a milder bite.)
  • 1/2 cup garlic sauce (Use homemade or jarred for convenience.)

Instructions 

Marinating Chicken

  • In a bowl, mix olive oil, cumin, paprika, turmeric, coriander, salt, and pepper. Add chicken and coat well. Marinate for at least 30 minutes.

Cooking Chicken

  • Preheat grill or skillet over medium-high heat. Cook chicken until browned and cooked through, about 5-7 minutes per side.
  • Remove chicken and let rest for a few minutes, then slice.

Preparing Pita

  • Warm pita breads on the grill or in a skillet.

Assembling Shawarma

  • Assemble shawarma by adding sliced chicken, lettuce, tomato, cucumber, and red onion to pita.
  • Drizzle garlic sauce on top and serve.

Notes

Leftovers store well for up to 3 days. Reheat gently for the best results. Involve kids in wrapping to reduce mealtime fuss. Can also adapt for air fryer cooking.
Calories: 450kcal
Course: Dinner, Main Course
Cuisine: Mediterranean, Middle Eastern
Keyword: chicken shawarma, Family Meal, garlic sauce, quick recipe, Weeknight Dinner

If you're anything like me, there's nothing quite as satisfying as a dish that tantalizes your taste buds and fills your kitchen with the irresistible aroma of garlic. I’ve rounded up my top nine garlic chicken recipes that are not only bursting with flavor but also incredibly easy to prepare. Whether you're in the mood for something cheesy, creamy, or packed with herbs, I've got you covered! Each recipe promises to transform your everyday meals into something special, so get ready to impress your family and friends with delicious, flavor-packed dishes that you'll want to make again and again.

1. Cheesy Garlic Chicken Wraps

Cheesy Garlic Chicken Wraps

There's nothing quite like the comforting aroma of garlic and butter wafting through the kitchen, especially on a rainy evening filled with laughter and love. Dive into the world of Cheesy Garlic Chicken Wraps—a recipe that brings a cozy vibe straight to your dining table. With gooey, melted cheese and savory chicken enveloped in warm tortillas, these wraps are not just a meal; they’re a hug for your taste buds. Join me as we explore how this recipe can transform your family dinners into delightful memories, packed with flavor and nostalgia.

View Recipe →

2. Chicken Shawarma with Garlic Sauce

Chicken Shawarma with Garlic Sauce

If you’re craving a dish that brims with flavor and brings the family together, look no further than Chicken Shawarma with Garlic Sauce! This recipe transforms busy weeknights into culinary adventures, filling your kitchen with the irresistible aroma of spices while making dinner a breeze. With tender, grilled chicken and a creamy garlic sauce that packs a punch, you’ll discover how easy it is to enjoy a taste of Middle Eastern cuisine right at home—perfect for quick meals or leisurely Sunday feasts. Dive into the full recipe and elevate your next dinner experience!

View Recipe →

3. Cheesy Garlic Chicken Wraps

Cheesy Garlic Chicken Wraps

If you're searching for a dish that combines comfort with quick preparation, look no further than Cheesy Garlic Chicken Wraps! This delightful recipe brings the warmth of your kitchen to the dinner table, making it an easy favorite for families of all sizes. With the irresistible aroma of garlic and melting cheese mingling in the air, you'll quickly discover why this meal will have everyone eagerly requesting it again. Dive into this article for a tasty solution that promises not just flavor, but also the joy of family togetherness over a simple yet special dinner.

View Recipe →

4. Sheet Pan Garlic Butter Chicken and Veggies

Sheet Pan Garlic Butter Chicken and Veggies

Imagine opening your oven to the rich aroma of garlic and butter wafting through your kitchen, instantly warming your heart and home. This Sheet Pan Garlic Butter Chicken and Veggies is not just a meal; it's a weeknight lifesaver that marries convenience with comfort, offering a delightful blend of tender chicken and vibrant roasted vegetables—all in one easy-to-clean pan! Dive into this recipe to discover how to create a comforting family dinner that will have everyone asking for seconds. Plus, don't miss out on other quick and tasty options like Bang Bang Chicken Sliders for your next culinary adventure!

View Recipe →

5. Garlic Herb Chicken

Garlic Herb Chicken

Imagine a bustling weeknight transformed into a cozy family gathering with just one simple recipe: Garlic Herb Chicken. This succulent dish fills your kitchen with the mouthwatering aromas of garlic and butter while delivering flavors that will make everyone at the table smile. With its easy preparation and comforting taste, this meal not only makes dinner a breeze but also creates lasting memories. Ready to turn your next dinner into a cherished family moment? Dive into our guide to discover how to whip up this crowd-pleaser that will have your loved ones asking for seconds!

View Recipe →

6. Garlic Butter Chicken Crockpot Recipe: 6-Hour Magic for Tender Bliss

Garlic Butter Chicken Crockpot Recipe: 6-Hour Magic for Tender Bliss

Are you ready to transform your weeknight dinners into a culinary delight with minimal effort? This Garlic Butter Chicken Crockpot Recipe promises just that—tender, flavorful chicken swimming in a luscious garlic-butter sauce, all achieved with the magic of slow cooking. Perfect for busy families, this dish will have your kitchen smelling divine and your loved ones gathering around the table for a heartwarming meal. Dive into this easy, comforting recipe that brings together taste and convenience, and discover why it's bound to become a staple in your household!

View Recipe →

7. Creamy Garlic Parmesan Chicken Breast

Creamy Garlic Parmesan Chicken Breast

Imagine stepping into your kitchen and being enveloped by the enticing aroma of garlic and butter, all while creating a dinner that feels like a warm hug. This Creamy Garlic Parmesan Chicken Breast recipe is your ticket to a quick yet indulgent meal, where tender chicken and a luscious sauce come together effortlessly in one pan. With its blend of comforting flavors and speedy preparation, this dish promises to become a favorite that will draw friends and family to the table, eager to savor every bite. Ready to elevate your weeknight dinners? Dive into this recipe for a delightful, home-cooked experience!

View Recipe →

8. Creamy Garlic Mushroom Chicken Thighs

Creamy Garlic Mushroom Chicken Thighs

Imagine stepping into your kitchen and being enveloped by the irresistible aroma of garlic and butter, hinting at a delightful family dinner waiting to happen. With this Creamy Garlic Mushroom Chicken Thighs recipe, you'll create a comforting meal that's not just easy to whip up but also feels indulgent enough for a special occasion. In just a few simple steps, you can have a dish that wraps your loved ones in warmth and flavor, making it a perfect addition to your weekly dinner rotation. Ready to impress? Let’s dive in!

View Recipe →

9. Crockpot Garlic Parmesan Chicken Thighs

Crockpot Garlic Parmesan Chicken Thighs

Imagine stepping into your kitchen to the warm, inviting aroma of garlic and butter, signaling that dinner is about to become a comforting reality. This Crockpot Garlic Parmesan Chicken Thighs recipe not only makes your home smell incredible but also brings your family closer together as they reach for seconds at the dining table. Perfect for busy evenings, this dish does most of the work while you enjoy quality time with your loved ones, making mealtime a breeze. Get ready to impress everyone with minimal effort—let’s dive into this easy, delicious recipe that promises a satisfying dining experience for all!

View Recipe →

chicken and spinach recipes are the kind of lifesaver I reach for when it is 6 pm, I am hungry, and I do not want a sink full of dishes staring me down. You know that moment when you want something cozy and filling, but you also want it to feel a little fresh? That is exactly where chicken plus spinach comes in. It is hearty, it tastes like real dinner, and it still has a pop of green that makes you feel like you tried. Today I am sharing my go to creamy spinach chicken situation that my family requests on repeat.
Hearty and Flavorful Chicken and Spinach Recipes Everyone Will Love

30-minute one-pot recipe

This is my weeknight hero: creamy chicken with spinach, made in one pot, done in about 30 minutes if you are moving at a normal human pace. I am not talking about a fussy, restaurant style sauce either. It is simple, cozy, and forgiving. And yes, it fits right into the whole “hearty and flavorful chicken and spinach recipes everyone will love” vibe without making you do anything complicated.

What you will need

  • Chicken (about 1.5 pounds, see the next section for best cuts)
  • Fresh spinach (5 to 6 big handfuls) or frozen spinach (thawed and squeezed dry)
  • 1 small onion, chopped (or 1 teaspoon onion powder when you are in a hurry)
  • 3 cloves garlic, minced (or 1 to 2 teaspoons garlic powder)
  • 1 cup chicken broth
  • 3/4 cup cream (heavy cream is classic, but I give options below)
  • 1/3 cup grated parmesan (optional but really good)
  • 1 teaspoon salt, plus more to taste
  • 1/2 teaspoon black pepper
  • 1 teaspoon Italian seasoning (or a mix of oregano and basil)
  • 2 tablespoons olive oil or butter

How I make it

First, I heat olive oil in a large skillet or pot on medium high heat. I season the chicken with salt and pepper, then brown it for a few minutes on each side. You are not trying to fully cook it at this point, you just want that golden outside that makes everything taste better.

Next, I lower the heat a bit and toss in the onion. When the onion looks soft, I add garlic and stir for about 30 seconds. Then I pour in chicken broth and scrape the bottom a little so all the flavorful bits come up into the sauce.

Now the creamy part: I add the cream, seasoning, and parmesan if I am using it. Let it bubble gently for a few minutes so it thickens just a little. Then I add spinach and stir until it wilts down. The pot will look wildly full at first, then suddenly the spinach becomes basically nothing. That is normal and kind of funny every time.

Finally, I put the chicken back in (if you set it aside), cover for a few minutes, and cook until the chicken is done. If the sauce gets thicker than you like, add a splash of broth. If it is thinner than you want, let it simmer uncovered for a couple minutes.

This is one of those chicken and spinach recipes that makes you feel like you cooked a real meal, but you did not have to plan your entire day around it.
Hearty and Flavorful Chicken and Spinach Recipes Everyone Will Love

What kind of chicken to use?

I have made this with pretty much every type of chicken that shows up in my fridge, and it all works, but some options make life easier.

Chicken thighs are my personal favorite here. They stay juicy even if you get distracted and simmer a little too long. If you are cooking for picky eaters who prefer white meat, go with breasts, just keep an eye on the timing.

Here is my quick breakdown:

Boneless skinless chicken thighs: most forgiving, super flavorful, great for creamy sauces.

Boneless skinless chicken breasts: lean and mild, best if you slice them thinner so they cook evenly.

Chicken tenderloins: quickest option, good when you want dinner fast.

Rotisserie chicken: yes, you can cheat. Just make the sauce and stir in shredded chicken at the end to warm through.

One little tip from my own trial and error: if you use chicken breasts, pound them slightly or slice them in half horizontally. Not fancy, just practical. It helps them cook faster and keeps them from drying out, which is the number one complaint people have with chicken. And honestly, dry chicken can ruin even the best chicken and spinach recipes.

Substitutes for the cream

Not everyone wants heavy cream all the time, and I get it. Sometimes I am cooking for someone who wants lighter food, sometimes I just do not have cream in the fridge. The good news is you still have options that taste great.

My favorite swaps:

Half and half: still creamy, just a bit lighter. The sauce will be slightly thinner, so simmer a touch longer.

Evaporated milk: surprisingly good in creamy skillet dinners. It gives you that cozy texture without being super rich.

Greek yogurt: this one works, but you need to be gentle. Turn the heat low and stir it in at the end so it does not split. It adds a nice tang that goes well with garlic and spinach.

Cream cheese: if you have a block hanging out in the fridge, add 2 to 4 ounces and stir until smooth. It makes the sauce thick and dreamy.

Coconut milk: works if you are dairy free. Use the canned full fat kind for best results. The flavor is slightly different, but with garlic and parmesan omitted, it becomes its own delicious thing.

I will say this: if you are skipping dairy completely, go heavier on seasoning. A little extra garlic, black pepper, and herbs help keep the sauce tasting bold. It is still one of those hearty and flavorful chicken and spinach recipes everyone will love, just with a different kind of comfort.

“I made this after a long day and my kids actually asked for seconds. The sauce was so good I spooned it over rice, and there were no leftovers.”

Cooking tips

This is the section that saves you from the little annoyances, like bland sauce or watery spinach. I have made these chicken and spinach recipes enough times to learn what matters and what does not.

Tip 1: Season in layers. Salt the chicken before it hits the pan, then taste the sauce at the end. Creamy sauces need enough salt or they taste flat.

Tip 2: Do not crank the heat once the cream goes in. Gentle bubbling is your friend. High heat can make dairy sauces separate, especially if you used half and half or yogurt.

Tip 3: If using frozen spinach, squeeze it dry. I press it in a clean towel or paper towels. If you skip this, the sauce can get watery fast.

Tip 4: Brown the chicken. Even a quick sear adds so much flavor. It also makes the whole dish smell amazing, which is half the joy of cooking.

Tip 5: Use a big enough pan. Spinach takes up space before it wilts. A larger skillet keeps you from stirring spinach onto the stove, which I have done more than once.

Also, if you want a little kick, add a pinch of red pepper flakes. Not enough to burn your mouth off, just enough to make the creamy sauce feel lively.

What to serve with creamy spinach chicken

This is where you can make it feel like a full comfort meal or keep it lighter, depending on your mood. I love that flexibility. The sauce is the star, so you want something that can catch it.

Easy serving ideas

  • Rice, especially jasmine or basmati
  • Mashed potatoes for full cozy mode
  • Pasta, like penne or fettuccine
  • Cauliflower rice if you want low carb
  • Crusty bread to swipe through the sauce
  • Roasted broccoli or green beans on the side

If I am cooking for guests, I usually do pasta plus a simple salad with lemony dressing. If it is just a normal Tuesday, it is rice, and I call it a win. Either way, it is one of those hearty and flavorful chicken and spinach recipes everyone will love because it feels like comfort food without being heavy in a dull way.

Common Questions

Can I make this ahead of time?
Yes. It keeps well in the fridge for about 3 days. The sauce will thicken as it sits, so add a splash of broth when reheating.

Can I freeze creamy spinach chicken?
You can, but creamy sauces sometimes change texture after freezing. If you plan to freeze it, use evaporated milk or coconut milk instead of heavy cream for a more stable result.

How do I know the chicken is cooked?
The safest way is a thermometer, 165 F in the thickest part. If you do not have one, slice a piece and make sure it is no longer pink and the juices run clear.

What if my sauce is too thin?
Simmer it uncovered for a few minutes. Parmesan also helps thicken it a bit. If you are in a rush, mix 1 teaspoon cornstarch with 1 tablespoon water and stir it in, then simmer briefly.

Can I add extra veggies?
Absolutely. Mushrooms, sun dried tomatoes, and chopped bell peppers all work. Add mushrooms early with the onion, and add tomatoes closer to the end.

A cozy dinner you will actually want to make again

If you have been hunting for chicken and spinach recipes that feel comforting but still easy enough for a busy night, this one is a keeper. It is quick, it is one pot, and it gives you that creamy, garlicky sauce that makes people hover around the stove. Play with the cream substitutes if you need to, and pick the chicken cut that fits your life. Most importantly, taste as you go and do not stress it. Make it once, and I bet it slides into your regular rotation.
chicken and spinach recipes

Creamy Spinach Chicken

Prep Time 15 minutes
Cook Time 15 minutes
Total Time 30 minutes
Servings 4 servings
Calories 450
A cozy, easy, and delicious one-pot creamy spinach chicken recipe ready in 30 minutes, perfect for busy weeknights.

Ingredients

Main Ingredients

  • 1.5 pounds Chicken (about 1.5 pounds) (Boneless skinless chicken thighs or breasts recommended.)
  • 5-6 handsful Fresh spinach (Or use frozen spinach (thawed and squeezed dry).)
  • 1 small Onion, chopped (Alternatively, use 1 teaspoon onion powder.)
  • 3 cloves Garlic, minced (Or 1 to 2 teaspoons garlic powder.)
  • 1 cup Chicken broth
  • 3/4 cup Cream (Heavy cream recommended but can use half and half or alternatives.)
  • 1/3 cup Grated parmesan (Optional but enhances the flavor.)
  • 1 teaspoon Salt (Plus more to taste.)
  • 1/2 teaspoon Black pepper
  • 1 teaspoon Italian seasoning (Can substitute with a mix of oregano and basil.)
  • 2 tablespoons Olive oil or butter

Instructions 

Cooking

  • Heat olive oil in a large skillet or pot over medium-high heat. Season the chicken with salt and pepper, then brown it on each side for a few minutes.
  • Lower the heat and add the onion. Cook until the onion is soft, then add the garlic and stir for about 30 seconds.
  • Pour in the chicken broth and scrape the bottom of the pan to release any flavorful bits.
  • Add the cream, seasoning, and parmesan (if using). Let it bubble gently for a few minutes to thicken.
  • Stir in the spinach and cook until wilted. Add the chicken back into the pot, cover, and cook until the chicken is done.
  • Adjust the consistency of the sauce by adding broth if it's too thick or simmer uncovered if it's too thin.

Notes

Substitute cream with half and half, evaporated milk, Greek yogurt, cream cheese, or coconut milk if desired. Serve with rice, pasta, or crusty bread for a full meal.
Calories: 450kcal
Course: Dinner, Main Course
Cuisine: American, Comfort Food
Keyword: creamy chicken, easy weeknight dinner, one-pot recipe, quick chicken recipe, spinach chicken