Category

30-Minute Chicken Dinners

Category

Street Corn Chicken Rice Bowl

The kitchen smells like lime and charred corn. The skillet hisses and a little steam lifts, carrying memories of summer nights. You hear a plate clink as someone sets the rice down and little voices asking when dinner will be ready.

This Street Corn Chicken Rice Bowl is one of those meals that fills the room with comfort. It comes together quickly, feeds a hungry family, and still feels special enough for guests. If you want a slightly different take, I have a longer post about this exact dish on my own site for more tips and photos: Street Corn Chicken Rice Bowl page.

Why this works

Street Corn Chicken Rice Bowl

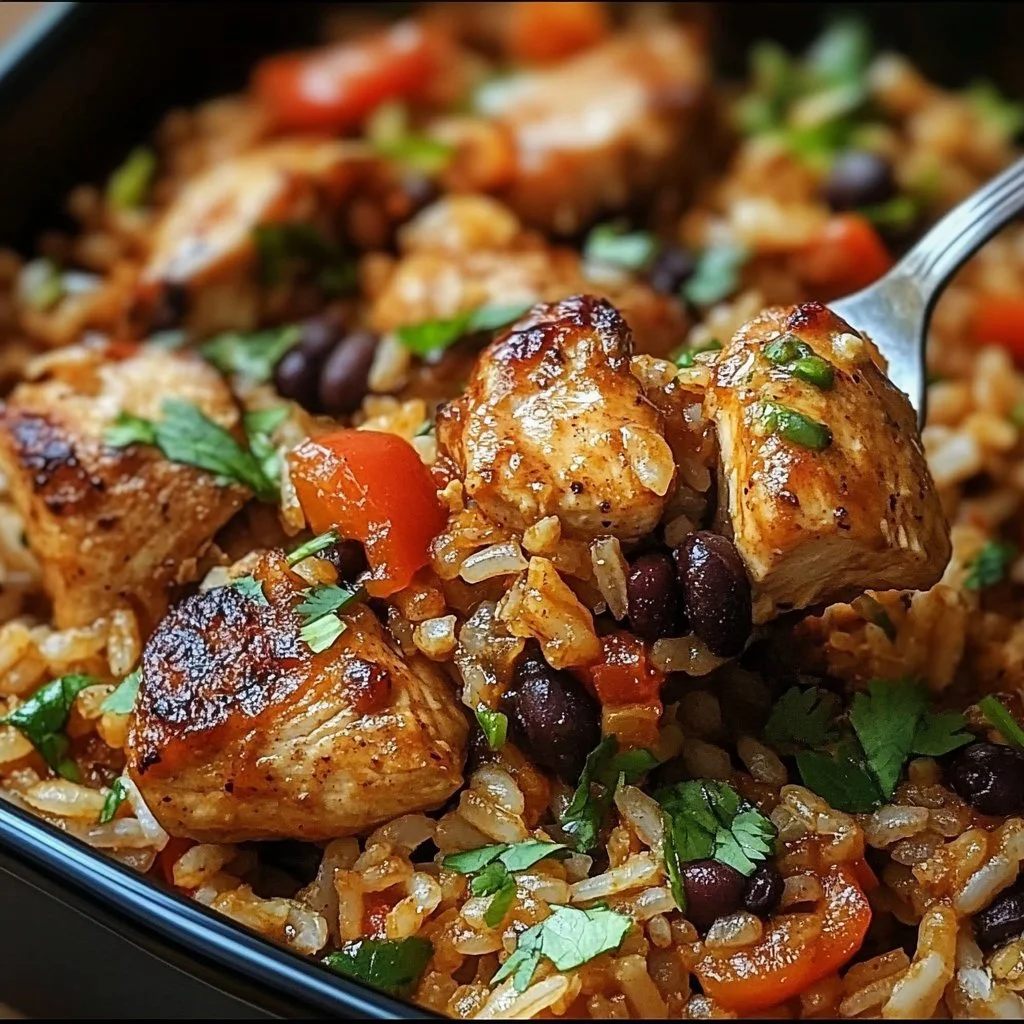
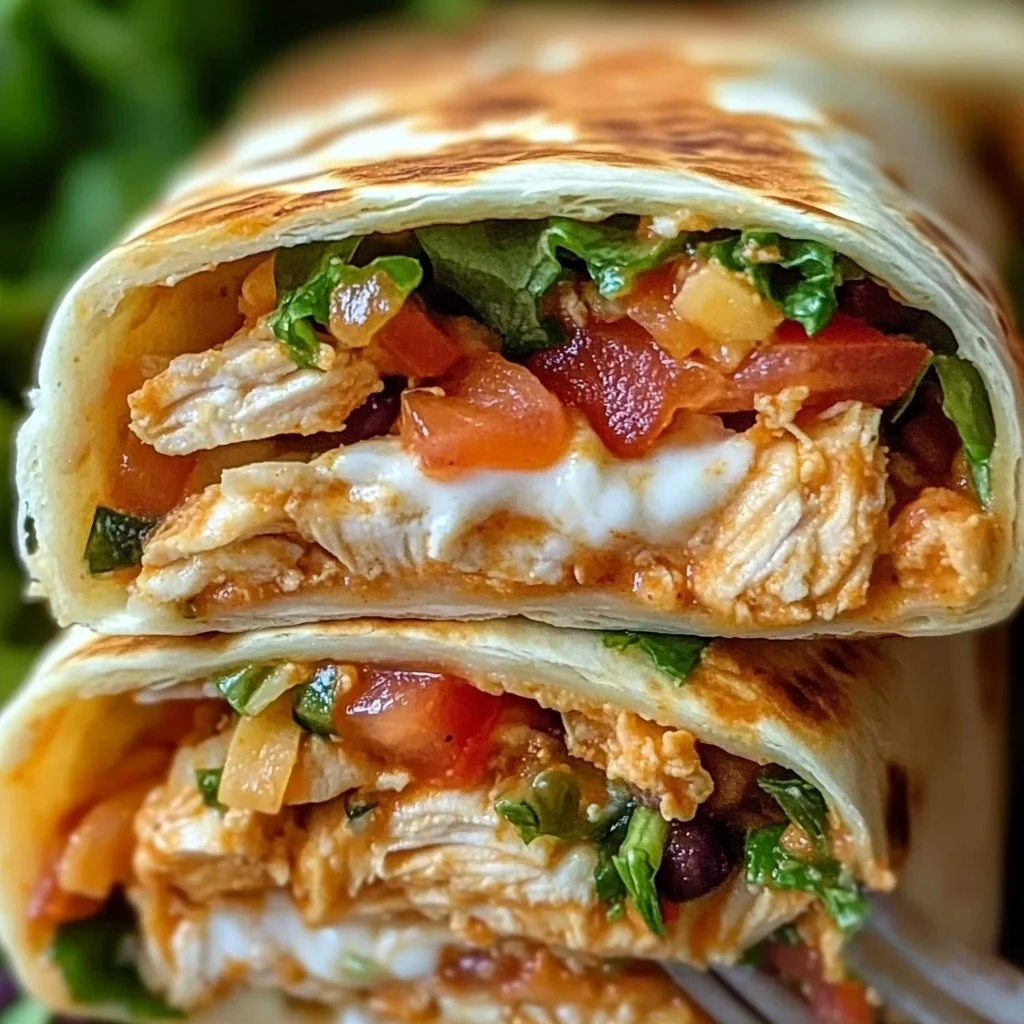
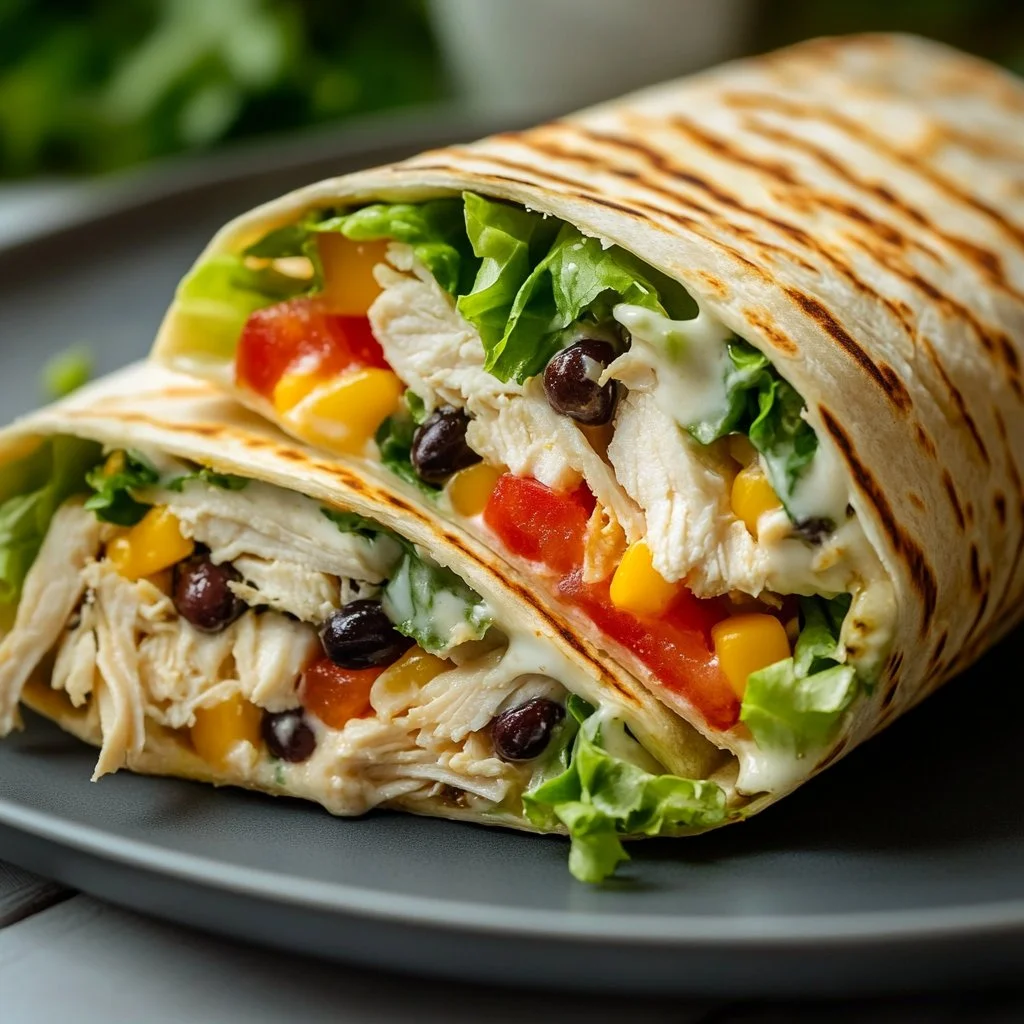
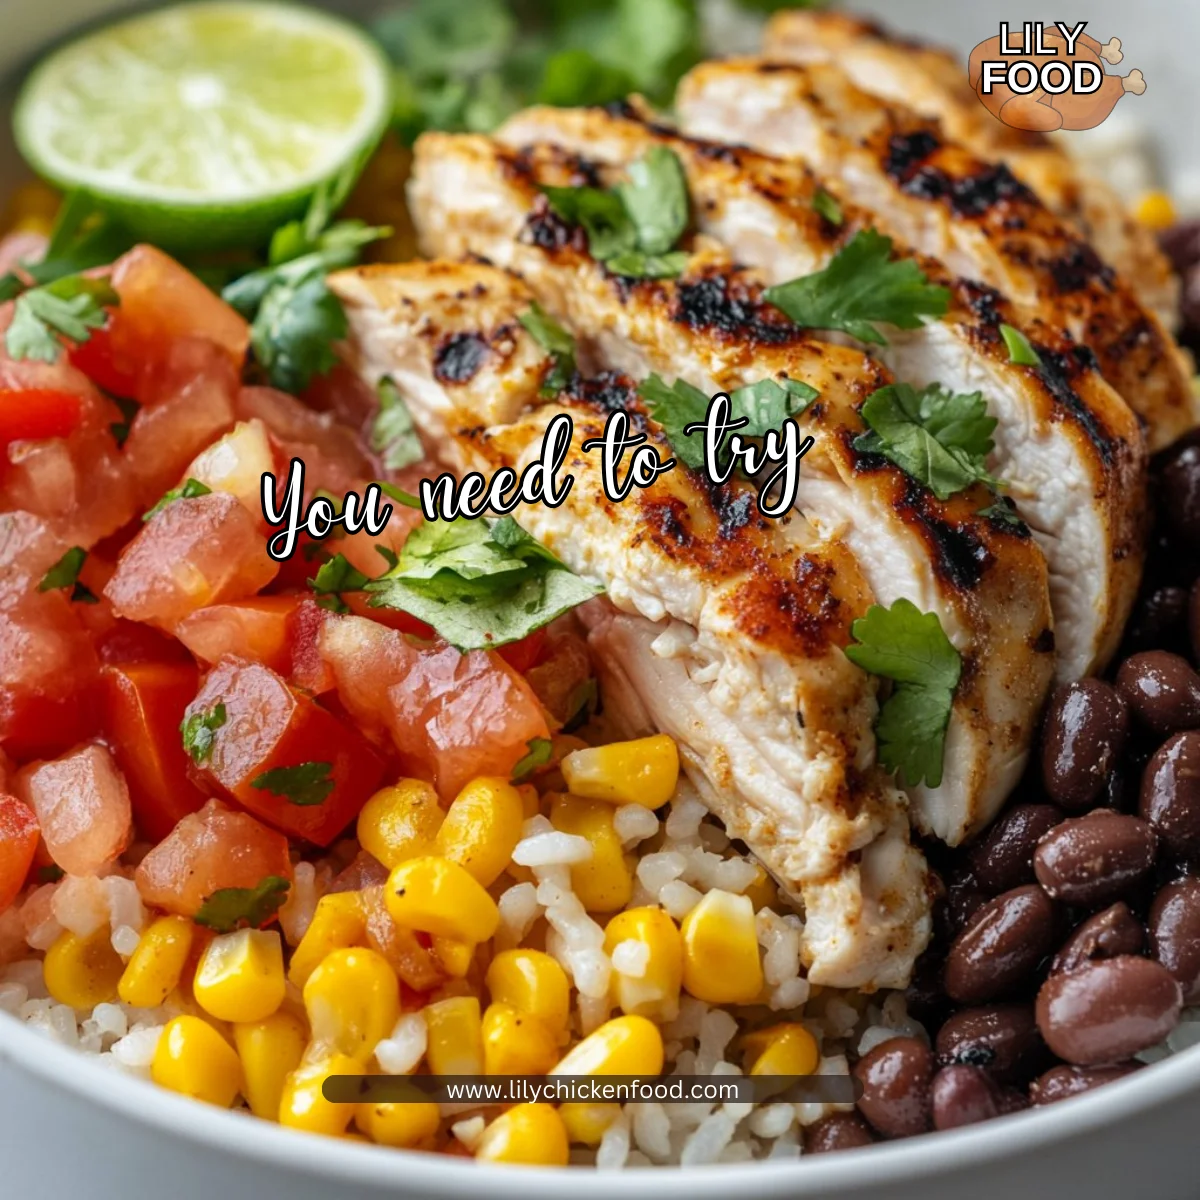
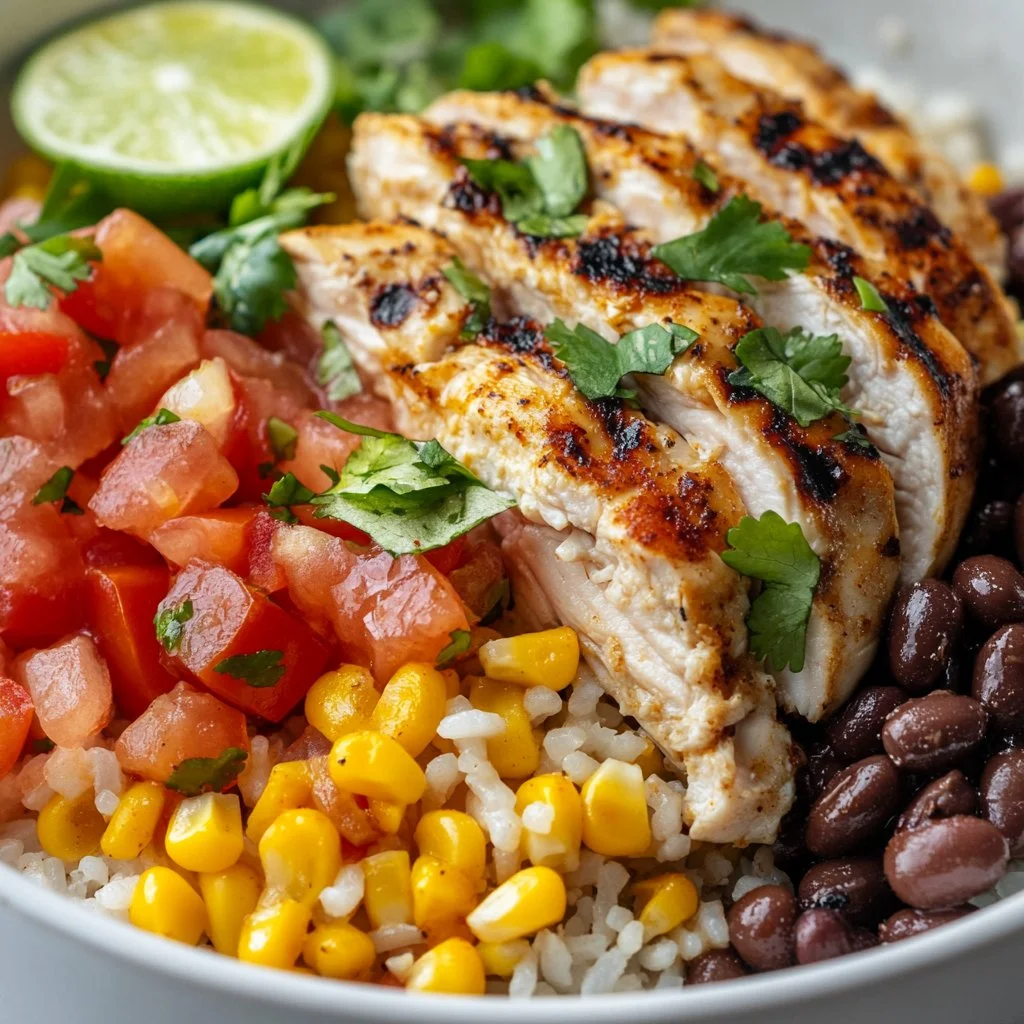
This bowl balances textures and flavors in a way that kids and grownups both love. Warm rice gives a neutral base. Grilled chicken adds protein and a savory note. Charred corn brings sweetness and a hint of smokiness. A tangy lime crema ties it all together.

It is also a huge time saver. You can grill chicken ahead, use leftover rice, and toss together the toppings in minutes. If you want a simpler meal night, my easy version walks through even faster prep and pantry swaps: easy Street Corn Chicken Bowl.

This dish scales well. Make a double batch for leftovers or a family-style dinner. It is forgiving when you need to substitute ingredients. That makes weeknights calmer and family dinners happier.

Process Overview

“This is where the magic happens—when the aroma fills the kitchen.”

The main steps are quick and satisfying. You char the corn, mix a bright lime crema, slice pre-grilled chicken, and assemble the bowls. If you like to prep ahead, grill the chicken and cook rice earlier in the day.

I often lean on similar bowls that bring comfort with simple steps. If you enjoy bowl-style dinners, check my chicken and sweet potato rice bowl for another family favorite: chicken sweet potato rice bowl.

Ingredients

  • 2 cups cooked rice (white, brown, or cilantro-lime rice)
    Tip: Use leftover rice chilled for firmer grains. Cilantro-lime rice brightens the bowl if you have it on hand.

  • 2 chicken breasts (grilled and sliced)
    Tip: Pound to even thickness for quick, even grilling. Leftover roasted chicken works well too.

  • 1 cup corn kernels (fresh, frozen, or canned)
    Tip: Fresh corn gives the best bite. If frozen, thaw and pat dry. Canned corn can be drained and patted to remove extra liquid.

  • 1/2 cup black beans (drained and rinsed)
    Tip: Rinsing canned beans reduces sodium and improves flavor. Warm them briefly if serving from cold helps the bowl feel cohesive.

  • 1/4 cup diced red onion
    Tip: Soak for 5 minutes in cold water to mellow the sharpness if your family prefers a softer onion flavor.

  • 1/4 cup diced tomatoes
    Tip: Use roma or vine-ripe tomatoes for less water. Pat dry to avoid watering down the rice.

  • 1/4 cup crumbled cotija cheese
    Tip: If you do not have cotija, feta is a good substitute though slightly tangier.

  • 2 tablespoons chopped fresh cilantro (for garnish)
    Tip: Add cilantro just before serving for the brightest flavor. Reserve a little for kids who may pick it off.

  • 1 tablespoon olive oil
    Tip: Use a neutral-flavored oil if you plan to char the corn at higher heat.

  • 1 teaspoon chili powder
    Tip: Adjust to taste. Use mild chili powder for kids, or a smoky blend for deeper flavor.

  • 1/2 teaspoon smoked paprika
    Tip: Smoked paprika adds that campfire note. Use sweet paprika if you prefer less smoke.

  • 1/2 teaspoon cumin
    Tip: Toast cumin briefly in the pan for extra fragrance, but do not burn it.

  • 1/4 teaspoon salt
    Tip: Start with less, taste, and add more as needed. Salt interacts with lime, so adjust at the end.

  • 1/4 teaspoon black pepper
    Tip: Freshly cracked pepper tastes best. Add extra if you like a little bite.

  • 1/2 cup sour cream or Greek yogurt
    Tip: Greek yogurt makes a tangier, protein-rich crema. Sour cream is creamier and more traditional.

  • Juice of 1 lime
    Tip: Fresh lime juice is essential. Taste the crema and add a little more if you want more brightness.

  • 1/2 teaspoon garlic powder
    Tip: Garlic powder blends smoothly into the crema; minced garlic can be stronger and more assertive.

  • 1/4 teaspoon salt
    Tip: This is for the crema. Mix and taste so the lime flavor shines without being too salty.

Lily’s personal notes: Use what your family already likes. The most important parts are the charred corn and the lime crema. The rest is flexible and forgiving.

Directions

  1. Heat a skillet over medium heat. Add the olive oil and sauté the corn kernels for 3-4 minutes until lightly charred. Season with chili powder, smoked paprika, cumin, salt, and pepper. Set aside.
    Encouragement: Take your time to get a little color on the corn. It adds a lot of flavor.

  2. In a small bowl, mix together the sour cream, lime juice, garlic powder, and salt to make the lime crema. Adjust lime juice to taste.
    Encouragement: Taste as you go. The crema should be bright and creamy. Add a little more lime for extra zip.

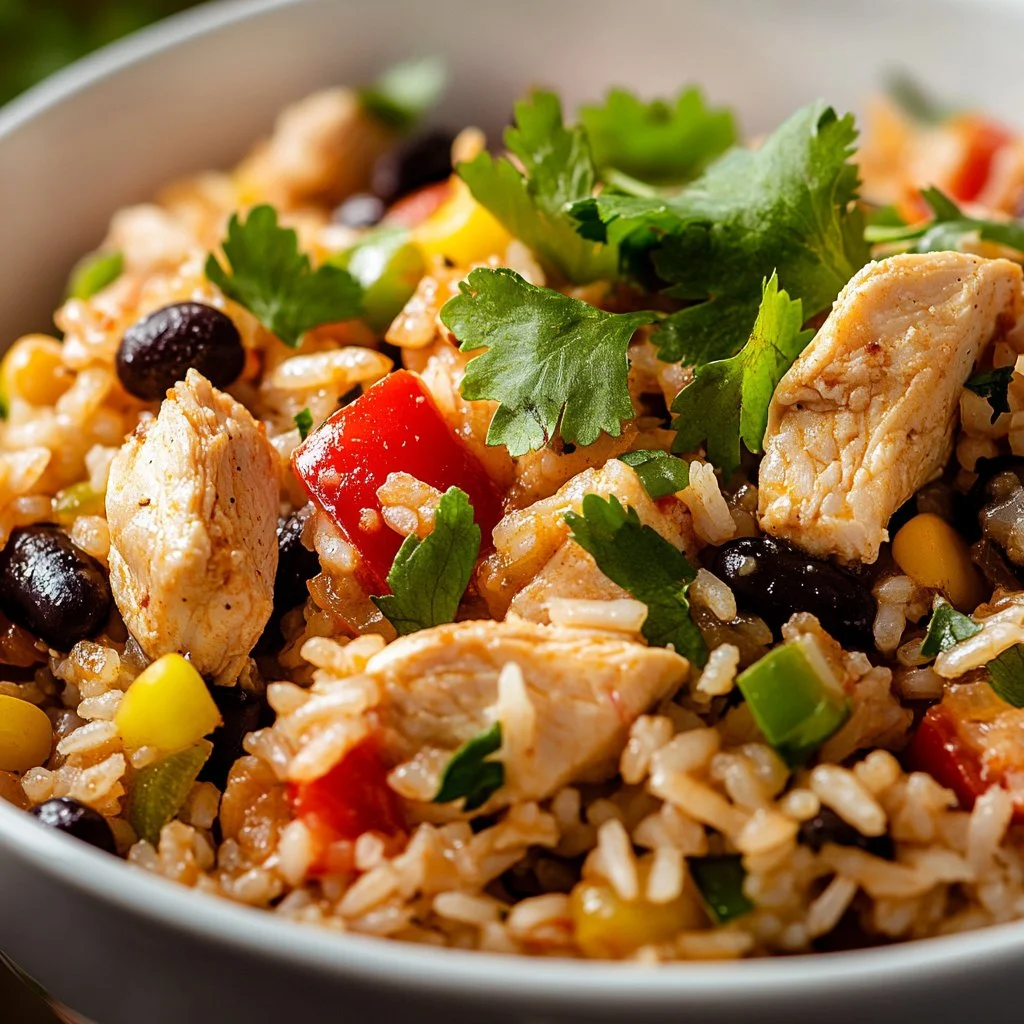
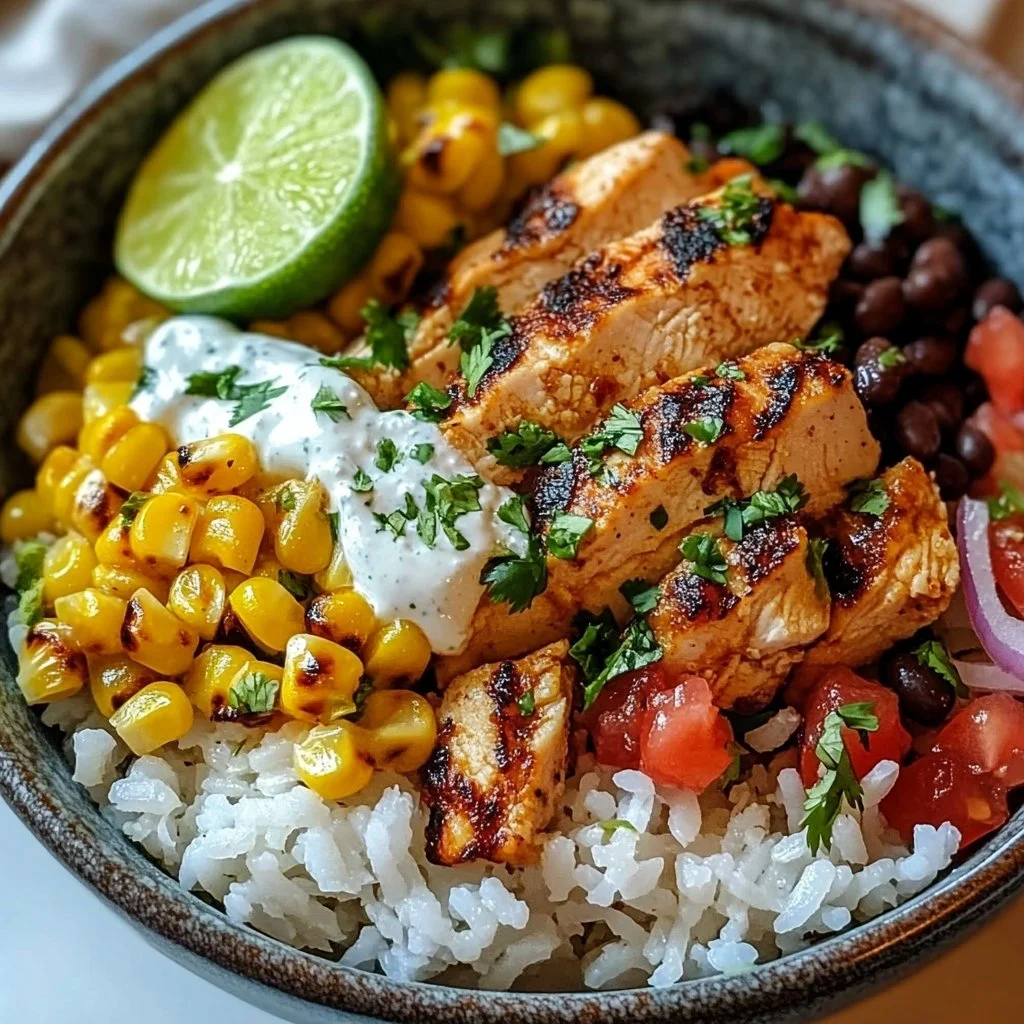
  3. Assemble the bowls: Start with a base of cooked rice. Layer the grilled chicken slices, charred corn, black beans, diced tomatoes, red onion, and cotija cheese on top.
    Encouragement: Build each bowl to suit the eater. Let kids pick more or less of each topping. It keeps mealtime happy.

  4. Drizzle the lime crema over the bowl and garnish with fresh cilantro.
    Encouragement: A little crema goes a long way. Add more at the table for those who want it.

  5. Serve immediately and enjoy!
    Encouragement: Sit down together and talk about the best part of your day. This meal is about flavor and family.

A few extra notes while you cook: if your chicken is not yet grilled, seasoning with salt, pepper, and a little chili powder before grilling helps tie it to the bowl. If time is tight, use a rotisserie chicken and slice it warm.

Serving

Street Corn Chicken Rice Bowl

Serve these bowls family-style for a joyful dinner. Place warm rice in a big bowl, a platter of sliced chicken nearby, and separate bowls for corn, beans, tomatoes, onions, cheese, and crema. Let everyone build their own bowl.

For younger kids, pre-plate a simpler version with chicken, rice, and a little corn. Offer the crema on the side so they can choose. For guests, set out lime wedges and extra cilantro so everyone can customize.

If you want to turn this into a picnic or packed lunch, let the rice and chicken cool before packing. Pack the crema in a small container to pour over at mealtime.

You might also enjoy a different family-friendly rice bowl from my collection when planning a week of meals: healthy chicken sweet potato rice bowl.

Storage

Store leftovers in airtight containers in the refrigerator for up to 3 days. Keep the crema separate if possible to preserve texture.

To reheat, warm the rice and chicken gently in the microwave for about 1-2 minutes, stirring once. Reheat the corn and beans briefly or enjoy them at room temperature. Add the crema after reheating.

If you want to freeze components, freeze cooked grilled chicken and rice separately. Thaw in the refrigerator overnight, then reheat before assembling.

Leftover bowls make a great next-day lunch. Add a squeeze of fresh lime and a sprinkle of cilantro to revive flavors.

Kitchen Notes

  • Use a cast-iron skillet or grill pan for the best char on the corn and chicken.
  • Make extra lime crema and use it as a dip for veggies or as a sandwich spread.
  • Swap in leftover roasted vegetables to use up the weeknight produce.
  • Prep toppings the night before to save 10 to 15 minutes on busy evenings.
  • Keep cotija in the fridge and crumble it fresh; it holds flavor and texture well.

If you like shortcuts that keep flavor intact, I have a quick teriyaki rice bowl that uses pantry staples and is equally family friendly: the best teriyaki chicken rice bowl.

Variations

  • For picky eaters: Offer ingredients in separate bowls and let them build their own. Serve the corn plain or mixed with a touch of butter for kids who prefer simple flavors.
  • Vegetarian: Replace chicken with seasoned and roasted tofu or extra black beans. Grill the tofu firm for a meaty texture.
  • Low carb: Swap rice for cauliflower rice or a bed of greens for a lighter bowl.
  • Spicy: Add chopped jalapeño or a pinch of cayenne to the corn, or mix a little hot sauce into the crema.
  • Dairy-free: Use a dairy-free yogurt or a cashew crema in place of sour cream or Greek yogurt. Omit cotija or use a dairy-free crumble.

These small swaps let you serve the bowl to different diets without losing the core flavors.

FAQ

Q: Can I make this gluten-free?
A: Yes. All main ingredients are naturally gluten-free. Double-check any store-bought spice blends or crema ingredients for hidden gluten.

Q: How do I get the best char on the corn?
A: Dry the kernels, heat the pan until it is hot but not smoking, then add oil and corn. Let it sit undisturbed until it gets color before stirring.

Q: Can I use frozen corn?
A: Yes. Thaw and pat it dry so it will char and not steam. Frozen corn is a great winter option.

Q: How long will leftovers last?
A: Stored in airtight containers, the components keep in the refrigerator for up to 3 days. Keep crema separate if possible.

Q: Can I grill everything at once?
A: Absolutely. Grill the chicken and corn at the same time if your grill has space. Keep corn in a grill basket or on a sheet for even charring.

Conclusion

Thanks for cooking with me. This Street Corn Chicken Rice Bowl is one of my favorite weeknight meals because it smells amazing, comes together quickly, and invites everyone to build their plate. For more inspiration and a slightly different take, I often look to other home cooks and writers. I found great variations and step-by-step photos on Street Corn Chicken Rice Bowls – The Skinnyish Dish, and another flavorful recipe idea lives on Mexican Street Corn Chicken Rice Bowl Recipe – Jar Of Lemons.

Happy cooking, and don’t forget to share this bowl with someone you love.

Street Corn Chicken Rice Bowl

Prep Time 20 minutes
Cook Time 15 minutes
Total Time 35 minutes
Servings 4 servings
Calories 600
A comforting bowl filled with grilled chicken, charred corn, and a zesty lime crema on a base of warm rice, perfect for family dinners or casual gatherings.

Ingredients

For the Bowl

  • 2 cups cooked rice (white, brown, or cilantro-lime rice)
  • 2 pieces chicken breasts (grilled and sliced, pound to even thickness for quick grilling)
  • 1 cup corn kernels (fresh, frozen, or canned; fresh corn gives the best bite)
  • 1/2 cup black beans (drained and rinsed, warm briefly if serving cold)
  • 1/4 cup diced red onion (soak in cold water to mellow flavor)
  • 1/4 cup diced tomatoes (use roma or vine-ripe tomatoes; pat dry)
  • 1/4 cup crumbled cotija cheese (substitute with feta if needed)
  • 2 tablespoons chopped fresh cilantro (add just before serving)

For the Lime Crema

  • 1/2 cup sour cream or Greek yogurt (Greek yogurt adds tanginess)
  • 1 tablespoon olive oil (neutral-flavored for charring corn)
  • 1 teaspoon chili powder (adjust to taste)
  • 1/2 teaspoon smoked paprika (adds a campfire note)
  • 1/2 teaspoon cumin (toast briefly for added fragrance)
  • 1/4 teaspoon salt (adjust at end for lime flavor)
  • 1/4 teaspoon black pepper (freshly cracked is best)
  • Juice of 1 lime (fresh lime juice is essential)
  • 1/2 teaspoon garlic powder (blends smoothly in crema)
  • 1/4 teaspoon salt (for the crema)

Instructions 

Preparation

  • Heat a skillet over medium heat and add the olive oil.
  • Sauté the corn kernels for 3-4 minutes until lightly charred. Season with chili powder, smoked paprika, cumin, salt, and pepper. Set aside.
  • In a small bowl, mix together the sour cream, lime juice, garlic powder, and salt to make the lime crema. Adjust lime juice to taste.

Assembly

  • Assemble the bowls: Start with a base of cooked rice. Layer with grilled chicken slices, charred corn, black beans, diced tomatoes, red onion, and cotija cheese.
  • Drizzle the lime crema over the bowl and garnish with fresh cilantro.

Serving

  • Serve immediately and enjoy! Encourage family to sit down together and share their day.

Notes

You can substitute different ingredients based on preferences. The essential components are charred corn and lime crema.
Calories: 600kcal
Course: Dinner, Main Course
Cuisine: American, Mexican
Keyword: Chicken Bowl, Comfort Food, Family Meal, Quick Dinner, Street Corn

No Peek Chicken Casserole

I can still smell it. The warm, savory steam that rolls out when I lift the foil makes the whole house feel like a hug. The gentle tick of the oven timer becomes part of a quiet rhythm as I set the table. Kids drop backpacks and come running at the first whiff.

I am Lily, a mom who cooks weeknight meals that bring the family together. I have been writing about simple, comforting dishes for years. If you love easy, reliable recipes, you might enjoy how this casserole pairs with my other warm favorites, like this my chicken noodle soup for chilly nights.

Why this works

No Peek Chicken Casserole

This casserole is a family favorite because it cooks itself while you get things done. The rice and soups create a steaming, flavor-packed base that keeps the chicken moist. The onion soup mix gives a seasoned crust without extra effort.

It saves time and mind space. Pop it in the oven and go about homework, errands, or folding laundry. For busy weeknights, nothing beats a dish that needs one pan and almost no babysitting.

If you want a reminder of classic comfort that everyone recognizes, try pairing leftovers with a simple salad or a slice of crusty bread. For a different comforting soup to serve alongside, see my classic chicken noodle soup notes.

Process Overview

“This is where the magic happens—when the aroma fills the kitchen.”

I like to think of this as a steam bath for the chicken. The rice slowly absorbs the soup flavors. The sealed foil creates a mini oven that cooks everything evenly. The result is tender chicken and perfectly cooked rice.

If you worry about timing, this is forgiving. The long bake time softens the rice fully and makes shredding easy if you want to serve the chicken that way. For a brighter garlic or ginger lift, I sometimes follow techniques I use in my ginger garlic version and add a squeeze of lemon to finish.

Ingredients

  • 4 boneless, skinless chicken breasts
    • Tip from Lily: Choose similar-sized breasts so they cook evenly. If one is much thicker, slice it horizontally.
  • 1 cup long-grain white rice
    • Tip from Lily: Rinse the rice quickly if you want less starch. Long-grain gives a light, separate texture.
  • 1 can (10.5 oz) cream of mushroom soup
    • Tip from Lily: Use a full-fat or reduced-sodium version based on your taste. The soup carries most of the savory base.
  • 1 can (10.5 oz) cream of chicken soup
    • Tip from Lily: Mixing both soups gives depth. If you prefer, swap cream of celery for a milder taste.
  • 1 1/4 cups water
    • Tip from Lily: Use warm water to help the soups blend smoothly and to reduce bake time variance.
  • 1 packet onion soup mix
    • Tip from Lily: Sprinkle evenly so each bite gets a bit of onion flavor. It forms a nice coating on the chicken.
  • Salt and pepper to taste
    • Tip from Lily: Season lightly before baking and re-season on the plate if needed. Salt level depends on the soup brand.

If you often cook from pantry staples, this recipe is a perfect example of pantry-meets-weeknight. For quick substitutions and using leftover rotisserie meat, see my leftover rotisserie chicken tips for ideas.

Directions

1️⃣ Preheat the oven to 350°F (175°C).

  • Encouraging note: Take a minute to preheat so the casserole starts cooking right away. I like to set the timer and breathe for a second.

2️⃣ Mix the base: In a large bowl, combine the rice, cream of mushroom soup, cream of chicken soup, and water. Stir until well-mixed.

  • Encouraging note: Stir until the mixture is smooth. You can give it a little extra swirl if the soups are thick. This is a quick, satisfying step.

3️⃣ Prepare the baking dish: Grease a 9×13-inch baking dish and pour in the rice and soup mixture, spreading it evenly over the bottom.

  • Encouraging note: Greasing prevents sticking and helps clean-up. Use a little butter or cooking spray so the rice slides out easily.

4️⃣ Add the chicken: Place the chicken breasts on top of the rice mixture and season with salt and pepper.

  • Encouraging note: Space the chicken pieces evenly so the steam circulates. A gentle press into the rice helps them nestle and cook evenly.

5️⃣ Top with onion soup mix: Sprinkle the packet of onion soup mix evenly over the chicken, ensuring each piece is well-coated.

  • Encouraging note: The onion mix forms a flavorful crust. If you have picky eaters, you can split the dish and only top half with the mix.

6️⃣ Cover tightly: Cover the dish tightly with aluminum foil. It’s crucial to keep it sealed to trap the steam, which will cook the rice and chicken to perfection.

  • Encouraging note: Press the foil close to the dish to keep steam in. This is the secret to moist, tender chicken without extra fuss.

7️⃣ Bake: Place the dish in the oven and bake for 1 hour and 30 minutes. Resist the temptation to peek during cooking—keeping the foil sealed is key!

  • Encouraging note: Set a timer and trust the process. This long bake softens the rice perfectly and gives you time to finish other tasks.

8️⃣ Rest and serve: Once done, remove the casserole from the oven and let it rest for a few minutes before serving. Enjoy the rich, savory flavors and tender chicken.

  • Encouraging note: Letting it rest helps the rice finish absorbing liquids and makes serving neater. Use two forks to shred chicken if you like it mixed in.

For more step-by-step ideas on homemade broths and comfort pairings, check my homemade chicken noodle soup guide, which pairs well with this casserole on a chilly night.

Serving

No Peek Chicken Casserole

Serve this casserole family-style straight from the baking dish. Place the dish in the center of the table and pass bowls for seconds. The smell invites conversation and slow, relaxed bites.

Simple sides work best. Steam green beans, a mixed salad, or roasted carrots keep the meal balanced. If you want a crunchy contrast, a small bowl of toast points or crackers is lovely.

For picky eaters, shred the chicken and let them spoon rice separately. Presentation matters with kids, so set out small bowls of grated cheese, ranch, or steamed peas to customize plates.

Storage

Store leftover casserole in an airtight container in the fridge for up to 4 days. The rice will firm up a bit, but reheating brings it back.

To reheat in the oven, cover and bake at 350°F for 20 to 30 minutes until warmed through. For a faster option, reheat single servings in the microwave for 2 to 3 minutes, stirring halfway.

If you want to freeze, portion into freezer-safe containers. Freeze for up to 3 months. Thaw overnight in the fridge before reheating. Add a splash of water when reheating from frozen to restore moisture.

Kitchen Notes

  • Use even-sized chicken pieces for uniform cooking.
  • If your family prefers brown rice, choose another method. Brown rice needs more water and time.
  • Low-sodium soup is a good swap if you watch salt. Taste and adjust after baking.
  • For easier clean-up, line the baking dish with foil before adding the mixture.
  • If someone in your family cannot have mushrooms, substitute an extra can of cream of chicken or cream of celery.

Variations

  • Cheesy top: Add 1 cup shredded cheddar in the last 10 minutes of baking for a melty finish.
  • Vegetables: Stir 1 cup frozen peas or mixed vegetables into the rice mixture before baking for extra color.
  • Lighter version: Use reduced-fat soups and cut the bake time by 10 minutes, checking for doneness.
  • Gluten-free: Use gluten-free condensed soups labeled as such and confirm your onion soup mix is gluten-free.
  • Picky eaters: Make one half plain rice and chicken, and the other half with the onion packet.

FAQ

Q: Can I use chicken thighs instead of breasts?
A: Yes. Bone-in thighs will change cook time slightly. Use boneless thighs for similar timing. They stay juicy and can give more flavor.

Q: Is it okay to peek during baking?
A: Try not to. Lifting the foil lets steam escape and can undercook the rice. If you must check, do it quickly and reseal tightly.

Q: Can I reduce the bake time?
A: Not safely. The long bake allows the rice to fully absorb liquid and the chicken to cook gently. Shortening time risks undercooked rice.

Q: My rice turned out too soft. What happened?
A: Using too much water or cooking at too low a temperature can over-soften rice. Measure water carefully and keep oven at 350°F.

Q: Can I double the recipe for a crowd?
A: Yes. Use two baking dishes with the same depth. Avoid overcrowding one pan, which can alter cooking times.

Conclusion

Thank you for letting me share this No Peek Chicken Casserole. It has saved many of my busy evenings and filled my table with full, happy bellies. For a classic take on this recipe, you can compare notes with the original No Peek Chicken Casserole at The Country Cook and a similar variation at No-Peek Chicken and Rice from Plain Chicken. Try it on a weeknight and notice how it changes the rhythm of your evening.

No Peek Chicken Casserole

Prep Time 10 minutes
Cook Time 1 hour 30 minutes
Total Time 1 hour 40 minutes
Servings 6 servings
Calories 320
A comforting, hands-off casserole that brings the family together, featuring tender chicken, flavorful rice, and creamy soup.

Ingredients

Main Ingredients

  • 4 pieces boneless, skinless chicken breasts (Choose similar-sized breasts for even cooking.)
  • 1 cup long-grain white rice (Rinse quickly for less starch.)
  • 1 can cream of mushroom soup (10.5 oz) (Use full-fat or reduced-sodium version.)
  • 1 can cream of chicken soup (10.5 oz) (Mixing both soups gives depth.)
  • 1.25 cups water (Use warm water for smoother blending.)
  • 1 packet onion soup mix (Sprinkle evenly for flavor.)
  • to taste salt and pepper (Season lightly before baking.)

Instructions 

Preparation

  • Preheat the oven to 350°F (175°C).
  • In a large bowl, combine the rice, cream of mushroom soup, cream of chicken soup, and water. Stir until well-mixed.
  • Grease a 9×13-inch baking dish and pour in the rice and soup mixture, spreading it evenly over the bottom.
  • Place the chicken breasts on top of the rice mixture and season with salt and pepper.
  • Sprinkle the packet of onion soup mix evenly over the chicken, ensuring each piece is well-coated.
  • Cover the dish tightly with aluminum foil.
  • Bake the casserole for 1 hour and 30 minutes.
  • Once done, remove the casserole from the oven and let it rest for a few minutes before serving.

Notes

Serve family-style from the baking dish, with simple sides like steamed green beans or mixed salad. Store leftovers in the fridge for up to 4 days, or freeze for up to 3 months.
Calories: 320kcal
Course: Dinner, Main Course
Cuisine: American, Comfort Food
Keyword: Casserole, Chicken, Easy Dinner, Family Meal, Weeknight Recipe

Smothered Chicken and Rice

I remember the first time I made this smothered chicken and rice for my family. The kitchen filled with a warm, savory smell that made my kids come running. You could hear the gentle simmer of the sauce and the soft clink of spoons as everyone waited to taste it.

This recipe is the kind I turn to when I want a comforting weeknight dinner that feeds the whole family and gives me time to breathe. If you like simple one-skillet meals, you might also enjoy my take on Greek Chicken and Lemon Rice, which is another family favorite.

Why this works

Smothered Chicken and Rice

There are a few reasons this dish becomes a fast favorite. First, it cooks in one pan. That means fewer dishes and more time at the table with people you love. Second, the rice soaks up the savory broth and cream of mushroom soup, creating a gentle sauce that keeps the chicken juicy.

If you are short on time, this recipe is forgiving. You can brown the chicken while the rice starts to simmer and finish the dish with the lid on. If your crew likes a hint of sweetness or tropical flavor, try my version inspired by Pineapple Chicken and Rice for a fun twist.

Family and time-saving benefits

This is a meal that stretches well. Leftovers are easy to reheat, and the flavors deepen overnight. It is perfect for busy evenings, picky eaters, and anyone who wants a warm, welcoming dinner without drama.

Process Overview

“This is where the magic happens—when the aroma fills the kitchen.”

I like to think of this as three simple stages: brown, simmer, and rest. Brown the chicken to get a little crust and flavor. Add vegetables and liquids to build the base. Simmer with rice until everything is tender. Let it rest a few minutes before serving so the juices settle and the rice finishes steaming.

If you follow these stages, you will end up with tender chicken and rice that tastes like you spent all afternoon, even when you did not.

Ingredients

  • 2 chicken breasts
    • Lily tip: Use boneless, skinless breasts for fast cooking. Pound them to an even thickness so they cook evenly.
  • 1 cup rice
    • Lily tip: Long grain white rice cooks in about 20 minutes. If you use brown rice, increase cooking time and liquid.
  • 2 cups chicken broth
    • Lily tip: Low sodium broth gives you control over salt. Taste and adjust at the end.
  • 1 onion, diced
    • Lily tip: Yellow or sweet onions both work. Dice uniformly for even cooking.
  • 2 garlic cloves, minced
    • Lily tip: Fresh garlic gives the best aroma. Add at the right time to avoid burning.
  • 1 cup cream of mushroom soup
    • Lily tip: This adds creaminess and depth. If you prefer, use cream of chicken for a milder flavor.
  • Salt and pepper to taste
    • Lily tip: Season in layers. Salt when you brown the chicken, then taste the final dish and adjust.
  • Olive oil
    • Lily tip: Use a couple tablespoons for browning. Extra virgin is fine, but a light olive oil gives a higher smoke point.

If you like, you can also add a splash of white wine when you deglaze the skillet, or stir in some frozen peas at the end for color and nutrition. For inspiration on mixing protein and rice comfort foods, see my post about Bang Bang Chicken Crispy Rice Salad.

Directions

  1. In a skillet, heat olive oil over medium heat.
    • Encouraging note: Let the oil warm up until it shimmers. This helps get a nice sear on the chicken.
  2. Season chicken breasts with salt and pepper, then brown them in the skillet for about 5-7 minutes on each side.
    • Encouraging note: Brown until golden. If the chicken sticks, give it another minute and try again. Patience pays off.
  3. Remove chicken from the skillet and set aside.
    • Encouraging note: This makes room to build flavor in the same pan. No need to wash between steps.
  4. In the same skillet, add diced onion and minced garlic, sautéing until the onion is translucent.
    • Encouraging note: Stir gently and breathe in that smell. The softened onion is the foundation of the sauce.
  5. Stir in the cream of mushroom soup and chicken broth, bringing it to a simmer.
    • Encouraging note: Scrape up any browned bits from the bottom of the pan. They add deep, savory flavor.
  6. Add the rice and mix well.
    • Encouraging note: Make sure the rice is evenly distributed so it cooks uniformly. Remember to keep the heat gentle.
  7. Place the browned chicken breasts on top of the rice mixture.
    • Encouraging note: Nestle them in so they steam with the rice and stay juicy.
  8. Cover and let it cook on low heat for about 20 minutes or until the rice is cooked and chicken is tender.
    • Encouraging note: Do not lift the lid often. Let the steam do its work. If you used thicker breasts, check for doneness with a meat thermometer at 165 °F.
  9. Serve hot.
    • Encouraging note: Let it rest a few minutes so the rice finishes absorbing any remaining liquid. Then bring it to the table and watch faces light up.

A quick tip: If you want a golden top, remove the lid with 5 minutes left and let the heat rise slightly. For a creamier finish, stir a tablespoon of butter before serving. For ideas about other comforting skillet dinners, you might like my BBQ Chicken Mac and Cheese post.

Serving

Smothered Chicken and Rice

Serve this dish family-style right from the skillet. Place it on a trivet in the center of the table with a couple of serving spoons. Add a simple green salad and warm dinner rolls to round out the meal.

Garnish ideas

A sprinkle of chopped parsley or a few thinly sliced green onions brightens the plate. For a little tang, add a squeeze of lemon or a spoonful of plain yogurt on the side. Kids often like a little grated cheese on top.

Make it feel special by bringing out the favorite side dishes. A bowl of roasted vegetables, steamed broccoli, or a simple cucumber salad pairs nicely.

Storage

Leftovers store well in the refrigerator. Place the cooled dish in an airtight container and use within 3 to 4 days. For longer storage, freeze portions in freezer-safe containers for up to 3 months.

Reheating tips

  • Stovetop: Warm gently over low heat with a splash of chicken broth or water to revive the rice. Stir occasionally until hot.
  • Microwave: Cover and heat in 1-minute intervals, stirring between each interval for even warming. Add a little liquid if it looks dry.
  • Oven: Place in a covered baking dish at 350 °F until heated through, about 20 minutes for a large portion.

Always check that the chicken reaches 165 °F when reheating. Use your nose and eyes for quality checks. If anything smells off, discard it.

Kitchen Notes

  • Ready in 45 minutes total: 10 to brown, 20 to simmer, plus prep time.
  • Use a heavy skillet with a tight-fitting lid for even cooking and minimal evaporation.
  • Swap cream of mushroom soup with cream of chicken or homemade white sauce for a fresher flavor.
  • To speed up prep, dice onions and mince garlic the night before and store in the fridge.
  • For extra flavor, add a teaspoon of smoked paprika or a pinch of dried thyme when sautéing the onion.

These shortcuts save time and keep the dish reliable. I often double the recipe and freeze half for a future busy night.

Variations

  • Kid-friendly: Leave out strong spices and serve with a side of ketchup or a simple gravy. Add a handful of frozen peas or corn for color.
  • Low-carb: Replace rice with cauliflower rice. Reduce the broth slightly and check often to avoid soggy cauliflower.
  • Gluten-free: Ensure the cream of mushroom soup is labeled gluten-free or make a homemade white sauce with cornstarch.
  • Dairy-free: Use a dairy-free cream soup alternative or make a creamy base with blended cashews and warm broth.
  • Protein swap: Use boneless chicken thighs if you prefer more flavor. Adjust cooking time to ensure they reach 165 °F.

If you want a baked finish, transfer the skillet to a 375 °F oven for 10 minutes after simmering. For different family meals that blend comfort and convenience, see my version of Cheesy Ground Beef and Rice Casserole for ideas you can adapt.

FAQ

Q: Can I use chicken thighs instead of breasts?
A: Yes. Boneless thighs stay more forgiving and add extra flavor. Reduce cooking time slightly if they are thinner.

Q: What type of rice should I use?
A: Long grain white rice works best for the 20-minute simmer. Brown rice will need more liquid and a longer cook time.

Q: Can I make this in the oven?
A: You can. After browning and combining ingredients, cover and bake at 350 °F for about 25 to 30 minutes, or until rice and chicken are done.

Q: How do I know when the chicken is fully cooked?
A: Use a meat thermometer. The internal temperature should reach 165 °F. If you do not have a thermometer, cut into the thickest part and make sure the juices run clear.

Q: Is this freezer friendly?
A: Yes. Cool completely and freeze in portions. Thaw overnight in the refrigerator before reheating gently.

Conclusion

I hope this smothered chicken and rice becomes a go-to in your home like it did in mine. It is one of those comforting meals that makes the kitchen feel cozy and the family gather close. If you enjoy rich, creamy chicken dinners, you might also like the recipe for Creamy Smothered Chicken Thighs for another comforting option. For a one-pan take that is similar in spirit, check out Smothered Chicken and Rice (ONE Pan!).

Thank you for letting me share this recipe. Put on some music, let the smells fill the house, and enjoy dinner with the people you love.

Smothered Chicken and Rice

Prep Time 10 minutes
Cook Time 30 minutes
Total Time 40 minutes
Servings 4 servings
Calories 450
A comforting one-pan meal featuring tender chicken breasts simmered with rice in a savory broth and creamy sauce, perfect for a family dinner.

Ingredients

Main Ingredients

  • 2 pieces chicken breasts (Use boneless, skinless breasts for fast cooking. Pound them to an even thickness.)
  • 1 cup rice (Long grain white rice cooks in about 20 minutes. If using brown rice, increase cooking time and liquid.)
  • 2 cups chicken broth (Low sodium broth gives you control over salt.)
  • 1 piece onion, diced (Yellow or sweet onions both work. Dice uniformly for even cooking.)
  • 2 cloves garlic, minced (Fresh garlic provides the best aroma.)
  • 1 cup cream of mushroom soup (This adds creaminess and depth; can substitute with cream of chicken.)
  • to taste salt and pepper (Season in layers; taste and adjust at the end.)
  • 2 tablespoons olive oil (Good for browning; use extra virgin or light olive oil for a higher smoke point.)

Instructions 

Preparation

  • In a skillet, heat olive oil over medium heat until it shimmers.
  • Season chicken breasts with salt and pepper, then brown them in the skillet for about 5-7 minutes on each side until golden.
  • Remove chicken from the skillet and set aside.
  • In the same skillet, add diced onion and minced garlic, sautéing until the onion is translucent.

Cooking

  • Stir in the cream of mushroom soup and chicken broth, bringing it to a simmer.
  • Add the rice and mix well to ensure it is evenly distributed.
  • Place the browned chicken breasts on top of the rice mixture, cover, and let it cook on low heat for about 20 minutes or until the rice is cooked and chicken is tender.

Serving

  • Serve hot, letting it rest a few minutes before serving for the rice to finish absorbing remaining liquid.

Notes

For a golden top, remove the lid with 5 minutes left. For a creamier finish, stir in a tablespoon of butter before serving. Leftovers can be stored for 3-4 days in the refrigerator or frozen for up to 3 months.
Calories: 450kcal
Course: Dinner, Main Course
Cuisine: American
Keyword: Comfort Food, One-Pan Meal, Smothered Chicken

Caribbean Chicken and Rice

The kitchen smells like warm coconut and toasted spices. A gentle sizzle from the pot mixes with the laughter of kids setting the table. You can hear the clink of spoons and the excited chatter that always makes a weeknight dinner feel special.

This Caribbean Chicken and Rice is one of those meals that fills the house and feels like a hug. I’ve been making variations of this dish for years for my family. If you love balanced weeknight meals that taste like a little vacation, you might also enjoy my take on Greek Chicken and Lemon Rice, which shares the same simple approach to big flavor.

Why this works

Caribbean Chicken and Rice

This recipe shines because it combines familiar pantry ingredients with a few vibrant touches. Coconut milk adds a creamy, slightly sweet backdrop. Cumin and paprika bring warm depth without complicated prep. The result is a one-pot meal that keeps your hands free for homework help and bedtime stories.

It is a time-saver for busy families. You brown the chicken, add everything else, and let the pot do the rest. If your kids love a sweeter flavor, try the bright twist of my Pineapple Chicken and Rice for a fruity swap that still cooks up fast.

Process Overview

“This is where the magic happens—when the aroma fills the kitchen.”

The method is straightforward. Sauté vegetables, cook the chicken, add rice and liquids, and let it simmer. In about 30 minutes you have a full meal that tastes like you spent hours. I often have the table set while the last five minutes of cooking happen so dinner comes together calmly.

If you like to pre-chop and have everything ready, the cooking feels even faster. For a fresher crunch, serve a simple green salad on the side or include some quick-pickled onions for brightness. For a spicy kick, add a splash of hot sauce at the table.

I sometimes borrow plating ideas from other family favorites like my Bang Bang Chicken Crispy Rice Salad when I want something a little different to serve alongside.

Ingredients

  • 2 cups rice
    Lily’s tip: Use long-grain white rice for a light, fluffy result. Rinse the rice briefly to remove excess starch if you want the grains to separate more.

  • 2 chicken breasts, diced
    Lily’s tip: Cut the chicken into uniform pieces so they cook evenly. If you want faster cook time, cut smaller.

  • 1 can black beans, drained
    Lily’s tip: Rinse the beans in a colander to brighten their flavor and reduce any canning liquid taste.

  • 1 can coconut milk
    Lily’s tip: Shake the can and stir it before measuring. Light coconut milk works to reduce calories, but full-fat gives a creamier finish.

  • 1 red bell pepper, diced
    Lily’s tip: Red peppers add sweetness and color. If you have picky eaters, try finely dicing so they blend into the rice.

  • 1 onion, diced
    Lily’s tip: Yellow or sweet onions both work. Sauté until translucent to coax out a mild, sweet flavor.

  • 2 cloves garlic, minced
    Lily’s tip: Fresh garlic is best. Add a little extra if your family loves garlic.

  • 1 tsp cumin
    Lily’s tip: Toast ground cumin in the pan for 20 seconds before adding liquids to intensify the aroma.

  • 1 tsp paprika
    Lily’s tip: Smoked paprika adds a lovely smoky note, but plain sweet paprika keeps it mild for kids.

  • 1/2 tsp salt
    Lily’s tip: Start with this amount and taste at the end. Add more if your coconut milk or beans are low in salt.

  • 1/2 tsp pepper
    Lily’s tip: Freshly ground black pepper has more bite than pre-ground.

  • Fresh cilantro, for garnish
    Lily’s tip: Chop cilantro just before serving for the brightest flavor. If your family dislikes cilantro, try fresh parsley.

Extra tip: If you want an extra layer of flavor, stir in a squeeze of lime at the end. It wakes up the coconut and spices beautifully.

For quick inspiration while cooking, my go-to comfort pairings include hearty sides like BBQ Chicken Mac and Cheese, which makes family dinners feel festive.

Directions

  1. In a large pot, heat some oil over medium heat.
    Encouraging note: Warm the oil until it shimmers. This step wakes up the spices and gives you a great base to build flavor. If you feel rushed, a medium-high heat works too; just watch closely.

  2. Add diced onion, bell pepper, and garlic; sauté until softened.
    Encouraging note: Let the vegetables soften and smell sweet. Take a deep breath and enjoy that homey aroma. Stir every minute so nothing browns too quickly.

  3. Stir in the chicken pieces and cook until no longer pink.
    Encouraging note: Cook the chicken until it is mostly white on the outside. Small pieces cook faster and make bedtime smoother. Browning the edges adds more flavor but is optional for time-crunched nights.

  4. Add the rice, beans, coconut milk, cumin, paprika, salt, and pepper.
    Encouraging note: Stir everything together so the rice is evenly distributed. This is a good moment to taste the liquid and adjust salt if needed. The coconut milk should gently coat the rice and beans.

  5. Bring to a boil, then reduce heat to low, cover, and simmer for about 20 minutes or until the rice is cooked and liquid is absorbed.
    Encouraging note: Avoid lifting the lid too often. Trust the pot and let it do the work. While it simmers, set plates, pour drinks, or grab spoons from the drawer.

  6. Remove from heat and let it sit for 5 minutes.
    Encouraging note: Resting helps the rice finish steaming and keeps everything fluffy. Use this quiet minute to wipe counters or tell a quick story before dinner.

  7. Fluff with a fork, garnish with cilantro, and serve.
    Encouraging note: Fluff gently so the grains stay separate. Sprinkle cilantro right before serving for the best color and scent. If you want to add a little green crunch, quickly toss in chopped scallions.

If you want heartier sides, consider something warm and cheesy like my Cheesy Ground Beef and Rice Casserole for a shared family-style table.

Serving

Caribbean Chicken and Rice

Serve this dish family-style in the middle of the table. Place a small bowl of lime wedges, extra cilantro, and a gentle hot sauce so everyone can adjust to taste. The colors make it feel special: red pepper, green cilantro, and the creamy rice.

For a complete meal, add a crisp salad or roasted vegetables. Kids love it when you let them sprinkle their own toppings. Turn on soft music and make it a relaxed, sit-down meal that becomes part of your weekly rhythm.

Storage

Store leftover Caribbean Chicken and Rice in an airtight container in the fridge for up to 4 days. Cool the pot slightly before transferring to containers to reduce condensation.

To reheat, add a splash of water or chicken broth to loosen the rice and microwave covered for 1 to 2 minutes, stirring once halfway through. For stovetop reheating, warm gently over low heat with a tablespoon of water, stirring until heated through. If you plan to freeze, portion into freezer-safe containers and keep for up to 2 months. Thaw overnight in the fridge before reheating.

If you expect picky leftovers, store plain rice and chicken separately from beans and cilantro. That way you can reassemble bowls to suit different tastes.

Kitchen Notes

  • Use day-old rice? No need here. This one-pot method cooks the rice from raw and turns out great fresh.
  • Swap chicken thighs for breasts if you want more forgiving cooking and extra flavor.
  • If your coconut milk separates in the can, stir it first or warm the can briefly for easier mixing.
  • For less cleanup, brown chicken and vegetables using a splatter guard to keep the stovetop tidy.
  • Want more veggies? Fold in frozen peas or fresh spinach in the last 5 minutes of cooking.

These small shortcuts help keep dinnertime smooth and less stressful. Families appreciate meals that are reliable and tasty.

Variations

  • For picky eaters: Reduce paprika and cumin slightly, finely chop vegetables, and serve the cilantro on the side.
  • For a vegetarian version: Replace chicken with extra beans, cubed sweet potato, or firm tofu. Use vegetable broth instead of chicken broth if you choose to add any.
  • For a gluten-free version: This recipe is naturally gluten-free as written, just check labels for any added ingredients.
  • For extra heat: Add 1/2 tsp of crushed red pepper or a finely chopped Scotch bonnet pepper to the sauté stage. Adjust to your family’s spice tolerance.
  • For richer flavor: Stir in a tablespoon of butter or a squeeze of lime right before serving.

These tweaks let you tailor the dish to tastes and dietary needs while keeping the same easy method.

FAQ

Q: Can I use brown rice instead of white rice?

A: Yes. Brown rice works but needs more liquid and a longer cooking time. Use 2 1/2 cups of liquid and simmer about 35 to 40 minutes. Check packaging for exact times.

Q: Can I prepare this in a slow cooker?

A: You can, but results vary. Brown the chicken and veggies first, then add everything to the slow cooker with 2 1/2 to 3 cups of liquid. Cook on low for 3 to 4 hours. The rice texture will be softer.

Q: Is this recipe freezer-friendly?

A: Yes. Cool completely, portion into airtight containers, and freeze for up to 2 months. Thaw overnight in the fridge before reheating.

Q: Can I make this spicy for adults and mild for kids?

A: Absolutely. Keep the pot mild and offer hot sauce or chopped chilies at the table. That keeps everyone happy without extra fuss during cooking.

Q: What sides go well with Caribbean Chicken and Rice?

A: A green salad, roasted plantains, or steamed vegetables are perfect. For a cozy family meal, simple cornbread or warm tortillas also work well.

Conclusion

I hope this Caribbean Chicken and Rice becomes a beloved weeknight staple in your home. It brings a warm, comforting aroma to the kitchen and fills plates with flavor and color. For more step-by-step takes on similar one-pot dinners, I recommend this recipe for One Pot Caribbean Jerk Chicken & Rice and this detailed guide on How To Make Mouthwatering One-Pot Caribbean Chicken & Rice. Try what fits your family and make it your own. Happy cooking from my kitchen to yours.

Caribbean Chicken and Rice

Prep Time 10 minutes
Cook Time 30 minutes
Total Time 40 minutes
Servings 4 servings
Calories 450
A comforting one-pot meal combining chicken, rice, and vibrant flavors that fills the house with warmth and love.

Ingredients

Main ingredients

  • 2 cups rice (Use long-grain white rice for a light, fluffy result.)
  • 2 pieces chicken breasts, diced (Cut the chicken into uniform pieces for even cooking.)
  • 1 can black beans, drained (Rinse to reduce canning liquid taste.)
  • 1 can coconut milk (Light coconut milk works for reduced calories, full-fat gives creaminess.)
  • 1 piece red bell pepper, diced (Red peppers add sweetness and color.)
  • 1 piece onion, diced (Yellow or sweet onions work well.)
  • 2 cloves garlic, minced (Fresh garlic is best.)
  • 1 tsp cumin (Toast for 20 seconds before adding liquids.)
  • 1 tsp paprika (Smoked adds a smoky note; sweet keeps it mild.)
  • 1/2 tsp salt (Taste and adjust as needed.)
  • 1/2 tsp pepper (Freshly ground has more bite.)
  • to taste fresh cilantro, for garnish (Chop just before serving.)

Instructions 

Cooking

  • In a large pot, heat some oil over medium heat.
  • Add diced onion, bell pepper, and garlic; sauté until softened.
  • Stir in the chicken pieces and cook until no longer pink.
  • Add the rice, beans, coconut milk, cumin, paprika, salt, and pepper.
  • Bring to a boil, then reduce heat to low, cover, and simmer for about 20 minutes or until the rice is cooked and liquid is absorbed.
  • Remove from heat and let it sit for 5 minutes.
  • Fluff with a fork, garnish with cilantro, and serve.

Notes

Serve family-style with lime wedges, extra cilantro, and hot sauce. Store leftovers in an airtight container for up to 4 days.
Calories: 450kcal
Course: Dinner, Main Course
Cuisine: Caribbean
Keyword: Chicken and Rice, Comfort Food, Family Dinner, One-Pot Meal, Weeknight Dinner

Green Chili Chicken Enchiladas

I can still smell the roasted peppers and hear the soft sizzle from the skillet. The kitchen fills with a warm, inviting scent that tells everyone dinner will be ready soon. Little hands press sticky fingerprints on the counter as we laugh and wait.

If you love casseroles that feed a family and feel like a hug on a plate, you will love these Green Chili Chicken Enchiladas. I often pair them with other cozy dishes like my green chicken enchiladas for a weekend of familiar favorites. This recipe is forgiving, tasty, and made for sharing.

Why this works

Green Chili Chicken Enchiladas

These enchiladas balance creamy, tangy, and slightly spicy in every bite. The green chili sauce brightens the chicken while the melted cheese brings comfort. Corn tortillas soak up flavor without getting soggy when you prepare them right.

This dish saves time on busy nights. You can use leftover roasted or rotisserie chicken and assemble while kids set the table. If you want a cheesier twist, try my pepper jack version for extra kick at pepper jack version.

It also stretches well. Two cups of shredded chicken will feed a hungry family and leave a bit for lunch. You can double the recipe for potlucks and busy weeks.

Process Overview

“This is where the magic happens—when the aroma fills the kitchen.”

We start by softening the tortillas and building a simple filling. The filling uses shredded chicken, just a touch of sauce, and onions for sweetness. After rolling, pour the remaining green chili sauce over the top, sprinkle with cheese, and bake.

This method keeps the inside moist and prevents the tortillas from drying out. If you enjoy warm, comforting casseroles, try pairing the enchiladas with a bowl of white chicken chili from my collection at best white chicken chili recipes for a chilly night.

Ingredients

  • 2 cups cooked and shredded chicken
    Lily’s tip: Use leftover roast chicken or a rotisserie bird. Shred while still slightly warm for easier mixing.

  • 1 cup green chili sauce
    Lily’s tip: Choose a medium-heat salsa verde for brightness. Taste it first and add more later if you want it spicier.

  • 1 cup shredded cheese (cheddar or Monterey Jack)
    Lily’s tip: Freshly shred for better melt and flavor. Combine cheddar and Monterey Jack for both tang and creaminess.

  • 8 corn tortillas
    Lily’s tip: Gently warm them before rolling so they do not crack. Corn tortillas give authentic texture.

  • 1/2 cup diced onions
    Lily’s tip: Sauté until soft to sweeten them and remove raw bite. Yellow or white onions both work.

  • 1/2 cup sour cream
    Lily’s tip: Use full-fat sour cream for creamier topping. You can thin with a tablespoon of milk if you prefer a drizzle.

  • 1 tablespoon olive oil
    Lily’s tip: Olive oil adds a subtle richness when sautéing onions. Use neutral oil if you prefer a lighter flavor.

  • Salt and pepper to taste
    Lily’s tip: Season in layers. Salt the chicken mixture lightly, then taste after baking and adjust.

  • Fresh cilantro for garnish
    Lily’s tip: Chop cilantro just before serving. It adds a bright finishing note that lifts the whole dish.

If you follow my pantry shortcuts, you will be surprised how quickly this meal comes together. For meat-focused variations, I sometimes use a richer chicken base inspired by my carnivore recipes at carnivore white chicken chili.

Directions

  1. Preheat the oven to 375°F (190°C).
    Encouraging note: Get this running first so the oven is ready when you finish assembling. It makes the whole process feel smooth.

  2. In a skillet, heat olive oil over medium heat, add onions, and sauté until soft.
    Encouraging note: Stir gently and breathe in the sweet onion aroma. This small step adds big flavor.

  3. In a large bowl, combine shredded chicken, 1/2 cup green chili sauce, salt, and pepper.
    Encouraging note: Mix gently so you keep some texture in the chicken. Taste and add a pinch more salt if needed.

  4. Soften tortillas by briefly warming them in the microwave.
    Encouraging note: Wrap them in a damp paper towel and heat 20 seconds at a time. They will roll without cracking when warm.

  5. Spoon a portion of the chicken mixture into each tortilla, roll them up, and place seam-side down in a baking dish.
    Encouraging note: Be generous but not overflowing. Place them snugly so they hold together while baking.

  6. Pour remaining green chili sauce over the top and sprinkle with shredded cheese.
    Encouraging note: Pour slowly and cover all the tortillas. Cheese on top helps seal in moisture and makes everything cozy.

  7. Bake in the preheated oven for 20-25 minutes, until cheese is melted and bubbly.
    Encouraging note: Watch for a light golden color and bubbling. Let the smell tell you it is almost ready.

  8. Serve with sour cream on top and garnish with fresh cilantro.
    Encouraging note: A spoonful of sour cream finishes the dish. Let everyone add cilantro to their taste.

If you want to pair the enchiladas with a creamy side, try one of my favorite bowls like this creamy white chicken chili at creamy white chicken chili for a complete comfort meal.

Serving

Green Chili Chicken Enchiladas

Serve these enchiladas family-style right from the baking dish. Place the dish in the center of the table and give each person a serving spoon. The warmth at the table is half of the meal.

Offer bowls of extra sour cream, chopped cilantro, and sliced limes. Add a simple green salad or steamed vegetables for balance. Kids will love tweaking their plate, and adults will appreciate the easy clean-up when everyone eats together.

For a party, double the recipe and bake in a 9×13 pan. Let the dish rest five minutes before serving so the filling sets and everyone can plate clean slices.

Storage

Refrigerator: Store leftovers in an airtight container for up to 3 days. Keep the sauce and sour cream separate if you plan to reheat individual portions.

Freezer: For longer storage, assemble the enchiladas and freeze before baking. Wrap the pan tightly and freeze up to 2 months. Thaw overnight in the fridge before baking.

Reheat: Warm in a 350°F oven for 15-20 minutes if refrigerated. If frozen and thawed, check for an extra 5-10 minutes. You can microwave single servings for 1-2 minutes, but the oven keeps the texture better.

Tip: Add a splash of water or extra sauce before reheating to prevent drying. A quick broil for one minute at the end gives cheese a fresh melted finish.

Kitchen Notes

  • Use rotisserie chicken to skip cooking time and keep the meal family-friendly.
  • Warm tortillas in a clean kitchen towel wrapped around a plate to save steps.
  • Shred cheese from a block for better melt and less anti-caking.
  • Leftover filling makes a great taco bowl or quesadilla the next day.
  • Double the sauce and freeze half in a jar for another quick dinner night.

These shortcuts keep the meal simple without sacrificing flavor.

Variations

  • Picky eaters: Reduce green chili sauce to 1/2 cup in the filling and add the rest on the side. Offer cheese-only enchiladas for children.
  • Gluten-free: Use certified corn tortillas and check sauce ingredients for hidden gluten. Corn tortillas are naturally gluten-free but verify labels.
  • Low-carb: Swap corn tortillas for large butter lettuce leaves or a low-carb wrap for a lighter version.
  • Spicier: Stir chopped pickled jalapeños or a splash of hot sauce into the filling. Add extra cilantro and lime to balance heat.
  • Vegetarian: Replace chicken with shredded roasted sweet potato or black beans. Use vegetable broth-thinned salsa verde for depth.

These tweaks let you adapt the recipe to your family’s likes while keeping the heart of the dish.

FAQ

Can I use flour tortillas instead of corn?

Yes. Flour tortillas are softer and more forgiving for beginners. They will be slightly chewier, but many families prefer them. Lightly warm them before rolling.

How do I make the dish less spicy for kids?

Use a mild green chili sauce or reduce the sauce in the filling to 1/2 cup. Serve extra sauce on the side for adults. Sour cream helps calm the heat on the plate.

Can I prepare enchiladas ahead of time?

Absolutely. Assemble in the baking dish, cover, and refrigerate up to 24 hours before baking. Add five extra minutes to the bake time if chilled.

What cheese is best for melting?

Monterey Jack melts beautifully and has a mild flavor. A blend of cheddar and Monterey Jack gives the best balance of flavor and stretch.

Is there a way to make it dairy-free?

Yes. Use a dairy-free sour cream and a plant-based cheese that melts well. Nutritional yeast adds a savory depth if you want extra flavor.

Conclusion

Thanks for letting me share this family favorite. These Green Chili Chicken Enchiladas are a simple, comforting dish that brings people to the table. When the oven timer dings and everyone gathers, you will see why I make them so often.

For a similar spin on the classic inspired by a favorite food writer, I like to compare notes with this Easy Green Chicken Enchiladas Recipe – Inspired Taste for extra technique ideas. If you want a practical, budget-friendly approach to green chile enchiladas, check out this thoughtful guide at Green Chile Chicken Enchiladas – Budget Bytes for more tips.

I hope this recipe finds its way into your weeknight rotation. Gather around, pass the dish, and enjoy the little sounds of a happy kitchen.

Green Chili Chicken Enchiladas

Prep Time 15 minutes
Cook Time 25 minutes
Total Time 40 minutes
Servings 6 servings
Calories 350
These cozy Green Chili Chicken Enchiladas are creamy, tangy, and slightly spicy, perfect for family dinners and potlucks.

Ingredients

Main Ingredients

  • 2 cups cooked and shredded chicken (Use leftover roast chicken or a rotisserie bird.)
  • 1 cup green chili sauce (Choose a medium-heat salsa verde for brightness.)
  • 1 cup shredded cheese (cheddar or Monterey Jack) (Freshly shredded for better melt and flavor.)
  • 8 pieces corn tortillas (Gently warm them before rolling so they do not crack.)
  • 1/2 cup diced onions (Sauté until soft to sweeten them.)
  • 1/2 cup sour cream (Use full-fat for creamier topping.)
  • 1 tablespoon olive oil (Adds subtle richness when sautéing onions.)
  • Salt and pepper (Season in layers.)
  • Fresh cilantro for garnish (Chop just before serving.)

Instructions 

Preparation

  • Preheat the oven to 375°F (190°C).
  • In a skillet, heat olive oil over medium heat, add onions, and sauté until soft.
  • In a large bowl, combine shredded chicken, 1/2 cup green chili sauce, salt, and pepper.
  • Soften tortillas by briefly warming them in the microwave.
  • Spoon a portion of the chicken mixture into each tortilla, roll them up, and place seam-side down in a baking dish.
  • Pour remaining green chili sauce over the top and sprinkle with shredded cheese.
  • Bake in the preheated oven for 20-25 minutes, until cheese is melted and bubbly.
  • Serve with sour cream on top and garnish with fresh cilantro.

Notes

Store leftovers in an airtight container for up to 3 days. For longer storage, freeze before baking. Add a splash of water or extra sauce before reheating.
Calories: 350kcal
Course: Dinner, Main Course
Cuisine: Mexican
Keyword: Casserole, Chicken, Comfort Food, Enchiladas, Family Dinner

Ground Chicken Enchiladas Skillet

I can smell the warm, tangy sauce and hear the soft sizzle of chicken in the skillet. The kitchen feels cozy and alive, like a Sunday evening even when it is a weekday. The family chatter is just a few feet away, and that comforting smell draws everyone to the table.

As a home cook and food blogger for over a decade, I love one pan dinners that feed a crowd without fuss. If you enjoy easy meals that still taste homemade, you might also like my take on my classic chicken enchiladas. This ground chicken enchiladas skillet is quick, satisfying, and perfect for weeknights.

Why this works

Ground Chicken Enchiladas Skillet

This recipe brings together simple pantry staples and keeps everything in one pan. That saves time on prep and cleanup, and puts dinner on the table faster. It also warms the whole house with that familiar enchilada scent, which makes the family smile.

Because it uses ground chicken, you get lean protein that cooks quickly and soaks up sauce beautifully. If you like comfort meals with minimal dishes, this skillet belongs in your weeknight rotation. For another green-sauce option I love, see my twist on green chicken enchiladas for a different flavor profile.

This dish scales up well for hungry families and still feels homey. It is forgiving, so even if you are new to cooking, you will get a delicious result.

Process Overview

“This is where the magic happens—when the aroma fills the kitchen.”

We brown the chicken, build flavor with aromatics, stir in sauce and beans, and finish with melty cheese. The whole process is straightforward and comes together in about 25 to 30 minutes.

If you enjoy one-pan meals in general, they are a great foundation for creativity. I often turn to quick skillet dinners like these during busy evenings, and I recommend them as a reliable go-to. You can also find more inspiration on easy one-skillet dinners that work well with this cooking style.

Ingredients

I test recipes carefully to make sure they are family-friendly and easy to follow. Below are the ingredients with my personal tips for each.

What you need

  • 1 lb ground chicken
    Lily’s tip: Choose fresh ground chicken or the best quality you can find. It browns faster than turkey and stays juicy.

  • 1 onion, diced
    Lily’s tip: Sweet yellow onions work well. Dice small so they soften quickly and blend with the sauce.

  • 2 cloves garlic, minced
    Lily’s tip: Fresh garlic gives the best flavor. If you are in a hurry, 1/2 tsp garlic powder works in a pinch.

  • 1 can (10 oz) enchilada sauce
    Lily’s tip: Mild or medium depending on your family. I keep both on hand and mix to control heat.

  • 1 cup black beans, drained and rinsed
    Lily’s tip: Rinse to reduce sodium and improve color. Canned beans save time but cook your own if you prefer.

  • 1 cup corn, frozen or fresh
    Lily’s tip: Frozen corn is convenient and adds a sweet pop. No need to thaw if you toss it straight into the hot skillet.

  • 1 1/2 cups shredded cheese (cheddar or Mexican blend)
    Lily’s tip: Use a blend for more complexity, or cheddar for that classic tang. Grate your own for better melting.

  • 1 tsp chili powder
    Lily’s tip: Adjust to taste. A mild chili powder keeps this kid-friendly.

  • 1 tsp cumin
    Lily’s tip: Freshly ground cumin adds depth. A little goes a long way.

  • Salt and pepper to taste
    Lily’s tip: Start light and taste at the end. The enchilada sauce may already contain salt.

  • Fresh cilantro for garnish
    Lily’s tip: Chop just before serving. If someone in the family does not like cilantro, try sliced green onions.

For a fun variation with pepper jack, check how cheese changes flavor in my pepper jack enchiladas post.

Directions

  1. In a large skillet, cook the ground chicken over medium heat until browned. Drain any excess fat.
    Encouraging note: Let the chicken brown well for flavor. If you are nervous about sticking, add a little oil and use a spatula to break it into even pieces.

  2. Add the diced onion and minced garlic; sauté for 2-3 minutes until softened.
    Encouraging note: The smell of softened onions is an instant sign of progress. Stir often so the garlic does not burn.

  3. Stir in the enchilada sauce, black beans, corn, chili powder, cumin, salt, and pepper.
    Encouraging note: Mix gently so the sauce coats everything. This is when the dish starts to look like a true enchilada filling.

  4. Bring to a simmer and cook for another 5 minutes.
    Encouraging note: Simmering lets the flavors meld. If the mixture gets too thick, splash in 2 Tablespoons water to loosen it.

  5. Sprinkle the shredded cheese on top, cover the skillet, and allow the cheese to melt for about 2-3 minutes.
    Encouraging note: Use a lid so the cheese melts evenly. Peek once to avoid over-melting, but leave it alone long enough to get gooey goodness.

  6. Garnish with fresh cilantro before serving. Enjoy your delicious one pan meal!
    Encouraging note: Sprinkle cilantro right before serving for brightness. Call the family to the table and watch how fast plates empty.

If you prefer another way to use extra ground chicken, try my quick ground chicken fried rice for a different weeknight dinner.

Serving

Ground Chicken Enchiladas Skillet

Serve this skillet family-style right from the pan. Place warm tortillas, a bowl of sour cream, and lime wedges on the table. Let everyone assemble their own plate.

For kids or picky eaters, offer plain tortillas or rice on the side. A simple green salad or chopped tomatoes add freshness and color. When we eat together, the skillet in the center of the table makes it easy to share and talk about the day.

You can also serve over rice, quinoa, or even spoon into baked potatoes for a fun twist. The melty cheese and sauce make it adaptable to different tastes and ages.

Storage

Leftovers keep well and reheat beautifully. Store in an airtight container in the fridge for up to 3 days. If you want to freeze, cool completely and freeze in a shallow container for up to 2 months.

To reheat from the fridge, place the skillet over medium-low heat, cover, and stir occasionally until warmed through. Add a splash of water or broth if it looks dry.

To reheat from frozen, thaw in the fridge overnight and then reheat using the stovetop method. You can also microwave single portions on medium power for 2 to 3 minutes, stirring halfway.

A note on safety: always reheat until the center is steaming hot, and never refreeze leftovers that have been sitting at room temperature for more than two hours.

Kitchen Notes

  • Use a wide, heavy skillet for even cooking and easy stirring.
  • Brown the chicken in batches if your pan is crowded to get better caramelization.
  • Swap frozen corn for a fresh cob in summer for a sweeter bite.
  • Grate your own cheese for smoother melting compared to pre-shredded varieties.
  • Keep a jar of enchilada sauce in the pantry for last-minute dinners.

These small shortcuts save time without sacrificing flavor. Over the years I have learned that little tweaks like warming tortillas or grating cheese right before dinner make a big difference in family meals.

Variations

  • For picky eaters: Leave out the beans and corn on half the skillet. Serve a plain portion with tortillas.
  • For low-carb: Serve over cauliflower rice or spoon into lettuce cups.
  • For extra heat: Add chopped jalapeños or a few dashes of hot sauce.
  • For vegetarian: Swap the ground chicken for crumbled tofu or a plant-based ground alternative and use vegetable stock if needed.
  • For a creamy twist: Stir in 1/4 cup cream cheese or sour cream at the end for a richer sauce.

These tweaks let you customize the dish while keeping the core technique the same. I like to adapt this skillet to whatever is in the fridge and whoever is at the table.

FAQ

Q: Can I use ground turkey instead of ground chicken?
A: Yes. Ground turkey works similarly. Brown it the same way, but watch for dryness. Add a tablespoon of oil if it looks too dry while cooking.

Q: Is this dish freezer friendly?
A: Yes. Cool completely, place in a freezer-safe container, and freeze for up to 2 months. Thaw overnight in the refrigerator before reheating.

Q: Can I make this ahead for meal prep?
A: You can prepare the filling and refrigerate for up to 2 days before melting the cheese and serving. For best texture, add the cheese just before serving.

Q: How can I make this milder for children?
A: Use mild enchilada sauce and reduce chili powder to 1/2 tsp. Serve with sour cream and tortilla chips to balance any remaining heat.

Q: What sides pair best with this skillet?
A: A simple green salad, Spanish rice, or warm tortillas all pair well. Fresh lime wedges and sliced avocado add brightness.

Conclusion

I hope this Ground Chicken Enchiladas Skillet becomes one of your family favorites. It is a simple, comforting meal that fills the kitchen with inviting aromas and brings everyone together at the table. For a slightly different take on one-pan enchilada-style dinners, I often refer to the helpful method in this one-pan chicken enchilada skillet. And for more testing on healthy skillet versions, I like the approach shown in Well Plated’s chicken enchilada skillet.

Thank you for cooking with me. Send me a note about how your family liked it, and feel free to swap ingredients to suit your table. Happy cooking from my kitchen to yours.

Ground Chicken Enchiladas Skillet

Prep Time 10 minutes
Cook Time 20 minutes
Total Time 30 minutes
Servings 4 servings
Calories 450
This quick and satisfying one-pan meal combines ground chicken with flavorful enchilada sauce, black beans, and cheese, making it perfect for busy weeknights.

Ingredients

Main Ingredients

  • 1 lb ground chicken (Choose fresh ground chicken or the best quality; it browns faster than turkey.)
  • 1 c onion, diced (Sweet yellow onions work well; dice small for quick cooking.)
  • 2 cloves garlic, minced (Fresh garlic provides the best flavor; garlic powder can be used in a pinch.)
  • 1 can (10 oz) enchilada sauce (Choose mild or medium based on preference.)
  • 1 c black beans, drained and rinsed (Rinse to reduce sodium.)
  • 1 c corn, frozen or fresh (Frozen corn is convenient; no need to thaw.)
  • 1 1/2 c shredded cheese (cheddar or Mexican blend) (Grate your own for better melting.)
  • 1 tsp chili powder (Adjust to taste.)
  • 1 tsp cumin (Freshly ground adds depth.)
  • to taste salt and pepper (Start light; the sauce may contain salt.)
  • fresh cilantro for garnish (Chop just before serving.)

Instructions 

Cooking

  • In a large skillet, cook the ground chicken over medium heat until browned. Drain any excess fat.
  • Add the diced onion and minced garlic; sauté for 2-3 minutes until softened.
  • Stir in the enchilada sauce, black beans, corn, chili powder, cumin, salt, and pepper.
  • Bring to a simmer and cook for another 5 minutes.
  • Sprinkle the shredded cheese on top, cover the skillet, and allow the cheese to melt for about 2-3 minutes.
  • Garnish with fresh cilantro before serving.

Notes

Serve family-style with warm tortillas, sour cream, and lime wedges. Leftovers store well in the fridge for up to 3 days or freeze for up to 2 months.
Calories: 450kcal
Course: Dinner, Main Course
Cuisine: Mexican
Keyword: Easy Dinner, Family Meal, Ground Chicken Enchiladas, One-Pan Skillet, quick recipe

Garlic Parmesan Chicken Meatloaf

I can still smell the garlic when I walk into my kitchen. The soft sizzle from the pan, the gentle hum of the oven, and the warm peppery scent of Parmesan make everyone gather close. This Garlic Parmesan Chicken Meatloaf is one of those recipes that feels like a hug on a plate.

If you want the printable recipe card and a few extra photos, you can find my tested version on my Garlic Parmesan Chicken Meatloaf recipe page. I test family recipes until they are simple, reliable, and easy to love.

Why this works

Garlic Parmesan Chicken Meatloaf

This meatloaf hits all the notes families want. Ground chicken keeps it lighter than beef, while Parmesan adds a savory, nutty depth. Garlic gives the aroma that pulls everyone to the table.

H3 Family and time saving

It is quick to assemble and bakes in under an hour. That makes it a great weeknight main when homework, sports, and life need a home-cooked meal without a late night. Pair it with mashed potatoes or a simple salad and you have dinner ready.

For a similar hands-on weeknight idea that pairs well with leftovers, try my creamy chicken breast recipe that the kids often ask for next day lunches at my creamy garlic parmesan chicken breast page.

Process Overview

“This is where the magic happens—when the aroma fills the kitchen.”

The process is straightforward. You mix, shape, and bake. The garlic and Parmesan work together to keep the chicken flavorful and moist. Breadcrumbs and an egg bind the mixture so the loaves hold their shape and slice neatly for serving.

I write steps so home cooks can follow easily. Little tips along the way help ensure a moist result every time.

Ingredients

  • 1 lb ground chicken
    • Tip: Use fresh ground chicken from a trusted source or grind your own breasts and thighs for the best texture. Mixing breasts and thighs gives more flavor.
  • 1/2 cup grated Parmesan cheese
    • Tip: Freshly grated Parmesan melts and blends better than pre-grated powder. It adds a salty, savory boost.
  • 4 cloves garlic, minced
    • Tip: Mince garlic finely or press it. Raw garlic blends into the meat and becomes mellow and rich after baking.
  • 1/4 cup chopped fresh parsley
    • Tip: Parsley adds color and a light herb note. Flat leaf parsley is my preference for flavor.
  • 1/4 cup breadcrumbs
    • Tip: Plain breadcrumbs work well. If you only have panko, pulse it briefly in a food processor to match the texture.
  • 1 egg
    • Tip: The egg binds and adds moisture. If you are out of eggs, use 2 tablespoons of plain yogurt as a binder.
  • 1 tsp salt
    • Tip: Taste your Parmesan first since it can be salty. Adjust the added salt accordingly.
  • 1/2 tsp black pepper
    • Tip: Freshly cracked pepper brightens the flavors. Use more if your family likes a bit of bite.
  • 1 tsp Italian seasoning
    • Tip: I like a homemade mix of oregano, basil, and thyme. It pairs perfectly with Parmesan and garlic.

Short personal note: I test this recipe with my family and adjust salt and garlic to make sure it is kid-friendly and loved by adults too. For a different texture and extra veggies, see my skillet variation below.

In case you want another one-pan chicken and potato idea to serve alongside or use leftover meatloaf slices, check my skillet version at Garlic Parmesan Chicken and Potatoes Skillet.

Directions

  1. Preheat the oven to 375°F (190°C).

    • Encouraging note: Letting the oven reach the right temperature first makes baking predictable. While it heats, you can prep the rest.
  2. In a large bowl, combine ground chicken, Parmesan cheese, minced garlic, parsley, breadcrumbs, egg, salt, pepper, and Italian seasoning. Mix until well combined.

    • Encouraging note: Use clean hands or a spoon and mix gently until everything is incorporated. Overworking can tighten the meat, so stop once it looks unified.
  3. Form the mixture into mini loaf shapes and place them on a baking sheet lined with parchment paper.

    • Encouraging note: Mini loaves cook more evenly and are great for portioning. If you prefer one large loaf, shape it and increase the bake time a little.
  4. Bake for 30-35 minutes, or until the meatloaves are cooked through and they reach an internal temperature of 165°F (74°C).

    • Encouraging note: Use an instant-read thermometer for accuracy. The thermometer is your best friend for safe, juicy results.
  5. Serve with mashed potatoes, a side salad, or veggies.

    • Encouraging note: Let the loaves rest for a few minutes after baking so they firm up. Slice gently and serve warm to smiles around the table.

If you want to make these in a slow cooker for a hands-off day, I have a crockpot twist that adapts well and keeps the flavors intact. You can compare methods on my crockpot recipe page at my crockpot garlic parmesan chicken thighs page.

Serving

Garlic Parmesan Chicken Meatloaf

Serve these meatloaves family style on a large platter. I like to place the loaves in the center with mashed potatoes on one side and roasted vegetables on the other. Let everyone help themselves.

For kids, slice thin pieces and serve with a small scoop of their favorite sauce. For adults, pair with an easy salad and a lemon wedge to brighten the dish. Leftover slices make excellent sandwiches the next day.

Set out warm plates, and consider a small bowl of extra grated Parmesan for those who like an extra sprinkle. This meal keeps conversation flowing and plates full.

Storage

Refrigerate

  • Store cooled meatloaves in an airtight container for up to 4 days in the fridge.
  • To reheat, place slices on a baking sheet and warm at 325°F for 10 to 12 minutes until heated through.
  • Alternatively, microwave a single slice on medium power in 30 second intervals until warm.

Freezing

  • Wrap cooled loaves tightly in plastic wrap and foil, and freeze for up to 3 months.
  • Thaw in the fridge overnight before reheating in the oven to preserve texture.

Safety tip: Always reheat until the center reaches 165°F for safe eating. I label my containers with dates so nothing gets lost in the back of the fridge.

Kitchen Notes

  • Use a thermometer. It removes guesswork and keeps family meals worry free.
  • Make mini loaves for faster cooking and easy portion control.
  • Swap plain breadcrumbs for crushed crackers if you need a pantry substitute.
  • Double the recipe and freeze half for busy weeks. It saves time and stress.
  • Clean while you cook. Wipe counters and load the dishwasher during baking to keep the kitchen calm.

Variations

H3 For picky eaters

  • Mild version: Reduce garlic to 2 cloves and add 1/4 cup finely grated carrot or zucchini for extra moisture and hidden veggies.
  • Cheese swap: Replace Parmesan with 1/2 cup finely shredded mild cheddar for a familiar taste kids often prefer.

H3 For different diets

  • Low-carb: Replace breadcrumbs with 1/4 cup almond flour. Watch texture and add a touch of extra moisture if needed.
  • Gluten-free: Use gluten-free breadcrumbs or crushed gluten-free crackers.
  • Dairy-free: Omit Parmesan and add 2 tablespoons nutritional yeast and an extra pinch of salt for savory notes.

H3 Make it saucy

  • Brush a thin layer of ketchup or BBQ sauce before baking for a glossy finish the kids like.
  • For a tangy twist, mix 1 tablespoon Dijon mustard into the egg before combining.

If you want to pair this meatloaf with a sweeter sauce and garlicky potatoes, my honey BBQ chicken with garlic-Parmesan potatoes is a great inspiration and side idea at my honey BBQ chicken page.

FAQ

Q: Can I use ground turkey instead of ground chicken?
A: Yes. Ground turkey works similarly but may be leaner. Consider mixing in a little extra fat like a tablespoon of olive oil or using a mix of turkey dark meat for juiciness.

Q: How can I tell when the meatloaf is done without a thermometer?
A: Cut into the center and make sure juices run clear and there is no pink. However, a thermometer is more reliable and recommended for safety.

Q: Can I prepare these ahead of time?
A: Absolutely. Shape the loaves, cover, and refrigerate for up to 24 hours before baking. You can also freeze them before baking and bake from frozen with extra time.

Q: Is it safe to use ground chicken for meatloaf?
A: Yes. Ground chicken is safe when cooked to 165°F (74°C). Proper handling and cooking keep the meal healthy and delicious.

Q: What sides go best with this meatloaf?
A: Mashed potatoes, steamed green beans, roasted carrots, or a crisp salad are all great. For a cozy dinner, creamy mashed potatoes are my go-to comfort side.

Conclusion

I hope this Garlic Parmesan Chicken Meatloaf becomes a regular on your family table. It is comforting, straightforward, and built for busy evenings when you still want a homemade meal.

If you are looking for another take on this recipe from a trusted source, I like the version on Garlic Parmesan Chicken Meatloaf – The Recipe Critic for additional serving ideas. For a mini meatloaf spin with extra tips, see the helpful guide at Garlic Parmesan Chicken Meatloaves – Will Cook For Smiles.

Thank you for cooking with me. From my kitchen to yours, may every meal bring your family a little closer.

Garlic Parmesan Chicken Meatloaf

Prep Time 15 minutes
Cook Time 35 minutes
Total Time 50 minutes
Servings 6 servings
Calories 240
A comforting and flavorful meatloaf made with ground chicken, Parmesan cheese, and garlic, perfect for busy weeknights.

Ingredients

Main Ingredients

  • 1 lb ground chicken (Use fresh ground chicken from a trusted source or grind your own for the best texture.)
  • 1/2 cup grated Parmesan cheese (Freshly grated Parmesan melts and blends better than pre-grated.)
  • 4 cloves garlic, minced (Mince garlic finely or press it for best flavor.)
  • 1/4 cup chopped fresh parsley (Flat leaf parsley is preferred for flavor.)
  • 1/4 cup breadcrumbs (Plain breadcrumbs work well; if using panko, pulse it briefly in a food processor.)
  • 1 large egg (The egg binds and adds moisture.)
  • 1 tsp salt (Adjust according to the saltiness of your Parmesan.)
  • 1/2 tsp black pepper (Use freshly cracked pepper for best flavor.)
  • 1 tsp Italian seasoning (Homemade mix of oregano, basil, and thyme works well.)

Instructions 

Preparation

  • Preheat the oven to 375°F (190°C).
  • In a large bowl, combine ground chicken, Parmesan cheese, minced garlic, parsley, breadcrumbs, egg, salt, pepper, and Italian seasoning. Mix until well combined.
  • Form the mixture into mini loaf shapes and place them on a baking sheet lined with parchment paper.

Baking

  • Bake for 30-35 minutes, or until the meatloaves are cooked through and reach an internal temperature of 165°F (74°C).
  • Let the loaves rest for a few minutes before slicing and serving.

Serving

  • Serve with mashed potatoes, a side salad, or veggies.

Notes

For a different texture, try adding finely grated carrot or zucchini. If you want extra flavor, brush with ketchup or BBQ sauce before baking.
Calories: 240kcal
Course: Dinner, Main Course
Cuisine: American
Keyword: Chicken Dinner, Comfort Food, Easy Meatloaf, Garlic Parmesan Chicken Meatloaf, Weeknight Dinner

High Protein Chicken Crunch Wrap Supreme

The kitchen fills with the smell of warm tortillas and seasoned chicken. I hear the little clink of a spoon against a bowl and the soft sizzle when the wrap hits the skillet. Those sounds mean dinner is almost ready and the family is about to gather around the table.

This High Protein Chicken Crunch Wrap Supreme is one of those recipes that feels like comfort and energy all at once. It is crunchy, creamy, and full of lean protein. My kids love the crispy texture, and I love how fast it comes together on busy nights. If you enjoy hearty salads and wraps, you might also like my Buffalo Chicken Salad for another family-friendly protein option.

Why this works

High Protein Chicken Crunch Wrap Supreme

This recipe blends textures and flavors in a way that keeps everyone happy. The seasoned chicken brings savory depth. The Greek yogurt adds creaminess without a lot of extra calories. The crispy tortilla holds it all together.

It works for families because it is quick to assemble and easy to customize. You can set out bowls of toppings and let everyone build their own. That saves time and makes dinner interactive. If you want another crunchy handheld idea for busy evenings, check out my Crispy Air Fryer Chicken Mozzarella Wraps.

The recipe also stretches ingredients well. Use leftover chicken from a roast or from meal prep to make this in minutes. For busy nights, the crunch and comfort make it feel special without a lot of fuss.

Process Overview

“This is where the magic happens—when the aroma fills the kitchen.”

The process is simple. You season and shred the chicken. You layer it with fresh veggies and Greek yogurt on a large tortilla. You fold and crisp the wrap in a skillet until golden.

The magic moment is when the wrap hits the hot pan and you hear that satisfying sizzle. That crisp sound tells you the outside is turning beautifully golden. In under 10 minutes of active cooking you have a crunchy, protein-packed meal that feeds the whole family.

Ingredients

  • 1 large tortilla
    Tip: Use a large whole wheat tortilla for extra fiber and structure. Warm it briefly to make folding easier.
  • 1 cup cooked chicken, shredded
    Tip: Rotisserie chicken works great and saves time. Leftover grilled chicken adds extra flavor.
  • 1/2 cup Greek yogurt
    Tip: Choose plain Greek yogurt for tang and protein. Mix in a little lime juice for brightness.
  • 1/2 cup shredded lettuce
    Tip: Romaine holds up better than iceberg. Shred it thin so it layers nicely.
  • 1/4 cup diced tomatoes
    Tip: Drain extra juice from tomatoes to prevent a soggy wrap.
  • 1/4 cup shredded cheese
    Tip: Cheddar melts well and adds savory richness. Use reduced-fat if you prefer.
  • 1/4 cup black beans, rinsed and drained
    Tip: Rinse canned beans to remove excess sodium. They add fiber and make the wrap more filling.
  • 1/4 teaspoon taco seasoning
    Tip: Use a mild blend for kids or add more for bolder flavor. You can make your own with cumin, chili powder, and a pinch of salt.
  • Cooking spray or olive oil
    Tip: Cooking spray gives an even crisp. A teaspoon of olive oil adds flavor and helps with browning.

My personal notes: measure your chicken and Greek yogurt to keep the protein balance right. These ingredients form a complete, satisfying meal with lean protein, fresh produce, and a little indulgence from cheese.

Directions

  1. In a bowl, mix the cooked chicken with taco seasoning.
    Note: Toss gently and taste a bit. Adjust seasoning if you need more zing. This step builds flavor fast.

  2. Lay the tortilla flat and spread Greek yogurt in the center.
    Note: Leave a border so you can fold the edges. The yogurt acts like a creamy glue.

  3. Layer shredded chicken, lettuce, tomatoes, cheese, and black beans on top of the yogurt.
    Note: Keep the pile centered and not too high. You want every bite to have a little of each filling.

  4. Fold the sides of the tortilla inwards and roll it up tightly to form a wrap.
    Note: Take your time with the fold. A tight roll helps the wrap stay together while cooking.

  5. Heat a skillet over medium heat and spray with cooking spray or add olive oil.
    Note: A hot pan gives a quick crisp. Test with a tiny drop of water to check for sizzle.

  6. Place the wrap seam-side down in the skillet and cook until golden brown and crispy, about 2-3 minutes.
    Note: Press gently with a spatula to seal and crisp the surface. That sound is so satisfying.

  7. Flip and cook the other side until crispy.
    Note: Use a sturdy spatula and keep an eye on the heat. You want golden color, not burned edges.

  8. Remove from skillet, slice in half, and serve.
    Note: Let it rest for a minute so the fillings set. Then slice on a slight angle for a nice presentation.

Each step is forgiving. If a wrap leaks a bit, just scoop the filling back in for the next one. Encourage kids to help with layering and folding. They will be proud of a dinner they helped create. If you are watching calories but want the protein, remember you can reduce cheese and use low-fat Greek yogurt without losing too much flavor. For a different texture, try grilling the assembled wrap in a sandwich press for extra crisp.

Serving

High Protein Chicken Crunch Wrap Supreme

Serve these crunch wraps family-style on a large platter. Place extra bowls of Greek yogurt, salsa, and sliced avocado nearby for topping. My family likes to add a squeeze of lime and a sprinkle of chopped cilantro.

For kids, cut the wrap into smaller pieces and serve with carrot sticks or a side of fruit. For adults, pair the wrap with a simple mixed greens salad or roasted vegetables. If you want a protein-packed salad that pairs well for a meal rotation, try my Easy High Protein Feta Chicken Salad on another night.

You can also wrap leftovers in foil and serve them warm at lunch. They hold up well and stay crunchy with a quick reheat.

Storage

Store any leftover wraps covered in the refrigerator for up to 3 days. If the lettuce and tomatoes make the wrap soggy, remove those before storing and add fresh when you reheat.

To reheat, place the wrap in a preheated skillet over medium heat for 2 to 4 minutes per side until warmed and crisp. You can also reheat in a 350°F oven for 8 to 10 minutes. Avoid microwaving if you want to keep the exterior crunchy. If you must use the microwave, heat in short intervals and then crisp in a hot skillet for 30 to 60 seconds.

If you plan to freeze, assemble without lettuce and tomatoes, wrap tightly in foil, and freeze for up to 1 month. Reheat from frozen in a 350°F oven for 20 to 25 minutes, or until hot throughout.

Kitchen Notes

  • Prep once, eat twice: Shred extra chicken on the weekend for quick meals during the week.
  • Double duty ingredients: Use the same taco-seasoned chicken in salads or bowls for variety.
  • Keep toppings separate: Store lettuce and tomatoes in a different container to prevent sogginess.
  • Pan choice matters: A nonstick skillet or cast iron gives the best crisp.
  • Kid-friendly steps: Let kids add toppings and fold their own wraps under supervision.

These shortcuts save time and keep the family meal smooth and stress-free.

Variations

  • For picky eaters: Leave out tomatoes and black beans. Add corn or sweet bell peppers for color without strong flavors.
  • Higher heat: Add a small pinch of cayenne or extra taco seasoning to the chicken for adults.
  • Low carb: Use a large lettuce leaf or low-carb tortilla instead of a regular tortilla.
  • Vegetarian: Swap the chicken for seasoned, crumbled tempeh or roasted cauliflower with the same taco seasoning.
  • Dairy free: Replace Greek yogurt with a dairy-free plain yogurt or mashed avocado for creaminess. For a version with cottage cheese flair, see my High Protein Cottage Cheese Chicken Salad for pairing ideas.

You can tailor this crunch wrap to meet different dietary needs without losing the spirit of the meal. For a southwest twist, try adding corn, cilantro, and a squeeze of lime from my High Protein Southwest Chicken Salad for inspiration.

FAQ

Q: Can I use shredded raw chicken and cook it inside the tortilla?
A: No. Always use fully cooked chicken. The tortilla will crisp before raw chicken reaches a safe temperature. Use pre-cooked or leftover chicken.

Q: How can I make this lower in calories?
A: Use low-fat Greek yogurt, reduce cheese, and choose a whole wheat tortilla. Load up on lettuce and tomatoes for volume.

Q: Can I bake this instead of skillet-cooking?
A: Yes. Brush the wrap with a little oil and bake at 375°F for 10 to 12 minutes until golden and crisp. Flip halfway through baking for even color.

Q: Is this freezer-friendly?
A: Yes. Assemble without lettuce and tomatoes, wrap tightly, and freeze up to 1 month. Reheat in a 350°F oven until hot.

Q: How do I keep the wrap from falling apart?
A: Do not overfill and be sure to fold tightly. Press seam-side down in the skillet first to seal it. Let it rest for a minute before slicing.

These quick answers help you troubleshoot common questions and keep dinner running smoothly.

Conclusion

I hope this High Protein Chicken Crunch Wrap Supreme brings warmth and energy to your dinner table. It is one of those recipes that makes weeknights feel a bit more special while still being practical. If you love crusty, golden wraps and protein-filled meals, you might enjoy the flavor-focused take in Half Baked Harvest’s healthier homemade crunchwrap and the hearty assembly ideas in Sailor Bailey’s Chicken Crunch Wrap Supreme for more inspiration.

Thanks for letting me share this family favorite. Come back and tell me how your kitchen sounded when the wraps hit the pan.

High Protein Chicken Crunch Wrap Supreme

Prep Time 10 minutes
Cook Time 6 minutes
Total Time 16 minutes
Servings 4 servings
Calories 400
A hearty and quick-to-make wrap filled with seasoned chicken, Greek yogurt, fresh veggies, and a crispy tortilla shell, perfect for family dinners.

Ingredients

Main Ingredients

  • 1 large large tortilla (Use a large whole wheat tortilla for extra fiber and structure. Warm it briefly to make folding easier.)
  • 1 cup cooked chicken, shredded (Rotisserie chicken works great and saves time. Leftover grilled chicken adds extra flavor.)
  • 1/2 cup Greek yogurt (Choose plain Greek yogurt for tang and protein. Mix in a little lime juice for brightness.)
  • 1/2 cup shredded lettuce (Romaine holds up better than iceberg. Shred it thin so it layers nicely.)
  • 1/4 cup diced tomatoes (Drain extra juice from tomatoes to prevent a soggy wrap.)
  • 1/4 cup shredded cheese (Cheddar melts well and adds savory richness. Use reduced-fat if you prefer.)
  • 1/4 cup black beans, rinsed and drained (Rinse canned beans to remove excess sodium. They add fiber and make the wrap more filling.)
  • 1/4 teaspoon taco seasoning (Use a mild blend for kids or add more for bolder flavor. You can make your own with cumin, chili powder, and a pinch of salt.)
  • as needed Cooking spray or olive oil (Cooking spray gives an even crisp. A teaspoon of olive oil adds flavor and helps with browning.)

Instructions 

Preparation

  • In a bowl, mix the cooked chicken with taco seasoning. Toss gently and taste a bit. Adjust seasoning if you need more zing.
  • Lay the tortilla flat and spread Greek yogurt in the center. Leave a border so you can fold the edges.
  • Layer shredded chicken, lettuce, tomatoes, cheese, and black beans on top of the yogurt. Keep the pile centered and not too high.
  • Fold the sides of the tortilla inwards and roll it up tightly to form a wrap. Take your time with the fold.

Cooking

  • Heat a skillet over medium heat and spray with cooking spray or add olive oil.
  • Place the wrap seam-side down in the skillet and cook until golden brown and crispy, about 2-3 minutes.
  • Flip and cook the other side until crispy.
  • Remove from skillet, slice in half, and serve. Let it rest for a minute so the fillings set.

Notes

Serve with extra toppings like Greek yogurt, salsa, and sliced avocado. Store leftovers for up to 3 days, reheating in a skillet for best results.
Calories: 400kcal
Course: Dinner, Main Course
Cuisine: American, Mexican
Keyword: Chicken Wrap, Crunch Wrap, Family Meal, Healthy Dinner, High Protein

Paleo Grilled Chicken Cobb Salad with Honey Dijon Dressing

A warm kitchen smell greets you the moment the grill comes alive. The sizzle of chicken on hot metal, the soft clink of a salad bowl, the gentle chop of an avocado. These are the sounds and smells that mean a simple, nourishing dinner is on its way.

This Paleo Grilled Chicken Cobb Salad with Honey Dijon Dressing is one of my go-to family meals. It is bright, hearty, and quick enough for weeknights, yet pretty enough for a Sunday supper. If you love bold flavors and easy prep, this recipe will become a regular in your rotation. For another family favorite that pairs well with weeknight grilling, try my recipe for chipotle honey chicken thighs with smoked gouda mashed potatoes to inspire your menu planning.

Why this works

Paleo Grilled Chicken Cobb Salad with Honey Dijon Dressing

This salad checks so many boxes for busy families. The grilled chicken gives hearty protein that kids and adults both recognize. The avocado and boiled eggs add creamy texture and healthy fats. Crisp cherry tomatoes and mixed greens keep the dish fresh.

It is also a time saver. You can grill the chicken while boiling eggs and crisping bacon. Once everything is ready, assembly takes minutes. If you prefer a lighter dressing or want to swap vinaigrette ideas, my guide to homemade Caesar dressing without raw anchovies offers a simple method to make dressings from pantry staples.

Because the elements hold up well, you can prep parts ahead for busy evenings. Cook extra chicken for leftovers or for a quick lunch the next day. This flexibility makes the salad ideal for families juggling after-school activities and late workdays.

Process Overview

“This is where the magic happens—when the aroma fills the kitchen.”

Start with the chicken and bacon. While the grill heats and the bacon browns, set a pot of water on to boil for eggs. Arrange a work station with bowls for chopped avocado, halved tomatoes, and crumbled cheese.

Once you get the hang of the flow, assembly feels effortless. If you like to prepare components in advance, my recipe for homemade chicken salad with grapes shows how to portion proteins and make quick midweek meals that keep well in the fridge. With a little prep, you can turn this Cobb salad into a weekly staple.

Ingredients

Below are the ingredients you need. I include a short tip for each to help you get the best flavor and texture.

  • 2 grilled chicken breasts, sliced.
    • Tip: Grill over medium-high heat until the internal temperature reaches 165 °F. Let the chicken rest 5 minutes before slicing so juices stay locked in.
  • 4 cups mixed greens.
    • Tip: Use a sturdy mix like romaine and baby kale to hold the weight of the toppings without wilting.
  • 1 avocado, diced.
    • Tip: Choose an avocado that yields slightly to gentle pressure. Toss diced avocado in a splash of lemon juice if you plan to prep ahead to avoid browning.
  • 2 boiled eggs, chopped.
    • Tip: For creamy yolks, boil eggs for 9 minutes, then plunge into ice water. Peel gently to keep whites intact.
  • 1 cup cherry tomatoes, halved.
    • Tip: Use ripe tomatoes for sweetness. If they are super juicy, drain excess liquid so your salad does not become watery.
  • 1/2 cup crumbled bacon.
    • Tip: Cook bacon until crisp and drain on paper towels. Crumble just before serving to keep it crunchy.
  • 1/4 cup blue cheese, crumbled.
    • Tip: Buy a small chunk and crumble yourself. It melts more pleasantly into the salad than pre-crumbled varieties.
  • 1/4 cup olive oil.
    • Tip: Use extra virgin olive oil for dressings for the best flavor. Measure carefully for emulsification.
  • 2 tablespoons Dijon mustard.
    • Tip: Dijon adds tang and helps the dressing emulsify. If you prefer milder, use 1 tablespoon and increase honey slightly.
  • 2 tablespoons honey.
    • Tip: Use a mild honey to balance the mustard. Honey makes the dressing family-friendly and helps marry flavors.
  • 1 tablespoon apple cider vinegar.
    • Tip: Apple cider vinegar gives a gentle brightness. Use white wine vinegar for a subtler note if you prefer.
  • Salt and pepper to taste.
    • Tip: Season components lightly as you build. Taste the finished salad and adjust seasoning just before serving.

Directions

  1. In a large bowl, combine mixed greens, grilled chicken, avocado, boiled eggs, cherry tomatoes, bacon, and blue cheese.

    • Encouraging note: Take your time to layer the ingredients. Let the kids help place colors on the salad so everyone feels part of the meal.
  2. In a small bowl, whisk together olive oil, Dijon mustard, honey, apple cider vinegar, salt, and pepper to make the dressing.

    • Encouraging note: Whisk until the dressing is smooth and glossy. If you like, shake it in a jar for easy storage and an even emulsion.
  3. Drizzle the dressing over the salad and toss gently to combine.

    • Encouraging note: Start with half the dressing, toss, then add more as needed. This helps avoid overdressing and keeps the greens crisp.
  4. Serve immediately and enjoy your healthy meal!

    • Encouraging note: Serve at the table and watch everyone dive in. This salad shines best fresh, so enjoy the bright textures and warm grilled chicken together as a family.

For an easy weeknight option, you can prep the dressing and bacon ahead. I also recommend pairing this salad with a simple side, or add extra grilled vegetables to stretch the meal for hungry teens.

Serving

Paleo Grilled Chicken Cobb Salad with Honey Dijon Dressing

Serve this salad family-style in one large platter so everyone can take what they like. Arrange the protein, veggies, and toppings in rows across the greens for a classic Cobb presentation. Place the dressing in a small pitcher so family members can choose the amount they prefer.

If you are serving guests, add warm slices of grilled sourdough or roasted sweet potatoes on the side. For little ones who prefer separated flavors, offer small bowls with components and let them build their own plates.

Pair the salad with a chilled sparkling water or a light iced tea. The simplicity of the dressing and the grilled chicken keeps flavors balanced and crowd-pleasing.

Storage

Leftovers store well when you keep the components separate. Place mixed greens and dressing in different containers to prevent sogginess.

  • In the refrigerator: Store cooked chicken and bacon in an airtight container for up to 3 days. Egg halves or chopped eggs stay good for 3 to 4 days.
  • For assembled leftovers: If you must assemble ahead, pack avocado and dressing separately and combine just before serving. Assembled salads keep for about 12 hours in the fridge but will soften over time.
  • Reheating: Reheat sliced chicken gently in a skillet over medium-low heat or in the microwave for 30 to 60 seconds. Warm chicken on top of cool greens keeps textures balanced.
  • Freezing: Do not freeze assembled salad. Cooked chicken can be frozen for up to 3 months, but thaw overnight in the refrigerator before reheating.

A practical trick is to prep everything on a Sunday and store components in clear containers for grab-and-go dinners during the week.

Kitchen Notes

  • Make extra chicken: Cook 3 to 4 breasts when you grill so you can use leftovers for sandwiches, wraps, or quick lunches.
  • Use a salad spinner: Wash and spin your greens dry to help the dressing adhere and prevent watering down the salad.
  • Warm bacon shortcut: Crisp bacon in the oven at 400 °F for 15 to 20 minutes for hands-off cooking and even results.
  • Quick boiled eggs: Start eggs in cold water, bring to a boil, then cover and remove from heat. Let sit for 9 minutes before cooling in ice water.
  • Swap cheeses: If blue cheese is too strong for some in your family, swap for crumbled feta or goat cheese for a milder tang.

Variations

  • Picky eaters: Separate the toppings on a platter so children can pick what they like. Offer plain grilled chicken slices for those who prefer less dressing.
  • Dairy-free: Omit the blue cheese and replace with toasted sunflower seeds or chopped almonds for crunch and a nutty flavor.
  • Low-sodium: Use reduced-sodium bacon or turkey bacon and taste the dressing before adding extra salt.
  • Vegetarian: Substitute grilled portobello or marinated tempeh for the chicken and omit bacon for a hearty vegetarian Cobb.
  • Keto friendly: This recipe is already low in carbs, but reduce honey to 1 teaspoon in the dressing to lower carbs further.

FAQ

Q: Can I use rotisserie chicken instead of grilling?
A: Yes. Rotisserie chicken is a great time saver. Slice or shred it and toss it into the salad cold or warmed.

Q: How do I make boiled eggs easy to peel?
A: Use slightly older eggs and cool them immediately in ice water after boiling. The ice bath helps the membrane separate from the shell.

Q: Can I make the dressing without honey?
A: Absolutely. Substitute with a stevia blend or reduce the mustard slightly and use a splash of orange juice for natural sweetness.

Q: What is the best way to keep avocado from browning?
A: Toss diced avocado with a small squeeze of lemon or lime juice. If you prepare the avocado far ahead, store it in an airtight container with a piece of cut onion to slow browning.

Q: Is this salad family-friendly for kids?
A: Yes. The familiar flavors of chicken, bacon, and eggs appeal to many children. Offer toppings on the side to accommodate varying tastes.

Conclusion

I hope this Paleo Grilled Chicken Cobb Salad with Honey Dijon Dressing becomes a comforting family favorite in your kitchen. It balances bright vegetables, savory grilled chicken, and a sweet-tangy dressing into a meal that feels both special and doable on busy nights. For inspiration on similar salads and to compare techniques, you might enjoy this detailed take on a similar salad from Healthy Grilled Chicken Cobb Salad with Honey Dijon Dressing and this classic variation from How To Make Classic Chicken Cobb Salad (Paleo).

Thanks for cooking with me. Gather the family, turn on the grill, and enjoy the simple joy of a shared meal.

Paleo Grilled Chicken Cobb Salad with Honey Dijon Dressing

Prep Time 20 minutes
Cook Time 20 minutes
Total Time 40 minutes
Servings 4 servings
Calories 450
A vibrant and hearty salad featuring grilled chicken, creamy avocado, boiled eggs, and a sweet-tangy dressing, perfect for family dinners.

Ingredients

Salad Components

  • 2 pieces grilled chicken breasts, sliced (Grill over medium-high heat until the internal temperature reaches 165 °F. Let the chicken rest 5 minutes before slicing.)
  • 4 cups mixed greens (Use a sturdy mix like romaine and baby kale to hold the weight of the toppings without wilting.)
  • 1 piece avocado, diced (Choose an avocado that yields slightly to gentle pressure. Toss diced avocado in a splash of lemon juice if you plan to prep ahead to avoid browning.)
  • 2 pieces boiled eggs, chopped (For creamy yolks, boil eggs for 9 minutes, then plunge into ice water. Peel gently to keep whites intact.)
  • 1 cup cherry tomatoes, halved (Use ripe tomatoes for sweetness. If they are super juicy, drain excess liquid so your salad does not become watery.)
  • 1/2 cup crumbled bacon (Cook bacon until crisp and drain on paper towels. Crumble just before serving to keep it crunchy.)
  • 1/4 cup blue cheese, crumbled (Buy a small chunk and crumble yourself. It melts more pleasantly into the salad than pre-crumbled varieties.)

Dressing

  • 1/4 cup olive oil (Use extra virgin olive oil for dressings for the best flavor. Measure carefully for emulsification.)
  • 2 tablespoons Dijon mustard (Dijon adds tang and helps the dressing emulsify. If you prefer milder, use 1 tablespoon and increase honey slightly.)
  • 2 tablespoons honey (Use a mild honey to balance the mustard. Honey makes the dressing family-friendly and helps marry flavors.)
  • 1 tablespoon apple cider vinegar (Apple cider vinegar gives a gentle brightness. Use white wine vinegar for a subtler note if you prefer.)
  • Salt and pepper to taste (Season components lightly as you build. Taste the finished salad and adjust seasoning just before serving.)

Instructions 

Preparation

  • In a large bowl, combine mixed greens, grilled chicken, avocado, boiled eggs, cherry tomatoes, bacon, and blue cheese.
  • In a small bowl, whisk together olive oil, Dijon mustard, honey, apple cider vinegar, salt, and pepper to make the dressing.
  • Drizzle the dressing over the salad and toss gently to combine.
  • Serve immediately and enjoy your healthy meal!

Notes

Leftovers store well when you keep the components separate. Store in an airtight container for up to 3 days. Consider prepping everything on a Sunday for easy weeknight meals.
Calories: 450kcal
Course: Main Course, Salad
Cuisine: American, Paleo
Keyword: Cobb Salad, Family Meal, Grilled Chicken, Healthy Dinner, Paleo Recipe

Ultimate Chicken Parmesan

I step into the kitchen and the air changes. The warm scent of garlic and tomato greets me, soft and familiar. Pans clink. The oven hums. That sound means comfort is on its way.

This Ultimate Chicken Parmesan is the recipe I reach for when I want something that feels special but stays simple. I make it for weeknight dinners and Sunday gatherings. If you want a similar weeknight version, try my classic Chicken Parmesan recipe for a quicker twist.

Why this works

Ultimate Chicken Parmesan

This dish hits three notes every family loves. Crispy, golden chicken on the outside. Bright, tangy marinara. Gooey, bubbling cheese that pulls apart with a fork. It is comfort and celebration all on one plate.

It saves time without losing flavor. Browning in a skillet locks in juices so the oven only needs to finish the cooking. That cuts total hands-on time and keeps things moist. For other crowd-pleasers with similar flavor profiles, you might like my creamy garlic Parmesan chicken for a softer, saucier option.

This recipe also stretches well. Make two pans and freeze one, or use leftovers in sandwiches. If you want a slow cooker twist for busy days, see my crockpot garlic Parmesan chicken thighs for another easy approach.

Process Overview

“This is where the magic happens—when the aroma fills the kitchen.”

We brown, bake, and melt. Browning gives a crisp crust that stands up to sauce. Baking finishes the chicken gently and melts the cheese to a perfect golden top. It is simple, dependable, and lovely for family dinners.

Along the way I remind myself to trust the timing and enjoy the smells. If you prefer a skillet-only method, the flavors stay true and you can adapt by following the technique in my garlic Parmesan chicken and potatoes skillet for similar results in one pan.

Ingredients

  • 4 boneless, skinless chicken breasts
    • Lily’s tip: Pound each breast to an even thickness so they cook evenly. A zip-top bag and a rolling pin work great.
  • 1 cup breadcrumbs
    • Lily’s tip: Use plain or Italian-style breadcrumbs. For crunch, add 1/4 cup panko to the mix.
  • 1/2 cup grated Parmesan cheese
    • Lily’s tip: Freshly grated Parmesan melts better and gives brighter flavor than pre-grated.
  • 1 teaspoon Italian seasoning
    • Lily’s tip: Mix with salt and pepper, and add a pinch of red pepper flakes if the family likes a little heat.
  • 2 cups marinara sauce
    • Lily’s tip: Use a good-quality jarred sauce or make a simple tomato sauce. Warm it slightly before pouring over the chicken.
  • 1 1/2 cups shredded mozzarella cheese
    • Lily’s tip: Whole milk mozzarella gives creamier melt. Freshly shredded melts smoother than pre-shredded.
  • Salt and pepper to taste
    • Lily’s tip: Season both sides of the chicken before breading for balanced flavor.
  • Olive oil for cooking
    • Lily’s tip: Use enough oil to coat the skillet. A medium-high heat helps create a golden crust quickly.

These basic pantry items come together easily. Assemble them before you start to keep the process calm and steady.

Directions

  1. Preheat the oven to 375°F (190°C).
    • Encouraging note: Give the oven a few minutes to reach temperature so the chicken finishes evenly. Pour a cup of tea while it warms.
  2. In a shallow dish, mix breadcrumbs, Parmesan cheese, Italian seasoning, salt, and pepper.
    • Encouraging note: Take a moment to taste a pinch. Adjust the seasoning so it sings. This mix is the flavor coat for your chicken.
  3. Coat each chicken breast in the breadcrumb mixture, pressing to adhere.
    • Encouraging note: Press firmly so the crumbs stick. If a spot looks thin, press again. It will crisp up nicely in the pan.
  4. Heat olive oil in a large skillet over medium heat. Cook chicken until golden brown on both sides, about 4 minutes per side.
    • Encouraging note: Work in batches if needed. A golden crust sets the foundation for a juicy chicken under the sauce.
  5. Transfer the chicken to a baking dish. Pour marinara sauce over the chicken and top with mozzarella cheese.
    • Encouraging note: Be generous with sauce for extra comfort. A spoonful more will keep everything moist and flavorful.
  6. Bake in the preheated oven for 20-25 minutes, until the chicken is cooked through and the cheese is bubbly.
    • Encouraging note: Use a meat thermometer if you like. Chicken is done at 165°F. Let the cheese bubble and brown a touch.
  7. Serve hot with additional marinara sauce if desired.
    • Encouraging note: Let the pan rest 3 to 5 minutes before serving. It helps the juices settle and makes slicing neat.

If you want a one-pan shortcut, sear and then cover the skillet to finish in the oven. For a crispier top, broil for 1-2 minutes at the end, watching closely so the cheese does not burn.

Serving

Ultimate Chicken Parmesan

Serve this family-style on a large platter so everyone can help themselves. Add a big bowl of pasta tossed with a little olive oil and garlic, or keep it low-carb with a green salad and roasted vegetables.

I like to place bowls of extra marinara and grated Parmesan on the table. Little touches let everyone customize their plate. For a playful weeknight switch, serve slices of chicken on soft rolls for simple chicken Parmesan sandwiches. Looking for a spicy side? My Bang Bang Chicken Bowl adds a bright, punchy contrast for adventurous eaters.

Storage

Refrigerator: Store leftover chicken in an airtight container for up to 3 days. Keep sauce separate if you want to avoid sogginess.

Freezer: Freeze portions in a freezer-safe container for up to 2 months. Thaw overnight in the fridge before reheating.

Reheating: Reheat in a 350°F oven for 15-20 minutes to keep the crust crisp. If you are short on time, microwave in short bursts, then finish under the broiler for a minute to revive the exterior.

Label containers with the date so you know when to use them. These simple steps make leftovers taste almost as good as fresh.

Kitchen Notes

  • Shortcut breading: Use seasoned panko for extra crunch and skip the Parmesan in the mix if you add it later for more flavor layering.
  • Make ahead: Bread the chicken and store on a tray covered in the fridge for up to 1 day. This saves time on busy nights.
  • Sauce swap: Use a chunky marinara for texture or a smooth tomato-basil sauce for a refined finish.
  • Double batch: Cook twice the chicken and freeze half. Reheat for quick weeknight meals when life gets busy.
  • Kid-friendly: Keep one pan plain with just cheese for picky eaters, and add herbs or red pepper flakes to a second pan for adults.

These tips help you adapt the recipe to your schedule and taste preferences without stress.

Variations

  • Low-carb: Replace breadcrumbs with almond flour or crushed pork rinds. Serve with roasted vegetables instead of pasta.
  • Gluten-free: Use gluten-free breadcrumbs or crushed gluten-free crackers. Ensure your marinara is gluten-free.
  • Lighter version: Skip the pan-frying step. Bake breaded chicken at 425°F for 18-22 minutes to get a lighter crust.
  • Extra cheesy: Mix shredded mozzarella and fontina for a richer, creamier top.
  • Herb-forward: Add fresh basil and oregano under the cheese for a burst of fresh flavor.

Each variation keeps the heart of the dish while accommodating diets and picky eaters. Trust your kitchen and your family’s preferences.

FAQ

Q: Can I use chicken thighs instead of breasts?

A: Yes. Boneless, skinless chicken thighs work well and stay juicy. Reduce baking time slightly and check for doneness at 165°F. Thighs add a richer flavor that many families love.

Q: How do I avoid soggy breading?

A: Brown the chicken well in the skillet to set the crust before adding sauce. Use slightly warm, not hot, sauce when spooning it on. Finish in the oven just long enough to cook through and melt the cheese.

Q: Can I prepare this ahead for guests?

A: Absolutely. Bread and pan-sear the chicken the day before, then refrigerate. On the day, assemble, add sauce and cheese, and bake. This reduces hands-on time when guests arrive.

Q: What sides pair best with Chicken Parmesan?

A: Classic choices are spaghetti with olive oil and garlic, Caesar salad, or garlic bread. Roasted green beans or a simple mixed greens salad are lighter complements.

Q: Is there a vegetarian alternative?

A: Use thick eggplant slices or large portobello mushrooms in place of chicken. Bread, brown, and bake them the same way. Eggplant Parmesan is a delicious vegetarian cousin.

Conclusion

I hope this Ultimate Chicken Parmesan becomes a warm, reliable recipe in your home. It has been a go-to for my family because it delivers comfort without fuss and stretches to feed hungry housefuls. For inspiration on classic techniques and another family-style version, check out this thoughtful write-up on The Best Chicken Parmigiana (Family Recipe) | A Simple Palate. If you like a step-by-step video and a trusted tested method, take a look at this detailed guide for Chicken Parmesan Recipe (with Video) – Allrecipes.

Happy cooking, and save a slice for someone you love.

Ultimate Chicken Parmesan

Prep Time 15 minutes
Cook Time 25 minutes
Total Time 40 minutes
Servings 4 servings
Calories 480
A simple yet special dish featuring crispy chicken, vibrant marinara, and gooey cheese, perfect for weeknight dinners or gatherings.

Ingredients

For the chicken

  • 4 pieces boneless, skinless chicken breasts (Pound each breast to an even thickness for even cooking.)
  • 1 cup breadcrumbs (Use plain or Italian-style breadcrumbs. Add 1/4 cup panko for extra crunch.)
  • 1/2 cup grated Parmesan cheese (Freshly grated Parmesan melts better.)
  • 1 teaspoon Italian seasoning (Mix with salt and pepper; add red pepper flakes for some heat.)
  • 2 cups marinara sauce (Use high-quality jarred or homemade; warm slightly before use.)
  • 1 1/2 cups shredded mozzarella cheese (Whole milk mozzarella gives a creamier melt.)
  • to taste salt and pepper (Season both sides of the chicken before breading.)
  • as needed tablespoons olive oil (Coat skillet for frying.)

Instructions 

Preparation

  • Preheat the oven to 375°F (190°C).
  • In a shallow dish, mix breadcrumbs, Parmesan cheese, Italian seasoning, salt, and pepper.
  • Coat each chicken breast in the breadcrumb mixture, pressing to adhere.

Cooking

  • Heat olive oil in a large skillet over medium heat. Cook chicken until golden brown on both sides, about 4 minutes per side.
  • Transfer the chicken to a baking dish. Pour marinara sauce over the chicken and top with mozzarella cheese.
  • Bake in the preheated oven for 20-25 minutes, until the chicken is cooked through and the cheese is bubbly.
  • Serve hot with additional marinara sauce if desired.

Notes

This dish can be adapted for freezing and reheating. Serve with pasta or a green salad.
Calories: 480kcal
Course: Dinner, Main Course
Cuisine: Italian
Keyword: Baked Chicken, Cheesy Chicken, Chicken Parmesan, Comfort Food, Family Dinner