Category

30-Minute Chicken Dinners

Category

Hawaiian Chicken Sheet Pan

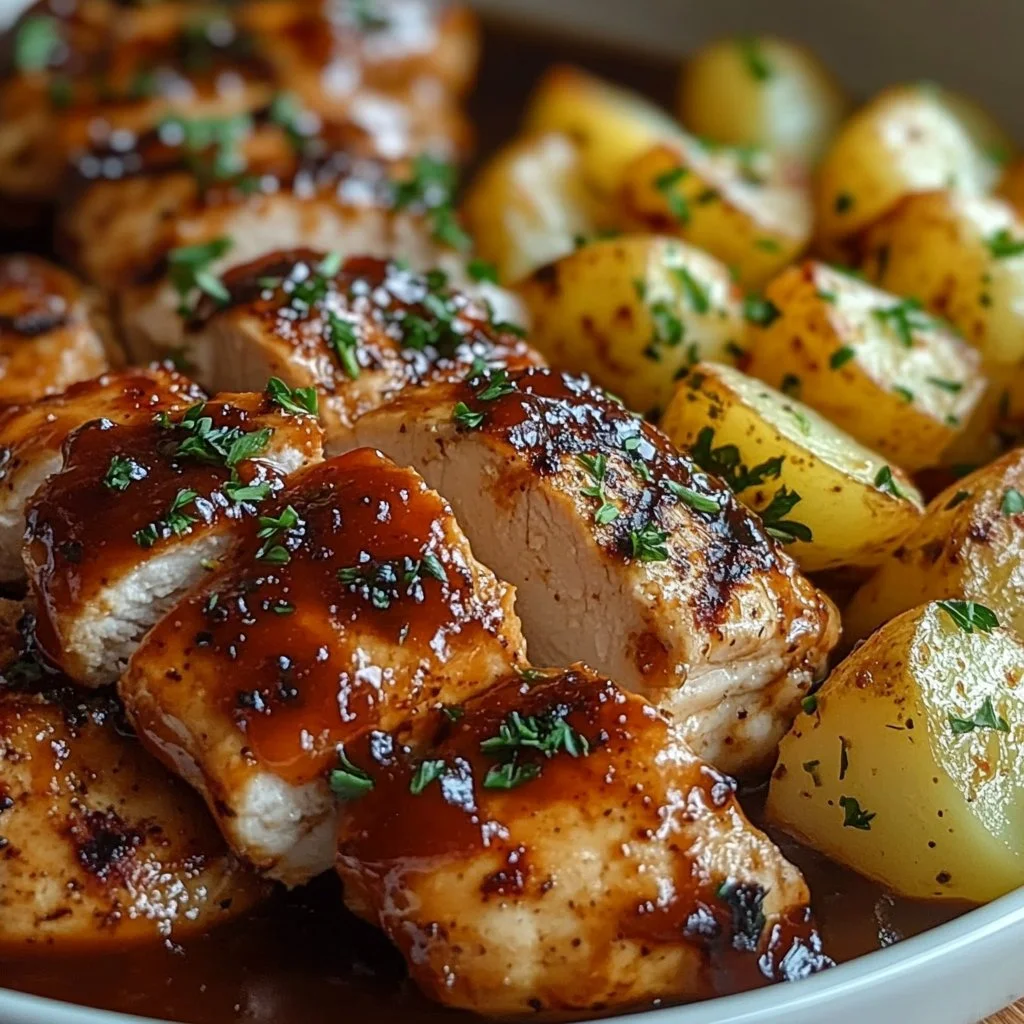
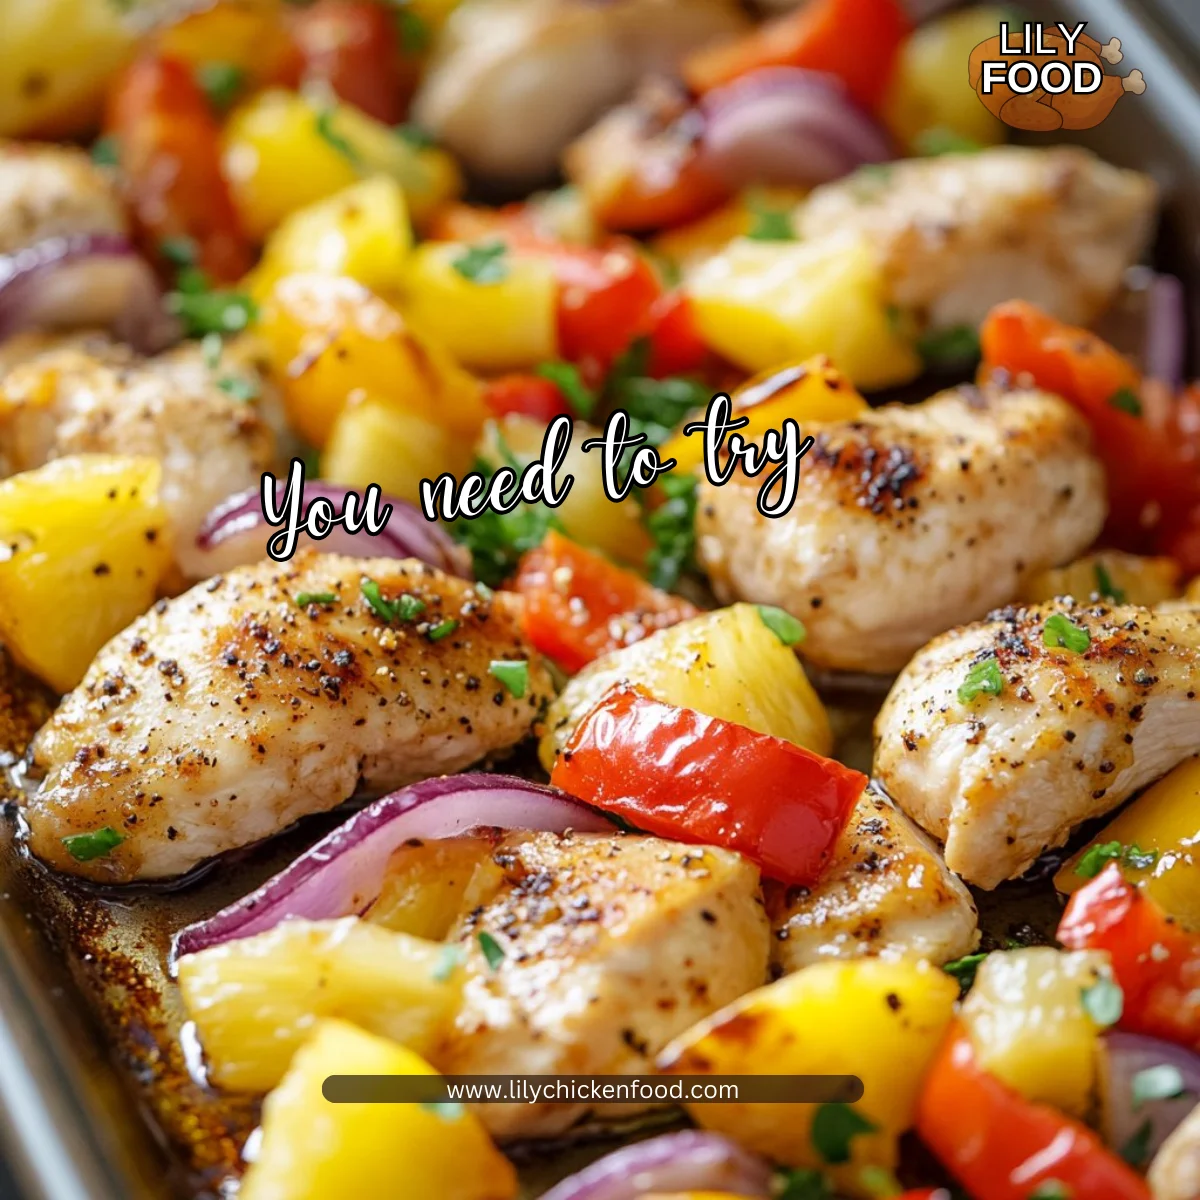
There’s something truly magical about a kitchen filled with the sweet and savory scents of roasted chicken and vibrant vegetables. The sound of sizzling oil and bubbling sauces creates a symphony that warms the heart. As the flavors meld together, anticipation builds. You know that a delightful meal is just moments away. Today, I’m excited to share a delicious recipe for Hawaiian Chicken Sheet Pan that’s perfect for family dinners. It’s an easy, one-pan dish that brings tropical vibes right to your dining table.

Why This Works

Hawaiian Chicken Sheet Pan

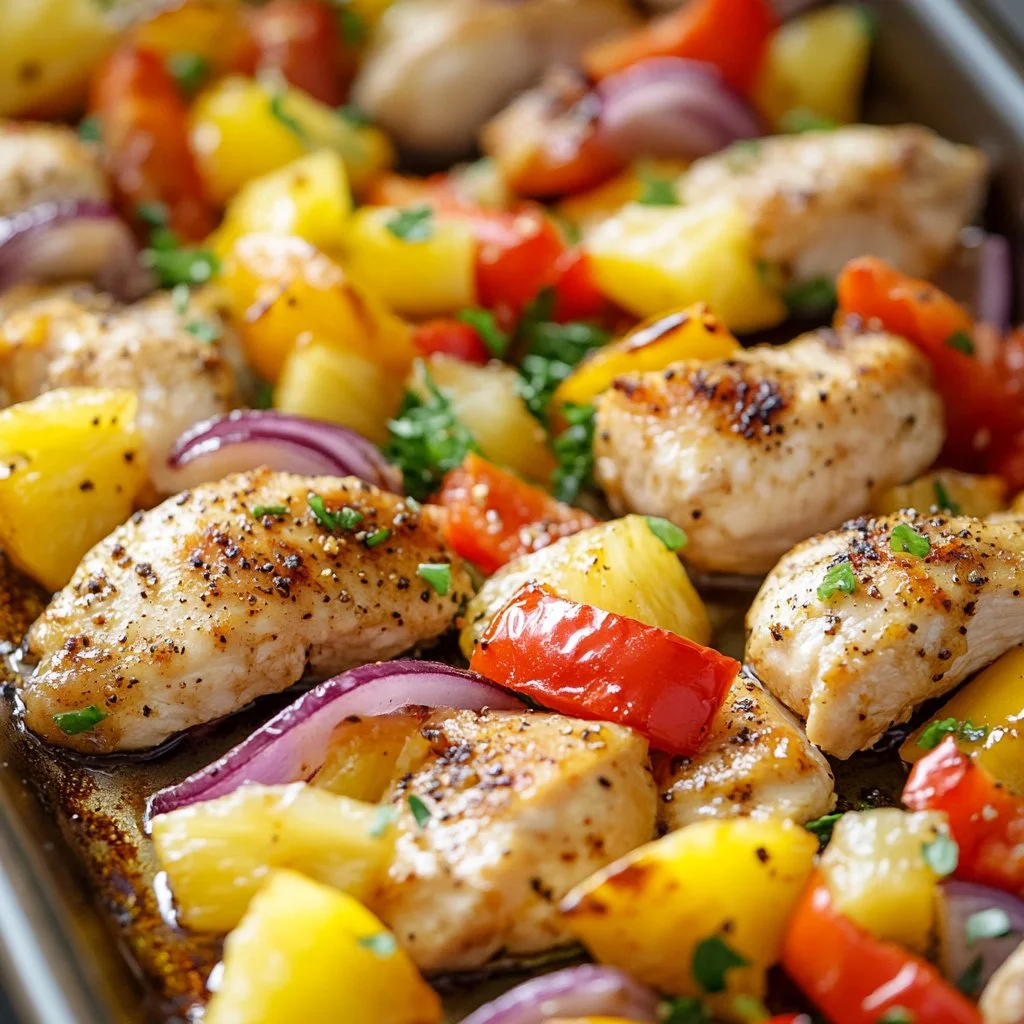
Hawaiian Chicken Sheet Pan is a standout dish for many reasons. First, it brings the bright flavors of the islands into your home, transporting you to sun-soaked beaches with every bite. The combination of chicken, colorful bell peppers, sweet pineapple, and a savory sauce creates a meal that is both aromatic and satisfying.

Most importantly, this recipe saves time. With just one sheet pan for prep and cleanup, it takes away the hassle of multiple dishes. Your family can go from the kitchen to the dinner table in no time. Gather everyone around, and enjoy this meal together—just like the island traditions that inspired it.

Process Overview

“This is where the magic happens—when the aroma fills the kitchen.”

Creating this dish is not just about the final result; it’s about the magic of the process. You’ll chop, toss, and bake until the enticing scents fill your kitchen and everyone starts to wander in curiously. This straightforward method allows anyone to feel like a chef, even on the busiest of evenings.

Ingredients

To make Hawaiian Chicken Sheet Pan, you’ll need:

  • 1 ½ lbs (700 g) boneless skinless chicken breasts, cut into 1-inch pieces
  • 1 red bell pepper, chopped
  • 1 yellow bell pepper, chopped
  • 1 small red onion, cut into wedges
  • 1 ½ cups fresh pineapple chunks (or canned, drained)
  • 2 tbsp olive oil
  • 2 cloves garlic, minced
  • ½ tsp salt
  • ½ tsp black pepper
  • ½ tsp paprika
  • ¼ tsp chili flakes (optional)

Sauce

  • ⅓ cup low-sodium soy sauce
  • ¼ cup pineapple juice (from the can or fresh)
  • 3 tbsp honey (or brown sugar)
  • 2 tbsp rice vinegar (or apple cider vinegar)
  • 1 tbsp cornstarch + 2 tbsp water (slurry, optional for thickening)

Lily’s Tip: For an extra punch of flavor, try adding a teaspoon of grated fresh ginger to the sauce. It pairs beautifully with the other ingredients.

Directions

  1. Prep the oven & pan: Preheat your oven to 400°F (200°C). This will ensure even cooking. It’s the perfect temperature for roasting.

  2. Line a large sheet pan: You can use parchment paper or lightly grease it with cooking spray. This step saves you from scrubbing the pan later.

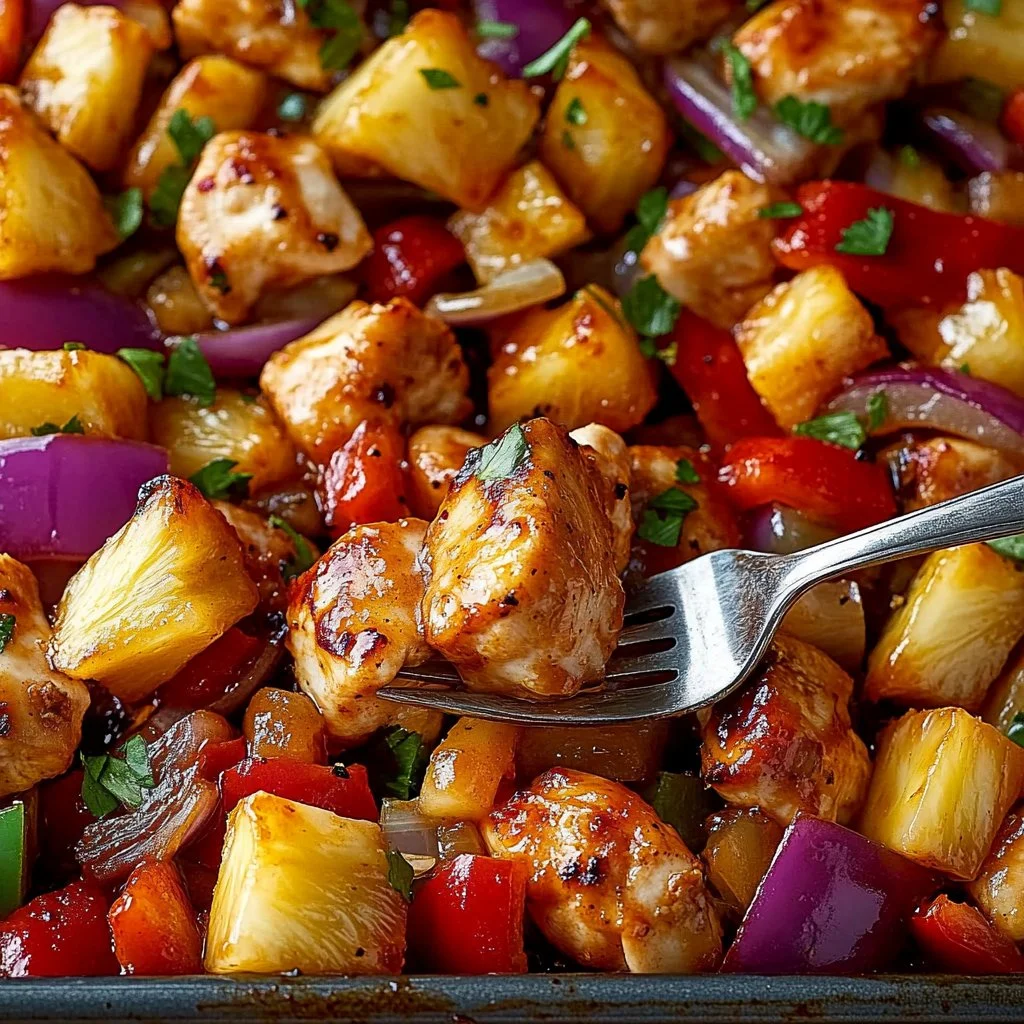
  3. Assemble ingredients: On the pan, spread the chopped chicken, bell peppers, onion, and pineapple. You want a colorful arrangement.

  4. Drizzle with olive oil: Add garlic, salt, pepper, paprika, and chili flakes. Toss everything to coat evenly. The colors alone will make your mouth water, and the flavors are sure to blend perfectly.

  5. Bake: Roast for 20–25 minutes, flipping halfway through. You’re looking for the chicken to be fully cooked, reaching an internal temperature of 165°F (74°C). The smell is going to be amazing.

  6. Make the sauce: While the chicken and vegetables bake, whisk together soy sauce, pineapple juice, honey, and vinegar in a saucepan. Simmer for 3–4 minutes. If you like it thicker, stir in the cornstarch slurry to achieve that glossy finish.

  7. Finish: Once the chicken and veggies are done, drizzle the sauce over the top. If you prefer, you can serve the sauce on the side for dipping. A sprinkle of sesame seeds or sliced green onions adds a nice touch.

Encouraging Note: Cooking is a joyful experience! Take your time and enjoy the process. Your family will appreciate the warmth you bring to the kitchen.

Serving

Hawaiian Chicken Sheet Pan

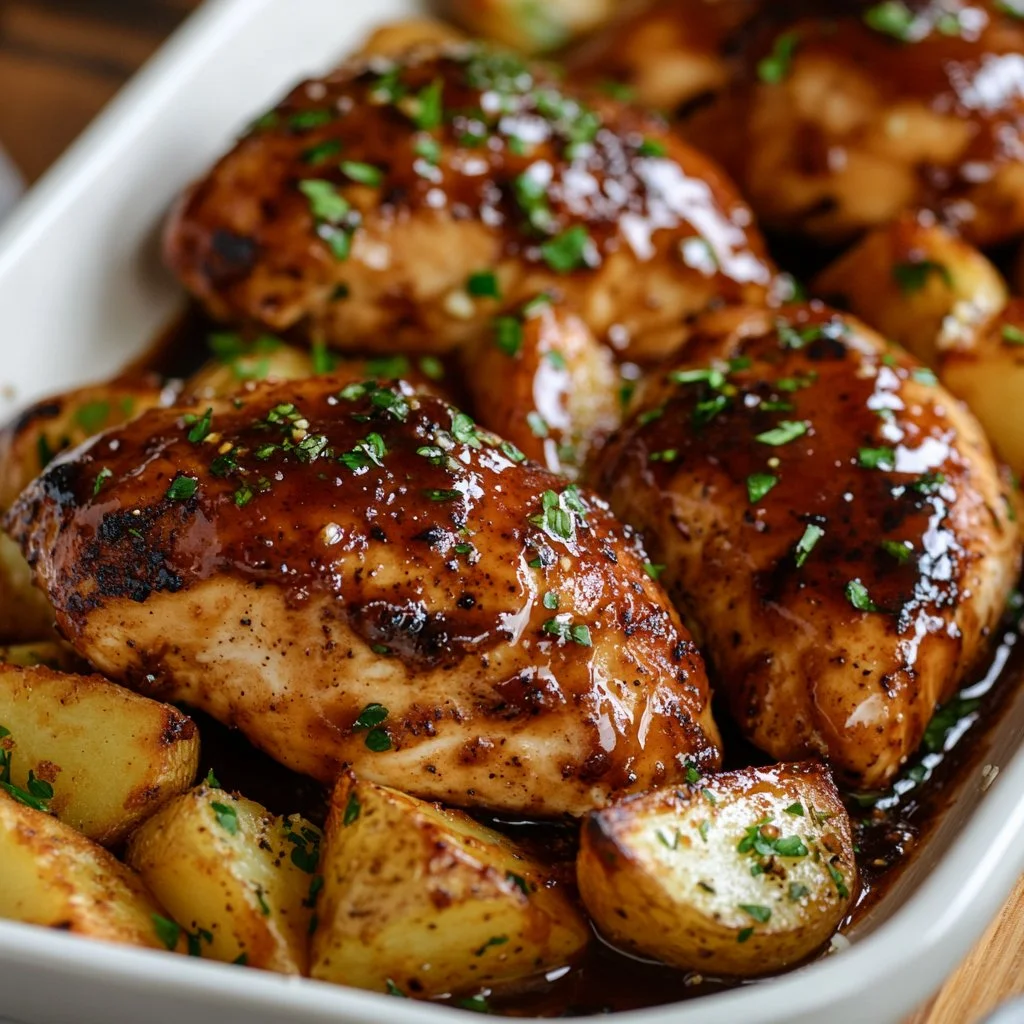
For a family-style meal, serve the Hawaiian Chicken Sheet Pan directly from the oven. Use a large serving spoon to scoop up generous portions, and let everyone help themselves. This inviting approach makes dinner a shared experience. Pair the dish with fluffy rice or quinoa to soak up the delicious sauce, and don’t forget a fresh green salad on the side. This way, you create a wholesome meal that nourishes both body and spirit.

Storage

Leftovers can be a lifesaver for busy weeknights. Store any uneaten Hawaiian Chicken in an airtight container in the fridge for up to three days. When you’re ready to eat again, simply reheat in the microwave or oven until warmed through. Keep in mind that the vegetables may soften, but they will still taste great.

Practical Tip: If you have a lot of leftovers, consider portioning them out for lunches. They make for a quick grab-and-go meal the next day.

Kitchen Notes

  • Use pre-chopped veggies to save time on busy evenings.
  • Substitute chicken with shrimp or firm tofu for a different protein option.
  • If you don’t have fresh pineapple, canned works just as well.
  • To save even more time, prepare the sauce in advance.
  • Kid-friendly option: Serve the chicken and veggies over rice, allowing the kids to customize their plates.

Variations

If you have picky eaters in your family, don’t worry. There are plenty of ways to tweak this recipe to fit different tastes:

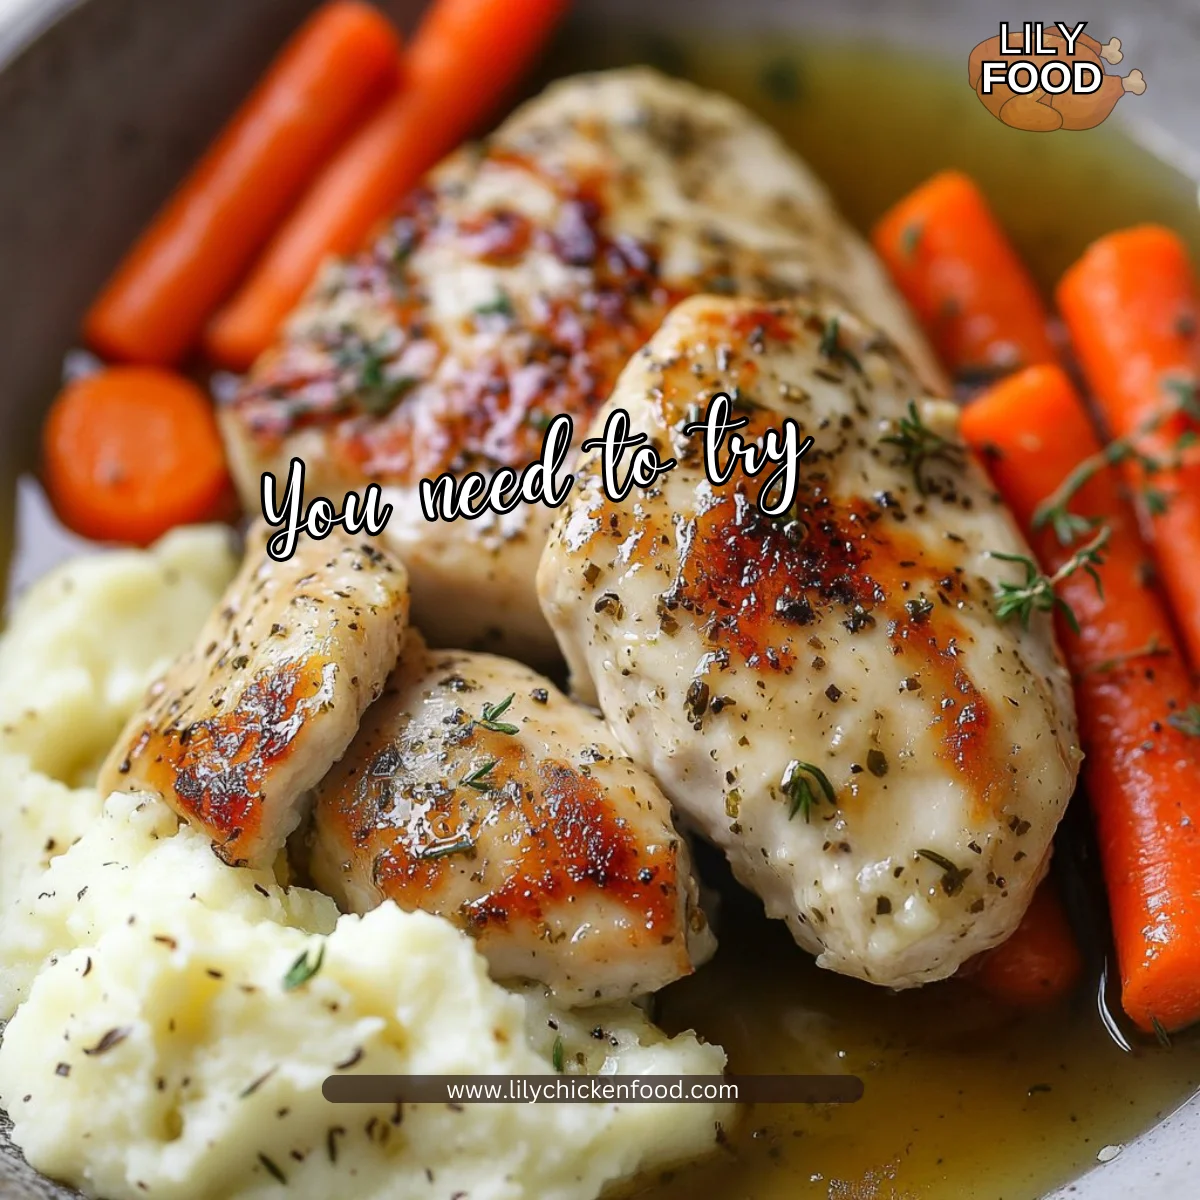
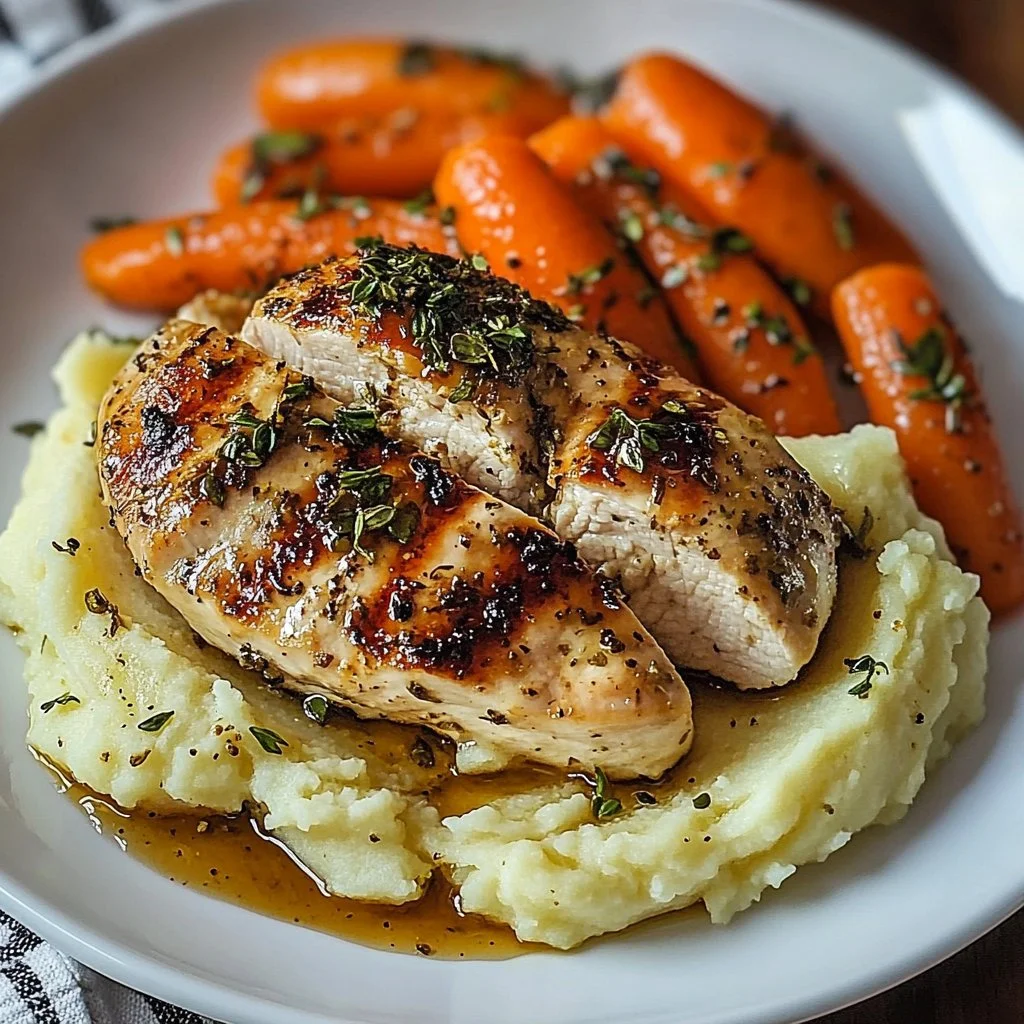
  • Vegetable swaps: Try using broccoli, snap peas, or carrots instead of bell peppers.
  • Different proteins: Substitute chicken with salmon, pork, or even chickpeas for a vegetarian version.
  • Heat adjustment: Omit the chili flakes if your family prefers milder flavors.

FAQ

1. Can I use frozen chicken?
Yes, frozen chicken can be used, but be sure to thaw it prior to cooking for even cooking.

2. What if I don’t like pineapple?
You can replace pineapple with mango or omit it altogether. It will still taste fantastic.

3. Can this dish be prepared ahead of time?
Absolutely! You can marinate the chicken and veggies in the sauce the night before and store them in the fridge until you’re ready to bake.

4. Can I double the recipe?
Yes, just make sure your sheet pan is large enough to accommodate all the ingredients in a single layer.

5. How do I know when the chicken is done?
Use a meat thermometer. The chicken should reach an internal temperature of 165°F (74°C) to ensure it is properly cooked.

Conclusion

Cooking is more than just filling our bellies. It’s about creating moments that bring families together. This Hawaiian Chicken Sheet Pan is a celebration of flavors and a time saver for busy families. As the aroma fills your kitchen and the laughter echoes around the table, know that you are making memories. Enjoy this special meal, and relish in the warmth it brings to your home. Happy cooking!

Hawaiian Chicken Sheet Pan

Prep Time 15 minutes
Cook Time 25 minutes
Total Time 40 minutes
Servings 4 servings
Calories 450
A delicious one-pan dish bringing tropical vibes with chicken, bell peppers, pineapple, and a savory sauce, perfect for family dinners.

Ingredients

Main Ingredients

  • 1.5 lbs boneless skinless chicken breasts, cut into 1-inch pieces
  • 1 each red bell pepper, chopped
  • 1 each yellow bell pepper, chopped
  • 1 small red onion, cut into wedges
  • 1.5 cups fresh pineapple chunks (or canned, drained)
  • 2 tbsp olive oil
  • 2 cloves garlic, minced
  • 0.5 tsp salt
  • 0.5 tsp black pepper
  • 0.5 tsp paprika
  • 0.25 tsp chili flakes (optional)

Sauce

  • 0.33 cups low-sodium soy sauce
  • 0.25 cups pineapple juice (from the can or fresh)
  • 3 tbsp honey (or brown sugar)
  • 2 tbsp rice vinegar (or apple cider vinegar)
  • 1 tbsp cornstarch + 2 tbsp water (slurry, optional for thickening)

Instructions 

Preparation

  • Preheat your oven to 400°F (200°C) to ensure even cooking.
  • Line a large sheet pan with parchment paper or lightly grease it with cooking spray.
  • On the pan, spread the chopped chicken, bell peppers, onion, and pineapple.
  • Drizzle olive oil over the ingredients and add garlic, salt, pepper, paprika, and chili flakes.
  • Toss everything to coat evenly.

Cooking

  • Roast for 20–25 minutes, flipping halfway through, until the chicken is fully cooked at 165°F (74°C).
  • While the chicken and vegetables bake, whisk together soy sauce, pineapple juice, honey, and vinegar in a saucepan and simmer for 3–4 minutes.
  • If desired, stir in the cornstarch slurry to thicken the sauce.

Serving

  • Once done, drizzle the sauce over the chicken and veggies, or serve on the side.
  • Serve directly from the oven for a family-style meal. Consider pairing with rice or quinoa and a fresh salad.

Notes

For extra flavor, add grated fresh ginger to the sauce. Leftovers can be stored in an airtight container in the fridge for up to three days. Reheat as needed, and consider portioning out for lunches.
Calories: 450kcal
Course: Dinner, Main Course
Cuisine: Hawaiian, Tropical
Keyword: Easy Chicken Recipe, Family Dinner, Hawaiian Chicken, One-Pan Meal, Sheet Pan Dinner

Garlic Butter Chicken and Bowtie Pasta

There’s something wonderfully comforting about the smell of garlic and butter wafting through the kitchen. It’s that warm, inviting aroma that calls everyone in the house. As you stir together the ingredients, you can hear the soft bubbling of the sauce, combined with the gentle simmer of the pasta. This is the perfect backdrop to a family meal that feels special and tastes divine. Today, I’m sharing one of my family’s favorites: Garlic Butter Chicken and Bowtie Pasta.

Why This Works

Garlic Butter Chicken and Bowtie Pasta

This recipe is a fantastic blend of rich flavors and textures that your whole family will love. Garlic butter? Yes, please. Tender chicken perfectly coated in creamy sauce? It’s like a warm hug on a plate.

Not only does this dish taste incredible, but it’s also quick to prepare. With just a few ingredients and a straightforward cooking method, you’ll have dinner ready in no time. This is ideal for busy weeknights when you want to serve something delicious without spending hours in the kitchen.

Process Overview

“This is where the magic happens—when the aroma fills the kitchen.”

Cooking this Garlic Butter Chicken and Bowtie Pasta is truly an enjoyable experience. It brings your family together—from the delightful scents that fill your home to the smiles on their faces when they dig into a warm, hearty meal. You’ll love how this simple process transforms everyday ingredients into something extraordinary. Let’s get started!

Ingredients

For this recipe, you will need:

  • 2 chicken breasts
  • 8 oz bowtie pasta
  • 4 cloves garlic, minced
  • 1/2 cup butter
  • 1 cup heavy cream
  • 1 cup chicken broth
  • 1/2 cup Parmesan cheese
  • Salt and pepper to taste
  • Fresh parsley for garnish

Lily’s Tips:

  • Chicken Breasts: Look for ones that are plump and of even size for even cooking.
  • Bowtie Pasta: This shape holds onto the sauce beautifully.
  • Garlic: Fresh garlic is a must. It provides the best flavor.
  • Butter: Use unsalted butter for more control over the saltiness of the dish.
  • Parmesan Cheese: Freshly grated cheese melts better than pre-packaged varieties.

Directions

  1. Cook the bowtie pasta according to package instructions; drain and set aside.
    Note: Don’t forget to save a bit of pasta water. It can help adjust the sauce later if needed.

  2. In a large skillet, melt butter over medium heat.
    This step sets the stage for all the rich flavors to come. Just watch it melt into a beautiful golden hue.

  3. Add minced garlic and sauté until fragrant.
    The smell of sautéing garlic is magic in the kitchen. Make sure not to burn it—keep an eye on it as it cooks.

  4. Add chicken breasts and cook until browned and cooked through.
    Turn them a couple of times to get an even golden crust. This will seal in the juices.

  5. Remove chicken from skillet and slice.
    Letting the chicken rest for a few minutes before slicing ensures it stays juicy.

  6. In the same skillet, add chicken broth and heavy cream; bring to a simmer.
    The beauty of one-pan meals is the flavor buildup in the skillet. Scrape any tasty bits off the bottom.

  7. Stir in Parmesan cheese, salt, and pepper.
    Watch as everything comes together into a creamy, cheesy sauce—it’s dreamy!

  8. Add cooked pasta and sliced chicken to the sauce; mix well.
    This is where you can really get everyone involved. Have the kids help stir.

  9. Serve hot, garnished with fresh parsley.
    The pop of green looks lovely and adds a fresh touch to the rich dish.

Serving

Garlic Butter Chicken and Bowtie Pasta

When it comes to serving Garlic Butter Chicken and Bowtie Pasta, make it family-style. Present it in a large bowl and let everyone help themselves. You can sprinkle a bit more Parmesan cheese on top for those who love a cheesy finish.

Don’t forget to pair this dish with a simple side salad or some steamed vegetables to balance out the meal. Enjoy the laughter and conversations around the table as everyone digs in.

Storage

If you have leftovers (which is rare, but it happens!), store the Garlic Butter Chicken and Bowtie Pasta in an airtight container in the fridge. It should be good for 3 to 4 days.

When reheating, do so gently in a skillet over low heat. Add a splash of chicken broth or cream to revive the sauce and keep it creamy.

Kitchen Notes

Here are some handy shortcuts to keep in mind:

  • Meal Prep: Cook the chicken and make the sauce ahead of time. Store it separately for up to two days.
  • Pasta Cooking: Remember to add salt to your pasta water for added flavor.
  • Frozen Chicken: Use frozen chicken breasts; just increase the cooking time.
  • One-Pot Wonder: Instead of cooking pasta separately, you can cook the pasta in the sauce with added water.
  • Herbs: Fresh herbs like thyme or basil can add extra flavor if you have them on hand.

Variations

This recipe can easily adapt to suit different tastes:

  • Picky Eaters: Cut the chicken into smaller pieces or treat them to a fun shape pasta.
  • Healthier Option: Use whole wheat or gluten-free pasta to fit dietary needs.
  • Veggie Boost: Add in spinach or cherry tomatoes for extra nutrients.
  • Low-Carb: Substitute pasta with zucchini noodles or spaghetti squash for a lighter meal.
  • Spice it Up: Add a pinch of red pepper flakes to the garlic for a kick.

FAQ

1. Can I use other types of pasta?
Yes, feel free to substitute any pasta you have on hand. Just adjust the cooking time as necessary.

2. Is there a vegetarian version of this dish?
Absolutely! Swap out the chicken for sautéed mushrooms or a plant-based protein.

3. How can I make it dairy-free?
Use a dairy-free butter alternative and substitute the heavy cream with coconut cream or a plant-based cream.

4. Can I freeze leftovers?
Yes, but keep in mind the pasta may become a bit soft upon thawing. It’s best to freeze the sauce and chicken separately.

5. What can I serve with this dish?
A green salad, garlic bread, or steamed veggies are excellent options for side dishes.

As you finish up the meal, take a moment to savor the joy that comes with sharing a homemade dinner. Cooking can be a beautiful way to bond with loved ones, creating not just food but also lasting memories. Enjoy your Garlic Butter Chicken and Bowtie Pasta, and cherish those precious family moments at the table.

Garlic Butter Chicken and Bowtie Pasta

Prep Time 10 minutes
Cook Time 20 minutes
Total Time 30 minutes
Servings 4 servings
Calories 600
A comforting and quick family meal featuring tender chicken in a creamy garlic butter sauce, served with bowtie pasta.

Ingredients

Main Ingredients

  • 2 pieces chicken breasts (Look for plump, even-sized breasts for even cooking.)
  • 8 oz bowtie pasta (This shape holds onto the sauce beautifully.)
  • 4 cloves garlic, minced (Fresh garlic is a must for the best flavor.)
  • 1/2 cup butter (Use unsalted for better control over seasoning.)
  • 1 cup heavy cream (Provides a rich, creamy texture.)
  • 1 cup chicken broth (Adds depth to the sauce.)
  • 1/2 cup Parmesan cheese (Freshly grated melts better than pre-packaged.)
  • Salt and pepper to taste
  • Fresh parsley for garnish (Adds freshness and color.)

Instructions 

Cooking Pasta

  • Cook the bowtie pasta according to package instructions; drain and set aside. Save a bit of pasta water for the sauce if needed.

Preparing Sauce

  • In a large skillet, melt butter over medium heat.
  • Add minced garlic and sauté until fragrant, being careful not to burn it.
  • Add chicken breasts and cook until browned and cooked through, turning a couple of times.
  • Remove chicken from skillet and let it rest for a few minutes before slicing.
  • In the same skillet, add chicken broth and heavy cream; bring to a simmer.
  • Stir in Parmesan cheese, salt, and pepper, mixing until well combined.
  • Add cooked pasta and sliced chicken to the sauce; mix well and serve hot, garnished with fresh parsley.

Notes

For serving, present in a large bowl. Pair with a side salad or steamed vegetables. Leftovers can be stored in an airtight container for 3 to 4 days.
Calories: 600kcal
Course: Dinner, Main Course
Cuisine: American, Family
Keyword: Comfort Food, Family Meal, Garlic Butter Chicken, Pasta, Quick Dinner

Honey BBQ Chicken with Garlic Parmesan Potatoes

There’s something about entering a kitchen while dinner is cooking. The sweet smell of Honey BBQ chicken fills the air, blending with the savory scent of roasted garlic potatoes. You can almost hear the sizzle from the pan, a calming and familiar sound that says home. This experience is perfect for any family gathering, weeknight dinner, or simply a way to show your loved ones you care.

Why This Works

Honey BBQ Chicken with Garlic Parmesan Potatoes

Life gets busy, and finding a meal that’s both delicious and quick is a treasure. This Honey BBQ Chicken with Garlic Parmesan Potatoes is perfect for family dinners where you want to gather everyone around the table without spending hours in the kitchen.

The combination of sweet and savory flavors appeals to both kids and adults. Bonus: it’s easy! You can make it in under an hour, allowing more time for laughter and conversation at the dinner table.

Process Overview

“This is where the magic happens—when the aroma fills the kitchen.”

The process of making this meal is straightforward and engaging. You’ll find it’s not just about cooking; it’s about creating memories as you chop, sauté, and serve. With each step, you’ll notice how the kitchen transforms into a haven filled with family-friendly flavors, bringing everyone together.

Ingredients

To make Honey BBQ Chicken with Garlic Parmesan Potatoes, you’ll need:

  • 4 chicken breasts: Look for breasts that are even in size for uniform cooking.
  • 1 cup Honey BBQ sauce: A good quality sauce will enhance the flavor. You can even make your own if you like!
  • 2 cups potatoes, diced: I recommend using russet or Yukon gold potatoes for a fluffy texture.
  • 1 cup shredded Parmesan cheese: Freshly grated cheese melts better than the pre-shredded variety.
  • 2 tablespoons garlic, minced: Fresh garlic gives a more robust flavor compared to powdered garlic.
  • 2 tablespoons olive oil: Use extra virgin olive oil for richer taste and health benefits.
  • Salt and pepper to taste: Adjust based on your family’s preferences.
  • Chopped parsley for garnish: Fresh herbs brighten up the dish visually and add freshness.

Directions

  1. Preheat the oven to 400°F (200°C).
    Start with this step to ensure your oven is ready when the time comes to roast your potatoes.

  2. In a bowl, combine the diced potatoes, olive oil, minced garlic, salt, and pepper; toss to coat.
    This is a crucial step. Make sure every potato is coated evenly for maximum flavor.

  3. Spread the potatoes on a baking sheet and bake for 20-25 minutes until tender and golden.
    Keep an eye on them. You want them crispy but not overcooked.

  4. While the potatoes are baking, grill or pan-fry the chicken breasts until cooked through.
    Cooking chicken can seem daunting, but the best way to check is by using a meat thermometer—it should read 165°F.

  5. Brush the Honey BBQ sauce over the chicken during the last few minutes of cooking.
    This allows the sauce to caramelize a bit, making every bite absolutely heavenly.

  6. Remove the potatoes from the oven, sprinkle with Parmesan cheese, and return to the oven for an additional 5 minutes until the cheese is melted.
    This is one of the best moments—watching the cheese melt into a golden crust.

  7. Serve the BBQ chicken with the Garlic Parmesan Potatoes and garnish with chopped parsley.
    Take a moment to appreciate your amazing creation before digging in.

Serving

Honey BBQ Chicken with Garlic Parmesan Potatoes

Serve this dish family-style on a large platter. It encourages sharing and conversation. Let your family dish out their favorites. The sweet BBQ chicken pairs perfectly with the gooey cheesy potatoes. Don’t forget to sprinkle a little more parsley for that pop of color.

Storage

If you have leftovers, they can stay fresh in the fridge for up to 4 days. Just make sure to store the chicken and potatoes in airtight containers. When you’re ready to enjoy them again, simply reheat in the oven at 350°F (175°C) for 15-20 minutes until warmed through. You can also use a microwave, but the oven will keep the potatoes crispy.

Kitchen Notes

  • Prep Ahead: You can dice the potatoes and marinate the chicken the night before to save time.
  • Add Veggies: Toss in some broccoli or green beans before roasting the potatoes for extra nutrition.
  • Chicken Substitutes: This recipe works great with thighs or drumsticks too.
  • Quick Cleanup: Line your baking sheet with parchment paper for easy cleanup.
  • Cooking Tools: A meat thermometer will help you avoid over or undercooking your chicken.

Variations

  • For Picky Eaters: If BBQ sauce isn’t a favorite, try a simple salt and pepper seasoning or teriyaki sauce instead.
  • Low-Carb Options: Substitute potatoes with cauliflower florets for a lighter version.
  • Gluten-Free: Ensure your BBQ sauce is gluten-free, and you’re all set.
  • Spicy Kick: Add some cayenne pepper or hot sauce to the BBQ sauce for a spice lovers’ twist.
  • Herb Alternatives: Use different herbs like thyme or rosemary instead of parsley for varied flavor profiles.

FAQ

  1. Can I use frozen chicken?
    Yes, but it’s best to thaw it overnight in the fridge beforehand.

  2. What side dishes go well with this meal?
    A simple salad or steamed vegetables would be a great addition.

  3. Can I bake the chicken instead of grilling it?
    Absolutely! Bake at 375°F (190°C) for 25-30 minutes.

  4. What BBQ sauce do you recommend?
    I love using a honey BBQ sauce for this, but any favorite BBQ sauce will work.

  5. Can I prepare the potatoes the night before?
    Yes, but it’s best to keep them in water to prevent browning.

As you savor every bite of this warm, filling meal, remember that cooking is more than just about nourishment. It’s an opportunity to create family traditions and moments that last a lifetime. Enjoy the process and the result, and don’t hesitate to gather your loved ones around the table. Happy cooking!

Honey BBQ Chicken with Garlic Parmesan Potatoes

Prep Time 15 minutes
Cook Time 30 minutes
Total Time 45 minutes
Servings 4 servings
Calories 540
A deliciously sweet and savory combo of Honey BBQ chicken breasts served alongside garlic roasted potatoes topped with Parmesan cheese, perfect for family gatherings or quick weeknight dinners.

Ingredients

For the Chicken

  • 4 pieces chicken breasts (Look for breasts that are even in size for uniform cooking.)
  • 1 cup Honey BBQ sauce (A good quality sauce will enhance the flavor. You can even make your own if you like!)

For the Potatoes

  • 2 cups potatoes, diced (I recommend using russet or Yukon gold potatoes for a fluffy texture.)
  • 1 cup shredded Parmesan cheese (Freshly grated cheese melts better than the pre-shredded variety.)
  • 2 tablespoons garlic, minced (Fresh garlic gives a more robust flavor compared to powdered garlic.)
  • 2 tablespoons olive oil (Use extra virgin olive oil for richer taste and health benefits.)
  • to taste Salt and pepper (Adjust based on your family’s preferences.)
  • as needed Chopped parsley for garnish (Fresh herbs brighten up the dish visually and add freshness.)

Instructions 

Preparation

  • Preheat the oven to 400°F (200°C).
  • In a bowl, combine the diced potatoes, olive oil, minced garlic, salt, and pepper; toss to coat.
  • Spread the potatoes on a baking sheet and bake for 20-25 minutes until tender and golden.

Cooking Chicken

  • While the potatoes are baking, grill or pan-fry the chicken breasts until cooked through.
  • Brush the Honey BBQ sauce over the chicken during the last few minutes of cooking.

Finishing Touches

  • Remove the potatoes from the oven, sprinkle with Parmesan cheese, and return to the oven for an additional 5 minutes until the cheese is melted.
  • Serve the BBQ chicken with the Garlic Parmesan Potatoes and garnish with chopped parsley.

Notes

If you have leftovers, they can stay fresh in the fridge for up to 4 days. Just make sure to store the chicken and potatoes in airtight containers. Reheat in the oven at 350°F (175°C) for 15-20 minutes until warmed through.
Calories: 540kcal
Course: Dinner, Main Course
Cuisine: American
Keyword: Comfort Food, Family Dinner, Garlic Parmesan Potatoes, Honey BBQ Chicken, Quick Meal

Make Garlic Herb Chicken with Mashed Potatoes and Glazed Carrots Tonight!

Ah, the sounds of the kitchen singing with the sizzle of garlic and the warmth of deliciousness. The aroma of garlic herb chicken wafting through your home is like ( textit{comfort food} ) wrapped in a warm hug. You can almost hear the laughter of happy family members settling around the table, eager to dig into a meal that feels like home. This Garlic Herb Chicken with Mashed Potatoes and Glazed Carrots is one of those meals that comes together beautifully, allowing you to create lasting memories without spending all day in the kitchen.

Why This Works

Make Garlic Herb Chicken with Mashed Potatoes and Glazed Carrots Tonight!

This dish is designed with families in mind. It’s not just about flavor; it’s about ease. With a few simple steps, you can whip up a meal that impresses without overwhelming you. First off, the chicken is infused with garlic and herbs, providing layers of flavor that make every bite exciting. The creamy mashed potatoes are the perfect cozy side, and the glazed carrots add a sweet touch—perfect for making even the pickiest eaters smile. Plus, most of the cooking can happen at the same time, saving you valuable minutes in the kitchen. Let’s dive into how you can create this delightful dinner.

Process Overview

“This is where the magic happens—when the aroma fills the kitchen.”

Cooking is not just about the food; it’s about the experience. As we prepare this meal together, you’ll witness the transformation of raw ingredients into a spread that sings of love and togetherness. From roasting the colorful carrots to searing the chicken to golden perfection, it’s a beautiful way to spend the evening. And the best part? You’ll have everything ready in about an hour. Let’s get started!

Ingredients

Here’s what you’ll need to create your Garlic Herb Chicken Dinner:

For the Chicken:

  • 4 boneless, skinless chicken breasts
  • 3 tablespoons olive oil, divided
  • 4 cloves garlic, minced
  • 1 teaspoon dried thyme
  • 1 teaspoon dried Italian herbs
  • 1 teaspoon salt
  • 1/2 teaspoon black pepper

For the Mashed Potatoes:

  • 4 large russet potatoes, peeled and cut into 2–3 inch chunks
  • 4 tablespoons butter
  • 1/2 cup whole milk, warmed
  • 2 ounces cream cheese (optional)

For the Glazed Carrots:

  • 1 pound carrots, peeled and sliced in half if large
  • 1 tablespoon olive oil
  • 2 tablespoons butter
  • 1 tablespoon honey
  • 1 clove garlic, grated

For the Pan Sauce:

  • 1 shallot, minced
  • 2 cloves garlic, minced
  • 1/2 cup dry white wine
  • 1/2 cup chicken stock
  • 2 tablespoons cold butter

Lily’s Tips:

  • Use fresh herbs when possible for a brighter flavor.
  • Don’t rush the chicken searing; golden-brown means more flavor.
  • For creamy mashed potatoes, keep the potatoes hot when mixing in the butter and milk.
  • Choose organic carrots for more sweetness and nutrition.
  • You can substitute the white wine with more chicken stock if preferred.

Directions

  1. Prepare the Potatoes
    Begin by adding the peeled and chunked potatoes to a pot of cold salted water. Bring the water to a boil and cook the potatoes until they are fork-tender, about 15 minutes. Drain the potatoes and return them to the hot pot for 1–2 minutes to steam off excess moisture. Cover and set them aside.

  2. Roast the Carrots
    Preheat your oven to 425°F. Toss the peeled and sliced carrots with 1 tablespoon of olive oil, salt, and pepper on a parchment-lined baking sheet. Roast the carrots for 25–35 minutes, or until they are tender and lightly caramelized. Near the end of the roasting time, melt 2 tablespoons of butter with 1 tablespoon of honey and 1 grated garlic clove in a small pan until the mixture is bubbly and fragrant. Pour this honey-butter glaze over the hot carrots and toss to coat them evenly.

  3. Sear the Chicken
    Pat the chicken breasts dry and season them with salt, pepper, half of the minced garlic, and the thyme and/or Italian herbs, rubbing the seasoning in with 1 tablespoon of olive oil. Heat the remaining 2 tablespoons of olive oil in a large skillet over medium-high heat. Sear the chicken for 5–6 minutes per side, or until it is golden brown and cooked through. Transfer the seared chicken to a plate and tent it with foil to keep it warm.

  4. Make the Pan Sauce
    In the same skillet used for the chicken, sauté the minced shallot and remaining garlic over medium heat for 1–2 minutes. Deglaze the pan with the white wine, scraping up any browned bits from the bottom of the skillet. Simmer the mixture for 2–3 minutes to reduce it slightly, then add the chicken stock and continue simmering until the sauce has thickened slightly. Off the heat, whisk in 2 tablespoons of cold butter until the sauce becomes silky and emulsified. Season the pan sauce with salt and pepper to taste.

  5. Mash the Potatoes
    Mash the hot potatoes to your desired consistency. In a small saucepan, warm the 4 tablespoons of butter and cream cheese (if using), and milk just until the mixture is melted and combined. Stir this warm, creamy mixture into the mashed potatoes until they are smooth and luscious. Season the mashed potatoes with salt and pepper to taste. How lovely it is to see them transform into a fluffy cloud of comfort.

Serving

Make Garlic Herb Chicken with Mashed Potatoes and Glazed Carrots Tonight!

To serve this meal family-style, place the chicken in the center alongside the creamy mashed potatoes and the sweet glazed carrots. Ladle some of the silky pan sauce over the chicken to enhance its flavors. Encourage everyone to help themselves and dig in. It’s a great way to connect, share stories, and enjoy a feast together.

Storage

Leftovers can be stored in airtight containers in the refrigerator for up to 3 days. When ready to enjoy again, reheat the chicken and mashed potatoes in the oven at 350°F until warmed through. The glazed carrots can be gently reheated on the stove, though they might lose some of their crispiness.

Kitchen Notes

  • Prep your ingredients in advance to streamline the cooking process.
  • Use a potato masher or ricer for the fluffiest mashed potatoes.
  • Make the pan sauce while the chicken rests to save time.
  • Use frozen carrots if fresh ones are unavailable; they work well in a pinch.
  • For a one-pan meal, consider roasting the chicken and carrots together on the same tray.

Variations

  • For picky eaters, keep the chicken seasoning simple with just salt and pepper.
  • You can make this dish gluten-free by using gluten-free chicken stock.
  • If there’s a vegetarian in the family, swap the chicken for roasted portobello mushrooms.
  • Use sweet potatoes instead of russet potatoes for a healthier spin on the mash.
  • For a Mediterranean twist, add feta cheese to the mashed potatoes and use olives in the carrot mix.

FAQ

Q: Can I use chicken thighs instead of breasts?
A: Absolutely! Chicken thighs are great for added flavor and moisture.

Q: How do I know when the chicken is cooked through?
A: Use a meat thermometer; it should read at least 165°F at the thickest part of the chicken.

Q: Can I make this meal ahead of time?
A: Yes! You can prep the chicken and veggies ahead of time; just cook everything when you’re ready to eat.

Q: Do I have to use wine in the sauce?
A: You can substitute with additional chicken stock or omit it entirely if you prefer.

Q: Is there a vegetarian version of this dish?
A: You can replace the chicken with hearty vegetables or plant-based protein and follow the same steps for preparing the sides.

A warm meal like this Garlic Herb Chicken with Mashed Potatoes and Glazed Carrots can truly bring the family together. It’s simple, satisfying, and loaded with flavors that resonate with love. Happy cooking, and I hope your kitchen fills with delightful aromas that inspire joy and conversation.

Garlic Herb Chicken Dinner

Prep Time 20 minutes
Cook Time 40 minutes
Total Time 1 hour
Servings 4 servings
Calories 650
A comforting and flavorful dinner featuring garlic herb chicken, creamy mashed potatoes, and sweet glazed carrots, perfect for sharing with loved ones.

Ingredients

For the Chicken

  • 4 pieces boneless, skinless chicken breasts
  • 3 tablespoons olive oil, divided (Use extra virgin for better flavor.)
  • 4 cloves garlic, minced
  • 1 teaspoon dried thyme
  • 1 teaspoon dried Italian herbs
  • 1 teaspoon salt
  • 1/2 teaspoon black pepper

For the Mashed Potatoes

  • 4 large russet potatoes, peeled and cut into 2–3 inch chunks
  • 4 tablespoons butter (Use unsalted butter for better control of seasoning.)
  • 1/2 cup whole milk, warmed
  • 2 ounces cream cheese (optional) (For an extra creamy texture.)

For the Glazed Carrots

  • 1 pound carrots, peeled and sliced in half if large
  • 1 tablespoon olive oil
  • 2 tablespoons butter
  • 1 tablespoon honey
  • 1 clove garlic, grated

For the Pan Sauce

  • 1 shallot minced
  • 2 cloves garlic, minced
  • 1/2 cup dry white wine (Can substitute with chicken stock.)
  • 1/2 cup chicken stock
  • 2 tablespoons cold butter

Instructions 

Preparation

  • Begin by adding the peeled and chunked potatoes to a pot of cold salted water. Bring the water to a boil and cook the potatoes until they are fork-tender, about 15 minutes. Drain the potatoes and return them to the hot pot for 1–2 minutes to steam off excess moisture. Cover and set them aside.
  • Preheat your oven to 425°F. Toss the peeled and sliced carrots with 1 tablespoon of olive oil, salt, and pepper on a parchment-lined baking sheet. Roast the carrots for 25–35 minutes, or until they are tender and lightly caramelized.

Cooking

  • For the carrots, near the end of the roasting time, melt 2 tablespoons of butter with 1 tablespoon of honey and 1 grated garlic clove in a small pan until the mixture is bubbly and fragrant. Pour this honey-butter glaze over the hot carrots and toss to coat them evenly.
  • Pat the chicken breasts dry and season them with salt, pepper, half of the minced garlic, and the thyme and/or Italian herbs, rubbing the seasoning in with 1 tablespoon of olive oil. Heat the remaining 2 tablespoons of olive oil in a large skillet over medium-high heat. Sear the chicken for 5–6 minutes per side, or until it is golden brown and cooked through. Transfer the seared chicken to a plate and tent it with foil to keep it warm.
  • In the same skillet used for the chicken, sauté the minced shallot and remaining garlic over medium heat for 1–2 minutes. Deglaze the pan with the white wine, scraping up any browned bits from the bottom of the skillet. Simmer the mixture for 2–3 minutes to reduce it slightly, then add the chicken stock and continue simmering until the sauce has thickened slightly. Off the heat, whisk in 2 tablespoons of cold butter until the sauce becomes silky and emulsified. Season the pan sauce with salt and pepper to taste.
  • Mash the hot potatoes to your desired consistency. In a small saucepan, warm the 4 tablespoons of butter and cream cheese (if using), and milk just until the mixture is melted and combined. Stir this warm, creamy mixture into the mashed potatoes until they are smooth and luscious. Season the mashed potatoes with salt and pepper to taste.

Serving

  • To serve this meal family-style, place the chicken in the center alongside the creamy mashed potatoes and the sweet glazed carrots. Ladle some of the silky pan sauce over the chicken to enhance its flavors.

Notes

Leftovers can be stored in airtight containers in the refrigerator for up to 3 days. Reheat the chicken and mashed potatoes in the oven at 350°F until warmed through.
Calories: 650kcal
Course: Dinner, Main Course
Cuisine: American
Keyword: Comfort Food, Easy Recipe, Family Dinner, Garlic Herb Chicken, Mashed Potatoes

Key West Grilled Chicken

There’s something special about the sound of sizzling chicken on the grill and the sweet, tangy scent of citrus wafting through the kitchen. The vibrant aroma of grilled Key West Chicken can transform an ordinary day into a memorable family gathering. The sun may be shining, birds may be chirping, but nothing beats the delightful sound of laughter and conversation shared over a delicious meal.

This dish is not just a recipe; it’s a family experience. It brings everyone together, creating lasting memories. And the best part? It saves you time in the kitchen while still providing a fresh and energizing meal.

Why This Works

Key West Grilled Chicken

This recipe is all about family time. Key West Grilled Chicken captures the bright, sunny flavors of the tropics and combines them with the ease of grilling. It’s a perfect choice for busy weeknights or laid-back weekends. The marinade is quick to whip up, and you can let it do its magic while you attend to other tasks around the house.

With just a few simple ingredients, you can create a flavorful meal that pleases even the pickiest of eaters. Plus, grilling means less mess in the kitchen and more outdoor enjoyment. It’s truly an all-in-one win for family dinners!

Process Overview

“This is where the magic happens—when the aroma fills the kitchen.”

As you gather your ingredients and prepare to cook, you’ll find that the process is straightforward. You’ll marinate the chicken, fire up the grill, and in no time, you’ll have a delightful meal ready to serve. Follow along as we break down the steps, ensuring each part is easy to follow.

Ingredients

Here’s what you’ll need for the Key West Grilled Chicken along with a few personal tips:

  • 4 boneless, skinless chicken breasts
    Tip: Opt for organic chicken when available for better flavor and quality.

  • 1/4 cup lime juice
    Tip: Use fresh limes for the best taste; the bottled stuff does not compare.

  • 1/4 cup orange juice
    Tip: Squeeze your oranges right before using to maximize freshness.

  • 1/4 cup pineapple juice
    Tip: If you have fresh pineapple, blend a slice instead of using juice for added texture.

  • 2 tablespoons olive oil
    Tip: Use extra virgin olive oil for richer flavor.

  • 2 cloves garlic, minced
    Tip: Fresh garlic will give you a kick that powdered garlic can’t match.

  • 1 teaspoon salt
    Tip: Kosher salt is preferred for even seasoning.

  • 1/2 teaspoon black pepper
    Tip: Freshly ground pepper is the best for a pungent flavor.

  • 1 teaspoon cumin
    Tip: Toast the cumin seeds before grinding for an earthy depth.

  • 1/4 cup chopped fresh cilantro (for garnish)
    Tip: To keep cilantro fresh, store it upright in a glass of water in the fridge.

Directions

Follow these steps for perfectly grilled Key West Chicken:

  1. In a bowl, whisk together lime juice, orange juice, pineapple juice, olive oil, garlic, salt, pepper, and cumin to create the marinade.
    Encouragement: Don’t rush—take a moment to really whisk it together. This marinade is key!

  2. Place the chicken breasts in a resealable plastic bag or a shallow dish and pour the marinade over the chicken. Seal the bag or cover the dish and refrigerate for at least 1 hour, or overnight for the best flavor.
    Encouragement: If time allows, letting it marinate overnight will deeply infuse the flavors!

  3. Preheat the grill to medium-high heat.
    Encouragement: Preheating is essential for searing the chicken and locking in those juices!

  4. Remove chicken from the marinade and discard the marinade.
    Encouragement: Pat the chicken dry with a paper towel to get nice grill marks.

  5. Grill the chicken for 6-8 minutes on each side, or until fully cooked and juices run clear.
    Encouragement: Don’t flip too soon; let it sear before turning!

  6. Remove from the grill and let rest for a few minutes before slicing.
    Encouragement: Resting is key to juicy chicken—don’t skip this step!

  7. Garnish with chopped cilantro and serve. Enjoy!
    Encouragement: Gather the family around the table for a truly special meal!

Serving

Key West Grilled Chicken

This delicious Key West Grilled Chicken is perfect for serving family-style. Slice the chicken breasts and arrange them on a large platter. You can add sides like grilled vegetables, rice, or a fresh salad.

Consider setting up a family taco bar with toppings like shredded lettuce, guacamole, and salsa. This way, each person can customize their plate and enjoy the meal together.

Storage

Once you’ve enjoyed your meal, you may have some leftovers. The grilled chicken can be stored in an airtight container in the fridge for up to four days. For reheating, simply microwave it for a minute or until warmed through, or throw it back on the grill for a few moments to reheat and impart that smoky flavor.

If you want to freeze any leftovers, wrap the chicken tightly in aluminum foil or put it in a freezer-safe container. It should stay fresh in the freezer for up to three months. Just remember to thaw in the fridge overnight before reheating.

Kitchen Notes

Here are some shortcuts that can save you time while preparing this dish:

  • Pre-marinate chicken during meal prep at the beginning of the week.
  • Use bottled juice if fresh isn’t available.
  • Use a meat thermometer to check doneness (165°F is the goal).
  • Leftover marinade can be used as a dressing for salads after boiling it for safety.
  • Grill extra chicken to use in salads, sandwiches, or wraps throughout the week.

Variations

This recipe can be easily adapted for different diets or preferences:

  • For Picky Eaters: Skip the cumin if your family prefers milder flavors and add a touch of honey to the marinade for a sweeter taste.
  • Gluten-Free: This recipe is naturally gluten-free, so you’re all set.
  • For a Spicy Kick: Add red pepper flakes or jalapeños to the marinade for some heat.
  • Vegetarian Option: Replace the chicken with thick slices of zucchini, eggplant, or portobello mushrooms in the marinade for a fantastic grilled veggie option.
  • Low-Carb: Serve with a side of cauliflower rice instead of traditional rice for a keto-friendly meal.

FAQ

1. How long should I marinate the chicken?
For best flavor, marinate for at least 1 hour, but overnight is best.

2. Can I grill the chicken indoors?
Yes, you can use a grill pan on the stovetop or an indoor electric grill.

3. What is the best way to tell if chicken is cooked?
A meat thermometer should read 165°F in the thickest part of the breast.

4. Can I make the marinade ahead of time?
Absolutely! You can prepare the marinade and store it in the fridge for up to 2 days before using.

5. What’s a good side dish to serve with this chicken?
Grilled vegetables, rice, or a fresh green salad are all excellent options.

As you gather your family at the dinner table, remember that the heart of the meal is more than just good food; it’s about sharing moments together. This Key West Grilled Chicken recipe not only satisfies the taste buds but also brings smiles, laughter, and warmth to your home. Every bite is a reminder that family matters, and so does sharing delicious food. Enjoy every moment!

Key West Grilled Chicken

Prep Time 15 minutes
Cook Time 16 minutes
Total Time 31 minutes
Servings 4 servings
Calories 300
A vibrant and flavorful grilled chicken recipe inspired by the bright flavors of Key West, perfect for family gatherings and easy weeknight meals.

Ingredients

Marinade

  • 1/4 cup lime juice (Use fresh limes for the best taste.)
  • 1/4 cup orange juice (Squeeze your oranges right before using to maximize freshness.)
  • 1/4 cup pineapple juice (If you have fresh pineapple, blend a slice instead of using juice for added texture.)
  • 2 tablespoons olive oil (Use extra virgin olive oil for richer flavor.)
  • 2 cloves garlic, minced (Fresh garlic will give you a kick that powdered garlic can't match.)
  • 1 teaspoon salt (Kosher salt is preferred for even seasoning.)
  • 1/2 teaspoon black pepper (Freshly ground pepper is the best for a pungent flavor.)
  • 1 teaspoon cumin (Toast the cumin seeds before grinding for an earthy depth.)

For Serving

  • 4 pieces boneless, skinless chicken breasts (Opt for organic chicken when available for better flavor and quality.)
  • 1/4 cup chopped fresh cilantro (Store cilantro upright in a glass of water in the fridge.)

Instructions 

Preparation

  • In a bowl, whisk together lime juice, orange juice, pineapple juice, olive oil, garlic, salt, pepper, and cumin to create the marinade.
  • Place the chicken breasts in a resealable plastic bag or a shallow dish and pour the marinade over the chicken. Seal the bag or cover the dish and refrigerate for at least 1 hour, or overnight for the best flavor.

Cooking

  • Preheat the grill to medium-high heat.
  • Remove chicken from the marinade and discard the marinade. Pat the chicken dry with a paper towel.
  • Grill the chicken for 6-8 minutes on each side, or until fully cooked and juices run clear.
  • Remove from the grill and let rest for a few minutes before slicing.

Serving

  • Garnish with chopped cilantro and serve. Enjoy!

Notes

Consider setting up a family taco bar with toppings like shredded lettuce, guacamole, and salsa. Leftover chicken can be stored in an airtight container in the fridge for up to four days or frozen for up to three months.
Calories: 300kcal
Course: Dinner, Main Course
Cuisine: American, Tropical
Keyword: Citrus Marinade, Family Recipe, Grilled Chicken, Key West Chicken, Outdoor Cooking

Savory BLT Chicken Salad

The sound of sizzling bacon fills the kitchen. You can almost hear the laughter and chatter of your family gathering around the table. As you prepare the savory BLT chicken salad, the rich aroma of cooked chicken and crispy bacon mingles in the air. It’s a sensory invitation to a meal that feels both comforting and refreshing. With every bite, you experience a delightful crunch from the lettuce and a burst of flavor from the tomatoes.

This salad is not just a dish; it’s a celebration of flavors and family togetherness, perfect for any occasion, be it a busy weeknight or a leisurely weekend lunch.

Why This Works

Savory BLT Chicken Salad

This BLT chicken salad is a winning combination of flavor, texture, and ease. The smoky bacon pairs beautifully with the tender chicken and fresh vegetables. It’s a dish that can be prepared quickly, allowing you to spend less time in the kitchen and more time with your loved ones.

Whether you are hosting a casual family gathering or just need a quick meal, this salad hits all the right notes. It’s ready in about 15 minutes and is sure to impress everyone at the table.

Process Overview

“This is where the magic happens—when the aroma fills the kitchen.”

This recipe comes together in a few simple steps. You’ll start by combining the main ingredients for a hearty base. Then you’ll whisk together a creamy dressing that ties everything together. Once mixed, you can enjoy it right away or save it for later. Each step is designed to be straightforward, making the process enjoyable for both seasoned cooks and kitchen novices.

Ingredients

To make this savory BLT chicken salad, gather the following ingredients:

  • 2 cups cooked chicken, shredded
    (Tip: Use leftover rotisserie chicken for a quick shortcut.)
  • 4 slices bacon, cooked and crumbled
    (Tip: Cook extra bacon to use in breakfast dishes throughout the week.)
  • 1 cup cherry tomatoes, halved
    (Tip: Look for vibrant, firm tomatoes for the best flavor.)
  • 1 cup romaine lettuce, chopped
    (Tip: Fresh romaine adds a nice crunch to the salad.)
  • 1/2 cup mayonnaise
    (Tip: Use homemade mayo for a richer taste, if you have time.)
  • 1 tablespoon Dijon mustard
    (Tip: This adds a wonderful tang; feel free to adjust based on your taste.)
  • Salt and pepper to taste
    (Tip: Always taste your mixture before serving to adjust the seasoning.)
  • Optional: sliced avocado or hard-boiled eggs
    (Tip: These add creaminess and protein; they’re perfect additions.)

Directions

  1. In a large bowl, combine the chicken, bacon, tomatoes, and lettuce.
    (Make sure everything is mixed well for balanced flavor.)
  2. In a separate bowl, mix together the mayonnaise, Dijon mustard, salt, and pepper.
    (This dressing will elevate the entire dish, so whisk it to perfection.)
  3. Pour the dressing over the chicken mixture and toss to coat.
    (Ensure every ingredient is well-coated—this makes each bite delightful.)
  4. Serve immediately or refrigerate for meal prep.
    (Chilling it for a bit allows the flavors to meld together beautifully.)
  5. Optional: Top with sliced avocado or hard-boiled eggs before serving.
    (These additions can turn it into a hearty meal—perfect for a filling lunch.)

Serving

Savory BLT Chicken Salad

Serving this BLT chicken salad family-style can enhance the experience. Place the salad in a large bowl at the center of the table. Encourage everyone to dig in and create their own perfect plate. You can also set out some extra toppings, such as additional bacon or various greens, for a make-your-own salad experience. This not only makes it interactive but also allows everyone to customize their meal just the way they like it.

Storage

This salad keeps well in the fridge for up to three days. Just store it in an airtight container. If you plan to serve it later, keep the dressing separate until just before serving. This helps maintain the crispness of the lettuce and the overall texture.

To reheat any leftovers, warm them slightly in the microwave, but be cautious not to overdo it. You want to warm the chicken rather than cooking it further. Enjoy chilled, or slightly warmed for a cozy comfort food experience.

Kitchen Notes

  • Cook Ahead: Prepare the chicken and bacon ahead of time. They can be used in various meals.
  • Batch Cooking: Make a double batch for meal prep. It’s great for busy weeknights.
  • Fresh Ingredients: Use the freshest ingredients possible. This makes a considerable difference in flavor.
  • Mix It Up: Feel free to add other veggies based on preference. Cucumbers and bell peppers work great too.
  • Crisp Factor: Keep the dressing separate until serving to ensure the romaine stays crisp.

Variations

If you have picky eaters or want to cater to different diets, this salad is highly adaptable. Here are a few suggestions:

  • Picky Eaters: Try swapping the romaine for spinach or a mild blend of salad greens. Sneak in finely chopped veggies to boost nutrition without changing the flavor too much.
  • Gluten-Free: This recipe is naturally gluten-free, so it’s safe for gluten-sensitive friends and family.
  • Low-Carb/Keto: Omit the tomatoes and replace the mayonnaise with an avocado-based dressing for a low-carb option.
  • Dairy-Free: Substitute the mayonnaise with a vegan alternative, and you’re good to go.
  • Add More Protein: Include shredded cheese or chickpeas for added protein, meeting the needs of those who want extra energy in their meal.

FAQ

1. How long can I store the salad?
You can store it for up to three days in the fridge, but the lettuce may become limp.

2. Can I use canned chicken?
Yes, canned chicken can be a quick and convenient option, though fresh chicken will enhance the flavor.

3. Is this salad good for meal prep?
Absolutely! Just keep the dressing and lettuce separate until you are ready to eat.

4. Can I add other toppings?
Certainly! Croutons, nuts, or cheese can all be excellent additions to enhance flavor and texture.

5. How can I make this salad spicy?
Add some sliced jalapeños or a splash of hot sauce to the dressing for an extra kick.

As you gather around the table to enjoy this savory BLT chicken salad, remember that meals are about more than just the food. They’re about shared experiences, laughter, and love. So, dig in, savor the flavors, and make lasting memories with your family around this delightful dish.

BLT Chicken Salad

Prep Time 10 minutes
Cook Time 5 minutes
Total Time 15 minutes
Servings 4 servings
Calories 400
A delightful combination of shredded chicken, crispy bacon, fresh vegetables, and a creamy dressing, perfect for family gatherings or quick weeknight meals.

Ingredients

Main ingredients

  • 2 cups cooked chicken, shredded (Use leftover rotisserie chicken for a quick shortcut.)
  • 4 slices bacon, cooked and crumbled (Cook extra bacon to use in breakfast dishes throughout the week.)
  • 1 cup cherry tomatoes, halved (Look for vibrant, firm tomatoes for the best flavor.)
  • 1 cup romaine lettuce, chopped (Fresh romaine adds a nice crunch to the salad.)
  • 1/2 cup mayonnaise (Use homemade mayo for a richer taste, if you have time.)
  • 1 tablespoon Dijon mustard (This adds a wonderful tang; feel free to adjust based on your taste.)
  • to taste Salt and pepper (Always taste your mixture before serving to adjust the seasoning.)
  • optional sliced avocado or hard-boiled eggs (These add creaminess and protein; they’re perfect additions.)

Instructions 

Preparation

  • In a large bowl, combine the chicken, bacon, tomatoes, and lettuce.
  • In a separate bowl, mix together the mayonnaise, Dijon mustard, salt, and pepper.
  • Pour the dressing over the chicken mixture and toss to coat.
  • Serve immediately or refrigerate for meal prep.
  • Optional: Top with sliced avocado or hard-boiled eggs before serving.

Notes

Serve this salad family-style for an interactive meal. Store in an airtight container for up to three days. Keep the dressing separate until just before serving to maintain crispness. Reheat leftovers gently in the microwave.
Calories: 400kcal
Course: Dinner, Lunch, Salad
Cuisine: American
Keyword: BLT Chicken Salad, Chicken Salad, Family Recipe, Quick Meal, savory salad

Grilled Salsa Verde Pepper Jack Chicken

Grilled Salsa Verde Pepper Jack Chicken fills the kitchen with a tantalizing aroma as it sizzles away on the grill. The rich sounds of chicken cooking, combined with the fresh scent of salsa verde, make it almost impossible to resist this dish. It’s the kind of meal that not only brings the family together around the dinner table but also celebrates flavorful moments that linger in your memory.

Why This Works

Grilled Salsa Verde Pepper Jack Chicken

This Grilled Salsa Verde Pepper Jack Chicken is not only delicious but also saves you time in the kitchen. After a long day, you want a dish that cooks quickly and is still packed with flavor. This recipe takes just a half-hour, meaning you can enjoy quality family time instead of spending hours in the kitchen.

The combination of spicy pepper jack cheese with vibrant salsa verde will appeal to the whole family, making it a satisfying option for dinner. Plus, it’s an easy way to introduce more vibrant flavors into your meals without overwhelming anyone. It’s a fantastic choice for busy weeknights or weekend barbecues.

Process Overview

“This is where the magic happens—when the aroma fills the kitchen.”

The process for making this dish is straightforward and allows you to enjoy the grilling experience. You’ll find yourself getting lost in the smells and sounds of the cooking process. Grilling creates a mouthwatering char that’s hard to resist, and the best part is, you can relax while it cooks!

Ingredients

So, what do you need to bring this flavorful dish to life? Here’s a quick breakdown of the ingredients:

  1. 4 boneless, skinless chicken breasts: Chicken breasts are versatile and lean. Look for organic options if possible.
  2. 1 cup salsa verde: The vibrant flavors in salsa verde will elevate your chicken. Choose a brand that doesn’t use preservatives for the best taste.
  3. 1 cup shredded pepper jack cheese: This cheese adds creaminess and a bit of a kick. For a milder flavor, you can substitute with Monterey Jack.
  4. 1 tablespoon olive oil: This will help the spices stick while adding a rich flavor. Use extra virgin for the best quality.
  5. Salt and pepper to taste: Simple seasonings that will enhance the chicken’s natural flavors. Freshly ground pepper will give you the best taste.

Lily’s Tips:

  • For juicier chicken, consider marinating it in salsa verde for an hour before grilling.
  • Let your chicken rest for a few minutes after grilling to seal in the juices.

Directions

Let’s get started with the cooking! Follow these simple steps, and you’ll be well on your way to a delicious dinner.

  1. Preheat grill to medium-high heat.
    Getting the grill to the right temperature ensures that your chicken cooks evenly.

  2. Season chicken breasts with olive oil, salt, and pepper.
    Rub the oil in gently, ensuring every part is seasoned. This step gives every bite great flavor.

  3. Grill chicken for 6-7 minutes on each side or until cooked through.
    Listen for the sizzle! That’s your chicken developing a wonderful char.

  4. In the last few minutes of grilling, top each chicken breast with salsa verde and pepper jack cheese.
    This is where the magic happens, the salsa will heat through, and the cheese will begin to melt.

  5. Close the grill lid until cheese is melted.
    Keeping the lid closed helps create an oven-like environment that perfectly melts the cheese.

  6. Remove from grill and let rest before serving.
    This resting step locks in all the tasty juices. Patience will pay off here!

Serving

Grilled Salsa Verde Pepper Jack Chicken

When it comes to serving, I love to present this chicken family-style. Place the grilled chicken on a large platter, allowing everyone to help themselves. Serve with warm tortillas and a side of rice or a fresh garden salad. This dish invites sharing and encourages everyone to create their own perfect bite.

Storage

If you happen to have leftovers, don’t worry! Store them in an airtight container in the fridge for up to 3 days. Reheat in the microwave or on the grill to bring back the fresh flavors. If you’re reheating in the microwave, cover with a damp paper towel to keep the chicken moist.

Kitchen Notes

  • Marinate: If you have time, marinate the chicken in salsa verde for 1 hour before grilling.
  • Use a thermometer: Chicken should reach an internal temperature of 165°F to ensure it’s fully cooked.
  • Add veggies: Consider grilling some zucchini or bell peppers alongside the chicken for a complete meal.
  • Cheese alternatives: If you prefer non-dairy cheese, use a vegan pepper jack option.
  • Make it spicy: Add sliced jalapeños on top of the chicken for an extra kick.

Variations

Everyone has different tastes, and that’s what makes cooking fun! Here are some simple tweaks:

  • For picky eaters: Keep the toppings simple. Just use cheese and a light sprinkle of taco seasoning instead of salsa.
  • For low-carb diets: Serve the chicken over a bed of sautéed spinach instead of rice or tortillas.
  • Vegetarian option: Substitute chicken with thick slices of portobello mushrooms for a hearty texture.
  • Spicier option: Swap out pepper jack cheese for habanero cheese or sprinkle red pepper flakes on top.

FAQ

  1. Can I cook this in the oven?
    Yes! Preheat your oven to 375°F and bake for 25-30 minutes, adding the salsa and cheese in the last 5 minutes.

  2. What kind of salsa verde should I use?
    Choose any brand you love, or make your own using tomatillos, jalapeño, lime juice, and cilantro.

  3. Can I freeze the leftovers?
    Yes! Store them in a freezer-safe bag for up to 3 months.

  4. Is this recipe gluten-free?
    Yes, all the ingredients listed are naturally gluten-free.

  5. Can I use chicken thighs instead?
    Absolutely! Chicken thighs will add even more moisture and flavor.

In closing, I hope you and your family enjoy this Grilled Salsa Verde Pepper Jack Chicken as much as we do. It’s easy to prepare, bursting with flavor, and brings everyone together at the table. Cooking can be such a joyful experience, and it’s all about creating moments that you’ll cherish. Find joy in the simple meals and let the aromas fill your home. Happy cooking!

Grilled Salsa Verde Pepper Jack Chicken

Prep Time 10 minutes
Cook Time 20 minutes
Total Time 30 minutes
Servings 4 servings
Calories 300
A quick and flavorful meal featuring grilled chicken breasts topped with vibrant salsa verde and spicy pepper jack cheese.

Ingredients

Main ingredients

  • 4 pieces boneless, skinless chicken breasts (Look for organic options if possible.)
  • 1 cup salsa verde (Choose a brand that doesn't use preservatives for the best taste.)
  • 1 cup shredded pepper jack cheese (For a milder flavor, substitute with Monterey Jack.)
  • 1 tablespoon olive oil (Use extra virgin for the best quality.)
  • to taste salt (Enhances the chicken’s natural flavors.)
  • to taste pepper (Freshly ground pepper provides the best taste.)

Instructions 

Preparation

  • Preheat grill to medium-high heat.
  • Season chicken breasts with olive oil, salt, and pepper.

Grilling

  • Grill chicken for 6-7 minutes on each side or until cooked through.
  • Top each chicken breast with salsa verde and pepper jack cheese in the last few minutes of grilling.
  • Close the grill lid until cheese is melted.
  • Remove from grill and let rest before serving.

Notes

For juicier chicken, consider marinating it in salsa verde for an hour before grilling. Serve family-style with warm tortillas, rice, or salad. Store leftovers in an airtight container in the fridge for up to 3 days.
Calories: 300kcal
Course: Dinner, Main Course
Cuisine: Mexican
Keyword: Easy Dinner, Family Meal, Grilled Chicken, Pepper Jack Cheese, Salsa Verde

Lime Chicken Festival

There’s something soothing about the sounds of the kitchen while preparing a meal. The sizzle of chicken on the grill, the zesty scent of lime wafting through the air, and the cheerful chatter of family members create an atmosphere filled with warmth. Imagine gathering around the table, everyone eagerly anticipating a delicious meal together. That’s the magic that happens when you prepare Lime Chicken Festival.

Why This Works

Lime Chicken Festival

Lime Chicken Festival is a fantastic choice for busy families. It combines fresh flavors and simple ingredients, allowing you to whip up a delightful dish without spending hours in the kitchen. Marinating the chicken ahead of time not only enhances the flavors but also saves you precious moments during busy nights. It’s a recipe that brings the family together with minimum fuss. The bright, tangy lime pairs perfectly with the succulent chicken, making this dish a winner for both kids and adults. Plus, it’s easy to customize, ensuring everyone leaves the table satisfied.

Process Overview

“This is where the magic happens—when the aroma fills the kitchen.”

This recipe involves just a few simple steps, bringing you from start to finish in under an hour. You’ll mix your marinade, let the chicken soak up the citrus goodness, then grill it to perfection. The result is a juicy, flavorful chicken dish that even the pickiest eaters will love.

Ingredients

Here’s what you need for 4 servings of Lime Chicken Festival:

  • 4 boneless, skinless chicken breasts: Choosing chicken breasts ensures even cooking and tenderness. Look for organic options if possible.

  • 1 lime, juiced: Fresh lime juice brightens the dish and helps tenderize the chicken. If you don’t have a juicer, use a fork to extract juice.

  • 1 avocado, diced: Creamy avocado adds a great texture and flavor balance. Make sure to pick a ripe avocado for optimal taste.

  • 1/4 cup fresh cilantro, chopped: Fresh cilantro brings a burst of flavor and color. Rinse well before chopping.

  • 1 teaspoon chili powder: This adds a hint of heat without overwhelming the dish. Adjust the amount based on your family’s spice tolerance.

  • 2 tablespoons olive oil: Use extra virgin olive oil for its wonderful flavor and health benefits.

  • Salt and pepper to taste: Seasoning is key to enhancing all the flavors. Don’t be shy with these staples!

Directions

  1. In a bowl, mix the lime juice, olive oil, chili powder, salt, and pepper. Take your time to blend the ingredients well. The zesty aroma will make your mouth water.

  2. Marinate the chicken breasts in the mixture for at least 30 minutes. This is a crucial step for flavor. If you have time, marinate it overnight for maximum taste.

  3. Preheat the grill to medium heat. Make sure it’s hot before adding the chicken. A properly heated grill gives you beautiful sear marks.

  4. Grill the chicken for 6-7 minutes on each side, or until fully cooked. Check that the internal temperature reaches 165°F for safe eating.

  5. Remove the chicken from the grill and let it rest for a few minutes. Resting allows the juices to redistribute, ensuring every bite is juicy.

  6. Top with diced avocado and chopped cilantro before serving. This adds a lovely freshness that complements the grilled chicken beautifully.

Serving

Lime Chicken Festival

Serving Lime Chicken Festival family-style is the way to go. Create a vibrant platter with the grilled chicken beautifully arranged. Add the chopped avocado and cilantro on top for a stunning presentation. You may also want to serve it with warm tortillas, rice, or a fresh salad on the side. Family members can build their own plates, which adds a fun and interactive element to your meal.

Storage

For any leftovers, store the grilled chicken in an airtight container in the refrigerator. It will keep well for 3 to 4 days. When reheating, place it in a warm oven (about 350°F) for about 10-15 minutes, or until heated through. You can also reheat on the stovetop over low heat until warmed. If you’ve already added the avocado, it’s best to eat it fresh. Consider adding fresh avocado when serving leftovers for a creamy texture.

Kitchen Notes

  1. Marinate the chicken the night before for an even deeper flavor profile.
  2. Use a meat thermometer to avoid overcooking the chicken.
  3. For extra flavor, add minced garlic to the marinade.
  4. If grilling isn’t an option, you can cook the chicken in a skillet or bake it in the oven at 375°F.
  5. Consider adding sliced jalapeños to the grill for a spicy kick.

Variations

For picky eaters, consider these variations:

  • Different Proteins: Swap chicken for shrimp or firm tofu for a vegetarian option.
  • Herb Swap: Use parsley or basil instead of cilantro if your family prefers its flavor.
  • Add Vegetables: Grill bell peppers and zucchini alongside the chicken for a colorful side.
  • Different Citrus: Use lemon or orange juice for a different citrus flavor.
  • Sauce it Up: Serve with a tangy yogurt sauce or a salsa for added excitement.

FAQ

1. Can I use frozen chicken?
Yes, but thaw it completely before marinating and grilling for best results.

2. How can I tell if the chicken is done?
Ensure it reaches an internal temperature of 165°F. You can use a meat thermometer for accuracy.

3. What sides pair well with this dish?
Consider serving it with rice, quinoa, or a fresh salad for a balanced meal.

4. Can I marinate the chicken too long?
Marinating for too long can make the chicken too acidic. Aim for 30 minutes to a few hours.

5. Is this recipe suitable for meal prep?
Absolutely! Grilled chicken is versatile and can be used in numerous meals throughout the week.

As you gather around the table with your family, let the bright flavors of Lime Chicken Festival create warmth and connection. This dish is more than just a meal; it’s a time to enjoy each other’s company and celebrate the little joys of life together. Happy cooking!

Lime Chicken Festival

Prep Time 30 minutes
Cook Time 15 minutes
Total Time 45 minutes
Servings 4 servings
Calories 300
A fresh and flavorful dish featuring grilled chicken marinated in zesty lime juice, perfect for family gatherings.

Ingredients

Main Ingredients

  • 4 pieces boneless, skinless chicken breasts (Choose organic options if possible.)
  • 1 unit lime, juiced (Fresh lime juice brightens the dish.)
  • 1 unit avocado, diced (Use a ripe avocado for optimal taste.)
  • 1/4 cup fresh cilantro, chopped (Rinse well before chopping.)
  • 1 teaspoon chili powder (Adjust based on spice tolerance.)
  • 2 tablespoons olive oil (Use extra virgin for better flavor.)
  • Salt and pepper to taste (Seasoning enhances all flavors.)

Instructions 

Preparation

  • In a bowl, mix the lime juice, olive oil, chili powder, salt, and pepper until well combined.
  • Marinate the chicken breasts in the mixture for at least 30 minutes or overnight for maximum flavor.

Cooking

  • Preheat the grill to medium heat.
  • Grill the chicken for 6-7 minutes on each side, or until fully cooked (internal temperature should reach 165°F).
  • Remove the chicken from the grill and let it rest for a few minutes.
  • Top the grilled chicken with diced avocado and chopped cilantro before serving.

Notes

For leftovers, store in an airtight container for 3 to 4 days. Reheat in a warm oven or stovetop. Avoid adding avocado to leftovers for best quality.
Calories: 300kcal
Course: Dinner, Main Course
Cuisine: Healthy, Mexican
Keyword: Easy Dinner, Family Meal, Grilled Chicken, Lime Chicken, quick recipe

Street Corn Chicken Rice Bowl

Nothing beats the feeling of stepping into a warm kitchen, where the aroma of grilled chicken and spices dances in the air. The sizzle of corn hitting the hot skillet is music to my ears, a promise of deliciousness on the horizon. Today, I’m excited to share with you a recipe that brings comfort, joy, and a hint of adventure to the dinner table: the Street Corn Chicken Rice Bowl. It’s a vibrant dish that’s not just satisfying but also incredibly easy to prepare on a busy weeknight.

Why this works

Street Corn Chicken Rice Bowl

This recipe is the very definition of a family favorite. First, it’s a time-saver. You can have it on the table in less than 30 minutes, which means more time spent with loved ones instead of hovering over the stove. The combination of grilled chicken, sweet corn, and zesty lime crema ensures that everyone at the table is delighted.

Another reason this dish is a winner is its flexibility. You can tweak ingredients based on what your family loves or what you have on hand. It’s a one-bowl meal that satisfies hunger and makes everyone feel good.

Process Overview

“This is where the magic happens—when the aroma fills the kitchen.”

In just a few steps, you’ll create a filling meal that captures the essence of street food. The sequence is simple: sauté the corn, prepare the lime crema, layer your rice bowl, and top it off beautifully. Each step is straightforward, allowing you to focus on what really matters—creating a wonderful shared experience over dinner.

Ingredients

Let’s gather what you need for this mouthwatering dish:

  • 2 cups cooked rice (white, brown, or cilantro-lime rice)
  • 2 chicken breasts (grilled and sliced)
  • 1 cup corn kernels (fresh, frozen, or canned)
  • 1/2 cup black beans (drained and rinsed)
  • 1/4 cup diced red onion
  • 1/4 cup diced tomatoes
  • 1/4 cup crumbled cotija cheese
  • 2 tablespoons chopped fresh cilantro (for garnish)
  • 1 tablespoon olive oil
  • 1 teaspoon chili powder
  • 1/2 teaspoon smoked paprika
  • 1/2 teaspoon cumin
  • 1/4 teaspoon salt
  • 1/4 teaspoon black pepper
  • 1/2 cup sour cream or Greek yogurt
  • Juice of 1 lime
  • 1/2 teaspoon garlic powder
  • 1/4 teaspoon salt

Lily’s Tips

  • Rice: Cilantro-lime rice adds a zesty kick. Just mix cooked rice with some lime juice and fresh cilantro.
  • Chicken: Grill the chicken the day before to make prep even quicker.
  • Corn: For extra flavor, consider charring the corn on the grill if you have the time.
  • Beans: Canned beans are a huge time-saver when you’re in a pinch. Rinse them well for the best flavor.
  • Lime crema: Add more lime juice for a tangier dressing.

Directions

  1. Heat a skillet over medium heat. Add the olive oil and sauté the corn kernels for 3-4 minutes until lightly charred. Season with chili powder, smoked paprika, cumin, salt, and pepper. Set aside. The aroma is already irresistible.

  2. In a small bowl, mix together the sour cream, lime juice, garlic powder, and salt to make the lime crema. Adjust lime juice to taste. This creamy mixture adds a delightful zing.

  3. Assemble the bowls: Start with a base of cooked rice. Layer the grilled chicken slices, charred corn, black beans, diced tomatoes, red onion, and cotija cheese on top. Each layer adds texture and flavor—get creative!

  4. Drizzle the lime crema over the bowl and garnish with fresh cilantro. Feel free to add more toppings if you wish.

  5. Serve immediately and enjoy! Share smiles and stories over this delicious meal.

Serving

Street Corn Chicken Rice Bowl

To serve this dish family-style, create a beautiful spread by placing all the components on the table. Let everyone build their own rice bowl exactly how they like it. Watching your loved ones customize their meal is half the fun. Plus, it encourages everyone to try something new!

Storage

If you have leftovers (which is rare but happens), store each component in separate airtight containers in the fridge. The rice and beans will hold up well for about three days. Just reheat them gently in the microwave. The lime crema keeps well too, but it’s best used within two days for fresh flavor.

Kitchen Notes

  • Cook Rice in Bulk: Make extra rice over the weekend to save time during the week.
  • Pre-cook Chicken: Grill or sauté chicken ahead of time and refrigerate.
  • Frozen Corn: If you’re short on fresh corn, frozen works perfectly and cooks quickly.
  • Meal Prep: Chop the veggies ahead of time for an even quicker assembly.
  • Dress Up Leftovers: Use leftovers to create a wrap or salad the next day—no food waste here!

Variations

  • For Picky Eaters: If kids aren’t fans of black beans, substitute with refried beans or simply leave them out.
  • Vegetarian Option: Replace chicken with grilled tofu or tempeh, and add more veggies like bell peppers or zucchini.
  • Spicy Kick: Add jalapeños or your favorite hot sauce for a bit of heat.
  • Gluten-Free: This recipe is naturally gluten-free, but always check labels when buying canned or packaged ingredients.
  • Dairy-Free: Swap out cotija cheese for nutritional yeast or vegan cheese, and use a dairy-free yogurt for the crema.

FAQ

1. Can I use brown rice instead of white rice?
Absolutely. Brown rice adds a nuttier flavor and more fiber.

2. How can I make this dish spicier?
Consider adding more chili powder, diced jalapeños, or your favorite hot sauce.

3. Can I prepare this dish in advance?
You can prep the ingredients in advance but it’s best to assemble the bowl just before serving.

4. Is there a substitute for cotija cheese?
Feta cheese or any crumbly cheese works as a great substitute.

5. How do I store leftovers?
Keep leftovers in airtight containers in the fridge for up to three days.

As we wrap up this cooking adventure, I hope this Street Corn Chicken Rice Bowl becomes a cherished recipe in your family’s meal rotation. Food should be a source of comfort and joy, and I believe this bowl offers just that. So gather around the table, savor each bite, and share those warm nights filled with laughter and love. Happy cooking!

Street Corn Chicken Rice Bowl

Prep Time 15 minutes
Cook Time 15 minutes
Total Time 30 minutes
Servings 4 servings
Calories 600
A vibrant and satisfying dish combining grilled chicken, sweet corn, and zesty lime crema, perfect for busy weeknights.

Ingredients

Base Ingredients

  • 2 cups cooked rice (white, brown, or cilantro-lime rice)
  • 2 breasts chicken (grilled and sliced)
  • 1 cup corn kernels (fresh, frozen, or canned)
  • 1/2 cup black beans (drained and rinsed)
  • 1/4 cup diced red onion
  • 1/4 cup diced tomatoes
  • 1/4 cup crumbled cotija cheese
  • 2 tablespoons chopped fresh cilantro (for garnish)

Seasonings and Dressing

  • 1 tablespoon olive oil
  • 1 teaspoon chili powder
  • 1/2 teaspoon smoked paprika
  • 1/2 teaspoon cumin
  • 1/4 teaspoon salt
  • 1/4 teaspoon black pepper
  • 1/2 cup sour cream or Greek yogurt
  • Juice of 1 lime
  • 1/2 teaspoon garlic powder
  • 1/4 teaspoon salt

Instructions 

Preparation

  • Heat a skillet over medium heat. Add the olive oil and sauté the corn kernels for 3-4 minutes until lightly charred. Season with chili powder, smoked paprika, cumin, salt, and pepper. Set aside.
  • In a small bowl, mix together the sour cream, lime juice, garlic powder, and salt to make the lime crema. Adjust lime juice to taste.

Assembly

  • Assemble the bowls: Start with a base of cooked rice. Layer the grilled chicken slices, charred corn, black beans, diced tomatoes, red onion, and cotija cheese on top.
  • Drizzle the lime crema over the bowl and garnish with fresh cilantro.
  • Serve immediately and enjoy!

Notes

For a family-style serving, place all components on the table and let everyone build their own rice bowl. Store leftovers in separate airtight containers for up to three days.
Calories: 600kcal
Course: Dinner, Main Course
Cuisine: Comfort Food, Mexican
Keyword: Chicken Rice Bowl, Easy Dinner, One Bowl Meal, Quick Healthy Meal, Street Corn

Ranch Garlic Parmesan Chicken Skewers

As the sun sets, the warm smells of the kitchen wrap around you like a cozy blanket. You hear the sound of sizzling chicken on the grill, and your mouth starts to water in anticipation. The air is filled with the zesty aroma of ranch dressing mingling with the savory notes of garlic and the nuttiness of Parmesan cheese. Tonight’s dinner promise of Ranch Garlic Parmesan Chicken Skewers looks bright and delicious, ready to bring the family together around the dinner table.

Why This Works

Ranch Garlic Parmesan Chicken Skewers

Family meals should be about connection, and these Ranch Garlic Parmesan Chicken Skewers create just that. This dish is perfect for busy weeknights, allowing everyone to enjoy a wholesome dinner in less than 30 minutes of hands-on time. Plus, these skewers are fun to eat, making it easier to gather the family and share stories from the day. The flavors work so well together, creating a meal that pleases both kids and adults alike.

Process Overview

“This is where the magic happens—when the aroma fills the kitchen.”

The process of making these skewers is simple yet highly rewarding. You mix up a flavorful marinade, let the chicken soak it up, and then grill it to perfection. The steps are straightforward, making it an excellent choice for a family cooking night. Let’s get started on this delicious journey!

Ingredients

  • 1 lb chicken breast, cut into cubes
  • 1/2 cup ranch dressing
  • 1/4 cup grated Parmesan cheese
  • 2 cloves garlic, minced
  • Salt and pepper to taste
  • Skewers (wooden or metal)

Lily’s Personal Tips:

  • For wooden skewers, soak them in water for about 30 minutes before using them. This prevents them from burning on the grill.
  • If you choose metal skewers, make sure they are grill-safe and can handle high heat. These are also reusable, making them an eco-friendly option.

Directions

  1. In a bowl, mix together ranch dressing, Parmesan cheese, minced garlic, salt, and pepper. This is where the deliciousness begins.
  2. Add the chicken cubes to the marinade, ensuring they are well coated. Cover and refrigerate for at least 30 minutes. Don’t rush this step—letting the chicken soak up the flavors is key.
  3. Preheat the grill to medium-high heat. You want a nice hot surface for perfect grill marks.
  4. Thread the marinated chicken onto skewers. This step is fun, so get the kids involved! Let them help with threading the chicken.
  5. Grill the skewers for 10-12 minutes, turning occasionally, until the chicken is cooked through and has nice grill marks. The sound of chicken sizzling is music to the ears.
  6. Serve hot and enjoy your flavorful Ranch Garlic Parmesan Chicken Skewers! Gather everyone around the table and make some memories.

Serving

Ranch Garlic Parmesan Chicken Skewers

Serve these skewers family-style right off the grill. Lay them out on a large platter and let everyone dig in! Pair them with a fresh garden salad or some grilled veggies for a complete meal. Hand over some extra ranch dressing on the side for those who can’t get enough. Watching everyone enjoy their dinner together is what makes these meals so special.

Storage

Leftovers? No problem! Store any uneaten skewers in an airtight container in the fridge for up to 3 days. Reheat them in the microwave for a quick lunch or snack. Just be aware that the chicken may lose a bit of its original grilled texture, but the flavors will still be there. For best results, reheat in a skillet on medium heat until warmed through.

Kitchen Notes

  • Pre-cube the chicken and marinate it the night before for a faster meal.
  • Use store-bought ranch dressing for a quick and easy prep.
  • Add some veggies alongside the chicken on the skewers for a colorful dish. Bell peppers and zucchini work great!
  • Consider cooking more chicken than needed for leftovers. They can be added to salads, wraps, or sandwiches throughout the week.
  • Experiment with spices or herbs in the marinade for a different flavor profile.

Variations

Not everyone likes chicken, and that’s okay! These skewers can be tweaked for different diets.

  • For Picky Eaters: Serve the ranch dressing on the side for dipping rather than coating the chicken beforehand.
  • Vegetarian Option: Swap chicken for firm tofu or veggies like mushrooms, cherry tomatoes, and bell peppers. Adjust the marinade accordingly.
  • Gluten-Free: Ensure the ranch dressing is gluten-free. Most brands are, but it’s always good to check.
  • Lower-Carb Option: Use chicken thighs for a moister result and wrap in lettuce instead of tortillas.
  • Herb Variations: Add fresh herbs such as parsley or basil into the marinade for an added flavor boost.

FAQ

1. Can I use frozen chicken?
Yes, but be sure to thaw it completely before marinating for the best flavor and texture.

2. How do I know when the chicken is done?
Use a meat thermometer. Chicken should reach an internal temperature of 165°F.

3. Can I bake these skewers instead?
Absolutely! Preheat your oven to 400°F and bake for 20-25 minutes, turning halfway through.

4. What other dips can I use?
You can serve with homemade garlic sauce, yogurt dip, or even a spicy salsa for a twist!

5. Can I double the recipe?
Definitely! Just make sure you have enough skewers and grill space.

Conclusion

Creating simple and delicious meals that bring the family together is what cooking is all about. Ranch Garlic Parmesan Chicken Skewers are perfect for busy nights or weekend gatherings. The enticing smell of garlic and ranch wafting through your home will bring everyone to the table. As you serve these skewers, know that you are creating not only a meal but also lasting memories with your loved ones. Happy cooking!

Ranch Garlic Parmesan Chicken Skewers

Prep Time 30 minutes
Cook Time 12 minutes
Total Time 42 minutes
Servings 4 servings
Calories 280
Delicious and easy-to-make Ranch Garlic Parmesan Chicken Skewers that are perfect for family dinners.

Ingredients

For the marinade

  • 1/2 cup ranch dressing
  • 1/4 cup grated Parmesan cheese
  • 2 cloves garlic, minced
  • to taste Salt and pepper

For the skewers

  • 1 lb chicken breast, cut into cubes
  • Skewers (wooden or metal) (For wooden skewers, soak them in water for about 30 minutes before using.)

Instructions 

Preparation

  • In a bowl, mix together ranch dressing, Parmesan cheese, minced garlic, salt, and pepper.
  • Add the chicken cubes to the marinade, ensuring they are well coated. Cover and refrigerate for at least 30 minutes.

Grilling

  • Preheat the grill to medium-high heat.
  • Thread the marinated chicken onto skewers.
  • Grill the skewers for 10-12 minutes, turning occasionally, until the chicken is cooked through.
  • Serve hot and enjoy your flavorful Ranch Garlic Parmesan Chicken Skewers.

Notes

Store leftovers in an airtight container in the fridge for up to 3 days. Reheat in a skillet for best results.
Calories: 280kcal
Course: Dinner, Main Course
Cuisine: American
Keyword: Chicken Recipes, Easy Dinner, Family Meal, Grilled Chicken, Ranch Chicken Skewers