Category

30-Minute Chicken Dinners

Category

Creamy Garlic Parmesan Chicken

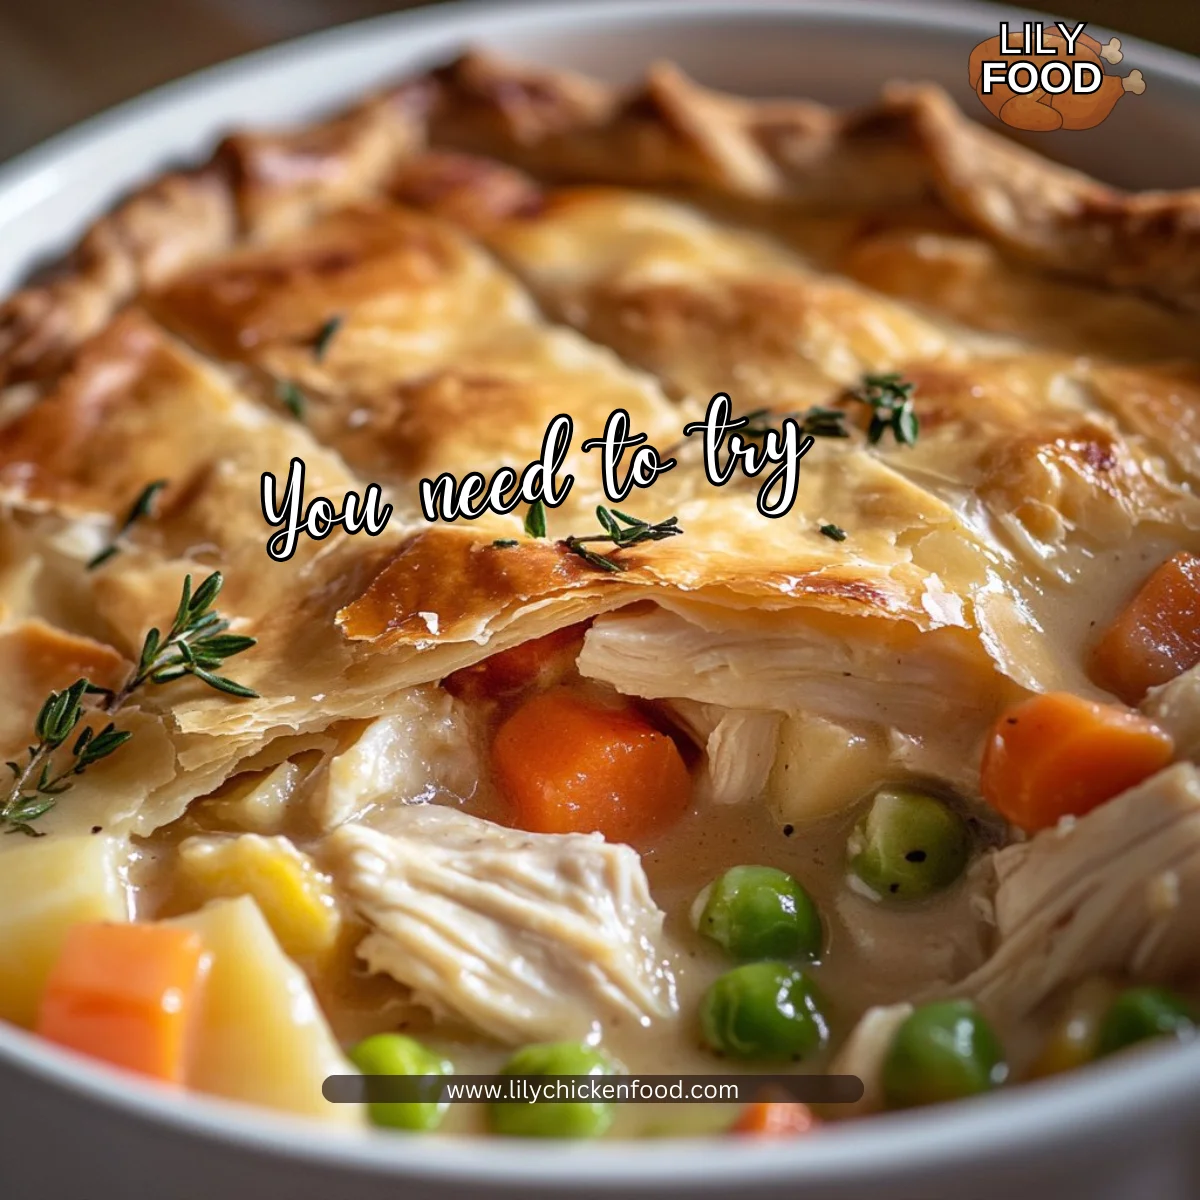
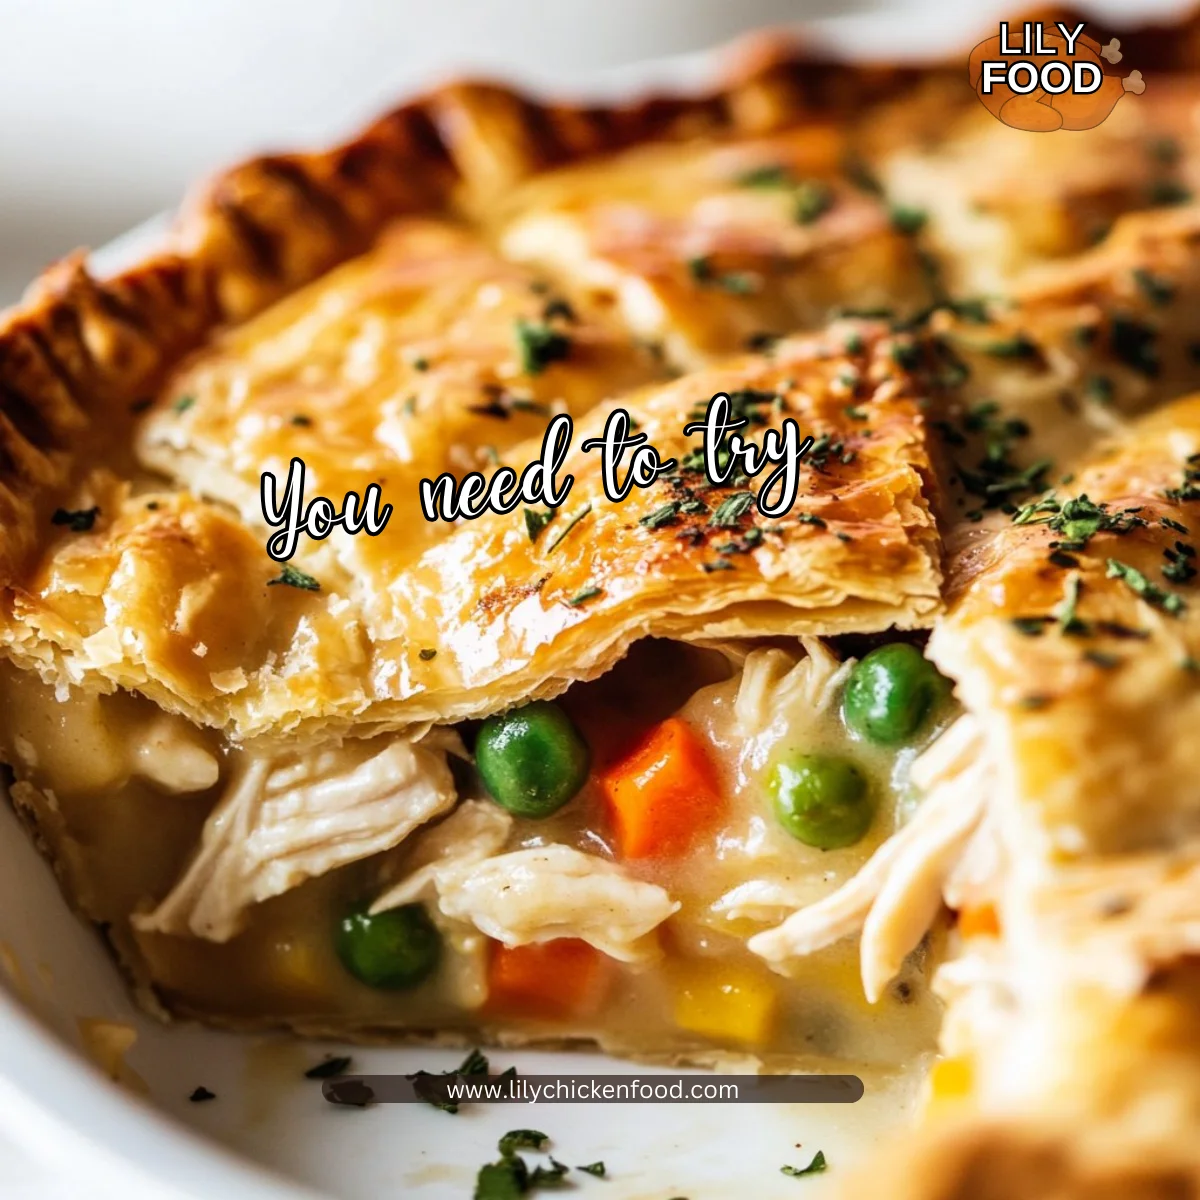
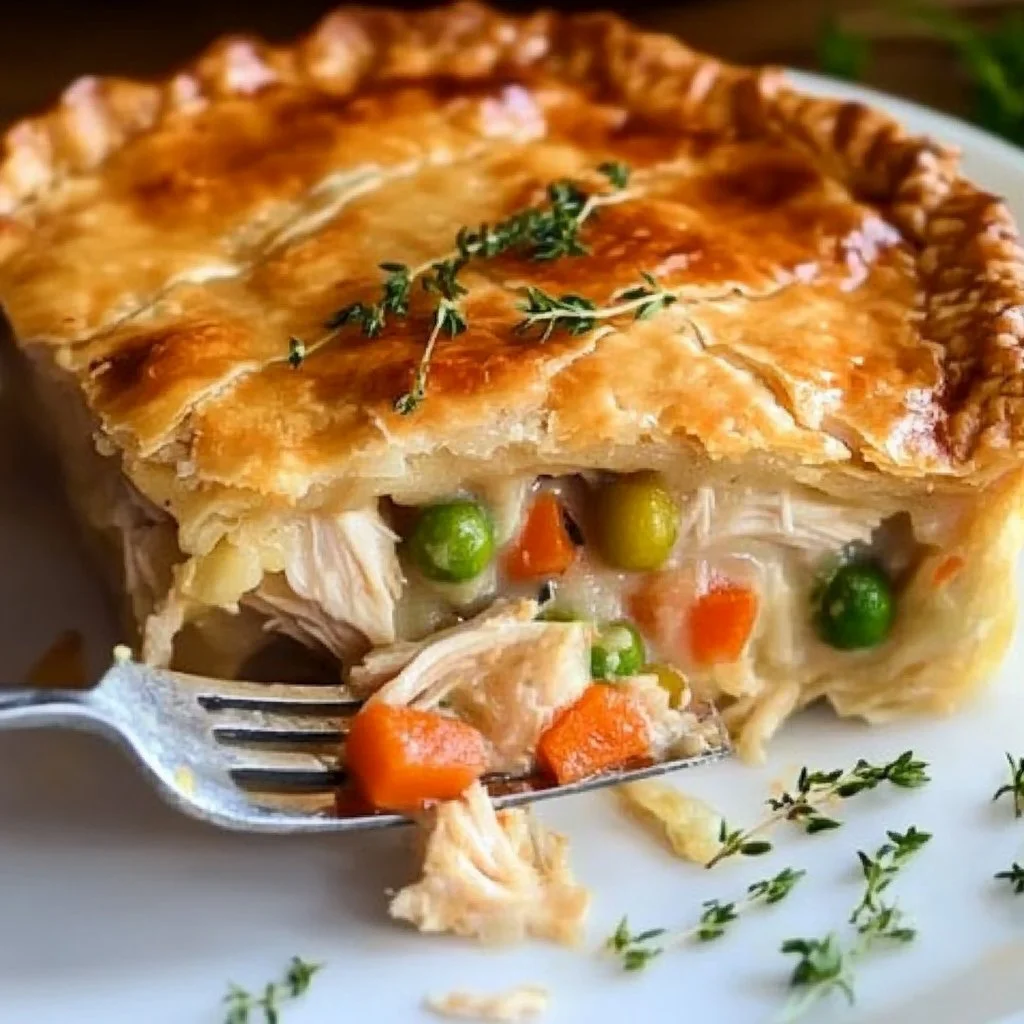
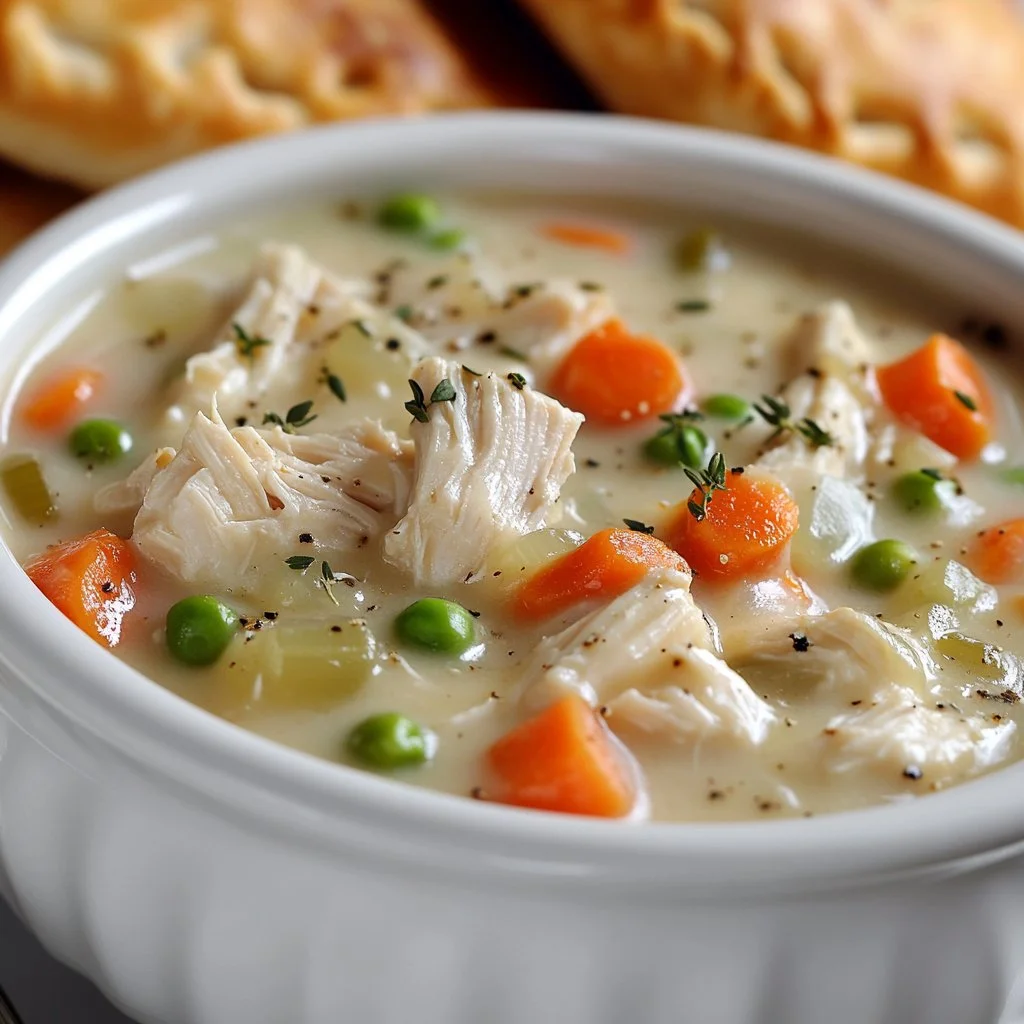
I remember the first time I made this Creamy Garlic Parmesan Chicken. The kitchen smelled like roasted garlic and warm butter. The sizzle of chicken in the pan made everyone in the house pause and peek in, curious.

You will hear those same small footsteps and see the same hopeful faces. This dish brings that cozy kitchen sound and the comfort of a dinner that feels a little fancy but comes together fast. If you prefer a pan-friendly weeknight version, I also have a full write up at Creamy Garlic Parmesan Chicken Breast that complements this post.

Why this works

Creamy Garlic Parmesan Chicken

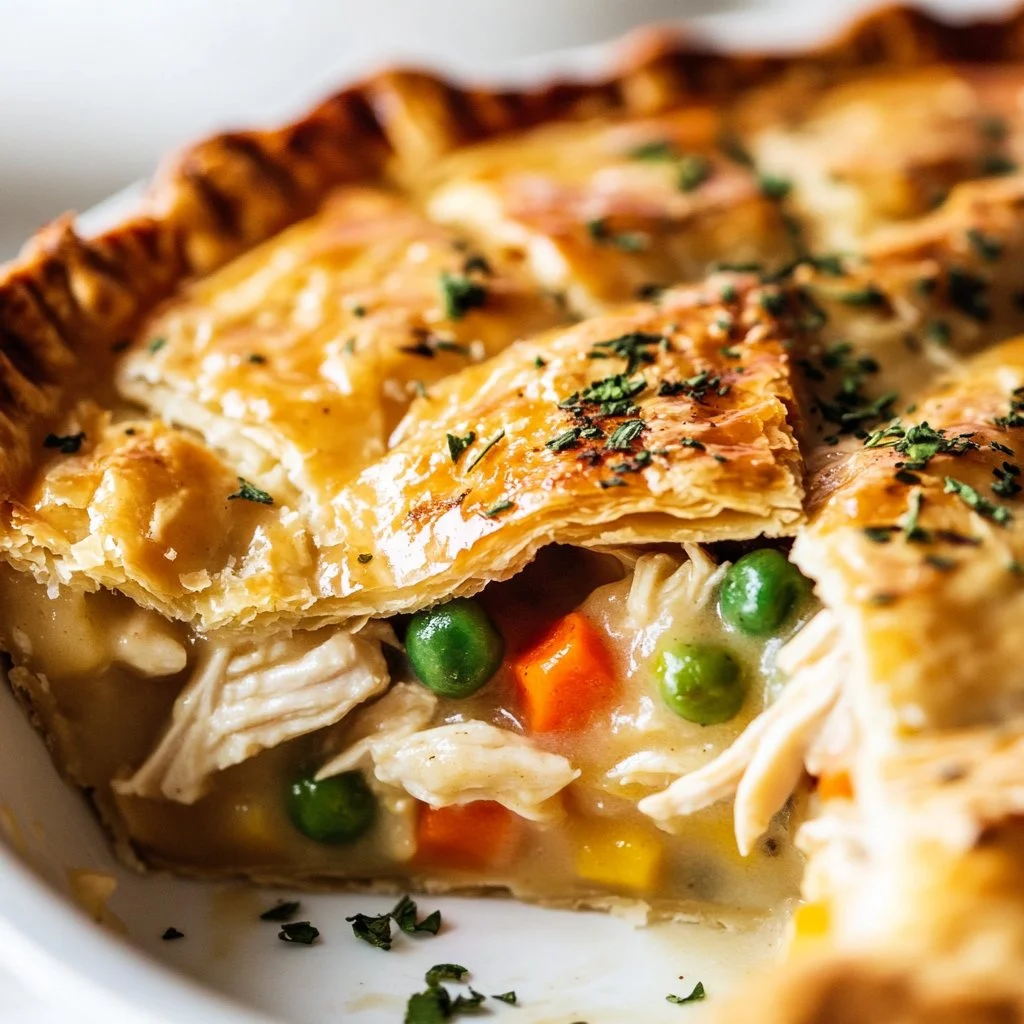
This recipe is the kind of family meal that earns a place on repeat. It balances creamy richness with bright garlic and nutty Parmesan, and it comes together quickly on a single skillet. That means less time cooking and more time at the table.

The flavors are familiar, so picky eaters will often try a bite without complaint. At the same time the sauce feels special enough for guests or a small celebration. If you like to plan ahead, the sauce holds well and keeps its texture when gently reheated.

This is also a time-saver. You can brown the chicken, make the sauce, and have everything plated within 30 minutes. When life gets busy, this becomes the recipe that rescues dinner. If you want a slow-cooker option for busier days, check out my practical spin in the Crockpot Garlic Parmesan Chicken Thighs post.

Process Overview

“This is where the magic happens—when the aroma fills the kitchen.”

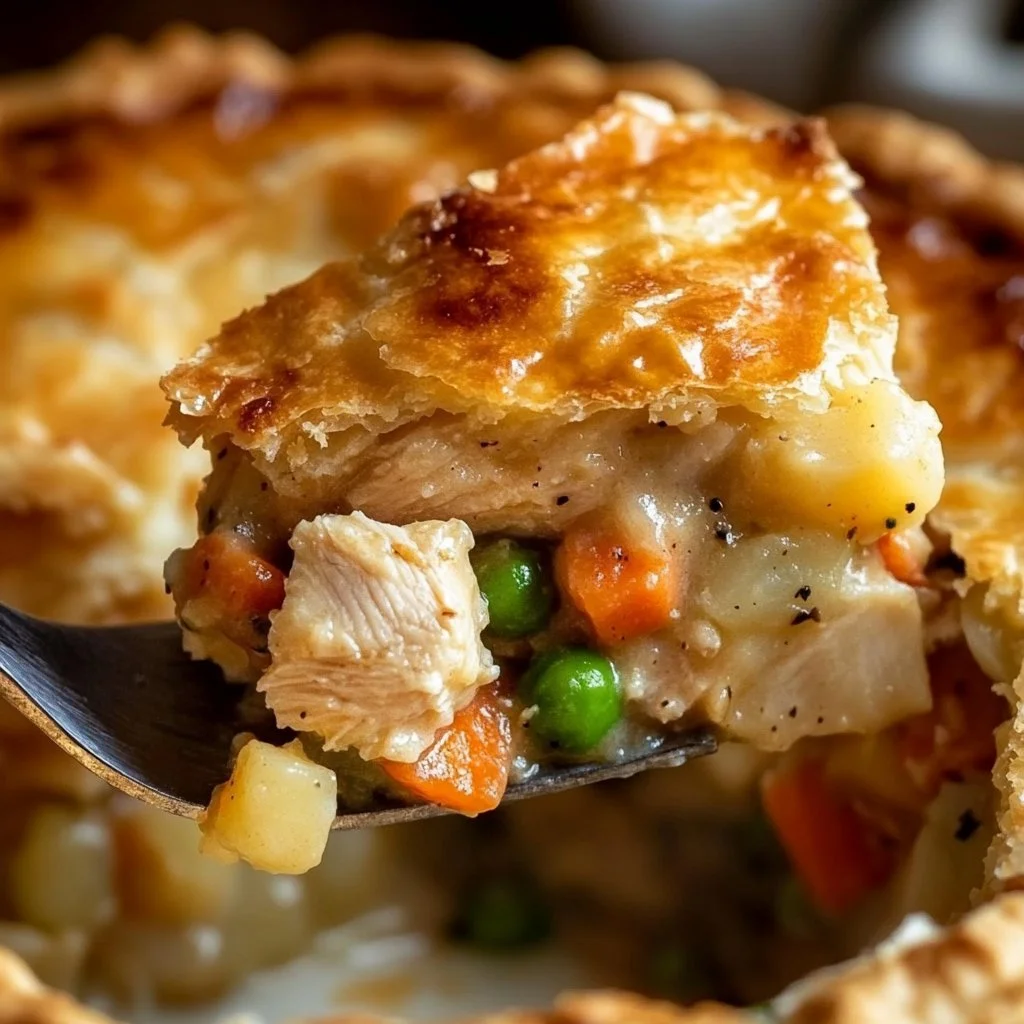
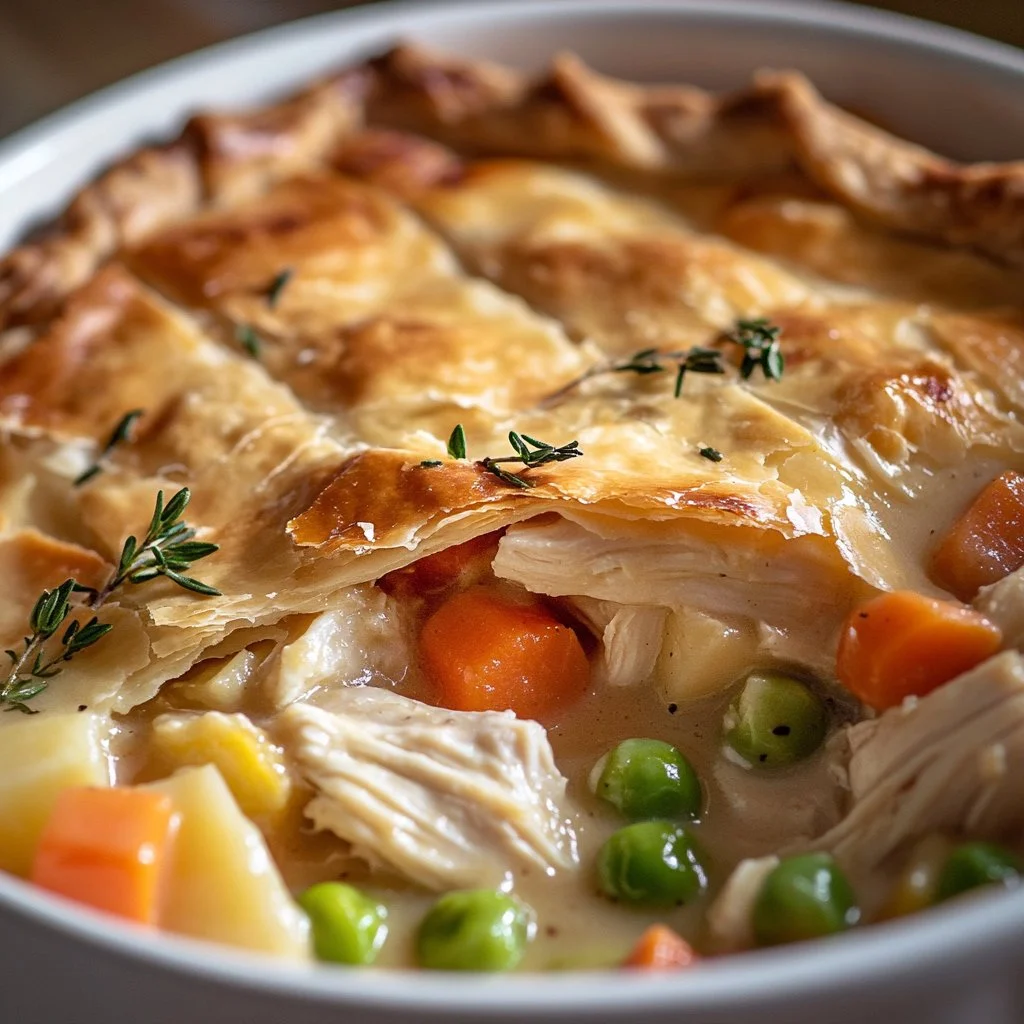
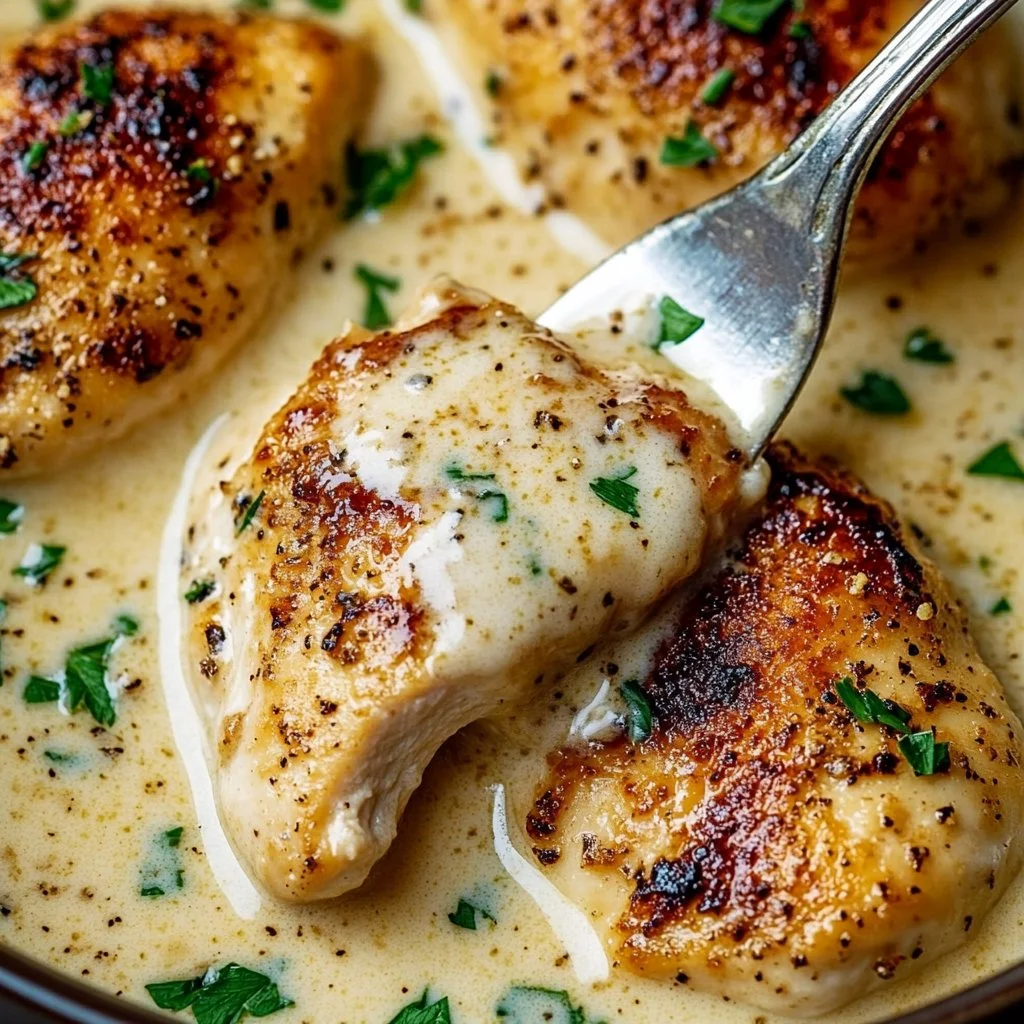
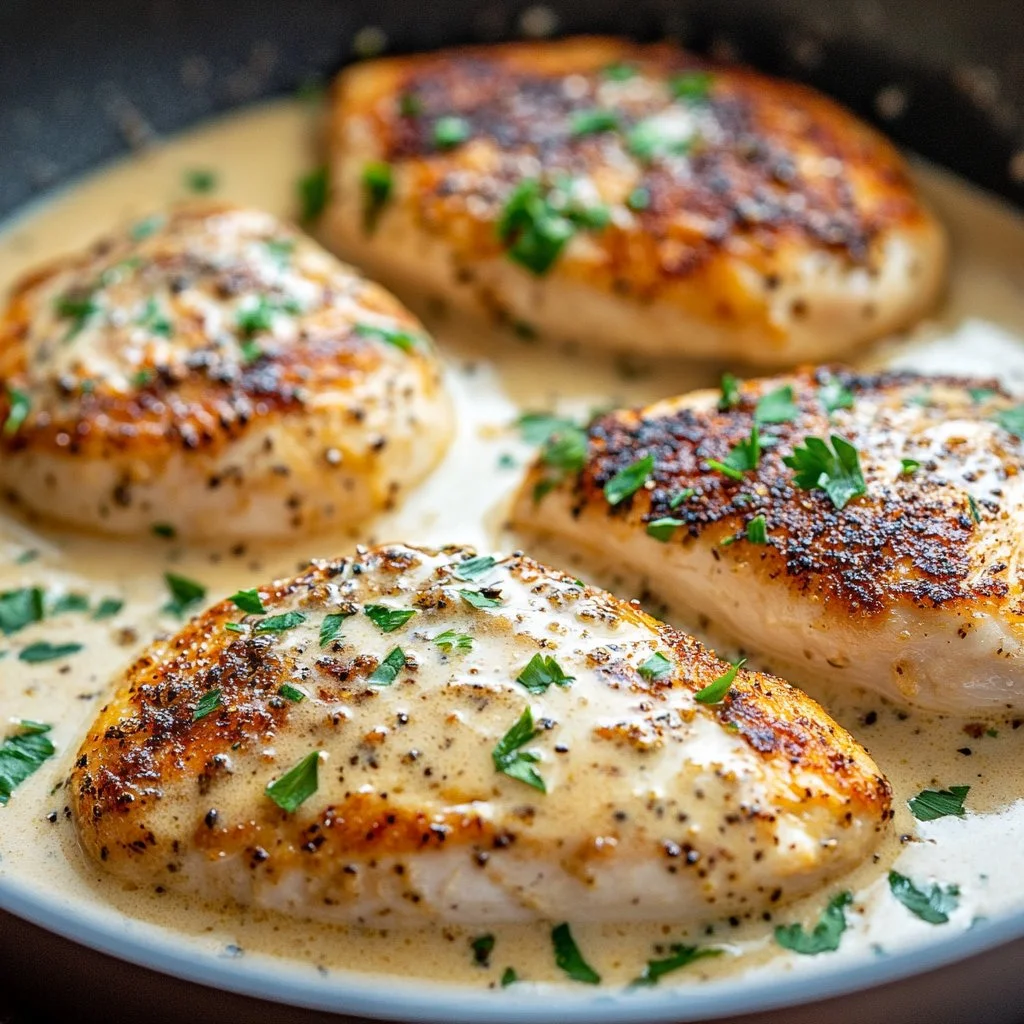
The method is simple and forgiving. Brown the chicken to build flavor, then let the sauce do the heavy lifting. The garlic infuses the cream, and the Parmesan melts into a silky sauce that clings to the meat.

You will want a heavy skillet with a lid or an oven-safe pan. A heavy pan gives a nice sear and keeps the sauce warm while it finishes. This recipe responds well to small adjustments, so feel free to use slightly less cream or a touch more cheese depending on how rich you like it.

Ingredients

  • 2 boneless, skinless chicken breasts
    Lily’s tip: Pound to an even thickness for even cooking. If your family prefers dark meat, swap in boneless skinless thighs and adjust cook time.

  • 1 tablespoon olive oil
    Lily’s tip: Use a good quality olive oil for a cleaner flavor. You can blend with 1 teaspoon butter for extra richness if desired.

  • 3 cloves garlic, minced
    Lily’s tip: Mince finely and add to the pan when it is hot but not smoking. Fresh garlic gives the brightest flavor. If you have little ones, use 2 cloves to soften the bite.

  • 1 cup heavy cream
    Lily’s tip: Heavy cream makes the sauce silky. For a lighter version, use half-and-half, but the sauce will be thinner.

  • 1 cup grated Parmesan cheese
    Lily’s tip: Use freshly grated Parmesan for the best melt and flavor. Pre-grated cheese contains anti-caking agents that can change texture.

  • Salt and pepper to taste
    Lily’s tip: Season in layers. Lightly salt before searing and adjust the sauce at the end for the best balance.

  • Chopped parsley for garnish
    Lily’s tip: Parsley brightens the plate. If you do not have parsley, a little lemon zest also lifts the flavors nicely.

If you want to pair this with mushrooms and get another weeknight favorite, try my creamy mushroom thighs recipe for a family-friendly option at Creamy Garlic Mushroom Chicken Thighs.

Directions

  1. Heat olive oil in a pan over medium heat.
    Encouraging note: Let the oil get hot enough that a drop of water sizzles. A properly heated pan gives a golden crust that tastes wonderful.

  2. Season chicken breasts with salt and pepper, then add to the pan. Cook until golden brown on both sides and cooked through, about 6-7 minutes per side.
    Encouraging note: Resist the urge to move the chicken too soon. Let each side form a crust. If your breasts are thick, cut them in half to speed cooking.

  3. Remove chicken from the pan and set aside.
    Encouraging note: Set the chicken on a plate and tent with foil. This keeps it warm while you finish the sauce and keeps the meat juicy.

  4. In the same pan, add minced garlic and sauté for about 1 minute until fragrant.
    Encouraging note: Watch the garlic closely. It cooks fast and you want it golden, not brown. Stir gently to release all the aroma.

  5. Add heavy cream and bring to a simmer.
    Encouraging note: Stir as the cream warms. A slow simmer helps the flavors come together without separating the cream.

  6. Stir in Parmesan cheese until melted and smooth.
    Encouraging note: Add the cheese gradually and stir constantly. Freshly grated cheese melts more smoothly than pre-grated varieties.

  7. Return chicken to the pan and coat with the sauce.
    Encouraging note: Nestle the chicken into the sauce and spoon it over the top. This encourages the chicken to finish cooking in the sauce and soak up flavor.

  8. Cook for an additional 2-3 minutes on low heat.
    Encouraging note: Use low heat so the sauce thickens gently. You are aiming for a glossy sauce that clings to the chicken.

  9. Garnish with chopped parsley before serving.
    Encouraging note: A sprinkle of parsley adds color and a fresh note that balances the richness. Tell your family to gather around.

If you like the idea of adding roasted potatoes directly to the pan for a one-skillet meal, my skillet recipe for chicken and potatoes shows how to do that without extra work at Garlic Parmesan Chicken and Potatoes Skillet.

Serving

Creamy Garlic Parmesan Chicken

Serve family-style right from the pan for a warm, communal feel. Place the pan in the center of the table and let everyone help themselves. This dish pairs well with simple sides that soak up the sauce.

Good serving ideas:

  • Steamed green beans or roasted broccoli for a vegetable that can handle the cream.
  • A bed of cooked pasta, rice, or mashed potatoes to carry the sauce.
  • Crusty bread for dipping if you want to keep things casual and hands-on for kids.

If you prefer to make it part of a family-style spread with a twist, try slicing the chicken and serving it over a tray of buttered egg noodles or creamy polenta. For a Middle Eastern-inspired side to serve alongside this chicken, my chicken kofta with garlic yogurt pairs nicely and adds variety to a family meal at Chicken Kofta with Creamy Garlic Yogurt Sauce.

Storage

Store leftovers in an airtight container in the refrigerator for up to 3 days. Let the sauce cool slightly before refrigerating to prevent condensation.

To reheat:

  • Warm gently in a skillet over medium-low heat. Add a splash of milk or cream if the sauce seems thick.
  • You can also reheat in the microwave in 30 second bursts, stirring between bursts until warm. Do not overheat or the sauce can separate.

If you freeze the dish, freeze only the chicken without a lot of sauce for best results. Thaw in the refrigerator overnight and reheat gently. Heavy cream does not always freeze well, so freezing may change the texture.

Kitchen Notes

  • Use a heavy skillet for the best sear and even heat distribution. Cast iron or stainless steel works well.
  • If the sauce looks too thin, simmer a minute longer. If it looks grainy, lower the heat and whisk gently until smooth.
  • Taste and adjust salt only after the cheese melts. Parmesan is salty and can change the seasoning.
  • For faster prep, mince garlic in advance and keep in the fridge for up to 24 hours. Fresh is best but convenience helps on busy nights.
  • To keep things moist, do not overcook the chicken. Use a meat thermometer; 165 °F is the safe internal temperature for poultry.

If you want a quick alternative that keeps the creamy concept but is adapted for picky eaters, check my thick and comforting thighs recipe for ideas on texture and seasoning at Creamy Garlic Mushroom Chicken Thighs.

Variations

  • Lighter Version: Swap heavy cream for half-and-half. The sauce will be thinner but still flavorful. Add a teaspoon of cornstarch dissolved in water if you like a thicker finish.
  • Kid-Friendly: Use 2 cloves of garlic and omit or reduce pepper. Slice the chicken before serving so little hands can reach in easily.
  • Low-Carb: Serve over cauliflower mash or zucchini noodles. The sauce is naturally low carb without added starch.
  • Herb Change-Up: Add a teaspoon of dried Italian seasoning while simmering for a herb-forward twist. Fresh thyme or basil also pairs well.
  • Protein Swap: Use boneless skinless thighs instead of breasts if your family prefers darker meat. Thighs stay moist and add deeper flavor.

For a different style that complements picky palates and keeps garlic front-and-center, I also recommend my chicken kofta recipe for a flavorful family meal at Chicken Kofta with Creamy Garlic Yogurt Sauce.

FAQ

Q: Can I use pre-grated Parmesan?
A: You can, but freshly grated Parmesan melts more smoothly and gives a better texture. Pre-grated can sometimes feel grainy.

Q: How do I keep the sauce from splitting?
A: Keep the heat low when you add the cheese. Stir gently and avoid boiling the sauce once the dairy is added.

Q: Can I make this dairy-free?
A: Try using a dairy-free cream alternative and a dairy-free Parmesan substitute. The texture will be different but still tasty. Taste and adjust seasoning.

Q: How thick should the chicken breasts be?
A: Aim for about 3-4 ounces each after trimming and 1/2 to 3/4 inch thick. Pound thicker breasts to an even thickness for even cooking.

Q: Can I cook this in the oven?
A: Yes. Sear the chicken on the stovetop, add the sauce, then transfer to an oven-safe pan and bake at 375 °F for 10 minutes until the internal temperature reaches 165 °F.

Conclusion

I hope this Creamy Garlic Parmesan Chicken becomes one of your go-to family meals. It is a recipe I trust when I want something that tastes special without taking the whole evening. If you like seeing other versions, the Salt & Lavender take on Creamy Garlic Parmesan Chicken offers a lovely variance, and for another popular perspective see the Gimme Delicious version of Creamy Garlic Parmesan Chicken.

Thanks for cooking with me. Put on some music, invite the family, and let that kitchen smell bring everyone together.

Creamy Garlic Parmesan Chicken

Prep Time 10 minutes
Cook Time 20 minutes
Total Time 30 minutes
Servings 4 servings
Calories 600
A quick and comforting chicken dish featuring a creamy garlic and Parmesan sauce, perfect for family dinners or special occasions.

Ingredients

Main ingredients

  • 2 pieces boneless, skinless chicken breasts (Pound to an even thickness for even cooking.)
  • 1 tablespoon olive oil (Use a good quality olive oil for a cleaner flavor.)
  • 3 cloves garlic, minced (Mince finely for bright flavor.)
  • 1 cup heavy cream (For a lighter version, use half-and-half.)
  • 1 cup grated Parmesan cheese (Use freshly grated for best melt and flavor.)
  • Salt and pepper to taste (Season in layers for best balance.)
  • Chopped parsley for garnish (Brings brightness to the plate.)

Instructions 

Preparation

  • Heat olive oil in a pan over medium heat until hot.
  • Season chicken breasts with salt and pepper, then add to the pan. Cook until golden brown on both sides and cooked through, about 6-7 minutes per side.
  • Remove chicken from the pan and set aside, tenting with foil to keep warm.

Making the sauce

  • In the same pan, add minced garlic and sauté for about 1 minute until fragrant.
  • Add heavy cream and bring to a simmer, stirring as the cream warms.
  • Stir in Parmesan cheese until melted and smooth.

Combining

  • Return chicken to the pan and coat with the sauce, cooking for an additional 2-3 minutes on low heat.
  • Garnish with chopped parsley before serving.

Notes

Store leftovers in an airtight container in the fridge for up to 3 days. Reheat gently to prevent separating the sauce.
Calories: 600kcal
Course: Dinner, Main Course
Cuisine: Italian
Keyword: Chicken Recipe, Comfort Food, Creamy Garlic Parmesan Chicken, Family Dinner, One-Skillet Meals

Homemade Chicken Pot Pie

I can smell butter and thyme the minute I slide the pan onto the stove. The gentle pop of carrots hitting the hot skillet, the soft clink of wooden spoons, and the promise of a warm dinner make my kitchen feel like home.

I started making this chicken pot pie recipe when my kids were little. It has comfort, flavor, and the kind of hands-on steps that let everyone help. If you love soups, try my chicken pot pie soup for a quick weeknight twist: my chicken pot pie soup is a great companion when you want the same flavors in a bowl.

Why this works

Homemade Chicken Pot Pie

This pot pie balances creamy filling, tender chicken, and a golden crust. It freezes well and reheats beautifully. That makes it a time-saving winner for busy families.

I test recipes with my family often, and recipes that please both hungry teens and picky toddlers earn a permanent spot in my weeknight rotation. If you prefer a different crust style or size, my classic pot pie page shows other options that families enjoy: family pot pie variations.

This recipe gives you reliable, crowd-pleasing results while letting you cut corners where life gets busy.

Process Overview

“This is where the magic happens—when the aroma fills the kitchen.”

We start by building a simple roux, add stock and milk for creaminess, and fold in cooked chicken and vegetables. The filling cooks on the stovetop until thick and glossy. Then we tuck it into a pie shell and bake until the crust is golden.

If you like one-pot comfort meals, this method shares a lot with my slow-cooker soups and stews. For a crockpot twist that simmers all day, see my slow-cooker idea here: my homemade crockpot chicken tortilla soup.

Ingredients

  • 1 lb cooked chicken, diced
    • Tip: Use leftover roasted chicken for the best flavor, or poach breasts and shred if you prefer a softer texture.
  • 1 cup carrots, diced
    • Tip: Small dice cooks faster and makes the filling feel more cohesive.
  • 1 cup peas
    • Tip: Frozen peas are fine. Add them at the end so they keep their sweet pop.
  • 1 cup potatoes, diced
    • Tip: Use Yukon gold for creamy texture. Parboil if you want to cut baking time.
  • 1/2 cup onion, chopped
    • Tip: Yellow onion gives depth. Saute until translucent to avoid a sharp bite.
  • 1/2 cup celery, diced
    • Tip: Celery adds classic pot pie flavor. Trim strings from larger stalks for tenderness.
  • 1/3 cup butter
    • Tip: Butter gives richness. If you need less dairy, use olive oil plus a pat of butter for flavor.
  • 1/3 cup flour
    • Tip: All-purpose flour works. Stir for a full minute to cook past the raw taste.
  • 1 3/4 cup chicken broth
    • Tip: Use low-sodium if you plan to add more salt later.
  • 2/3 cup milk
    • Tip: Whole milk gives the creamiest result, but 2% works fine too.
  • 1 tsp salt
    • Tip: Taste as you go. Salt levels change if you use salted butter or store-bought broth.
  • 1/2 tsp black pepper
    • Tip: Freshly ground pepper brightens the filling.
  • 1 tsp thyme
    • Tip: Fresh thyme is lovely, but dried thyme keeps well and is perfectly fine.
  • 2 pie crusts, homemade or store-bought
    • Tip for homemade crust: Roll the crust out a little thicker than usual. It holds up to the filling and stays crisp on top.
    • Tip for store-bought crust: Let refrigerated crust warm slightly before unrolling to avoid tears.
    • Bonus tip: For mini pot pies, use the same filling in smaller tins for kid-friendly portions: mini pot pie ideas.

Directions

  1. Preheat oven to 425°F (220°C).

    • Encouraging note: Warming the oven now means you can bake as soon as the filling is ready. It only takes a moment.
  2. In a large saucepan, melt butter over medium heat. Add onion and celery; sauté until soft.

    • Encouraging note: Stir often so the vegetables become sweet and tender. This base builds flavor.
  3. Stir in flour, salt, and pepper; cook for 1 minute.

    • Encouraging note: Cooking the flour for a minute removes the raw taste and helps your sauce thicken smoothly.
  4. Gradually whisk in chicken broth and milk, bring to a boil.

    • Encouraging note: Whisking gradually prevents lumps. When it thickens, you will know the filling is coming together.
  5. Add chicken, carrots, peas, potatoes, and thyme; mix well.

    • Encouraging note: Fold gently so the chicken stays tender. Taste and adjust the seasoning now for the best result.
  6. Pour filling into a pie crust in a pie dish.

    • Encouraging note: Leave a little room at the top. This helps prevent overflow and keeps the crust crisp.
  7. Cover with the second pie crust, seal the edges, and cut slits for steam to escape.

    • Encouraging note: Press edges with a fork or crimp with your fingers. The slits let steam out so your crust browns well.
  8. Bake for 30-35 minutes or until crust is golden brown.

    • Encouraging note: If the edges brown too fast, tent them with foil. When the crust is golden, your kitchen will smell irresistible.
  9. Let it cool for a few minutes before serving.

    • Encouraging note: Cooling helps the filling set so each slice holds together. Give everyone a minute and enjoy the anticipation.

If you love a buttery, flaky top like the copycat Red Lobster-style pot pie our family asks for on special nights, try my guide for that biscuit topping next time: Red Lobster biscuit-style pot pie.

Serving

Homemade Chicken Pot Pie

Serve this chicken pot pie family-style in the center of the table. Cut into wedges so everyone can take a generous piece with filling and crust in one bite.

Add a simple green salad and a crisp apple slaw for brightness. For smaller appetites, serve with a side of crust and a small scoop of filling in a bowl.

For gatherings, pair the pie with roasted vegetables and a warm loaf of bread. Let kids help dish up to make the meal feel like a shared, comforting moment.

Storage

Refrigerator: Cover leftover pie with foil or plastic wrap and store for up to 3 days. Reheat slices in a 350°F oven for 15 to 20 minutes until warmed through.

Freezer: Freeze baked pie wrapped tightly in plastic and foil for up to 2 months. Thaw in the refrigerator overnight before reheating.

Reheating tip: For the crispiest crust, reheat in the oven rather than the microwave. If you must microwave, place a damp paper towel over the slice to keep it from drying out.

Make-ahead option: You can assemble the pie and refrigerate for a few hours before baking. Cover it well to prevent the crust from drying.

Kitchen Notes

  • Shortcut: Use rotisserie chicken to skip roasting or poaching. It saves time and adds flavor.
  • Shortcut: Frozen mixed vegetables work well when you do not want to chop every vegetable.
  • Shortcut: If you are short on time, par-cook potatoes in the microwave for 4 to 6 minutes before adding them to the filling.
  • Shortcut: Brush the top crust with an egg wash (1 beaten egg plus 1 Tablespoon water) for a glossy finish.
  • Shortcut: Make double filling and freeze in a freezer-safe container. Thaw and bake in a fresh crust for a quick meal.

Variations

  • For picky eaters: Swap peas for corn, or leave out celery and substitute finely diced bell pepper for a sweeter flavor.
  • Gluten-free: Use a gluten-free flour blend for the roux and a store-bought gluten-free pie crust.
  • Lighter version: Replace half the butter with olive oil and use half-and-half instead of whole milk to reduce richness.
  • Herb-forward: Add a tablespoon of chopped parsley and a teaspoon of sage for a more savory, aromatic filling.
  • Vegetarian: Replace chicken with cubed, roasted cauliflower and chickpeas. Use vegetable broth instead of chicken broth.

FAQ

Q: Can I use raw chicken?
A: It is best to use cooked chicken. If you use raw, cook it first until fully cooked through. Otherwise, the chicken may not reach a safe temperature during the pie baking time.

Q: Can I make this in advance and bake later?
A: Yes. Assemble the pie, cover it, and refrigerate for up to 24 hours. Let the pie come close to room temperature before baking for even cooking.

Q: How do I prevent a soggy bottom crust?
A: Preheat your oven thoroughly and avoid over-wetting the filling. You can blind-bake the bottom crust for 8 minutes to give it a head start if sogginess is a concern.

Q: Can I use canned vegetables?
A: You can, but drain them well. Fresh or frozen vegetables usually give better texture and flavor.

Q: How do I tell if the filling is thick enough before baking?
A: The filling should coat the back of a spoon and hold a mound when scooped. If it seems thin, simmer a bit longer to reduce and thicken.

Conclusion

Thanks for cooking with me. I hope this homemade chicken pot pie becomes a family favorite in your home, too.

If you want another reliable from-scratch version to compare techniques, I often refer to this classic recipe as a helpful reference: Tastes Better From Scratch chicken pot pie recipe. For a different crust approach and extra tips, this recipe shows another well-loved method: Stephie Cooks chicken pot pie recipe.

Happy baking, and save a slice for someone you love.

Chicken Pot Pie

Prep Time 30 minutes
Cook Time 35 minutes
Total Time 1 hour 5 minutes
Servings 8 servings
Calories 360
This homemade chicken pot pie features a creamy filling with tender chicken and vegetables, all encased in a golden, flaky crust. It's the ultimate comfort food for families.

Ingredients

For the Filling

  • 1 lb cooked chicken, diced (Use leftover roasted chicken for the best flavor.)
  • 1 cup carrots, diced (Small dice cooks faster.)
  • 1 cup peas (Frozen peas are fine. Add them at the end to retain sweetness.)
  • 1 cup potatoes, diced (Use Yukon gold for creaminess.)
  • 1/2 cup onion, chopped (Yellow onion gives flavor depth.)
  • 1/2 cup celery, diced (Celery adds classic flavor.)
  • 1/3 cup butter (Use olive oil for a dairy-free option.)
  • 1/3 cup flour (All-purpose flour works best.)
  • 1 3/4 cup chicken broth (Use low-sodium broth if adding more salt.)
  • 2/3 cup milk (Whole milk gives the best creaminess.)
  • 1 tsp salt (Adjust based on the broth used.)
  • 1/2 tsp black pepper (Freshly ground works best.)
  • 1 tsp thyme (Fresh is lovely; dried works well too.)
  • 2 pie crusts homemade or store-bought (Roll homemade crusts thicker to hold up.)

Instructions 

Preparation

  • Preheat oven to 425°F (220°C).
  • In a large saucepan, melt butter over medium heat. Add onion and celery; sauté until soft.
  • Stir in flour, salt, and pepper; cook for 1 minute.
  • Gradually whisk in chicken broth and milk, bring to a boil.
  • Add chicken, carrots, peas, potatoes, and thyme; mix well.
  • Pour filling into a pie crust in a pie dish.
  • Cover with the second pie crust, seal the edges, and cut slits for steam to escape.
  • Bake for 30-35 minutes or until the crust is golden brown.
  • Let it cool for a few minutes before serving.

Notes

For best results, let kids help during preparation until baking. Storage tips: Refrigerate leftovers for up to 3 days or freeze for up to 2 months. Use frozen mixed veggies for convenience.
Calories: 360kcal
Course: Dinner, Main Course
Cuisine: American
Keyword: Chicken Pot Pie, Comfort Food, Easy Dinner, Family Meal, Homemade Pie

Chicken Pot Pie

The kitchen smells like butter and warm pastry. Pots clink softly on the stovetop. The oven clock ticks as the house waits for something comforting. That first breath of hot, savory steam is why I make chicken pot pie when I want the family gathered around the table.

This recipe is for busy weeknights and slow Sundays. You will hear small voices ask when it is ready and the soft scrape of a fork on a plate. If you love cozy dinner ideas, try my chicken pot pie soup for a quick spin on the same flavors: chicken pot pie soup.

Why this works

Chicken Pot Pie

This version uses a rotisserie chicken and a few pantry staples. That saves time without losing the home-style taste. Rotisserie chicken brings deep, roasted flavor. The cream of chicken soup creates a rich, velvety filling with almost no fuss.

Family life needs meals that feel special and are easy to pull together. This pot pie checks both boxes. It reheats well for school lunches and leftovers disappear fast at dinner. If you want a fuller breakdown or a larger batch, check my full chicken pot pie recipe for more tips and measurements: my full chicken pot pie recipe.

Process Overview

“This is where the magic happens—when the aroma fills the kitchen.”

Think of this as a friendly, step-by-step process you can count on. You will mix the filling, nestle it in a crust, and let the oven do the work. The crust browns while the filling bubbles and the house fills with the scent of comfort.

If you want smaller portions for picky eaters, you can make mini versions that are perfect for little hands and lunchboxes. I walk through those ideas in my mini chicken pot pies post: mini chicken pot pies.

Ingredients

  • 1 rotisserie chicken, shredded
    • Lily’s tip: Use the meat from the breast and thighs for the best texture. Save the carcass for stock.
  • 1 cup frozen mixed vegetables
    • Lily’s tip: Peas, carrots, and corn work well. No need to thaw first unless you prefer.
  • 1 can (10.5 oz) cream of chicken soup
    • Lily’s tip: For a lighter flavor, mix half soup and half low-sodium chicken broth.
  • 1/2 cup milk
    • Lily’s tip: Whole milk makes the filling richer. Use 2% if you want it lighter.
  • 1/2 teaspoon garlic powder
    • Lily’s tip: Garlic powder blends better than fresh garlic in quick casseroles.
  • 1/2 teaspoon onion powder
    • Lily’s tip: It boosts depth without chopping onion.
  • Salt and pepper to taste
    • Lily’s tip: Start with 1/4 teaspoon salt and a few grinds of pepper. Adjust after mixing.
  • 1 store-bought pie crust (or 2 crusts for top and bottom)
    • Lily’s tips:
      • One crust version: Use a single crust in a shallow dish and top with biscuits or puff pastry for a quicker finish.
      • Two crust version: Use both crusts for a classic double-crust pie that seals the filling and gives a beautiful top.

If you want a biscuit-style top like a well-loved restaurant favorite, I often mix it with a biscuit twist inspired by my Red Lobster biscuit-topped pot pie post: biscuit-topped pot pie ideas.

Directions

  1. Preheat the oven to 425°F (220°C).

    • Encouraging note: Get the oven ready first so it is hot and waiting when you finish assembling. A hot oven gives a flakier crust.
  2. In a large bowl, combine shredded chicken, frozen vegetables, cream of chicken soup, milk, garlic powder, onion powder, salt, and pepper. Mix well.

    • Encouraging note: Be gentle but sure when mixing. Taste a spoonful and adjust the seasoning. You are building the heart of the meal.
  3. Place one pie crust in a pie dish and pour the chicken mixture into it.

    • Encouraging note: Press the crust gently to fit the dish. If the crust tears, patch with a small piece from the second crust or press the edges to secure it.
  4. Cover with the second pie crust, sealing the edges. Cut slits in the top crust to allow steam to escape.

    • Encouraging note: Seal the edges with a fork or your fingers. The slits let the filling bubble without making a mess in the oven.
  5. Bake in the preheated oven for about 30-35 minutes or until the crust is golden brown.

    • Encouraging note: Keep an eye on the color. If the edges brown too fast, tent foil lightly over the top. The house will fill with a warm, savory smell that draws everyone in.
  6. Let it cool for a few minutes before serving.

    • Encouraging note: The filling needs a short rest to set. Use this time to plate sides, pour drinks, and call the family to the table. If you need another weeknight idea after leftovers, try my BBQ chicken sweet potato bowl for a fresh contrast: BBQ chicken sweet potato bowl.

Serving

Chicken Pot Pie

Serve this chicken pot pie family-style for the best feel. Place the pie in the center of the table on a simple trivet. Let everyone help themselves to a generous slice. Add steamed greens or a bright salad to cut the richness and bring color to the plate.

For children, a small scoop on their plate is often met with wide eyes and happy noises. For adults, a crisp green salad and a tangy vinaigrette balance the creamy filling. If you want to make it extra special, set out a bowl of crushed red pepper or a small dish of chopped fresh parsley for garnish.

Family-Style Tips

  • Use a shallow pie dish to get more golden crust and less spillover.
  • Serve with warm dinner rolls if you did a single crust version.
  • Save a wedge for the next day. Leftovers often improve overnight.

Storage

Refrigerator

  • Store leftovers in an airtight container for up to 3 days.
  • You can also cover the whole pie with foil and refrigerate for up to 2 days.

Freezer

  • For longer storage, freeze unbaked assembled pies for up to 1 month. Wrap tightly in plastic wrap and foil.
  • Thaw overnight in the fridge before baking. You may need to add a few extra minutes to the bake time.

Reheating

  • To reheat a slice, place it on a baking sheet and warm at 350°F for 15-20 minutes until heated through and the crust is crisp.
  • Microwave works in a pinch but the crust will soften. For a crisper top, give it a few minutes under the oven broiler, watching closely.

Kitchen Notes

  • Shortcut: Use rotisserie chicken to cut the prep time in half.
  • Shortcut: Frozen mixed vegetables are a simple, no-chop option.
  • Shortcut: Lightly brush the top crust with milk or egg wash for a shiny, golden finish.
  • Shortcut: If the filling feels thin, stir in 1 tablespoon of flour or cornstarch mixed with a little water to thicken.
  • Shortcut: Make extra filling and freeze it in a freezer-safe container. Thaw and pour into a crust for a fast dinner later.

Variations

  • Gluten-free: Use a store-bought gluten-free crust. Ensure your cream of chicken soup is gluten-free or make a homemade white sauce.
  • Vegetarian: Replace chicken with cubed potatoes and extra mushrooms. Use a vegetarian cream soup or a roux-based sauce with vegetable broth.
  • Low-carb: Skip the bottom crust and bake in a deep dish with only a thin top crust or a mashed cauliflower topping.
  • Picky eaters: Keep the vegetables on the side and serve them separately. Let each person add what they like to their slice.
  • Fancy touch: Add a splash of white wine and 1 teaspoon Dijon mustard to the filling for added depth.

FAQ

Q: Can I use cooked chicken that is not rotisserie?
A: Yes. Any leftover roasted or baked chicken works. Just shred or chop it into bite-size pieces and use the same quantity.

Q: Do I have to use cream of chicken soup?
A: No. You can replace it with a homemade white sauce made from butter, flour, and chicken broth for a fresher flavor. The canned soup saves time.

Q: How do I prevent a soggy bottom crust?
A: Use a hot oven and a shallow dish. Prebaking the bottom crust for 5 minutes helps. Also, make sure the filling is not too watery.

Q: Can I make this ahead of time?
A: Yes. Assemble the pie and keep it covered in the fridge for up to 24 hours. Bring it to room temperature before baking for even cooking.

Q: How do I know when it is done?
A: The crust should be a deep golden brown and the filling should bubble through the vents. If the top browns too quickly, cover with foil until the filling bubbles.

Conclusion

I hope this chicken pot pie becomes one of your go-to family favorites. The scent as it bakes, the shared spoons at the table, and the satisfied quiet after the meal are small joys that make cooking so worthwhile.

For a homemade approach with a few extra tips, I like the way this version is explained in the Homemade Chicken Pot Pie guide: Homemade Chicken Pot Pie – Tastes Better From Scratch. If you want to try a classic double-crust technique, this double-crust recipe gives clear, helpful steps: Chicken Pot Pie Recipe – Sally’s Baking Addiction.

Thank you for letting me share this simple, cozy recipe. Gather the family, enjoy the warmth, and make room for seconds.

Chicken Pot Pie

Prep Time 15 minutes
Cook Time 35 minutes
Total Time 50 minutes
Servings 8 servings
Calories 350
A comforting and easy chicken pot pie made with rotisserie chicken and pantry staples, perfect for family dinners on busy weeknights.

Ingredients

Filling Ingredients

  • 1 whole rotisserie chicken, shredded (Use the meat from the breast and thighs for the best texture. Save the carcass for stock.)
  • 1 cup frozen mixed vegetables (Peas, carrots, and corn work well. No need to thaw first unless you prefer.)
  • 1 can cream of chicken soup (10.5 oz) (For a lighter flavor, mix half soup and half low-sodium chicken broth.)
  • 1/2 cup milk (Whole milk makes the filling richer. Use 2% if you want it lighter.)
  • 1/2 teaspoon garlic powder (Garlic powder blends better than fresh garlic in quick casseroles.)
  • 1/2 teaspoon onion powder (It boosts depth without chopping onion.)
  • to taste salt (Start with 1/4 teaspoon salt and a few grinds of pepper. Adjust after mixing.)
  • to taste pepper

Crust Ingredients

Instructions 

Preparation

  • Preheat the oven to 425°F (220°C).
  • In a large bowl, combine shredded chicken, frozen vegetables, cream of chicken soup, milk, garlic powder, onion powder, salt, and pepper. Mix well.
  • Place one pie crust in a pie dish and pour the chicken mixture into it.
  • Cover with the second pie crust, sealing the edges. Cut slits in the top crust to allow steam to escape.

Baking

  • Bake in the preheated oven for about 30-35 minutes or until the crust is golden brown.
  • Let it cool for a few minutes before serving.

Notes

Serve family-style and let everyone help themselves. Pair with steamed greens or a bright salad to balance the richness.
Calories: 350kcal
Course: Dinner, Main Course
Cuisine: American
Keyword: Chicken Pot Pie, Comfort Food, Easy Dinner, Family Dinner, rotisserie chicken

Chicken Pot Pie Soup

I can still smell it. The warm, savory steam that rises when the butter meets the onion makes the whole kitchen feel like a hug. The gentle simmer, the soft bubbling of broth, and the chatter from my family at the table make this recipe a comfort ritual in our home.

If you want a one-pot meal that brings everyone to the table, try my version of Chicken Pot Pie Soup. It is creamy, loaded with vegetables, and easy to make. For a full walk-through of this recipe on my site, visit the chicken pot pie soup recipe where I keep step-by-step photos and tips for busy weeknights.

Why this works

Chicken Pot Pie Soup

This soup gives you the flavors of a classic pot pie with a lot less fuss. It tastes like childhood memories but cooks in one pot. That saves time and cleans up fast.

The balance of tender chicken, sweet carrots, bright peas, and a silky broth keeps picky eaters happy and adults satisfied. It stretches well, which makes it great for leftovers or feeding a crowd. If you love pot pie flavors but want something quicker, see my notes on chicken pot pie for when you want the full pastry experience.

This recipe is family friendly. It uses basic pantry staples and gives you room to swap in what you already have. It is reliable on busy evenings and feels special on a slow Sunday. It is the kind of meal that becomes a family favorite before you know it.

Process Overview

“This is where the magic happens—when the aroma fills the kitchen.”

The basic process builds flavor in simple steps. First you soften the vegetables in butter. Then you make a light roux for body and texture. You add broth and let it thicken. Finally, you fold in cooked chicken and cream for richness.

This approach gives you a thick, spoonable soup without needing a blender or crust. If you want other one-pot soup ideas with similar comfort, try my white chicken chili for more weeknight inspiration.

Ingredients

  • 2 cups cooked chicken, shredded
    Lily’s tip: Use roasted chicken or leftover rotisserie chicken for the best flavor. Shred with two forks for tender bites.

  • 1 cup carrots, diced
    Lily’s tip: Cut the carrots small so they cook evenly and quickly. Baby carrots work well if you dice them.

  • 1 cup peas
    Lily’s tip: Frozen peas are fine. Add them near the end so they stay bright and sweet.

  • 1 cup celery, diced
    Lily’s tip: Trim the ends and dice uniformly. Celery adds crunch and aroma, so do not skip it.

  • 1/2 cup onion, chopped
    Lily’s tip: Yellow or sweet onion gives the best base flavor. Cook until translucent to mellow the bite.

  • 4 cups chicken broth
    Lily’s tip: Use low-sodium broth so you can control the salt. If you only have bouillon, dilute it for a clean flavor.

  • 1 cup heavy cream
    Lily’s tip: For a lighter version, use half-and-half, but add it at the end so it does not curdle.

  • 1/4 cup all-purpose flour
    Lily’s tip: Dust the vegetables with flour and cook briefly to avoid a raw flour taste. This creates a gentle thickening.

  • 2 tablespoons butter
    Lily’s tip: Use real butter for richer flavor. Olive oil is okay in a pinch, but butter gives a classic taste.

  • 1 teaspoon thyme
    Lily’s tip: Fresh thyme is lovely. If using dried, rub it between your fingers before adding to release aroma.

  • Salt and pepper to taste
    Lily’s tip: Season in layers. Taste after each major step so you don’t over-salt early.

  • Extra add-ins I love: A splash of white wine when deglazing, or a sprinkle of parsley when serving.

For another chicken-soup twist that uses similar pantry items, check my crockpot chicken tortilla soup to see how spices and toppings can change the mood.

Directions

  1. In a large pot, melt the butter over medium heat. Add the onion, carrots, celery, and cook until softened.
    Encouragement: Take your time here. Softened vegetables build a deep, comforting base and your kitchen will smell amazing.

  2. Stir in the flour and cook for 1-2 minutes.
    Encouragement: Stir constantly to prevent lumps. This step gives the soup body and a smooth finish.

  3. Gradually add the chicken broth, stirring constantly until the mixture thickens.
    Encouragement: Pour slowly and whisk as you go. This keeps the broth lump-free and leads to a silky texture.

  4. Stir in the chicken, peas, thyme, salt, and pepper.
    Encouragement: Add the chicken last if it is already cooked. Let it warm gently so the meat stays tender.

  5. Finally, add the heavy cream and heat through.
    Encouragement: Warm without boiling. Too much heat can separate the cream. Taste and adjust seasoning.

  6. Serve warm.
    Encouragement: Ladle into bowls and watch faces light up. This is the kind of meal that invites seconds and smiles.

These steps keep the process straightforward. If you follow them in order, you will end up with a flavorful, creamy soup that tastes like homemade tradition.

Serving

Chicken Pot Pie Soup

Serve this soup family-style in a wide pot or in big bowls at the center of the table. Place crusty bread, butter, and a small salad nearby. Let everyone help themselves and pass the bowls around.

For a playful touch, top bowls with flaky biscuit halves or crushed crackers. This makes the meal feel like pot pie without the effort of rolling pastry. If you prefer handheld options, my mini chicken pot pies are a fun pairing idea for kids and grown-ups alike.

Encourage family members to add their own garnishes. Parsley, a grind of black pepper, or a drizzle of olive oil personalize each bowl. When you serve it this way, the meal becomes about sharing and comfort.

Storage

Fridge: Cool the soup within two hours and store it in an airtight container. It will keep for 3 to 4 days in the refrigerator.

Freezer: For longer storage, freeze the soup in a freezer-safe container for up to 3 months. Leave a little room at the top for expansion.

Reheating: Thaw in the fridge overnight if frozen. Reheat gently on the stove over low heat. Stir often and add a splash of broth or cream if it seems too thick.

Tip: If you plan to freeze portions, leave out the peas and add fresh ones during reheating. They stay brighter when added later.

Kitchen Notes

  • Shortcut 1: Use leftover or rotisserie chicken to save time and add flavor.
  • Shortcut 2: Frozen mixed vegetables work well if you are short on prep time.
  • Shortcut 3: If you only have whole milk, combine it with a tablespoon of butter for richness.
  • Shortcut 4: Make the base a day ahead and finish the soup when you are ready to eat.
  • Shortcut 5: Use an immersion blender for a creamier texture, but only blend part of the soup to keep chunks.

These small tricks help you adapt the recipe to busy schedules without losing the homemade taste.

Variations

  • For picky eaters: Cut vegetables smaller or puree half the soup for a smoother texture. Omit thyme if your family dislikes herbs.
  • Gluten-free: Substitute a gluten-free flour blend or use cornstarch mixed with cold water as a thickener. Add the cornstarch slurry slowly until you reach the right consistency.
  • Lighter version: Swap heavy cream for half-and-half or plain Greek yogurt stirred in off-heat for tang and creaminess.
  • Dairy-free: Use coconut milk or an unsweetened dairy-free creamer and a little olive oil in place of butter.
  • Slow cooker option: Sauté vegetables and then transfer everything to a slow cooker. Add chicken at the end to warm through without drying.

Each variation keeps the soul of the recipe while fitting different tastes and diets.

FAQ

Can I use raw chicken?

Yes. If you use raw chicken, cook it first in the pot with a bit of broth until it reaches 165°F. Then shred it and continue the recipe. This builds flavor and keeps the meat tender.

Can I make this vegetarian?

You can make a vegetarian version by swapping vegetable broth for chicken broth and adding chickpeas or tofu for protein. Increase the seasoning to boost flavor.

How thick should the soup be?

It should be spoonable, not thin like a broth or as thick as a stew. If it is too thin, simmer a few minutes to reduce. If it is too thick, whisk in extra broth.

Can I prepare this ahead of time?

Yes. Prepare up to the step before adding heavy cream and peas. Cool and refrigerate. Reheat and add cream and peas just before serving for the best texture.

Is it safe to reheat multiple times?

Only reheat the portion you will eat. Repeated reheating reduces quality and increases food safety risks. Store leftovers in single-serve containers when possible.

Conclusion

I hope this Chicken Pot Pie Soup becomes a warm staple in your home as it has in mine. It is a simple, forgiving recipe that adapts to what you have and who you are feeding. For more ideas and a different take on this comforting classic, I also love the version at Chicken Pot Pie Soup – The Country Cook and the helpful tips in the Chicken Pot Pie Soup | Gimme Some Oven recipe for inspiration.

Enjoy a bowl, share it with someone you love, and know that small meals like this make big memories.

Chicken Pot Pie Soup

Prep Time 15 minutes
Cook Time 30 minutes
Total Time 45 minutes
Servings 6 servings
Calories 350
A comforting one-pot chicken pot pie soup loaded with tender chicken, vegetables, and a creamy broth that brings the whole family together.

Ingredients

Main Ingredients

  • 2 cups cooked chicken, shredded (Use roasted chicken or leftover rotisserie chicken for the best flavor. Shred with two forks for tender bites.)
  • 1 cup carrots, diced (Cut the carrots small so they cook evenly and quickly. Baby carrots work well if you dice them.)
  • 1 cup peas (Frozen peas are fine. Add them near the end so they stay bright and sweet.)
  • 1 cup celery, diced (Trim the ends and dice uniformly. Celery adds crunch and aroma, so do not skip it.)
  • 1/2 cup onion, chopped (Yellow or sweet onion gives the best base flavor. Cook until translucent to mellow the bite.)
  • 4 cups chicken broth (Use low-sodium broth so you can control the salt. If you only have bouillon, dilute it for a clean flavor.)
  • 1 cup heavy cream (For a lighter version, use half-and-half, but add it at the end so it does not curdle.)
  • 1/4 cup all-purpose flour (Dust the vegetables with flour and cook briefly to avoid a raw flour taste. This creates a gentle thickening.)
  • 2 tablespoons butter (Use real butter for richer flavor. Olive oil is okay in a pinch, but butter gives a classic taste.)
  • 1 teaspoon thyme (Fresh thyme is lovely. If using dried, rub it between your fingers before adding to release aroma.)
  • Salt and pepper to taste (Season in layers. Taste after each major step so you don't over-salt early.)

Instructions 

Cooking

  • In a large pot, melt the butter over medium heat. Add the onion, carrots, celery, and cook until softened.
  • Stir in the flour and cook for 1-2 minutes.
  • Gradually add the chicken broth, stirring constantly until the mixture thickens.
  • Stir in the chicken, peas, thyme, salt, and pepper.
  • Finally, add the heavy cream and heat through without boiling.
  • Serve warm in bowls, garnished as desired.

Notes

Serve this soup family-style in a wide pot or in big bowls at the center of the table. Encourage family members to add their own garnishes like parsley or a drizzle of olive oil.
Calories: 350kcal
Course: Main Course, Soup
Cuisine: American
Keyword: Chicken Pot Pie Soup, Comfort Food, Easy Recipe, Family Recipe, One-Pot Meal

Chicken Pot Pie with Biscuits

I can still smell it now. The warm, buttery steam rolls out of the oven and makes the whole kitchen feel like a hug. I hear the gentle bubbling of the filling and the soft crack of biscuit tops as they brown. Those sounds promise comfort and a full table.

This recipe reminds me of weeknights with kids at the table and friends dropping by. If you like a bowl version, you might enjoy my take on chicken pot pie soup for a quicker, spoonable comfort meal.

Why this works

Chicken Pot Pie with Biscuits

This chicken pot pie with biscuits balances a creamy, savory filling and a golden, flaky biscuit top. The biscuits make it fast and family friendly. They take the place of a rolled pastry so you save time without losing the crispy, buttery contrast.

Using cooked chicken cuts the steps down to the essentials and keeps dinner doable on busy nights. If you want a classic version, I often point readers to my guide on the classic pot pie for pastry tips and extra sauce ideas.

This version is forgiving. You can use rotisserie chicken, leftover roasted chicken, or store-bought cooked pieces and still get a cozy, satisfying dish. The result keeps well and tastes even better the next day, which is perfect for lunches or leftovers.

Process Overview

“This is where the magic happens—when the aroma fills the kitchen.”

The method is straightforward. You make a simple roux, add broth and milk to make a creamy sauce, fold in chicken and vegetables, bake briefly, then top with biscuits until golden. The assembly is quick and the oven does the rest.

If you like one-pot slow-cooker comfort, you might also enjoy the creamy slow-cooker flavors in my crockpot white chicken chili. It uses similar pantry staples and is another great make-ahead option.

Ingredients

  • 2 cups cooked chicken, diced
    Tip: Rotisserie chicken works great. If you want a smoky flavor, leftover chipotle honey chicken thighs add a nice twist.

  • 1 cup frozen mixed vegetables
    Tip: Use peas and carrots or a mixed blend. No need to thaw; they will heat through in the sauce.

  • 1 cup chicken broth
    Tip: Low-sodium broth helps you control the salt. Add more for a saucier filling.

  • 1/2 cup milk
    Tip: Whole milk gives the creamiest result, but 2% works fine for a lighter dish.

  • 1/4 cup butter
    Tip: Use real butter for flavor. If you need dairy free, a butter substitute will work.

  • 1/4 cup all-purpose flour
    Tip: This is your thickening agent. Stir it into melted butter to make a smooth base.

  • 1 teaspoon onion powder
    Tip: Onion powder gives gentle flavor without chunks. Sautéed fresh onion also works if you prefer.

  • 1 teaspoon garlic powder
    Tip: Garlic powder blends smoothly into the sauce. You can swap for a minced clove if you like fresh garlic.

  • Salt and pepper to taste
    Tip: Start with a little and adjust after the sauce thickens.

  • Biscuits (homemade or refrigerated)
    Tip: Refrigerated biscuit dough is a real time saver. Homemade biscuits give extra flavor and texture. If using homemade, make them slightly smaller so they brown evenly on top.

My best practical tip for ingredients is to keep cooked chicken on hand in the fridge. I often make a batch of easy crockpot chicken thighs for weeknight recipes and then use the leftovers here.

Directions

  1. Preheat oven to 400°F (200°C).
    Encouragement: Preheating now saves time later. Get the oven ready and then enjoy a quick prep without rushing.

  2. In a saucepan, melt the butter over medium heat. Stir in flour, onion powder, garlic powder, salt, and pepper; cook for 1 minute.
    Encouragement: Keep stirring so the flour cooks but does not brown. This step gives your sauce a smooth base.

  3. Gradually whisk in chicken broth and milk; cook until thickened.
    Encouragement: Take your time whisking. The mixture will go from thin to creamy and will coat the back of a spoon when it is ready.

  4. In a large bowl, combine cooked chicken and mixed vegetables. Pour the sauce over the chicken mixture and stir to combine.
    Encouragement: Taste for seasoning. If it needs a pinch more salt or pepper, adjust now. Your filling should feel cozy and well seasoned.

  5. Pour the mixture into a baking dish.
    Encouragement: Spread it evenly so every scoop gets a good mix of chicken and vegetables. A 9-inch square or similar works well.

  6. Bake the mixture for 20 minutes.
    Encouragement: This step helps the filling set and heat through. It also lets the edges bubble and thicken a bit before the biscuits go on.

  7. Remove from the oven and top with biscuits.
    Encouragement: Arrange the biscuits evenly. For a rustic look, nestle them into the filling; for neat portions, space them out.

  8. Return to the oven and bake until biscuits are golden brown, about 15-20 minutes.
    Encouragement: Keep an eye on the color. Golden with a little crunch on top is the goal. Your kitchen will smell amazing.

  9. Let cool slightly before serving.
    Encouragement: Give it 5 minutes so the filling sets and the biscuits hold their shape. Then serve warm and enjoy the smiles at the table.

Serving

Chicken Pot Pie with Biscuits

Serve this pot pie family-style straight from the baking dish. Place a large spoon in the center and let everyone help themselves. The biscuit tops break into soft, buttery pieces that pair beautifully with creamy filling.

For a balanced plate, add a simple green salad or steamed green beans. Kids usually love the biscuit pieces, so consider offering a small bowl for sharing if you have a lively table.

If you want to be extra cozy, serve with a warm drink and buttered rolls on the side. The meal feels like a hug, and that is the point.

Storage

Refrigerator: Store leftovers in an airtight container for up to 3 days. The biscuits will soften over time, but the flavors deepen.

Reheating: Reheat single portions in the microwave for about 1 to 2 minutes, depending on power. For the best texture, reheat in a 350°F oven for 10 to 15 minutes, covered with foil to avoid over-browning.

Freezer: You can freeze the filling separately for up to 3 months. Thaw in the fridge overnight before topping with biscuits and baking. If you freeze a fully assembled dish with raw biscuit dough on top, wrap tightly and bake from thawed for best results.

Label your storage containers with the date. Leftovers are a weeknight hero and heat up well for quick lunches.

Kitchen Notes

  • Shortcut 1: Use store-bought cooked chicken or rotisserie to save time.
  • Shortcut 2: Refrigerated biscuit dough is a fast and reliable topping.
  • Shortcut 3: Make the filling a day ahead and bake the biscuits fresh before serving.
  • Shortcut 4: Double the filling and freeze half for a ready meal later.
  • Shortcut 5: Use a hand whisk or fork if you do not have a heavy whisk; keep stirring until smooth.

These quick ideas keep the recipe family-friendly and adaptable to busy schedules.

Variations

  • For picky eaters: Swap mixed vegetables for peas only, corn, or finely chopped carrots. Keep the seasoning mild and offer hot sauce on the side for adults.
  • For low-carb: Replace biscuits with a cauliflower mash topping or a cheesy cauliflower crust.
  • For dairy-free: Use a plant-based butter substitute and a non-dairy milk like oat or soy. Thicken a little longer if needed.
  • For extra herb flavor: Stir in 1 teaspoon dried thyme or 1 tablespoon chopped fresh parsley into the sauce before pouring over the chicken.
  • For a richer filling: Add 1/2 cup shredded cheddar to the sauce for a cheesy variation that kids often love.

These swaps keep the same comforting idea while adapting to tastes and diets.

FAQ

Can I use raw chicken?

Yes. If using raw chicken, cook it first until it reaches 165°F and shred or dice it. Using cooked or leftover chicken is faster and keeps the recipe simple.

Can I make this gluten-free?

Yes. Use a gluten-free flour blend for the roux and gluten-free biscuits. Make sure your broth is labeled gluten-free.

How do I stop the biscuits from getting soggy?

Pre-bake the filling for 10 minutes before adding the biscuits to reduce moisture. Also, space biscuits a bit to allow hot air to circulate for better browning.

Can I prepare this ahead of time?

Absolutely. Assemble the filling and refrigerate up to 24 hours. Add biscuits just before baking so they stay fresh and flaky.

What size baking dish should I use?

A 9-inch square or similar 2-quart baking dish works well. If you use a larger dish, the filling may be shallower and bake a bit faster.

Conclusion

Thank you for spending time with this recipe. I hope it becomes one of your go-to family meals for easy weeknights. If you want another twist on biscuit-topped comfort, check a similar approach from The Cozy Cook’s chicken pot pie with biscuits. For a version that focuses on flaky, buttery biscuit tops, take a look at the Pinch of Yum biscuit-topped pot pie for inspiration.

Chicken Pot Pie with Biscuits

Prep Time 15 minutes
Cook Time 35 minutes
Total Time 50 minutes
Servings 6 servings
Calories 450
A comforting chicken pot pie topped with golden, flaky biscuits that delivers warmth and satisfaction for family dinners.

Ingredients

Filling Ingredients

  • 2 cups cooked chicken, diced (Rotisserie chicken works great.)
  • 1 cup frozen mixed vegetables (Use peas and carrots or a mixed blend; no need to thaw.)
  • 1 cup chicken broth (Low-sodium broth helps control salt.)
  • 1/2 cup milk (Whole milk gives creaminess.)
  • 1/4 cup butter (Use real butter for flavor.)
  • 1/4 cup all-purpose flour (This is your thickening agent.)
  • 1 teaspoon onion powder (Gives gentle flavor without chunks.)
  • 1 teaspoon garlic powder (Blends smoothly into the sauce.)
  • Salt and pepper to taste (Adjust after the sauce thickens.)

Biscuit Topping

  • Biscuits (homemade or refrigerated) (Refrigerated dough is a real time saver.)

Instructions 

Preparation

  • Preheat oven to 400°F (200°C).
  • In a saucepan, melt the butter over medium heat. Stir in flour, onion powder, garlic powder, salt, and pepper; cook for 1 minute.
  • Gradually whisk in chicken broth and milk; cook until thickened.
  • In a large bowl, combine cooked chicken and mixed vegetables. Pour the sauce over the chicken mixture and stir to combine.
  • Pour the mixture into a baking dish.
  • Bake the mixture for 20 minutes.
  • Remove from the oven and top with biscuits.
  • Return to the oven and bake until biscuits are golden brown, about 15-20 minutes.
  • Let cool slightly before serving.

Notes

Serve family-style and pair with a simple green salad or steamed beans. For a comforting experience, enjoy with a warm drink and buttered rolls on the side. Store leftovers in an airtight container for up to 3 days.
Calories: 450kcal
Course: Dinner, Main Course
Cuisine: American, Comfort Food
Keyword: Biscuits, Chicken Pot Pie, Comfort Food, Easy Dinner, Family Meal

Homemade Chicken Pot Pie

I remember the first time I baked this chicken pot pie in my own kitchen. The warm smell of butter and herbs filled the house. I could hear the soft bubbling from the skillet and the tiny crackle of the pie crust as it started to brown.

If you are looking for a meal that comforts the whole family, this homemade chicken pot pie is a perfect choice. It pairs well with a bowl of soup when the weather turns cool, like my chicken pot pie soup recipe for a cozy weeknight dinner.

Why this works

Homemade Chicken Pot Pie

This recipe balances ease and flavor in a way that helps busy families. The filling cooks quickly on the stove, and you can use leftover or rotisserie chicken to cut prep time. The smooth, creamy sauce holds the vegetables and chicken together so each bite feels complete.

I write these recipes for real kitchens with real schedules. If you want to make smaller portions, you can use my tips for mini chicken pot pies to serve kids or packable lunches. These changes save time and keep dinner simple without losing the homemade taste.

Who I am and why you can trust this

I am Lily, a home cook and food blogger with years of family-tested recipes. I focus on clear steps, practical shortcuts, and honest flavors. I test this pot pie multiple times to get the sauce consistency right and the crust reliably golden.

Process Overview

“This is where the magic happens—when the aroma fills the kitchen.”

The process is straightforward and repeats well. You build a roux with butter and flour, then slowly add liquid to make a smooth gravy. Adding cooked chicken and frozen peas toward the end prevents overcooking. Finally, the crust bakes to a flaky, golden top.

If you want a detailed walkthrough of every technique and timing, see my full chicken pot pie guide that covers tips on crust, filling texture, and variations.

Ingredients

  • 2 cups cooked chicken, diced
    Lily’s tip: Use leftover roast or a shredded rotisserie chicken for fast prep. Dice uniformly so every bite has chicken.

  • 1 cup carrots, diced
    Lily’s tip: Cut carrots small so they soften with the onions and celery in the same pan.

  • 1 cup peas
    Lily’s tip: Frozen peas work best. Add them at the end so they stay bright and sweet.

  • 1/2 cup celery, diced
    Lily’s tip: Trim the ends and slice thin for even cooking and a mild crunch.

  • 1/3 cup butter
    Lily’s tip: Use unsalted butter so you control the salt level. If you only have salted, reduce added salt slightly.

  • 1/3 cup onion, chopped
    Lily’s tip: Yellow or sweet onion both work. Chop fine for a mellow finish.

  • 1/3 cup all-purpose flour
    Lily’s tip: Spoon and level the flour. This creates the roux that thickens the filling without lumps.

  • 1 3/4 cups chicken broth
    Lily’s tip: Low-sodium broth gives you better control over seasoning. If using a rich homemade broth, taste before adding extra salt.

  • 2/3 cup milk
    Lily’s tip: Whole milk yields the creamiest filling. You can substitute 2% if preferred.

  • 1 teaspoon salt
    Lily’s tip: Add salt in stages. Taste after the sauce thickens and adjust.

  • 1/2 teaspoon black pepper
    Lily’s tip: Freshly ground black pepper gives the best flavor.

  • 1/2 teaspoon garlic powder
    Lily’s tip: Garlic powder rounds out the flavor without the bite of fresh garlic.

  • 1/2 teaspoon thyme
    Lily’s tip: Dried thyme works well. If using fresh, use about 1 teaspoon and add it earlier.

  • 2 pie crusts
    Lily’s tip: Store-bought pie crusts are a great time saver. If you make your own, chilling the dough well helps it roll without shrinking.

If you like a one-pot slow-cooker approach for days you are out, try my homemade crockpot chicken tortilla soup for another hands-off family favorite.

Directions

  1. Preheat the oven to 425°F (220°C).
    Encouraging note: Get this step done first so your oven is ready when the pie is assembled.

  2. In a large skillet, melt butter over medium heat. Add onion, carrots, celery, and cook until tender.
    Encouraging note: Stir often and take your time here. Soften the vegetables but do not brown them too much.

  3. Stir in flour, salt, pepper, garlic powder, and thyme.
    Encouraging note: Cook the flour a minute to remove the raw taste. This step helps prevent a floury flavor in the sauce.

  4. Gradually stir in chicken broth and milk, cook until thickened.
    Encouraging note: Pour slowly and whisk as you go for a smooth gravy. The sauce should coat a spoon.

  5. Add cooked chicken and peas, mix well.
    Encouraging note: Fold them gently so the chicken stays tender and the peas stay bright.

  6. Pour filling into one pie crust. Cover with second pie crust, seal edges, and make slits on top.
    Encouraging note: Press edges firmly to avoid leaks. Brush with a little milk on top for a golden finish.

  7. Bake for 30-35 minutes until crust is golden brown.
    Encouraging note: If the crust browns too quickly, tent with aluminum foil. The center should bubble lightly.

  8. Let cool for a few minutes before serving.
    Encouraging note: Cooling helps the filling set so each slice holds together. Be patient for everyone at the table.

If you are feeling adventurous, try a flavorful twist inspired by a biscuit-top approach in my recipe for a Red Lobster biscuit chicken pot pie twist.

Serving

Homemade Chicken Pot Pie

Serve this pie family-style on a large wooden board or a warm platter. Let each person take a slice and pass a simple green salad alongside. Roasted vegetables or steamed broccoli make a light, colorful side.

For kids, make smaller portions and add a side of applesauce or sliced fruit. I find that a warm pot pie paired with crunchy green beans and buttery bread keeps everyone happy and full.

Presentation tips

Warm your serving plates in the oven for a minute. Sprinkle chopped parsley over the pie for a fresh touch. A small bowl of extra gravy on the side is a welcome addition for grandparents or picky eaters.

Storage

Refrigerate leftovers within two hours in an airtight container. The pie keeps well in the fridge for 3 to 4 days.

To reheat, bake individual slices at 350°F (175°C) for 12 to 15 minutes until heated through. For a crisp crust, reheat on a baking sheet rather than in the microwave. You can also cover the pie with foil and reheat the whole pie at 325°F (160°C) for 20 to 25 minutes.

To freeze, wrap cooled slices tightly in plastic wrap and foil. Freeze up to 3 months. Thaw in the refrigerator overnight and reheat in the oven for best texture.

Kitchen Notes

  • Use rotisserie chicken to save 15 to 20 minutes on prep.
  • Frozen mixed vegetables can replace carrots and peas in a pinch.
  • Make the filling a day ahead to reduce evening stress. Reheat and assemble just before baking.
  • If the filling is too thick, stir in a few tablespoons of broth. If too thin, simmer a bit longer.
  • For an even faster version, use a single top crust or biscuit topping to cut assembly time.

Variations

  • For picky eaters: Chop vegetables very small and add extra chicken to make it more meat-forward. Serve with ketchup or a mild gravy on the side.
  • Gluten-free: Use a gluten-free flour blend for the roux and a store-bought gluten-free pie crust. Adjust liquid as needed.
  • Dairy-free: Substitute dairy-free butter and unsweetened almond milk or oat milk. Use a dairy-free pie crust.
  • Vegetarian: Swap the chicken and broth for cooked chickpeas and vegetable broth. Add mushrooms for savory depth.
  • Make-ahead: Prepare and chill the filling and pre-roll crusts. Assemble and bake when ready.

FAQ

Q: Can I use raw chicken in this recipe?
A: I do not recommend raw chicken for this stovetop method. Use cooked chicken so the filling finishes quickly and the meat remains tender.

Q: Can I make this in a deep dish pie pan?
A: Yes. A deep dish will require a bit more filling. Watch baking time and cover the crust if it browns too fast.

Q: How can I tell when the filling is the right thickness?
A: The filling should coat the back of a spoon. If it runs off too fast, simmer a few more minutes. If it is too thick, add 1 to 2 tablespoons of broth.

Q: Can I use leftover Thanksgiving turkey for this?
A: Absolutely. Turkey is a wonderful substitute and brings extra holiday flavor to the pie.

Q: Is it okay to use all store-bought ingredients?
A: Yes. Store-bought crust and rotisserie chicken make this recipe fast and family-friendly while keeping the homemade spirit.

Kitchen Experience and Safety

I encourage home cooks to taste and adjust seasoning at each stage. Always check that reheated leftovers reach at least 165°F before serving. Keep a clean workspace and use oven mitts when handling hot dishes. These small steps keep family dinners safe and enjoyable.

Conclusion

Thank you for letting me share this chicken pot pie recipe with your family. For inspiration and another great homemade method, I like the version from Tastes Better From Scratch which dives into crust techniques. If you want a recipe that emphasizes a flaky pie crust, see the helpful approach from Stephie Cooks for extra tips on perfecting the top crust.

I hope this pie brings warmth and comfort to your table. Keep a rolling pin and a favorite wooden spoon nearby. Cooking for family is small work with big love.

Chicken Pot Pie

Prep Time 30 minutes
Cook Time 35 minutes
Total Time 1 hour 5 minutes
Servings 8 servings
Calories 400
This homemade chicken pot pie is a comforting dish filled with tender chicken, vegetables, and a creamy sauce, encased in a flaky crust, perfect for family dinners.

Ingredients

Filling

  • 2 cups cooked chicken, diced (Use leftover roast or a shredded rotisserie chicken for fast prep. Dice uniformly.)
  • 1 cup carrots, diced (Cut carrots small so they soften with the onions and celery.)
  • 1 cup peas (Frozen peas work best. Add at the end.)
  • 1/2 cup celery, diced (Trim the ends and slice thin for even cooking.)
  • 1/3 cup butter (Use unsalted butter to control salt level.)
  • 1/3 cup onion, chopped (Yellow or sweet onion both work. Chop fine.)
  • 1/3 cup all-purpose flour (Spoon and level the flour for a smooth roux.)
  • 1 3/4 cups chicken broth (Low-sodium broth recommended.)
  • 2/3 cup milk (Whole milk for creaminess; 2% can be used.)
  • 1 teaspoon salt (Add salt in stages; taste after sauce thickens.)
  • 1/2 teaspoon black pepper (Freshly ground for best flavor.)
  • 1/2 teaspoon garlic powder (Rounds out flavor without the bite of fresh garlic.)
  • 1/2 teaspoon thyme (Use fresh thyme if preferred.)

Crust

  • 2 pie crusts store-bought or homemade (Chill homemade dough well to avoid shrinking.)

Instructions 

Preparation

  • Preheat the oven to 425°F (220°C).
  • In a large skillet, melt butter over medium heat. Add onion, carrots, celery, and cook until tender.
  • Stir in flour, salt, pepper, garlic powder, and thyme. Cook for a minute to remove the raw taste.
  • Gradually stir in chicken broth and milk, cooking until thickened.
  • Add cooked chicken and peas, mixing gently.
  • Pour filling into one pie crust. Cover with the second pie crust, seal edges, and make slits on top.

Baking

  • Bake for 30-35 minutes until crust is golden brown.
  • Let cool for a few minutes before serving.

Notes

Store leftovers in an airtight container; refrigerate for 3-4 days. Reheat in the oven for best results.
Calories: 400kcal
Course: Dinner, Main Course
Cuisine: American
Keyword: Chicken Pot Pie, Comfort Food, Homemade Pie

Garlic Parmesan Chicken Meatloaf
There’s something magical about the sound of laughter and clinking silverware filling the kitchen. The aroma of Garlic Parmesan Chicken Meatloaf wafts in the air, mingling with memories of family dinners past. As I prepare to serve this dish, I can picture my kids darting in and out of the kitchen, eager to help set the table. Their little hands excitedly reach for plates as the oven timer dings, signaling that dinner is ready. It’s these moments, filled with love and connection, that make cooking a true joy for me. Let me share with you the warmth of this dish that feels like home.

Why This Garlic Parmesan Chicken Meatloaf Feels Like Home

Garlic Parmesan Chicken Meatloaf is more than just a dinner option; it resonates with memories of family gatherings. This recipe checks all the boxes. It’s comforting, simple, and above all, incredibly delicious. It combines familiar flavors with a twist that keeps everyone at the table wanting seconds.

Every ingredient plays a role, adding layers of flavor and texture that remind me of my grandmother’s cooking. I remember watching her mix the meatloaf, her hands deftly working the ingredients together as she shared stories of family traditions from her youth. This meatloaf is a tribute to those cherished times, and I hope it becomes a staple in your home too.

Why Garlic Parmesan Chicken Meatloaf is Our New Family Favorite

What makes this meatloaf a new favorite at our table? For starters, it’s quick to whip up, especially on busy weeknights. After a long day, I can easily gather the ingredients, mix them, and pop it into the oven while I help my kids with homework. Here’s the magic—it simultaneously fills my kitchen with a comforting aroma and creates an inviting atmosphere for us to gather together.

Additionally, this meatloaf checks the versatility box. It’s great on its own but can easily be paired with various side dishes. Whether you choose mashed potatoes, a fresh salad, or roasted vegetables, this meaty loaf complements them all. The best part? It pleases both picky eaters and adventurous palates, making it the kind of meal that brings everyone together.

The Simple Magic Behind Garlic Parmesan Chicken Meatloaf

This recipe transforms ordinary ingredients into an extraordinary dish. The combination of ground chicken and roasted garlic provides a flavor depth that surprises your taste buds. Meanwhile, the addition of Parmesan cheese brings a savory richness that complements the dish beautifully. It’s a wonderful feeling when these simple yet hearty ingredients unite, creating something that feels both effortless and special.

Moreover, the texture is another delightful aspect. The use of breadcrumbs creates a tender meatloaf that holds its shape yet is still moist and flavorful. Trust me, as this cooks, the mixture will brown slightly, signaling it’s almost done. That’s your cue—the tempting aroma fills your home, telling you that dinner is just moments away.

Why This Recipe Works for Our Busy, Joyful Nights

Carving out time for family dinner can often feel like a challenge. However, Garlic Parmesan Chicken Meatloaf offers a solution that fits seamlessly into busy lives. The process is straightforward and requires minimal cleanup, making it a favorite for our weeknight meals.

This meal is about more than just filling bellies; it’s about creating those moments when we catch up and share stories. I love that this recipe can transform an ordinary night into something special. We gather around the table, passing around the meatloaf and sharing laughter, ensuring that amidst our hectic lives, we remain connected through food.

Garlic Parmesan Chicken Meatloaf

How to Make Garlic Parmesan Chicken Meatloaf, The Heartwarming Way

Let’s dive into how we can make this comforting dish step by step.

“This is where the magic happens—when the aroma fills the kitchen and my kids come running in, asking ‘Is it ready yet?’”

Step-by-Step Overview: Keeping It Simple

While cooking may sometimes seem daunting, especially during a busy week, this Garlic Parmesan Chicken Meatloaf comes together effortlessly. Here are the steps we’ll follow, giving you cues along the way to ensure you’re on the right track.

The Cooking Process, Made Joyful

  1. Preheat the oven to 375°F (190°C).
    Start with this essential step. Preheating your oven helps to get that perfect bake.

  2. In a large bowl, combine the ingredients

    • 1 1/2 lbs ground chicken
    • 1 cup breadcrumbs
    • 1/2 cup grated Parmesan cheese
    • 1/4 cup chopped parsley
    • 1/2 cup roasted garlic (mashed)
    • 1/2 cup finely chopped onion
    • 2 eggs
    • 1 teaspoon salt
    • 1/2 teaspoon black pepper
    • 1 tablespoon Worcestershire sauce

    Mix well until all the ingredients are combined into a beautiful, cohesive mixture. Don’t shy away from using your hands here; it’s part of the joy!

  3. Transfer the mixture into a loaf pan and shape it into a loaf. Use a spatula or press it down with your hands to ensure it’s packed well. This is the part where the kids can jump in and help shape the loaf; they love getting their hands a little messy!

  4. Spread ketchup on top
    for added flavor and moisture. This classic topping brings a sweet tang that complements the savory meatloaf, making every bite a little burst of flavor.

  5. Bake in the preheated oven for 45-50 minutes or until the meatloaf is cooked through and the internal temperature reaches 165°F (75°C). Feel free to check it a few minutes early; the perfect meatloaf should be golden brown and firm to the touch.

  6. Let it rest for a few minutes before slicing.
    This allows the juices to redistribute, making your slices even more tender.

  7. Serve with your favorite sides and enjoy!
    Don’t forget to invite everyone to the table—this meal is best shared!

Serving Garlic Parmesan Chicken Meatloaf with Love

At our table, we make a habit of serving family-style. The Garlic Parmesan Chicken Meatloaf takes center stage, surrounded by colorful sides that everyone loves. We often pair it with creamy mashed potatoes bathed in warm gravy, tender green beans, or a crisp garden salad.

The fun truly begins when everyone digs in. My kids have their specialties; one loves a hearty slice with extra ketchup, while the other prefers a little sprinkle of shredded cheese on top. Watching their individual preferences come alive with this shared dish brings me so much joy.

Garlic Parmesan Chicken Meatloaf

Storage & Reheat Tips (Keeping the Goodness)

Leftovers from this delightful meal rarely last long, but in case you do end up with some, here are my trusty tips for storing and reheating.

To store, wrap any leftover meatloaf tightly in aluminum foil or place it in an airtight container. Ensure it is cooled to room temperature before refrigerating. This will retain its mouthwatering flavors for a couple of days.

When it comes time to reheat, I recommend the oven. Preheat it to 350°F (175°C), place the slices on a baking sheet, and cover them loosely with foil to maintain moisture. Heating in the oven takes a bit longer but brings back that fresh-from-the-oven warmth. The microwave is fine for a quick lunch, but it can cause the meatloaf to dry out.

My Kitchen Notes & Shortcuts

After making this recipe a countless number of times, I’ve gathered some notes and shortcuts that I’d love to share.

  • Substitution possibilities: You can swap out ground chicken for turkey or even lean beef if you prefer. They’ll all yield fantastic results with different, yet equally delicious flavors.

  • Make-ahead magic: Prep the meatloaf mixture a day ahead and store it in the fridge. When you’re ready for dinner, shape and bake. This is an excellent way to simplify your evening routine.

  • Get the kids involved: Have them help with mashing the garlic or mixing the ingredients together. Making it a fun family activity allows them to feel part of the cooking experience and expands their appreciation for homemade meals.

  • Experiment with flavors: Want a little spin? Try adding chopped mushrooms, grated carrots, or even a bit of feta cheese for an unexpected twist.

  • Perfect the topping: Instead of ketchup, mix it up with barbecue sauce or even a sprinkle of cheese for a gooey finish.

Family-Friendly Variations

Our Garlic Parmesan Chicken Meatloaf is quite adaptable. If you are looking to mix things up with your family, here are a few variations you might enjoy.

  • Add some veggies: Finely chopped bell peppers or shredded zucchini can blend in beautifully without being too noticeable, adding extra nutrition.

  • Herbs and spices: Don’t hesitate to swap out the parsley for your favorite fresh herbs like basil or thyme. They’ll infuse fresh flavors that keep everyone guessing.

  • Kid-friendly adjustability: If your family prefers a sweeter taste, consider using a bit more ketchup on top or adding a sprinkle of brown sugar to the mixture for an additional touch of sweetness.

These adjustments are just starting points. The beauty of cooking is making it work for you and your family’s tastes.

FAQs About Garlic Parmesan Chicken Meatloaf

Can I make this ahead for a busy week?

Absolutely! In fact, letting it sit for an hour or overnight allows the flavors to meld, leading to an even tastier dish.

What can I serve with Garlic Parmesan Chicken Meatloaf?

I suggest creamy mashed potatoes and steamed vegetables or even a light salad on the side. It pairs well with just about anything you’d like!

Can I freeze the leftovers?

Definitely. Slices freeze well. Wrap them tightly in foil or place them in a freezer-safe container. When ready to eat, thaw in the fridge overnight and reheat as directed before serving.

Is there a vegetarian version of this?

Yes! While it may not compete with the original, using plant-based ground meat or beans can create a delicious alternative. Just ensure your spices and toppings match the flavor profile you enjoy.

One Final Thought from My Kitchen

As you embark on your journey to create your very own Garlic Parmesan Chicken Meatloaf, I encourage you to soak in the warmth of your kitchen. Revel in the moments spent with your loved ones as you share this meal.

Twist and turn the recipe to fit your family’s tastes, and, most importantly, enjoy the process. Cooking isn’t just about nourishment; it’s about connection, love, and creating memories. May each bite remind you of the joy of home-cooked meals. Happy cooking, and until next time, I hope this dish finds its way into your family’s laughter and stories. If it does, my grandmother’s kitchen would be smiling.

Garlic Parmesan Chicken Meatloaf

Prep Time 15 minutes
Cook Time 50 minutes
Total Time 1 hour 5 minutes
Servings 6 servings
Calories 320
A comforting and delicious meatloaf made with ground chicken, roasted garlic, and Parmesan cheese, perfect for family dinners.

Ingredients

Main Ingredients

  • 1.5 lbs ground chicken (The base protein for the meatloaf.)
  • 1 cup breadcrumbs (Acts as a binder for the meatloaf.)
  • 0.5 cup grated Parmesan cheese (Adds savory richness.)
  • 0.25 cup chopped parsley (For freshness and color.)
  • 0.5 cup roasted garlic (Can be mashed for easier incorporation.)
  • 0.5 cup finely chopped onion (Adds flavor and moisture.)
  • 2 large eggs (Used as a binder.)
  • 1 teaspoon salt (Enhances overall flavor.)
  • 0.5 teaspoon black pepper (For seasoning.)
  • 1 tablespoon Worcestershire sauce (Adds depth of flavor.)

Topping

  • as needed ketchup (For topping the meatloaf.)

Instructions 

Preparation

  • Preheat the oven to 375°F (190°C).
  • In a large bowl, combine the ground chicken, breadcrumbs, Parmesan cheese, chopped parsley, roasted garlic, finely chopped onion, eggs, salt, black pepper, and Worcestershire sauce.
  • Mix well until all the ingredients are combined.
  • Transfer the mixture into a loaf pan and shape it into a loaf.
  • Spread ketchup on top for added flavor and moisture.

Baking

  • Bake in the preheated oven for 45-50 minutes or until the meatloaf is cooked through and the internal temperature reaches 165°F (75°C).
  • Let it rest for a few minutes before slicing.

Serving

  • Serve with your favorite sides and enjoy!

Notes

This meatloaf is versatile and can be served with various side dishes like mashed potatoes, green beans, or salads. Leftovers can be stored in an airtight container for a few days.
Calories: 320kcal
Course: Dinner, Main Course
Cuisine: American
Keyword: chicken meatloaf, Comfort Food, Easy Recipe, Family Dinner, meatloaf

Delicious Chicken Enchiladas

There’s something magical about the sounds that fill a family kitchen during a cozy weeknight dinner. The clatter of dishes as my kids laugh and help set the table, the soft simmering of chicken enchiladas bubbling away in the oven, and the heavenly aroma that wafts through the air, instantly reminding me of those warm days spent at my grandmother’s house. As we gather together, ready to share a meal, it feels like comfort and connection all wrapped up in each delicious bite.

Why This Delicious Chicken Enchiladas Feels Like Home

When I first made chicken enchiladas, I was simply looking for an easy weeknight meal that wouldn’t require much fuss. But what I found was a dish that felt so welcoming, so full of love, that it quickly became a family favorite. The minute I pulled the cheesy, saucy enchiladas out of the oven, it was like a warm hug for the soul.

Many meals have come and gone from our dinner table, but these enchiladas carry a special memory. They come together quickly, require only one baking dish, and please even the pickiest of eaters in my household. It’s a joyful recipe that turns busy evenings into special moments, filled with laughter and togetherness.

Delicious Chicken Enchiladas

The Simple Magic Behind Delicious Chicken Enchiladas

The beauty of this dish lies not only in its flavor but also in its simplicity. You don’t need to be a gourmet chef or have an elaborate kitchen setup to make these enchiladas sing. With just a handful of ingredients, this recipe is like a backstage pass to home-cooked comfort.

Moreover, it’s versatile. Want to add beans? Do it. Prefer a spicy kick? Just adjust the seasoning. This meal comes together with little stress, transforming your kitchen into a haven of delicious aromas and familiar warmth. Each layer of flavor invites a connection between family members, bonding over a shared love for good food.

Why This Recipe Works for Our Busy, Joyful Nights

Many of us juggle busy schedules, and sometimes, a simple meal plan makes all the difference. When making chicken enchiladas, I can prep the filling in advance, letting the flavors mingle while I finish my workday. With just a few rolls and a sprinkle of cheese, dinner is ready in no time.

This is precisely why I love this recipe. It embodies the essence of comfortable food combined with convenience. As the kid’s help with the assembly, it becomes less of a chore and more of a cherished family activity. And when we finally sit down, the smiles and laughter around the table remind me why I love cooking for them.

How to Make Delicious Chicken Enchiladas, The Heartwarming Way

Cooking any dish should be an experience filled with joy. With chicken enchiladas, that sense of creativity flows freely as you mix, roll, and bake. Whether it’s a quick weeknight meal or a special gathering, this cooking process is satisfying.

“This is where the magic happens—when the aroma fills the kitchen and my kids come running in, asking ‘Is it ready yet?’”

Let’s take a closer look at the cooking process and enjoy every moment along the way.

Ingredients You’ll Need

Here’s what you need to create your own comforting batch of chicken enchiladas. Remember, don’t hesitate to play with the ingredients based on what you have at home. Cooking is about enjoying the process as much as the final dish.

  • 2 cups Cooked and shredded chicken (Use rotisserie chicken for convenience or cook your own.)
  • 1 can Red enchilada sauce (10 oz) (Adds a zesty kick; choose mild or spicy based on preference.)
  • 2 cups Shredded Monterey Jack cheese (Melts beautifully and adds creaminess.)
  • 8 pieces Flour tortillas (Soft and pliable for easy rolling.)
  • 1 tablespoon Vegetable oil (Used for sautéing onions and garlic.)
  • 1 small Onion, chopped (Adds sweetness and depth to the filling.)
  • 2 cloves Garlic, minced (Brings a wonderful aroma and flavor.)
  • 1 teaspoon Cumin (Adds warmth and earthiness.)
  • 1 teaspoon Chili powder (Gives a nice kick and enhances flavor.)
  • to taste Salt and pepper (Helps balance the flavors.)
  • for garnish Chopped cilantro (Adds a pop of color and freshness.)
  • for serving Sour cream (Adds creaminess and tang.)

Don’t skip the fresh herbs; they’re the soul of the dish. And remember, use what’s in your fridge. This is about creativity, not perfection.

Step-by-Step Directions

Creating these enchiladas is as easy as pie, and I promise you’ll be surprised at how effortlessly they come together. Let’s break it down into manageable steps:

  1. Prepare the chicken. Start by boiling or baking the chicken until fully cooked. Once it’s done, shred it using two forks or your hands.

  2. Sauté the aromatics. Heat a skillet over medium heat and add vegetable oil. Sauté the chopped onion and minced garlic until soft and fragrant, about 3-4 minutes.

  3. Combine the filling. Add the shredded chicken to the skillet with the sautéed onions and garlic. Season with cumin, chili powder, salt, and pepper. Stir and cook for another 3-5 minutes until everything is warmed through and mixed well.

  4. Prepare the baking dish. Pour a small amount of red enchilada sauce into the bottom of a baking dish. This prevents sticking and adds flavor.

  5. Stuff the tortillas. Take a flour tortilla and place a generous spoonful of the chicken mixture in the center. Sprinkle with shredded cheese and roll tightly. Place seam side down in the baking dish. Repeat this until all tortillas are filled.

  6. Add sauce and cheese. Pour the remaining enchilada sauce over the top of the rolled enchiladas, then sprinkle with the rest of the shredded cheese.

  7. Bake. Cover the dish with foil and bake in a preheated oven at 375°F (190°C) for 20-25 minutes. Remove the foil and bake for an additional 5-10 minutes until the cheese is bubbly and slightly golden.

  8. Rest and serve. Let the enchiladas rest for a few minutes before serving. Garnish with chopped cilantro and serve with sour cream for that perfect finishing touch.

Remember, a little browning here builds flavor, just like grandma showed me. Let the kids stir this part; it’s the fun bit!

Delicious Chicken Enchiladas

Serving Delicious Chicken Enchiladas with Love

In our home, the best way to enjoy chicken enchiladas is family-style. I love placing the baking dish on the table, letting everyone help themselves. It turns dinner into a casual feast, where everyone is involved and can customize their plates just the way they like.

Alongside these enchiladas, I’ll often whip up some classic sides like a refreshing green salad or Spanish rice. A dollop of sour cream and a sprinkle of cilantro brightens the flavor, turning our meal into a celebration. Sharing stories and laughter around the table makes the experience even more special.

Delicious Chicken Enchiladas

Storage & Reheat Tips

Now, let’s talk about what to do with any leftovers. Because, let’s be honest, enchiladas make fantastic leftovers.

If you have some enchiladas left, store them in an airtight container in your fridge. They should be good for about 3-4 days. When you want to reheat them, the oven is your best friend. Preheat it to 350°F (175°C) and warm the enchiladas for about 15-20 minutes. This will help revive that fresh-baked charm.

Of course, the microwave works for a quick lunch too; just know that you may lose some of that cheesy goodness.

My Kitchen Notes & Shortcuts

Here are some quick tips I’ve gathered from making these delicious enchiladas time and again:

  • Use rotisserie chicken. It saves time and effort, allowing you to focus on making the dish sing.
  • Add beans or veggies. Black beans or diced bell peppers can make for excellent add-ins.
  • Make a double batch. If you’re already in the kitchen, why not? Freeze some for those busy nights later on.
  • Let the kids assemble. It’s a great way to get them involved, turning dinner prep into family fun.
  • Get creative. Don’t be afraid to switch up the cheeses or the sauce; you might discover a new favorite twist.

Family-Friendly Variations

The best part about chicken enchiladas is how flexible they are. Here are some easy ways to make this dish your own:

  • For a lighter version, swap out the flour tortillas for corn tortillas, which can also add an extra flavor twist.
  • Try a vegetarian version by using black beans and additional veggies instead of chicken.
  • Switch up the sauce. Green enchilada sauce can give a completely different flavor profile, bringing freshness to the meal.
  • Add a crunch. Top your enchiladas with some crushed tortilla chips for an added texture contrast that kids love.

Cooking is about expression, and it’s wonderful to find ways to make the dish feel like your own family story.

FAQs About Delicious Chicken Enchiladas

Can I make this ahead for a busy week?

Absolutely! In fact, letting it sit for an hour lets the flavors get to know each other, just like an old family recipe. You can prepare the filling and roll your enchiladas, then cover them and refrigerate until you’re ready to bake.

Can I freeze chicken enchiladas?

Yes, chicken enchiladas freeze beautifully. Just assemble them but don’t add the sauce or cheese until you’re ready to bake. Wrap them tightly and store them in a freezer-safe container for up to three months.

What can I use instead of Monterey Jack cheese?

You can absolutely use your favorite cheese! Cheddar cheese works great, or you can even mix different cheeses for a flavor boost.

Are there any side dishes that go well with enchiladas?

Sure! Spanish rice, guacamole, or a simple corn salad are all excellent choices that pair well with enchiladas.

What if I don’t have enchilada sauce?

No problem! If you’re in a pinch, you can blend some diced tomatoes with spices like chili powder and cumin to create a quick alternative.

One Final Thought from My Kitchen

As we wrap up this delicious journey through chicken enchiladas, I hope you find comfort in this recipe. The joy of cooking flows through the simple and heartwarming moments it creates, reminding us to gather around the table, share stories, and make memories.

May this dish bring laughter and love into your home, just as it does in mine. Until next time, happy cooking!

Chicken Enchiladas

Prep Time 20 minutes
Cook Time 30 minutes
Total Time 50 minutes
Servings 8 pieces
Calories 350
Warm and comforting chicken enchiladas, perfect for busy weeknight dinners. This simple recipe brings family together with its delicious flavors and ease of preparation.

Ingredients

Main Ingredients

  • 2 cups Cooked and shredded chicken (Use rotisserie chicken for convenience or cook your own.)
  • 1 can Red enchilada sauce (10 oz) (Adds a zesty kick; choose mild or spicy based on preference.)
  • 2 cups Shredded Monterey Jack cheese (Melts beautifully and adds creaminess.)
  • 8 pieces Flour tortillas (Soft and pliable for easy rolling.)
  • 1 tablespoon Vegetable oil (Used for sautéing onions and garlic.)
  • 1 small Onion, chopped (Adds sweetness and depth to the filling.)
  • 2 cloves Garlic, minced (Brings a wonderful aroma and flavor.)
  • 1 teaspoon Cumin (Adds warmth and earthiness.)
  • 1 teaspoon Chili powder (Gives a nice kick and enhances flavor.)
  • to taste Salt and pepper (Helps balance the flavors.)

Garnish and Serving

  • to taste Chopped cilantro (Adds a pop of color and freshness.)
  • for serving Sour cream (Adds creaminess and tang.)

Instructions 

Preparation

  • Prepare the chicken: Start by boiling or baking the chicken until fully cooked. Once it’s done, shred it using two forks or your hands.
  • Sauté the aromatics: Heat a skillet over medium heat and add vegetable oil. Sauté the chopped onion and minced garlic until soft and fragrant, about 3-4 minutes.
  • Combine the filling: Add the shredded chicken to the skillet with the sautéed onions and garlic. Season with cumin, chili powder, salt, and pepper. Stir and cook for another 3-5 minutes until everything is warmed through and mixed well.

Assembly

  • Prepare the baking dish: Pour a small amount of red enchilada sauce into the bottom of a baking dish. This prevents sticking and adds flavor.
  • Stuff the tortillas: Take a flour tortilla and place a generous spoonful of the chicken mixture in the center. Sprinkle with shredded cheese and roll tightly. Place seam side down in the baking dish. Repeat until all tortillas are filled.
  • Add sauce and cheese: Pour the remaining enchilada sauce over the top of the rolled enchiladas, then sprinkle with the rest of the shredded cheese.

Cooking

  • Bake: Cover the dish with foil and bake in a preheated oven at 375°F (190°C) for 20-25 minutes. Remove the foil and bake for an additional 5-10 minutes until the cheese is bubbly and slightly golden.
  • Rest and serve: Let the enchiladas rest for a few minutes before serving. Garnish with chopped cilantro and serve with sour cream for that perfect finishing touch.

Notes

For variations, consider adding black beans or vegetables. Freezing instructions are also available for future convenience.
Calories: 350kcal
Course: Dinner, Main Course
Cuisine: Mexican
Keyword: Chicken Enchiladas, Comfort Food, Easy weeknight meal, Family Dinner, Simple Recipe

Chicken Pot Pie Soup

Every time I prepare chicken pot pie soup, I am transported to my grandmother’s kitchen. The comforting aroma wafts through the air, making my heart feel warm and my stomach rumble in anticipation. The sound of my children bustling around the table, setting it with mismatched plates and laughter, adds to that cozy atmosphere. It’s that sweet moment when we all gather, ready to share a meal filled with love and memories. This recipe isn’t just a dish; it’s a hug in a bowl, infused with the kind of flavors that evoke cherished moments spent with family.

Why This Chicken Pot Pie Soup Feels Like Home

There’s something magical about food that reminds us of home. Chicken pot pie soup is one of those dishes that brings people together, effortlessly bridging the gap between comfort and flavor. It’s not just the ingredients; it’s the act of creating something nourishing and heartfelt.

The beauty of this soup lies in its simplicity. It encapsulates everything we love about comfort food: it’s creamy, hearty, and oh-so-full of flavor. With each spoonful, you’ll feel the warmth wash over you. On a chilly evening, it’s perfect to curl up with after a long day.

It’s also perfect for busy nights when cooking feels like a chore. This soup comes together in under an hour, making it a weeknight hero. You’ll find that it’s easy to prepare, and the results are spectacular. Family members actually cheer when I announce it’s on the menu!

Why Chicken Pot Pie Soup is Our New Family Favorite

Our family has embraced chicken pot pie soup as a weeknight staple because it’s easy to love. The creamy texture is just right and makes everyone want to come back for seconds. Plus, it hardly requires any elaborate prep work. The kids can help, stirring away while I chop the vegetables.

Chicken pot pie soup checks all the boxes: quick to make, satisfying, and an absolute pleaser for even the pickiest eaters. Since it’s loaded with wholesome ingredients, I feel good serving it to my family. Nothing beats gathering around the table, sharing laughter and stories over a bowl of this delightful meal.

The Simple Magic Behind Chicken Pot Pie Soup

What truly makes chicken pot pie soup shine is the balance of flavors. The vegetables meld beautifully with the chicken, while the herbs bring a touch of freshness. The cream transforms the broth into a luscious base that clings to everything in the bowl.

Every element has its place. You get the sweetness from the carrots, the earthiness from the potatoes, and a touch of brightness from the peas. It’s an elegant dance of flavors that comes together so effortlessly.

At the heart of this dish is a comforting blend of classic ingredients. Chicken, vegetables, cream, and spices unite to create a delicious meal that is nourishing for the body and soul. This is what home cooking is all about—bringing joy, warmth, and love back into our kitchens.

Why This Recipe Works for Our Busy, Joyful Nights

During those evenings when the clock seems to fly, this recipe is truly a lifesaver. It captures the essence of comfort without requiring hours in the kitchen. In fact, it allows for those little chats as you cook—catching up with your kids about their day or chatting with your partner about weekend plans.

With just one pot required, clean-up is a breeze. You can focus on what matters most: connecting with your loved ones. The idea is to savor those moments together rather than worry about how long the cooking takes.

It’s about making memories while feeding our families. There’s something special in the laughter shared over bowls of soup—it’s nourishment for the heart and a reminder of why we gather as a family.

Chicken Pot Pie Soup

How to Make Chicken Pot Pie Soup, The Heartwarming Way

Step-by-Step Overview: Keeping It Simple

Creating chicken pot pie soup is a joyful experience that you’ll look forward to. So gather your family around, enjoy the process, and let the aromas fill your kitchen. The goal is to keep it straightforward and fun. Here’s how to do it:

“This is where the magic happens—when the aroma fills the kitchen and my kids come running in, asking ‘Is it ready yet?’”

  1. In a large pot, heat olive oil over medium heat.
  2. Add the carrots, celery, and potatoes. Cook until softened, about 5-7 minutes.
  3. Stir in the flour (if using) and cook for another minute.
  4. Gradually add chicken broth, stirring constantly.
  5. Bring to a simmer and cook for about 15 minutes until potatoes are tender.
  6. Add shredded chicken, peas, thyme, salt, and pepper.
  7. Pour in heavy cream and stir to combine.
  8. Simmer for an additional 5 minutes, then serve hot.

Each of these steps invites collaboration and connection in the kitchen. Your family can pitch in with stirring or setting the table. This isn’t just about cooking; it’s about making an effort together and building bonds.

Ingredients You’ll Need

Gathering your ingredients is half the fun. The simplicity of chicken pot pie soup means that you don’t need fancy items to craft this delightful dish. Here’s what to have on hand:

  • 1 lb cooked chicken, shredded
  • 4 cups chicken broth
  • 2 cups potatoes, diced
  • 1 cup carrots, diced
  • 1 cup celery, diced
  • 1/2 cup frozen peas
  • 1 cup heavy cream
  • 2 tablespoons olive oil
  • 1 teaspoon dried thyme
  • Salt and pepper to taste
  • 2 tablespoons flour (optional, for thickening)

Don’t skip on the fresh herbs; they’re the soul of the dish. Feel free to use what you have in your fridge. This is about flexibility and creativity more than strict measurements. Turn it into your own!

Step-by-Step Directions

Let’s take a closer look at each step. Cooking can feel overwhelming, but with these easy instructions, you’ll see just how fun it can be.

  1. Heat Olive Oil: In a large pot, heat olive oil over medium heat. This is where the base flavors will begin to develop. A little browning here builds flavor, just like grandma taught me.

  2. Add Vegetables: Add the carrots, celery, and potatoes. Cook until softened, about 5-7 minutes. The colors are so vibrant at this stage; don’t rush it!

  3. Stir in Flour: Stir in the flour (if using) and cook for another minute. This helps thicken the soup later on, lending it a creamy richness.

  4. Gradually Add Broth: Gradually add chicken broth, stirring constantly. You want to dissolve any bits stuck to the bottom of the pot. That’s where the flavors are!

  5. Bring to a Simmer: Bring to a simmer and cook for about 15 minutes until potatoes are tender. The aroma fills your kitchen; it’s the comfort food we all crave.

  6. Add Chicken & Peas: Add shredded chicken, peas, thyme, salt, and pepper. Stir this in gently to bring all that delightful goodness together.

  7. Pour in Heavy Cream: Pour in heavy cream and stir to combine. This is truly the star moment of our soup—creating that luscious, dreamy texture.

  8. Final Simmer: Simmer for an additional 5 minutes, then serve hot. There’s nothing quite like finishing up a meal and feeling accomplished in the kitchen.

Serving Chicken Pot Pie Soup with Love

Every time we sit down for a meal, it’s about more than just the food; it’s about bringing everyone together. After preparing, I like to serve chicken pot pie soup family-style, in a big pot placed right in the center of the table.

Everyone can help themselves, making it a communal experience. We often pair it with homemade biscuits or a simple green salad. Some like to sprinkle a little extra thyme on top, while others prefer a hint of hot sauce for that spicy kick.

Gathering around with my loved ones, sharing stories, and enjoying the warmth of this meal creates memories that last. There’s a sense of joy that radiates when we come together to appreciate the food and each other.

Chicken Pot Pie Soup

Storage & Reheat Tips

Chicken pot pie soup can be an easy dish to work with when it comes to leftovers. If you have any soup remaining, be sure to store it properly to maintain its flavor.

Keep it in an airtight container in the refrigerator for up to three days. When reheating, the microwave works for a quick lunch, but the stove delivers that just-made warmth. Just add a splash of water or broth to revive the creaminess.

If you want to keep it longer, consider freezing it. Allow the soup to cool completely before transferring it to freezer-safe bags or containers. It’ll be good for up to three months. You will appreciate having a ready-to-go meal on busy evenings!

My Kitchen Notes & Shortcuts

Below are a few shortcuts I’ve picked up over time that help make this dish come together quickly without losing its soul:

  • Shredded Storebought Chicken: Save time by using a storebought rotisserie chicken. This adds flavor while cutting down on prep time.
  • Quick Veggie Prep: Use pre-diced frozen vegetables. It’s a great way to save on slicing and dicing!
  • Herb Flexibility: Experiment with different herbs. A bit of fresh rosemary or parsley can give the soup a new twist.
  • Involvement with Kids: Let the kids help with measuring and pouring—it makes them feel involved and teaches them valuable skills.

Family-Friendly Variations

One of the most enjoyable parts of making chicken pot pie soup is reinventing it. Over time, I’ve experimented with different variations to suit the tastes of my family. Here are a few ideas to inspire you:

  • Turkey Pot Pie Soup: Swap out chicken for turkey for a post-Thanksgiving treat. It creates a whole new flavor profile!
  • Vegetarian Option: Replace chicken with hearty mushrooms and use vegetable broth. It’s a fantastic way to enjoy a lighter, yet still filling, meal.
  • Pasta Addition: Try adding small pasta shapes, like orzo or ditalini. This adds an interesting texture and heartiness.
  • Coconut Cream: For a dairy-free version, substitute heavy cream with coconut cream for a rich flavor twist that the kids will love.

Feel free to get creative, share these variations with your family, and invite them to add their own personal touch to the recipe.

FAQs About Chicken Pot Pie Soup

Can I make this ahead for a busy week?

Absolutely! In fact, letting it sit for an hour allows the flavors to meld, just like in any treasured family recipe.

How can I modify the thickness of the soup?

If you prefer a thicker soup, just increase the flour a little at the beginning. It’s easily adjustable based on your texture preference.

How do I store leftovers?

Keep leftovers in an airtight container in the fridge for up to three days. You can also freeze them for later enjoyment, just remember to thaw in the fridge before reheating.

One Final Thought from My Kitchen

Cooking is as much about the memories we create as it is about the meals we serve. I hope this chicken pot pie soup finds a spot in your family’s culinary collection. May it create laughter and warmth at your table as it has at mine.

Until next time, happy cooking!

Chicken Pot Pie Soup

Prep Time 15 minutes
Cook Time 30 minutes
Total Time 45 minutes
Servings 6 servings
Calories 380
This comforting chicken pot pie soup is creamy, hearty, and full of flavor, perfect for busy weeknights and family gatherings.

Ingredients

Main ingredients

  • 1 lb cooked chicken, shredded (Use rotisserie chicken for convenience.)
  • 4 cups chicken broth
  • 2 cups potatoes, diced
  • 1 cup carrots, diced
  • 1 cup celery, diced
  • 1/2 cup frozen peas
  • 1 cup heavy cream
  • 2 tablespoons olive oil
  • 1 teaspoon dried thyme (Feel free to use fresh herbs if available.)
  • Salt and pepper to taste
  • 2 tablespoons flour (Optional, for thickening.)

Instructions 

Preparation

  • In a large pot, heat olive oil over medium heat.
  • Add the carrots, celery, and potatoes. Cook until softened, about 5-7 minutes.
  • Stir in the flour (if using) and cook for another minute.
  • Gradually add chicken broth, stirring constantly.
  • Bring to a simmer and cook for about 15 minutes until potatoes are tender.
  • Add shredded chicken, peas, thyme, salt, and pepper.
  • Pour in heavy cream and stir to combine.
  • Simmer for an additional 5 minutes, then serve hot.

Notes

Serve family-style, in a big pot placed in the center of the table. Great options for pairing include homemade biscuits or a simple green salad. Store leftovers in an airtight container for up to three days or freeze for up to three months.
Calories: 380kcal
Course: Main Course, Soup
Cuisine: American
Keyword: Chicken Pot Pie Soup, Comfort Food, Easy Dinner, Family Recipe, Quick Meal

Queso Chicken Enchiladas for a Quick and Cheesy Dinner Delight

There’s something so special about the sound of laughter bubbling in the background while delicious aromas fill the air. I can almost hear my kids setting the table, each plate placed with care, their innocent banter creating a joyful symphony. In the midst of it all, there’s a comforting smell wafting from the oven—my Queso Chicken Enchiladas for a Quick and Cheesy Dinner Delight. This dish not only brings my family around the table but also weaves their memories into mine. It’s these simple moments that turn an ordinary meal into a cherished family gathering.

Why This Queso Chicken Enchiladas for a Quick and Cheesy Dinner Delight Feels Like Home

When I first began making Queso Chicken Enchiladas, I was drawn to their simplicity and the way they wrapped everyone in a warm embrace of flavor. There’s a real magic in seeing my family’s eyes light up at the sight of these cheesy beauties. It feels like home because each bite carries a comforting familiarity, reminiscent of special occasions and cozy nights together. The creamy queso and tender chicken invite everyone in, even the pickiest eaters, making it easy to share laughter and conversations around the table.

This recipe is perfect for busy weeknights when cooking can feel daunting. All the ingredients play together harmoniously, creating a delightful dish without spending hours in the kitchen. It’s genuinely an effortless yet special recipe that transforms a regular dinner into a warm gathering.

Queso Chicken Enchiladas for a Quick and Cheesy Dinner Delight

Why Queso Chicken Enchiladas for a Quick and Cheesy Dinner Delight is Our New Family Favorite

What sets Queso Chicken Enchiladas apart as our new family favorite is their adaptability. Each week brings different schedules and tastes, yet this dish molds to fit everyone’s needs. Plus, it brings everyone into the kitchen. The kids love to help mix the ingredients, making it a dynamic family affair. Watching them engage with food creates a culinary connection that’s just as important as eating together.

With flavors that excite yet comfort, these enchiladas strike the perfect balance. You can modify ingredients based on what you have on hand or your family’s preferences. It’s a dish that encourages creativity and spontaneity, reminding us that the best meals often emerge from improvisation in the kitchen.

The Simple Magic Behind Queso Chicken Enchiladas for a Quick and Cheesy Dinner Delight

The recipe embraces the concept of effortless cooking while delivering outstanding flavor. You start with some rotisserie chicken—how easy is that? No need to spend time cooking the chicken from scratch. Toss it in with some velvety queso, tender tortillas, and a handful of spices, and you’re well on your way to a delicious meal.

Each ingredient complements the others, creating a symphony of taste. The shredded chicken provides heartiness, melted queso gives richness, while the green chilies add a bit of zing. Together, they form the ultimate comfort food, reminding you that good meals don’t need to be complicated.

Why This Recipe Works for Our Busy, Joyful Nights

In my home, busy nights are the norm. Between school activities, work, and everything in between, I often found myself scrambling for dinner ideas. That’s where this Queso Chicken Enchiladas recipe shines.

It comes together in no time. You could say it’s a lifesaver on those chaotic evenings when everyone is hungry, and I can’t afford to spend hours prepping. Plus, it requires minimal cleanup. You don’t need multiple pots and pans that clutter the kitchen after a long day. Instead, it consolidates everything into a single dish that you can serve family-style, making everyone feel included.

“This is where the magic happens—when the aroma fills the kitchen, and my kids come running in, asking ‘Is it ready yet?’”

How to Make Queso Chicken Enchiladas for a Quick and Cheesy Dinner Delight, The Heartwarming Way

Creating these enchiladas is an engaging and joyful process. It starts with gathering a handful of ingredients that you may already have in your pantry, making it accessible for anyone. Here is a peek into what you will need.

Ingredients You’ll Need

  • 4 burrito-sized flour tortillas (Corn tortillas can also be used, just warm them first)
  • 2 cups shredded chicken (Rotisserie chicken works fabulously for faster prep!)
  • 1 packet taco seasoning (Feel free to use homemade or store-bought)
  • 1 cup sour cream (Greek yogurt is a healthier substitute if desired)
  • 1 cup shredded cheddar cheese (Mix in Monterey Jack for extra creaminess)
  • 1 can chopped green chilies (Adjust quantity based on heat preference)
  • 1 can diced tomatoes with green chilies (Undrained for moisture)
  • 16 oz Queso Blanco Velveeta (Melts beautifully to create a creamy sauce)

Remember, cooking is about flexibility. Use what’s in your fridge. This is about creativity, not perfection. And while fresh herbs add brilliance, you can skip them if you need to.

Step-by-Step Directions

Now for the fun part—making the enchiladas! Follow these steps for a delightful meal that even your kids will love to help with.

  1. Preheat your oven to 350°F (175°C). This will ensure that when your enchiladas are ready, the oven is warm and waiting.

  2. In a mixing bowl, combine shredded chicken, taco seasoning, sour cream, and half of the cheese. Mix until everything is beautifully coated. This step builds flavor just as I learned from grandma.

  3. Take a tortilla and place a generous amount of the chicken mixture in the middle. Roll it up tightly and place it seam-side down in a greased baking dish. This is where you get to let creativity shine; it’s even fun to let the kids practice their rolling skills!

  4. Repeat the process for the remaining tortillas until the baking dish is full. You may want to sneak in a taste—a little nibble never hurt anyone.

  5. In a separate bowl, mix the diced tomatoes with chilies and Velveeta. Stir until you have a creamy concoction. This savory sauce is the showstopper that brings everything together.

  6. Pour the queso sauce over the rolled enchiladas, ensuring every corner is covered. Don’t skimp on that lovely sauce.

  7. Sprinkle with the remaining cheese on top. It’s all about that cheesy goodness that everyone craves.

  8. Bake for 20-25 minutes, until the cheese is bubbly and golden brown. The aroma filling your kitchen will have everyone searching for the source.

  9. Once cooled for a few minutes, serve the enchiladas straight out of the oven. Enjoy every cheesy bite and the smiles around the table.

Queso Chicken Enchiladas for a Quick and Cheesy Dinner Delight

Serving Queso Chicken Enchiladas for a Quick and Cheesy Dinner Delight with Love

We serve Queso Chicken Enchiladas family-style right in the center of the table. It’s such a heartwarming experience to see everyone helping themselves. We often add toppings like diced avocado, fresh cilantro, or a squeeze of lime to brighten up each bite.

Sometimes we pair it with a simple salad or refried beans on the side to round out the meal. It’s always interesting to note how different family members have their favorite toppings. My husband swears by extra sour cream, while one of my kids prefers it spicy with jalapeños. Each plate becomes a personal story, a reminder of the beautiful variety that family brings to a meal.

Queso Chicken Enchiladas for a Quick and Cheesy Dinner Delight

Storage & Reheat Tips

If you happen to have leftovers—I know it’s hard to resist digging in right away—they store beautifully for another meal. Here are some practical tips for keeping that goodness intact.

  • Cool before storing: Let the enchiladas cool down to room temperature. This helps maintain their texture and flavor.

  • Store in an airtight container: Place leftovers in a sealed container and refrigerate them. They should last for up to three days.

  • Reheat in the oven for best results: While the microwave is a quick fix, heating them in the oven restores their melty cheese and soft tortillas. Just cover with foil to prevent over-browning.

  • Can be frozen too: Freeze the enchiladas, wrapped tightly, for up to two months. Thaw in the refrigerator overnight and bake until warm.

My Kitchen Notes & Shortcuts

Here are a few things I’ve learned along the way that might help make your cooking experience smoother and more enjoyable.

  • Use leftover chicken: This is a perfect way to utilize any leftover rotisserie chicken you might have. It drastically cuts down on prep time.

  • Taco seasoning substitutes: If you want to skip the package stuff, you can easily make your own with spices you likely already have. Think chili powder, cumin, garlic powder, and onion powder.

  • Engage the kids: Let the kids get involved! From mixing ingredients to rolling tortillas, it’s a perfect chance for family bonding and learning in the kitchen.

  • Prep ahead: You can assemble the enchiladas earlier in the day and pop them into the oven when you’re ready. Eating together is what counts, after all.

Family-Friendly Variations

Cooking with easy flexibility in mind encourages creativity, and these Queso Chicken Enchiladas can adapt to many tastes. Here are ways to personalize your dish:

  • Vegetarian option: Replace the chicken with black beans or sautéed veggies. It’s delicious and just as satisfying.

  • Cheesy variations: Layer in different cheeses or even mix in cream cheese for an ultra-creamy filling.

  • Add some crunch: Try adding some black olives or sliced bell peppers for extra texture before rolling the tortillas.

  • Spice it up: For a little kick, add diced jalapeños or use spicy queso.

FAQs About Queso Chicken Enchiladas for a Quick and Cheesy Dinner Delight

Can I make this ahead for a busy week?

Absolutely! In fact, letting it sit for an hour lets the flavors get to know each other, just like an old family recipe.

What if I can’t find Queso Blanco Velveeta?

You can use any melty cheese blend as a substitute. Look for Mexican blend cheese, which will work just as wonderfully.

How do I make these gluten-free?

Use corn tortillas instead, and double-check the taco seasoning and Velveeta for gluten-free options.

One Final Thought from My Kitchen

I hope this dish finds its way into your family’s laughter and stories. Cooking is about connection, joy, and sharing meals that become part of our fabric. If Queso Chicken Enchiladas for a Quick and Cheesy Dinner Delight does just that, my heart is full, and my grandmother’s kitchen is smiling. Until next time, happy cooking!

Queso Chicken Enchiladas

Prep Time 10 minutes
Cook Time 25 minutes
Total Time 35 minutes
Servings 4 servings
Calories 550
A comforting and cheesy dinner dish that brings the family together, featuring shredded chicken and melted queso in tortillas.

Ingredients

Main ingredients

  • 4 pieces burrito-sized flour tortillas (Corn tortillas can also be used, just warm them first.)
  • 2 cups shredded chicken (Rotisserie chicken works fabulously for faster prep!)
  • 1 packet taco seasoning (Feel free to use homemade or store-bought.)
  • 1 cup sour cream (Greek yogurt is a healthier substitute if desired.)
  • 1 cup shredded cheddar cheese (Mix in Monterey Jack for extra creaminess.)
  • 1 can chopped green chilies (Adjust quantity based on heat preference.)
  • 1 can diced tomatoes with green chilies (Undrained for moisture.)
  • 16 oz Queso Blanco Velveeta (Melts beautifully to create a creamy sauce.)

Instructions 

Preparation

  • Preheat your oven to 350°F (175°C).
  • In a mixing bowl, combine shredded chicken, taco seasoning, sour cream, and half of the cheese. Mix until everything is beautifully coated.
  • Take a tortilla and place a generous amount of the chicken mixture in the middle. Roll it up tightly and place it seam-side down in a greased baking dish.
  • Repeat the process for the remaining tortillas until the baking dish is full.
  • In a separate bowl, mix the diced tomatoes with chilies and Velveeta. Stir until you have a creamy concoction.
  • Pour the queso sauce over the rolled enchiladas, ensuring every corner is covered. Sprinkle with the remaining cheese on top.

Cooking

  • Bake for 20-25 minutes, until the cheese is bubbly and golden brown.
  • Once cooled for a few minutes, serve the enchiladas straight out of the oven.

Notes

Serve family-style with toppings like diced avocado, fresh cilantro, or a squeeze of lime. Can be stored in an airtight container for up to three days and reheated in the oven.
Calories: 550kcal
Course: Dinner, Main Course
Cuisine: Mexican
Keyword: cheesy enchiladas, Comfort Food, Easy Dinner, Family Recipe, Queso Chicken Enchiladas