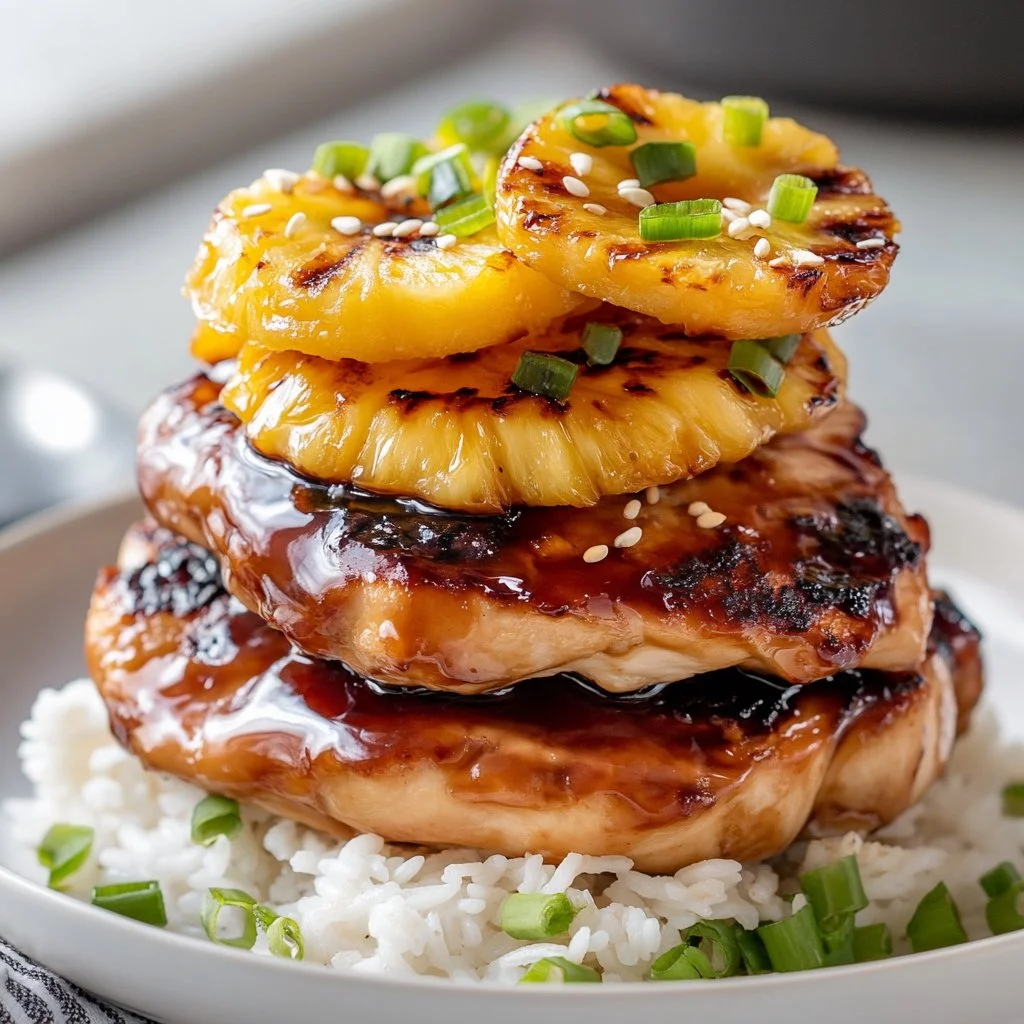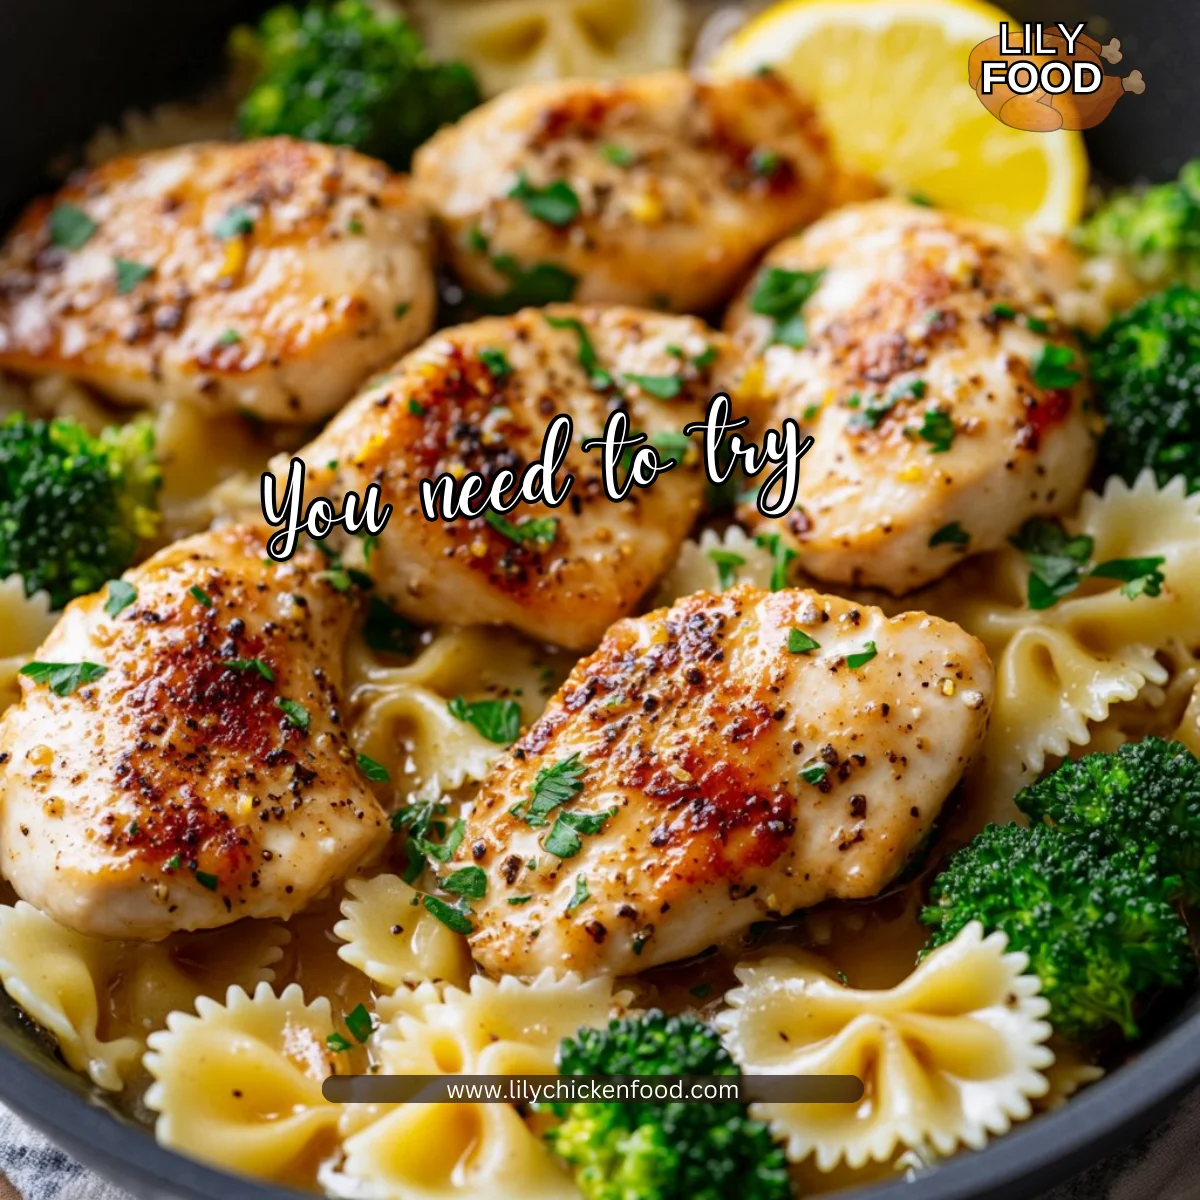
Zesty Cowboy Butter Chicken: Lemon Bowtie Pasta & Broccoli
The first thing you notice is the bright lemon smell, then the soft sizzle of butter and garlic in the pan. You hear the pot bubbling and the gentle clink of a wooden spoon as you stir. In my kitchen, that sound means dinner is on its way and the family will gather.
This dish fills the house with a warm, tangy aroma that makes everyone come out of their rooms. It is easy enough for weeknights and special enough for guests. If you like simple pasta dinners, you might also enjoy my Garlic Butter Chicken and Bowtie Pasta for another cozy option.
Why this works
This recipe balances bright lemon, smoky paprika, and rich butter. The bowtie pasta soaks up the sauce, and the broccoli brings color and texture. It is a complete meal in one skillet and pot, saving time and dishes.
I created this for busy families. You can prep while the pasta cooks and finish the sauce in the same pan you seared the chicken in. That saves time and keeps cleanup low. For a different weeknight favorite, try my tested Baked Lemon Butter Chicken for nights when you want a hands-off approach.
I test these recipes many times before sharing. I focus on safe cooking steps, consistent results, and flavors that children and adults both enjoy. The chicken should always reach 165°F to be safe and juicy.
Process Overview
“This is where the magic happens—when the aroma fills the kitchen.”
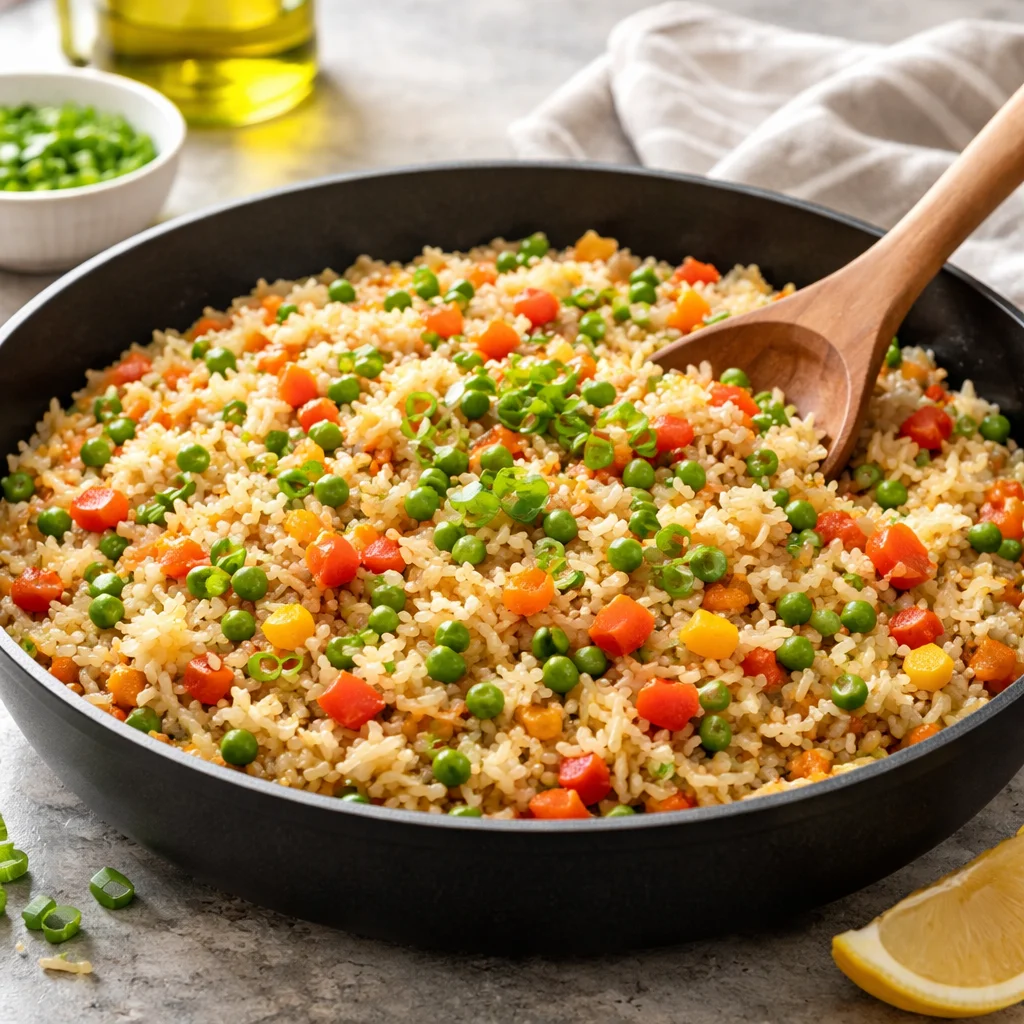
Start by prepping everything. Cook the bowtie pasta while you cut the chicken and chop the broccoli. Sear the chicken quickly to get a golden crust. Use the same pan to build the cowboy butter sauce for flavor depth.
Finish by tossing pasta, broccoli, and chicken together so each bite gets sauce. If you like grilled notes, this same cowboy butter idea works well on skewers, as I showed with my Grilled Chicken Skewers with Cowboy Butter.
Ingredients
H2: Pantry and fresh items
-
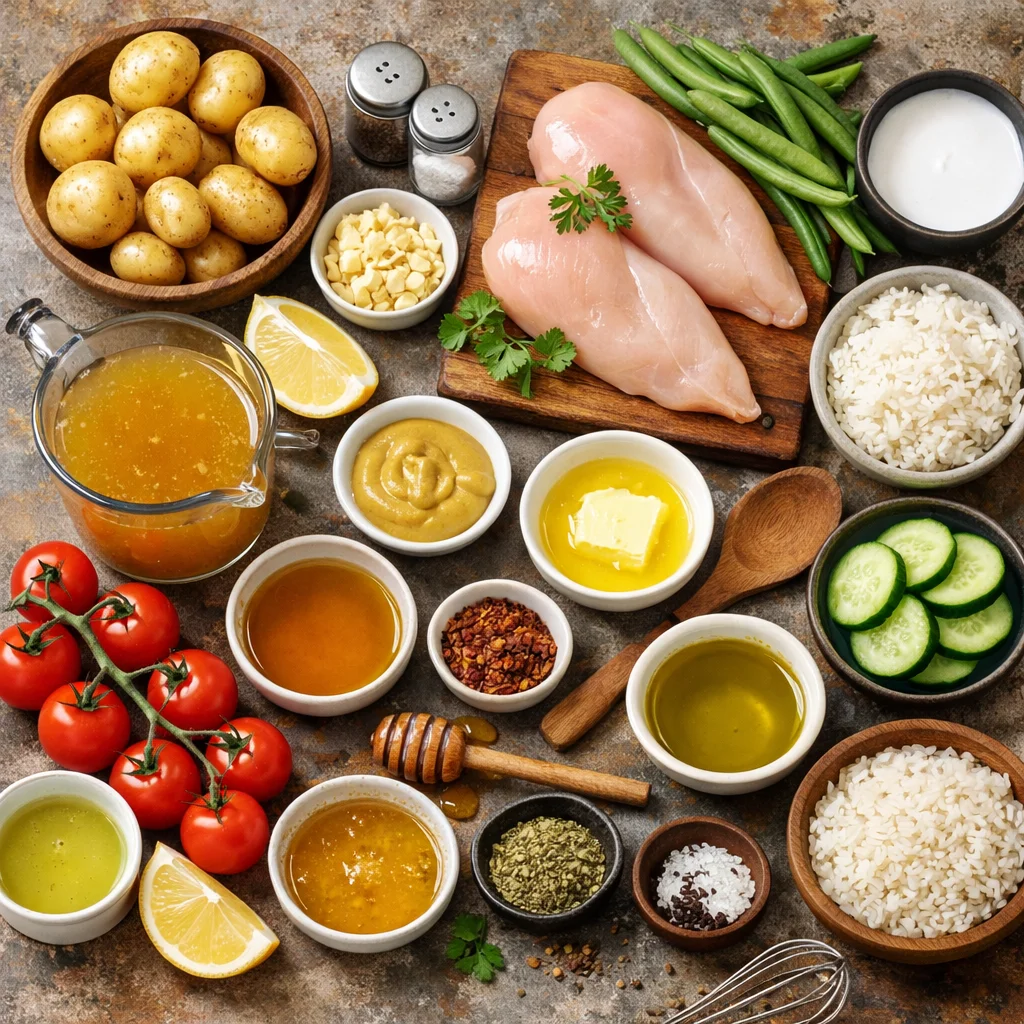
Boneless, skinless chicken breasts — cut into bite-sized pieces or thin cutlets.
Lily’s tip: Trim excess fat and pound thicker pieces thin for even cooking. Use 1.5 to 2 pounds for a family of four. -
Bowtie pasta (Farfalle).
Lily’s tip: Use 12 ounces. Bowtie holds sauce well and feels fun for kids. -
Fresh broccoli florets.
Lily’s tip: Cut into small, even florets so they cook quickly and match the pasta size. -
Unsalted butter.
Lily’s tip: Use real butter for the best flavor. Start with 4 tablespoons total for a rich, silky sauce. -
Freshly minced garlic.
Lily’s tip: Mince cloves fine so the garlic melts into the sauce without big raw bites. -
Finely minced shallots.
Lily’s tip: Shallots add sweetness and depth. One medium shallot is usually enough. -
Fresh rosemary.
Lily’s tip: Use a small amount. Strip leaves from the stem and finely chop for even flavor. -
Fresh thyme.
Lily’s tip: Remove leaves from the stem. Thyme pairs beautifully with lemon and butter. -
Fresh parsley.
Lily’s tip: Chop roughly and save some for garnish to brighten the dish at the end. -
Smoked paprika.
Lily’s tip: One teaspoon adds a warm, smoky note without heat. Use more if you like smoky flavors. -
Red pepper flakes (optional).
Lily’s tip: Add a pinch for mild kick. Leave out for little ones. -
Lemon zest.
Lily’s tip: Zest before juicing so you get the most bright flavor. -
Lemon juice.
Lily’s tip: Fresh juice tastes best. Use one medium lemon for about 2 tablespoons. -
Dijon mustard.
Lily’s tip: A teaspoon or two adds a subtle tang and helps the sauce emulsify. -
Worcestershire sauce.
Lily’s tip: Use sparingly. It gives savory depth. -
Low-sodium chicken broth.
Lily’s tip: Use about 1/2 to 1 cup. It helps loosen the sauce and add body. -
Salt.
Lily’s tip: Season in layers. Start with a little when cooking pasta and adjust at the end. -
Black pepper.
Lily’s tip: Freshly cracked is best for aroma and flavor.
H3: Ingredient notes and Lily’s tips
I like to lay everything out on the counter before I start. That keeps the pace steady and the family fed faster. If you want a creamier sauce, add a splash of heavy cream at the end. For a lighter meal, use a bit more lemon and reduce butter by one tablespoon.
Also, if you prefer a different pasta, most short pasta shapes will work. I often swap in penne or rotini when farfalle is not on hand. For a comforting casserole twist, see my Chicken Alfredo Pasta Bake for inspiration.
Directions
-
Prep Your Ingredients:
Cut your chicken breasts into uniform bite-sized pieces or thin cutlets. Chop your broccoli into small florets. Finely mince your garlic and shallots. Zest and juice your lemon. Roughly chop your fresh parsley, rosemary, and thyme.
Encouraging note: Prep makes cooking calm and quick. Take a deep breath. You are doing great. -
Cook the Pasta:
Bring a large pot of generously salted water to a rolling boil. Add the bowtie pasta and cook according to package directions until al dente. Reserve about 1 to 1.5 cups of the starchy pasta water before draining.
Encouraging note: Save that pasta water. It helps the sauce cling to the pasta and brings the whole dish together. -
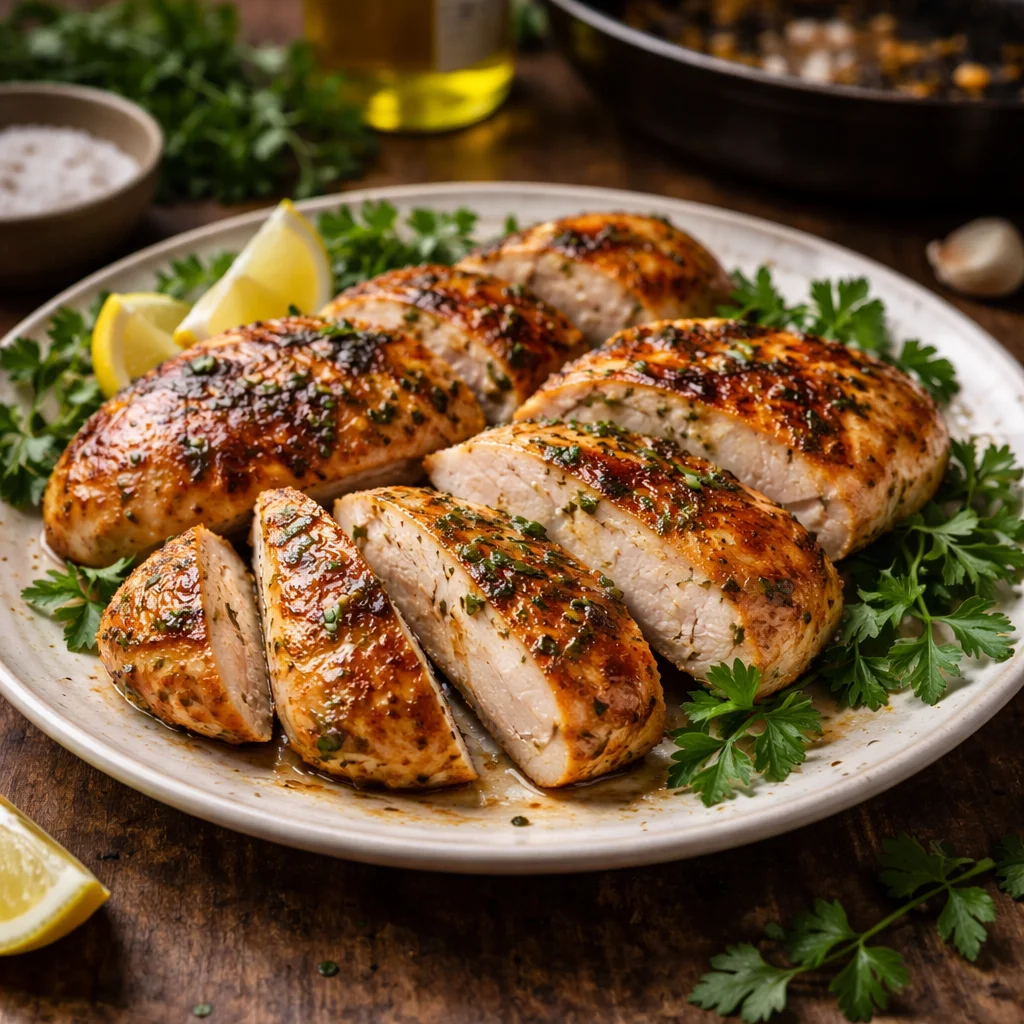
Sear the Chicken:
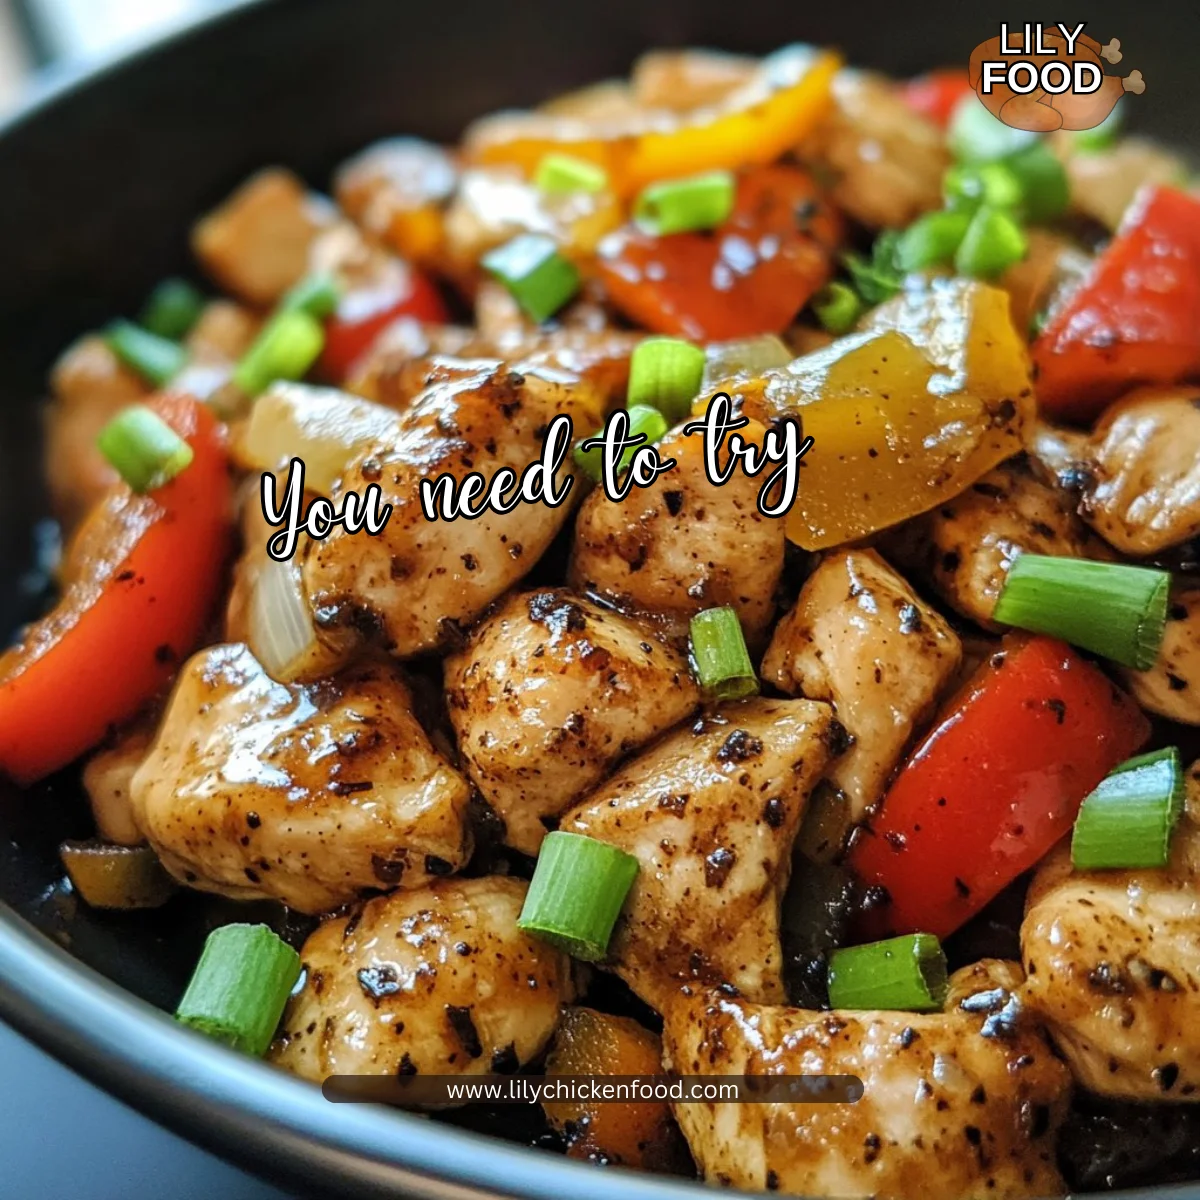
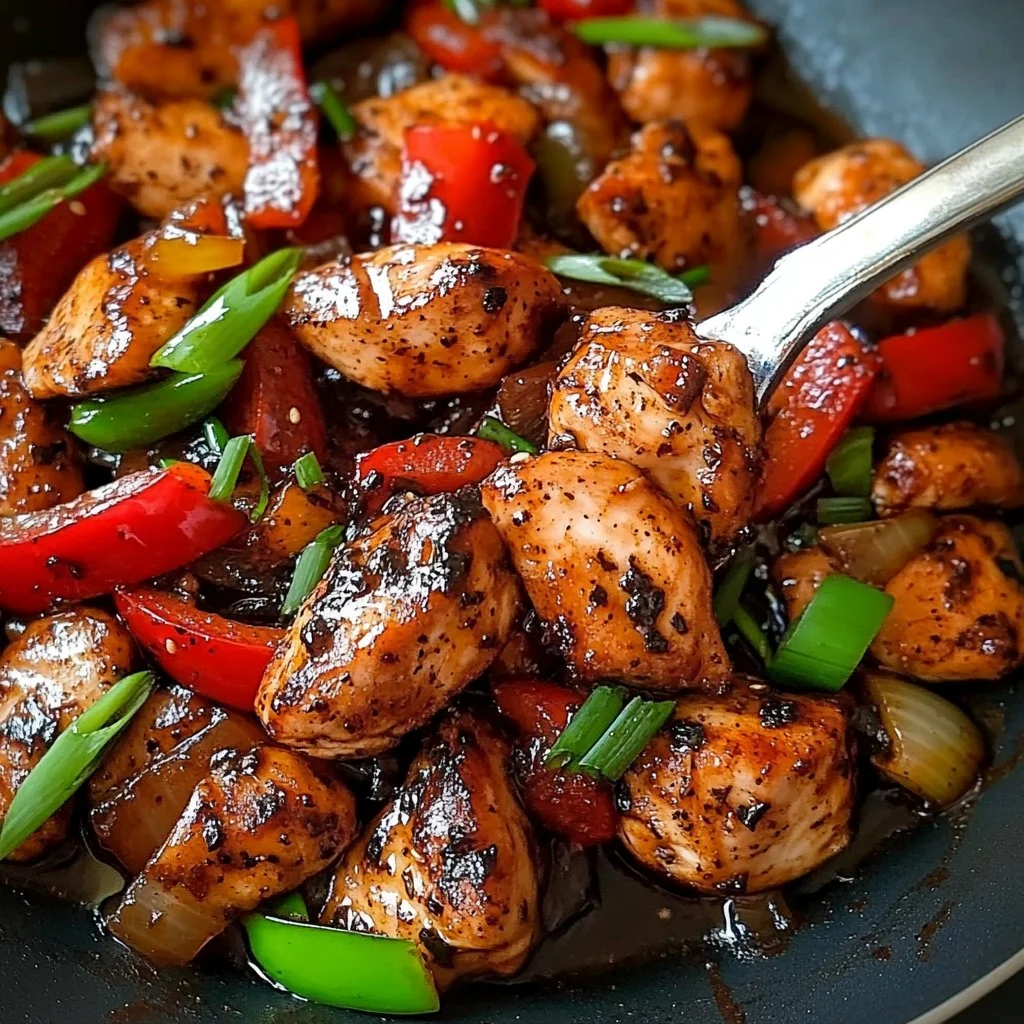
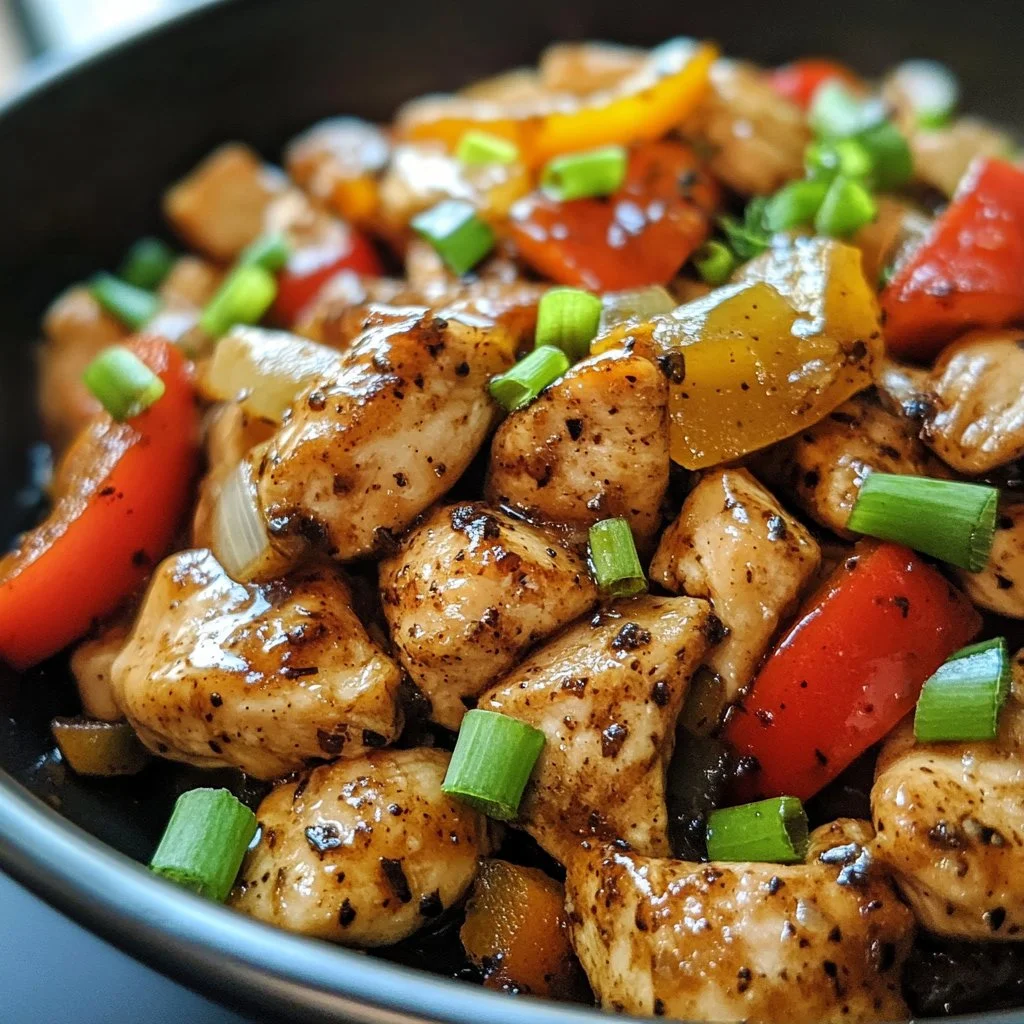
Pat your chicken pieces dry and season with salt and black pepper. In a large skillet, melt 1 tablespoon of unsalted butter over medium-high heat. Add the chicken in a single layer and cook for 3-4 minutes per side until golden brown and cooked through. Remove the chicken and set aside.
Encouraging note: A hot pan gives good color. If your pieces are crowded, sear in batches. Keep the cooked pieces warm on a plate. -
Build the Cowboy Butter Sauce:
Reduce heat to medium. Add the remaining unsalted butter to the skillet. Once melted, add the minced shallots and cook for 2-3 minutes until softened. Stir in the minced garlic, chopped rosemary, and thyme, cooking for another minute.
Encouraging note: This step smells amazing. Let those aromatics bloom gently without burning. -
Add Spices and Liquids:
Stir in the smoked paprika and red pepper flakes and cook for about 30 seconds. Pour in the chicken broth, scraping up any browned bits from the pan. Bring to a simmer.
Encouraging note: Those browned bits add deep flavor. A quick scrape brings them into the sauce. -
Finish the Sauce:
Stir in the Dijon mustard, Worcestershire sauce, lemon zest, and lemon juice. Let the sauce simmer gently for 2-3 minutes to reduce and thicken.
Encouraging note: Taste and adjust salt and pepper. This is the moment to balance acid and richness. -
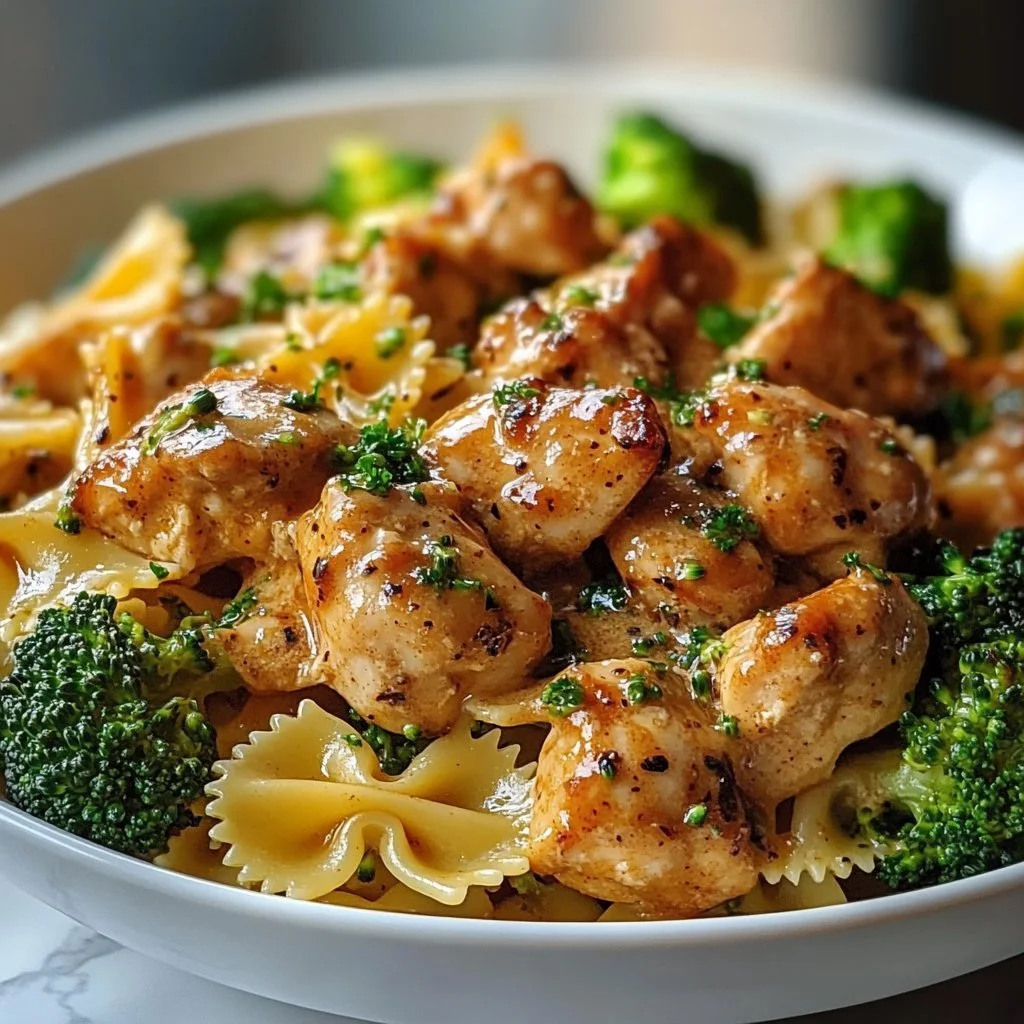
Combine & Toss:
Add the cooked broccoli florets to the sauce and let them cook until crisp-tender. Return the cooked chicken to the skillet with the sauce and broccoli. Add the drained bowtie pasta and toss everything gently to coat.
Encouraging note: Toss with a little reserved pasta water if the sauce needs to loosen. This helps the sauce cling to every bowtie. -
Serve Immediately:
Garnish with fresh chopped parsley and serve hot.
Encouraging note: Family meals are about connection. Serve with a smile and let everyone help pass bowls and extra lemon wedges.
Safety note: Always check that the chicken reaches an internal temperature of 165°F with a meat thermometer. That ensures safety while keeping the meat juicy.
Serving
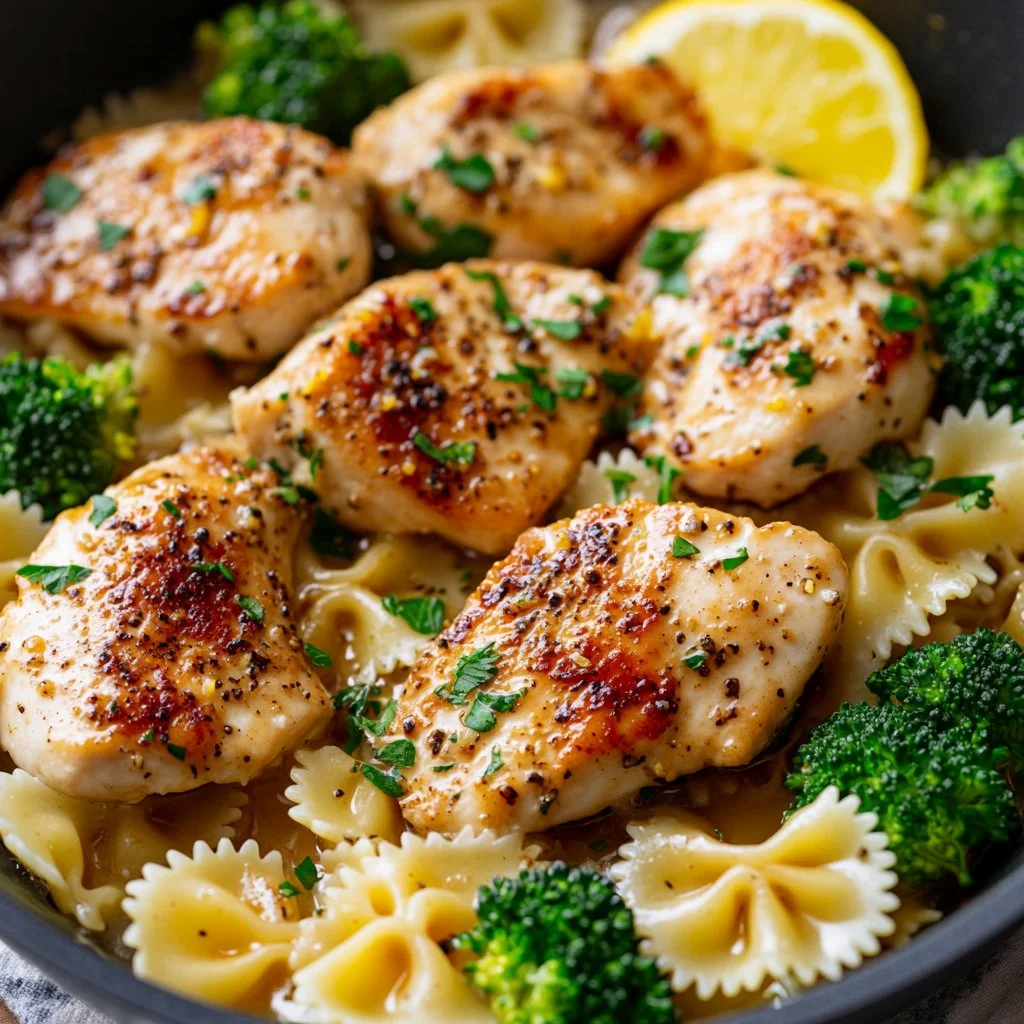
Serve this family-style right from the skillet into bowls or a big serving dish. Add lemon wedges on the side for anyone who wants extra brightness.
For a complete meal, pair it with a simple green salad and warm crusty bread to mop up the sauce. If you have picky eaters, serve the chicken and pasta slightly separated so everyone can build their own plates.
For a fun weeknight setup, place the skillet on the table with a serving spoon, a bowl of grated Parmesan, and extra parsley for garnish. If you want plating ideas for a dinner party, you can present individual portions with a sprig of rosemary on top.
I also have a full recipe page if you want a printable version to tuck into your meal plan: Zesty Cowboy Butter Chicken recipe.
Storage
Refrigerator:
Store leftovers in an airtight container for up to 3 days. Cool the dish to room temperature before refrigerating to protect flavor and texture.
Reheating:
Reheat on the stove over low heat with a splash of chicken broth or reserved pasta water. This keeps the sauce silky and prevents the chicken from drying out. Microwave reheating works too; add a splash of liquid and cover loosely to keep moisture.
Freezing:
You can freeze the cooked chicken and sauce for up to 2 months in a freezer-safe container. I do not recommend freezing the pasta with the sauce because it can become mushy when thawed. Instead, freeze the chicken and sauce, and boil fresh pasta when ready to serve.
Kitchen Notes
- Shortcut 1: Use pre-cut chicken or thin cutlets to save 10 minutes on prep.
- Shortcut 2: Frozen broccoli florets work fine. Thaw and pat dry before adding to the sauce.
- Shortcut 3: Swap in rotisserie chicken for an ultra-quick dinner. Add it at the end to warm through.
- Shortcut 4: Use low-sodium chicken broth and adjust salt at the end for better control.
- Shortcut 5: If you want a creamy finish, stir in 1/4 cup of heavy cream at the end and heat gently.
Variations
- For picky eaters: Keep the broccoli separate and offer the sauce on the side. Serve chicken pieces plain for those who prefer simple flavors.
- For a vegetarian version: Replace chicken with hearty mushrooms and extra chickpeas for protein.
- For grain-free: Use chickpea or lentil pasta for added fiber and protein while keeping the texture similar.
- For extra heat: Add more red pepper flakes or a splash of hot sauce to the sauce.
- For a lighter version: Use 2 tablespoons of butter and more lemon juice. Add a splash of olive oil to finish for extra shine.
FAQ
Q: Can I use chicken thighs instead of breasts?
A: Yes. Boneless, skinless thighs are forgiving and stay juicy. Adjust searing time slightly; thighs may need an extra minute or two.
Q: How can I make the sauce thicker?
A: Simmer a little longer to reduce the liquid or stir in a tablespoon of butter at the end. You can also whisk a teaspoon of cornstarch into a bit of cold water and add it if you need a quicker thicken.
Q: Can I prepare this ahead for guests?
A: You can cook the chicken and make the sauce ahead. Reheat gently, cook fresh pasta, and toss together just before serving for the best texture.
Q: What other vegetables pair well?
A: Asparagus, peas, or baby spinach all work. Add them at different times so they stay bright and crisp.
Q: Is this kid-friendly?
A: Yes. Omit the red pepper flakes and serve a little sauce on the side for the children. Most kids enjoy the simple lemon-butter flavor and fun bowtie pasta.
Conclusion
I hope this Zesty Cowboy Butter Chicken with Lemon Bowtie Pasta and Broccoli becomes a regular in your weeknight rotation. It is one of those dishes that feels special but comes together quickly, and it always brings the family to the table.
For more inspiration and similar cowboy butter recipes, check these trusted posts: Cowboy Butter Chicken Linguine – I Am Homesteader and Cowboy Butter Chicken Pasta – The Happier Homemaker.
Thanks for cooking with me. Come back soon for more family-friendly recipes and practical tips from my kitchen.

Zesty Cowboy Butter Chicken with Lemon Bowtie Pasta and Broccoli
Ingredients
Main Ingredients
- 1.5 pounds Boneless, skinless chicken breasts (Cut into bite-sized pieces or thin cutlets.)
- 12 ounces Bowtie pasta (Farfalle) (Holds sauce well and is fun for kids.)
- 2 cups Fresh broccoli florets (Cut into small, even florets.)
- 4 tablespoons Unsalted butter (Use real butter for the best flavor.)
- 4 cloves Freshly minced garlic (Mince fine so it melts into the sauce.)
- 1 medium Finely minced shallot (Adds sweetness and depth.)
- 1 teaspoon Fresh rosemary (Finely chopped for even flavor.)
- 1 teaspoon Fresh thyme leaves (Pairs beautifully with lemon and butter.)
- 1/4 cup Fresh parsley (Chop roughly; save some for garnish.)
- 1 teaspoon Smoked paprika (Adds a warm, smoky note.)
- 1 pinch Red pepper flakes (optional) (For mild kick. Leave out for kids.)
- 1 tablespoon Lemon zest (Zest before juicing for best flavor.)
- 2 tablespoons Lemon juice (Fresh juice preferred, from one medium lemon.)
- 1 teaspoon Dijon mustard (Adds subtle tang and helps emulsify sauce.)
- 1 tablespoon Worcestershire sauce (Use sparingly for savory depth.)
- 1 cup Low-sodium chicken broth (Loosens sauce and adds body.)
- to taste Salt (Season in layers.)
- to taste Black pepper (Freshly cracked is best.)
Instructions
Preparation
- Cut chicken into uniform bite-sized pieces or thin cutlets.
- Chop broccoli into small florets.
- Finely mince garlic and shallots.
- Zest and juice the lemon.
- Roughly chop parsley, rosemary, and thyme.
Cooking the Pasta
- Bring a large pot of salted water to a rolling boil. Add bowtie pasta and cook according to package directions until al dente.
- Reserve about 1 to 1.5 cups of starchy pasta water before draining.
Searing the Chicken
- Pat chicken dry and season with salt and black pepper.
- In a large skillet, melt 1 tablespoon of butter over medium-high heat.
- Add chicken in a single layer and cook for 3-4 minutes per side until golden brown and cooked through.
- Remove chicken and set aside.
Building the Cowboy Butter Sauce
- Reduce heat to medium and add remaining unsalted butter to the skillet.
- Once melted, add minced shallots and cook for 2-3 minutes until softened.
- Stir in garlic, chopped rosemary, and thyme, cooking for another minute.
Finishing the Sauce
- Stir in smoked paprika and red pepper flakes; cook for about 30 seconds.
- Pour in chicken broth and scrape up any browned bits from the pan, bringing to a simmer.
- Stir in Dijon mustard, Worcestershire sauce, lemon zest, and lemon juice, then let the sauce simmer gently for 2-3 minutes.
Combining Everything
- Add broccoli florets to the sauce, cooking until crisp-tender.
- Return chicken to the skillet with sauce and broccoli. Add drained bowtie pasta and toss gently to coat.
Serving
- Garnish with fresh chopped parsley and serve hot.