Tag

one pan meals

Browsing

Garlic Butter Chicken and Rice (Easy One-Pan Dinner)

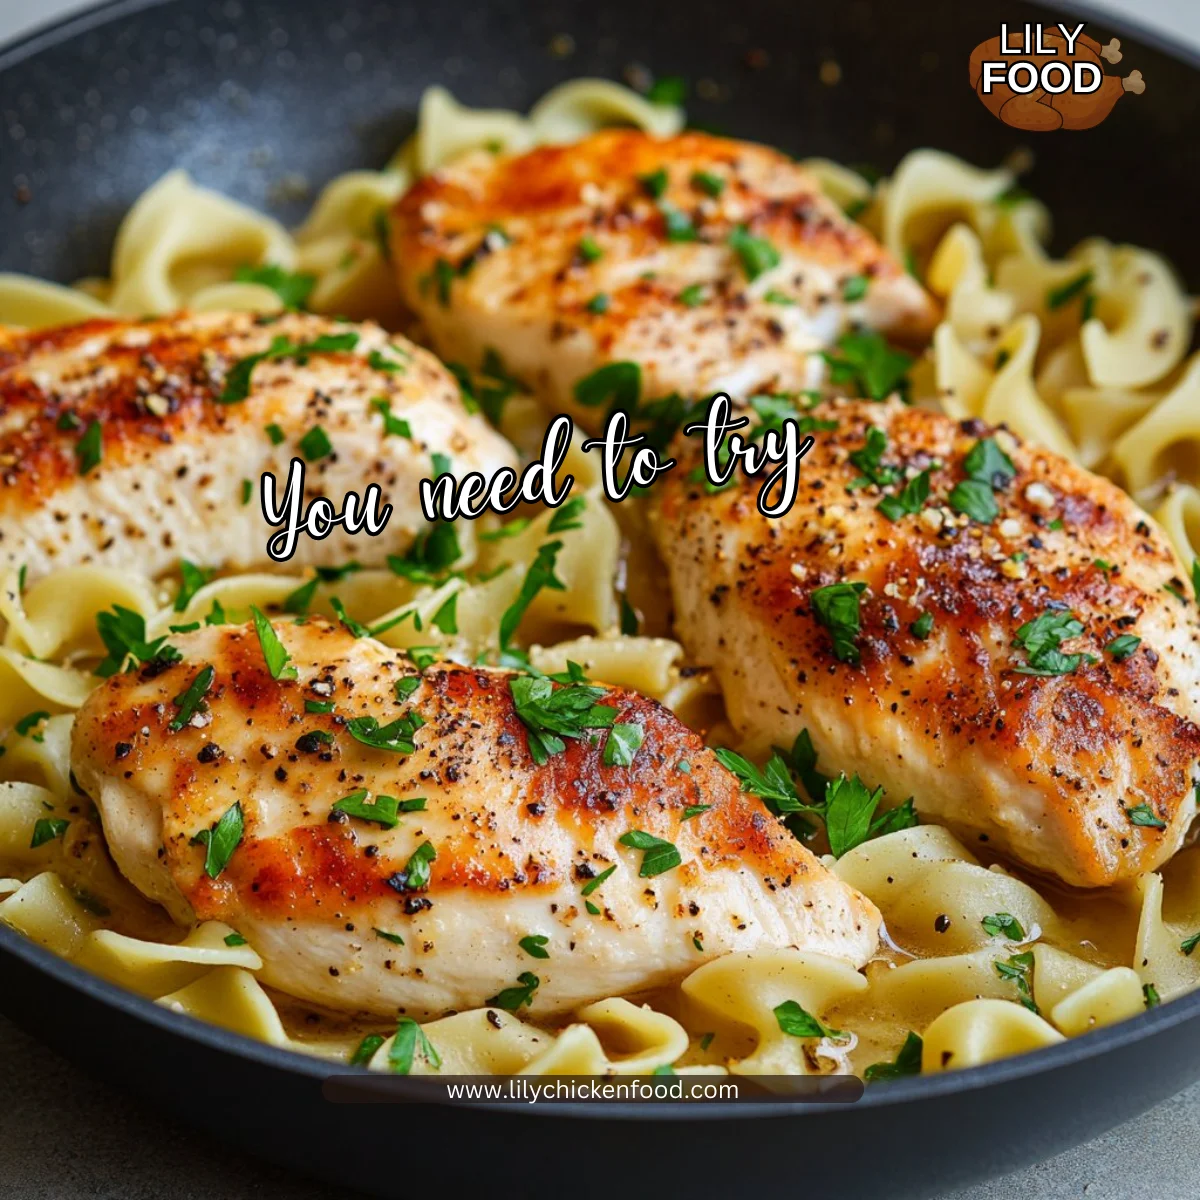
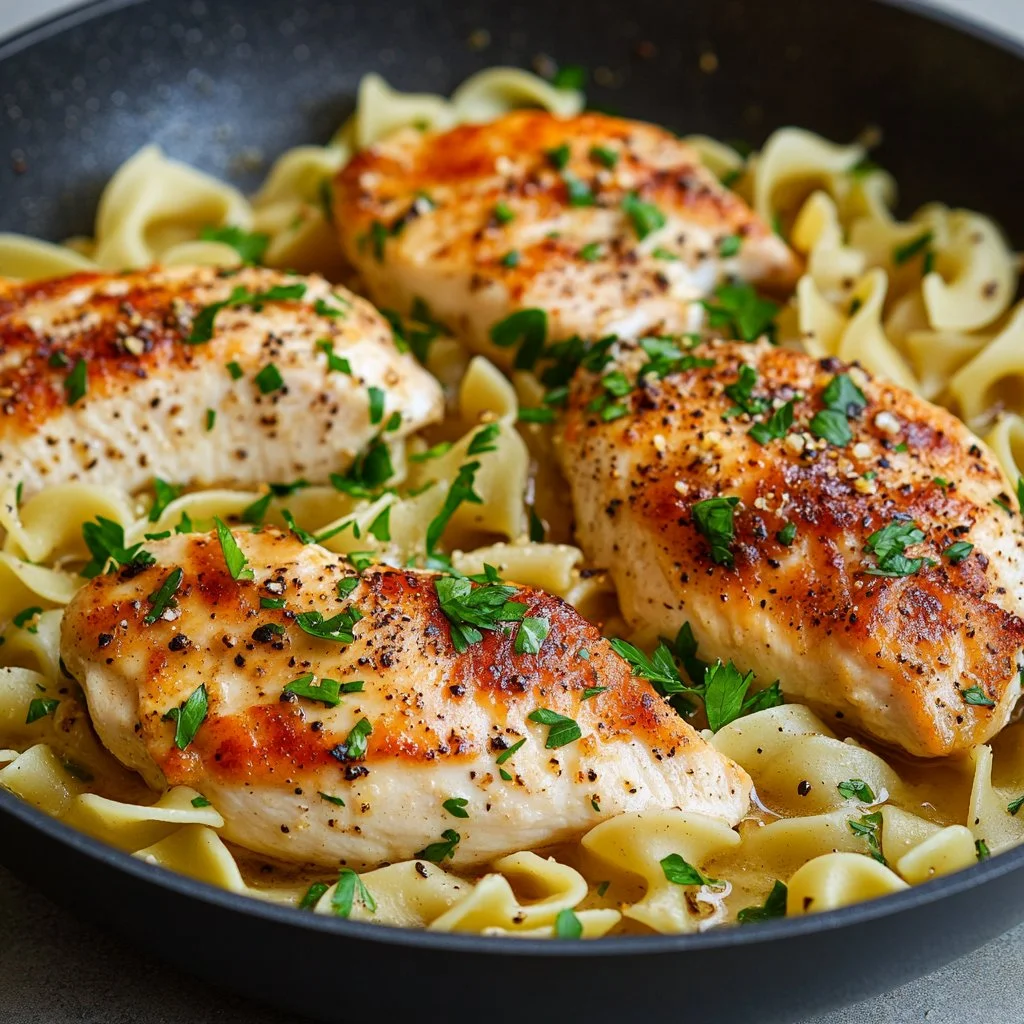
I still remember the first time I pulled this chicken mac and cheese from the oven. The kitchen filled with a warm, cheesy smell. The timer beeped and my kids came running. You can hear the tiny footsteps and the soft clinking of spoons as everyone claims their bowl.

This recipe is simple, forgiving, and perfect for a weeknight when you want comfort without fuss. If you love quick chicken meals, you might also enjoy my collection of easy chicken breast recipes that make family dinners feel special.

Why this works

Pin on Recipes

This dish checks every box for busy families. It cooks in one baking dish, which saves time on cleanup. The pasta soaks up a creamy sauce while the chicken stays tender and flavorful.

I often swap cuts to fit what I have on hand. If you prefer thighs, they work beautifully and keep the bake moist. For more ideas on quick roasted chicken options, see my post about 30-minute oven-baked boneless skinless chicken thighs.

This recipe is also a crowd-pleaser. Kids generally love the cheesy texture while adults enjoy the savory seasoning. Leftovers reheat well. That makes this dish a real time-saver for busy weeks.

Process Overview

“This is where the magic happens—when the aroma fills the kitchen.”

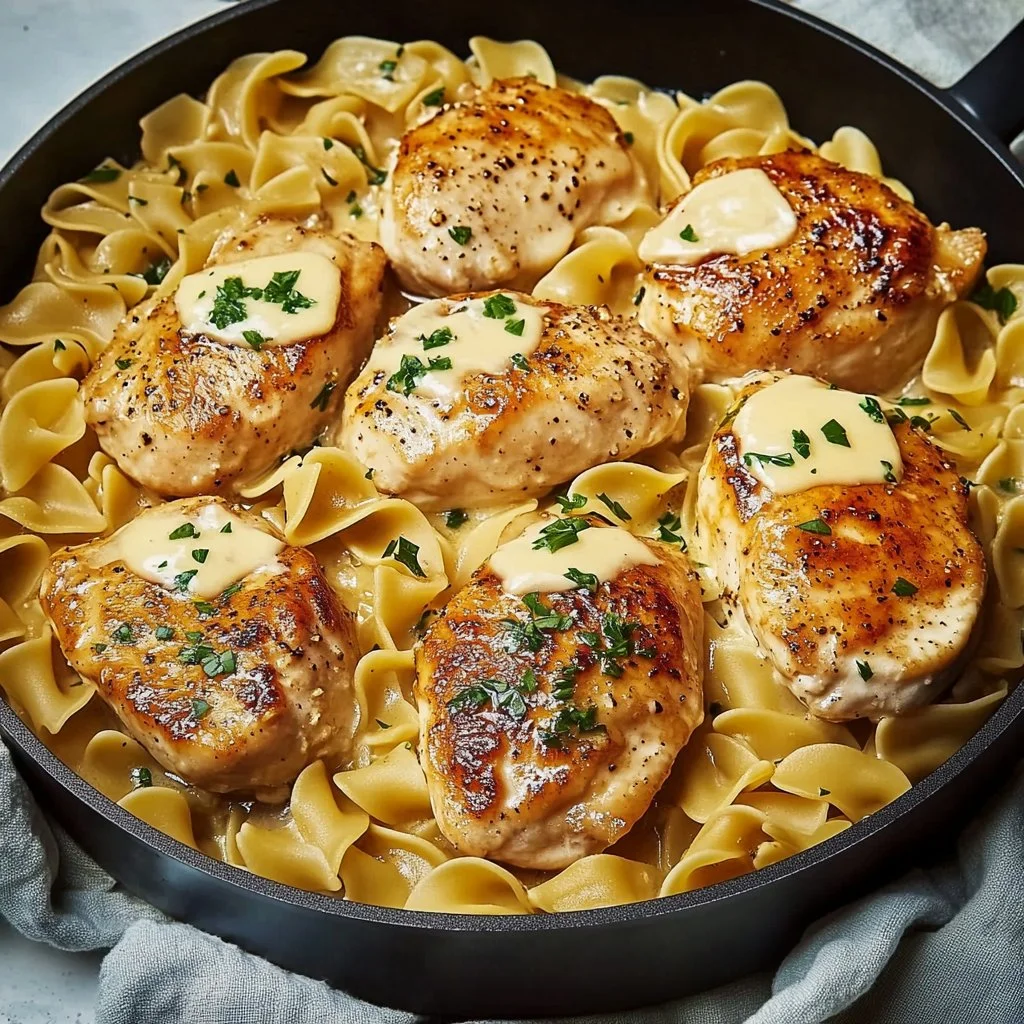
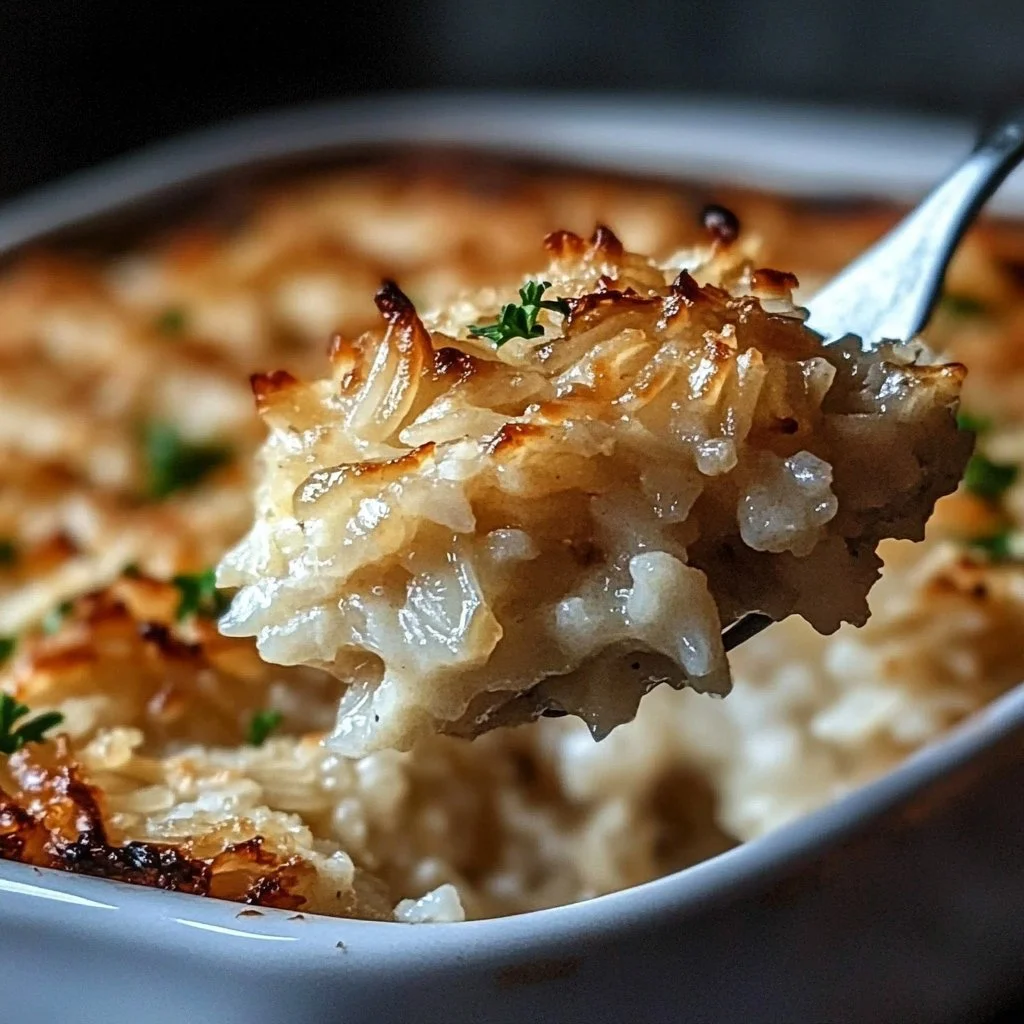
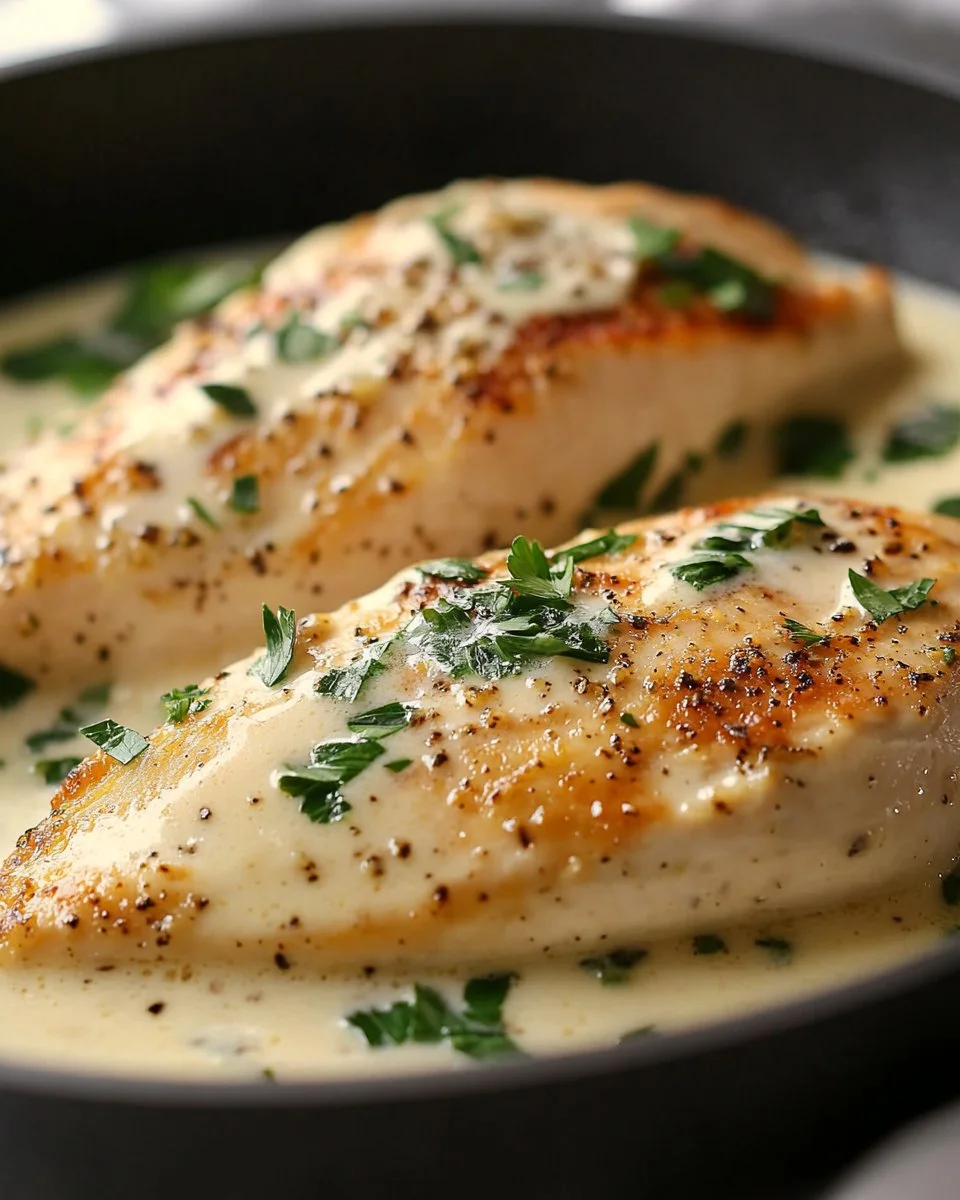
In broad strokes, you will cook the pasta and chicken, make a quick cheese sauce, combine everything, and bake until bubbly. The sauce thickens as it bakes and the top develops a light golden crust.

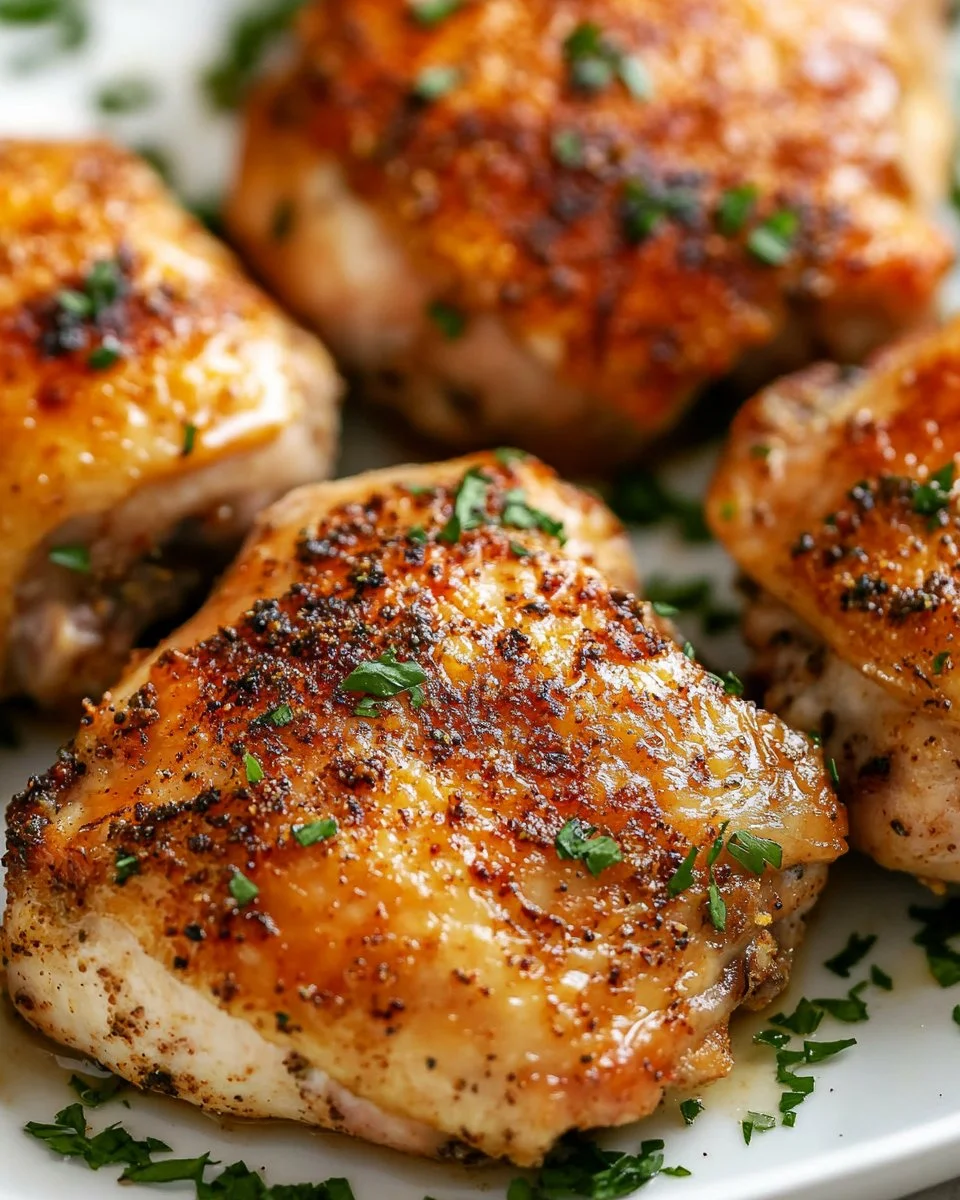
I like to brown the chicken slightly for extra flavor. If you are short on time, you can use rotisserie chicken or leftover roasted chicken and skip the browning step.

For more ideas that pair well with this kind of one-dish comfort meal, check my roundup of chicken and spinach ideas.

Ingredients

H3: What you need and my personal tips

  • 12 oz elbow macaroni or small pasta
  • Tip: Use pasta that fits a spoon easily. If you have whole wheat or gluten-free pasta, it will work. Cook 1 minute less than package directions so the pasta does not go mushy in the oven.
  • 1 1/2 lb boneless skinless chicken breasts, cut into 1-inch pieces
  • Tip: Trim any large fat and pat the pieces dry. If breasts are very large, pound to even thickness so they cook evenly.
  • 3 tbsp butter
  • Tip: Use salted butter for extra flavor or unsalted if you watch sodium.
  • 3 tbsp all-purpose flour
  • Tip: This makes the roux that thickens the sauce. For a gluten-free option, use a 1-to-1 gluten-free flour.
  • 2 1/2 cups milk (whole or 2%)
  • Tip: Whole milk gives the creamiest result. You can use half-and-half for a richer sauce.
  • 1 cup chicken broth
  • Tip: Low-sodium broth lets you control salt. If using rotisserie chicken, you can reduce the broth to 1/2 cup.
  • 2 cups shredded sharp cheddar cheese
  • Tip: Grate your own cheese for better melting and flavor.
  • 1 cup shredded mozzarella cheese
  • Tip: Mozzarella adds stretch and creaminess.
  • 1/2 cup grated Parmesan cheese
  • Tip: Parmesan adds a salty, nutty layer of flavor. Use freshly grated if possible.
  • 1 tsp Dijon mustard
  • Tip: Mustard brightens the sauce. If you do not have Dijon, yellow mustard works in a pinch.
  • 1/2 tsp garlic powder and 1/2 tsp onion powder
  • Tip: These build savory depth without adding moisture.
  • 1 tsp paprika
  • Tip: Smoked paprika is nice if you like a subtle smoky note.
  • Salt and pepper to taste
  • Tip: Start with 1 tsp salt and 1/2 tsp pepper. Taste before baking and adjust.
  • 1/2 cup breadcrumbs or crushed crackers for topping
  • Tip: Mix with 1 tbsp melted butter for a golden, crunchy finish.
  • 2 tbsp chopped fresh parsley for garnish (optional)
  • Tip: Parsley brightens the presentation and adds a fresh note.

I often include a link to my favorites when suggesting pasta and cheese swaps in my roundup of chicken macaroni favorites that inspired this bake.

Directions

H3: Step-by-step with encouragement

  1. Preheat the oven to 375°F and grease a 9 by 13-inch baking dish.
  2. Note: Preheating ensures even baking. I love that moment when the oven warms the kitchen and the kids know something good is coming.
  3. Cook the pasta according to package directions until al dente, but reduce the time by 1 minute. Drain and set aside.
  4. Note: Slightly undercooked pasta finishes in the oven and soaks up the sauce without getting too soft.
  5. Season the chicken pieces with salt, pepper, paprika, and a pinch of garlic powder.
  6. Note: Season well. This is where the chicken gains flavor quickly, and you will be glad you did.
  7. In a large skillet over medium-high heat, melt 1 tbsp butter and brown the chicken in batches until lightly golden, about 3 to 4 minutes. Remove and set aside.
  8. Note: Browning adds a layer of flavor but does not need to be perfect. If you skip this, your dish will still be delicious.
  9. In the same skillet, melt the remaining 2 tbsp butter over medium heat. Whisk in the flour and cook for 1 minute until it smells toasty. Slowly whisk in the milk and chicken broth until smooth.
  10. Note: Whisking constantly prevents lumps and gives you a silky sauce.
  11. Stir in Dijon mustard, garlic powder, onion powder, and half the cheddar and mozzarella. Cook until the cheese melts and the sauce thickens, about 3 minutes. Taste and season with salt and pepper.
  12. Note: The sauce will look rich and glossy. Feeling tempted to taste is normal. A small spoonful is encouraged.
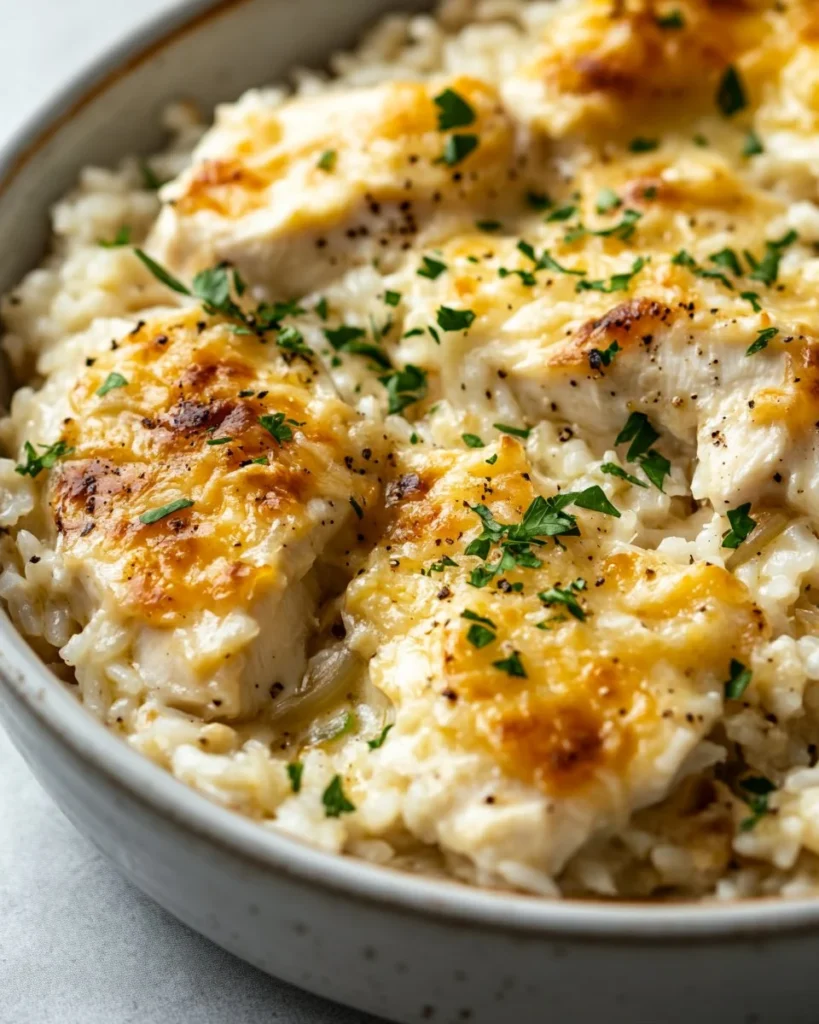
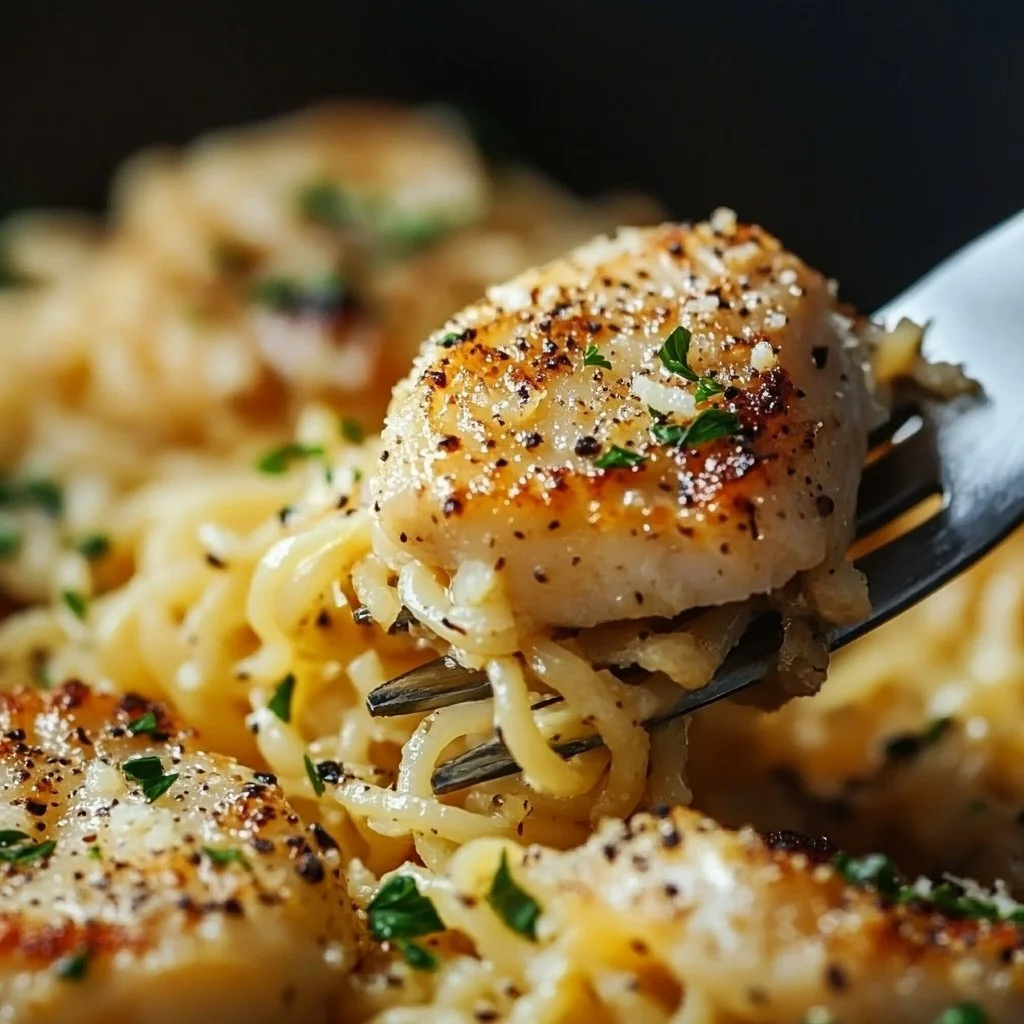
  13. Combine the cooked pasta, browned chicken, and cheese sauce in the greased baking dish. Stir until evenly coated. Sprinkle the remaining cheeses on top.
  14. Note: Make sure the pasta is well-coated so every bite is creamy.
  15. Mix breadcrumbs with 1 tbsp melted butter and sprinkle over the top for a golden crust.
  16. Note: The breadcrumb topping gives a pleasing crunch that kids love to break into.
  17. Bake uncovered for 20 to 25 minutes until the top is bubbly and golden. Let rest 5 minutes before serving.
  18. Note: Resting helps the sauce settle so you can serve neat portions.
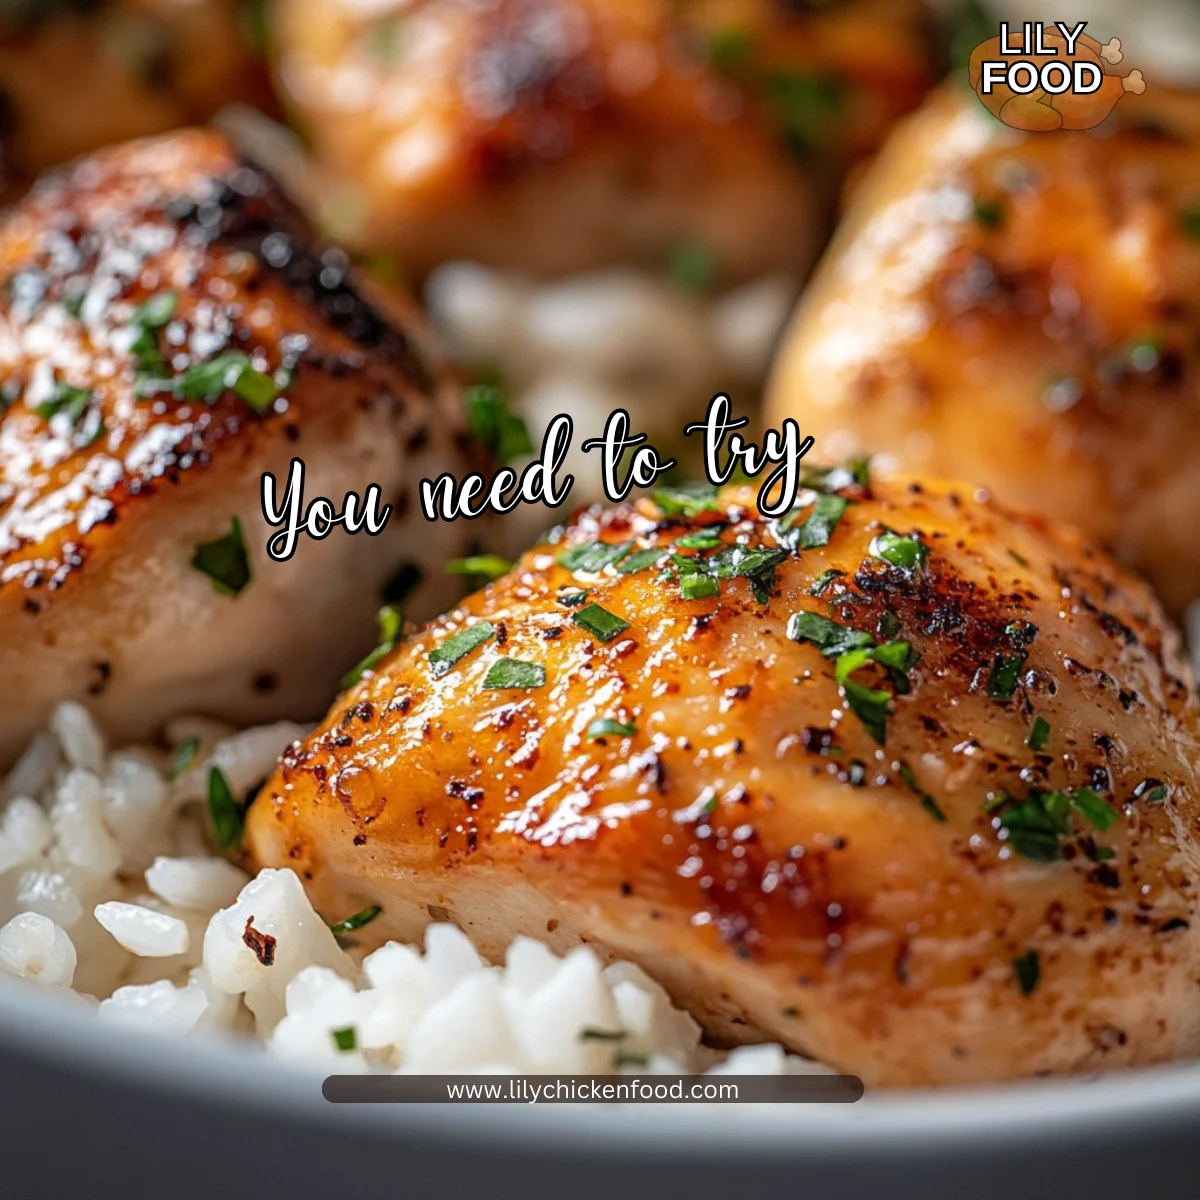
  19. Garnish with chopped parsley and serve warm.
  20. Note: A small sprinkle of parsley adds color and freshness. I often let the kids sprinkle it to make them feel involved.

If you want to read more about who I am and why I test recipes this way, feel free to learn about me and my recipes.

Serving

Pin on Recipes

Serve this chicken mac and cheese family-style right from the baking dish. Place bowls, a large serving spoon, and simple sides on the table. I like to offer a crisp green salad and roasted vegetables to balance the richness.

For a kid-friendly approach, let children add their own toppings at the table. Some of our favorites are extra shredded cheese, crushed crackers, or a few diced tomatoes.

If you want to turn this into a potluck dish, transfer it to a shallow, wide dish so the top browns evenly during transport. It holds well in an insulated carrier for about an hour.

Storage

This dish makes great leftovers. Store in an airtight container in the fridge for up to 4 days.

To reheat individual portions, microwave for 1 to 2 minutes on medium power, stirring halfway through to heat evenly. For a whole pan, cover with foil and bake at 350°F for 15 to 20 minutes until warmed through. Remove the foil for the last 5 minutes to let the top crisp up.

If you need to freeze, cool completely, cover with plastic wrap and foil, and freeze for up to 3 months. Thaw overnight in the refrigerator before reheating in the oven.

Kitchen Notes

  • Use a rotisserie chicken to save time. Shred it and skip the browning step.
  • Swap in gluten-free pasta and flour for a gluten-free version.
  • Use grated cheese from a block for the best melt. Pre-shredded cheese can contain anti-clumping agents that affect texture.
  • Make ahead to the point of baking, cover, and refrigerate. Bake when ready for dinner.
  • Double the recipe for a crowd and bake in two pans for even cooking.

Variations

  • Picky eater version: Leave out the paprika and use mild cheddar only. Serve plain with ketchup or plain butter if that helps picky eaters accept it.
  • Vegetables added: Stir in 1 cup steamed broccoli or peas before baking for added color and nutrients.
  • Spicy twist: Add 1/2 tsp red pepper flakes to the sauce and use pepper jack cheese for a kick.
  • Low-carb option: Replace pasta with cooked cauliflower florets and reduce milk to make a firmer sauce.
  • Dairy-free: Use a dairy-free milk and a dairy-free cheese alternative, plus a dairy-free butter substitute for the breadcrumb topping.

FAQ

Q: Can I use frozen chicken?

A: Yes. Cook and thaw the chicken first, then chop into pieces. If it is already cooked, add it in the last assembly step so it does not dry out.

Q: Is it possible to make this vegetarian?

A: Absolutely. Replace the chicken with roasted mushrooms, extra vegetables, or a plant-based chicken substitute. Use vegetable broth instead of chicken broth.

Q: How can I prevent the casserole from becoming watery?

A: Slightly undercook the pasta before baking and be sure to thicken the sauce on the stovetop until it coats the back of a spoon. Avoid adding too much broth.

Q: Can I use different cheeses?

A: Yes. Cheddar and mozzarella give a great balance. Gruyere or Monterey Jack work well too. Mix flavors to your family’s taste.

Q: What can I serve with this for a balanced meal?

A: A simple green salad, roasted Brussels sprouts, or steamed green beans pair nicely. Fresh fruit for dessert keeps things light.

Conclusion

I hope this creamy chicken mac and cheese becomes one of your go-to weeknight meals. It warms the kitchen and brings everyone to the table. Little moments like stirring the sauce or letting the breadcrumbs brown are what make dinner feel like home.

For inspiration on tools and techniques that make rolling and shaping dough easy, I recommend exploring the useful collection at Just Roll with It: 17 Recipes for Your Rolling Pin. If you are curious about noodle-based comfort dishes from other traditions, take a look at the classic Silver Pin Noodles with Chicken Recipe for a different take on family noodle dinners.

Thank you for cooking with me. Feed your family with love, and enjoy the delicious sounds and smells that make a house into a home.

Chicken Mac and Cheese

Prep Time 15 minutes
Cook Time 25 minutes
Total Time 40 minutes
Servings 6 servings
Calories 570
A simple and comforting one-dish meal featuring tender chicken and creamy cheese sauce baked with pasta.

Ingredients

Pasta and Chicken

  • 12 oz elbow macaroni or small pasta (Use pasta that fits a spoon easily. Whole wheat or gluten-free options work.)
  • 1.5 lb boneless skinless chicken breasts, cut into 1-inch pieces (Trim any large fat and pat dry.)

Sauce Ingredients

  • 3 tbsp butter (Use salted butter for extra flavor or unsalted if watching sodium.)
  • 3 tbsp all-purpose flour (For a gluten-free option, use a 1-to-1 gluten-free flour.)
  • 2.5 cups milk (whole or 2%) (Whole milk gives the creamiest result.)
  • 1 cup chicken broth (Low-sodium broth lets you control salt.)

Cheese Blend

  • 2 cups shredded sharp cheddar cheese (Grate your own cheese for better melting.)
  • 1 cup shredded mozzarella cheese (Adds stretch and creaminess.)
  • 1/2 cup grated Parmesan cheese (Use freshly grated if possible.)

Seasonings and Toppings

  • 1 tsp Dijon mustard (Mustard brightens the sauce.)
  • 1/2 tsp garlic powder (Adds savory depth.)
  • 1/2 tsp onion powder (Adds savory depth.)
  • 1 tsp paprika (Smoked paprika adds a subtle smoky note.)
  • 1/2 cup breadcrumbs or crushed crackers for topping (Mix with 1 tbsp melted butter for crunch.)

Garnish (Optional)

  • 2 tbsp chopped fresh parsley (Brightens presentation.)

Instructions 

Preparation

  • Preheat the oven to 375°F and grease a 9 by 13-inch baking dish.
  • Cook the pasta according to package directions until al dente, reducing time by 1 minute. Drain and set aside.
  • Season the chicken pieces with salt, pepper, paprika, and garlic powder.

Cooking

  • In a large skillet over medium-high heat, melt 1 tbsp butter and brown the chicken in batches, about 3 to 4 minutes. Remove and set aside.
  • In the same skillet, melt the remaining 2 tbsp butter, whisk in the flour and cook for 1 minute.
  • Slowly add the milk and chicken broth to the skillet, whisking until smooth.
  • Stir in Dijon mustard, garlic powder, onion powder, and half the cheddar and mozzarella. Cook until the cheese melts and the sauce thickens, about 3 minutes.

Assembly and Baking

  • Combine cooked pasta, browned chicken, and cheese sauce in the greased baking dish, stirring until evenly coated.
  • Sprinkle remaining cheeses on top, mix breadcrumbs with 1 tbsp melted butter, and sprinkle over the top.
  • Bake uncovered for 20 to 25 minutes until the top is bubbly and golden. Let rest 5 minutes before serving.
  • Garnish with parsley and serve warm.

Notes

This dish makes great leftovers. Store in an airtight container in the fridge for up to 4 days. It can be frozen for up to 3 months.
Calories: 570kcal
Course: Dinner, Main Course
Cuisine: American
Keyword: Baked Pasta, Cheesy Recipes, Chicken Mac and Cheese, Comfort Food, Family Dinner

One-Pan Chicken with Buttered Noodles

The clatter of forks, a little laugh from the back of the table and the warm, buttery steam rising from a skillet—that’s the moment I know dinner has done its job. Tonight it’s One-Pan Chicken with Buttered Noodles, simple as a hug and loud as family. If you’re rushing in from work or folding homework papers into dinner time, this is a meal that gathers everyone without fuss. For a slightly bolder weeknight twist, I sometimes pair it with flavors found in my chicken shawarma with garlic sauce, but this recipe stands proudly on its own.

Why This One-Pan Chicken with Buttered Noodles Feels Like Home

There is comfort in a single skillet that cooks through both protein and noodles, and there is relief in the few dishes left to wash. This dish blends golden seared chicken with silky egg noodles, all finished with butter and parsley that brightens everything up. It looks simple, but the layers of flavor come from small, steady steps—searing, simmering, finishing.
One-Pan Chicken with Buttered Noodles

When I first made this on a rainy Tuesday, my youngest declared it “the blanket dinner.” That stuck. It’s not just dinner; it’s an easy ritual that marks the end of busy hours and the start of time together.

What matters most is that this recipe is forgiving. Swap a spice, add a veg, or use aging butter for richer flavor. The trust I place in this method comes from doing it hundreds of times on nights that mattered and nights that needed saving.

The Simple Magic Behind One-Pan Chicken with Buttered Noodles

A few kitchen truths make this dish shine. First, a little browning equals a lot of flavor. That golden crust on the chicken creates the base of a rich broth once you add stock. Next, cooking the noodles right in the skillet lets them soak up that savory liquid so they stay coated rather than soggy. Finally, finish with butter and fresh parsley to lift everything and give these humble ingredients a clean, bright finish.

“This is where the magic happens—when the aroma fills the kitchen and my kids come running in, asking ‘Is it ready yet?’”

Look for visual cues: seared, deep gold on the chicken; a simmering, slightly reduced broth; noodles plump but still just tender to the bite. Those are the small wins that tell you you’re on the right track.

How This Recipe Works for Busy, Joyful Nights

This recipe keeps dishes minimal and time well spent. You can start it while you sort mail, let it do most of the work while you help with homework, and finish it with a flourish that makes everyone feel like a guest at your table. If you love weeknight one-pan meals, you’ll find this as reliable as my favorite skillet recipes like the cowboy butter lemon bowtie chicken, which uses similar techniques for bold flavor with small cleanup.

Ingredients You’ll Need

  • 4 boneless, skinless chicken breasts (1.5 lbs)
  • 8 oz egg noodles
  • 4 tbsp real butter
  • 4 cloves garlic, minced
  • 2 cups low-sodium chicken broth
  • ¼ cup fresh parsley, chopped
  • Salt and pepper to taste

A friendly note: don’t skip the fresh parsley; it’s the little green spark that brightens the whole dish. If you like lemon-butter flavor, a squeeze of lemon or a pinch of lemon zest adds wonderful lift. Use what’s in your fridge—this is about creativity, not perfection.

How to Make One-Pan Chicken with Buttered Noodles, The Heartwarming Way

Start with simple mise en place: measure, mince, and line up your ingredients. This little ritual keeps the cook calm and the dinner smooth. The process is: sear the chicken until golden, add garlic for a minute, pour in broth and bring to a boil, then nestle the noodles into the simmering liquid until tender. Finish with butter and parsley.

From there, you’ll see the color shift from pale to golden, and the smell change from faint to completely irresistible. That garlic-drenched butter aroma is what pulls everyone to the table.

Step-by-Step Directions

  1. Prep your ingredients by chopping garlic and any desired vegetables.
    • I like to toss a handful of spinach in at the end if I have it. It takes two minutes and adds color.
  2. Sear chicken in a large skillet over medium-high heat with 1 tbsp butter until golden brown (5 minutes per side). Season with salt and pepper.
    • That brown crust is small flavor gold. Don’t overcrowd the pan; give each piece space.
  3. Add minced garlic and sauté for 1 minute until fragrant.
    • Garlic burns fast. Once fragrant, move quickly to the next step.
  4. Pour in chicken broth and bring to a boil.
    • Scrape up any browned bits from the bottom of the pan—they are flavor.
  5. Stir in egg noodles, simmering for 8-10 minutes until al dente.
    • Stir occasionally to prevent sticking. The noodles will absorb flavor as they cook.
  6. Remove from heat; stir in remaining butter and sprinkle with parsley before serving.
    • Give it a taste for salt and pep before you call it done. A final knob of butter makes it silky.

Quick tip: if your broth tastes a touch flat, a splash of lemon juice or a pinch of salt will lift it instantly. If you like a creamier finish, stir in a couple of tablespoons of cream or a spoon of cream cheese at the end. For a make-ahead twist see my notes about slow cooker options like crockpot white chicken chili with cream cheese, which leans on a similar cozier feel for leftovers.

One-Pan Chicken with Buttered Noodles

Serving One-Pan Chicken with Buttered Noodles with Love

I bring this skillet straight to the center of the table, with a warm bread basket and a small bowl of extra parsley for topping. Let everyone help themselves; passing the pan and letting someone add a little extra butter or pepper is part of the ritual.
One-Pan Chicken with Buttered Noodles

On our table, one child likes a sprinkle of grated Parmesan, another drizzles hot sauce, and my partner always adds a squeeze of lemon. We serve it with a crisp green salad or roasted asparagus to add freshness and crunch. Sometimes I set out pickles or quick-pickled red onions for a tangy counterpoint.

If you want to make it dinner-party pretty, top each serving with a dusting of freshly ground black pepper and a sprig of parsley. The visuals matter here: golden chicken, glossy noodles and that bright green herb make it feel special without extra work.

Storage & Reheat Tips (Keeping the Goodness)

Leftovers keep well in the fridge for 3 to 4 days when stored in an airtight container. Cool the pan for no more than 30 minutes, then transfer to containers. If you plan to freeze, portion into meal-sized containers and freeze for up to 2 months.

Reheating tips: the microwave is fine for a quick lunch; add a splash of broth or water and heat in short increments to avoid drying the chicken. For a better result, reheat in a skillet on low with a touch of butter or broth until warmed through. The oven also works—cover with foil at 325°F and warm until heated, about 15 to 20 minutes depending on portion size.

If you prefer a different make-ahead path, try batch-cooking the chicken separately and storing it while keeping the noodles aside. Recombine and heat gently to keep the texture fresh. For other easy reheats and slow-cooker ideas, check out my easy crockpot chicken thighs with creamy gravy for inspiration.

My Kitchen Notes & Shortcuts

  • Use room-temperature chicken for even cooking. It browns better and stays juicier.
  • Swap fresh parsley for chives or basil if you want a different aroma. Fresh herbs change everything.
  • You can add a cup of quick-cooking vegetables like peas or thin-sliced mushrooms in step 5; stir them in so they cook through.
  • Double the recipe and freeze single servings for a rainy day when dinner needs to be easy.
  • Let children sprinkle the parsley or stir the noodles. It makes dinner collaborative and fun.

These small moves save time and keep the dish feeling homemade, not rushed.

Family-Friendly Variations

  • Lighter option: use olive oil instead of some of the butter and swap half the egg noodles for whole-wheat noodles or a short pasta.
  • Kid-pleaser: stir in a spoonful of cream cheese with the butter for ultra-creamy comfort. My kids call this “velvet noodles.”
  • Veg-forward: add spinach, peas, or broccoli for color and fiber. Toss them in at the end so they stay bright.
  • Herb-forward: swap parsley for dill and add lemon zest for a fresh summer flavor.
  • Heartier: toss in cooked bacon pieces or a handful of grated cheese right before serving.

These tweaks let you make the recipe your family’s own. Give it a try—you might surprise yourself with how creative everyone gets.

One-Pan Chicken with Buttered Noodles

FAQs About One-Pan Chicken with Buttered Noodles

Q: Can I make this ahead for a busy week?
A: Absolutely. You can cook everything and store separately—chicken in one container, noodles in another. Reheat together gently so the noodles soak up the sauce again.

Q: What if my noodles are done before the chicken?
A: Remove the chicken briefly and keep it warm in a low oven while you finish the noodles. Alternatively, slice the chicken thinly and return it to the pan to finish with the sauce.

Q: Can I use different pasta?
A: Yes. Egg noodles are ideal for texture, but small shapes like shells or farfalle work well. Adjust the cooking time as needed to reach al dente.

Q: How do I keep the chicken juicy?
A: Don’t overcook it. Sear until golden, and if using thicker breasts, finish in a low oven or slice them after resting to keep juices locked in.

Q: Is low-sodium broth necessary?
A: I recommend it so you can control the salt level. Taste near the end and add salt only if needed.

One Final Thought from My Kitchen

Cooking should bring calm, not chaos. This One-Pan Chicken with Buttered Noodles is one of those recipes that returns comfort for the effort you put in. It is simple enough for a weeknight and lovely enough for a small celebration. I hope it becomes a quiet favorite in your home, the kind of meal that makes people linger.

Conclusion

If you want to explore a similar, garlic-forward one-pan idea, I recommend reading Nomadette’s one pan garlic butter chicken pasta for inspiration and technique ideas. For a noodle-focused approach with a buttery finish, take a look at Easy One Pan Buttered Noodles – Yellow Bliss Road for tips on timing and texture.

Until next time, pull up a chair, pass the skillet, and let the conversation get saucy. Happy cooking, from my kitchen to yours.

One-Pan Chicken with Buttered Noodles

Prep Time 10 minutes
Cook Time 20 minutes
Total Time 30 minutes
Servings 4 servings
Calories 450
A comforting one-pan dinner that features golden seared chicken paired with silky egg noodles, finished with butter and fresh parsley.

Ingredients

Main Ingredients

  • 4 pieces boneless, skinless chicken breasts (About 1.5 lbs total)
  • 8 oz egg noodles
  • 4 tbsp real butter (Divided)
  • 4 cloves garlic, minced
  • 2 cups low-sodium chicken broth (Recommended for flavor control)
  • ¼ cup fresh parsley, chopped (Don't skip this for a bright finish)
  • Salt and pepper (To taste)

Instructions 

Preparation

  • Start with simple mise en place: measure, mince, and line up your ingredients.
  • Sear chicken in a large skillet over medium-high heat with 1 tbsp butter until golden brown (5 minutes per side). Season with salt and pepper.
  • Add minced garlic and sauté for 1 minute until fragrant.
  • Pour in chicken broth and bring to a boil.
  • Stir in egg noodles, simmering for 8-10 minutes until al dente. Stir occasionally to prevent sticking.
  • Remove from heat; stir in remaining butter and sprinkle with parsley before serving.

Notes

Leftovers keep well in the fridge for 3 to 4 days when stored in an airtight container. For freezing, portion into meal-sized containers and freeze for up to 2 months. Reheat gently to retain moisture.
Calories: 450kcal
Course: Dinner, Main Course
Cuisine: American
Keyword: Buttered Noodles, Chicken, Comfort Food, One-Pan Meal, Quick Dinner

30-min Oven Baked Boneless Skinless Chicken Thighs

I love the moment when the oven clicks on and the whole kitchen starts to warm up. The scent of garlic, paprika, and olive oil mixing with baking chicken is one of my favorite family comforts. You hear pots clink and kids ask, "Is it ready yet?" and you know dinner will bring everyone together.

This recipe is one of those reliable weeknight heroes. It is simple, forgiving, and fast. It gives you juicy chicken without fuss, and it frees up time to tuck in homework, set the table, or even sneak in a quick chat with a partner.

Why this works

30-min Oven Baked Boneless Skinless Chicken Thighs

This dish works because it is focused and practical. Boneless, skinless chicken thighs stay moist during baking. They tolerate a bold spice rub and still finish in about 30 minutes. That makes this a real time saver for busy families.

Chicken thighs give more forgiving cooking than breasts. You do not need a thermometer to be confident each time. The spice mix clings well, forming a light crust that keeps juices inside.

H3: Family friendly and fast

You can get this on the table in roughly the time it takes to do a load of laundry and pack lunches for the next day. Kids usually like the mild paprika flavor, and adults will appreciate how easy it is to customize for picky eaters or a crowd.

Process Overview

“This is where the magic happens—when the aroma fills the kitchen.”

Start with quality, simple ingredients. Mix the spices and oil, toss the thighs to coat, and bake. The process is short, and the reward is big.

I test this recipe many times and keep the steps pared down. That helps you get predictable results. The short bake time keeps the thighs tender and juicy without drying them out.

Ingredients

  • 4 boneless skinless chicken thighs
    Lily’s tip: Choose thighs of similar size so they finish at the same time. Trim excess fat if you prefer a leaner bite.

  • 2 tablespoons olive oil
    Lily’s tip: Use extra virgin olive oil for flavor. If you need a neutral oil, canola or avocado oil is fine.

  • 1 teaspoon garlic powder
    Lily’s tip: Garlic powder gives steady flavor without burning. If you like fresh garlic, use 1 clove minced and mix into the oil.

  • 1 teaspoon onion powder
    Lily’s tip: Onion powder adds sweetness and depth. It blends well with the garlic powder to form a simple base.

  • 1 teaspoon paprika
    Lily’s tip: Use smoked paprika for a subtle smoky touch. Regular sweet paprika makes a bright, family-friendly version.

  • 1 teaspoon salt
    Lily’s tip: I use kosher salt. If you use table salt, reduce slightly because it is finer.

  • 1/2 teaspoon black pepper
    Lily’s tip: Freshly ground black pepper gives a brighter bite. Adjust to taste for young children.

  • 1 teaspoon dried oregano
    Lily’s tip: Dried oregano adds Mediterranean warmth. If you have fresh oregano, chop a teaspoon and scatter it on top after baking.

These amounts serve 3 to 4 people when paired with sides. You can easily double or triple the spice mix for a crowd.

Directions

  1. Preheat the oven to 400°F (200°C).
    Encouraging note: This short preheat gets the oven ready without much wait. While it heats, you can mix your spices and oil.

  2. In a bowl, combine olive oil, garlic powder, onion powder, paprika, salt, black pepper, and oregano.
    Encouraging note: Use a whisk or fork to make a smooth paste. The oil helps the spices stick and promotes a light browning.

  3. Coat the chicken thighs with the spice mixture thoroughly.
    Encouraging note: Use your hands or a spoon. Make sure each piece is evenly covered. A well-coated thigh will stay juicy and flavorful.

  4. Place the chicken thighs in a baking dish or on a baking sheet lined with parchment paper.
    Encouraging note: Give the thighs a little space. A single layer ensures even cooking and a nice finish on each piece.

  5. Bake in the preheated oven for 25-30 minutes or until the chicken is cooked through and juices run clear.
    Encouraging note: Check at 25 minutes. If you have a meat thermometer, the internal temperature should reach 165°F. Cooking time varies by thickness.

  6. Let rest for 5 minutes before serving.
    Encouraging note: Resting lets the juices redistribute. It makes the chicken more tender and easier to slice, and it gives you a moment to set the table.

I like to roast a pan of vegetables on the same sheet for an easy one-pan meal. Use sturdier vegetables like carrots and potatoes and cut them into even pieces so they cook through.

Serving

30-min Oven Baked Boneless Skinless Chicken Thighs

Serve the thighs family-style right in the baking dish. Place the dish on the table and let everyone help themselves. Add simple sides like roasted broccoli, mashed potatoes, or a green salad.

H3: Kid friendly plating

For little ones, I slice the thighs into strips and arrange them next to sweet potato cubes or steamed green beans. For older kids and adults, offer warm tortillas, a bowl of rice, or crusty bread.

H3: Flavor finishing ideas

Top with a squeeze of lemon to brighten the dish. Sprinkle fresh parsley or a pinch of flaky salt for a restaurant feel. A spoonful of plain yogurt mixed with lemon and garlic makes a cooling sauce.

Storage

Refrigerator: Place cooled chicken in an airtight container. It keeps well for up to 4 days. Use it for quick lunches, salads, or wraps.

Freezer: Cool completely and freeze in a single layer on a baking sheet. Transfer frozen thighs to a freezer bag for up to 3 months. Thaw in the fridge overnight before reheating.

Reheat: Warm in a 350°F oven for 10 to 15 minutes until heated through. You can also microwave on medium power for short bursts, but the oven method keeps the texture better.

Leftover ideas: Slice and toss into a grain bowl with quinoa and roasted veggies. Shred for tacos with a quick slaw. Cut into kid-friendly strips and pack with fruit for school lunches.

Kitchen Notes

  • Use parchment paper or a silicone mat for easy cleanup and less sticking.
  • If you prefer a bit more color, switch to broil for the last 1 to 2 minutes while watching closely.
  • A meat thermometer speeds confidence. Aim for 165°F in the thickest part.
  • Marinate in the spice mix for up to 2 hours for extra flavor, but the recipe is great when made right away.
  • Double the recipe and cook on two pans if you are feeding a group. Rotate pans halfway for even baking.

Variations

  • Mild and creamy: Mix 2 tablespoons plain yogurt into the spice oil. Bake as directed. This yields a tender, slightly tangy finish that is gentle for picky eaters.

  • Spicy twist: Add 1/4 teaspoon cayenne pepper or a teaspoon of hot sauce to the spice mix for a kick. Serve with a cooling cucumber salad.

  • Low sodium: Reduce salt to 1/2 teaspoon and use more herbs like thyme and rosemary. Add a squeeze of lemon at the end for brightness.

  • Keto friendly: Serve with cauliflower mash and a side of roasted asparagus. The chicken is naturally keto compliant with the given spices and oil.

  • Gluten free: This recipe is gluten free as written. Confirm that your paprika and spices are labeled gluten free if you are sensitive.

These tweaks help you tailor the recipe for tastes at your table without upending the fast, 30-minute method.

FAQ

Q: Can I use chicken breasts instead of thighs?
A: Yes. Use boneless skinless chicken breasts but watch cooking time. Breasts can dry out faster. Check at 18 minutes and use a thermometer to reach 165°F.

Q: Can I make this ahead of time for meal prep?
A: Absolutely. Cook the thighs, cool, and store in the fridge. Reheat in the oven or slice cold for salads and wraps. It saves time on busy mornings.

Q: How do I know when chicken thighs are done?
A: The safest way is to use a meat thermometer. The thickest part should read 165°F. The juices should run clear and the meat should feel firm but not hard.

Q: Can I double the spices for more flavor?
A: You can increase spices to suit your family. If doubling chicken, double the spice mix. Taste and adjust if you prefer more garlic or less salt.

Q: Is this healthy for kids?
A: Yes. The recipe uses simple ingredients and moderate oil. It provides protein and pairs well with vegetables and whole grains for balanced family meals.

Conclusion

I hope this recipe becomes one of your weeknight go-tos. It is quick, reliable, and made with family in mind. For another easy guideline and photos to follow, I like the clear method at 30-Minute Baked Boneless Chicken Thighs – Familystyle Food. If you enjoy a spicier variation, check out this bright take on baked thighs at Baked Boneless Chicken Thighs (Easy Weeknight Recipe).

Thanks for cooking with me. Gather your people, set the table, and enjoy a simple meal that lets you spend less time at the stove and more time with the ones you love.

Juicy Baked Boneless Chicken Thighs

Prep Time 10 minutes
Cook Time 30 minutes
Total Time 40 minutes
Servings 4 servings
Calories 250
A simple, forgiving recipe for juicy baked chicken thighs that's perfect for busy weeknights and family-friendly dinners.

Ingredients

Main Ingredients

  • 4 pieces boneless skinless chicken thighs (Choose thighs of similar size for even cooking.)
  • 2 tablespoons olive oil (Use extra virgin for better flavor.)

Spice Mix

  • 1 teaspoon garlic powder (Gives steady flavor without burning.)
  • 1 teaspoon onion powder (Adds sweetness and depth.)
  • 1 teaspoon paprika (Smoked paprika adds a subtle smoky touch.)
  • 1 teaspoon salt (Kosher salt is preferred; adjust if using table salt.)
  • 1/2 teaspoon black pepper (Freshly ground for better flavor.)
  • 1 teaspoon dried oregano (For Mediterranean warmth.)

Instructions 

Preparation

  • Preheat the oven to 400°F (200°C).
  • In a bowl, combine olive oil, garlic powder, onion powder, paprika, salt, black pepper, and oregano.
  • Coat the chicken thighs with the spice mixture thoroughly.
  • Place the chicken thighs in a baking dish or on a baking sheet lined with parchment paper.

Cooking

  • Bake in the preheated oven for 25-30 minutes or until the chicken is cooked through and juices run clear.
  • Let rest for 5 minutes before serving.

Notes

Leftovers can be used in salads or wraps, and you can roast vegetables on the same sheet for a complete meal.
Calories: 250kcal
Course: Dinner, Main Course
Cuisine: American
Keyword: Baked Chicken Thighs, Comfort Food, Easy Dinner, Family Recipe, Weeknight Meal

Greek Sheet Pan Chicken

The kitchen wakes up first when this dish goes into the oven. You notice a bright lemon scent that mixes with warm oregano. The soft sizzle that starts on the sheet pan turns into a steady, comforting hum.

By the time the timer nears the end, you can hear small footsteps and the low murmur of family members gathering. The roasted vegetables send up caramelized notes. The chicken releases a rich, savory perfume that feels like home.

This Greek sheet pan chicken is one of those recipes that turns a busy weeknight into a moment. It is simple, soulful, and forgiving. It fills the house with familiar smells and brings everyone to the table.

Why this works

Greek Sheet Pan Chicken

This recipe works because it balances flavor, nutrition, and time. One pan means fewer dishes and more time to sit with your family. Olive oil, lemon, and oregano create a light but bold Mediterranean profile that appeals to picky eaters and adventurous palates alike.

The sheet pan method keeps everything together so the chicken flavors the vegetables and the vegetables add moisture to the chicken. Roasting at a consistent temperature lets sugars caramelize without drying out the meat. For busy families, a single tray that covers protein, veg, and seasoning is a small miracle.

I’ve cooked this style of meal countless times for my kids and friends. It reliably produces a satisfying dinner with minimal fuss, and it scales up easily for guests. If you want a comforting, family-friendly dinner with very little clean up, this is a go-to.

Process Overview

“This is where the magic happens—when the aroma fills the kitchen.”

The process is straightforward. You marinate, arrange, roast, and serve. Each stage enhances the final flavor: the quick lemon-oregano coating brightens the chicken, while the high roast temperature encourages caramelization on the vegetables.

You can prep the marinade and chop vegetables ahead of time. That means on a hectic day, your evening requires only a few minutes of hands-on work before the oven does the rest. The steps are forgiving, which helps you cook confidently.

Ingredients

  • 4 chicken thighs
    • Tip: Bone-in, skin-on thighs give the best texture and flavor. Trim excess fat if needed.
  • 2 cups mixed vegetables (bell peppers, zucchini, red onion, etc.)
    • Tip: Cut veggies to similar sizes so they roast evenly. Use what your family prefers.
  • 3 tablespoons olive oil
    • Tip: Use extra virgin for flavor, but any good olive oil will work. Toss evenly so everything browns.
  • 2 teaspoons dried oregano
    • Tip: If you have fresh oregano, use 1 tablespoon chopped for a brighter finish.
  • Juice of 1 lemon
    • Tip: Fresh lemon juice brightens the dish. Reserve a few wedges for serving.
  • Salt and pepper to taste
    • Tip: Season generously but taste after cooking. Chicken and roasted veg often need a final pinch.
  • Feta cheese (optional, for serving)
    • Tip: Crumble over the finished dish for a creamy, salty contrast. Omit for dairy-free families.

My personal note: Small choices make a difference. If you buy a whole chicken, you can use thighs and save the rest for another meal. I often double the vegetables because my kids love the charred peppers and onions.

Directions

  1. Preheat the oven to 400°F (200°C).

    • Encouragement: A hot oven is important here. While it heats, you can finish chopping and mixing. This short prep time feels satisfying.
  2. In a large bowl, combine the chicken thighs with olive oil, oregano, lemon juice, salt, and pepper.

    • Encouragement: Massage the marinade into the thighs so each piece is well coated. Let sit for 10 to 20 minutes if you have time; it deepens the flavor.
  3. Place the chicken on a sheet pan and scatter mixed vegetables around it.

    • Encouragement: Give the pieces a little space. Crowding can steam instead of roast. A single layer helps everything brown and crisp up.
  4. Roast in the oven for about 35-40 minutes, or until the chicken is cooked through and vegetables are caramelized.

    • Encouragement: Check at 30 minutes if your oven runs hot. The skin should be golden and the vegetables tender with browned edges. Use an instant-read thermometer if you like; chicken is safe at 165°F.
  5. Serve warm, optionally topped with feta cheese.

    • Encouragement: Let the pan rest 5 minutes before serving. Sprinkle feta and a squeeze of lemon over the top. Call everyone to the table and enjoy the simple, bright flavors together.

These directions are flexible. If you prefer a crispier skin, broil for 2 minutes at the end, watching closely. If you need the chicken to be extra moist, remove the vegetables a little earlier and let the chicken finish by itself.

Serving

Greek Sheet Pan Chicken

Serve this dish family-style right from the sheet pan. Place the pan in the center of the table with a trivet underneath. Provide serving spoons, a small bowl of lemon wedges, and a dish of crumbled feta for people to help themselves.

Pair the meal with a simple side like warm crusty bread or a quick couscous. A green salad or a bowl of olives keeps the Mediterranean theme. For little ones, plate smaller portions and offer plain rice or mashed potatoes if they need a familiar base.

Leftovers make a terrific lunch. I often slice the leftover chicken over a salad or toss the vegetables into an omelet. The flavors hold well, and reheated portions remain juicy if warmed properly.

Storage

Refrigerate within two hours of cooking. Store in an airtight container for up to 3 days. Keep the chicken and vegetables together or separate them if you plan to reheat differently.

To reheat in the oven, place onto a baking sheet at 350°F for 10-15 minutes until heated through. This method helps restore some crispness to the skin and re-caramelizes the vegetables.

For a quicker option, microwave on medium power in 30-second bursts, stirring between intervals. Add a splash of water or a drizzle of olive oil to keep the chicken moist. If freezing, wrap tightly and freeze for up to 2 months. Thaw overnight in the refrigerator before reheating.

Kitchen Notes

  • Use parchment paper or a silicone mat for easy cleanup and to prevent sticking.
  • If you prefer white meat, swap thighs for bone-in chicken breasts. Add a few extra minutes of cook time if needed.
  • Rotate the sheet pan halfway through cooking for more even browning.
  • For deeper flavor, marinate the chicken for up to 4 hours in the refrigerator.
  • Save pan drippings for a quick pan sauce. Deglaze with a little chicken stock and lemon, then spoon over the chicken.

These little tricks save time and lift the dish into something the whole family remembers.

Variations

  • Kid-Friendly: Use mild bell peppers, add sweet potato chunks, and reduce lemon slightly for a gentler tang.
  • Low-Carb: Double the non-starchy vegetables like zucchini and eggplant. Skip any starchy sides.
  • Gluten-Free: This dish is naturally gluten-free. Ensure any additional sides or seasoning blends are labeled gluten-free.
  • Dairy-Free: Omit the feta or offer a dairy-free crumbly cheese alternative for topping.
  • Spicy: Add 1/2 teaspoon crushed red pepper flakes to the marinade or a dusting of smoked paprika for a warm kick.

You can also switch herbs. Try a mix of thyme and rosemary for an earthy shift, or fresh dill for a brighter finish. These small swaps keep the base recipe familiar while tailoring it to your family’s tastes.

FAQ

Q: Can I use boneless chicken thighs or breasts?
A: Yes. Boneless thighs will cook a bit faster, usually around 25-30 minutes. Boneless chicken breasts may need about 25-30 minutes depending on thickness. Use an instant-read thermometer to ensure 165°F internal temperature.

Q: Can I make this for a crowd?
A: Absolutely. Use two sheet pans and rotate them in the oven if needed. You can also double the recipe and roast in batches. Keep cooked pans warm in a low oven until ready to serve.

Q: What vegetables work best?
A: Heartier vegetables like bell peppers, zucchini, red onion, cherry tomatoes, and small potatoes roast well together. Avoid watery vegetables like cucumbers that do not hold up to high heat.

Q: How do I prevent the chicken from drying out?
A: Choose bone-in, skin-on thighs for the most forgiving results. Do not overcook. Remove from the oven once the internal temperature reaches 165°F and let rest for 5 minutes.

Q: Can I prep this ahead of time?
A: Yes. Marinate the chicken and chop the vegetables up to 24 hours ahead. Store in separate airtight containers in the refrigerator and assemble just before roasting.

Conclusion

I hope this Greek sheet pan chicken becomes a weeknight favorite in your home. It is the kind of meal that brings comforting smells and easy conversation to the table, and it frees up time for the things that matter most.

For a slightly different but inspiring approach, I often compare notes with other cooks. I like the practical tips found in Downshiftology’s Greek Sheet Pan Chicken Dinner, and I also enjoy the flavor variations on The Mediterranean Dish’s Greek Sheet Pan Chicken.

Thanks for cooking with me. Put the pan on the table, invite everyone to serve themselves, and enjoy the little reunion that happens at dinner.

Greek Sheet Pan Chicken

Prep Time 20 minutes
Cook Time 40 minutes
Total Time 1 hour
Servings 4 servings
Calories 450
This Greek sheet pan chicken is a simple, flavorful weeknight meal that combines roasted chicken and vegetables seasoned with lemon and oregano, all in one pan for easy serving and minimal cleanup.

Ingredients

Main Ingredients

  • 4 pieces chicken thighs (Bone-in, skin-on thighs give the best texture and flavor. Trim excess fat if needed.)
  • 2 cups mixed vegetables (bell peppers, zucchini, red onion, etc.) (Cut veggies to similar sizes so they roast evenly. Use what your family prefers.)
  • 3 tablespoons olive oil (Use extra virgin for flavor, but any good olive oil will work. Toss evenly so everything browns.)
  • 2 teaspoons dried oregano (If you have fresh oregano, use 1 tablespoon chopped for a brighter finish.)
  • 1 piece lemon juice (Fresh lemon juice brightens the dish. Reserve a few wedges for serving.)
  • to taste salt and pepper (Season generously but taste after cooking. Chicken and roasted veg often need a final pinch.)
  • optional Feta cheese (Crumble over the finished dish for a creamy, salty contrast. Omit for dairy-free families.)

Instructions 

Preparation

  • Preheat the oven to 400°F (200°C).
  • In a large bowl, combine the chicken thighs with olive oil, oregano, lemon juice, salt, and pepper. Massage the marinade into the thighs so each piece is well coated.
  • Let sit for 10 to 20 minutes if you have time; it deepens the flavor.

Cooking

  • Place the chicken on a sheet pan and scatter mixed vegetables around it. Give the pieces a little space to help everything brown and crisp up.
  • Roast in the oven for about 35-40 minutes, or until the chicken is cooked through and vegetables are caramelized. Check at 30 minutes if your oven runs hot. The skin should be golden and the vegetables tender with browned edges.
  • Serve warm, optionally topped with feta cheese. Let the pan rest for 5 minutes before serving and sprinkle feta and a squeeze of lemon over the top.

Notes

Serve family-style right from the sheet pan. Pair with warm crusty bread or a green salad. Leftovers make a terrific lunch, and reheating them correctly retains moisture.
Calories: 450kcal
Course: Dinner, Main Course
Cuisine: Greek, Mediterranean
Keyword: Easy Dinner, Family Meal, Greek Chicken, Sheet Pan Chicken, Weeknight Cooking

French Onion Chicken Rice Bake

The kitchen smells like caramelized onions and warm broth. You hear the gentle sizzle as onions brown in the pan and a soft bubbling from the stove. That sound tells you dinner is turning into something comforting and memorable.

This French Onion Chicken Rice Bake is one of those meals that hugs your family on a busy weeknight. It combines tender chicken, creamy rice, and a cheesy topping that browns perfectly in the oven. I wrote this recipe to be simple, reliable, and forgiving so you can feed a crowd without fuss.

If you love easy chicken dinners, you might also enjoy a fun slider recipe I developed for busy nights. Try my Bang Bang Chicken Sliders for another family favorite.

Why this works

French Onion Chicken Rice Bake

This dish works because it balances deep onion flavor with creamy richness and simple convenience. Caramelizing the onions brings a sweet, savory base. The chicken and rice make the meal filling and kid-friendly. The cheese on top gives a golden, gooey finish that everyone loves.

It is also forgiving. You can use leftover rice and cooked chicken, or make it all from scratch in under an hour. That flexibility makes it ideal for weeknights and busy weekends. For more quick and adaptable chicken ideas, see this collection of easy weekday recipes. Explore quick and easy chicken dishes

Process Overview

“This is where the magic happens—when the aroma fills the kitchen.”

The process is mostly stovetop onion work, mixing, and a short bake. Start with slow, patient caramelization. That step builds the flavor foundation. Then combine everything, top with cheese, and bake until hot and bubbly.

If you want a faster weeknight route, consider pre-cooked rotisserie chicken or leftover rice. These small swaps keep great flavor and cut active time. For crispy air fryer solutions when you want a crunch alongside this bake, check out my air fryer mozzarella wraps recipe. Crunchy Air Fryer Chicken Mozzarella Wraps

Ingredients

  • 2 cups cooked rice
    Lily’s tip: Use day-old rice if you have it. It holds texture better and avoids mushy results.

  • 1 lb chicken breast, diced
    Lily’s tip: Cut to uniform size for even cooking. You can use leftover cooked chicken to save time.

  • 2 medium onions, sliced
    Lily’s tip: Slice thin and cook low and slow for best caramelization. A pinch of salt speeds release of moisture.

  • 2 cups chicken broth
    Lily’s tip: Low-sodium broth gives you better control over the salt level.

  • 1 cup heavy cream
    Lily’s tip: For a lighter version, use half-and-half, but expect a slightly thinner sauce.

  • 1 cup Gruyère cheese, shredded
    Lily’s tip: Gruyère melts beautifully and adds a nutty, rich flavor.

  • 1 cup Swiss cheese, shredded
    Lily’s tip: Swiss blends well with Gruyère. Swap for fontina if needed.

  • 2 cloves garlic, minced
    Lily’s tip: Add garlic near the end of onion cooking to keep it bright and not bitter.

  • Salt and pepper to taste
    Lily’s tip: Season in layers. Taste before baking and adjust.

  • Olive oil for cooking
    Lily’s tip: Use a neutral oil or a light olive oil to avoid overpowering the onions.

  • Fresh parsley for garnish (optional)
    Lily’s tip: A sprinkle of parsley adds color and freshness at the end.

For more ideas on quick chicken dishes, you might like this curated list of air fryer chicken recipes I keep handy. Air fryer chicken ideas

Directions

  1. Preheat the oven to 375°F (190°C). In a skillet, heat olive oil over medium heat and add the sliced onions. Cook until caramelized, about 15-20 minutes. Add garlic and cook for another minute.
    Encouragement: Don’t rush the onions. Stir them gently and let time do the work. The smell is worth the wait.

  2. In a large bowl, combine the cooked rice, diced chicken, caramelized onions, chicken broth, heavy cream, salt, and pepper. Mix well.
    Encouragement: Taste as you go and adjust seasoning. This mixture should feel comforting and flavorful.

  3. Transfer the mixture into a baking dish and top with shredded Gruyère and Swiss cheese.
    Encouragement: Be generous with the cheese. It creates that family-pleasing golden top.

  4. Bake in the preheated oven for 25-30 minutes, or until the cheese is melted and golden on top.
    Encouragement: When the edges bubble and the top browns lightly, you know it is ready. Let it rest a few minutes before serving.

  5. Garnish with fresh parsley if desired, and serve with a fresh salad or roasted vegetables.
    Encouragement: Serve warm and watch everyone dig in. Pair with a crisp green salad for balance.

If you prefer a faster version, use pre-cooked rice and rotisserie chicken. This swap makes dinner come together in under 30 minutes while keeping the same cozy flavor. For another quick, creamy chicken-and-rice idea, take a look at this one-pot skillet recipe that inspired many weeknight cooks. Quick one-pot inspiration

Serving

French Onion Chicken Rice Bake

Serve this bake family-style right from the dish. Place it in the center of the table so everyone can help themselves. A simple tossed salad or roasted green beans make a bright, crunchy side.

H3 Family-style tips

  • Use a large wooden spoon or spatula to scoop generous portions.
  • Offer lemon wedges for those who like a touch of brightness.
  • Let kids top their servings with extra cheese if they like.

If you want a plated, more formal presentation, scoop onto warm plates and add a sprinkle of parsley and a side of toasted bread.

Storage

Fridge: Store leftovers in an airtight container for up to 3 days. Cool to room temperature before refrigerating.

Reheat: Warm individual portions in the microwave for 90 seconds, stirring halfway. For best texture, reheat in a 350°F oven for 10-12 minutes covered, then uncover to brown the top.

Freeze: You can freeze this bake for up to 2 months. Cool completely, wrap tightly, and freeze in a freezer-safe container. Thaw overnight in the fridge before reheating.

Tip: If the sauce tightens up after refrigeration, stir in a splash of chicken broth or cream when reheating to loosen it.

Kitchen Notes

  • Use leftover rice to save time and keep the bake from getting mushy.
  • Rotisserie chicken works well if you want to skip cooking raw chicken.
  • Cook onions low and slow for best flavor. A pinch of sugar helps if your onions stall.
  • Shred the cheese yourself for better melting and flavor. Pre-shredded cheese can be coated and won’t melt as smoothly.
  • If you want a crunchy top, sprinkle breadcrumbs mixed with a little butter over the cheese before baking.

Variations

  • Low-carb: Swap rice for cauliflower rice and reduce the broth to avoid excess liquid.
  • Vegetarian: Replace chicken with cooked mushrooms and white beans for protein. Use vegetable broth.
  • Kid-friendly: Add a handful of frozen peas or corn into the mix for sweet, colorful bites.
  • Spicy: Stir in some red pepper flakes or a diced jalapeño with the garlic.
  • Lighter: Substitute half-and-half for heavy cream and use reduced-fat cheese.

FAQ

Q: Can I make this ahead and bake later?
A: Yes. Prepare through step 3, cover, and refrigerate up to 24 hours. Bake when you are ready.

Q: Can I use brown rice?
A: Yes. Use cooked brown rice, but toast the rice briefly in the skillet if it seems very moist.

Q: Is it safe to use frozen chicken?
A: Thaw frozen chicken completely before dicing and mixing. Partially frozen chicken will not cook evenly in the bake.

Q: Can I add more vegetables?
A: Absolutely. Spinach, mushrooms, or bell peppers are great additions. Sauté them first to remove excess moisture.

Q: How can I make this gluten-free?
A: The recipe as written is gluten-free if you use gluten-free broth and ensure no cross-contamination. Avoid breadcrumbs unless they are certified gluten-free.

Conclusion

I hope this French Onion Chicken Rice Bake becomes one of your weeknight go-tos. It is cozy, forgiving, and made for sharing with the people you love. If you want another take on this classic comfort combination, you can compare a creamy version at French Onion Chicken and Rice Recipe from The Kitchn. For a quicker one-pot skillet option that still hits all the comforting notes, see the One-Pot French Onion Chicken and Rice Skillet at 12 Tomatoes.

Thanks for cooking with me. Feed the people you love, and savor the small, delicious moments.

French Onion Chicken Rice Bake

Prep Time 30 minutes
Cook Time 30 minutes
Total Time 1 hour
Servings 6 servings
Calories 600
A comforting bake combining tender chicken, creamy rice, and a cheesy topping, perfect for busy weeknights.

Ingredients

Main Ingredients

  • 2 cups cooked rice (Use day-old rice for better texture.)
  • 1 lb chicken breast, diced (Cut to uniform size for even cooking. Can use leftover cooked chicken.)
  • 2 medium onions, sliced (Slice thin and cook low and slow for best caramelization.)
  • 2 cups chicken broth (Low-sodium broth is recommended for better control over salt.)
  • 1 cup heavy cream (For a lighter version, use half-and-half.)
  • 1 cup Gruyère cheese, shredded (Melts beautifully and adds a rich flavor.)
  • 1 cup Swiss cheese, shredded (Can be swapped for fontina if desired.)
  • 2 cloves garlic, minced (Add near the end of onion cooking.)
  • Salt and pepper to taste (Season in layers.)
  • Olive oil for cooking (Use a neutral oil to avoid overpowering the onions.)
  • Fresh parsley for garnish (optional) (Adds freshness at the end.)

Instructions 

Preparation

  • Preheat the oven to 375°F (190°C). In a skillet, heat olive oil over medium heat and add the sliced onions. Cook until caramelized, about 15-20 minutes. Add garlic and cook for another minute.
  • In a large bowl, combine the cooked rice, diced chicken, caramelized onions, chicken broth, heavy cream, salt, and pepper. Mix well.
  • Transfer the mixture into a baking dish and top with shredded Gruyère and Swiss cheese.

Baking

  • Bake in the preheated oven for 25-30 minutes, or until the cheese is melted and golden on top.
  • Let it rest a few minutes before serving and garnish with fresh parsley if desired.

Notes

Storage: Refrigerate leftovers in an airtight container for up to 3 days. Reheat in microwave for 90 seconds or oven for 10-12 minutes covered. Freezable for up to 2 months.
Calories: 600kcal
Course: Dinner, Main Course
Cuisine: American, French
Keyword: Chicken Bake, Comfort Food, Easy Dinner, French Onion Chicken, Rice Bake

Creamy Garlic Parmesan Chicken Breast

The smell of garlic and butter hits you the moment the pan warms. You hear a soft sizzle as the chicken meets the hot skillet. Wooden spoon taps the edge of the pan, and the kitchen feels alive.

This cozy dinner is quick to make and feels like a warm hug on the table. It fills the whole house with a familiar, comforting scent that makes everyone come to the kitchen.

Why this works

Creamy Garlic Parmesan Chicken Breast

This recipe shines because it balances speed and comfort. The sauce comes together in the same pan, which saves time and gives the chicken a rich flavor. A busy weeknight can turn into a small celebration without hours at the stove.

The flavors are familiar to kids and adults alike. Garlic, butter, and Parmesan create a creamy sauce that feels indulgent but stays simple. You can serve it over rice, pasta, or mashed potatoes and feed a whole family with minimal fuss.

I make this dish when I need a dinner that pleases picky eaters and still feels special. It reheats well and often becomes even better the next day.

Process Overview

“This is where the magic happens—when the aroma fills the kitchen.”

This section gives a quick look at what you will do. You start by trimming and flattening the chicken. Then you sear for a golden crust. The sauce builds from garlic, butter, and cream, finished with grated Parmesan. Finally, you nestle the chicken back in the sauce so each piece gets a glossy coat.

With this method you cut down on cleanup and keep bold flavor. The pan fond from searing the chicken dissolves into the sauce and adds depth. That small step makes a big difference.

Ingredients

  • 2 large boneless, skinless chicken breasts
    • Lily’s tip: Slice them in half horizontally if they are thick. If not, gently pound to even thickness so they cook evenly.
  • 1 tablespoon olive oil
    • Lily’s tip: Use a light olive oil for searing. It gives good flavor and won’t smoke at medium heat.
  • 2 tablespoons butter
    • Lily’s tip: Real butter adds richness. Add it after searing to avoid burning.
  • 4 garlic cloves, minced
    • Lily’s tip: Mince garlic fresh whenever you can. Garlic powder works in a pinch, but fresh garlic brightens the sauce.
  • 1 cup heavy cream
    • Lily’s tip: Use full-fat cream for the creamiest texture. Light cream will thin the sauce.
  • 1/2 cup grated Parmesan cheese
    • Lily’s tip: Freshly grated Parmesan melts better and gives a cleaner flavor than pre-grated blends.
  • 1 teaspoon Italian seasoning
    • Lily’s tip: If you have fresh herbs like thyme or oregano, add a small pinch for a fresher taste.
  • Salt and black pepper to taste
    • Lily’s tip: Season both sides of the chicken before searing. Taste the sauce and adjust near the end.
  • Fresh chopped parsley for garnish (optional)
    • Lily’s tip: Parsley adds color and a light herbal brightness at the end. Sprinkle it just before serving.

Directions

  1. Slice the chicken breasts in half horizontally or pound to even thickness. Season with salt, pepper, and Italian seasoning.

    • Encouragement: Take a moment to season well. Even seasoning makes a big difference and shows you care.
  2. Heat olive oil in a skillet over medium heat. Sear chicken until golden and cooked through, 4 to 5 minutes per side.

    • Encouragement: Let the chicken sit while it sears. That golden color is key and it smells amazing.
  3. Remove chicken. Lower heat, add butter and garlic, and sauté until fragrant.

    • Encouragement: Watch the garlic carefully. It only needs a minute or two to release its aroma. Keep the heat medium low.
  4. Pour in heavy cream and stir to deglaze. Add Parmesan and simmer until thickened.

    • Encouragement: Stir the bottom of the pan to lift those browned bits into the sauce. The sauce will come together quickly.
  5. Return chicken to skillet. Simmer for 2 to 3 minutes to heat through and coat with sauce.

    • Encouragement: Baste the chicken gently with the sauce so every bite stays moist. Let it rest a minute before serving.

Each step moves quickly, so have your ingredients close by. The whole dish comes together in about 25 minutes. That makes it perfect for weeknights and busy evenings.

Serving

Creamy Garlic Parmesan Chicken Breast

Serve this chicken family-style right from the skillet. Place the pan on a heat-safe trivet in the center of the table and let everyone help themselves. Add a big bowl of steamed vegetables and a pile of mashed potatoes or buttered noodles.

For a plated approach, spoon sauce over a bed of pasta or rice first, then top with the chicken. Garnish with chopped parsley for color and a light, fresh note.

I like to offer lemon wedges on the side. A tiny squeeze of lemon brightens the cream and cuts through some of the richness for those who want it.

Pair this meal with a simple green salad, crusty bread, and a cold glass of water or a family favorite drink. Kids enjoy the creamy sauce on noodles and adults can spoon it over roasted vegetables.

Storage

Store leftovers in an airtight container in the fridge for up to 3 days. The sauce thickens as it cools. When you reheat, add a splash of milk or cream and warm gently on the stove over low heat. Stir until the sauce loosens and the chicken is heated through.

For freezer storage, place chicken with sauce in a freezer-safe container and freeze for up to 2 months. Thaw overnight in the fridge before reheating. Reheat slowly on the stove rather than in the microwave to preserve texture.

If you plan to pack this for lunches, keep the sauce slightly runnier before storing. Add a small sealed container of extra cream or milk for reheating if needed.

Kitchen Notes

  • Shortcut: Use rotisserie chicken if you want to skip searing. Add shredded cooked chicken to the sauce and warm through.
  • Shortcut: Swap garlic for 1/2 to 1 teaspoon garlic powder when you are short on time.
  • Shortcut: Use pre-grated Parmesan in a pinch. Watch salt levels because some pre-grated cheese contains added salt.
  • Shortcut: Make the sauce ahead and reheat with freshly cooked or reheated chicken for faster assembly.
  • Shortcut: If the sauce is too thin, stir a small tablespoon of cornstarch mixed with cold water into the sauce and simmer to thicken.

These small tricks help when life gets busy. You can still make a comforting dinner without feeling rushed.

Variations

  • Kid-friendly: Leave out the Italian seasoning or add less. Serve the sauce over plain noodles and cut the chicken into small strips.
  • Low-carb: Serve the chicken over cauliflower mash or sautéed zucchini noodles for a lighter meal.
  • Vegetarian twist: Use large flat mushrooms or thick slices of eggplant in place of chicken. Sear them the same way and finish in the sauce.
  • Herb-forward: Add fresh basil or tarragon at the end for a brighter flavor. Add just a tablespoon so the cream stays balanced.
  • Spicy kick: Stir in a pinch of red pepper flakes when sautéing garlic for a gentle heat that warms the sauce.

These small tweaks let you tailor the recipe to dietary needs and family preferences. The base technique stays the same, so you can trust the outcome.

FAQ

Q: Can I use chicken thighs instead of breasts?
A: Yes. Boneless, skinless thighs work well and stay juicy. Reduce the cooking time slightly and check for doneness.

Q: How do I know when the chicken is cooked through?
A: The chicken should reach an internal temperature of 165°F. If you do not have a thermometer, slice into the thickest part and check that the juices run clear.

Q: My sauce separated. How can I fix it?
A: Lower the heat and whisk in a splash of warm heavy cream or milk. Keep the pan at low heat and stir until it comes back together.

Q: Can I make the sauce without cream?
A: You can substitute half-and-half, but the sauce will be lighter and less rich. For a dairy-free option, use a full-fat coconut milk, though the taste will change.

Q: Is this safe for kids to help make?
A: Absolutely. Kids can help measure Parmesan, chop parsley with supervision, or stir the sauce off the heat. Let them taste small spoonfuls and talk about the flavors.

These answers reflect common concerns and simple fixes. I test these approaches with my own family and adjust based on what works in a busy kitchen.

Conclusion

I hope this Creamy Garlic Parmesan Chicken becomes a go-to for your family dinners. It is fast, comforting, and full of flavors that please both children and adults. For more inspiration and similar family-tested recipes, try the full version of this dish at Creamy Garlic Parmesan Chicken at Gimme Delicious and another lovely take at Creamy Garlic Parmesan Chicken at Salt & Lavender.

Thanks for cooking with me. When you make this, listen for the sizzle, breathe in the garlic-butter scent, and gather around the table. Feed your family with love, one warm plate at a time.

Creamy Garlic Parmesan Chicken

Prep Time 10 minutes
Cook Time 15 minutes
Total Time 25 minutes
Servings 4 servings
Calories 700
A quick and comforting chicken dish with garlic, butter, and Parmesan in a creamy sauce, perfect for busy weeknights.

Ingredients

Main Ingredients

  • 2 large boneless, skinless chicken breasts (Slice in half horizontally if thick, or pound to even thickness.)
  • 1 tablespoon olive oil (Use a light olive oil for searing.)
  • 2 tablespoons butter (Add after searing to avoid burning.)
  • 4 cloves garlic, minced (Fresh garlic brightens the sauce.)
  • 1 cup heavy cream (Use full-fat cream for the creamiest texture.)
  • 1/2 cup grated Parmesan cheese (Freshly grated Parmesan melts better.)
  • 1 teaspoon Italian seasoning (Fresh herbs can be added for a fresher taste.)
  • Salt and black pepper to taste (Season both sides of the chicken.)
  • Fresh chopped parsley for garnish (optional) (Adds color and a light herbal brightness.)

Instructions 

Preparation

  • Slice the chicken breasts in half horizontally or pound to even thickness. Season with salt, pepper, and Italian seasoning.
  • Heat olive oil in a skillet over medium heat. Sear chicken until golden and cooked through, 4 to 5 minutes per side.
  • Remove chicken from the skillet and lower heat. Add butter and garlic, and sauté until fragrant.
  • Pour in heavy cream and stir to deglaze. Add Parmesan and simmer until thickened.
  • Return chicken to skillet and simmer for 2 to 3 minutes to heat through and coat with sauce.

Notes

Store leftovers in an airtight container for up to 3 days. Add a splash of milk or cream when reheating to loosen sauce. For freezing, seal chicken with sauce in a freezer-safe container for up to 2 months.
Calories: 700kcal
Course: Dinner, Main Course
Cuisine: American, Comfort Food
Keyword: Comfort Food, creamy chicken, Family-Friendly, Garlic Parmesan, Quick Dinner