Tag

garlic butter chicken

Browsing

Chicken with Garlic Butter

I remember the first time I made chicken with garlic butter for my family. The kitchen smelled like warm garlic and butter, and the sizzle of the chicken on the griddle sounded like a little celebration. My kids came running, and the whole house felt cozy and full.

This recipe is simple enough for a weeknight and special enough for a Sunday dinner. If you love bold garlic flavors, you might enjoy my twist on shawarma flavors too in this other family favorite: chicken shawarma with garlic sauce.

Why this works

Chicken with Garlic Butter

This method uses high heat and a little butter to lock in juices and build a brown, savory crust. Garlic butter gives big flavor without long prep. That makes it perfect for busy families who want something fast, tasty, and comforting.

It is also forgiving. You can stretch this across meals, pack leftovers into lunches, and feed picky eaters with small changes. If you enjoy quick, buttery dinners with a family focus, you might also like the easy comfort of my Cowboy Butter Lemon Bowtie Chicken with Broccoli for another time-saving option.

Process Overview

“This is where the magic happens—when the aroma fills the kitchen.”

The magic is in the timing. A hot surface sears the outside and keeps the inside tender. Garlic butter melts and coats the chicken as it cooks. The result is a simple, crowd-pleasing dish that looks and tastes like you spent more time on it than you really did.

I like to work in stages: prep, heat, sear, rest, and serve. Each step is short and intentional. When the aroma fills the kitchen, you know dinner is nearly ready.
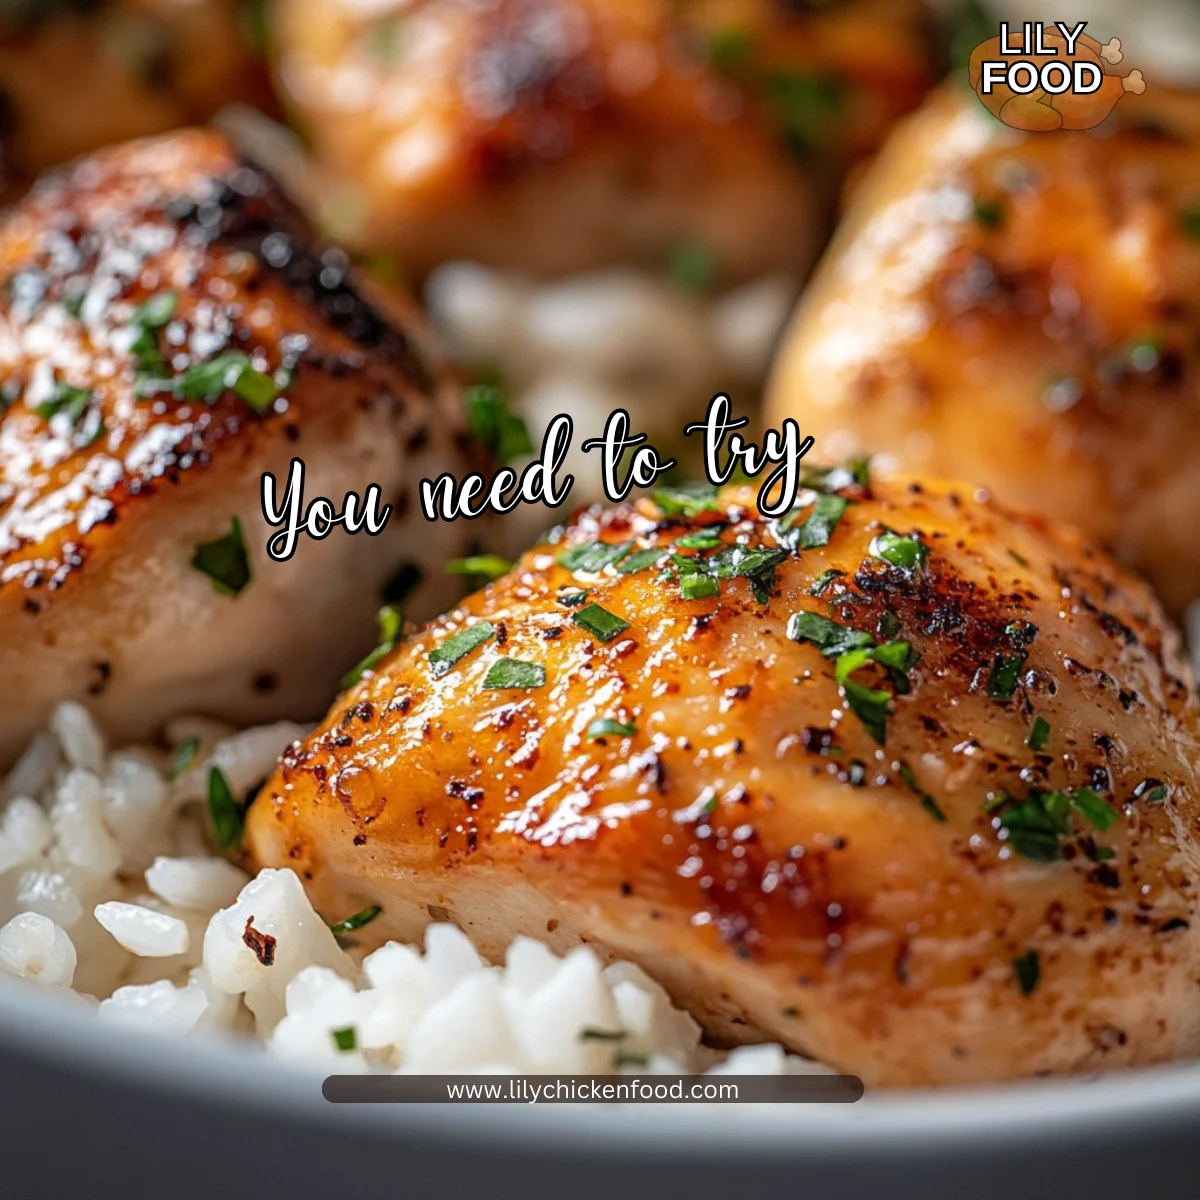
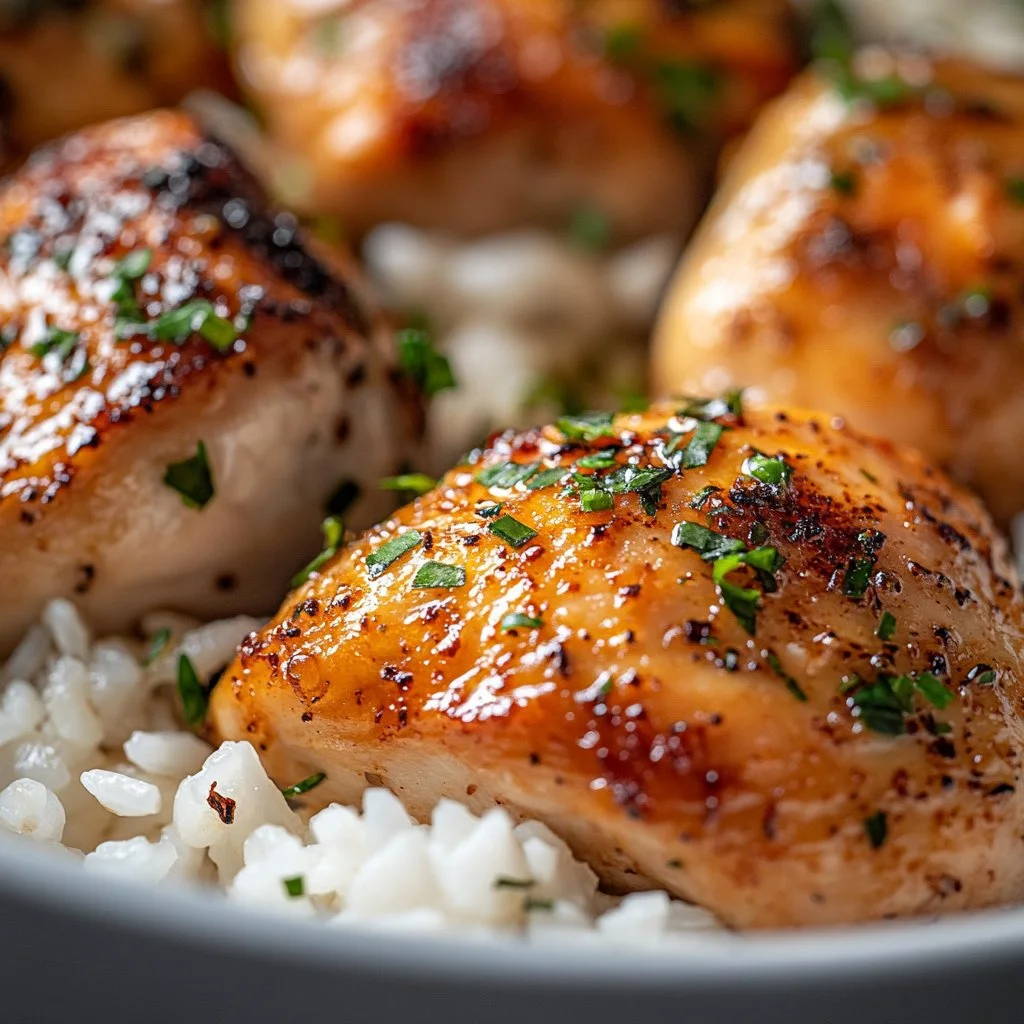
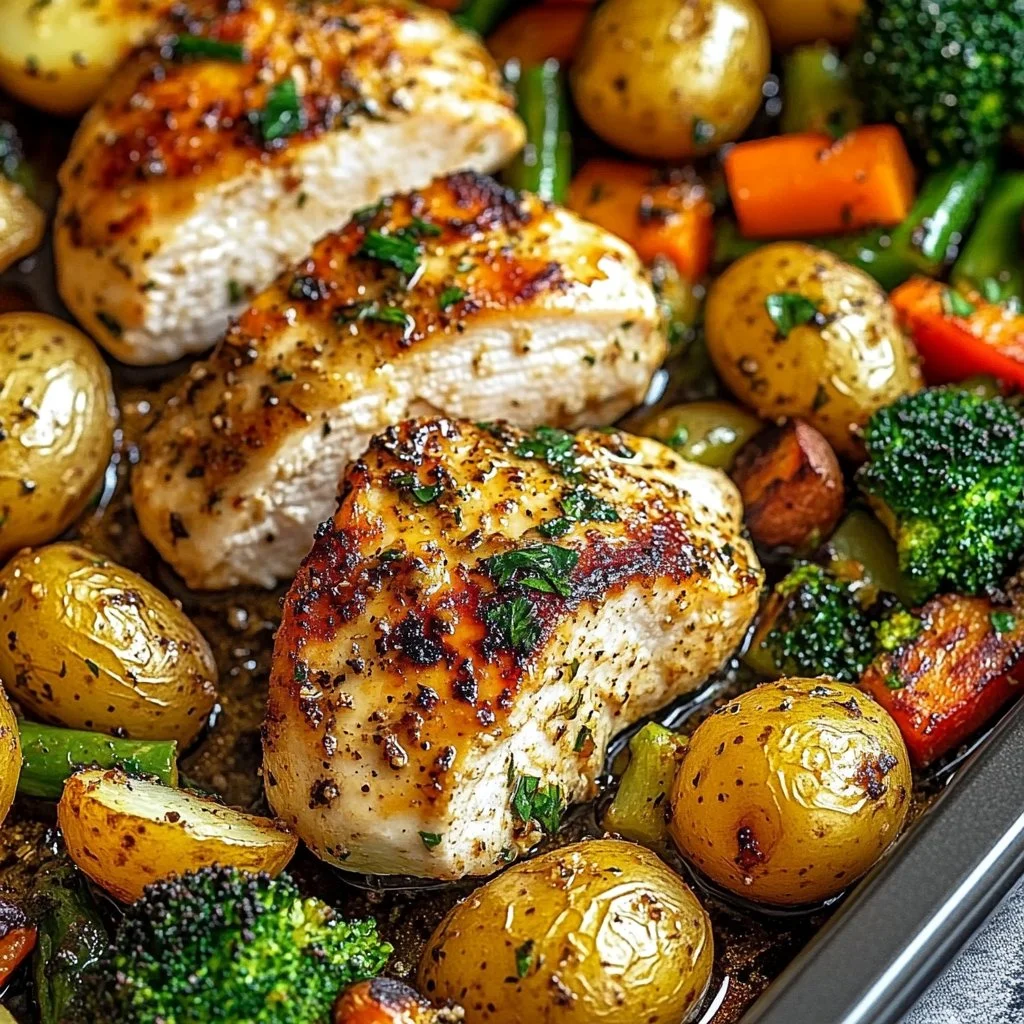
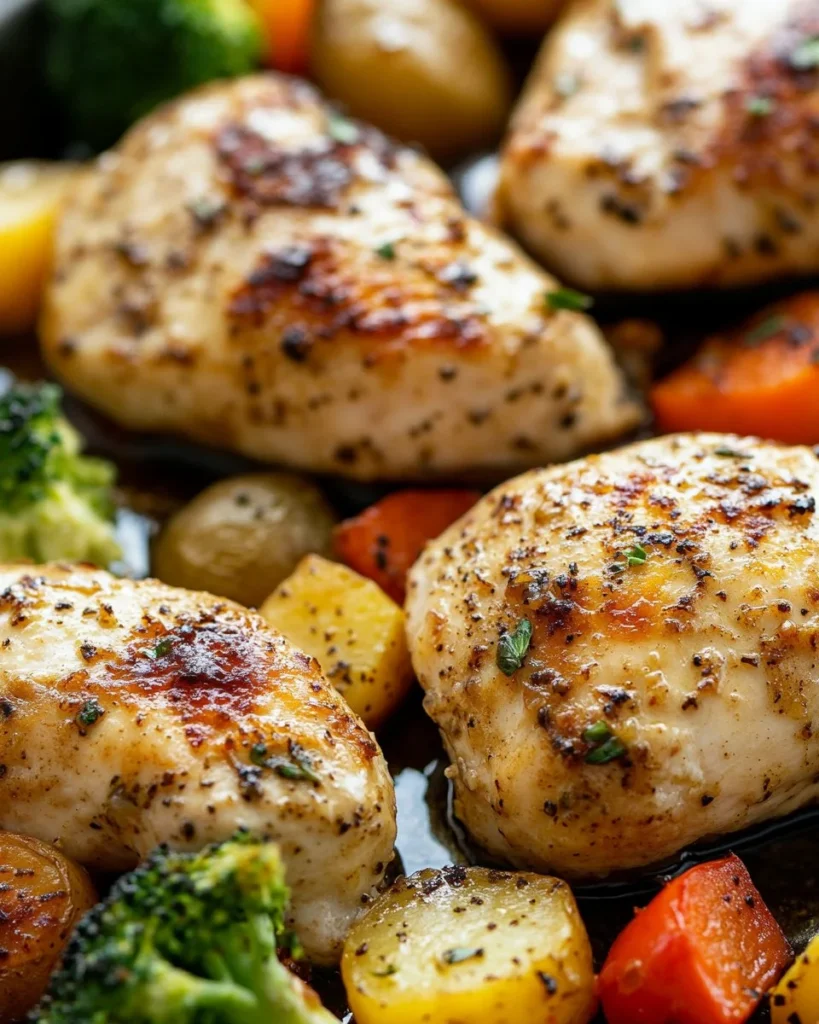
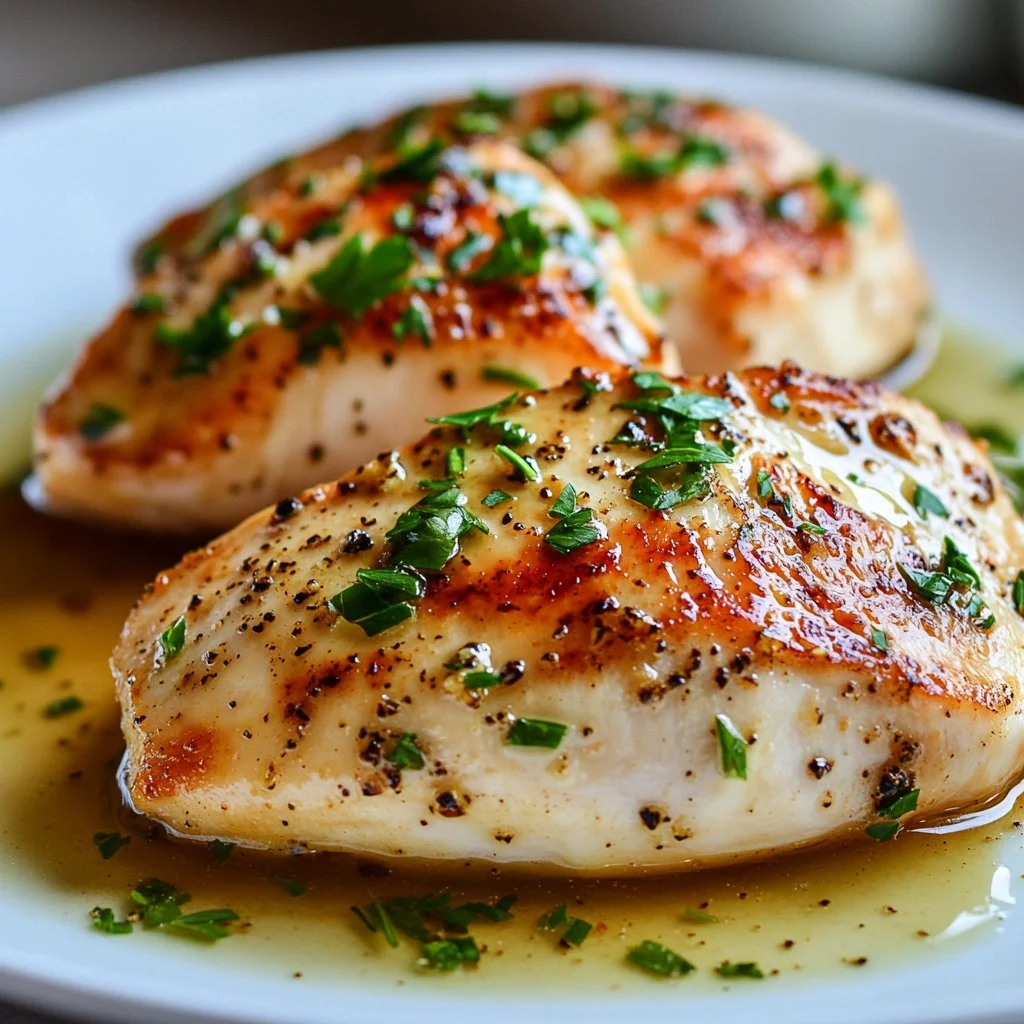
Ingredients

  • 4 boneless, skinless chicken breasts
  • 4 tablespoons garlic butter
  • Salt and pepper to taste
  • Fresh parsley, chopped (for garnish)

Lily’s personal tips for each

  • 4 boneless, skinless chicken breasts
    • Tip: Pound thicker breasts to an even thickness. They cook more evenly and stay tender. If you only have bone-in, plan for longer cook time.
  • 4 tablespoons garlic butter
    • Tip: Use a high-quality garlic butter or make your own with softened butter and minced garlic. Fresh garlic gives the brightest flavor.
  • Salt and pepper to taste
    • Tip: Season generously. Salt helps form a nice crust. I season both sides and lightly again after cooking if needed.
  • Fresh parsley, chopped (for garnish)
    • Tip: Parsley brightens the dish and adds a fresh finish. Cilantro works if you prefer a slightly different herb note.

If you like pairing garlic chicken with potatoes or beef, check out my quick skillet idea in this recipe for garlic butter beef bites with potatoes. It uses the same pantry flavors for a heartier meal.

Directions

  1. Preheat your Blackstone Griddle over medium-high heat.

    • Encouraging note: A hot griddle is your best friend. Give it a few minutes to come up to temperature so the chicken sears quickly.
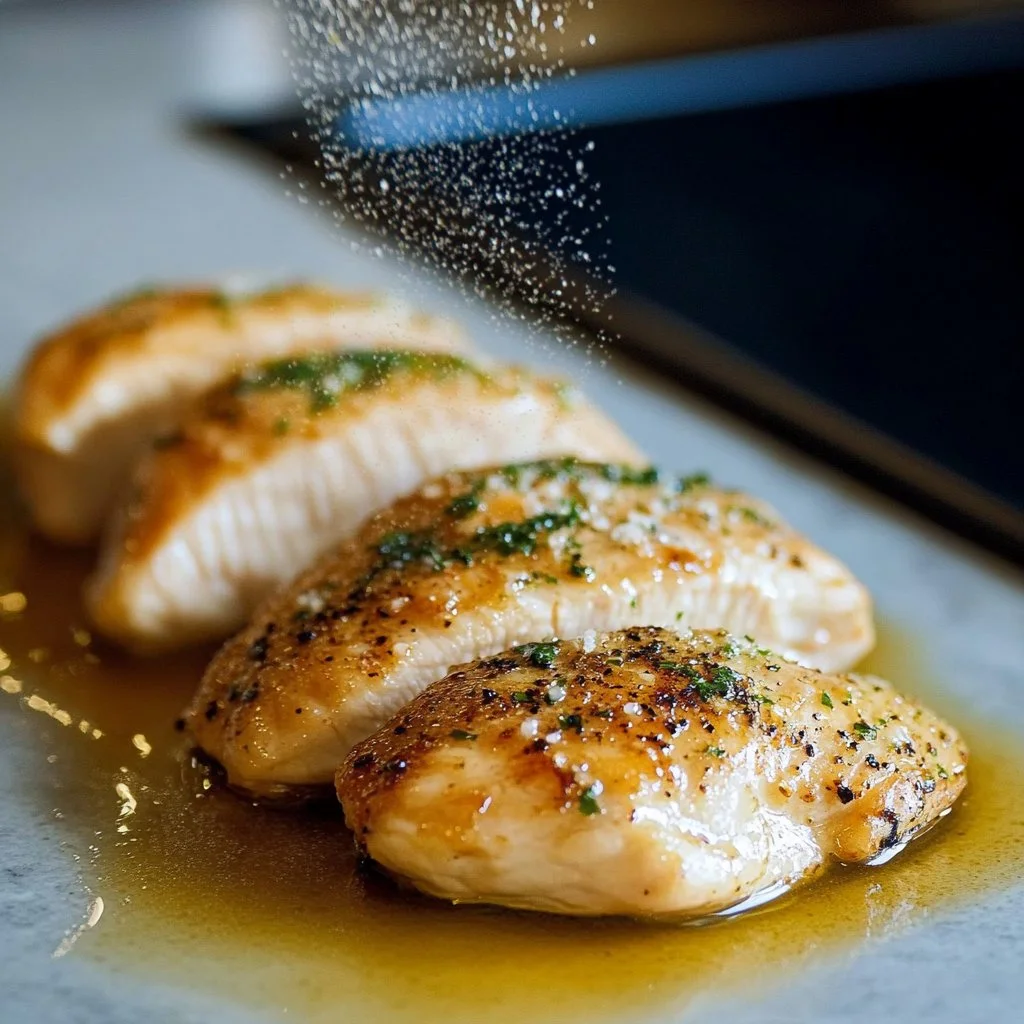
  2. Season chicken breasts with salt and pepper.

    • Encouraging note: Be kind to the meat. Season both sides and press the spices in lightly. This step makes a big difference in flavor.
  3. Melt the garlic butter on the griddle.

    • Encouraging note: Let the butter foam and smell the garlic wake up. Keep an eye on it so it does not brown too fast.
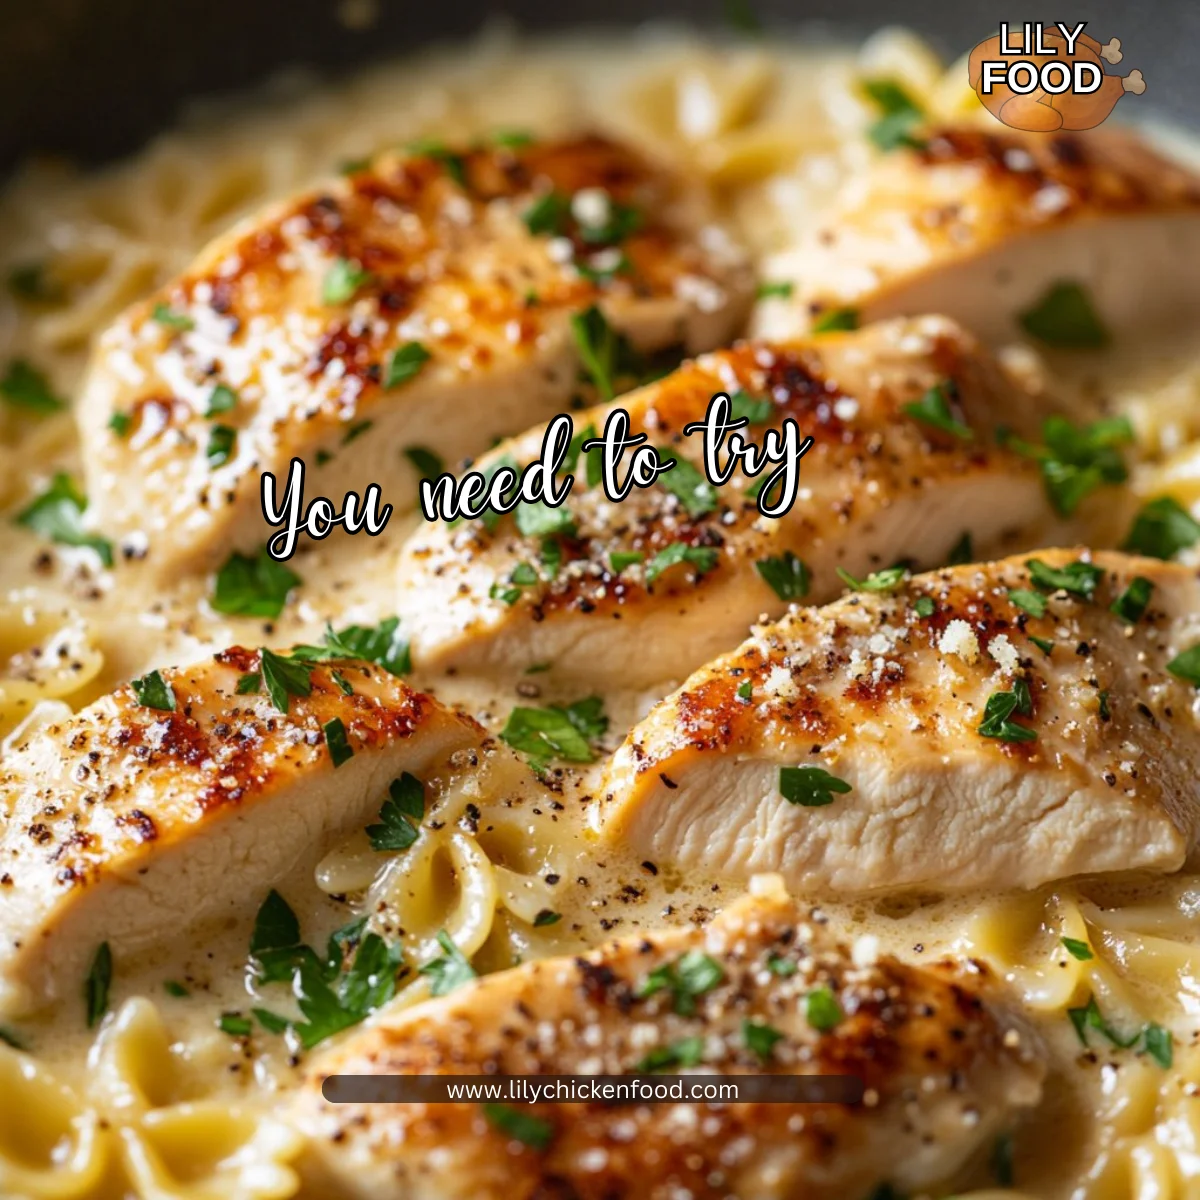
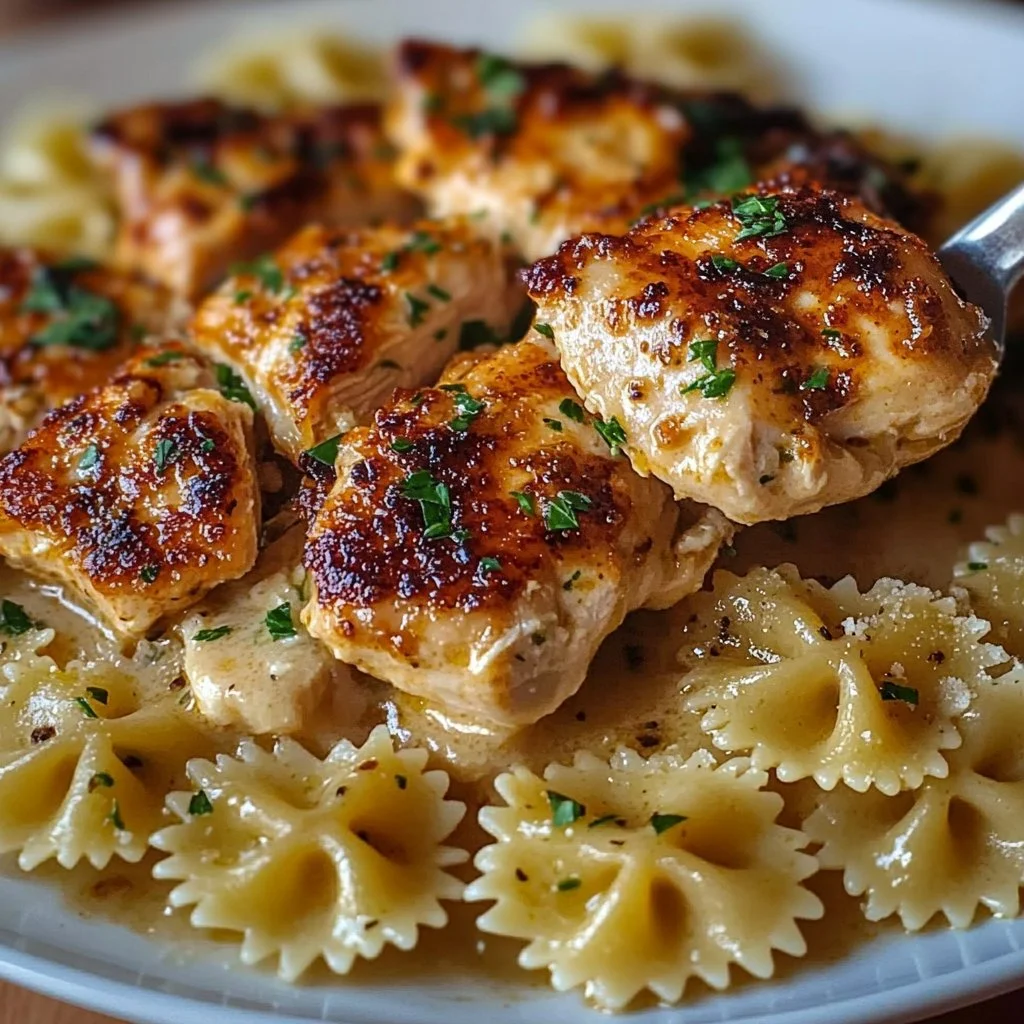
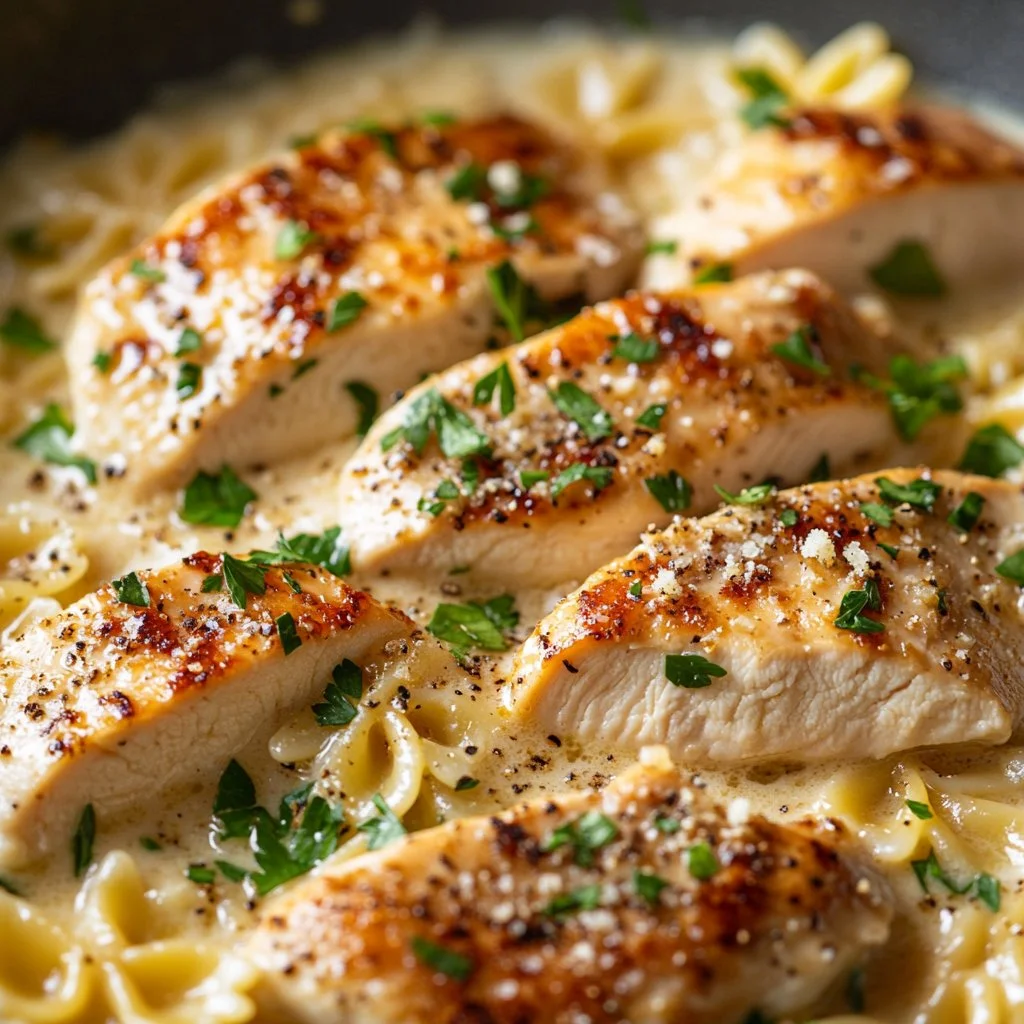
  4. Add the chicken breasts to the griddle and cook for about 6-7 minutes on each side, or until fully cooked and golden brown.

    • Encouraging note: Resist the urge to flip too often. Let the chicken form a golden crust before turning. Use a thermometer to check for 165°F at the thickest part.
  5. Remove from heat and let it rest for a few minutes.

    • Encouraging note: Resting lets the juices redistribute. Cover loosely with foil if you need to keep it warm while you finish sides.
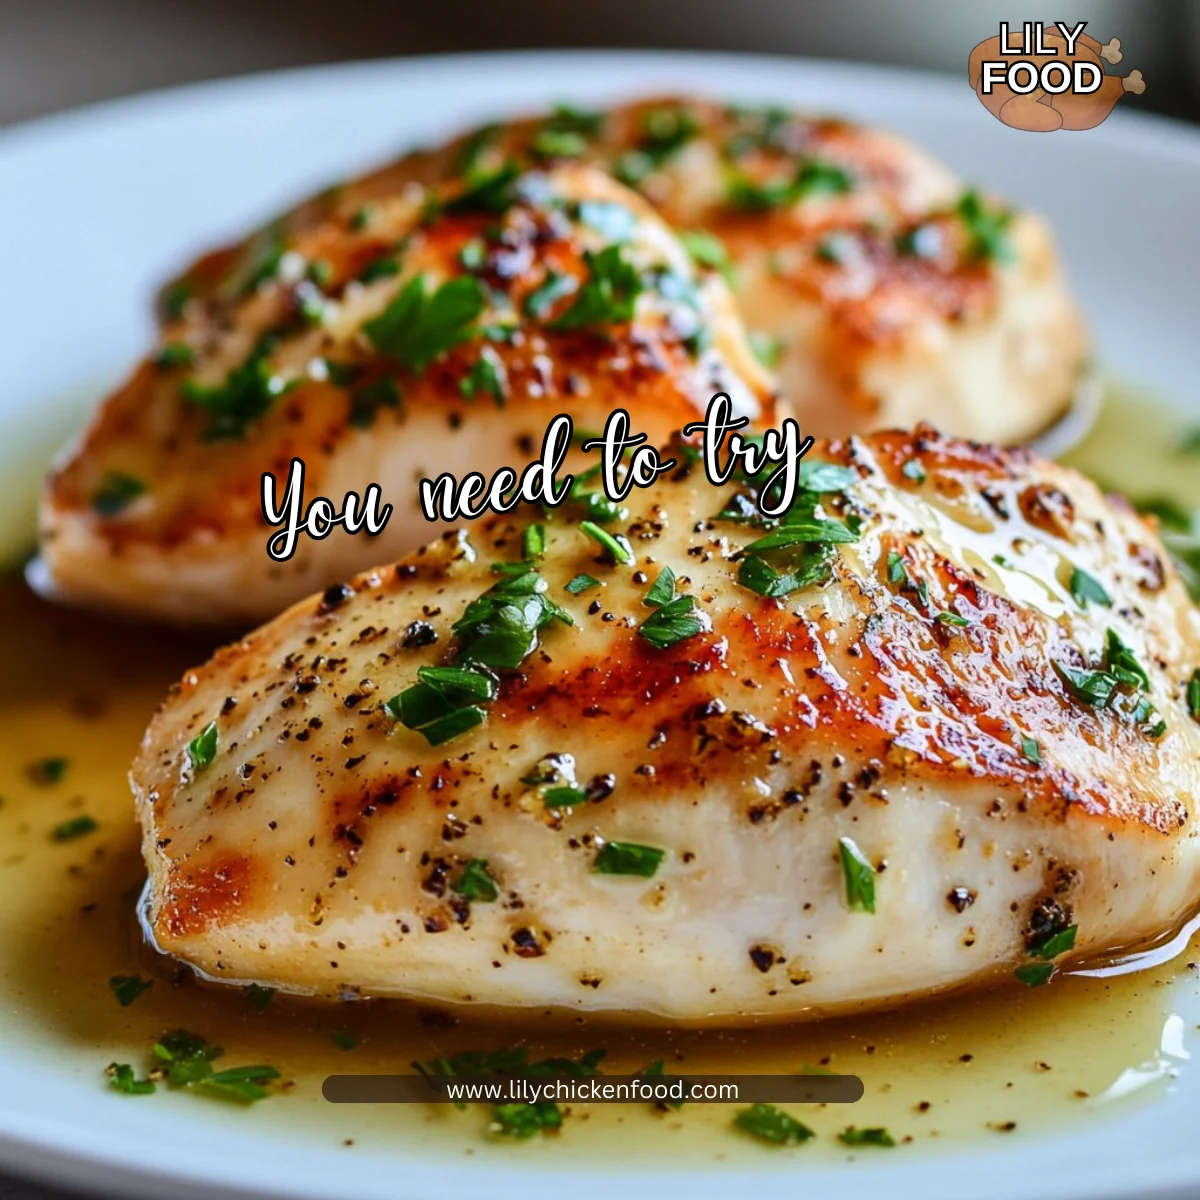
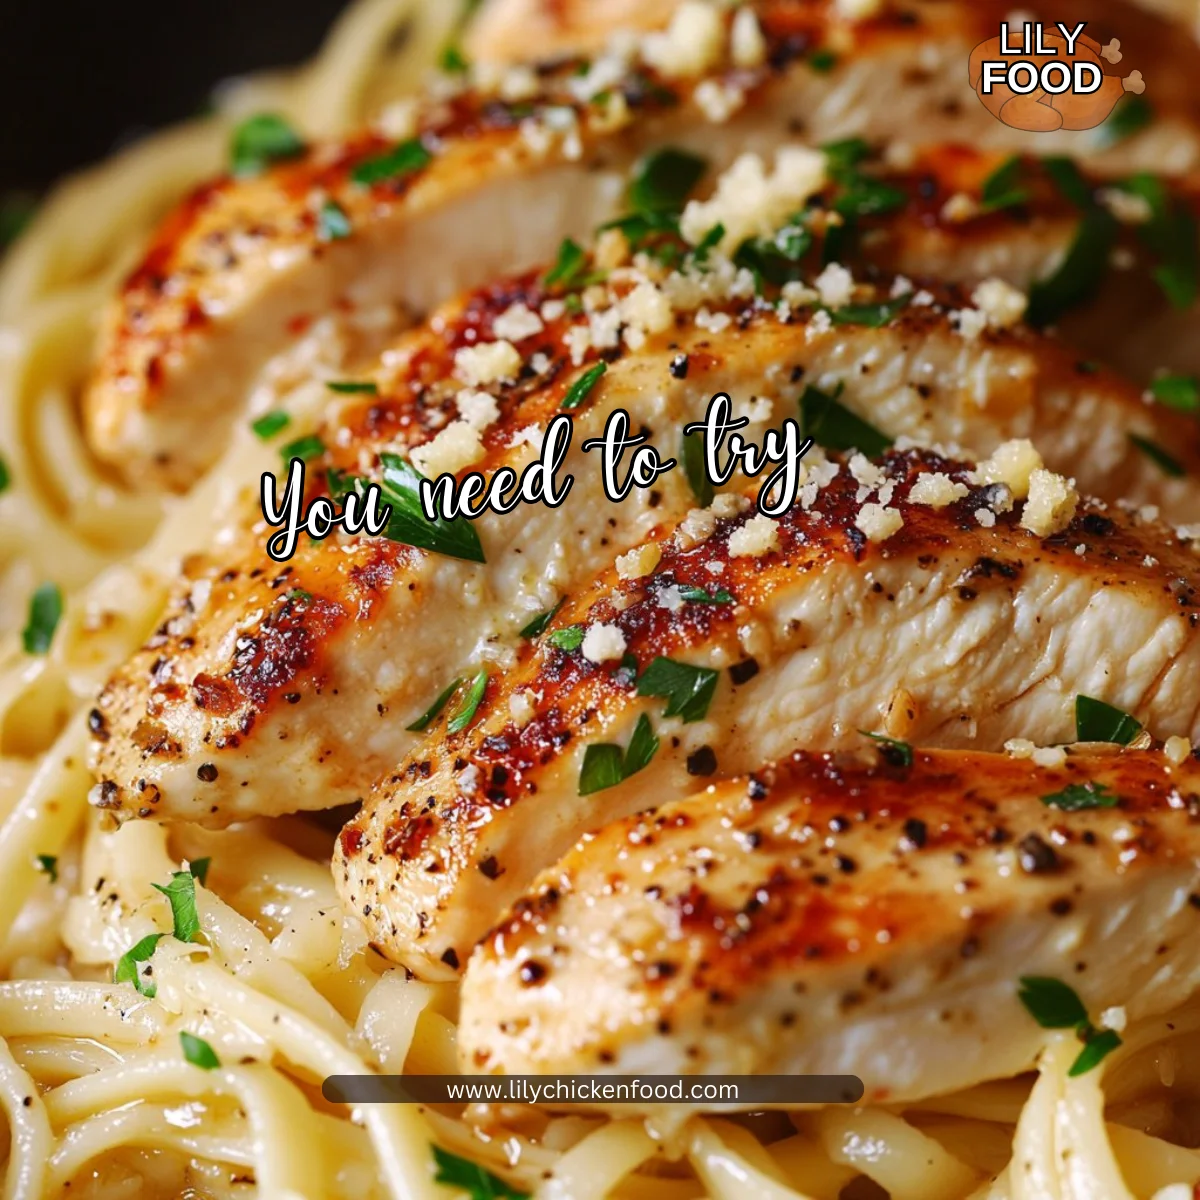
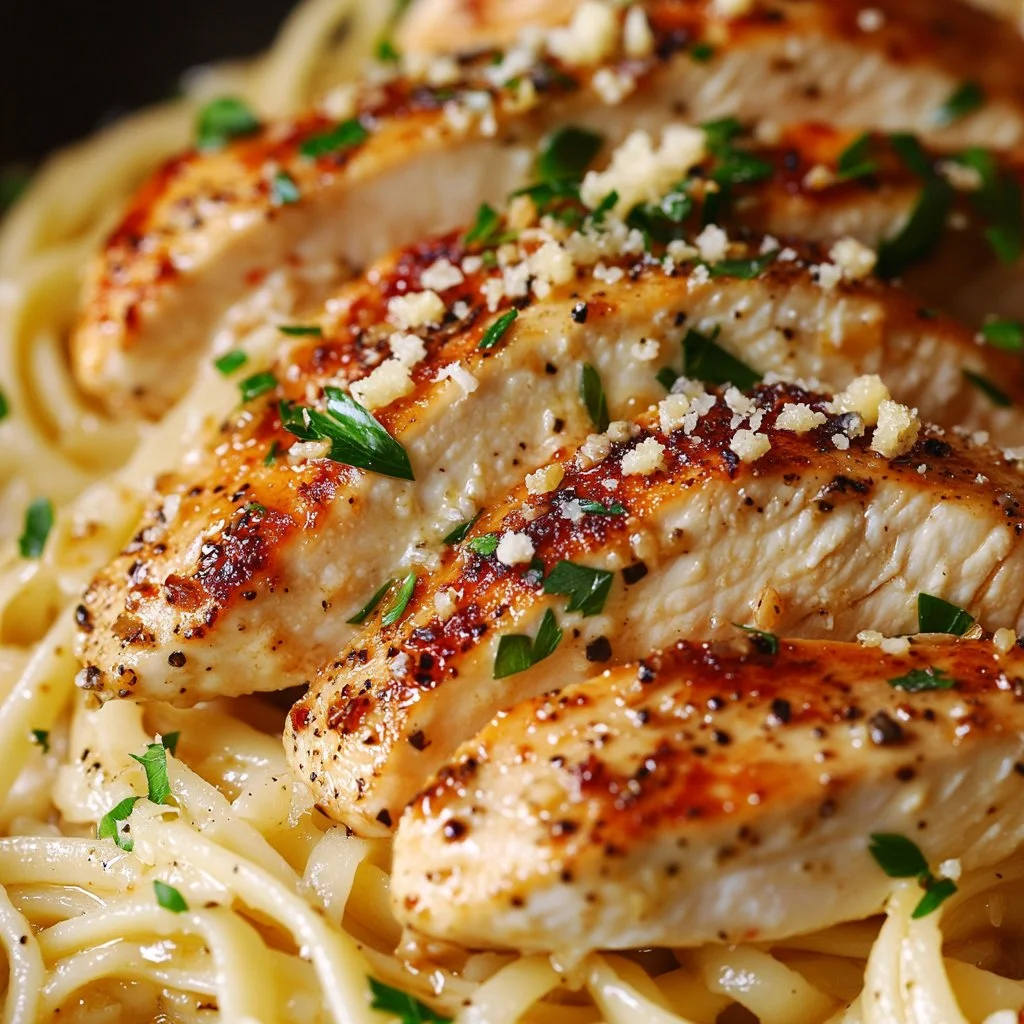
  6. Garnish with fresh parsley before serving. Enjoy!

    • Encouraging note: A sprinkle of parsley and a squeeze of lemon if you like will lift the whole plate. You did it!

If you enjoy quick grilled flavors, this method shares tips I use for other simple meals like my easy grilled Asian chicken skewers with honey garlic sauce. The sequence of hot surface, proper rest, and bright garnish repeats across many good weeknight recipes.

Serving

Chicken with Garlic Butter

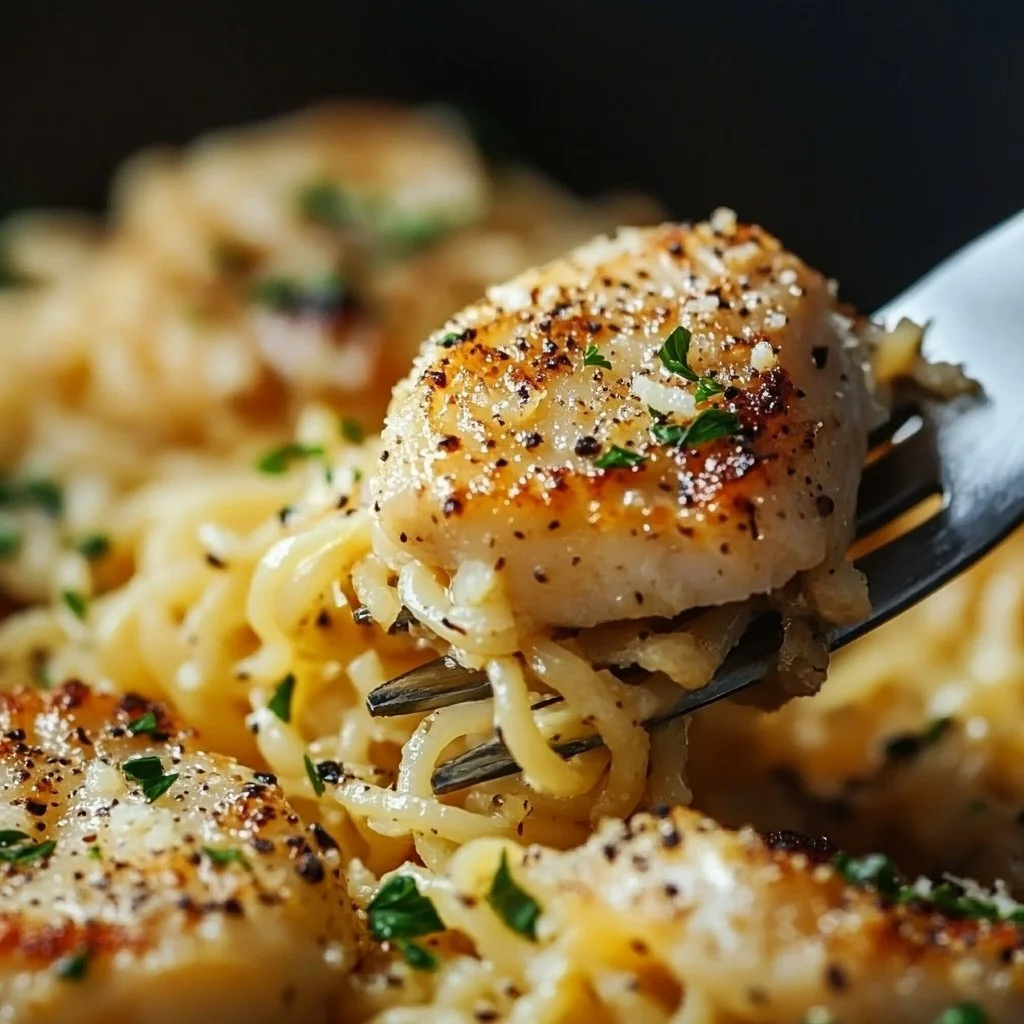
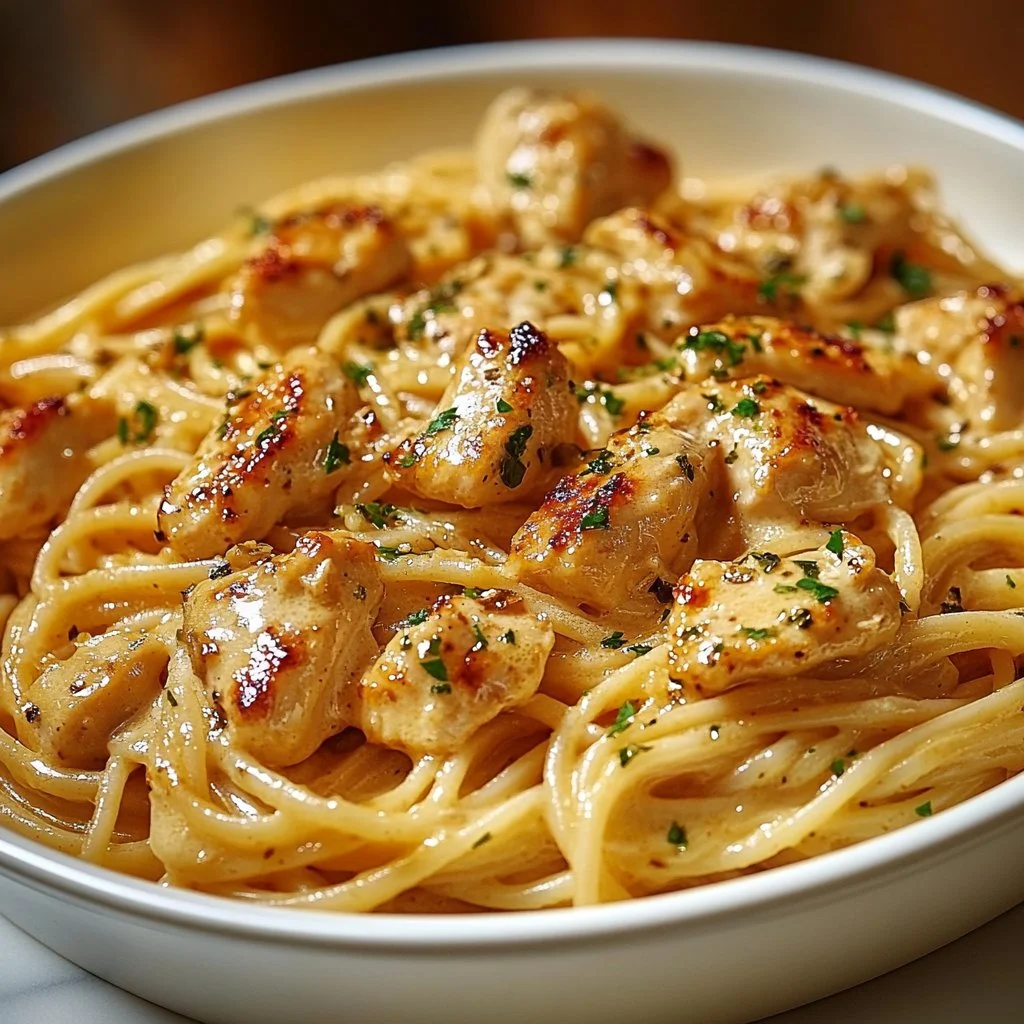
Serve family-style on a large platter so everyone can help themselves. Lay the chicken breasts on a bed of buttered rice, mashed potatoes, or roasted vegetables. Add lemon wedges for squeezing and a small bowl of extra garlic butter if someone wants more.

For a family-style feel, place two sides on the table and let each person pick their portions. Kids love a simple plate with chicken, a veg, and a carb. Adults will appreciate the golden crust and the garlic aroma.

Pair with a bright salad or steamed green beans to balance the richness. For a rustic dinner, slice the chicken and serve over crusty bread to soak up the garlic butter.

Storage

Fridge

  • Cool the chicken to room temperature before storing.
  • Place in an airtight container and refrigerate up to 4 days.
  • Store the garlic butter separately if you prefer to reheat without extra fat.

Reheat

  • Oven: Preheat to 350°F. Place chicken in a baking dish with a splash of broth or water. Cover and heat for 10 to 15 minutes.
  • Stovetop: Reheat gently in a skillet over medium-low heat with a teaspoon of butter or oil. Turn often to warm through.
  • Microwave: Use short intervals and cover to keep the meat from drying. Add a damp paper towel over the plate to lock moisture.

Leftovers make great sandwiches, salads, or a quick pasta topper. Slice and toss with greens for an easy lunch.

Kitchen Notes

  • Use a thermometer. 165°F at the thickest part means safe, juicy chicken.
  • Even thickness matters. Pound to even thickness for consistent cooking.
  • Swap the Blackstone for a heavy skillet if needed. Cast iron works well.
  • Make extra garlic butter. Freeze it in small portions for fast dinners.
  • Keep herbs fresh. A final herb sprinkle brightens the whole dish and makes it family friendly.

For a creamy garlic twist that kids often love, try my quick kofta idea in this recipe for chicken kofta with creamy garlic yogurt sauce.

Variations

  • For picky eaters

    • Keep the garlic light. Use 2 tablespoons of garlic butter and offer extra at the table.
    • Serve plain slices alongside a dipping sauce like ketchup or mild ranch.
  • For low-carb or keto

    • Serve over a bed of sautéed spinach or cauliflower mash.
    • Use herb butter and skip any sugary marinades.
  • For gluten-free families

    • This dish is naturally gluten-free. Avoid cross-contamination and you are set.
  • For a spicy kick

    • Mix a pinch of red pepper flakes into the butter before melting.
    • Add a cayenne sprinkle to the seasoning.
  • For a citrus note

    • Add lemon zest to the butter or squeeze fresh lemon over each breast before serving.

These tweaks keep the recipe flexible so every member of the family can enjoy it.

FAQ

Q: Can I use chicken thighs instead of breasts?
A: Yes. Bone-in thighs will need longer to cook, about 8 to 10 minutes per side depending on thickness. Remove from heat when they reach 165°F and rest.

Q: Can I use store-bought garlic butter?
A: Absolutely. A high-quality, fresh garlic butter will speed things up and taste great. I often use store-bought when I am short on time.

Q: What if I do not have a Blackstone Griddle?
A: A heavy cast-iron skillet or stainless steel pan works well. The key is a hot, even surface to sear the chicken.

Q: How do I prevent the garlic from burning?
A: Keep the butter moving and watch the heat. If the garlic browns too fast, lower the heat and spoon the butter over the chicken rather than letting it pool and burn.

Q: Is this recipe kid-friendly?
A: Yes. The flavors are simple and familiar. Offer sides your kids already like and reduce the garlic if they prefer milder tastes.

Conclusion

I hope this garlic butter chicken becomes one of your go-to family dinners. It is quick, forgiving, and full of the kind of flavor that brings people to the table.

For another take on simple garlic butter chicken sauces and technique, I often refer to recipes like Garlic Butter Chicken (4 Ingredient Sauce!) from Don’t Go Bacon My Heart for inspiration. If you want a fast 20-minute version with clear timing and pantry tips, this version on Wholesome Yum’s Garlic Butter Chicken (Easy 20-Minute Dinner) is a helpful read.

Thank you for cooking with me. Gather your family, listen for the sizzle, and enjoy the simple joy of a meal made with butter, garlic, and a little love.

Garlic Butter Chicken

Prep Time 10 minutes
Cook Time 15 minutes
Total Time 25 minutes
Servings 4 servings
Calories 320
A simple yet flavorful chicken dish featuring garlic butter that is perfect for busy weeknights or special family dinners.

Ingredients

Main Ingredients

  • 4 pieces boneless, skinless chicken breasts (Pound thicker breasts to an even thickness for better cooking.)
  • 4 tablespoons garlic butter (Use high-quality garlic butter or make your own with softened butter and minced garlic.)
  • Salt and pepper to taste (Season generously to help form a nice crust.)
  • Fresh parsley, chopped (for garnish) (Parsley brightens the dish; cilantro can be used for a different flavor.)

Instructions 

Preparation

  • Preheat your Blackstone Griddle over medium-high heat.
  • Season chicken breasts with salt and pepper on both sides.
  • Melt the garlic butter on the griddle until foamy.

Cooking

  • Add the seasoned chicken breasts to the griddle and cook for about 6-7 minutes on each side, or until fully cooked and golden brown.
  • Remove from heat and let the chicken rest for a few minutes.

Serving

  • Garnish with fresh parsley before serving.

Notes

For best results, use a thermometer to ensure chicken reaches 165°F at the thickest part. Leftovers make great sandwiches or salads. Keep garlic butter on hand for quick meals.
Calories: 320kcal
Course: Dinner, Main Course
Cuisine: American
Keyword: Easy Chicken Recipe, Family Dinner, Garlic Butter Chicken, Quick Meal

Garlic Butter Chicken Linguine

There’s something enchanting about the smells that waft through the kitchen when you cook. The sizzle of chicken meets the mild crunch of garlic, creating a melody that makes your heart warm. When your family gathers around the dinner table and enjoys a hearty plate of Garlic Butter Chicken Linguine, you feel the love and togetherness in every bite. This recipe is easy and quick, perfect for those busy weeknights when you crave something comforting yet special.

Why This Works
Garlic Butter Chicken Linguine

Garlic Butter Chicken Linguine is a dish that brings the family together without consuming your entire evening. In just about 30 minutes, you can have a delightful meal that almost undoubtedly pleases everyone. The robust garlic flavor paired with tender chicken and silky linguine makes this recipe a hit, even with picky eaters.

By using simple ingredients and straightforward techniques, you’ll save time and create lasting memories around the dinner table. It is family-friendly, budget-conscious, and above all, a breeze to whip up. It’s these kinds of meals that make busy lives feel a little slower.

Process Overview

“This is where the magic happens—when the aroma fills the kitchen.”

As you gather your ingredients, you might even feel a little excitement bubbling inside. Preparing Garlic Butter Chicken Linguine is not just about putting food on the table; it’s about creating an atmosphere of warmth and love for your family. Imagine each step, from melting butter to adding the minced garlic and hearing that irresistible sizzle. That’s where the fun begins.

Ingredients

For this Garlic Butter Chicken Linguine, you will need:

  • 2 chicken breasts
    • Opt for organic chicken if you can.
  • 3 tablespoons butter
    • Use unsalted butter for better control over salt levels.
  • 4 cloves garlic, minced
    • Fresh garlic will give the best flavor.
  • 1 teaspoon red pepper flakes
    • Adjust based on your family’s spice tolerance.
  • 8 ounces linguine
    • You can substitute with whole wheat or gluten-free.
  • Salt and pepper to taste
    • Freshly ground black pepper adds more flavor.
  • Parmesan cheese for serving
    • A sprinkling of freshly grated makes it even better.
  • Fresh parsley for garnish
    • Chop it finely to up the presentation.

Directions

  1. Cook the linguine according to package instructions. Drain and set aside.

    • Make sure to reserve a little pasta water before draining. It helps in creating a creamy sauce later.
  2. In a large skillet, melt the butter over medium heat.

    • Keep an eye on it, so it doesn’t brown too much; you want just enough to flavor the chicken.
  3. Add the minced garlic and red pepper flakes, sauté until fragrant.

    • You should be able to smell the garlic wafting through your kitchen; it’s an excellent sign you’re on the right path.
  4. Season the chicken breasts with salt and pepper, then add them to the skillet. Cook until the chicken is browned and cooked through, about 5-7 minutes per side.

    • Flip them once you see a nice golden crust; that’s where all that flavor is.
  5. Remove the chicken from the skillet and slice it.

    • Let it rest for a minute before slicing to keep the juices inside.
  6. Add the cooked linguine to the skillet, tossing to coat in the garlicky butter.

    • If it seems a little dry, splash in that reserved pasta water to loosen it up.
  7. Serve the linguine topped with sliced chicken, grated Parmesan cheese, and fresh parsley.

    • Make it nice and pretty; a well-plated dish makes everyone feel special.

Serving
Garlic Butter Chicken Linguine

Serving Garlic Butter Chicken Linguine family-style can be an enjoyable experience. Place the pasta in a large serving bowl and let everyone help themselves. This not only turns dinner into a shared event but also fosters conversation and connection. As everyone fills their plates, it’s a wonderful time to share stories of the day or even plan the next family get-together.

Consider setting up a little “toppings bar” with extra Parmesan and red pepper flakes on the side. You can even add a green salad to complement the meal and balance the flavors.

Storage

If you happen to have leftovers (which isn’t likely), store the pasta in an airtight container in the fridge. It can last for up to three days, but it’s best enjoyed within the first two. To reheat, add a splash of water or chicken broth to keep the noodles from drying out. You can heat it in a skillet over medium heat, stirring occasionally, to maintain that delightful garlicky flavor.

Kitchen Notes

Here are five shortcuts to make this recipe even easier:

  • Use pre-cooked rotisserie chicken if you’re short on time. Just add it to the skillet to warm up.
  • Substitute melted margarine if you cannot use butter due to dietary restrictions.
  • Feel free to use frozen minced garlic to save time on prep.
  • If you want a veggie boost, toss in some spinach or cherry tomatoes with the garlic.
  • Pre-cook the linguine and store it in the fridge for a quick cook during busy evenings.

Variations

Sometimes, you must cater to various tastes in your household. Here are some tweaks you can make:

  • For picky eaters, try substituting chicken with shrimp or even tofu for a vegetarian option.
  • If someone in your family is avoiding carbs, spiralized zucchini or spaghetti squash could serve as a great substitute for linguine.
  • You can add in other vegetables such as bell peppers or broccoli for a colorful presentation and added nutrients.
  • If someone prefers a thicker sauce, mix in a splash of heavy cream or even cream cheese while tossing the pasta in the skillet.
  • Experiment using different cheeses like feta or gouda if Parmeran isn’t available.

FAQ

  1. Can I use a different pasta?
    Yes! Any long pasta works, such as spaghetti or fettuccine.

  2. Is this meal freezer-friendly?
    While it is edible after freezing, the texture might change. It’s best enjoyed fresh.

  3. What wine pairs well with this dish?
    A nice white wine like Sauvignon Blanc complements garlic and chicken beautifully.

  4. Can I make this dish ahead of time?
    You can prepare the chicken and sauce beforehand, and then quickly toss in the pasta before serving.

  5. How can I make it more garlicky?
    You can add more cloves of garlic or even roasted garlic for a sweeter flavor.

Conclusion

As the evening winds down and your family enjoys their plates of Garlic Butter Chicken Linguine, take a moment to appreciate the warmth and joy of family meals. This recipe is simple yet filled with rich flavors, and it brings loved ones together. Cooking is about more than just preparing food; it’s about nurturing relationships and creating lasting memories. So roll up your sleeves and bring this delicious dish to your table. You’re bound to create smiles all around.

Garlic Butter Chicken Linguine

Prep Time 10 minutes
Cook Time 20 minutes
Total Time 30 minutes
Servings 4 servings
Calories 550
A comforting and quick family meal featuring tender chicken, silky linguine, and robust garlic flavor, perfect for busy weeknights.

Ingredients

Main Ingredients

  • 2 pieces chicken breasts (Opt for organic chicken if you can.)
  • 3 tablespoons butter (Use unsalted butter for better control over salt levels.)
  • 4 cloves garlic, minced (Fresh garlic will give the best flavor.)
  • 1 teaspoon red pepper flakes (Adjust based on your family's spice tolerance.)
  • 8 ounces linguine (You can substitute with whole wheat or gluten-free.)
  • to taste Salt and pepper (Freshly ground black pepper adds more flavor.)
  • for serving Parmesan cheese (A sprinkling of freshly grated makes it even better.)
  • for garnish Fresh parsley (Chop it finely to up the presentation.)

Instructions 

Cooking the Linguine

  • Cook the linguine according to package instructions. Drain and set aside.
  • Make sure to reserve a little pasta water before draining to help create a creamy sauce later.

Cooking the Chicken

  • In a large skillet, melt the butter over medium heat. Keep an eye on it to prevent browning too much.
  • Add the minced garlic and red pepper flakes, sauté until fragrant.
  • Season the chicken breasts with salt and pepper, then add them to the skillet. Cook until browned and cooked through, about 5-7 minutes per side.
  • Remove the chicken from the skillet and slice it after letting it rest for a minute.

Combining Ingredients

  • Add the cooked linguine to the skillet, tossing to coat in the garlicky butter. Splash in reserved pasta water if needed.
  • Serve topped with sliced chicken, grated Parmesan cheese, and fresh parsley.

Notes

Serving Garlic Butter Chicken Linguine family-style can enhance the meal experience. Provide a toppings bar with extra Parmesan and red pepper flakes. Leftovers can be stored in an airtight container for up to three days.
Calories: 550kcal
Course: Dinner, Main Course
Cuisine: Italian
Keyword: Chicken, Comfort Food, Garlic, Pasta, Quick Dinner

Garlic Butter Chicken and Bowtie Pasta

There’s something wonderfully comforting about the smell of garlic and butter wafting through the kitchen. It’s that warm, inviting aroma that calls everyone in the house. As you stir together the ingredients, you can hear the soft bubbling of the sauce, combined with the gentle simmer of the pasta. This is the perfect backdrop to a family meal that feels special and tastes divine. Today, I’m sharing one of my family’s favorites: Garlic Butter Chicken and Bowtie Pasta.

Why This Works

Garlic Butter Chicken and Bowtie Pasta

This recipe is a fantastic blend of rich flavors and textures that your whole family will love. Garlic butter? Yes, please. Tender chicken perfectly coated in creamy sauce? It’s like a warm hug on a plate.

Not only does this dish taste incredible, but it’s also quick to prepare. With just a few ingredients and a straightforward cooking method, you’ll have dinner ready in no time. This is ideal for busy weeknights when you want to serve something delicious without spending hours in the kitchen.

Process Overview

“This is where the magic happens—when the aroma fills the kitchen.”

Cooking this Garlic Butter Chicken and Bowtie Pasta is truly an enjoyable experience. It brings your family together—from the delightful scents that fill your home to the smiles on their faces when they dig into a warm, hearty meal. You’ll love how this simple process transforms everyday ingredients into something extraordinary. Let’s get started!

Ingredients

For this recipe, you will need:

  • 2 chicken breasts
  • 8 oz bowtie pasta
  • 4 cloves garlic, minced
  • 1/2 cup butter
  • 1 cup heavy cream
  • 1 cup chicken broth
  • 1/2 cup Parmesan cheese
  • Salt and pepper to taste
  • Fresh parsley for garnish

Lily’s Tips:

  • Chicken Breasts: Look for ones that are plump and of even size for even cooking.
  • Bowtie Pasta: This shape holds onto the sauce beautifully.
  • Garlic: Fresh garlic is a must. It provides the best flavor.
  • Butter: Use unsalted butter for more control over the saltiness of the dish.
  • Parmesan Cheese: Freshly grated cheese melts better than pre-packaged varieties.

Directions

  1. Cook the bowtie pasta according to package instructions; drain and set aside.
    Note: Don’t forget to save a bit of pasta water. It can help adjust the sauce later if needed.

  2. In a large skillet, melt butter over medium heat.
    This step sets the stage for all the rich flavors to come. Just watch it melt into a beautiful golden hue.

  3. Add minced garlic and sauté until fragrant.
    The smell of sautéing garlic is magic in the kitchen. Make sure not to burn it—keep an eye on it as it cooks.

  4. Add chicken breasts and cook until browned and cooked through.
    Turn them a couple of times to get an even golden crust. This will seal in the juices.

  5. Remove chicken from skillet and slice.
    Letting the chicken rest for a few minutes before slicing ensures it stays juicy.

  6. In the same skillet, add chicken broth and heavy cream; bring to a simmer.
    The beauty of one-pan meals is the flavor buildup in the skillet. Scrape any tasty bits off the bottom.

  7. Stir in Parmesan cheese, salt, and pepper.
    Watch as everything comes together into a creamy, cheesy sauce—it’s dreamy!

  8. Add cooked pasta and sliced chicken to the sauce; mix well.
    This is where you can really get everyone involved. Have the kids help stir.

  9. Serve hot, garnished with fresh parsley.
    The pop of green looks lovely and adds a fresh touch to the rich dish.

Serving

Garlic Butter Chicken and Bowtie Pasta

When it comes to serving Garlic Butter Chicken and Bowtie Pasta, make it family-style. Present it in a large bowl and let everyone help themselves. You can sprinkle a bit more Parmesan cheese on top for those who love a cheesy finish.

Don’t forget to pair this dish with a simple side salad or some steamed vegetables to balance out the meal. Enjoy the laughter and conversations around the table as everyone digs in.

Storage

If you have leftovers (which is rare, but it happens!), store the Garlic Butter Chicken and Bowtie Pasta in an airtight container in the fridge. It should be good for 3 to 4 days.

When reheating, do so gently in a skillet over low heat. Add a splash of chicken broth or cream to revive the sauce and keep it creamy.

Kitchen Notes

Here are some handy shortcuts to keep in mind:

  • Meal Prep: Cook the chicken and make the sauce ahead of time. Store it separately for up to two days.
  • Pasta Cooking: Remember to add salt to your pasta water for added flavor.
  • Frozen Chicken: Use frozen chicken breasts; just increase the cooking time.
  • One-Pot Wonder: Instead of cooking pasta separately, you can cook the pasta in the sauce with added water.
  • Herbs: Fresh herbs like thyme or basil can add extra flavor if you have them on hand.

Variations

This recipe can easily adapt to suit different tastes:

  • Picky Eaters: Cut the chicken into smaller pieces or treat them to a fun shape pasta.
  • Healthier Option: Use whole wheat or gluten-free pasta to fit dietary needs.
  • Veggie Boost: Add in spinach or cherry tomatoes for extra nutrients.
  • Low-Carb: Substitute pasta with zucchini noodles or spaghetti squash for a lighter meal.
  • Spice it Up: Add a pinch of red pepper flakes to the garlic for a kick.

FAQ

1. Can I use other types of pasta?
Yes, feel free to substitute any pasta you have on hand. Just adjust the cooking time as necessary.

2. Is there a vegetarian version of this dish?
Absolutely! Swap out the chicken for sautéed mushrooms or a plant-based protein.

3. How can I make it dairy-free?
Use a dairy-free butter alternative and substitute the heavy cream with coconut cream or a plant-based cream.

4. Can I freeze leftovers?
Yes, but keep in mind the pasta may become a bit soft upon thawing. It’s best to freeze the sauce and chicken separately.

5. What can I serve with this dish?
A green salad, garlic bread, or steamed veggies are excellent options for side dishes.

As you finish up the meal, take a moment to savor the joy that comes with sharing a homemade dinner. Cooking can be a beautiful way to bond with loved ones, creating not just food but also lasting memories. Enjoy your Garlic Butter Chicken and Bowtie Pasta, and cherish those precious family moments at the table.

Garlic Butter Chicken and Bowtie Pasta

Prep Time 10 minutes
Cook Time 20 minutes
Total Time 30 minutes
Servings 4 servings
Calories 600
A comforting and quick family meal featuring tender chicken in a creamy garlic butter sauce, served with bowtie pasta.

Ingredients

Main Ingredients

  • 2 pieces chicken breasts (Look for plump, even-sized breasts for even cooking.)
  • 8 oz bowtie pasta (This shape holds onto the sauce beautifully.)
  • 4 cloves garlic, minced (Fresh garlic is a must for the best flavor.)
  • 1/2 cup butter (Use unsalted for better control over seasoning.)
  • 1 cup heavy cream (Provides a rich, creamy texture.)
  • 1 cup chicken broth (Adds depth to the sauce.)
  • 1/2 cup Parmesan cheese (Freshly grated melts better than pre-packaged.)
  • Salt and pepper to taste
  • Fresh parsley for garnish (Adds freshness and color.)

Instructions 

Cooking Pasta

  • Cook the bowtie pasta according to package instructions; drain and set aside. Save a bit of pasta water for the sauce if needed.

Preparing Sauce

  • In a large skillet, melt butter over medium heat.
  • Add minced garlic and sauté until fragrant, being careful not to burn it.
  • Add chicken breasts and cook until browned and cooked through, turning a couple of times.
  • Remove chicken from skillet and let it rest for a few minutes before slicing.
  • In the same skillet, add chicken broth and heavy cream; bring to a simmer.
  • Stir in Parmesan cheese, salt, and pepper, mixing until well combined.
  • Add cooked pasta and sliced chicken to the sauce; mix well and serve hot, garnished with fresh parsley.

Notes

For serving, present in a large bowl. Pair with a side salad or steamed vegetables. Leftovers can be stored in an airtight container for 3 to 4 days.
Calories: 600kcal
Course: Dinner, Main Course
Cuisine: American, Family
Keyword: Comfort Food, Family Meal, Garlic Butter Chicken, Pasta, Quick Dinner

Garlic Butter Chicken and Rice (Easy One-Pan Dinner)

I still remember the first time I pulled this chicken mac and cheese from the oven. The kitchen filled with a warm, cheesy smell. The timer beeped and my kids came running. You can hear the tiny footsteps and the soft clinking of spoons as everyone claims their bowl.

This recipe is simple, forgiving, and perfect for a weeknight when you want comfort without fuss. If you love quick chicken meals, you might also enjoy my collection of easy chicken breast recipes that make family dinners feel special.

Why this works

Pin on Recipes

This dish checks every box for busy families. It cooks in one baking dish, which saves time on cleanup. The pasta soaks up a creamy sauce while the chicken stays tender and flavorful.

I often swap cuts to fit what I have on hand. If you prefer thighs, they work beautifully and keep the bake moist. For more ideas on quick roasted chicken options, see my post about 30-minute oven-baked boneless skinless chicken thighs.

This recipe is also a crowd-pleaser. Kids generally love the cheesy texture while adults enjoy the savory seasoning. Leftovers reheat well. That makes this dish a real time-saver for busy weeks.

Process Overview

“This is where the magic happens—when the aroma fills the kitchen.”

In broad strokes, you will cook the pasta and chicken, make a quick cheese sauce, combine everything, and bake until bubbly. The sauce thickens as it bakes and the top develops a light golden crust.

I like to brown the chicken slightly for extra flavor. If you are short on time, you can use rotisserie chicken or leftover roasted chicken and skip the browning step.

For more ideas that pair well with this kind of one-dish comfort meal, check my roundup of chicken and spinach ideas.

Ingredients

H3: What you need and my personal tips

  • 12 oz elbow macaroni or small pasta
  • Tip: Use pasta that fits a spoon easily. If you have whole wheat or gluten-free pasta, it will work. Cook 1 minute less than package directions so the pasta does not go mushy in the oven.
  • 1 1/2 lb boneless skinless chicken breasts, cut into 1-inch pieces
  • Tip: Trim any large fat and pat the pieces dry. If breasts are very large, pound to even thickness so they cook evenly.
  • 3 tbsp butter
  • Tip: Use salted butter for extra flavor or unsalted if you watch sodium.
  • 3 tbsp all-purpose flour
  • Tip: This makes the roux that thickens the sauce. For a gluten-free option, use a 1-to-1 gluten-free flour.
  • 2 1/2 cups milk (whole or 2%)
  • Tip: Whole milk gives the creamiest result. You can use half-and-half for a richer sauce.
  • 1 cup chicken broth
  • Tip: Low-sodium broth lets you control salt. If using rotisserie chicken, you can reduce the broth to 1/2 cup.
  • 2 cups shredded sharp cheddar cheese
  • Tip: Grate your own cheese for better melting and flavor.
  • 1 cup shredded mozzarella cheese
  • Tip: Mozzarella adds stretch and creaminess.
  • 1/2 cup grated Parmesan cheese
  • Tip: Parmesan adds a salty, nutty layer of flavor. Use freshly grated if possible.
  • 1 tsp Dijon mustard
  • Tip: Mustard brightens the sauce. If you do not have Dijon, yellow mustard works in a pinch.
  • 1/2 tsp garlic powder and 1/2 tsp onion powder
  • Tip: These build savory depth without adding moisture.
  • 1 tsp paprika
  • Tip: Smoked paprika is nice if you like a subtle smoky note.
  • Salt and pepper to taste
  • Tip: Start with 1 tsp salt and 1/2 tsp pepper. Taste before baking and adjust.
  • 1/2 cup breadcrumbs or crushed crackers for topping
  • Tip: Mix with 1 tbsp melted butter for a golden, crunchy finish.
  • 2 tbsp chopped fresh parsley for garnish (optional)
  • Tip: Parsley brightens the presentation and adds a fresh note.

I often include a link to my favorites when suggesting pasta and cheese swaps in my roundup of chicken macaroni favorites that inspired this bake.

Directions

H3: Step-by-step with encouragement

  1. Preheat the oven to 375°F and grease a 9 by 13-inch baking dish.
  2. Note: Preheating ensures even baking. I love that moment when the oven warms the kitchen and the kids know something good is coming.
  3. Cook the pasta according to package directions until al dente, but reduce the time by 1 minute. Drain and set aside.
  4. Note: Slightly undercooked pasta finishes in the oven and soaks up the sauce without getting too soft.
  5. Season the chicken pieces with salt, pepper, paprika, and a pinch of garlic powder.
  6. Note: Season well. This is where the chicken gains flavor quickly, and you will be glad you did.
  7. In a large skillet over medium-high heat, melt 1 tbsp butter and brown the chicken in batches until lightly golden, about 3 to 4 minutes. Remove and set aside.
  8. Note: Browning adds a layer of flavor but does not need to be perfect. If you skip this, your dish will still be delicious.
  9. In the same skillet, melt the remaining 2 tbsp butter over medium heat. Whisk in the flour and cook for 1 minute until it smells toasty. Slowly whisk in the milk and chicken broth until smooth.
  10. Note: Whisking constantly prevents lumps and gives you a silky sauce.
  11. Stir in Dijon mustard, garlic powder, onion powder, and half the cheddar and mozzarella. Cook until the cheese melts and the sauce thickens, about 3 minutes. Taste and season with salt and pepper.
  12. Note: The sauce will look rich and glossy. Feeling tempted to taste is normal. A small spoonful is encouraged.
  13. Combine the cooked pasta, browned chicken, and cheese sauce in the greased baking dish. Stir until evenly coated. Sprinkle the remaining cheeses on top.
  14. Note: Make sure the pasta is well-coated so every bite is creamy.
  15. Mix breadcrumbs with 1 tbsp melted butter and sprinkle over the top for a golden crust.
  16. Note: The breadcrumb topping gives a pleasing crunch that kids love to break into.
  17. Bake uncovered for 20 to 25 minutes until the top is bubbly and golden. Let rest 5 minutes before serving.
  18. Note: Resting helps the sauce settle so you can serve neat portions.
  19. Garnish with chopped parsley and serve warm.
  20. Note: A small sprinkle of parsley adds color and freshness. I often let the kids sprinkle it to make them feel involved.

If you want to read more about who I am and why I test recipes this way, feel free to learn about me and my recipes.

Serving

Pin on Recipes

Serve this chicken mac and cheese family-style right from the baking dish. Place bowls, a large serving spoon, and simple sides on the table. I like to offer a crisp green salad and roasted vegetables to balance the richness.

For a kid-friendly approach, let children add their own toppings at the table. Some of our favorites are extra shredded cheese, crushed crackers, or a few diced tomatoes.

If you want to turn this into a potluck dish, transfer it to a shallow, wide dish so the top browns evenly during transport. It holds well in an insulated carrier for about an hour.

Storage

This dish makes great leftovers. Store in an airtight container in the fridge for up to 4 days.

To reheat individual portions, microwave for 1 to 2 minutes on medium power, stirring halfway through to heat evenly. For a whole pan, cover with foil and bake at 350°F for 15 to 20 minutes until warmed through. Remove the foil for the last 5 minutes to let the top crisp up.

If you need to freeze, cool completely, cover with plastic wrap and foil, and freeze for up to 3 months. Thaw overnight in the refrigerator before reheating in the oven.

Kitchen Notes

  • Use a rotisserie chicken to save time. Shred it and skip the browning step.
  • Swap in gluten-free pasta and flour for a gluten-free version.
  • Use grated cheese from a block for the best melt. Pre-shredded cheese can contain anti-clumping agents that affect texture.
  • Make ahead to the point of baking, cover, and refrigerate. Bake when ready for dinner.
  • Double the recipe for a crowd and bake in two pans for even cooking.

Variations

  • Picky eater version: Leave out the paprika and use mild cheddar only. Serve plain with ketchup or plain butter if that helps picky eaters accept it.
  • Vegetables added: Stir in 1 cup steamed broccoli or peas before baking for added color and nutrients.
  • Spicy twist: Add 1/2 tsp red pepper flakes to the sauce and use pepper jack cheese for a kick.
  • Low-carb option: Replace pasta with cooked cauliflower florets and reduce milk to make a firmer sauce.
  • Dairy-free: Use a dairy-free milk and a dairy-free cheese alternative, plus a dairy-free butter substitute for the breadcrumb topping.

FAQ

Q: Can I use frozen chicken?

A: Yes. Cook and thaw the chicken first, then chop into pieces. If it is already cooked, add it in the last assembly step so it does not dry out.

Q: Is it possible to make this vegetarian?

A: Absolutely. Replace the chicken with roasted mushrooms, extra vegetables, or a plant-based chicken substitute. Use vegetable broth instead of chicken broth.

Q: How can I prevent the casserole from becoming watery?

A: Slightly undercook the pasta before baking and be sure to thicken the sauce on the stovetop until it coats the back of a spoon. Avoid adding too much broth.

Q: Can I use different cheeses?

A: Yes. Cheddar and mozzarella give a great balance. Gruyere or Monterey Jack work well too. Mix flavors to your family’s taste.

Q: What can I serve with this for a balanced meal?

A: A simple green salad, roasted Brussels sprouts, or steamed green beans pair nicely. Fresh fruit for dessert keeps things light.

Conclusion

I hope this creamy chicken mac and cheese becomes one of your go-to weeknight meals. It warms the kitchen and brings everyone to the table. Little moments like stirring the sauce or letting the breadcrumbs brown are what make dinner feel like home.

For inspiration on tools and techniques that make rolling and shaping dough easy, I recommend exploring the useful collection at Just Roll with It: 17 Recipes for Your Rolling Pin. If you are curious about noodle-based comfort dishes from other traditions, take a look at the classic Silver Pin Noodles with Chicken Recipe for a different take on family noodle dinners.

Thank you for cooking with me. Feed your family with love, and enjoy the delicious sounds and smells that make a house into a home.

Chicken Mac and Cheese

Prep Time 15 minutes
Cook Time 25 minutes
Total Time 40 minutes
Servings 6 servings
Calories 570
A simple and comforting one-dish meal featuring tender chicken and creamy cheese sauce baked with pasta.

Ingredients

Pasta and Chicken

  • 12 oz elbow macaroni or small pasta (Use pasta that fits a spoon easily. Whole wheat or gluten-free options work.)
  • 1.5 lb boneless skinless chicken breasts, cut into 1-inch pieces (Trim any large fat and pat dry.)

Sauce Ingredients

  • 3 tbsp butter (Use salted butter for extra flavor or unsalted if watching sodium.)
  • 3 tbsp all-purpose flour (For a gluten-free option, use a 1-to-1 gluten-free flour.)
  • 2.5 cups milk (whole or 2%) (Whole milk gives the creamiest result.)
  • 1 cup chicken broth (Low-sodium broth lets you control salt.)

Cheese Blend

  • 2 cups shredded sharp cheddar cheese (Grate your own cheese for better melting.)
  • 1 cup shredded mozzarella cheese (Adds stretch and creaminess.)
  • 1/2 cup grated Parmesan cheese (Use freshly grated if possible.)

Seasonings and Toppings

  • 1 tsp Dijon mustard (Mustard brightens the sauce.)
  • 1/2 tsp garlic powder (Adds savory depth.)
  • 1/2 tsp onion powder (Adds savory depth.)
  • 1 tsp paprika (Smoked paprika adds a subtle smoky note.)
  • 1/2 cup breadcrumbs or crushed crackers for topping (Mix with 1 tbsp melted butter for crunch.)

Garnish (Optional)

  • 2 tbsp chopped fresh parsley (Brightens presentation.)

Instructions 

Preparation

  • Preheat the oven to 375°F and grease a 9 by 13-inch baking dish.
  • Cook the pasta according to package directions until al dente, reducing time by 1 minute. Drain and set aside.
  • Season the chicken pieces with salt, pepper, paprika, and garlic powder.

Cooking

  • In a large skillet over medium-high heat, melt 1 tbsp butter and brown the chicken in batches, about 3 to 4 minutes. Remove and set aside.
  • In the same skillet, melt the remaining 2 tbsp butter, whisk in the flour and cook for 1 minute.
  • Slowly add the milk and chicken broth to the skillet, whisking until smooth.
  • Stir in Dijon mustard, garlic powder, onion powder, and half the cheddar and mozzarella. Cook until the cheese melts and the sauce thickens, about 3 minutes.

Assembly and Baking

  • Combine cooked pasta, browned chicken, and cheese sauce in the greased baking dish, stirring until evenly coated.
  • Sprinkle remaining cheeses on top, mix breadcrumbs with 1 tbsp melted butter, and sprinkle over the top.
  • Bake uncovered for 20 to 25 minutes until the top is bubbly and golden. Let rest 5 minutes before serving.
  • Garnish with parsley and serve warm.

Notes

This dish makes great leftovers. Store in an airtight container in the fridge for up to 4 days. It can be frozen for up to 3 months.
Calories: 570kcal
Course: Dinner, Main Course
Cuisine: American
Keyword: Baked Pasta, Cheesy Recipes, Chicken Mac and Cheese, Comfort Food, Family Dinner

Sheet Pan Garlic Butter Chicken and Veggies

I can smell the garlic and butter as soon as I open the oven. The soft sizzle of potatoes hitting hot pan makes the whole kitchen feel cozy. That warmth is what I love about a simple sheet pan dinner.

This Sheet Pan Garlic Butter Chicken and Veggies recipe is one of those weeknight lifesavers. It fills the house with a comforting aroma and gives you a full meal with almost no fuss. If you like easy dinners, you might enjoy my Bang Bang Chicken Sliders too for another family-friendly option.

Why this works

Sheet Pan Garlic Butter Chicken and Veggies

This recipe brings a few smart ideas together. Chicken cooks quickly and stays juicy when surrounded by vegetables. The garlic butter gives everything a uniform, irresistible flavor. Roasting everything together saves time and reduces dishes, so you can focus on your family.

If you are short on time, this sheet pan meal lets you prep, pop it in the oven, and check on it only once. For more one-pan chicken ideas, I often turn to resources in my quick and easy chicken collection for inspiration.

Process Overview

“This is where the magic happens—when the aroma fills the kitchen.”

The process is very straightforward. You arrange the chicken, tuck the veggies around it, drizzle garlic butter, season, and roast. The heat caramelizes the vegetables and seals juices in the chicken so everything is tender, flavorful, and ready in about 30 minutes.

If you like a crisp finish, give the sheet pan a quick broil for 2 minutes at the end. I use the broiler sparingly, but it adds a nice color when you want that golden look. For more tips on sheet pan finishing, check out a few of my favorite air fryer tricks in this post about air fryer chicken recipes that translate well to oven cooking.

Ingredients

  • 4 chicken breasts
    • Lily’s tip: Use even-sized breasts so everything cooks at the same rate. If they are large, pound them gently to uniform thickness.
  • 4 tablespoons garlic butter
    • Lily’s tip: Real butter with fresh garlic gives the best flavor. If you want lighter, use 3 tablespoons butter and 1 tablespoon olive oil.
  • 1 pound baby potatoes, halved
    • Lily’s tip: Choose small, firm potatoes and halve them so they roast quickly. Toss them cut side down for better browning.
  • 2 cups mixed vegetables (such as bell peppers, carrots, and broccoli)
    • Lily’s tip: Cut vegetables into similar-sized pieces. Denser veggies like carrots may need a slightly smaller dice so everything finishes together.
  • Salt and pepper to taste
    • Lily’s tip: Season in layers. A little on the chicken and vegetables before roasting, then a pinch when you finish.
  • 1 teaspoon Italian seasoning (optional)
    • Lily’s tip: Italian seasoning adds a herby note. Use fresh herbs if you have them on hand, or skip it for a simpler buttery garlic flavor.

I like to prep everything on a single cutting board and measure the butter ahead of time. Having the garlic butter ready to melt saves those few extra minutes when you want to get the pan in the oven.

Directions

  1. Preheat your oven to 400°F (200°C).
    • Encouragement: A warm oven makes the kitchen smell like dinner is already happening. While the oven heats, take a breath and enjoy the moment.
  2. Arrange the chicken breasts on a sheet pan.
    • Encouragement: Give each breast a bit of space so air can circulate. If you feel overwhelmed, know this step is simple and forgiving.
  3. Surround the chicken with halved baby potatoes and mixed veggies.
    • Encouragement: Tuck carrots and peppers close but leave broccoli a little looser so it crisps. Picture the colors on the pan—it makes the meal feel special.
  4. Melt the garlic butter and drizzle it over the chicken and veggies.
    • Encouragement: Pour slowly so the butter covers everything. The aroma is a reward right away and a little taste test is encouraged.
  5. Season everything with salt, pepper, and Italian seasoning if desired.
    • Encouragement: Seasoning is where the magic balances. Taste and adjust if you like bolder flavors. Little tweaks here make it yours.
  6. Bake in the oven for 25-30 minutes, or until the chicken is cooked through and veggies are tender.
    • Encouragement: Use a meat thermometer for peace of mind; chicken should reach 165°F. If the potatoes need more time, remove the chicken and roast a few extra minutes.
  7. Serve warm and enjoy your easy one-pan dinner!
    • Encouragement: Let the pan rest for a couple minutes before serving. Call the family to the table and share that first happy bite.

If you want a crispier top, pop the pan under the broiler for 1 to 2 minutes at the end. Watch it closely so it does not burn.

Serving

Sheet Pan Garlic Butter Chicken and Veggies

This dish is perfect for family-style serving. Place the sheet pan in the center of the table and let everyone help themselves. I like to offer simple sides like a leafy green salad or warm crusty bread.

For kids who love to customize, set out small bowls of grated cheese, lemon wedges, or a mild dipping sauce. If you want a fancier presentation, carve the chicken on a cutting board and arrange the vegetables around it. Serving family-style keeps things relaxed and lively.

If you enjoy family meals with similar crowd-pleasing flavors, my crispy mozzarella wraps are a hit on busy nights and make a great companion recipe to offer variety at the table: Crunchy Crispy Air Fryer Chicken Mozzarella Wraps.

Storage

Refrigerator

  • Store leftovers in an airtight container within two hours of cooking.
  • They will keep well for up to 3 days.

Reheating

  • Reheat in a 350°F oven for 10 to 15 minutes to preserve the roast texture.
  • For speed, microwave individual portions for 1 to 2 minutes, then crisp in a hot skillet for a minute if you like the potatoes crisp.

Freezing

  • I do not recommend freezing whole cooked potatoes and vegetables as texture changes. You can freeze cooked chicken breasts separately for up to 2 months and thaw overnight before reheating.

A quick tip: keep a small dab of butter or a splash of water with the leftovers when reheating to keep things moist.

Kitchen Notes

  • Use parchment paper or a silicone baking mat to make cleanup faster.
  • If you are short on time, buy pre-cut vegetables from the grocery store.
  • Swap garlic butter with garlic-infused olive oil if dairy is a concern.
  • If your oven runs hot, rotate the pan halfway through baking for even browning.
  • Line up vegetables by cook time: potatoes and carrots on one side, tender peppers and broccoli added later if needed.

These shortcuts help busy families get dinner on the table without stress. I keep a small jar of garlic butter in the fridge to speed things along on hectic nights.

Variations

  • For picky eaters: Serve veggies on the side or roast them separately with a different seasoning so each person gets what they like.
  • Low carb: Replace potatoes with more broccoli and cauliflower or use 1 medium sweet potato sliced thin.
  • Gluten free: This recipe is naturally gluten free if you use certified gluten-free butter and seasoning blends.
  • Dairy free: Use garlic-infused olive oil or a dairy-free buttery spread instead of butter.
  • Spicy version: Add 1/2 teaspoon red pepper flakes to the garlic butter or finish with a drizzle of hot honey for a sweet-heat twist.

Small changes like swapping one vegetable or adding a favorite spice make this dish adaptable to many tastes and diets.

FAQ

Q: Can I use bone-in chicken pieces instead of breasts?
A: Yes. Bone-in pieces will take longer to cook. Increase bake time to 35 to 40 minutes and check that the internal temperature reaches 165°F.

Q: Can I prepare this ahead of time?
A: You can assemble the pan ahead and refrigerate it for up to 24 hours. Let it sit at room temperature 20 minutes before baking and expect a few extra minutes of oven time.

Q: What if my potatoes are not tender when the chicken is done?
A: Remove the chicken to a cutting board and continue roasting the potatoes for 5 to 10 minutes. You can also parboil the potatoes for 5 minutes before roasting to speed things up.

Q: Can I make this in an air fryer?
A: Yes. Use a large air fryer that fits the ingredients in a single layer. Cook at 375°F for about 18 to 22 minutes, checking halfway and shaking the basket for even browning.

Q: How do I know the chicken is cooked through without a thermometer?
A: Cut into the thickest part of the breast; the juices should run clear and the meat should be white with no pink. A thermometer is the safest method when you can use one.

Conclusion

I hope this Sheet Pan Garlic Butter Chicken and Veggies becomes a go-to in your weeknight rotation. It is simple, forgiving, and full of the comforting flavors families love.

If you want a slightly different take or more ideas for one-pan dinners, this Sheet Pan Garlic Butter Chicken Meal from The Country Cook has a lovely spin. You might also enjoy comparing notes with this sister recipe for a one-pan dinner at One-Pan Garlic Butter Chicken and Veggies on Simply Stacie.

Thanks for cooking with me tonight. Gather around the table, enjoy the aroma, and tell the family the kitchen smells like love.

Sheet Pan Garlic Butter Chicken and Veggies

Prep Time 10 minutes
Cook Time 30 minutes
Total Time 40 minutes
Servings 4 servings
Calories 450
A cozy and simple weeknight dinner featuring juicy chicken breasts, garlic butter, and colorful roasted vegetables, all cooked on one sheet pan.

Ingredients

Main Ingredients

  • 4 pieces chicken breasts (Use even-sized breasts for uniform cooking.)
  • 4 tablespoons garlic butter (Real butter with fresh garlic gives the best flavor.)
  • 1 pound baby potatoes, halved (Choose small, firm potatoes and halve them for quick roasting.)
  • 2 cups mixed vegetables (such as bell peppers, carrots, and broccoli) (Cut vegetables into similar-sized pieces for even cooking.)
  • to taste salt and pepper (Season in layers for better flavor.)
  • 1 teaspoon Italian seasoning (optional) (Adds a herby note; use fresh herbs if possible.)

Instructions 

Preparation

  • Preheat your oven to 400°F (200°C).
  • Arrange the chicken breasts on a sheet pan, giving each breast a bit of space.
  • Surround the chicken with halved baby potatoes and mixed veggies.

Cooking

  • Melt the garlic butter and drizzle it over the chicken and veggies.
  • Season everything with salt, pepper, and Italian seasoning if desired.
  • Bake in the oven for 25-30 minutes, or until the chicken is cooked through and veggies are tender.
  • If you want a crispier top, pop the pan under the broiler for 1 to 2 minutes at the end.

Serving

  • Serve warm and enjoy your easy one-pan dinner!

Notes

This dish is perfect for family-style serving. Offer simple sides like a leafy green salad or warm crusty bread. For added variety, customize with dipping sauces or cheese.
Calories: 450kcal
Course: Dinner, Main Course
Cuisine: American, Comfort Food
Keyword: Easy Dinner, Family Meal, Garlic Butter Chicken, Sheet Pan Chicken