I can still smell the garlic and toasted peanuts as I write this. The kitchen hums with the grill and the laughter of kids at the table. When you make chicken satay at home, the whole family leans in to taste.
I started making this recipe years ago for my little ones. It became a quick weeknight favorite and a party staple for weekend guests. If you love fast, family-friendly dinners, this recipe will become a new go-to. For another easy chicken dinner idea that your family will love, try my take on oven-baked boneless skinless chicken thighs in a different post: 30-Min Oven Baked Boneless Skinless Chicken Thighs.
Why this works

Chicken satay balances simple technique with big, familiar flavors. The marinade is quick to mix and needs little hands-on time. You can marinate ahead to save time on busy evenings. That makes it a perfect family dinner when you want flavor without stress.
The peanut butter and fish sauce mix gives a savory and slightly sweet base that even picky eaters tend to like. The lime juice brightens the dish and keeps it from feeling heavy. When we grill, I can usually get everything on the table in under 30 minutes if the chicken marinates earlier.
If you want an equally family-friendly saucy chicken dish with sweet and savory notes, you might also enjoy my teriyaki chicken bowl: 30-Minute Teriyaki Chicken Bowl.
Process Overview
“This is where the magic happens—when the aroma fills the kitchen.”
I like to think of this recipe as three simple parts: the marinade, the skewering, and the quick grill. The marinade brings the flavor, skewers make it kid-friendly and fun, and the grill adds a smoky finish. You can also use an air fryer if you prefer an indoor method; I have a step-by-step for that here: Air Fryer Chicken Breasts.
The goal is to keep each step easy so you can enjoy time with family. Prep in the morning, and dinner practically cooks itself.
Ingredients
-
1 pound chicken breast, cut into strips
Lily’s tip: Cut strips about 1/2 inch thick so they cook evenly. If kids like smaller bites, cut shorter lengths before marinating. -
2 tablespoons soy sauce
Lily’s tip: Use low-sodium soy sauce if you are watching salt. It still gives the needed savory depth. -
1 tablespoon peanut butter
Lily’s tip: Smooth peanut butter blends easily into the marinade. If you have allergies, see the Variations section for substitutes. -
1 tablespoon fish sauce
Lily’s tip: Fish sauce adds umami. Start with one tablespoon and taste the sauce before serving, so it does not overpower. -
1 tablespoon brown sugar
Lily’s tip: Light brown sugar dissolves quickly and adds a gentle caramel note that kids love. -
1 tablespoon lime juice
Lily’s tip: Fresh lime juice brightens the marinade. Bottled will work, but fresh is best. -
2 cloves garlic, minced
Lily’s tip: Mince finely so the garlic disperses and cooks without large raw pieces. -
1 teaspoon curry powder
Lily’s tip: Curry powder adds a warm, familiar flavor without heat. Adjust to taste. -
Skewers (wooden or metal)
Lily’s tip: If using wooden skewers, soak them in water for 30 minutes before grilling. Metal skewers are reusable and heat up quickly. -
Peanut sauce for serving
Lily’s tip: I like to make an extra batch of peanut sauce so everyone can dip. Warm it slightly before serving for the best texture.
Directions
-
In a bowl, combine soy sauce, peanut butter, fish sauce, brown sugar, lime juice, garlic, and curry powder to make the marinade.
Encouraging note: Whisk until smooth and fragrant. It should smell nutty and bright. If you need an easy shortcut, let older kids help with stirring. -
Add the chicken strips to the marinade, ensuring they are well coated. Cover and refrigerate for at least 1 hour or overnight for best results.
Encouraging note: The longer you marinate, the more flavor the chicken will soak up. If you are short on time, even 30 minutes will add flavor. -
Preheat the grill to medium-high heat. If using wooden skewers, soak them in water for 30 minutes to prevent burning.
Encouraging note: A steady, medium-high grill gives you good char without drying out the chicken. You can also heat a grill pan indoors. -
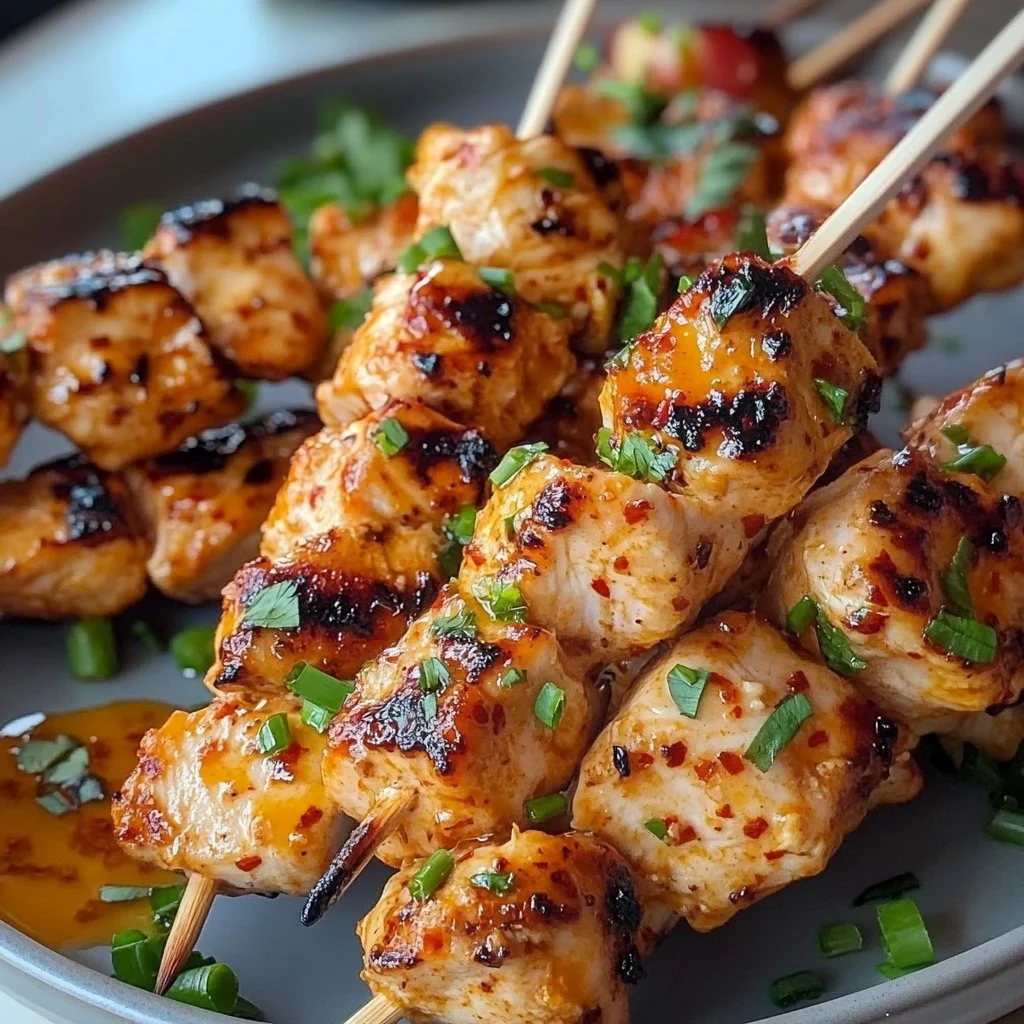
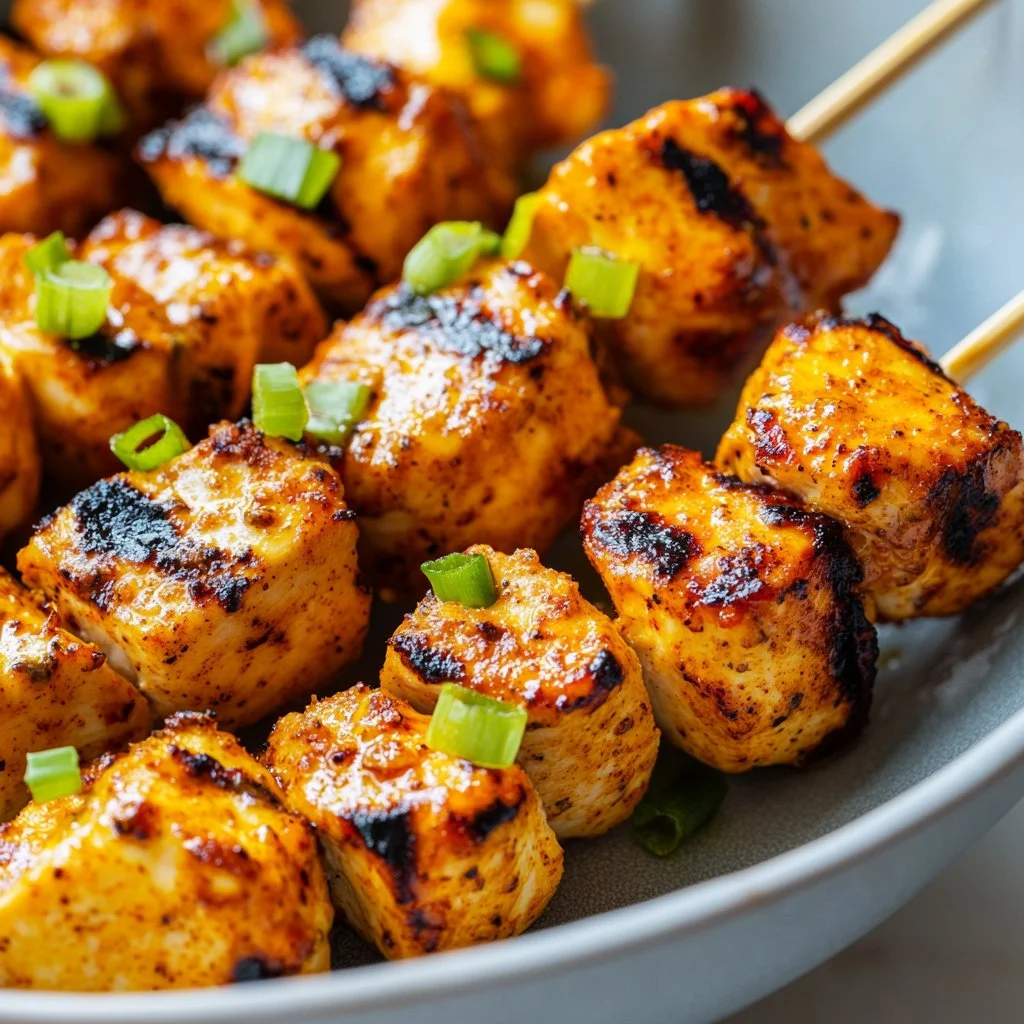
Thread the marinated chicken onto skewers.
Encouraging note: Fold each strip in half and slide it on so pieces sit snugly but not crowded. Kids love threading skewers as a fun activity. -
Grill the skewers for about 5-7 minutes per side or until the chicken is cooked through and has grill marks.
Encouraging note: Flip once for the best grill lines. Use a thermometer to check for 165°F in the thickest piece for safety and juiciness. -
Serve hot with peanut sauce for dipping.
Encouraging note: Let the skewers rest a few minutes so juices settle. Serve with warm peanut sauce and lime wedges for extra brightness.
If you want a hands-off method, you can adapt these steps for the air fryer. I often switch between a grill and the air fryer depending on weather and time. For a guide to cooking skewers in the air fryer, see this helpful post I wrote: Air Fryer Chicken Skewers.
Serving

Serve chicken satay family-style on a large platter. Arrange the skewers with fresh lime wedges and a bowl of warm peanut sauce in the center. Add cucumber slices and steamed jasmine rice for a classic pairing.
I like to include a simple vegetable on the side, such as a quick cucumber salad or roasted broccoli. For a full family meal that kids gobble up, try pairing these skewers with crunchy oven-roasted wings for a party platter: Air Fryer Chicken Wings.
For serving to small children, slide the cooked chicken off the skewers and cut into bite-sized pieces. Keep the peanut sauce on the side if you are concerned about allergies.
Storage
Refrigerate leftover chicken satay in an airtight container for up to 3 days. Keep the peanut sauce in a separate container to preserve texture.
To reheat, warm in a 350°F oven for 8 to 10 minutes, or heat gently in a skillet with a little oil. If you use an air fryer, reheat at 350°F for 3 to 5 minutes until warmed through. Avoid reheating in the microwave when possible, as it can dry the chicken.
If you froze pre-cooked skewers, thaw overnight in the refrigerator, then reheat using the oven or air fryer for the best texture.
Kitchen Notes
- Use boneless, skinless chicken breasts for lean meat that grills quickly. If you prefer thighs, they stay juicier.
- Marinate overnight for deepest flavor. Even a one-hour soak will make a difference.
- If using wooden skewers, soak them every time to prevent burning. Metal skewers cut down on prep time.
- Test one skewer first on the grill to check heat and timing. Adjust the rest if needed.
- Keep extra peanut sauce on hand. It doubles as a dip for veggies and rice.
Variations
- For peanut allergies, use sunflower seed butter or almond butter as a swap. Check labels and inform guests.
- To make it spicy, add 1 teaspoon of chili garlic sauce to the marinade and a pinch of red pepper flakes to the peanut sauce.
- For a low-carb plate, serve the skewers over a bed of mixed greens and grilled vegetables.
- Swap chicken breast for boneless chicken thighs to add extra moisture and a richer flavor.
- For a vegetarian version, use firm tofu or tempeh. Press tofu well, slice into strips, and marinate the same way before grilling.
If your family likes different textures, try pairing this with my air fryer chicken breasts recipe for an easy combo night: Air Fryer Chicken Breasts.
FAQ
Can I make the marinade without fish sauce?
Yes. Fish sauce adds depth, but you can use 2 teaspoons of soy sauce plus 1 teaspoon of Worcestershire sauce instead. Taste and adjust so the flavor stays balanced.
How long can I marinate the chicken?
You can marinate for 30 minutes up to 24 hours. Overnight gives the best flavor. Avoid much longer than 24 hours to prevent texture change.
Can I use frozen chicken?
Thaw chicken completely in the refrigerator before cutting and marinating. Marinating frozen chicken will not work well because the meat will not absorb flavors until thawed.
What kind of peanut sauce should I serve?
A smooth, warm peanut sauce made with coconut milk, peanut butter, soy sauce, and lime juice is classic. For a quick version, thin creamy peanut butter with a splash of soy sauce and lime juice to taste.
Is chicken satay safe for kids?
Yes, when cooked to an internal temperature of 165°F. For young kids, remove the chicken from the skewers and chop into small pieces. Watch for peanut allergies and offer an alternative if needed.
Conclusion
I hope this chicken satay brings warm memories to your kitchen. It is a simple recipe that feeds both busy weeknights and little celebrations. The smell of garlic, lime, and toasted peanut will quickly become part of your family’s favorite dinners.
For a classic take on chicken satay with peanut sauce and a trusted tested method, I also recommend this recipe from The Modern Proper: Chicken Satay with Peanut Sauce | The Modern Proper. If you want a Thai-inspired version with helpful step-by-step photos, this guide from RecipeTin Eats is a great reference: Thai Chicken Satay with Peanut Sauce – RecipeTin Eats.
Thanks for cooking with me. Invite the family into the kitchen, let someone thread the skewers, and enjoy the simple joy of shared food.

Chicken Satay
Ingredients
For the marinade
- 2 tablespoons soy sauce (Use low-sodium for less salt.)
- 1 tablespoon peanut butter (Smooth peanut butter blends easily.)
- 1 tablespoon fish sauce (Start with one tablespoon and taste before serving.)
- 1 tablespoon brown sugar (Light brown sugar dissolves quickly.)
- 1 tablespoon lime juice (Fresh lime juice is best.)
- 2 cloves garlic, minced (Mince finely for even flavor.)
- 1 teaspoon curry powder (Adjust to taste.)
For grilling
- 1 pound chicken breast, cut into strips (Cut strips about 1/2 inch thick.)
- Skewers (wooden or metal) (Soak wooden skewers in water for 30 minutes if using.)
- Peanut sauce for serving (Prepare extra for dipping.)
Instructions
Marinating
- In a bowl, combine soy sauce, peanut butter, fish sauce, brown sugar, lime juice, garlic, and curry powder to make the marinade.
- Add the chicken strips to the marinade, ensuring they are well coated. Cover and refrigerate for at least 1 hour, preferably overnight.
Grilling
- Preheat the grill to medium-high heat.
- Thread the marinated chicken onto skewers.
- Grill the skewers for about 5-7 minutes per side or until the chicken is cooked through and has grill marks.
- Serve hot with peanut sauce for dipping.