Tag

air fryer recipes

Browsing

Air Fryer Chicken Skewers

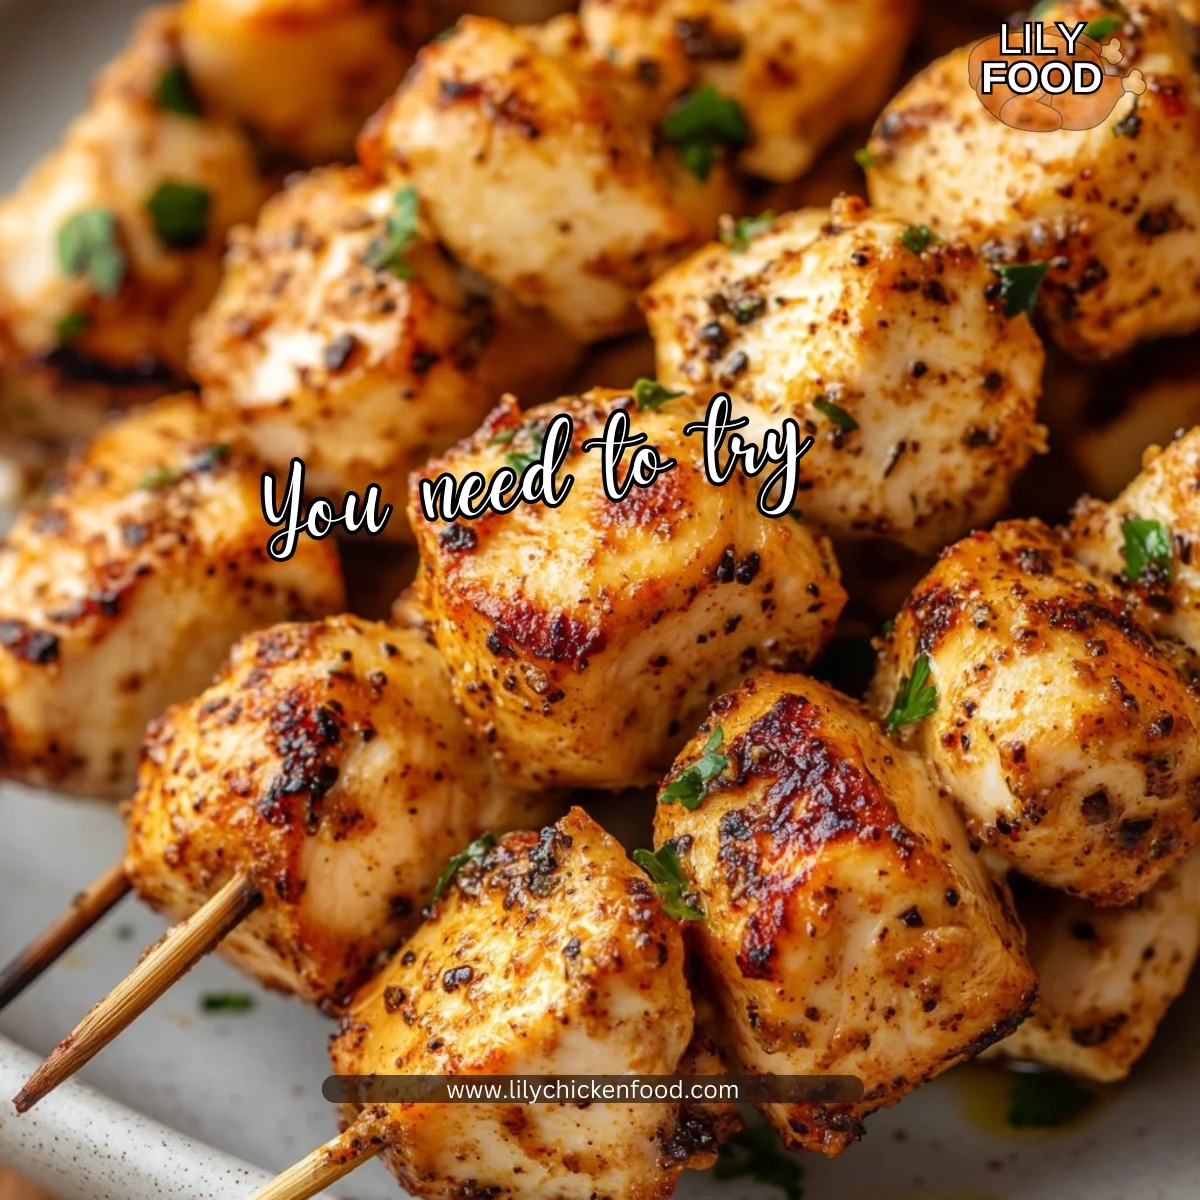
When you step into the kitchen and catch the savory aroma of marinated chicken skewers, you can’t help but feel a sense of comfort. The sound of sizzling chicken, the warmth filling the air, evokes memories of family dinners and joyful gatherings. This recipe for air fryer chicken skewers not only packs flavor but also fits perfectly into our busy lives.

Why This Works

The best part about this recipe is how effortlessly it brings the family together. With just a few ingredients and a short prep time, you can serve a meal that tastes like you’ve spent hours in the kitchen. Air frying is a game-changer. You get the deliciously crispy exterior without the mess of traditional frying.

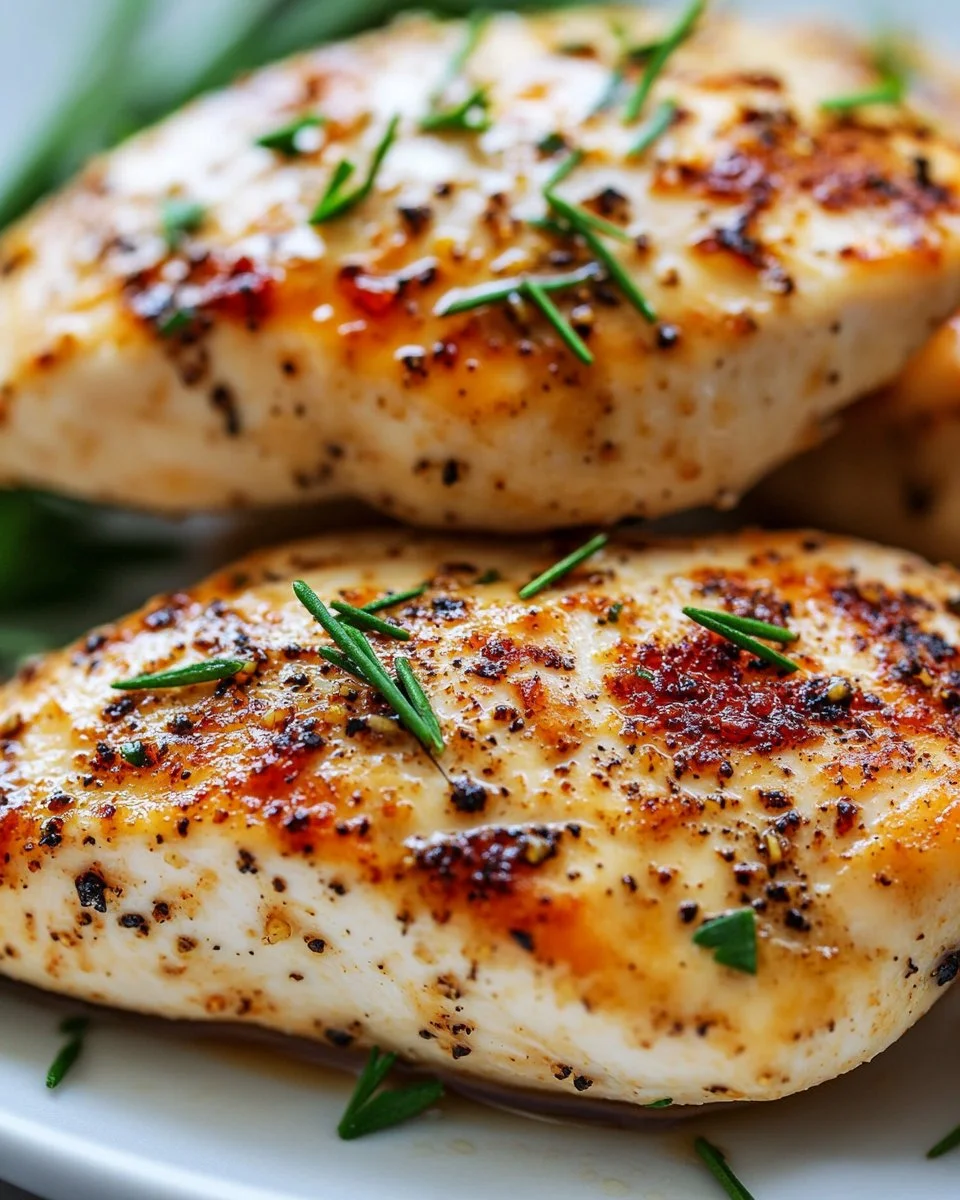
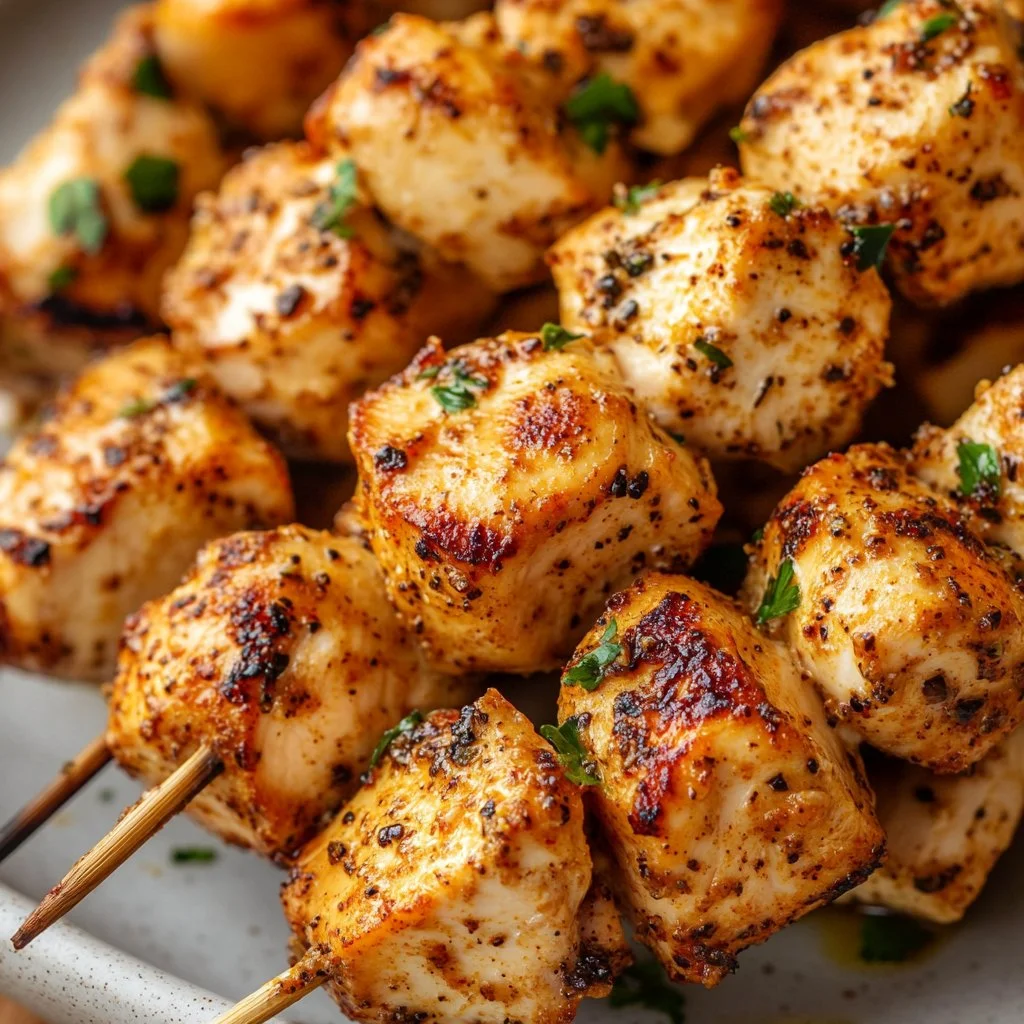
Every bite is tender, juicy chicken infused with the bright flavors of garlic and herbs. It’s perfect for busy weeknights or weekend family barbecues.

Air Fryer Chicken Skewers

Process Overview

Creating delightful chicken skewers is straightforward and rewarding.

“This is where the magic happens—when the aroma fills the kitchen.”

You’ll see how quickly everything comes together and how little time it takes to serve a wholesome meal to your family.

Ingredients

For this recipe, you will need:

  • 1 pound chicken breast, cut into cubes
  • 2 tablespoons olive oil
  • 2 cloves garlic, minced
  • 1 teaspoon paprika
  • 1 teaspoon cumin
  • Salt and pepper to taste
  • 1/4 cup butter, melted
  • 1 tablespoon fresh herbs (like parsley or thyme), chopped

Here are some tips for each ingredient:

  • Chicken Breast: Choose fresh chicken for the best texture. If you have leftovers, they can be grilled or baked on another day.
  • Olive Oil: This helps with marinating. For a twist, use flavored oils like garlic or chili.
  • Garlic: Fresh garlic adds a beautiful depth of flavor. If you’re in a pinch, garlic powder works too.
  • Paprika & Cumin: These spices give a smoky flavor. You can adjust the amounts based on your family’s taste.
  • Salt & Pepper: Season to your preference. Always taste as you go.
  • Butter: For richness, use unsalted butter. You can mix in some lemon juice for a zesty kick.
  • Fresh Herbs: Fresh herbs uplift the dish. If you don’t have any, dried herbs work fine—just use less.

Directions

  1. In a bowl, combine olive oil, minced garlic, paprika, cumin, salt, and pepper. Add chicken cubes and marinate for at least 30 minutes. Remember, marinating allows the flavors to penetrate deeply into the chicken, making each bite delicious.

  2. Preheat your air fryer to 400°F (200°C). Take this time to prepare your skewers and get excited about the smell that’s about to fill your kitchen.

  3. Thread the marinated chicken onto skewers. You can use soaked wooden skewers or metal ones based on your preference. Make sure not to overcrowd them for even cooking.

  4. Brush the chicken skewers with melted butter mixed with fresh herbs. This not only layers flavor but gives a beautiful glaze as they cook.

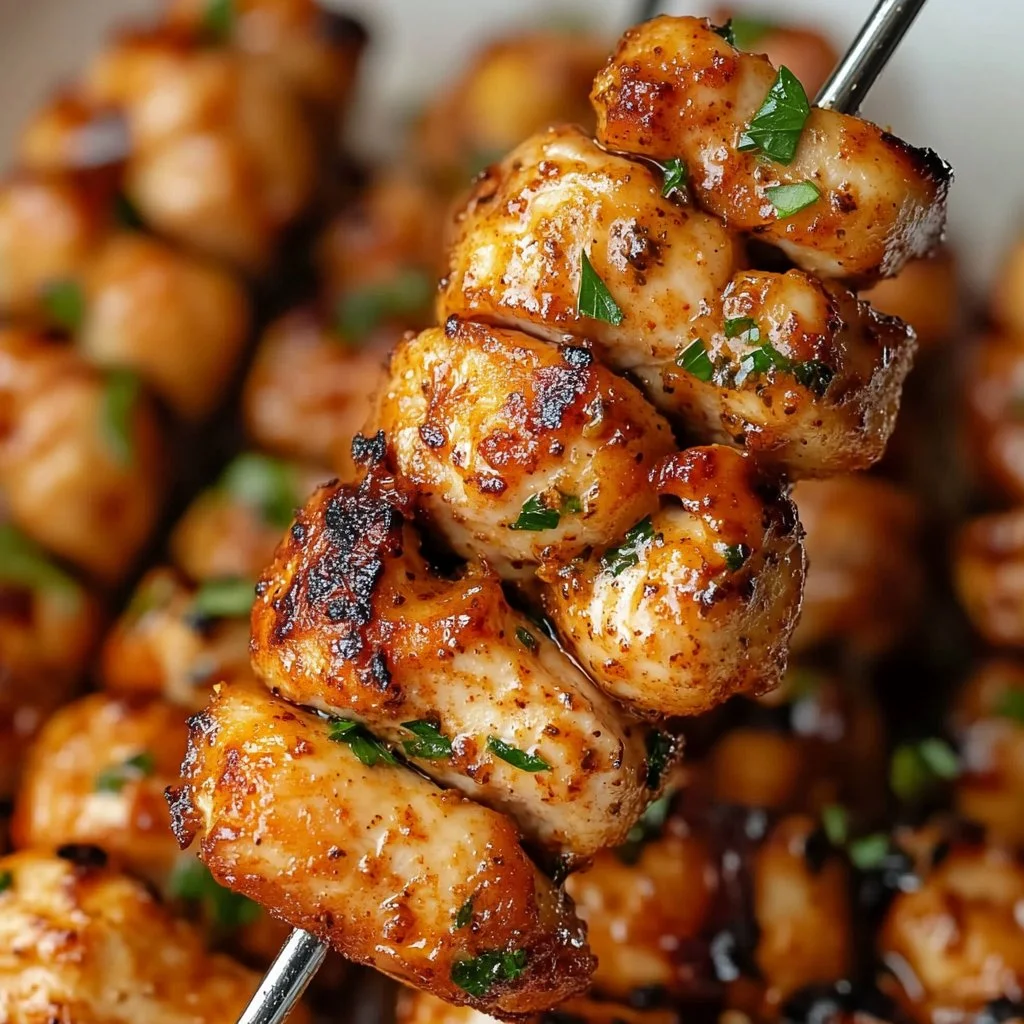
  5. Place the skewers in the air fryer and cook for 10-12 minutes, flipping halfway through. Check for that perfect golden color. If you have a meat thermometer, the internal temperature should reach 165°F for safe eating.

  6. Serve hot and enjoy your juicy chicken skewers! Gather your family, and watch their eyes light up as they take their first bite.

Serving

Air Fryer Chicken Skewers

To serve your chicken skewers family-style, place them on a platter and sprinkle with additional fresh herbs. Pair them with a side of rice, a fresh salad, or grilled vegetables for a lovely meal. Encourage family members to pull their own skewers, making it an interactive dining experience. Kids can even help set the table or add their favorite dipping sauces.

Storage

If you have leftovers, place your chicken skewers in an airtight container and store them in the fridge for up to 3 days. To reheat, pop them in the air fryer at 350°F for about 5 minutes. This keeps them juicy and avoids drying out. If you prefer, you can also use the microwave; however, the air fryer produces better texture.

Kitchen Notes

Here are some handy shortcuts to make the process even smoother:

  • Use pre-cut chicken breast from your local grocery store.
  • Substitute the marinade with your favorite pre-made spice mix for a quick option.
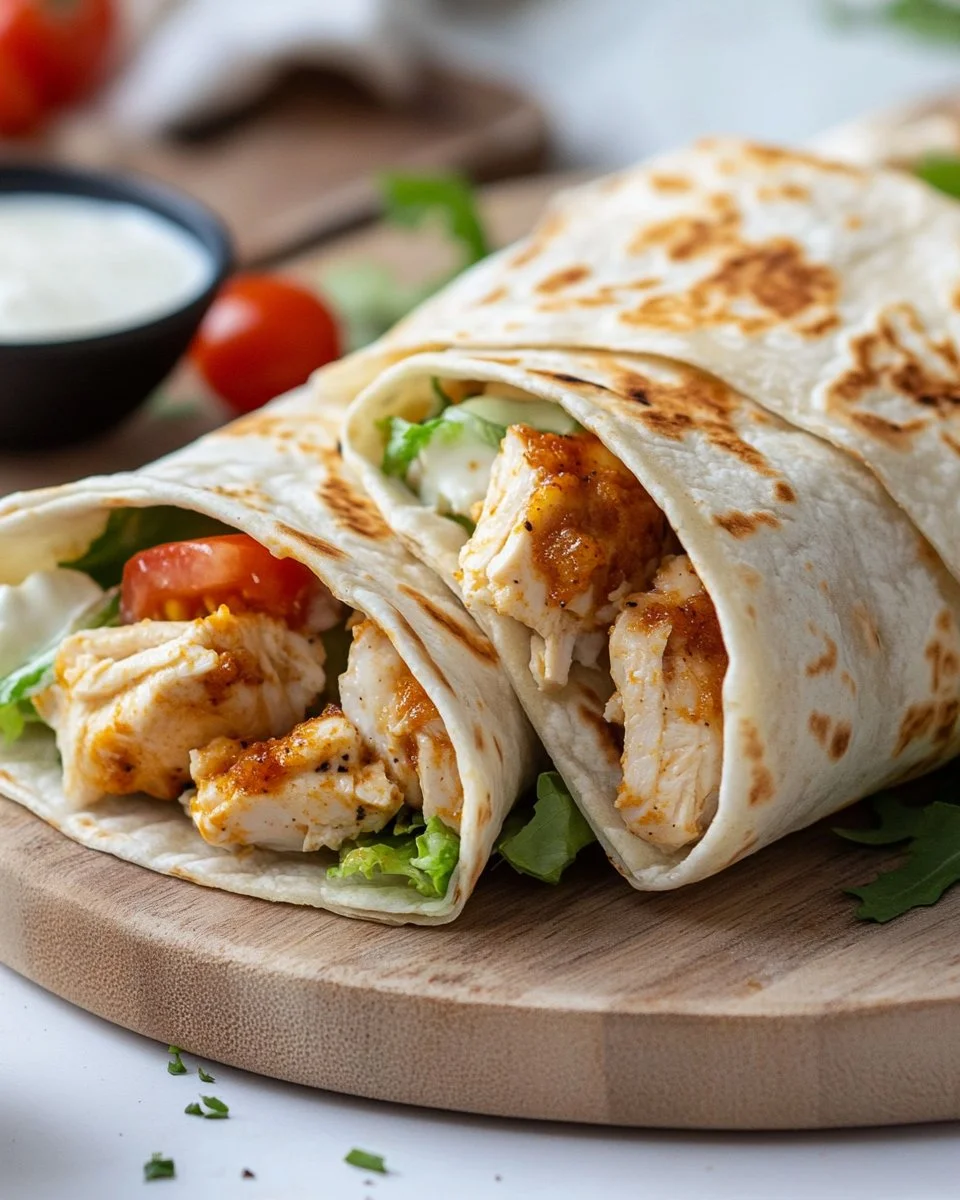
  • Opt for whole wheat pita instead of skewers for a different serving style.
  • If pressed for time, marinate in the morning and cook when you get home.
  • Pair with store-bought sauce or homemade tzatziki for added flavor without extra effort.

Variations

This chicken skewer recipe is versatile. Here are some ideas for tweaking it:

  • For Picky Eaters: Avoid spices by marinating the chicken in a simple mixture of olive oil, salt, and pepper.
  • For Vegetarians: Replace chicken with firm tofu or vegetables like bell peppers, zucchini, and mushrooms.
  • For Low Carb: Serve the skewers with salad instead of rice.
  • Herbal Infusion: Experiment with different herbs like cilantro, dill, or basil to suit your family’s preferences.
  • Spice Lovers: Add a pinch of cayenne pepper or chili flakes to the marinade for a spicy kick.

FAQ

1. Can I use frozen chicken for this recipe?
Yes, but be sure to thaw it completely before marinating.

2. How can I make these skewers ahead of time?
You can marinate the chicken a day in advance and keep it in the fridge until you are ready to cook.

3. What dipping sauces are good with chicken skewers?
Yogurt sauce, barbecue sauce, or a simple honey mustard pair well.

4. Can I cook vegetables with the chicken?
Absolutely! Just ensure that they require the same cooking time as the chicken for even cooking.

5. What should I do if I don’t have an air fryer?
You can grill the skewers on an outdoor grill or bake them in the oven at 400°F for about 20-25 minutes.

As you try out this air fryer chicken skewers recipe, I hope it fills your home with warmth and love, just like it does mine. Gather your family, share meals, and create memories around the dinner table. Happy cooking!

Chicken Skewers

Prep Time 30 minutes
Cook Time 12 minutes
Total Time 42 minutes
Servings 4 servings
Calories 290
These air fryer chicken skewers are tender, juicy, and infused with the bright flavors of garlic and herbs, making them perfect for family dinners or gatherings.

Ingredients

Main Ingredients

  • 1 pound chicken breast, cut into cubes (Choose fresh chicken for the best texture.)
  • 2 tablespoons olive oil (Helps with marinating; use flavored oils for a twist.)
  • 2 cloves garlic, minced (Fresh garlic adds depth of flavor.)
  • 1 teaspoon paprika (Gives a smoky flavor; adjust based on taste.)
  • 1 teaspoon cumin (Gives a smoky flavor; adjust based on taste.)
  • to taste Salt and pepper (Season to preference.)
  • 1/4 cup butter, melted (Use unsalted butter; can mix in lemon juice for zest.)
  • 1 tablespoon fresh herbs (like parsley or thyme), chopped (Fresh herbs uplift the dish.)

Instructions 

Preparation

  • In a bowl, combine olive oil, minced garlic, paprika, cumin, salt, and pepper. Add chicken cubes and marinate for at least 30 minutes.
  • Preheat your air fryer to 400°F (200°C).
  • Thread the marinated chicken onto skewers.
  • Brush the chicken skewers with melted butter mixed with fresh herbs.

Cooking

  • Place the skewers in the air fryer and cook for 10-12 minutes, flipping halfway through. Check for a golden color and ensure the internal temperature reaches 165°F.

Serving

  • Serve hot and enjoy your juicy chicken skewers! Gather your family and watch their eyes light up.

Notes

If you have leftovers, store them in an airtight container in the fridge for up to 3 days. Reheat in the air fryer at 350°F for about 5 minutes for the best texture.
Calories: 290kcal
Course: Dinner, Main Course
Cuisine: American
Keyword: Air Fryer Recipe, Chicken Skewers, Grilling

Air Fryer Chicken Wings

Air frying has become a game changer in many households, and for good reason. The enticing smell of chicken wings cooking in the air fryer fills the kitchen, making mouths water before they even reach the table. The sound of sizzling wings is enough to get everyone excited, promising a meal that’s not just delicious but also easy to prepare. Let’s dive into a recipe that your whole family will love: Air Fryer Chicken Wings.

Why This Works

Air Fryer Chicken Wings

This recipe for air fryer chicken wings is perfect for busy families. The air fryer cooks the wings quickly while keeping them crispy without a lot of oil. This means you get healthy, satisfying chicken wings in less time than it takes to order takeout. You can spend more time enjoying your meal and less time in the kitchen.

Getting your kids involved in cooking is a great way to bond. They can help you toss the wings in the seasoning and sauce. Plus, the air fryer is much safer than frying in hot oil. With this recipe, you can whip up a family dinner that everyone will eagerly anticipate each week.

Process Overview

“This is where the magic happens—when the aroma fills the kitchen.”

Cooking chicken wings in the air fryer allows you to create a perfectly crispy exterior while sealing in the juicy flavor beneath. The process is straightforward, making it easy to prepare a crowd-pleasing dish. In just a few simple steps, you’ll have wings that will be the star of your family dinner.

Ingredients

  • 2 pounds chicken wings
  • 1 tablespoon baking powder
  • 1 teaspoon salt
  • 1 teaspoon black pepper
  • Your favorite wing sauce (for tossing)

Let me share some personal tips for each of these ingredients.

  • Chicken Wings: Look for fresh wings that are plump. Frozen is fine too, but make sure to thaw them completely.

  • Baking Powder: This secret ingredient is key to achieving crispy skin. Don’t skip it; it works wonders.

  • Salt and Pepper: Salt enhances the flavor of the wings while pepper adds a bit of heat. Feel free to adjust to your taste.

  • Wing Sauce: Whether you prefer buffalo, barbecue, or teriyaki, choose a sauce that your family loves. You can also make your own sauce for a personal touch.

Directions

  1. Preheat your air fryer to 400°F (200°C).

    • Preheating ensures that your wings cook evenly and get that nice crispy exterior.
  2. In a large bowl, combine the chicken wings with baking powder, salt, and pepper. Toss until the wings are well coated.

    • Don’t be shy here; make sure each wing is evenly coated for the best flavor and texture.
  3. Place the wings in a single layer in the air fryer basket.

    • Working in batches is better than overcrowding to avoid steaming, which means less crispiness.
  4. Cook for 25-30 minutes, shaking the basket halfway through to ensure even cooking.

    • Set a timer to remind you to shake it; even cooking means delicious, crispy wings for everyone.
  5. Once cooked, toss the wings in your favorite sauce or serve as is, lightly seasoned.

    • If you’re serving a crowd, consider letting each person choose their sauce for a fun family experience.

Serving

Air Fryer Chicken Wings

Serving chicken wings family-style is the way to go. You could set up a fun wing bar with various sauces, sliced veggies, and ranch or blue cheese dressing on the side. Grab some plates, and let everyone mix and match flavors. Make it a casual meal where everyone can grab a wing and enjoy at their leisure. This makes for relaxed family time where everyone can talk and laugh over a great meal.

Storage

If you have leftovers (though I doubt you will), you can store your wings in an airtight container in the refrigerator for up to three days. To reheat, place them back in the air fryer at 350°F (175°C) for about 10 minutes for the best results. This will help them regain their crispiness and warmth, making them taste fresh again.

Kitchen Notes

  • Use tongs for easy handling of the wings when transferring them to and from the air fryer.
  • If you like extra crispy wings, increase the cooking time by a few minutes.
  • Marinate the wings in your sauce for some hours before cooking for more intense flavor.
  • Replace baking powder with cornstarch for a gluten-free option.
  • Clean your air fryer after use to keep it in top condition.

Variations

This recipe is so versatile. Here are a few ideas to cater to different tastes or dietary needs:

  • Classic Buffalo: Toss the wings in a classic buffalo sauce after cooking.
  • BBQ Delight: Swap out the sauce for your favorite barbecue sauce for a sweeter twist.
  • Teriyaki Flavor: For a sweet Asian flair, try tossing the wings in teriyaki sauce.
  • Lemon Pepper: Mix lemon zest and black pepper for a zesty, non-sauce option.
  • Vegetarian Alternative: Try air frying cauliflower wings using the same method and sauce.

FAQ

1. Can I make these wings ahead of time?
Yes, you can cook them ahead of time and reheat them in the air fryer before serving.

2. Are these wings gluten-free?
Yes, as long as your wing sauce is gluten-free, this recipe is gluten-free.

3. How do I ensure crispy wings?
Make sure to coat them evenly in baking powder and not overcrowd the air fryer basket.

4. Can I cook frozen wings in the air fryer?
Yes, you can. Just increase the cooking time by about 10 minutes.

5. What should I serve with chicken wings?
Great side options include celery sticks, carrot sticks, and a fresh salad or potato wedges.

In conclusion, air fryer chicken wings are a wonderful dish to bring family and friends together. With a simple recipe, you can create a meal that is easy to prepare and bursts with flavor. The kitchen fills with the mouthwatering aroma of wings, and the laughter around the table makes mealtime special. So gather your loved ones, and enjoy these delicious wings together. Happy cooking!

Air Fryer Chicken Wings

Prep Time 10 minutes
Cook Time 30 minutes
Total Time 40 minutes
Servings 4 servings
Calories 300
Crispy and delicious chicken wings cooked in an air fryer, perfect for family gatherings and easy weeknight dinners.

Ingredients

Main Ingredients

  • 2 pounds chicken wings (Look for fresh wings that are plump. Frozen is fine too, but make sure to thaw them completely.)
  • 1 tablespoon baking powder (This secret ingredient is key to achieving crispy skin. Don’t skip it; it works wonders.)
  • 1 teaspoon salt (Enhances flavor; adjust to taste.)
  • 1 teaspoon black pepper (Adds heat; feel free to adjust.)
  • to taste your favorite wing sauce (Choose a sauce your family loves.)

Instructions 

Preparation

  • Preheat your air fryer to 400°F (200°C).
  • In a large bowl, combine the chicken wings with baking powder, salt, and pepper. Toss until the wings are well coated.

Cooking

  • Place the wings in a single layer in the air fryer basket.
  • Cook for 25-30 minutes, shaking the basket halfway through to ensure even cooking.
  • Once cooked, toss the wings in your favorite sauce or serve as is, lightly seasoned.

Notes

Serving chicken wings family-style is a great idea. Set up a fun wing bar with various sauces. Store leftovers in an airtight container in the refrigerator for up to three days. Reheat in the air fryer at 350°F (175°C) for best results. Use tongs for easy handling and consider marinating wings before cooking for extra flavor.
Calories: 300kcal
Course: Appetizer, Main Course
Cuisine: American
Keyword: Air Fryer, Chicken Wings, Crispy Wings, Family Dinner, quick recipe

Air Fryer Chicken Breasts

The kitchen smells warm and inviting. You can hear the soft sizzle when the seasoning hits the hot air fryer basket. That sound means dinner is on its way, and the whole house perks up.

I remember the first time I used an air fryer for a weeknight chicken dinner. The kids came running for the smell. The chicken came out juicy, with a light crisp on the outside, and we had time to sit down together without rushing. That simple victory is what I want to share with you.

Why this works

Air Fryer Chicken Breasts

Air frying is a family-friendly way to cook chicken breasts that saves time and keeps things simple. The air fryer uses hot circulating air to create a crispy outside and a tender inside. That means less oil, less mess, and faster clean up.

I test recipes in my home kitchen with my family. Over the years I have found the right temperatures and timing that give consistent results. This method keeps the centers juicy while giving a pleasant golden exterior that everyone at the table will love.

This recipe is perfect for busy nights. You can season the chicken ahead, pop it in the basket, and get side dishes ready while it cooks. It gives you more time to talk, set the table, and enjoy the meal together.

Process Overview

“This is where the magic happens—when the aroma fills the kitchen.”

The process is straightforward. You preheat the air fryer, season the chicken, place it in a single layer, and cook until the internal temperature reaches 165°F. The cooking window is short enough to keep the meat juicy and long enough to develop a nice color.

I recommend using an instant read thermometer. It is the most reliable way to know your chicken is done. Resting the chicken for a few minutes after cooking lets the juices redistribute. That small pause makes a noticeable difference.

Quick timeline

  • Prep and seasoning: 5 to 10 minutes.
  • Cook time: 12 to 15 minutes depending on thickness.
  • Rest: 3 to 5 minutes.
  • Total time: About 25 minutes from start to table.

Ingredients

  • 4 chicken breasts
    • Tip: Use even-sized breasts for even cooking. If one is much thicker, pound it gently to match the others.
  • 2 tablespoons olive oil
    • Tip: Olive oil helps the seasoning stick and promotes browning. You only need a light coating.
  • 1 teaspoon garlic powder
    • Tip: Garlic powder gives a steady savory base. For fresh garlic, use one small clove minced, but remember it browns faster.
  • 1 teaspoon onion powder
    • Tip: Onion powder adds depth without adding moisture. It blends well with the garlic and paprika.
  • 1 teaspoon paprika
    • Tip: Paprika gives color and a mild smoky flavor. Use smoked paprika for a deeper taste, or sweet paprika if you prefer mildness.
  • Salt and pepper to taste
    • Tip: I use about 3/4 teaspoon kosher salt and 1/4 teaspoon black pepper for four breasts, then adjust to personal taste. Season both sides.

Personal note: I often double the seasoning when I make extra chicken for salads or meal prep. It holds up well in leftovers and freezes nicely.

Directions

  1. Preheat the air fryer to 380°F (190°C).

    • Encouragement: Preheating gives you a consistent start and helps the outside crisp quickly. Take a moment to set the table or chop a quick side salad.
  2. In a bowl, mix the olive oil, garlic powder, onion powder, paprika, salt, and pepper.

    • Encouragement: Use your hands or a spoon to combine until it looks spreadable. Smelling the seasoning mix is one of my favorite parts.
  3. Coat the chicken breasts evenly with the seasoning mixture.

    • Encouragement: Rub the mixture into both sides. A little patience here means every bite will be flavorful.
  4. Place the chicken breasts in the air fryer basket in a single layer.

    • Encouragement: Give each breast a little room. Crowding the basket can reduce air flow and affect crisping. If needed, cook in batches.
  5. Cook for 12-15 minutes, flipping halfway through, until the chicken is cooked through and reaches an internal temperature of 165°F (75°C).

    • Encouragement: Check with an instant read thermometer. When it hits 165°F, you know it is safe and perfectly juicy. Thicker breasts may need the full 15 minutes.
  6. Allow to rest for a few minutes before slicing and serving.

    • Encouragement: Resting is not wasted time. It allows the juices to redistribute so the slices remain moist. Use those few minutes to finish a side or pour drinks.

Serving

Air Fryer Chicken Breasts

Slice the chicken against the grain and place it on a large platter for family-style serving. This way everyone can take the number of slices they prefer. It makes dinner feel relaxed and communal.

Pairings I love:

  • Steamed green beans and roasted sweet potatoes for a balanced plate.
  • Mixed greens with a lemon vinaigrette for a lighter meal.
  • Rice bowls with roasted vegetables and a drizzle of your favorite sauce for a kid-friendly option.

For picky eaters, keep a small bowl of ketchup or BBQ sauce on the table. For adults, offer a light chimichurri or garlic yogurt sauce on the side. Let everyone customize their plate. That way the meal is flexible and everyone gets something they enjoy.

Storage

Cool the chicken to room temperature for no more than two hours before refrigerating. Store in an airtight container.

Refrigerator: Keeps well for 3 to 4 days. Slice it before storing for quick reheating or to use in salads and sandwiches.

Freezer: Wrap each breast tightly in plastic wrap and place in a freezer bag. Freeze up to 3 months. Thaw overnight in the refrigerator before reheating.

Reheat tips:

  • Air fryer: 350°F for 3 to 5 minutes. This restores some crispness while keeping the inside moist.
  • Oven: 325°F for about 10 minutes covered with foil, depending on thickness.
  • Microwave: Use short 20 to 30 second bursts to avoid drying. Add a splash of water and cover with a microwave-safe lid to retain moisture.

Label containers with the date so you always know what is freshest. I keep a small permanent marker and masking tape handy for quick labeling.

Kitchen Notes

  • Use an instant read thermometer for consistent results.
  • If breasts are uneven, fold the thin end under to even the thickness or gently pound to match.
  • Lightly oil the basket or spray with a nonstick spray if your model tends to stick.
  • Cook in one layer. If you must cook in batches, keep finished pieces loosely tented with foil to stay warm.
  • Try to handle the chicken as little as possible after cooking to preserve juices.

Variations

  • Kid-friendly mild: Reduce the paprika and add a pinch of brown sugar for a slightly sweet glaze kids enjoy.
  • BBQ style: Brush with 2 tablespoons of your favorite BBQ sauce in the last 2 minutes of cooking for a sticky finish.
  • Lemon herb: Add 1 teaspoon dried oregano and replace paprika with lemon zest for a bright flavor.
  • Spicy: Add 1/2 teaspoon cayenne pepper or 1 teaspoon chili powder to the seasoning mix for heat.
  • Keto and low carb: Serve over cauliflower rice or with roasted broccoli for a filling low-carb meal.
  • Gluten-free: This recipe is naturally gluten-free. Check your seasonings and sauces to confirm they are labeled gluten-free if sensitivity is a concern.

Mix and match these tweaks to suit your family. Small changes can keep this recipe fresh and interesting over time.

FAQ

Q: Can I use frozen chicken breasts?
A: It is better to thaw before cooking for the most even result. If you must cook from frozen, increase the time and check the internal temperature often. Make sure it reaches 165°F.

Q: How do I stop chicken from drying out?
A: Use even thickness, do not overcook, and rest the chicken after cooking. An instant read thermometer is the best tool to prevent overcooking.

Q: Can I bread the chicken for a crunchy coating?
A: Yes. Lightly coat the breasts in a beaten egg and then a mixture of panko and seasonings. Spray the breading with oil and air fry at the same temperature, watching closely for browning.

Q: What if my air fryer runs hot or cool?
A: All air fryers run a little differently. Start checking at the lower end of the time range. Make notes of timing for your model so you get consistent results.

Q: Can I double the recipe for a larger family?
A: Yes, but do not crowd the basket. Cook in batches if needed. Keep finished pieces loosely covered to stay warm while the next batch cooks.

Conclusion

I hope this recipe becomes a go-to for your family weeknights. It is simple, reliable, and flexible enough to please kids and adults alike. Cooking should make you smile, not add stress, and this air fryer method gives you more time together around the table.

For another take on juicy air fryer chicken, I often reference this helpful guide from a fellow recipe tester at Air Fryer Chicken Breast Recipe (Tender & Juicy!). If you enjoy rich, family-tested variations, take a look at this popular collection from a well-known food writer at Best Air Fryer Chicken Breasts Recipe – The Pioneer Woman.

Happy cooking from my kitchen to yours. If your family loves it, come back and tell me how you served it.

Juicy Air Fryer Chicken Breasts

Prep Time 10 minutes
Cook Time 15 minutes
Total Time 25 minutes
Servings 4 servings
Calories 230
This air fryer chicken recipe delivers juicy, tender chicken breasts with a crispy exterior, perfect for family dinners with quick prep and cook times.

Ingredients

Main ingredients

  • 4 pieces chicken breasts (Use even-sized breasts for even cooking. If one is much thicker, pound it gently to match the others.)
  • 2 tablespoons olive oil (Helps the seasoning stick and promotes browning. You only need a light coating.)
  • 1 teaspoon garlic powder (Gives a steady savory base. For fresh garlic, use one small clove minced.)
  • 1 teaspoon onion powder (Adds depth without adding moisture.)
  • 1 teaspoon paprika (For color and mild smoky flavor.)
  • to taste salt and pepper (Use about 3/4 teaspoon kosher salt and 1/4 teaspoon black pepper for four breasts.)

Instructions 

Preparation

  • Preheat the air fryer to 380°F (190°C).
  • In a bowl, mix the olive oil, garlic powder, onion powder, paprika, salt, and pepper.
  • Coat the chicken breasts evenly with the seasoning mixture.
  • Place the chicken breasts in the air fryer basket in a single layer.

Cooking

  • Cook for 12-15 minutes, flipping halfway through, until the chicken is cooked through and reaches an internal temperature of 165°F (75°C).
  • Allow to rest for a few minutes before slicing and serving.

Serving

  • Slice the chicken against the grain and place it on a large platter for family-style serving.

Notes

Cool the chicken to room temperature for no more than two hours before refrigerating. Store in an airtight container for 3-4 days. For freezing, wrap each breast tightly and freeze up to 3 months.
Calories: 230kcal
Course: Dinner, Main Course
Cuisine: American
Keyword: air fryer chicken, Easy Chicken Dinner, family-friendly recipe, juicy chicken recipe, quick weeknight meal

Crunchy Crispy Air Fryer Chicken & Mozzarella Wraps

The air in my kitchen fills with that warm, toasty smell that makes everyone slow down a little. My youngest always sets the timer and then peeks through the oven window, hopeful. Tonight it is the sound of tortillas crisping in the air fryer and the low chatter of the family planning who gets the last wrap. That simple moment — a little chaos, a little comfort — is why I cook.

Why This Crunchy Crispy Air Fryer Chicken & Mozzarella Wraps Feels Like Home

These Crunchy Crispy Air Fryer Chicken & Mozzarella Wraps have become a little ritual in our house. They are crunchy at the edges, melty in the center, and an easy excuse for everyone to gather. The texture hits both the kid and adult senses: crispy outside, chewy warm cheese inside, and flavorful tender chicken at the heart.

Crunchy Crispy Air Fryer Chicken & Mozzarella Wraps

I remember my grandmother showing me how a good browning changes everything. A little bubble here, a golden edge there, and suddenly the ordinary becomes memorable. This recipe gives you that glow without the fuss. It is practical, fast, and it brings people together around a plate.

Why Crunchy Crispy Air Fryer Chicken & Mozzarella Wraps is Our New Family Favorite

On busy weeknights, we need food that arrives quickly and still feels special. These wraps tick both boxes. They take pantry staples and turn them into handheld comfort. The air fryer does the heavy lifting, giving you crispy outsides while using less oil.

It is also forgiving. Use leftover chicken, switch the cheese, or add a handful of herbs. The goal is to make dinner feel effortless yet delicious. That balance is what keeps this recipe coming back to our table.

The Simple Magic Behind Crunchy Crispy Air Fryer Chicken & Mozzarella Wraps

The magic is in the contrast. Crispy, warm tortilla against soft, melty mozzarella and seasoned chicken. A few pantry spices bring the flavor forward, and a quick brush of olive oil makes the outside sing.

Texture cues tell you everything. When the wrap puffs slightly and the edges turn golden brown, you know you are almost there. When a faint aroma of toasted garlic and paprika drifts out, it is time to take them out and invite everyone to the table.

Why This Recipe Works for Our Busy, Joyful Nights

This wrap is a recipe that respects your time and your taste buds. It uses cooked chicken so there is no last-minute juggling of raw meat and busy schedules. It makes minimal dishes. Kids can help assemble, and the air fryer takes care of the rest.

Once warmed and crispy, the wraps hold up well for serving family-style. It is that kind of meal that can be plated quickly, shared easily, and remembered fondly. Give it a try; you might surprise yourself with how often it becomes a go-to.

How to Make Crunchy Crispy Air Fryer Chicken & Mozzarella Wraps, The Heartwarming Way

“This is where the magic happens—when the aroma fills the kitchen and my kids come running in, asking ‘Is it ready yet?’”

First, you gather simple ingredients. Then you mix, roll, brush, and crisp. The sound of the air fryer and the sight of golden edges are all the signals you need. The cheese should be melty, the tortilla golden, and the chicken warmed through. If the edges are toasted and the center gives a little under gentle pressure, you are ready to serve.

From there, you plate them with little bowls of toppings and watch everyone build their perfect bite. It is an easy process with satisfying results. The combination of color and aroma cues will tell you you’re doing it right.

Ingredients You’ll Need

What goes into these wraps is straightforward. You probably have most of it in your fridge and pantry.

  • 2 cups cooked chicken, shredded
  • 1 cup mozzarella cheese, shredded
  • 4 large tortillas or wraps
  • 1 tablespoon olive oil
  • 1 teaspoon garlic powder
  • 1 teaspoon paprika
  • Salt and pepper to taste
  • Optional toppings: lettuce
  • Optional toppings: tomatoes
  • Optional toppings: ranch dressing

Don’t skip fresh herbs if you have them. A few leaves of basil or a sprinkle of parsley lift everything. Use what’s in your fridge — this recipe is about creativity, not perfection.

Step-by-Step Overview: Keeping It Simple

  1. Preheat the air fryer to 375°F (190°C).
    Heat the air fryer so it crisps evenly from the start.
    Preheating helps the tortilla blister and brown just right.

  2. In a bowl, mix the shredded chicken, mozzarella cheese, garlic powder, paprika, salt, and pepper.
    Stir until the cheese and spices are well combined with the chicken.
    Taste a small pinch and adjust the seasoning — a little salt makes the flavors pop.

  3. Place a portion of the chicken mixture on each tortilla and roll them up tightly.
    Keep the filling centered and roll snug to avoid spills.
    Rolling tightly helps the wraps hold their shape during cooking.

  4. Brush the outside of each wrap with olive oil.
    A thin brush of oil encourages deep browning and crispy edges.
    Use a pastry brush or a paper towel for even coverage.

  5. Place the wraps in the air fryer basket in a single layer.
    Give each wrap room to crisp; overcrowding prevents browning.
    If needed, cook in batches — it is worth the extra minute.

  6. Cook for about 8-10 minutes or until crispy and golden brown.
    Flip gently halfway through for an even crust.
    Look for a golden color and a faint puffing of the tortilla.

  7. Serve warm with optional toppings if desired.
    Slice on the diagonal for pretty presentation and easy sharing.
    Offer lettuce, tomatoes, and ranch so everyone can customize.

A little browning here builds flavor, just like my grandmother taught me. Let the kids help with stirring the filling or brushing the oil. It is their favorite part.

Crunchy Crispy Air Fryer Chicken & Mozzarella Wraps

Preparing Crunchy Crispy Air Fryer Chicken & Mozzarella Wraps Without the Stress

Keep it relaxed. Use leftover rotisserie chicken or weeknight-cooked chicken breasts. Pre-shred the chicken and cheese the night before. Assemble the wraps in the morning and store them ready to crisp.

If time is tight, skip the preheating and add a minute or two to the cook time. The goal is a hot, melted center and a crisp outer layer. Trust your senses: sight, smell, and a gentle press will tell you when each wrap is done.

Serving Crunchy Crispy Air Fryer Chicken & Mozzarella Wraps with Love

We serve these Crunchy Crispy Air Fryer Chicken & Mozzarella Wraps family-style in the middle of the table. Everyone reaches in, plates their favorites, and shares bites and stories. Little bowls of lettuce, chopped tomatoes, and a herby ranch are always nearby.

Crunchy Crispy Air Fryer Chicken & Mozzarella Wraps

My partner likes his with extra ranch, my teenager piles on tomatoes, and the kids often ask for plain and crispy. A simple side salad and a bowl of fruit make the meal feel balanced and bright. It is the little sharing rituals that turn a quick dinner into a comforting family memory.

Storage & Reheat Tips (Keeping the Goodness)

Leftovers store well for up to 3 days in an airtight container. Let them cool to room temperature first to avoid sogginess. If you want to save longer, wrap them tightly and freeze for up to 1 month.

For reheating, the air fryer or oven is best. Reheat at 350°F (175°C) for 4-6 minutes until warmed through and crisp. The microwave will work in a pinch, but it softens the tortilla. For best texture, give them a minute in the air fryer after microwaving.

Honest tip: if reheating from frozen, thaw in the fridge overnight for even heating. If you must go from frozen, add a few extra minutes and check the center for warmth.

My Kitchen Notes & Shortcuts

  • Use leftover chicken to save time and add flavor. Rotisserie chicken is my go-to.
  • Swap mozzarella for a sharper cheese if you like a bolder flavor. Cheddar or a pepper jack mix well.
  • Make a big batch of the filling and refrigerate for easy midweek assembly.
  • Want extra crunch? Sprinkle a few crushed tortilla chips inside before rolling.
  • Let the kids assemble and brush oil. It makes dinner feel like teamwork.

These little shortcuts keep the dish approachable while holding onto the flavor and warmth we love.

Family-Friendly Variations

  • Lighter version: swap regular tortillas for whole wheat or low-carb wraps.
  • Kid-friendly: leave out spices and serve with ketchup or mild ranch.
  • Spicy twist: mix in buffalo sauce or a pinch of cayenne and serve with blue cheese.
  • Veg-packed: add a handful of spinach or cooked peppers into the chicken mix.
  • Mediterranean tweak: add chopped sun-dried tomatoes and a sprinkle of oregano.

Think of these variations as invitations to make this your family’s dish. Every home has its own tastes, and small changes can make the recipe feel truly yours.

FAQs About Crunchy Crispy Air Fryer Chicken & Mozzarella Wraps

Can I make this ahead for a busy week?
Absolutely. Assemble the wraps, wrap them tightly in plastic, and refrigerate for up to 24 hours. Air fry from chilled for a few extra minutes until crispy.

What if my tortilla falls apart in the air fryer?
If tortillas tear, try warming them slightly before filling to make them more pliable. Also avoid overfilling. A tightly rolled wrap holds better during cooking.

How do I keep the cheese from leaking out?
Press the filling into the center and seal the edges by rolling snugly. Brushing the outside with oil helps seal and crisp, reducing leaks.

Can I use raw chicken?
I recommend starting with cooked chicken to keep things fast and safe. If you use raw chicken, cook it fully before adding to the wraps to avoid food safety issues.

Is the air fryer necessary?
The air fryer gives the best crisp without much oil. You can also cook these in a preheated oven at 400°F for 10-12 minutes, flipping halfway, or pan-fry for a few minutes per side.

One Final Thought from My Kitchen

Thank you for letting me share this little family favorite. Cooking is how I invite people into my kitchen and into my life. These Crunchy Crispy Air Fryer Chicken & Mozzarella Wraps are simple, reliable, and full of the little joys that make dinner matter.

I hope this recipe finds its way into your weeknights and weekend lunches alike. If it becomes part of your family’s routine, I will picture my grandmother smiling beside you as you enjoy every crunchy, melty bite.

Conclusion

If you want a similar spin on handheld chicken wraps, try this Healthy Crispy Chicken Wrap recipe for another air fryer-friendly idea that highlights crisp textures and simple ingredients. For a spicier, indulgent variation that inspired some of my tweaks, take a look at this Buffalo Chicken Crunch Wraps – Meg’s Everyday Indulgence.

Crunchy Crispy Air Fryer Chicken & Mozzarella Wraps

Prep Time 15 minutes
Cook Time 10 minutes
Total Time 25 minutes
Servings 4 wraps
Calories 450
These wraps combine crispy edges with melty mozzarella and seasoned chicken, making for a quick and comforting meal that brings the family together.

Ingredients

Main Ingredients

  • 2 cups cooked chicken, shredded (Use leftover or rotisserie chicken for convenience.)
  • 1 cup mozzarella cheese, shredded (Can substitute with cheddar or pepper jack for different flavors.)
  • 4 large tortillas or wraps (Whole wheat or low-carb wraps can be used for a lighter version.)
  • 1 tablespoon olive oil (Brush on wraps for crispiness.)
  • 1 teaspoon garlic powder (Adds flavor to the filling.)
  • 1 teaspoon paprika (Enhances the dish's color and flavor.)
  • to taste salt and pepper (Adjust according to preference.)

Optional Toppings

  • to taste lettuce (Fresh greens for crunch.)
  • to taste tomatoes (Chopped for color and freshness.)
  • to taste ranch dressing (For added creaminess.)

Instructions 

Preparation

  • Preheat the air fryer to 375°F (190°C).
  • In a bowl, mix the shredded chicken, mozzarella cheese, garlic powder, paprika, salt, and pepper until well combined.
  • Place a portion of the chicken mixture on each tortilla and roll them up tightly.
  • Brush the outside of each wrap with olive oil.

Cooking

  • Place the wraps in the air fryer basket in a single layer, being careful not to overcrowd.
  • Cook for about 8-10 minutes or until crispy and golden brown, flipping gently halfway through.
  • Serve warm with optional toppings if desired, sliced on the diagonal for easy sharing.

Notes

Use leftover chicken for convenience. You can also pre-shred chicken and cheese for faster assembly. A little browning builds flavor.
Calories: 450kcal
Course: Dinner, Main Course
Cuisine: American
Keyword: Air Fryer Recipe, Chicken Wrap, Comfort Food, Family Meal, Quick Dinner