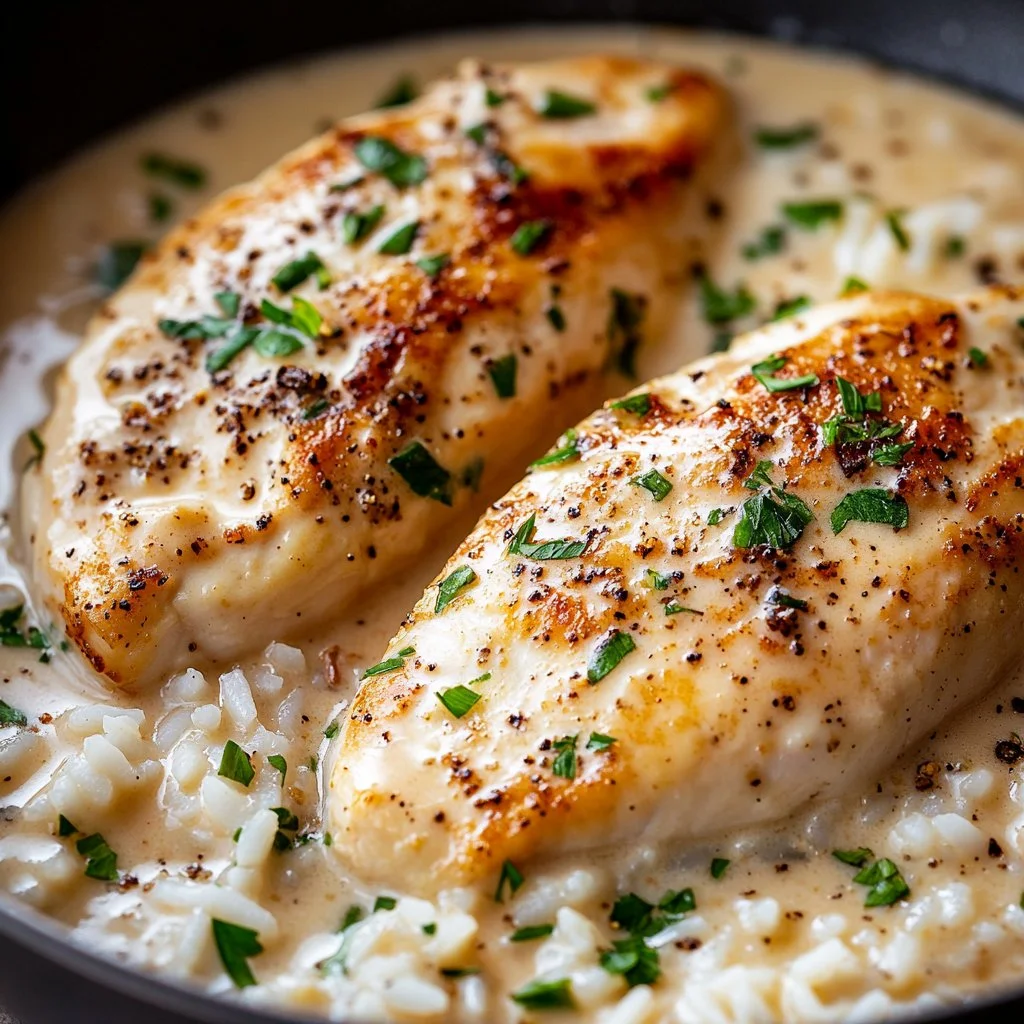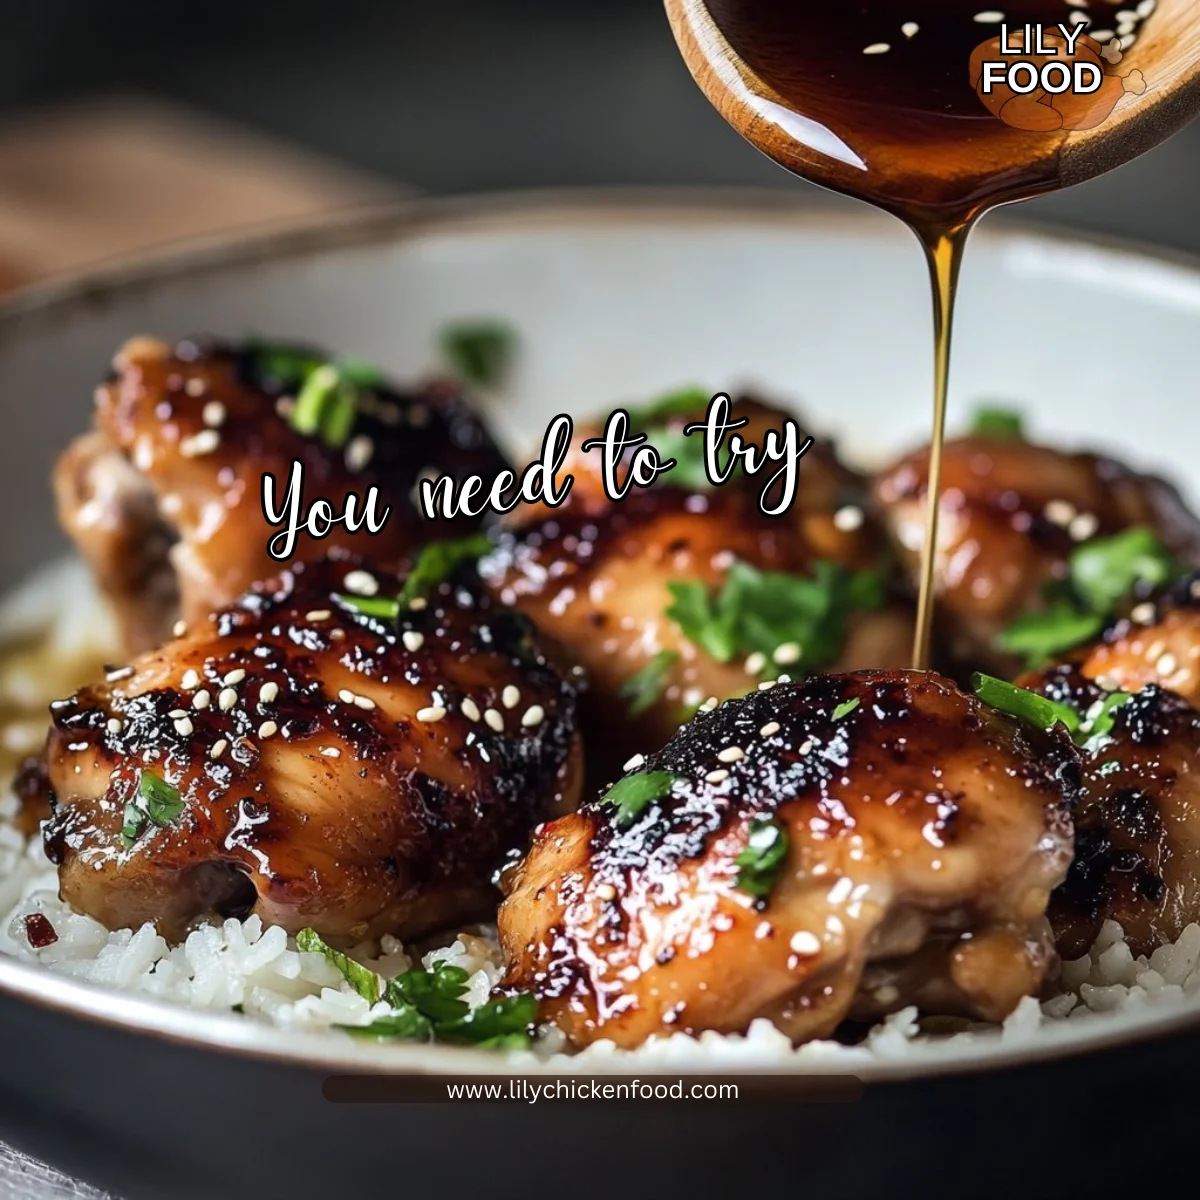
There’s something truly magical that happens in the kitchen when you’re about to make Honey Garlic Chicken Thighs. Imagine the sweet scent of honey mingling with the savory aroma of garlic. You can hear the sizzle of chicken thighs hitting the skillet, promising a quick and satisfying meal. It’s a symphony of smells and sounds that instantly feels like home.
Why This Works
Honey Garlic Chicken Thighs works so well because it perfectly combines flavors and simplicity. The sweet honey paired with the salty soy sauce creates a mesmerizing glaze that coats the chicken beautifully. Plus, chicken thighs cook up tender and juicy, making them perfect for busy family nights.
In today’s hectic world, anyone can appreciate a quick meal that brings everyone together. This dish is perfect for those evenings when time is short but love for family is high. You’ll spend less time in the kitchen and more time enjoying a delicious meal with your loved ones.
Process Overview
“This is where the magic happens—when the aroma fills the kitchen.”
Cooking Honey Garlic Chicken Thighs really is a simple process. Gather your ingredients, mix the sauce, and let the chicken do all the work in the skillet. The wonderful fragrances will draw everyone to the dinner table, eagerly awaiting a special meal that feels homemade, even on a busy night.
Ingredients
Here’s what you’ll need:
-
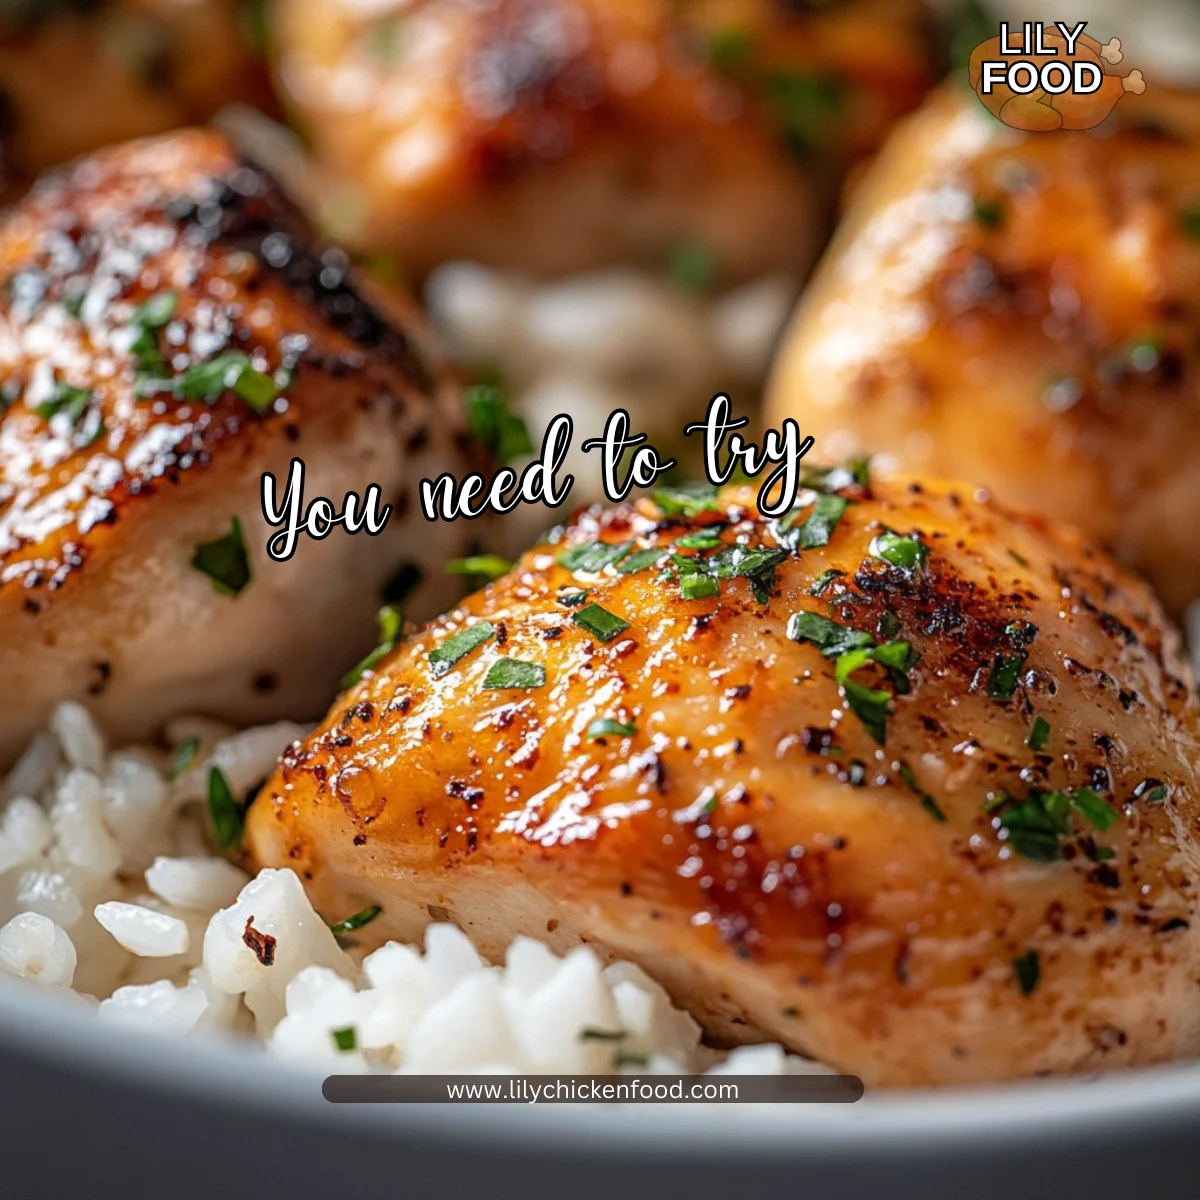
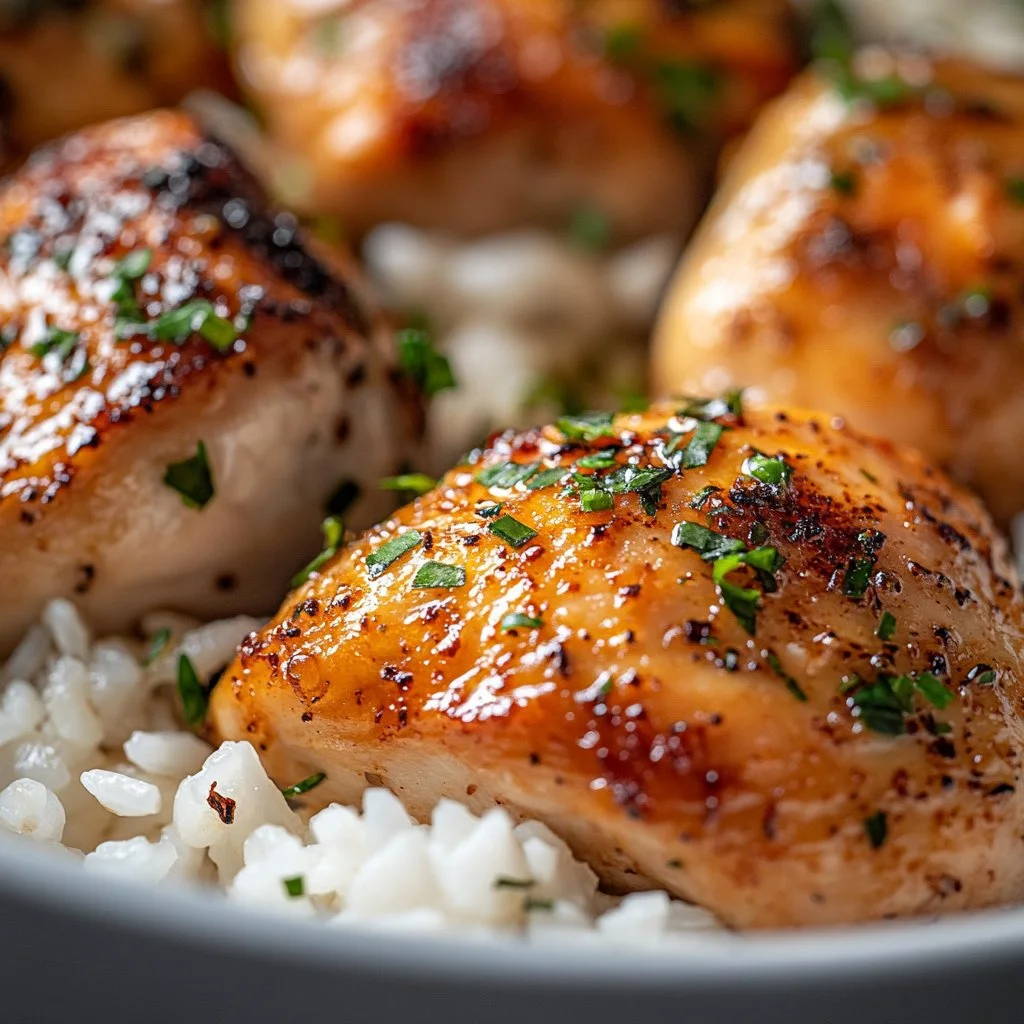
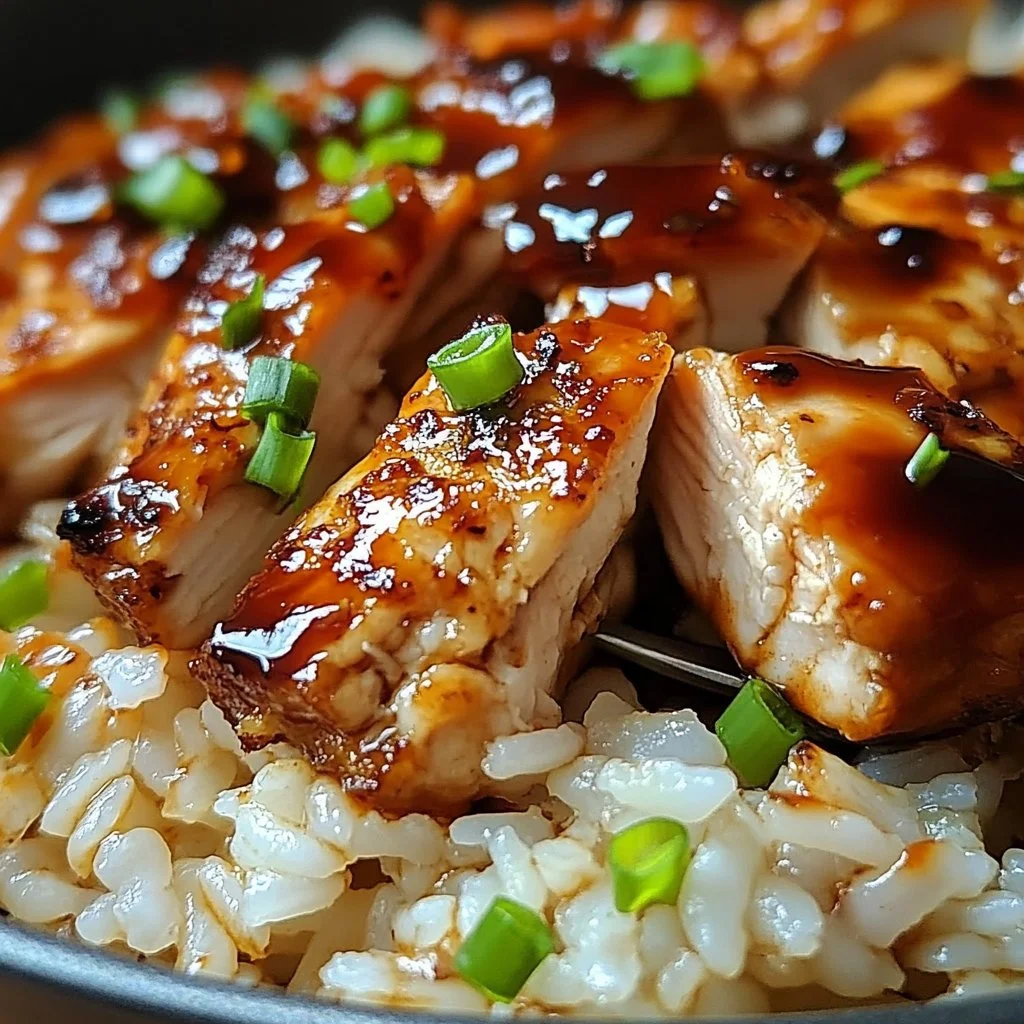
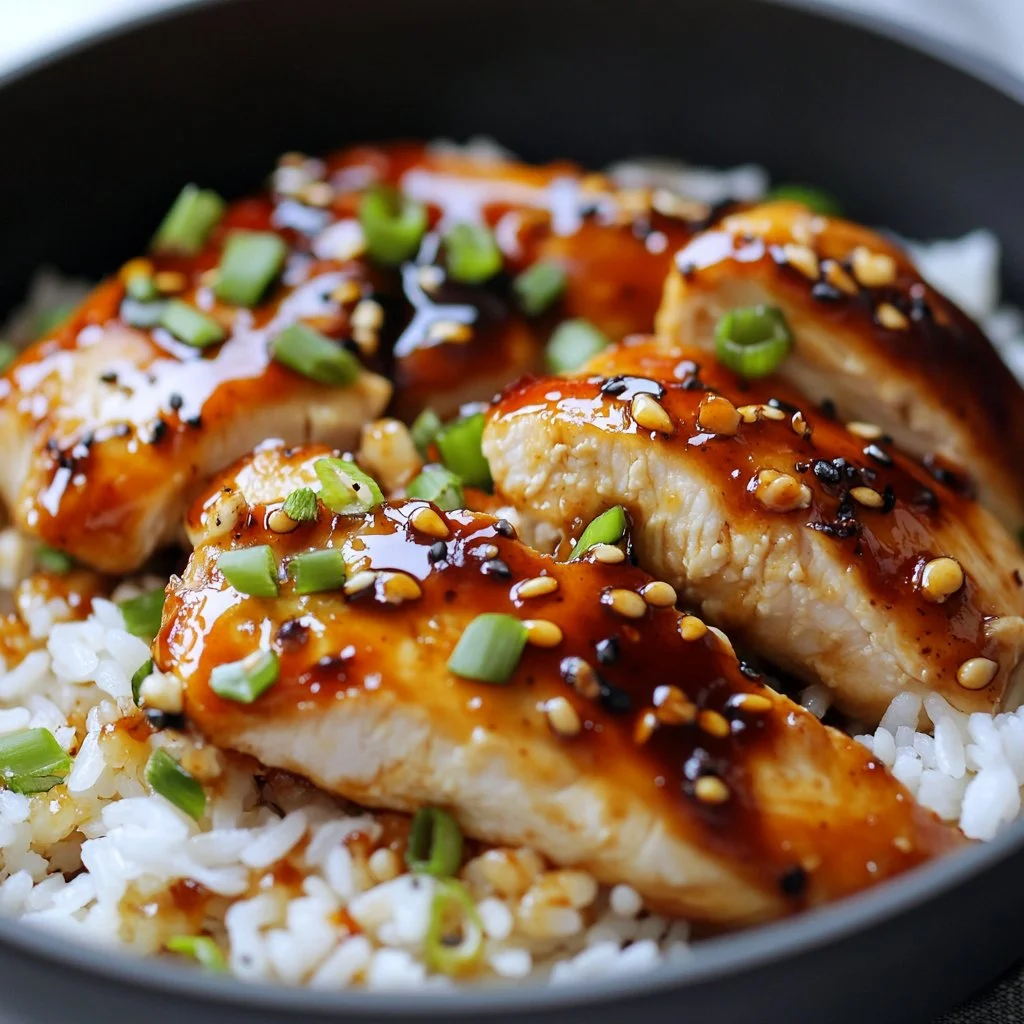
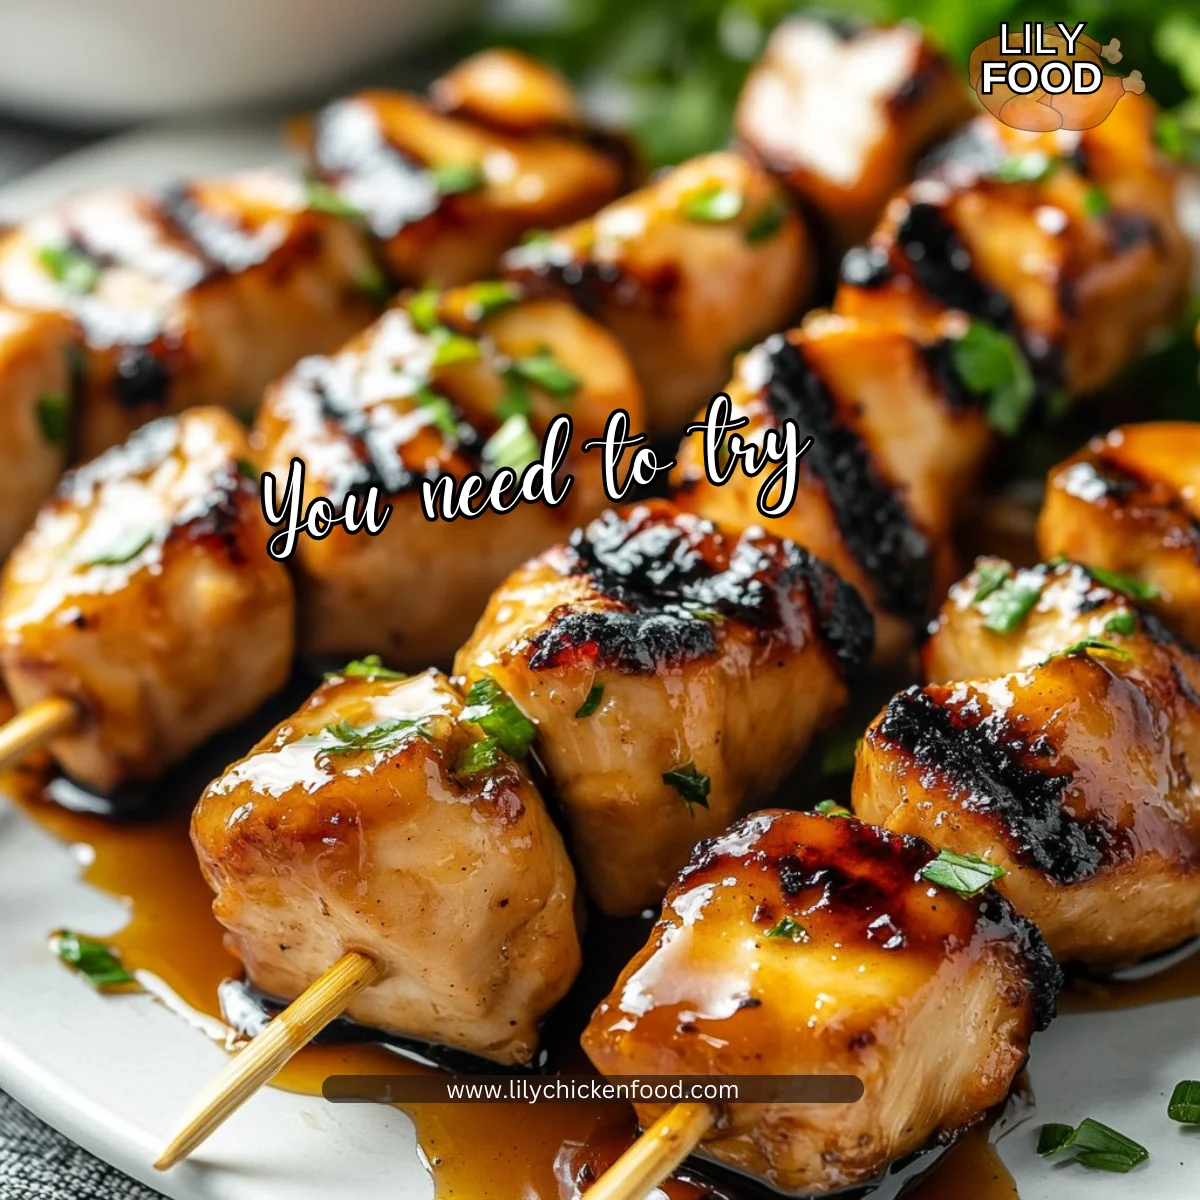
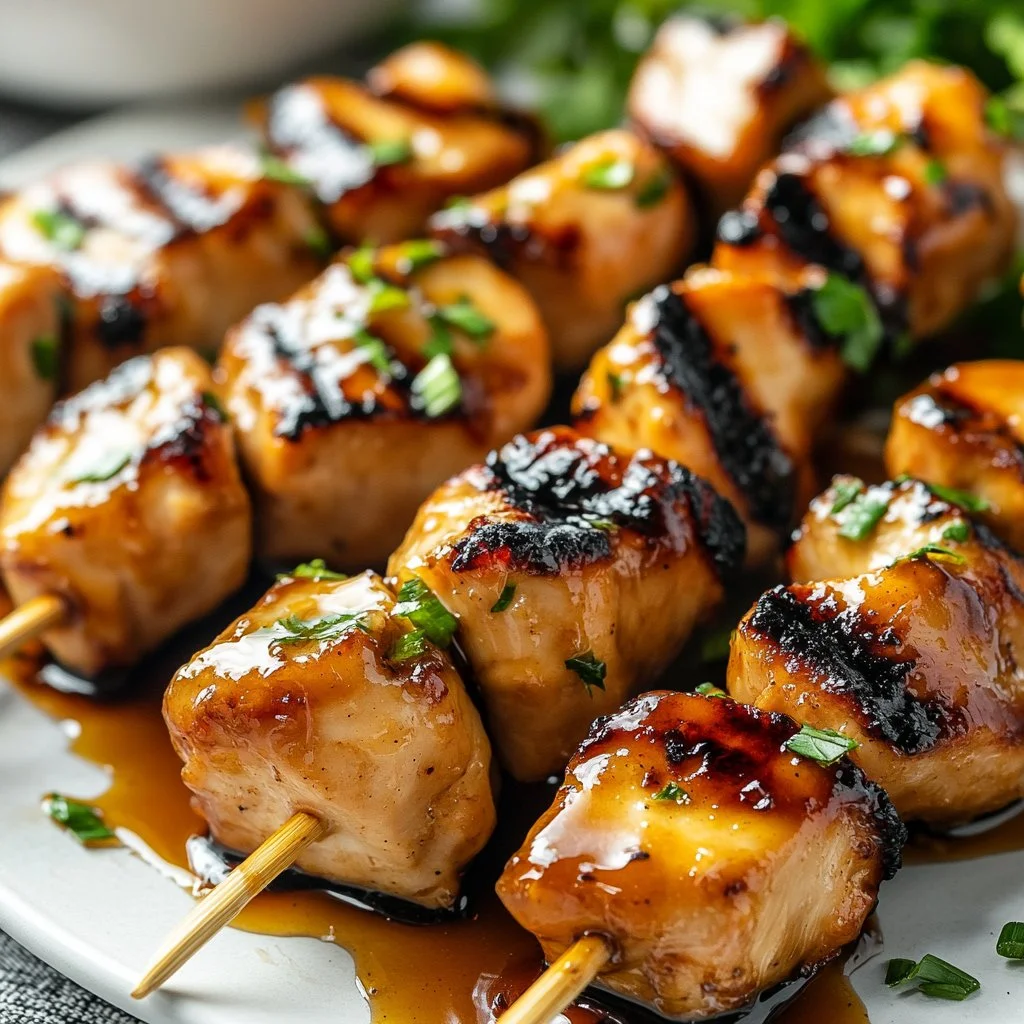
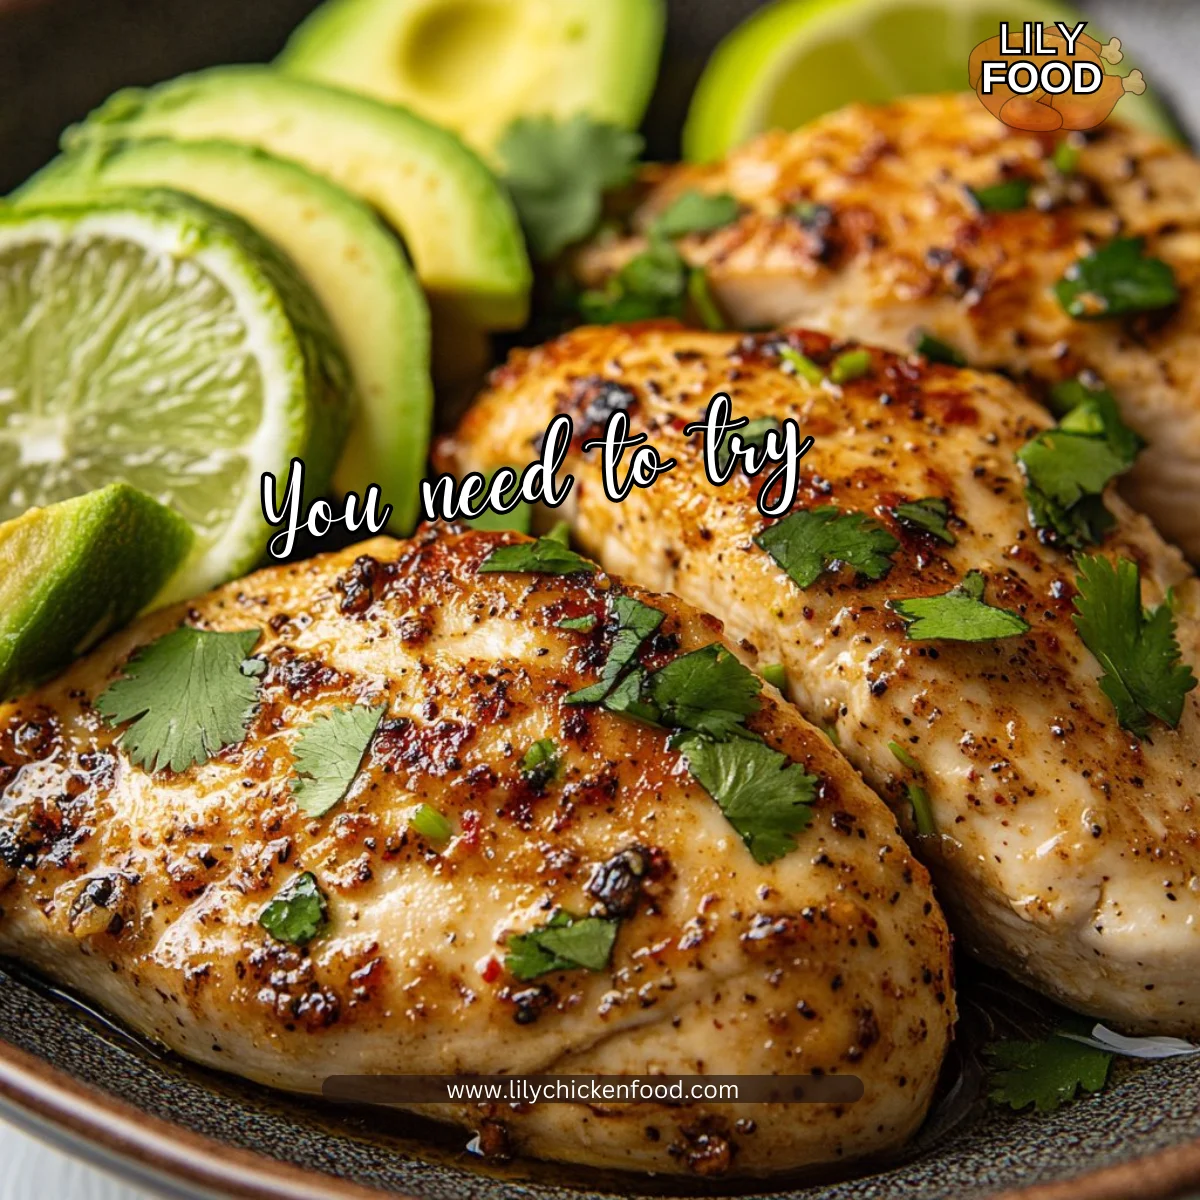
Chicken Thighs: About 1.5 pounds of skin-on, bone-in or boneless thighs work beautifully. Bone-in often has richer flavor.
-
Honey: 1/3 cup for sweetness. Use a high-quality honey for the best flavor.
-
Soy Sauce: 1/4 cup. Opt for low sodium if you prefer to control the saltiness.
-
Garlic: 4 cloves, minced. Fresh garlic makes a big difference in flavor.
-
Rice: 2 cups, cooked. Serve fluffy white rice or brown rice for a heartier option.
Lily’s Tip: You can use fresh ginger or add a dash of red pepper flakes to the sauce for an extra kick—but I recommend starting simple for the kids!
Directions
-
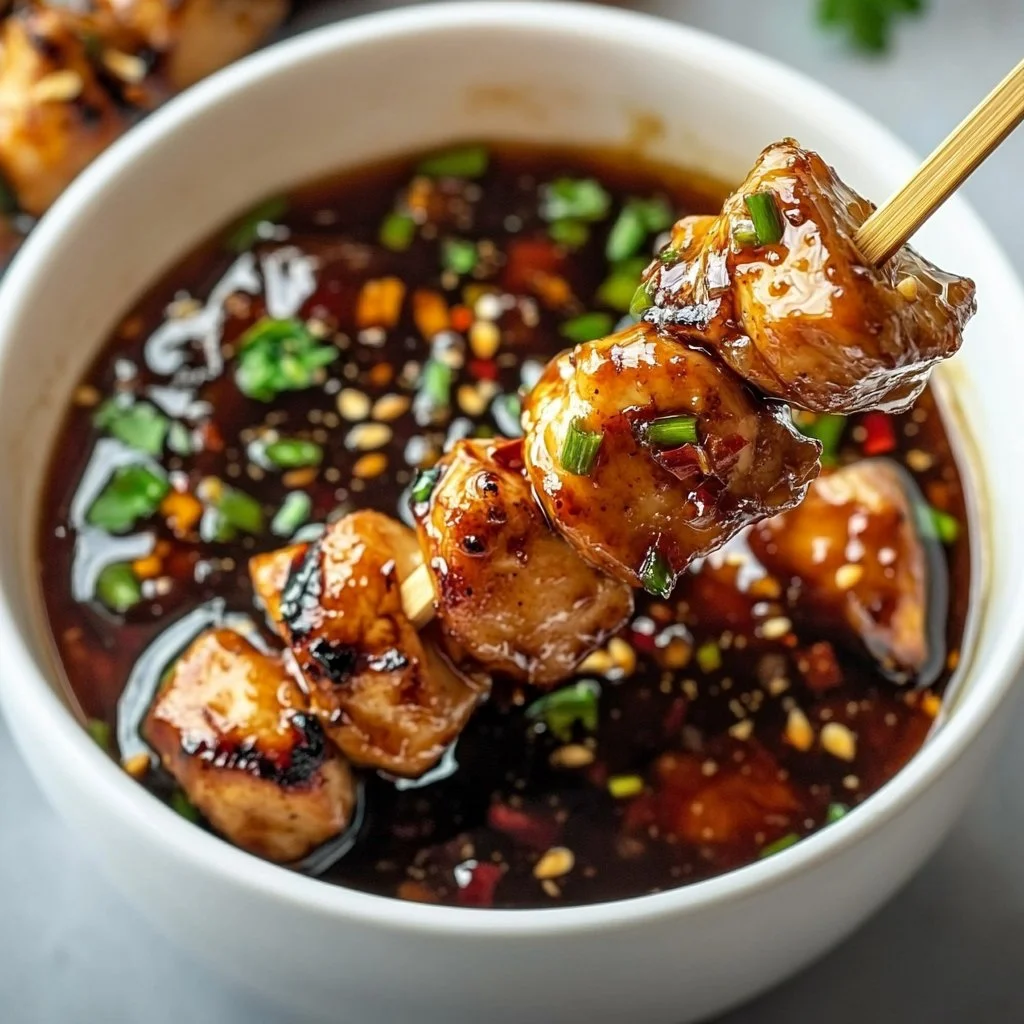
In a bowl, mix honey, soy sauce, and minced garlic to create the sauce. Make sure to combine it thoroughly for maximum flavor.
-
Heat a skillet over medium-high heat and add the chicken thighs. It’s important to hear that sizzle—it means you’re on the right track!
-
Cook the chicken for about 2-3 minutes on each side until browned. You want that nice golden color—trust me, it adds to the flavor.
-
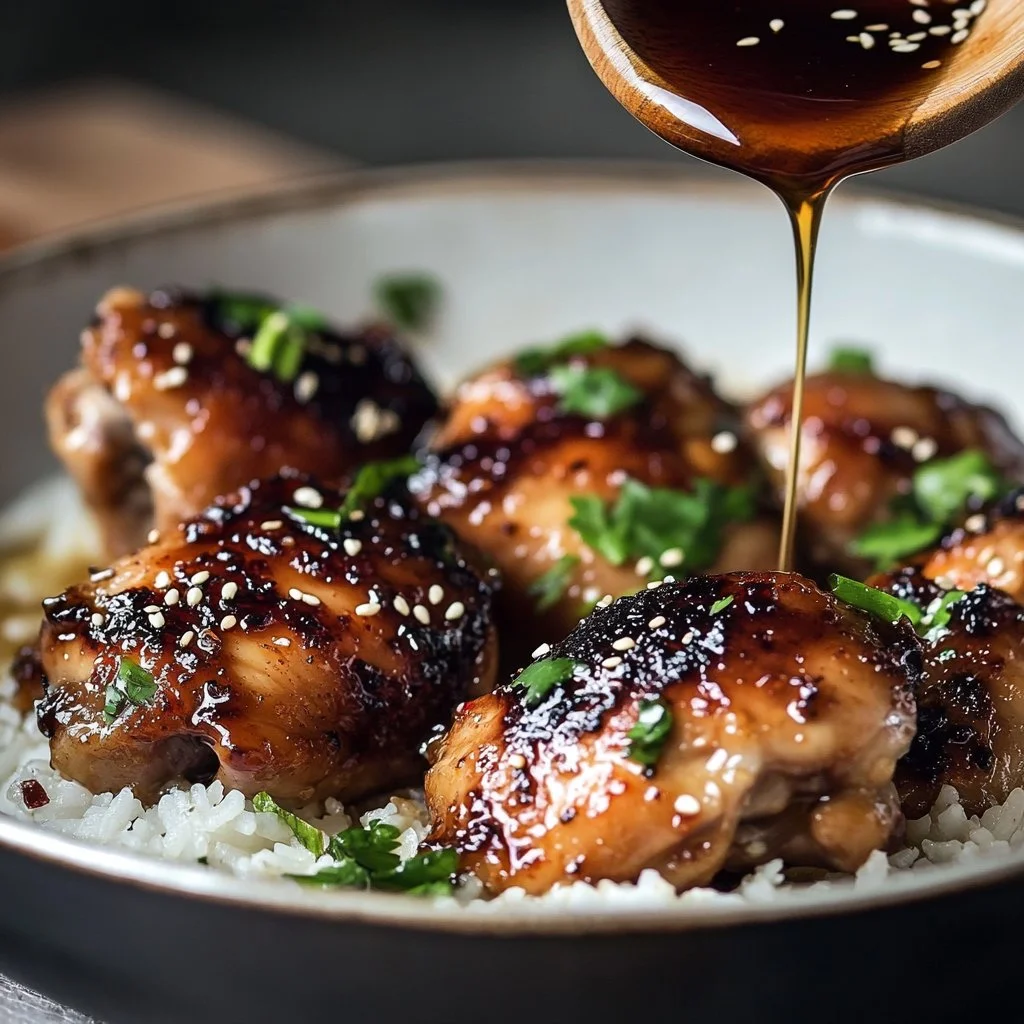
Pour the honey garlic sauce over the chicken and let it simmer for another 5-7 minutes. This step is so important; it ensures the chicken is cooked through and well coated.
-
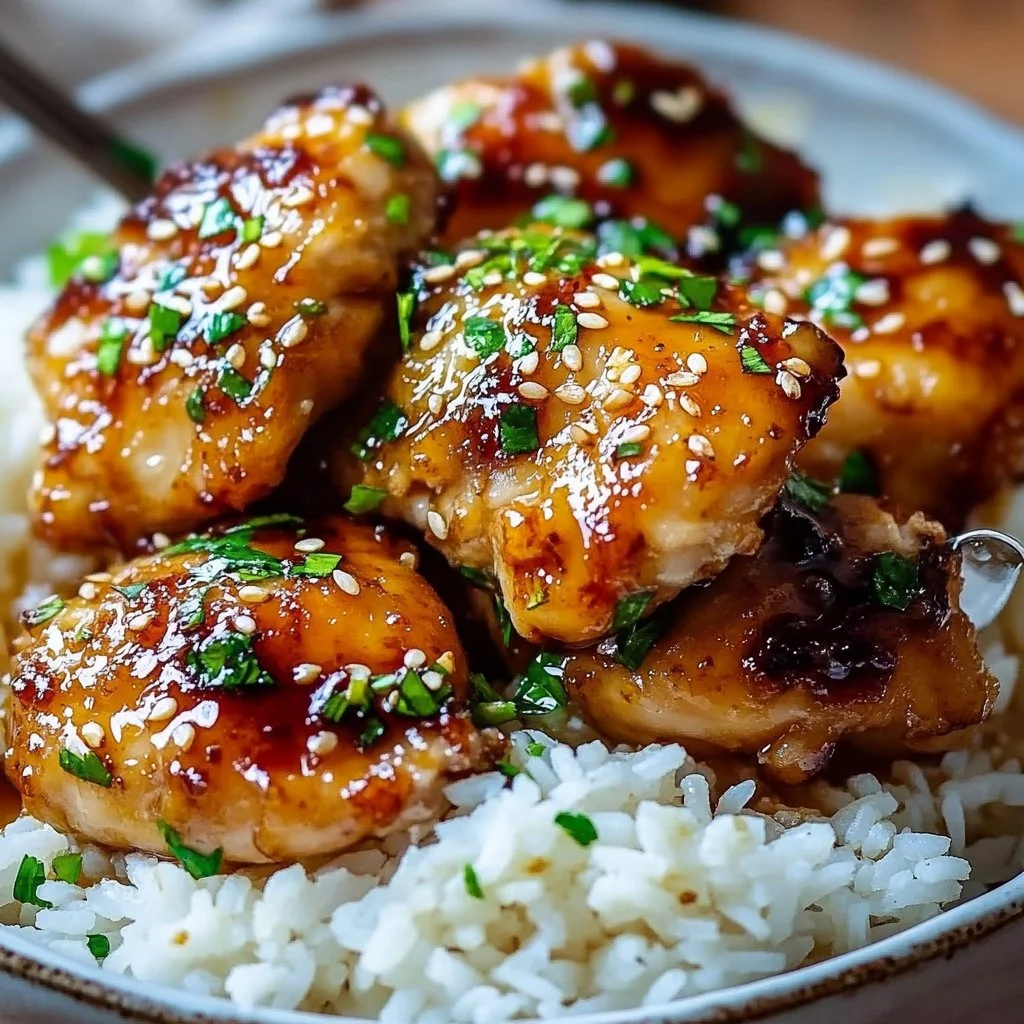
Serve hot with cooked rice. The drizzle of extra sauce over the top really makes the dish shine.
Encouraging note: Don’t worry if it’s not perfect. Cooking is all about enjoying the process and refining your skills!
Serving
When it’s time to serve, think family-style. Place the chicken thighs on a large platter and pour the extra sauce over the top. Accompany it with a big bowl of fluffy rice, so everyone can help themselves. Add a side of steamed veggies for a complete meal.
The beauty of this dish is that it looks impressive but is so easy to prepare. Your family will feel like they’re dining at a restaurant!
Storage
Keep any leftovers in an airtight container in the fridge. They’ll stay fresh for about 3-4 days. Reheat in the microwave or on the stovetop. If reheating on the stovetop, add a splash of water to keep the chicken from drying out.
Kitchen Notes
Here are some quick shortcuts to make your time in the kitchen even easier:
-
Pre-marinate: Marinate the chicken thighs in the sauce for a few hours or overnight for richer flavor.
-
Use a slow cooker: Combine everything in a slow cooker for an effortless meal. Cook on low for 6 hours.
-
Double the sauce: Make extra sauce and save it for other proteins like shrimp or tofu.
-
Cook rice in bulk: Prepare a big batch of rice and store it in the fridge for quick meals throughout the week.
-
Use pre-minced garlic: For busy nights, grab a jar of pre-minced garlic to save time.
Variations
Feel free to get creative! Here are a few ideas to cater to picky eaters or different diets:
-
Picky Eaters: Serve the sauce on the side for those who might want to taste the chicken first. You can also substitute the thighs for chicken breasts if preferred.
-
Gluten-Free: Use gluten-free soy sauce or tamari in the recipe. It tastes just as good!
-
Add Veggies: Toss in some sliced bell peppers or broccoli into the skillet while simmering for an easy one-pan meal.
-
Spicy Version: Add a teaspoon of Sriracha or red pepper flakes to the honey garlic sauce for a spicy kick.
-
Honey Mustard: Mix honey with Dijon mustard instead of soy sauce for a tangy twist.
FAQ
Q: Can I use chicken breasts instead of thighs?
A: Yes, chicken breasts will work, but they may cook faster, so keep an eye on them!
Q: How can I make this dish spicier?
A: Adding red pepper flakes or a splash of Sriracha to the sauce will do the trick.
Q: Is it okay to prepare this meal in advance?
A: Absolutely! You can marinate the chicken in the sauce a day ahead for even better flavor.
Q: Can I freeze this dish?
A: Yes, you can freeze the cooked chicken in a freezer-safe container. Thaw and reheat when you’re ready to enjoy it.
Q: What should I serve with Honey Garlic Chicken Thighs?
A: Fluffy rice is a great start, but you can also pair it with steamed broccoli, green beans, or a light salad.
In closing, Honey Garlic Chicken Thighs is a delightful recipe that brings warmth, flavor, and family together in a simple, loving way. I encourage you to try making this dish, engage your loved ones in the cooking process, and savor the precious moments shared around the dinner table. Happy cooking!

Honey Garlic Chicken Thighs
Ingredients
Main ingredients
- 1.5 pounds skin-on, bone-in or boneless chicken thighs (Bone-in thighs have richer flavor)
- 1/3 cup honey (Use high-quality honey for the best flavor)
- 1/4 cup soy sauce (Opt for low sodium if you prefer to control the saltiness)
- 4 cloves garlic, minced (Fresh garlic makes a big difference)
- 2 cups cooked rice (Fluffy white rice or brown rice for a heartier option)
Instructions
Preparation
- In a bowl, mix honey, soy sauce, and minced garlic to create the sauce. Make sure to combine it thoroughly for maximum flavor.
- Heat a skillet over medium-high heat and add the chicken thighs. Listen for the sizzle—that means you’re on the right track!
Cooking
- Cook the chicken for about 2-3 minutes on each side until browned for a nice golden color.
- Pour the honey garlic sauce over the chicken and let it simmer for another 5-7 minutes, ensuring the chicken is cooked through and well-coated.
- Serve hot with cooked rice and drizzle extra sauce over the top.


")