Tag

oven baked chicken

Browsing

30-min Oven Baked Boneless Skinless Chicken Thighs

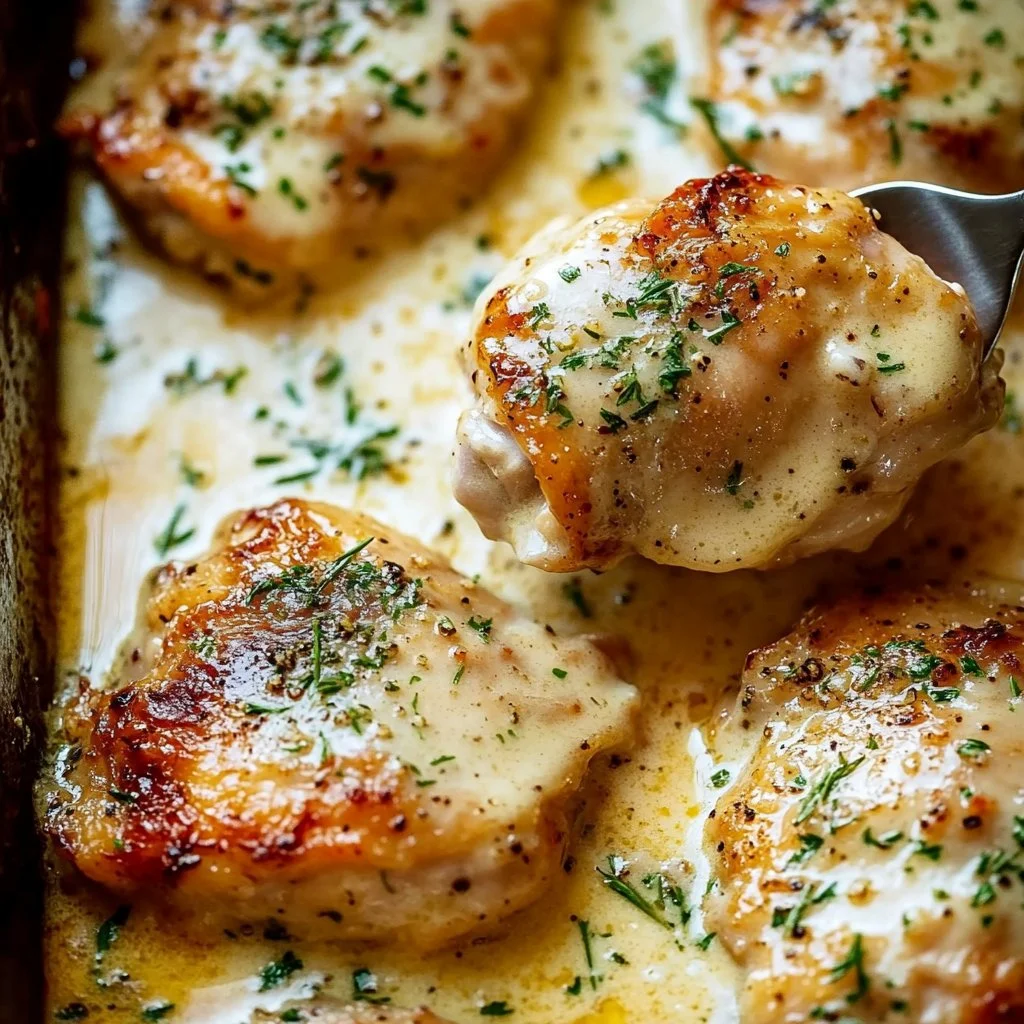
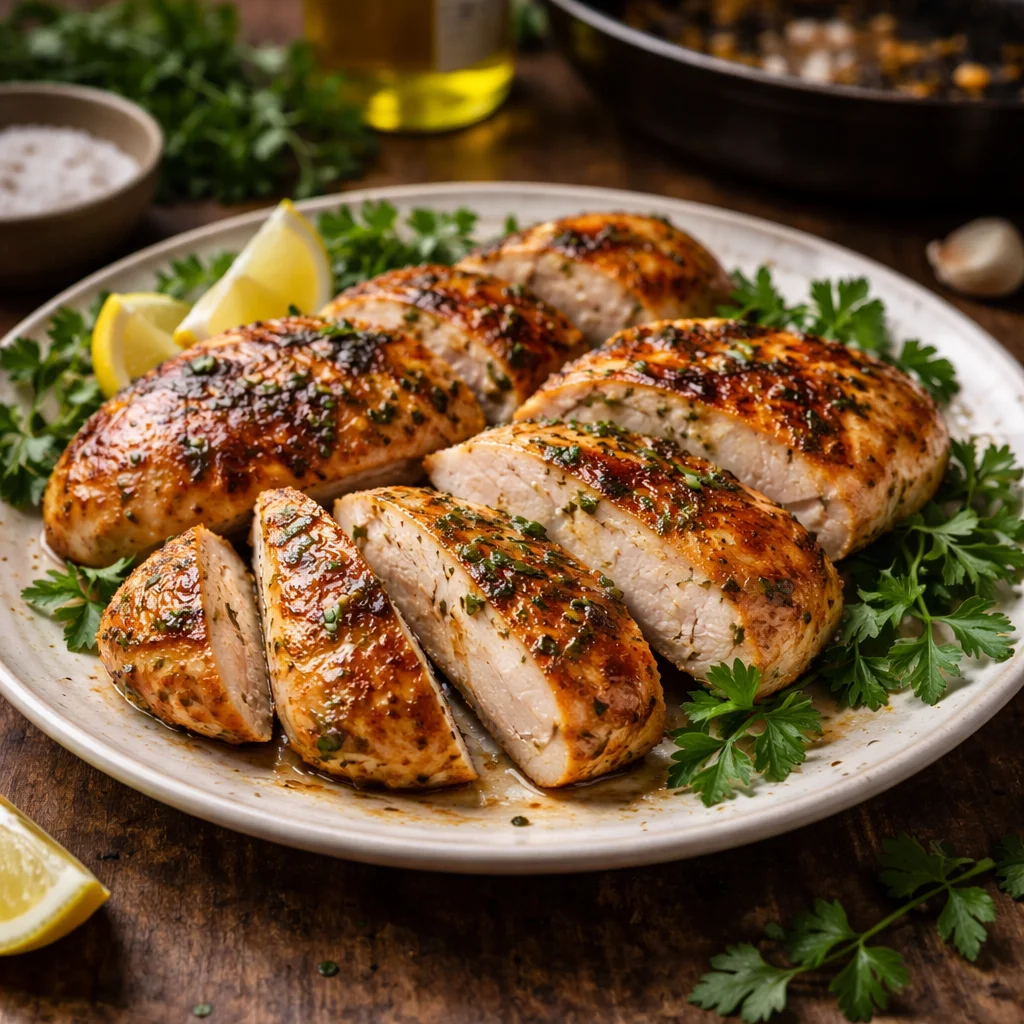
I love the moment when the oven clicks on and the whole kitchen starts to warm up. The scent of garlic, paprika, and olive oil mixing with baking chicken is one of my favorite family comforts. You hear pots clink and kids ask, "Is it ready yet?" and you know dinner will bring everyone together.

This recipe is one of those reliable weeknight heroes. It is simple, forgiving, and fast. It gives you juicy chicken without fuss, and it frees up time to tuck in homework, set the table, or even sneak in a quick chat with a partner.

Why this works

30-min Oven Baked Boneless Skinless Chicken Thighs

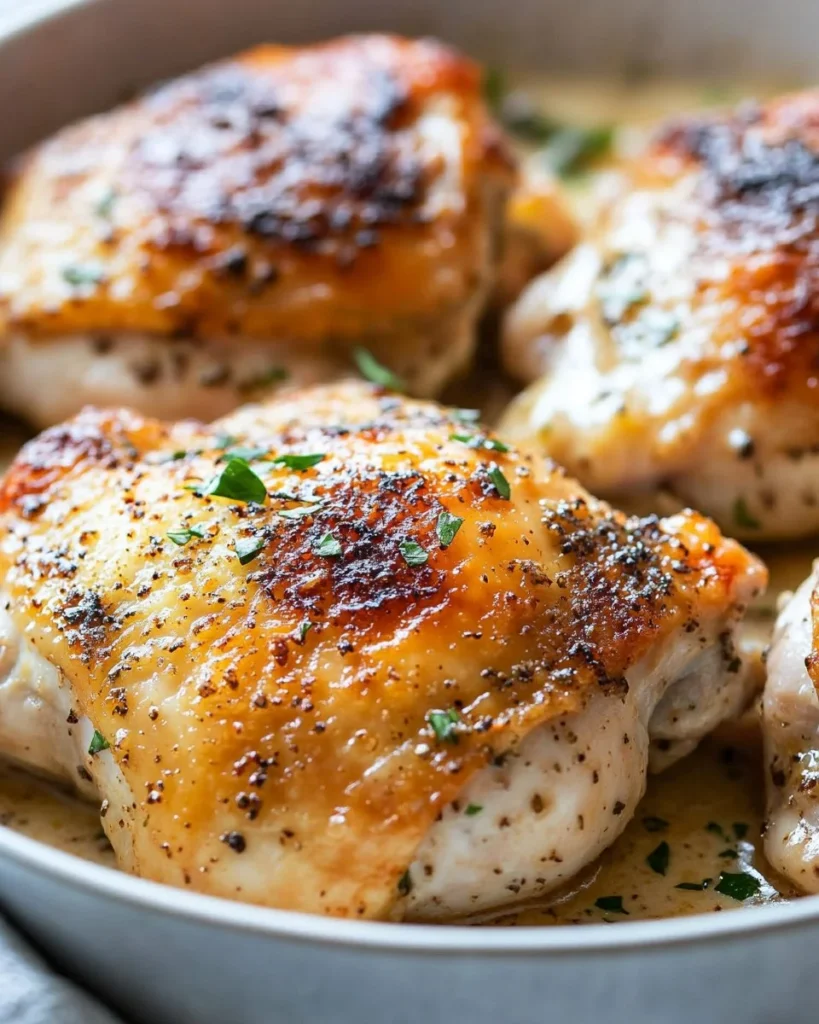
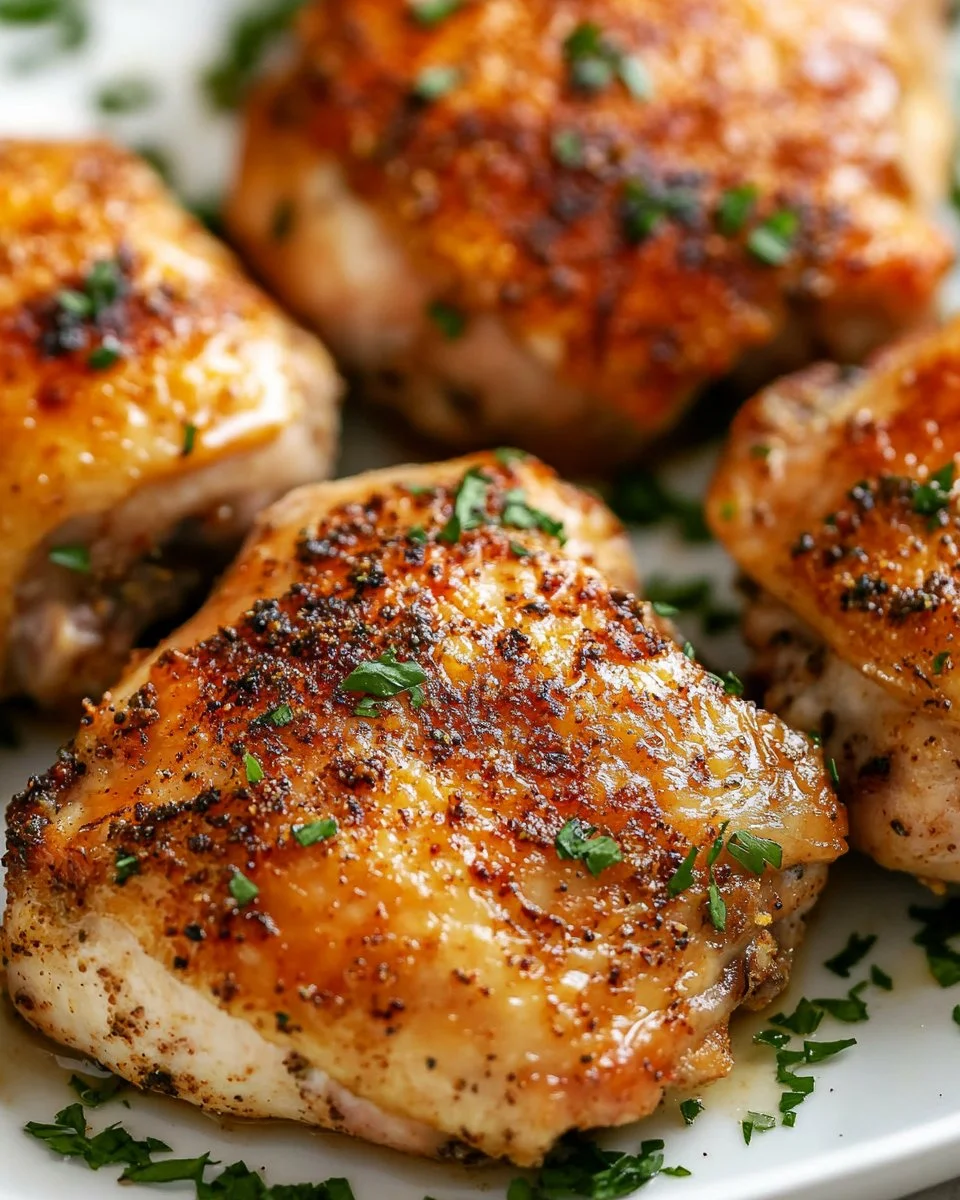
This dish works because it is focused and practical. Boneless, skinless chicken thighs stay moist during baking. They tolerate a bold spice rub and still finish in about 30 minutes. That makes this a real time saver for busy families.

Chicken thighs give more forgiving cooking than breasts. You do not need a thermometer to be confident each time. The spice mix clings well, forming a light crust that keeps juices inside.

H3: Family friendly and fast

You can get this on the table in roughly the time it takes to do a load of laundry and pack lunches for the next day. Kids usually like the mild paprika flavor, and adults will appreciate how easy it is to customize for picky eaters or a crowd.

Process Overview

“This is where the magic happens—when the aroma fills the kitchen.”

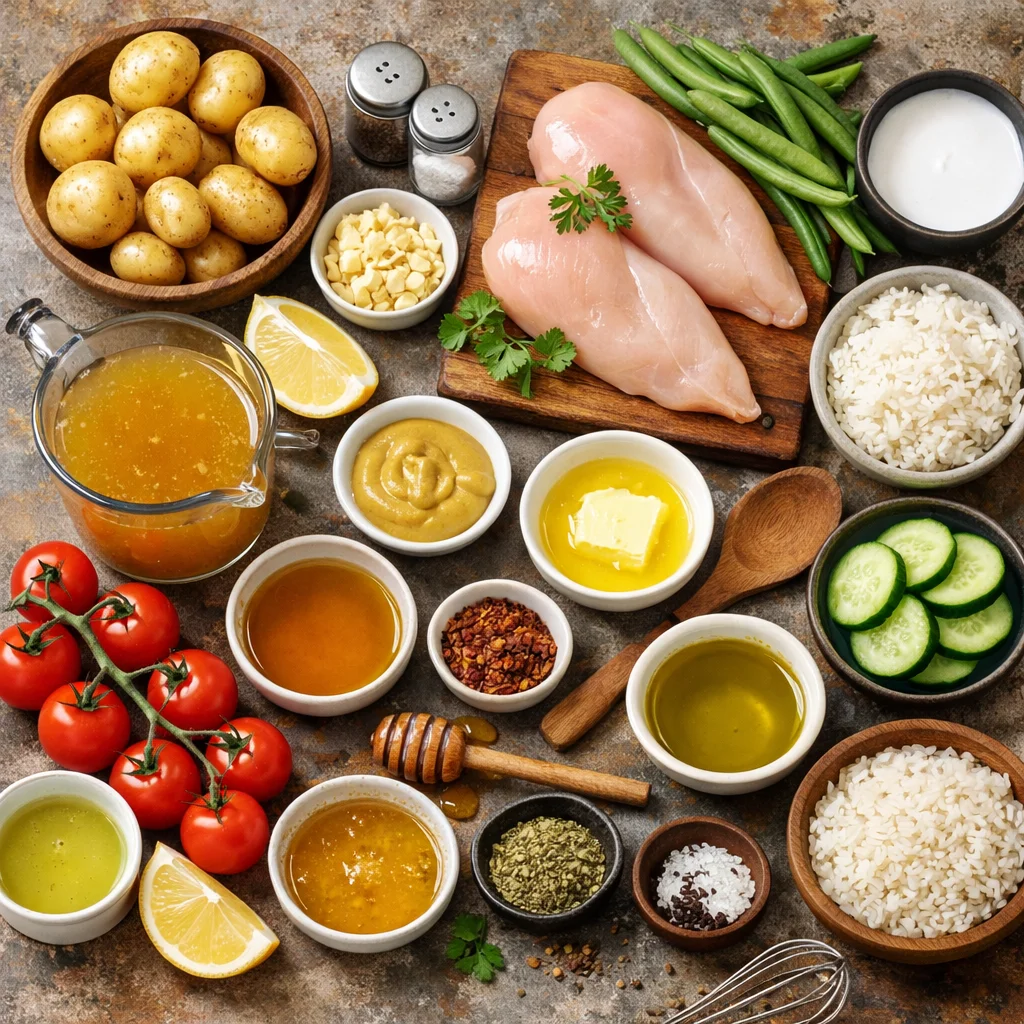
Start with quality, simple ingredients. Mix the spices and oil, toss the thighs to coat, and bake. The process is short, and the reward is big.

I test this recipe many times and keep the steps pared down. That helps you get predictable results. The short bake time keeps the thighs tender and juicy without drying them out.

Ingredients

  • 4 boneless skinless chicken thighs
    Lily’s tip: Choose thighs of similar size so they finish at the same time. Trim excess fat if you prefer a leaner bite.

  • 2 tablespoons olive oil
    Lily’s tip: Use extra virgin olive oil for flavor. If you need a neutral oil, canola or avocado oil is fine.

  • 1 teaspoon garlic powder
    Lily’s tip: Garlic powder gives steady flavor without burning. If you like fresh garlic, use 1 clove minced and mix into the oil.

  • 1 teaspoon onion powder
    Lily’s tip: Onion powder adds sweetness and depth. It blends well with the garlic powder to form a simple base.

  • 1 teaspoon paprika
    Lily’s tip: Use smoked paprika for a subtle smoky touch. Regular sweet paprika makes a bright, family-friendly version.

  • 1 teaspoon salt
    Lily’s tip: I use kosher salt. If you use table salt, reduce slightly because it is finer.

  • 1/2 teaspoon black pepper
    Lily’s tip: Freshly ground black pepper gives a brighter bite. Adjust to taste for young children.

  • 1 teaspoon dried oregano
    Lily’s tip: Dried oregano adds Mediterranean warmth. If you have fresh oregano, chop a teaspoon and scatter it on top after baking.

These amounts serve 3 to 4 people when paired with sides. You can easily double or triple the spice mix for a crowd.

Directions

  1. Preheat the oven to 400°F (200°C).
    Encouraging note: This short preheat gets the oven ready without much wait. While it heats, you can mix your spices and oil.

  2. In a bowl, combine olive oil, garlic powder, onion powder, paprika, salt, black pepper, and oregano.
    Encouraging note: Use a whisk or fork to make a smooth paste. The oil helps the spices stick and promotes a light browning.

  3. Coat the chicken thighs with the spice mixture thoroughly.
    Encouraging note: Use your hands or a spoon. Make sure each piece is evenly covered. A well-coated thigh will stay juicy and flavorful.

  4. Place the chicken thighs in a baking dish or on a baking sheet lined with parchment paper.
    Encouraging note: Give the thighs a little space. A single layer ensures even cooking and a nice finish on each piece.

  5. Bake in the preheated oven for 25-30 minutes or until the chicken is cooked through and juices run clear.
    Encouraging note: Check at 25 minutes. If you have a meat thermometer, the internal temperature should reach 165°F. Cooking time varies by thickness.

  6. Let rest for 5 minutes before serving.
    Encouraging note: Resting lets the juices redistribute. It makes the chicken more tender and easier to slice, and it gives you a moment to set the table.

I like to roast a pan of vegetables on the same sheet for an easy one-pan meal. Use sturdier vegetables like carrots and potatoes and cut them into even pieces so they cook through.

Serving

30-min Oven Baked Boneless Skinless Chicken Thighs

Serve the thighs family-style right in the baking dish. Place the dish on the table and let everyone help themselves. Add simple sides like roasted broccoli, mashed potatoes, or a green salad.

H3: Kid friendly plating

For little ones, I slice the thighs into strips and arrange them next to sweet potato cubes or steamed green beans. For older kids and adults, offer warm tortillas, a bowl of rice, or crusty bread.

H3: Flavor finishing ideas

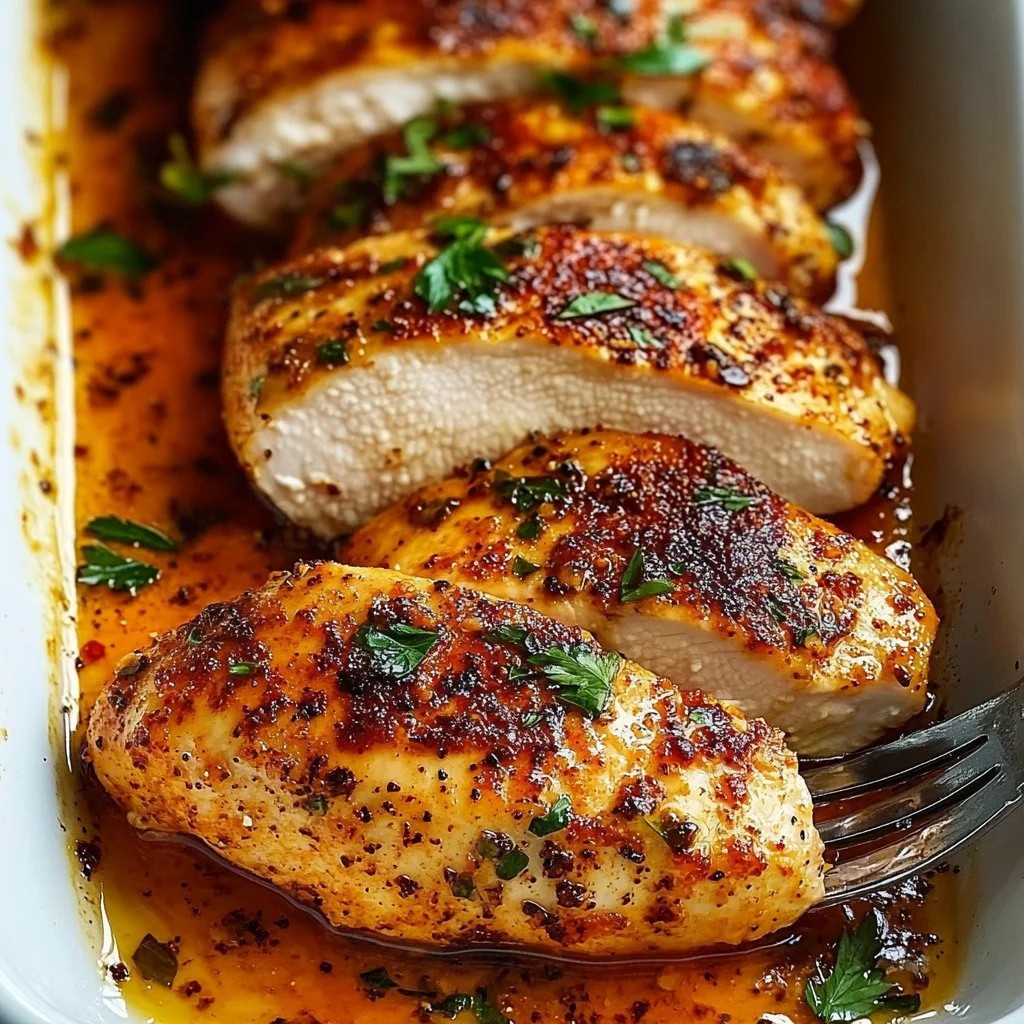
Top with a squeeze of lemon to brighten the dish. Sprinkle fresh parsley or a pinch of flaky salt for a restaurant feel. A spoonful of plain yogurt mixed with lemon and garlic makes a cooling sauce.

Storage

Refrigerator: Place cooled chicken in an airtight container. It keeps well for up to 4 days. Use it for quick lunches, salads, or wraps.

Freezer: Cool completely and freeze in a single layer on a baking sheet. Transfer frozen thighs to a freezer bag for up to 3 months. Thaw in the fridge overnight before reheating.

Reheat: Warm in a 350°F oven for 10 to 15 minutes until heated through. You can also microwave on medium power for short bursts, but the oven method keeps the texture better.

Leftover ideas: Slice and toss into a grain bowl with quinoa and roasted veggies. Shred for tacos with a quick slaw. Cut into kid-friendly strips and pack with fruit for school lunches.

Kitchen Notes

  • Use parchment paper or a silicone mat for easy cleanup and less sticking.
  • If you prefer a bit more color, switch to broil for the last 1 to 2 minutes while watching closely.
  • A meat thermometer speeds confidence. Aim for 165°F in the thickest part.
  • Marinate in the spice mix for up to 2 hours for extra flavor, but the recipe is great when made right away.
  • Double the recipe and cook on two pans if you are feeding a group. Rotate pans halfway for even baking.

Variations

  • Mild and creamy: Mix 2 tablespoons plain yogurt into the spice oil. Bake as directed. This yields a tender, slightly tangy finish that is gentle for picky eaters.

  • Spicy twist: Add 1/4 teaspoon cayenne pepper or a teaspoon of hot sauce to the spice mix for a kick. Serve with a cooling cucumber salad.

  • Low sodium: Reduce salt to 1/2 teaspoon and use more herbs like thyme and rosemary. Add a squeeze of lemon at the end for brightness.

  • Keto friendly: Serve with cauliflower mash and a side of roasted asparagus. The chicken is naturally keto compliant with the given spices and oil.

  • Gluten free: This recipe is gluten free as written. Confirm that your paprika and spices are labeled gluten free if you are sensitive.

These tweaks help you tailor the recipe for tastes at your table without upending the fast, 30-minute method.

FAQ

Q: Can I use chicken breasts instead of thighs?
A: Yes. Use boneless skinless chicken breasts but watch cooking time. Breasts can dry out faster. Check at 18 minutes and use a thermometer to reach 165°F.

Q: Can I make this ahead of time for meal prep?
A: Absolutely. Cook the thighs, cool, and store in the fridge. Reheat in the oven or slice cold for salads and wraps. It saves time on busy mornings.

Q: How do I know when chicken thighs are done?
A: The safest way is to use a meat thermometer. The thickest part should read 165°F. The juices should run clear and the meat should feel firm but not hard.

Q: Can I double the spices for more flavor?
A: You can increase spices to suit your family. If doubling chicken, double the spice mix. Taste and adjust if you prefer more garlic or less salt.

Q: Is this healthy for kids?
A: Yes. The recipe uses simple ingredients and moderate oil. It provides protein and pairs well with vegetables and whole grains for balanced family meals.

Conclusion

I hope this recipe becomes one of your weeknight go-tos. It is quick, reliable, and made with family in mind. For another easy guideline and photos to follow, I like the clear method at 30-Minute Baked Boneless Chicken Thighs – Familystyle Food. If you enjoy a spicier variation, check out this bright take on baked thighs at Baked Boneless Chicken Thighs (Easy Weeknight Recipe).

Thanks for cooking with me. Gather your people, set the table, and enjoy a simple meal that lets you spend less time at the stove and more time with the ones you love.

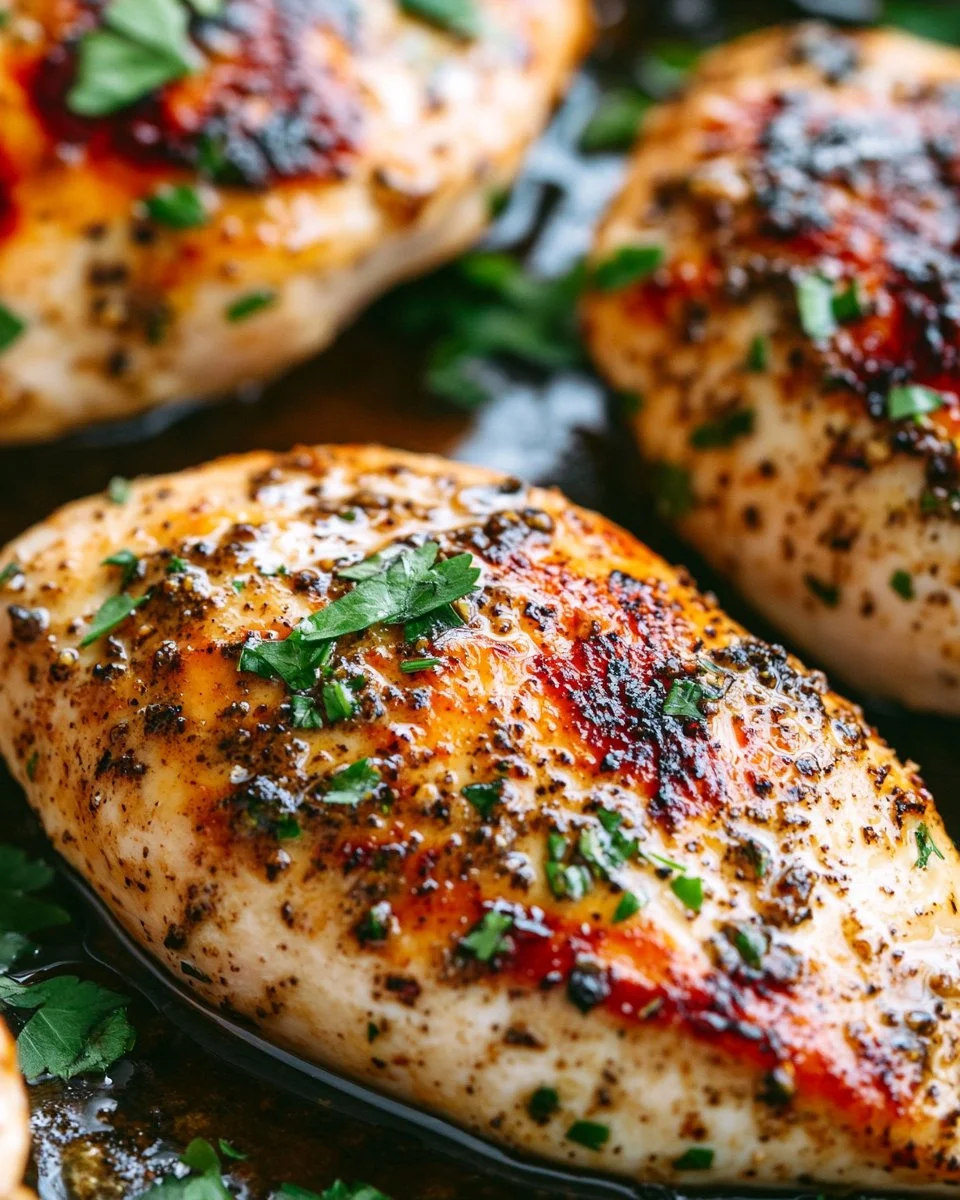
Juicy Baked Boneless Chicken Thighs

Prep Time 10 minutes
Cook Time 30 minutes
Total Time 40 minutes
Servings 4 servings
Calories 250
A simple, forgiving recipe for juicy baked chicken thighs that's perfect for busy weeknights and family-friendly dinners.

Ingredients

Main Ingredients

  • 4 pieces boneless skinless chicken thighs (Choose thighs of similar size for even cooking.)
  • 2 tablespoons olive oil (Use extra virgin for better flavor.)

Spice Mix

  • 1 teaspoon garlic powder (Gives steady flavor without burning.)
  • 1 teaspoon onion powder (Adds sweetness and depth.)
  • 1 teaspoon paprika (Smoked paprika adds a subtle smoky touch.)
  • 1 teaspoon salt (Kosher salt is preferred; adjust if using table salt.)
  • 1/2 teaspoon black pepper (Freshly ground for better flavor.)
  • 1 teaspoon dried oregano (For Mediterranean warmth.)

Instructions 

Preparation

  • Preheat the oven to 400°F (200°C).
  • In a bowl, combine olive oil, garlic powder, onion powder, paprika, salt, black pepper, and oregano.
  • Coat the chicken thighs with the spice mixture thoroughly.
  • Place the chicken thighs in a baking dish or on a baking sheet lined with parchment paper.

Cooking

  • Bake in the preheated oven for 25-30 minutes or until the chicken is cooked through and juices run clear.
  • Let rest for 5 minutes before serving.

Notes

Leftovers can be used in salads or wraps, and you can roast vegetables on the same sheet for a complete meal.
Calories: 250kcal
Course: Dinner, Main Course
Cuisine: American
Keyword: Baked Chicken Thighs, Comfort Food, Easy Dinner, Family Recipe, Weeknight Meal

Creamy Oven Baked Chicken Thighs

I remember the first time I baked creamy chicken thighs for my family. The kitchen smelled like warm garlic and melting cheese. The oven clock ticked while my kids laughed at the table. When I opened the oven, the sound of the sauce gently bubbling told me we were about to eat something special.

This recipe is cozy, quick, and forgiving. You do not need fancy techniques to make a dish that smells like Sunday dinner and tastes like a hug. I will walk you through every step so you feel confident in the kitchen. Let us get cooking.

Why this works

Creamy Oven Baked Chicken Thighs

This dish balances simple technique with rich flavor. Searing the chicken first locks in juices and builds a golden crust. The creamy Parmesan mixture adds a silky sauce that keeps each bite tender and satisfying. It is one of those meals that feels special but comes together fast.

Families will love it because it is both comforting and practical. You can prepare the sauce and sear the chicken while helping kids with homework or folding a load of laundry. It bakes in one pan, so cleanup is minimal. That means more time at the table and less time washing dishes.

I have tested this recipe many times for my own family and for friends. Each time, it came back with smiles and requests for the recipe. If you need a time-saving dinner that still feels homemade, this is a keeper.

Process Overview

“This is where the magic happens—when the aroma fills the kitchen.”

In short, the process is sear, mix, pour, and bake. Searing adds texture. The cream and Parmesan melt into a sauce that keeps the chicken moist. Baking finishes the cooking gently and evenly.

You can multi-task easily. While the chicken sears, combine the sauce. Once everything goes in the oven, you can chop a simple salad or set the table. This method gives you a great result with little fuss.

Quick science behind the method

Searing uses Maillard browning to add flavor. The cream and cheese provide fat and protein which make the sauce cling to the meat. Baking at 400°F gives a good balance between a golden top and tender interior. The final internal temperature should reach 165°F for safe, juicy chicken.

Ingredients

  • Chicken thighs
    • Use bone-in, skin-on thighs if you want extra flavor and juiciness. Boneless skinless works too and will cook a bit faster. I usually buy farm-raised thighs when possible.
  • Garlic
    • Fresh cloves give the best aroma. Mince finely for a smoother sauce. If you are short on time, jarred minced garlic is an acceptable shortcut.
  • Parmesan cheese
    • Freshly grated Parmesan melts best and gives a clean salty flavor. Pre-grated works, but look for a finely grated variety for better melt.
  • Heavy cream
    • Heavy cream makes the sauce rich and silky. For a lighter option, you can use half-and-half, but the sauce will be thinner.
  • Salt
    • I prefer fine sea salt for even seasoning. Taste the sauce before baking and adjust lightly.
  • Pepper
    • Freshly ground black pepper adds brightness. Add to taste, and a little extra on the finished dish if you like a peppery kick.
  • Olive oil
    • Use a good quality extra virgin olive oil for searing. It adds flavor and helps the skin crisp.
  • Fresh herbs (optional)
    • Parsley, thyme, or basil add a fresh finish. I often sprinkle chopped parsley at the end for color.

I include these ingredients because they are pantry-friendly, and most can be swapped if needed. My guiding rule is balance: a good sear, a rich sauce, and a final herb note.

Directions

  1. Preheat the oven to 400°F (200°C).

    • This heat gives a golden top while keeping the chicken juicy. Go ahead and preheat right away so the oven is ready when you finish searing.
  2. In a skillet, heat olive oil over medium-high heat.

    • Let the oil shimmer but not smoke. A hot pan helps you get a good sear. You are doing great so far.
  3. Season chicken thighs with salt and pepper, then sear them in the skillet until golden brown on both sides, about 4-5 minutes per side.

    • Searing develops flavor and texture. Don’t overcrowd the pan. If needed, sear in batches and keep the seared pieces warm while you finish.
  4. In a bowl, mix heavy cream, minced garlic, and grated Parmesan cheese.

    • Stir until the cheese is evenly distributed. Taste a small spoonful and adjust salt and pepper if necessary. The sauce should be flavorful on its own.
  5. Pour the creamy mixture over the seared chicken thighs in the skillet.

    • Make sure the thighs sit in the sauce but keep some skin above the liquid if you like a little crisp finish. The aromas will start to bloom right away.
  6. Transfer the skillet to the oven and bake for 25-30 minutes or until the chicken is cooked through.

    • Use an instant-read thermometer to check for 165°F in the thickest part of a thigh. If the sauce bubbles and the chicken reaches temperature, you are set.
  7. Garnish with fresh herbs if desired and serve hot.

    • A sprinkle of parsley or thyme brightens the rich sauce. Let the chicken rest for 3-5 minutes before serving so the juices redistribute.

Each step is forgiving. If you slightly overcook or under-season, a quick squeeze of lemon or a pinch of extra salt at the end can rescue the dish. Cooking is about adjustments, not perfection.

Serving

Creamy Oven Baked Chicken Thighs

Serve this dish family-style right from the skillet. Place the hot pan on the table and let everyone help themselves. That warm, communal feel is part of why this recipe works so well for busy weeknights and slower weekend meals.

Suggested sides

  • A green salad with vinaigrette to cut the richness.
  • Steamed green beans, roasted carrots, or sautéed spinach.
  • Mashed potatoes, rice, or crusty bread to soak up the sauce.

For a family dinner, I usually set out a bowl of quick steamed broccoli and some roasted fingerling potatoes. My kids like to dip bread into the sauce, and that makes them happy. Little moments like that are what home cooking is about.

Storage

Refrigerator

  • Store leftovers in an airtight container for up to 3-4 days.
  • Keep the sauce and chicken together for the best flavor.

Freezer

  • You can freeze portions for up to 2 months. Cool the dish completely before transferring to a freezer-safe container.
  • Thaw in the refrigerator overnight before reheating.

Reheating

  • Oven method: Preheat to 350°F. Cover the chicken with foil and heat for 15-20 minutes, or until warmed through.
  • Stovetop: Gently reheat in a skillet over low heat. Add a splash of cream or stock if the sauce looks thick.
  • Microwave: Use short intervals and stir the sauce between cycles to distribute heat. This works in a pinch but can change the texture slightly.

Label containers with the date so you always know how fresh leftovers are. Reheat until the internal temperature reaches 165°F for safe eating.

Kitchen Notes

  • Use a cast iron skillet if you have one. It goes from stovetop to oven easily and holds heat well.
  • If you prefer crispier skin, sear skin-side down a little longer and briefly broil at the end. Watch closely to avoid burning.
  • Grate your own Parmesan for the best melting and flavor. Block cheese beats pre-shredded for texture.
  • If your skillet is not oven-safe, transfer the chicken and sauce to a baking dish before placing in the oven.
  • Want a faster version? Use boneless, skinless thighs and reduce bake time by 5-10 minutes. Check with a thermometer.

These shortcuts keep the meal simple without losing flavor. I lean on them on busy nights when I want a real dinner with minimal stress.

Variations

Picky eaters

  • Mild version: Reduce garlic to one clove and omit herbs. Serve with plain mashed potatoes or buttered pasta.
  • Crispy version: Keep skin dry, sear well, and finish with a minute or two under the broiler to crisp.

Low-carb or keto

  • This dish is already friendly to low-carb and keto diets if you skip starchy sides. Serve with cauliflower mash or roasted Brussels sprouts.

Dairy-free

  • Substitute full-fat coconut milk for heavy cream and use a dairy-free Parmesan alternative. Note that flavor will shift but texture stays creamy.

Gluten-free

  • Naturally gluten-free if you use gluten-free Parmesan and check labels on any packaged ingredients.

Spicy twist

  • Add 1/2 teaspoon red pepper flakes to the sauce or a dash of hot sauce to the finished dish for heat that warms the whole family.

Make-ahead

  • Sear chicken and make the sauce up to 24 hours in advance. Keep chilled and bake when you are ready to eat. This saves active cooking time and still delivers fresh flavor.

I encourage you to adapt the recipe to your family’s tastes. I often change small elements depending on what I have in the pantry. The core method stays the same and keeps the results reliable.

FAQ

Q: Can I use chicken breasts instead of thighs?
A: Yes. Chicken breasts will cook faster and can dry out more easily. Use bone-in breasts for juicier results and check for an internal temperature of 165°F. Reduce bake time and monitor closely.

Q: How do I know when the chicken is done?
A: The safest and simplest way is an instant-read thermometer. Insert into the thickest part of the thigh; it should read 165°F. The juices should run clear.

Q: Can I double this recipe for a larger crowd?
A: Absolutely. Use a larger ovenproof dish or two skillets. If you double, you may need to sear in batches to avoid overcrowding the pan.

Q: Is it okay to skip the searing step?
A: Searing adds flavor and color, but you can skip it if you are short on time. The chicken will still cook in the creamy sauce but will lack the browned crust. Increase bake time slightly if you skip searing.

Q: Can I prepare this in advance for a dinner party?
A: Yes. Sear the chicken and prepare the sauce a few hours ahead. Keep both chilled and bake 30-40 minutes before serving. Finish with fresh herbs and a quick broil if you want a golden top.

These questions come up often when I share this recipe with readers. If you have a specific concern, feel free to adjust and test small changes. Cooking should be responsive to your kitchen and schedule.

Conclusion

I hope this creamy oven baked chicken thighs recipe becomes a regular in your rotation. It brings comfort without a lot of hands-on time, and it travels well from weeknight dinner to casual weekend gatherings.

For a version with extra family-friendly notes and step-by-step photos, you might like the detailed guide at Creamy Oven Baked Chicken Thighs – Munchkin Time. If you are looking for another variation with different seasoning ideas, check this helpful take on the dish at Creamy Oven Baked Chicken Thighs | The English Kitchen.

Thank you for letting me share this recipe with you. I love hearing how it turns out in your home. Happy cooking, and enjoy the warm moments at your table.

Creamy Chicken Thighs

Prep Time 15 minutes
Cook Time 30 minutes
Total Time 45 minutes
Servings 4 servings
Calories 600
This cozy, quick recipe features seared chicken thighs baked in a rich creamy Parmesan sauce, perfect for family dinners.

Ingredients

Main Ingredients

  • 4 pieces bone-in skin-on chicken thighs (Boneless skinless works too.)
  • 1 tablespoon olive oil (Use good quality extra virgin for best results.)
  • 1 cup heavy cream (For a lighter option, use half-and-half.)
  • 4 cloves garlic (Mince finely for best results. Jarred minced garlic is an acceptable shortcut.)
  • 1 cup freshly grated Parmesan cheese (Pre-grated works, but finely grated variety melts best.)
  • to taste salt (Fine sea salt is preferred.)
  • to taste freshly ground black pepper (A little extra on the finished dish adds flavor.)

Optional Garnishes

  • to taste fresh herbs (Parsley, thyme, or basil add a fresh finish.)

Instructions 

Preparation

  • Preheat the oven to 400°F (200°C).
  • In a skillet, heat olive oil over medium-high heat.
  • Season chicken thighs with salt and pepper, then sear them in the skillet until golden brown on both sides, about 4-5 minutes per side.
  • In a bowl, mix heavy cream, minced garlic, and grated Parmesan cheese. Stir until well combined.
  • Pour the creamy mixture over the seared chicken thighs in the skillet.
  • Transfer the skillet to the oven and bake for 25-30 minutes or until the chicken is cooked through, checking for an internal temperature of 165°F.
  • Garnish with fresh herbs if desired and serve hot.

Notes

Serve family-style right from the skillet. Can be stored in an airtight container for up to 3-4 days in the refrigerator.
Calories: 600kcal
Course: Dinner, Main Course
Cuisine: American, Comfort Food
Keyword: Chicken Recipes, Comfort Food, Creamy Chicken Thighs, Easy Family Dinner, Oven Baked Chicken

Oven Baked Chicken Breast

I can already smell it. The warm, savory scent of roasted chicken fills the air and makes the kitchen feel like home. You hear the gentle tick of the oven timer and the soft clink of a baking sheet. That small chorus tells you dinner is coming together.

This oven baked chicken breast recipe is simple, reliable, and perfect for busy weeknights or lazy Sundays. I test this method often for my family. It is forgiving, fast, and keeps the meat juicy when you follow a few smart steps.

Why this works

Oven Baked Chicken Breast

This method focuses on even heat and straightforward seasoning. Baking at a steady temperature lets the chicken cook through gently. The olive oil helps the spices stick and promotes a light, golden crust.

I choose this technique when I want a meal that fits family life. It saves time, and you can cook a few breasts at once for lunches, salads, or tacos. It also leaves room for sides without babysitting the pan.

As a food blogger and home cook, I trust recipes that deliver consistent results. This one does. You get flavorful, moist chicken without fancy tools or long prep.

Process Overview

“This is where the magic happens—when the aroma fills the kitchen.”

The process is short. Prep, rub, bake, rest. Each step builds flavor and keeps the meat tender.

You can prep the seasoning ahead of time. That makes weeknight dinners feel calm and manageable. The oven does most of the work while you set the table or help with homework.

A quick rest after baking is important. It gives the juices a chance to settle back into the meat. That is the small act that makes a big difference.

Ingredients

  • 4 chicken breasts
    Lily tip: Choose even-sized breasts so they cook at the same rate. If one is much thicker, pound it gently to match the others.

  • 2 tablespoons olive oil
    Lily tip: Use a good quality olive oil for flavor and to help the seasonings adhere. You can substitute avocado oil if you prefer.

  • 1 teaspoon garlic powder
    Lily tip: Garlic powder gives steady flavor without burning like fresh garlic might. If you like fresh garlic, use one minced clove and reduce the powder to 1/2 teaspoon.

  • 1 teaspoon onion powder
    Lily tip: Onion powder adds roundness. It blends well with paprika and helps the chicken taste savory and balanced.

  • 1 teaspoon paprika
    Lily tip: Paprika gives color and a mild sweetness. Use smoked paprika for a subtle smoky note, or regular sweet paprika for a classic flavor.

  • Salt and pepper to taste
    Lily tip: Salt is essential for flavor. I recommend 1/2 to 3/4 teaspoon kosher salt per breast, adjusted to your taste. Freshly ground black pepper brightens the mix.

  • Fresh herbs (optional for garnish)
    Lily tip: Parsley, thyme, or chives add a fresh finish. Scatter them on right before serving to keep their color and aroma.

Each ingredient plays a role. Together they create a simple, family-friendly profile that kids and adults can enjoy.

Directions

  1. Preheat the oven to 400°F (200°C).
    You are setting the stage here. A hot oven gives a quick, even roast that keeps the chicken juicy inside.

  2. In a bowl, mix olive oil, garlic powder, onion powder, paprika, salt, and pepper.
    Take a moment to whisk everything together. The oil carries the spices evenly across the chicken and helps the crust form.

  3. Rub the seasoning mixture all over the chicken breasts.
    Be generous and feel free to rub under the thin edge for more flavor. A good rub makes every bite taste intentional.

  4. Place the chicken breasts on a baking sheet lined with parchment paper.
    Parchment keeps clean up quick and prevents sticking. Give the pieces space so heat circulates freely around each breast.

  5. Bake for 25-30 minutes, or until the chicken is cooked through and juices run clear.
    Use an instant-read thermometer if you can. The safe internal temperature is 165°F. If the breasts are very thin, check closer to 20 minutes.

  6. Let rest for a few minutes before slicing.
    Resting is key. It keeps the meat moist and locks those juices in. Five minutes can make a big difference.

  7. Garnish with fresh herbs if desired and serve.
    A little green on top makes the dish feel special. This is a great moment to call everyone to the table.

You will find each step easy to follow. If you have kids helping, this recipe is forgiving and teaches simple kitchen skills.

Serving

Oven Baked Chicken Breast

Serve this chicken family-style on a large platter so everyone can choose their portion. Slice the breasts into thin pieces for salads or serve whole for heartier plates.

H3 Family-style serving ideas

  • Weeknight platter: Add roasted carrots, steamed broccoli, and warm rolls. Let each person build their own plate.
  • Taco night: Slice the chicken and place it beside soft tortillas, shredded lettuce, and salsa. Kids love assembling their own tacos.
  • Salad upgrade: Slice chilled leftover chicken and toss with mixed greens, cherry tomatoes, and a lemon vinaigrette for quick lunches.
  • Grain bowl: Pair with cooked rice or quinoa, a scoop of hummus, and roasted vegetables for a balanced meal.

This chicken is flexible. It fits into lunches, quick dinners, and even packed school lunches. Keep a small container of the pan juices or a simple sauce on the side to brighten the meat.

Storage

Cool the chicken to room temperature for no more than two hours. Then refrigerate in an airtight container.

Store cooked chicken in the fridge for up to 4 days. For longer storage, freeze in a sealed freezer bag for up to 3 months. Label the bag with the date.

To reheat, slice the chicken and warm gently in a skillet with a splash of broth or water over medium heat. Cover for a minute to steam through. You can also reheat in the oven at 300°F for 10-15 minutes until warmed through.

If you are reheating in a microwave, add a damp paper towel over the slices to keep moisture. Heat in short intervals to avoid drying out the meat.

Leftover chicken is perfect for sandwiches, pasta, and salads. Think of it as a versatile ingredient that saves time on busy days.

Kitchen Notes

  • Use a meat thermometer. It takes the guesswork out of doneness and protects you from overcooking.
  • Pound uneven breasts to a uniform thickness for even cooking. Place the breast between plastic wrap and press gently with a pan.
  • Make the seasoning mix in a small jar. Store it in your spice rack for quick dinners.
  • Rest the meat under tented foil for 2 to 5 minutes to keep it warm without sweating.
  • Double the batch and freeze half for easy weeknight meals. Thaw overnight in the fridge before reheating.

These shortcuts keep the recipe fast and friendly for family life. Little changes add up to consistent results.

Variations

  • For picky eaters: Reduce the garlic and onion powder by half. Keep the paprika light and season gently with salt. Kids often prefer a milder profile.
  • For low-sodium diets: Use low-sodium salt and add fresh lemon juice or herbs for flavor instead of increasing salt.
  • For a Mediterranean twist: Add 1 teaspoon dried oregano and the zest of one lemon to the seasoning. Serve with a side of tzatziki and olives.
  • For a smoky flavor: Use 1/2 teaspoon smoked paprika and a pinch of cumin. Serve with roasted sweet potatoes.
  • For a gluten-free option: This recipe is naturally gluten-free when you use gluten-free spices and parchment.

Small tweaks let you adapt the chicken to different tastes and diets without losing the core technique.

FAQ

Q: Can I use bone-in chicken breasts?
A: Yes. Bone-in breasts take longer to cook. Increase bake time to about 35-40 minutes and check for an internal temperature of 165°F near the bone.

Q: How do I prevent dry chicken?
A: Do not overcook. Use a thermometer and remove the chicken at 165°F. Let it rest for a few minutes to redistribute juices before slicing.

Q: Can I marinate the chicken instead of using a dry rub?
A: Absolutely. A 30-minute to 2-hour marinade with olive oil, lemon, and herbs adds flavor. Pat the chicken dry before adding the dry seasoning for a nice crust.

Q: Is it okay to bake at a different temperature?
A: You can bake at 375°F for a slightly longer time, around 30-35 minutes. Lower heat is gentler but take care to monitor internal temperature.

Q: Can I prepare this ahead for a party?
A: Yes. Bake the chicken and slice it. Keep warm in a low oven at 200°F covered with foil, or serve at room temperature on a platter for a buffet. Offer sauces on the side.

Conclusion

I hope this oven baked chicken breast becomes one of your go-to recipes. It is simple, dependable, and kind to busy family schedules. Little habits like using a thermometer and letting the meat rest will reward you with moist, flavorful chicken every time.

For another trusted variation of a baked chicken breast recipe, I like the practical method shown by Oven Baked Chicken Breast – RecipeTin Eats. For additional tips on achieving juicy results and serving ideas, check out Baked Chicken Breast | Gimme Some Oven.

Thanks for cooking with me. I love hearing how your family enjoys this recipe, so come back and share your favorite twist.

Oven Baked Chicken Breast

Prep Time 10 minutes
Cook Time 30 minutes
Total Time 40 minutes
Servings 4 servings
Calories 250
A simple, reliable recipe for juicy oven-baked chicken breasts that is perfect for busy weeknights or lazy Sundays.

Ingredients

Main Ingredients

  • 4 pieces chicken breasts (Choose even-sized breasts so they cook at the same rate.)
  • 2 tablespoons olive oil (Use a good quality olive oil for flavor.)
  • 1 teaspoon garlic powder (Use fresh garlic if preferred; reduce garlic powder.)
  • 1 teaspoon onion powder (Adds roundness to the flavor.)
  • 1 teaspoon paprika (Use smoked paprika for a subtle smoky note.)
  • Salt and pepper to taste (1/2 to 3/4 teaspoon kosher salt per breast.)
  • Fresh herbs (optional for garnish) (Parsley, thyme, or chives add a fresh finish.)

Instructions 

Preparation

  • Preheat the oven to 400°F (200°C).
  • In a bowl, mix olive oil, garlic powder, onion powder, paprika, salt, and pepper.
  • Rub the seasoning mixture all over the chicken breasts.
  • Place the chicken breasts on a baking sheet lined with parchment paper.

Cooking

  • Bake for 25-30 minutes, or until the chicken is cooked through and juices run clear.
  • Let rest for a few minutes before slicing.
  • Garnish with fresh herbs if desired and serve.

Notes

Cool the chicken to room temperature for no more than two hours before refrigerating. Store cooked chicken in the fridge for up to 4 days or freeze for up to 3 months.
Calories: 250kcal
Course: Dinner, Main Course
Cuisine: American
Keyword: Easy Chicken Recipe, Family Dinner, Juicy Chicken Breast, Oven Baked Chicken, Weeknight Meal

chicken breast recipes are my weeknight lifesaver, especially on those evenings when I open the fridge and feel like everything in there is either random or tired. You want something that tastes like you tried, but you also want dinner soon. I have been there, standing in socks, hungry, and slightly annoyed at how long everything takes. The good news is chicken breast can be juicy and exciting without fancy steps. Tonight I am sharing the simple techniques and my favorite flavor ideas so you can pick what fits your mood.
Deliciously Easy Chicken Breast Recipes to Try Tonight

Top Chicken Breast Cooking Techniques

If you have ever had dry chicken breast, it usually is not the chicken’s fault. It is the method, the heat, or honestly just bad timing. These are the techniques I lean on the most when I want reliable results and minimal stress.

My go to methods for juicy results

Pan sear and finish is my number one. You start in a hot pan to get that golden outside, then lower the heat or finish in the oven so the inside can catch up without turning into sawdust.

Oven bake is the hands off option. It is great when you are doing a side dish at the same time. I like baking because it is predictable and easy to repeat.

Air fryer is the “I am tired” method. It is fast, it browns well, and cleanup is basically nothing if you use a liner.

Poaching sounds boring, but it is amazing for shredding chicken for tacos, salads, or a quick sandwich. Gentle heat keeps it tender.

Grilling gives you that smoky, summer flavor even if it is a weeknight. Just watch it closely because it can go from perfect to dry really fast.

Here are a few practical tips that help across all methods:

  • Pound thicker pieces so they cook evenly. Even thickness matters more than you think.
  • Pat dry before cooking if you want browning.
  • Rest the chicken for 5 minutes after cooking so the juices stay put.

One more real life tip: if you are cooking multiple breasts, try to pick similar sizes. Mixing a huge one with two small ones is how dinner gets awkward and uneven.

chicken breast recipes

Unique Chicken Breast Recipes

Okay, let’s get to the fun part. These are the flavors I make when I want something beyond basic chicken and rice. They are all built for normal kitchens and real schedules.

Three easy favorites I actually make on busy nights

1) Lemon garlic skillet chicken with burst tomatoes
This one feels bright and fresh, like you did something special, but it is just a skillet dinner. Sear the chicken, then toss in a handful of cherry tomatoes, sliced garlic, and a splash of broth. Finish with lemon juice and a little butter if you want it silky. I love it over couscous or with toasted bread to mop up the pan juices.

2) Honey mustard sheet pan chicken with crispy potatoes
Mix mustard, honey, olive oil, salt, pepper, and a pinch of paprika. Coat the chicken and toss chopped potatoes on the same pan. Everything roasts together and the sauce gets sticky in the best way. Add green beans in the last 10 minutes if you want a veggie without extra work.

3) Creamy coconut lime chicken with a tiny kick
This is my “takeout cravings” fix. Sear chicken pieces, then simmer with coconut milk, lime juice, and a spoon of curry paste or chili garlic sauce. It smells incredible, and it is surprisingly forgiving. Serve with rice and cucumber slices for a cool crunch.

And here is a quick mini checklist that helps these turn out right:

  • Use a big enough pan so the chicken is not crowded.
  • Keep sauces simple and let one or two flavors lead.
  • Taste at the end and adjust salt and acid like lemon or vinegar.

“I tried the honey mustard sheet pan version on a Tuesday and my family thought it was a weekend meal. The chicken stayed juicy and the potatoes disappeared fast.”

When people ask me for chicken breast recipes that do not taste bland, these are the ones I send first because they have strong flavor without complicated steps.

Best Marinades and Seasoning for Chicken Breast

If chicken breast had a love language, it would be seasoning. Because it is lean, it really benefits from a little planning, even if that planning is just 10 minutes while you chop something else.

Here are the marinades and seasonings I reach for most:

Classic Italian style: olive oil, lemon juice, garlic, oregano, salt, pepper. Great for baking or grilling.

Simple yogurt marinade: plain yogurt, lemon, garlic, salt, and a pinch of cumin. Yogurt helps tenderize and adds a gentle tang. This is one of the easiest ways to get juicy chicken.

Soy ginger: soy sauce, grated ginger, garlic, a little brown sugar or honey, and sesame oil. Awesome for stir fry style dinners.

Smoky spice rub: paprika, onion powder, garlic powder, salt, pepper, and a pinch of cayenne. Rub it on with a bit of oil and you are good.

How long should you marinate? For most marinades, I aim for 20 to 60 minutes. If it is a stronger acidic marinade with lots of lemon or vinegar, keep it on the shorter side so the texture stays nice.

Also, do not underestimate the power of salt. Even a simple salt and pepper seasoning done well can make chicken taste like something you actually want to eat. And if you are using a store bought seasoning blend, taste it first. Some are very salty, and you might not need extra salt at all.

Cooking Time and Temperature for Best Results

This is the part that saves dinner. Chicken breast is not hard, but it is specific. The sweet spot is cooking it through without pushing it so far that it dries out.

The most reliable rule: cook chicken breast to an internal temperature of 165 F at the thickest part. If you have a thermometer, use it. It is not “chef gear,” it is just a sanity tool.

General timing guidelines that usually work in my kitchen:

Pan sear: about 5 to 7 minutes per side depending on thickness, then a few minutes on lower heat if needed.

Bake: 400 F for about 18 to 24 minutes for average sized breasts. Thicker ones can take longer.

Air fryer: 375 to 390 F for about 10 to 14 minutes, flipping halfway.

Poach: simmer gently about 12 to 18 minutes depending on size, then rest in the hot liquid a few minutes.

One thing I do all the time: I pull the chicken off the heat at around 160 to 163 F and let it rest. It usually climbs the last few degrees on its own, and that resting time makes it noticeably juicier.

If you are meal prepping, slightly under cooking by a tiny bit can help because it will warm up later. Just make sure it still reaches safe temp during cooking and is stored properly in the fridge.

Common Mistakes to Avoid When Cooking Chicken Breast

I have made every mistake on this list, usually when I was hungry and impatient. If you avoid these, your chicken will instantly improve.

Cooking straight from the fridge: ice cold chicken tends to cook unevenly. Let it sit out 10 to 15 minutes while you prep.

Skipping the dry off step: if the chicken is wet, it steams instead of browning. Pat it dry for better color and flavor.

Heat too high the whole time: high heat is great for starting, but not always for finishing. Lower it after searing or finish in the oven so the inside cooks gently.

Cutting into it too soon: I know it is tempting. Rest it for a few minutes so the juices do not run out all over the cutting board.

Not seasoning enough: chicken breast needs help. Even if you are keeping it simple, use enough salt and some kind of flavor booster like garlic, lemon, or a spice blend.

And a quick note about leftovers: store cooked chicken within 2 hours, keep it sealed, and use it within 3 to 4 days. Warm it gently with a splash of broth or sauce so it stays tender.

Common Questions

How do I keep chicken breast from drying out?
Use medium heat, do not overcook it, and let it rest. A quick marinade or even just oil plus seasoning also helps a lot.

Can I cook frozen chicken breast tonight?
Yes, but it takes longer and browning is harder. Baking or air frying works best. Use a thermometer and make sure it reaches 165 F.

What is the best way to meal prep chicken breast?
Bake or air fry a batch, cool it, then store in airtight containers. Keep a couple sauces on the side so it does not feel like the same meal every day.

Should I rinse chicken breast before cooking?
No. Rinsing can spread germs around your sink. Just pat it dry with paper towels and wash your hands and surfaces after.

What are the best sides for these dinners?
Rice, roasted potatoes, salad kits, steamed broccoli, or quick pasta. Honestly, even toast and a bagged salad can make it feel complete.

Dinner is handled, and you have options

If you take one thing from this, let it be this: chicken breast can be juicy, flavorful, and easy when you use the right heat and do not rush the resting step. Play with a marinade when you can, keep a thermometer handy, and pick one of the recipes that matches your energy level tonight. I hope these chicken breast recipes make your evening feel a little calmer and a lot more delicious. If you try one, tell me what you served it with, because I am always looking for new side ideas.
chicken breast recipes

Chicken Breast Mastery

Prep Time 15 minutes
Cook Time 30 minutes
Total Time 45 minutes
Servings 4 servings
Calories 350
Explore easy cooking techniques and flavorful recipes for juicy chicken breast that fit into your busy weeknight schedule.

Ingredients

For Lemon Garlic Skillet Chicken

  • 4 pieces chicken breasts (Pounded to even thickness)
  • 1 cup cherry tomatoes (Halved)
  • 3 cloves garlic (Sliced)
  • 0.5 cup chicken broth (Low sodium recommended)
  • 1 tbsp lemon juice (Fresh)
  • 1 tbsp butter (Optional for silkiness)

For Honey Mustard Sheet Pan Chicken

  • 4 pieces chicken breasts (Preferably boneless)
  • 0.5 cup honey (For coating)
  • 0.5 cup mustard (Dijon or yellow)
  • 1 tbsp olive oil (For coating)
  • 1 tsp salt (To taste)
  • 1 tsp pepper (To taste)
  • 1 tbsp paprika (For extra flavor)
  • 4 cups potatoes (Chopped)

For Creamy Coconut Lime Chicken

  • 4 pieces chicken thighs (Can substitute breasts)
  • 1 can coconut milk
  • 2 tbsp lime juice (Freshly squeezed)
  • 1 tbsp curry paste (Or chili garlic sauce)

For Marinades

  • 0.25 cup olive oil (For the Italian style)
  • 1 tbsp lemon juice (For the yogurt marinade)
  • 1 tbsp soy sauce (For the soy ginger marinade)
  • 1 tbsp paprika (For the spice rub)

Instructions 

Preparation

  • Pound chicken breasts to even thickness.
  • Pat chicken dry before cooking.
  • Prepare marinades and seasonings of choice.

Cooking Techniques

  • For pan searing, heat pan to high, sear chicken 5-7 minutes on each side.
  • For baking, preheat oven to 400°F and bake for 18-24 minutes.
  • For air frying, preheat to 375°F and cook for 10-14 minutes, flipping halfway.
  • Gently poach in simmering water for 12-18 minutes.
  • Allow chicken to rest for at least 5 minutes to retain juices.

Serving Suggestions

  • Serve lemon garlic chicken over couscous or with toasted bread.
  • Pair honey mustard chicken with roasted vegetables.
  • Accompany creamy coconut lime chicken with rice and cucumber slices.

Notes

For best results, remember to rest the chicken after cooking and keep sauces simple. Adjust seasonings to taste, and use a thermometer for accurate cooking temperatures.
Calories: 350kcal
Course: Dinner, Main Course
Cuisine: American
Keyword: Chicken Breast, Cooking Techniques, Marinades, Quick Recipes, Weeknight Dinner