Tag

garlic chicken

Browsing

Lemon Garlic Chicken

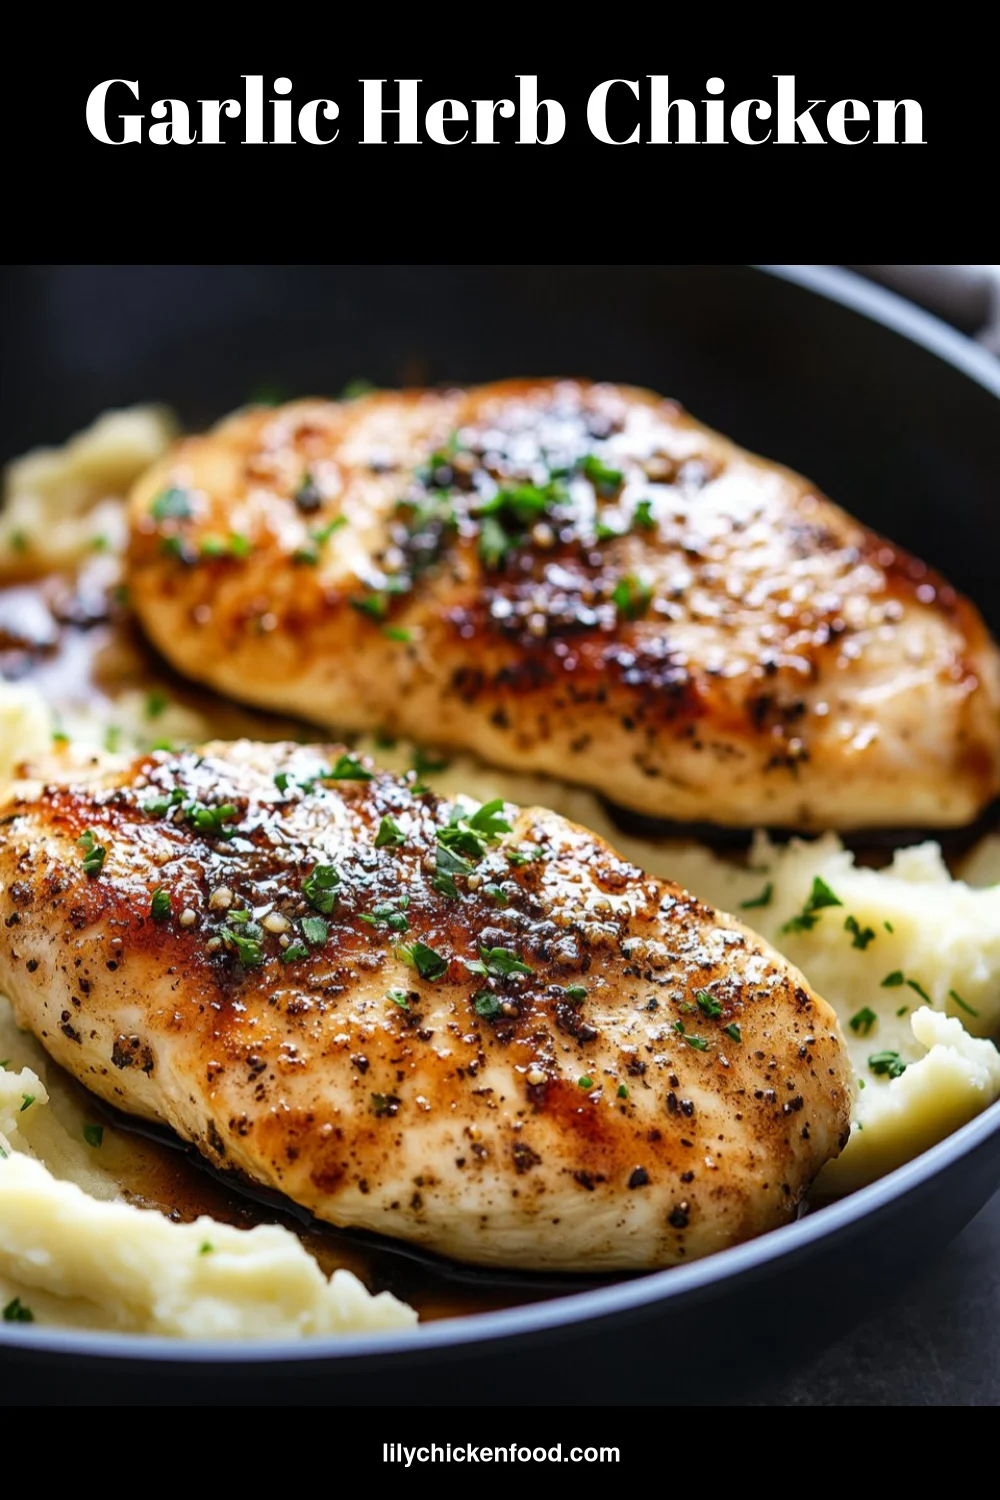
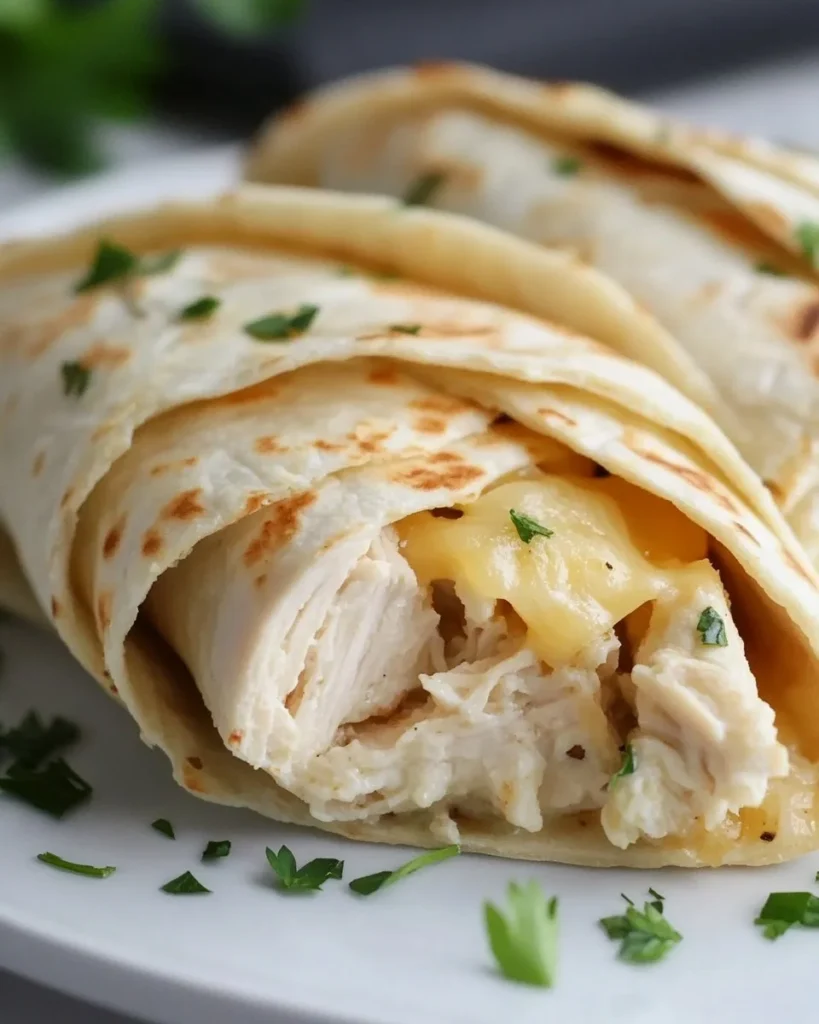
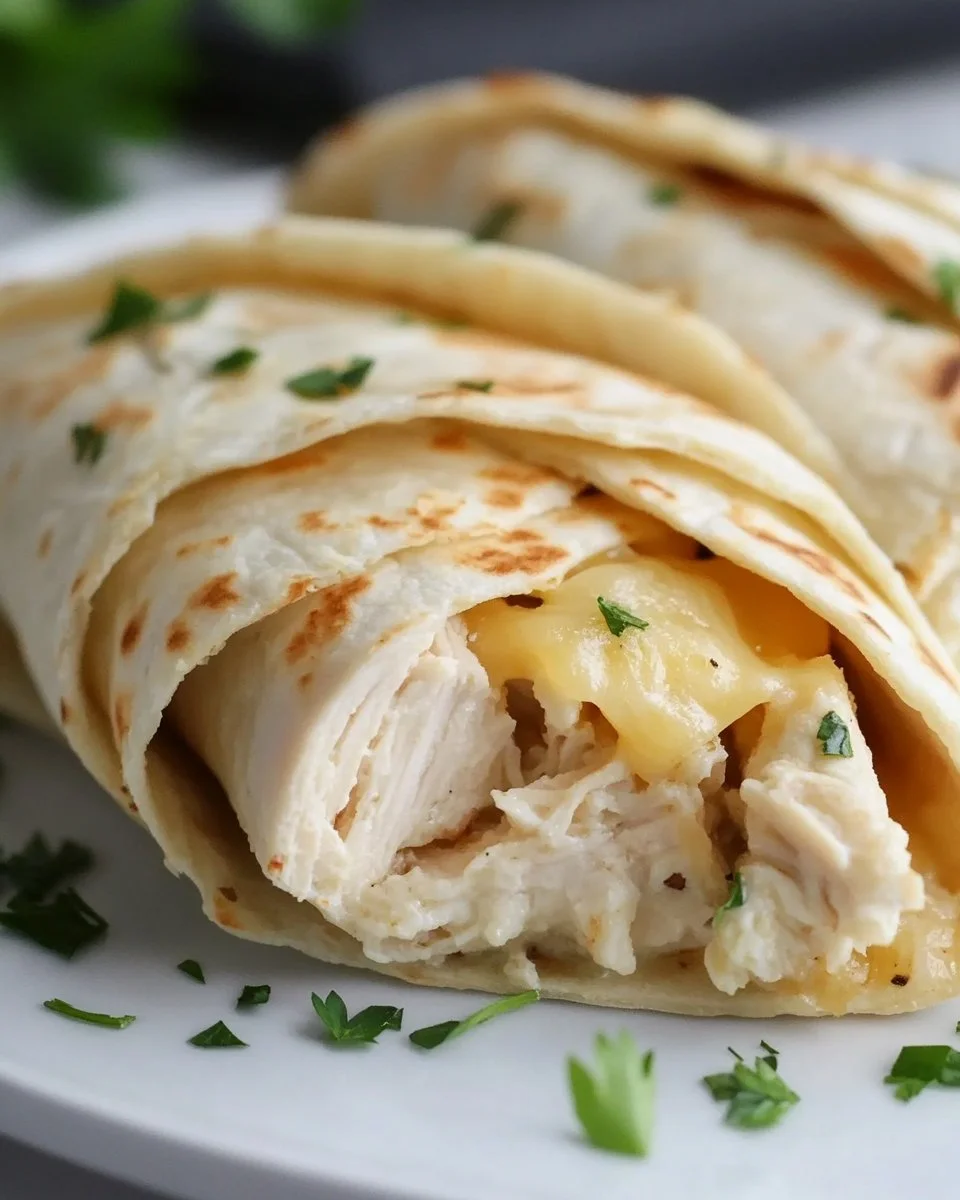
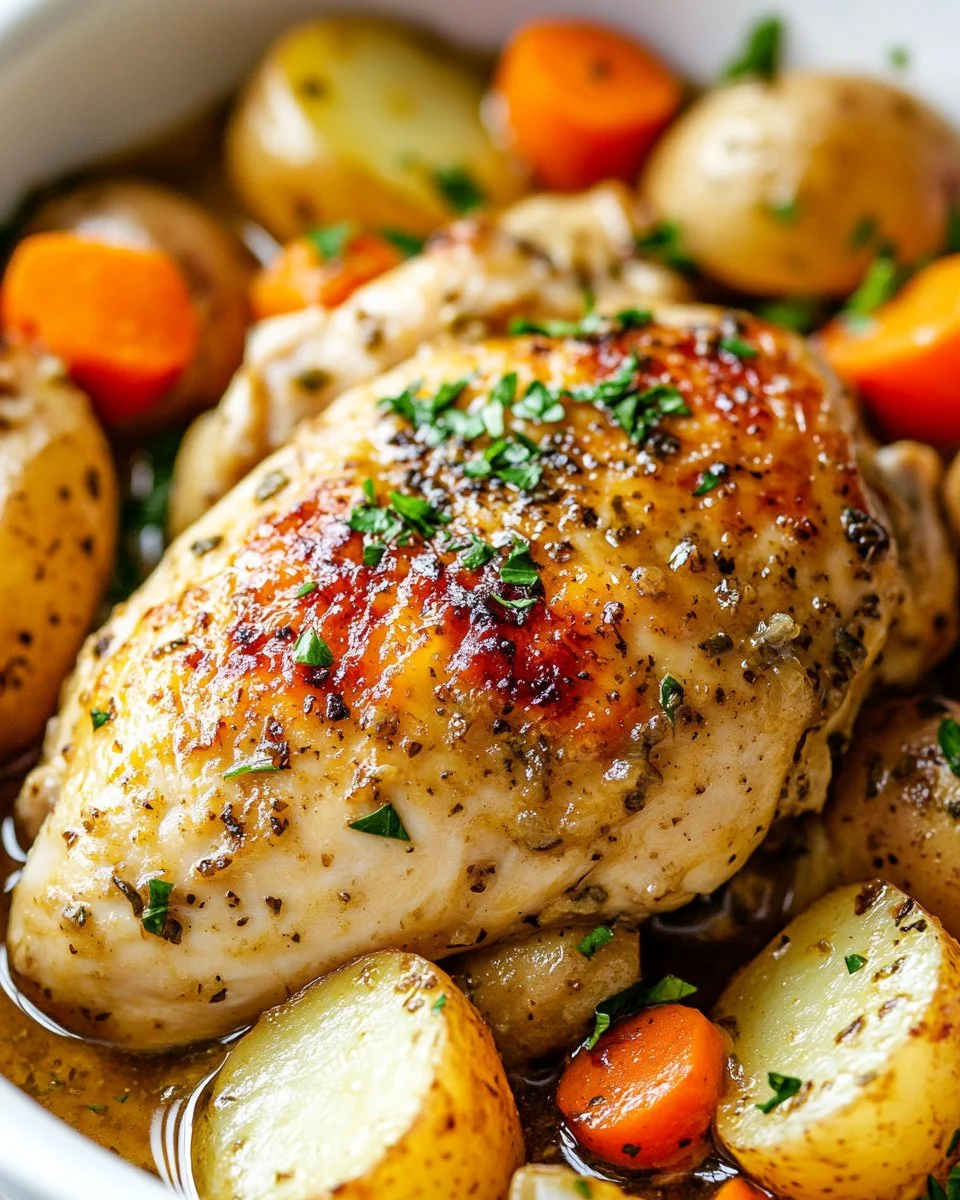
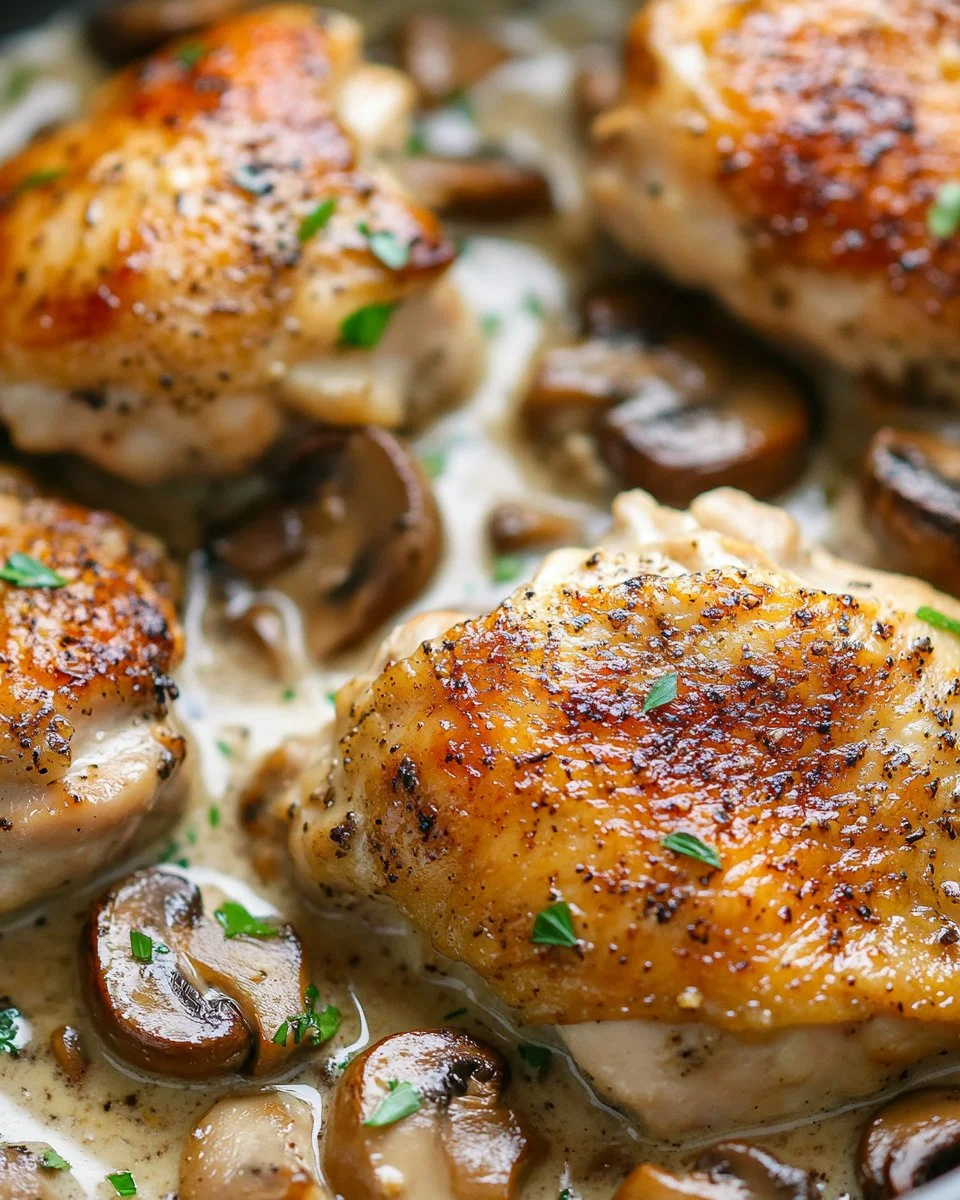
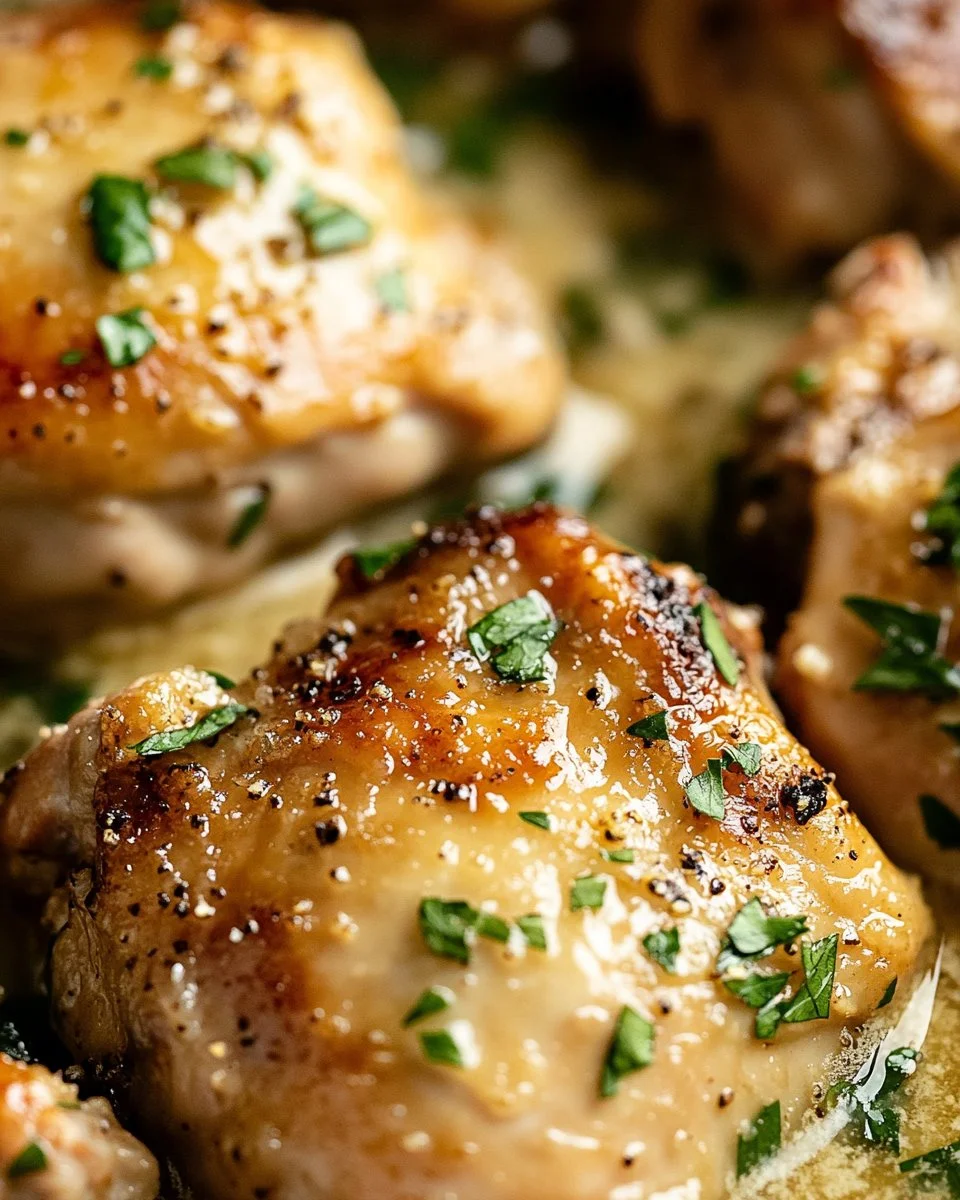
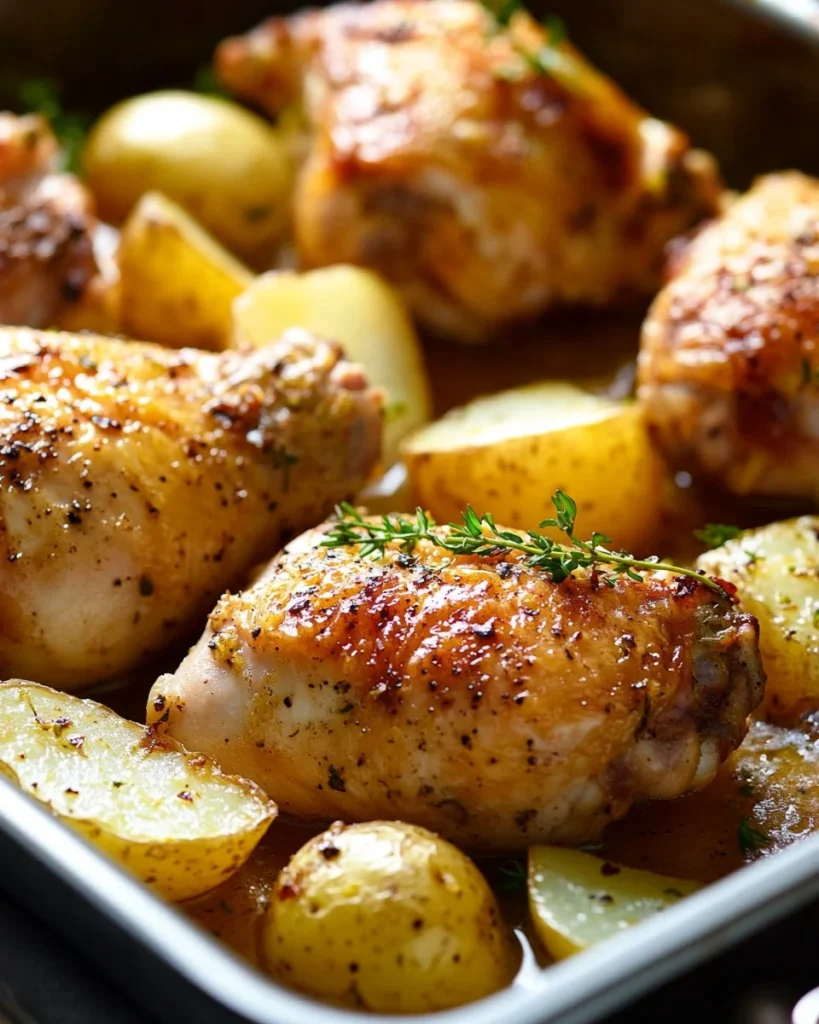
There’s nothing quite like the smell of roasted chicken wafting through the kitchen. The garlic, lemon, and spices mingle together, creating a melody of flavors that sing of comfort and home. As the chicken sizzles in the oven, the family can hardly wait to gather around the table. This Lemon Garlic Chicken recipe is not just a dish; it’s a celebration of family time shared over a warm meal.

Why this works

Lemon Garlic Chicken

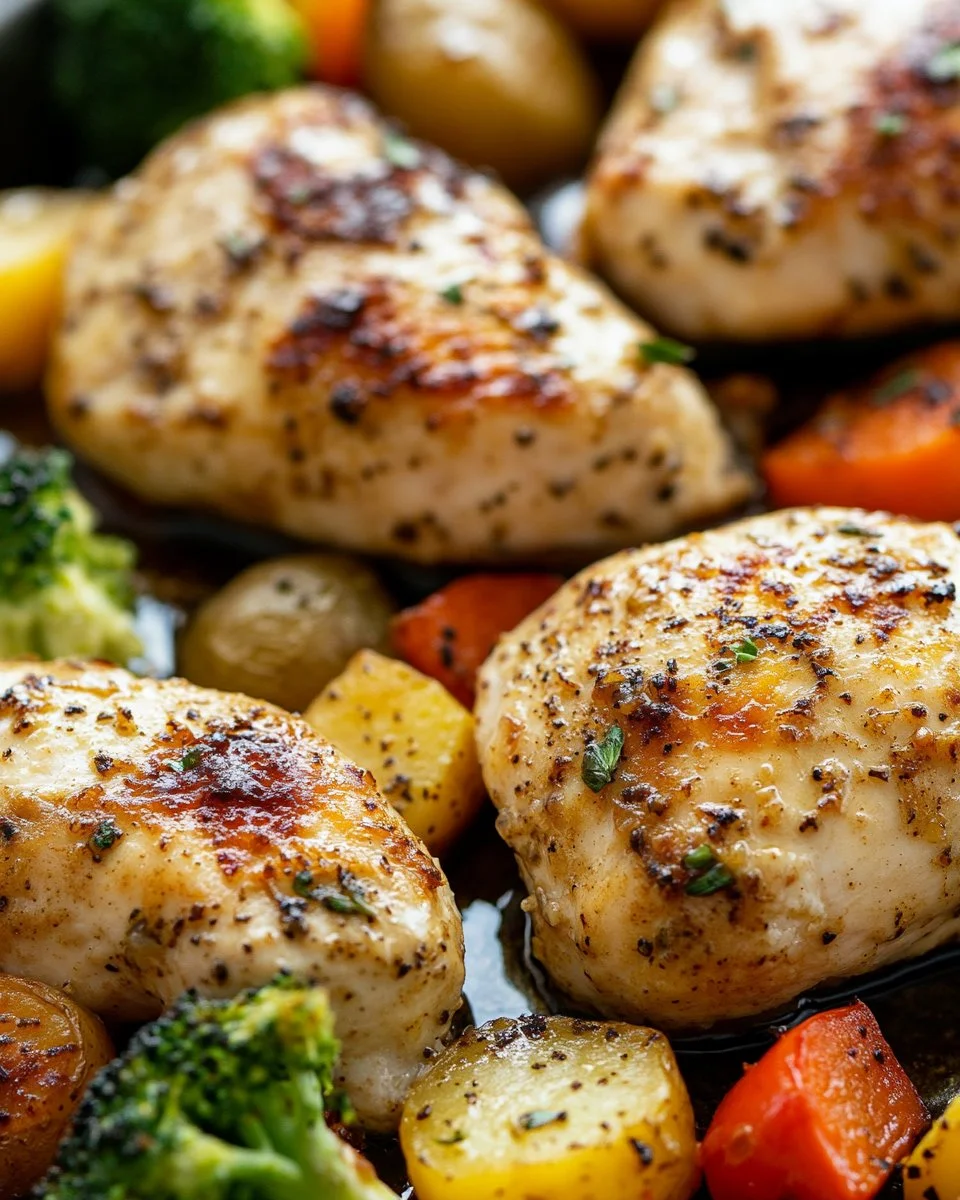
This Lemon Garlic Chicken recipe comes together quickly, making it perfect for busy weeknights or special family dinners. The beauty of this dish lies in its simplicity. With just a handful of ingredients, you can whip up a satisfying meal that everyone will love.

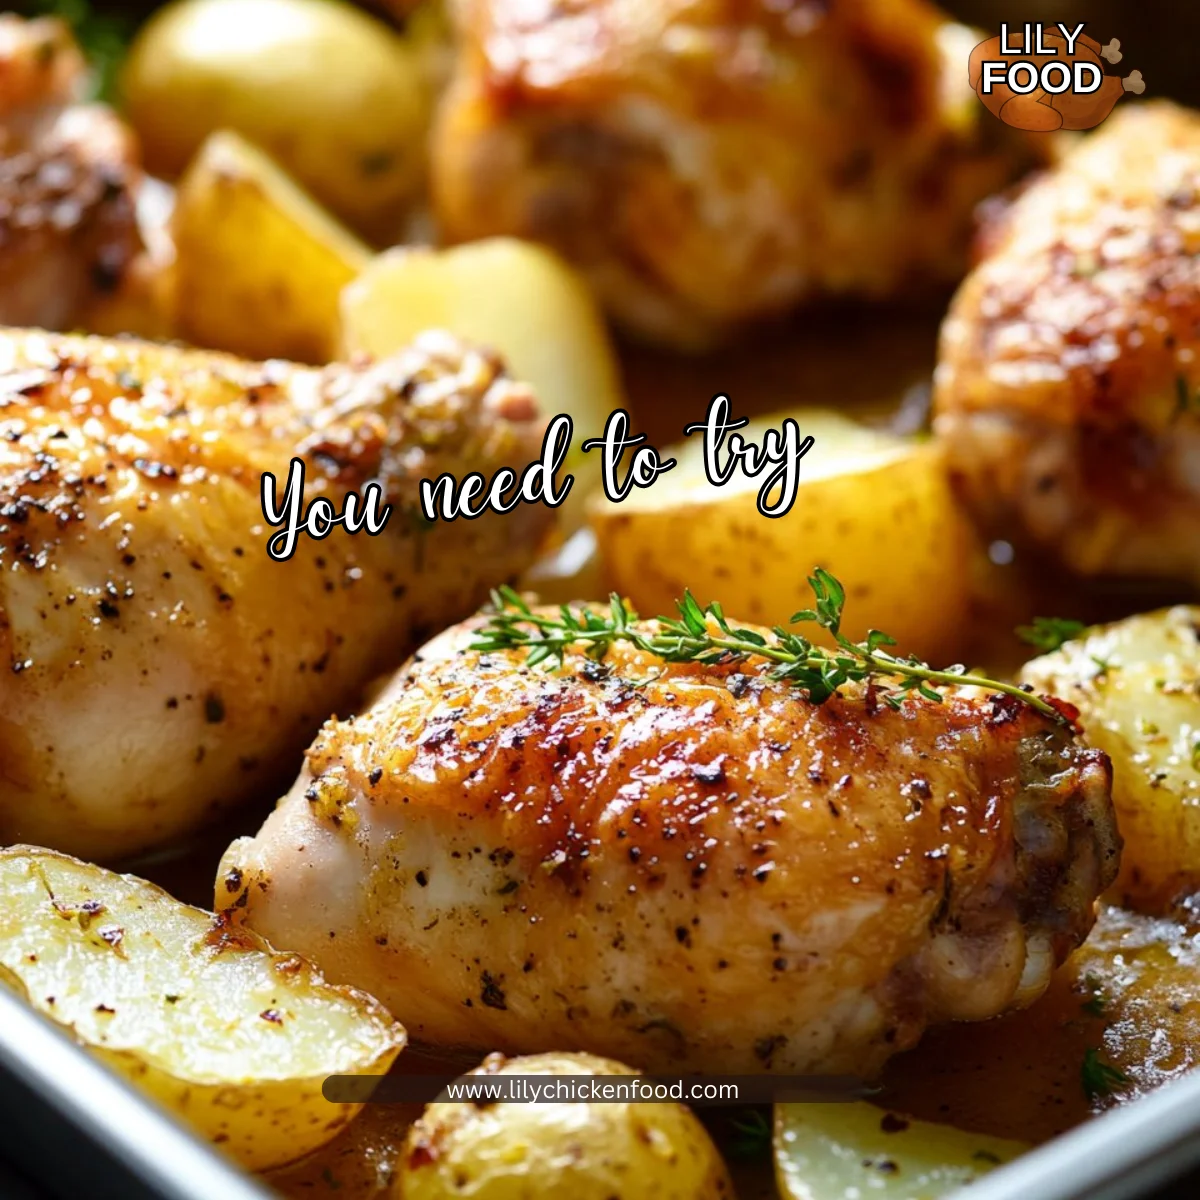
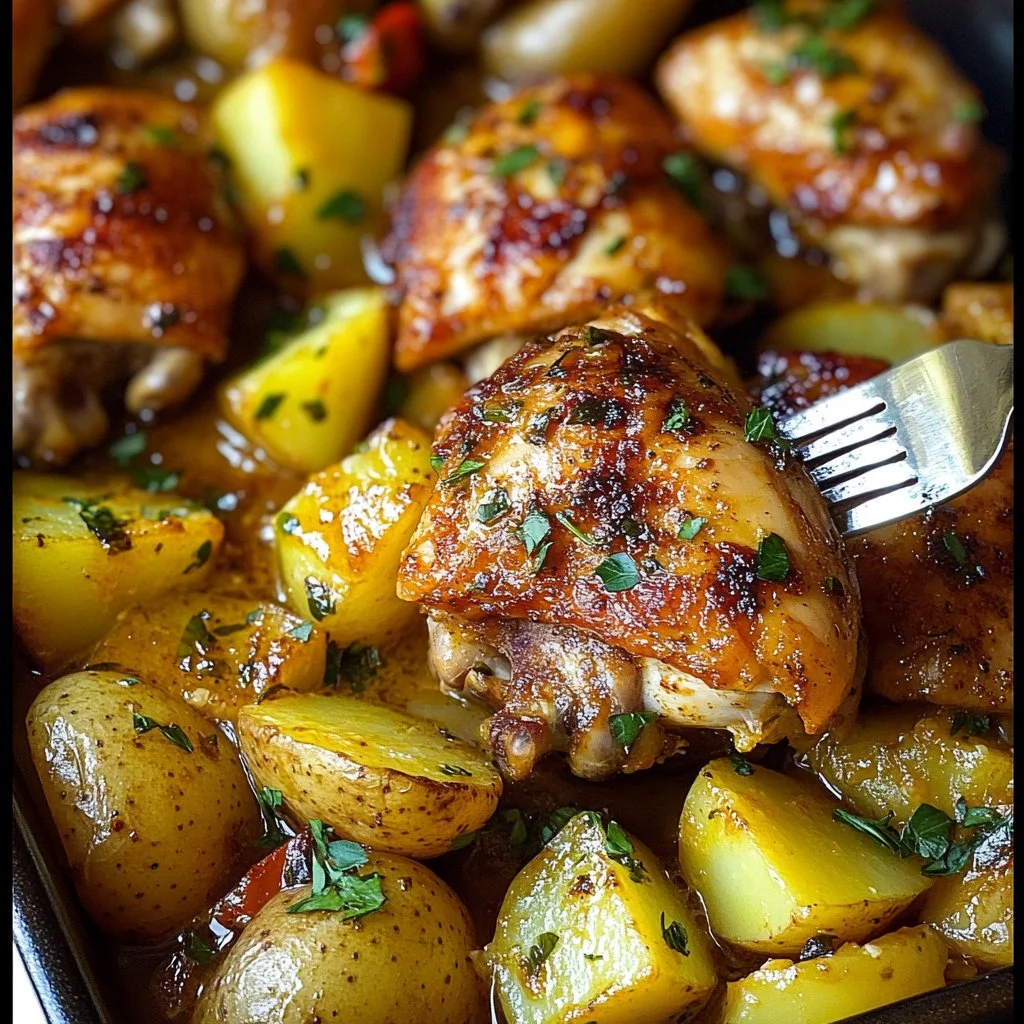
What’s more, the chicken’s crispy skin infused with lemon and garlic pairs beautifully with tender potatoes, making it a complete meal. You can throw it all together and let the oven do the work. So, whether you are a seasoned cook or a novice in the kitchen, this recipe will inspire confidence and bring everyone to the table.

Process Overview

“This is where the magic happens—when the aroma fills the kitchen.”

The process for making Lemon Garlic Chicken is straightforward. You start by preparing the chicken and potatoes, then season everything with aromatic spices. Once it’s in the oven, sit back and let the delicious smells fill your home. It truly makes cooking feel effortless and enjoyable.

Ingredients

To make this delightful Lemon Garlic Chicken, you will need the following ingredients:

  • 3½ pounds bone-in chicken (about 6 leg quarters)
  • 3 large potatoes (peeled and cut into chunks)
  • 1½ teaspoons garlic powder
  • 1½ teaspoons onion powder
  • 1½ teaspoons paprika
  • 1 teaspoon coriander powder
  • ½ teaspoon black pepper
  • 1½ teaspoons salt
  • ¼ teaspoon turmeric
  • 2 tablespoons extra virgin olive oil
  • 10 cloves garlic
  • ½ cup lemon juice
  • ⅓ cup extra virgin olive oil
  • ⅓ cup cold water
  • 1 teaspoon Aleppo pepper

Lily’s Tips:

  • Use high-quality chicken for the best flavor. Look for organic or free-range varieties when possible.
  • Choose Yukon Gold potatoes for their buttery texture; they hold up well during roasting.
  • Adjust the salt according to your preference, especially if you are watching your sodium intake.
  • Fresh garlic can enhance the dish even further; just mince it and mix it into the marinade.
  • For a burst of flavor, try adding some fresh herbs, like rosemary or thyme.

Directions

  1. Preheat your oven to 425°F.
  2. Clean the chicken and pat it dry using a paper towel. Add it to a 9×13 pan that’s lined with parchment paper.
  3. Add the peeled potatoes around the chicken in the pan.
  4. In a small bowl, mix the garlic powder, onion powder, paprika, coriander, salt, black pepper, and turmeric.
  5. Sprinkle the spice mixture all over the chicken and potatoes, making sure to get it under the skin for maximum flavor.
  6. Drizzle two tablespoons of olive oil over everything and rub it all over to coat.
  7. Pour the lemon juice, cold water, and Aleppo pepper into the pan, allowing the flavors to meld.
  8. Bake in the preheated oven, uncovered, for about 30 minutes, or until the chicken is golden brown and the juices run clear.

Encouraging Notes:

  • Don’t be afraid to get your hands dirty when rubbing the olive oil and spices onto the chicken. It’s all part of the cooking experience!
  • Keep an eye on the chicken as it cooks. Every oven is different, and you want the skin crispy, but not burnt.
  • If you like, baste the chicken with the pan juices halfway through cooking for extra moisture.

Serving

Lemon Garlic Chicken

Serving Lemon Garlic Chicken family-style makes for a cozy meal. Lay the chicken and potatoes out on a large platter. Encourage everyone to help themselves. Pair this dish with a simple green salad or steamed vegetables to round out the meal.

When you all sit down together, it fosters connection and conversation, making the meal much more than just food.

Storage

Leftovers can be just as delightful as the original meal. Store any leftover chicken and potatoes in an airtight container in the refrigerator for up to three days.

To reheat, place the chicken and potatoes on a baking sheet and warm them in a 350°F oven for about 15-20 minutes. You can also microwave them, but the oven gives the chicken its crispy skin back.

Kitchen Notes

  • Use Parchment Paper: It makes for effortless cooking and cleanup.
  • Cut Potatoes Evenly: This ensures they cook uniformly.
  • Marinate Ahead: For an even richer flavor, marinate the chicken for a few hours or overnight in the lemon-garlic mixture before cooking.
  • Opt for Bone-In Chicken: The bones add moisture and flavor to the meat.
  • Stock Up on Spices: Keep your spices fresh for the best flavor.

Variations

Cooking for picky eaters? Here are some tweaks to make this dish work for everyone:

  • Substitute Chicken Parts: Feel free to use chicken breasts if your family prefers white meat. Reduce baking time slightly for more tenderness.
  • Skip the Potatoes: If watching carbs, add steamed broccoli or green beans instead.
  • Add Different Spices: Experiment with your favorite spice blends, like Italian seasoning or even a dash of cumin for a different flavor profile.
  • Gluten-Free Option: This dish is naturally gluten-free, so it’s perfect for gluten-sensitive family members.
  • Herb Variation: Fresh herbs like thyme or parsley can be added right before serving for an added burst of flavor.

FAQ

  1. Can I use skinless chicken parts?
    Yes, but keep in mind that skinless chicken may be less flavorful and can dry out faster.

  2. What can I substitute for Aleppo pepper?
    If you don’t have Aleppo pepper, crushed red pepper flakes or a bit of cayenne can work as a substitute.

  3. Is it okay to prepare this dish ahead of time?
    Absolutely! You can prep everything, marinate it, and then put it in the fridge until you are ready to bake.

  4. Can this recipe be made in a slow cooker?
    Yes, you can cook this dish in a slow cooker on low for about 6 hours. Add the potatoes halfway through for optimal cooking.

  5. What side dishes pair well with Lemon Garlic Chicken?
    Green salads, roasted vegetables, and rice pilaf are great options to complement the dish.

Conclusion

Cooking Lemon Garlic Chicken is more than just a dinner recipe; it’s an opportunity to create lasting memories around your table. Share smiles, laughter, and stories as you gather to enjoy this heartwarming meal. Remember, the aromas and flavors will weave themselves into the fabric of your family traditions. Happy cooking!

Lemon Garlic Chicken

Prep Time 15 minutes
Cook Time 30 minutes
Total Time 45 minutes
Servings 6 servings
Calories 600
A delightful Lemon Garlic Chicken recipe that brings family together around a warm meal, infused with delicious flavors of lemon, garlic, and spices.

Ingredients

Main Ingredients

  • 3.5 pounds bone-in chicken (about 6 leg quarters) (Use high-quality chicken for the best flavor.)
  • 3 large potatoes (peeled and cut into chunks) (Choose Yukon Gold potatoes for best results.)
  • 10 cloves garlic (Fresh garlic adds additional flavor.)
  • 0.5 cup lemon juice (Use fresh lemon juice for optimal flavor.)
  • 0.33 cup extra virgin olive oil (Can be substituted with another high-quality oil.)
  • 0.33 cup cold water (Helps to meld the flavors.)

Spices

  • 1.5 teaspoons garlic powder
  • 1.5 teaspoons onion powder
  • 1.5 teaspoons paprika
  • 1 teaspoon coriander powder
  • 0.5 teaspoon black pepper
  • 1.5 teaspoons salt (Adjust according to preference.)
  • 0.25 teaspoon turmeric
  • 1 teaspoon Aleppo pepper (Can be substituted with crushed red pepper flakes.)

Instructions 

Preparation

  • Preheat your oven to 425°F.
  • Clean the chicken and pat it dry using a paper towel. Add it to a 9x13 pan that’s lined with parchment paper.
  • Add the peeled potatoes around the chicken in the pan.
  • In a small bowl, mix the garlic powder, onion powder, paprika, coriander, salt, black pepper, and turmeric.
  • Sprinkle the spice mixture all over the chicken and potatoes, making sure to get it under the skin for maximum flavor.
  • Drizzle two tablespoons of olive oil over everything and rub it all over to coat.
  • Pour the lemon juice, cold water, and Aleppo pepper into the pan, allowing the flavors to meld.

Cooking

  • Bake in the preheated oven, uncovered, for about 30 minutes, or until the chicken is golden brown and the juices run clear.

Notes

Don’t be afraid to get your hands dirty when rubbing the olive oil and spices onto the chicken. Keep an eye on the chicken as it cooks to ensure a crispy skin. If desired, baste the chicken with pan juices halfway through cooking for extra moisture.
Calories: 600kcal
Course: Dinner, Main Course
Cuisine: American
Keyword: Comfort Food, Easy Dinner, Family Meal, Lemon Garlic Chicken, Roasted Chicken

Garlic Herb Chicken

The kitchen fills with the warm scent of garlic and butter. I hear the soft sizzle as the chicken hits the hot pan and feel a small thrill that dinner is coming together.

This recipe is the kind that turns a busy weeknight into a cozy family moment. The sounds, smells, and the sticky glaze make everyone pause and take notice. Let me show you how to make a dish your people will ask for again and again.

Why this works

Garlic Herb Chicken

Family meals need to be easy and reliable. This Garlic Herb Chicken gives you both. The sear locks in juices quickly, so the chicken stays tender without long cook times. The pan sauce uses the drippings to make big flavor from simple steps.

It saves time and cleanup. You sear, make the sauce in the same pan, and serve on mashed potatoes for a one-skillet feel with a comfort-food finish. It is also flexible for picky eaters and busy schedules.

This is a go-to weeknight recipe that still feels a little special. You can prep ahead or finish at the last minute while everyone sets the table.

Process Overview

“This is where the magic happens—when the aroma fills the kitchen.”

I like to think of the process as three simple parts. Season and sear, make the sauce, and pair with creamy mashed potatoes. Each step builds flavor, and the pan sauce brings everything together.

Work confidently. Follow the steps and trust your senses. A quick temperature check and a few minutes of attention will reward you with juicy chicken and a glossy glaze.

Ingredients

  • 4 boneless skinless chicken breasts

    • Tip: If breasts are uneven, pound them to even thickness so they cook at the same rate. That keeps the center from drying out.
  • 3 tablespoons olive oil

    • Tip: Use a good quality olive oil for searing and flavor. Heat until shimmering before adding the chicken to get a golden crust.
  • 4 cloves garlic, minced

    • Tip: Mince fresh garlic or press it for more aroma. Add it to the herb rub rather than the hot oil to avoid burning.
  • 2 tablespoons fresh parsley, chopped

    • Tip: Chop parsley just before using for bright color and fresh flavor. Save a little for garnish.
  • 1 tablespoon fresh thyme leaves

    • Tip: Strip thyme leaves from the stems with your fingers. Fresh thyme gives a subtle earthy lift that pairs well with garlic.
  • 2 tablespoons butter

    • Tip: Add butter toward the end of searing for basting. Clarified butter can handle higher heat but regular butter adds a lovely nutty browning.
  • 1 cup chicken broth

    • Tip: Use low-sodium broth so you control the salt. If you only have bouillon, dissolve a small amount in hot water.
  • 2 pounds russet potatoes

    • Tip: Russets make creamy, fluffy mashed potatoes. Cut to even chunks so they cook evenly.
  • 1/2 cup heavy cream

    • Tip: Warm the cream slightly before adding to the potatoes for a silkier mash and to avoid cooling them down.
  • 2 tablespoons brown sugar

    • Tip: Brown sugar helps balance the balsamic and gives a sticky, caramelized finish. Use light or dark based on your taste.
  • 1 tablespoon balsamic vinegar

    • Tip: A good balsamic adds bright acidity to the sauce. Add it slowly and taste as the sauce reduces.

Each ingredient plays a clear role. The herbs season the meat, the butter enriches the sauce, and the potatoes create the cozy base. You can find most of these at any grocery store, and they keep well if you want to batch prep.

Directions

  1. Pat the chicken breasts dry with paper towels and season generously with salt and pepper on both sides. In a small bowl, combine minced garlic, chopped parsley, and thyme leaves. Rub this herb mixture all over the chicken breasts, pressing gently so it adheres to the meat. Let the chicken rest at room temperature for 10 minutes to allow the flavors to penetrate.

    • Encouragement: This short rest makes a big difference. Take a moment to breathe and set the table.
  2. Heat olive oil in a large skillet over medium-high heat until shimmering. Carefully place the chicken breasts in the pan and sear without moving them for 5-6 minutes until a deep golden-brown crust forms.

    • Encouragement: Let the pan do the work. A steady sear creates that beautiful color and flavor.
  3. Flip the chicken and cook for another 5-6 minutes. Add butter to the pan and baste the chicken with the melted butter and pan juices. Once the internal temperature reaches 165 degrees Fahrenheit, transfer chicken to a plate and tent with foil.

    • Encouragement: Use a quick-read thermometer. When it hits 165 degrees Fahrenheit, you know it is safe and juicy. Tenting helps the juices settle.
  4. In the same skillet with the remaining drippings, add brown sugar and balsamic vinegar. Stir continuously over medium heat until the sugar dissolves and begins to caramelize, about 2 minutes. Pour in chicken broth and scrape up any browned bits from the bottom of the pan. Bring to a simmer and cook for 5-7 minutes until the sauce reduces by half and becomes slightly syrupy. Taste and adjust seasoning with salt and pepper.

    • Encouragement: Scraping up the browned bits transforms the sauce. Keep an eye on the reduction so it does not get too thick.
  5. While the chicken cooks, peel and cut the potatoes into evenly sized chunks. Place them in a large pot and cover with cold salted water. Bring to a boil over high heat, then reduce to a simmer and cook for 15-20 minutes until the potatoes are fork-tender. Drain thoroughly and return the potatoes to the pot. Add butter and heavy cream, then mash until smooth and creamy. Season with salt and pepper to taste.

    • Encouragement: Taste the potatoes as you season them. A final little pinch of salt can brighten the whole dish.
  6. Spoon a generous portion of mashed potatoes onto each plate, creating a bed for the chicken. Place one chicken breast on top of the mashed potatoes. Drizzle the reduced pan sauce generously over the chicken and around the plate. Garnish with additional fresh herbs if desired. Serve immediately while hot, ensuring each guest gets plenty of that delicious sticky glaze.

    • Encouragement: Serve hot and smile. This meal brings comfort and cheers at the table.

Follow these steps and you will have tender chicken, a glossy sauce, and creamy potatoes in about 40 minutes total. The sauce is the finish that makes it feel special.

Serving

Garlic Herb Chicken

Serve family-style on a large platter or plate individually over mashed potatoes. Place the mashed potatoes on the platter first, then arrange the chicken breasts on top. Spoon the sauce over everything so the glaze pools around the potatoes.

For a weeknight, set the platter in the center of the table and let everyone help themselves. For a small gathering, plate individually and add a sprig of parsley for color.

Add a simple side of steamed green beans or a crisp salad to round the meal. Warm dinner rolls or crusty bread are perfect for soaking up extra sauce.

Storage

Keep leftovers in an airtight container in the refrigerator for up to 3 days. Store sauce in a separate container if possible. This makes reheating easier and prevents the potatoes from soaking up too much sauce.

To reheat the chicken, place it in a skillet over low heat with a splash of chicken broth. Cover and warm gently until heated through. This keeps the meat tender better than the microwave.

Reheat mashed potatoes in a pot with a splash of cream or milk over low heat. Stir often until warmed. If using the microwave, add a little cream and cover to retain moisture.

Freeze cooked chicken and sauce in a freezer-safe container for up to 2 months. Thaw overnight in the refrigerator before reheating.

Kitchen Notes

  • Use a heavy-bottomed skillet for even searing and easy deglazing.
  • If chicken breasts are thick, halve them horizontally for faster cooking.
  • Warm the plates in the oven for a few minutes to keep the meal hot a little longer.
  • Swap russets for Yukon Golds if you prefer a naturally creamier potato.
  • Make the sauce ahead and reheat gently to save time on busy nights.

Variations

  • For picky eaters: Leave the herbs out of half the chicken or serve the sauce on the side.
  • Low-carb option: Skip the mashed potatoes and serve over roasted cauliflower mash.
  • Creamy version: Stir a spoonful of cream into the pan sauce for a richer finish.
  • Herb swap: Use rosemary instead of thyme for a woodsy flavor.
  • Make it spicy: Add a pinch of red pepper flakes to the herb rub or sauce for heat.

These variations keep the core recipe intact while letting you adapt to tastes and diets. Small swaps can make a big difference in how the family receives the dish.

FAQ

Q: Can I use bone-in chicken?
A: Yes. Bone-in will take longer to cook. Allow extra time and check the temperature near the bone for 165 degrees Fahrenheit.

Q: How do I prevent the garlic from burning?
A: Keep garlic in the herb rub and add it to the pan at a lower heat if you want to cook it in oil. Burning occurs at high heat, so watch closely.

Q: Can I make the sauce without sugar?
A: Yes. Omit the brown sugar and add a touch more balsamic for acidity. The sauce will be less caramelized but still flavorful.

Q: Is there a gluten-free version?
A: Absolutely. All ingredients here are naturally gluten-free. Just verify your chicken broth if you buy commercial brands.

Q: How do I know when the sauce is done?
A: It should reduce until it lightly coats the back of a spoon and has a glossy, slightly syrupy texture.

Conclusion

I hope this Garlic Herb Chicken brings warmth to your table. It is simple enough for a busy weeknight and special enough for guests. The pan sauce and mashed potatoes make it feel like a full meal with minimal fuss.

If you want a quicker creamy take, I like this 15-minute creamy garlic herb chicken from My Life In An Apron for when time is tight. For another lovely version that uses a garlic herb butter sauce, see the recipe at Chisel & Fork for extra inspiration.

Thank you for cooking with me. Gather your people, set the table, and enjoy a warm meal made with care.

Garlic Herb Chicken

Prep Time 10 minutes
Cook Time 30 minutes
Total Time 40 minutes
Servings 4 servings
Calories 540
A cozy, easy weeknight meal featuring tender chicken breasts seared to perfection and served over creamy mashed potatoes with a sticky pan sauce.

Ingredients

For the Chicken

  • 4 pieces boneless skinless chicken breasts (If breasts are uneven, pound them to even thickness.)
  • 3 tablespoons olive oil (Use a good quality olive oil for flavor.)
  • 4 cloves garlic, minced (Mince fresh garlic or press it for more aroma.)
  • 2 tablespoons fresh parsley, chopped (Chop just before using for bright color.)
  • 1 tablespoon fresh thyme leaves (Fresh thyme gives a subtle earthy lift.)
  • 2 tablespoons butter (Add toward the end of searing for basting.)
  • 1 cup chicken broth (Use low-sodium broth for better control of salt.)

For the Mashed Potatoes

  • 2 pounds russet potatoes (Cut into even chunks to cook evenly.)
  • 1/2 cup heavy cream (Warm slightly before adding for a silkier mash.)
  • 2 tablespoons brown sugar (Helps balance the balsamic and gives a sticky finish.)
  • 1 tablespoon balsamic vinegar (Adds bright acidity to the sauce.)

Instructions 

Preparation

  • Pat the chicken breasts dry with paper towels and season with salt and pepper on both sides.
  • In a small bowl, combine minced garlic, chopped parsley, and thyme leaves. Rub this herb mixture all over the chicken breasts.
  • Let the chicken rest at room temperature for 10 minutes.

Cooking the Chicken

  • Heat olive oil in a large skillet over medium-high heat until shimmering.
  • Place the chicken breasts in the pan and sear for 5-6 minutes until golden brown.
  • Flip and cook for another 5-6 minutes. Add butter and baste the chicken.
  • Check internal temperature; once it reaches 165°F, transfer to a plate and tent with foil.

Making the Sauce

  • In the same skillet, add brown sugar and balsamic vinegar. Stir until the sugar dissolves.
  • Pour in chicken broth, scrape browned bits, and bring to a simmer. Cook for 5-7 minutes until slightly syrupy.

Preparing the Mashed Potatoes

  • Peel and cut the potatoes into chunks and boil in salted water for 15-20 minutes until fork-tender.
  • Drain and return potatoes to the pot. Add butter and heavy cream, then mash until smooth.
  • Season with salt and pepper to taste.

Serving

  • Spoon a generous portion of mashed potatoes onto each plate, place chicken on top, and drizzle with sauce.
  • Garnish with fresh herbs if desired and serve immediately.

Notes

Leftovers can be stored in the refrigerator for up to 3 days. Sauce can be stored separately for reheating.
Calories: 540kcal
Course: Dinner, Main Course
Cuisine: American
Keyword: Comfort Food, Easy weeknight meal, Family Dinner, Garlic Herb Chicken, One-skillet meal

Cheesy Garlic Chicken Wraps

I can smell garlic and butter as I walk into my kitchen. The sound of a skillet warming up makes the house feel cozy and familiar. Tonight feels like one of those easy family dinners that everyone will request again.

I first made these Cheesy Garlic Chicken Wraps years ago when my kids were small and I needed something quick and flavorful. If you love simple recipes that feel a little special, this one will be a go-to. For another hands-on wrap idea, I often pair the evening with a side from my crunchy collection, like my Crunchy Crispy Air Fryer Chicken Mozzarella Wraps.

Why this works

Cheesy Garlic Chicken Wraps

This wrap keeps family life in mind. It uses cooked chicken and simple pantry spices so you can assemble fast on busy nights. The cheese melts into pockets of goodness that kids and adults both love.

I tested this recipe over many weeknights. It holds up well for busy schedules and travel days when you need dinner ready fast. If you like sliders and small sandwiches, try pairing this idea with something fun from my recipe box, such as the Bang Bang Chicken Sliders Recipe for a party night.

This recipe saves time and reduces stress. You can prep the filling earlier, then crisp the wraps right before dinner. That small step makes the meal feel freshly cooked and satisfying.

Process Overview

“This is where the magic happens—when the aroma fills the kitchen.”

I like to think of this recipe as three quick stages: mix, assemble, and crisp. You mix the seasoned chicken filling, build the wrap with cheese, and sear it in a skillet until golden. The aroma is the reward that tells you dinner is almost ready.

If you want to speed things up further, use leftover rotisserie chicken or shredded deli chicken. It saves time and keeps flavor bright.

Ingredients

  • 2 cups cooked chicken, shredded
    Lily’s tip: Use rotisserie or leftover roasted chicken to save time. Shred it by hand for a rustic texture that catches the garlic and cheese.

  • 1 cup shredded cheese (cheddar or mozzarella)
    Lily’s tip: Sharp cheddar gives bold flavor. Mozzarella melts beautifully. Mix both if you like gooey stretch with a tang.

  • 2 tablespoons garlic, minced
    Lily’s tip: Fresh garlic gives the brightest flavor. If you must, use jarred minced garlic but add it a minute earlier in the skillet so it wakes up.

  • 1 teaspoon garlic powder
    Lily’s tip: A small amount boosts the garlic flavor without overpowering the fresh garlic.

  • 1 teaspoon onion powder
    Lily’s tip: Onion powder rounds out the filling. If you have a small sweet onion, you can swap one teaspoon of onion powder for a tablespoon of finely diced onion.

  • Salt and pepper to taste
    Lily’s tip: Start light and taste. If your chicken came seasoned, you may need less salt.

  • 4 large tortillas or wrap bread
    Lily’s tip: Flour tortillas with a bit of chew work best. Warm them briefly to make rolling easier.

  • 2 tablespoons olive oil or butter for frying
    Lily’s tip: Butter gives a richer crust; olive oil is lighter. Use a mix if you like both flavors.

  • Fresh parsley, chopped (for garnish)
    Lily’s tip: Parsley brightens the plate and adds a fresh finish. Sprinkle it just before serving.

For more ideas on air fryer meals that pair well with wraps, check out my collection of air fryer chicken recipes.

Directions

  1. In a bowl, mix together the shredded chicken, garlic, garlic powder, onion powder, salt, and pepper.
    Encouragement: Take a moment to really combine the spices with the chicken so every bite has flavor. If the mixture seems dry, add a teaspoon of olive oil.

  2. Place a tortilla on a flat surface and add a portion of the chicken mixture to the center, then top with shredded cheese.
    Encouragement: Don’t worry about perfection. Add enough cheese to get a good melt but leave space to fold the sides.

  3. Roll the tortilla tightly, folding in the sides as you go.
    Encouragement: Practice one or two wraps first. Once you get the tuck, the rest go quickly and look lovely.

  4. Heat olive oil or butter in a skillet over medium heat.
    Encouragement: Heat the pan until the oil shimmers. A hot skillet gives a crisp, golden exterior without drying the filling.

  5. Place the wraps seam-side down in the skillet and cook until golden brown, about 3-4 minutes on each side.
    Encouragement: Press gently with a spatula for even browning. Flip once and watch that gorgeous color develop.

  6. Remove from skillet, slice in half, and garnish with chopped parsley. Serve warm.
    Encouragement: Slice with a sharp knife and plate for quick family service. These are best hot and melty.

If you need a quick list of other family-friendly chicken ideas, see my quick and easy chicken ideas for more inspiration.

Serving

Cheesy Garlic Chicken Wraps

Serve these wraps family-style on a large platter. Cut each wrap in half and arrange them so everyone can grab a warm piece. Add small bowls of dipping sauce on the side.

My family likes ranch, plain Greek yogurt with a squeeze of lemon, or a mild hot sauce. For a simple side, serve a crisp green salad, carrot sticks, or oven fries. The warm cheese and garlic are the stars, so keep sides fresh and textural.

For a picnic or packed lunch, wrap each half in parchment and secure with a sticker. They travel well for short trips and still taste great at room temperature.

Storage

Fridge: Store finished wraps in an airtight container for up to 3 days. Keep them whole if you plan to reheat, which preserves moisture.

Reheat on stovetop: Heat a nonstick skillet over medium-low and crisp each wrap for 2-3 minutes per side. This restores the crunchy exterior and melty center.

Reheat in oven: Preheat to 350°F. Place wraps on a baking sheet and warm 8 to 10 minutes until heated through. Cover loosely with foil if you worry about too much browning.

Microwave: Use for speed. Microwave one wrap for 45 to 60 seconds. Then sear in a hot skillet for 30 seconds per side for a crisp finish.

Freezing: Wrap each cooked wrap tightly in plastic wrap and place in a freezer bag. Freeze up to 1 month. Thaw overnight in the fridge before reheating.

Kitchen Notes

  • Use rotisserie chicken to cut prep time in half. It keeps flavor and texture lively.
  • Warm tortillas on a dry skillet or in the microwave for 10 seconds. Warm wraps roll without cracking.
  • Grate your cheese fresh from a block for better melting and less starch.
  • Use a large skillet so you can cook two wraps at once and save time.
  • Double the filling and keep extra in the fridge for 2-3 days to make more wraps quickly.

I also like to tweak these notes depending on time and mood, and sometimes I pair this wrap with a crunchy recipe from my blog for busy nights.

Variations

  • For picky eaters: Omit onion powder and use mild cheddar. Add a thin spread of mayonnaise or cream cheese to encourage kids to eat the wrap.
  • Low-carb option: Use low-carb or large lettuce leaves instead of tortillas. Sear briefly in the skillet to warm the filling, then fold.
  • Spicy twist: Add 1/2 teaspoon chili powder or a few dashes of hot sauce to the chicken mix. Top with pickled jalapeños for zing.
  • Vegetarian swap: Replace chicken with shredded, seasoned cauliflower or a sauté of mushrooms and bell peppers. Keep the garlic and cheese for comfort.
  • Meal prep friendly: Make the filling in bulk and refrigerate. Assemble fresh or reheat filling and assemble then sear for dinner.

These small swaps make the recipe flexible and family-friendly. Adjust seasonings to taste and involve kids in choosing a variation for their plate.

FAQ

Q: Can I use raw chicken instead of cooked chicken?
A: Yes. If using raw chicken breast cut into small pieces, cook it in a skillet with the minced garlic and spices until it reaches 165°F internally. Let it cool slightly, shred if needed, then assemble wraps.

Q: What cheese melts best in these wraps?
A: Mozzarella melts smoothly and gives stringy texture. Sharp cheddar offers more flavor. A blend of both gives great melt and taste.

Q: Can I freeze the wraps before cooking?
A: You can freeze assembled wraps, but for best texture, freeze after cooking. If you freeze raw assembled wraps, thaw overnight in the fridge before cooking and crisp in a skillet.

Q: How do I keep the tortillas from falling apart when rolling?
A: Warm the tortillas for a few seconds to make them pliable. Avoid overfilling. Fold in the sides first, then roll tightly to secure the seam.

Q: Is this safe for kids with nut allergies?
A: Yes. This recipe contains no nuts by default. Always check ingredient labels on pre-shredded cheese and store-bought tortillas for cross-contamination warnings if allergies are severe.

Conclusion

I hope these Cheesy Garlic Chicken Wraps bring warmth to your table and make weeknights easier. They are a little bit of comfort and a lot of family-friendly flavor.

If you want another take on this idea, I sometimes compare notes with recipes like Cheesy Garlic Chicken Wraps – Cooked & Loved for inspiration. For a protein-focused option you might enjoy, check out the Cheesy Garlic Chicken Wrap | High Protein – Hummus Fit product page for ideas on packing more protein into a wrap.

Thanks for cooking with me. Come back soon for more simple, family-focused recipes that turn busy evenings into moments everyone remembers.

Cheesy Garlic Chicken Wraps

Prep Time 15 minutes
Cook Time 8 minutes
Total Time 23 minutes
Servings 4 servings
Calories 400
These flavorful and easy-to-make wraps are filled with seasoned chicken, garlic, and melted cheese, making them a perfect family-friendly dinner option.

Ingredients

Filling Ingredients

  • 2 cups cooked chicken, shredded (Use rotisserie or leftover roasted chicken to save time.)
  • 1 cup shredded cheese (cheddar or mozzarella) (Mix both for gooey stretch; sharp cheddar for bold flavor.)
  • 2 tablespoons garlic, minced (Fresh garlic gives the brightest flavor.)
  • 1 teaspoon garlic powder (Boosts garlic flavor without overpowering fresh garlic.)
  • 1 teaspoon onion powder (Can swap for diced onion.)
  • to taste none Salt and pepper (Start light and taste.)

Wrap Components

  • 4 large tortillas or wrap bread (Flour tortillas work best; warm briefly to roll easier.)
  • 2 tablespoons olive oil or butter for frying (Use a mix for richer flavor.)
  • 1/4 cup Fresh parsley, chopped (Garnish before serving.)

Instructions 

Preparation

  • In a bowl, mix together the shredded chicken, garlic, garlic powder, onion powder, salt, and pepper.
  • If the mixture seems dry, add a teaspoon of olive oil.

Assembling the Wraps

  • Place a tortilla on a flat surface and add a portion of the chicken mixture to the center, then top with shredded cheese.
  • Roll the tortilla tightly, folding in the sides as you go.

Cooking

  • Heat olive oil or butter in a skillet over medium heat.
  • Place the wraps seam-side down in the skillet and cook until golden brown, about 3-4 minutes on each side.
  • Remove from skillet, slice in half, and garnish with chopped parsley. Serve warm.

Notes

Store finished wraps in an airtight container for up to 3 days. Reheat on stovetop or oven for best results. Freezing options available.
Calories: 400kcal
Course: Dinner, Main Course
Cuisine: American, Family-Friendly
Keyword: Cheesy Garlic Chicken Wraps, Chicken Wraps, Easy Dinner, Family Dinner, Quick Meal

If you're anything like me, there's nothing quite as satisfying as a dish that tantalizes your taste buds and fills your kitchen with the irresistible aroma of garlic. I’ve rounded up my top nine garlic chicken recipes that are not only bursting with flavor but also incredibly easy to prepare. Whether you're in the mood for something cheesy, creamy, or packed with herbs, I've got you covered! Each recipe promises to transform your everyday meals into something special, so get ready to impress your family and friends with delicious, flavor-packed dishes that you'll want to make again and again.

1. Cheesy Garlic Chicken Wraps

Cheesy Garlic Chicken Wraps

There's nothing quite like the comforting aroma of garlic and butter wafting through the kitchen, especially on a rainy evening filled with laughter and love. Dive into the world of Cheesy Garlic Chicken Wraps—a recipe that brings a cozy vibe straight to your dining table. With gooey, melted cheese and savory chicken enveloped in warm tortillas, these wraps are not just a meal; they’re a hug for your taste buds. Join me as we explore how this recipe can transform your family dinners into delightful memories, packed with flavor and nostalgia.

View Recipe →

2. Chicken Shawarma with Garlic Sauce

Chicken Shawarma with Garlic Sauce

If you’re craving a dish that brims with flavor and brings the family together, look no further than Chicken Shawarma with Garlic Sauce! This recipe transforms busy weeknights into culinary adventures, filling your kitchen with the irresistible aroma of spices while making dinner a breeze. With tender, grilled chicken and a creamy garlic sauce that packs a punch, you’ll discover how easy it is to enjoy a taste of Middle Eastern cuisine right at home—perfect for quick meals or leisurely Sunday feasts. Dive into the full recipe and elevate your next dinner experience!

View Recipe →

3. Cheesy Garlic Chicken Wraps

Cheesy Garlic Chicken Wraps

If you're searching for a dish that combines comfort with quick preparation, look no further than Cheesy Garlic Chicken Wraps! This delightful recipe brings the warmth of your kitchen to the dinner table, making it an easy favorite for families of all sizes. With the irresistible aroma of garlic and melting cheese mingling in the air, you'll quickly discover why this meal will have everyone eagerly requesting it again. Dive into this article for a tasty solution that promises not just flavor, but also the joy of family togetherness over a simple yet special dinner.

View Recipe →

4. Sheet Pan Garlic Butter Chicken and Veggies

Sheet Pan Garlic Butter Chicken and Veggies

Imagine opening your oven to the rich aroma of garlic and butter wafting through your kitchen, instantly warming your heart and home. This Sheet Pan Garlic Butter Chicken and Veggies is not just a meal; it's a weeknight lifesaver that marries convenience with comfort, offering a delightful blend of tender chicken and vibrant roasted vegetables—all in one easy-to-clean pan! Dive into this recipe to discover how to create a comforting family dinner that will have everyone asking for seconds. Plus, don't miss out on other quick and tasty options like Bang Bang Chicken Sliders for your next culinary adventure!

View Recipe →

5. Garlic Herb Chicken

Garlic Herb Chicken

Imagine a bustling weeknight transformed into a cozy family gathering with just one simple recipe: Garlic Herb Chicken. This succulent dish fills your kitchen with the mouthwatering aromas of garlic and butter while delivering flavors that will make everyone at the table smile. With its easy preparation and comforting taste, this meal not only makes dinner a breeze but also creates lasting memories. Ready to turn your next dinner into a cherished family moment? Dive into our guide to discover how to whip up this crowd-pleaser that will have your loved ones asking for seconds!

View Recipe →

6. Garlic Butter Chicken Crockpot Recipe: 6-Hour Magic for Tender Bliss

Garlic Butter Chicken Crockpot Recipe: 6-Hour Magic for Tender Bliss

Are you ready to transform your weeknight dinners into a culinary delight with minimal effort? This Garlic Butter Chicken Crockpot Recipe promises just that—tender, flavorful chicken swimming in a luscious garlic-butter sauce, all achieved with the magic of slow cooking. Perfect for busy families, this dish will have your kitchen smelling divine and your loved ones gathering around the table for a heartwarming meal. Dive into this easy, comforting recipe that brings together taste and convenience, and discover why it's bound to become a staple in your household!

View Recipe →

7. Creamy Garlic Parmesan Chicken Breast

Creamy Garlic Parmesan Chicken Breast

Imagine stepping into your kitchen and being enveloped by the enticing aroma of garlic and butter, all while creating a dinner that feels like a warm hug. This Creamy Garlic Parmesan Chicken Breast recipe is your ticket to a quick yet indulgent meal, where tender chicken and a luscious sauce come together effortlessly in one pan. With its blend of comforting flavors and speedy preparation, this dish promises to become a favorite that will draw friends and family to the table, eager to savor every bite. Ready to elevate your weeknight dinners? Dive into this recipe for a delightful, home-cooked experience!

View Recipe →

8. Creamy Garlic Mushroom Chicken Thighs

Creamy Garlic Mushroom Chicken Thighs

Imagine stepping into your kitchen and being enveloped by the irresistible aroma of garlic and butter, hinting at a delightful family dinner waiting to happen. With this Creamy Garlic Mushroom Chicken Thighs recipe, you'll create a comforting meal that's not just easy to whip up but also feels indulgent enough for a special occasion. In just a few simple steps, you can have a dish that wraps your loved ones in warmth and flavor, making it a perfect addition to your weekly dinner rotation. Ready to impress? Let’s dive in!

View Recipe →

9. Crockpot Garlic Parmesan Chicken Thighs

Crockpot Garlic Parmesan Chicken Thighs

Imagine stepping into your kitchen to the warm, inviting aroma of garlic and butter, signaling that dinner is about to become a comforting reality. This Crockpot Garlic Parmesan Chicken Thighs recipe not only makes your home smell incredible but also brings your family closer together as they reach for seconds at the dining table. Perfect for busy evenings, this dish does most of the work while you enjoy quality time with your loved ones, making mealtime a breeze. Get ready to impress everyone with minimal effort—let’s dive into this easy, delicious recipe that promises a satisfying dining experience for all!

View Recipe →