Tag

easy dinner

Browsing

{image_template}

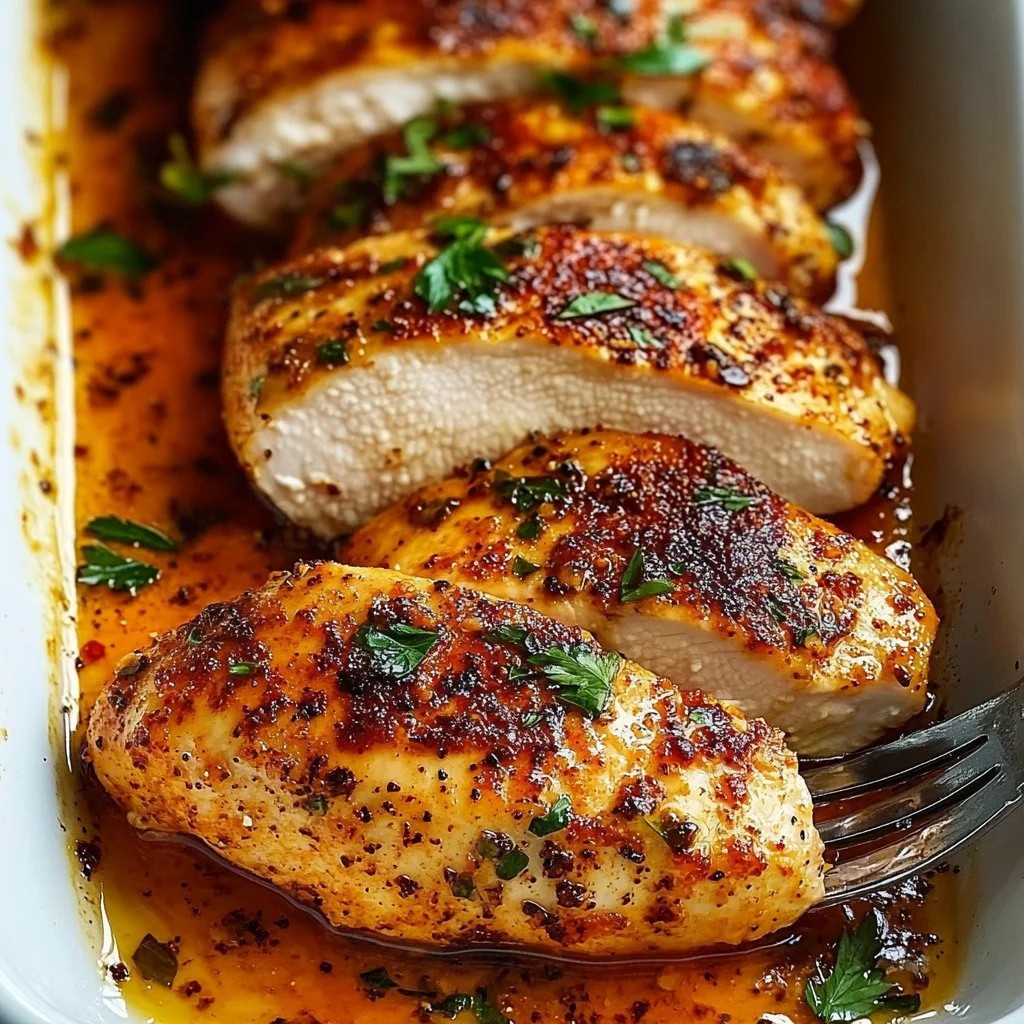
The kitchen smells like warm pineapple and garlic. You hear the gentle sizzle of chicken hitting a hot skillet and the soft clink of a wooden spoon. Those sounds tell you dinner is taking shape and that something simple can feel special tonight.

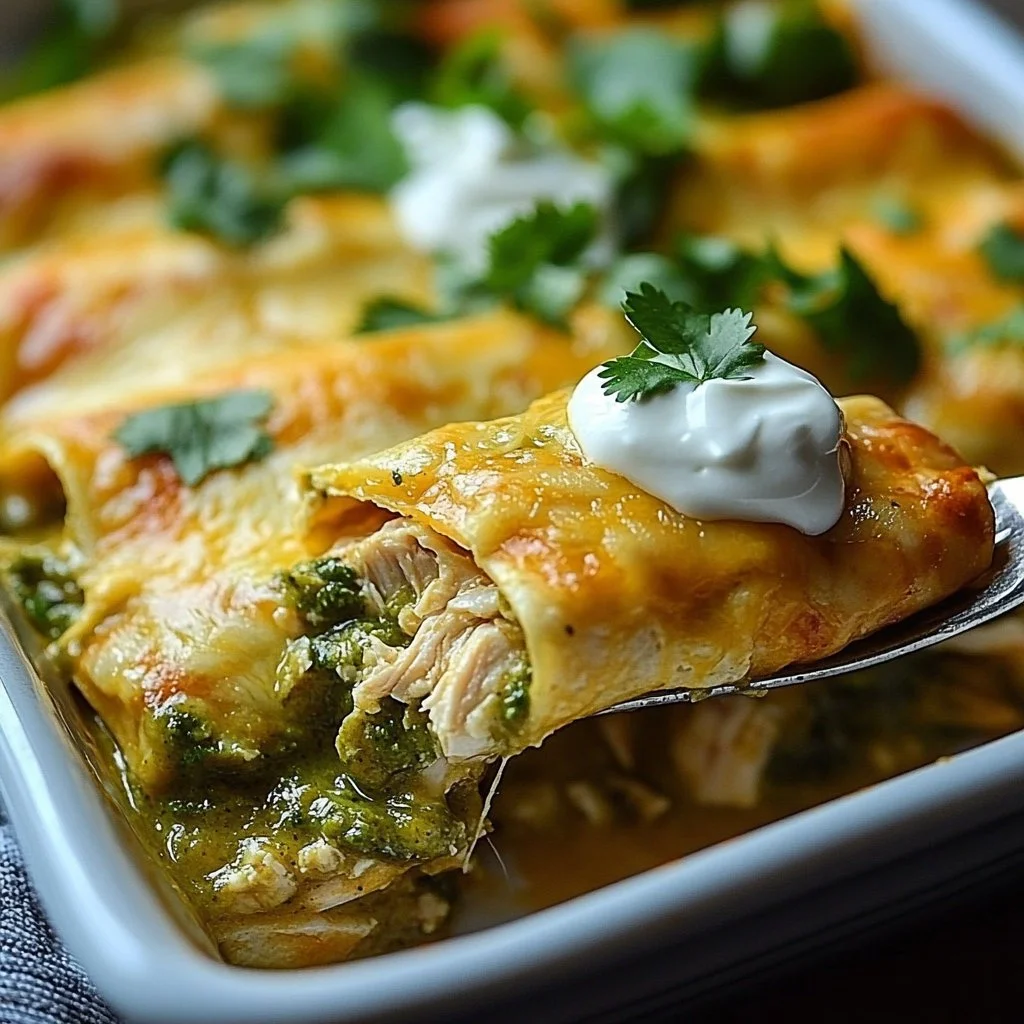
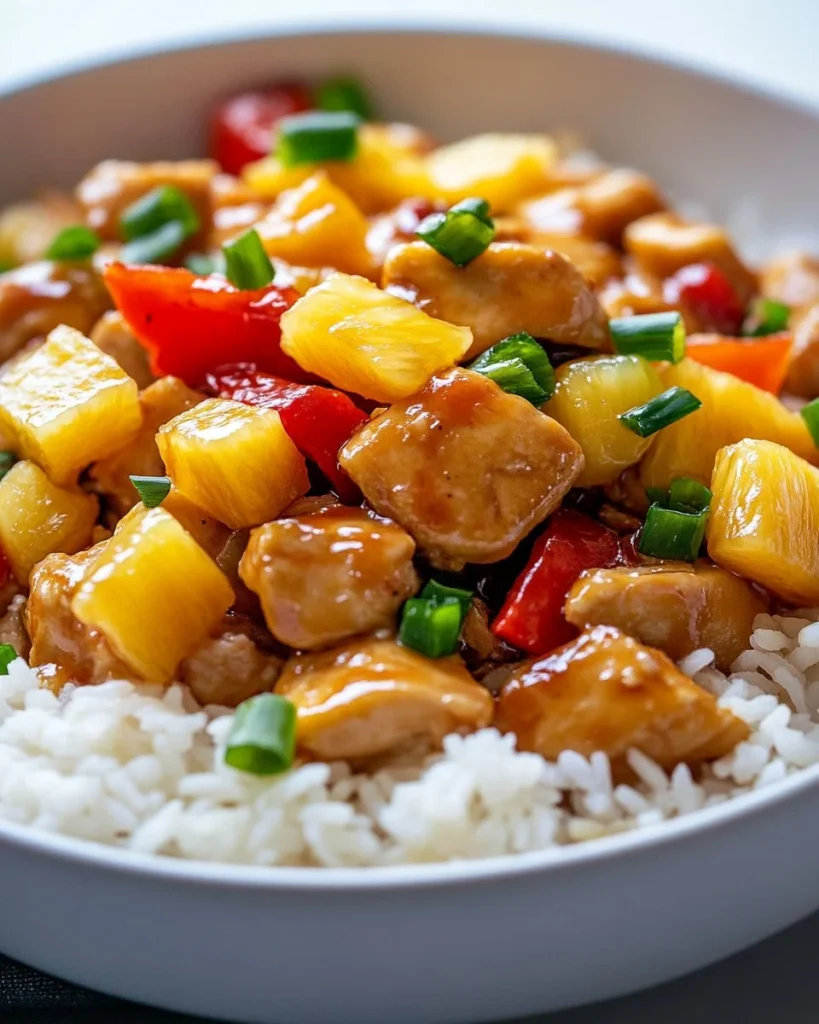
This Pineapple Chicken and Rice recipe is one of those weeknight winners that makes the table feel cozy. It is bright, slightly sweet, and savory in a way that gets even picky eaters asking for seconds. If you like playful sweet and savory combinations, you might also enjoy my Pineapple Cowboy Candy Chicken Wings for another family-friendly twist.

Why this works

Pineapple Chicken and Rice

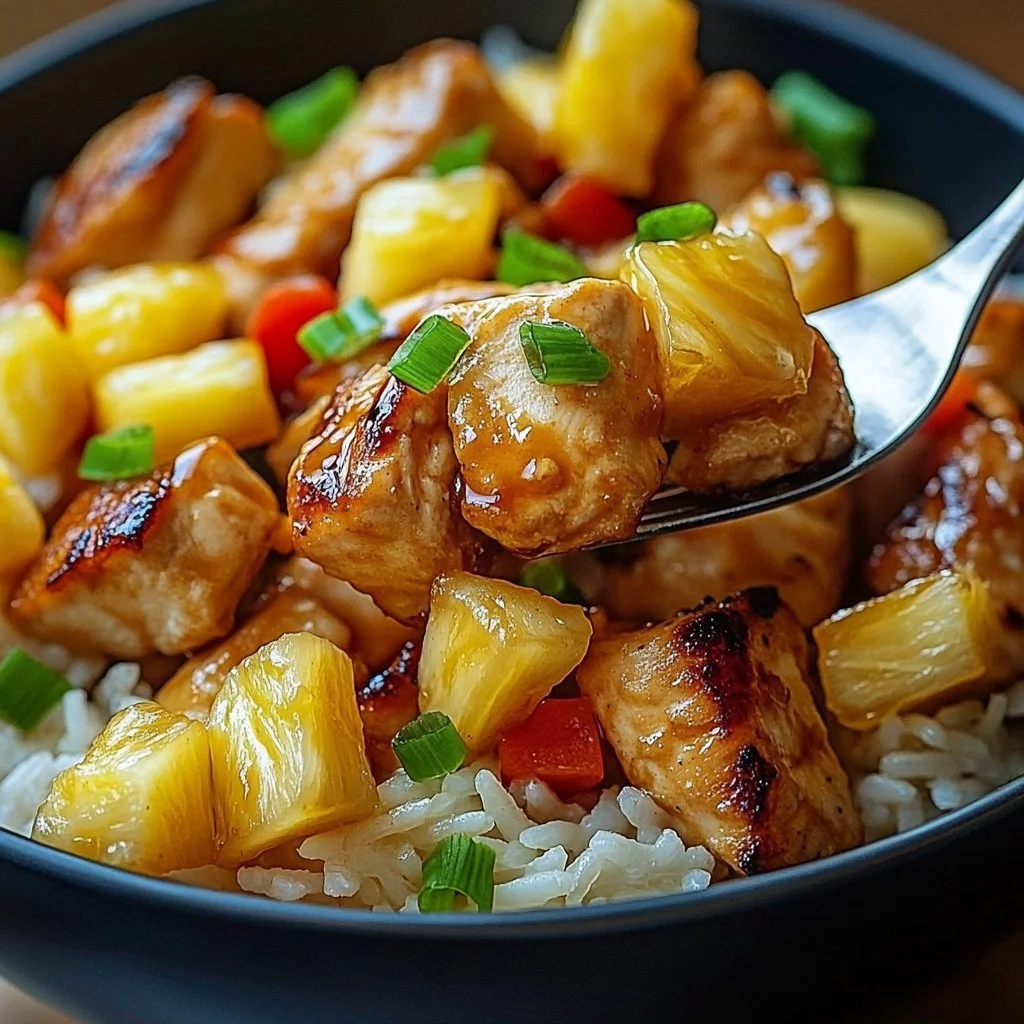
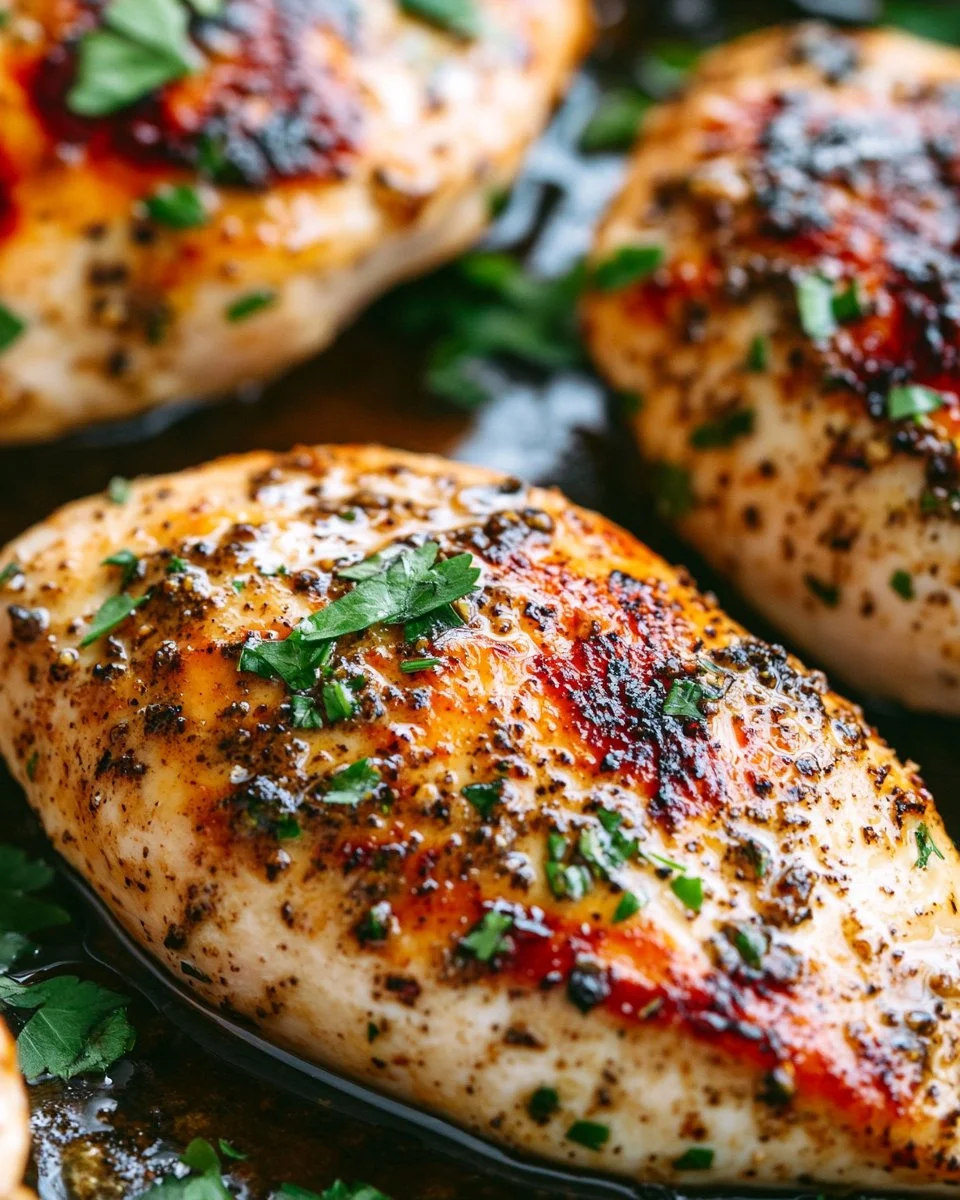
This dish balances tender chicken, juicy pineapple, and fluffy rice for a whole meal in one skillet. The flavors are simple but layered. The pineapple adds bright acidity that cuts through the richness of the chicken and rice.

It is designed for busy families. With cooked rice already on hand, you can pull dinner together in about 20 minutes. That time-saving approach means less busyness and more moments around the table.

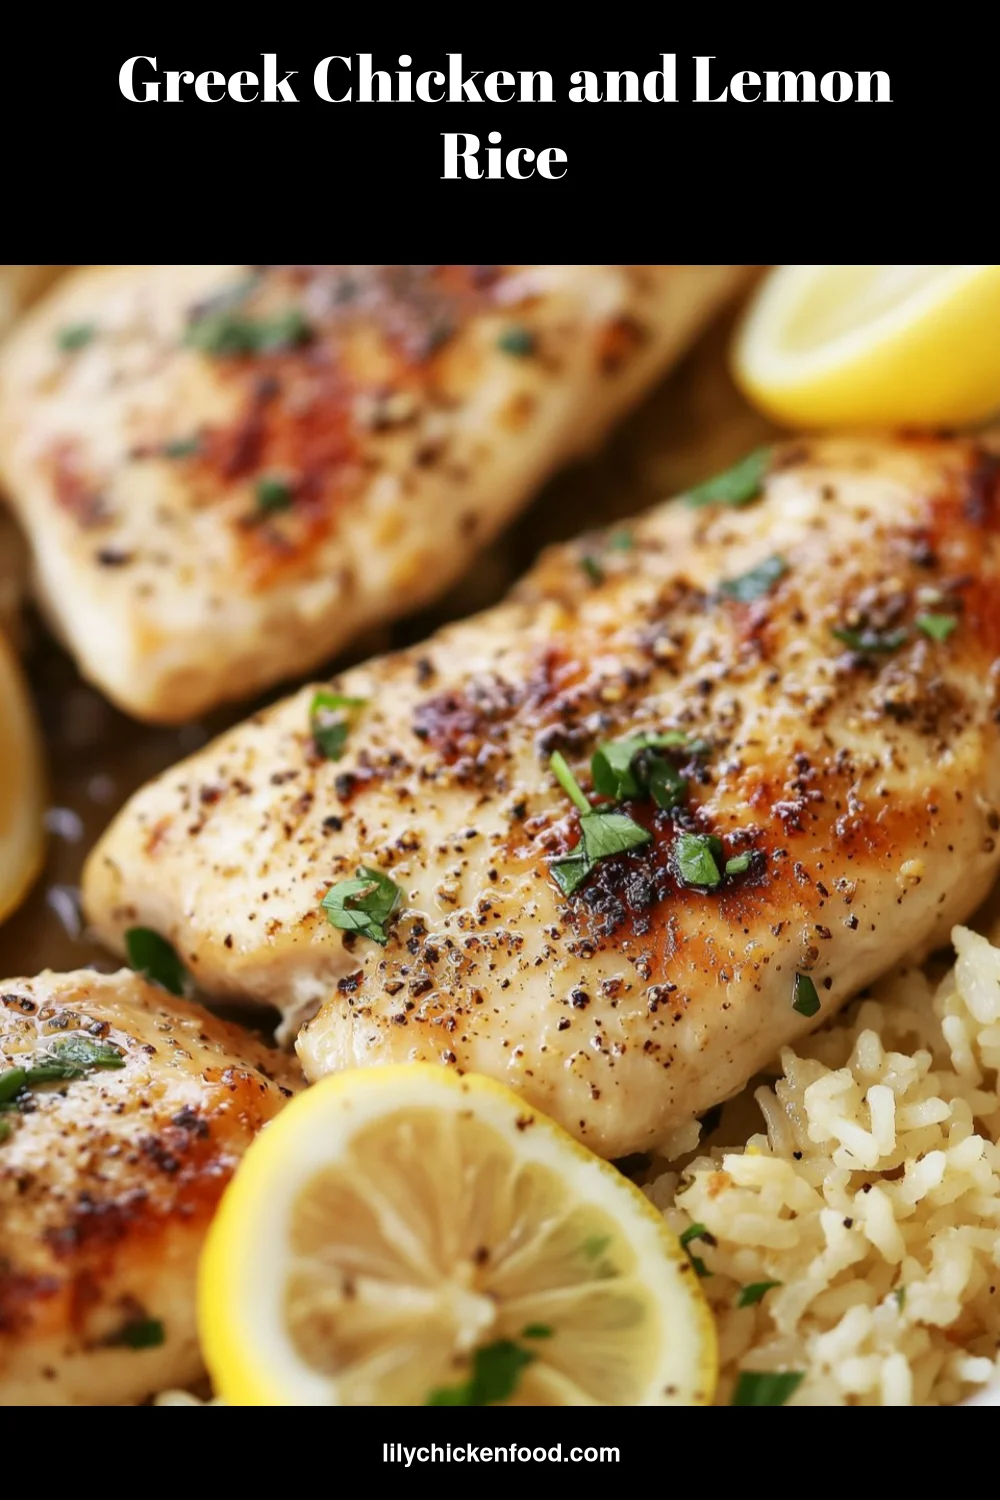
The technique is forgiving. Browning the chicken builds flavor, sautéing the vegetables softens them just enough, and stirring everything together lets the flavors marry. If you enjoy hearty comfort meals with fresh notes, try pairing this with my tangy Greek Chicken and Lemon Rice for another quick family meal.

Process Overview

“This is where the magic happens—when the aroma fills the kitchen.”

In plain steps, you brown the chicken, sauté the vegetables, add pineapple and soy sauce, then fold in cooked rice. The goal is a warm, cohesive dish where each bite gives you chicken, rice, and pineapple.

This approach is flexible. If you want a crispier texture, finish under a broiler for a minute. If you want more sauce, add a splash of chicken broth or more soy sauce. For a milder version for kids, reduce the soy sauce and offer extra sauce at the table.

I find small adjustments make a big difference. For a richer finish, toss in a knob of butter at the end. For a fresher finish, top with scallions and a squeeze of lime.

Ingredients

  • 1 pound chicken breast, cubed
    • Tip: Use breasts for lean meat that cooks quickly. Pound slightly for even pieces.
  • 1 cup pineapple chunks
    • Tip: Fresh pineapple adds brightness but canned works fine. Drain canned well to avoid thinning the sauce.
  • 2 cups cooked rice
    • Tip: Day-old rice holds up best. If using fresh, spread it on a tray to cool slightly.
  • 1 bell pepper, diced
    • Tip: Any color works. Red or yellow adds sweetness that kids usually like.
  • 1 onion, diced
    • Tip: Yellow onion gives a nice balance. Soften it well to bring out natural sweetness.
  • 2 cloves garlic, minced
    • Tip: Fresh garlic beats jarred. Add toward the end of sautéing so it does not burn.
  • 2 tablespoons soy sauce
    • Tip: Use low-sodium if you watch salt. You can add more to taste at the table.
  • 1 tablespoon olive oil
    • Tip: Olive oil works for flavor. Use a neutral oil if you plan to cook at higher heat.
  • Salt and pepper to taste
    • Tip: Add salt sparingly if your soy sauce is high in sodium.
  • Optional: green onions for garnish
    • Tip: Slice thinly and sprinkle at the end for color and a fresh bite.

These pantry-friendly items make it easy to cook without a long shopping list. If you want a bit more depth, a splash of rice vinegar or a teaspoon of brown sugar can round the flavors.

Directions

  1. In a large skillet, heat olive oil over medium heat. Add the chicken and cook until browned.

    • Encouragement: Aim for a light golden color. Browning gives you flavor, so be patient and resist crowding the pan.
  2. Add onion, bell pepper, and garlic to the skillet, sautéing until the vegetables are tender.

    • Encouragement: Stir often and enjoy how the kitchen fills with aroma. Tender vegetables add softness to the dish.
  3. Stir in the pineapple chunks and soy sauce.

    • Encouragement: The pineapple will warm and release juice. Let it mingle with the soy sauce for a bright, savory note.
  4. Mix in the cooked rice, combining everything well.

    • Encouragement: Break up any rice clumps gently with your spoon. Make sure each scoop has a mix of chicken, pineapple, and veggies.
  5. Season with salt and pepper to taste.

    • Encouragement: Taste a small spoonful and adjust. Salt can bring out the sweetness of the pineapple.
  6. Cook for an additional 5 minutes, allowing the flavors to meld.

    • Encouragement: Low and steady heat helps flavors marry. If the mixture seems dry, add a splash of chicken broth or water.
  7. Serve hot, garnished with green onions if desired.

    • Encouragement: Let it sit for a minute so the flavors settle. Scoop into bowls and watch smiles at the table.

If you like fuller sauces, add a tablespoon of cornstarch mixed with two tablespoons of water while the mixture simmers. Stir until slightly thickened for a glossy finish.

While you cook, remember that family meals do not need perfect plating. The goal is to feed people you love and make the night feel a little gentler. For another cozy option that fills bowls with comfort, I often turn to my Delicious Homemade Chicken and Dumplings when I need extra comfort.

Serving

Pineapple Chicken and Rice

Serve this Pineapple Chicken and Rice family-style in a large shallow bowl or straight from the skillet. It keeps things casual and invites everyone to help themselves. The warm rice holds the juices, so it is easy to scoop.

Add garnishes at the table. Chopped green onions, a wedge of lime, or a few sesame seeds are all welcome. If your family likes a little heat, pass around crushed red pepper or Sriracha for those who want it.

For side dishes, a simple green salad or steamed broccoli brings balance. If you want a tropical twist, serve with a side of sliced mango or a crisp cabbage slaw. This meal pairs well with light-bodied white wine or a sparkling water with lime for the kids.

If you serve buffet-style, keep a small ladle for the sauce so guests can add extra. For leftovers, portion into bowls and let everyone pick their favorite add-ins from those you set out.

Storage

Store leftovers in an airtight container in the fridge for up to 3 days. Cool the dish to room temperature before refrigerating to keep the rice from becoming too soggy.

Reheat gently on the stovetop over medium-low heat with a splash of water or chicken broth to bring back moisture. Alternatively, microwave single portions covered for about 1 to 2 minutes, stirring halfway through.

If you plan to freeze, let the dish cool completely and freeze in portioned containers. Freeze for up to 2 months. Thaw overnight in the fridge before reheating. Reheated pineapple can lose some texture, so consider adding a handful of fresh pineapple after reheating to brighten the dish.

To keep mealtime simple on busy days, I once stored extra rice and grilled chicken separately so reheats stay tender. If you want more make-ahead family meals, check out my French Onion Chicken Rice Bake for another plan-ahead option.

Kitchen Notes

  • Use day-old rice for the best texture. Fresh rice can clump and get mushy.
  • Cut chicken into even pieces so everything cooks at the same rate.
  • If you want more sauce, add 1/4 cup low-sodium chicken broth and simmer until reduced slightly.
  • Cook pineapple briefly so it warms without becoming mushy.
  • Taste as you go. Adjust soy sauce and salt at the end to avoid over-salting.

These little shortcuts help you keep dinner stress-free. When nights get busy, they make the difference between a frantic meal and a calm family dinner.

Variations

  • For picky eaters: Omit the bell pepper and finely chop extra onion. Serve pineapple on the side for those who want it.
  • For gluten-free diets: Use tamari or a certified gluten-free soy sauce.
  • For low-sodium: Use low-sodium soy sauce and add salt sparingly at the end.
  • For extra veggies: Stir in peas, shredded carrots, or chopped spinach during the last few minutes of cooking.
  • For more protein: Add a beaten egg at the end and stir quickly for a fried rice effect.

Each variation keeps the spirit of the recipe but tailors it to your table. If your family prefers a leafy boost, try my Hearty and Flavorful Chicken and Spinach recipes for other ways to add greens.

FAQ

Q: Can I use ground chicken instead of cubed breast?
A: Yes. Brown ground chicken and drain any excess fat before adding vegetables. It will change the texture but keep the flavor.

Q: Is canned pineapple okay?
A: Absolutely. Drain canned pineapple chunks well to avoid watering down the dish.

Q: Can I make this spicy?
A: Yes. Add sliced jalapeño while sautéing the vegetables or finish with chili flakes at the table.

Q: How do I keep the chicken juicy?
A: Do not overcook the chicken. Remove the pan from heat once the pieces are cooked through and allow residual heat to finish gently while you mix everything.

Q: What rice works best?
A: Long grain white rice or jasmine gives a light texture. Short-grain rice can be stickier but still works if you prefer it.

Conclusion

If you want a similar pineapple fried rice inspiration, I often look to dependable ideas like Easy Pineapple Chicken Fried Rice from Dude That Cookz for a different take on flavors and technique. For a version with more layers and seasonings, consider the Pineapple Fried Rice with Chicken at The Endless Meal to spark new family favorites.

Thank you for spending time here in my kitchen. I hope this Pineapple Chicken and Rice becomes one of those trusted recipes you turn to when you want feeding your family to feel easy and loving.

Pineapple Chicken and Rice

Prep Time 10 minutes
Cook Time 10 minutes
Total Time 20 minutes
Servings 4 servings
Calories 450
A bright, slightly sweet, and savory one-skillet meal that combines tender chicken, juicy pineapple, and fluffy rice, perfect for busy weeknights.

Ingredients

Main Ingredients

  • 1 pound chicken breast, cubed (Use breasts for lean meat that cooks quickly. Pound slightly for even pieces.)
  • 1 cup pineapple chunks (Fresh pineapple adds brightness but canned works fine. Drain canned well to avoid thinning the sauce.)
  • 2 cups cooked rice (Day-old rice holds up best. If using fresh, spread it on a tray to cool slightly.)
  • 1 bell pepper, diced (Any color works. Red or yellow adds sweetness that kids usually like.)
  • 1 onion, diced (Yellow onion gives a nice balance. Soften it well to bring out natural sweetness.)
  • 2 cloves garlic, minced (Fresh garlic beats jarred. Add toward the end of sautéing so it does not burn.)
  • 2 tablespoons soy sauce (Use low-sodium if you watch salt. You can add more to taste at the table.)
  • 1 tablespoon olive oil (Olive oil works for flavor. Use a neutral oil if you plan to cook at higher heat.)
  • to taste salt and pepper (Add salt sparingly if your soy sauce is high in sodium.)
  • Optional: green onions for garnish (Slice thinly and sprinkle at the end for color and a fresh bite.)

Instructions 

Cooking

  • In a large skillet, heat olive oil over medium heat. Add the chicken and cook until browned.
  • Add onion, bell pepper, and garlic to the skillet, sautéing until the vegetables are tender.
  • Stir in the pineapple chunks and soy sauce.
  • Mix in the cooked rice, combining everything well.
  • Season with salt and pepper to taste.
  • Cook for an additional 5 minutes, allowing the flavors to meld.
  • Serve hot, garnished with green onions if desired.

Notes

For fuller sauces, add a tablespoon of cornstarch mixed with two tablespoons of water while the mixture simmers. Store leftovers in an airtight container in the fridge for up to 3 days.
Calories: 450kcal
Course: Dinner, Main Course
Cuisine: American, Asian
Keyword: Comfort Food, Family Meal, One-skillet meal, Pineapple Chicken, Weeknight Dinner

Green Chicken Enchiladas

I can still hear the skillet sing as I shred the warm chicken. The scent of roasted garlic and tangy green salsa fills the kitchen and pulls everyone to the table. These green chicken enchiladas are one of those family recipes that feel like a hug on a busy weeknight.

If you love simple comfort food, this dish will become a staple. I sometimes pair it with lighter sides and sometimes serve it with a simple salad. If you want another cozy chicken idea for a weeknight, try my Bang Bang Chicken Sliders recipe for a change of pace.

Why this works

Green Chicken Enchiladas

Green chicken enchiladas hit the sweet spot between quick prep and big flavor. The filling is forgiving. You can use leftover roast chicken, a rotisserie bird, or quickly poach breasts and shred them by hand.

These enchiladas save time because you can build them ahead and bake when you are ready. That makes them perfect for a busy family dinner. They also adapt well for picky eaters. If your kids prefer milder flavors, use a milder green salsa. If you want a smoky kick, mix in some roasted poblanos.

For a week when I need extra help in the kitchen, I reach for my collection of air fryer chicken recipes and pair something light on the side. The flexibility is why I keep this enchilada recipe on rotation.

Process Overview

“This is where the magic happens—when the aroma fills the kitchen.”

The process is simple and comforting. You will mix the shredded chicken with a few spices, warm your tortillas so they roll without cracking, fill and roll, then pour the green salsa over the tray and bake until bubbly.

A little advance work goes a long way. If you like, shred the chicken the night before or warm the tortillas ahead and store them wrapped in a kitchen towel. If you want more ideas for quick builds, check my quick easy chicken collection for other weeknight wins.

Ingredients

  • 2 cups cooked, shredded chicken
    • Lily’s tip: Use rotisserie chicken for speed. If you poach chicken, reserve a cup of the poaching liquid to keep meat moist.
  • 8-10 corn tortillas
    • Lily’s tip: Warm tortillas on a hot skillet or microwave wrapped in a damp towel so they do not crack while rolling.
  • 2 cups green salsa
    • Lily’s tip: Choose a salsa verde you love. Fresh tomatillo-based salsa is bright and flavorful. A milder jarred salsa works well for kids.
  • 1 cup shredded cheese (cheddar or Monterey Jack)
    • Lily’s tip: Monterey Jack melts beautifully and stays creamy. Mix half cheddar for a deeper flavor.
  • 1/2 cup sour cream
    • Lily’s tip: Use full fat for best texture. You can thin it with a tablespoon of lime juice if you want a tangy finish.
  • 1/2 teaspoon cumin
    • Lily’s tip: Toast cumin in a dry skillet briefly for a warmer aroma before adding to the chicken mix.
  • 1/2 teaspoon garlic powder
    • Lily’s tip: If you prefer fresh garlic, use one small clove, minced, and sauté it with a touch of oil first.
  • Salt and pepper to taste
    • Lily’s tip: Season lightly, then taste a small spoonful of the chicken mixture. You can always add more salt after baking.
  • Chopped cilantro for garnish (optional)
    • Lily’s tip: Add cilantro just before serving. It brightens the dish and keeps the green color fresh.

If you like a little extra texture, add a few tablespoons of drained, canned corn or black beans to the chicken mix. For a creamier filling, fold in two tablespoons of the sour cream into the chicken mixture.

For another crunchy option that kids love, try pairing this meal with my crispy air fryer chicken mozzarella wraps as a snack or side.

Directions

  1. Preheat your oven to 350°F (175°C).

    • Encouraging note: Give yourself a moment to preheat while you tidy the counter. A warm oven makes everything come together more quickly.
  2. In a bowl, combine the shredded chicken, cumin, garlic powder, salt, and pepper.

    • Encouraging note: Mix gently. Taste a tiny pinch and adjust seasoning so the filling sings but does not overpower the salsa.
  3. Warm the tortillas in a dry skillet or microwave until pliable.

    • Encouraging note: Warm tortillas make rolling easy and avoid cracks. Wrap them in a towel to stay warm while you fill.
  4. Spoon some of the chicken mixture onto each tortilla, roll them up, and place them seam-side down in a baking dish.

    • Encouraging note: Don’t worry about perfection. Place them snug so they support each other when baking.
  5. Pour green salsa over the enchiladas and sprinkle with shredded cheese.

    • Encouraging note: Use enough salsa to cover them well so they stay moist. Add a little extra cheese if your family loves a golden top.
  6. Bake in the preheated oven for 20-25 minutes until the cheese is bubbly.

    • Encouraging note: Let the oven do the work. Your kitchen will smell amazing and your family will start setting the table.
  7. Serve with a dollop of sour cream and garnish with cilantro if desired.

    • Encouraging note: A final spoon of sour cream cools the heat and rounds the flavors. Let everyone add cilantro or extra salsa to taste.

If you want to assemble these ahead, cover the dish with plastic wrap and refrigerate. Add about 5 extra minutes to the bake time if baking straight from chilled.

Serving

Green Chicken Enchiladas

Serve these enchiladas family-style, straight from the baking dish. Place the dish on the table with bowls of extras: sour cream, chopped cilantro, lime wedges, and maybe a little hot sauce for those who want a kick.

I like to add a crisp side salad or roasted vegetables to balance the meal. Warm, homemade corn tortillas or a simple rice pilaf make the meal feel complete. For casual nights, serve directly from the oven and let everyone help themselves.

If you are serving small children, plate a half enchilada and offer some plain rice or steamed veggies on the side. For grown-ups, top with extra cheese and a squeeze of lime.

Storage

  • Fridge: Store leftover enchiladas in an airtight container for up to 3 days. Cool to room temperature before refrigerating.
  • Reheat: Reheat single portions in the microwave for 1-2 minutes, or in a 350°F oven for 10-12 minutes until warmed through and bubbly.
  • Freeze: To freeze, place uncovered enchiladas on a tray and freeze until firm. Transfer to a freezer-safe container and reheat from frozen at 375°F for 25-30 minutes, covering loosely with foil to prevent over-browning.
  • Tip: If you plan to freeze, under-bake by 5 minutes first, then finish baking after thawing or reheating. This keeps textures fresher.

A small spoon of sour cream or a sprinkle of fresh cilantro after reheating brightens the dish again.

Kitchen Notes

  • Use rotisserie chicken to save time and add deep flavor.
  • Warm tortillas wrapped in a towel to keep them flexible while you fill.
  • Mix half Monterey Jack and half cheddar for great melt and flavor.
  • Assemble in the morning and bake in the evening for an easy dinner.
  • Double the recipe and freeze a tray for a no-stress future meal.

These shortcuts help make weeknight dinners feel doable and delicious. They save time without losing the home-cooked touch.

Variations

  • For picky eaters: Use mild green salsa and reduce cumin. Serve sauce on the side and let each person spoon on what they like.
  • For a low-carb option: Use large flour tortillas or lettuce wraps and skip the rice side. You can also make a casserole without tortillas by layering chicken and salsa, then baking with cheese.
  • For a vegetarian version: Replace chicken with seasoned, roasted cauliflower or sautéed mushrooms and black beans.
  • For a spicy twist: Stir in chopped roasted jalapeño or use a spicy green salsa. Add a pinch of smoked paprika for depth.
  • For extra creaminess: Mix a half cup of cream cheese or full-fat Greek yogurt into the chicken filling before rolling.

These variations let you match the meal to your family’s tastes and dietary needs.

FAQ

Q: Can I use flour tortillas instead of corn?
A: Yes. Flour tortillas will be softer and easier to roll. Corn offers more authentic texture and holds fillings well if warmed properly.

Q: How can I prevent soggy enchiladas?
A: Do not over-sauce. Use enough salsa to coat, but avoid pooling. Slightly warm your salsa to prevent chilling the tortillas and making them soggy.

Q: Can I make this ahead for a party?
A: Absolutely. Assemble the enchiladas, cover, and refrigerate. Bake 25-30 minutes before serving. For a crowd, double the recipe and use two baking dishes.

Q: Is there a dairy-free option?
A: Yes. Omit the cheese and use a dairy-free sour cream substitute. Nutritional yeast can add a cheesy flavor if you want a similar taste.

Q: What sides go best with these enchiladas?
A: A crisp green salad, roasted vegetables, or simple cilantro lime rice pair beautifully. For a crunchy side, serve tortilla chips and fresh salsa.

Conclusion

I hope these green chicken enchiladas become a trusted dinner in your home. They are simple, comforting, and flexible enough for busy nights and special dinners alike.

For inspiration on similar flavors and to see another take on salsa verde enchiladas, I like the Inspired Taste green chicken enchiladas recipe which shows classic technique and tweaks. If you want a version with an easy homemade green chile sauce, check out Christina’s Cucina green chicken enchiladas with easy green chile sauce for more ideas.

Thanks for cooking with me. Gather around the table, pass the dish, and enjoy the simple joy of a meal made with love.

Green Chicken Enchiladas

Prep Time 30 minutes
Cook Time 25 minutes
Total Time 55 minutes
Servings 6 servings
Calories 360
These comforting green chicken enchiladas are quick to prepare and packed with flavor, making them a perfect choice for busy weeknight dinners.

Ingredients

For the filling

  • 2 cups cooked, shredded chicken (Use rotisserie chicken for speed.)
  • 1/2 teaspoon cumin (Toast cumin for a warmer aroma.)
  • 1/2 teaspoon garlic powder (Fresh garlic can be used instead.)

For the enchiladas

  • 8-10 pieces corn tortillas (Warm to avoid cracking while rolling.)
  • 2 cups green salsa (Choose your favorite salsa verde.)
  • 1 cup shredded cheese (cheddar or Monterey Jack) (Monterey Jack melts beautifully.)
  • 1/2 cup sour cream (Use full fat for best texture.)
  • Chopped to taste cilantro for garnish (Add just before serving.)

Instructions 

Preparation

  • Preheat your oven to 350°F (175°C).
  • In a bowl, combine the shredded chicken, cumin, garlic powder, salt, and pepper.
  • Warm the tortillas in a dry skillet or microwave until pliable.

Assembly

  • Spoon some of the chicken mixture onto each tortilla, roll them up, and place them seam-side down in a baking dish.
  • Pour green salsa over the enchiladas and sprinkle with shredded cheese.

Baking

  • Bake in the preheated oven for 20-25 minutes until the cheese is bubbly.
  • Serve with a dollop of sour cream and garnish with cilantro if desired.

Notes

These enchiladas can be assembled ahead of time. Refrigerate and bake straight from the fridge, adding an extra 5 minutes to bake time.
Calories: 360kcal
Course: Dinner, Main Course
Cuisine: Mexican
Keyword: Chicken, Comfort Food, Enchiladas, Family Meal, Quick Dinner

Easy Crockpot Chicken Thighs with Creamy Gravy

The kitchen smells like warm chicken and soft onion. The slow hum of the crockpot fills the room. A spoon clinks against a bowl. You feel your home settle into something comforting.

This recipe is the kind that makes weeknight dinner feel like a small celebration. It is simple, forgiving, and built for busy families. I am Lily, and I share this easy crockpot chicken thighs recipe to help you put a wholesome meal on the table with little fuss.

Why this works

Easy Crockpot Chicken Thighs with Creamy Gravy

This dish works because it trusts time and gentle heat. The crockpot lets the chicken thighs slowly release their juices. The cream of chicken soup and broth turn into a creamy, spoonable gravy that clings to every bite.

For busy families, this is a win. You can set it and forget it for hours. Come home to a ready meal and a kitchen that smells like care. It is also forgiving if you need to double the recipe or add vegetables.

Process Overview

“This is where the magic happens—when the aroma fills the kitchen.”

The process is straightforward. You layer simple ingredients in the crockpot. Heat and time do the rest. There is no last-minute stove juggling and no need to watch a pot.

I like to start in the morning before school runs. By evening the house smells like dinner, and everyone gathers around the table. This recipe is about slowing down a little and enjoying what comfort food does best.

Ingredients

  • 4 chicken thighs
    Tip: I use bone-in, skin-on thighs for flavor. You can remove skin for less fat. If you prefer boneless, add 30 minutes less cooking time on low.

  • 1 can cream of chicken soup
    Tip: Full fat gives the richest gravy. For a lighter option, use low-fat or a homemade white sauce.

  • 1 cup chicken broth
    Tip: Use low-sodium broth so you can control salt. If you only have bouillon, dissolve it in hot water first.

  • 1 onion, chopped
    Tip: Yellow onion works well for sweetness. Chop it into medium pieces so it softens but still has texture.

  • 2 cloves garlic, minced
    Tip: Fresh garlic gives the best aroma. If you must, 1/2 teaspoon garlic powder will work in a pinch.

  • Salt and pepper to taste
    Tip: Start with 1/2 teaspoon salt and 1/4 teaspoon pepper and adjust before serving. If you use salty broth, use less salt.

  • Optional: Fresh parsley for garnish
    Tip: Parsley brightens the dish. Chop it right before serving for the best color and texture.

My small kitchen tests taught me to keep these ingredients handy. They are staples most families have on a regular basis. That makes this recipe perfect for easy weeknight planning.

Directions

  1. Place chicken thighs in the crockpot.
    Encouragement: Lay them in a single layer when you can. It feels good to start with a tidy pot.

  2. In a bowl, mix together cream of chicken soup, chicken broth, chopped onion, minced garlic, salt, and pepper.
    Encouragement: Stir until the soup loosens into the broth. The aroma will already make you smile.

  3. Pour the mixture over the chicken thighs in the crockpot.
    Encouragement: Cover the chicken well. The sauce will envelop each piece and keep it moist.

  4. Cover and cook on low for 6-7 hours or high for 3-4 hours, until the chicken is tender.
    Encouragement: Let time do the work. The thighs should be fork tender and the gravy should be slightly thick.

  5. Serve with gravy over rice or mashed potatoes and garnish with fresh parsley if desired.
    Encouragement: Spoon the gravy over each portion. Invite everyone to pass sides family-style. You did a great job.

If your gravy looks thin at the end, whisk 1 tablespoon cornstarch with 2 tablespoons cold water and stir it into the crockpot. Cover and cook 10 to 15 minutes more on high until it thickens. Taste and add salt or pepper as needed.

Serving

Easy Crockpot Chicken Thighs with Creamy Gravy

Serve this dish family-style in a warm casserole dish. Place the crockpot on the table for second helpings. Let each person spoon gravy over mashed potatoes or steaming rice.

Add a green vegetable to balance the plate. Steamed green beans, roasted broccoli, or a simple salad all work. A basket of warm bread is always welcome if your family likes it.

For little ones, shred the chicken after cooking and mix it into mashed potatoes for an easy toddler-friendly bowl. For older kids, offer extra gravy and hot sauce at the table.

Storage

Cool the leftovers before storing. Place the chicken and gravy in an airtight container and refrigerate.

  • Refrigerator: Keeps well for 3 to 4 days.
  • Freezer: Freeze in a freezer-safe container for up to 3 months. Leave some headspace for expansion.

Reheating tips:

  • Microwave: Reheat single servings on medium heat. Stir every 30 seconds to make sure the gravy heats evenly.
  • Stovetop: Warm on low in a saucepan, stirring often. Add a splash of broth if it clings too much to the pan.
  • Oven: For a family meal, transfer to an oven-safe dish, cover, and reheat at 325°F for 20 to 30 minutes until warmed through.

When reheating from frozen, thaw in the refrigerator overnight for best texture. If reheating from frozen, add a few extra minutes and check the center for warmth.

Kitchen Notes

  • Use bone-in thighs for flavor. They stay juicier than boneless thighs. If swap to boneless, reduce cook time slightly.
  • If you like a crust, brown the thighs in a skillet for 3 minutes per side before adding to the crockpot. It adds a nice depth of flavor.
  • Make it a one-pot meal by adding baby potatoes and carrots at the start. Use small pieces so they cook through with the thighs.
  • Adjust salt at the end. Broth and canned soup can vary in saltiness, so taste before adding more.
  • If you prefer thicker gravy, mix 2 teaspoons cornstarch with cold water and stir in during the last 15 minutes on high.

These little shortcuts will make your evenings easier without losing any comfort.

Variations

  • For picky eaters: Shred the chicken and mix it with the gravy so flavors are even. Serve with buttered noodles or mashed potatoes, which appeal to many kids.
  • Lower-carb option: Skip the potatoes and serve over cauliflower mash or a bed of sautéed greens.
  • Gluten-free: Use a gluten-free cream of chicken soup or make a simple roux with gluten-free flour. Check the broth label for gluten.
  • Dairy-free tweak: Use a dairy-free cream soup or blend soaked cashews with a bit of warm broth for a creamy swap.
  • Herby twist: Add 1 teaspoon dried thyme or rosemary for a heartier herb flavor. Fresh herbs added at the end keep their brightness.

These changes let you adapt the recipe for family preferences and dietary needs without losing the comforting base of the dish.

FAQ

Q: Can I use chicken breasts instead of thighs?
A: Yes. Use boneless breasts and reduce the low cook time to 4 to 5 hours or high to 2 to 3 hours. Check for doneness so breasts do not dry out.

Q: How do I thicken the gravy if it is too thin?
A: Whisk 1 to 2 teaspoons cornstarch with cold water and stir into the crockpot. Turn to high and cook 10 to 15 minutes until thickened. You can also remove some sauce, simmer on the stove, and reduce it until thicker.

Q: Is it safe to cook this from frozen chicken?
A: It is best to thaw chicken first. Cooking from frozen in a crockpot can keep it too long in the temperature danger zone. Thaw overnight in the refrigerator for best and safest results.

Q: Can I double this recipe?
A: Yes. Use a larger crockpot or make two batches. Increase the cook time only slightly if your crockpot becomes very full. Ensure the liquid covers the chicken and check for doneness.

Q: Can I add vegetables to cook with the chicken?
A: Yes. Add heartier vegetables like carrots and small potatoes at the start. Tender vegetables like peas or zucchini should be added in the last 30 to 60 minutes to avoid overcooking.

Conclusion

Thank you for letting me share this simple, family-friendly crockpot chicken thighs with creamy gravy. I hope it becomes one of those go-to recipes that saves time and brings your family together around the table.

If you want a similar slow cooker idea with step-by-step photos, I like the Crockpot Chicken & Gravy page for extra inspiration. For another reliable version to compare techniques, see the Crock Pot Chicken and Gravy – The Country Cook guide.

Happy cooking from my kitchen to yours. Keep it simple, keep it warm, and enjoy the comfort of a home-cooked meal.

Crockpot Chicken Thighs

Prep Time 15 minutes
Cook Time 6 hours
Total Time 6 hours 15 minutes
Servings 4 servings
Calories 450
This comforting and easy crockpot recipe features chicken thighs slow-cooked with cream of chicken soup and broth, resulting in a creamy gravy that clings to every bite—perfect for busy families.

Ingredients

Main Ingredients

  • 4 pieces chicken thighs (Bone-in, skin-on thighs add flavor. Remove skin for less fat.)
  • 1 can cream of chicken soup (Full fat for rich gravy; use low-fat or homemade for lighter option.)
  • 1 cup chicken broth (Use low-sodium broth for better control over salt.)
  • 1 piece onion, chopped (Yellow onion offers sweetness. Chop into medium pieces.)
  • 2 cloves garlic, minced (Fresh garlic preferred; can substitute with garlic powder.)
  • to taste salt and pepper (Start with 1/2 tsp salt and 1/4 tsp pepper.)

Optional Garnish

  • 1 tablespoon fresh parsley, chopped (Chop just before serving for color.)

Instructions 

Preparation

  • Place chicken thighs in the crockpot in a single layer.
  • In a bowl, mix cream of chicken soup, chicken broth, chopped onion, minced garlic, salt, and pepper until combined.
  • Pour the mixture over the chicken thighs in the crockpot, ensuring the chicken is well covered.

Cooking

  • Cover and cook on low for 6-7 hours or high for 3-4 hours until the chicken is tender.
  • Serve with gravy over rice or mashed potatoes, garnished with fresh parsley if desired.
  • If gravy is thin, mix 1 tbsp cornstarch with 2 tbsp cold water and stir into the crockpot; cook on high for an additional 10-15 minutes until thickened.

Notes

Store leftovers in an airtight container in the refrigerator for 3-4 days or freeze for up to 3 months. Reheat in the microwave, stovetop, or oven as needed. Adjust seasoning at the end if necessary.
Calories: 450kcal
Course: Dinner, Main Course
Cuisine: American, Comfort Food
Keyword: Chicken Thighs, Crockpot Chicken, Easy Chicken Recipe, Family-Friendly, Slow Cooker Recipe

Greek Chicken and Lemon Rice

The scent of lemon and oregano fills the air as the skillet sizzles gently on the stove. I love that sound, the little pops and sighs that mean dinner is underway. You can almost hear the family gathering, the clink of plates, the quiet questions about what smells so good.

This Greek chicken and lemon rice recipe is one of those meals that makes the whole kitchen feel like a hug. It is fragrant, simple, and comforting. I wrote this recipe after years of cooking for my kids and friends. It’s the kind of dish that keeps well, travels well to potlucks, and makes weeknights feel a lot less hectic.

Why this works

Greek Chicken and Lemon Rice

This dish hits the sweet spot between flavor and ease. The lemon brightens everything, while the oregano and garlic give a familiar, earthy taste that kids and adults both enjoy. The rice cooks in the same skillet as the chicken, so you get a pan full of flavor without extra dishes.

It also saves time and hands-on work. After a quick sear, the oven does the heavy lifting. That means you can tidy up, help with homework, or set the table while the oven finishes the job. For busy families, this one-pan approach keeps evenings peaceful and dinners delicious.

I test recipes for my family and my readers. Over the years I have learned small adjustments that make a difference. This version balances bright lemon with savory chicken and a tender, not mushy, rice texture.

Process Overview

“This is where the magic happens—when the aroma fills the kitchen.”

The process is simple. You season and sear the chicken to build flavor, then deglaze the pan with chicken broth and lemon. The rice simmers gently in that broth, soaking up all those browned bits and lemony notes. The oven finishes the cook so the chicken stays juicy and the rice cooks through evenly.

Cooking this way gives you a layered flavor profile with minimal effort. If you follow the steps, you will have a comforting, family-friendly meal in under an hour.

Ingredients

  • 4 boneless, skinless chicken breasts
    Lily’s tip: Choose similar-sized breasts so they cook evenly. If they are thick, pound them gently to an even thickness for quicker, more consistent cooking.

  • 2 tablespoons olive oil
    Lily’s tip: Use a good-quality extra virgin olive oil for flavor. If you need a higher smoke point, use light olive oil.

  • 1 teaspoon dried oregano
    Lily’s tip: Dried oregano is more concentrated than fresh. If you have fresh oregano, use 1 tablespoon chopped instead.

  • 1 teaspoon garlic powder
    Lily’s tip: Garlic powder adds gentle, even flavor. For a fresher note, add one crushed garlic clove to the pan when deglazing.

  • 1 teaspoon onion powder
    Lily’s tip: Onion powder boosts savory depth without adding texture. It is great when picky eaters do not like visible chopped onions.

  • 1 teaspoon lemon zest
    Lily’s tip: Zest a lemon before juicing it. The zest releases oils that brighten the dish more than juice alone.

  • 1/4 cup lemon juice
    Lily’s tip: Fresh lemon juice is best. Bottled works in a pinch but lacks brightness.

  • 2 cups chicken broth
    Lily’s tip: Use low-sodium broth so you can control the salt. If using homemade broth, taste it first and adjust salt later.

  • 1 cup long-grain rice
    Lily’s tip: Long-grain rice stays fluffy and separate. Rinse it under cold water to remove excess starch for a less sticky result.

  • 1/2 teaspoon salt
    Lily’s tip: This is a baseline. If your broth is already salted, reduce the added salt and taste before serving.

  • 1/4 teaspoon black pepper
    Lily’s tip: Freshly ground pepper makes a subtle difference. Add more at the table if someone likes a kick.

  • 1 tablespoon fresh parsley, chopped
    Lily’s tip: Parsley adds color and freshness at the end. Flat-leaf parsley works best for flavor.

I use simple pantry staples and fresh lemon for brightness. These ingredients keep well and are easy to find year-round. The tips come from years of cooking for children who prefer familiar textures and adults who like bold flavor.

Directions

  1. Preheat your oven to 375°F (190°C).
    Encouragement: Give yourself a moment to set the timer and gather ingredients while the oven warms. This little step starts the rhythm.

  2. Pat the chicken breasts dry with paper towels to remove any excess moisture.
    Encouragement: Dry chicken sears better. A quick pat ensures a golden crust.

  3. Rub both sides of each chicken breast with olive oil.
    Encouragement: The oil helps the seasonings stick and keeps the meat juicy. Be generous but not greasy.

  4. Season the chicken breasts with dried oregano, garlic powder, onion powder, lemon zest, salt, and black pepper.
    Encouragement: Press the seasoning gently into the meat. This is where flavor begins to build.

  5. Heat a large oven-safe skillet over medium-high heat.
    Encouragement: Give the skillet a minute to get hot. A properly heated pan creates a nice sear.

  6. Once the skillet is hot, add the seasoned chicken breasts to the skillet.
    Encouragement: Place the chicken away from you to avoid splatters. Hear that satisfying sizzle.

  7. Cook the chicken breasts for about 4-5 minutes on each side, or until golden brown.
    Encouragement: Resist the urge to move the chicken too soon. Let it form a crust for the best flavor.

  8. Once browned, remove the chicken from the skillet and set it aside on a plate.
    Encouragement: Do not worry if the chicken is not fully cooked. The oven will finish it while the rice cooks.

  9. Add the chicken broth to the skillet, scraping up any browned bits from the bottom of the pan with a wooden spoon.
    Encouragement: Those browned bits are flavor gold. Scrape them up to flavor the rice.

  10. Stir in the lemon juice and bring the broth to a simmer.
    Encouragement: The lemon brightens the whole pan. Let it bloom for a minute in the warm broth.

  11. Add the rice to the skillet, stirring to ensure the rice is evenly distributed.
    Encouragement: Spread the rice into an even layer so it cooks uniformly. Stirring helps it soak up the liquid.

  12. Place the chicken breasts back into the skillet on top of the rice.
    Encouragement: Nestle them gently so the rice cooks under the chicken and absorbs juices.

  13. Cover the skillet with a lid or foil and transfer it to the preheated oven.
    Encouragement: This is the hands-off part. Clean up while the oven does the rest.

  14. Bake for 20-25 minutes, or until the rice is cooked through and the chicken reaches an internal temperature of 165°F (74°C).
    Encouragement: Use a thermometer for peace of mind. The right temperature keeps chicken safe and tender.

  15. Remove the skillet from the oven and let it sit, covered, for 5 minutes.
    Encouragement: Resting helps the juices redistribute. It also makes serving neater.

  16. Sprinkle the chopped fresh parsley over the chicken and rice before serving.
    Encouragement: A fresh green touch makes the dish sing. Children often enjoy helping with this final step.

  17. Serve the chicken and lemon rice warm, garnished with additional parsley if desired.
    Encouragement: Call the family. This meal is best enjoyed fresh and shared around the table.

Follow these steps and you will have a flavorful, homey meal that feels special without a lot of fuss.

Serving

Greek Chicken and Lemon Rice

This recipe shines when served family-style. Bring the skillet to the table, place a bowl of lemon wedges nearby, and let everyone help themselves. The visual of the golden chicken resting on bright, lemony rice is inviting.

Pair it with a simple green salad or roasted vegetables. A side of steamed broccoli or a Greek salad keeps the meal balanced and colorful. For a little extra richness, offer crumbled feta at the table.

I like to serve this with warm pita or crusty bread. Guests enjoy scooping rice and sauce into bread for a satisfying bite. Serving family-style makes dinner feel less formal and more like the cozy gatherings I grew up with.

Storage

Cool leftovers promptly and store in an airtight container in the refrigerator for up to 3 days. The rice will continue to absorb liquid, so it may seem drier after refrigeration.

To reheat, add a splash of chicken broth or water to the skillet or microwave-safe dish to loosen the rice. Cover loosely and reheat in a 350°F oven for 10-12 minutes, or microwave on medium power in 1-minute bursts until hot. Add a squeeze of fresh lemon before serving to revive the brightness.

You can also freeze portions. Place cooled portions in freezer-safe containers and freeze for up to 2 months. Thaw overnight in the refrigerator before reheating as described.

Kitchen Notes

  • Use an oven-safe skillet so you can sear on the stovetop and finish in the oven without extra dishes.
  • Rinse long-grain rice under cold water to remove starch and keep grains separate.
  • If chicken breasts vary in size, slice thicker ones in half horizontally for even cooking.
  • Low-sodium broth gives you better control over the dish’s salt level. Taste before adding more salt.
  • A meat thermometer is a small tool that saves stress and avoids overcooking.

These shortcuts save time and keep flavor consistent. Over time, you will find little adjustments that fit your family’s tastes.

Variations

  • For picky eaters: Leave out the lemon zest in the seasoning mix and add lemon wedges at the table so each person can choose their level of tang.
  • For a low-carb option: Serve the seasoned chicken over cauliflower rice. Sear and finish in the oven as directed, but check cauliflower rice sooner as it cooks faster.
  • For extra vegetables: Stir 1 cup of diced bell peppers or peas into the rice before baking. They add color and nutrition without extra effort.
  • For a dairy twist: Sprinkle 1/2 cup crumbled feta over the dish in the last 5 minutes of baking so it softens but does not completely melt.
  • For a heartier meal: Use bone-in chicken thighs instead of breasts. Increase bake time to ensure thighs are cooked through and the internal temperature reaches 165°F.

These variations let you tailor the meal to diets, seasons, and pantry items. I often switch things up depending on what my kids will eat that week.

FAQ

Q: Can I use brown rice instead of long-grain white rice?
A: Yes, but brown rice needs more liquid and a longer cooking time. Use about 2 1/2 cups broth and increase oven time by 20-25 minutes. Check for tenderness.

Q: Can I make this on the stovetop only?
A: You can. After adding the rice and replacing the chicken, reduce heat to low, cover tightly, and simmer for 20-25 minutes until the rice is tender and the chicken reaches 165°F.

Q: How do I prevent the rice from sticking to the pan?
A: Use a well-heated skillet and scrape up browned bits before adding the liquid. Rinsing the rice helps too. Also watch liquid ratio closely and avoid lifting the lid often during baking.

Q: Is this recipe freezer friendly?
A: Yes. Cool the dish completely, portion into freezer-safe containers, and freeze for up to 2 months. Thaw overnight in the fridge before reheating.

Q: Can I use thighs instead of breasts for more flavor?
A: Absolutely. Bone-in thighs add richness. Brown them well, and increase oven time until they reach 165°F and the rice is tender.

Conclusion

I hope this Greek chicken and lemon rice becomes one of your go-to weeknight recipes. It is forgiving, full of flavor, and perfect for sharing around the table with people you love. Cooking for my family taught me that good meals do not have to be complicated to be memorable.

For another one-pot take with similar flavors, I like to compare versions and techniques from trusted recipe developers. You can see a bright, quick version at Julia’s Album Greek Chicken and Lemon Rice (30 Minutes, One-Pot) and a hearty approach at RecipeTin Eats One Pot Greek Chicken and Lemon Rice for inspiration.

Happy cooking from my kitchen to yours. Enjoy the aroma, the conversation, and the moments that happen over a shared plate.

Greek Chicken and Lemon Rice

Prep Time 10 minutes
Cook Time 25 minutes
Total Time 35 minutes
Servings 4 servings
Calories 450
A fragrant, one-pan meal featuring seasoned chicken breasts and lemon-infused rice that makes weeknight dinners comforting and easy.

Ingredients

Main Ingredients

  • 4 pieces boneless, skinless chicken breasts (Choose similar-sized breasts for even cooking.)
  • 2 tablespoons olive oil (A good-quality extra virgin olive oil is best.)
  • 1 teaspoon dried oregano (If using fresh, use 1 tablespoon chopped instead.)
  • 1 teaspoon garlic powder (For a fresher flavor, use one crushed garlic clove.)
  • 1 teaspoon onion powder (Boosts savory depth without adding texture.)
  • 1 teaspoon lemon zest (Zest before juicing for better flavor.)
  • 1/4 cup lemon juice (Fresh lemon juice is preferred.)
  • 2 cups chicken broth (Use low-sodium to control salt level.)
  • 1 cup long-grain rice (Rinse to remove excess starch.)
  • 1/2 teaspoon salt (Taste broth before adding additional salt.)
  • 1/4 teaspoon black pepper (Freshly ground adds more flavor.)
  • 1 tablespoon fresh parsley, chopped (Adds freshness and color just before serving.)

Instructions 

Preparation

  • Preheat your oven to 375°F (190°C).
  • Pat the chicken breasts dry with paper towels.
  • Rub both sides of each chicken breast with olive oil.
  • Season the chicken breasts with oregano, garlic powder, onion powder, lemon zest, salt, and pepper.
  • Heat a large oven-safe skillet over medium-high heat.
  • Once hot, add the seasoned chicken breasts to the skillet.
  • Cook the chicken for about 4-5 minutes on each side until golden brown.
  • Remove the chicken from the skillet and set aside.

Cooking

  • Add chicken broth to the skillet, scraping up any browned bits from the bottom.
  • Stir in the lemon juice and bring to a simmer.
  • Add the rice, stirring to ensure it is evenly distributed.
  • Place the chicken back into the skillet on top of the rice.
  • Cover with a lid or foil and transfer to the oven.
  • Bake for 20-25 minutes, until rice is cooked and chicken reaches an internal temperature of 165°F (74°C).
  • Remove from oven and let sit covered for 5 minutes.
  • Sprinkle with parsley before serving.

Serving

  • Serve warm, garnished with additional parsley if desired.

Notes

Cool leftovers promptly and store in an airtight container in the refrigerator for up to 3 days. The rice may seem drier after refrigeration. To reheat, add a splash of broth or water, cover, and heat in the oven or microwave.
Calories: 450kcal
Course: Dinner, Main Course
Cuisine: Greek
Keyword: Comfort Food, Family Meal, Greek Chicken, Lemon Rice, One-Pan Dinner

Garlic Herb Chicken

The kitchen fills with the warm scent of garlic and butter. I hear the soft sizzle as the chicken hits the hot pan and feel a small thrill that dinner is coming together.

This recipe is the kind that turns a busy weeknight into a cozy family moment. The sounds, smells, and the sticky glaze make everyone pause and take notice. Let me show you how to make a dish your people will ask for again and again.

Why this works

Garlic Herb Chicken

Family meals need to be easy and reliable. This Garlic Herb Chicken gives you both. The sear locks in juices quickly, so the chicken stays tender without long cook times. The pan sauce uses the drippings to make big flavor from simple steps.

It saves time and cleanup. You sear, make the sauce in the same pan, and serve on mashed potatoes for a one-skillet feel with a comfort-food finish. It is also flexible for picky eaters and busy schedules.

This is a go-to weeknight recipe that still feels a little special. You can prep ahead or finish at the last minute while everyone sets the table.

Process Overview

“This is where the magic happens—when the aroma fills the kitchen.”

I like to think of the process as three simple parts. Season and sear, make the sauce, and pair with creamy mashed potatoes. Each step builds flavor, and the pan sauce brings everything together.

Work confidently. Follow the steps and trust your senses. A quick temperature check and a few minutes of attention will reward you with juicy chicken and a glossy glaze.

Ingredients

  • 4 boneless skinless chicken breasts

    • Tip: If breasts are uneven, pound them to even thickness so they cook at the same rate. That keeps the center from drying out.
  • 3 tablespoons olive oil

    • Tip: Use a good quality olive oil for searing and flavor. Heat until shimmering before adding the chicken to get a golden crust.
  • 4 cloves garlic, minced

    • Tip: Mince fresh garlic or press it for more aroma. Add it to the herb rub rather than the hot oil to avoid burning.
  • 2 tablespoons fresh parsley, chopped

    • Tip: Chop parsley just before using for bright color and fresh flavor. Save a little for garnish.
  • 1 tablespoon fresh thyme leaves

    • Tip: Strip thyme leaves from the stems with your fingers. Fresh thyme gives a subtle earthy lift that pairs well with garlic.
  • 2 tablespoons butter

    • Tip: Add butter toward the end of searing for basting. Clarified butter can handle higher heat but regular butter adds a lovely nutty browning.
  • 1 cup chicken broth

    • Tip: Use low-sodium broth so you control the salt. If you only have bouillon, dissolve a small amount in hot water.
  • 2 pounds russet potatoes

    • Tip: Russets make creamy, fluffy mashed potatoes. Cut to even chunks so they cook evenly.
  • 1/2 cup heavy cream

    • Tip: Warm the cream slightly before adding to the potatoes for a silkier mash and to avoid cooling them down.
  • 2 tablespoons brown sugar

    • Tip: Brown sugar helps balance the balsamic and gives a sticky, caramelized finish. Use light or dark based on your taste.
  • 1 tablespoon balsamic vinegar

    • Tip: A good balsamic adds bright acidity to the sauce. Add it slowly and taste as the sauce reduces.

Each ingredient plays a clear role. The herbs season the meat, the butter enriches the sauce, and the potatoes create the cozy base. You can find most of these at any grocery store, and they keep well if you want to batch prep.

Directions

  1. Pat the chicken breasts dry with paper towels and season generously with salt and pepper on both sides. In a small bowl, combine minced garlic, chopped parsley, and thyme leaves. Rub this herb mixture all over the chicken breasts, pressing gently so it adheres to the meat. Let the chicken rest at room temperature for 10 minutes to allow the flavors to penetrate.

    • Encouragement: This short rest makes a big difference. Take a moment to breathe and set the table.
  2. Heat olive oil in a large skillet over medium-high heat until shimmering. Carefully place the chicken breasts in the pan and sear without moving them for 5-6 minutes until a deep golden-brown crust forms.

    • Encouragement: Let the pan do the work. A steady sear creates that beautiful color and flavor.
  3. Flip the chicken and cook for another 5-6 minutes. Add butter to the pan and baste the chicken with the melted butter and pan juices. Once the internal temperature reaches 165 degrees Fahrenheit, transfer chicken to a plate and tent with foil.

    • Encouragement: Use a quick-read thermometer. When it hits 165 degrees Fahrenheit, you know it is safe and juicy. Tenting helps the juices settle.
  4. In the same skillet with the remaining drippings, add brown sugar and balsamic vinegar. Stir continuously over medium heat until the sugar dissolves and begins to caramelize, about 2 minutes. Pour in chicken broth and scrape up any browned bits from the bottom of the pan. Bring to a simmer and cook for 5-7 minutes until the sauce reduces by half and becomes slightly syrupy. Taste and adjust seasoning with salt and pepper.

    • Encouragement: Scraping up the browned bits transforms the sauce. Keep an eye on the reduction so it does not get too thick.
  5. While the chicken cooks, peel and cut the potatoes into evenly sized chunks. Place them in a large pot and cover with cold salted water. Bring to a boil over high heat, then reduce to a simmer and cook for 15-20 minutes until the potatoes are fork-tender. Drain thoroughly and return the potatoes to the pot. Add butter and heavy cream, then mash until smooth and creamy. Season with salt and pepper to taste.

    • Encouragement: Taste the potatoes as you season them. A final little pinch of salt can brighten the whole dish.
  6. Spoon a generous portion of mashed potatoes onto each plate, creating a bed for the chicken. Place one chicken breast on top of the mashed potatoes. Drizzle the reduced pan sauce generously over the chicken and around the plate. Garnish with additional fresh herbs if desired. Serve immediately while hot, ensuring each guest gets plenty of that delicious sticky glaze.

    • Encouragement: Serve hot and smile. This meal brings comfort and cheers at the table.

Follow these steps and you will have tender chicken, a glossy sauce, and creamy potatoes in about 40 minutes total. The sauce is the finish that makes it feel special.

Serving

Garlic Herb Chicken

Serve family-style on a large platter or plate individually over mashed potatoes. Place the mashed potatoes on the platter first, then arrange the chicken breasts on top. Spoon the sauce over everything so the glaze pools around the potatoes.

For a weeknight, set the platter in the center of the table and let everyone help themselves. For a small gathering, plate individually and add a sprig of parsley for color.

Add a simple side of steamed green beans or a crisp salad to round the meal. Warm dinner rolls or crusty bread are perfect for soaking up extra sauce.

Storage

Keep leftovers in an airtight container in the refrigerator for up to 3 days. Store sauce in a separate container if possible. This makes reheating easier and prevents the potatoes from soaking up too much sauce.

To reheat the chicken, place it in a skillet over low heat with a splash of chicken broth. Cover and warm gently until heated through. This keeps the meat tender better than the microwave.

Reheat mashed potatoes in a pot with a splash of cream or milk over low heat. Stir often until warmed. If using the microwave, add a little cream and cover to retain moisture.

Freeze cooked chicken and sauce in a freezer-safe container for up to 2 months. Thaw overnight in the refrigerator before reheating.

Kitchen Notes

  • Use a heavy-bottomed skillet for even searing and easy deglazing.
  • If chicken breasts are thick, halve them horizontally for faster cooking.
  • Warm the plates in the oven for a few minutes to keep the meal hot a little longer.
  • Swap russets for Yukon Golds if you prefer a naturally creamier potato.
  • Make the sauce ahead and reheat gently to save time on busy nights.

Variations

  • For picky eaters: Leave the herbs out of half the chicken or serve the sauce on the side.
  • Low-carb option: Skip the mashed potatoes and serve over roasted cauliflower mash.
  • Creamy version: Stir a spoonful of cream into the pan sauce for a richer finish.
  • Herb swap: Use rosemary instead of thyme for a woodsy flavor.
  • Make it spicy: Add a pinch of red pepper flakes to the herb rub or sauce for heat.

These variations keep the core recipe intact while letting you adapt to tastes and diets. Small swaps can make a big difference in how the family receives the dish.

FAQ

Q: Can I use bone-in chicken?
A: Yes. Bone-in will take longer to cook. Allow extra time and check the temperature near the bone for 165 degrees Fahrenheit.

Q: How do I prevent the garlic from burning?
A: Keep garlic in the herb rub and add it to the pan at a lower heat if you want to cook it in oil. Burning occurs at high heat, so watch closely.

Q: Can I make the sauce without sugar?
A: Yes. Omit the brown sugar and add a touch more balsamic for acidity. The sauce will be less caramelized but still flavorful.

Q: Is there a gluten-free version?
A: Absolutely. All ingredients here are naturally gluten-free. Just verify your chicken broth if you buy commercial brands.

Q: How do I know when the sauce is done?
A: It should reduce until it lightly coats the back of a spoon and has a glossy, slightly syrupy texture.

Conclusion

I hope this Garlic Herb Chicken brings warmth to your table. It is simple enough for a busy weeknight and special enough for guests. The pan sauce and mashed potatoes make it feel like a full meal with minimal fuss.

If you want a quicker creamy take, I like this 15-minute creamy garlic herb chicken from My Life In An Apron for when time is tight. For another lovely version that uses a garlic herb butter sauce, see the recipe at Chisel & Fork for extra inspiration.

Thank you for cooking with me. Gather your people, set the table, and enjoy a warm meal made with care.

Garlic Herb Chicken

Prep Time 10 minutes
Cook Time 30 minutes
Total Time 40 minutes
Servings 4 servings
Calories 540
A cozy, easy weeknight meal featuring tender chicken breasts seared to perfection and served over creamy mashed potatoes with a sticky pan sauce.

Ingredients

For the Chicken

  • 4 pieces boneless skinless chicken breasts (If breasts are uneven, pound them to even thickness.)
  • 3 tablespoons olive oil (Use a good quality olive oil for flavor.)
  • 4 cloves garlic, minced (Mince fresh garlic or press it for more aroma.)
  • 2 tablespoons fresh parsley, chopped (Chop just before using for bright color.)
  • 1 tablespoon fresh thyme leaves (Fresh thyme gives a subtle earthy lift.)
  • 2 tablespoons butter (Add toward the end of searing for basting.)
  • 1 cup chicken broth (Use low-sodium broth for better control of salt.)

For the Mashed Potatoes

  • 2 pounds russet potatoes (Cut into even chunks to cook evenly.)
  • 1/2 cup heavy cream (Warm slightly before adding for a silkier mash.)
  • 2 tablespoons brown sugar (Helps balance the balsamic and gives a sticky finish.)
  • 1 tablespoon balsamic vinegar (Adds bright acidity to the sauce.)

Instructions 

Preparation

  • Pat the chicken breasts dry with paper towels and season with salt and pepper on both sides.
  • In a small bowl, combine minced garlic, chopped parsley, and thyme leaves. Rub this herb mixture all over the chicken breasts.
  • Let the chicken rest at room temperature for 10 minutes.

Cooking the Chicken

  • Heat olive oil in a large skillet over medium-high heat until shimmering.
  • Place the chicken breasts in the pan and sear for 5-6 minutes until golden brown.
  • Flip and cook for another 5-6 minutes. Add butter and baste the chicken.
  • Check internal temperature; once it reaches 165°F, transfer to a plate and tent with foil.

Making the Sauce

  • In the same skillet, add brown sugar and balsamic vinegar. Stir until the sugar dissolves.
  • Pour in chicken broth, scrape browned bits, and bring to a simmer. Cook for 5-7 minutes until slightly syrupy.

Preparing the Mashed Potatoes

  • Peel and cut the potatoes into chunks and boil in salted water for 15-20 minutes until fork-tender.
  • Drain and return potatoes to the pot. Add butter and heavy cream, then mash until smooth.
  • Season with salt and pepper to taste.

Serving

  • Spoon a generous portion of mashed potatoes onto each plate, place chicken on top, and drizzle with sauce.
  • Garnish with fresh herbs if desired and serve immediately.

Notes

Leftovers can be stored in the refrigerator for up to 3 days. Sauce can be stored separately for reheating.
Calories: 540kcal
Course: Dinner, Main Course
Cuisine: American
Keyword: Comfort Food, Easy weeknight meal, Family Dinner, Garlic Herb Chicken, One-skillet meal

Oven Baked Chicken Breast

I can already smell it. The warm, savory scent of roasted chicken fills the air and makes the kitchen feel like home. You hear the gentle tick of the oven timer and the soft clink of a baking sheet. That small chorus tells you dinner is coming together.

This oven baked chicken breast recipe is simple, reliable, and perfect for busy weeknights or lazy Sundays. I test this method often for my family. It is forgiving, fast, and keeps the meat juicy when you follow a few smart steps.

Why this works

Oven Baked Chicken Breast

This method focuses on even heat and straightforward seasoning. Baking at a steady temperature lets the chicken cook through gently. The olive oil helps the spices stick and promotes a light, golden crust.

I choose this technique when I want a meal that fits family life. It saves time, and you can cook a few breasts at once for lunches, salads, or tacos. It also leaves room for sides without babysitting the pan.

As a food blogger and home cook, I trust recipes that deliver consistent results. This one does. You get flavorful, moist chicken without fancy tools or long prep.

Process Overview

“This is where the magic happens—when the aroma fills the kitchen.”

The process is short. Prep, rub, bake, rest. Each step builds flavor and keeps the meat tender.

You can prep the seasoning ahead of time. That makes weeknight dinners feel calm and manageable. The oven does most of the work while you set the table or help with homework.

A quick rest after baking is important. It gives the juices a chance to settle back into the meat. That is the small act that makes a big difference.

Ingredients

  • 4 chicken breasts
    Lily tip: Choose even-sized breasts so they cook at the same rate. If one is much thicker, pound it gently to match the others.

  • 2 tablespoons olive oil
    Lily tip: Use a good quality olive oil for flavor and to help the seasonings adhere. You can substitute avocado oil if you prefer.

  • 1 teaspoon garlic powder
    Lily tip: Garlic powder gives steady flavor without burning like fresh garlic might. If you like fresh garlic, use one minced clove and reduce the powder to 1/2 teaspoon.

  • 1 teaspoon onion powder
    Lily tip: Onion powder adds roundness. It blends well with paprika and helps the chicken taste savory and balanced.

  • 1 teaspoon paprika
    Lily tip: Paprika gives color and a mild sweetness. Use smoked paprika for a subtle smoky note, or regular sweet paprika for a classic flavor.

  • Salt and pepper to taste
    Lily tip: Salt is essential for flavor. I recommend 1/2 to 3/4 teaspoon kosher salt per breast, adjusted to your taste. Freshly ground black pepper brightens the mix.

  • Fresh herbs (optional for garnish)
    Lily tip: Parsley, thyme, or chives add a fresh finish. Scatter them on right before serving to keep their color and aroma.

Each ingredient plays a role. Together they create a simple, family-friendly profile that kids and adults can enjoy.

Directions

  1. Preheat the oven to 400°F (200°C).
    You are setting the stage here. A hot oven gives a quick, even roast that keeps the chicken juicy inside.

  2. In a bowl, mix olive oil, garlic powder, onion powder, paprika, salt, and pepper.
    Take a moment to whisk everything together. The oil carries the spices evenly across the chicken and helps the crust form.

  3. Rub the seasoning mixture all over the chicken breasts.
    Be generous and feel free to rub under the thin edge for more flavor. A good rub makes every bite taste intentional.

  4. Place the chicken breasts on a baking sheet lined with parchment paper.
    Parchment keeps clean up quick and prevents sticking. Give the pieces space so heat circulates freely around each breast.

  5. Bake for 25-30 minutes, or until the chicken is cooked through and juices run clear.
    Use an instant-read thermometer if you can. The safe internal temperature is 165°F. If the breasts are very thin, check closer to 20 minutes.

  6. Let rest for a few minutes before slicing.
    Resting is key. It keeps the meat moist and locks those juices in. Five minutes can make a big difference.

  7. Garnish with fresh herbs if desired and serve.
    A little green on top makes the dish feel special. This is a great moment to call everyone to the table.

You will find each step easy to follow. If you have kids helping, this recipe is forgiving and teaches simple kitchen skills.

Serving

Oven Baked Chicken Breast

Serve this chicken family-style on a large platter so everyone can choose their portion. Slice the breasts into thin pieces for salads or serve whole for heartier plates.

H3 Family-style serving ideas

  • Weeknight platter: Add roasted carrots, steamed broccoli, and warm rolls. Let each person build their own plate.
  • Taco night: Slice the chicken and place it beside soft tortillas, shredded lettuce, and salsa. Kids love assembling their own tacos.
  • Salad upgrade: Slice chilled leftover chicken and toss with mixed greens, cherry tomatoes, and a lemon vinaigrette for quick lunches.
  • Grain bowl: Pair with cooked rice or quinoa, a scoop of hummus, and roasted vegetables for a balanced meal.

This chicken is flexible. It fits into lunches, quick dinners, and even packed school lunches. Keep a small container of the pan juices or a simple sauce on the side to brighten the meat.

Storage

Cool the chicken to room temperature for no more than two hours. Then refrigerate in an airtight container.

Store cooked chicken in the fridge for up to 4 days. For longer storage, freeze in a sealed freezer bag for up to 3 months. Label the bag with the date.

To reheat, slice the chicken and warm gently in a skillet with a splash of broth or water over medium heat. Cover for a minute to steam through. You can also reheat in the oven at 300°F for 10-15 minutes until warmed through.

If you are reheating in a microwave, add a damp paper towel over the slices to keep moisture. Heat in short intervals to avoid drying out the meat.

Leftover chicken is perfect for sandwiches, pasta, and salads. Think of it as a versatile ingredient that saves time on busy days.

Kitchen Notes

  • Use a meat thermometer. It takes the guesswork out of doneness and protects you from overcooking.
  • Pound uneven breasts to a uniform thickness for even cooking. Place the breast between plastic wrap and press gently with a pan.
  • Make the seasoning mix in a small jar. Store it in your spice rack for quick dinners.
  • Rest the meat under tented foil for 2 to 5 minutes to keep it warm without sweating.
  • Double the batch and freeze half for easy weeknight meals. Thaw overnight in the fridge before reheating.

These shortcuts keep the recipe fast and friendly for family life. Little changes add up to consistent results.

Variations

  • For picky eaters: Reduce the garlic and onion powder by half. Keep the paprika light and season gently with salt. Kids often prefer a milder profile.
  • For low-sodium diets: Use low-sodium salt and add fresh lemon juice or herbs for flavor instead of increasing salt.
  • For a Mediterranean twist: Add 1 teaspoon dried oregano and the zest of one lemon to the seasoning. Serve with a side of tzatziki and olives.
  • For a smoky flavor: Use 1/2 teaspoon smoked paprika and a pinch of cumin. Serve with roasted sweet potatoes.
  • For a gluten-free option: This recipe is naturally gluten-free when you use gluten-free spices and parchment.

Small tweaks let you adapt the chicken to different tastes and diets without losing the core technique.

FAQ

Q: Can I use bone-in chicken breasts?
A: Yes. Bone-in breasts take longer to cook. Increase bake time to about 35-40 minutes and check for an internal temperature of 165°F near the bone.

Q: How do I prevent dry chicken?
A: Do not overcook. Use a thermometer and remove the chicken at 165°F. Let it rest for a few minutes to redistribute juices before slicing.

Q: Can I marinate the chicken instead of using a dry rub?
A: Absolutely. A 30-minute to 2-hour marinade with olive oil, lemon, and herbs adds flavor. Pat the chicken dry before adding the dry seasoning for a nice crust.

Q: Is it okay to bake at a different temperature?
A: You can bake at 375°F for a slightly longer time, around 30-35 minutes. Lower heat is gentler but take care to monitor internal temperature.

Q: Can I prepare this ahead for a party?
A: Yes. Bake the chicken and slice it. Keep warm in a low oven at 200°F covered with foil, or serve at room temperature on a platter for a buffet. Offer sauces on the side.

Conclusion

I hope this oven baked chicken breast becomes one of your go-to recipes. It is simple, dependable, and kind to busy family schedules. Little habits like using a thermometer and letting the meat rest will reward you with moist, flavorful chicken every time.

For another trusted variation of a baked chicken breast recipe, I like the practical method shown by Oven Baked Chicken Breast – RecipeTin Eats. For additional tips on achieving juicy results and serving ideas, check out Baked Chicken Breast | Gimme Some Oven.

Thanks for cooking with me. I love hearing how your family enjoys this recipe, so come back and share your favorite twist.

Oven Baked Chicken Breast

Prep Time 10 minutes
Cook Time 30 minutes
Total Time 40 minutes
Servings 4 servings
Calories 250
A simple, reliable recipe for juicy oven-baked chicken breasts that is perfect for busy weeknights or lazy Sundays.

Ingredients

Main Ingredients

  • 4 pieces chicken breasts (Choose even-sized breasts so they cook at the same rate.)
  • 2 tablespoons olive oil (Use a good quality olive oil for flavor.)
  • 1 teaspoon garlic powder (Use fresh garlic if preferred; reduce garlic powder.)
  • 1 teaspoon onion powder (Adds roundness to the flavor.)
  • 1 teaspoon paprika (Use smoked paprika for a subtle smoky note.)
  • Salt and pepper to taste (1/2 to 3/4 teaspoon kosher salt per breast.)
  • Fresh herbs (optional for garnish) (Parsley, thyme, or chives add a fresh finish.)

Instructions 

Preparation

  • Preheat the oven to 400°F (200°C).
  • In a bowl, mix olive oil, garlic powder, onion powder, paprika, salt, and pepper.
  • Rub the seasoning mixture all over the chicken breasts.
  • Place the chicken breasts on a baking sheet lined with parchment paper.

Cooking

  • Bake for 25-30 minutes, or until the chicken is cooked through and juices run clear.
  • Let rest for a few minutes before slicing.
  • Garnish with fresh herbs if desired and serve.

Notes

Cool the chicken to room temperature for no more than two hours before refrigerating. Store cooked chicken in the fridge for up to 4 days or freeze for up to 3 months.
Calories: 250kcal
Course: Dinner, Main Course
Cuisine: American
Keyword: Easy Chicken Recipe, Family Dinner, Juicy Chicken Breast, Oven Baked Chicken, Weeknight Meal

Crock Pot Angel Chicken

The first thing you notice is the warm, savory smell that fills the kitchen. Pots gently hum on the counter and the slow cooker makes a soft, steady sound as it works. It feels like a cozy hug for your whole family.

This Crock Pot Angel Chicken recipe has that kind of magic. It is creamy, comforting, and simple enough to make on busy days. If you love easy family meals, you might also enjoy my Bang Bang chicken sliders for another quick crowd-pleaser: Bang Bang Chicken Sliders.

Why this works

Crock Pot Angel Chicken

This recipe shines because it asks for very little hands-on time. You combine a few pantry staples, then let low heat slowly turn simple chicken into tender, shreddable comfort food. The slow cooker does the heavy lifting while you handle homework, errands, or a quick afternoon nap.

It is family-friendly and forgiving. Kids tend to love the mild, creamy sauce and grown-ups love that it stretches to feed a crowd. If you want other easy weeknight chicken ideas that save time, check my air fryer recipe collection for inspiration: Air Fryer Chicken Recipes.

This dish is also great for busy schedules. You can prep in the morning, go about your day, and come home to a wholesome meal. It is a stay-at-home comfort that works for potlucks, busy weeknights, and lazy Sundays.

Process Overview

“This is where the magic happens—when the aroma fills the kitchen.”

I like to think of the slow cooker as a friendly helper in the kitchen. You mix your sauce, nestle the chicken inside, and let the warmth do the rest. The low, steady heat coaxes out flavor and keeps the meat tender.

While the chicken cooks, you can check a recipe like my crunchy mozzarella wraps for a quick side idea. They pair well when you want a little crunch alongside the creamy pasta: Crunchy Crispy Air Fryer Chicken Mozzarella Wraps.

When the house starts to smell like dinner, you know your family will gather soon. That moment, when everyone drifts to the kitchen, is one of my favorites. The slow cooker makes it easy to create those moments without stress.

Ingredients

  • 4 chicken breasts — Tip: Use boneless, skinless breasts for easy shredding. If you prefer dark meat, thighs stay juicier.
  • 1 can cream of chicken soup — Tip: Shake the can first and taste the sauce before serving. You can swap for a low-sodium version if salt is a concern.
  • 1 packet Italian dressing mix — Tip: This mix adds herbs and a mild tang. If you make your own mix, a pinch of oregano and garlic works well.
  • 1 cup chicken broth — Tip: Use low-sodium broth so you can control the salt. It helps thin the sauce and adds depth.
  • 8 ounces angel hair pasta — Tip: Angel hair cooks fast and soaks up the creamy sauce beautifully. Cook it al dente to avoid over-soft noodles.
  • 1 cup grated Parmesan cheese — Tip: Freshly grated gives the best flavor and melts smoothly into the sauce.
  • Salt and pepper to taste — Tip: Start light. You can always add more at the table.
  • Chopped parsley for garnish — Tip: Fresh parsley brightens the plate and adds a pretty finish.

A few of my personal touches: I like to buy a good-quality Parmesan and grate it fresh. When I use frozen chicken breasts from a busy week, I place them in the fridge to thaw overnight for even cooking. If you are in a rush, you can start with thawed chicken and cook on high for a shorter time.

Directions

  1. In a slow cooker, combine cream of chicken soup, Italian dressing mix, and chicken broth. Stir well.

    • Encouraging note: This is the easy base. A quick stir and it is ready.
  2. Add chicken breasts to the slow cooker and coat them with the sauce. Season with salt and pepper.

    • Encouraging note: Make sure the chicken sits partly in the sauce so it picks up flavor while it cooks.
  3. Cover and cook on low for 6-7 hours or on high for 3-4 hours until chicken is tender.

    • Encouraging note: The slow cooker does the work. Go enjoy your afternoon while it cooks.
  4. About 30 minutes before serving, cook the angel hair pasta according to package instructions.

    • Encouraging note: Freshly cooked pasta will be warm and ready when the chicken finishes.
  5. Once the chicken is done, shred it in the slow cooker and stir in Parmesan cheese.

    • Encouraging note: Shredding right in the cooker keeps the sauce silky and locks in moisture.
  6. Serve the creamy chicken mixture over the cooked angel hair pasta and garnish with chopped parsley.

    • Encouraging note: Scoop generous portions and let the family help themselves. This one is built for sharing.

If you want, add a simple side salad or some steamed veggies for color and texture. The sauce is rich, so something crisp pairs nicely. For more quick and comforting chicken recipes you can turn to during busy evenings, I recommend browsing my quick weeknight collection: Quick and Easy Chicken Recipes.

Serving

Crock Pot Angel Chicken

Serve this dish family-style right from the slow cooker or transfer the pasta to a large serving bowl and spoon the chicken and sauce over the top. Family-style service keeps things relaxed and lets everyone take their preferred portion size.

Place a small bowl of extra Parmesan and a bowl of chopped parsley on the table. Let each person season their serving to taste. Kids often like a lighter portion of sauce, while adults may scoop extra Parmesan.

For a cozy dinner, bring the slow cooker to the table on a heat-safe trivet. The steam and aroma make the meal feel special. If you are taking this to a potluck, keep the slow cooker on low so it stays warm and inviting. If you want a crunchy side, consider items from my air fryer collection to round out the meal: Air Fryer Chicken Recipes.

Storage

Leftovers refrigerate well for up to 3 days. Store the chicken and sauce in an airtight container and keep the pasta separately if possible. This prevents the pasta from soaking up too much sauce and getting mushy.

To reheat, gently warm the chicken and sauce in a saucepan over medium-low heat. Add a splash of chicken broth or milk if the sauce seems too thick. Heat until just warmed through, then serve over fresh pasta or gently reheated pasta.

For meal prep, freeze in portions without pasta for up to 3 months. Thaw overnight in the fridge, then reheat on the stove. Add fresh Parmesan and a handful of parsley when reheating for a bright finish.

Kitchen Notes

  • Shortcut: Use pre-grated Parmesan in a pinch, but freshly grated yields better flavor.
  • Time-saver: Prep sauce the night before and store it in the fridge. Add chicken to the cooker in the morning.
  • Tip: Rotisserie chicken can be used if you are short on time. Stir shredded rotisserie chicken into warmed sauce for a fast weeknight meal.
  • Make-ahead: Cook the chicken ahead of time, shred it, and store in sauce. Reheat and add fresh pasta when ready to serve.
  • Swap: Use cooked whole wheat or gluten-free pasta to fit dietary needs.

Variations

  • Picky eaters: Keep the sauce simple and mild. Serve pasta and chicken separately so picky eaters can choose.
  • Low-carb: Swap angel hair for spiralized zucchini or cauliflower pasta for a lighter option.
  • Dairy-free: Use a dairy-free cream soup substitute and a plant-based Parmesan alternative.
  • Herb-forward: Add a teaspoon of dried basil or a sprinkle of fresh thyme for more herb flavor.
  • Cheesy baked version: Transfer the cooked mixture to a baking dish, top with extra Parmesan, and bake at 375°F for 10 minutes for a lightly browned top.

FAQ

Q: Can I use frozen chicken breasts?
A: Yes. You can use frozen breasts, but cooking times may extend. For best results, thaw overnight in the fridge and follow the times above.

Q: Can I make this in an Instant Pot?
A: You can adapt the recipe for an Instant Pot by using the poultry setting or manual high pressure for about 12 minutes, then natural release. Add a little extra broth to prevent burning. I recommend shredding and stirring in the cheese after pressure cooking.

Q: Is angel hair the only pasta that works?
A: No. Angel hair is fast and light, but you can use spaghetti, linguine, or a short pasta like penne. Cook the pasta al dente so it holds up to the sauce.

Q: How do I keep the sauce from becoming too thin?
A: If the sauce seems thin at the end, remove the lid and cook on high for 15-20 minutes to reduce. Stir in extra Parmesan to thicken slightly.

Q: Can I double this recipe for a crowd?
A: Yes. Use a larger slow cooker or cook in two slow cookers. Keep the same ratios and check doneness at the lower end of the cooking time since more volume may need a bit longer.

Conclusion

I hope this Crock Pot Angel Chicken becomes one of your go-to family meals. It gives you warm flavor, hands-off cooking, and a dish that feels like home.

For a similar recipe you can compare technique and seasoning with another slow-cooker version at Crock Pot Angel Chicken – The Country Cook. If you want another easy slow cooker approach and a different set of tips, take a look at this classic version at Easy Crockpot Angel Chicken Recipe – Belle of the Kitchen.

Thanks for cooking with me. Feed your family with love and enjoy the simple joys around the table.

Crock Pot Angel Chicken

Prep Time 15 minutes
Cook Time 7 hours
Total Time 7 hours 15 minutes
Servings 6 servings
Calories 500
A creamy and comforting slow cooker chicken dish that is perfect for busy days and family dinners.

Ingredients

Main Ingredients

  • 4 pieces chicken breasts (Use boneless, skinless breasts for easy shredding.)
  • 1 can cream of chicken soup (Shake the can first and taste the sauce before serving.)
  • 1 packet Italian dressing mix (This mix adds herbs and a mild tang.)
  • 1 cup chicken broth (Use low-sodium broth to control salt.)
  • 8 ounces angel hair pasta (Cook it al dente to avoid over-soft noodles.)
  • 1 cup grated Parmesan cheese (Freshly grated gives the best flavor.)
  • to taste Salt and pepper (Start light; you can add more at the table.)
  • for garnish Chopped parsley (Fresh parsley brightens the plate.)

Instructions 

Preparation

  • In a slow cooker, combine cream of chicken soup, Italian dressing mix, and chicken broth. Stir well.
  • Add chicken breasts to the slow cooker and coat them with the sauce. Season with salt and pepper.
  • Cover and cook on low for 6-7 hours or on high for 3-4 hours until chicken is tender.
  • About 30 minutes before serving, cook the angel hair pasta according to package instructions.
  • Once the chicken is done, shred it in the slow cooker and stir in Parmesan cheese.
  • Serve the creamy chicken mixture over the cooked angel hair pasta and garnish with chopped parsley.

Notes

Leftovers refrigerate well for up to 3 days. Store chicken and sauce separately from the pasta to avoid mushiness. For meal prep, freeze portions without pasta for up to 3 months.
Calories: 500kcal
Course: Dinner, Main Course
Cuisine: American
Keyword: Comfort Food, Crock Pot Chicken, Easy Chicken Dinner, Family Meal, Slow Cooker Recipe

Marry Me Chicken

The rich smell of olive oil and garlic fills the kitchen as I prepare this delightful dish. You hear the soft sizzling of the chicken in the skillet, all while the thought of a cozy family dinner lingers in the air. This is Marry Me Chicken, a recipe so good that it might just be worth a proposal.

Why This Works

Marry Me Chicken

Marry Me Chicken is one of those meals that feels special yet comes together with ease. It’s perfect for busy weeknights when you want to serve your family something delicious without spending hours in the kitchen. The creamy sauce enveloping the chicken pairs beautifully with pasta or rice, making it a complete meal.

Not only is this a time-saver, but it also has that wow factor that can impress anyone at the dinner table. After all, who wouldn’t fall in love after tasting a dish this comforting?

Process Overview

“This is where the magic happens—when the aroma fills the kitchen.”

The process for making Marry Me Chicken is not just straightforward but also quite enjoyable. From searing the chicken to creating that luscious creamy sauce, each step brings warmth into your home. You will appreciate how quickly it all comes together, allowing you to enjoy more quality time with your loved ones.

Ingredients

  • 4 boneless, skinless chicken breasts
  • 2 tablespoons olive oil
  • Salt and pepper to taste
  • 1 teaspoon garlic powder
  • 1 tablespoon Italian seasoning
  • 1 cup heavy cream
  • 1 cup chicken broth
  • 1 cup diced tomatoes
  • 1 cup grated Parmesan cheese
  • Fresh parsley for garnish

Lily’s Personal Tips

  • Chicken Breasts: Choose organic if possible. You can also use chicken thighs for a different flavor.
  • Olive Oil: Extra virgin olive oil offers a richer taste.
  • Garlic Powder: Fresh garlic can be used but adjust the quantity to avoid overpowering the dish.
  • Parmesan Cheese: Grating it fresh gives the best texture and flavor.
  • Fresh Parsley: This does not only look pretty; it adds a fresh taste that balances the creaminess.

Directions

  1. Preheat your oven to 375°F (190°C).

    • Starting with a preheated oven ensures your chicken cooks evenly.
  2. Season the chicken breasts with salt, pepper, garlic powder, and Italian seasoning.

    • Make sure to rub the seasoning in well for the best flavor.
  3. In a large skillet, heat olive oil over medium-high heat. Add the chicken breasts and sear until golden brown, about 5 minutes on each side.

    • This will give your chicken a beautiful crust and lock in the juices.
  4. Remove the chicken from the skillet and set aside.

    • Letting it rest is key to keeping it moist.
  5. In the same skillet, add chicken broth, heavy cream, and diced tomatoes. Stir well and bring to a simmer.

    • You’ll want those flavors to meld together beautifully.
  6. Stir in the Parmesan cheese until melted.

    • This will create a creamy sauce that coats everything perfectly.
  7. Return the chicken to the skillet, spooning sauce over the top.

    • Make sure each piece is well coated; this is where the love really comes in.
  8. Transfer the skillet to the preheated oven and bake for 20-25 minutes until the chicken is cooked through.

    • Use a meat thermometer; the internal temperature should reach 165°F.
  9. Garnish with fresh parsley and serve over pasta or rice.

    • A sprinkle of parsley adds both color and taste; serve it up family-style for that heartwarming touch.

Serving

Marry Me Chicken

Marry Me Chicken is best served warm and family-style. Load it up over a bed of pasta or rice, and let everyone help themselves. Consider adding some steamed vegetables or a fresh salad on the side to complete your meal. Sharing this dish around the table creates a loving environment where every bite feels like a hug.

Storage

If you have leftovers (which is rare, trust me), you can store them in an airtight container in the fridge for up to four days. When ready to enjoy again, reheat gently on the stovetop or in the microwave, adding a splash of broth or cream to maintain the sauce’s richness.

Kitchen Notes

  • Use one skillet for everything to minimize clean-up.
  • Look for pre-cut chicken or ask your butcher for help to save time.
  • Make a double batch and freeze it for those nights you don’t want to cook.
  • Consider adding a splash of white wine to the sauce for extra flavor.
  • Keep your herbs fresh by storing them in water in the fridge.

Variations

Feel free to customize Marry Me Chicken according to your family’s tastes or dietary needs. Here are a few ideas:

  • Substitute almond milk for heavy cream for a lighter option.
  • Use dairy-free cheese alternatives if anyone is lactose intolerant.
  • For a spicy kick, add red pepper flakes to the sauce.
  • Toss in some chopped spinach or kale for added greens.
  • If you have picky eaters, slice the chicken into bite-sized pieces for easier eating.

FAQ

1. Can Marry Me Chicken be made in advance?
Yes, you can prepare the chicken and the sauce ahead. Just bake it when you are ready to serve.

2. Is it possible to use frozen chicken?
While fresh chicken works best, you can use frozen chicken; just ensure it is cooked through completely.

3. What can I serve with Marry Me Chicken?
Pasta, rice, or even a simple side salad pairs nicely with this dish.

4. How do I know when the chicken is fully cooked?
Use a meat thermometer; it should read 165°F.

5. Can I make this dish in a slow cooker?
Yes, you can adapt it for a slow cooker; just add everything and cook on low for 4-6 hours.

Conclusion

Thank you for joining me on this delightful cooking journey. Marry Me Chicken is truly a dish that brings families together around the table. With its wonderful flavors and simple preparation, it’s bound to become a favorite in your home. I hope you enjoy cooking and sharing this special meal with your loved ones. Until next time, happy cooking!

Marry Me Chicken

Prep Time 10 minutes
Cook Time 30 minutes
Total Time 40 minutes
Servings 4 servings
Calories 600
A delicious and creamy chicken dish that's perfect for family dinners, combining tender chicken with a flavorful sauce. A dish so good, it might just earn a proposal!

Ingredients

Main Ingredients

  • 4 pieces boneless, skinless chicken breasts (Choose organic if possible or substitute with chicken thighs.)
  • 2 tablespoons olive oil (Extra virgin olive oil offers a richer taste.)
  • 1 teaspoon garlic powder (Fresh garlic can be used but adjust the quantity.)
  • 1 tablespoon Italian seasoning (Adds flavor to the chicken.)
  • 1 cup heavy cream (For a creamy sauce.)
  • 1 cup chicken broth (Adds depth to the sauce.)
  • 1 cup diced tomatoes (Provide flavor and texture.)
  • 1 cup grated Parmesan cheese (Grating fresh gives the best texture and flavor.)
  • to taste salt and pepper (Used for seasoning.)
  • as needed fresh parsley for garnish (Adds a fresh taste and visual appeal.)

Instructions 

Preparation

  • Preheat your oven to 375°F (190°C).
  • Season the chicken breasts with salt, pepper, garlic powder, and Italian seasoning.
  • In a large skillet, heat olive oil over medium-high heat. Add the chicken breasts and sear until golden brown, about 5 minutes on each side.
  • Remove the chicken from the skillet and set aside.
  • In the same skillet, add chicken broth, heavy cream, and diced tomatoes. Stir well and bring to a simmer.
  • Stir in the Parmesan cheese until melted.
  • Return the chicken to the skillet, spooning sauce over the top.
  • Transfer the skillet to the preheated oven and bake for 20-25 minutes until the chicken is cooked through.
  • Garnish with fresh parsley and serve over pasta or rice.

Notes

Consider serving with steamed vegetables or a fresh salad. Store leftovers in an airtight container in the fridge for up to four days.
Calories: 600kcal
Course: Dinner, Main Course
Cuisine: American
Keyword: Chicken, Comfort Food, Creamy sauce, Family Dinner, Quick Meal

The Only Cajun Chicken Pasta My Kids Actually Eat

The kitchen is alive with the sounds of sizzling chicken and the warm, inviting aroma of garlic and spices. As the Cajun seasoning dances through the air, you can almost taste the bold flavors that await. Creamy Cajun chicken pasta is the perfect dish for family dinners, bringing everyone to the table with its rich and vibrant taste. This dish not only pleases the palate but also saves time for busy evenings, allowing you to whip up a restaurant-quality meal at home.

Why This Works

Creamy Cajun Chicken Pasta: A Bold, Flavor-Packed Dinner

Creamy Cajun chicken pasta is a fantastic choice for families looking for a quick, delicious meal that doesn’t skimp on flavor. With a few simple ingredients and straightforward steps, you can have a dinner that feels special without spending hours in the kitchen.

This recipe utilizes chicken breasts that are quick to cook and soak up all the delicious flavors. The creaminess of the sauce envelops the pasta, providing a comforting embrace that the whole family will appreciate. Plus, the vibrant Cajun spices add an exciting kick that keeps everyone coming back for more.

Process Overview

“This is where the magic happens—when the aroma fills the kitchen.”

The joy of cooking is in the process, and that’s especially true with this dish. You’ll start by perfectly seasoning and cooking the chicken. While it rests, the pasta will boil, and then we’ll create a creamy Cajun sauce that brings everything together beautifully. In no time, you’ll serve a meal that not only tastes great but also warms your heart.

Ingredients

Here’s what you need to create this delightful dish:

  • 2 boneless, skinless chicken breasts
  • Chicken breasts are quick to cook and absorb the Cajun seasoning well. You could also use thighs for more flavor.
  • 1 tablespoon olive oil
  • For cooking the chicken. Olive oil adds a mild flavor and helps sear the chicken evenly.
  • 1 tablespoon Cajun seasoning
  • This is the key to the dish’s bold flavor. You can either use store-bought Cajun seasoning or make your own blend.
  • Salt and pepper, to taste
  • Essential for seasoning the chicken and ensuring it has enough flavor.
  • 12 oz penne, fettuccine, or spaghetti
  • Any long or short pasta will work, but penne and fettuccine are great choices for creamy sauces.
  • Salt, for the pasta water
  • Seasoning the pasta water enhances the flavor of the pasta.
  • 2 tablespoons unsalted butter
  • The butter forms the base of the creamy sauce, adding richness and flavor.
  • 4 cloves garlic, minced
  • Fresh garlic brings aromatic depth to the sauce.
  • 1 tablespoon Cajun seasoning
  • Adding Cajun seasoning to the sauce intensifies the dish’s flavor profile.
  • 1 teaspoon smoked paprika
  • For a smoky flavor that complements the Cajun seasoning and adds depth to the sauce.
  • 1 cup heavy cream
  • The heavy cream makes the sauce velvety and rich, balancing the heat from the Cajun spices.
  • ½ cup chicken broth
  • Chicken broth adds a savory base to the sauce and helps thin it out slightly for a smoother texture.
  • ¼ cup grated Parmesan cheese
  • Parmesan adds a salty, umami depth to the sauce, making it extra flavorful.
  • Fresh parsley, chopped (optional)
  • For garnish and added freshness.
  • Red pepper flakes
  • For an extra kick of heat, sprinkle some red pepper flakes on top.
  • Fresh lemon juice
  • A squeeze of lemon just before serving will brighten the dish and balance the richness.
  • Sautéed vegetables (optional)
  • Add sautéed bell peppers, onions, spinach, or mushrooms for extra flavor and nutrition.
  • Shrimp (optional)
  • Substitute the chicken with shrimp for a seafood twist on this Cajun pasta.

Lily’s Tips:

  • For a milder flavor, reduce the Cajun seasoning or skip the red pepper flakes.
  • Don’t rush cooking the chicken. A good sear locks in the juices and flavor.
  • Feel free to adjust the amount of heavy cream for a lighter sauce.

Directions

First Step: Prepare the Chicken

Start by seasoning both sides of the chicken breasts with the Cajun seasoning, salt, and pepper. Heat the olive oil in a skillet over medium-high heat, and cook the chicken for about 5-7 minutes on each side, or until golden brown and fully cooked. The chicken should reach an internal temperature of 165°F. Once done, remove it from the skillet and let it rest. This will keep it juicy and flavorful.

Second Step: Cook the Pasta

In a large pot, bring water to a boil. Add a generous amount of salt, followed by your pasta of choice. Cook according to package instructions until al dente. Once cooked, reserve a cup of the pasta water, then drain the pasta and set it aside. The salty pasta will enhance the dish and act as a great base layer.

Third Step: Make the Cajun Cream Sauce

In the same skillet used for the chicken, melt the butter over medium heat. Add minced garlic and sauté until fragrant, about 30 seconds. Add another tablespoon of Cajun seasoning and smoked paprika, stirring to combine. Slowly pour in the heavy cream and chicken broth, stirring continuously until smooth. Let it simmer for about 2-3 minutes to thicken, then stir in the Parmesan cheese, allowing it to melt into the sauce.

Fourth Step: Combine the Pasta, Chicken, and Sauce

Slice the rested chicken and return it to the skillet with the sauce. Add the cooked pasta and toss everything together gently. If the sauce is too thick, you can add some reserved pasta water until you reach your desired consistency. Taste and adjust with more Cajun seasoning, salt, or pepper as needed. Don’t forget to sprinkle with fresh parsley before serving!

Serving

Creamy Cajun Chicken Pasta: A Bold, Flavor-Packed Dinner

For a warm family-style presentation, serve the creamy Cajun chicken pasta in a large bowl at the center of the table. This encourages everyone to dig in and enjoy together. Pair it with a fresh salad or garlic bread for a complete meal. Lastly, a squeeze of fresh lemon juice over the top just before serving brightens up all those bold flavors.

Storage

Leftovers can be stored in an airtight container in the fridge for up to three days. To reheat, gently warm the pasta on the stove over low heat, adding a splash of chicken broth or cream to prevent it from drying out. You can also microwave it in short intervals, stirring in between until heated through.

Kitchen Notes

  • Pre-cut your vegetables ahead of time to save on cooking time.
  • Use frozen shrimp for a quick protein option—just thaw and toss in during the last minutes of cooking.
  • Opt for a pasta pot with a built-in strainer for easy draining.
  • Make the sauce while the pasta cooks to speed up the process.
  • If you like spice, keep Cajun seasoning handy for sprinkling on top when serving.

Variations

  • Vegetarian: Swap chicken for sautéed mushrooms or add vegetables like zucchini and spinach for a hearty veggie option.
  • Gluten-Free: Substitute regular pasta with gluten-free alternatives.
  • Seafood Twist: Try shrimp or even crawfish for a delicious seafood version of the dish.
  • Cream-Free Version: For a lighter dish, replace the heavy cream with Greek yogurt or pureed cashews for a creamy consistency without the calories.
  • Picky Eaters: If someone in your family is hesitant about the spices, serve the pasta with a light, plain sauce on the side for them to mix in.

FAQ

1. Can I prepare this dish in advance?

Yes, you can prep the chicken and make the sauce ahead of time. Just store everything separately in the fridge and combine when ready to eat.

2. Is it possible to freeze the leftovers?

Yes, you can freeze the pasta in an airtight container, but the cream sauce may separate a bit upon thawing.

3. What other proteins can I use in this recipe?

Feel free to substitute the chicken with shrimp, sausage, or tofu for a vegetarian option.

4. Is there a vegetarian alternative to the heavy cream?

Yes, consider using coconut cream or a cashew cream for a dairy-free option.

5. How can I reduce the spiciness?

Use less Cajun seasoning or substitute it with a milder blend. You can also omit the red pepper flakes.

As you gather around the table to enjoy this creamy Cajun chicken pasta, remember that cooking is not just about the ingredients. It’s about the time spent together and the memories you create. Embrace the flavors, the laughter, and the joy of family meals. You’ve crafted something special, and that is worth celebrating. Happy cooking!

Creamy Cajun Chicken Pasta

Prep Time 15 minutes
Cook Time 20 minutes
Total Time 35 minutes
Servings 4 servings
Calories 500
A quick and delicious creamy Cajun chicken pasta that packs bold flavors for a comforting family meal.

Ingredients

For the Chicken

  • 2 pieces boneless, skinless chicken breasts (Chicken breasts are quick to cook and absorb the Cajun seasoning well.)
  • 1 tablespoon olive oil (For cooking the chicken.)
  • 1 tablespoon Cajun seasoning (This is the key to the dish’s bold flavor.)
  • to taste salt and pepper (Essential for seasoning the chicken.)

For the Pasta

  • 12 oz penne, fettuccine, or spaghetti (Any long or short pasta will work.)
  • to taste salt (For the pasta water.)

For the Cream Sauce

  • 2 tablespoons unsalted butter (The butter forms the base of the creamy sauce.)
  • 4 cloves garlic, minced (Fresh garlic brings aromatic depth.)
  • 1 tablespoon Cajun seasoning (Adding Cajun seasoning to the sauce intensifies flavor.)
  • 1 teaspoon smoked paprika (For a smoky flavor.)
  • 1 cup heavy cream (Makes the sauce velvety and rich.)
  • ½ cup chicken broth (Adds a savory base to the sauce.)
  • ¼ cup grated Parmesan cheese (Adds salty, umami depth.)
  • to taste red pepper flakes (For an extra kick of heat.)
  • juice of 1 lemon fresh lemon juice (Brightens the dish.)
  • Fresh parsley, chopped (optional) (For garnish.)

Instructions 

Preparation

  • Season both sides of the chicken breasts with Cajun seasoning, salt, and pepper.
  • Heat olive oil in a skillet over medium-high heat and cook the chicken for about 5-7 minutes on each side, or until golden brown and fully cooked.
  • Remove the chicken from the skillet and let it rest.

Cooking the Pasta

  • In a large pot, bring water to a boil and add a generous amount of salt.
  • Add the pasta and cook according to package instructions until al dente.
  • Reserve a cup of the pasta water, then drain the pasta and set aside.

Making the Cajun Cream Sauce

  • In the same skillet, melt butter over medium heat.
  • Add minced garlic and sauté until fragrant, about 30 seconds.
  • Add Cajun seasoning and smoked paprika, stirring to combine.
  • Slowly pour in heavy cream and chicken broth, stirring until smooth.
  • Let it simmer for 2-3 minutes to thicken, then stir in Parmesan cheese.

Combining Everything

  • Slice the rested chicken and return it to the skillet with the sauce.
  • Add the cooked pasta and toss everything together gently.
  • If the sauce is too thick, add reserved pasta water to reach desired consistency.
  • Taste and adjust with more Cajun seasoning, salt, or pepper as needed.
  • Sprinkle with fresh parsley before serving.

Notes

Leftovers can be stored in an airtight container in the fridge for up to three days. Reheat gently over low heat to prevent drying out.
Calories: 500kcal
Course: Dinner, Main Course
Cuisine: Cajun, Southern
Keyword: Comfort Food, Creamy Cajun chicken pasta, easy pasta, Family Dinner, Quick Meal