Category

30-Minute Chicken Dinners

Category

{image_template}

The kitchen smells like garlic and warm tomatoes. I hear the soft sizzle of chicken browning in the skillet and my kids calling from the hallway. That sound tells me we are close to a family meal everyone will love.

This Whole30 Marry Me Chicken recipe has become a weeknight favorite at my house. It’s simple, family-friendly, and the sauce is so silky that even picky eaters ask for seconds. If you want a comforting, Whole30-approved dinner that feels a little fancy without extra effort, you are in the right place. For more ideas with similar flavors, check out my Marry Me Chicken page which has tips I use at home.

Why this works

Whole30 Marry Me Chicken

This recipe hits the sweet spot between fast and impressive. The chicken cooks quickly, and the sauce comes together while the chicken rests. The whole process is designed to save time, which matters when you are juggling kids, homework, and everything else.

The coconut cream makes a rich, dairy-free base that feels indulgent. Sun-dried tomatoes and basil add bright, Mediterranean flavor. It’s a dish that feels special but is simple enough to make on a busy weeknight. If you love Mediterranean flavors, explore more from my Mediterranean recipes collection for other family favorites.

What your family will thank you for

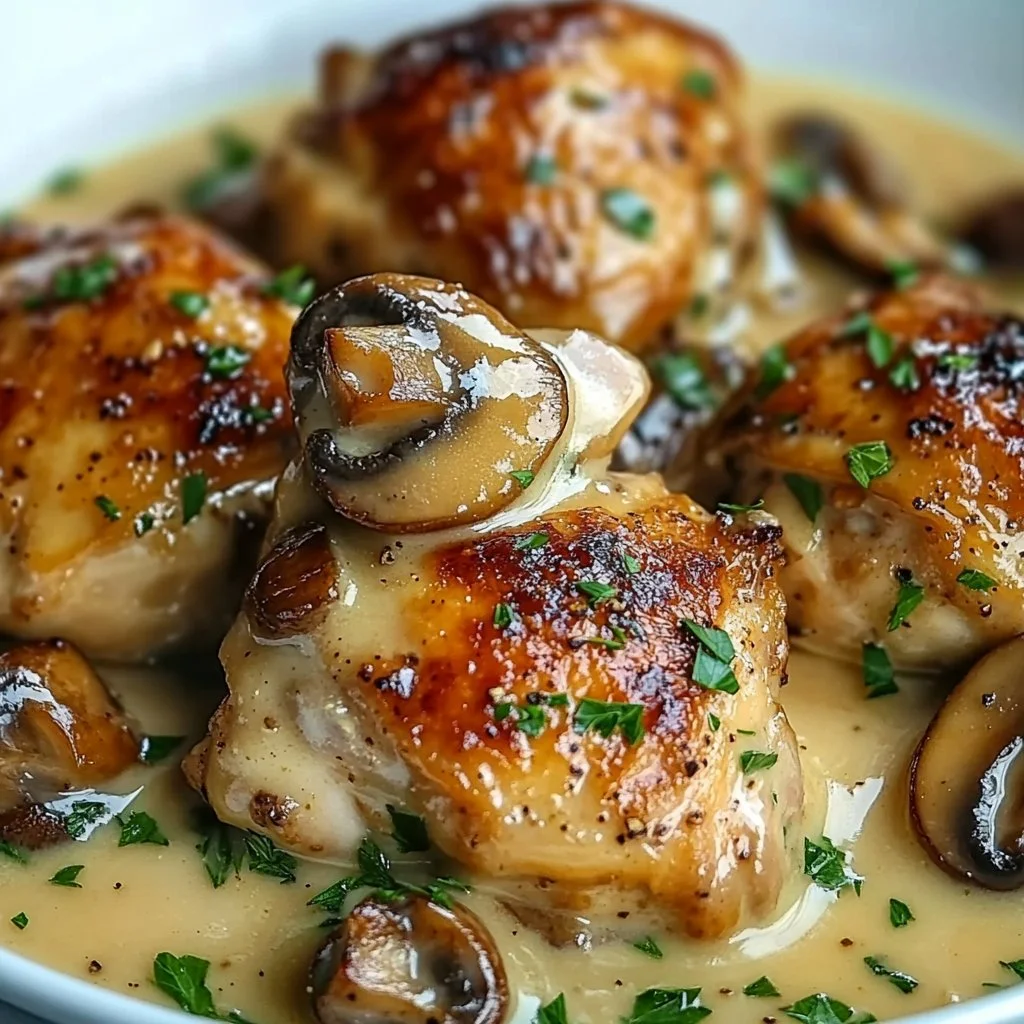
The sauce clings to each piece of chicken, so every bite tastes complete. You can serve this family style on the table and let everyone help themselves. Little hands and big appetites both get what they need. It’s a time-saver, a crowd-pleaser, and a keeper for your regular rotation.

Process Overview

“This is where the magic happens—when the aroma fills the kitchen.”

The technique is straightforward. Brown chicken, whisk a simple broth and arrowroot mix, melt in the coconut cream, and simmer until silky. While the chicken cooks, your sauce comes together in a few easy steps. If you like creamy garlic flavors, this method will feel familiar. I often borrow a trick from my creamy garlic parmesan chicken breast recipe and keep a small splash of broth ready to adjust the sauce consistency.

Ingredients

  • 2 tablespoons olive oil (or avocado oil)
    Lily’s tip: Use avocado oil if you prefer a neutral taste. I keep both oils on hand and reach for olive oil when I want a little extra flavor.

  • 1.5 pounds boneless skinless chicken breast (cut into 1" cubes)
    Lily’s tip: Cut the chicken into even cubes so they cook at the same rate. I pound larger breasts slightly before dicing to keep pieces uniform.

  • 2 teaspoons garlic salt (or salt, divided)
    Lily’s tip: Garlic salt gives an extra savory lift. If you use plain salt, add a pinch of garlic powder for the same effect.

  • 1/2 teaspoon black pepper
    Lily’s tip: Freshly cracked pepper adds brightness. Grind it just before cooking for the best flavor.

  • 1 tablespoon fresh minced garlic
    Lily’s tip: Fresh garlic truly makes a difference. Mince it finely so it disperses easily through the sauce.

  • 1 13.66 ounce can full-fat unsweetened canned coconut cream (chilled; solid part only)
    Lily’s tip: Chill the can overnight so the cream separates cleanly. Use only the solid white part for a rich, creamy sauce. I save the liquid in a jar for smoothies.

  • 1 cup chicken broth
    Lily’s tip: Use low-sodium broth so you can control the salt. Homemade broth works great and deepens the flavor.

  • 1/4 cup nutritional yeast
    Lily’s tip: Nutritional yeast adds a savory, slightly cheesy depth without dairy. Toast it briefly in the pan if you want a nuttier note.

  • 1 teaspoon dried oregano
    Lily’s tip: Oregano pairs perfectly with sun-dried tomatoes. If you have fresh oregano, use 1 tablespoon chopped.

  • 1-2 tablespoons arrowroot or potato starch
    Lily’s tip: Arrowroot gives the cleanest shine to the sauce. Start with 1 tablespoon and add more only if needed.

  • 1 8-ounce jar sun-dried tomatoes (drained, blotted dry, and chopped (about a 1/3 cup chopped))
    Lily’s tip: My boys do not like large chunks of these tomatoes, so I finely chop them. Blot all oil off well, or the final dish may become oily.

  • 0.5 ounces fresh basil (Optional but recommended)
    Lily’s tip: Fresh basil brightens the whole dish. Tear it with your hands and stir in at the end to keep the aroma fresh.

For more ideas that highlight garlic-forward chicken, see my best garlic chicken recipes collection.

Directions

  1. In a large skillet, heat the olive oil over medium heat.
    Encouraging note: Heat the oil until it shimmers. This prevents sticking and gives the chicken a lovely sear.

  2. Once the oil is hot, add the cubed chicken breasts and sprinkle with 1 teaspoon salt and 1/2 teaspoon pepper.
    Encouraging note: Spread the chicken in an even layer. Don’t crowd the pan or the pieces will steam instead of browning.

  3. Cook for about 5-7 minutes, or until they’re golden brown and cooked through.
    Encouraging note: Flip gently so the pieces brown on each side. Use a fork to check doneness. Your family will love the golden edges.

  4. Add the minced garlic for the last minute of cooking, cooking until just fragrant.
    Encouraging note: Garlic burns quickly. Stir it in at the end and smell how the kitchen fills with warmth. This is a moment that makes everyone gather.

  5. While the chicken is cooking, make the sauce. In a medium mixing bowl, whisk together the chicken broth, nutritional yeast, dried oregano, remaining 1 teaspoon salt, and only 1 tablespoon of the starch.
    Encouraging note: Whisk until smooth. This simple mix will thicken the sauce gently and add savory flavor.

  6. Drain, blot dry, and chop the sun-dried tomatoes. My boys don’t like large chunks of these tomatoes, so I finely chop them, but that’s up to you. But, be sure to blot the oil off well, or your final dish will be oily!
    Encouraging note: Take a minute to pat them dry. It makes the sauce silkier and keeps the flavor balanced.

  7. Once the chicken is cooked, add the sun-dried tomatoes to the pan. Stir to combine. Then, add ONLY the white solid part of the chilled coconut cream (set aside the opaque liquid, you won’t use it in this recipe – great for smoothies!). Mix until it has melted. Add the chicken broth mixture.
    Encouraging note: Add the coconut cream in pieces so it melts evenly. It will turn into a luxurious base for the sauce.

  8. Bring the sauce to a boil then simmer until thickened, about 5 minutes, or until it reaches your desired consistency. If sauce is not thick enough, combine 1 additional tablespoon starch with 1 additional tablespoon broth, whisking until smooth. If it is too thick, add a 1/4-1/2 cup additional chicken broth. Add to pan, stirring in immediately, and cooking until sauce thickens as desired.
    Encouraging note: Taste as you go and adjust. Thick, spoonable sauce is perfect for serving with veggies or cauliflower rice.

  9. Add additional salt to taste then serve your Marry Me Chicken with a side of your favorite veggies or over a bed of steamed cauliflower rice for a complete Whole30 dinner.
    Encouraging note: Finish with torn basil and a sprinkle of extra nutritional yeast if you like. Your family will notice the love in every bite.

If you want an even simpler hands-off option for busy days, I sometimes adapt the flavors into a slow cooker as I mention in my crockpot garlic parmesan chicken thighs post.

Serving

Whole30 Marry Me Chicken

Serve this Marry Me Chicken family-style in a shallow bowl or on a large platter. Garnish with torn basil and a few extra sun-dried tomato pieces for color. For a Whole30 plate, spoon it over steamed cauliflower rice and add a side of roasted broccoli or a big green salad.

If you are feeding kids, offer the sauce on the side so picky eaters can choose. My boys love the chicken plain, but the adults always pile on the sauce. Make a simple tray with veggies, rice, and bowls so everyone builds their own plate.

Storage

  • Fridge: Store leftover chicken and sauce in an airtight container for 3 to 4 days. Let it cool before sealing.
  • Reheat: Gently reheat on the stove over low heat with a splash of chicken broth to loosen the sauce. Microwave in 30 second bursts, stirring between intervals.
  • Freezer: You can freeze the cooked chicken and sauce for up to 3 months. Thaw overnight in the fridge and reheat slowly to maintain creaminess.
  • Tip: Add fresh basil after reheating. Herbs lose brightness with heat, so saving some for the end revives the dish.

Kitchen Notes

  • Use the reserved coconut water in smoothies or curries. It’s great for a morning protein smoothie.
  • If you want a smoother sauce, strain the sun-dried tomatoes before adding.
  • For more depth, sauté a small diced onion with the chicken for the first few minutes.
  • Arrowroot thickens best when mixed first with cold liquid. Never add it directly to hot sauce or it can clump.
  • Make a double batch of sauce and freeze half. It saves time on a busy weeknight.

Variations

  • For picky eaters: Leave the sun-dried tomatoes on the side. Some kids prefer the chicken plain with a side of sauce.
  • Lower sodium: Use low-sodium broth and reduce added salt to taste.
  • Paleo swap: Use avocado oil and arrowroot as instructed for a paleo-friendly outcome.
  • Extra veggies: Fold in baby spinach at the end until wilted for a green boost.
  • Protein swap: Try the same sauce with leftover roast chicken, turkey breast, or sautéed shrimp.

FAQ

Q: Can I use canned coconut milk instead of coconut cream?
A: You can, but use the thickest, full-fat canned coconut milk and chill it so the cream separates. Scoop only the solid part for the richest texture.

Q: My sauce is grainy after adding starch. What happened?
A: That usually means the starch was not mixed with cold liquid first. Whisk it into cold broth before adding or make a slurry with extra chicken broth.

Q: Can I make this dairy-free but not Whole30?
A: Yes. This recipe is naturally dairy-free. You can add grated Parmesan after cooking if you are not following Whole30.

Q: Will this work with chicken thighs?
A: Boneless thighs work beautifully. They stay juicy and may need a minute or two longer to brown.

Q: Is nutritional yeast necessary?
A: It adds savory complexity. If you do not have it, add a teaspoon of tomato paste or a splash of coconut aminos for extra umami.

Conclusion

Thank you for cooking along with me. I hope this Whole30 Marry Me Chicken becomes a cozy, reliable meal in your home the way it has in mine. If you want to compare variations or the original inspiration, see Whole Food For 7’s Whole30 Marry Me Chicken recipe and this carefully tested version at 40 Aprons Whole30 Marry Me Chicken (Paleo, Dairy Free). Happy cooking, and enjoy that wonderful kitchen scent when the sauce comes together.

Whole30 Marry Me Chicken

Prep Time 10 minutes
Cook Time 20 minutes
Total Time 30 minutes
Servings 4 servings
Calories 480
This Whole30 Marry Me Chicken recipe is a simple, family-friendly dish featuring succulent chicken in a rich, tomato-based sauce infused with garlic and coconut cream.

Ingredients

Main Ingredients

  • 2 tablespoons olive oil (or avocado oil) (Use avocado oil for a neutral taste.)
  • 1.5 pounds boneless skinless chicken breast (cut into 1" cubes) (Cut chicken into even cubes for uniform cooking.)
  • 2 teaspoons garlic salt (or salt, divided) (Garlic salt gives extra savory lift.)
  • 1/2 teaspoon black pepper (Use freshly cracked pepper for better flavor.)
  • 1 tablespoon fresh minced garlic (Mince finely for better flavor distribution.)
  • 1 can full-fat unsweetened canned coconut cream (chilled; solid part only) (Chill overnight for best results.)
  • 1 cup chicken broth (Preferably low-sodium broth.)
  • 1/4 cup nutritional yeast (Adds a savory, cheesy depth.)
  • 1 teaspoon dried oregano (Use fresh oregano if available.)
  • 1-2 tablespoons arrowroot or potato starch (Start with 1 tablespoon, adjust for thickness.)
  • 1 jar sun-dried tomatoes (drained, chopped) (Finely chop to avoid large chunks.)
  • 0.5 ounces fresh basil (Recommended for garnish.)

Instructions 

Cooking Chicken

  • In a large skillet, heat the olive oil over medium heat until it shimmers.
  • Add the cubed chicken breasts and sprinkle with 1 teaspoon salt and 1/2 teaspoon pepper.
  • Cook for about 5-7 minutes, or until golden brown and cooked through.
  • Add the minced garlic for the last minute of cooking, until just fragrant.

Making the Sauce

  • While the chicken is cooking, whisk together chicken broth, nutritional yeast, dried oregano, remaining salt, and 1 tablespoon of starch in a medium bowl.
  • Drain, blot dry, and chop the sun-dried tomatoes.
  • Once the chicken is cooked, add sun-dried tomatoes to the pan, then the white solid part of the chilled coconut cream, mixing until melted.
  • Add the chicken broth mixture and bring to a boil, then simmer until thickened, about 5 minutes.
  • Adjust the sauce thickness as needed with additional starch or broth.

Serving

  • Serve your Marry Me Chicken with a side of veggies or over steamed cauliflower rice.
  • Garnish with torn basil and a sprinkle of extra nutritional yeast if desired.

Notes

Store leftovers in an airtight container for 3-4 days. Reheat gently. You can freeze for up to 3 months.
Calories: 480kcal
Course: Dinner, Main Course
Cuisine: Mediterranean, Whole30
Keyword: Comfort Food, Family Meal, Healthy Dinner, Marry Me Chicken, Whole30 Chicken

{image_template}

The kitchen smells like warm pineapple and garlic. You hear the gentle sizzle of chicken hitting a hot skillet and the soft clink of a wooden spoon. Those sounds tell you dinner is taking shape and that something simple can feel special tonight.

This Pineapple Chicken and Rice recipe is one of those weeknight winners that makes the table feel cozy. It is bright, slightly sweet, and savory in a way that gets even picky eaters asking for seconds. If you like playful sweet and savory combinations, you might also enjoy my Pineapple Cowboy Candy Chicken Wings for another family-friendly twist.

Why this works

Pineapple Chicken and Rice

This dish balances tender chicken, juicy pineapple, and fluffy rice for a whole meal in one skillet. The flavors are simple but layered. The pineapple adds bright acidity that cuts through the richness of the chicken and rice.

It is designed for busy families. With cooked rice already on hand, you can pull dinner together in about 20 minutes. That time-saving approach means less busyness and more moments around the table.

The technique is forgiving. Browning the chicken builds flavor, sautéing the vegetables softens them just enough, and stirring everything together lets the flavors marry. If you enjoy hearty comfort meals with fresh notes, try pairing this with my tangy Greek Chicken and Lemon Rice for another quick family meal.

Process Overview

“This is where the magic happens—when the aroma fills the kitchen.”

In plain steps, you brown the chicken, sauté the vegetables, add pineapple and soy sauce, then fold in cooked rice. The goal is a warm, cohesive dish where each bite gives you chicken, rice, and pineapple.

This approach is flexible. If you want a crispier texture, finish under a broiler for a minute. If you want more sauce, add a splash of chicken broth or more soy sauce. For a milder version for kids, reduce the soy sauce and offer extra sauce at the table.

I find small adjustments make a big difference. For a richer finish, toss in a knob of butter at the end. For a fresher finish, top with scallions and a squeeze of lime.

Ingredients

  • 1 pound chicken breast, cubed
    • Tip: Use breasts for lean meat that cooks quickly. Pound slightly for even pieces.
  • 1 cup pineapple chunks
    • Tip: Fresh pineapple adds brightness but canned works fine. Drain canned well to avoid thinning the sauce.
  • 2 cups cooked rice
    • Tip: Day-old rice holds up best. If using fresh, spread it on a tray to cool slightly.
  • 1 bell pepper, diced
    • Tip: Any color works. Red or yellow adds sweetness that kids usually like.
  • 1 onion, diced
    • Tip: Yellow onion gives a nice balance. Soften it well to bring out natural sweetness.
  • 2 cloves garlic, minced
    • Tip: Fresh garlic beats jarred. Add toward the end of sautéing so it does not burn.
  • 2 tablespoons soy sauce
    • Tip: Use low-sodium if you watch salt. You can add more to taste at the table.
  • 1 tablespoon olive oil
    • Tip: Olive oil works for flavor. Use a neutral oil if you plan to cook at higher heat.
  • Salt and pepper to taste
    • Tip: Add salt sparingly if your soy sauce is high in sodium.
  • Optional: green onions for garnish
    • Tip: Slice thinly and sprinkle at the end for color and a fresh bite.

These pantry-friendly items make it easy to cook without a long shopping list. If you want a bit more depth, a splash of rice vinegar or a teaspoon of brown sugar can round the flavors.

Directions

  1. In a large skillet, heat olive oil over medium heat. Add the chicken and cook until browned.

    • Encouragement: Aim for a light golden color. Browning gives you flavor, so be patient and resist crowding the pan.
  2. Add onion, bell pepper, and garlic to the skillet, sautéing until the vegetables are tender.

    • Encouragement: Stir often and enjoy how the kitchen fills with aroma. Tender vegetables add softness to the dish.
  3. Stir in the pineapple chunks and soy sauce.

    • Encouragement: The pineapple will warm and release juice. Let it mingle with the soy sauce for a bright, savory note.
  4. Mix in the cooked rice, combining everything well.

    • Encouragement: Break up any rice clumps gently with your spoon. Make sure each scoop has a mix of chicken, pineapple, and veggies.
  5. Season with salt and pepper to taste.

    • Encouragement: Taste a small spoonful and adjust. Salt can bring out the sweetness of the pineapple.
  6. Cook for an additional 5 minutes, allowing the flavors to meld.

    • Encouragement: Low and steady heat helps flavors marry. If the mixture seems dry, add a splash of chicken broth or water.
  7. Serve hot, garnished with green onions if desired.

    • Encouragement: Let it sit for a minute so the flavors settle. Scoop into bowls and watch smiles at the table.

If you like fuller sauces, add a tablespoon of cornstarch mixed with two tablespoons of water while the mixture simmers. Stir until slightly thickened for a glossy finish.

While you cook, remember that family meals do not need perfect plating. The goal is to feed people you love and make the night feel a little gentler. For another cozy option that fills bowls with comfort, I often turn to my Delicious Homemade Chicken and Dumplings when I need extra comfort.

Serving

Pineapple Chicken and Rice

Serve this Pineapple Chicken and Rice family-style in a large shallow bowl or straight from the skillet. It keeps things casual and invites everyone to help themselves. The warm rice holds the juices, so it is easy to scoop.

Add garnishes at the table. Chopped green onions, a wedge of lime, or a few sesame seeds are all welcome. If your family likes a little heat, pass around crushed red pepper or Sriracha for those who want it.

For side dishes, a simple green salad or steamed broccoli brings balance. If you want a tropical twist, serve with a side of sliced mango or a crisp cabbage slaw. This meal pairs well with light-bodied white wine or a sparkling water with lime for the kids.

If you serve buffet-style, keep a small ladle for the sauce so guests can add extra. For leftovers, portion into bowls and let everyone pick their favorite add-ins from those you set out.

Storage

Store leftovers in an airtight container in the fridge for up to 3 days. Cool the dish to room temperature before refrigerating to keep the rice from becoming too soggy.

Reheat gently on the stovetop over medium-low heat with a splash of water or chicken broth to bring back moisture. Alternatively, microwave single portions covered for about 1 to 2 minutes, stirring halfway through.

If you plan to freeze, let the dish cool completely and freeze in portioned containers. Freeze for up to 2 months. Thaw overnight in the fridge before reheating. Reheated pineapple can lose some texture, so consider adding a handful of fresh pineapple after reheating to brighten the dish.

To keep mealtime simple on busy days, I once stored extra rice and grilled chicken separately so reheats stay tender. If you want more make-ahead family meals, check out my French Onion Chicken Rice Bake for another plan-ahead option.

Kitchen Notes

  • Use day-old rice for the best texture. Fresh rice can clump and get mushy.
  • Cut chicken into even pieces so everything cooks at the same rate.
  • If you want more sauce, add 1/4 cup low-sodium chicken broth and simmer until reduced slightly.
  • Cook pineapple briefly so it warms without becoming mushy.
  • Taste as you go. Adjust soy sauce and salt at the end to avoid over-salting.

These little shortcuts help you keep dinner stress-free. When nights get busy, they make the difference between a frantic meal and a calm family dinner.

Variations

  • For picky eaters: Omit the bell pepper and finely chop extra onion. Serve pineapple on the side for those who want it.
  • For gluten-free diets: Use tamari or a certified gluten-free soy sauce.
  • For low-sodium: Use low-sodium soy sauce and add salt sparingly at the end.
  • For extra veggies: Stir in peas, shredded carrots, or chopped spinach during the last few minutes of cooking.
  • For more protein: Add a beaten egg at the end and stir quickly for a fried rice effect.

Each variation keeps the spirit of the recipe but tailors it to your table. If your family prefers a leafy boost, try my Hearty and Flavorful Chicken and Spinach recipes for other ways to add greens.

FAQ

Q: Can I use ground chicken instead of cubed breast?
A: Yes. Brown ground chicken and drain any excess fat before adding vegetables. It will change the texture but keep the flavor.

Q: Is canned pineapple okay?
A: Absolutely. Drain canned pineapple chunks well to avoid watering down the dish.

Q: Can I make this spicy?
A: Yes. Add sliced jalapeño while sautéing the vegetables or finish with chili flakes at the table.

Q: How do I keep the chicken juicy?
A: Do not overcook the chicken. Remove the pan from heat once the pieces are cooked through and allow residual heat to finish gently while you mix everything.

Q: What rice works best?
A: Long grain white rice or jasmine gives a light texture. Short-grain rice can be stickier but still works if you prefer it.

Conclusion

If you want a similar pineapple fried rice inspiration, I often look to dependable ideas like Easy Pineapple Chicken Fried Rice from Dude That Cookz for a different take on flavors and technique. For a version with more layers and seasonings, consider the Pineapple Fried Rice with Chicken at The Endless Meal to spark new family favorites.

Thank you for spending time here in my kitchen. I hope this Pineapple Chicken and Rice becomes one of those trusted recipes you turn to when you want feeding your family to feel easy and loving.

Pineapple Chicken and Rice

Prep Time 10 minutes
Cook Time 10 minutes
Total Time 20 minutes
Servings 4 servings
Calories 450
A bright, slightly sweet, and savory one-skillet meal that combines tender chicken, juicy pineapple, and fluffy rice, perfect for busy weeknights.

Ingredients

Main Ingredients

  • 1 pound chicken breast, cubed (Use breasts for lean meat that cooks quickly. Pound slightly for even pieces.)
  • 1 cup pineapple chunks (Fresh pineapple adds brightness but canned works fine. Drain canned well to avoid thinning the sauce.)
  • 2 cups cooked rice (Day-old rice holds up best. If using fresh, spread it on a tray to cool slightly.)
  • 1 bell pepper, diced (Any color works. Red or yellow adds sweetness that kids usually like.)
  • 1 onion, diced (Yellow onion gives a nice balance. Soften it well to bring out natural sweetness.)
  • 2 cloves garlic, minced (Fresh garlic beats jarred. Add toward the end of sautéing so it does not burn.)
  • 2 tablespoons soy sauce (Use low-sodium if you watch salt. You can add more to taste at the table.)
  • 1 tablespoon olive oil (Olive oil works for flavor. Use a neutral oil if you plan to cook at higher heat.)
  • to taste salt and pepper (Add salt sparingly if your soy sauce is high in sodium.)
  • Optional: green onions for garnish (Slice thinly and sprinkle at the end for color and a fresh bite.)

Instructions 

Cooking

  • In a large skillet, heat olive oil over medium heat. Add the chicken and cook until browned.
  • Add onion, bell pepper, and garlic to the skillet, sautéing until the vegetables are tender.
  • Stir in the pineapple chunks and soy sauce.
  • Mix in the cooked rice, combining everything well.
  • Season with salt and pepper to taste.
  • Cook for an additional 5 minutes, allowing the flavors to meld.
  • Serve hot, garnished with green onions if desired.

Notes

For fuller sauces, add a tablespoon of cornstarch mixed with two tablespoons of water while the mixture simmers. Store leftovers in an airtight container in the fridge for up to 3 days.
Calories: 450kcal
Course: Dinner, Main Course
Cuisine: American, Asian
Keyword: Comfort Food, Family Meal, One-skillet meal, Pineapple Chicken, Weeknight Dinner

Chi-Chi's Baked Chicken Chimichangas

The smell of warm tortillas in the oven takes me right back to a busy kitchen filled with laughter and clinking bowls. You hear the soft sizzle when the filling hits a warm skillet. You smell spices and melted cheese blending into something comforting.

These Chi-Chi’s style baked chicken chimichangas are one of those family meals that feels like a hug on a plate. They are easy to assemble, forgiving if you are short on time, and they feed a crowd without fuss. My kitchen often smells like this on Sunday afternoons. The kids help roll the tortillas, and someone always claims the crispy corner pieces.

I want to show you how to make a reliable, family-friendly version that saves time without sacrificing flavor. I have tested this recipe many times. I will share tips from my own kitchen to help you get it right the first time.

Why this works

Chi-Chi's Baked Chicken Chimichangas

This recipe is built for busy families. Using cooked shredded chicken and refried beans gives you instant protein with minimal prep. The filling holds together well, so rolling is simple. Baking instead of frying saves hands-on time and makes cleanup easier.

The spices are gentle and kid friendly. You can boost the heat at the table. Baking makes the chimichangas crisp and golden without standing over a pan of oil. That means you can chat with family, set the table, or get a quick salad ready.

These chimichangas reheat beautifully. They travel to potlucks and work well as leftovers. If you want a dinner that stretches across meals and keeps everyone happy, this is a reliable choice.

Process Overview

“This is where the magic happens—when the aroma fills the kitchen.”

I like to think of the process in three clear stages. First, prepare the filling. Second, assemble the chimichangas. Third, bake until golden and serve warm.

I keep a simple workflow. Lay out the tortillas, scoop the filling, fold, and place on a lined pan. A light brush of oil is all you need for a golden finish. The oven does the heavy lifting.

Now let us look at the ingredients and a few personal tips to help you personalize this dish.

Ingredients

  • 2 cups cooked shredded chicken
    Tip: Use rotisserie chicken for a time-saver. If you have leftover roasted chicken, shred it with two forks for quick prep.

  • 1 cup refried beans
    Tip: Canned refried beans are fine. Warm them briefly so they mix easily with the chicken.

  • 1 cup shredded cheese (cheddar or Mexican blend)
    Tip: Freshly shredded cheese melts better than pre-shredded. Mix cheddar and Monterey Jack for creaminess.

  • 1/2 cup salsa
    Tip: Use a mild salsa for kids and a chunkier one for adults. If your salsa is watery, drain a little before mixing.

  • 1 teaspoon chili powder
    Tip: This adds gentle heat and color. Taste the filling and adjust to your family’s heat tolerance.

  • 1/2 teaspoon cumin
    Tip: Toast whole seeds briefly and grind for a brighter flavor if you have time.

  • 8 large flour tortillas
    Tip: Warm the tortillas for 15 seconds in the microwave wrapped in a damp towel. They will roll without tearing.

  • Cooking spray or oil for brushing
    Tip: Brushing with a little oil helps the tortillas crisp evenly. Use an oil with a neutral flavor.

  • Sour cream and guacamole for serving (optional)
    Tip: Keep toppings separate so everyone can customize their plate. Add a squeeze of lime to guacamole for fresh brightness.

These ingredients form a flexible template. I often double the chicken for larger families or add a handful of corn for texture. The amounts are forgiving and easy to scale.

Directions

  1. Preheat the oven to 375°F (190°C).
    Take a moment to line a baking sheet with parchment paper. This keeps cleanup simple and protects the bottom from sticking.

  2. In a large bowl, combine the shredded chicken, refried beans, cheese, salsa, chili powder, and cumin.
    Mix until the flavors blend. Taste a small spoonful and adjust the salsa or spices to your liking. You can do this while the oven heats.

  3. Place about 1/4 cup of the chicken mixture in the center of each tortilla.
    Keep the fills even so they cook uniformly. A small scoop works well if you want neater chimichangas.

  4. Fold the sides of the tortilla over the filling and roll it up tightly.
    Tuck the ends in as you roll to keep fillings secure. Don’t worry if they are not perfect. Practice makes faster rolls.

  5. Place the chimichangas seam-side down on a baking sheet lined with parchment paper.
    Give them a little space so air can circulate. This helps each one crisp up evenly.

  6. Lightly spray the tops with cooking spray or brush with oil.
    A light coat of oil promotes even browning. You will get a golden, crispy texture without deep frying.

  7. Bake in the preheated oven for 20-25 minutes, or until golden brown and crispy.
    Peek in around 20 minutes and rotate the sheet if your oven has hot spots. Let the tops reach a warm, deep color.

  8. Serve with sour cream and guacamole if desired.
    Place bowls of toppings at the table so everyone can pick their favorites. Enjoy the moment when the family digs in together.

Each step is designed to be calm and steady. The recipe does not demand precision on the level of baking breads, so you can relax and cook with confidence.

Serving

Chi-Chi's Baked Chicken Chimichangas

I serve these chimichangas family-style on a large platter. Arrange them so the golden sides show. Place bowls of sour cream, guacamole, extra salsa, and chopped cilantro around the platter.

A simple green salad or a quick slaw balances the meal with brightness. For kids, offer a small side of rice or tortilla chips. For adults, a wedge of lime or a drizzle of hot sauce lets them customize heat.

Let everyone assemble their plate. Kids love dipping and adding toppings. This makes dinner more interactive and helps picky eaters build a meal they will enjoy.

If you want a party display, cut chimichangas in half and fan them out. The cheese pull and colorful filling make a great presentation.

Storage

Leftovers keep well and reheat nicely.

  • Fridge: Store chimichangas in an airtight container for up to 3 days. Let them cool to room temperature before refrigerating to avoid sogginess.

  • Freezer: Wrap individually in foil or plastic wrap and place in a freezer bag for up to 2 months. Label with the date.

  • Reheat from fridge: Warm in a 350°F oven for 10 to 15 minutes until heated through and crisped. Using foil for the first few minutes prevents over-browning.

  • Reheat from frozen: Thaw overnight in the fridge if possible. Heat in a 375°F oven for 20 to 25 minutes from thawed, or 30 to 35 minutes from frozen, until hot inside and crisp outside.

Avoid microwaving if you want to keep the crisp texture. If you must use a microwave, zap briefly to warm then finish in a toaster oven or oven to regain crunch.

Kitchen Notes

  • Use rotisserie chicken to cut active prep time in half. It is my go-to shortcut on busy nights.
  • Warm tortillas briefly in the microwave or on a dry skillet to make rolling easy.
  • Line your baking sheet with parchment paper for an easy cleanup.
  • If you like extra crunch, brush with oil and sprinkle a little additional cheese before baking.
  • For meal prep, make the filling ahead and keep it chilled. Assemble just before baking for best texture.

These small tips save time and add consistency to the recipe. I use them every week.

Variations

  • For picky eaters: Hold back the salsa or use a mild version. Serve toppings separately so each person can add what they like.
  • Vegetarian option: Replace chicken with shredded roasted sweet potato or grilled peppers and onions. Add more beans and a little corn.
  • Lower-carb option: Use low-carb or whole wheat tortillas. You can also make a chimichanga bowl with all the filling over rice or greens.
  • Extra spice: Add chopped jalapeno, a pinch of cayenne, or a few dashes of hot sauce to the filling. Start small and add more to taste.
  • Cheesy bake: Fold in extra cheese into the filling and sprinkle on top before baking for a gooier finish.

These variations help this recipe adapt to many diets and preferences. The structure stays the same, and you can tweak flavors to suit your family.

FAQ

Q: Can I make these ahead of time?
A: Yes. Prepare the filling a day ahead and refrigerate. Roll the chimichangas and keep them covered in the fridge for up to one day. Brush with oil and bake when you are ready.

Q: Can I freeze chimichangas before baking?
A: Yes. Place rolled chimichangas on a tray to flash freeze for an hour, then transfer to a freezer bag. When ready to bake, add a few extra minutes to the baking time.

Q: How do I keep chimichangas from getting soggy?
A: Avoid overfilling and serve soon after baking. Warm tortillas before rolling and use parchment paper to promote crisping. Reheating in the oven restores crunch.

Q: Can I use corn tortillas?
A: Corn tortillas are more fragile and can crack when rolled. If you prefer corn, warm them gently and consider folding without rolling, or make a chimichanga-style casserole instead.

Q: Are these child-friendly?
A: Yes. The flavors are mild and you can control spice levels. Let kids choose toppings and help assemble to make dinner fun.

These answers reflect tests from my kitchen and common questions from family dinners. I aim to anticipate what you might wonder before you start cooking.

Conclusion

Thank you for cooking with me today. I hope this recipe becomes a weekday favorite in your home. If you love ideas for using leftovers, try this Baked Chicken Chimichangas (great leftover recipe!) for another take on a family classic. For a different perspective and more variations, I also like this trusted Baked Chicken Chimichangas Recipe – Allrecipes.

Happy baking and enjoy the laughter at your table. From my family to yours, Lily

Baked Chicken Chimichangas

Prep Time 15 minutes
Cook Time 25 minutes
Total Time 40 minutes
Servings 8 servings
Calories 300
A family-friendly baked version of the classic chimichangas, filled with shredded chicken, refried beans, and cheese, served with sour cream and guacamole.

Ingredients

Filling

  • 2 cups cooked shredded chicken (Use rotisserie chicken for a time-saver.)
  • 1 cup refried beans (Canned refried beans are fine. Warm them briefly.)
  • 1 cup shredded cheese (cheddar or Mexican blend) (Freshly shredded cheese melts better than pre-shredded.)
  • 1/2 cup salsa (Use a mild salsa for kids.)
  • 1 teaspoon chili powder (Adjust to your family’s heat tolerance.)
  • 1/2 teaspoon cumin (Toast whole seeds for brighter flavor.)

Wrap

  • 8 large flour tortillas (Warm briefly in the microwave wrapped in a damp towel.)
  • cooking spray or oil for brushing (Helps the tortillas crisp evenly.)

Serving Suggestions

  • to taste sour cream (Optional, for serving.)
  • to taste guacamole (Optional, for serving.)

Instructions 

Preparation

  • Preheat the oven to 375°F (190°C).
  • Line a baking sheet with parchment paper.
  • In a large bowl, combine the shredded chicken, refried beans, cheese, salsa, chili powder, and cumin. Mix well.

Assembly

  • Place about 1/4 cup of the chicken mixture in the center of each tortilla.
  • Fold the sides of the tortilla over the filling and roll it up tightly.
  • Place the chimichangas seam-side down on the baking sheet.

Baking

  • Lightly spray the tops with cooking spray or brush with oil.
  • Bake for 20-25 minutes, or until golden brown and crispy.
  • Serve with sour cream and guacamole if desired.

Notes

Store leftovers in an airtight container for up to 3 days. Reheat in the oven for best texture.
Calories: 300kcal
Course: Dinner, Main Course
Cuisine: Mexican
Keyword: baked chicken chimichangas, Chimichangas, Easy Dinner, Family Recipe

Green Chile Pepper Jack Chicken Enchiladas

I can still smell it when I walk into my kitchen. The warm, cheesy scent of pepper jack and green chiles makes everyone slow down and follow their nose. Pots clink. A wooden spoon taps the side of a bowl. That small noise tells me dinner is close and the house will soon be full of happy chatter.

This recipe is one I turn to on busy weeknights and on lazy Sundays when the whole family gathers. The filling comes together fast, the oven does most of the work, and kids help roll the tortillas with big grins. If you like simple weeknight meals that feel homemade, start here and give this a try. For another easy crowd-pleaser I love to pair on game day, check out my Bang Bang Chicken Sliders recipe for inspiration.

Why this works

Green Chile Pepper Jack Chicken Enchiladas

These enchiladas balance flavor, speed, and comfort. The roasted chicken brings a mild backbone. The canned green chiles add a bright, gentle heat. Pepper jack cheese melts into creamy pockets that kids and grown-ups both love.

This is a time-saving dinner. You can use leftover rotisserie chicken or baked chicken breasts shredded in minutes. The filling mixes in one bowl and the oven finishes everything while you set the table. If you are short on time but want a meal that feels special, this is your friend.

If you are exploring more quick dinners with lots of personality, you might enjoy my picks from the air fryer chicken recipes collection. Those dishes use similar shortcuts for big flavor and small fuss.

Process Overview

“This is where the magic happens—when the aroma fills the kitchen.”

You will mix, roll, and bake. The oven melts the cheese, warms the tortillas, and brings the flavors together. It is a simple process, but timing helps. Warm tortillas stay pliable and cheeses melt evenly when the dish goes straight from prep to oven.

I like to set everything out in a small assembly line. Lay the tortillas, portion the filling, and keep sauce close. If you want even more quick dinners like this one, see my collection of quick and easy chicken recipes that follow the same simple logic.

Ingredients

These measurements serve about 4 people. Read my personal tips for each ingredient to make the dish your own.

  • 2 cups shredded cooked chicken
    Tip: Use rotisserie chicken to save time. I shred it with my hands for texture. Cold chicken shreds easier if you remove skin first.
  • 1 can diced green chiles
    Tip: Drain slightly if your chiles are very wet. The can adds flavor and small chunks of chile so you do not have to roast poblanos.
  • 1 cup pepper jack cheese, shredded
    Tip: Buy a block and shred it yourself. Freshly shredded cheese melts better and has more flavor than pre-shredded varieties.
  • 1 cup sour cream
    Tip: Full fat gives the creamiest texture, but you can use light if you prefer. Mix gently so it stays smooth.
  • 8 corn tortillas
    Tip: Warm them briefly to make rolling easier. If you prefer flour, swap them out, but corn gives the best traditional texture.
  • 1 cup enchilada sauce
    Tip: Use your favorite store-bought red or green sauce. I sometimes mix half red and half green for a mild tang.
  • 1/2 teaspoon cumin
    Tip: Toast it lightly in a dry pan for 20 seconds for a deeper aroma if you have time.
  • 1/2 teaspoon garlic powder
    Tip: This keeps things simple. Use 1 small clove of minced fresh garlic if you want a brighter garlic note.
  • Salt and pepper to taste
    Tip: Taste the mixture before filling the tortillas. Adjust slowly. Remember the sauce and cheese add salt.
  • Chopped cilantro for garnish
    Tip: Add cilantro last so its fresh flavor stays bright. If someone in your family does not like cilantro, reserve half for serving.

Useful tool note: I often prep the filling and keep it warm in a shallow bowl while I warm tortillas. If you like a crisp top, add a few extra minutes under the broiler at the end.

If you are curious about another cheesy wrap idea, I also use similar filling ideas for my Crunchy Crispy Air Fryer Chicken Mozzarella Wraps. The techniques crossover well between recipes.

Directions

  1. Preheat your oven to 350°F (175°C).
    Note: A fully heated oven gives even baking and melty cheese. Preheat for at least 10 minutes while you assemble.

  2. In a mixing bowl, combine shredded chicken, green chiles, 1/2 cup of pepper jack cheese, sour cream, cumin, garlic powder, salt, and pepper.
    Note: Mix gently so the cheese folds in without clumping. Taste a small spoonful to balance salt and spice. You are doing great.

  3. Warm the tortillas in a dry skillet or microwave until pliable.
    Note: Warm tortillas bend without cracking. I warm 4 at a time in the microwave wrapped in a damp paper towel for about 20 seconds. You will feel proud when they roll perfectly.

  4. Spoon the chicken mixture into each tortilla, roll them up, and place them seam-side down in a greased baking dish.
    Note: Use about 1/3 to 1/2 cup of filling per tortilla depending on size. Space them snugly so the sauce stays inside while they bake.

  5. Pour enchilada sauce over the rolled tortillas.
    Note: Cover them completely so the tortillas steam and the flavor sinks in. If your family prefers less sauce, pour a thinner layer and add extra at the table.

  6. Sprinkle the remaining pepper jack cheese on top.
    Note: A good even layer of cheese creates that bubbly, golden finish that kids love. If you want a crunchy contrast, add 1/4 cup of breadcrumbs mixed with a little butter.

  7. Bake for 20-25 minutes or until the cheese is bubbly and golden.
    Note: Keep an eye on the last 5 minutes. Ovens vary. When the cheese bubbles and gets lightly golden, it is time to pull it out.

  8. Garnish with chopped cilantro before serving.
    Note: Chop cilantro just before serving for the freshest flavor. Let the pan sit for 5 minutes to set slightly then serve family-style.

A final assembly tip: If you are preparing ahead, assemble in the dish, cover tightly, and refrigerate for up to 24 hours. Bake covered with foil for 25 minutes, then remove foil and bake until bubbly.

For an extra bit of comfort and speed, I sometimes warm the tortillas on a skillet and keep them wrapped in a clean towel while I fill each one. The process becomes calming and fun if you include kids in rolling.

Serving

Green Chile Pepper Jack Chicken Enchiladas

Serve these enchiladas family-style straight from the baking dish. Place a big scoop of sour cream, extra enchilada sauce, and a bowl of sliced avocados or guacamole nearby. A simple side salad with lime vinaigrette cuts through the richness.

Let everyone serve themself. I like to add a lime wedge and a handful of pickled onions. If you have picky eaters, keep extra shredded cheese in a small dish so they can add more on their plate.

If you are hosting, lay out tortillas, toppings, and a salad. Guests enjoy customizing a plate. This dish shines when shared.

Storage

Leftovers store well and often taste even better the next day.

  • Fridge: Store in an airtight container for up to 3 days. You can also keep the baking dish covered with foil or plastic wrap.
  • Reheat: Reheat individual portions in the microwave in 45 to 60 second bursts until warm. For a crisp top, bake at 350°F for 12 to 15 minutes.
  • Freezer: Freeze unbaked rolled enchiladas in a freezer-safe dish covered tightly for up to 2 months. Thaw overnight in the refrigerator before baking. You will want to add 5 to 10 minutes to baking time if partially frozen.

A note on texture: Cheese will firm up in the fridge. A splash of milk or extra sauce before reheating keeps them moist.

Kitchen Notes

  • Prep ahead: Shred chicken and make the filling a day ahead to cut evening time in half.
  • Tortilla trick: Drape warmed tortillas over the edges of a large bowl to keep them warm while you fill.
  • Make it cheesy: Use a mix of pepper jack and Monterey jack for milder creaminess.
  • Kid helper: Let children spoon filling and roll tortillas. It becomes a fun kitchen job for small hands.
  • Quick cleanup: Line the baking dish with parchment for easier washing.

If you like the ease of make-ahead dinners and short cleanups, these habits become part of your regular meal rhythm.

Variations

  • For picky eaters: Omit the green chiles or chop them extra fine so the heat is gentle. Use mild cheddar or Monterey jack instead of pepper jack.
  • For low-carb: Use large lettuce leaves or low-carb tortillas. Warm the leaves briefly before filling so they fold without tearing.
  • For vegetarian: Swap the chicken for roasted sweet potatoes and black beans. Add a pinch more cumin and a squeeze of lime.
  • For smoky flavor: Use a tablespoon of chipotle in adobo, finely chopped, and reduce the green chiles slightly.
  • For extra protein: Add drained black beans or drained and chopped roasted poblano for body and texture.

These tweaks let the dish fit many diets and tastes without changing the heart of the recipe.

FAQ

Q: Can I use flour tortillas instead of corn?
A: Yes. Flour tortillas are softer and easier to roll for some people. Corn gives a more traditional texture. Both work.

Q: Is this dish spicy?
A: It is mildly spicy thanks to the green chiles and pepper jack. You can reduce heat by using mild cheese or rinsing the canned chiles slightly.

Q: Can I make a dairy-free version?
A: You can use dairy-free sour cream and dairy-free cheese alternatives. Texture will vary, but flavors still sing with good seasoning.

Q: How many enchiladas does this recipe make?
A: With 8 corn tortillas and the ingredient amounts listed, you will make about 8 enchiladas, serving 3 to 4 people depending on appetite.

Q: Can I double the recipe for a crowd?
A: Yes. Use a larger baking dish or two dishes. Baking time may increase slightly if the dish becomes very deep. Keep an eye on the cheese.

Conclusion

I hope these Green Chile Pepper Jack Chicken Enchiladas become a cozy staple in your weeknight rotation. They are warm, forgiving, and easy to make ahead. When the oven opens and the scent fills the room, you will know the whole family will gather and enjoy the kind of dinner that makes memories.

If you want to see another version of this classic, I sometimes follow an old family variation found at Green Chile and Pepper Jack Cheese Chicken Enchiladas. For more inspiration and a slightly different take on the same flavors, check this detailed recipe as well at Green Chile and Pepper Jack Cheese Chicken Enchiladas.

From my kitchen to yours, happy cooking.

Green Chile Pepper Jack Chicken Enchiladas

Prep Time 15 minutes
Cook Time 25 minutes
Total Time 40 minutes
Servings 4 servings
Calories 350
A cozy and quick dinner recipe featuring shredded chicken, green chiles, and pepper jack cheese wrapped in corn tortillas, perfect for family gatherings or busy weeknights.

Ingredients

Enchilada Filling

  • 2 cups shredded cooked chicken (Use rotisserie chicken to save time.)
  • 1 can diced green chiles (Drain slightly if very wet.)
  • 1 cup pepper jack cheese, shredded (Shred it yourself for better melting.)
  • 1 cup sour cream (Full fat is creamiest; light can be used.)
  • 1 cup enchilada sauce (Use store-bought red or green sauce.)
  • 1/2 teaspoon cumin (Toast lightly for a deeper aroma.)
  • 1/2 teaspoon garlic powder (Can use fresh garlic if desired.)
  • Chopped cilantro for garnish (Add last for fresh flavor.)

Wraps

  • 8 pieces corn tortillas (Wrap in a damp paper towel to warm.)

Instructions 

Preparation

  • Preheat your oven to 350°F (175°C).
  • In a mixing bowl, combine shredded chicken, green chiles, 1/2 cup of pepper jack cheese, sour cream, cumin, garlic powder, salt, and pepper.
  • Warm the tortillas in a dry skillet or microwave until pliable.
  • Spoon the chicken mixture into each tortilla, roll them up, and place them seam-side down in a greased baking dish.
  • Pour enchilada sauce over the rolled tortillas, covering them completely.
  • Sprinkle the remaining pepper jack cheese on top.

Baking

  • Bake for 20-25 minutes or until the cheese is bubbly and golden.
  • Garnish with chopped cilantro before serving.

Notes

Leftovers store well in an airtight container for up to 3 days. To reheat, do so in the microwave or bake for a crispy top.
Calories: 350kcal
Course: Dinner, Main Course
Cuisine: Comfort Food, Mexican
Keyword: Chicken, Enchiladas, Green Chiles, Pepper Jack, Quick Dinner

Green Chicken Enchiladas

I can still hear the skillet sing as I shred the warm chicken. The scent of roasted garlic and tangy green salsa fills the kitchen and pulls everyone to the table. These green chicken enchiladas are one of those family recipes that feel like a hug on a busy weeknight.

If you love simple comfort food, this dish will become a staple. I sometimes pair it with lighter sides and sometimes serve it with a simple salad. If you want another cozy chicken idea for a weeknight, try my Bang Bang Chicken Sliders recipe for a change of pace.

Why this works

Green Chicken Enchiladas

Green chicken enchiladas hit the sweet spot between quick prep and big flavor. The filling is forgiving. You can use leftover roast chicken, a rotisserie bird, or quickly poach breasts and shred them by hand.

These enchiladas save time because you can build them ahead and bake when you are ready. That makes them perfect for a busy family dinner. They also adapt well for picky eaters. If your kids prefer milder flavors, use a milder green salsa. If you want a smoky kick, mix in some roasted poblanos.

For a week when I need extra help in the kitchen, I reach for my collection of air fryer chicken recipes and pair something light on the side. The flexibility is why I keep this enchilada recipe on rotation.

Process Overview

“This is where the magic happens—when the aroma fills the kitchen.”

The process is simple and comforting. You will mix the shredded chicken with a few spices, warm your tortillas so they roll without cracking, fill and roll, then pour the green salsa over the tray and bake until bubbly.

A little advance work goes a long way. If you like, shred the chicken the night before or warm the tortillas ahead and store them wrapped in a kitchen towel. If you want more ideas for quick builds, check my quick easy chicken collection for other weeknight wins.

Ingredients

  • 2 cups cooked, shredded chicken
    • Lily’s tip: Use rotisserie chicken for speed. If you poach chicken, reserve a cup of the poaching liquid to keep meat moist.
  • 8-10 corn tortillas
    • Lily’s tip: Warm tortillas on a hot skillet or microwave wrapped in a damp towel so they do not crack while rolling.
  • 2 cups green salsa
    • Lily’s tip: Choose a salsa verde you love. Fresh tomatillo-based salsa is bright and flavorful. A milder jarred salsa works well for kids.
  • 1 cup shredded cheese (cheddar or Monterey Jack)
    • Lily’s tip: Monterey Jack melts beautifully and stays creamy. Mix half cheddar for a deeper flavor.
  • 1/2 cup sour cream
    • Lily’s tip: Use full fat for best texture. You can thin it with a tablespoon of lime juice if you want a tangy finish.
  • 1/2 teaspoon cumin
    • Lily’s tip: Toast cumin in a dry skillet briefly for a warmer aroma before adding to the chicken mix.
  • 1/2 teaspoon garlic powder
    • Lily’s tip: If you prefer fresh garlic, use one small clove, minced, and sauté it with a touch of oil first.
  • Salt and pepper to taste
    • Lily’s tip: Season lightly, then taste a small spoonful of the chicken mixture. You can always add more salt after baking.
  • Chopped cilantro for garnish (optional)
    • Lily’s tip: Add cilantro just before serving. It brightens the dish and keeps the green color fresh.

If you like a little extra texture, add a few tablespoons of drained, canned corn or black beans to the chicken mix. For a creamier filling, fold in two tablespoons of the sour cream into the chicken mixture.

For another crunchy option that kids love, try pairing this meal with my crispy air fryer chicken mozzarella wraps as a snack or side.

Directions

  1. Preheat your oven to 350°F (175°C).

    • Encouraging note: Give yourself a moment to preheat while you tidy the counter. A warm oven makes everything come together more quickly.
  2. In a bowl, combine the shredded chicken, cumin, garlic powder, salt, and pepper.

    • Encouraging note: Mix gently. Taste a tiny pinch and adjust seasoning so the filling sings but does not overpower the salsa.
  3. Warm the tortillas in a dry skillet or microwave until pliable.

    • Encouraging note: Warm tortillas make rolling easy and avoid cracks. Wrap them in a towel to stay warm while you fill.
  4. Spoon some of the chicken mixture onto each tortilla, roll them up, and place them seam-side down in a baking dish.

    • Encouraging note: Don’t worry about perfection. Place them snug so they support each other when baking.
  5. Pour green salsa over the enchiladas and sprinkle with shredded cheese.

    • Encouraging note: Use enough salsa to cover them well so they stay moist. Add a little extra cheese if your family loves a golden top.
  6. Bake in the preheated oven for 20-25 minutes until the cheese is bubbly.

    • Encouraging note: Let the oven do the work. Your kitchen will smell amazing and your family will start setting the table.
  7. Serve with a dollop of sour cream and garnish with cilantro if desired.

    • Encouraging note: A final spoon of sour cream cools the heat and rounds the flavors. Let everyone add cilantro or extra salsa to taste.

If you want to assemble these ahead, cover the dish with plastic wrap and refrigerate. Add about 5 extra minutes to the bake time if baking straight from chilled.

Serving

Green Chicken Enchiladas

Serve these enchiladas family-style, straight from the baking dish. Place the dish on the table with bowls of extras: sour cream, chopped cilantro, lime wedges, and maybe a little hot sauce for those who want a kick.

I like to add a crisp side salad or roasted vegetables to balance the meal. Warm, homemade corn tortillas or a simple rice pilaf make the meal feel complete. For casual nights, serve directly from the oven and let everyone help themselves.

If you are serving small children, plate a half enchilada and offer some plain rice or steamed veggies on the side. For grown-ups, top with extra cheese and a squeeze of lime.

Storage

  • Fridge: Store leftover enchiladas in an airtight container for up to 3 days. Cool to room temperature before refrigerating.
  • Reheat: Reheat single portions in the microwave for 1-2 minutes, or in a 350°F oven for 10-12 minutes until warmed through and bubbly.
  • Freeze: To freeze, place uncovered enchiladas on a tray and freeze until firm. Transfer to a freezer-safe container and reheat from frozen at 375°F for 25-30 minutes, covering loosely with foil to prevent over-browning.
  • Tip: If you plan to freeze, under-bake by 5 minutes first, then finish baking after thawing or reheating. This keeps textures fresher.

A small spoon of sour cream or a sprinkle of fresh cilantro after reheating brightens the dish again.

Kitchen Notes

  • Use rotisserie chicken to save time and add deep flavor.
  • Warm tortillas wrapped in a towel to keep them flexible while you fill.
  • Mix half Monterey Jack and half cheddar for great melt and flavor.
  • Assemble in the morning and bake in the evening for an easy dinner.
  • Double the recipe and freeze a tray for a no-stress future meal.

These shortcuts help make weeknight dinners feel doable and delicious. They save time without losing the home-cooked touch.

Variations

  • For picky eaters: Use mild green salsa and reduce cumin. Serve sauce on the side and let each person spoon on what they like.
  • For a low-carb option: Use large flour tortillas or lettuce wraps and skip the rice side. You can also make a casserole without tortillas by layering chicken and salsa, then baking with cheese.
  • For a vegetarian version: Replace chicken with seasoned, roasted cauliflower or sautéed mushrooms and black beans.
  • For a spicy twist: Stir in chopped roasted jalapeño or use a spicy green salsa. Add a pinch of smoked paprika for depth.
  • For extra creaminess: Mix a half cup of cream cheese or full-fat Greek yogurt into the chicken filling before rolling.

These variations let you match the meal to your family’s tastes and dietary needs.

FAQ

Q: Can I use flour tortillas instead of corn?
A: Yes. Flour tortillas will be softer and easier to roll. Corn offers more authentic texture and holds fillings well if warmed properly.

Q: How can I prevent soggy enchiladas?
A: Do not over-sauce. Use enough salsa to coat, but avoid pooling. Slightly warm your salsa to prevent chilling the tortillas and making them soggy.

Q: Can I make this ahead for a party?
A: Absolutely. Assemble the enchiladas, cover, and refrigerate. Bake 25-30 minutes before serving. For a crowd, double the recipe and use two baking dishes.

Q: Is there a dairy-free option?
A: Yes. Omit the cheese and use a dairy-free sour cream substitute. Nutritional yeast can add a cheesy flavor if you want a similar taste.

Q: What sides go best with these enchiladas?
A: A crisp green salad, roasted vegetables, or simple cilantro lime rice pair beautifully. For a crunchy side, serve tortilla chips and fresh salsa.

Conclusion

I hope these green chicken enchiladas become a trusted dinner in your home. They are simple, comforting, and flexible enough for busy nights and special dinners alike.

For inspiration on similar flavors and to see another take on salsa verde enchiladas, I like the Inspired Taste green chicken enchiladas recipe which shows classic technique and tweaks. If you want a version with an easy homemade green chile sauce, check out Christina’s Cucina green chicken enchiladas with easy green chile sauce for more ideas.

Thanks for cooking with me. Gather around the table, pass the dish, and enjoy the simple joy of a meal made with love.

Green Chicken Enchiladas

Prep Time 30 minutes
Cook Time 25 minutes
Total Time 55 minutes
Servings 6 servings
Calories 360
These comforting green chicken enchiladas are quick to prepare and packed with flavor, making them a perfect choice for busy weeknight dinners.

Ingredients

For the filling

  • 2 cups cooked, shredded chicken (Use rotisserie chicken for speed.)
  • 1/2 teaspoon cumin (Toast cumin for a warmer aroma.)
  • 1/2 teaspoon garlic powder (Fresh garlic can be used instead.)

For the enchiladas

  • 8-10 pieces corn tortillas (Warm to avoid cracking while rolling.)
  • 2 cups green salsa (Choose your favorite salsa verde.)
  • 1 cup shredded cheese (cheddar or Monterey Jack) (Monterey Jack melts beautifully.)
  • 1/2 cup sour cream (Use full fat for best texture.)
  • Chopped to taste cilantro for garnish (Add just before serving.)

Instructions 

Preparation

  • Preheat your oven to 350°F (175°C).
  • In a bowl, combine the shredded chicken, cumin, garlic powder, salt, and pepper.
  • Warm the tortillas in a dry skillet or microwave until pliable.

Assembly

  • Spoon some of the chicken mixture onto each tortilla, roll them up, and place them seam-side down in a baking dish.
  • Pour green salsa over the enchiladas and sprinkle with shredded cheese.

Baking

  • Bake in the preheated oven for 20-25 minutes until the cheese is bubbly.
  • Serve with a dollop of sour cream and garnish with cilantro if desired.

Notes

These enchiladas can be assembled ahead of time. Refrigerate and bake straight from the fridge, adding an extra 5 minutes to bake time.
Calories: 360kcal
Course: Dinner, Main Course
Cuisine: Mexican
Keyword: Chicken, Comfort Food, Enchiladas, Family Meal, Quick Dinner

Classic Chicken Tortilla Soup

I can still smell it now. The warm, tomato and spice-scented steam rising from the pot. The kitchen hums with the soft clatter of spoons and the distant giggle of my little one asking when dinner will be ready.

I’m Lily, a home cook and food blogger. I have cooked for our family for over a decade. This Classic Chicken Tortilla Soup has become our go-to. It fills the house with comfort and makes weeknights feel a little gentler.

This soup is simple, forgiving, and full of flavor. It is a bowl that welcomes busy schedules and hungry kids. Let me walk you through the recipe and the small tips that make it a family favorite.

Why this works

Classic Chicken Tortilla Soup

This recipe works because it balances flavor, speed, and family needs. The base of sautéed vegetables and warm spices builds a familiar, cozy taste that kids and adults enjoy.

Using cooked shredded chicken saves time. You can use leftover roast chicken, a rotisserie bird, or poached breasts. That saves time on busy nights and keeps dinner on the table faster.

The components come together in one pot. That means fewer dishes and more time to sit with the family. The crispy tortilla strips add texture and keep the meal feeling special without extra fuss.

This soup also scales well. Double it for a potluck. Freeze portions for a later rushed evening. Its flexibility keeps it practical for real family life.

Process Overview

“This is where the magic happens—when the aroma fills the kitchen.”

The process is straightforward. You start by building flavor in the pot with olive oil, onion, garlic, and bell pepper. Those aromatics create the savory foundation for the whole soup.

Next, you add the broth, tomatoes, beans, and shredded chicken. A short simmer blends everything. This is when the soup develops depth and the kitchen fills with the smell we love.

While the soup simmers, you fry the tortilla strips until they are crisp. That crunchy contrast makes the dish feel homemade and bright.

Finally, finish with fresh cilantro and a squeeze of lime. The citrus and herbs lift the bowl and make each spoonful sing. It is simple, and it tastes like a family dinner.

Ingredients

  • 2 tablespoons olive oil — Use a good quality olive oil for flavor. I often keep a budget and a nicer bottle and use the nicer one here.
  • 1 onion, diced — Yellow onion works well. If your family prefers milder flavor, use half an onion.
  • 2 cloves garlic, minced — Fresh garlic is best. If you are in a rush, 1/2 teaspoon garlic powder will do.
  • 1 bell pepper, diced — Any color works. Red or orange add sweetness that kids tend to like.
  • 1 jalapeño, diced (optional) — Remove seeds if you want less heat. I often leave it out for the kids and add chopped jalapeño to my bowl.
  • 4 cups chicken broth — Use low-sodium if you watch salt. You can always add salt to taste at the end.
  • 1 can (15 oz) diced tomatoes — Undrained. I sometimes use fire-roasted tomatoes for extra depth.
  • 1 can (15 oz) black beans, drained and rinsed — Rinsing removes excess starch and sodium. Beans add protein and texture.
  • 2 cups cooked chicken, shredded — Rotisserie chicken works great. This saves loads of time.
  • 1 teaspoon cumin — Toast it lightly in the pan if you want a deeper flavor.
  • 1 teaspoon chili powder — Adjust to taste. Mild chili powder works well for families.
  • Salt and pepper, to taste — Start small. You can always add more later.
  • Corn tortillas, cut into strips — Use for frying. For a lighter option, brush with oil and bake until crispy.
  • Fresh cilantro, for garnish — Chop right before serving for bright flavor.
  • Lime wedges, for serving — A squeeze of lime wakes up the soup. Keep wedges on the side for everyone to add what they like.

Directions

  1. In a large pot, heat olive oil over medium heat. Add onion, garlic, and bell pepper; sauté until softened.

    • Take your time here. Softened vegetables build a sweet and savory base. Stir often so nothing browns too quickly.
  2. Stir in jalapeño, if using, and cook for another minute.

    • This step brings a gentle heat. If your family is sensitive, skip the jalapeño and add chopped peppers to individual bowls.
  3. Pour in chicken broth, diced tomatoes, black beans, shredded chicken, cumin, chili powder, salt, and pepper. Bring to a boil, then reduce heat and simmer for 20 minutes.

    • Simmering lets flavors marry. If you have time, simmer a little longer on low. Taste and adjust seasoning before serving.
  4. While the soup is simmering, in a separate pan, fry the tortilla strips in a little oil until crispy.

    • Frying tortillas is quick and fun. Keep an eye on them; they turn golden fast. Drain on paper towels and season lightly with salt.
  5. Serve the soup hot, topped with crispy tortilla strips, fresh cilantro, and lime wedges.

    • Encourage everyone to build their bowl. Let kids add toppings. It turns dinner into a warm, interactive family moment.

Serving

Classic Chicken Tortilla Soup

Serve this soup family-style in a big pot set in the center of the table. Let each person ladle their own bowl and add toppings. It keeps dinner relaxed and allows everyone to eat how they like.

Set out small bowls of extra cilantro, diced avocado, shredded cheese, and hot sauce. If you have little ones, place a small plate with plain tortilla strips or crackers for dipping.

For a heartier meal, add a side of warm corn or flour tortillas and a simple salad. A loaf of crusty bread also pairs nicely for anyone who prefers bread to tortillas.

Serve with lime wedges. A squeeze of lime brightens the whole bowl. Watching family members customize their bowls is one of my favorite parts of dinner.

Storage

Cool the soup to room temperature before storing. Transfer to airtight containers and refrigerate for up to 4 days.

To freeze, cool completely and use freezer-safe containers. Freeze for up to 3 months. Thaw overnight in the refrigerator before reheating.

Reheat on the stove over medium-low heat until warmed through. If the soup seems thick after refrigerating, add a splash of broth or water while reheating.

Keep tortilla strips separate. They will lose their crispness in storage. Re-fry or bake them before serving leftover soup.

Kitchen Notes

  • Use rotisserie chicken to save time and add flavor.
  • Low-sodium broth gives you control over seasoning.
  • Bake tortilla strips at 400°F for 10 minutes as a hands-off crisp alternative.
  • Freeze individual portions in meal-sized containers for quick lunches.
  • Toast spices briefly for a deeper aroma when time permits.

Variations

  • Kid-friendly: Omit jalapeño and chili powder. Add extra corn and shredded carrots for familiar sweetness.
  • Vegetarian: Replace chicken with extra beans, diced sweet potato, or chopped mushrooms. Use vegetable broth.
  • Low-carb: Skip tortilla strips and serve over a bed of cauliflower rice.
  • Spicy: Add chipotle in adobo or more jalapeño. Serve with lime to balance heat.
  • Creamy: Stir in 1/2 cup plain Greek yogurt or 1/2 cup cream at the end for a richer texture.

FAQ

Q: Can I make this on the weeknight when I get home late?
A: Yes. Use shredded rotisserie chicken and canned beans to cut hands-on time. The soup cooks quickly once the ingredients are in the pot.

Q: Can I use raw chicken instead of cooked?
A: You can. Add raw chicken pieces with the broth and simmer until cooked through, about 20 minutes. Shred before serving or cook whole and shred after cooling slightly.

Q: How do I keep the tortilla strips from getting soggy?
A: Store them separately and add just before serving. If leftovers soak them, re-crisp in a 350°F oven for a few minutes.

Q: Is this soup freezer friendly?
A: Yes. Freeze fully cooled soup in airtight containers for up to 3 months. Keep toppings separate.

Q: Can I make this in a slow cooker or Instant Pot?
A: For the slow cooker, sauté vegetables first, then add other ingredients and cook on low for 4 hours. For Instant Pot, use the sauté function, then pressure cook for 8 minutes with a quick release.

Conclusion

Thank you for sharing the kitchen with me. I hope this Classic Chicken Tortilla Soup becomes a warm part of your weeknight routine and family memories. If you want to explore an authentic take for inspiration, I recommend this version from Authentic Chicken Tortilla Soup | Dude That Cookz. For another reliable, tested method with helpful technique notes, see the Perfect Chicken Tortilla Soup Recipe – The Kitchn.

Happy cooking, and enjoy that first spoonful. — Lily

Classic Chicken Tortilla Soup

Prep Time 15 minutes
Cook Time 30 minutes
Total Time 45 minutes
Servings 6 servings
Calories 300
A comforting and flavorful chicken tortilla soup that is perfect for busy weeknights, featuring shredded chicken, black beans, and crispy tortilla strips.

Ingredients

Base Ingredients

  • 2 tablespoons olive oil (Use a good quality olive oil for flavor.)
  • 1 cup onion, diced (Yellow onion works well. Use half for a milder flavor.)
  • 2 cloves garlic, minced (Fresh garlic is best.)
  • 1 cup bell pepper, diced (Any color works, red or orange adds sweetness.)
  • 1 cup jalapeño, diced (Optional; remove seeds for less heat.)

Soup Components

  • 4 cups chicken broth (Use low-sodium if watching salt.)
  • 1 can diced tomatoes (15 oz) (Undrained. Fire-roasted gives extra depth.)
  • 1 can black beans, drained and rinsed (15 oz) (Rinsing removes excess starch and sodium.)
  • 2 cups cooked chicken, shredded (Rotisserie chicken saves time.)
  • 1 teaspoon cumin (Toast lightly for deeper flavor.)
  • 1 teaspoon chili powder (Adjust to taste.)
  • to taste salt and pepper (Start small and adjust as needed.)

Serving Ingredients

  • Corn tortillas cut into strips (Fry or bake until crispy for topping.)
  • Fresh cilantro for garnish (Chop right before serving.)
  • Lime wedges for serving (A squeeze wakes up the soup.)

Instructions 

Preparation

  • In a large pot, heat olive oil over medium heat. Add onion, garlic, and bell pepper; sauté until softened.
  • Stir in jalapeño, if using, and cook for another minute.

Cooking

  • Pour in chicken broth, diced tomatoes, black beans, shredded chicken, cumin, chili powder, salt, and pepper. Bring to a boil, then reduce heat and simmer for 20 minutes.
  • While the soup simmers, fry the tortilla strips in a separate pan until crispy.
  • Serve the soup hot, topped with crispy tortilla strips, fresh cilantro, and lime wedges.

Notes

For storage, cool the soup to room temperature before storing in airtight containers. Refrigerate for up to 4 days or freeze for up to 3 months. Keep tortilla strips separate to maintain crispness.
Calories: 300kcal
Course: Main Course, Soup
Cuisine: American, Mexican
Keyword: Chicken Tortilla Soup, Comfort Food, Family Dinner, One Pot Meal, Quick Dinner

Crockpot Garlic Parmesan Chicken Thighs

I can still smell it now. The warm garlic as it met the butter, the soft sizzle from a pan while I browned the thighs just a touch. In my kitchen, that sound means dinner is on its way and everyone will gather around the table soon.

This Crockpot Garlic Parmesan Chicken Thighs recipe fills the house with comfort. It is the kind of meal that makes little hands reach for seconds and fills the room with quiet conversation. As a food blogger and mom, I love recipes that do most of the work while I do the things that matter most.

Why this works

Crockpot Garlic Parmesan Chicken Thighs

This recipe pairs indulgent cream and Parmesan with garlic and Italian seasoning to create a sauce that clings to each tender chicken thigh. The slow cooker does the heavy lifting. You get melt-in-your-mouth chicken without hovering over the stove.

For busy families, this is a lifesaver. Put it in the Crockpot before work or after school activities. Come home to an aromatic kitchen and a dinner that feels homemade. It saves time and preserves the warmth of a family meal.

Process Overview

“This is where the magic happens—when the aroma fills the kitchen.”

The slow cooker slowly coaxes flavor and tenderness into the meat while the cream and Parmesan thicken into a silky sauce. A short prep and a long, gentle cook time mean you can focus on homework, chores, or simply sitting down with the kids. The result is reliably comforting every time.

Ingredients

  • 4 chicken thighs
    Lily’s tip: Choose bone-in, skin-on thighs for the richest flavor. If you prefer less fat, trim excess skin. Browning before the slow cook boosts flavor but is optional.

  • 1 cup heavy cream
    Lily’s tip: Full-fat heavy cream makes the sauce silky and rich. For a lighter option, use half-and-half, but the sauce will be thinner.

  • 1/2 cup grated Parmesan cheese
    Lily’s tip: Freshly grated Parmesan melts better and tastes brighter than pre-grated. Save some for sprinkling at the end.

  • 4 cloves garlic, minced
    Lily’s tip: Fresh garlic is the star here. If you are in a rush, jarred minced garlic works, but reduce the amount slightly if it’s strong.

  • 1 teaspoon Italian seasoning
    Lily’s tip: Use a mix that has oregano and basil prominently. If you like a bit more herb, add an extra pinch.

  • Salt and pepper to taste
    Lily’s tip: Season the chicken lightly at first. You can always adjust the sauce at the end after it reduces.

  • Optional: fresh parsley for garnish
    Lily’s tip: Parsley brightens the dish and adds a fresh look. Chopped chives also work well for a mild onion note.

Lily’s quick pantry checks

Before you start, check for good Parmesan and fresh garlic. A warm, well-balanced cheese will lift the whole dish, and fresh garlic gives the sauce its soul.

Directions

  1. Place the chicken thighs in the slow cooker.
    Encouraging note: Arrange them in a single layer if you can. Don’t worry if they overlap a bit; they will still cook beautifully.

  2. In a bowl, mix the heavy cream, Parmesan cheese, minced garlic, Italian seasoning, salt, and pepper.
    Encouraging note: Whisk until smooth. It looks simple, but this step builds the sauce that will coat every bite.

  3. Pour the mixture over the chicken thighs in the slow cooker.
    Encouraging note: Make sure the sauce covers as much of the chicken as possible. The flavor spreads as it cooks.

  4. Cover and cook on low for 6-7 hours or high for 3-4 hours until the chicken is tender.
    Encouraging note: The house will start to smell amazing. Check at the lower end of the time if you like very tender but intact thighs.

  5. Serve with pasta, rice, or roasted veggies, and garnish with fresh parsley if desired.
    Encouraging note: Spoon extra sauce over the sides. Your family will love the creamy Parmesan coating on pasta or mashed potatoes.

Serving

Crockpot Garlic Parmesan Chicken Thighs

I love serving this family-style on a big platter. Arrange the thighs in the center, spoon the creamy sauce over them, and tuck roasted vegetables or a bed of pasta around the edges. Let everyone help themselves. The steam and aroma make the table feel warm, and the casual passing of dishes brings conversation.

For a smoother service, place a bowl of grated Parmesan and a small dish of chopped parsley on the table. That way each person can tweak their plate. Bread on the side is always welcomed. It soaks up every last drop of sauce and makes small children grin.

Pairing ideas

Serve with a simple green salad and a bright vinaigrette to cut the richness. A glass of sparkling water with lemon keeps things refreshing for family meals.

Storage

Leftovers keep well and make excellent next-day lunches. Follow these tips to stay safe and keep flavor:

  • Fridge: Store in an airtight container for up to 4 days. Cool to room temperature before refrigerating but do not leave out for more than 2 hours.
  • Reheat on the stove: Warm gently over low heat in a covered skillet. Stir occasionally to keep the sauce smooth. Add a splash of water or milk if it has thickened too much.
  • Reheat in the microwave: Use medium power and heat in 60-second intervals, stirring between intervals. Cover the dish to trap steam and keep the chicken moist.
  • Freeze: Freeze in a freezer-safe container for up to 3 months. Thaw overnight in the fridge before reheating. The sauce may separate slightly when frozen; whisk in a little cream while reheating to bring it back together.

Food safety note: Always reheat to an internal temperature of 165 °F.

Kitchen Notes

  • Shortcut: Brown the thighs quickly in a skillet for 2-3 minutes per side if you want extra color, but you can skip this step for a true dump-and-go meal.
  • Shortcut: Use pre-minced garlic if you are short on time. Start with a little less and taste the sauce later.
  • Shortcut: Swap half the heavy cream with low-sodium chicken broth to lighten the sauce while keeping flavor.
  • Shortcut: If your Parmesan is very salty, reduce added salt and adjust at the end.
  • Shortcut: If the sauce is too thin at serving time, remove the lid and cook on high for 15-30 minutes to reduce it, or whisk 1 teaspoon of cornstarch with 1 tablespoon of cold water and stir it in, then cook for a few minutes more.

Variations

  • For picky eaters: Use boneless skinless thighs or chicken breasts. If using breast meat, check earlier for doneness to avoid drying out. Add a little extra cream for moistness.
  • Lighter option: Substitute 1 Cup low-fat milk plus 2 tablespoons flour for the heavy cream. The flour helps thicken the sauce while reducing fat.
  • Gluten-free: Use cornstarch instead of flour for thickening. Confirm that your Parmesan and seasonings are gluten-free.
  • Low-carb: Serve over zucchini noodles or cauliflower mash instead of pasta or rice. The sauce is naturally low in carbs.
  • Herb-forward: Stir in fresh basil or thyme just before serving for a bright finish. Add stronger herbs sparingly so they do not overpower the Parmesan.

FAQ

Q1: Can I use chicken breasts instead of thighs?

Yes. Chicken breasts will cook faster and can dry out if overcooked. Use boneless breasts and check for doneness around 3 hours on low or 1.5 to 2 hours on high. Add a splash more cream if they seem dry.

Q2: Do I need to brown the chicken first?

No. Browning adds flavor and color, but the slow cooker will make the chicken tender without it. I brown when I have the time, but many busy nights I skip it and still get a delicious meal.

Q3: Can I make this on the stovetop?

Absolutely. Simmer the sauce in a skillet, add the chicken, cover, and cook over low heat for 25 to 35 minutes until the chicken reaches 165 °F. Turn once for even cooking.

Q4: My sauce separated after reheating. How do I fix it?

Stir in a tablespoon of heavy cream or a small pat of cold butter while warming the sauce gently. Whisking over low heat brings it back together. Avoid boiling which can make separation worse.

Q5: Can I add vegetables directly to the slow cooker?

Yes. Add firmer vegetables like carrots or potatoes at the start so they have time to cook. Tender vegetables like broccoli or peas should be added in the last 30 minutes to preserve texture.

Conclusion

I hope this Crockpot Garlic Parmesan Chicken Thighs recipe becomes one of your family favorites. It is simple, forgiving, and full of flavor. You will love how the creamy sauce brings comfort without hours of work.

If you want a version with potatoes cooked in the slow cooker, take a look at this delicious adaptation: Slow Cooker Garlic Parmesan Chicken and Potatoes. For a creamy pasta pairing inspired by a restaurant-style take, try this crockpot chicken pasta idea: Crockpot Garlic Parmesan Chicken Pasta (Buffalo Wild Wings).

Thank you for cooking with me. When the kitchen fills with the smell of garlic and cheese, you will know dinner is exactly where it should be: at your table, with the people you love.

Crockpot Garlic Parmesan Chicken Thighs

Prep Time 10 minutes
Cook Time 6 hours
Total Time 6 hours 10 minutes
Servings 4 servings
Calories 500
This comforting crockpot recipe pairs tender chicken thighs with a rich garlic Parmesan sauce, perfect for busy families.

Ingredients

Main Ingredients

  • 4 thighs chicken thighs (Choose bone-in, skin-on thighs for the richest flavor.)
  • 1 cup heavy cream (Full-fat heavy cream makes the sauce silky and rich.)
  • 1/2 cup grated Parmesan cheese (Freshly grated Parmesan melts better and tastes brighter.)
  • 4 cloves garlic, minced (Fresh garlic is preferred for the best flavor.)
  • 1 teaspoon Italian seasoning (Use a mix that has oregano and basil prominently.)
  • to taste Salt and pepper (Season lightly and adjust at the end as needed.)
  • optional fresh parsley for garnish (Brightens the dish and adds a fresh look.)

Instructions 

Preparation

  • Place the chicken thighs in the slow cooker, arranging them in a single layer if possible.
  • In a bowl, mix the heavy cream, Parmesan cheese, minced garlic, Italian seasoning, salt, and pepper until smooth.
  • Pour the mixture over the chicken thighs in the slow cooker, ensuring the sauce covers as much chicken as possible.

Cooking

  • Cover and cook on low for 6-7 hours or high for 3-4 hours until the chicken is tender.
  • Serve with pasta, rice, or roasted veggies, and garnish with fresh parsley if desired.

Notes

Leftovers keep well; store in an airtight container for up to 4 days. For freezing, use a freezer-safe container for up to 3 months. Always reheat to an internal temperature of 165 °F.
Calories: 500kcal
Course: Dinner, Main Course
Cuisine: American, Comfort Food
Keyword: Comfort Food, Crockpot Chicken, Family Dinner, Garlic Parmesan, Slow Cooker

Creamy Garlic Mushroom Chicken Thighs

The kitchen smells like comfort tonight. Warm garlic and butter greet me at the door, and I can hear the soft sizzle of chicken skin as it hits the hot pan. Those little sounds mean one thing: a family dinner that wraps everyone in a hug.

This Creamy Garlic Mushroom Chicken Thighs recipe is easy to make and feels like a special meal. It is the kind of dish that fills the house with aroma and brings everyone to the table. Let me walk you through how to make a creamy, cozy dinner your family will ask for again and again.

Why this works

Creamy Garlic Mushroom Chicken Thighs

This dish hits the sweet spot between quick and comforting. Bone-in, skin-on thighs give you flavor and juicy meat without a lot of fuss. Searing the skin first locks in juices and gives you a satisfying crisp, while the mushroom cream sauce adds richness that stretches a simple chicken dinner into a special family meal.

It saves time because it cooks mostly in one skillet. You do not need to babysit multiple pans or dishes. The sauce comes together fast, and while it simmers you can finish a side dish or set the table. For busy families, this is a weeknight miracle that feels like a weekend treat.

Process Overview

“This is where the magic happens—when the aroma fills the kitchen.”

The method is simple. Sear the thighs to get crisp skin and deep flavor. Sauté mushrooms and garlic in the same pan to pick up browned bits. Add broth and cream to make a silky sauce. Return the chicken and finish it gently so it stays tender.

I love the rhythm of this recipe. The sear, the sauté, the simmer. It all adds up to a dinner that smells incredible and feeds a family with minimal stress.

Ingredients

  • 4 bone-in, skin-on chicken thighs
    Lily’s tip: Choose thighs about the same size so they cook evenly. Bone-in, skin-on gives the best flavor and juiciness.

  • Salt and pepper, to taste
    Lily’s tip: Season generously. Salt is your friend for crisp skin and seasoned meat. Add a pinch at each step for layered flavor.

  • 1 tablespoon butter
    Lily’s tip: Use real butter for a silky, rich finish. If you need less saturated fat, reduce to 1/2 tablespoon and add olive oil.

  • 1 tablespoon olive oil
    Lily’s tip: Olive oil raises the smoke point a bit and helps the butter from burning. You can use avocado oil for higher heat.

  • 8 oz fresh cremini or button mushrooms, diced
    Lily’s tip: Cremini add more depth, but button mushrooms work well and are often cheaper. Chop them uniformly so they brown evenly.

  • 3 garlic cloves, minced
    Lily’s tip: Fresh garlic matters. Mince finely so it releases flavor quickly. Add a little later if you worry about burning.

  • 1/2 cup chicken broth
    Lily’s tip: Low-sodium broth lets you control the salt. If you only have bouillon, dilute carefully and taste.

  • 3/4 cup heavy cream
    Lily’s tip: Heavy cream gives the sauce body and richness. For a lighter option, mix 1/2 cup milk with 1/4 cup half-and-half, but expect a slightly thinner sauce.

  • 2 tablespoons fresh parsley or thyme, chopped (plus extra for garnish)
    Lily’s tip: Fresh herbs brighten the sauce. Parsley gives freshness; thyme gives an earthy note. Add a small extra sprinkle for the table.

  • Additional salt and pepper, to taste
    Lily’s tip: Taste before serving and adjust. Heat can mute salt, so season at the end as well.

Directions

  1. Pat chicken thighs dry with paper towels to ensure crispy skin during cooking. Season both sides generously with salt and pepper.
    Encouraging note: Dry skin sears better, so take that extra minute. Seasoning now builds flavor all the way through.

  2. Heat butter and olive oil in a large skillet over medium-high heat. Place chicken thighs skin-side down and sear for 5-7 minutes until the skin is crispy and golden. Flip and cook the other side briefly, about 2-3 minutes, then remove chicken and set aside.
    Encouraging note: Let the skin get a golden crust before flipping. This step creates the fond that makes the sauce taste so good.

  3. In the same skillet, add the diced mushrooms and minced garlic. Sauté for 4-5 minutes until mushrooms release moisture and start to brown and the garlic becomes fragrant.
    Encouraging note: Scrape up browned bits as the mushrooms cook. That fond carries flavor into the sauce.

  4. Pour in chicken broth and gently scrape up any browned bits from the pan with a wooden spoon. Allow the broth to reduce slightly, then stir in the heavy cream. Let the sauce simmer gently until thickened and velvety.
    Encouraging note: Keep the heat moderate so the cream does not boil. A gentle simmer brings the flavors together and yields a smooth sauce.

  5. Nestle the chicken thighs back into the creamy mushroom sauce. Reduce heat to low, cover, and cook for 10-12 minutes until the chicken is cooked through and tender and the sauce is infused with flavor.
    Encouraging note: Covered cooking lets the thighs finish gently. Use a meat thermometer if you like; the internal temperature should read 165°F.

  6. Sprinkle chopped fresh parsley or thyme over the top before serving directly from the skillet for a fresh, vibrant finish.
    Encouraging note: Serving from the skillet saves dishes and keeps dinner warm. The fresh herbs add brightness that cuts through the richness.

Serving

Creamy Garlic Mushroom Chicken Thighs

Serve this dish family-style right from the skillet. Place it on a low trivet or heatproof mat at the center of the table so everyone can help themselves. Offer bowls of mashed potatoes, buttered egg noodles, or steamed rice to soak up the sauce.

A simple green salad or lightly roasted vegetables balance the richness. For bread lovers, a crusty loaf or soft dinner rolls are perfect for mopping up every last drop.

For picky eaters, serve the sauce on the side so they can choose how much to add. Kids often love the creamy sauce with noodles, while adults may prefer it spooned over roasted veggies.

Storage

Refrigerator: Store leftovers in an airtight container for up to 3 days. Cool the skillet or food slightly before sealing to avoid condensation.

Freezer: I do not recommend freezing the cream sauce for best texture. If you must freeze, place cooled chicken and sauce in a freezer-safe container for up to 1 month. Thaw overnight in the refrigerator.

Reheating: Reheat gently over low heat on the stovetop. Add a splash of broth or cream if the sauce thickens too much. You can also reheat in a microwave-safe dish in short bursts, stirring between intervals to keep the sauce smooth.

Safety tip: Always reheat until the internal temperature reaches 165°F. When reheating from frozen, thaw fully in the fridge before warming.

Kitchen Notes

  • Use a heavy skillet – A cast iron or stainless steel pan holds heat well and helps build a good sear.
  • Room temperature chicken – Let thighs sit out for 15 minutes before cooking to promote even cooking.
  • Do not overcrowd the pan – Sear in batches if needed so each piece gets a proper crust.
  • Low and slow finish – After returning the chicken, keep heat low to maintain tenderness.
  • Taste as you go – Adjust salt and herbs at the end for the best balance.

Variations

  • For boneless or skinless chicken: Use 4 boneless thighs or 6 boneless chicken breasts. Reduce final covered cooking to 6-8 minutes to prevent overcooking.
  • Lighter version: Substitute 3/4 cup half-and-half or 1/2 cup milk plus 1/4 cup Greek yogurt stirred in off-heat. Do not boil.
  • Mushroom-free: Replace mushrooms with thinly sliced bell peppers or caramelized onions for a different flavor profile.
  • Herb swap: Use rosemary or tarragon for a different aromatic note. Add rosemary sparingly as it is strong.
  • Gluten-free: This recipe is naturally gluten-free if your chicken broth is certified gluten-free.

FAQ

Q: Can I use chicken breasts instead of thighs?
A: Yes. Use bone-in breasts if you want similar flavor, or boneless breasts for a quicker option. Watch cooking time closely since breasts can dry out. Check for 165°F internal temp.

Q: How do I stop the cream from splitting?
A: Keep the sauce at a gentle simmer, not a boil. Stir slowly and add cream off a slightly reduced heat if needed. A small splash of cold broth or cream can smooth the sauce if it looks thin.

Q: Can I make this ahead of time?
A: Yes. Sear the chicken and make the sauce, then cool and refrigerate separately. Reheat on low, finishing the dish in the skillet for 10 minutes before serving.

Q: What sides pair best with this dish?
A: Mashed potatoes, buttered egg noodles, rice, or roasted root vegetables all work well. A crisp green salad adds freshness.

Q: Can I add wine to the sauce?
A: Absolutely. Replace 1/4 cup of the chicken broth with dry white wine and let it reduce before adding cream for extra depth.

Conclusion

I hope this Creamy Garlic Mushroom Chicken Thighs recipe brings warmth to your table and becomes one of those meals you turn to when you want comfort without fuss. It is forgiving, family-friendly, and adaptable to many tastes.

If you are looking for another version with similar comforting notes, I love the take on these flavors in this Creamy Mushroom Chicken Thighs – Cooking with Mima. For a faster one-pot option that keeps the creamy mushroom idea simple, see this Creamy Garlic Mushroom Chicken Thighs (30-Minute Dinner).

Thanks for cooking with me. Gather your family, set a cozy table, and enjoy the sounds of a warm kitchen.

Creamy Garlic Mushroom Chicken Thighs

Prep Time 15 minutes
Cook Time 30 minutes
Total Time 45 minutes
Servings 4 servings
Calories 700
This Creamy Garlic Mushroom Chicken Thighs recipe is easy to make and feels like a special meal, filling your home with aroma and bringing the family together.

Ingredients

Chicken Thighs

  • 4 pieces bone-in, skin-on chicken thighs (Choose thighs about the same size for even cooking.)
  • Salt and pepper to taste salt and pepper (Season generously for crisp skin and seasoned meat.)

Cooking Essentials

  • 1 tablespoon butter (Use real butter for a silky, rich finish.)
  • 1 tablespoon olive oil (Olive oil raises the smoke point; can substitute with avocado oil.)

Vegetables

  • 8 oz fresh cremini or button mushrooms, diced (Chop uniformly for even browning.)
  • 3 cloves garlic, minced (Fresh garlic releases flavor quickly; add later if worried about burning.)

Sauce Ingredients

  • 1/2 cup chicken broth (Low-sodium broth is recommended.)
  • 3/4 cup heavy cream (For a lighter option, mix with milk and half-and-half.)
  • 2 tablespoons fresh parsley or thyme, chopped (Add extra for garnish.)

Seasoning

  • Additional salt and pepper, to taste (Taste before serving and adjust as needed.)

Instructions 

Preparation

  • Pat chicken thighs dry with paper towels and season generously with salt and pepper.
  • Heat butter and olive oil in a large skillet over medium-high heat.

Cooking Chicken

  • Place chicken thighs skin-side down and sear for 5-7 minutes until the skin is crispy and golden.
  • Flip and cook the other side briefly for 2-3 minutes, then remove chicken and set aside.

Making the Sauce

  • In the same skillet, add diced mushrooms and minced garlic. Sauté for 4-5 minutes until mushrooms release moisture and start to brown.
  • Pour in chicken broth, scrape up any browned bits, and allow it to reduce slightly.
  • Stir in heavy cream and let the sauce simmer gently until thickened.

Finishing the Dish

  • Nestle chicken thighs back into the creamy mushroom sauce, cover, and cook on low for 10-12 minutes until cooked through.
  • Sprinkle chopped parsley or thyme over the top before serving.

Notes

Serve family-style from the skillet. Pair with mashed potatoes, rice, or roasted vegetables. Store leftovers in an airtight container for up to 3 days. Do not freeze the cream sauce.
Calories: 700kcal
Course: Dinner, Main Course
Cuisine: American, Comfort Food
Keyword: Chicken Thighs, Comfort Food, Creamy Mushroom Sauce, Easy Recipe, Family Dinner

30-min Oven Baked Boneless Skinless Chicken Thighs

I love the moment when the oven clicks on and the whole kitchen starts to warm up. The scent of garlic, paprika, and olive oil mixing with baking chicken is one of my favorite family comforts. You hear pots clink and kids ask, "Is it ready yet?" and you know dinner will bring everyone together.

This recipe is one of those reliable weeknight heroes. It is simple, forgiving, and fast. It gives you juicy chicken without fuss, and it frees up time to tuck in homework, set the table, or even sneak in a quick chat with a partner.

Why this works

30-min Oven Baked Boneless Skinless Chicken Thighs

This dish works because it is focused and practical. Boneless, skinless chicken thighs stay moist during baking. They tolerate a bold spice rub and still finish in about 30 minutes. That makes this a real time saver for busy families.

Chicken thighs give more forgiving cooking than breasts. You do not need a thermometer to be confident each time. The spice mix clings well, forming a light crust that keeps juices inside.

H3: Family friendly and fast

You can get this on the table in roughly the time it takes to do a load of laundry and pack lunches for the next day. Kids usually like the mild paprika flavor, and adults will appreciate how easy it is to customize for picky eaters or a crowd.

Process Overview

“This is where the magic happens—when the aroma fills the kitchen.”

Start with quality, simple ingredients. Mix the spices and oil, toss the thighs to coat, and bake. The process is short, and the reward is big.

I test this recipe many times and keep the steps pared down. That helps you get predictable results. The short bake time keeps the thighs tender and juicy without drying them out.

Ingredients

  • 4 boneless skinless chicken thighs
    Lily’s tip: Choose thighs of similar size so they finish at the same time. Trim excess fat if you prefer a leaner bite.

  • 2 tablespoons olive oil
    Lily’s tip: Use extra virgin olive oil for flavor. If you need a neutral oil, canola or avocado oil is fine.

  • 1 teaspoon garlic powder
    Lily’s tip: Garlic powder gives steady flavor without burning. If you like fresh garlic, use 1 clove minced and mix into the oil.

  • 1 teaspoon onion powder
    Lily’s tip: Onion powder adds sweetness and depth. It blends well with the garlic powder to form a simple base.

  • 1 teaspoon paprika
    Lily’s tip: Use smoked paprika for a subtle smoky touch. Regular sweet paprika makes a bright, family-friendly version.

  • 1 teaspoon salt
    Lily’s tip: I use kosher salt. If you use table salt, reduce slightly because it is finer.

  • 1/2 teaspoon black pepper
    Lily’s tip: Freshly ground black pepper gives a brighter bite. Adjust to taste for young children.

  • 1 teaspoon dried oregano
    Lily’s tip: Dried oregano adds Mediterranean warmth. If you have fresh oregano, chop a teaspoon and scatter it on top after baking.

These amounts serve 3 to 4 people when paired with sides. You can easily double or triple the spice mix for a crowd.

Directions

  1. Preheat the oven to 400°F (200°C).
    Encouraging note: This short preheat gets the oven ready without much wait. While it heats, you can mix your spices and oil.

  2. In a bowl, combine olive oil, garlic powder, onion powder, paprika, salt, black pepper, and oregano.
    Encouraging note: Use a whisk or fork to make a smooth paste. The oil helps the spices stick and promotes a light browning.

  3. Coat the chicken thighs with the spice mixture thoroughly.
    Encouraging note: Use your hands or a spoon. Make sure each piece is evenly covered. A well-coated thigh will stay juicy and flavorful.

  4. Place the chicken thighs in a baking dish or on a baking sheet lined with parchment paper.
    Encouraging note: Give the thighs a little space. A single layer ensures even cooking and a nice finish on each piece.

  5. Bake in the preheated oven for 25-30 minutes or until the chicken is cooked through and juices run clear.
    Encouraging note: Check at 25 minutes. If you have a meat thermometer, the internal temperature should reach 165°F. Cooking time varies by thickness.

  6. Let rest for 5 minutes before serving.
    Encouraging note: Resting lets the juices redistribute. It makes the chicken more tender and easier to slice, and it gives you a moment to set the table.

I like to roast a pan of vegetables on the same sheet for an easy one-pan meal. Use sturdier vegetables like carrots and potatoes and cut them into even pieces so they cook through.

Serving

30-min Oven Baked Boneless Skinless Chicken Thighs

Serve the thighs family-style right in the baking dish. Place the dish on the table and let everyone help themselves. Add simple sides like roasted broccoli, mashed potatoes, or a green salad.

H3: Kid friendly plating

For little ones, I slice the thighs into strips and arrange them next to sweet potato cubes or steamed green beans. For older kids and adults, offer warm tortillas, a bowl of rice, or crusty bread.

H3: Flavor finishing ideas

Top with a squeeze of lemon to brighten the dish. Sprinkle fresh parsley or a pinch of flaky salt for a restaurant feel. A spoonful of plain yogurt mixed with lemon and garlic makes a cooling sauce.

Storage

Refrigerator: Place cooled chicken in an airtight container. It keeps well for up to 4 days. Use it for quick lunches, salads, or wraps.

Freezer: Cool completely and freeze in a single layer on a baking sheet. Transfer frozen thighs to a freezer bag for up to 3 months. Thaw in the fridge overnight before reheating.

Reheat: Warm in a 350°F oven for 10 to 15 minutes until heated through. You can also microwave on medium power for short bursts, but the oven method keeps the texture better.

Leftover ideas: Slice and toss into a grain bowl with quinoa and roasted veggies. Shred for tacos with a quick slaw. Cut into kid-friendly strips and pack with fruit for school lunches.

Kitchen Notes

  • Use parchment paper or a silicone mat for easy cleanup and less sticking.
  • If you prefer a bit more color, switch to broil for the last 1 to 2 minutes while watching closely.
  • A meat thermometer speeds confidence. Aim for 165°F in the thickest part.
  • Marinate in the spice mix for up to 2 hours for extra flavor, but the recipe is great when made right away.
  • Double the recipe and cook on two pans if you are feeding a group. Rotate pans halfway for even baking.

Variations

  • Mild and creamy: Mix 2 tablespoons plain yogurt into the spice oil. Bake as directed. This yields a tender, slightly tangy finish that is gentle for picky eaters.

  • Spicy twist: Add 1/4 teaspoon cayenne pepper or a teaspoon of hot sauce to the spice mix for a kick. Serve with a cooling cucumber salad.

  • Low sodium: Reduce salt to 1/2 teaspoon and use more herbs like thyme and rosemary. Add a squeeze of lemon at the end for brightness.

  • Keto friendly: Serve with cauliflower mash and a side of roasted asparagus. The chicken is naturally keto compliant with the given spices and oil.

  • Gluten free: This recipe is gluten free as written. Confirm that your paprika and spices are labeled gluten free if you are sensitive.

These tweaks help you tailor the recipe for tastes at your table without upending the fast, 30-minute method.

FAQ

Q: Can I use chicken breasts instead of thighs?
A: Yes. Use boneless skinless chicken breasts but watch cooking time. Breasts can dry out faster. Check at 18 minutes and use a thermometer to reach 165°F.

Q: Can I make this ahead of time for meal prep?
A: Absolutely. Cook the thighs, cool, and store in the fridge. Reheat in the oven or slice cold for salads and wraps. It saves time on busy mornings.

Q: How do I know when chicken thighs are done?
A: The safest way is to use a meat thermometer. The thickest part should read 165°F. The juices should run clear and the meat should feel firm but not hard.

Q: Can I double the spices for more flavor?
A: You can increase spices to suit your family. If doubling chicken, double the spice mix. Taste and adjust if you prefer more garlic or less salt.

Q: Is this healthy for kids?
A: Yes. The recipe uses simple ingredients and moderate oil. It provides protein and pairs well with vegetables and whole grains for balanced family meals.

Conclusion

I hope this recipe becomes one of your weeknight go-tos. It is quick, reliable, and made with family in mind. For another easy guideline and photos to follow, I like the clear method at 30-Minute Baked Boneless Chicken Thighs – Familystyle Food. If you enjoy a spicier variation, check out this bright take on baked thighs at Baked Boneless Chicken Thighs (Easy Weeknight Recipe).

Thanks for cooking with me. Gather your people, set the table, and enjoy a simple meal that lets you spend less time at the stove and more time with the ones you love.

Juicy Baked Boneless Chicken Thighs

Prep Time 10 minutes
Cook Time 30 minutes
Total Time 40 minutes
Servings 4 servings
Calories 250
A simple, forgiving recipe for juicy baked chicken thighs that's perfect for busy weeknights and family-friendly dinners.

Ingredients

Main Ingredients

  • 4 pieces boneless skinless chicken thighs (Choose thighs of similar size for even cooking.)
  • 2 tablespoons olive oil (Use extra virgin for better flavor.)

Spice Mix

  • 1 teaspoon garlic powder (Gives steady flavor without burning.)
  • 1 teaspoon onion powder (Adds sweetness and depth.)
  • 1 teaspoon paprika (Smoked paprika adds a subtle smoky touch.)
  • 1 teaspoon salt (Kosher salt is preferred; adjust if using table salt.)
  • 1/2 teaspoon black pepper (Freshly ground for better flavor.)
  • 1 teaspoon dried oregano (For Mediterranean warmth.)

Instructions 

Preparation

  • Preheat the oven to 400°F (200°C).
  • In a bowl, combine olive oil, garlic powder, onion powder, paprika, salt, black pepper, and oregano.
  • Coat the chicken thighs with the spice mixture thoroughly.
  • Place the chicken thighs in a baking dish or on a baking sheet lined with parchment paper.

Cooking

  • Bake in the preheated oven for 25-30 minutes or until the chicken is cooked through and juices run clear.
  • Let rest for 5 minutes before serving.

Notes

Leftovers can be used in salads or wraps, and you can roast vegetables on the same sheet for a complete meal.
Calories: 250kcal
Course: Dinner, Main Course
Cuisine: American
Keyword: Baked Chicken Thighs, Comfort Food, Easy Dinner, Family Recipe, Weeknight Meal

Garlic Herb Chicken

The kitchen fills with the warm scent of garlic and butter. I hear the soft sizzle as the chicken hits the hot pan and feel a small thrill that dinner is coming together.

This recipe is the kind that turns a busy weeknight into a cozy family moment. The sounds, smells, and the sticky glaze make everyone pause and take notice. Let me show you how to make a dish your people will ask for again and again.

Why this works

Garlic Herb Chicken

Family meals need to be easy and reliable. This Garlic Herb Chicken gives you both. The sear locks in juices quickly, so the chicken stays tender without long cook times. The pan sauce uses the drippings to make big flavor from simple steps.

It saves time and cleanup. You sear, make the sauce in the same pan, and serve on mashed potatoes for a one-skillet feel with a comfort-food finish. It is also flexible for picky eaters and busy schedules.

This is a go-to weeknight recipe that still feels a little special. You can prep ahead or finish at the last minute while everyone sets the table.

Process Overview

“This is where the magic happens—when the aroma fills the kitchen.”

I like to think of the process as three simple parts. Season and sear, make the sauce, and pair with creamy mashed potatoes. Each step builds flavor, and the pan sauce brings everything together.

Work confidently. Follow the steps and trust your senses. A quick temperature check and a few minutes of attention will reward you with juicy chicken and a glossy glaze.

Ingredients

  • 4 boneless skinless chicken breasts

    • Tip: If breasts are uneven, pound them to even thickness so they cook at the same rate. That keeps the center from drying out.
  • 3 tablespoons olive oil

    • Tip: Use a good quality olive oil for searing and flavor. Heat until shimmering before adding the chicken to get a golden crust.
  • 4 cloves garlic, minced

    • Tip: Mince fresh garlic or press it for more aroma. Add it to the herb rub rather than the hot oil to avoid burning.
  • 2 tablespoons fresh parsley, chopped

    • Tip: Chop parsley just before using for bright color and fresh flavor. Save a little for garnish.
  • 1 tablespoon fresh thyme leaves

    • Tip: Strip thyme leaves from the stems with your fingers. Fresh thyme gives a subtle earthy lift that pairs well with garlic.
  • 2 tablespoons butter

    • Tip: Add butter toward the end of searing for basting. Clarified butter can handle higher heat but regular butter adds a lovely nutty browning.
  • 1 cup chicken broth

    • Tip: Use low-sodium broth so you control the salt. If you only have bouillon, dissolve a small amount in hot water.
  • 2 pounds russet potatoes

    • Tip: Russets make creamy, fluffy mashed potatoes. Cut to even chunks so they cook evenly.
  • 1/2 cup heavy cream

    • Tip: Warm the cream slightly before adding to the potatoes for a silkier mash and to avoid cooling them down.
  • 2 tablespoons brown sugar

    • Tip: Brown sugar helps balance the balsamic and gives a sticky, caramelized finish. Use light or dark based on your taste.
  • 1 tablespoon balsamic vinegar

    • Tip: A good balsamic adds bright acidity to the sauce. Add it slowly and taste as the sauce reduces.

Each ingredient plays a clear role. The herbs season the meat, the butter enriches the sauce, and the potatoes create the cozy base. You can find most of these at any grocery store, and they keep well if you want to batch prep.

Directions

  1. Pat the chicken breasts dry with paper towels and season generously with salt and pepper on both sides. In a small bowl, combine minced garlic, chopped parsley, and thyme leaves. Rub this herb mixture all over the chicken breasts, pressing gently so it adheres to the meat. Let the chicken rest at room temperature for 10 minutes to allow the flavors to penetrate.

    • Encouragement: This short rest makes a big difference. Take a moment to breathe and set the table.
  2. Heat olive oil in a large skillet over medium-high heat until shimmering. Carefully place the chicken breasts in the pan and sear without moving them for 5-6 minutes until a deep golden-brown crust forms.

    • Encouragement: Let the pan do the work. A steady sear creates that beautiful color and flavor.
  3. Flip the chicken and cook for another 5-6 minutes. Add butter to the pan and baste the chicken with the melted butter and pan juices. Once the internal temperature reaches 165 degrees Fahrenheit, transfer chicken to a plate and tent with foil.

    • Encouragement: Use a quick-read thermometer. When it hits 165 degrees Fahrenheit, you know it is safe and juicy. Tenting helps the juices settle.
  4. In the same skillet with the remaining drippings, add brown sugar and balsamic vinegar. Stir continuously over medium heat until the sugar dissolves and begins to caramelize, about 2 minutes. Pour in chicken broth and scrape up any browned bits from the bottom of the pan. Bring to a simmer and cook for 5-7 minutes until the sauce reduces by half and becomes slightly syrupy. Taste and adjust seasoning with salt and pepper.

    • Encouragement: Scraping up the browned bits transforms the sauce. Keep an eye on the reduction so it does not get too thick.
  5. While the chicken cooks, peel and cut the potatoes into evenly sized chunks. Place them in a large pot and cover with cold salted water. Bring to a boil over high heat, then reduce to a simmer and cook for 15-20 minutes until the potatoes are fork-tender. Drain thoroughly and return the potatoes to the pot. Add butter and heavy cream, then mash until smooth and creamy. Season with salt and pepper to taste.

    • Encouragement: Taste the potatoes as you season them. A final little pinch of salt can brighten the whole dish.
  6. Spoon a generous portion of mashed potatoes onto each plate, creating a bed for the chicken. Place one chicken breast on top of the mashed potatoes. Drizzle the reduced pan sauce generously over the chicken and around the plate. Garnish with additional fresh herbs if desired. Serve immediately while hot, ensuring each guest gets plenty of that delicious sticky glaze.

    • Encouragement: Serve hot and smile. This meal brings comfort and cheers at the table.

Follow these steps and you will have tender chicken, a glossy sauce, and creamy potatoes in about 40 minutes total. The sauce is the finish that makes it feel special.

Serving

Garlic Herb Chicken

Serve family-style on a large platter or plate individually over mashed potatoes. Place the mashed potatoes on the platter first, then arrange the chicken breasts on top. Spoon the sauce over everything so the glaze pools around the potatoes.

For a weeknight, set the platter in the center of the table and let everyone help themselves. For a small gathering, plate individually and add a sprig of parsley for color.

Add a simple side of steamed green beans or a crisp salad to round the meal. Warm dinner rolls or crusty bread are perfect for soaking up extra sauce.

Storage

Keep leftovers in an airtight container in the refrigerator for up to 3 days. Store sauce in a separate container if possible. This makes reheating easier and prevents the potatoes from soaking up too much sauce.

To reheat the chicken, place it in a skillet over low heat with a splash of chicken broth. Cover and warm gently until heated through. This keeps the meat tender better than the microwave.

Reheat mashed potatoes in a pot with a splash of cream or milk over low heat. Stir often until warmed. If using the microwave, add a little cream and cover to retain moisture.

Freeze cooked chicken and sauce in a freezer-safe container for up to 2 months. Thaw overnight in the refrigerator before reheating.

Kitchen Notes

  • Use a heavy-bottomed skillet for even searing and easy deglazing.
  • If chicken breasts are thick, halve them horizontally for faster cooking.
  • Warm the plates in the oven for a few minutes to keep the meal hot a little longer.
  • Swap russets for Yukon Golds if you prefer a naturally creamier potato.
  • Make the sauce ahead and reheat gently to save time on busy nights.

Variations

  • For picky eaters: Leave the herbs out of half the chicken or serve the sauce on the side.
  • Low-carb option: Skip the mashed potatoes and serve over roasted cauliflower mash.
  • Creamy version: Stir a spoonful of cream into the pan sauce for a richer finish.
  • Herb swap: Use rosemary instead of thyme for a woodsy flavor.
  • Make it spicy: Add a pinch of red pepper flakes to the herb rub or sauce for heat.

These variations keep the core recipe intact while letting you adapt to tastes and diets. Small swaps can make a big difference in how the family receives the dish.

FAQ

Q: Can I use bone-in chicken?
A: Yes. Bone-in will take longer to cook. Allow extra time and check the temperature near the bone for 165 degrees Fahrenheit.

Q: How do I prevent the garlic from burning?
A: Keep garlic in the herb rub and add it to the pan at a lower heat if you want to cook it in oil. Burning occurs at high heat, so watch closely.

Q: Can I make the sauce without sugar?
A: Yes. Omit the brown sugar and add a touch more balsamic for acidity. The sauce will be less caramelized but still flavorful.

Q: Is there a gluten-free version?
A: Absolutely. All ingredients here are naturally gluten-free. Just verify your chicken broth if you buy commercial brands.

Q: How do I know when the sauce is done?
A: It should reduce until it lightly coats the back of a spoon and has a glossy, slightly syrupy texture.

Conclusion

I hope this Garlic Herb Chicken brings warmth to your table. It is simple enough for a busy weeknight and special enough for guests. The pan sauce and mashed potatoes make it feel like a full meal with minimal fuss.

If you want a quicker creamy take, I like this 15-minute creamy garlic herb chicken from My Life In An Apron for when time is tight. For another lovely version that uses a garlic herb butter sauce, see the recipe at Chisel & Fork for extra inspiration.

Thank you for cooking with me. Gather your people, set the table, and enjoy a warm meal made with care.

Garlic Herb Chicken

Prep Time 10 minutes
Cook Time 30 minutes
Total Time 40 minutes
Servings 4 servings
Calories 540
A cozy, easy weeknight meal featuring tender chicken breasts seared to perfection and served over creamy mashed potatoes with a sticky pan sauce.

Ingredients

For the Chicken

  • 4 pieces boneless skinless chicken breasts (If breasts are uneven, pound them to even thickness.)
  • 3 tablespoons olive oil (Use a good quality olive oil for flavor.)
  • 4 cloves garlic, minced (Mince fresh garlic or press it for more aroma.)
  • 2 tablespoons fresh parsley, chopped (Chop just before using for bright color.)
  • 1 tablespoon fresh thyme leaves (Fresh thyme gives a subtle earthy lift.)
  • 2 tablespoons butter (Add toward the end of searing for basting.)
  • 1 cup chicken broth (Use low-sodium broth for better control of salt.)

For the Mashed Potatoes

  • 2 pounds russet potatoes (Cut into even chunks to cook evenly.)
  • 1/2 cup heavy cream (Warm slightly before adding for a silkier mash.)
  • 2 tablespoons brown sugar (Helps balance the balsamic and gives a sticky finish.)
  • 1 tablespoon balsamic vinegar (Adds bright acidity to the sauce.)

Instructions 

Preparation

  • Pat the chicken breasts dry with paper towels and season with salt and pepper on both sides.
  • In a small bowl, combine minced garlic, chopped parsley, and thyme leaves. Rub this herb mixture all over the chicken breasts.
  • Let the chicken rest at room temperature for 10 minutes.

Cooking the Chicken

  • Heat olive oil in a large skillet over medium-high heat until shimmering.
  • Place the chicken breasts in the pan and sear for 5-6 minutes until golden brown.
  • Flip and cook for another 5-6 minutes. Add butter and baste the chicken.
  • Check internal temperature; once it reaches 165°F, transfer to a plate and tent with foil.

Making the Sauce

  • In the same skillet, add brown sugar and balsamic vinegar. Stir until the sugar dissolves.
  • Pour in chicken broth, scrape browned bits, and bring to a simmer. Cook for 5-7 minutes until slightly syrupy.

Preparing the Mashed Potatoes

  • Peel and cut the potatoes into chunks and boil in salted water for 15-20 minutes until fork-tender.
  • Drain and return potatoes to the pot. Add butter and heavy cream, then mash until smooth.
  • Season with salt and pepper to taste.

Serving

  • Spoon a generous portion of mashed potatoes onto each plate, place chicken on top, and drizzle with sauce.
  • Garnish with fresh herbs if desired and serve immediately.

Notes

Leftovers can be stored in the refrigerator for up to 3 days. Sauce can be stored separately for reheating.
Calories: 540kcal
Course: Dinner, Main Course
Cuisine: American
Keyword: Comfort Food, Easy weeknight meal, Family Dinner, Garlic Herb Chicken, One-skillet meal