Category

30-Minute Chicken Dinners

Category

Cowboy Butter Lemon Bowtie Chicken with Broccoli

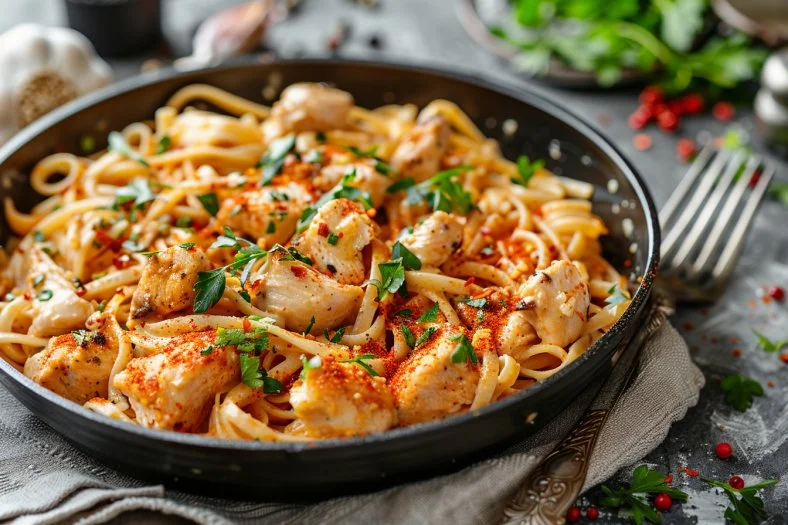
I love the moment the kitchen fills with hot lemon and butter scents while the pasta simmers. You hear the gentle boil of water and the light sizzle of chicken hitting the pan. That sound tells you dinner is almost ready and everyone will gather around the table.

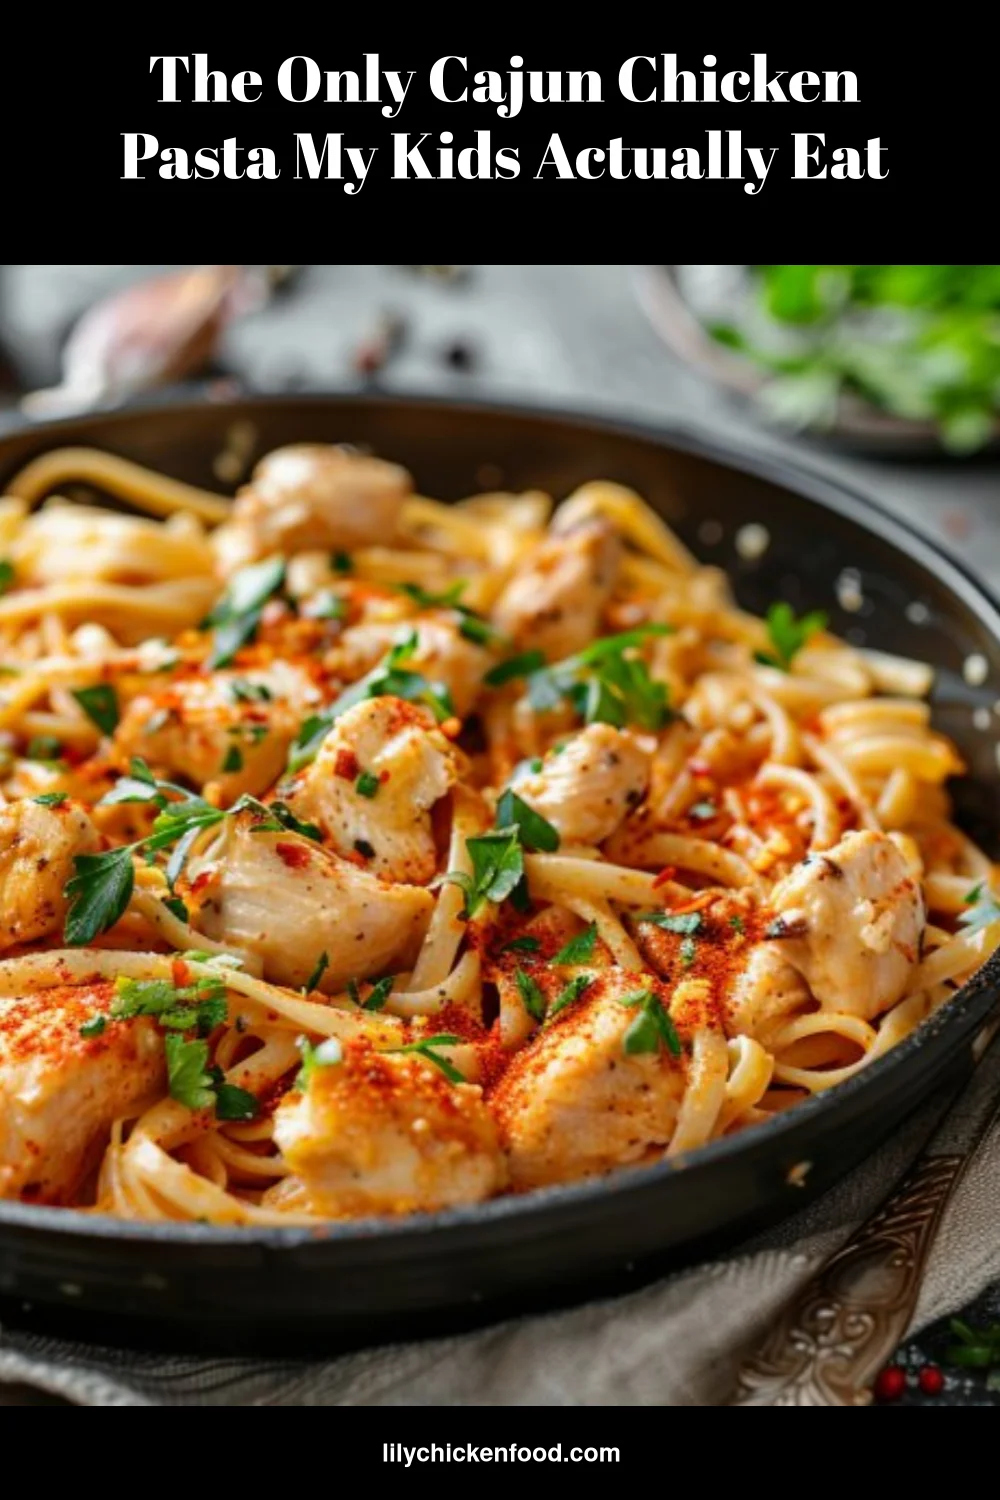
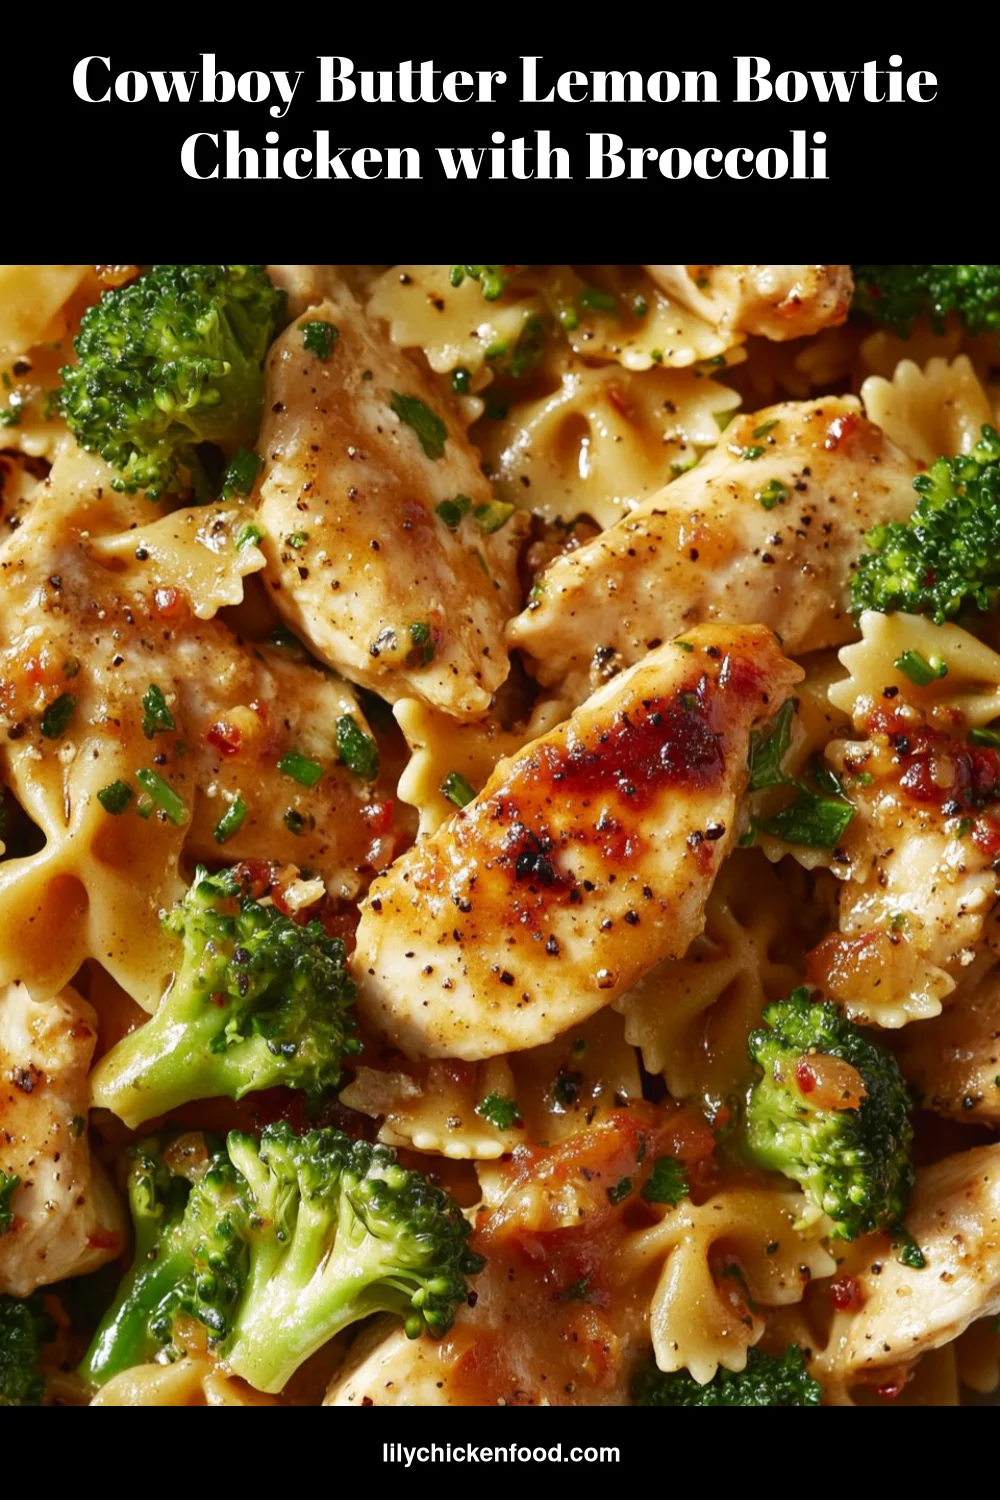
This Cowboy Butter Lemon Bowtie Chicken with Broccoli is one of those meals I make when I want comfort, bright flavor, and a quick cleanup. It is family-friendly and comes together in under 30 minutes. If you like bold flavors and easy weeknight meals, this will quickly become a go-to. For another fun chicken bite the kids love, try my Bang Bang Chicken Sliders for a party or busy night right here.

Why this works

Cowboy Butter Lemon Bowtie Chicken with Broccoli

This recipe balances richness and brightness. The cowboy butter gives a savory, garlicky backbone. Lemon brings a fresh lift that keeps the dish from feeling heavy. Broccoli adds color, texture, and a kid-friendly vegetable that blends well with the pasta.

It works for busy families because you can cook almost everything at once. Pasta boils while you brown the chicken and steam broccoli. The sauce is quick to finish in the same pan. I test recipes with real family schedules in mind, and this one shines on nights when homework, music practice, and soccer practice collide.

If you want fast chicken options for busy evenings, my collection of air fryer chicken recipes has simple ideas you can pair with this pasta available here.

Process Overview

“This is where the magic happens—when the aroma fills the kitchen.”

The steps are straightforward: season and brown the chicken, cook the pasta and broccoli, make a quick lemony cowboy butter sauce, and toss everything together. You can multitask the whole time, and cleanup stays minimal because most of the final sauce development happens in one pan.

If you like quick and reliable dinner plans, I keep this under my quick weeknight recipes for easy reference see the collection.

Ingredients

  • 1 lb boneless, skinless chicken breasts, cut into bite-sized pieces.
    Lily’s tip: Trim extra fat and slice pieces the same size so they cook evenly. Pound thicker parts gently if needed.

  • 12 oz bowtie (farfalle) pasta.
    Lily’s tip: Use a high-quality pasta and salt the water well. It makes a big difference in flavor.

  • 2 cups broccoli florets.
    Lily’s tip: Cut florets small so kids are more likely to eat them. Use stems sliced thin if you want extra texture.

  • 1 tsp Cajun seasoning (Adjust according to spice preference).
    Lily’s tip: Start with less if you have sensitive eaters. You can always add more to the sauce later.

  • 1/2 tsp garlic powder.
    Lily’s tip: Garlic powder blends into the sauce without leaving raw garlic bits. Use fresh garlic only if you like a sharper bite.

  • 1/2 tsp smoked paprika.
    Lily’s tip: Smoked paprika adds warmth and a subtle smokiness; it pairs well with the cowboy butter profile.

  • Salt to taste.
    Lily’s tip: Season in layers. Taste the sauce at the end and adjust.

  • Black pepper to taste.
    Lily’s tip: Freshly ground pepper brings a brighter finish.

  • 1/2 tsp crushed red pepper flakes (optional).
    Lily’s tip: Keep them on the side for kids and sprinkle on adults’ portions.

  • 1 tsp Dijon mustard.
    Lily’s tip: Dijon gives the sauce body and a slight tang. It helps the butter emulsify with the pasta water.

  • Juice and zest of 1 lemon.
    Lily’s tip: Zest first, then juice. The zest is concentrated flavor and makes the dish feel fresh.

  • 2 tbsp fresh parsley, chopped.
    Lily’s tip: Stir parsley in at the end to preserve color and freshness.

  • 1 tbsp fresh chives, chopped.
    Lily’s tip: Chives add a mild onion note without overpowering the lemon.

  • 2 tbsp olive oil (For cooking chicken).
    Lily’s tip: Use a neutral extra virgin olive oil or light olive oil for higher smoke point.

  • 6 tbsp unsalted butter (For the sauce).
    Lily’s tip: Unsalted butter lets you control the salt level. For richer flavor, use European-style butter.

  • 1/2 cup grated Parmesan cheese (Plus extra for topping).
    Lily’s tip: Freshly grated Parmesan melts better and tastes more vibrant than pre-grated.

  • 1/2 cup reserved pasta water (To adjust sauce consistency).
    Lily’s tip: Reserve more if you like a saucier pasta. Starchy pasta water helps the sauce cling to the noodles.

If you love a crisped chicken finish, I also shared a crunchy air fryer mozzarella wrap recipe that pairs well with pasta nights you can find here.

Directions

1. Preparation

  1. Fill a large pot with water and bring to a rolling boil. Salt it generously.
  2. Cut the chicken into even bite-sized pieces. Pat dry with paper towels.
  3. Zest and juice the lemon. Chop parsley and chives, then set aside.
  4. Measure out the butter, olive oil, and spices so everything is ready.

Encouraging note: Prepping first makes the cooking feel calm. I like to play a favorite playlist to make this part fun.

2. Cooking the Pasta and Broccoli

  1. Add the bowtie pasta to boiling water and cook according to package instructions until al dente.
  2. About 3 minutes before the pasta is done, add the broccoli florets to the same pot. This steams the broccoli and saves time.
  3. Reserve 1/2 cup to 3/4 cup of pasta water, then drain the pasta and broccoli together. Keep the reserved water.

Encouraging note: Cooking pasta and broccoli together keeps the flavor cohesive and cuts down on pots.

3. Cooking the Chicken

  1. While the pasta cooks, heat a large skillet over medium-high heat. Add 2 tbsp olive oil.
  2. Toss the chicken pieces with Cajun seasoning, garlic powder, smoked paprika, salt, and black pepper.
  3. Add the chicken to the hot skillet in a single layer. Do not crowd the pan.
  4. Cook for 3 to 4 minutes without moving to get a golden sear, then stir and cook another 2 to 3 minutes until cooked through.
  5. If using crushed red pepper flakes, add them in the last minute of cooking for a gentle toast.

Encouraging note: A hot pan and dry chicken equals good sear. If the chicken looks pale, raise the heat for a quick color boost.

Tip: For crispier, faster chicken, you can use air fryer chicken pieces from my quick recipes collection for a time saver see options.

4. Making the Sauce

  1. Reduce the heat to medium. Push the chicken to one side of the pan.
  2. Add the 6 tbsp butter to the empty side, letting it melt slowly.
  3. Stir in Dijon mustard, lemon zest, and lemon juice. Allow the sauce to simmer for 1 minute.
  4. Mix in the grated Parmesan cheese, stirring until it melts and the sauce becomes silky.
  5. Slowly add reserved pasta water a few tablespoons at a time until the sauce reaches your desired consistency.

Encouraging note: Taste and adjust the salt and pepper. The lemon should brighten, not overpower.

5. Combining Ingredients

  1. Add the drained pasta and broccoli into the skillet with the sauce and chicken.
  2. Toss gently to coat everything. If needed, add a splash more reserved pasta water to loosen the sauce.
  3. Stir in the chopped parsley and chives. Remove from heat and let it sit for one minute so the flavors settle.
  4. Finish with an extra sprinkle of Parmesan on top.

Encouraging note: Tossing off the heat keeps the butter from separating and gives a glossy finish.
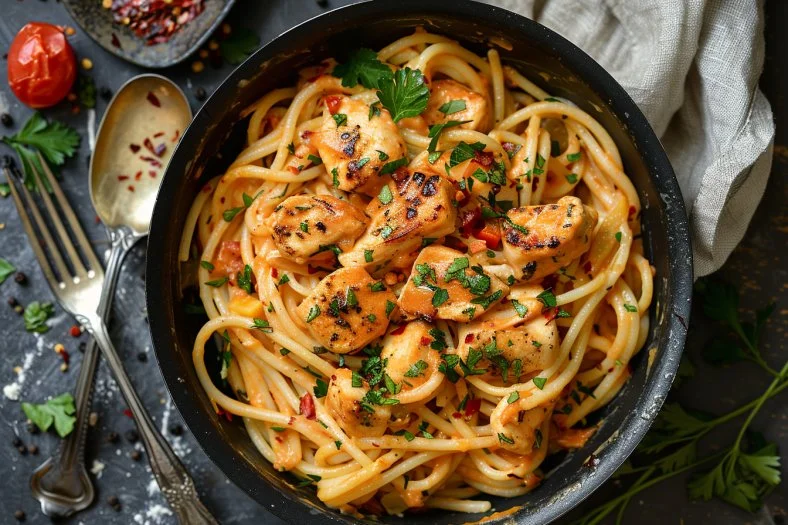
Serving

Cowboy Butter Lemon Bowtie Chicken with Broccoli

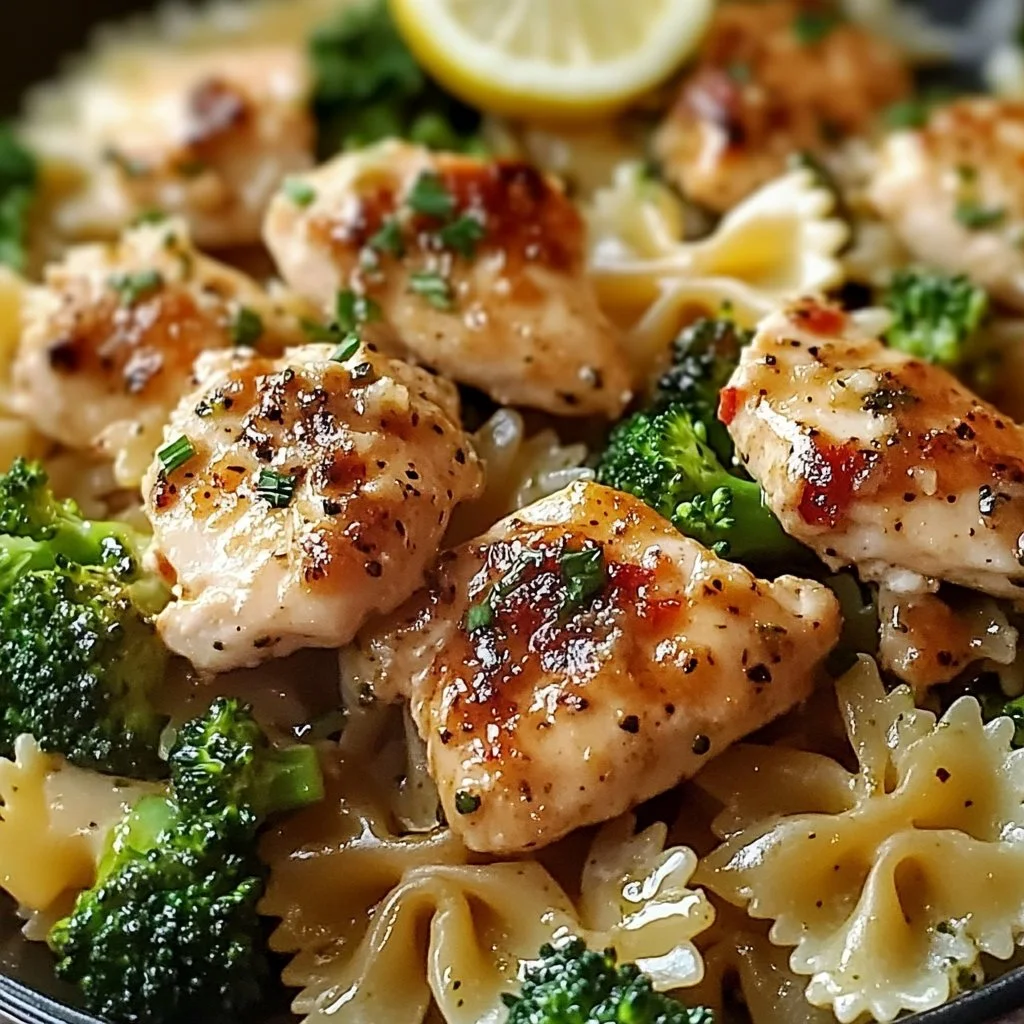
Serve this dish family-style right from the skillet or transfer to a large shallow bowl. Freshly grated Parmesan on the table invites everyone to add their own extra. A wedge of lemon on the side lets picky eaters decide how much brightness they want.

For a simple sides plan, pair with a crisp green salad and warm crusty bread. The whole meal feels like a small celebration without a lot of fuss.

Storage

  • Fridge: Store leftovers in an airtight container for up to 3 days. The sauce will firm up a bit as it cools.
  • Reheating: Gently reheat in a skillet over low heat with a splash of water or reserved pasta water. Stir until warmed and glossy.
  • Freezer: I do not recommend freezing this with the butter sauce. Freeze plain cooked chicken separately for up to 2 months and combine with fresh pasta when ready.
  • Meal prep tip: If making ahead, undercook the pasta by 1 minute so it stays perfect when reheated.

Encouraging note: This reheats well on busy nights. A quick toss in a hot pan brings back the bright lemon flavor.

Kitchen Notes

  • Use room temperature butter so it melts into the sauce smoothly.
  • Reserve more pasta water than you think you need; it saves the sauce from getting gummy.
  • For even cooking, pat chicken very dry before seasoning.
  • If worried about spice, mix half the Cajun seasoning in the chicken and save the rest to add to individual plates.
  • A nonstick skillet reduces cleanup and helps keep the sauce from clinging too much to the pan.

I often rely on shortcuts when evenings get hectic. These small steps keep dinner tasty without stress. For more make-ahead ideas and crispy chicken sides, check my crunchy mozzarella wrap notes here.

Variations

  • Kid-friendly: Reduce Cajun seasoning to 1/2 tsp or omit crushed red pepper. Add a sprinkle of cheddar instead of Parmesan for familiarity.
  • Low-carb: Replace the bowtie pasta with spiralized zucchini or cauliflower gnocchi. Cook the zucchini lightly to avoid a watery sauce.
  • Creamier: Stir in 1/4 cup heavy cream with the butter for a more decadent sauce.
  • Gluten-free: Use gluten-free bowtie pasta and ensure your Cajun seasoning has no wheat-based starches.
  • Vegetarian swap: Replace chicken with pan-seared tofu cubes or roasted chickpeas and increase broccoli to 3 cups.

FAQ

Q: Can I use chicken thighs instead of breasts?
A: Yes. Boneless skinless thighs add more flavor and stay juicy. Adjust cooking time slightly longer and ensure pieces reach 165°F.

Q: How spicy is the Cajun seasoning?
A: It varies by brand. Start with less and taste. You can always add more crushed red pepper when serving to control heat by plate.

Q: Can I make the sauce ahead of time?
A: The butter-based sauce is best made fresh. You can prepare the chicken and pasta ahead, then finish the sauce and combine before serving.

Q: What is cowboy butter?
A: Cowboy butter is a butter-based compound sauce with garlic, lemon, herbs, and spices. It is rich, savory, and great on chicken, steak, or vegetables.

Q: My sauce looks oily. How do I fix that?
A: Add a splash of reserved pasta water and whisk it in. The starches help emulsify the fat and create a glossy, cohesive sauce.

Conclusion

Thank you for cooking along with me. I hope this Cowboy Butter Lemon Bowtie Chicken with Broccoli becomes a familiar weeknight favorite in your home. It is one of those meals that feels special but is simple enough for a busy evening.

For a similar lemon-chicken and broccoli inspiration from a trusted source, I like to compare techniques with this classic Lemon Chicken with Broccoli & Bow Ties Recipe | Ina Garten from Ina Garten. If you want to see a recipe that inspired the cowboy butter twist, this Cowboy Butter Lemon Bowtie Chicken with Broccoli – Umami | Recipe has helpful flavor notes right here.

Happy cooking, and tell your family this one came from my kitchen to yours.

Cowboy Butter Lemon Bowtie Chicken with Broccoli

Prep Time 15 minutes
Cook Time 15 minutes
Total Time 30 minutes
Servings 4 servings
Calories 550
A quick and family-friendly meal featuring tender chicken, bowtie pasta, and vibrant broccoli in a bright lemony cowboy butter sauce, all prepared in under 30 minutes.

Ingredients

For the Chicken

  • 1 lb boneless, skinless chicken breasts, cut into bite-sized pieces (Trim extra fat and slice pieces the same size for even cooking.)
  • 2 tbsp olive oil (Use a neutral extra virgin olive oil or light olive oil for higher smoke point.)
  • 1 tsp Cajun seasoning (Adjust according to spice preference.)
  • 1/2 tsp garlic powder (Blends into the sauce without leaving raw garlic bits.)
  • 1/2 tsp smoked paprika (Adds warmth and smokiness; pairs well with cowboy butter.)
  • 1/2 tsp crushed red pepper flakes (optional) (Keep them on the side for kids.)

For the Pasta and Broccoli

  • 12 oz bowtie (farfalle) pasta (Use a high-quality pasta and salt the water well.)
  • 2 cups broccoli florets (Cut florets small for kids and use thinly sliced stems for extra texture.)

For the Sauce

  • 6 tbsp unsalted butter (Use unsalted butter for better salt control.)
  • 1 tsp Dijon mustard (Helps the butter emulsify with the pasta water.)
  • 1/2 cup grated Parmesan cheese (Freshly grated melts better than pre-grated.)
  • 1/2 cup reserved pasta water (Helps adjust sauce consistency.)
  • 2 tbsp fresh parsley, chopped (Stir in at the end to preserve freshness.)
  • 1 tbsp fresh chives, chopped (Adds a mild onion note.)

Instructions 

Preparation

  • Fill a large pot with water and bring to a rolling boil. Salt it generously.
  • Cut the chicken into even bite-sized pieces and pat dry with paper towels.
  • Zest and juice the lemon. Chop parsley and chives, then set aside.
  • Measure out the butter, olive oil, and spices so everything is ready.

Cooking the Pasta and Broccoli

  • Add the bowtie pasta to boiling water and cook according to package instructions until al dente.
  • About 3 minutes before the pasta is done, add the broccoli florets to the same pot.
  • Reserve 1/2 cup to 3/4 cup of pasta water, then drain the pasta and broccoli together.

Cooking the Chicken

  • Heat a large skillet over medium-high heat. Add 2 tbsp olive oil.
  • Toss the chicken pieces with Cajun seasoning, garlic powder, smoked paprika, salt, and black pepper.
  • Add the chicken to the hot skillet in a single layer. Do not crowd the pan.
  • Cook for 3 to 4 minutes without moving to get a golden sear, then stir and cook another 2 to 3 minutes until cooked through.
  • If using crushed red pepper flakes, add them in the last minute of cooking.

Making the Sauce

  • Reduce the heat to medium. Push the chicken to one side of the pan.
  • Add the butter to the empty side, letting it melt slowly.
  • Stir in Dijon mustard, lemon zest, and lemon juice. Allow the sauce to simmer for 1 minute.
  • Mix in the grated Parmesan cheese, stirring until it melts and the sauce becomes silky.
  • Slowly add reserved pasta water until the sauce reaches your desired consistency.

Combining Ingredients

  • Add the drained pasta and broccoli into the skillet with the sauce and chicken.
  • Toss gently to coat everything. Add more reserved pasta water if needed.
  • Stir in the chopped parsley and chives. Remove from heat and let it sit for one minute.
  • Finish with an extra sprinkle of Parmesan on top.

Notes

For a crisped chicken finish, pairing with crunchy air fryer mozzarella wraps can elevate pasta nights. Store leftovers in an airtight container for up to 3 days. Gently reheat while adding a splash of water to maintain quality.
Calories: 550kcal
Course: Dinner, Main Course
Cuisine: American
Keyword: Chicken, Comfort Food, Pasta, Quick Recipes, Weeknight Dinner

buffalo chicken dip is one of those recipes I end up making when I need something that feels fun, comforting, and basically guaranteed to disappear. You know the situation, you volunteer to bring an appetizer, and suddenly you are standing in your kitchen wondering what will actually make people happy. This is my answer because it is creamy, a little spicy, and super easy to scoop. I have made it for game nights, family get togethers, and that random Friday when we just wanted snacky dinner. If you want the kind of dip that keeps people hovering near the food table, you are in the right place.
buffalo chicken dip

How to Make Buffalo Chicken Dip

The Creamiest Buffalo Chicken Dip You’ll Ever Make! comes down to two things: using enough creamy base and mixing it well before you bake. I like this version because it stays smooth, not greasy, and you get buffalo flavor in every bite.

Ingredients and what you will need

  • Cooked chicken (about 2 to 3 cups, shredded). Rotisserie chicken makes life easier.
  • Cream cheese (8 ounces, softened). This is the main creamy backbone.
  • Sour cream (1 cup). Adds tang and keeps it scoopable.
  • Shredded cheddar (1 cup) plus a little extra for the top.
  • Shredded mozzarella (1 cup). This gives you that melty pull.
  • Buffalo sauce (about 1 by 2 cup, adjust to taste).
  • Ranch dressing (2 to 3 tablespoons) or blue cheese dressing if that is your thing.
  • Garlic powder (1 by 2 teaspoon) and a pinch of salt and pepper.
  • Optional: sliced green onions for the top.

You will also need a mixing bowl, a spoon or spatula, and a baking dish. An 8 by 8 dish works great, but a pie dish is fine too. If you are feeding a crowd, double it and use a 9 by 13.

Directions (simple, no fuss)

1) Heat your oven to 375F.

2) In a bowl, stir together the softened cream cheese, sour cream, ranch or blue cheese, buffalo sauce, garlic powder, and a little pepper. Mix until it looks smooth and fluffy.

3) Fold in the shredded chicken and about two thirds of the cheeses. Stir until everything is coated and evenly mixed.

4) Spread it into your baking dish and sprinkle the remaining cheese on top.

5) Bake for 20 to 25 minutes, until hot and bubbly at the edges. If you want a more golden top, broil for 1 to 2 minutes, but do not walk away because it goes fast.

6) Let it sit for about 5 minutes before serving. It thickens slightly and is easier to scoop.

Little personal tip: if your buffalo sauce is super vinegary or extra spicy, start with less. You can always stir in another splash after baking. The goal is bold, not painful.

“I brought this to our Sunday football hangout and it was the first dish to vanish. People literally scraped the corners of the pan.”

The Creamiest Buffalo Chicken Dip You'll Ever Make!

Can I prepare Buffalo Chicken Dip Ahead of Time?

Yes, and honestly this is one of my favorite things about it. The Creamiest Buffalo Chicken Dip You’ll Ever Make! is just as good when you prep it earlier, and it makes party day feel so much calmer.

Here is how I do it when I am trying to be the person who is not stressed out:

To prep the night before: Mix everything, spread it in your baking dish, cover tightly, and refrigerate. When you are ready, bake it straight from the fridge. Just add 5 to 10 extra minutes since the dish is cold.

To freeze it: You can freeze it, but the texture can change a tiny bit because dairy can get a little grainy after thawing. It still tastes good though. Freeze it unbaked for best results, thaw overnight in the fridge, then bake.

Leftovers: If you have any, store them in a sealed container in the fridge for up to 3 to 4 days. Reheat in the microwave in short bursts, stirring in between. If it looks a little thick, add a spoonful of sour cream and it comes right back to life.

One more thing I learned the hard way: do not add green onions until after baking if you are prepping ahead. They can get a little sad in the fridge. Sprinkle them fresh at the end for that nice pop.

What to Serve with Buffalo Chicken Dip

This is where you can have fun. buffalo chicken dip is super rich, so I like to put a mix of crunchy, sturdy dippers and a few lighter options. If you set out a variety, everyone can build their perfect bite.

  • Tortilla chips (the thicker restaurant style ones hold up best)
  • Celery sticks and carrot sticks for the classic buffalo vibe
  • Pretzel bites or pretzel crisps
  • Sliced bell peppers for extra crunch
  • Toasted baguette slices
  • Pita chips

If you want to turn it into a full on snack dinner, add a simple salad on the side. Something crisp and lemony is nice because it cuts through the creamy heat.

Also, if you are hosting, keep the dip warm. A warm dip is a creamy dip. If it sits out too long it thickens, which is normal. You can pop it back in the oven for 5 minutes, or keep it in a small slow cooker on warm.

Recipe Notes & Tips

I have made this enough times to know where things can go a little off track, so here are the tips I wish someone told me earlier.

Soften the cream cheese. If you try to mix it cold, you will fight lumps and it will feel annoying. Leave it on the counter for 30 minutes, or microwave it for about 15 seconds at a time until soft.

Use shredded chicken, not chunky cubes. Shredded chicken mixes into the creamy base better so every scoop has chicken. Big chunks can make it harder to scoop and less dip like.

Watch the salt. Buffalo sauce, ranch, and cheese all bring salt. Taste your mixture before adding extra. I usually only add pepper and maybe a tiny pinch of salt if needed.

Adjust the heat the smart way. If you want it hotter, add more buffalo sauce, a pinch of cayenne, or a few dashes of hot sauce. If you want it milder, use less buffalo sauce and add a little more sour cream. You can also top it with extra cheese which softens the heat.

Make it extra creamy on purpose. If you want that truly soft, scoopable texture, do not skimp on the sour cream and cream cheese. That is basically the whole magic of The Creamiest Buffalo Chicken Dip You’ll Ever Make!

Buffalo Chicken Dip Variations (e.g., Instant Pot, Crock Pot, Oven)

I love the oven method most, but I have done the other versions too, especially when I need hands off cooking. All of these still get you to The Creamiest Buffalo Chicken Dip You’ll Ever Make!, just with a different route.

Oven baked (my go to): Best for a bubbly top and a little golden cheese situation. Follow the main recipe above.

Crock Pot version: Add everything to the slow cooker except a small handful of cheese for the top. Cook on low for 2 to 3 hours, stirring once or twice, then sprinkle the remaining cheese and let it melt. Keep it on warm for serving. This is perfect for parties because it stays hot.

Instant Pot version: Use the sauté setting on low, add cream cheese, sour cream, buffalo sauce, and dressing, stirring until smooth. Add cooked shredded chicken and cheese, stir until melted, then switch to keep warm. If it feels thick, add a tablespoon or two of milk and stir. This one is fast and great when the oven is already full.

Protein swaps: Turkey works great, especially after the holidays. Canned chicken works in a pinch too, just drain it well and break it up.

Cheese swaps: Pepper jack adds a little kick. Monterey jack melts nicely. If you love blue cheese, sprinkle some crumbles on top after baking.

Common Questions

Can I use canned chicken?
Yes. Drain it really well and stir it in. The texture is a bit softer than shredded rotisserie chicken, but it still makes a solid dip.

How do I keep it from getting oily?
Use full fat dairy and do not overbake it. Also, avoid super high heat for too long. If you see oil pooling, stir it and it usually pulls back together.

Can I make it without ranch?
Totally. You can skip it, or use blue cheese dressing, or even add a little extra sour cream and a pinch of onion powder for flavor.

What is the best buffalo sauce to use?
Use one you already like. If you are unsure, start with a classic, medium heat buffalo wing sauce. Taste the mix before baking and adjust.

How much dip should I make for a party?
For about 8 to 10 people, the standard recipe is usually fine if you have other snacks. For a bigger group or a game day crowd, double it and bake in a 9 by 13.

Alright, go make it

If you want something easy that feels like a guaranteed win, this is it. You can bake it, keep it warm in a slow cooker, and tweak the heat to match your crowd. The Creamiest Buffalo Chicken Dip You’ll Ever Make! is creamy, cheesy, and the kind of snack that makes people ask for the recipe. If you try it, do yourself a favor and make extra because leftovers are gold.
The Creamiest Buffalo Chicken Dip You'll Ever Make!

Buffalo Chicken Dip

Prep Time 10 minutes
Cook Time 25 minutes
Total Time 35 minutes
Servings 8 servings
Calories 350
A creamy, spicy dip made with shredded chicken, cream cheese, and buffalo sauce that's perfect for parties and gatherings.

Ingredients

Main ingredients

  • 2-3 cups Cooked chicken, shredded (Rotisserie chicken makes life easier.)
  • 8 ounces Cream cheese, softened (This is the main creamy backbone.)
  • 1 cup Sour cream (Adds tang and keeps it scoopable.)
  • 1 cup Shredded cheddar (Plus a little extra for the top.)
  • 1 cup Shredded mozzarella (This gives you that melty pull.)
  • 1/2 cup Buffalo sauce (Adjust to taste.)
  • 2-3 tablespoons Ranch dressing (Or blue cheese dressing if preferred.)
  • 1/2 teaspoon Garlic powder
  • to taste Salt and pepper
  • optional to taste Sliced green onions (For topping.)

Instructions 

Preparation

  • Heat your oven to 375°F.
  • In a bowl, stir together the softened cream cheese, sour cream, ranch or blue cheese dressing, buffalo sauce, garlic powder, and a pinch of pepper. Mix until smooth and fluffy.
  • Fold in the shredded chicken and about two thirds of the cheeses. Stir until everything is coated and evenly mixed.
  • Spread the mixture into your baking dish and sprinkle the remaining cheese on top.
  • Bake for 20 to 25 minutes until hot and bubbly at the edges. Broil for 1 to 2 minutes for a more golden top.
  • Let it sit for about 5 minutes before serving to thicken slightly.

Notes

Make ahead of time by mixing everything, spreading in a baking dish, covering tightly, and refrigerating. Bake directly from the fridge with 5 to 10 extra minutes. Store leftovers in a sealed container for up to 3-4 days. Reheat in the microwave, adding a spoonful of sour cream if it thickens.
Calories: 350kcal
Course: Appetizer, Snack
Cuisine: American
Keyword: Appetizer Recipes, Buffalo Chicken Dip, Creamy Dips, Dip Recipes, Party Food

Marry Me Chicken

The rich smell of olive oil and garlic fills the kitchen as I prepare this delightful dish. You hear the soft sizzling of the chicken in the skillet, all while the thought of a cozy family dinner lingers in the air. This is Marry Me Chicken, a recipe so good that it might just be worth a proposal.

Why This Works

Marry Me Chicken

Marry Me Chicken is one of those meals that feels special yet comes together with ease. It’s perfect for busy weeknights when you want to serve your family something delicious without spending hours in the kitchen. The creamy sauce enveloping the chicken pairs beautifully with pasta or rice, making it a complete meal.

Not only is this a time-saver, but it also has that wow factor that can impress anyone at the dinner table. After all, who wouldn’t fall in love after tasting a dish this comforting?

Process Overview

“This is where the magic happens—when the aroma fills the kitchen.”

The process for making Marry Me Chicken is not just straightforward but also quite enjoyable. From searing the chicken to creating that luscious creamy sauce, each step brings warmth into your home. You will appreciate how quickly it all comes together, allowing you to enjoy more quality time with your loved ones.

Ingredients

  • 4 boneless, skinless chicken breasts
  • 2 tablespoons olive oil
  • Salt and pepper to taste
  • 1 teaspoon garlic powder
  • 1 tablespoon Italian seasoning
  • 1 cup heavy cream
  • 1 cup chicken broth
  • 1 cup diced tomatoes
  • 1 cup grated Parmesan cheese
  • Fresh parsley for garnish

Lily’s Personal Tips

  • Chicken Breasts: Choose organic if possible. You can also use chicken thighs for a different flavor.
  • Olive Oil: Extra virgin olive oil offers a richer taste.
  • Garlic Powder: Fresh garlic can be used but adjust the quantity to avoid overpowering the dish.
  • Parmesan Cheese: Grating it fresh gives the best texture and flavor.
  • Fresh Parsley: This does not only look pretty; it adds a fresh taste that balances the creaminess.

Directions

  1. Preheat your oven to 375°F (190°C).

    • Starting with a preheated oven ensures your chicken cooks evenly.
  2. Season the chicken breasts with salt, pepper, garlic powder, and Italian seasoning.

    • Make sure to rub the seasoning in well for the best flavor.
  3. In a large skillet, heat olive oil over medium-high heat. Add the chicken breasts and sear until golden brown, about 5 minutes on each side.

    • This will give your chicken a beautiful crust and lock in the juices.
  4. Remove the chicken from the skillet and set aside.

    • Letting it rest is key to keeping it moist.
  5. In the same skillet, add chicken broth, heavy cream, and diced tomatoes. Stir well and bring to a simmer.

    • You’ll want those flavors to meld together beautifully.
  6. Stir in the Parmesan cheese until melted.

    • This will create a creamy sauce that coats everything perfectly.
  7. Return the chicken to the skillet, spooning sauce over the top.

    • Make sure each piece is well coated; this is where the love really comes in.
  8. Transfer the skillet to the preheated oven and bake for 20-25 minutes until the chicken is cooked through.

    • Use a meat thermometer; the internal temperature should reach 165°F.
  9. Garnish with fresh parsley and serve over pasta or rice.

    • A sprinkle of parsley adds both color and taste; serve it up family-style for that heartwarming touch.

Serving

Marry Me Chicken

Marry Me Chicken is best served warm and family-style. Load it up over a bed of pasta or rice, and let everyone help themselves. Consider adding some steamed vegetables or a fresh salad on the side to complete your meal. Sharing this dish around the table creates a loving environment where every bite feels like a hug.

Storage

If you have leftovers (which is rare, trust me), you can store them in an airtight container in the fridge for up to four days. When ready to enjoy again, reheat gently on the stovetop or in the microwave, adding a splash of broth or cream to maintain the sauce’s richness.

Kitchen Notes

  • Use one skillet for everything to minimize clean-up.
  • Look for pre-cut chicken or ask your butcher for help to save time.
  • Make a double batch and freeze it for those nights you don’t want to cook.
  • Consider adding a splash of white wine to the sauce for extra flavor.
  • Keep your herbs fresh by storing them in water in the fridge.

Variations

Feel free to customize Marry Me Chicken according to your family’s tastes or dietary needs. Here are a few ideas:

  • Substitute almond milk for heavy cream for a lighter option.
  • Use dairy-free cheese alternatives if anyone is lactose intolerant.
  • For a spicy kick, add red pepper flakes to the sauce.
  • Toss in some chopped spinach or kale for added greens.
  • If you have picky eaters, slice the chicken into bite-sized pieces for easier eating.

FAQ

1. Can Marry Me Chicken be made in advance?
Yes, you can prepare the chicken and the sauce ahead. Just bake it when you are ready to serve.

2. Is it possible to use frozen chicken?
While fresh chicken works best, you can use frozen chicken; just ensure it is cooked through completely.

3. What can I serve with Marry Me Chicken?
Pasta, rice, or even a simple side salad pairs nicely with this dish.

4. How do I know when the chicken is fully cooked?
Use a meat thermometer; it should read 165°F.

5. Can I make this dish in a slow cooker?
Yes, you can adapt it for a slow cooker; just add everything and cook on low for 4-6 hours.

Conclusion

Thank you for joining me on this delightful cooking journey. Marry Me Chicken is truly a dish that brings families together around the table. With its wonderful flavors and simple preparation, it’s bound to become a favorite in your home. I hope you enjoy cooking and sharing this special meal with your loved ones. Until next time, happy cooking!

Marry Me Chicken

Prep Time 10 minutes
Cook Time 30 minutes
Total Time 40 minutes
Servings 4 servings
Calories 600
A delicious and creamy chicken dish that's perfect for family dinners, combining tender chicken with a flavorful sauce. A dish so good, it might just earn a proposal!

Ingredients

Main Ingredients

  • 4 pieces boneless, skinless chicken breasts (Choose organic if possible or substitute with chicken thighs.)
  • 2 tablespoons olive oil (Extra virgin olive oil offers a richer taste.)
  • 1 teaspoon garlic powder (Fresh garlic can be used but adjust the quantity.)
  • 1 tablespoon Italian seasoning (Adds flavor to the chicken.)
  • 1 cup heavy cream (For a creamy sauce.)
  • 1 cup chicken broth (Adds depth to the sauce.)
  • 1 cup diced tomatoes (Provide flavor and texture.)
  • 1 cup grated Parmesan cheese (Grating fresh gives the best texture and flavor.)
  • to taste salt and pepper (Used for seasoning.)
  • as needed fresh parsley for garnish (Adds a fresh taste and visual appeal.)

Instructions 

Preparation

  • Preheat your oven to 375°F (190°C).
  • Season the chicken breasts with salt, pepper, garlic powder, and Italian seasoning.
  • In a large skillet, heat olive oil over medium-high heat. Add the chicken breasts and sear until golden brown, about 5 minutes on each side.
  • Remove the chicken from the skillet and set aside.
  • In the same skillet, add chicken broth, heavy cream, and diced tomatoes. Stir well and bring to a simmer.
  • Stir in the Parmesan cheese until melted.
  • Return the chicken to the skillet, spooning sauce over the top.
  • Transfer the skillet to the preheated oven and bake for 20-25 minutes until the chicken is cooked through.
  • Garnish with fresh parsley and serve over pasta or rice.

Notes

Consider serving with steamed vegetables or a fresh salad. Store leftovers in an airtight container in the fridge for up to four days.
Calories: 600kcal
Course: Dinner, Main Course
Cuisine: American
Keyword: Chicken, Comfort Food, Creamy sauce, Family Dinner, Quick Meal

Pineapple Cowboy Candy Chicken Wings

I can still hear my boys setting the table, the clink of plates timed perfectly with the sweet, spicy steam coming from the oven. The smell of caramelized brown sugar and pineapple pulls them from homework and screens faster than a bell. Those small moments—everyone gathered around a pan of sticky, crispy wings—are why I cook like this: to make a noisy, warm house feel like home.

Why This Pineapple Cowboy Candy Chicken Wings Feels Like Home

There is something simple and comforting about a pan of wings that balances sweet, salty, and heat all at once. Pineapple Cowboy Candy Chicken Wings remind me of summer barbecues and quick weeknight dinners that still felt special. The brown sugar melts into a glossy, almost jammy coating. The jalapeño gives a friendly kick rather than stopping the conversation.

This recipe matters because it meets so many of our family needs. It comes together quickly, uses just a few bowls, and makes plenty of sticky, shareable food. You can prep ahead, let the oven do the work, and still feel like you made something thoughtful.
Pineapple Cowboy Candy Chicken Wings

I use this when I want to feel cozy without fuss. When my grandmother used to make preserves near the dam, she would say a little sugar and a little patience fixed most days. That lesson lives in these wings.

The Simple Magic Behind Pineapple Cowboy Candy Chicken Wings

“This is where the magic happens—when the aroma fills the kitchen and my kids come running in, asking ‘Is it ready yet?’”

The process is honest and forgiving. You marinate, bake, and finish with a quick broil for shine. The color cues tell you when you are close: a deep golden brown with sticky edges is the goal. The texture should be crisp on the outside and tender inside, with a syrupy cling of sauce that makes napkins necessary and conversations louder.

From there, the flavor logic is simple. Pineapple juice supplies bright acidity and sweetness. Brown sugar deepens into caramel notes during baking. Soy sauce brings the salty, savory backbone. Smoked paprika and garlic add warmth, while chopped jalapeños bring lively heat. The result is familiar, approachable, and full of flavor.

Ingredients You’ll Need

1.5 lbs chicken wings
1/2 cup pineapple juice
1/2 cup brown sugar
2 jalapeños, finely chopped
1 teaspoon garlic powder
1 teaspoon onion powder
1 teaspoon smoked paprika
1/4 cup soy sauce
1/2 teaspoon black pepper
1 tablespoon olive oil (for greasing)

A quick note from my kitchen: fresh jalapeños make a difference. If you prefer milder heat, remove the seeds. If your pantry lacks soy sauce, a splash of Worcestershire will work in a pinch, but the soy brings the right savory balance. Use what you have and make it yours. Little swaps do not mean less love.

How to Make Pineapple Cowboy Candy Chicken Wings, The Heartwarming Way

Step-by-step, this recipe stays friendly. Marinate the wings briefly, bake until the outside sings, and finish with a broil if you want more crisp. The aroma will be your cue. When the sugar starts to caramelize and you see flecks of char on the edges, you know you have a winner.

Keep an eye on the wings during broil. The sugars can go from perfect to too dark quickly. Use a wire rack so air can circulate and the bottoms do not steam. Meanwhile, let the kids help mix the sauce if you like; it is a safe and fun job. The sticky fingers are part of the memory.

Step-by-Step Directions

  1. Preheat your oven to 400°F (200°C).
    Rinse the chicken wings under cold water and pat them dry with paper towels. Place them in a large mixing bowl.
    Tip: Dry wings crisp better. Pat until they feel dry to the touch.

  2. In a separate bowl, combine the pineapple juice, brown sugar, chopped jalapeños, garlic powder, onion powder, smoked paprika, soy sauce, and black pepper. Whisk until the brown sugar is dissolved and the ingredients are well mixed.
    Tip: Warm the pineapple juice slightly to help the sugar dissolve faster if you are short on time.

  3. Pour the marinade over the chicken wings in the mixing bowl. Toss the wings to ensure they are evenly coated. Cover the bowl with plastic wrap and let them marinate in the refrigerator for at least 30 minutes, or up to 2 hours for more flavor.
    Tip: Two hours deepens the flavor, but 30 minutes still gives a lovely lift. I often do 45 minutes while I set the table.

  4. Line a baking sheet with aluminum foil and place a wire rack on top. Lightly grease the rack with olive oil.
    Tip: The rack keeps the wings from sitting in their juices and helps both sides brown evenly.

  5. Remove the wings from the marinade, allowing any excess liquid to drip off. Place them in a single layer on the wire rack. Reserve the marinade for later use.
    Tip: Leave a little marinade behind to baste. Too much will pool and make the wings soggy.

  6. Place the baking sheet in the preheated oven and bake the wings for 25-30 minutes, or until they are golden brown and crispy. Brush the wings with some of the reserved marinade halfway through cooking.
    Tip: A little browning builds flavor, just like grandma showed me. Keep the brush handy and baste gently.

  7. If desired, switch the oven to broil for the last 3-5 minutes of cooking for extra crispiness.
    Tip: Stand close and watch. That last minute can flip from perfect to charred fast, but a light char adds smoky depth.

  8. Once done, remove the wings from the oven and let them rest for a few minutes. Serve warm, garnished with additional chopped jalapeños if desired.
    Tip: Let them rest so the juices settle. This makes them juicier inside and easier to pick up.

Quick encouragement: This is easier than it looks. The oven does the heavy lifting and the flavors come together with very little fuss. Give it a try; you might surprise yourself.

Pineapple Cowboy Candy Chicken Wings

Serving Pineapple Cowboy Candy Chicken Wings with Love

I lay these wings in the center of the table on a big platter and tell everyone to dig in. We eat family-style, grabbing a wing with one hand and a napkin in the other. Little bowls of extra chopped jalapeños, lime wedges, and a simple slaw make the spread feel lively.

On the side, my kids love plain rice or a cornbread muffin to sop up any sauce. Adults often appreciate a green salad with a bright vinaigrette to cut the sweetness. For a weekend feast, we add roasted sweet potatoes and a pitcher of iced tea.
Pineapple Cowboy Candy Chicken Wings

A small story: once my son declared these his favorite food and insisted on making up a song while he ate. Food is about connection, and a recipe like this makes room for those small, silly moments.

Storage & Reheat Tips (Keeping the Goodness)

Store leftover wings in an airtight container in the fridge for up to 3 days. If you want to keep them longer, freeze in a single layer on a tray and then transfer to a freezer bag. They will hold for up to 2 months.

To reheat, the oven is best. Place wings on a baking sheet at 350°F (175°C) for 8–10 minutes to revive the crisp. The microwave is fine for a quick lunch; cover with a damp paper towel and heat in short bursts to avoid rubbery texture.

If your wings lose a bit of glaze in storage, warm a tablespoon of reserved or fresh pineapple juice with a teaspoon of brown sugar and brush on before reheating. It brings the shine back and refreshes the flavor.

My Kitchen Notes & Shortcuts

  • Marinate in a zip-top bag for quick cleanup and more even coating. Squeeze out extra air so the wings contact the marinade.
  • If you are short on time, a 30-minute marinade still gives good flavor. I make these on busy nights when sports start at six.
  • Use canned pineapple juice if fresh is not available. For more pineapple texture, add small diced pineapple in the last 10 minutes of baking.
  • To make them oven-free, try an air fryer at 380°F for 20 minutes, turning once. Check earlier if your air fryer runs hot.
  • Let the kids help chop soft toppings or shake the wings in the bag. They love to claim a job and it saves time.

These small tricks keep dinner quick without losing the soul of the dish.

Family-Friendly Variations

  • Milder version: Remove the seeds and membranes from jalapeños or use just one pepper. Serve extra sliced peppers for those who want heat.
  • Tangy twist: Add a tablespoon of apple cider vinegar to the marinade for more bright acidity. Great for balancing sweetness.
  • Smokier depth: Stir in a dash of liquid smoke or increase smoked paprika for a campfire feel. I reach for this on cool nights.
  • Kid-friendly glaze: Omit the jalapeños and add a splash of ketchup to the reserved marinade for a familiar barbecue taste.
  • Vegetarian idea: Swap wings for cauliflower florets tossed in the same marinade and roasted until tender and charred at the edges.

Feel free to make this dish your own. Every family adds a little patch of personality.

FAQs About Pineapple Cowboy Candy Chicken Wings

Can I make this ahead for a busy week?
Absolutely. In fact, letting it sit for an hour lets the flavors get to know each other, just like an old family recipe. Marinate the wings up to 2 hours ahead, or prepare the sauce the day before.

How do I know when the wings are fully cooked?
Look for an internal temperature of 165°F (74°C). If you do not have a thermometer, check that the juices run clear when pierced near the bone and the meat pulls away slightly from the joint.

My glaze is too thin after baking. What can I do?
Simmer the reserved marinade on the stove for a few minutes until it reduces and thickens. Brush on again and broil for a minute to set the glaze.

Can I make this gluten-free?
Yes. Use tamari or a gluten-free soy sauce alternative. Check labels on brown sugar if you have strict dietary needs.

What if my wings stick to the rack?
Grease the rack lightly before placing wings. Let them sit a minute after baking before lifting; the glaze sets and they are less likely to rip.

One Final Thought from My Kitchen

When I make Pineapple Cowboy Candy Chicken Wings, I am not just cooking for dinner. I am building a small ritual for my family: a shared plate, loud chatter, and the kind of mess that means memories were made. It is the sort of recipe that welcomes improvisation and forgiveness.

Remember, cooking at home does not need to be perfect to be meaningful. A little sugar, a little heat, and the people you love are the real ingredients.

Conclusion

If you want a version of this recipe to print or keep on your phone, you might enjoy the recipe notes on this page: Pineapple Cowboy Candy Chicken Wings Recipe.

For a playful look at the original Cowboy Candy and ideas for making your own pineapple-based preserves, this guide is a lovely companion: Pineapple Cowboy Candy – Playful Cooking.

Until next time, happy cooking. I hope these wings bring warmth, sticky fingers, and a lot of laughter to your table.

Pineapple Cowboy Candy Chicken Wings

Prep Time 45 minutes
Cook Time 30 minutes
Total Time 1 hour 15 minutes
Servings 4 servings
Calories 400
A comforting and simple recipe that combines sweet, salty, and spicy flavors, perfect for family gatherings.

Ingredients

Main Ingredients

  • 1.5 lbs chicken wings
  • 1/2 cup pineapple juice (Fresh or canned)
  • 1/2 cup brown sugar (Deepens caramel notes during baking)
  • 2 jalapeños, finely chopped (Remove seeds for milder heat)
  • 1 teaspoon garlic powder
  • 1 teaspoon onion powder
  • 1 teaspoon smoked paprika
  • 1/4 cup soy sauce (Can substitute with Worcestershire sauce)
  • 1/2 teaspoon black pepper

For Greasing

  • 1 tablespoon olive oil (For greasing the wire rack)

Instructions 

Preparation

  • Preheat your oven to 400°F (200°C).
  • Rinse the chicken wings under cold water and pat them dry with paper towels.
  • In a large mixing bowl, combine the wings and marinate with the other ingredients.

Marinating

  • In a separate bowl, whisk together the pineapple juice, brown sugar, jalapeños, garlic powder, onion powder, smoked paprika, soy sauce, and black pepper until well mixed.
  • Pour the marinade over the chicken wings and toss to ensure they are fully coated. Cover and let marinate for at least 30 minutes, or up to 2 hours.

Baking

  • Line a baking sheet with aluminum foil and place a wire rack on top. Grease the rack lightly with olive oil.
  • Remove the wings from the marinade and place them in a single layer on the wire rack. Reserve the marinade for later. Bake for 25-30 minutes or until golden brown and crispy.

Broiling (optional)

  • If desired, switch the oven to broil for the last 3-5 minutes for extra crispiness.

Serving

  • Remove from the oven and let the wings rest for a few minutes before serving. Garnish with extra chopped jalapeños if desired.

Notes

Store leftovers in an airtight container for up to 3 days in the fridge, or freeze for up to 2 months.
Calories: 400kcal
Course: Appetizer, Main Course
Cuisine: American
Keyword: BBQ Wings, Chicken Wings, Family Recipe, Pineapple

The Only Cajun Chicken Pasta My Kids Actually Eat

The kitchen is alive with the sounds of sizzling chicken and the warm, inviting aroma of garlic and spices. As the Cajun seasoning dances through the air, you can almost taste the bold flavors that await. Creamy Cajun chicken pasta is the perfect dish for family dinners, bringing everyone to the table with its rich and vibrant taste. This dish not only pleases the palate but also saves time for busy evenings, allowing you to whip up a restaurant-quality meal at home.

Why This Works

Creamy Cajun Chicken Pasta: A Bold, Flavor-Packed Dinner

Creamy Cajun chicken pasta is a fantastic choice for families looking for a quick, delicious meal that doesn’t skimp on flavor. With a few simple ingredients and straightforward steps, you can have a dinner that feels special without spending hours in the kitchen.

This recipe utilizes chicken breasts that are quick to cook and soak up all the delicious flavors. The creaminess of the sauce envelops the pasta, providing a comforting embrace that the whole family will appreciate. Plus, the vibrant Cajun spices add an exciting kick that keeps everyone coming back for more.

Process Overview

“This is where the magic happens—when the aroma fills the kitchen.”

The joy of cooking is in the process, and that’s especially true with this dish. You’ll start by perfectly seasoning and cooking the chicken. While it rests, the pasta will boil, and then we’ll create a creamy Cajun sauce that brings everything together beautifully. In no time, you’ll serve a meal that not only tastes great but also warms your heart.

Ingredients

Here’s what you need to create this delightful dish:

  • 2 boneless, skinless chicken breasts
  • Chicken breasts are quick to cook and absorb the Cajun seasoning well. You could also use thighs for more flavor.
  • 1 tablespoon olive oil
  • For cooking the chicken. Olive oil adds a mild flavor and helps sear the chicken evenly.
  • 1 tablespoon Cajun seasoning
  • This is the key to the dish’s bold flavor. You can either use store-bought Cajun seasoning or make your own blend.
  • Salt and pepper, to taste
  • Essential for seasoning the chicken and ensuring it has enough flavor.
  • 12 oz penne, fettuccine, or spaghetti
  • Any long or short pasta will work, but penne and fettuccine are great choices for creamy sauces.
  • Salt, for the pasta water
  • Seasoning the pasta water enhances the flavor of the pasta.
  • 2 tablespoons unsalted butter
  • The butter forms the base of the creamy sauce, adding richness and flavor.
  • 4 cloves garlic, minced
  • Fresh garlic brings aromatic depth to the sauce.
  • 1 tablespoon Cajun seasoning
  • Adding Cajun seasoning to the sauce intensifies the dish’s flavor profile.
  • 1 teaspoon smoked paprika
  • For a smoky flavor that complements the Cajun seasoning and adds depth to the sauce.
  • 1 cup heavy cream
  • The heavy cream makes the sauce velvety and rich, balancing the heat from the Cajun spices.
  • ½ cup chicken broth
  • Chicken broth adds a savory base to the sauce and helps thin it out slightly for a smoother texture.
  • ¼ cup grated Parmesan cheese
  • Parmesan adds a salty, umami depth to the sauce, making it extra flavorful.
  • Fresh parsley, chopped (optional)
  • For garnish and added freshness.
  • Red pepper flakes
  • For an extra kick of heat, sprinkle some red pepper flakes on top.
  • Fresh lemon juice
  • A squeeze of lemon just before serving will brighten the dish and balance the richness.
  • Sautéed vegetables (optional)
  • Add sautéed bell peppers, onions, spinach, or mushrooms for extra flavor and nutrition.
  • Shrimp (optional)
  • Substitute the chicken with shrimp for a seafood twist on this Cajun pasta.

Lily’s Tips:

  • For a milder flavor, reduce the Cajun seasoning or skip the red pepper flakes.
  • Don’t rush cooking the chicken. A good sear locks in the juices and flavor.
  • Feel free to adjust the amount of heavy cream for a lighter sauce.

Directions

First Step: Prepare the Chicken

Start by seasoning both sides of the chicken breasts with the Cajun seasoning, salt, and pepper. Heat the olive oil in a skillet over medium-high heat, and cook the chicken for about 5-7 minutes on each side, or until golden brown and fully cooked. The chicken should reach an internal temperature of 165°F. Once done, remove it from the skillet and let it rest. This will keep it juicy and flavorful.

Second Step: Cook the Pasta

In a large pot, bring water to a boil. Add a generous amount of salt, followed by your pasta of choice. Cook according to package instructions until al dente. Once cooked, reserve a cup of the pasta water, then drain the pasta and set it aside. The salty pasta will enhance the dish and act as a great base layer.

Third Step: Make the Cajun Cream Sauce

In the same skillet used for the chicken, melt the butter over medium heat. Add minced garlic and sauté until fragrant, about 30 seconds. Add another tablespoon of Cajun seasoning and smoked paprika, stirring to combine. Slowly pour in the heavy cream and chicken broth, stirring continuously until smooth. Let it simmer for about 2-3 minutes to thicken, then stir in the Parmesan cheese, allowing it to melt into the sauce.

Fourth Step: Combine the Pasta, Chicken, and Sauce

Slice the rested chicken and return it to the skillet with the sauce. Add the cooked pasta and toss everything together gently. If the sauce is too thick, you can add some reserved pasta water until you reach your desired consistency. Taste and adjust with more Cajun seasoning, salt, or pepper as needed. Don’t forget to sprinkle with fresh parsley before serving!

Serving

Creamy Cajun Chicken Pasta: A Bold, Flavor-Packed Dinner

For a warm family-style presentation, serve the creamy Cajun chicken pasta in a large bowl at the center of the table. This encourages everyone to dig in and enjoy together. Pair it with a fresh salad or garlic bread for a complete meal. Lastly, a squeeze of fresh lemon juice over the top just before serving brightens up all those bold flavors.

Storage

Leftovers can be stored in an airtight container in the fridge for up to three days. To reheat, gently warm the pasta on the stove over low heat, adding a splash of chicken broth or cream to prevent it from drying out. You can also microwave it in short intervals, stirring in between until heated through.

Kitchen Notes

  • Pre-cut your vegetables ahead of time to save on cooking time.
  • Use frozen shrimp for a quick protein option—just thaw and toss in during the last minutes of cooking.
  • Opt for a pasta pot with a built-in strainer for easy draining.
  • Make the sauce while the pasta cooks to speed up the process.
  • If you like spice, keep Cajun seasoning handy for sprinkling on top when serving.

Variations

  • Vegetarian: Swap chicken for sautéed mushrooms or add vegetables like zucchini and spinach for a hearty veggie option.
  • Gluten-Free: Substitute regular pasta with gluten-free alternatives.
  • Seafood Twist: Try shrimp or even crawfish for a delicious seafood version of the dish.
  • Cream-Free Version: For a lighter dish, replace the heavy cream with Greek yogurt or pureed cashews for a creamy consistency without the calories.
  • Picky Eaters: If someone in your family is hesitant about the spices, serve the pasta with a light, plain sauce on the side for them to mix in.

FAQ

1. Can I prepare this dish in advance?

Yes, you can prep the chicken and make the sauce ahead of time. Just store everything separately in the fridge and combine when ready to eat.

2. Is it possible to freeze the leftovers?

Yes, you can freeze the pasta in an airtight container, but the cream sauce may separate a bit upon thawing.

3. What other proteins can I use in this recipe?

Feel free to substitute the chicken with shrimp, sausage, or tofu for a vegetarian option.

4. Is there a vegetarian alternative to the heavy cream?

Yes, consider using coconut cream or a cashew cream for a dairy-free option.

5. How can I reduce the spiciness?

Use less Cajun seasoning or substitute it with a milder blend. You can also omit the red pepper flakes.

As you gather around the table to enjoy this creamy Cajun chicken pasta, remember that cooking is not just about the ingredients. It’s about the time spent together and the memories you create. Embrace the flavors, the laughter, and the joy of family meals. You’ve crafted something special, and that is worth celebrating. Happy cooking!

Creamy Cajun Chicken Pasta

Prep Time 15 minutes
Cook Time 20 minutes
Total Time 35 minutes
Servings 4 servings
Calories 500
A quick and delicious creamy Cajun chicken pasta that packs bold flavors for a comforting family meal.

Ingredients

For the Chicken

  • 2 pieces boneless, skinless chicken breasts (Chicken breasts are quick to cook and absorb the Cajun seasoning well.)
  • 1 tablespoon olive oil (For cooking the chicken.)
  • 1 tablespoon Cajun seasoning (This is the key to the dish’s bold flavor.)
  • to taste salt and pepper (Essential for seasoning the chicken.)

For the Pasta

  • 12 oz penne, fettuccine, or spaghetti (Any long or short pasta will work.)
  • to taste salt (For the pasta water.)

For the Cream Sauce

  • 2 tablespoons unsalted butter (The butter forms the base of the creamy sauce.)
  • 4 cloves garlic, minced (Fresh garlic brings aromatic depth.)
  • 1 tablespoon Cajun seasoning (Adding Cajun seasoning to the sauce intensifies flavor.)
  • 1 teaspoon smoked paprika (For a smoky flavor.)
  • 1 cup heavy cream (Makes the sauce velvety and rich.)
  • ½ cup chicken broth (Adds a savory base to the sauce.)
  • ¼ cup grated Parmesan cheese (Adds salty, umami depth.)
  • to taste red pepper flakes (For an extra kick of heat.)
  • juice of 1 lemon fresh lemon juice (Brightens the dish.)
  • Fresh parsley, chopped (optional) (For garnish.)

Instructions 

Preparation

  • Season both sides of the chicken breasts with Cajun seasoning, salt, and pepper.
  • Heat olive oil in a skillet over medium-high heat and cook the chicken for about 5-7 minutes on each side, or until golden brown and fully cooked.
  • Remove the chicken from the skillet and let it rest.

Cooking the Pasta

  • In a large pot, bring water to a boil and add a generous amount of salt.
  • Add the pasta and cook according to package instructions until al dente.
  • Reserve a cup of the pasta water, then drain the pasta and set aside.

Making the Cajun Cream Sauce

  • In the same skillet, melt butter over medium heat.
  • Add minced garlic and sauté until fragrant, about 30 seconds.
  • Add Cajun seasoning and smoked paprika, stirring to combine.
  • Slowly pour in heavy cream and chicken broth, stirring until smooth.
  • Let it simmer for 2-3 minutes to thicken, then stir in Parmesan cheese.

Combining Everything

  • Slice the rested chicken and return it to the skillet with the sauce.
  • Add the cooked pasta and toss everything together gently.
  • If the sauce is too thick, add reserved pasta water to reach desired consistency.
  • Taste and adjust with more Cajun seasoning, salt, or pepper as needed.
  • Sprinkle with fresh parsley before serving.

Notes

Leftovers can be stored in an airtight container in the fridge for up to three days. Reheat gently over low heat to prevent drying out.
Calories: 500kcal
Course: Dinner, Main Course
Cuisine: Cajun, Southern
Keyword: Comfort Food, Creamy Cajun chicken pasta, easy pasta, Family Dinner, Quick Meal

Easy Street Corn Chicken Bowl

The smell of warm corn and cumin on a weeknight can make the whole kitchen feel like a hug. My kids always start setting the table the minute they catch that scent. The sound of a wooden spoon tapping a bowl, a small argument about who gets the lime wedge, and the little rush of everyone gathering makes this meal more than food. It is a simple routine that turns a busy night into a moment we share.

Why This Easy Street Corn Chicken Bowl Feels Like Home

This Easy Street Corn Chicken Bowl is the kind of meal that folds comfort and speed into one easy pan. It uses pantry staples and whatever cooked chicken you have on hand. That means dinner comes together fast without giving up flavor.

What helps it feel homey is the bright mix of corn, cumin, and fresh cilantro. The textures balance each other: tender chicken, sweet corn, crisp bell pepper, and the soft bed of rice. Meanwhile, the lime adds the small zing that wakes up the whole bowl.

This bowl also works for picky eaters and adventurous ones alike. The basics please children and the bright add-ons invite grown-ups to experiment. Often I set out toppings so everyone can build their bowl. It’s simple and special in the same sweep.

Easy Street Corn Chicken Bowl

The Simple Magic Behind Easy Street Corn Chicken Bowl

“This is where the magic happens, when the aroma fills the kitchen and my kids come running in, asking ‘Is it ready yet?’”

The heart of this recipe is the way flavors meet in one bowl. You start with cooked chicken and rice, then add corn, beans, bell pepper, and onion. Chili powder and cumin bring warmth, while cilantro and lime brighten the finish. Texture cues will tell you when it is right: soft shredded chicken coated in spices, corn plump and lightly sweet, and rice grains separated enough to soak up dressing without clumping.

Next up, think of this method as friendly and flexible. Use cooked chicken from the rotisserie, a pan of poached chicken, or last night’s leftovers. The seasoning is forgiving; taste and adjust as you go. From there, it becomes a bowl you can serve for a weeknight dinner or a casual weekend lunch.

Ingredients You’ll Need

2 cups cooked chicken, shredded
1 can (15 oz) corn, drained
1 cup cooked rice
1 bell pepper, diced
1/2 cup red onion, diced
1 cup black beans, rinsed and drained
1 teaspoon chili powder
1 teaspoon cumin
Salt and pepper to taste
Fresh cilantro, for garnish
Lime wedges, for serving

Don’t skip the fresh herbs. They are the soul of the dish and add that last bright layer. Use what’s in your fridge if you need to swap the bell pepper for a small zucchini or the red onion for green onion. This recipe welcomes creativity, not perfection.

Step-by-Step Directions

  1. In a large bowl, combine the shredded chicken, corn, cooked rice, bell pepper, red onion, and black beans.
    Sprinkle with chili powder, cumin, salt, and pepper, and stir until well combined.
    A quick toss helps the flavors start to mingle.

  2. Taste for seasoning and add more salt or a pinch more chili powder if you like extra warmth.
    If the mix seems dry, squeeze a little lime over it and stir again.
    Remember, bright citrus lifts the whole bowl.

  3. Divide the mixture into serving bowls or plate it family-style in a large bowl for everyone to share.
    Garnish with chopped cilantro and place lime wedges on the side.
    A sprinkle of extra cumin or a drizzle of olive oil can be a nice final touch.

  4. Serve with any optional toppings you love, such as avocado slices, a spoonful of sour cream, or salsa.
    Let everyone customize their bowl — kids love the small choices.
    This part makes dinner feel like a small celebration around the table.

  5. Enjoy your quick weeknight dinner!
    Clean up is easy because most of this comes together in one main bowl.
    Let the slow chatter at the table begin.

Quick tip: a little browning on the shredded chicken in a hot skillet before mixing builds deep flavor, just like my grandmother showed me. Let the kids stir this part if they want — it’s often the most fun for them.

Easy Street Corn Chicken Bowl

Serving Easy Street Corn Chicken Bowl with Love

I serve this bowl family-style in the middle of the table and let everyone help themselves. That simple act of sharing makes the meal feel warm and communal. I put out small bowls with toppings so each person can make their plate unique.

My kids usually go for extra cheese and avocado. My partner likes a splash of hot sauce and an extra lime wedge. I pop a big bowl of mixed greens on the side for anyone who wants to add freshness. For a heartier dinner, offer warm tortillas or chips so people can scoop and build.

If you are feeding guests, set up a small topping station: chopped cilantro, sliced avocado, shredded cheese, sour cream, and mild salsa. That way, the meal becomes a tiny interactive event and everyone can customize while chatting.

Easy Street Corn Chicken Bowl

Storage & Reheat Tips (Keeping the Goodness)

Store the bowls in an airtight container in the fridge for up to 3 days. Keep the cilantro and lime wedges separate until you serve. Fresh herbs lose their bright flavor after a day or two when mixed in, and limes dry out if left exposed.

For reheating, the microwave is fine for a quick lunch. Heat in 30 second bursts, stirring in between, so the rice warms evenly. If you want that “just-made” feel, reheat in a skillet over medium heat with a splash of water or chicken broth. That method brings back a little crunch to the bell pepper and freshens the whole dish.

If you plan to freeze, separate into single portions in freezer-safe containers. Freeze for up to 2 months. Thaw overnight in the fridge and warm gently on the stove to keep the texture pleasant.

If the bowl seems dry after refrigerating, add a squeeze of lime, a drizzle of olive oil, or a spoonful of warm broth when you reheat. Those simple additions revive flavor and make leftovers just as cozy as the first night.

My Kitchen Notes & Shortcuts

  • Use rotisserie chicken to cut prep time in half. It adds a smoky note and saves an evening.
  • Make a double batch of rice at the weekend and freeze single portions. It is a fast way to get dinner on the table.
  • If you prefer a smoky flavor, char the bell pepper under the broiler for a few minutes before dicing it.
  • Let the mixture sit for 15 to 30 minutes if you have time. The flavors settle and taste more connected.
  • Involve kids by letting them measure spices or squeeze lime wedges. Small tasks build confidence and make dinner a shared memory.

Family-Friendly Variations

Make it milder for little ones by reducing the chili powder and serving salsa on the side. For a low-carb option, serve over a bed of mixed greens or cauliflower rice. If you want a richer, creamier bowl, stir in a spoonful of Greek yogurt or a splash of crema.

For a vegetarian version, swap the chicken for extra beans, cubed tofu, or grilled halloumi. For more bite, add roasted sweet potato cubes or sautéed mushrooms. If you love heat, toss in sliced jalapeños or a drizzle of your favorite hot sauce at the end.

These shifts let you put your family’s stamp on the dish. The base is forgiving, and most changes keep the spirit of the bowl intact: simple, fast, and full of heart.

FAQs About Easy Street Corn Chicken Bowl

Can I make this ahead for a busy week?
Absolutely. In fact, letting it sit for an hour lets the flavors get to know each other, like a good family recipe. Store in the fridge for up to 3 days.

Is canned corn okay or should I use fresh?
Canned corn is fine and saves time. If you use fresh, it adds a bright snap. If you have fresh corn, a quick char in a hot pan deepens the flavor.

Can I substitute brown rice or quinoa?
Yes. Brown rice and quinoa work well and add more fiber. Just note that cooking times and texture will differ.

How do I keep the bell pepper crunchy after storing?
Store the bell pepper separately if you want it extra crisp. Add it to each bowl just before serving.

Will the black beans make the dish soggy?
Rinse and drain the beans well. That removes extra moisture and keeps textures pleasant.

One Final Thought from My Kitchen

Cooking small, steady rituals like this bowl has given me so many quiet, good moments. It is not only about feeding bodies, it is about the daily chance to slow and connect, even when time is tight. I hope this Easy Street Corn Chicken Bowl finds a place in your rotation and brings the same easy joy it brings ours.

Conclusion

If you want another version with a grilled corn twist and extra herbs, take a look at this take on Street Corn Chicken Rice Bowls from The Skinnyish Dish for ideas you can borrow. For a more step-by-step, family-friendly write up with bright salsa and topping options, try the recipe at Tastes Better From Scratch.

Easy Street Corn Chicken Bowl

Prep Time 10 minutes
Cook Time 10 minutes
Total Time 20 minutes
Servings 4 servings
Calories 450
A comforting and quick meal that combines cooked chicken, corn, rice, and vegetables, topped with fresh lime and herbs, perfect for family dinner.

Ingredients

Main Ingredients

  • 2 cups cooked chicken, shredded (Use rotisserie or leftover cooked chicken.)
  • 1 can corn (15 oz), drained (Canned corn is fine for quick preparation.)
  • 1 cup cooked rice (Brown rice or quinoa can be used as substitutes.)
  • 1 piece bell pepper, diced (Can be replaced with zucchini if desired.)
  • 1/2 cup red onion, diced (Green onion can be used as an alternative.)
  • 1 cup black beans, rinsed and drained (Rinse well to avoid sogginess.)

Spices and Garnish

  • 1 teaspoon chili powder (Adjust to taste for milder flavor.)
  • 1 teaspoon cumin (Additional cumin can be sprinkled on before serving.)
  • to taste salt and pepper
  • fresh herbs cilantro, for garnish (Important for adding brightness.)
  • 1 piece lime wedges, for serving (Adds a zing to the dish.)

Instructions 

Preparation

  • In a large bowl, combine the shredded chicken, corn, cooked rice, bell pepper, red onion, and black beans.
  • Sprinkle with chili powder, cumin, salt, and pepper, and stir until well combined.
  • Taste for seasoning and add more salt or a pinch of chili powder if you like extra warmth.
  • If the mix seems dry, squeeze a little lime over it and stir again.

Serving

  • Divide the mixture into serving bowls or plate it family-style in a large bowl.
  • Garnish with chopped cilantro and place lime wedges on the side.
  • Offer optional toppings such as avocado slices, sour cream, or salsa.

Notes

Store the bowls in an airtight container in the fridge for up to 3 days, and keep cilantro and lime wedges separate until serving. Reheat in the microwave or a skillet with water or broth for best results.
Calories: 450kcal
Course: Dinner, Family-Friendly, Main Course
Cuisine: American, Comfort Food
Keyword: Chicken Bowl, Comfort Food, Easy Street Corn Chicken Bowl, Family Meal, Quick Dinner