Tag

Savory Dishes

Browsing

Blackstone Bourbon Chicken

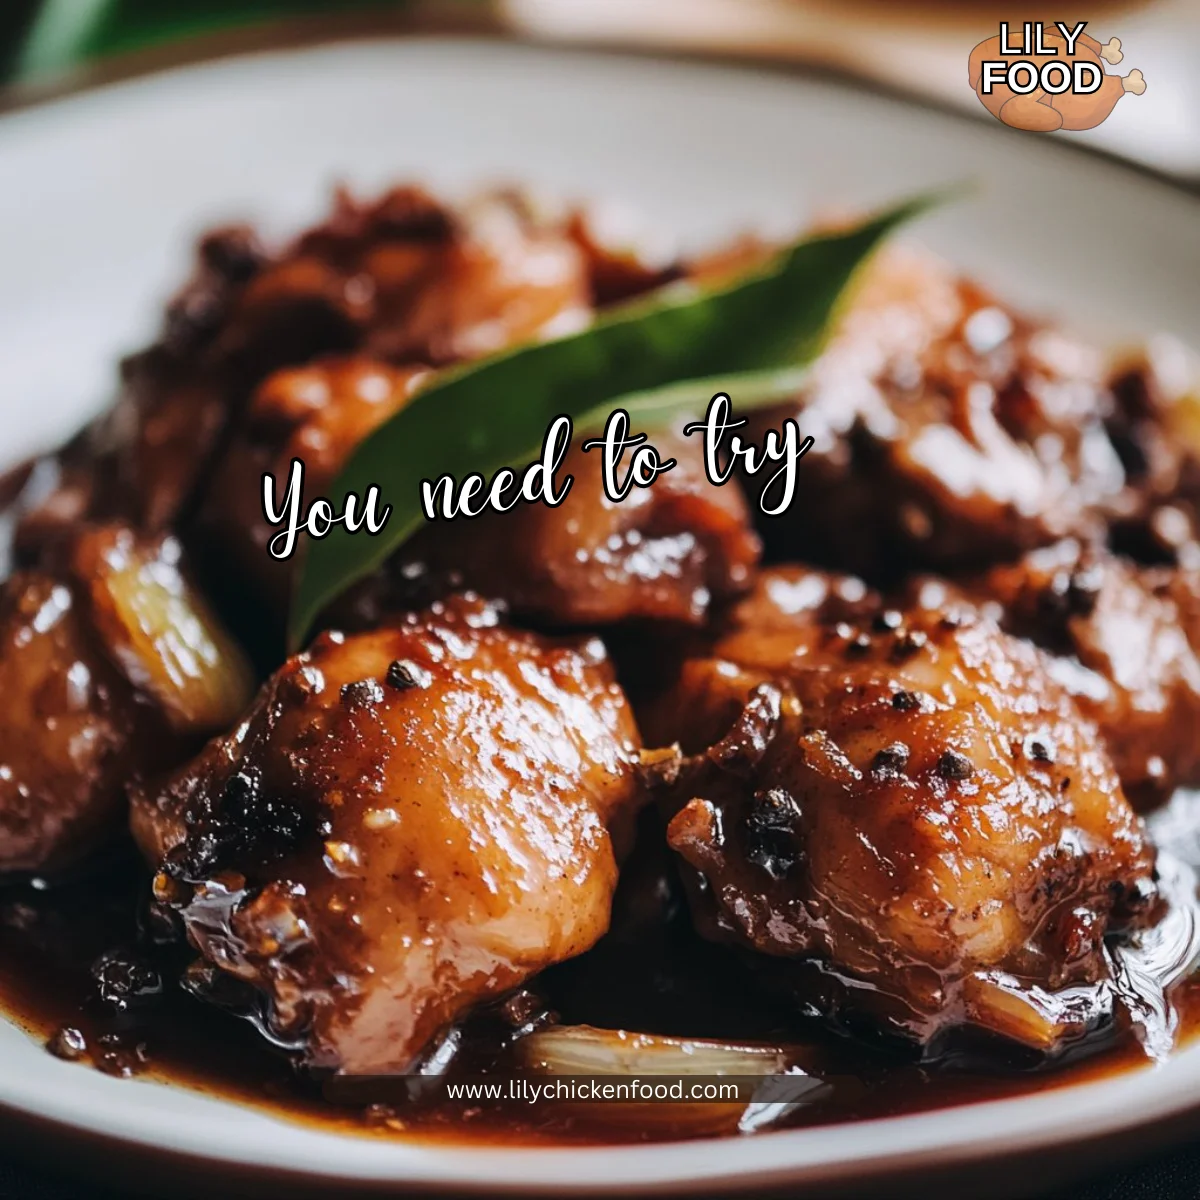
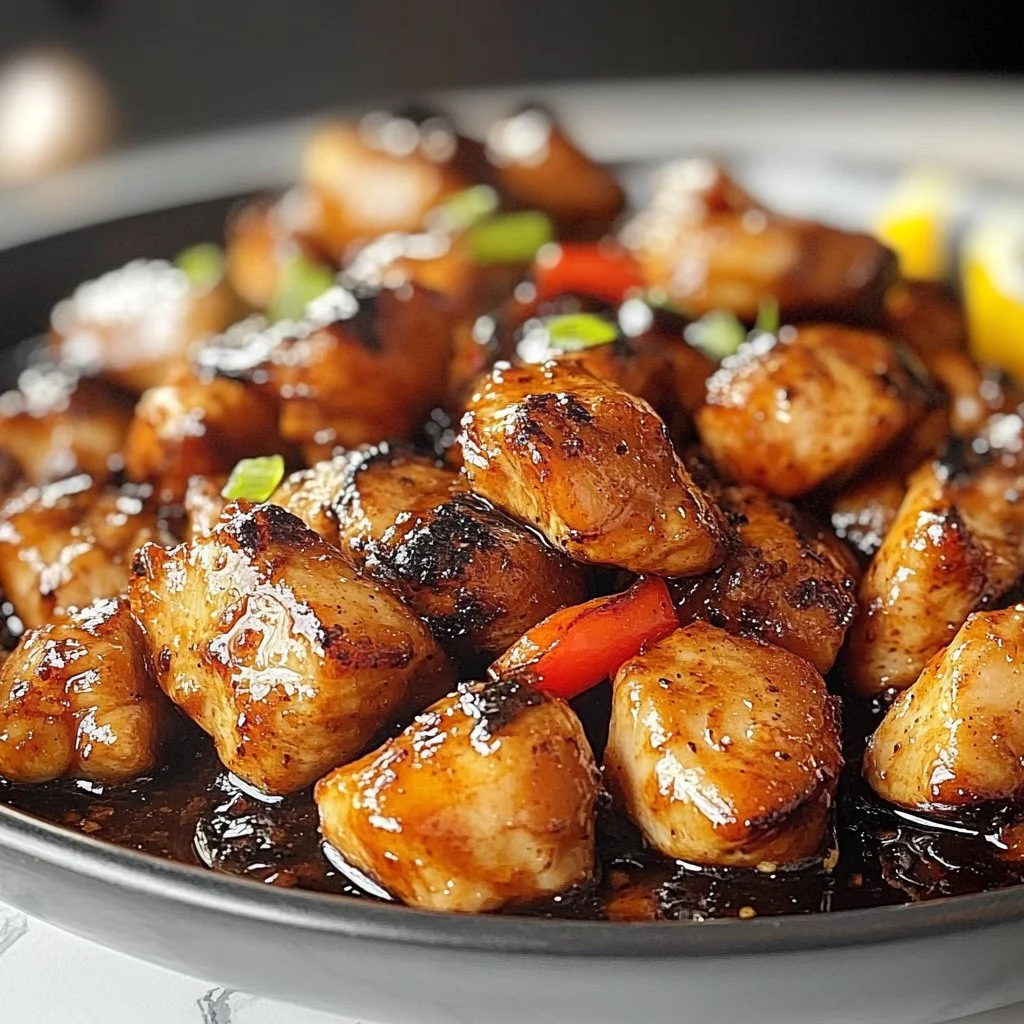
I step into my kitchen and the first thing I notice is the warm, sweet scent of bourbon and brown sugar melding with garlic. The griddle hisses as the chicken hits the surface. That sound tells me dinner is almost ready and the family will be smiling soon.

I am Lily, a home cook and food blogger who loves simple meals that bring people together. This Blackstone Bourbon Chicken is one of those recipes that makes weeknights feel special without extra fuss. It is forgiving, fast, and full of flavor. If you like easy grills and happy family tables, you will love this dish.

I often pair this recipe with other quick family favorites like my oven baked chicken thighs for a busy night. For a lighter twist, try it with air fryer chicken breasts when you want a different texture.

Why this works

Blackstone Bourbon Chicken

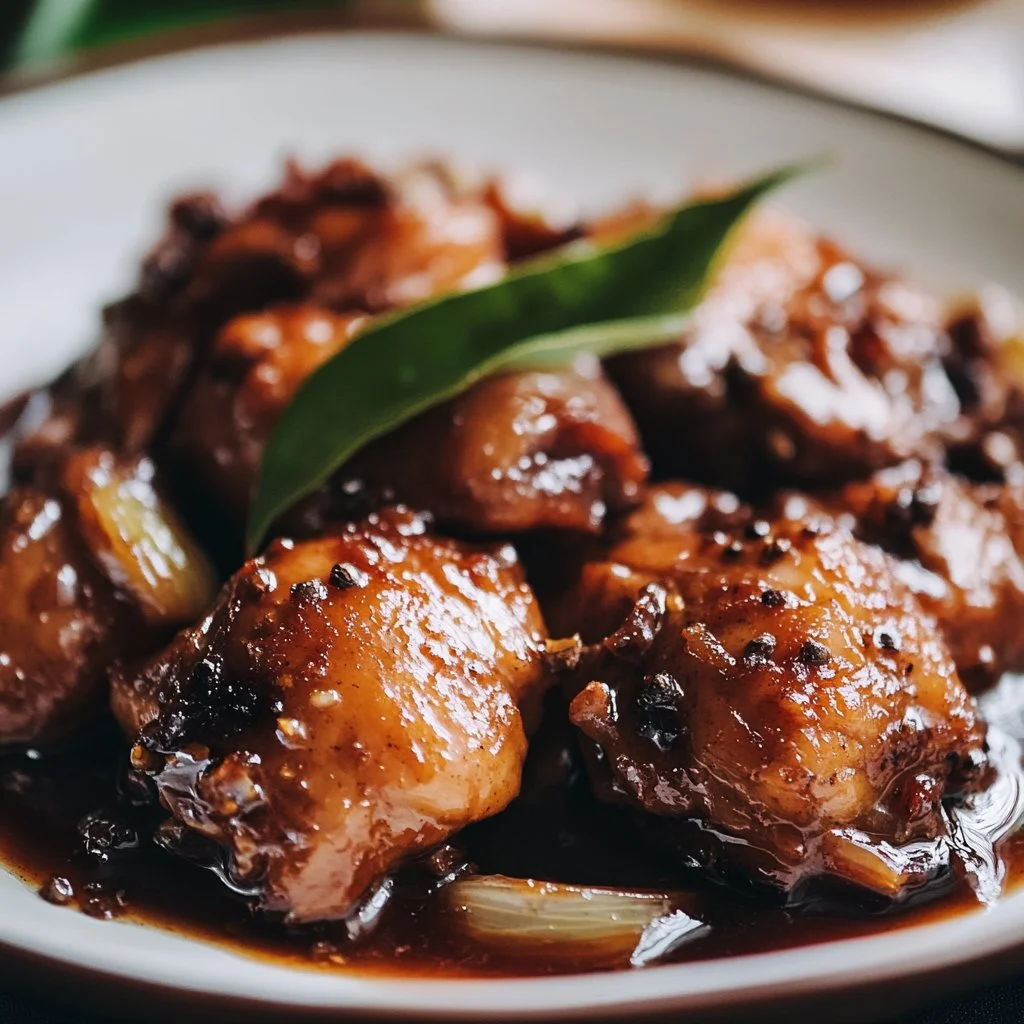
This recipe balances sweet, salty, and a touch of heat. The bourbon adds depth without overpowering the chicken. Brown sugar caramelizes on the griddle and creates little pockets of flavor.

The method uses simple steps and a short marinade. That makes it a time saver on busy evenings. You can marinate while you set the table and still get dinner on the table quickly.

Cooking on a flat top like a Blackstone lets you sear more surface area evenly. This gives the chicken great color and a slightly crisp exterior while keeping the inside moist.

If you love family friendly meals, this is a keeper. I often serve it with rice and quick steamed veggies. For another fast weeknight bowl idea, try my teriyaki chicken bowl that families seem to crave.

Process Overview

“This is where the magic happens—when the aroma fills the kitchen.”

The overall flow is gentle. Mix a simple marinade, soak the chicken, heat the griddle, and cook. The marinade does two things. It flavors the meat and tenderizes it a bit.

You do not need special skills to pull this off. Follow the steps and use a meat thermometer for peace of mind. If you want a different cook method, this marinade also works well with air fryer or oven methods. I have a clear guide for air fryer chicken breasts that shows how to use similar flavors.

Ingredients

Here are the ingredients with my personal tips for each. Each tip is a small trick I use at home to help families get consistent results.

  • 4 boneless, skinless chicken breasts
    Tip: Pound thicker ends gently so the breasts are even. This helps everything cook at the same time.

  • 1/2 cup bourbon
    Tip: Use a mid range bottle. The alcohol cooks off and leaves a deep flavor. If you prefer no alcohol, swap for chicken broth and a splash of apple cider vinegar.

  • 1/4 cup soy sauce
    Tip: Low sodium soy sauce keeps salt in check for kids. Taste the marinade before adding salt.

  • 1/4 cup brown sugar
    Tip: Light brown sugar gives a subtle molasses note. Pack it lightly when measuring for consistent sweetness.

  • 2 cloves garlic, minced
    Tip: Fresh garlic is worth it here. If you are short on time, 1/2 teaspoon garlic powder will work.

  • 1 tablespoon olive oil
    Tip: Olive oil helps the marinade cling and promotes browning on the griddle.

  • 1/2 teaspoon black pepper
    Tip: Freshly ground black pepper adds brightness. Use more or less to suit your family.

  • 1/4 teaspoon red pepper flakes (optional)
    Tip: These give a gentle heat. Leave them out for young children or add more for adults.

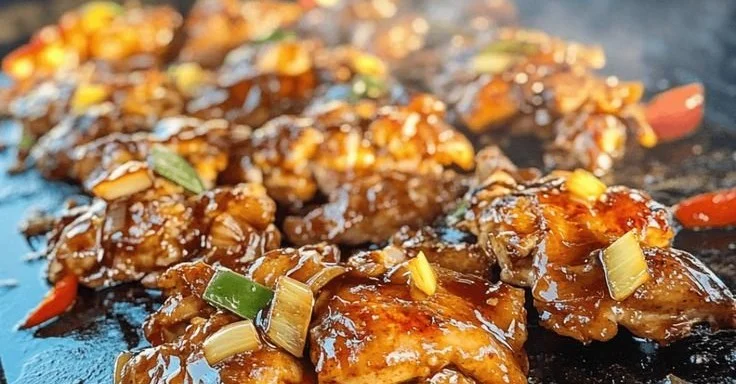
  • Chopped green onions for garnish
    Tip: Slice thin and add right before serving for color and fresh bite.

Directions

  1. In a bowl, mix together bourbon, soy sauce, brown sugar, garlic, olive oil, black pepper, and red pepper flakes.
    Encouragement: This is an easy mix that smells amazing. Stir until the sugar dissolves and know you have a great base.

  2. Add chicken breasts to the marinade, ensuring they are well-coated. Marinate for at least 30 minutes, or up to 2 hours in the refrigerator.
    Encouragement: Even 30 minutes helps. If you need a faster option, start cooking after 15 minutes and accept a lighter flavor.

  3. Preheat your Blackstone griddle over medium-high heat.
    Encouragement: Let the griddle get hot so you get a good sear. A stable heat makes the texture truly satisfying.

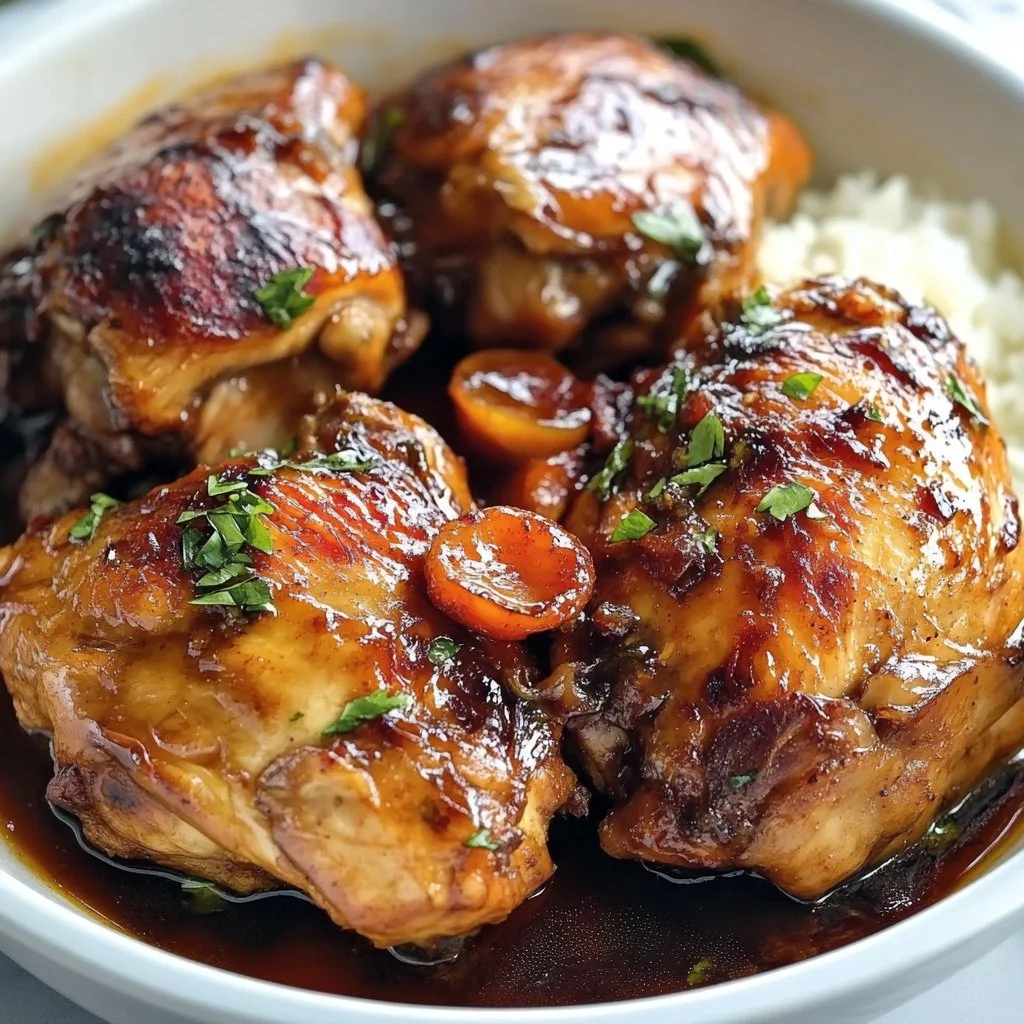
  4. Remove chicken from marinade and place on the griddle. Grill for about 6-8 minutes on each side, or until the internal temperature reaches 165°F and the chicken is cooked through.
    Encouragement: Use a thermometer and trust the read. Flip once for a clean crust. If you get a little glaze on the surface, that is perfect.

  5. Garnish with chopped green onions before serving.
    Encouragement: A quick sprinkle brightens the dish and makes it feel special for the table.

  6. Serve hot and enjoy your delicious bourbon chicken!
    Encouragement: Gather the family and enjoy. This recipe shines when shared with people you love.

If you prefer to cook inside, this same approach works on a large skillet or oven. I sometimes move the cooked breasts to a 350°F oven to finish if they brown too fast. For skewers and cook times on a flat top alternative, my air fryer chicken skewers guide makes a handy reference.

Serving

Blackstone Bourbon Chicken

Serve this bourbon chicken family style. Slice the breasts and arrange them on a large platter. Spoon any pan juices over the top and scatter chopped green onions.

Pair with steamed rice or a simple fried rice. A side of roasted broccoli or snap peas adds color and crunch. For a full meal, add a green salad and warm rolls.

Make it a bowl night by piling rice or noodles in a wide bowl, topping with sliced chicken, and adding quick pickled cucumbers or shredded carrots for tang. Kids love it with a side of corn or simple roasted potatoes.

If you want a lower carb option, serve the sliced chicken over a bed of mixed greens or cauliflower rice. The marinade holds up well to different bases.

Storage

Refrigerate leftover chicken within two hours of cooking. Place it in an airtight container and use within 3 to 4 days.

To reheat, warm gently in a skillet over medium-low heat. Add a tablespoon of water or broth to the pan and cover briefly to keep the chicken moist. You can also reheat in a 350°F oven for 10 to 12 minutes.

For longer storage, freeze cooked chicken in a freezer safe container for up to 3 months. Thaw in the refrigerator overnight before reheating. The texture may change slightly, but the flavor holds up well.

Kitchen Notes

  • Shortcut 1: Cut chicken into strips before marinating for faster flavor absorption and quicker cooking.
  • Shortcut 2: Use low sodium soy sauce to control salt for kids and sensitive eaters.
  • Shortcut 3: Double the marinade for a larger family crowd and reserve some to drizzle after cooking. Do not reuse raw marinade.
  • Shortcut 4: If you do not have a griddle, use a heavy skillet over medium-high heat for similar results.
  • Shortcut 5: Make it a sheet pan meal by placing veggies on the pan and cooking at 425°F alongside the chicken when sliced thin.

Variations

  • For picky eaters: Reduce brown sugar slightly and leave out red pepper flakes. Serve with familiar sides like mashed potatoes.
  • For gluten free: Use tamari instead of soy sauce and check labels on broths and other packaged ingredients.
  • For low sugar: Replace brown sugar with a 1 to 1 mix of a sugar substitute designed for cooking and a touch of molasses for depth.
  • For a smoky twist: Add 1/2 teaspoon smoked paprika to the marinade.
  • For a spicy family version: Add 1 teaspoon sriracha or more red pepper flakes to the marinade.

FAQ

Q: Can I use chicken thighs instead of breasts?
A: Yes. Boneless, skinless chicken thighs work great. They stay very tender and need slightly less time if cut smaller.

Q: Does the bourbon make the chicken taste boozy?
A: No. Most alcohol cooks off during cooking and leaves behind flavor. You get depth and warmth, not a strong boozy taste.

Q: How long can I marinate the chicken?
A: Up to 2 hours is ideal for this recipe. Longer marinating can change the texture because of the acids and alcohol in the mix.

Q: Can I make the sauce ahead of time?
A: Yes. Mix and store the marinade in the fridge up to 24 hours. Do not reuse marinade that has been in contact with raw chicken unless you boil it first.

Q: What temperature should I cook the chicken to?
A: Cook until the internal temperature reaches 165°F. A quick read with an instant read thermometer is the most accurate way.

Conclusion

I hope this Blackstone Bourbon Chicken becomes one of your family favorites. It is a dish that fills the kitchen with inviting smells and makes weeknights feel a bit more special. If you want a tried and tested griddle version, I like this detailed guide to making bourbon chicken on a flat top for step by step visuals. For a version inspired by popular restaurant flavors, this recipe that copies CJ’s favorite style gives a nice comparison and extra tips.

For a quick oven baked alternative that fits busy schedules, check my oven baked boneless skinless chicken thighs. For a different take on flavors kids love, my teriyaki chicken bowl recipe is a family hit. For more quick air fryer options, see my guides on air fryer chicken breasts, air fryer chicken skewers, and air fryer chicken wings.

Bourbon Chicken on the Griddle – Easy Blackstone Chicken Recipe and CJ’s Copy Cat Bourbon Chicken – Blackstone Products

Enjoy this meal with people you love. Send me a note if you try it and I will be cheering you on.

Blackstone Bourbon Chicken

Prep Time 30 minutes
Cook Time 16 minutes
Total Time 46 minutes
Servings 4 servings
Calories 250
A quick and flavorful dish featuring marinated chicken breasts cooked on a griddle, perfect for weeknight dinners.

Ingredients

For the Marinade

  • 1/2 cup bourbon (Use a mid-range bottle for best flavor.)
  • 1/4 cup soy sauce (Low sodium soy sauce recommended.)
  • 1/4 cup brown sugar (Light brown sugar gives a subtle molasses note.)
  • 2 cloves garlic, minced (Fresh garlic is preferable.)
  • 1 tablespoon olive oil (Helps the marinade cling to the chicken.)
  • 1/2 teaspoon black pepper (Use freshly ground for better flavor.)
  • 1/4 teaspoon red pepper flakes (Optional for a little heat.)

For the Chicken

  • 4 pieces boneless, skinless chicken breasts (Pound thicker ends for even cooking.)
  • Chopped for garnish green onions (Add just before serving.)

Instructions 

Preparation

  • In a bowl, mix together bourbon, soy sauce, brown sugar, garlic, olive oil, black pepper, and red pepper flakes until the sugar dissolves.
  • Add chicken breasts to the marinade, ensuring they are well-coated. Marinate for at least 30 minutes, up to 2 hours.
  • Preheat your Blackstone griddle over medium-high heat.

Cooking

  • Remove chicken from marinade and place on the griddle. Grill for about 6-8 minutes on each side, until internal temperature reaches 165°F.
  • Garnish with chopped green onions before serving.
  • Serve hot and enjoy your delicious bourbon chicken with family.

Notes

Refrigerate leftovers within two hours and use within 3 to 4 days. You can freeze cooked chicken for up to 3 months.
Calories: 250kcal
Course: Dinner, Main Course
Cuisine: American
Keyword: Bourbon Chicken, Easy Dinner, Family Meal, Griddle Chicken, quick recipe

Chicken Adobo

The kitchen smells like warm vinegar and garlic, and the gentle hiss of simmering sauce feels like a welcome song. I often catch my kids peeking in the doorway when the aroma starts to fill the house. That sound of family gathering is part of why I love making chicken adobo.

This recipe is one I return to when I want comfort food that is simple and true. If you enjoy quick weeknight meals, you might also like my recipe for 30-min oven baked boneless skinless chicken thighs, which shares the same homey spirit and simple prep.

Why this works

Chicken Adobo

Family Friendly and Time Saving

Chicken adobo uses pantry staples and gentle cooking that lets flavors develop without fuss. It is forgiving, so even busy weeknights become a celebration. Marinating for a short time gives the meat an instant lift, and the slow simmer makes the chicken tender enough for little hands to enjoy.

This dish stretches well and tastes even better the next day, making it perfect for leftovers and batch cooking. If your week needs more easy wins, try pairing it with a quick rice bowl like my 30-minute teriyaki chicken bowl for another family favorite.

Process Overview

“This is where the magic happens—when the aroma fills the kitchen.”

I like to think of adobo as a gentle balance of savory and bright. You marinate, then simmer. The sauce reduces and glazes the chicken. The steps are clear, and each one adds a layer of flavor. If you are curious about adapting cooking methods, I sometimes shift to an oven finish or use my air fryer for crispier skin when time allows. For those methods, see my notes about air fryer chicken breasts for helpful timing ideas.

Ingredients

  • 2 lbs chicken
    • Tip: Use bone-in, skin-on thighs for extra flavor and tenderness. If you prefer white meat, breasts work too but watch the cooking time.
  • 1 cup soy sauce
    • Tip: Use a low-sodium soy sauce if you want more control over salt. Taste before adding extra.
  • 1 cup vinegar
    • Tip: Cane vinegar or white vinegar both work. Apple cider vinegar gives a softer tang.
  • 6 cloves garlic, minced
    • Tip: Fresh garlic adds bright heat. If you are making a big batch, you can double the garlic for a bolder profile.
  • 2 bay leaves
    • Tip: Bay leaves add savory depth. Remove them before serving.
  • 1 teaspoon black peppercorns
    • Tip: Whole peppercorns give gentle heat while simmering. Crush a few at the table if you want more zip.
  • 1 tablespoon sugar
    • Tip: Sugar balances the acidity. Brown or white sugar both work. Start with a tablespoon and adjust to taste.
  • 1 onion, sliced
    • Tip: Yellow onion softens and adds natural sweetness. Slice thick so it holds up during simmering.
  • 1 cup water
    • Tip: This keeps the sauce glossy and controls salt intensity. Add more if you want more sauce.
  • Salt to taste
    • Tip: Salt at the end so you can adjust after reduction.

My kitchen tests have shown that these simple amounts give a reliably balanced sauce that pleases adults and kids alike. If you want a deeper caramelized finish, you can reduce the sauce further at the end.

Directions

  1. In a bowl, combine soy sauce, vinegar, garlic, bay leaves, peppercorns, sugar, and onion. Marinate the chicken in this mixture for at least 30 minutes.
    • Encourage: Give it time to soak in the flavors. If you are short on time, even 30 minutes will help. I sometimes marinate overnight on the weekend.
  2. Heat a pan over medium heat and add the marinated chicken with the marinade.
    • Encourage: Lay the pieces skin side down first if using skin-on chicken. Listen for a gentle sizzle. This step helps render fat and build flavor.
  3. Add water and bring to a boil.
    • Encourage: Boiling wakes up all the aromatics. Stay nearby so you can adjust the heat if the pot tries to bubble over.
  4. Reduce heat and simmer for 30-40 minutes until the chicken is cooked and tender.
    • Encourage: Simmer low and slow. The chicken becomes tender and the sauce mellows. I stir gently now and then and spoon the sauce over the pieces.
  5. Taste and adjust seasoning with salt if necessary.
    • Encourage: Tasting is my favorite part. Add a pinch of salt if it needs it, or a touch more sugar if it feels too sharp.
  6. Serve hot over rice.
    • Encourage: Spoon sauce over both chicken and rice. Let the family dig in together for a cozy meal.

If you want a crisp finish, lift the chicken pieces out and broil them on a baking sheet for 3 to 5 minutes until the skin browns. Or transfer to an air fryer for a few minutes to tighten the skin; check my guide for air fryer chicken skewers for timing ideas when cooking smaller pieces.

Serving

Chicken Adobo

Serve this adobo family-style in the center of the table. A big bowl of steamed white rice is the perfect partner. Add simple sides like steamed greens, a crisp cucumber salad, or fried plantains for a bit of sweetness.

For a casual weeknight, place the platter in the middle and let everyone serve themselves. This keeps things relaxed and encourages conversation. If you want to dress it up, garnish with chopped scallions and a few toasted sesame seeds.

If you have little ones, shred a few tender thighs and plate them with a milder drizzle of sauce. For older kids and adults, offer lime wedges or crushed peppercorns at the table.

To add a playful twist, make rice bowls with a soft-cooked egg and pickled vegetables. The mixture of textures makes every bite interesting and helps picky eaters sample new flavors. For other family bowl ideas, you might enjoy my take on air fryer chicken wings nights when you want party-style food.

Storage

Store leftover adobo in an airtight container in the refrigerator for up to 4 days. The flavors mature and often taste better the next day.

To reheat, warm gently on the stove over low heat with a splash of water. Cover the pan and heat until the chicken reaches a safe temperature. If you prefer, reheat single servings in the microwave for 1 to 2 minutes, stirring halfway through.

For longer storage, freeze portions in freezer-safe containers for up to 3 months. Thaw overnight in the refrigerator before reheating. When reheating from frozen, defrost fully and warm slowly to preserve texture.

Kitchen Notes

  • Use bone-in thighs for the juiciest results. They hold up in the sauce and stay tender.
  • If you want a darker, richer sauce, remove the chicken at the end and reduce the sauce over medium heat until glossy.
  • Swap vinegar types to change the profile. Apple cider vinegar is milder, white vinegar gives a brighter tang.
  • For less salt, use low-sodium soy sauce and add salt to taste after reduction.
  • If you want a spicy kick, add sliced chilies or a pinch of red pepper flakes during simmering.

These small shortcuts save time and keep dinner stress free. Over the years, I have learned which tweaks give the most consistent results for busy families.

Variations

  • Kid friendly: Reduce the vinegar to 3/4 cup and add an extra tablespoon of sugar. This keeps tang gentle and sweet.
  • Spicy: Add 1 to 2 sliced chilies or 1/2 teaspoon red pepper flakes during the simmer.
  • Low sodium: Use low-sodium soy sauce and skip added salt until the end of cooking.
  • Oven finish: After simmering, transfer to a 400 °F oven for 10 minutes to brown the top. Watch carefully to avoid burning.
  • Vegetarian option: Simmer tofu or seitan in the adobo sauce and reduce until the sauce coats the pieces.

Each of these variations keeps the spirit of adobo while tailoring it to your family’s needs. I often mix approaches depending on what my kids will eat that night.

FAQ

What cut of chicken is best for adobo?

Bone-in, skin-on thighs are ideal for flavor and tenderness. If you prefer white meat, use breasts but reduce simmer time to prevent drying.

Can I make this ahead of time?

Yes. Adobo tastes great the next day. Store in the fridge for up to 4 days or freeze portions for up to 3 months.

Is vinegar necessary?

Yes. Vinegar gives adobo its signature bright note. You can adjust the amount to your taste, but do not omit it.

Can I use a slow cooker?

Yes. Brown the chicken first if you like, then add the marinade and cook on low for 4 to 6 hours. The sauce will be milder, so taste before serving.

How can I thicken the sauce?

Remove the chicken and reduce the sauce over medium heat until it reaches a glaze. You can also whisk in a teaspoon of cornstarch mixed with a tablespoon of water for a quicker finish.

Conclusion

I hope this recipe brings warmth and ease to your table. Chicken adobo is a recipe that welcomes family, conversation, and second helpings. If you want to explore traditional and modern takes on this classic, this guide from Filipino Chicken Adobo (Flavour Kapow!) – RecipeTin Eats offers a well-tested perspective, and this version on Chicken Adobo – Food52 provides useful technique notes and variations.

Thank you for cooking with me. Leave a note about how your family liked it, and tell me which tweaks made it a keeper in your home.

Chicken Adobo

Prep Time 30 minutes
Cook Time 40 minutes
Total Time 1 hour 10 minutes
Servings 4 servings
Calories 480
A comforting and simple Filipino dish where chicken is marinated and simmered in a tangy and savory sauce made with soy sauce, vinegar, and spices, perfect for family meals.

Ingredients

Main Ingredients

  • 2 lbs chicken (Use bone-in, skin-on thighs for extra flavor and tenderness.)
  • 1 cup soy sauce (Use low-sodium soy sauce if desired.)
  • 1 cup vinegar (Cane or white vinegar work; apple cider vinegar gives a softer tang.)
  • 6 cloves garlic, minced (Fresh garlic adds bright heat; double for bolder flavor.)
  • 2 pieces bay leaves (Add savory depth; remove before serving.)
  • 1 teaspoon black peppercorns (Whole peppercorns provide gentle heat.)
  • 1 tablespoon sugar (Balances acidity; adjust to taste.)
  • 1 piece onion, sliced (Yellow onion adds natural sweetness.)
  • 1 cup water (Keeps sauce glossy; add more for extra sauce.)
  • to taste Salt (Adjust saltiness after cooking.)

Instructions 

Marinating

  • In a bowl, combine soy sauce, vinegar, garlic, bay leaves, peppercorns, sugar, and onion. Marinate the chicken in this mixture for at least 30 minutes.

Cooking

  • Heat a pan over medium heat and add the marinated chicken with the marinade.
  • Add water and bring to a boil.
  • Reduce heat and simmer for 30-40 minutes until the chicken is cooked and tender.
  • Taste and adjust seasoning with salt if necessary.
  • Serve hot over rice.

Crisping (Optional)

  • For a crisp finish, lift the chicken pieces out and broil them on a baking sheet for 3 to 5 minutes until the skin browns.

Notes

Serve family-style in the center of the table. Ideal paired with steamed white rice, steamed greens, or fried plantains. Store leftovers in an airtight container in the refrigerator for up to 4 days or freeze for longer storage.
Calories: 480kcal
Course: Dinner, Main Course
Cuisine: Filipino
Keyword: Chicken Adobo, Comfort Food, Easy Recipe, Family Dinner, One Pot Meal

Chicken Pot Pie

There’s something magical about the warm, savory aroma filling the kitchen, pulling everyone in like a cozy embrace. My kids rush in, ready to set the table, as I pull a bubbling Chicken Pot Pie from the oven. It’s a dish that has been passed down through generations, often reminding me of lazy Sundays at Grandma’s house, where laughter and love intertwined with the comforting smell of homemade goodness. Chicken Pot Pie is not just a meal; it’s a cherished experience that brings my family together, and I can’t wait to share my tips and stories with you.

Why This Chicken Pot Pie Feels Like Home

Chicken Pot Pie isn’t just a recipe; it’s a heartwarming tradition. Each bite is packed with warmth and comfort, a perfect reminder of home-cooked meals that had the power to bring smiles to our faces. The beauty of this dish lies in its ability to evoke nostalgia while still being flexible enough for modern family life.

What makes Chicken Pot Pie such a beloved meal in our home? For one, it checks all the boxes when it comes to satisfying everyone at the table. The creamy filling, tender chicken, and crisp crust are like a warm hug. It has a way of making even the busiest nights feel special.

Why Chicken Pot Pie is Our New Family Favorite

With its rich flavor and homey feel, Chicken Pot Pie has found its way into our weeknight rotation. The best part? It often comes together quickly, which is a lifesaver for busy families. The simplicity of this dish does not compromise on taste, making it a favorite for kids and adults alike.

This recipe embodies the idea of effortless yet special cooking, turning any weekday dinner into a comforting occasion. It creates moments for connection, laughter, and shared experiences around the dinner table, and that’s what really matters to us.

Chicken Pot Pie

The Simple Magic Behind Chicken Pot Pie

Preparing Chicken Pot Pie gives you an incredible opportunity to witness the magic of cooking. As the ingredients come together, the vibrant colors of carrots, peas, and chicken blend beautifully, while delightful aromas fill the air.

What makes this dish truly shine is how it offers endless possibilities. This is where you can get creative—adding vegetables you have on hand or even tweaking the spices to suit your family’s taste. I assure you, it’s easier than it looks, and the reward is well worth the effort.

How to Make Chicken Pot Pie, The Heartwarming Way

Making Chicken Pot Pie is a delightful process that transforms simple ingredients into a dish that feels like a hug on a plate. Let’s walk through the steps so that you can embark on this joyful cooking adventure.

“This is where the magic happens—when the aroma fills the kitchen and my kids come running in, asking ‘Is it ready yet?’”

Step-by-Step Overview: Keeping It Simple

This dish may look fancy, but it’s all about the feel-good experience of cooking. You’ll find it’s straightforward, and I promise those kitchen aromas will have everyone gathering around. As you cook, look for those cues—like a lightly browned onion or bubbling filling—that let you know you’re right on track.

Ingredients You’ll Need

Let’s gather our simple, flavorful essentials. Here’s what you’ll need. Don’t be shy about using what’s in your fridge to boost flavor:

  • 2 cups cooked chicken, shredded
  • 1 cup carrots, diced
  • 1 cup peas
  • 1 cup celery, diced
  • 1/2 cup onion, diced
  • 1/4 cup butter
  • 1/4 cup all-purpose flour
  • 2 cups chicken broth
  • 1 cup milk
  • 1 teaspoon salt
  • 1/2 teaspoon black pepper
  • 1 teaspoon dried thyme
  • 2 pie crusts (store-bought or homemade)

Remember, fresh herbs are the soul of this dish. Don’t skip them! Add some creativity with whatever you have.

Step-by-Step Directions

Now, let’s get you cooking!

  1. Preheat oven to 425°F (220°C).

    • The first step is crucial. Preheating ensures a flaky, golden crust.
  2. In a large skillet, melt butter over medium heat.

    • Sizzling butter is the start of something special. Add your onions and let them sweat until they’re translucent.
  3. Add onions, carrots, celery, and cook until softened.

    • This step builds incredible flavors. A little browning here adds depth, just like Grandma showed me.
  4. Stir in flour and cook for 1 minute.

    • This helps thicken your filling—make sure to stir well.
  5. Gradually add chicken broth and milk, stirring constantly until thickened.

    • Look for that lovely creamy texture. My kids love to stir at this point; it keeps them engaged.
  6. Add shredded chicken, peas, salt, pepper, and thyme. Mix well.

    • Stir until everything is evenly coated. The colors alone make my heart sing.
  7. Pour the chicken mixture into a pie crust and cover with another crust.

    • Lay that crust gently, and don’t forget to seal the edges with your fingers.
  8. Cut slits in the top crust for steam to escape.

    • This is essential! It helps prevent soggy crusts and ensures a crispy finish.
  9. Bake for 30-35 minutes until the crust is golden brown.

    • Keep an eye on it; the smell will drive your family wild.
  10. Let cool for a few minutes before serving.

    • This waiting part can feel long but trust me, it’s worth it!

Serving Chicken Pot Pie with Love

Once you pull your Chicken Pot Pie from the oven, a glorious sight greets you. As I set it down in the middle of the table, it does not take long for the smiles to spread. This meal is always shared family-style, where everyone can help themselves.

I like to serve it alongside a light salad or some warm bread to soak up any extra sauce. My husband loves it topped with a dollop of cranberry sauce. Whatever your family enjoys, make it your own.

Chicken Pot Pie

Storage & Reheat Tips (Keeping the Goodness)

Leftovers? No problem! Chicken Pot Pie keeps surprisingly well. Here are my best tips to ensure you savor every last bite:

  • Store any leftovers in an airtight container in the refrigerator for up to 3 days.

  • For reheating, the oven is your best friend. Preheat it to 350°F (175°C) and cover the pot pie with foil to retain moisture and warmth.

  • Microwaving is fine for a quick lunch, but the oven will give you that just-baked feeling.

My Kitchen Notes & Shortcuts

As someone who makes this dish frequently, I have picked up a few handy shortcuts that I am excited to share:

  • Use rotisserie chicken for a quick, ready-to-go protein.

  • If time is short, you can prep the filling a day in advance. Just assemble and bake when you’re ready.

  • Involve the kids! Give them small tasks like stirring or cutting the vegetables to make it a family affair.

  • Consider adding a splash of white wine to the mixture for extra depth.

  • Don’t forget to experiment. Swap in veggies that your family loves or even switch up the seasonings for a different twist.

Family-Friendly Variations

Getting creative with Chicken Pot Pie can lead to delightful surprises. Here are a few popular variations I’ve tried over the years:

  • Swap in leftover turkey after the holidays for a festive touch.

  • For a lighter version, use a mix of cauliflower and potatoes instead of butter and cream.

  • Add some spice! Red pepper flakes or fresh herbs can elevate the dish beautifully.

  • For a kid-friendly twist, let them create their own mini pot pies using muffin tins.

Your Chicken Pot Pie can be as unique as your family. Embrace creativity—after all, this is about your memories and stories.

FAQs About Chicken Pot Pie

Can I make this ahead for a busy week?

Absolutely! Letting it sit for an hour allows the flavors to meld and deepen. It’s perfect for prepping a day ahead.

What if I don’t have chicken?

No worries! You can use turkey, beef, or even just a healthy mix of vegetables.

Can I freeze Chicken Pot Pie?

Yes! Before baking, wrap it well and freeze. When you’re ready, just bake it directly from frozen; allow a little extra time for cooking.

How long should it cool before serving?

Let it cool for about 10 minutes. This helps it set and makes serving easier.

What are good sides to serve with it?

A fresh green salad or roasted vegetables complements the richness perfectly.

One Final Thought from My Kitchen

As you embark on your Chicken Pot Pie journey, I hope this dish finds its way into your family’s laughter and shared stories. It’s not just a meal; it’s a chance to make memories around the table, filled with warmth and love. From my kitchen to yours, happy cooking.

Chicken Pot Pie

Prep Time 15 minutes
Cook Time 35 minutes
Total Time 50 minutes
Servings 6 servings
Calories 350
A cozy and comforting Chicken Pot Pie filled with tender chicken and fresh vegetables, wrapped in a flaky crust—perfect for family gatherings.

Ingredients

For the Filling

  • 2 cups cooked chicken, shredded
  • 1 cup carrots, diced
  • 1 cup peas
  • 1 cup celery, diced
  • 1/2 cup onion, diced
  • 1/4 cup butter (for sautéing)
  • 1/4 cup all-purpose flour
  • 2 cups chicken broth
  • 1 cup milk
  • 1 teaspoon salt
  • 1/2 teaspoon black pepper
  • 1 teaspoon dried thyme

For the Crust

  • 2 pieces pie crusts (store-bought or homemade)

Instructions 

Preparation

  • Preheat oven to 425°F (220°C).
  • In a large skillet, melt butter over medium heat.
  • Add diced onion and let it sweat until translucent.
  • Add diced carrots and celery, cooking until softened.
  • Stir in flour and cook for 1 minute.
  • Gradually add chicken broth and milk, stirring constantly until thickened.
  • Add shredded chicken, peas, salt, pepper, and thyme. Mix well.

Assembly

  • Pour the chicken mixture into a pie crust and cover with another crust.
  • Cut slits in the top crust for steam to escape.

Baking

  • Bake for 30-35 minutes until the crust is golden brown.
  • Let cool for a few minutes before serving.

Notes

Store leftovers in an airtight container for up to 3 days. Reheat in the oven for best results. Consider using rotisserie chicken for quicker prep.
Calories: 350kcal
Course: Dinner, Main Course
Cuisine: American
Keyword: Baking, Chicken Pot Pie, Comfort Food, Family Meal, Homemade