Tag

Mediterranean Recipes

Browsing

Grilled Greek Chicken Kabobs

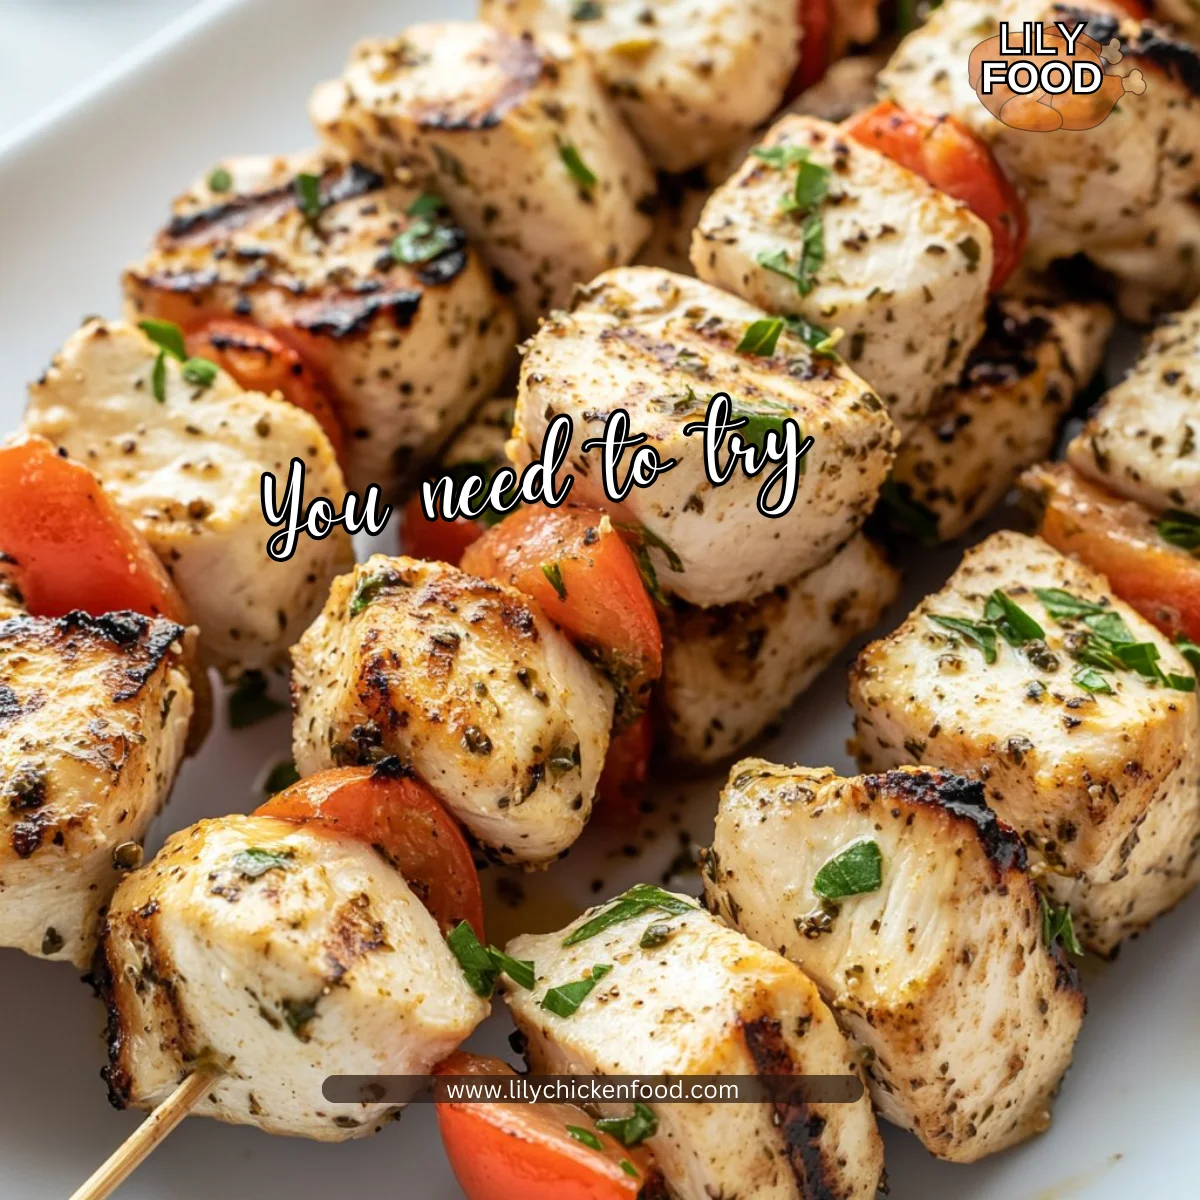
I can still smell it as I write this. The bright lemon and oregano hit first, then warm garlic and olive oil follow. The grill sizzles and the whole kitchen hums, a sound that tells me dinner is almost ready.

I started making these kabobs for my family when the kids were small. They loved threading the pieces on skewers and testing small bites while I flipped the grill. If you like simple dinners that fill the house with cozy smells, you will love this too. For another quick skewer idea, try my easy grilled Asian chicken skewers with honey garlic sauce.

Why this works

Grilled Greek Chicken Kabobs

These kabobs balance bold flavors with fast prep. Olive oil carries the herbs and garlic, red wine vinegar brightens the chicken, and oregano gives a classic Greek note. The marinade soaks into bite-sized cubes quickly, so you do not need to marinate for hours.

This recipe shines for families. You can prep the marinade and cut the veggies while the kids set the table. The skewers cook in about 15 minutes, which keeps evenings relaxed and dinner time pleasant. If you want a deeper marinade flavor or an alternate method, I often use my grilled chicken marinade for larger batches or for meal prep.

This dish saves time and stretches well. Make extra, and you have great leftovers for lunches and salads.

Process Overview

“This is where the magic happens—when the aroma fills the kitchen.”

Start by whisking a simple marinade. Cut the chicken into cubes so each piece cooks evenly. Thread chicken and veggies onto skewers so the grill gets even contact. Preheat the grill to medium-high so you get a quick sear and lock in juices.

I often adapt this to a sheet pan for easy cleanup or when weather keeps me from grilling. If you prefer that method, my Greek sheet pan chicken shows how to get the same flavors with oven roasting.

Safety tip: cook chicken to an internal temperature of 165°F. A quick digital thermometer makes this fast and foolproof.

Ingredients

  • 1 lb chicken breast, cut into cubes
  • 3 tablespoons olive oil
  • 2 tablespoons red wine vinegar
  • 2 teaspoons dried oregano
  • 4 cloves garlic, minced
  • Salt and pepper to taste
  • Pita bread, for serving
  • Optional: vegetables for skewering (bell peppers, onions, cherry tomatoes)

Lily’s personal tips for vegetables

  • Bell peppers: Choose red or orange for sweetness. Cut into 1 to 1 1/2 inch pieces so they cook at the same rate as the chicken. If peppers are thick, give them a little more time on the grill.
  • Onions: I like using red or sweet onions. Cut into wedges and separate the layers so the heat hits each slice. If you want milder onion flavor, soak the wedges in cold water for 10 minutes before threading.
  • Cherry tomatoes: Add these last when assembling if you want them to keep their shape. They burst with sweet juices and give a nice pop of color. If you prefer them softer, skewer them between chicken pieces.

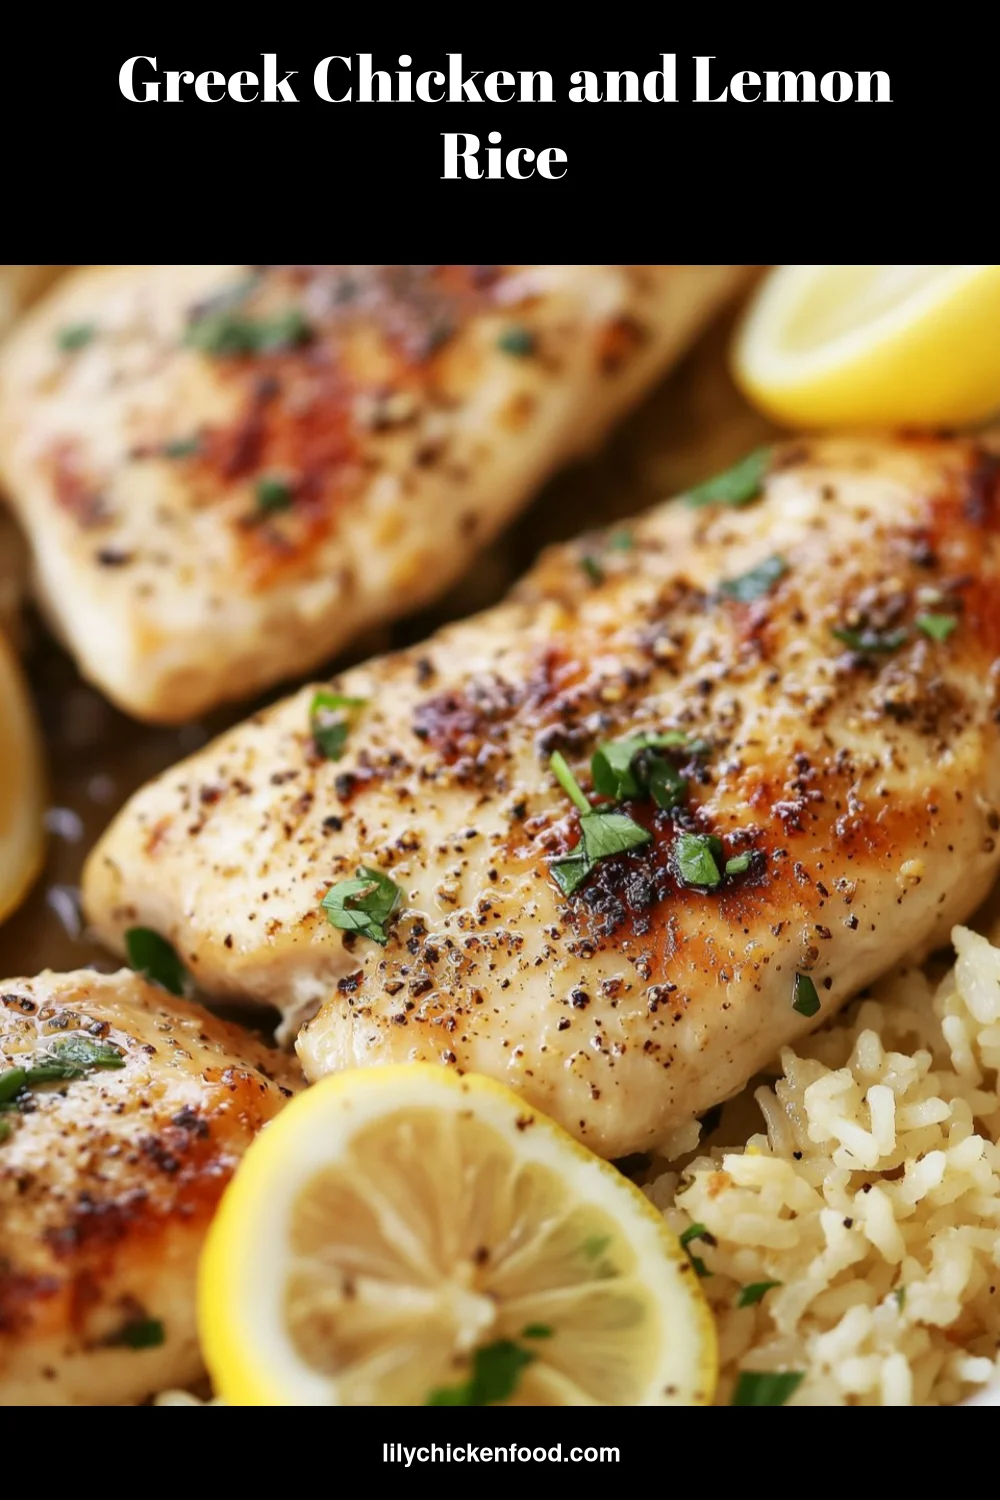
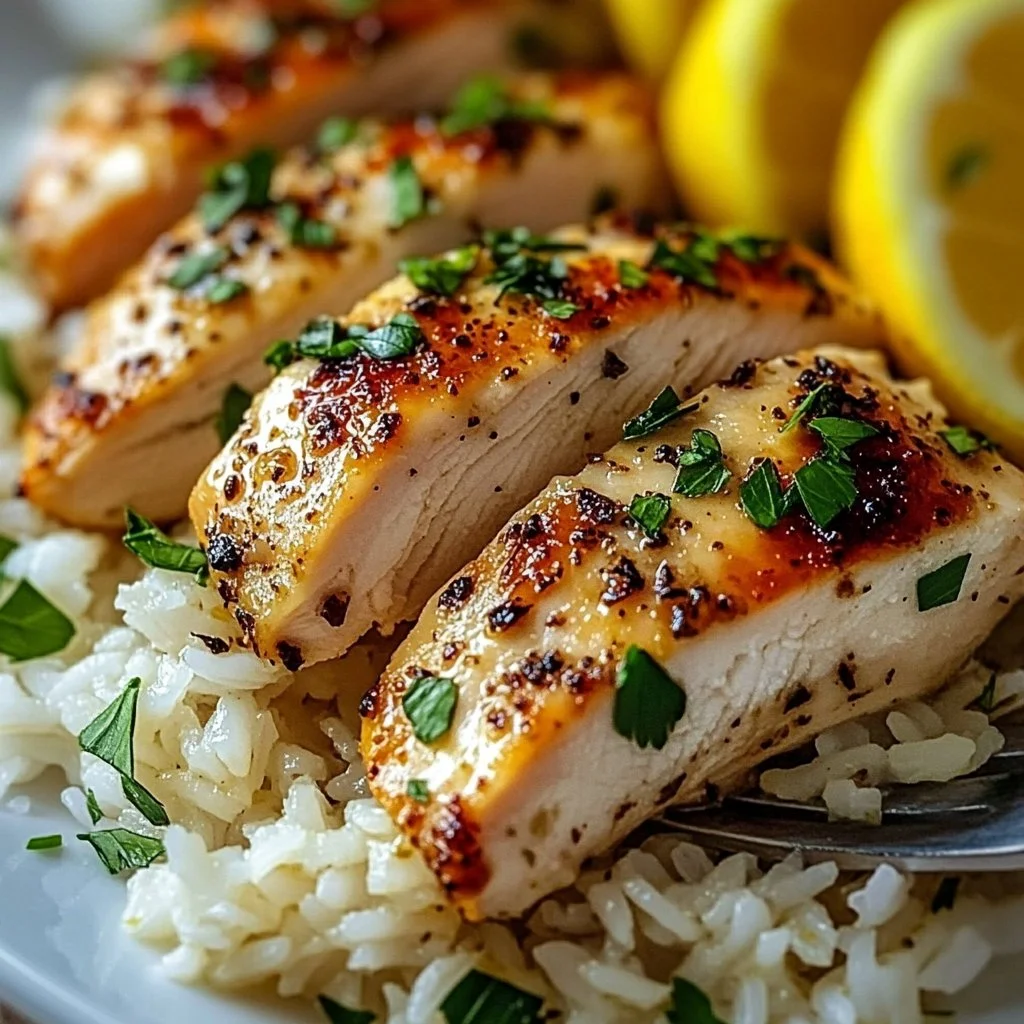
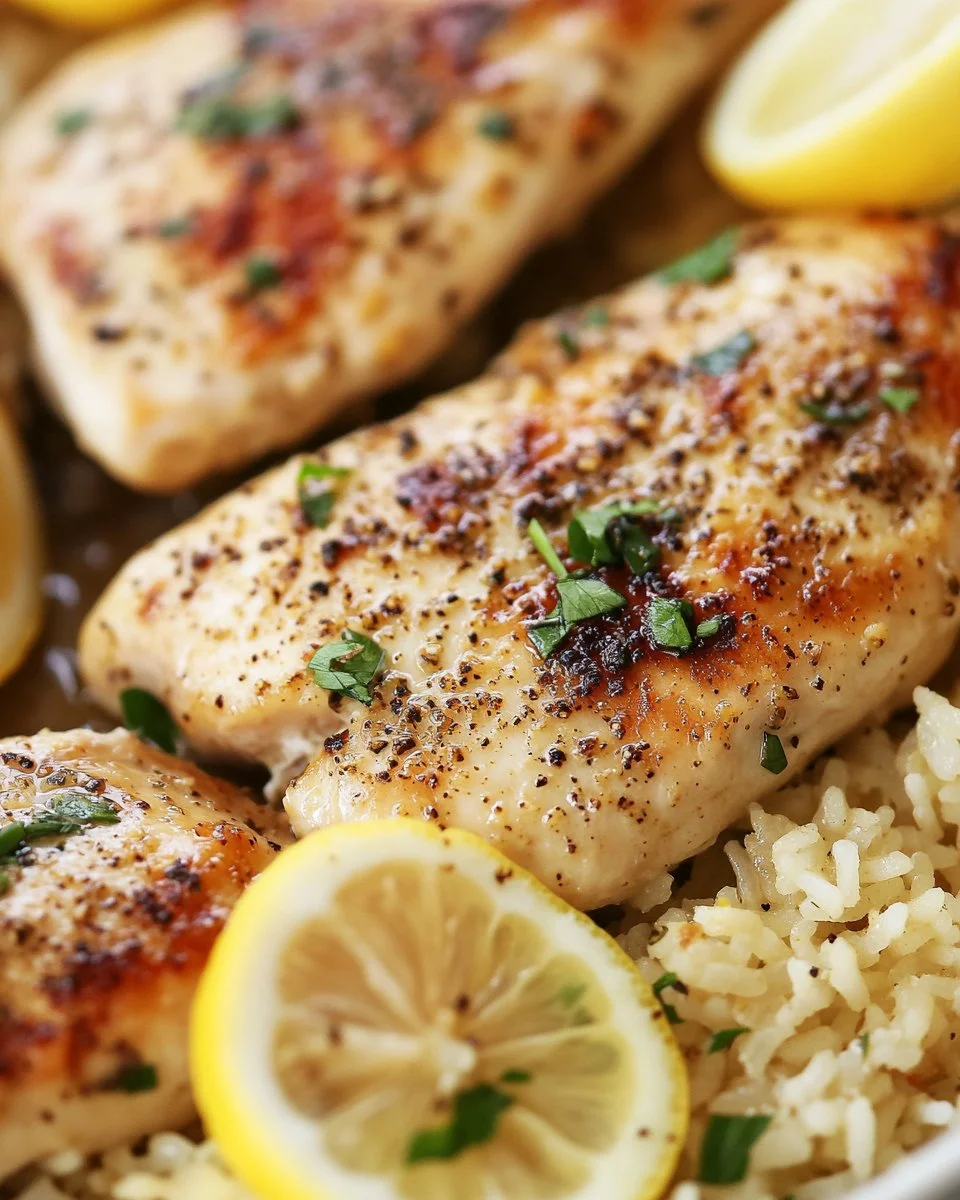
Pairing idea: these kabobs go beautifully with lemon rice and a simple salad. For a full meal idea, I often serve them with my Greek chicken and lemon rice.

Directions

  1. In a bowl, whisk together olive oil, red wine vinegar, oregano, garlic, salt, and pepper to make the marinade.

    • Take a moment to taste the marinade. Adjust salt if you like a bolder flavor. Trust your palate.
  2. Add the chicken cubes to the marinade and toss to coat. Let it marinate for at least 30 minutes.

    • If your schedule allows, marinate for 2 hours in the refrigerator for deeper flavor. If short on time, 30 minutes still does a great job.
  3. If using vegetables, prepare them by cutting into similar sizes.

    • Keep the veggies bite-sized so everything cooks evenly. Encourage kids to help with safe tasks like threading the pieces.
  4. Thread the chicken and vegetables onto skewers.

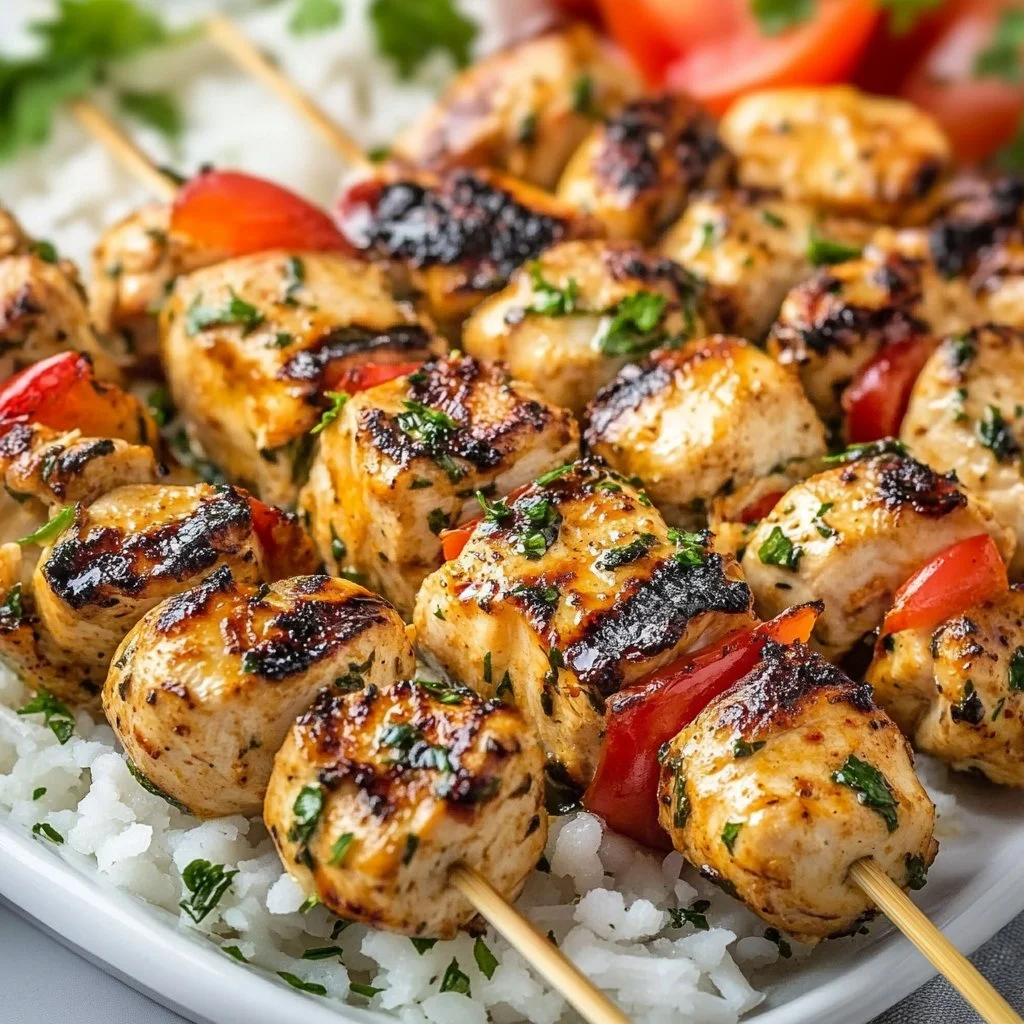
    • Alternate chicken and vegetables for color and texture. Leave a little space between pieces so heat circulates.
  5. Preheat the grill to medium-high heat.

    • Clean and oil the grates to prevent sticking. A hot grill gives a nice char without drying the chicken.
  6. Grill the kabobs for about 10-15 minutes, rotating occasionally, until the chicken is cooked through.

    • Look for clear juices and an internal temperature of 165°F. Rotate every few minutes so each side gets a turn at the heat.
  7. Serve with grilled pita bread.

    • Warm pita on the grill for 1 to 2 minutes per side. A squeeze of lemon over the kabobs brightens the whole plate.

Each step is simple, and you can involve the whole family. Little helpers can brush the marinade or arrange pita bread for serving. Cooking together makes the meal taste even better.

Serving

Grilled Greek Chicken Kabobs

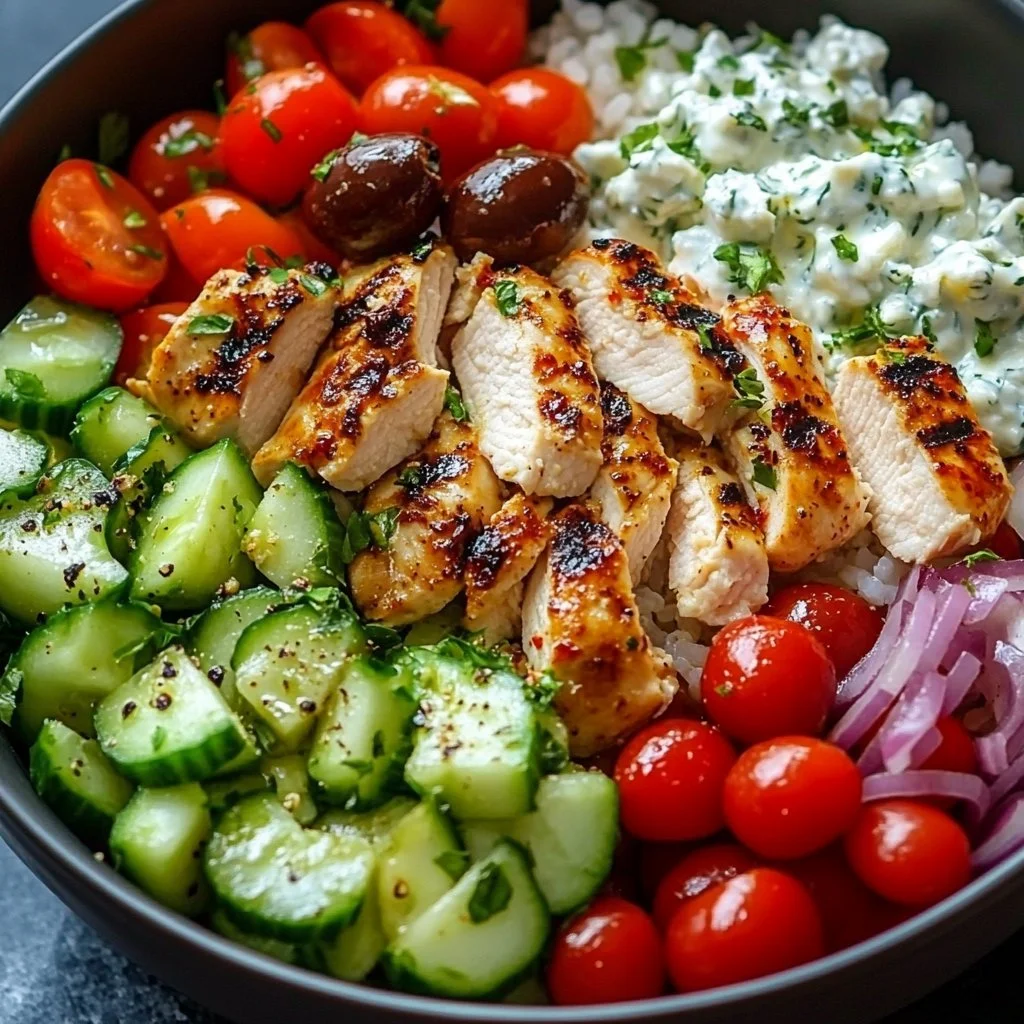
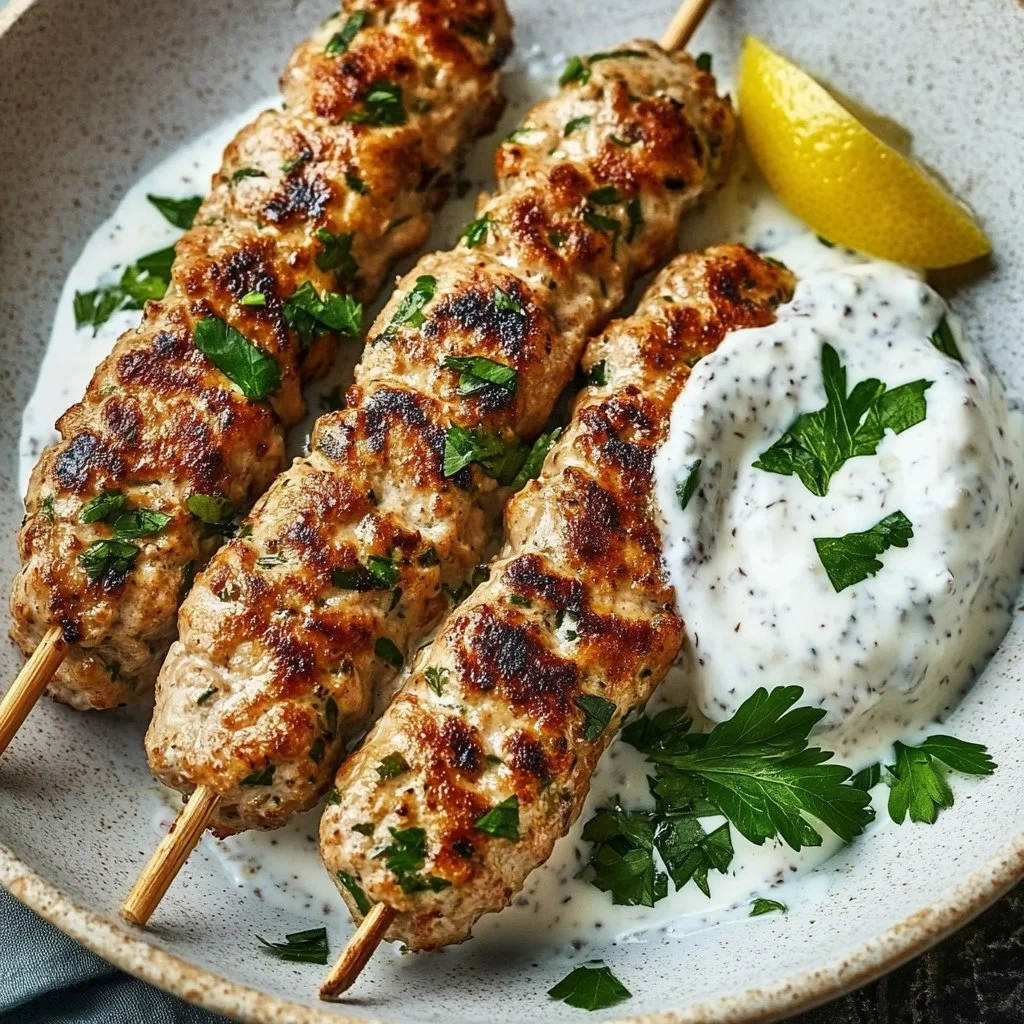
Serve these kabobs family-style on a large platter. Pile the grilled pita on one side, add a bowl of tzatziki or plain yogurt for dipping, and scatter lemon wedges around. Let everyone build their own pita wraps. This keeps the mood relaxed and encourages conversation around the table.

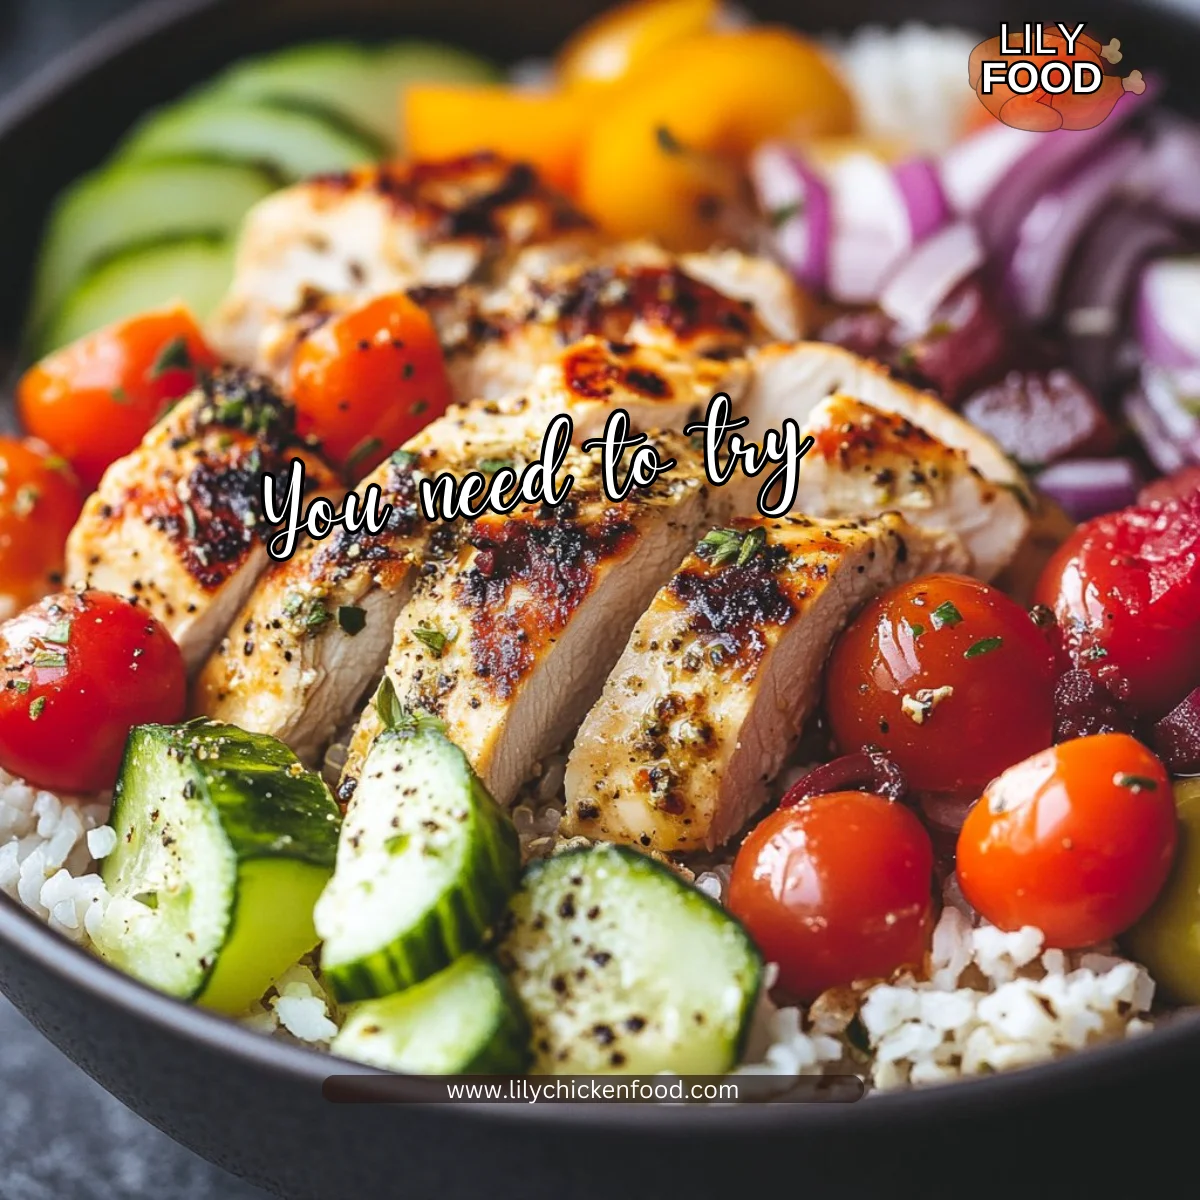
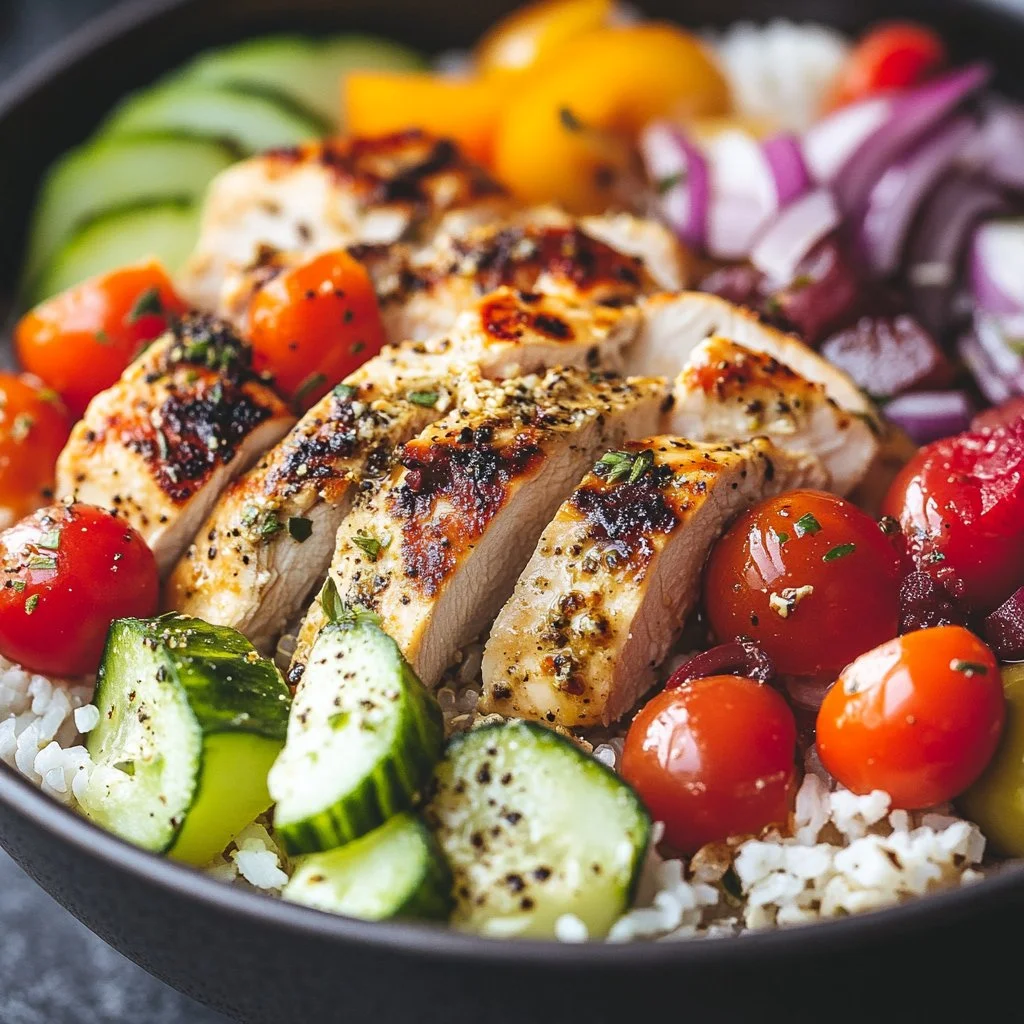
If you want a bowl-style meal, these kabobs are lovely over greens, rice, or a grain bowl. Try serving them with my Greek chicken bowls for a colorful, handheld option that kids can customize.

For a casual weeknight, place the platter in the center of the table. Invite everyone to reach in and assemble as they like. It is a small family ritual we look forward to.

Storage

Store leftover kabobs in an airtight container. They keep well in the refrigerator for 3 to 4 days. If you plan ahead, remove chicken from skewers before storing to save space and make reheating easier.

To reheat in the oven: place chicken on a baking sheet, cover loosely with foil, and warm at 325°F for 10 to 12 minutes. For a quicker option, reheat in a skillet over medium heat for 3 to 5 minutes, turning once. A short grill reheat gives back some of the fresh-grilled flavor.

Freezing: remove chicken from skewers and pack into freezer-safe containers for up to 3 months. Thaw overnight in the refrigerator before reheating.

Safety note: always reheat to 165°F. A reliable digital thermometer helps you reheat confidently.

Kitchen Notes

  • Skewer choice: If using wooden skewers, soak them in water for 30 minutes to prevent burning. Metal skewers are reusable and easy for kids to handle.
  • Even pieces: Cut chicken and vegetables to similar sizes to ensure even cooking.
  • Make ahead: Marinate the chicken the night before for a deeper flavor and faster assembly on busy nights.
  • Tzatziki shortcut: Use plain Greek yogurt, add minced cucumber, garlic, lemon juice, and a pinch of dill for a quick sauce.
  • Grill timing: If your grill runs hot, reduce cooking time and keep a close eye to avoid overcooking.

Variations

  • For picky eaters: Serve plain grilled chicken cubes alongside the marinated kebabs. Offer dipping sauces like honey mustard, ketchup, or yogurt so each person can choose.
  • Low-carb option: Skip the pita and serve kabobs on a bed of greens with olives and feta.
  • Gluten-free: Ensure your pita is certified gluten-free or serve over rice or roasted vegetables.
  • Dairy-free: Skip tzatziki and use a garlic-lemon vinaigrette for a fresh, dairy-free dip.
  • Kid-friendly tweak: Cut chicken into smaller cubes and grill on two skewers per child so they can easily hold and eat without assisting.

If you enjoy hearty one-pan meals, these flavors can move to rice or sheet pan dinners too. For another family-friendly recipe that uses many of the same ingredients, check out this idea for bowl-style servings and meal prep inspiration.

FAQ

Q: How long should I marinate the chicken?
A: At least 30 minutes for good flavor. If you can, marinate 2 hours or overnight for best results. Do not exceed 24 hours to avoid texture changes.

Q: Can I use chicken thighs instead of breast?
A: Yes. Thighs stay juicier and work well on skewers. Adjust cooking time slightly, checking the internal temperature to reach 165°F.

Q: Do I need to oil the grill?
A: Yes. Brush the grill grates with oil or use an oiled paper towel to prevent sticking and help achieve nice grill marks.

Q: Can I make this indoors on a stovetop?
A: Yes. Use a heavy skillet or grill pan over medium-high heat and cook in batches so the pan stays hot. You will get similar browning and flavor.

Q: How do I prevent vegetables from burning before the chicken is done?
A: Cut vegetables into sizes that match chicken. If a vegetable cooks faster, remove it early or place it toward cooler parts of the grill. Cherry tomatoes typically need less time, so skewer them last or add them during the final minutes.

Conclusion

I hope these Grilled Greek Chicken Kabobs bring your family together the way they do mine. They are quick, flavorful, and easy to adapt for kids and grown-ups alike. If you want another version of this classic, I often look to tried recipes like the one on Grilled Greek Chicken Kabobs – Cooking For My Soul for inspiration, and I also like the take on Greek Chicken Kabobs {Tender & Juicy} – Two Peas & Their Pod for tips on seasoning and presentation.

Thanks for cooking with me today. Pack up the leftovers, smile at the little messes, and know you made something nourishing for the people you love.

Grilled Greek Chicken Kabobs

Prep Time 30 minutes
Cook Time 15 minutes
Total Time 45 minutes
Servings 4 servings
Calories 350
Flavorful grilled chicken kabobs with lemon, oregano, and garlic, perfect for family dinners.

Ingredients

For the marinade

  • 3 tablespoons olive oil
  • 2 tablespoons red wine vinegar
  • 2 teaspoons dried oregano
  • 4 cloves garlic, minced
  • to taste Salt
  • to taste Pepper

For the skewers

  • 1 lb chicken breast, cut into cubes
  • Pita bread, for serving
  • Optional: bell peppers, onions, cherry tomatoes (Vegetables for skewering)

Instructions 

Preparation

  • In a bowl, whisk together olive oil, red wine vinegar, oregano, garlic, salt, and pepper to make the marinade.
  • Add the chicken cubes to the marinade and toss to coat. Let it marinate for at least 30 minutes; for deeper flavor, marinate for 2 hours in the refrigerator.
  • Prepare veggies by cutting them into similar bite-sized pieces.
  • Thread the chicken and veggies onto skewers, alternating for color and texture, leaving little space between pieces.

Cooking

  • Preheat the grill to medium-high heat. Clean and oil the grates.
  • Grill the kabobs for about 10-15 minutes, turning occasionally, until chicken is cooked through and reaches an internal temperature of 165°F.

Serving

  • Serve with grilled pita bread, tzatziki, or plain yogurt for dipping. Squeeze lemon over the kabobs for added flavor.

Notes

For leftovers, store in an airtight container in the refrigerator for 3-4 days. For reheating, warm them in the oven or skillet to 165°F.
Calories: 350kcal
Course: Dinner, Main Course
Cuisine: Greek
Keyword: Easy Skewers, Family Dinner, Grilled Chicken Kabobs, Grilling, Marinated Chicken

Greek Chicken Bowls

The kitchen is alive with the warm scent of grilled chicken and fresh vegetables. You can hear the sizzle of the chicken as it sears on the grill, and the gentle chopping of crisp cucumbers and juicy tomatoes fills the air. Preparing Greek Chicken Bowls is more than just cooking; it’s about creating a meal that brings the family together. It’s a dish that nourishes both body and soul, making even the busy weeknights feel special.

Why This Works

Greek Chicken Bowls

Greek Chicken Bowls are perfect for busy families. With just a few ingredients, you can whip up a wholesome dinner that’s both delicious and filling. The best part is that it doesn’t take much time to prepare. Marinating the chicken ahead of time can save you precious minutes on a hectic evening. Plus, the vibrant colors and fresh flavors appeal to everyone, making it a hit at the dinner table.

What I love about these bowls is their versatility. You can customize them to suit your family’s tastes. Even if someone is a picky eater, you can easily swap ingredients to meet their preferences. This dish also encourages everyone to get involved in prepping—chopping veggies, arranging toppings, and even drizzling on that tzatziki sauce. It really becomes a family affair in every sense!

Process Overview

“This is where the magic happens—when the aroma fills the kitchen.”

Preparing Greek Chicken Bowls is a delightful process that gently unfolds in stages. The marinated chicken gets grilled to perfection, and while it rests, you can prepare the colorful toppings. Layering all the components in a bowl creates a beautiful presentation that everyone will appreciate. With each bite, you’ll be reminded of sun-soaked Mediterranean days.

Ingredients

To make these Greek Chicken Bowls, gather the following ingredients:

  • 2 cups cooked rice or quinoa: This makes a hearty base. Quinoa adds extra protein, while rice offers a comforting familiarity.
  • 1 lb chicken breasts, marinated and grilled: Chicken is lean and soaks up flavors beautifully.
  • 1 cup cherry tomatoes, halved: These add sweetness and a burst of color.
  • 1 cucumber, diced: Crisp and refreshing, cucumbers balance the richness of the chicken.
  • 1 red onion, thinly sliced: Sweet and tangy, red onions bring depth to the bowls.
  • 1 bell pepper, diced: Use any color bell pepper you love; they all taste great and add crunch.
  • 1 cup Kalamata olives, pitted: These olives provide a briny contrast that enhances the dish.
  • 1/2 cup feta cheese, crumbled: Feta offers a tangy creaminess that ties the flavors together.
  • 1/2 cup tzatziki sauce: This creamy yogurt sauce is a must for that authentic Greek taste.
  • Olive oil, for drizzling: Enhance flavors and keep the chicken moist.
  • Salt and pepper to taste: Simple but necessary for bringing out the best flavors.

Lily’s Personal Tips

  • Use day-old rice for better texture. It’s less sticky and holds up well in bowls.
  • Marinate the chicken in advance, even overnight if you can. The flavors deepen beautifully over time.
  • Opt for a mix of colored bell peppers for a vibrant dish.
  • If you prefer, try a non-fat Greek yogurt for a lighter tzatziki.
  • Don’t skip the feta; it’s key for that Greek flavor profile.

Directions

  1. Marinate chicken breasts in olive oil, lemon juice, garlic, and oregano for at least 30 minutes. This is where the magic starts. The longer you marinate, the more flavorful your chicken will be.
  2. Grill the marinated chicken until fully cooked, about 6-7 minutes per side. Let it rest before slicing. This helps to keep the juices locked in.
  3. In bowls, layer cooked rice or quinoa, sliced grilled chicken, cherry tomatoes, cucumber, red onion, bell pepper, and olives. Each layer adds its unique flair and taste.
  4. Drizzle with tzatziki sauce and sprinkle with feta cheese. The creamy tzatziki paired with the salty feta is heavenly.
  5. Season with salt and pepper to taste, and serve immediately. This meal is best enjoyed fresh, while all the ingredients are at their peak.

Serving

Greek Chicken Bowls

To serve these Greek Chicken Bowls family-style, create a beautiful spread on the table. Place each ingredient in bowls and allow everyone to build their own bowl. This way, you can accommodate varying tastes and preferences. Don’t hesitate to place some extra tzatziki and feta on the table, because who wouldn’t want more of that?

For added flair, consider accompanying your bowls with warm pita bread or a simple Greek salad on the side. Eating together while assembling your bowls makes for a joyful and interactive experience.

Storage

If you have leftovers, you’re in luck! Store the components separately in airtight containers in the refrigerator. The chicken stays fresh for about 3-4 days, while vegetables can last up to 2 days. When you’re ready to enjoy again, simply reheat the chicken in the microwave or on the stove. Keep the toppings fresh to enjoy that crisp texture.

Practical Fridge/Reheat Tips

  • Store ingredients separately to keep everything fresh longer.
  • Add a splash of water when reheating chicken to keep it juicy.
  • Wrap any leftover rice tightly to avoid drying out.
  • Don’t mix the tzatziki with the bowls until ready to eat to maintain its creaminess.
  • Revive sad, leftover veggies by quickly sautéing them before serving.

Kitchen Notes

  1. Use a grill pan if you don’t have an outdoor grill for a beautiful sear.
  2. Substitute the chicken for shrimp or tofu for a different protein option.
  3. Pre-cook rice or quinoa in bulk for faster meal prep.
  4. Try adding roasted veggies for an added depth of flavor.
  5. Freeze marinated chicken for an easy meal solution on busy days.

Variations

If you have picky eaters at home or family members with dietary restrictions, consider these tweaks:

  • Use grilled tempeh or chickpeas instead of chicken for a vegetarian option.
  • Swap the tzatziki for hummus if someone prefers that flavor.
  • Offer a side of roasted vegetables or grilled corn for added variety.
  • Use brown rice or cauliflower rice for a gluten-free base.
  • Adjust the toppings based on preferences; skip olives or feta if they are not a favorite.

FAQ

Q: Can I prepare the chicken in advance?
A: Yes! Marinated chicken can be stored in the refrigerator for up to 24 hours before cooking.

Q: What’s the best way to grill the chicken?
A: Preheat your grill to medium-high heat and avoid overcrowding the grill to achieve nice grill marks.

Q: Can I use other grains instead of rice or quinoa?
A: Absolutely! Farro, barley, or even couscous work great as alternatives.

Q: How do I make this dish vegan?
A: Use chickpeas or tofu, and swap tzatziki for a vegan tahini dressing.

Q: Can leftovers be frozen?
A: It’s best to freeze the chicken separately from the fresh vegetables. They can be frozen for up to 3 months.

In summary, Greek Chicken Bowls are a nourishing and colorful meal that can easily fit into your family’s busy schedule. The vibrant ingredients combine to create a dish that is sure to please. As you prepare this meal, think of the joy of gathering around the table with your loved ones, sharing stories, and creating memories one bowl at a time. Enjoy every bite and cherish the moments spent together!

Greek Chicken Bowls

Prep Time 30 minutes
Cook Time 14 minutes
Total Time 44 minutes
Servings 4 servings
Calories 570
A wholesome, customizable dish featuring marinated grilled chicken, fresh vegetables, and a delightful tzatziki sauce, perfect for busy weeknights.

Ingredients

Base

  • 2 cups cooked rice or quinoa (Quinoa adds extra protein, while rice offers comfort.)

Chicken

  • 1 lb chicken breasts, marinated and grilled (Marinate in olive oil, lemon juice, garlic, and oregano for at least 30 minutes.)

Vegetables

  • 1 cup cherry tomatoes, halved (Adds sweetness and color.)
  • 1 cucumber diced (Crisp and refreshing.)
  • 1 red onion thinly sliced (Brings sweet and tangy depth.)
  • 1 bell pepper diced (Any color bell pepper works; adds crunch.)
  • 1 cup Kalamata olives, pitted (Offers briny contrast.)

Toppings

  • 1/2 cup feta cheese, crumbled (Provides tangy creaminess.)
  • 1/2 cup tzatziki sauce (Essential for authentic Greek taste.)
  • to taste Olive oil, for drizzling (Enhances flavors and moisture.)
  • to taste Salt and pepper (Important for flavor enhancement.)

Instructions 

Preparation

  • Marinate chicken breasts in olive oil, lemon juice, garlic, and oregano for at least 30 minutes.
  • Grill the marinated chicken until fully cooked, about 6-7 minutes per side. Let it rest before slicing.

Assembly

  • In bowls, layer cooked rice or quinoa, sliced grilled chicken, cherry tomatoes, cucumber, red onion, bell pepper, and olives.
  • Drizzle with tzatziki sauce and sprinkle with feta cheese.
  • Season with salt and pepper to taste, and serve immediately.

Notes

For leftovers, store components separately. Chicken stays fresh for 3-4 days; veggies last up to 2 days. Don't mix tzatziki with bowls until serving to keep it creamy.
Calories: 570kcal
Course: Dinner, Main Course
Cuisine: Greek, Mediterranean
Keyword: Family Meal, Greek Chicken Bowls, Grilled Chicken, Healthy Dinner, quick recipe

Chicken Kofta with Creamy Garlic Yogurt Sauce

Start with the sound of laughter and the clinking of silverware, the children gathering around the table. There’s a joyful energy as they help set everything just right. You can smell something delicious simmering away, perhaps a recipe that warms the heart and brings everyone to the table after a busy day. Today, that dish is Chicken Kofta with Creamy Garlic Yogurt Sauce—an inviting meal that sparks connection and comfort.

Why This Chicken Kofta with Creamy Garlic Yogurt Sauce Feels Like Home

Chicken Kofta with Creamy Garlic Yogurt Sauce isn’t just a dish; it’s an experience that fills the home with warmth and delicious aromas. I can almost hear my children cheer when they know this is on the menu. Every bite brings a hug of flavor, combining the tenderness of the chicken with vibrant spices and the freshness of herbs. This meal lets us all gather, share stories, and savor a moment where everyone feels at home.

You see, growing up, my family had our traditions around dinner час. There was always a special touch that came with every meal. This recipe embodies that feeling—easy to prepare and sure to please both kids and adults alike. The combination of juicy kofta and creamy garlic yogurt sauce is simply irresistible and becomes a lovely memory shared around the dinner table.

The Simple Magic Behind Chicken Kofta with Creamy Garlic Yogurt Sauce

The magic of Chicken Kofta with Creamy Garlic Yogurt Sauce lies in its simplicity and flavor. This is one of those meals that may seem fancy but is surprisingly easy to whip up on a weeknight. It comes together quickly, allowing you to focus less on cooking and more on family. The familiar scents of garlic and cumin fill the air, guiding you through each step, almost as if you had your grandmother’s hand reassuring you along the way.

When busy nights roll around, I can rely on this dish to bring everyone together without fuss and without a mountain of dishes to clean afterward. The creamy garlic yogurt sauce is the star here, elevating the kofta and making it feel like a special occasion. The result? A meal that tastes like it took hours to prepare when it really didn’t.

Chicken Kofta with Creamy Garlic Yogurt Sauce

How to Make Chicken Kofta with Creamy Garlic Yogurt Sauce, The Heartwarming Way

Cooking Chicken Kofta with Creamy Garlic Yogurt Sauce doesn’t just fill your kitchen with wonderful smells; it creates a shared moment of joy. The process is not about perfection but about connection. As you mix the ingredients, feel free to get your hands in there. It’s a sensory experience filled with textures, colors, and delightful aromas.

Here’s an overview of what makes this recipe a breeze: you’ll combine ingredients, form them into shapes, cook them to golden perfection, and whip together a creamy yogurt sauce that will have everyone asking for seconds. Trust me, once you see the golden-brown kofta on your plate, you’ll feel proud of your creation!

“This is where the magic happens—when the aroma fills the kitchen and my kids come running in, asking ‘Is it ready yet?’”

Ingredients You’ll Need

Having simple, fresh ingredients on hand is key, and that’s where this recipe shines. Here’s what you’ll need to create this heartwarming dish:

  • 1 lb ground chicken
  • 1 small onion, finely chopped
  • 2 cloves garlic, minced (extra garlic for the sauce)
  • 1/4 cup fresh parsley, chopped (don’t skip the fresh herbs; they’re the soul of the dish)
  • 1 tsp ground cumin
  • 1 tsp ground coriander
  • 1/2 tsp paprika
  • Salt and pepper to taste
  • Wooden skewers (if you’re grilling)
  • 1 cup plain yogurt
  • 1 tbsp lemon juice
  • Salt to taste

These ingredients are not only easy to find but also give you the freedom to be creative. Use what you have in your fridge—maybe substitute cilantro for the parsley or skip the skewers altogether. You can easily tailor this to what suits your family best.

Step-by-Step Directions

Let’s get started! Follow these steps to create a delicious Chicken Kofta with Creamy Garlic Yogurt Sauce that’s sure to be a new family favorite:

  1. In a large bowl, combine ground chicken, chopped onion, minced garlic, parsley, cumin, coriander, paprika, salt, and pepper. Mix until well combined. Get your hands in there; it’s a fun part!

  2. Form the mixture into long, oval-shaped kofta and thread them onto wooden skewers. Think of it like shaping little logs filled with flavor.

  3. Preheat a grill or skillet over medium heat and cook the kofta for about 6-8 minutes on each side or until cooked through and browned. Let the kids help turn the kofta—it’s the fun bit!

  4. In another bowl, combine yogurt, minced garlic, lemon juice, and salt to make the creamy garlic yogurt sauce. A little sour and a lot creamy—what’s not to love?

  5. Serve the kofta hot with the yogurt sauce on the side. Drizzle that sauce generously; it brings everything together beautifully.

This method is straightforward, but the results are exceptional. The textures of the juicy kofta and the silky yogurt sauce complement each other perfectly, making every bite a delight.

Serving Chicken Kofta with Creamy Garlic Yogurt Sauce with Love

How we enjoy Chicken Kofta with Creamy Garlic Yogurt Sauce at home is part of its charm. I love to lay out the kofta in the center of the table alongside the creamy garlic yogurt sauce. I find that serving family-style allows everyone to dig in, choose their portions, and enjoy the meal together.

We might round out the meal with warm pita bread, a fresh salad, or some roasted veggies. Each family member has their favorite accompaniment—my daughter loves the kofta wrapped in pita, while my son prefers it straight from the skewer, dunked in the sauce. This dish becomes an opportunity for laughter and shared stories, surrounded by the warmth of family.

Chicken Kofta with Creamy Garlic Yogurt Sauce

Storage & Reheat Tips

Leftovers? Not a problem! To keep the goodness alive, store any uneaten kofta in an airtight container in the fridge. They can stay fresh for about three days, perfect for lunch the next day. When you’re ready to enjoy them again, the microwave is fine for a quick reheat, but if you have the time, popping them in the oven brings back that just-made warmth—around 350°F should do the trick for about 10-15 minutes.

My Kitchen Notes & Shortcuts

From my time spent experimenting and cooking with Chicken Kofta, I’ve gathered some notes and shortcuts that help me keep things smooth:

  • Prep Ahead: Mix the kofta ingredients a few hours before cooking for a quick meal later. The flavors will meld beautifully!
  • Make It a Family Affair: Let the kids help shape the kofta; it’s a great way to involve them in the process. They often get excited about their creations.
  • Swap Ingredients: If you’re low on chicken, turkey works well too. Just keep an eye on the cooking time, as it might vary slightly.
  • Add a Twist: Finely chopped bell peppers or zucchini mixed in with the kofta for a veggie boost add freshness without taking away from the dish.

These small adjustments can make a delightful difference while keeping cooking stress-free and enjoyable.

Family-Friendly Variations

Get creative! Here are some of my family’s favorite twists on Chicken Kofta with Creamy Garlic Yogurt Sauce:

  • Taco Style: Use the kofta as a filling for soft tacos. Add avocado, salsa, and shredded cheese for a fun twist.
  • Vegetarian Options: For non-meat eaters, you can try using chickpeas or lentils as a substitute. Just add spices and ground oats to hold everything together.
  • Spice It Up: If you like a bit of heat, add red pepper flakes or cayenne to the kofta mixture, providing an extra kick that adventurous eaters will love.

Let these suggestions inspire you to make your own variations. You can give this dish your family’s touch by incorporating fresh favorite ingredients.

FAQs About Chicken Kofta with Creamy Garlic Yogurt Sauce

Can I make this ahead for a busy week?

Absolutely! Preparing the kofta ahead of time allows all the flavors to mingle, and you can even freeze them, ready to cook when you need a quick meal.

What else can I serve with kofta?

These kofta pair well with various sides like couscous, rice pilaf, or simply a fresh salad to lighten up the meal.

How do I know when the kofta are cooked through?

The kofta should reach an internal temperature of 165°F. The outside will be pleasantly browned too!

One Final Thought from My Kitchen

I hope this Chicken Kofta with Creamy Garlic Yogurt Sauce finds its way into your family’s laughter and stories. Cooking is not just about putting food on the table; it’s about sharing experiences, connecting with loved ones, and other heartwarming moments. If this dish sparks joy in your kitchen, then my grandmother’s kitchen is smiling. Until next time, happy cooking!

Chicken Kofta with Creamy Garlic Yogurt Sauce

Prep Time 15 minutes
Cook Time 15 minutes
Total Time 30 minutes
Servings 4 servings
Calories 300
A heartwarming dish of juicy chicken kofta paired with a creamy garlic yogurt sauce, perfect for family gatherings and weeknight dinners.

Ingredients

For the Chicken Kofta

  • 1 lb ground chicken
  • 1 small onion, finely chopped
  • 2 cloves garlic, minced (Extra garlic for the sauce)
  • 1/4 cup fresh parsley, chopped (Don’t skip the fresh herbs; they’re the soul of the dish.)
  • 1 tsp ground cumin
  • 1 tsp ground coriander
  • 1/2 tsp paprika
  • Salt and pepper to taste
  • Wooden skewers (if you’re grilling)

For the Creamy Garlic Yogurt Sauce

  • 1 cup plain yogurt
  • 1 tbsp lemon juice
  • Salt to taste

Instructions 

Preparation

  • In a large bowl, combine ground chicken, chopped onion, minced garlic, parsley, cumin, coriander, paprika, salt, and pepper. Mix until well combined.
  • Form the mixture into long, oval-shaped kofta and thread them onto wooden skewers.
  • Preheat a grill or skillet over medium heat and cook the kofta for about 6-8 minutes on each side or until cooked through and browned.
  • In another bowl, combine yogurt, minced garlic, lemon juice, and salt to make the creamy garlic yogurt sauce.

Serving

  • Serve the kofta hot with the yogurt sauce on the side. Drizzle the sauce generously over the kofta.

Notes

Store leftovers in an airtight container in the fridge for about three days. Reheat in the microwave or oven at 350°F for about 10-15 minutes for best results.
Calories: 300kcal
Course: Dinner, Main Course
Cuisine: Mediterranean
Keyword: Chicken Kofta, Comfort Food, Creamy Yogurt Sauce, Easy Recipe, Family Meal

Easy Mediterranean diet recipes, healthy Mediterranean recipes, whole food recipes

There’s something special about gathering in the kitchen. The warmth of the oven, the soft sizzle from the skillet, and the smell of fresh herbs wafting through the air signal the start of a wonderful family meal. Cooking is a symphony of sights, sounds, and smells, all coming together to create something delightful. And today, we’re diving into a Mediterranean salad that’s as vibrant as it is nourishing.

Why This Works

Pin by Jessica Garcia on I N S A L A T A | Easy Mediterranean diet recipes, healthy Mediterranean recipes, whole food recipes

This Mediterranean salad is a game changer for busy families. It’s quick to throw together, bursting with flavor, and packed with nutrition. It showcases the goodness of fresh ingredients that not only please the palates of adults but also delight kids.

By prepping the ingredients ahead of time, you can serve this in under 30 minutes, making it an ideal choice for weeknight dinners or lunches. You’ll enjoy quality time with your loved ones, creating memories as you gather around the table to share a delicious meal.

Process Overview

“This is where the magic happens—when the aroma fills the kitchen.”

Crafting this Mediterranean salad is straightforward and rewarding. It involves chopping, mixing, and dressing, allowing you to enjoy the process as much as the end product. Each step builds anticipation and leads to a dish that’s fresh, flavorful, and beautiful.

Ingredients

Here’s what you’ll need to create this incredible Mediterranean salad, along with some of my personal tips.

  • 2 cups cherry tomatoes, halved
  • Use a mix of colors for a more vibrant dish.
  • 1 cucumber, diced
  • Choose an English cucumber for fewer seeds and a crisper texture.
  • 1 bell pepper (any color), diced
  • Bell peppers add sweetness and crunch.
  • 1/2 red onion, thinly sliced
  • Soak the sliced onion in cold water for a few minutes to mellow the flavor.
  • 1 cup Kalamata olives, pitted and halved
  • They bring a delicious briny flavor.
  • 1 cup feta cheese, crumbled (optional)
  • Use a block of feta for a creamier texture; crumble it yourself for freshness.
  • 1/4 cup fresh parsley, chopped
  • Fresh parsley elevates the flavor; use flat-leaf for the best taste.
  • 1/4 cup extra virgin olive oil
  • A good quality oil makes a significant difference in flavor.
  • 2 tablespoons red wine vinegar
  • This adds brightness and balances the richness of the olive oil.
  • Salt and pepper to taste
  • Season gradually; you can always add more.

Directions

  1. Prepare the Ingredients
  2. Start by washing all your fresh produce. This is an exciting step as all the colors come together.
  3. Chop the Vegetables
  4. Dice the tomatoes, cucumber, bell pepper, and onion. Aim for uniform sizes for even mixing.
  5. Combine in a Bowl
  6. In a large mixing bowl, combine the cherry tomatoes, cucumber, bell pepper, red onion, and olives. It is satisfying to see the vibrant colors blend together.
  7. Add Cheese and Herbs
  8. Gently fold in the feta and parsley. The addition of feta spreads creaminess throughout the salad.
  9. Prepare the Dressing
  10. In a small bowl, whisk together the olive oil, red wine vinegar, salt, and pepper. This simple dressing pulls all the flavors together.
  11. Dress the Salad
  12. Pour the dressing over the salad and toss gently. The aroma will be delightful, enticing everyone in the home.
  13. Taste and Adjust
  14. Take a moment to taste and adjust the seasoning if needed. This is where you can make it your own.
  15. Serve
  16. Transfer to a serving platter or bowl. Enjoy the look of happiness on your family’s faces as they see this colorful meal.

Serving

Pin by Jessica Garcia on I N S A L A T A | Easy Mediterranean diet recipes, healthy Mediterranean recipes, whole food recipes

To serve this Mediterranean salad family-style, arrange it on a large platter. This encourages sharing and brings everyone together around the table. You can also offer extra feta and olives on the side for those who want more. Pair it with grilled chicken or fish for a complete meal.

Storage

This salad is best enjoyed fresh but can hold up for a few days in the fridge. Store it in an airtight container to keep it crisp. If you have leftovers, feel free to add them to a wrap or sandwich for a tasty lunch. When reheating, add a drizzle of fresh olive oil for an extra burst of flavor.

Kitchen Notes

  • Batch Prep Ahead: Chop your vegetables ahead of time and store them in the fridge for quick access.
  • Dress Right Before Serving: To prevent sogginess, toss the salad with dressing right before serving.
  • Taste Test: Always taste your dressing before adding it to the salad, adjusting as needed.
  • Use Leftover Ingredients: This salad is great for using up any vegetables you have in your fridge.
  • Make it a Meal: Add protein like grilled chicken, chickpeas, or quinoa to make this a complete dish.

Variations

  • Picky Eaters: For kids who may be hesitant about certain veggies, try substituting cucumber with sweet corn and use mild cheese like mozzarella instead of feta.
  • Vegan Option: Omit the feta, or substitute with a plant-based cheese to keep it dairy-free.
  • Gluten-Free: This salad is naturally gluten-free, making it an excellent option for those following a gluten-free diet.
  • Extra Crunch: Add some chopped walnuts or sunflower seeds for a delightful crunch.
  • Herb Swaps: Swap parsley for basil or cilantro based on your family’s preferences for a different flavor profile.

FAQ

1. Can I make this salad the day before?

While it’s best fresh, you can prepare the ingredients a day in advance and mix them just before serving.

2. What can I use instead of Kalamata olives?

Any pitted olives will work! Green olives or even black olives will fit well in this salad.

3. How long will leftovers last?

If stored properly, leftovers can last for about 3 days in the refrigerator.

4. Can I add pasta to this salad?

Absolutely! Adding cooked pasta can turn it into a hearty meal. Just toss in the pasta after it cools down.

5. What’s the best way to chop vegetables quickly?

Using a sharp knife and a cutting board allows for safe and efficient chopping. You can also use a food processor for even quicker prep.

As you finish your culinary adventure, remember that meals made with love are the most memorable. Enjoy every bite of this Mediterranean salad, and savor the moments spent with your family around the table. Happy cooking!

Mediterranean Salad

Prep Time 15 minutes
Total Time 15 minutes
Servings 4 servings
Calories 250
A vibrant and nourishing Mediterranean salad that is quick to prepare, bursting with flavors, and enjoyable for both adults and kids alike.

Ingredients

Fresh Vegetables

  • 2 cups cherry tomatoes, halved (Use a mix of colors for a more vibrant dish.)
  • 1 piece cucumber, diced (Choose an English cucumber for fewer seeds and a crisper texture.)
  • 1 piece bell pepper (any color), diced (Bell peppers add sweetness and crunch.)
  • 1/2 piece red onion, thinly sliced (Soak the sliced onion in cold water for a few minutes to mellow the flavor.)

Salad Add-Ins

  • 1 cup Kalamata olives, pitted and halved (They bring a delicious briny flavor.)
  • 1 cup feta cheese, crumbled (Use a block of feta for a creamier texture; crumble it yourself for freshness.)
  • 1/4 cup fresh parsley, chopped (Use flat-leaf for the best taste.)

Dressing Ingredients

  • 1/4 cup extra virgin olive oil (A good quality oil makes a significant difference in flavor.)
  • 2 tablespoons red wine vinegar (This adds brightness and balances the richness of the olive oil.)
  • to taste salt and pepper (Season gradually; you can always add more.)

Instructions 

Preparation

  • Start by washing all your fresh produce.
  • Dice the tomatoes, cucumber, bell pepper, and onion, aiming for uniform sizes for even mixing.

Mixing

  • In a large mixing bowl, combine the cherry tomatoes, cucumber, bell pepper, red onion, and olives.
  • Gently fold in the feta and parsley.

Dressing

  • In a small bowl, whisk together the olive oil, red wine vinegar, salt, and pepper.
  • Pour the dressing over the salad and toss gently.
  • Taste and adjust the seasoning if needed.

Serving

  • Transfer to a serving platter or bowl, and enjoy!

Notes

This salad is best enjoyed fresh but can hold up for a few days in the fridge. Store it in an airtight container to keep it crisp. Dress right before serving to avoid sogginess.
Calories: 250kcal
Course: Light Meal, Salad, Side Dish
Cuisine: Healthy, Mediterranean
Keyword: Healthy Salad, Mediterranean Salad, Nourishing Salad, Quick Salad

Greek Chicken and Lemon Rice

The scent of lemon and oregano fills the air as the skillet sizzles gently on the stove. I love that sound, the little pops and sighs that mean dinner is underway. You can almost hear the family gathering, the clink of plates, the quiet questions about what smells so good.

This Greek chicken and lemon rice recipe is one of those meals that makes the whole kitchen feel like a hug. It is fragrant, simple, and comforting. I wrote this recipe after years of cooking for my kids and friends. It’s the kind of dish that keeps well, travels well to potlucks, and makes weeknights feel a lot less hectic.

Why this works

Greek Chicken and Lemon Rice

This dish hits the sweet spot between flavor and ease. The lemon brightens everything, while the oregano and garlic give a familiar, earthy taste that kids and adults both enjoy. The rice cooks in the same skillet as the chicken, so you get a pan full of flavor without extra dishes.

It also saves time and hands-on work. After a quick sear, the oven does the heavy lifting. That means you can tidy up, help with homework, or set the table while the oven finishes the job. For busy families, this one-pan approach keeps evenings peaceful and dinners delicious.

I test recipes for my family and my readers. Over the years I have learned small adjustments that make a difference. This version balances bright lemon with savory chicken and a tender, not mushy, rice texture.

Process Overview

“This is where the magic happens—when the aroma fills the kitchen.”

The process is simple. You season and sear the chicken to build flavor, then deglaze the pan with chicken broth and lemon. The rice simmers gently in that broth, soaking up all those browned bits and lemony notes. The oven finishes the cook so the chicken stays juicy and the rice cooks through evenly.

Cooking this way gives you a layered flavor profile with minimal effort. If you follow the steps, you will have a comforting, family-friendly meal in under an hour.

Ingredients

  • 4 boneless, skinless chicken breasts
    Lily’s tip: Choose similar-sized breasts so they cook evenly. If they are thick, pound them gently to an even thickness for quicker, more consistent cooking.

  • 2 tablespoons olive oil
    Lily’s tip: Use a good-quality extra virgin olive oil for flavor. If you need a higher smoke point, use light olive oil.

  • 1 teaspoon dried oregano
    Lily’s tip: Dried oregano is more concentrated than fresh. If you have fresh oregano, use 1 tablespoon chopped instead.

  • 1 teaspoon garlic powder
    Lily’s tip: Garlic powder adds gentle, even flavor. For a fresher note, add one crushed garlic clove to the pan when deglazing.

  • 1 teaspoon onion powder
    Lily’s tip: Onion powder boosts savory depth without adding texture. It is great when picky eaters do not like visible chopped onions.

  • 1 teaspoon lemon zest
    Lily’s tip: Zest a lemon before juicing it. The zest releases oils that brighten the dish more than juice alone.

  • 1/4 cup lemon juice
    Lily’s tip: Fresh lemon juice is best. Bottled works in a pinch but lacks brightness.

  • 2 cups chicken broth
    Lily’s tip: Use low-sodium broth so you can control the salt. If using homemade broth, taste it first and adjust salt later.

  • 1 cup long-grain rice
    Lily’s tip: Long-grain rice stays fluffy and separate. Rinse it under cold water to remove excess starch for a less sticky result.

  • 1/2 teaspoon salt
    Lily’s tip: This is a baseline. If your broth is already salted, reduce the added salt and taste before serving.

  • 1/4 teaspoon black pepper
    Lily’s tip: Freshly ground pepper makes a subtle difference. Add more at the table if someone likes a kick.

  • 1 tablespoon fresh parsley, chopped
    Lily’s tip: Parsley adds color and freshness at the end. Flat-leaf parsley works best for flavor.

I use simple pantry staples and fresh lemon for brightness. These ingredients keep well and are easy to find year-round. The tips come from years of cooking for children who prefer familiar textures and adults who like bold flavor.

Directions

  1. Preheat your oven to 375°F (190°C).
    Encouragement: Give yourself a moment to set the timer and gather ingredients while the oven warms. This little step starts the rhythm.

  2. Pat the chicken breasts dry with paper towels to remove any excess moisture.
    Encouragement: Dry chicken sears better. A quick pat ensures a golden crust.

  3. Rub both sides of each chicken breast with olive oil.
    Encouragement: The oil helps the seasonings stick and keeps the meat juicy. Be generous but not greasy.

  4. Season the chicken breasts with dried oregano, garlic powder, onion powder, lemon zest, salt, and black pepper.
    Encouragement: Press the seasoning gently into the meat. This is where flavor begins to build.

  5. Heat a large oven-safe skillet over medium-high heat.
    Encouragement: Give the skillet a minute to get hot. A properly heated pan creates a nice sear.

  6. Once the skillet is hot, add the seasoned chicken breasts to the skillet.
    Encouragement: Place the chicken away from you to avoid splatters. Hear that satisfying sizzle.

  7. Cook the chicken breasts for about 4-5 minutes on each side, or until golden brown.
    Encouragement: Resist the urge to move the chicken too soon. Let it form a crust for the best flavor.

  8. Once browned, remove the chicken from the skillet and set it aside on a plate.
    Encouragement: Do not worry if the chicken is not fully cooked. The oven will finish it while the rice cooks.

  9. Add the chicken broth to the skillet, scraping up any browned bits from the bottom of the pan with a wooden spoon.
    Encouragement: Those browned bits are flavor gold. Scrape them up to flavor the rice.

  10. Stir in the lemon juice and bring the broth to a simmer.
    Encouragement: The lemon brightens the whole pan. Let it bloom for a minute in the warm broth.

  11. Add the rice to the skillet, stirring to ensure the rice is evenly distributed.
    Encouragement: Spread the rice into an even layer so it cooks uniformly. Stirring helps it soak up the liquid.

  12. Place the chicken breasts back into the skillet on top of the rice.
    Encouragement: Nestle them gently so the rice cooks under the chicken and absorbs juices.

  13. Cover the skillet with a lid or foil and transfer it to the preheated oven.
    Encouragement: This is the hands-off part. Clean up while the oven does the rest.

  14. Bake for 20-25 minutes, or until the rice is cooked through and the chicken reaches an internal temperature of 165°F (74°C).
    Encouragement: Use a thermometer for peace of mind. The right temperature keeps chicken safe and tender.

  15. Remove the skillet from the oven and let it sit, covered, for 5 minutes.
    Encouragement: Resting helps the juices redistribute. It also makes serving neater.

  16. Sprinkle the chopped fresh parsley over the chicken and rice before serving.
    Encouragement: A fresh green touch makes the dish sing. Children often enjoy helping with this final step.

  17. Serve the chicken and lemon rice warm, garnished with additional parsley if desired.
    Encouragement: Call the family. This meal is best enjoyed fresh and shared around the table.

Follow these steps and you will have a flavorful, homey meal that feels special without a lot of fuss.

Serving

Greek Chicken and Lemon Rice

This recipe shines when served family-style. Bring the skillet to the table, place a bowl of lemon wedges nearby, and let everyone help themselves. The visual of the golden chicken resting on bright, lemony rice is inviting.

Pair it with a simple green salad or roasted vegetables. A side of steamed broccoli or a Greek salad keeps the meal balanced and colorful. For a little extra richness, offer crumbled feta at the table.

I like to serve this with warm pita or crusty bread. Guests enjoy scooping rice and sauce into bread for a satisfying bite. Serving family-style makes dinner feel less formal and more like the cozy gatherings I grew up with.

Storage

Cool leftovers promptly and store in an airtight container in the refrigerator for up to 3 days. The rice will continue to absorb liquid, so it may seem drier after refrigeration.

To reheat, add a splash of chicken broth or water to the skillet or microwave-safe dish to loosen the rice. Cover loosely and reheat in a 350°F oven for 10-12 minutes, or microwave on medium power in 1-minute bursts until hot. Add a squeeze of fresh lemon before serving to revive the brightness.

You can also freeze portions. Place cooled portions in freezer-safe containers and freeze for up to 2 months. Thaw overnight in the refrigerator before reheating as described.

Kitchen Notes

  • Use an oven-safe skillet so you can sear on the stovetop and finish in the oven without extra dishes.
  • Rinse long-grain rice under cold water to remove starch and keep grains separate.
  • If chicken breasts vary in size, slice thicker ones in half horizontally for even cooking.
  • Low-sodium broth gives you better control over the dish’s salt level. Taste before adding more salt.
  • A meat thermometer is a small tool that saves stress and avoids overcooking.

These shortcuts save time and keep flavor consistent. Over time, you will find little adjustments that fit your family’s tastes.

Variations

  • For picky eaters: Leave out the lemon zest in the seasoning mix and add lemon wedges at the table so each person can choose their level of tang.
  • For a low-carb option: Serve the seasoned chicken over cauliflower rice. Sear and finish in the oven as directed, but check cauliflower rice sooner as it cooks faster.
  • For extra vegetables: Stir 1 cup of diced bell peppers or peas into the rice before baking. They add color and nutrition without extra effort.
  • For a dairy twist: Sprinkle 1/2 cup crumbled feta over the dish in the last 5 minutes of baking so it softens but does not completely melt.
  • For a heartier meal: Use bone-in chicken thighs instead of breasts. Increase bake time to ensure thighs are cooked through and the internal temperature reaches 165°F.

These variations let you tailor the meal to diets, seasons, and pantry items. I often switch things up depending on what my kids will eat that week.

FAQ

Q: Can I use brown rice instead of long-grain white rice?
A: Yes, but brown rice needs more liquid and a longer cooking time. Use about 2 1/2 cups broth and increase oven time by 20-25 minutes. Check for tenderness.

Q: Can I make this on the stovetop only?
A: You can. After adding the rice and replacing the chicken, reduce heat to low, cover tightly, and simmer for 20-25 minutes until the rice is tender and the chicken reaches 165°F.

Q: How do I prevent the rice from sticking to the pan?
A: Use a well-heated skillet and scrape up browned bits before adding the liquid. Rinsing the rice helps too. Also watch liquid ratio closely and avoid lifting the lid often during baking.

Q: Is this recipe freezer friendly?
A: Yes. Cool the dish completely, portion into freezer-safe containers, and freeze for up to 2 months. Thaw overnight in the fridge before reheating.

Q: Can I use thighs instead of breasts for more flavor?
A: Absolutely. Bone-in thighs add richness. Brown them well, and increase oven time until they reach 165°F and the rice is tender.

Conclusion

I hope this Greek chicken and lemon rice becomes one of your go-to weeknight recipes. It is forgiving, full of flavor, and perfect for sharing around the table with people you love. Cooking for my family taught me that good meals do not have to be complicated to be memorable.

For another one-pot take with similar flavors, I like to compare versions and techniques from trusted recipe developers. You can see a bright, quick version at Julia’s Album Greek Chicken and Lemon Rice (30 Minutes, One-Pot) and a hearty approach at RecipeTin Eats One Pot Greek Chicken and Lemon Rice for inspiration.

Happy cooking from my kitchen to yours. Enjoy the aroma, the conversation, and the moments that happen over a shared plate.

Greek Chicken and Lemon Rice

Prep Time 10 minutes
Cook Time 25 minutes
Total Time 35 minutes
Servings 4 servings
Calories 450
A fragrant, one-pan meal featuring seasoned chicken breasts and lemon-infused rice that makes weeknight dinners comforting and easy.

Ingredients

Main Ingredients

  • 4 pieces boneless, skinless chicken breasts (Choose similar-sized breasts for even cooking.)
  • 2 tablespoons olive oil (A good-quality extra virgin olive oil is best.)
  • 1 teaspoon dried oregano (If using fresh, use 1 tablespoon chopped instead.)
  • 1 teaspoon garlic powder (For a fresher flavor, use one crushed garlic clove.)
  • 1 teaspoon onion powder (Boosts savory depth without adding texture.)
  • 1 teaspoon lemon zest (Zest before juicing for better flavor.)
  • 1/4 cup lemon juice (Fresh lemon juice is preferred.)
  • 2 cups chicken broth (Use low-sodium to control salt level.)
  • 1 cup long-grain rice (Rinse to remove excess starch.)
  • 1/2 teaspoon salt (Taste broth before adding additional salt.)
  • 1/4 teaspoon black pepper (Freshly ground adds more flavor.)
  • 1 tablespoon fresh parsley, chopped (Adds freshness and color just before serving.)

Instructions 

Preparation

  • Preheat your oven to 375°F (190°C).
  • Pat the chicken breasts dry with paper towels.
  • Rub both sides of each chicken breast with olive oil.
  • Season the chicken breasts with oregano, garlic powder, onion powder, lemon zest, salt, and pepper.
  • Heat a large oven-safe skillet over medium-high heat.
  • Once hot, add the seasoned chicken breasts to the skillet.
  • Cook the chicken for about 4-5 minutes on each side until golden brown.
  • Remove the chicken from the skillet and set aside.

Cooking

  • Add chicken broth to the skillet, scraping up any browned bits from the bottom.
  • Stir in the lemon juice and bring to a simmer.
  • Add the rice, stirring to ensure it is evenly distributed.
  • Place the chicken back into the skillet on top of the rice.
  • Cover with a lid or foil and transfer to the oven.
  • Bake for 20-25 minutes, until rice is cooked and chicken reaches an internal temperature of 165°F (74°C).
  • Remove from oven and let sit covered for 5 minutes.
  • Sprinkle with parsley before serving.

Serving

  • Serve warm, garnished with additional parsley if desired.

Notes

Cool leftovers promptly and store in an airtight container in the refrigerator for up to 3 days. The rice may seem drier after refrigeration. To reheat, add a splash of broth or water, cover, and heat in the oven or microwave.
Calories: 450kcal
Course: Dinner, Main Course
Cuisine: Greek
Keyword: Comfort Food, Family Meal, Greek Chicken, Lemon Rice, One-Pan Dinner