Category

30-Minute Chicken Dinners

Category

Bang Bang Chicken Skewers

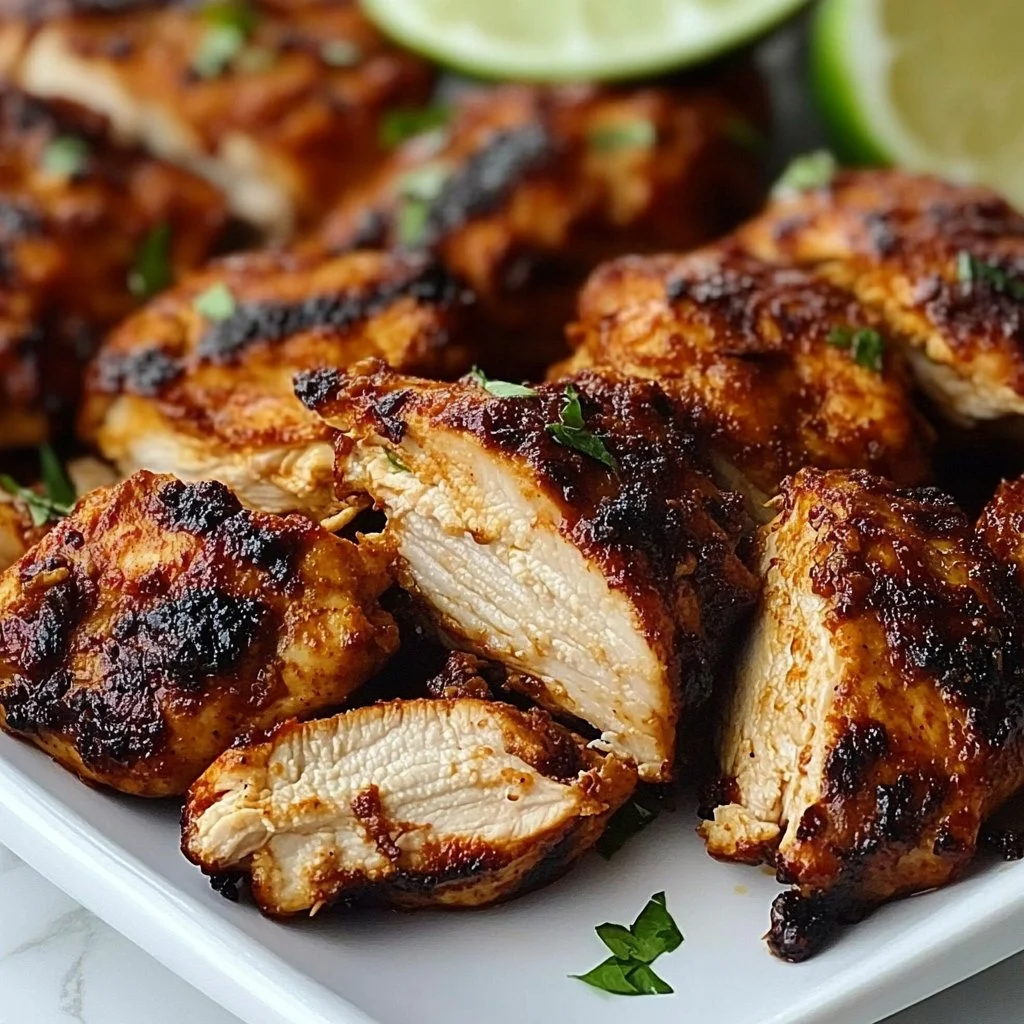
I can still smell the sweet chili and garlic when I think about the first time I served these Bang Bang Chicken Skewers to my family. The sizzle hit the air and the kitchen filled with a warm, tangy aroma that made everyone pause what they were doing.

You will hear little feet rushing over and the clink of plates as hands reach for the skewers. This recipe brings that kind of happy, noisy dinner table energy.

If you like a hands-off weeknight option that still feels special, you might enjoy my full take on this dish at my Bang Bang Chicken Skewers page where I share a few more family tricks.

Why this works

Bang Bang Chicken Skewers

This recipe works for busy families because it balances speed and flavor. Chicken breasts cook quickly when cut into bite-sized pieces. The bang bang sauce takes two minutes to mix and gives a lot of bang for very little effort.

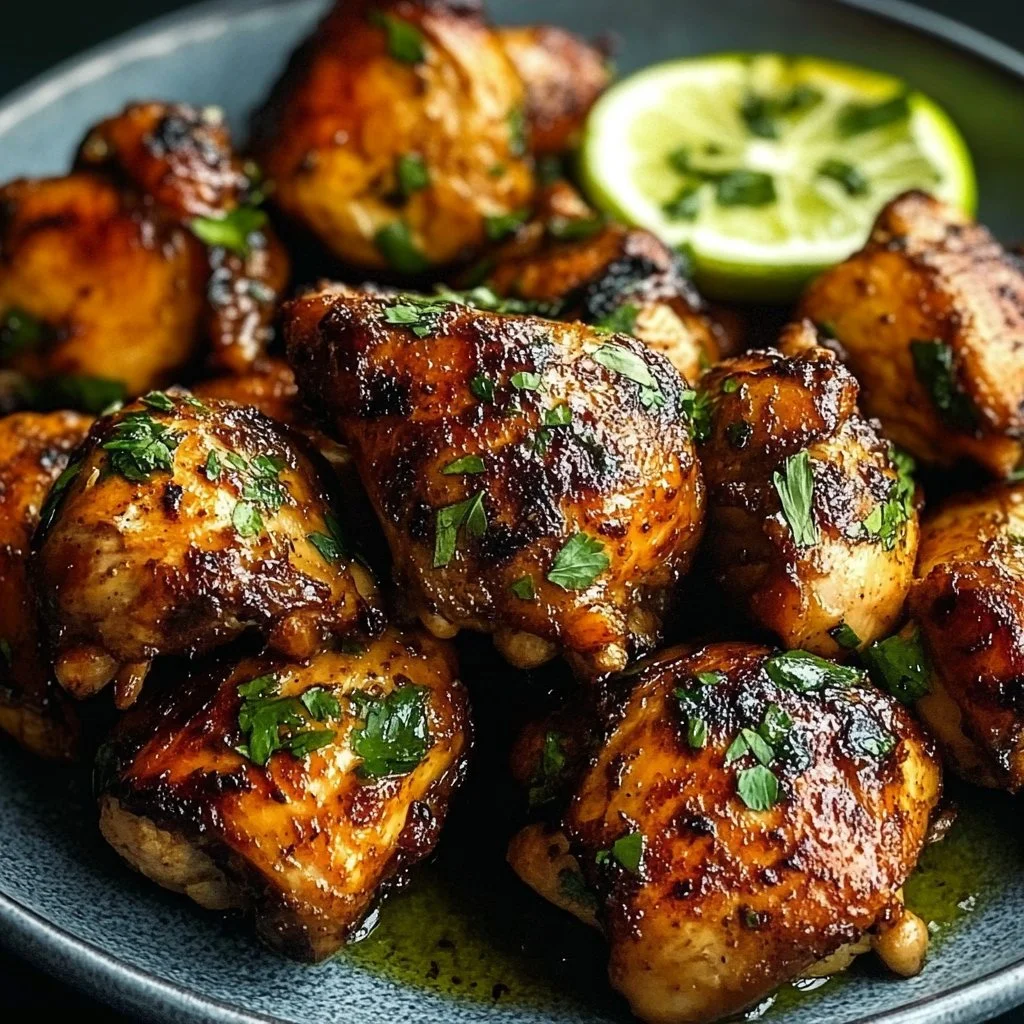
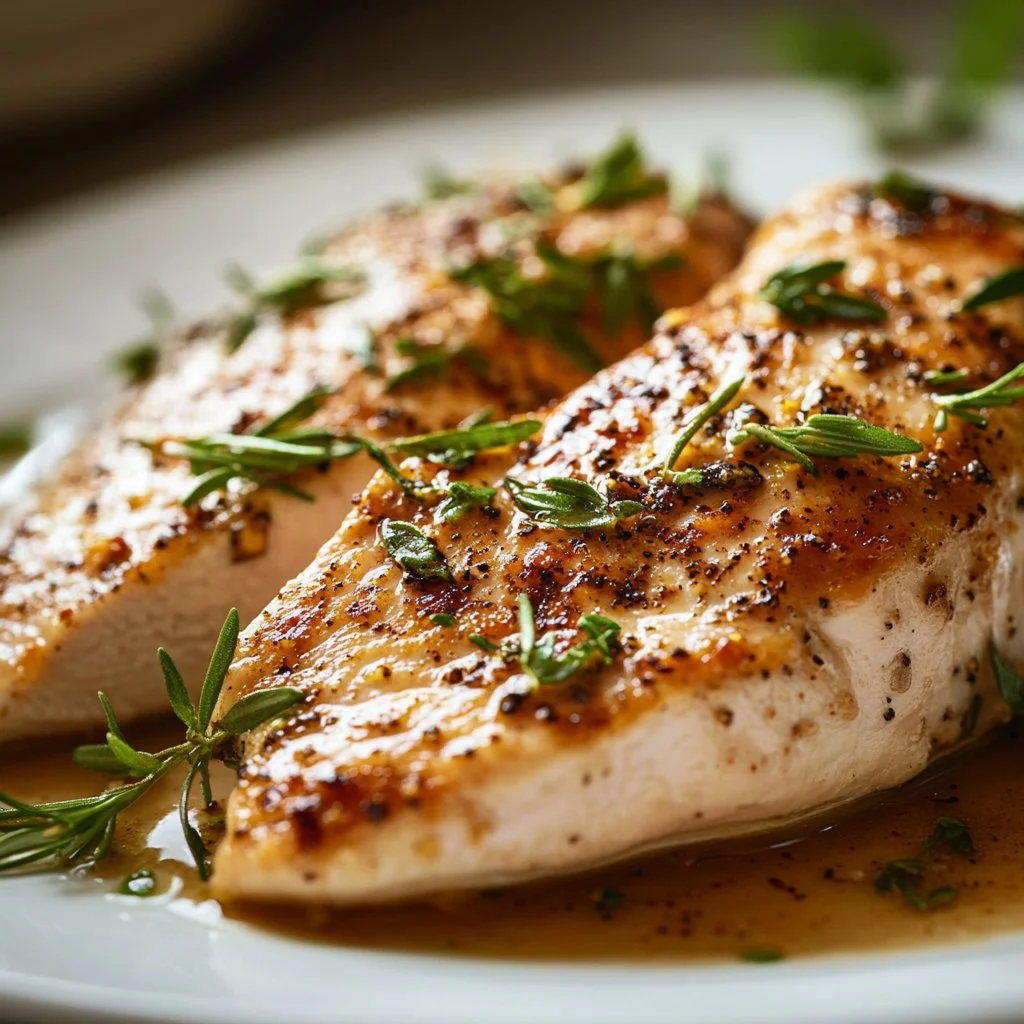
Grilling adds a smoky depth that makes simple ingredients sing. You get those satisfying grill marks and a caramelized crust while the inside stays juicy and tender.

If you want to stretch the idea into a bowl for picky eaters, try a trusted family-friendly version like my Bang Bang Chicken Bowl for an easy weeknight assembly approach.

Process Overview

“This is where the magic happens—when the aroma fills the kitchen.”

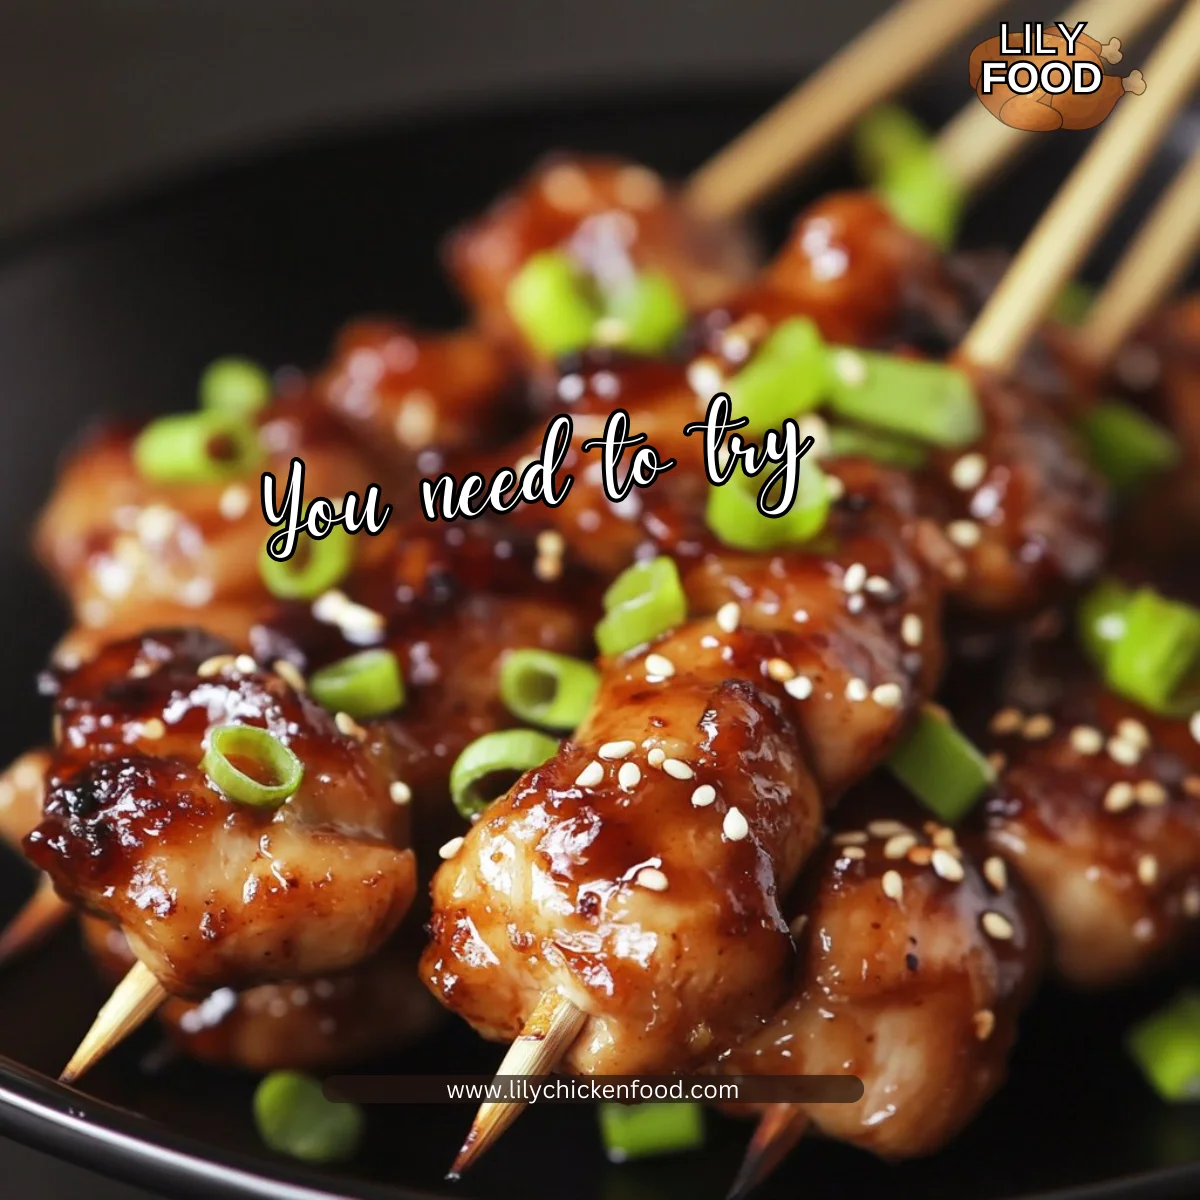
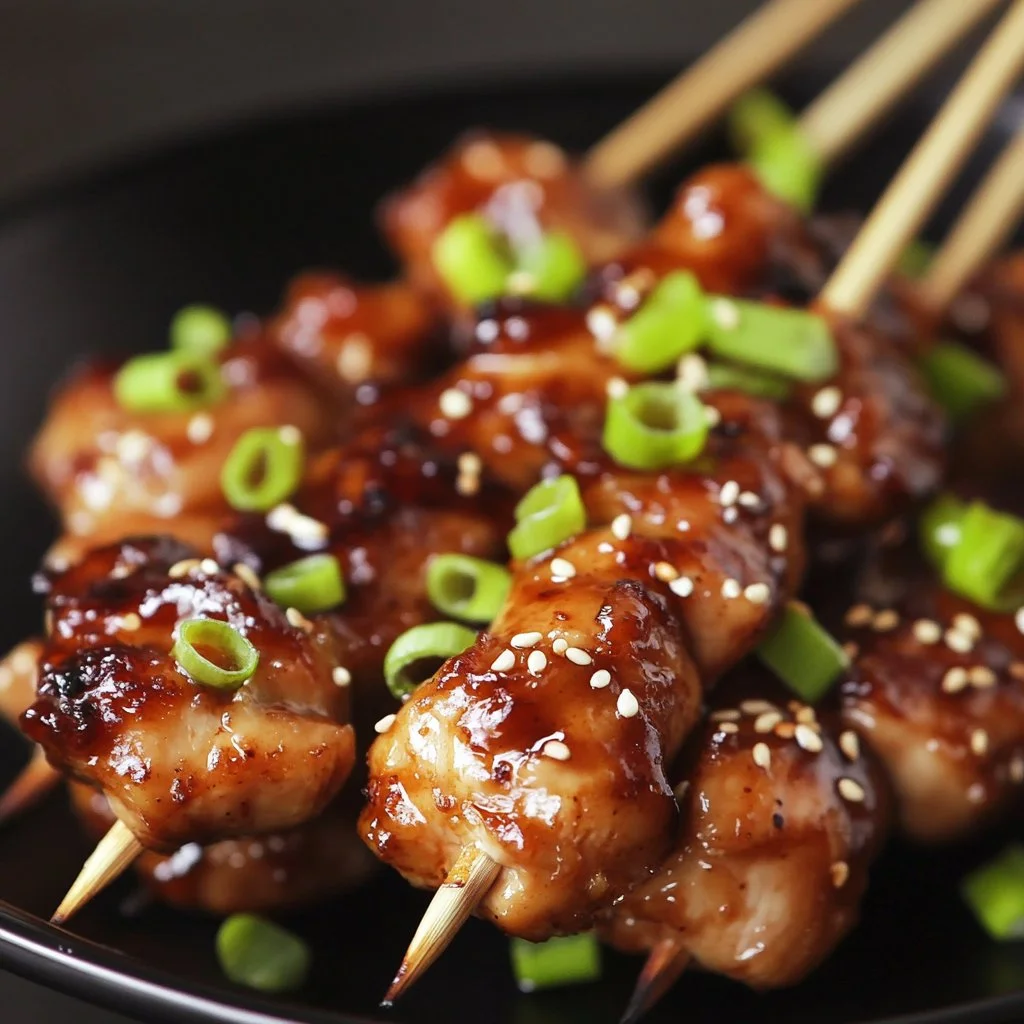
In short, you cut, skewer, grill, and sauce. The sauce is creamy, sweet, and spicy, and it clings to the warm chicken beautifully.

You can prep ingredients ahead to save time. Marinate for 15 minutes or refrigerate the skewered chicken for a couple hours. The grill does the rest.

I recommend using an instant-read thermometer to confirm doneness. That simple tool keeps food safe and saves guesswork.

Ingredients

What you need and my personal tips for each item.

  • 1.5 to 2 lbs chicken breasts, boneless and skinless.
    Tip: Trim the fat and cut into 1 to 1 1/2-inch pieces for even cooking. Smaller pieces cook faster and are great for kids.

  • Bang bang sauce (makes about 1 cup)

    • 1/2 Cup mayonnaise
    • 1/2 Cup sweet chili sauce
    • 1 to 2 teaspoons sriracha, to taste
      Tip: Mix and taste. Start with 1 teaspoon of sriracha, then add more if your family likes heat.
  • 1 teaspoon salt
    Tip: Use kosher salt if available. It seasons more evenly.

  • 1/2 teaspoon black pepper
    Tip: Freshly ground pepper lifts the flavor more than pre-ground.

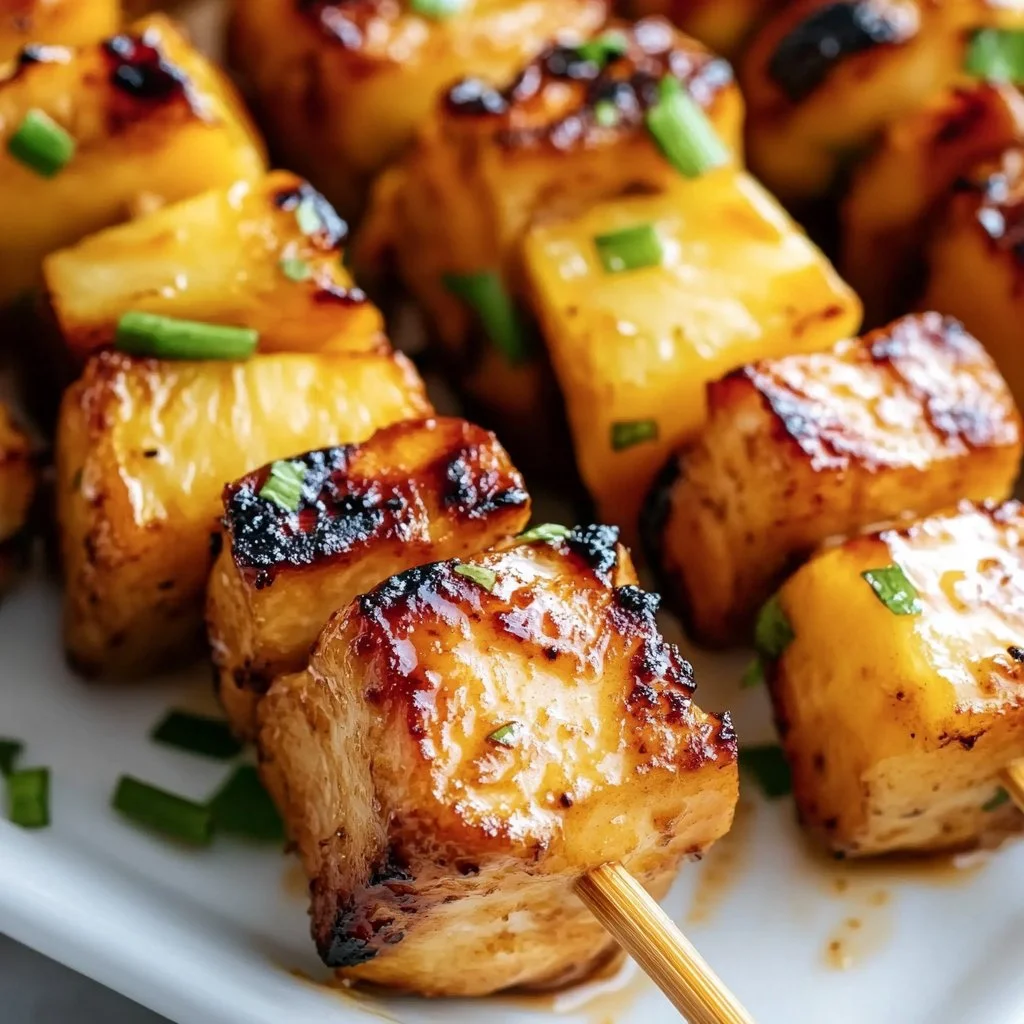
  • Skewers, wooden or metal.
    Tip: If using wooden skewers, soak them 30 minutes in water to prevent burning.

Optional for serving

  • Steamed rice or jasmine rice
  • Roasted or grilled vegetables
    Tip: Serving with rice and veggies turns these skewers into a balanced family meal. If you want a crunchy salad version, I often serve these over my Bang Bang Chicken Crispy Rice Salad for a playful weeknight change-up.

H3: Kitchen tools I use

  • Instant-read thermometer
  • Grill or grill pan
  • Mixing bowl and brush
  • Cutting board and sharp knife

Directions

  1. Cut the chicken breasts into bite-sized pieces and season with salt and pepper.
    Encouragement: Take your time cutting to keep pieces even. Even pieces mean even cooking and happy kids.

  2. Thread the chicken pieces onto the skewers.
    Encouragement: Leave a little space between pieces so heat can circulate. Handle gently and enjoy this small, calming step.

  3. Preheat the grill to medium-high heat.
    Encouragement: A properly hot grill gives you those pretty char marks fast. If you are using a grill pan, heat it until it is smoking lightly.

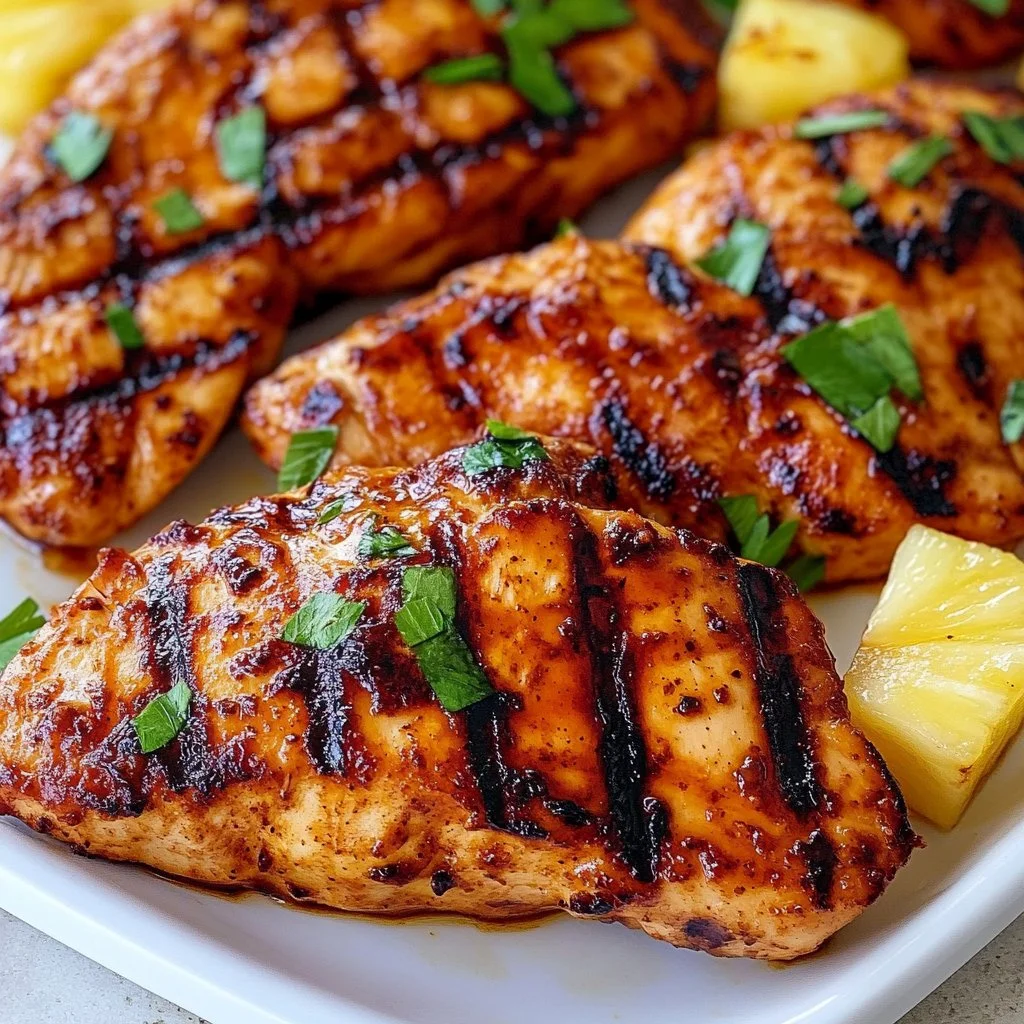
  4. Grill the skewers for about 10-12 minutes, turning occasionally, until the chicken is cooked through and has nice grill marks.
    Encouragement: Turn each skewer every 3 minutes or so. Check an internal temperature of 165 °F in the thickest piece for safety and reassurance.

  5. Meanwhile, in a bowl, mix the mayonnaise, sweet chili sauce, and sriracha to make the bang bang sauce.
    Encouragement: Taste as you go. A spoonful of sauce on a warm bite will tell you if it needs more sriracha or a pinch of sugar.

  6. Once the chicken is cooked, brush it with the bang bang sauce.
    Encouragement: Brush once during the last minute on the grill and again right after you take the skewers off. The heat helps the sauce set into a glossy coat.

  7. Serve the skewers hot with extra sauce on the side and your choice of rice or veggies.
    Encouragement: Let everyone build their plate. Little hands love picking their favorite veggie or scooping sauce.

If grilling is not an option, you can adapt the method to an indoor appliance. I have a reliable step-by-step for an alternative in my Air Fryer Chicken Skewers post that keeps things just as simple.

Serving

Bang Bang Chicken Skewers

Serve family-style on a large platter so everyone can pick and choose. Arrange the skewers over a bed of rice and tuck roasted vegetables around the edges.

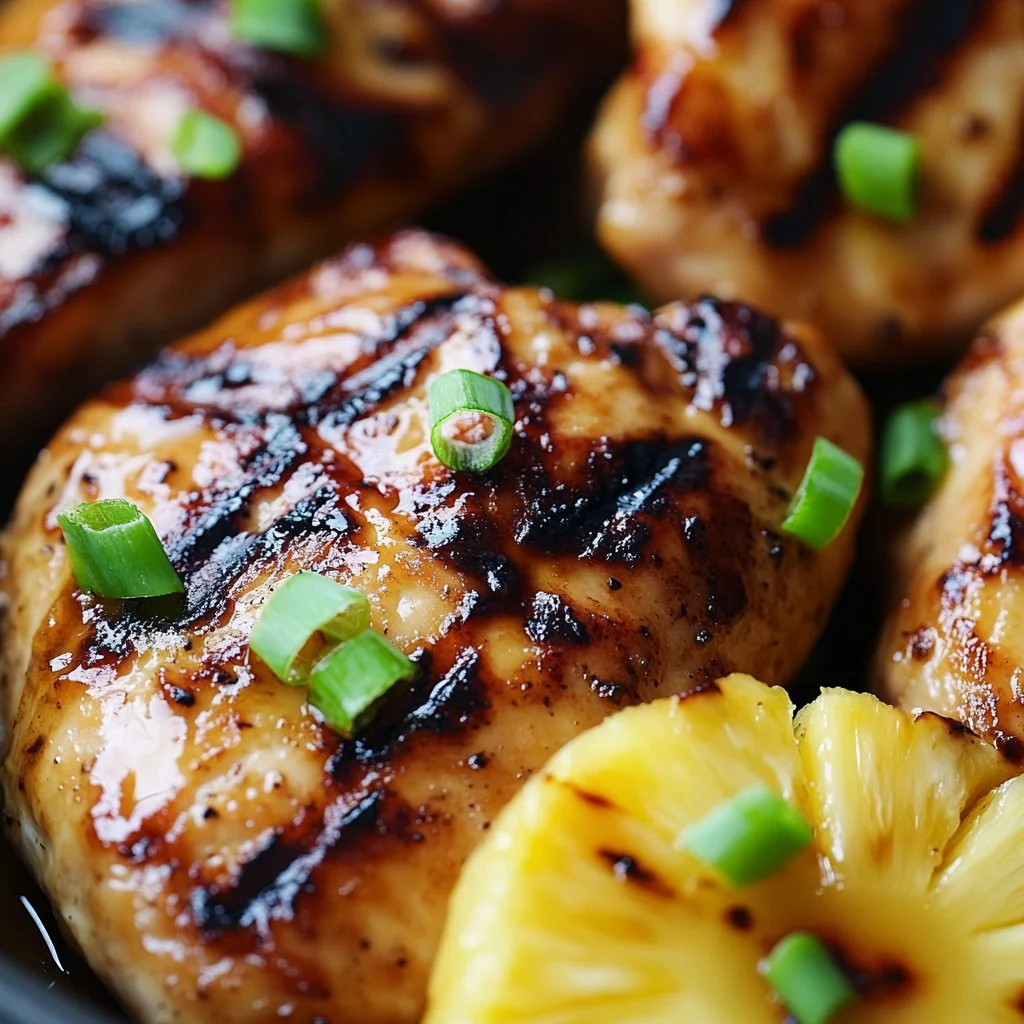
H3: Garnishes and sides

  • Sprinkle chopped green onions and sesame seeds for color and crunch.
  • Offer lime wedges for bright acidity.
  • Serve extra bang bang sauce on the side so each person can adjust the heat.

Sharing a big platter makes dinner feel special and keeps things casual. I place a bowl of rice, a bowl of sauce, and the skewers in the center for easy passing.

Storage

Leftovers keep well and reheat nicely, which makes this a meal that gives back.

Fridge

  • Store cooled skewers in an airtight container for up to 3 days.
  • Place extra sauce in a separate container to preserve texture.

Freezer

  • You can freeze cooked pieces without the skewers in a freezer container for up to 2 months.
  • Thaw overnight in the fridge before reheating.

Reheating

  • To reheat, warm gently in a 350 °F oven for 8 to 10 minutes, or until heated through.
  • You can also reheat briefly on a hot grill or grill pan to restore some char.
  • Add fresh sauce after reheating for the best texture and flavor.

Safety note: Always reheat until the internal temperature reaches at least 165 °F.

Kitchen Notes

Five time-saving shortcuts I use all the time.

  • Cook double and freeze half for easy weeknight dinners later.
    Tip: Portion into meal-sized packs so you only thaw what you need.

  • Use pre-made sweet chili sauce. It seriously speeds things up and tastes great.

  • Prep skewers the night before and keep them covered in the fridge.
    Tip: Store them on a tray to avoid bending or sticking.

  • Swap mayo for Greek yogurt to reduce fat and add tang.
    Tip: Start with half mayo and half yogurt to keep the creamy texture kids like.

  • Turn dinner into handhelds by making sliders with the skewered chicken removed and served on mini buns.
    For a quick slider how-to, I often reference my Bang Bang Chicken Sliders Recipe which is perfect for busy family nights.

Variations

Make this recipe match the way your family eats. A few easy tweaks.

  • For a milder sauce: Reduce or omit the sriracha. Add a teaspoon of honey if you need extra sweetness.
  • For extra heat: Add more sriracha or a pinch of cayenne. Toss some chili flakes on top when serving.
  • Keto or low carb: Serve over cauliflower rice or a mixed green salad instead of rice.
  • Gluten-free: Check labels on the sweet chili sauce. Many are gluten-free but read the label.
  • Vegetarian option: Use firm tofu or tempeh cubes marinated and grilled the same way. Brush with the same bang bang sauce for a familiar family favorite.

FAQ

Q: Can I use chicken thighs instead of breasts?
A: Yes. Thighs stay juicy and are forgiving on the grill. Cut them into the same size as you would breasts for even cooking.

Q: How do I keep wooden skewers from burning?
A: Soak wooden skewers in water for at least 30 minutes. Also avoid letting the ends sit directly on the grill grates if they are very long.

Q: What temperature should I cook the chicken to?
A: Cook until the internal temperature reaches 165 °F. Use an instant-read thermometer for accuracy.

Q: Can I make the sauce ahead of time?
A: Absolutely. The sauce stores in the fridge for up to 4 days. Stir before serving if it separates slightly.

Q: Is there a non-mayo version of bang bang sauce?
A: Yes. Swap mayonnaise for plain Greek yogurt for a tangier, lower-fat version. Start slow so the texture and taste balance right.

Conclusion

I love how these Bang Bang Chicken Skewers take ordinary weeknight ingredients and turn them into a crowd-pleaser. They are fast, family-friendly, and easy to adapt for picky eaters or special diets.

If you want another home cook’s take on this classic, I found a lovely step-by-step on I Am Homesteader’s Bang Bang Chicken Skewers that offers helpful tips. For a slightly different flavor profile and serving ideas, see the version at Cooked & Loved’s Bang Bang Chicken Skewers Recipe.

Thanks for cooking with me. I hope this recipe brings your family to the table, laughing and sharing the small moments that matter.

Bang Bang Chicken Skewers

Prep Time 15 minutes
Cook Time 12 minutes
Total Time 27 minutes
Servings 4 servings
Calories 350
These Bang Bang Chicken Skewers are fast and family-friendly, featuring juicy chicken pieces grilled to perfection and coated in a creamy, sweet, and spicy bang bang sauce.

Ingredients

Chicken Skewers

  • 1.5 to 2 lbs boneless, skinless chicken breasts (Trim the fat and cut into 1 to 1 1/2-inch pieces.)
  • 1 teaspoon salt (Use kosher salt if available.)
  • 1/2 teaspoon black pepper (Freshly ground pepper is preferred.)
  • skewers wooden or metal skewers (If using wooden skewers, soak for 30 minutes.)

Bang Bang Sauce

  • 1/2 cup mayonnaise
  • 1/2 cup sweet chili sauce
  • 1 to 2 teaspoons sriracha (Adjust to taste.)

Optional Serving Suggestions

  • steamed rice or jasmine rice
  • roasted or grilled vegetables

Instructions 

Preparation

  • Cut the chicken breasts into bite-sized pieces and season with salt and pepper.
  • Thread the chicken pieces onto the skewers, leaving space between pieces.
  • Preheat the grill to medium-high heat.

Cooking

  • Grill the skewers for about 10-12 minutes, turning occasionally until cooked through.
  • Meanwhile, mix mayonnaise, sweet chili sauce, and sriracha in a bowl to make the bang bang sauce.
  • Once the chicken is cooked, brush it with the bang bang sauce.

Serving

  • Serve the skewers hot with extra sauce on the side and your choice of rice or veggies.

Notes

Leftovers can be stored in an airtight container for up to 3 days. You can freeze cooked chicken pieces for up to 2 months.
Calories: 350kcal
Course: Dinner, Main Course
Cuisine: American
Keyword: Bang Bang Chicken, Chicken Skewers, Family Dinner, Grilled Chicken, Quick Meal

Creamy White Chicken Enchiladas

The smell of sizzling butter fills the kitchen, inviting everyone to gather around. You hear the soft sound of chicken being shredded and the gentle mixing of ingredients. It’s not just a meal; it’s a comforting experience that brings the family together. Creamy White Chicken Enchiladas are a warm, delightful dish that’s perfect for weeknight dinners or cozy gatherings. With a simple method and comforting flavors, you can set the stage for wonderful moments at the dining table.

Why this works

Creamy White Chicken Enchiladas

These creamy white chicken enchiladas hit all the right notes for family mealtime. You can easily whip them up using leftover chicken or store-bought rotisserie chicken, saving you valuable time. The flavorful filling wrapped in soft tortillas and smothered in a velvety white sauce is sure to please even the pickiest eaters. Plus, this recipe makes a generous portion, so leftovers are a delightful bonus for busy days ahead.

Process Overview

“This is where the magic happens—when the aroma fills the kitchen.”

The process of making these enchiladas is straightforward and enjoyable. First, you create a smooth white sauce that acts as the perfect base. Next, you mix the delicious filling and wrap it all up in soft tortillas. Finally, those wrapped beauties are drenched in more white sauce, sprinkled with cheese, and baked until bubbly and golden. The kitchen comes alive with the smells of savory chicken and melted cheese, making your family even more eager for dinner.

Ingredients

Here’s what you’ll need to create these mouthwatering enchiladas:

  • 8-10 medium flour tortillas
  • 3 cups cooked shredded chicken (rotisserie works great)
  • 2 cups shredded Monterey Jack cheese (divided)
  • 1 cup shredded cheddar cheese (divided)
  • 1/2 cup diced green chiles (canned or fresh)
  • 1/4 cup chopped fresh cilantro
  • 1 small onion (diced)
  • 3 tablespoons butter (for white sauce)
  • 3 tablespoons all-purpose flour (for roux)
  • 2 cups chicken broth (for white sauce)
  • 1 cup sour cream (room temperature)
  • 1/2 teaspoon cumin (ground)
  • Salt and pepper to taste

Lily’s Tips: Use a rotisserie chicken not just for convenience but also for added flavor. Let your sour cream come to room temperature for easier mixing. Adjust the amount of green chiles based on your family’s spice preference.

Directions

  1. Melt butter in a large saucepan over medium heat. This step creates a rich base for your sauce.
  2. Whisk in flour and cook for 1 minute, stirring constantly, until it forms a smooth paste and turns light golden. This creates the foundation for your velvety white sauce.
  3. Gradually add chicken broth to the roux, whisking constantly to prevent lumps. Keep whisking until the sauce thickens and becomes smooth, about 3-4 minutes. Remove from heat and stir in sour cream, cumin, salt, and pepper until perfectly combined. Taste and adjust seasonings as needed.
  4. In a mixing bowl, combine shredded chicken, diced onion, green chiles, cilantro, and 1 cup of the cheese mixture. Mix thoroughly to create a well-distributed filling that delivers flavor in every bite. Don’t be afraid to get in there with your hands for better mixing.
  5. Preheat oven to 350°F. Spread a thin layer of white sauce in the bottom of a greased 9×13 baking dish. This keeps the enchiladas from sticking.
  6. Place about 1/3 cup chicken mixture down the center of each tortilla, roll tightly, and arrange seam-side down in the prepared dish. Take your time rolling; tightly wrapped enchiladas will hold their shape better.
  7. Pour the remaining white sauce evenly over rolled enchiladas, ensuring they’re completely covered. Sprinkle remaining Monterey Jack and cheddar cheese over the top for that golden, bubbly finish.
  8. Bake uncovered at 350°F for 25-30 minutes until sauce is bubbling around the edges and cheese is melted and golden brown. Remove from oven and let rest for 5 minutes before serving to allow sauce to set properly. Your patience will reward you with perfect enchiladas.

Serving

Creamy White Chicken Enchiladas

Serve these creamy white chicken enchiladas family-style. Place the casserole dish at the center of the table, and let everyone help themselves. Pair them with a simple side salad or some Mexican rice for a complete meal. If you have anyone in your family who loves spice, consider putting out some hot sauce for them to drizzle on top.

Storage

These enchiladas store beautifully. If you have leftovers, place them in an airtight container and refrigerate for up to 3 days. When you’re ready to enjoy them again, simply reheat in the oven at 350°F for about 15-20 minutes until warmed through. You can also microwave individual portions, but the oven keeps them from getting too soggy.

Kitchen Notes

  • Shortcut Sauce: Use store-bought white sauce for a faster option.
  • Frozen Enchiladas: Prepare the dish, cover well, and freeze before baking for up to three months. Bake from frozen, adding an additional 10-15 minutes.
  • Rotisserie Chicken: This is a major time-saver and adds great flavor.
  • Cheese Variety: Feel free to mix up the cheese. Pepper jack or a Mexican blend can add a nice kick.
  • Prep Ahead: You can assemble the enchiladas earlier in the day and refrigerate before baking.

Variations

Here are a few ideas to personalize your creamy white chicken enchiladas:

  • Vegetarian Option: Swap the chicken for black beans or sautéed vegetables like mushrooms, zucchini, and spinach.
  • Low-Carb Twist: Use cauliflower tortillas or zucchini slices instead of flour tortillas.
  • Different Proteins: Ground turkey or pork can make a delicious alternative to chicken.
  • Kid-Friendly: Reduce the spices and stick with plain cheese enchiladas for picky eaters.
  • Dairy-Free: Use plant-based cream, non-dairy cheese, and replace butter with olive oil.

FAQ

1. Can I use tortillas other than flour?
Yes, corn tortillas work fine but may require softening before filling.

2. How can I make these spicier?
Add diced jalapeños to the filling or use hotter green chiles.

3. Can I make these ahead of time?
Absolutely! Assemble them and store in the fridge for up to 24 hours before baking.

4. What should I do if my sauce is too thick?
Add a bit more chicken broth or sour cream to reach your desired consistency.

5. Can I freeze these enchiladas?
Yes, they freeze very well. Just be sure to cover them tightly before freezing.

As you prepare this dish, allow the process to become a joyful family event. Cooking together can create lasting memories. Enjoy the rich flavor and creamy texture of these enchiladas, and relish the smiles around the table. This meal is about nurturing love and connection through food. Happy cooking!

Creamy White Chicken Enchiladas

Prep Time 30 minutes
Cook Time 30 minutes
Total Time 1 hour
Servings 8 servings
Calories 450
A comforting dish perfect for weeknight dinners, featuring soft tortillas filled with flavorful shredded chicken and smothered in a velvety white sauce.

Ingredients

For the enchiladas

  • 8-10 medium flour tortillas
  • 3 cups cooked shredded chicken (rotisserie works great)
  • 2 cups shredded Monterey Jack cheese (divided)
  • 1 cup shredded cheddar cheese (divided)
  • 1/2 cup diced green chiles (canned or fresh)
  • 1/4 cup chopped fresh cilantro
  • 1 small onion (diced)

For the white sauce

  • 3 tablespoons butter (for white sauce)
  • 3 tablespoons all-purpose flour (for roux)
  • 2 cups chicken broth (for white sauce)
  • 1 cup sour cream (room temperature)
  • 1/2 teaspoon cumin (ground)
  • Salt and pepper (to taste)

Instructions 

Preparation

  • Melt butter in a large saucepan over medium heat.
  • Whisk in flour and cook for 1 minute, stirring constantly, until it forms a smooth paste and turns light golden.
  • Gradually add chicken broth to the roux, whisking constantly to prevent lumps.
  • Whisk until the sauce thickens and becomes smooth, about 3-4 minutes.
  • Remove from heat and stir in sour cream, cumin, salt, and pepper until well combined.
  • In a mixing bowl, combine shredded chicken, diced onion, green chiles, cilantro, and 1 cup of the cheese mixture.
  • Mix thoroughly to create a well-distributed filling.

Assembly

  • Preheat oven to 350°F.
  • Spread a thin layer of white sauce in the bottom of a greased 9x13 baking dish.
  • Place about 1/3 cup chicken mixture down the center of each tortilla, roll tightly, and arrange seam-side down in the prepared dish.
  • Pour the remaining white sauce evenly over rolled enchiladas.
  • Sprinkle remaining Monterey Jack and cheddar cheese over the top.

Baking

  • Bake uncovered at 350°F for 25-30 minutes until sauce is bubbling and cheese is melted and golden brown.
  • Remove from oven and let rest for 5 minutes before serving.

Notes

These enchiladas can be served family-style. Store leftovers in an airtight container for up to 3 days. You can also freeze them before baking for up to three months.
Calories: 450kcal
Course: Dinner, Main Course
Cuisine: Mexican
Keyword: Chicken Enchiladas, Comfort Food, Creamy White Chicken Enchiladas, Easy Recipe, Family Dinner

Roasted Chicken (Chipotle Copycat Recipe)

I love the way a kitchen wakes up when you roast chicken. The smell of garlic and citrus hits first. Then you hear the soft sizzle as the marinade meets the hot pan. Plates clink. Kids call from the next room. That simple noise tells me dinner is going to be something everyone remembers.

This roasted chicken is my take on a Chipotle favorite. It is smoky, bright, and family friendly. I often pair it with rice bowls and a big salad for a weeknight dinner. If you want a side to serve it with, try my guide for homestyle fried sides and copycat KFC chicken for a comfort-food combo.

Why this works

Roasted Chicken (Chipotle Copycat Recipe)

This recipe balances three things my family cares about: bold flavor, low fuss, and a texture that stays juicy. The adobo peppers give heat and smokiness. Citrus lifts the heavy flavors. Cilantro and garlic keep it fresh.

It works for busy nights because the marinade doubles as a quick sauce. I often make extra and use it over rice the next day. If you want a crunchy side or something green, I also love serving this with a bright copy of a Santa Fe salad; you can find ideas on how to build that at my Santa Fe salad copycat.

Families will like this because you can make it three ways. Grilled, pan seared, or air fried all deliver great results. The methods save time and fit whatever equipment you have at home.

Process Overview

“This is where the magic happens—when the aroma fills the kitchen.”

Start with a quick blender marinade. Let the chicken sit while you prep the sides. Then choose your cooking method. Each method gives slightly different texture but the same flavor.

If you try the grilled route, it takes a little more attention but gives the best char. Pan searing is fastest for weeknights. The air fryer is a great hands-off option that still gives a nice crust.

For a simple weeknight plan, marinate in the morning or after school. It keeps well in the fridge for a few hours. While the chicken rests, make rice, chop cabbage, and warm beans. For a balanced bowl, add a fresh squeeze of lime at the end.

Ingredients

  • 3 pounds boneless skinless chicken thighs (or boneless skinless chicken breast sliced in half lengthwise)
    • Lily’s tip: Thighs stay juicier and handle reheating better. If you use breasts, slice them thin so they cook evenly.
  • 2 tsp olive oil
    • Lily’s tip: Use good oil for searing. It helps develop a light crust and prevents sticking.
  • 4-5 tbsp water (for pan frying cooking method, optional)
    • Lily’s tip: Add just enough to keep the pan from smoking and to make a small pan sauce if the chicken is very browned.
  • 1 can chipotle peppers in adobo sauce (7 oz can)
    • Lily’s tip: Start with one pepper and add more if you prefer heat. Remove seeds for milder flavor.
  • 4 tbsp fresh lime juice
    • Lily’s tip: Fresh juice brightens the marinade. I never use bottled for this recipe.
  • 4 tbsp fresh orange juice
    • Lily’s tip: Orange adds a subtle sweetness. Blood orange works well in season.
  • 1/2 cup fresh cilantro
    • Lily’s tip: Add the stems if you want more herb flavor. They blend well and reduce waste.
  • 6 garlic cloves
    • Lily’s tip: Smash then chop before blending for the best garlic heat without chunks.
  • 1 medium onion (quartered)
    • Lily’s tip: White or yellow onion both work. Red onion makes it a touch sweeter.
  • 1 tsp cumin
    • Lily’s tip: Toast briefly in a dry pan for a deeper flavor if you have time.
  • 1 tbsp dried oregano
    • Lily’s tip: Use Mexican oregano if you can find it, for a more authentic note.
  • 1 tsp ground coriander (optional)
    • Lily’s tip: Coriander adds citrusy warmth. Skip it if you do not have it on hand.
  • 1 tsp smoked paprika
    • Lily’s tip: This enhances the smoky profile without extra heat.
  • 1 tsp salt
    • Lily’s tip: Taste the marinade before you add chicken. The sauce should be slightly seasoned.
  • 1/2 tsp pepper
    • Lily’s tip: Freshly ground black pepper gives the best aroma.

Directions

  1. Marinade

    • In a blender, combine chipotle peppers, lime juice, orange juice, cilantro, garlic, onion, cumin, oregano, coriander if using, smoked paprika, salt, and pepper. Blend until smooth.
    • Pour about half the marinade over the chicken in a bowl or zip-top bag. Reserve the rest for basting or making a sauce after cooking.
    • Marinate at least 30 minutes at room temperature or up to 6 hours in the fridge.
    • Encouraging note: Even a short 30-minute soak makes a big difference. Don’t worry if you forgot to marinate overnight.
  2. Grilled Chicken

    • Preheat your grill to medium-high. Oil the grates with 1 tsp olive oil on a paper towel held by tongs.
    • Place chicken on the grill. Cook thighs 5 to 7 minutes per side, until internal temperature reaches 165 °F. Breasts will take about 4 to 6 minutes per side depending on thickness.
    • Baste with reserved marinade during the last 2 minutes of cooking for extra gloss.
    • Rest for 5 minutes before slicing.
    • Encouraging note: The grill gives the most char. If the flames flare, move chicken to a cooler spot and close the lid to finish cooking.
  3. Pan Seared Chicken

    • Heat a large skillet over medium-high heat with 2 tsp olive oil. Add chicken in a single layer.
    • If the pan browns too fast, add 1 to 2 tbsp water to deglaze and control the heat.
    • Cook 4 to 6 minutes per side for thighs or breasts, until internal temperature reaches 165 °F.
    • Spoon any pan juices over the chicken and finish with a splash of reserved marinade warmed gently in the pan for 30 seconds.
    • Encouraging note: Pan searing is fast and takes less cleanup. Keep an eye on the heat so the garlic flavor stays bright.
  4. Air Fryer Chicken

    • Preheat the air fryer to 380 °F. Lightly brush both sides of the chicken with olive oil and a bit of the reserved marinade.
    • Place chicken in the basket, not touching. Cook thighs for 10 to 12 minutes, flipping halfway. Breasts will take 8 to 10 minutes depending on thickness.
    • Check for 165 °F internal temperature. Let rest 3 to 5 minutes.
    • Encouraging note: The air fryer gives a great crust without extra oil. Use a thermometer for confident results.

Serving

Roasted Chicken (Chipotle Copycat Recipe)

Serve family-style on a large platter. Slice the chicken against the grain so each piece stays tender. Offer extra lime wedges, chopped cilantro, and warmed reserved marinade-thinned sauce in a small bowl.

I like to lay the chicken over cilantro-lime rice, black beans, and chopped cabbage. Let everyone build their own bowls. For a kid-friendly plate, serve with mashed potatoes or corn. If you want a crunchy side and a fresh salad combo, see my tips for pairing with a copycat Santa Fe salad at my Santa Fe salad copycat.

Family-style serving encourages passing, sharing, and conversation. It also makes clean up easier because everyone uses the same dishes.

Storage

  • Fridge: Store leftover chicken in an airtight container for up to 4 days. Keep any reserved sauce separate to avoid making the meat soggy.
  • Freeze: Freeze in a shallow container for up to 3 months. Thaw overnight in the refrigerator before reheating.
  • Reheat: Warm slices gently in a skillet with a splash of water or chicken broth. Cover the pan to steam for 2 to 3 minutes until warmed through. The air fryer at 350 °F for 4 to 6 minutes also works well.
  • Meal prep tip: Slice the chicken and store over rice or greens for quick lunches. Add fresh lime before eating.

Kitchen Notes

  • Use a digital thermometer to hit 165 °F reliably. It removes guesswork.
  • If you want less heat, rinse the chipotle peppers under water before blending.
  • Make extra marinade and thin it with water or stock to serve as a dipping sauce.
  • For a smoky oven option, roast at 425 °F on a sheet pan for 15 to 20 minutes, flipping once.
  • Double the recipe and freeze cooked chicken in portions for easy future meals.

Variations

  • Mild for kids: Use half a pepper and omit seeds. Add a little honey for sweetness.
  • Gluten free: This recipe is naturally gluten free. Ensure your adobo peppers are labeled gluten free if you have concerns.
  • Paleo or Whole30 friendly: Skip the orange juice and add a splash of apple cider vinegar. Use whole fruit juices sparingly to fit your plan.
  • Vegan alternative: Marinate portobello mushroom caps or tofu with the same blend. Grill or air fry using the same times adjusted for thickness.
  • Low sodium: Reduce salt to 1/2 tsp and rely on citrus and herbs for flavor. Taste the marinade before adding the chicken.

FAQ

Q: Can I use the sauce as a marinade and a finishing sauce?
A: Yes. Reserve half the blended sauce before adding it to raw chicken. Warm the reserved half before serving.

Q: How long should I marinate the chicken?
A: At least 30 minutes. Up to 6 hours in the fridge is ideal. Avoid overnight marinating if the marinade is very acidic to prevent texture change.

Q: What is the best chicken to use?
A: Thighs are my top pick for juiciness and reheating. Breasts work if sliced thin. Both become flavorful with this marinade.

Q: Can I make this ahead for a party?
A: Absolutely. Marinate in the morning, cook in the afternoon, and reheat gently before guests arrive. Serve at room temperature on a platter with warm sides.

Q: How spicy is this recipe?
A: It can range from mild to medium depending on how many chipotle peppers you use and whether you include seeds. Start with one pepper and taste as you go.

FAQ CONTINUED

Q: Can I use bottled lime juice?
A: Fresh lime juice gives a brighter flavor. Use bottled only if fresh is not available.

Q: Are chipotle peppers the same as ancho chiles?
A: Chipotles are smoked jalapeños. Ancho chiles are dried poblano peppers and have a different, milder profile.

Conclusion

I hope this roasted chicken becomes a favorite on your weeknight rotation. It balances smoky heat, bright citrus, and fresh herbs in a way kids and adults both enjoy. For a full step-by-step variation and another take on Pollo Asado, I found an inspiring version at Pollo Asado (Chipotle Copycat Recipe) by fed by sab. If you like video guidance and a slightly different method, take a look at the helpful demo over at Stay Snatched’s Pollo Asado recipe and video.

Thanks for cooking with me today. I love hearing how your family makes this recipe your own.

Roasted Chicken

Prep Time 30 minutes
Cook Time 20 minutes
Total Time 50 minutes
Servings 6 servings
Calories 350
This smoky and bright roasted chicken is a family favorite, infused with bold flavors and perfect for busy weeknights.

Ingredients

For the Marinade

  • 1 can chipotle peppers in adobo sauce (7 oz can) (Start with one pepper and add more if you prefer heat. Remove seeds for milder flavor.)
  • 4 tbsp fresh lime juice (Fresh juice brightens the marinade. I never use bottled for this recipe.)
  • 4 tbsp fresh orange juice (Orange adds a subtle sweetness. Blood orange works well in season.)
  • 1/2 cup fresh cilantro (Add the stems if you want more herb flavor. They blend well and reduce waste.)
  • 6 cloves garlic (Smash then chop before blending for the best garlic heat without chunks.)
  • 1 medium onion (quartered) (White or yellow onion both work. Red onion makes it a touch sweeter.)
  • 1 tsp cumin (Toast briefly in a dry pan for a deeper flavor if you have time.)
  • 1 tbsp dried oregano (Use Mexican oregano if you can find it, for a more authentic note.)
  • 1 tsp ground coriander (optional) (Coriander adds citrusy warmth. Skip it if you do not have it on hand.)
  • 1 tsp smoked paprika (This enhances the smoky profile without extra heat.)
  • 1 tsp salt (Taste the marinade before you add chicken. The sauce should be slightly seasoned.)
  • 1/2 tsp pepper (Freshly ground black pepper gives the best aroma.)

For the Chicken

  • 3 pounds boneless skinless chicken thighs (Thighs stay juicier and handle reheating better. Use breasts if preferred.)
  • 2 tsp olive oil (Use good oil for searing. It helps develop a light crust and prevents sticking.)
  • 4-5 tbsp water (For pan frying cooking method, add just enough to keep the pan from smoking.)

Instructions 

Marinade

  • In a blender, combine chipotle peppers, lime juice, orange juice, cilantro, garlic, onion, cumin, oregano, coriander if using, smoked paprika, salt, and pepper. Blend until smooth.
  • Pour about half the marinade over the chicken in a bowl or zip-top bag. Reserve the rest for basting or making a sauce after cooking.
  • Marinate at least 30 minutes at room temperature or up to 6 hours in the fridge.

Grilled Chicken

  • Preheat your grill to medium-high. Oil the grates with 1 tsp olive oil on a paper towel held by tongs.
  • Place chicken on the grill. Cook thighs 5 to 7 minutes per side, until internal temperature reaches 165 °F. Breasts will take about 4 to 6 minutes per side depending on thickness.
  • Baste with reserved marinade during the last 2 minutes of cooking for extra gloss.
  • Rest for 5 minutes before slicing.

Pan Seared Chicken

  • Heat a large skillet over medium-high heat with 2 tsp olive oil. Add chicken in a single layer.
  • If the pan browns too fast, add 1 to 2 tbsp water to deglaze and control the heat.
  • Cook 4 to 6 minutes per side for thighs or breasts, until internal temperature reaches 165 °F.
  • Spoon any pan juices over the chicken and finish with a splash of reserved marinade warmed gently in the pan for 30 seconds.

Air Fryer Chicken

  • Preheat the air fryer to 380 °F. Lightly brush both sides of the chicken with olive oil and a bit of the reserved marinade.
  • Place chicken in the basket, not touching. Cook thighs for 10 to 12 minutes, flipping halfway. Breasts will take 8 to 10 minutes depending on thickness.
  • Check for 165 °F internal temperature. Let rest 3 to 5 minutes.

Serving

  • Serve family-style on a large platter. Slice the chicken against the grain so each piece stays tender.
  • Offer extra lime wedges, chopped cilantro, and warmed reserved marinade-thinned sauce in a small bowl.
  • For a balanced bowl, add to cilantro-lime rice, black beans, and chopped cabbage.

Notes

Store leftover chicken in an airtight container for up to 4 days. Keep any reserved sauce separate to avoid making the meat soggy.
Calories: 350kcal
Course: Dinner, Main Course
Cuisine: American, Mexican
Keyword: Chipotle Copycat, Family Friendly, Healthy Dinner, Marinade, Roasted Chicken

Chicken Enchiladas with Homemade Red Enchilada Sauce

The warm, inviting scents of spices and roasted chicken fill the air. As you enter the kitchen, you hear a gentle simmering sound coming from the stove. It’s the beginning of an exciting family dinner—homemade Chicken Enchiladas with Red Enchilada Sauce. The combination of savory shredded chicken and cheesy goodness wrapped in soft tortillas brings back memories of family gatherings centered around hearty meals and happy conversations.

Time spent in the kitchen is more than just cooking; it’s about making memories with those you love. This recipe is perfect for a cozy family dinner or a weekend gathering with friends.

Why This Works

Chicken Enchiladas with Homemade Red Enchilada Sauce

This Chicken Enchiladas recipe shines for its simplicity and heartiness. With just a few ingredients and little time, you can create a dish that feels like a celebration. Your family will relish the vibrant flavors of homemade red enchilada sauce paired with tender tortillas.

The best part? This recipe is designed to save you time. You can prep the enchiladas ahead and pop them in the oven when it’s time to eat. It makes dinner rush more manageable, leaving you with extra moments to spend with your loved ones.

Process Overview

“This is where the magic happens—when the aroma fills the kitchen.”

Making these enchiladas is a delightful journey through layers of flavor. You start with preparing a savory red enchilada sauce that will coat your chicken and tortillas in a glorious, rich flavor. Then you’ll assemble the enchiladas with swirling motions of joy. Finally, a beautiful layer of cheese melts over the top, creating a golden crust that everyone will love.

Ingredients

Here’s what you’ll need to make delicious Chicken Enchiladas:

  • 2 cups cooked shredded chicken
    Tip: You can use leftover rotisserie chicken to save time and enhance the flavor.

  • 8 flour tortillas
    Tip: Choose larger tortillas for easier rolling; they hold more fillings!

  • 2 cups grated cheese (cheddar or Monterey Jack)
    Tip: Mixing half cheddar and half Monterey Jack elevates the flavor and texture.

  • 1 can (15 oz) tomato sauce
    Tip: Look for no-salt-added options if you’re watching your sodium intake.

  • 2 tablespoons chili powder
    Tip: Adjust the amount to your taste—add more for extra warmth!

  • 1 teaspoon cumin
    Tip: Purchasing whole cumin seeds and grinding them fresh gives a deeper flavor.

  • 1 teaspoon garlic powder
    Tip: You can substitute with fresh garlic if you prefer a stronger garlic taste.

  • 1 teaspoon onion powder
    Tip: Use finely chopped onions for added texture and sweetness.

  • Salt and pepper to taste
    Tip: Taste your sauce before adding salt; the cheese adds flavor too.

  • 1/4 cup chopped cilantro (optional)
    Tip: Cilantro adds a refreshing brightness; you can also use parsley as an alternative.

  • Sour cream (for serving, optional)
    Tip: A dollop of sour cream balances the spiciness and adds creaminess.

Directions

  1. Preheat the oven to 350°F (175°C).
    This sets the stage for baking those enchiladas to perfection.

  2. In a saucepan, combine the tomato sauce, chili powder, cumin, garlic powder, onion powder, salt, and pepper. Simmer for 10 minutes to create the enchilada sauce.
    Allow the spices to bloom, filling your kitchen with a delightful aroma.

  3. Spread a thin layer of the enchilada sauce on the bottom of a baking dish.
    This prevents the tortillas from sticking and adds flavor to the base of your dish.

  4. In each tortilla, place a portion of shredded chicken, cheese, and a spoonful of enchilada sauce. Roll up the tortillas and place them seam-side down in the baking dish.
    Fill them generously—the more flavor, the better!

  5. Pour the remaining enchilada sauce over the top and sprinkle with more cheese.
    The layer of cheese creates a beautiful golden crust while keeping everything moist.

  6. Cover with foil and bake for 20 minutes, then remove the foil and bake for an additional 10 minutes until bubbly and golden.
    The process transforms the dish into a creamy, comforting delight.

  7. Garnish with chopped cilantro and serve hot with sour cream if desired.
    A sprinkle of cilantro just before serving makes the dish look vibrant and inviting.

Serving

Chicken Enchiladas with Homemade Red Enchilada Sauce

When it comes to serving Chicken Enchiladas, think family-style. Place the baking dish at the center of the table and let everyone help themselves. Accompany the dish with bowls of sour cream, additional cheese, and chopped cilantro for personal customization. Enjoy the lively chatter and laughter around the table, as everyone delights in their very own cheesy enchilada creation.

Storage

For leftovers, let the enchiladas cool completely before storing them in an airtight container in the fridge. They can be kept for up to 3 days. When you want to reheat, place them uncovered in the oven at 350°F for about 15-20 minutes. For individual portions, a microwave works too, but the oven gives a better texture on the cheese.

Kitchen Notes

  • Shredded chicken shortcut: Buy pre-cooked or rotisserie chicken.
  • Make ahead: Assemble the enchiladas, cover, and refrigerate before baking—perfect for busy nights.
  • Frozen enchiladas: You can freeze assembled enchiladas for up to 3 months. Just add extra time when baking from frozen.
  • Sauce substitutions: Store-bought enchilada sauce can save time if you’re in a pinch.
  • One pot wonder: Consider using a large skillet to prepare the sauce and bake the enchiladas in the same pot for easier cleanup.

Variations

  • Vegetarian: Substitute chicken with black beans or sautéed vegetables like bell peppers and zucchini.
  • For the kiddos: Swap out the spices in the sauce for mild seasoning, making it friendly for little ones. Use cheese only in the filling if you need to tone down the flavors.
  • Gluten-free: Use corn tortillas in place of flour tortillas for a gluten-free alternative.
  • Extra spicy: Add diced jalapeños into the filling or increase the chili powder for more heat.

FAQ

1. Can I use other types of meat?
Yes! Ground beef, pork, or turkey all work wonderfully as substitutes.

2. How can I make the sauce smoother?
You can blend the sauce ingredients before simmering for a smoother texture.

3. Can I double this recipe?
Absolutely! Just ensure to use a larger baking dish and adjust cooking time slightly.

4. What’s the best way to reheat leftovers?
The oven gives the best fluffy texture, but microwaving is a quick alternative.

5. Can I prep this meal the day before?
Yes! Assemble everything and refrigerate until you are ready to bake it the next day.

As you create these Chicken Enchiladas with Homemade Red Enchilada Sauce, remember, it’s more than just a meal. It brings warmth, love, and togetherness to your table. These recipes become part of your family’s story, nurturing both body and soul. Happy cooking!

Chicken Enchiladas

Prep Time 20 minutes
Cook Time 30 minutes
Total Time 50 minutes
Servings 8 servings
Calories 350
A hearty and flavorful recipe for Chicken Enchiladas with homemade red enchilada sauce, perfect for family dinners.

Ingredients

Main Ingredients

  • 2 cups cooked shredded chicken (You can use leftover rotisserie chicken to save time.)
  • 8 pieces flour tortillas (Choose larger tortillas for easier rolling.)
  • 2 cups grated cheese (cheddar or Monterey Jack) (Mixing half cheddar and half Monterey Jack elevates the flavor.)
  • 1 can (15 oz) tomato sauce (Look for no-salt-added options if you’re watching your sodium intake.)
  • 2 tablespoons chili powder (Adjust the amount to your taste.)
  • 1 teaspoon cumin (Purchasing whole cumin seeds and grinding them fresh gives a deeper flavor.)
  • 1 teaspoon garlic powder (You can substitute with fresh garlic for a stronger taste.)
  • 1 teaspoon onion powder (Use finely chopped onions for added texture.)
  • to taste Salt and pepper (Taste your sauce before adding salt.)
  • 1/4 cup chopped cilantro (optional) (Cilantro adds brightness; parsley can be used as an alternative.)
  • Sour cream (for serving, optional) (Balances the spiciness and adds creaminess.)

Instructions 

Preparation

  • Preheat the oven to 350°F (175°C).
  • In a saucepan, combine the tomato sauce, chili powder, cumin, garlic powder, onion powder, salt, and pepper. Simmer for 10 minutes to create the enchilada sauce.
  • Spread a thin layer of the enchilada sauce on the bottom of a baking dish.
  • In each tortilla, place a portion of shredded chicken, cheese, and a spoonful of enchilada sauce. Roll up the tortillas and place them seam-side down in the baking dish.
  • Pour the remaining enchilada sauce over the top and sprinkle with more cheese.
  • Cover with foil and bake for 20 minutes, then remove the foil and bake for an additional 10 minutes until bubbly and golden.
  • Garnish with chopped cilantro and serve hot with sour cream if desired.

Notes

For leftovers, let the enchiladas cool completely before storing in an airtight container. They can be kept for up to 3 days. Reheat uncovered in the oven at 350°F for about 15-20 minutes. You can freeze assembled enchiladas for up to 3 months. Consider using a large skillet to prepare the sauce and bake in the same pot for easier cleanup.
Calories: 350kcal
Course: Dinner, Main Course
Cuisine: Mexican
Keyword: Chicken Enchiladas, Comfort Food, Enchilada Sauce, Family Dinner, Hearty Meal

Korean Chicken Skewers

The kitchen is filled with the warm, enticing aroma of soy sauce and garlic simmering away. The sizzle of chicken skewers hitting the grill is music to my ears. Cooking is more than just preparing meals; it’s about gathering the family and creating memories. Today, I’m excited to share an irresistible recipe for Korean Chicken Skewers. Let’s dive in!

Why This Works

Korean Chicken Skewers

These Korean Chicken Skewers are a hit at family gatherings and casual dinners alike. With just a few simple steps, you can whip up a delicious meal that pleases everyone. What makes this recipe special is the marinade, which is easy to prepare and packed with flavor. Plus, marinating the chicken ahead of time not only saves you stress in the kitchen but also allows the flavors to deepen.

This dish is perfect for busy nights when you want to spend more time eating and less time cooking.

Process Overview

“This is where the magic happens—when the aroma fills the kitchen.”

Marinating the chicken transforms it into a flavor-packed delight. You’ll have tender, juicy skewers that are perfect for grilling. After a quick marinade, just thread the chicken onto skewers and grill them to perfection. Can you hear that sizzle already?

Let’s gather our ingredients and get started on this tasty journey.

Ingredients

  • 1 1/2 lbs. chicken thighs (boneless, skinless)
    Tip: Thighs are juicier than breasts, which makes them perfect for skewers.
  • 2 tsp fresh ginger (finely grated)
    Tip: Fresh ginger provides a wonderful zing; skip the powder for a brighter flavor.
  • 2 tsp minced garlic
    Tip: Use fresh garlic for a richer taste. Pre-minced can work in a pinch but may lack depth.
  • 3 tbsp low sodium soy sauce
    Tip: Low sodium soy sauce balances the dish without overpowering it.
  • 3 tbsp brown sugar
    Tip: The sugar caramelizes beautifully on the grill, giving a sweet contrast to the savory elements.
  • 1 tsp sesame oil
    Tip: A little sesame oil adds a delightful nuttiness.
  • 1 tbsp rice vinegar
    Tip: This keeps the chicken tender and adds acidity to the marinade.
  • 2 tbsp gochujang
    Tip: For those not familiar, gochujang is a Korean chili paste. It gives the skewers a nice kick! Adjust to taste.
  • Chopped green onions (optional garnish)
    Tip: Fresh green onions add a beautiful crunch and pop of color to your dish.

Directions

  1. Start by cutting the chicken into 1 1/2" cubes and tossing them in a large bowl. This size is perfect for even cooking.
  2. In another small bowl, whisk together the remaining ingredients (except the chopped green onions, if using) to make the marinade. This is where the aroma begins to come together.
  3. Pour half of the marinade over the chicken and mix well to fully coat. It’s best to use clean hands for this—don’t be shy; get in there!
  4. Cover the bowl and place it in the fridge to marinate for at least 4 hours, or up to overnight. The longer it sits, the more flavor the chicken absorbs.
  5. Cover and refrigerate the remaining marinade for basting later. This helps lock in even more flavor during grilling.
  6. When the chicken is ready, place the pieces on skewers. If you’re using wooden skewers, make sure to soak them in water for about 30 minutes first to prevent burning.
  7. Heat the grill to medium heat. A well-heated grill will give your chicken perfect grill marks.
  8. Once hot, place the skewers on a lightly oiled grill. Turn the skewers every 3-4 minutes until the chicken is cooked through, reaching an internal temperature of 165°F. This will take about 20-30 minutes.
  9. During the last few turns, baste the chicken with the remaining sauce. The glaze will caramelize beautifully!
  10. Remove the skewers from the grill and serve them warm with chopped green onions as a garnish, if desired. Pair them with your favorite side dishes for a complete meal.

Serving

Korean Chicken Skewers

To serve Korean Chicken Skewers family-style, arrange the skewers on a large platter. This creates a vibrant presentation. Allow everyone to help themselves, diving into the flavors together. It’s a fun and interactive way to enjoy dinner. Consider serving them with steamed rice, fresh vegetables, or a light salad for a balanced approach.

Storage

These skewers can be stored in an airtight container in the fridge for up to 3 days. To reheat, place them in a skillet over medium-low heat for about 5 minutes until warmed through. Alternatively, you can pop them in the oven at 350°F for 10-15 minutes for reheating, ensuring they’re heated up evenly.

Kitchen Notes

  • Use pre-cut chicken to save time if available.
  • Make the marinade in advance and store it in the fridge for an easy weeknight meal.
  • Double the marinade and freeze half for another batch of skewers later.
  • Prepare a fresh dipping sauce, like spicy mayo, to serve alongside.
  • Keep skewers soaked in water nearby to prevent burning during grilling.

Variations

For picky eaters or those on different diets, feel free to make these adjustments:

  • Chicken Breasts: You can substitute chicken thighs with breast for a leaner option; just be careful not to overcook them.
  • Vegetable Skewers: Mix in bell peppers, zucchini, or cherry tomatoes on the skewers for a colorful twist.
  • Brown Sugar Substitute: If needed, use honey or maple syrup for a different sweetness profile.
  • No Gochujang: Swap it out for a mild chili paste or sriracha, depending on heat preference.
  • Gluten-Free: Use tamari in place of soy sauce for a gluten-free marinade while keeping the flavor intact.

FAQ

  1. Can I grill these skewers on a stovetop grill pan?
    Yes, a stovetop grill pan works wonderfully. Just make sure to preheat it well.

  2. How long do I need to marinate the chicken?
    For the best flavor, aim for at least 4 hours. If you can, overnight is even better.

  3. Can I make this recipe ahead of time?
    Absolutely! The marinated chicken can be stored in the fridge for a day or two before grilling.

  4. Is there a vegetarian option?
    Yes, you can substitute the chicken with firm tofu or mushrooms, using the same marinade.

  5. What should I serve with these skewers?
    They go well with rice, grilled veggies, or a fresh cucumber salad to balance the flavors.

As we wrap up, remember that cooking should be enjoyable. Sharing meals with family and friends creates lasting bonds. Let these Korean Chicken Skewers be part of your next gathering, bringing everyone together for a delicious and memorable feast. Happy grilling!

Korean Chicken Skewers

Prep Time 10 minutes
Cook Time 30 minutes
Total Time 40 minutes
Servings 4 servings
Calories 320
Delicious and juicy Korean Chicken Skewers marinated in a flavorful soy sauce and garlic blend, perfect for grilling and family gatherings.

Ingredients

Main Ingredients

  • 1.5 lbs chicken thighs (boneless, skinless) (Thighs are juicier than breasts, which makes them perfect for skewers.)
  • 2 tsp fresh ginger (finely grated) (Fresh ginger provides a wonderful zing; skip the powder for a brighter flavor.)
  • 2 tsp minced garlic (Use fresh garlic for a richer taste. Pre-minced can work in a pinch but may lack depth.)
  • 3 tbsp low sodium soy sauce (Balances the dish without overpowering it.)
  • 3 tbsp brown sugar (The sugar caramelizes beautifully on the grill.)
  • 1 tsp sesame oil (Adds a delightful nuttiness.)
  • 1 tbsp rice vinegar (Keeps the chicken tender and adds acidity to the marinade.)
  • 2 tbsp gochujang (A Korean chili paste. Adjust to taste.)
  • chopped green onions (Optional garnish for a beautiful crunch and pop of color.)

Instructions 

Preparation

  • Cut the chicken into 1 1/2" cubes and place in a large bowl.
  • In another small bowl, whisk together the remaining ingredients (except the chopped green onions) to make the marinade.
  • Pour half of the marinade over the chicken and mix well to fully coat.
  • Cover the bowl and place it in the fridge to marinate for at least 4 hours, or up to overnight.
  • Cover and refrigerate the remaining marinade for basting later.

Grilling

  • Once marinated, thread the chicken pieces onto skewers. If using wooden skewers, soak them in water for 30 minutes to prevent burning.
  • Heat the grill to medium heat.
  • Place the skewers on a lightly oiled grill, turning them every 3-4 minutes until cooked through (internal temperature of 165°F). This will take about 20-30 minutes.
  • During the last few turns, baste the chicken with the remaining sauce.
  • Remove the skewers from the grill and serve warm with chopped green onions as garnish, if desired.

Notes

Store cooked skewers in an airtight container for up to 3 days. Reheat in a skillet or in the oven at 350°F.
Calories: 320kcal
Course: Dinner, Main Course
Cuisine: Asian, Korean
Keyword: Family Dinner, Grilled Chicken, Korean Chicken Skewers, Marinated Chicken, Skewers

Pin by Jayne Rawlings on Food | Chicken dishes recipes, Peruvian recipes, Chicken recipes

The kitchen greets you with warm steam and bright citrus notes. The scent of garlic, cumin, and roasted chicken fills the air. I hear the soft clink of a spoon against a pan and the gentle chatter of family in the next room.

This recipe, a beloved pin by Jayne Rawlings, brings those familiar kitchen sounds to life. It is simple enough for weeknights and special enough for Sunday dinner. If you love comforting chicken dishes, you may also enjoy my roundup of hearty chicken and spinach recipes that pair well with this meal.

Why this works

Pin by Jayne Rawlings on Food | Chicken dishes recipes, Peruvian recipes, Chicken recipes

Peruvian-inspired flavors are all about balance. Bright citrus and spicy peppers lift the savory chicken. A quick marinade does most of the work and lets the oven finish the dish with a golden crust and tender meat.

This recipe saves time because most of the active work happens up front. Marinate, sear, and bake. The oven does the rest while you set the table and help the kids with homework. If you need a speedy weeknight option, try my 30-minute baked chicken thighs for a similar hands-off approach.

Process Overview

“This is where the magic happens—when the aroma fills the kitchen.”

At its heart, this recipe is a triangle of flavor: citrus for brightness, spices for warmth, and slow heat for tenderness. We build the flavors in three stages.

  1. Marinate to infuse bright and savory notes.
  2. Sear to lock in juices and add color.
  3. Bake until just cooked and resting to redistribute juices.

This method keeps the chicken moist and full of flavor every time.

Ingredients

Below I list the ingredients and add a personal tip for each one. These tips come from years of cooking for my family and testing small changes to improve texture and taste.

  • 2.5 pounds bone-in, skin-on chicken thighs or breasts, about 6 pieces
    • Tip: I prefer thighs for richer flavor and forgiving texture. If using breasts, pound slightly thinner for even cooking.
  • 1/3 cup fresh lime juice, about 2 limes
    • Tip: Fresh juice beats bottled every time. It brightens the dish without bitterness.
  • 1/4 cup orange juice, fresh or store
    • Tip: A little orange mellows the lime and creates a nice glaze.
  • 4 cloves garlic, minced
    • Tip: Mince fine so garlic disperses through the marinade and cooks evenly.
  • 2 teaspoons ground cumin
    • Tip: Toast whole cumin briefly in a dry pan, then grind for a warmer, fresher taste.
  • 1 teaspoon smoked paprika
    • Tip: Smoked paprika adds a subtle roast note without adding heat.
  • 1/2 to 1 teaspoon crushed red pepper flakes
    • Tip: Start with 1/2 teaspoon for kids or add more for adults who like a kick.
  • 1 teaspoon kosher salt
    • Tip: Use kosher salt for consistent seasoning. Adjust to taste if you use table salt.
  • 1/2 teaspoon black pepper
    • Tip: Freshly cracked pepper has more aroma than pre-ground.
  • 1/4 cup olive oil
    • Tip: Use a good quality extra virgin olive oil for flavor and a better sear.
  • 2 tablespoons chopped fresh cilantro
    • Tip: Add most at the end to keep color and fresh flavor.
  • 1 small yellow onion, thinly sliced
    • Tip: Caramelized onions add sweetness. Slice thin so they soften during baking.
  • 1 small jalapeño, seeded and thinly sliced, optional
    • Tip: Keep the seeds for heat. Remove them for milder taste.
  • 1 tablespoon honey or brown sugar
    • Tip: A touch of sweetness helps caramelize the skin during roasting.

Directions

  1. Make the marinade. In a medium bowl, whisk lime juice, orange juice, garlic, cumin, smoked paprika, red pepper flakes, salt, pepper, olive oil, and honey until smooth.
    • Encouraging note: Whisk until the marinade smells bright. This step wakes up the spices.
  2. Add the chicken and onions. Place the chicken pieces in a large zip-top bag or shallow baking dish. Pour the marinade over the chicken and toss to coat. Add sliced onion and jalapeño if using.
    • Encouraging note: Let the chicken get comfortable in the marinade. An hour is great, but overnight is best.
  3. Marinate in the fridge for at least 1 hour and up to 12 hours. Turn the bag once so every piece gets a turn.
    • Encouraging note: This is the easy part. Use this time to prepare sides or set the table.
  4. Preheat the oven to 425°F. Heat a large ovenproof skillet over medium-high heat and add a tablespoon of olive oil.
    • Encouraging note: A hot pan gives a quick sear and beautiful color.
  5. Sear the chicken. Remove chicken from the marinade, letting excess drip off. Place skin-side down in the hot skillet. Sear 3 to 4 minutes until golden brown. Turn and sear the other side for 2 minutes.
    • Encouraging note: Resist the urge to move the chicken. Let the crust form.
  6. Add onions and remaining marinade. Spoon the onions around the chicken and pour any leftover marinade over the pieces.
    • Encouraging note: The onions help shield the chicken and add sweet, roasted flavor.
  7. Bake in the preheated oven for 20 to 25 minutes, until the internal temperature reaches 165°F for breasts and 175°F for thighs at the thickest part.
    • Encouraging note: Use an instant-read thermometer. It takes the guesswork out of dinner.
  8. Rest the chicken. Remove the skillet and let the chicken rest 5 to 8 minutes before serving. Sprinkle chopped cilantro on top.
    • Encouraging note: Resting keeps the juices inside the meat for moist, tender bites.
  9. Optional glaze. If you want a glossy finish, spoon the pan juices over the chicken before serving, or broil for 1 to 2 minutes to crisp the skin.
    • Encouraging note: Keep a close eye if broiling. It adds a nice finish in just minutes.
  10. Serve family-style and enjoy the smiles around the table.
    • Encouraging note: Invite everyone to dig in and share what they love about the meal.

While you are prepping sides, you might enjoy pairing this with comfort dishes like my white chicken chili ideas for a heartier table.

Serving

Pin by Jayne Rawlings on Food | Chicken dishes recipes, Peruvian recipes, Chicken recipes

Serve this chicken family-style on a large platter. Pile the chicken pieces in the center with the roasted onions and spoon the pan juices over the top. Add lime wedges on the side for extra brightness.

For side dishes, think simple and nourishing. Roasted sweet potatoes, steamed rice, or a crisp green salad work beautifully. I often set out bowls of warm rice, sliced avocado, and chopped cilantro so everyone can customize their plate.

If you want a festive touch, serve with warm corn tortillas. Guests can make small tacos with roasted chicken, onions, and a squeeze of lime. This keeps the meal interactive and fun for kids.

Storage

Fridge: Store cooled chicken in an airtight container for up to 4 days. Keep pan juices in a separate small container to spoon over when reheating.

Freezer: For longer storage, remove the chicken from the bones, wrap tightly, and freeze for up to 3 months. Label with the date.

Reheating: Reheat gently to keep the chicken moist. My favorite method is using a low oven. Preheat to 300°F, place chicken in a baking dish, add a splash of chicken broth or reserved pan juices, cover with foil, and heat 15 to 20 minutes until warm.

Microwave: If you are short on time, microwave on medium power in 30 second bursts. Add a damp paper towel over the chicken to retain moisture.

Safety tip: Always reheat to an internal temperature of 165°F.

Kitchen Notes

  • Use a heavy ovenproof skillet to go from stovetop to oven without changing pans.
  • Marinate overnight for the deepest flavor if you plan ahead.
  • If you skip searing, the dish still tastes great but will lack the browned crust that kids notice first.
  • Make extra sauce by simmering reserved pan juices with a teaspoon of cornstarch to thicken.
  • For easier cleanup, line the baking dish with foil or use a disposable pan when feeding a crowd.

You may find more weeknight shortcuts and family favorites listed among my easy chicken breast recipes.

Variations

  • For picky eaters: Reduce or omit the jalapeño and red pepper flakes. Use only lime and a touch of paprika for familiar flavors.
  • For low-sodium needs: Cut the salt in half and add a squeeze more lime at the end to lift the flavor.
  • For a gluten-free meal: This recipe is naturally gluten-free. Ensure your pantry staples like paprika and any added broths are certified gluten-free.
  • For a dairy-free plate: This recipe contains no dairy. Serve with dairy-free sides like avocado salad or roasted vegetables.
  • For a spicier version: Add a tablespoon of aji amarillo paste or an extra jalapeño for authentic Peruvian heat.

If you want a different comfort pairing, try combining this chicken with pasta or casseroles from my chicken macaroni favorites.

FAQ

Q: Can I use boneless, skinless chicken?
A: Yes. Boneless, skinless chicken cooks faster. Pound breasts to even thickness and reduce baking time by 5 to 8 minutes. Use an instant-read thermometer to confirm doneness.

Q: How long can I marinate the chicken?
A: You can marinate from 1 hour up to 12 hours. Acidic marinades break down protein over long times. I prefer 2 to 8 hours for best texture.

Q: Can I make this on the grill?
A: Absolutely. Sear the chicken over direct heat to get grill marks, then move to indirect heat until the internal temperature reaches the safe range. Watch closely to avoid flare-ups.

Q: Is there a nonalcoholic way to add depth like a splash of white wine might?
A: Yes. Add a teaspoon of low-sodium chicken broth concentrate or a splash of apple cider vinegar for depth without alcohol.

Q: Can I double the recipe for a crowd?
A: Yes. Use two pans or a large sheet pan. Do not overcrowd the chicken; it will steam instead of roast. Stagger pans in the oven if needed and rotate for even browning.

Conclusion

I hope this recipe brings warmth to your table and becomes a new family favorite. I use tested techniques and family feedback to keep weeknight dinners both simple and memorable.

If you enjoy learning about the people behind recipes, you might like this piece on people and their recipes for more culinary stories. For background on how meat has been used in cooking traditions over time, this page about the history of meat on The Food Timeline is a great reference.

Thank you for cooking with me. Gather your people, share the meal, and savor the small moments.

Peruvian-Inspired Roasted Chicken Thighs

Prep Time 1 hour 30 minutes
Cook Time 25 minutes
Total Time 1 hour 55 minutes
Servings 6 pieces
Calories 400
A comforting and flavorful dish featuring marinated chicken thighs seared for a golden crust and baked to tender perfection, perfect for any weeknight or special occasion.

Ingredients

Main Ingredients

  • 2.5 pounds bone-in, skin-on chicken thighs or breasts (Prefer thighs for richer flavor and forgiving texture.)
  • 1/3 cup fresh lime juice (Fresh juice beats bottled every time.)
  • 1/4 cup orange juice (A little orange mellows the lime.)
  • 4 cloves garlic, minced (Mince fine so garlic disperses through the marinade.)
  • 2 teaspoons ground cumin (Toast whole cumin briefly in a pan for a fresher taste.)
  • 1 teaspoon smoked paprika (Adds a subtle roast note without adding heat.)
  • 1/2 to 1 teaspoon crushed red pepper flakes (Start with 1/2 teaspoon for kids or add more for adults.)
  • 1 teaspoon kosher salt (Adjust to taste if you use table salt.)
  • 1/2 teaspoon black pepper (Freshly cracked pepper has more aroma.)
  • 1/4 cup olive oil (Use good quality extra virgin for flavor.)
  • 2 tablespoons chopped fresh cilantro (Add most at the end for fresh flavor.)
  • 1 small yellow onion, thinly sliced (Caramelized onions add sweetness.)
  • 1 small jalapeño, seeded and thinly sliced (Keep the seeds for heat, remove for milder taste.)
  • 1 tablespoon honey or brown sugar (Helps caramelize the skin during roasting.)

Instructions 

Making the Marinade

  • In a medium bowl, whisk lime juice, orange juice, garlic, cumin, smoked paprika, red pepper flakes, salt, pepper, olive oil, and honey until smooth.

Marinating the Chicken

  • Place the chicken pieces in a large zip-top bag or shallow baking dish. Pour the marinade over the chicken and toss to coat. Add sliced onion and jalapeño if using.
  • Marinate in the fridge for at least 1 hour and up to 12 hours.

Searing and Baking

  • Preheat the oven to 425°F. Heat a large ovenproof skillet over medium-high heat and add a tablespoon of olive oil.
  • Remove chicken from the marinade, letting excess drip off. Place skin-side down in the hot skillet. Sear for 3 to 4 minutes until golden brown.
  • Turn and sear the other side for 2 minutes.
  • Spoon the onions around the chicken and pour any leftover marinade over the pieces.
  • Bake in the preheated oven for 20 to 25 minutes, until the internal temperature reaches 165°F for breasts and 175°F for thighs.

Resting and Serving

  • Remove the skillet and let the chicken rest for 5 to 8 minutes before serving. Sprinkle chopped cilantro on top.
  • Spoon the pan juices over the chicken before serving, or broil for 1 to 2 minutes to crisp the skin.

Notes

Store cooled chicken in an airtight container for up to 4 days. For longer storage, freeze for up to 3 months. Reheat gently to keep the chicken moist.
Calories: 400kcal
Course: Dinner, Main Course
Cuisine: Latin American, Peruvian
Keyword: Comfort Food, Easy Chicken Recipe, Roasted Chicken, Weeknight Dinner

Pineapple Chicken Skewers

There’s nothing like the scent of grilled chicken wafting through the air, mingling with the sweet aroma of pineapples. The sound of the grill sizzling brings a comforting warmth, signaling a perfect family meal is on its way. Today, let’s dive into a delightful recipe for Pineapple Chicken Skewers. This dish packs a punch of flavor and is incredibly easy to prepare, making it a go-to option for busy weeknights or sunny weekend barbecues.

Why This Works

Pineapple Chicken Skewers

One of the best parts about these Pineapple Chicken Skewers is how they bring the family together. The colorful ingredients are not only visually appealing but also encourage everyone to get involved in the cooking process. Whether it’s cubing the chicken or threading the skewers, this dish offers a fun and interactive way to enjoy meal prep together.

Plus, the simplicity of this recipe cuts down on stress in the kitchen. With just a handful of ingredients, you can create a meal that feels special without spending hours cooking. The marinade works wonders in a short time, making it a time-saving win for busy families.

Process Overview

“This is where the magic happens—when the aroma fills the kitchen.”

As you prepare for this recipe, keep your senses awake. The sound of the sizzling grill will soon accompany the wonderful fragrance of sweet and savory chicken and pineapple. Before long, you will have an irresistible dish that everyone can enjoy together.

Ingredients

To make Pineapple Chicken Skewers, gather these ingredients:

  • 2 Chicken breasts, cubed: Choose high-quality, fresh chicken for the best flavor.
  • 1 cup Pineapple chunks: Fresh pineapple will provide the sweetest taste, but canned works too.
  • 1 Bell pepper (any color, cut into pieces): Feel free to mix colors for a vibrant dish.
  • 2 tablespoons Olive oil: This adds richness to the marinade.
  • 3 tablespoons Soy sauce: Adds saltiness and depth to the flavor.
  • 2 cloves Garlic, minced: Fresh garlic gives an excellent kick.
  • 1 tablespoon Honey or brown sugar: This balances the saltiness with sweetness.
  • Salt and pepper to taste: Essential for enhancing all the flavors.
  • Skewers: Wooden or metal works; soak wooden skewers in water for at least 30 minutes before use to prevent burning.

Lily’s Tips

  • Use chicken thighs instead of breasts for a juicier bite.
  • Experiment with different colors of bell peppers to add a pop of color.
  • Always taste your marinade before adding chicken to ensure it meets your flavor preferences.

Directions

  1. In a bowl, mix olive oil, soy sauce, minced garlic, honey or brown sugar, salt, and pepper to create a marinade. This step is crucial, as the marinade infuses the chicken with flavor, so don’t rush through it.

  2. Add the cubed chicken to the marinade, cover, and let it sit for at least 30 minutes. While you wait, it’s a great time to prepare your veggies.

  3. Preheat the grill to medium heat. A well-heated grill ensures the chicken gets those beautiful grill marks we all love.

  4. Thread the marinated chicken, pineapple chunks, and bell peppers onto skewers, alternating between them. Get creative with the arrangement—this is where you can have fun!

  5. Grill the kabobs for about 10-15 minutes, turning occasionally until the chicken is cooked through and has nice grill marks. You’ll hear the delightful sizzle, making your mouth water in anticipation.

  6. Serve with rice or a fresh salad. This adds freshness to the meal and complements the skewers beautifully.

Serving

Pineapple Chicken Skewers

Pineapple Chicken Skewers are perfect for serving family-style. Lay out the skewers on a large platter for everyone to help themselves. Pair them with a side of brown rice or a crisp garden salad for a fulfilling meal. This encourages family bonding and makes for a warm dining experience where stories can be shared and laughter can thrive.

Storage

Let any leftover skewers cool completely before storing them in an airtight container. They can be kept in the fridge for up to three days. When reheating, place them in a skillet over medium heat for about 5-7 minutes until warmed through. You can also use the microwave, although the grill or stovetop will help retain that desirable grilled flavor.

Kitchen Notes

Here are five shortcuts to make the process even easier:

  • Prep Ahead: Marinate the chicken the night before to save time on cooking day.
  • Look for Pre-cut Vegetables: Many grocery stores offer pre-cut bell peppers which can save on prep time.
  • Use Grill Basket: A grill basket allows you to grill smaller pieces without worrying about them falling into the flames.
  • Use Leftovers in Wraps: If you have leftovers, they make delicious fillings for wraps or sandwiches.
  • Make Extra Marinade: Always make a little extra marinade for future stir-fries or as a salad dressing.

Variations

If you have picky eaters at home or are looking for some dietary tweaks, here are a few variations:

  • For different proteins: Swap the chicken for shrimp or tofu for a vegetarian option.
  • Add veggies: Try zucchini, cherry tomatoes, or mushrooms for added nutrition and taste.
  • Gluten-free option: Use coconut aminos instead of soy sauce for a gluten-free marinade.
  • Spice it up: Adding a pinch of red pepper flakes to the marinade introduces heat for those who enjoy a spicy kick.
  • Change the fruit: Experiment with mango or peaches instead of pineapple for a different flavor profile.

FAQ

1. Can I use frozen chicken for this recipe?
Yes, but ensure it’s fully thawed before marinating to allow for even flavor distribution.

2. How can I tell if the chicken is cooked through?
Use a meat thermometer to check for an internal temperature of 165°F.

3. What do I do if I don’t have skewers?
You can cook the marinated ingredients in a grill basket or on a grill pan.

4. How many skewers does this recipe make?
This recipe typically yields about 4-6 skewers, depending on how you assemble them.

5. Can I bake these skewers instead?
Absolutely! Preheat your oven to 400°F and place the skewers on a baking sheet. Bake for about 15-20 minutes, turning halfway through.

Conclusion

As we prepare to enjoy these Pineapple Chicken Skewers, remember that cooking is not just about the food; it’s about creating memories together. The joyful sounds and enticing smells from the kitchen serve to remind us that family time is precious. Happy cooking, and enjoy this delightful dish with your loved ones.

Pineapple Chicken Skewers

Prep Time 30 minutes
Cook Time 15 minutes
Total Time 45 minutes
Servings 6 skewers
Calories 250
A delightful and easy recipe for Pineapple Chicken Skewers that combines tender chicken with sweet pineapple and colorful bell peppers, perfect for family meals or barbecues.

Ingredients

For the Skewers

  • 2 pieces Chicken breasts, cubed (Choose high-quality, fresh chicken for the best flavor.)
  • 1 cup Pineapple chunks (Fresh pineapple will provide the sweetest taste, but canned works too.)
  • 1 piece Bell pepper (any color, cut into pieces) (Feel free to mix colors for a vibrant dish.)
  • 2 tablespoons Olive oil (Adds richness to the marinade.)
  • 3 tablespoons Soy sauce (Adds saltiness and depth to the flavor.)
  • 2 cloves Garlic, minced (Fresh garlic gives an excellent kick.)
  • 1 tablespoon Honey or brown sugar (Balances the saltiness with sweetness.)
  • to taste none Salt and pepper (Essential for enhancing all the flavors.)
  • none Skewers (Wooden or metal works; soak wooden skewers in water for at least 30 minutes before use to prevent burning.)

Instructions 

Preparation

  • In a bowl, mix olive oil, soy sauce, minced garlic, honey or brown sugar, salt, and pepper to create a marinade. This step is crucial, as the marinade infuses the chicken with flavor.
  • Add the cubed chicken to the marinade, cover, and let it sit for at least 30 minutes. While you wait, it’s a great time to prepare your veggies.
  • Preheat the grill to medium heat.
  • Thread the marinated chicken, pineapple chunks, and bell peppers onto skewers, alternating between them.

Cooking

  • Grill the kabobs for about 10-15 minutes, turning occasionally until the chicken is cooked through and has nice grill marks.
  • Serve with rice or a fresh salad.

Notes

Use chicken thighs instead of breasts for a juicier bite. Experiment with different colors of bell peppers to add a pop of color. Always taste your marinade before adding chicken to ensure it meets your flavor preferences.
Calories: 250kcal
Course: Dinner, Main Course
Cuisine: American, BBQ
Keyword: BBQ Recipe, Easy Dinner, Family Meal, Grilled Skewers, Pineapple Chicken

Mother's love, on a platter | Chicken breast recipes baked, Chicken recipes, Chicken dishes recipes

The smell of garlic and lemon wakes the house. I can hear the oven preheat click and the soft clink of a spoon against a measuring cup. In my kitchen the sound of family plates and warm conversation comes before the first bite.

This recipe, "Mother’s love, on a platter," is my ode to weekday dinners that feel special. It roasts simple chicken breasts until they are tender, juicy, and flavored in ways the whole family remembers. If you need a main that fills the home with comfort and saves time, this one will be on your regular rotation. For a few other weeknight ideas, see my collection of deliciously easy chicken breast recipes.

Why this works

Mother's love, on a platter | Chicken breast recipes baked, Chicken recipes, Chicken dishes recipes

This dish uses plain ingredients and a smart technique that locks in moisture. The quick brine or marinade gives the chicken a deep, steady flavor that arrives at the table fast. You can get it on the table in under an hour on most weeknights.

It also scales easily. Make a double batch for a full family dinner, or cook single breasts for two and save the extras for lunches. If you want a faster finish and crisp edges, try my method for air fryer chicken breasts in another recipe. That helps when you need dinner extra quickly.

This recipe respects busy schedules. Prep can happen earlier in the day or the night before. While the oven works, you can set the table and start a salad. Little steps like these make feeding the family feel like nurturing instead of a race.

Process Overview

“This is where the magic happens—when the aroma fills the kitchen.”

I start with a light brine or a quick rub. Then the chicken rests, so the flavors sink into the meat. Finally, the oven does the heavy lifting. Roasting at a moderate temperature creates a tender inside and a gently browned exterior.

If you like a tangy finish, I often baste with a balsamic glaze toward the end. I explain a similar finishing touch in my favorite balsamic baked chicken breast recipe. The steps are simple, and the result looks like a recipe you made with care.

Ingredients

  • 4 boneless skinless chicken breasts, about 6 oz each
    Lily tip: Pound the thicker end gently so the breasts are even. They cook more evenly and finish at the same time.

  • 1/4 cup olive oil
    Lily tip: Use extra virgin for flavor. If you have a lighter oil, blend half and half to reduce strong olive notes for kids.

  • 1/4 cup low-sodium chicken broth
    Lily tip: Adds moisture while keeping the flavor savory.

  • 2 tablespoons freshly squeezed lemon juice
    Lily tip: Fresh lemon brightens the dish. Bottled juice works in a pinch.

  • 1 tablespoon Dijon mustard
    Lily tip: Dijon helps the sauce cling to the chicken and adds a gentle tang.

  • 3 cloves garlic, minced
    Lily tip: Use a garlic press for even pieces that melt into the sauce.

  • 1 teaspoon kosher salt
    Lily tip: Salt helps proteins hold moisture. If you brine, reduce added salt in the rub.

  • 1/2 teaspoon black pepper
    Lily tip: Freshly ground tastes best. Keep it mild for picky eaters.

  • 1 teaspoon dried thyme or 1 tablespoon fresh thyme leaves
    Lily tip: Thyme has a homey, herbal note. Substitute rosemary for a piney flavor.

  • 1/2 cup panko breadcrumbs (optional)
    Lily tip: For a gentle crunch, brush the breasts with a small pat of melted butter and press the panko on before baking.

  • 2 tablespoons unsalted butter
    Lily tip: Dotting the breasts with butter adds richness, especially when baking without skin.

  • Lemon slices and fresh parsley for garnish
    Lily tip: Garnish brightens both flavor and the family table.

  • Optional: 1 teaspoon honey or maple syrup for a touch of sweetness
    Lily tip: A little sweetness balances lemon and garlic, and kids often notice the difference.

For side dishes, I often reach for pasta or a creamy macaroni that everyone loves. A great list of comforting pasta pairings is in my roundup of best chicken macaroni recipes.

Directions

  1. Preheat and prepare.
    Preheat the oven to 375°F. Pat the chicken dry with paper towels. A dry surface browns better in the oven. You will feel confident once the oven is ready.

  2. Brine or marinate.
    For a simple brine, dissolve 1 tablespoon kosher salt in 2 cups of water and let the breasts sit for 15 to 20 minutes. Or combine olive oil, lemon juice, Dijon, garlic, thyme, salt, and pepper to make a quick marinade. I like to let it sit for 20 to 30 minutes if I have time. This step makes the chicken juicier and more flavorful.

  3. Pound and even.
    If one end of a breast is much thicker, place it between two pieces of plastic wrap and gently pound with a meat mallet or rolling pin until even. This saves you from overcooking the thin part and undercooking the thick part. You will thank yourself when every bite is tender.

  4. Sear for color, optional.
    Heat 1 tablespoon of olive oil in an ovenproof skillet over medium-high heat. Sear the breasts for 2 minutes per side until they gain color. This step adds depth and is optional if you’re short on time. It also makes the final dish look like you spent a bit more time cooking.

  5. Arrange and top.
    Place the breasts in the skillet or a baking dish. Spoon any remaining marinade over the top. Dot with butter and sprinkle with panko if using. Add lemon slices on top for steam and aroma. Your kitchen will start to smell like the best moments of a family dinner.

  6. Bake to temperature.
    Bake for 18 to 24 minutes, depending on thickness. Use an instant-read thermometer to check the internal temperature. The USDA recommends 165°F for chicken. I remove the chicken at 160°F and let it rest to reach 165°F because carryover heat keeps it juicy. You are doing great following the temps.

  7. Rest and glaze.
    Let the breasts rest for 5 minutes before slicing. If you like, brush with a honey-lemon glaze or a balsamic reduction while resting. The rest time lets the juices redistribute so the meat stays tender.

  8. Slice and serve.
    Slice against the grain and arrange on a platter. The aroma will draw everyone to the table. If you want more dinner ideas, check my collection of best chicken dinner recipes for crowd-pleasing sides and mains.

Each step has a purpose. Take a breath between steps and enjoy the pace. Cooking should feel like feeding both body and heart.

Serving

Mother's love, on a platter | Chicken breast recipes baked, Chicken recipes, Chicken dishes recipes

Serve family-style on a warm platter. Arrange sliced breasts in the center. Scatter fresh parsley and lemon wedges around them. Spoon any pan juices on top for shine and moisture.

For sides, roast vegetables like carrots and broccoli, or offer a creamy mashed potato. A simple green salad with a lemon vinaigrette brightens heavier sides. If you want a cozy macaroni side, my pasta pairings are a favorite with this chicken. Place bread or rolls in a basket so everyone can share.

If you have little ones, plate a smaller portion and leave the glaze on the side. This lets kids choose how much flavor they want. For guests, offer extra sauce in a small pitcher so they can ladle as they wish.

Storage

Refrigerate leftovers in an airtight container within two hours of cooking. Use the chicken within 3 to 4 days. Keep the pan juices or glaze separate for best texture when reheating.

To reheat in the oven, preheat to 300°F. Place chicken in a shallow baking dish and add a tablespoon of chicken broth or water. Cover with foil and heat for 10 to 15 minutes until warmed through. This slow, gentle heat prevents drying.

For quick reheats, slice the chicken and microwave on medium power for 1 minute, then check and add 30-second bursts until warm. Add a splash of broth to keep moist. If you reheated in the air fryer, a short 3 to 4 minute burst at 350°F crisps edges without drying the meat.

If you freeze leftovers, wrap tightly and freeze up to 3 months. Thaw in the refrigerator overnight before reheating.

Kitchen Notes

  • Shortcut: Use pre-minced garlic from a jar if you are short on time. It still adds flavor.
  • Shortcut: A store-bought rotisserie chicken can be shredded and tossed with the glaze for a fast weeknight meal.
  • Shortcut: Make the marinade ahead and use it for 3 to 4 breasts in one go to save prep time.
  • Shortcut: Use silicone baking mats to reduce cleanup and prevent sticking.
  • Shortcut: Double the recipe and keep extras in the fridge for salads and wraps throughout the week.

These small steps keep dinner simple and enjoyable. Once you get in the rhythm, this dish becomes a go-to.

Variations

  • For picky eaters: Reduce garlic to 1 clove and omit thyme. Serve glaze on the side and offer plain rice or mashed potatoes.
  • For low-carb: Skip the panko breadcrumbs. Serve with roasted cauliflower and green beans.
  • For gluten-free: Use gluten-free panko or almond flour. Make sure all other condiments are labeled gluten-free.
  • For a spicy version: Add 1/2 teaspoon smoked paprika and a pinch of cayenne to the rub. Keep a cooling yogurt sauce on the side for kids.
  • For Mediterranean flavor: Replace thyme with oregano, add 1/4 cup diced sun-dried tomatoes, and finish with crumbled feta.

These tweaks let you tailor the dish to your family and any dietary needs. Cooking this way helps everyone feel included at the table.

FAQ

Q: Can I use bone-in chicken breasts?
A: Yes. Bone-in breasts will take longer to cook, usually 30 to 40 minutes at 375°F. Use a thermometer and aim for 165°F internal temperature near the bone.

Q: How can I keep the chicken moist?
A: Brining or marinating helps. Also resist the urge to overcook. Remove at 160°F and let rest to 165°F for the juiciest result.

Q: Is it safe to bake chicken from frozen?
A: You can bake from frozen, but it will take longer. Increase baking time by about 50 percent and use a thermometer to check for 165°F. Thawing first gives a more even texture.

Q: Can I prepare this ahead for a dinner party?
A: Yes. Marinate the chicken the night before and let it sit covered in the refrigerator. Bring it to room temperature for 20 minutes before baking for even cooking.

Q: What sides pair best with this chicken?
A: Roast vegetables, mashed potatoes, rice pilaf, and a green salad are classic. For family favorites, consider a warm pasta or macaroni side to make the meal extra comforting.

Conclusion

I hope this recipe brings warmth to your table. When I make "Mother’s love, on a platter," I remember small hands reaching for lemon wedges and the soft hum of conversation that follows a good meal. Cooking for family is about consistency and care. Small habits like a quick brine or a late glaze make every dinner feel thoughtful.

If you want to learn more about estimating nutrition for homemade meals, see this helpful guide on how to calculate calories in homemade meals. For those who enjoy culinary references and language, you might appreciate the latest dictionary and thesaurus edition (2022) for clear culinary terms.

Thank you for letting me share this recipe. Feed your family well and enjoy the moments around your table.

Mother's love, on a platter

Prep Time 30 minutes
Cook Time 24 minutes
Total Time 54 minutes
Servings 4 servings
Calories 300
This recipe roasts tender and juicy chicken breasts, infused with garlic and lemon, perfect for a comforting weekday dinner.

Ingredients

Chicken Ingredients

  • 4 pieces boneless skinless chicken breasts, about 6 oz each (Pound the thicker end gently so the breasts are even.)

Marinade

  • 1/4 cup olive oil (Use extra virgin for flavor. If you have a lighter oil, blend half and half.)
  • 1/4 cup low-sodium chicken broth (Adds moisture while keeping the flavor savory.)
  • 2 tablespoons freshly squeezed lemon juice (Fresh lemon brightens the dish; bottled juice works in a pinch.)
  • 1 tablespoon Dijon mustard (Helps the sauce cling to the chicken and adds a gentle tang.)
  • 3 cloves garlic, minced (Use a garlic press for even pieces.)
  • 1 teaspoon kosher salt (Salt helps proteins hold moisture.)
  • 1/2 teaspoon black pepper (Freshly ground tastes best.)
  • 1 teaspoon dried thyme or 1 tablespoon fresh thyme leaves (Substitute with rosemary for a piney flavor.)

Optional Toppings

  • 1/2 cup panko breadcrumbs (For a gentle crunch, press onto chicken before baking.)
  • 2 tablespoons unsalted butter (Adds richness when baking without skin.)
  • 1 teaspoon honey or maple syrup (optional) (Balances lemon and garlic.)
  • 1 slices lemon, for garnish (Brightens flavor.)
  • 1 bunch fresh parsley, for garnish (Brightens the family table.)

Instructions 

Preparation

  • Preheat the oven to 375°F. Pat the chicken dry with paper towels.
  • For a simple brine, dissolve 1 tablespoon kosher salt in 2 cups of water and let the breasts sit for 15 to 20 minutes. Alternatively, mix olive oil, lemon juice, Dijon, garlic, thyme, salt, and pepper for a quick marinade.
  • If one end of a breast is much thicker, place it between two pieces of plastic wrap and gently pound until even.
  • Heat 1 tablespoon of olive oil in an ovenproof skillet over medium-high heat if you choose to sear. Sear the breasts for 2 minutes per side until they gain color.

Cooking

  • Place the breasts in the skillet or a baking dish. Spoon any remaining marinade over the top. Dot with butter and sprinkle with panko if using.
  • Bake for 18 to 24 minutes until the internal temperature reaches 160°F.
  • Let the breasts rest for 5 minutes before slicing. If desired, brush with honey-lemon glaze or balsamic reduction.
  • Slice against the grain and serve on a warm platter, garnished with fresh parsley and lemon wedges.

Notes

Refrigerate leftovers within 2 hours and consume within 3 to 4 days. The chicken can be reheated gently in the oven or microwave. Consider using pre-minced garlic or a store-bought rotisserie chicken for quick preparation.
Calories: 300kcal
Course: Dinner, Main Course
Cuisine: American, Comfort Food
Keyword: Chicken Breast, Comfort Food, Easy Recipe, Family Dinner, Roasted Chicken

Hawaiian Grilled Chicken and Pineapple

I can smell the sweet pineapple and soy sauce as soon as I open the fridge. The sizzle of the grill gets my kids running to the backyard. The kitchen sounds like summer. These are the small moments I live for.

This Hawaiian grilled chicken and pineapple recipe has been one of my family favorites for years. It is bright, easy, and full of sweet and savory balance. If you love pineapple with chicken, you might also enjoy my pineapple chicken and rice recipe for a hearty weeknight meal that everyone eats up. My pineapple chicken and rice recipe

H2: Why this works

Hawaiian Grilled Chicken and Pineapple

H3: Family friendly and time saving

This dish works because it brings big flavor with very little fuss. The marinade uses pineapple juice and simple pantry spices. That means no long, complicated prep. You can marinate in the morning, start the grill after work, and dinner is ready before homework begins.

The pineapple juice tenderizes the chicken naturally. The brown sugar and soy sauce give caramelization and depth. You get a meal that feels special but comes together fast. For another weeknight favorite that travels well to picnics and potlucks, try my Caribbean chicken and rice for similar tropical notes. Try my Caribbean chicken and rice

H2: Process Overview

“This is where the magic happens—when the aroma fills the kitchen.”

I like to keep things simple and hands on. Marinate. Grill chicken. Grill pineapple. Eat together. The grill caramelizes the sugar and creates those lovely char lines. Kids love the sweet pineapple, and adults enjoy the savory glaze. If you enjoy bright, citrusy grilled flavors, you may also like my lemon chili grilled chicken bowls that mix fresh cucumber and hummus for a refreshing twist. Lemon chili grilled chicken bowls

H2: Ingredients

  • 4 boneless, skinless chicken breasts
    Tip: Choose even-sized breasts so they cook at the same rate. If one is thick, butterfly it or pound it gently for uniform cooking.
  • 1 cup pineapple juice
    Tip: Fresh juice is brightest, but store-bought works fine when you need convenience. Measure and taste before using.
  • 2 tablespoons soy sauce (or gluten-free soy sauce)
    Tip: Low-sodium soy sauce gives more control. Use gluten-free tamari if someone needs a gluten-free option.
  • 2 tablespoons brown sugar
    Tip: Light brown sugar adds sweetness without overpowering. Pack it into the measuring spoon for accuracy.
  • 1 teaspoon garlic powder
    Tip: Garlic powder blends smoothly into marinades. For a fresher bite, use one clove minced if you prefer.
  • 1 teaspoon ginger powder
    Tip: Ground ginger is convenient. Fresh grated ginger gives more zing if you have a microplane handy.
  • 1/2 teaspoon salt
    Tip: Start with this amount and adjust after cooking. Salt in the marinade helps flavor penetrate the meat.
  • 1/4 teaspoon black pepper
    Tip: Freshly cracked pepper adds a brighter finish. Measure carefully for kids who prefer milder spice.
  • 1 fresh pineapple, sliced
    Tip: Choose a slightly soft pineapple that smells sweet at the base. Slice about 1/2 inch thick for grilling.
  • Green onion, for garnish (optional)
    Tip: Thinly sliced green onions add color and a mild onion note. Save a few for the kids if they like them.

For a fun appetizer idea, these flavors also pair well with my sweet and spicy pineapple cowboy candy wings. Pineapple cowboy candy wings

H2: Directions

  1. In a mixing bowl, combine pineapple juice, soy sauce, brown sugar, garlic powder, ginger powder, salt, and pepper.
    Encouraging note: Whisk until the sugar dissolves. This takes just a minute and builds flavor quickly.

  2. Place the chicken breasts in a resealable plastic bag and pour the marinade over them. Seal the bag and refrigerate for at least 1 hour, or up to 4 hours.
    Encouraging note: Letting the chicken rest in the fridge gives time for the flavors to sink in. It is worth the wait, even for busy nights.

  3. Preheat the grill to medium-high heat.
    Encouraging note: Clean, oiled grates prevent sticking. A hot grill gives nice char without overcooking the inside.

  4. Remove the chicken from the marinade and discard the marinade.
    Encouraging note: Discarding the used marinade keeps things safe. If you want a glaze, set aside some fresh marinade before adding the raw chicken.

  5. Grill the chicken for about 6-7 minutes on each side, or until cooked through and internal temperature reaches 165°F (75°C).
    Encouraging note: Use an instant-read thermometer for perfect results. If your breasts are thin, check earlier to avoid drying them out.

  6. While the chicken is grilling, place pineapple slices on the grill and grill for about 2-3 minutes on each side until caramelized.
    Encouraging note: Watch the pineapple closely. It can go from perfectly charred to too soft fast, but those golden spots are worth it.

  7. Serve the grilled chicken with grilled pineapple slices on top, and garnish with green onions if desired.
    Encouraging note: Arrange everything family-style so everyone can help themselves. A little bowl of extra soy glaze or hot sauce keeps the crowd happy.

If you want to pair this with a creamy side, try serving it alongside my cozy BBQ chicken mac and cheese for a crowd-pleasing combo. BBQ chicken mac and cheese

H2: Serving

Hawaiian Grilled Chicken and Pineapple

Serve this Hawaiian grilled chicken family-style on a large platter. Lay chicken breasts across the middle and arrange grilled pineapple slices on top. Sprinkle sliced green onions and a little extra black pepper.

Add sides that balance sweet and savory. A big bowl of steamed rice, a simple green salad, or grilled corn make great companions. For a casual family night, set out plates, napkins, and serving tongs and let everyone pick their portions.

H2: Storage

Refrigerate leftover chicken in an airtight container within two hours of cooking. It will keep well for 3 to 4 days. Store grilled pineapple in a separate container to keep the texture pleasant.

To reheat, warm the chicken gently in a 325°F oven for 10 to 12 minutes or until it reaches 165°F. You can also reheat slices in a covered skillet over low heat with a splash of water to keep them moist. Avoid microwaving for long stretches as it can dry the chicken.

If you want to freeze cooked chicken, wrap it well and freeze for up to 2 months. Thaw overnight in the fridge before reheating. Freeze pineapple only if you plan to use it in smoothies or cooked dishes, as texture will change.

H2: Kitchen Notes

  • Shortcut: Use store-bought pineapple juice for weeknight speed and fresh pineapple when you have time.
  • Shortcut: Pound chicken to an even thickness to cut grill time and keep it juicy.
  • Shortcut: Use grill baskets for small pineapple slices to avoid losing pieces through the grates.
  • Shortcut: Make extra marinade (set aside before adding chicken) and simmer it for 5 minutes to serve as a glaze.
  • Shortcut: Double the recipe and freeze cooked chicken for easy lunches and quick dinners.

H2: Variations

  • For picky eaters: Serve the grilled pineapple on the side instead of on top. Let kids build simple chicken-and-rice plates with a spoonful of grilled fruit.
  • For a spicy kick: Add 1 teaspoon of crushed red pepper flakes to the marinade or brush with a chili-honey glaze as it cooks.
  • For low-sodium diets: Use low-sodium soy sauce and reduce added salt. Taste before serving and adjust if needed.
  • For a gluten-free option: Use gluten-free tamari instead of soy sauce. Confirm other packaged ingredients are gluten-free.
  • For a sheet pan version: If you do not have a grill, roast the chicken and pineapple at 425°F for 18 to 22 minutes, flipping halfway through for even caramelization.

H2: FAQ

Q1: Can I use boneless chicken thighs instead of breasts?
A1: Yes. Chicken thighs stay moist and add extra flavor. Grill them for about 5 to 6 minutes per side depending on thickness and check for an internal temp of 165°F.

Q2: How long can I marinate the chicken?
A2: Marinate for at least 1 hour and up to 4 hours for best results. If you marinate longer than 4 hours, the pineapple enzymes can start to change the texture too much.

Q3: Do I need to discard the marinade?
A3: Yes, discard the used marinade to avoid contamination. If you want to use it as a sauce, reserve a portion before adding raw chicken and simmer it for safety.

Q4: Can I make this indoors on a grill pan?
A4: Absolutely. A hot grill pan gives similar char. Preheat the pan until hot and brush with oil to prevent sticking. Cook times are similar but watch for flare-ups if using a gas stove.

Q5: What sides go best with Hawaiian grilled chicken and pineapple?
A5: White or brown rice, a fresh slaw, roasted sweet potatoes, or a crisp green salad are great choices. For a family comfort combo, try pairing with creamy mac and cheese.

H2: Conclusion

I hope this Hawaiian grilled chicken and pineapple recipe brings summer to your table any night of the week. It is easy, bright, and made for sharing with family. Try it the first time as written, and then make small tweaks for your household.

For more inspiration on Hawaiian-style grilled chicken and fruity salsas, I recommend this flavorful take from Dinner at the Zoo: Dinner at the Zoo’s Hawaiian Coconut Grilled Chicken with Pineapple Salsa. If you want another perspective with a colorful presentation, check out Averie Cooks’ grilled aloha chicken and pineapple for extra plating ideas: Averie Cooks’ Grilled Aloha Chicken and Pineapple.

Cook with love, pass the plate, and savor the small sounds that make family meals special. — Lily

Hawaiian Grilled Chicken and Pineapple

Prep Time 2 hours
Cook Time 15 minutes
Total Time 2 hours 15 minutes
Servings 4 servings
Calories 350
A bright and easy Hawaiian grilled chicken recipe paired with sweet grilled pineapple, perfect for family dinners.

Ingredients

For the Marinade

  • 1 cup pineapple juice (Fresh juice is brightest, but store-bought works fine for convenience.)
  • 2 tablespoons soy sauce (Low-sodium soy sauce gives more control. Use gluten-free tamari for gluten-free option.)
  • 2 tablespoons brown sugar (Use light brown sugar packed into the measuring spoon for accuracy.)
  • 1 teaspoon garlic powder (Use fresh minced garlic for stronger flavor if desired.)
  • 1 teaspoon ginger powder (Fresh grated ginger gives more zing if you have it.)
  • 1/2 teaspoon salt (Adjust after cooking to taste.)
  • 1/4 teaspoon black pepper (Freshly cracked pepper adds brightness.)

For the Chicken

  • 4 pieces boneless, skinless chicken breasts (Choose even-sized breasts for uniform cooking.)

For Grilling

  • 1 whole fresh pineapple, sliced (Choose a slightly soft pineapple that smells sweet.)
  • Green onion, for garnish (optional) (Thinly sliced, save some for kids if they like them.)

Instructions 

Marinating the Chicken

  • In a mixing bowl, combine pineapple juice, soy sauce, brown sugar, garlic powder, ginger powder, salt, and pepper. Whisk until the sugar dissolves.
  • Place the chicken breasts in a resealable plastic bag and pour the marinade over them. Seal the bag and refrigerate for at least 1 hour, or up to 4 hours.

Grilling

  • Preheat the grill to medium-high heat.
  • Remove the chicken from the marinade and discard the marinade.
  • Grill the chicken for about 6-7 minutes on each side, or until cooked through and the internal temperature reaches 165°F (75°C).
  • While the chicken is grilling, grill the pineapple slices for about 2-3 minutes on each side until caramelized.

Serving

  • Serve the grilled chicken with grilled pineapple slices on top, and garnish with green onions if desired.

Notes

Refrigerate leftover chicken within two hours of cooking. Store for 3 to 4 days. To reheat, warm gently in a 325°F oven for 10 to 12 minutes.
Calories: 350kcal
Course: Dinner, Main Course
Cuisine: Grilled, Hawaiian
Keyword: Family Dinner, Hawaiian Grilled Chicken, Pineapple Recipe, quick recipe, Summer Grilling

Cowboy Butter Chicken Linguine

There’s something magical about the kitchen when dinner is on the way. The scent of sizzling chicken fills the air, mingling with the comforting aroma of melted butter. You can hear the gentle bubbling of a sauce, each pop signaling that a delicious meal is about to unfold. Cowboy Butter Chicken Linguine is one of those dishes that not only pleases the palate but also brings the family closer together. With this simple recipe, you’ll find yourself savoring every bite and making new cherished memories around the dinner table.

Why This Works

Cowboy Butter Chicken Linguine

Cowboy Butter Chicken Linguine is an amazing option for busy families. It combines tender chicken, flavorful butter sauce, and linguine pasta, making a meal that everyone will love. Plus, it comes together quickly, so you can spend less time cooking and more time enjoying each other’s company. The distinct buttery flavor gives a unique twist that keeps your taste buds excited without being overly complicated.

This recipe is an excellent way to introduce your family to new flavors while sticking to what they love. You can have it on the table in less than 30 minutes, making it perfect for weeknight dinners.

Process Overview

“This is where the magic happens—when the aroma fills the kitchen.”

Picture the scene: you’re busy in the kitchen, the sounds of pots clanging and knives chopping fill the air, while delicious smells waft around you. Cooking doesn’t have to feel overwhelming. With this simple overview, you’ll see how easy it is to bring this comforting dish to life.

First, you’ll cook the linguine until it’s just right. While that’s coming together, sauté some chicken in cowboy butter to create a mouthwatering sauce. A touch of heavy cream and spices will elevate it to something truly special. Toss in the pasta, and just like that, dinner is ready!

Ingredients

For Cowboy Butter Chicken Linguine, you will need the following ingredients:

  • 2 chicken breasts: Look for well-trimmed breasts for even cooking.
  • 8 oz linguine pasta: This type of pasta holds the sauce well.
  • 1/2 cup cowboy butter: You can find pre-made cowboy butter at stores or make your own by blending butter with spices.
  • 1 cup heavy cream: Use heavy cream for a rich, smooth sauce.
  • 1 tsp crushed red pepper: Adjust the amount depending on your family’s heat tolerance.
  • Salt and black pepper: Season to taste and enhance the flavors.
  • 1/2 cup parmesan cheese: Freshly grated cheese makes a big difference in taste.
  • Fresh parsley for garnish: This adds a splash of color and freshness.

Tips: Always taste your sauce before serving to ensure the seasoning is just right. Don’t hesitate to add more cheese if you love that richness!

Directions

  1. Cook the linguine pasta according to package instructions. Drain and set aside.

    • Remember, slightly undercooking the pasta helps it absorb the sauce better.
  2. In a large skillet, melt cowboy butter over medium heat.

    • The butter will start to gleam and foam; this is a sign that it’s ready for the chicken.
  3. Add the chicken strips, season with salt and black pepper, and cook until golden brown and cooked through, about 5-7 minutes.

    • Keep an eye on the chicken. You want it juicy and delicious.
  4. Lower the heat and pour in the heavy cream; stir to combine.

    • The cream will blend beautifully with the butter, creating a lovely sauce.
  5. Add the crushed red pepper and let the sauce simmer for a few minutes.

    • Give it time to thicken a little, and the flavors will deepen.
  6. Toss the cooked pasta in the sauce until well coated.

    • Make sure every strand of linguine gets that luscious sauce.
  7. Serve hot, garnished with parmesan cheese and parsley.

    • A great family-style presentation can enhance the dining experience!

Serving

Cowboy Butter Chicken Linguine

Serving Cowboy Butter Chicken Linguine is a delightful experience. You can place the pasta in a large bowl and allow family members to serve themselves. This not only speeds up the process but encourages everyone to join in, making it a fun family moment. You can offer additional parmesan cheese for those who love an extra cheesy bite. A side salad or garlic bread pairs perfectly with this dish as well.

Storage

Storing leftovers is easy. Allow the Cowboy Butter Chicken Linguine to cool before placing it in an airtight container. It can safely be stored in the fridge for up to 3 days. When you’re ready to enjoy it again, simply reheat it on the stovetop over medium heat. Add a splash of cream or a touch of chicken broth to loosen up the sauce if it thickens too much upon reheating.

Kitchen Notes

  • Always mince your garlic ahead of time if you decide to add it for an extra punch of flavor.
  • Use a large skillet to prevent overcrowding the chicken, allowing it to brown properly.
  • Pre-cook the linguine when in a hurry for a quicker meal on busy nights.
  • Make extra cowboy butter in advance to have it on hand for other dishes.
  • Experiment with different pasta shapes – penne or fettuccine work just as well!

Variations

If you have picky eaters or dietary preferences in your household, here are a few adaptations you can make:

  • Swap chicken for shrimp for a lighter twist.
  • Use gluten-free pasta if someone in your family has gluten sensitivity.
  • For a vegetarian option, substitute the chicken with sautéed bell peppers and zucchini.
  • Make it dairy-free by using plant-based butter and cream alternatives.
  • If heat isn’t everyone’s cup of tea, reduce or omit the crushed red pepper.

FAQ

1. Can I prepare the cowboy butter in advance?
Yes, you can make cowboy butter in advance and store it in the fridge for up to a week.

2. How can I make this dish spicier?
You can add more crushed red pepper or toss in some sliced jalapeños when cooking the chicken.

3. Can I use frozen chicken for this recipe?
Yes, just ensure it’s thawed properly to ensure even cooking.

4. Is this dish kid-friendly?
Absolutely! The buttery flavor and creamy sauce usually appeal to kids. You can modify the spice level based on their preferences.

5. What should I serve with this dish?
A simple garden salad or some garlic bread complements it beautifully, adding to the overall meal experience.

As you wrap up your cooking adventure with Cowboy Butter Chicken Linguine, take a moment to appreciate the joy of family meals. This dish not only satisfies hunger but also creates space for laughter, conversation, and love. Enjoy every bite and the memories that come with them. Happy cooking!

Cowboy Butter Chicken Linguine

Prep Time 10 minutes
Cook Time 15 minutes
Total Time 25 minutes
Servings 4 servings
Calories 650
A quick and delicious dish featuring tender chicken, savory cowboy butter sauce, and linguine pasta, perfect for busy weeknight dinners.

Ingredients

Main Ingredients

  • 2 pieces chicken breasts (Look for well-trimmed breasts for even cooking.)
  • 8 oz linguine pasta (This type of pasta holds the sauce well.)
  • 1/2 cup cowboy butter (You can find pre-made cowboy butter at stores or make your own by blending butter with spices.)
  • 1 cup heavy cream (Use heavy cream for a rich, smooth sauce.)
  • 1 tsp crushed red pepper (Adjust the amount depending on your family's heat tolerance.)
  • to taste none salt and black pepper (Season to taste and enhance the flavors.)
  • 1/2 cup parmesan cheese (Freshly grated cheese makes a big difference in taste.)
  • to garnish none fresh parsley (This adds a splash of color and freshness.)

Instructions 

Cook the Linguine

  • Cook the linguine pasta according to package instructions. Drain and set aside.
  • Remember, slightly undercooking the pasta helps it absorb the sauce better.

Prepare the Sauce

  • In a large skillet, melt cowboy butter over medium heat.
  • Add the chicken strips, season with salt and black pepper, and cook until golden brown and cooked through, about 5-7 minutes.
  • Lower the heat and pour in the heavy cream; stir to combine.
  • Add the crushed red pepper and let the sauce simmer for a few minutes.

Combine and Serve

  • Toss the cooked pasta in the sauce until well coated.
  • Serve hot, garnished with parmesan cheese and parsley.

Notes

Always taste your sauce before serving to ensure the seasoning is just right. Don't hesitate to add more cheese if you love that richness! Store leftovers in an airtight container in the fridge for up to 3 days and reheat on the stovetop.
Calories: 650kcal
Course: Dinner, Main Course
Cuisine: American
Keyword: butter sauce, chicken pasta, Easy Recipe, Family Meal, Quick Dinner