Tag

Mexican food

Browsing

Delicious Chicken Chimichanga

The kitchen smells like warm tortillas and melted cheese. I hear the gentle sizzle as the filling comes together on the stove. Little hands tap on the counter and a timer ticks while everyone waits with happy patience.

I love this moment. It is the kind of cooking that turns a weekday into something special. The sound of the oven door closing always feels like the start of a small celebration in our home.

Why this works

Delicious Chicken Chimichanga

This recipe works because it is simple, fast, and fits into family life. You can use leftover chicken from a roast, a rotisserie bird, or a quick batch of poached breasts. That saves time and keeps costs down.

It is also easy to scale. Make a few for a small dinner, or a dozen for a weekend gathering. Kids and adults both love the crispy outside and the creamy, cheesy inside.

I designed this dish to be forgiving. The flavors are familiar, and the steps are straightforward. You do not need special skills, just some basic pantry items and a bit of confidence.

Family and time-saving benefits

I constantly test recipes in a real family kitchen. I keep my pantry stocked with tortillas, canned chilies, and shredded cheese for nights when time runs short.

Prep ahead by shredding chicken on Sunday and storing it in the fridge. On busy weeknights, assembly takes about 10 minutes and the oven does the rest. That is why chimichangas become a go-to weeknight meal at our house.

Process Overview

“This is where the magic happens—when the aroma fills the kitchen.”

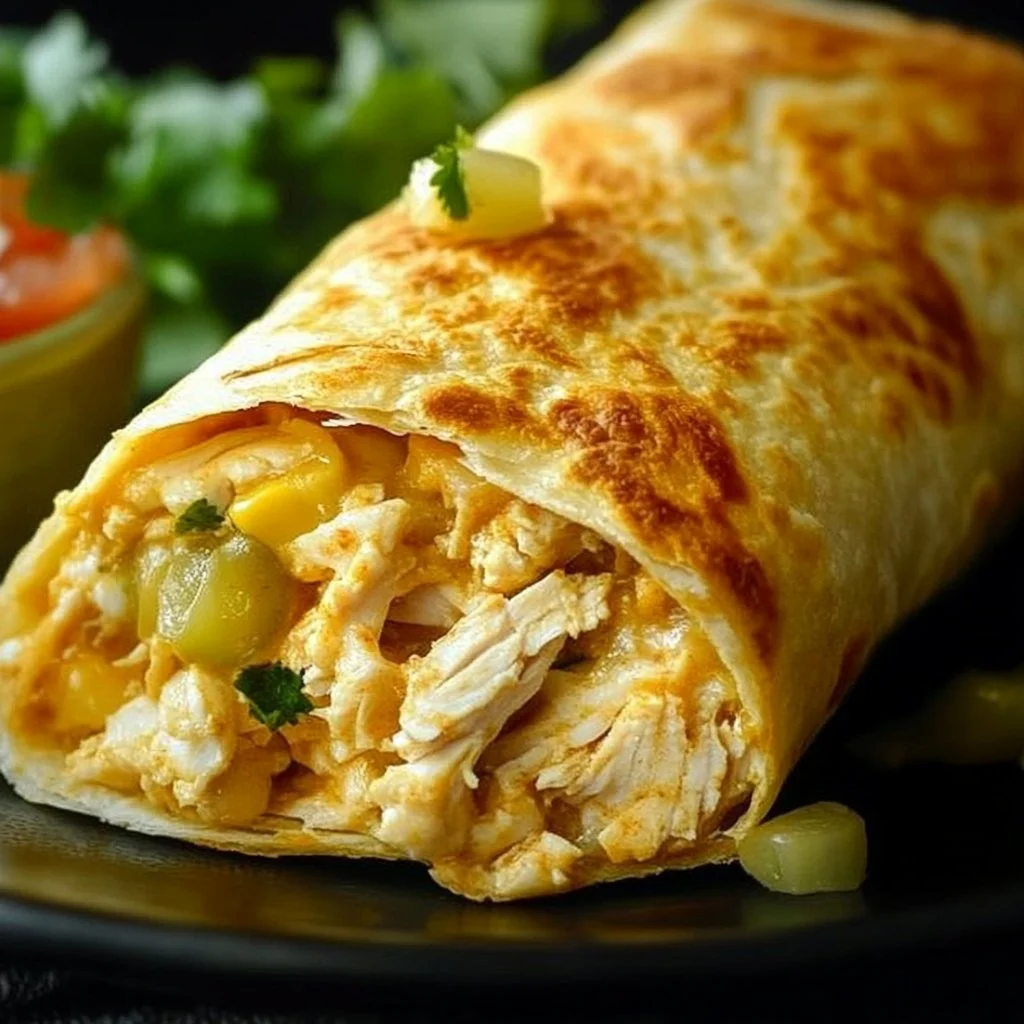
This is a hands-on recipe that feels special but moves quickly. The filling is a simple mix of shredded chicken, cheese, mild green chilies, sour cream, and taco seasoning.

You build each chimichanga like a small present. Folding the tortilla around the filling keeps everything neat and helps the outside get golden and crisp. Baking gives you the texture you want without deep frying.

I encourage you to let the oven time be your friend. While the chimichangas bake, set the table, chop fresh toppings, and let everyone pick a salsa or garnish.

Ingredients

  • 2 cups cooked chicken, shredded
    • Lily’s tip: Use rotisserie chicken to save time. If you poach, shred while still warm for easier pulling.
  • 1 cup shredded cheese (cheddar or Mexican blend)
    • Lily’s tip: Use a blend for softer, melty texture. Grate fresh cheese for the best melt and flavor.
  • 1 can (4 oz) mild green chilies, drained
    • Lily’s tip: Rinse quickly to reduce salt if your canned chilies seem very salty.
  • 8 large flour tortillas
    • Lily’s tip: Look for tortillas labeled "burrito size" or 10 inch for easy rolling. Warm them briefly to prevent cracking.
  • 1/4 cup sour cream
    • Lily’s tip: Full fat sour cream gives the creamiest filling. For a lighter version, use plain Greek yogurt.
  • 1 teaspoon taco seasoning
    • Lily’s tip: Use your favorite store mix or my homemade blend of chili powder, cumin, garlic powder, and a pinch of salt.
  • Cooking spray
    • Lily’s tip: Use an oil spray for an even crisp without excess oil. Light coverage works best.
  • Salsa, for serving
    • Lily’s tip: Offer a mild and a spicy salsa so everyone can choose. Fresh pico de gallo is a nice option.

Each ingredient is chosen to be pantry-friendly and family approved. The quantities here are designed to feed four to six people, depending on appetite.

Directions

  1. Preheat the oven to 375°F (190°C).

    • Encouraging note: Let the oven fully heat while you assemble. A hot oven gives the best crisp on the tortilla.
  2. In a mixing bowl, combine cooked chicken, cheese, green chilies, sour cream, and taco seasoning.

    • Encouraging note: Taste a small pinch of the filling. Adjust seasoning with a little salt or extra taco mix if you like more zip.
  3. Place about 1/3 cup of the chicken mixture in the center of each tortilla.

    • Encouraging note: Less is more here. Overfilling can make rolling tricky. Keep the edges clear for a tight seam.
  4. Fold the sides of the tortilla over the filling, then roll it up to form a burrito.

    • Encouraging note: Fold the sides first, then roll snugly from one end. If a tortilla cracks, use a little water on the edge to seal it.
  5. Place the chimichangas seam side down on a baking sheet.

    • Encouraging note: Line the baking sheet with foil or parchment for easy cleanup. Leave space between each chimichanga so they crisp evenly.
  6. Spray the tops lightly with cooking spray.

    • Encouraging note: A light spray is all you need. It helps the tortillas brown and get that golden, crunchy texture.
  7. Bake for about 25-30 minutes or until golden and crispy.

    • Encouraging note: Check at 20 minutes if your oven runs hot. Rotate the sheet halfway through for even browning. The tops should be deeply golden.
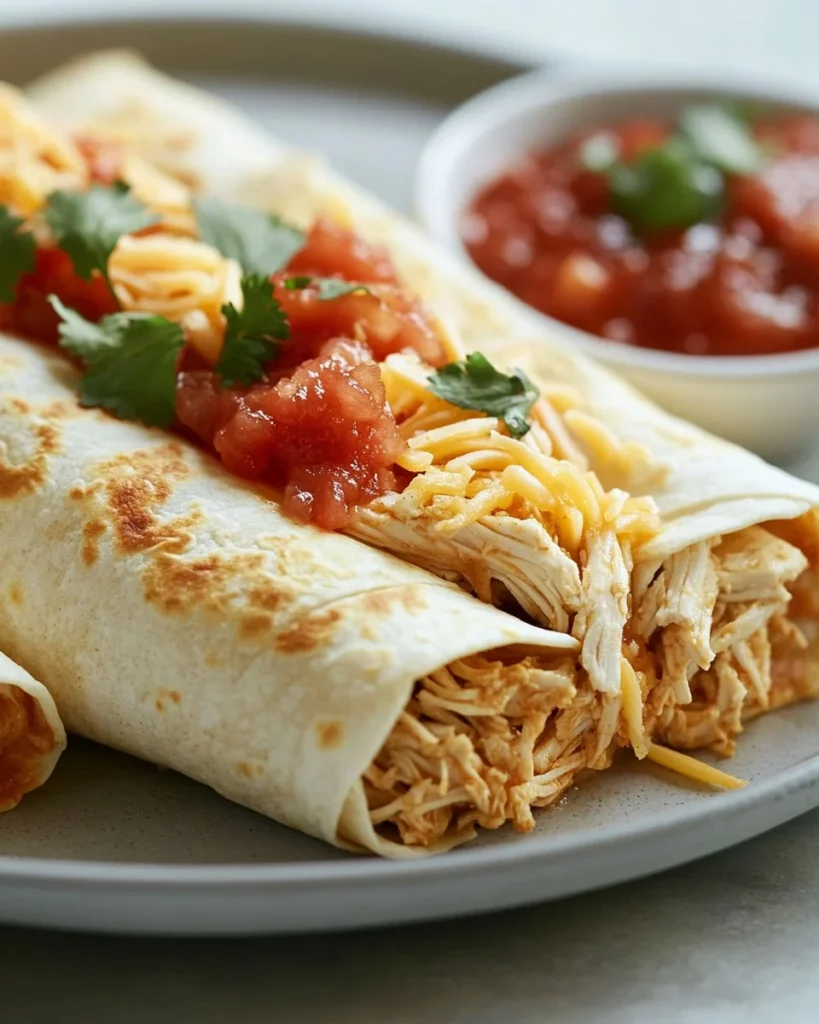
  8. Serve with salsa.

    • Encouraging note: Transfer to a platter and let them rest for a couple of minutes. Serve with warm salsa, extra sour cream, and your favorite toppings.

These steps are simple. Take them at your pace. Invite kids to help with filling or arranging the chimichangas on the sheet. This dish is a great way to include little helpers.

Serving

Delicious Chicken Chimichanga

Serve chimichangas family-style right from the center of the table. Arrange them on a large platter and offer small bowls of salsa, guacamole, and sour cream.

I like to add chopped cilantro, lime wedges, and a few slices of fresh jalapeño for the adults. For kids, offer shredded lettuce and diced tomatoes so they can build their own plate.

A side of rice and beans makes the meal feel complete. For a lighter dinner, pair the chimichangas with a crisp green salad and a squeeze of lime.

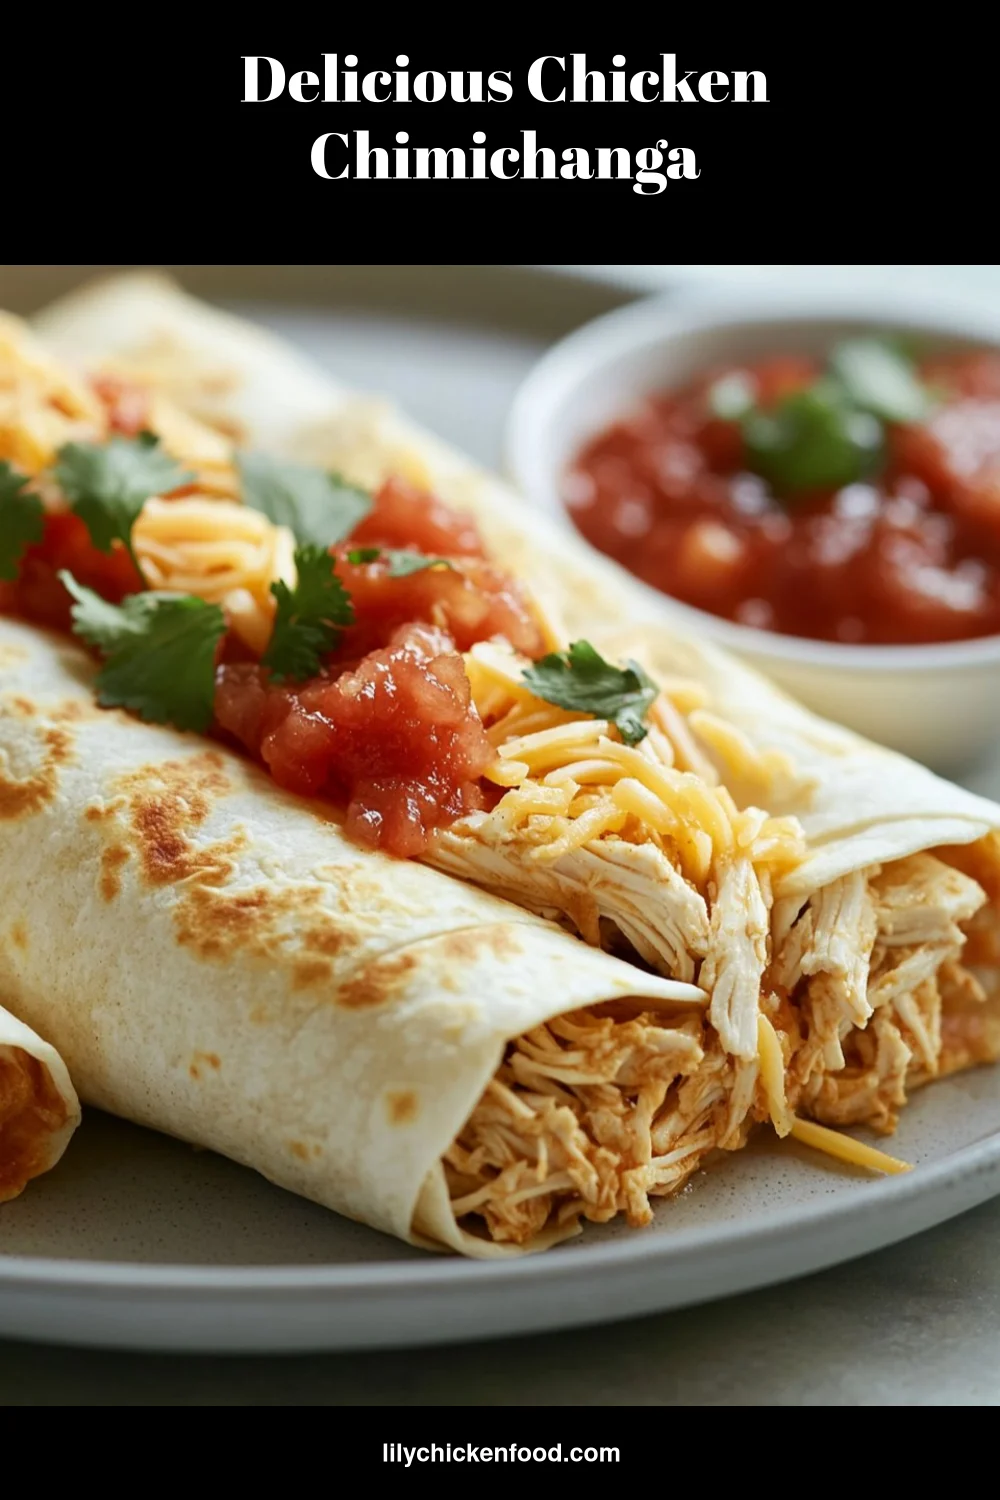
Presentation tip: Cut one open so the melted cheese and chicken are visible. That warm, cheesy center invites everyone to dig in.

Storage

Refrigerator
Store leftover chimichangas in an airtight container for up to 3 days. Place a sheet of parchment between layers if you stack them.

Reheating in the oven
Reheat at 350°F (175°C) for 10 to 15 minutes. This method brings back the crispness and keeps the filling warm without drying it out.

Reheating in the microwave
Microwave for 60 to 90 seconds if you are short on time. The tortilla will be softer. To restore crispness, pop it under the broiler for 1 to 2 minutes afterward, watching carefully.

Freezing
Wrap each chimichanga tightly in foil and store in a freezer bag for up to 2 months. Reheat from frozen at 375°F (190°C) for 30 to 40 minutes until heated through and crisp.

Food safety tip: Make sure shredded chicken is cooled quickly before refrigerating. Store within two hours of cooking to keep your family safe.

Kitchen Notes

  • Shortcut: Use rotisserie chicken to save time and add flavor.
  • Meal prep: Assemble chimichangas ahead and keep them covered in the fridge for up to 24 hours before baking.
  • Crisp tip: A light spray of oil is better than brushing. It yields an even crunch without excess grease.
  • Double batch: This recipe doubles easily. Use two baking sheets and rotate them in the oven for even baking.
  • Kid helper: Give children a spoon for filling placement and a small spatula for rolling. It keeps things tidy and fun.

These notes come from many evenings cooking with family around me. Small shortcuts make the difference when weeknights get busy.

Variations

  • For picky eaters: Leave out the green chilies and use a mild cheese. Serve salsa on the side so everyone can choose how much to add.
  • Vegetarian: Swap the chicken for a mix of black beans and corn. Add a little cumin and lime for brightness.
  • Low carb: Use large romaine leaves as wraps and bake very briefly to warm the filling, then enjoy a lighter crunch.
  • Spicy version: Add a diced chipotle pepper or a teaspoon of adobo sauce to the filling. Offer cooling toppings like sour cream and avocado.
  • Dairy-free: Use a dairy-free sour cream and a plant-based shredded cheese. Bake the same way for a family-friendly alternative.

Experiment with what your family likes. These chimichangas accept many changes and still deliver comfort.

FAQ

Q: Can I freeze chimichangas before baking?
A: Yes. Wrap each chimichanga tightly in foil or plastic wrap and freeze for up to 2 months. Bake from frozen at 375°F (190°C) for 30 to 40 minutes.

Q: Can I make these ahead of time for a party?
A: Absolutely. Assemble them and refrigerate until ready to bake. If you need to store for more than 24 hours, freeze them and bake when guests arrive.

Q: How do I keep chimichangas from getting soggy?
A: Avoid overfilling and keep the tortilla edges dry to seal them well. Bake on a wire rack set over a baking sheet if you have one, for extra airflow and crispness.

Q: What sides go well with chimichangas?
A: Rice, beans, fresh salad, or roasted vegetables are all great options. For a lighter meal, pair with a citrusy slaw or chopped tomato salad.

Q: Can kids help make chimichangas?
A: Yes. Kids can help measure, mix the filling, and place filling on tortillas. Supervise the rolling and oven steps for safety.

These answers reflect what I learned after testing this recipe multiple times in my home kitchen with my family. I aim to make this dish reliable and repeatable.

Conclusion

I hope this recipe brings warmth and ease to your family table. I use these chimichangas on busy nights and for casual weekend meals. They are a comforting, crowd-pleasing option that can be adapted to many tastes.

If you want more ideas for chicken chimichangas with different fillings, try the Chicken Chimichanga Recipe with Black Beans and Corn for a heartier twist.

For a classic take and extra tips on shaping and cooking, I also like this recipe guide from Homemade Chimichangas with Chicken – Carlsbad Cravings.

Thanks for cooking with me. Come back soon for more family-friendly recipes and simple kitchen joy.

Cheesy Chicken Chimichangas

Prep Time 10 minutes
Cook Time 30 minutes
Total Time 40 minutes
Servings 6 servings
Calories 300
These cheesy chicken chimichangas are a comforting, crowd-pleasing option that can be adapted to many tastes. Fried to golden perfection, they are easy to prepare and perfect for busy weeknights.

Ingredients

Filling Ingredients

  • 2 cups cooked chicken, shredded (Use rotisserie chicken to save time.)
  • 1 cup shredded cheese (cheddar or Mexican blend) (Use a blend for softer, melty texture. Grate fresh cheese for the best melt and flavor.)
  • 1 can (4 oz) mild green chilies, drained (Rinse quickly to reduce salt if your canned chilies seem very salty.)
  • 1/4 cup sour cream (Full fat sour cream gives the creamiest filling. For a lighter version, use plain Greek yogurt.)
  • 1 teaspoon taco seasoning (Use your favorite store mix or my homemade blend of chili powder, cumin, garlic powder, and a pinch of salt.)

Assembly Ingredients

  • 8 large flour tortillas (Look for tortillas labeled "burrito size" or 10 inch for easy rolling. Warm them briefly to prevent cracking.)
  • cooking spray Cooking spray (Use an oil spray for an even crisp without excess oil. Light coverage works best.)
  • Salsa, for serving (Offer a mild and a spicy salsa so everyone can choose.)

Instructions 

Preparation

  • Preheat the oven to 375°F (190°C).
  • In a mixing bowl, combine cooked chicken, cheese, green chilies, sour cream, and taco seasoning.

Assembling Chimichangas

  • Place about 1/3 cup of the chicken mixture in the center of each tortilla.
  • Fold the sides of the tortilla over the filling, then roll it up to form a burrito.
  • Place the chimichangas seam side down on a baking sheet.
  • Spray the tops lightly with cooking spray.

Baking

  • Bake for about 25-30 minutes or until golden and crispy.
  • Serve with salsa.

Notes

Store leftover chimichangas in an airtight container for up to 3 days. Reheat in the oven at 350°F (175°C) for 10-15 minutes or in the microwave for 60-90 seconds.
Calories: 300kcal
Course: Dinner, Main Course
Cuisine: Mexican
Keyword: cheesy, Chicken, Chimichangas, Easy Dinner, Family-Friendly

Easy Street Corn Chicken Bowl

The smell of warm corn and cumin on a weeknight can make the whole kitchen feel like a hug. My kids always start setting the table the minute they catch that scent. The sound of a wooden spoon tapping a bowl, a small argument about who gets the lime wedge, and the little rush of everyone gathering makes this meal more than food. It is a simple routine that turns a busy night into a moment we share.

Why This Easy Street Corn Chicken Bowl Feels Like Home

This Easy Street Corn Chicken Bowl is the kind of meal that folds comfort and speed into one easy pan. It uses pantry staples and whatever cooked chicken you have on hand. That means dinner comes together fast without giving up flavor.

What helps it feel homey is the bright mix of corn, cumin, and fresh cilantro. The textures balance each other: tender chicken, sweet corn, crisp bell pepper, and the soft bed of rice. Meanwhile, the lime adds the small zing that wakes up the whole bowl.

This bowl also works for picky eaters and adventurous ones alike. The basics please children and the bright add-ons invite grown-ups to experiment. Often I set out toppings so everyone can build their bowl. It’s simple and special in the same sweep.

Easy Street Corn Chicken Bowl

The Simple Magic Behind Easy Street Corn Chicken Bowl

“This is where the magic happens, when the aroma fills the kitchen and my kids come running in, asking ‘Is it ready yet?’”

The heart of this recipe is the way flavors meet in one bowl. You start with cooked chicken and rice, then add corn, beans, bell pepper, and onion. Chili powder and cumin bring warmth, while cilantro and lime brighten the finish. Texture cues will tell you when it is right: soft shredded chicken coated in spices, corn plump and lightly sweet, and rice grains separated enough to soak up dressing without clumping.

Next up, think of this method as friendly and flexible. Use cooked chicken from the rotisserie, a pan of poached chicken, or last night’s leftovers. The seasoning is forgiving; taste and adjust as you go. From there, it becomes a bowl you can serve for a weeknight dinner or a casual weekend lunch.

Ingredients You’ll Need

2 cups cooked chicken, shredded
1 can (15 oz) corn, drained
1 cup cooked rice
1 bell pepper, diced
1/2 cup red onion, diced
1 cup black beans, rinsed and drained
1 teaspoon chili powder
1 teaspoon cumin
Salt and pepper to taste
Fresh cilantro, for garnish
Lime wedges, for serving

Don’t skip the fresh herbs. They are the soul of the dish and add that last bright layer. Use what’s in your fridge if you need to swap the bell pepper for a small zucchini or the red onion for green onion. This recipe welcomes creativity, not perfection.

Step-by-Step Directions

  1. In a large bowl, combine the shredded chicken, corn, cooked rice, bell pepper, red onion, and black beans.
    Sprinkle with chili powder, cumin, salt, and pepper, and stir until well combined.
    A quick toss helps the flavors start to mingle.

  2. Taste for seasoning and add more salt or a pinch more chili powder if you like extra warmth.
    If the mix seems dry, squeeze a little lime over it and stir again.
    Remember, bright citrus lifts the whole bowl.

  3. Divide the mixture into serving bowls or plate it family-style in a large bowl for everyone to share.
    Garnish with chopped cilantro and place lime wedges on the side.
    A sprinkle of extra cumin or a drizzle of olive oil can be a nice final touch.

  4. Serve with any optional toppings you love, such as avocado slices, a spoonful of sour cream, or salsa.
    Let everyone customize their bowl — kids love the small choices.
    This part makes dinner feel like a small celebration around the table.

  5. Enjoy your quick weeknight dinner!
    Clean up is easy because most of this comes together in one main bowl.
    Let the slow chatter at the table begin.

Quick tip: a little browning on the shredded chicken in a hot skillet before mixing builds deep flavor, just like my grandmother showed me. Let the kids stir this part if they want — it’s often the most fun for them.

Easy Street Corn Chicken Bowl

Serving Easy Street Corn Chicken Bowl with Love

I serve this bowl family-style in the middle of the table and let everyone help themselves. That simple act of sharing makes the meal feel warm and communal. I put out small bowls with toppings so each person can make their plate unique.

My kids usually go for extra cheese and avocado. My partner likes a splash of hot sauce and an extra lime wedge. I pop a big bowl of mixed greens on the side for anyone who wants to add freshness. For a heartier dinner, offer warm tortillas or chips so people can scoop and build.

If you are feeding guests, set up a small topping station: chopped cilantro, sliced avocado, shredded cheese, sour cream, and mild salsa. That way, the meal becomes a tiny interactive event and everyone can customize while chatting.

Easy Street Corn Chicken Bowl

Storage & Reheat Tips (Keeping the Goodness)

Store the bowls in an airtight container in the fridge for up to 3 days. Keep the cilantro and lime wedges separate until you serve. Fresh herbs lose their bright flavor after a day or two when mixed in, and limes dry out if left exposed.

For reheating, the microwave is fine for a quick lunch. Heat in 30 second bursts, stirring in between, so the rice warms evenly. If you want that “just-made” feel, reheat in a skillet over medium heat with a splash of water or chicken broth. That method brings back a little crunch to the bell pepper and freshens the whole dish.

If you plan to freeze, separate into single portions in freezer-safe containers. Freeze for up to 2 months. Thaw overnight in the fridge and warm gently on the stove to keep the texture pleasant.

If the bowl seems dry after refrigerating, add a squeeze of lime, a drizzle of olive oil, or a spoonful of warm broth when you reheat. Those simple additions revive flavor and make leftovers just as cozy as the first night.

My Kitchen Notes & Shortcuts

  • Use rotisserie chicken to cut prep time in half. It adds a smoky note and saves an evening.
  • Make a double batch of rice at the weekend and freeze single portions. It is a fast way to get dinner on the table.
  • If you prefer a smoky flavor, char the bell pepper under the broiler for a few minutes before dicing it.
  • Let the mixture sit for 15 to 30 minutes if you have time. The flavors settle and taste more connected.
  • Involve kids by letting them measure spices or squeeze lime wedges. Small tasks build confidence and make dinner a shared memory.

Family-Friendly Variations

Make it milder for little ones by reducing the chili powder and serving salsa on the side. For a low-carb option, serve over a bed of mixed greens or cauliflower rice. If you want a richer, creamier bowl, stir in a spoonful of Greek yogurt or a splash of crema.

For a vegetarian version, swap the chicken for extra beans, cubed tofu, or grilled halloumi. For more bite, add roasted sweet potato cubes or sautéed mushrooms. If you love heat, toss in sliced jalapeños or a drizzle of your favorite hot sauce at the end.

These shifts let you put your family’s stamp on the dish. The base is forgiving, and most changes keep the spirit of the bowl intact: simple, fast, and full of heart.

FAQs About Easy Street Corn Chicken Bowl

Can I make this ahead for a busy week?
Absolutely. In fact, letting it sit for an hour lets the flavors get to know each other, like a good family recipe. Store in the fridge for up to 3 days.

Is canned corn okay or should I use fresh?
Canned corn is fine and saves time. If you use fresh, it adds a bright snap. If you have fresh corn, a quick char in a hot pan deepens the flavor.

Can I substitute brown rice or quinoa?
Yes. Brown rice and quinoa work well and add more fiber. Just note that cooking times and texture will differ.

How do I keep the bell pepper crunchy after storing?
Store the bell pepper separately if you want it extra crisp. Add it to each bowl just before serving.

Will the black beans make the dish soggy?
Rinse and drain the beans well. That removes extra moisture and keeps textures pleasant.

One Final Thought from My Kitchen

Cooking small, steady rituals like this bowl has given me so many quiet, good moments. It is not only about feeding bodies, it is about the daily chance to slow and connect, even when time is tight. I hope this Easy Street Corn Chicken Bowl finds a place in your rotation and brings the same easy joy it brings ours.

Conclusion

If you want another version with a grilled corn twist and extra herbs, take a look at this take on Street Corn Chicken Rice Bowls from The Skinnyish Dish for ideas you can borrow. For a more step-by-step, family-friendly write up with bright salsa and topping options, try the recipe at Tastes Better From Scratch.

Easy Street Corn Chicken Bowl

Prep Time 10 minutes
Cook Time 10 minutes
Total Time 20 minutes
Servings 4 servings
Calories 450
A comforting and quick meal that combines cooked chicken, corn, rice, and vegetables, topped with fresh lime and herbs, perfect for family dinner.

Ingredients

Main Ingredients

  • 2 cups cooked chicken, shredded (Use rotisserie or leftover cooked chicken.)
  • 1 can corn (15 oz), drained (Canned corn is fine for quick preparation.)
  • 1 cup cooked rice (Brown rice or quinoa can be used as substitutes.)
  • 1 piece bell pepper, diced (Can be replaced with zucchini if desired.)
  • 1/2 cup red onion, diced (Green onion can be used as an alternative.)
  • 1 cup black beans, rinsed and drained (Rinse well to avoid sogginess.)

Spices and Garnish

  • 1 teaspoon chili powder (Adjust to taste for milder flavor.)
  • 1 teaspoon cumin (Additional cumin can be sprinkled on before serving.)
  • to taste salt and pepper
  • fresh herbs cilantro, for garnish (Important for adding brightness.)
  • 1 piece lime wedges, for serving (Adds a zing to the dish.)

Instructions 

Preparation

  • In a large bowl, combine the shredded chicken, corn, cooked rice, bell pepper, red onion, and black beans.
  • Sprinkle with chili powder, cumin, salt, and pepper, and stir until well combined.
  • Taste for seasoning and add more salt or a pinch of chili powder if you like extra warmth.
  • If the mix seems dry, squeeze a little lime over it and stir again.

Serving

  • Divide the mixture into serving bowls or plate it family-style in a large bowl.
  • Garnish with chopped cilantro and place lime wedges on the side.
  • Offer optional toppings such as avocado slices, sour cream, or salsa.

Notes

Store the bowls in an airtight container in the fridge for up to 3 days, and keep cilantro and lime wedges separate until serving. Reheat in the microwave or a skillet with water or broth for best results.
Calories: 450kcal
Course: Dinner, Family-Friendly, Main Course
Cuisine: American, Comfort Food
Keyword: Chicken Bowl, Comfort Food, Easy Street Corn Chicken Bowl, Family Meal, Quick Dinner