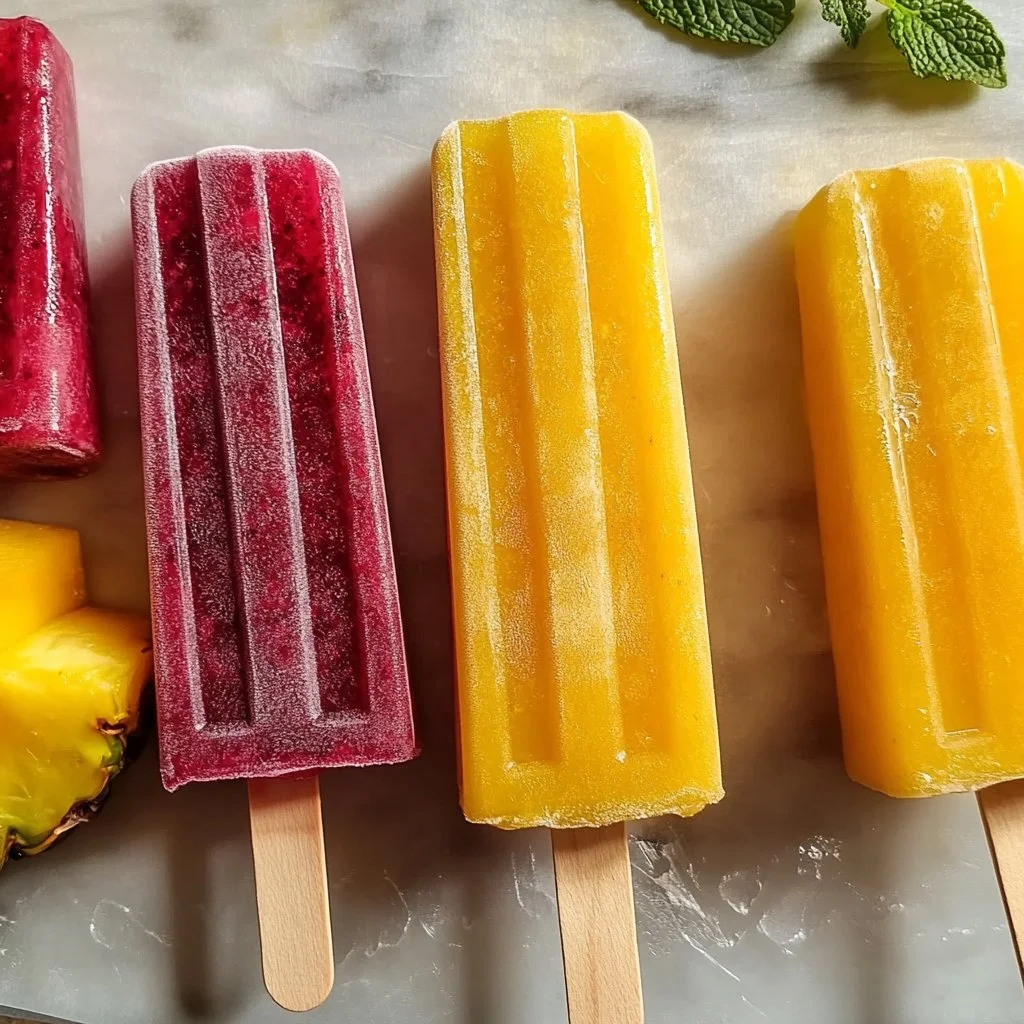
I can still hear the little clink of spoons against bowls as my kids race to the fridge on a hot afternoon, faces already sticky with mango and berry juice. The kitchen smells like summer—bright citrus and mint—while the freezer hums, promising something cold and cheery. Those small, joyful moments are why I make Homemade Freeze Pops most weeks: they turn a noisy, warm day into a family ritual in under an hour.
Why This Homemade Freeze Pops Feels Like Home
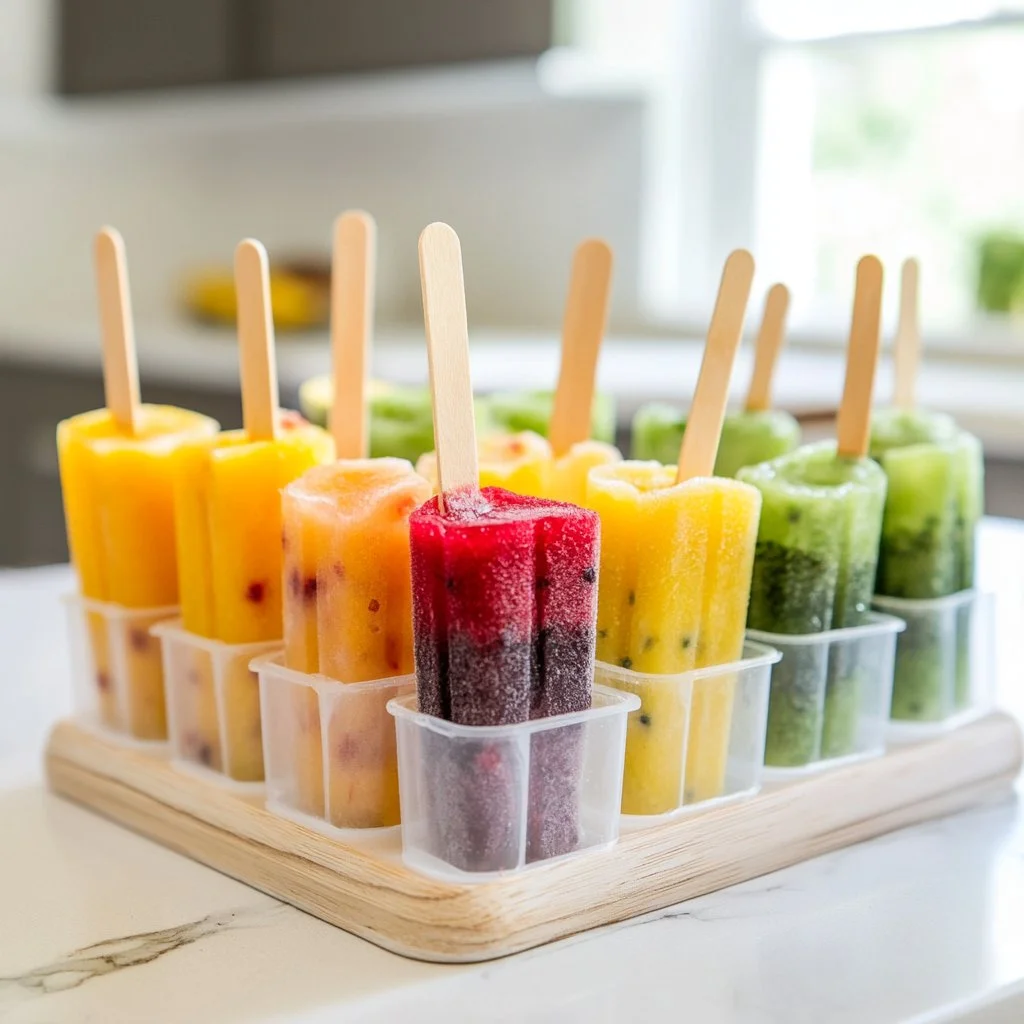
There is a quiet comfort in handing a child a popsicle you made from fresh fruit. It is simple and honest, and it carries small moments of care that become memories. This Homemade Freeze Pops recipe does that for us. It comes together fast, needs only a blender and molds, and lets the fruit do the talking.
I often pair a tray of these freeze pops with easy dinners like a warm bowl of homemade chicken noodle soup on cooler nights, or a light salad on busy evenings. The colors and flavors bring a smile, and the kids love that they get to pick their favorite.
Why Homemade Freeze Pops is Our New Family Favorite
It took me one summer afternoon to realize how much joy a simple frozen treat could bring to our table. We started making flavors the kids suggested and now each snack feels like a tiny celebration.
Why this recipe works: it is forgiving, fast, and adaptable. You can use what’s in the freezer or swap sweeteners to suit your family. It makes a crowd-pleasing treat with almost no fuss, and the clean, bright flavors remind me of the fruit stands I passed as a child. Meanwhile, you get the satisfaction of knowing exactly what’s in your kids’ snack.
The Simple Magic Behind Homemade Freeze Pops
This recipe leans into the natural sweetness and texture of frozen fruit. Frozen fruit thaws just enough to blend smoothly, and a touch of citrus keeps the flavors bright. A small bit of honey or agave adds balance without overwhelming the fruit.
I teach my kids to watch for color and texture cues. If a blend looks too thick, add a splash more water; if it feels too tart, a pinch more sweetener will calm it down. That little judgment call is where home cooking becomes a skill, not a chore.
Why This Recipe Works for Our Busy, Joyful Nights
On nights when time is short, this recipe needs only a blender and a few minutes of hands-on time. You can blend multiple flavors at once, pour into sleeves or molds, and then let the freezer finish the work. It frees up the evening for homework, stories, or a quick walk while the pops set.
If you love simple, seasonal food like I do, you’ll appreciate how these freeze pops highlight fruit without turning it into something fussy. They fit right into our family meals, whether we are sitting down to a bowl of homemade chicken and dumplings or a casual backyard picnic.
How to Make Homemade Freeze Pops, The Heartwarming Way
“This is where the magic happens—when the aroma fills the kitchen and my kids come running in, asking ‘Is it ready yet?’”
Start by thawing the fruit just enough so it blends without lumps. From there, add water and citrus, sweeten lightly, and blend until silky. The texture should be smooth but still a little thick—think thick smoothie, not soup.
The color gives you a clue. If the mango mix glows like sunset, you are on the right track. If the berry blend looks dull, a squeeze of lemon will lift the brightness. Once blended, use a funnel or a steady hand to fill your popsicle sleeves. Freeze until solid, and then serve with a laugh and a napkin or two.
Ingredients You’ll Need
2 cups frozen fruit, thawed for 30 minutes at room temperature or 30 seconds in the microwave, 1/2 cup water, 2 tablespoons freshly squeezed lemon or lime juice, 2 tablespoons honey or agave, Mint leaves for color (for kiwi pineapple flavor)
2 cups frozen strawberries, 1/2 cup water, 2 tablespoons lemon juice, 2 tablespoons honey
2 cups frozen mango, 1/2 cup water, 2 tablespoons lime juice, 2 tablespoons agave
2 cups frozen peach, 1/2 cup water, 2 tablespoons lemon juice, 2 tablespoons honey
1 cup frozen kiwi, 1 cup frozen pineapple, 1/2 cup water, 2 tablespoons lime juice, 2 tablespoons agave, 1/4 cup mint leaves
2 cups frozen blueberries, 1/2 cup water, 2 tablespoons lemon juice, 2 tablespoons honey
1 cup frozen dragonfruit, 1 cup frozen raspberry, 1/2 cup water, 2 tablespoons lime juice, 2 tablespoons agave
Friendly note: don’t skip fresh herbs if you have them. Mint or basil gives a surprising lift. And use what’s in your fridge—this is about creativity, not perfection. If you only have frozen berries, that is perfect too. You can mix and match fruit to please everyone.
Step-by-Step Directions
-
Thaw frozen fruit for 3o minutes at room temperature or for 30 seconds in the microwave.
Let the fruit soften so it blends easily. A little thawing pays off with a smoother texture. -
Add to a blender with water, lemon or lime juice, and honey.
Pulse first, then blend until smooth. Taste and adjust citrus or sweetener as needed. -
Blend until smooth.
Aim for the texture of a thick smoothie. If it is too stiff, add 1 tablespoon of water at a time. -
Pour into popsicle sleeves, using a funnel so you don’t make a mess.
A fun tip: let the kids help with pouring under supervision. They love to twist the tops. -
Move to the freezer and freeze until completely solid – about 8 hours or overnight.
Patience here is rewarded. If you are impatient, a few hours will firm them up, but overnight is best.
Quick kitchen tip: rinse the blender right away. Cold fruit can be sticky later, and a quick rinse keeps cleanup easy. Also, label the sleeves with flavor names so younger kids know what they are choosing. It’s easier than it looks and a great way to get the kids to try new fruits.
Serving Homemade Freeze Pops with Love
When the pops are ready, we bring them to the table family-style with a small bowl of paper towels and a tray for drips. Everyone chooses their flavor, and the table settles into that happy, quiet crunch of cold fruit.
Add small sides if you like—cheese cubes, whole-grain crackers, or a simple yogurt dip. My youngest loves dipping a strawberry pop into a spoonful of Greek yogurt. It is messy, and we laugh, and I love it.

How We Enjoy Homemade Freeze Pops at Our Table
I keep a stash in the back of the freezer for the "I need something now" moments. They also travel well for picnics and pool days. On school mornings, a thawed pop in a cooler can make the walk to the bus a little brighter.
Sometimes we make a themed tray—mango with spicy chili powder for adults, berry pops for kids, and minty pineapple for the neighbors. Sharing them feels like sharing a small delight, and it turns ordinary afternoons into little celebrations.
Storage & Reheat Tips (Keeping the Goodness)
Because these are frozen treats, storage is easy. Keep them in a single layer in the freezer until fully solid. Once frozen, you can stack or stand them upright for space-saving.
Short-term: keep in the coldest part of the freezer and use within 2 months for best texture and flavor. Long-term: fruit can slowly lose color and brightness, so I recommend enjoying them within a few weeks.
If you have leftover blended mix you will use soon, pour it into ice cube trays and freeze. Use cubes in smoothies later. Honest advice: these are best eaten cold, so reheating is not part of the plan. If you want a warm dessert, save the fruit for a quick compote.
My Kitchen Notes & Shortcuts
- Swap sweeteners: use honey, agave, or maple syrup depending on what you have. I often use agave when making pops for guests who avoid honey.
- Prep ahead: blend and freeze in ice cube trays, then pulse frozen cubes in the blender for an instant slushy. This saves time and gives the same bright flavor.
- Kid helpers: let kids add the mint leaves or pick flavors. They love small tasks, and it makes them proud to eat what they helped create.
- Flavor boosts: a pinch of sea salt or a splash of vanilla can deepen fruit flavors in unexpected ways. Try a tiny bit next time you make peach pops.
- No-fuss cleanup: rinse the blender immediately and soak the funnels. Cold fruit cleans out easily, and less mess means less stress.
Family-Friendly Variations
Our family has a rotating list of favorites. Try these simple twists and make the recipe yours.
- Lighter version: reduce sweetener by half and add a splash of coconut water for a subtle flavor.
- Creamy swirl: swirl a spoonful of yogurt into each sleeve for a creamy stripe in each pop. Kids love the marbled look.
- Kid-friendly: for toddlers, dilute slightly with more water and skip added sweetener. The fruit is sweet enough for small palates.
- Boozy adult version: add a splash of sparkling wine or light rum after blending, then freeze for a grown-up treat.
- Herb-forward: basil pairs beautifully with strawberry; mint brightens pineapple and kiwi. Use 1-2 leaves per cup of fruit.
FAQs About Homemade Freeze Pops
Q: Can I make this ahead for a busy week?
A: Absolutely. Make a big batch, freeze overnight, and pull one out as needed. They keep well for several weeks.
Q: What if my freeze pops are icy or grainy?
A: That usually means too much water or a blender that did not fully puree the fruit. Blend longer and use slightly less water next time.
Q: Can I use fresh fruit instead of frozen?
A: Yes. If using fresh, add a few ice cubes or a small amount of chilled water to help the mixture thicken and chill before freezing.
Q: Are these safe for toddlers?
A: For very young children, thaw slightly and monitor them to prevent choking. Use low-sugar options and softer fruits like peach or banana blends.
Q: Can I use molds instead of sleeves?
A: Yes, molds work perfectly and can make larger pops. Just remember to add a stick before fully frozen.
One Final Thought from My Kitchen
I hope this Homemade Freeze Pops recipe finds its way into your warm afternoons and noisy kitchens. There is a kind of quiet joy in sharing frozen fruit with people you love. It is small, bright, and utterly simple—the kind of recipe that asks for few ingredients and returns a whole lot of smiles.
If you try different fruit combos, tell your family story into the flavors. Give it a go—you might surprise yourself with what your kids will try when they helped make it.
Conclusion
Thank you for spending time in my kitchen. If you want another quick, family-friendly frozen treat idea, I recommend this version from Homemade Freeze Pops – Crowded Kitchen for extra flavor inspiration. For more fresh fruit ideas that pair well with weeknight dinners, take a look at Homemade Fresh Fruit Freeze Pops | Love and Olive Oil.
Homemade Freeze Pops
Ingredients
Base Ingredients
- 2 cups frozen fruit, thawed for 30 minutes at room temperature or 30 seconds in the microwave (Any combination of fruits can be used.)
- 1/2 cup water
- 2 tablespoons freshly squeezed lemon or lime juice (Adjust based on taste.)
- 2 tablespoons honey or agave (Sweetener can be adjusted.)
- Mint leaves for color (optional, for kiwi pineapple flavor) (Fresh herbs add a nice touch.)
Flavor Variations
- 2 cups frozen strawberries (Use with 1/2 cup water, 2 tablespoons lemon juice, and 2 tablespoons honey.)
- 2 cups frozen mango (Use with 1/2 cup water, 2 tablespoons lime juice, and 2 tablespoons agave.)
- 2 cups frozen peach (Use with 1/2 cup water, 2 tablespoons lemon juice, and 2 tablespoons honey.)
- 1 cup frozen kiwi (Combine with 1 cup frozen pineapple, 1/2 cup water, 2 tablespoons lime juice, and 2 tablespoons agave.)
- 2 cups frozen blueberries (Use with 1/2 cup water, 2 tablespoons lemon juice, and 2 tablespoons honey.)
- 1 cup frozen dragonfruit (Combine with 1 cup frozen raspberry, 1/2 cup water, 2 tablespoons lime juice, and 2 tablespoons agave.)
Instructions
Preparation
- Thaw frozen fruit for 30 minutes at room temperature or for 30 seconds in the microwave.
- Add to a blender with water, lemon or lime juice, and honey. Pulse first, then blend until smooth.
- Aim for the texture of a thick smoothie. If it is too stiff, add 1 tablespoon of water at a time.
Freezing
- Pour into popsicle sleeves, using a funnel to avoid mess.
- Move to the freezer and freeze until completely solid, about 8 hours or overnight.
- Label the sleeves with flavor names so younger kids know what they are choosing.
Serving
- Serve family-style with a tray for drips and allow everyone to choose their flavor.
- Add small sides like cheese cubes, whole-grain crackers, or yogurt dips.