Tag

Grilled Chicken Recipes

Browsing

Best Grilled Chicken

I can still smell the lemon and garlic when I think about this grilled chicken. The sizzle of the grill, the small puff of steam when I open the lid, and the way the kitchen fills with a warm, bright aroma make me feel like family is already gathered around the table.

This recipe is one I test over and over until it feels right. It is practical, simple to scale for a crowd, and forgiving when life gets busy. If you want more easy ideas to pair with this chicken, I often reach for my favorite chicken macaroni recipes for a quick side dish: chicken macaroni recipes.

Why this works

Best Grilled Chicken

This method blends bright acid, olive oil, and garlic to tenderize the chicken and build flavor without masking its natural taste. The short marinade time saves dinner plans when afternoons run late. It also holds up well for family-style meals when you need to feed different appetites.

If you want more ideas for family dinners that move fast and please a crowd, check out these tested chicken dinner recipes. I write this with years of grilling for kids, grandparents, and neighbors. My tips aim to keep things safe, reliable, and delicious.

Process Overview

“This is where the magic happens—when the aroma fills the kitchen.”

At its heart, this recipe is about balancing flavor and timing. You do a quick prep, let the chicken rest in the fridge, then finish it on a hot grill to get that golden exterior and juicy interior. I recommend using a reliable meat thermometer and a simple routine so you can relax and enjoy company while the grill does its job.

You can also use the cooked chicken in cool salads or sandwiches for easy lunches. If you like chicken salads, this makes a great base for recipes like those found in my collection of chicken salad recipes.

Ingredients

Main Ingredients:

  • 2 pounds boneless (skinless chicken breasts (or thighs))
  • Paper towels (for drying)

Marinade:

  • ¼ cup olive oil
  • 2 tablespoons lemon juice
  • 3 cloves garlic (minced)
  • 1 teaspoon Italian seasoning
  • 1 teaspoon paprika
  • 1 teaspoon salt
  • ½ teaspoon black pepper

Optional:

  • Fresh parsley for garnish
  • Cooking oil for grill grates

My tips for each ingredient:

  • Chicken: Choose even size breasts or thighs for consistent cooking. If breasts are large, cut them in half horizontally or pound them thin.
  • Paper towels: Drying the chicken helps the marinade stick and gives a better sear on the grill.
  • Olive oil: Use a good, fruity extra virgin for flavor. It helps the marinade carry flavors into the meat.
  • Lemon juice: Adds brightness and gently tenderizes. Do not over-marinate in acidic mixes for more than 8 hours.
  • Garlic: Fresh garlic gives the most flavor. Use pressed or finely minced for even distribution.
  • Italian seasoning: Use a blend you like. For families with kids, a milder mix works well.
  • Paprika: Adds color and a subtle smoky note. Smoked paprika is optional if you want extra depth.
  • Salt and pepper: I test for salt after the chicken rests. If you prefer low-sodium, start with ¾ teaspoon and adjust after cooking.
  • Parsley: Adds color and freshness at the end. Chop it finely.
  • Cooking oil for grill grates: Use a high-smoke-point oil and a folded paper towel on tongs to coat the grates safely.

If you want more short, family-friendly chicken ideas that fit weeknight schedules, try my list of easy weeknight chicken recipes.

Directions

  1. Prep the Chicken

    • Pat chicken dry with paper towels.
    • Encouraging note: Drying the meat helps the marinade cling and gives you a better sear. Take a minute here; it pays off on the grill.
  2. Pound chicken breasts to even thickness for even cooking.

    • Encouraging note: Use a meat mallet or rolling pin inside a zip bag. This helps the chicken cook the same from edge to center.
  3. Trim excess fat if using thighs.

    • Encouraging note: A quick trim makes the chicken more pleasant for picky eaters and helps prevent flare-ups.
  4. Make the Marinade

    • In a bowl, whisk together olive oil, lemon juice, garlic, Italian seasoning, paprika, salt, and pepper.
    • Encouraging note: Taste a small dab on a spoon to check balance. Adjust lemon or salt to your preference.
  5. Marinate

    • Place chicken in a zip-top bag or shallow dish.
    • Encouraging note: Use a bag for easy cleanup and better coating.
  6. Pour marinade over chicken and coat evenly.

    • Encouraging note: Massage the bag so every piece gets covered. Kids like helping with this step.
  7. Marinate at least 30 minutes (up to 8 hours in the refrigerator).

    • Encouraging note: If you are short on time, even 30 minutes makes a difference. For a weekend meal, marinate a few hours for deeper flavor.
  8. Remove from fridge 15-20 minutes before grilling.

    • Encouraging note: Letting the chicken come toward room temperature helps it cook more evenly.
  9. Preheat Grill

    • Heat grill to 400-425°F (medium-high).
    • Encouraging note: A hot grill gives you a quick sear that locks in juices.
  10. Lightly oil grill grates to prevent sticking.

    • Encouraging note: Oil the grates right before you place the chicken on them to minimize sticking.
  11. Grill the Chicken

    • Place chicken on grill.
    • Encouraging note: Place pieces with a little space between them so heat circulates.
  12. Close lid and cook 5-7 minutes.

    • Encouraging note: Let the top form a crust. Avoid the temptation to lift the lid too often.
  13. Flip and cook another 5-7 minutes.

    • Encouraging note: Use tongs, not a fork, to keep juices inside.
  14. Cook until internal temperature reaches 165°F.

    • Encouraging note: Insert a meat thermometer into the thickest part. This is the best way to know the chicken is done without overcooking.
  15. Rest & Serve

    • Remove from grill and let rest 5-10 minutes.
    • Encouraging note: Resting lets the juices redistribute so every slice is moist.
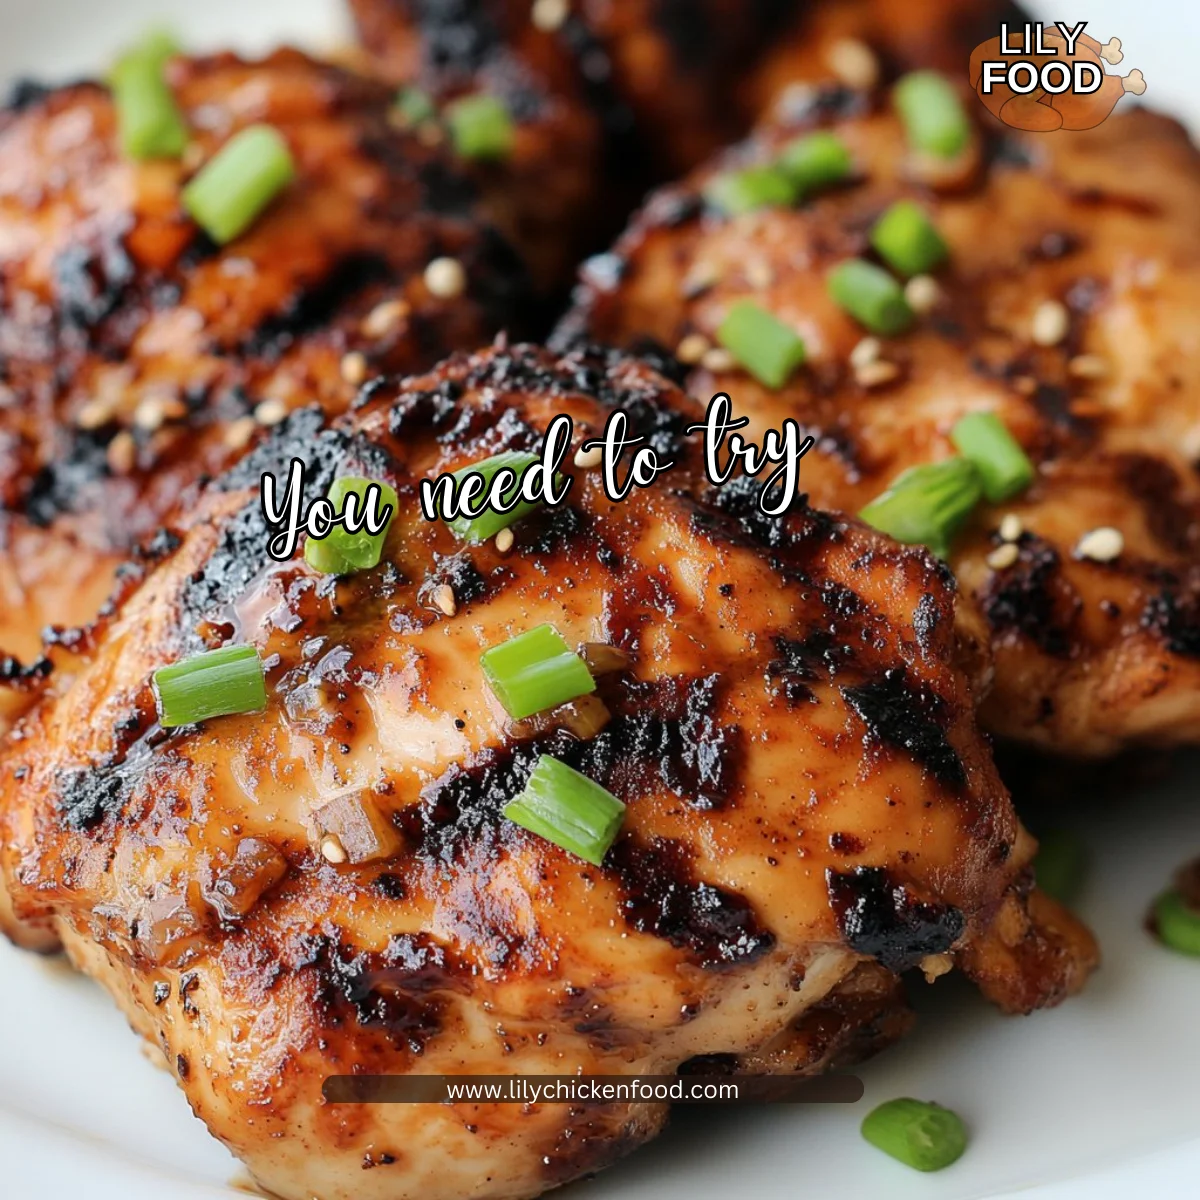
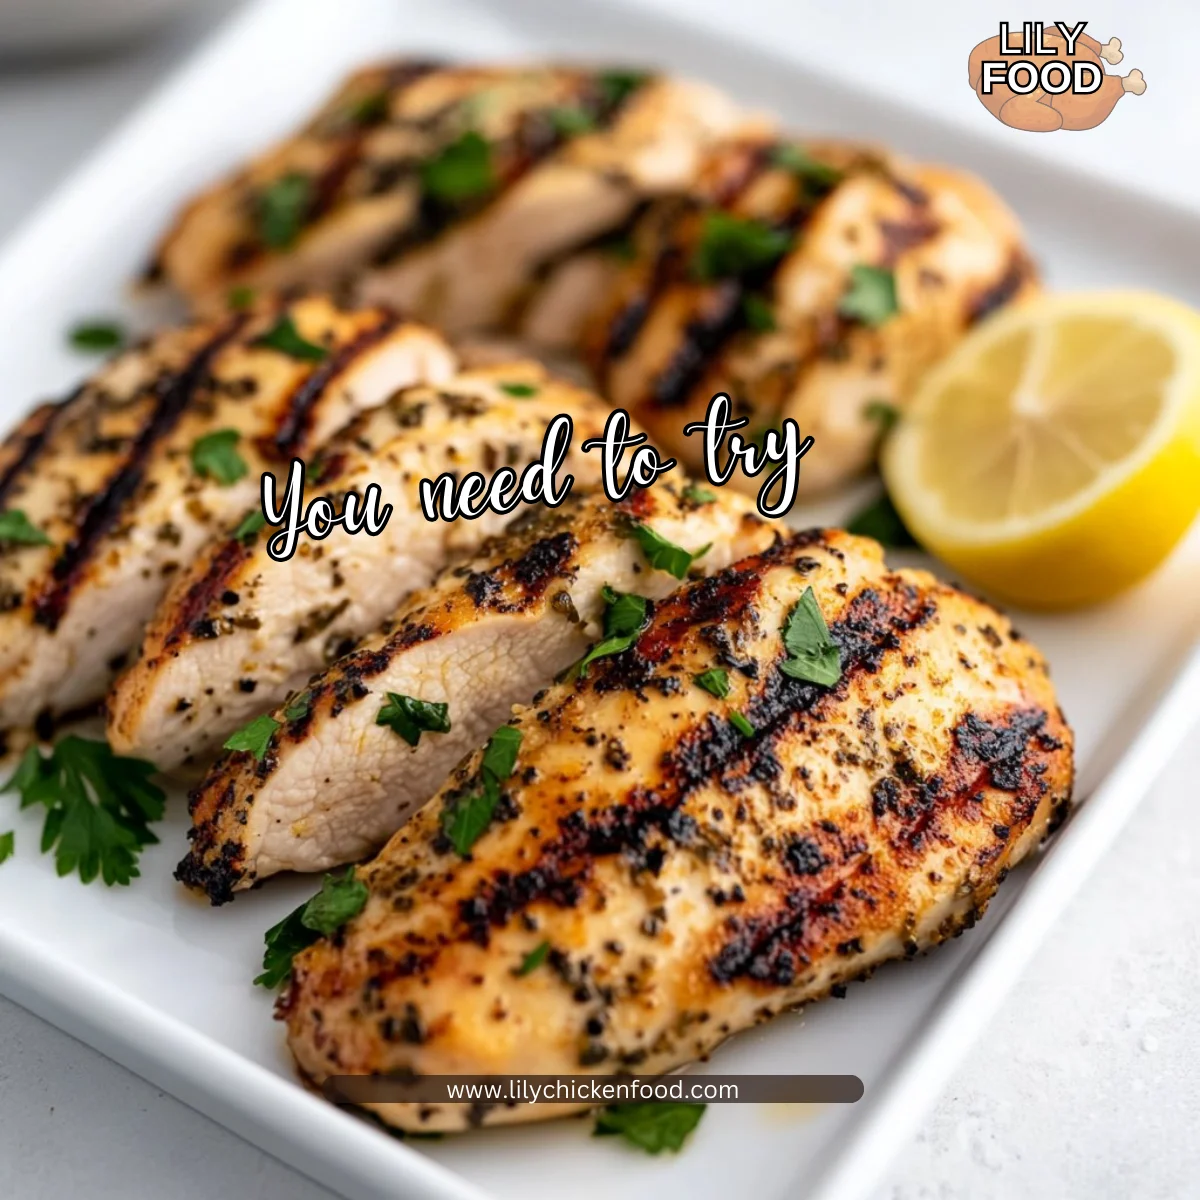
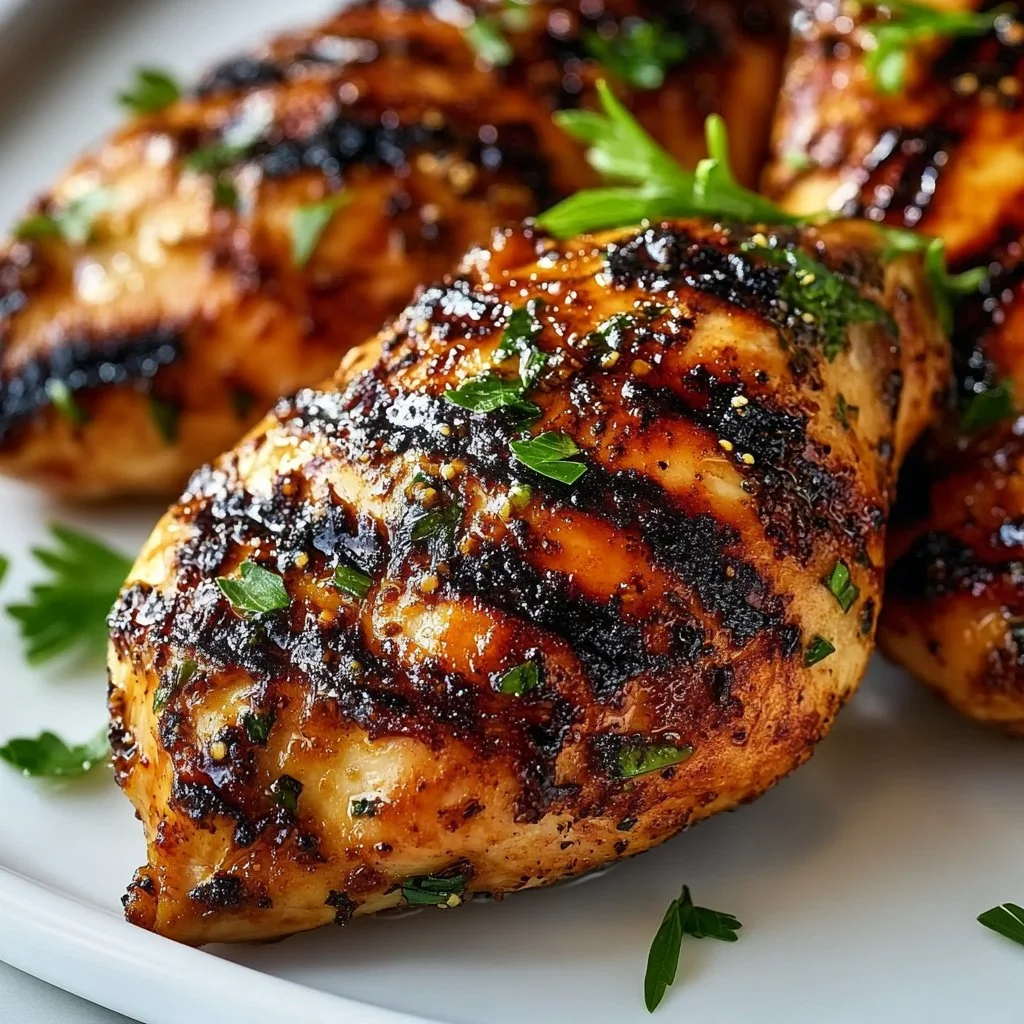
  16. Slice against the grain.

    • Encouraging note: Slicing against the grain shortens muscle fibers and makes the meat feel more tender.
  17. Garnish with fresh parsley if desired.

    • Encouraging note: A simple sprinkle of parsley adds color and a light herb note kids often accept.

Each step keeps family meals stress-free and consistent. I recommend a quick taste test after resting so you can tweak salt or acidity for your next batch.

Serving

Best Grilled Chicken

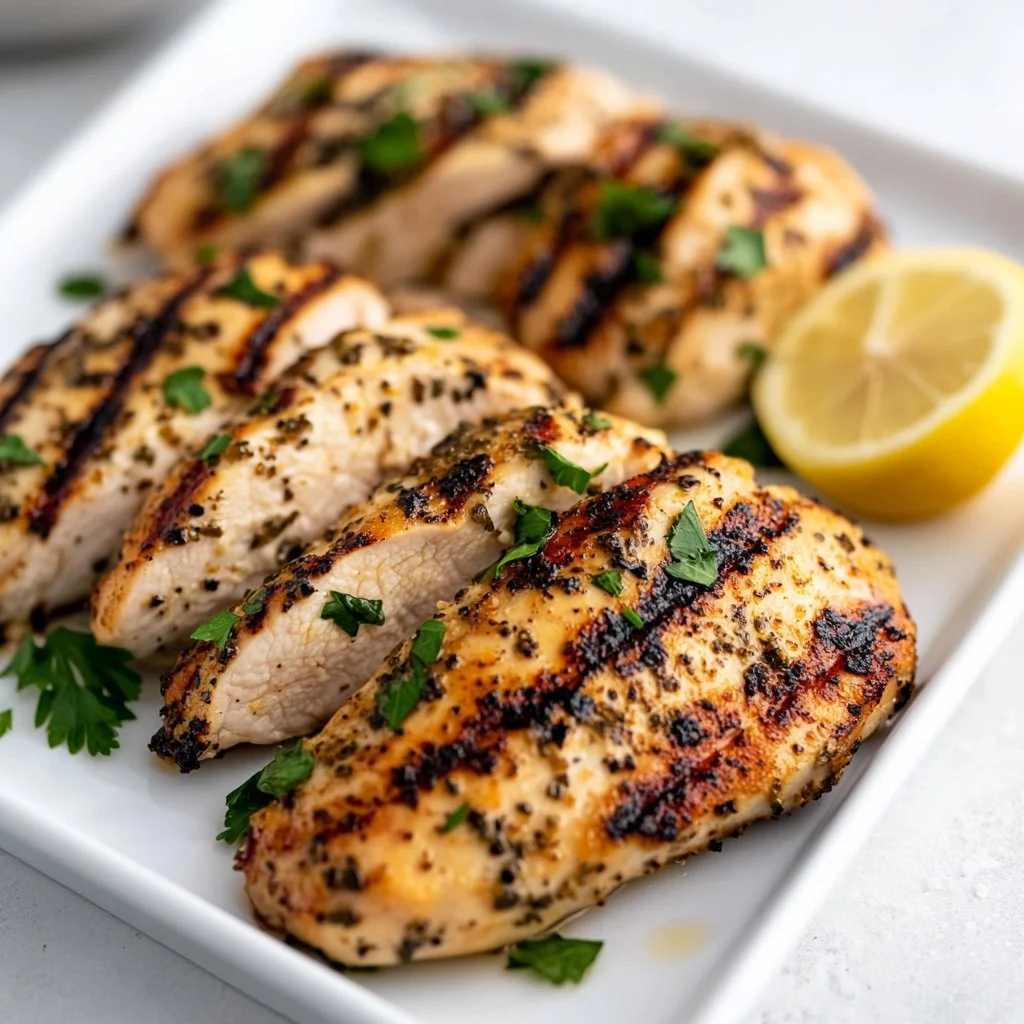
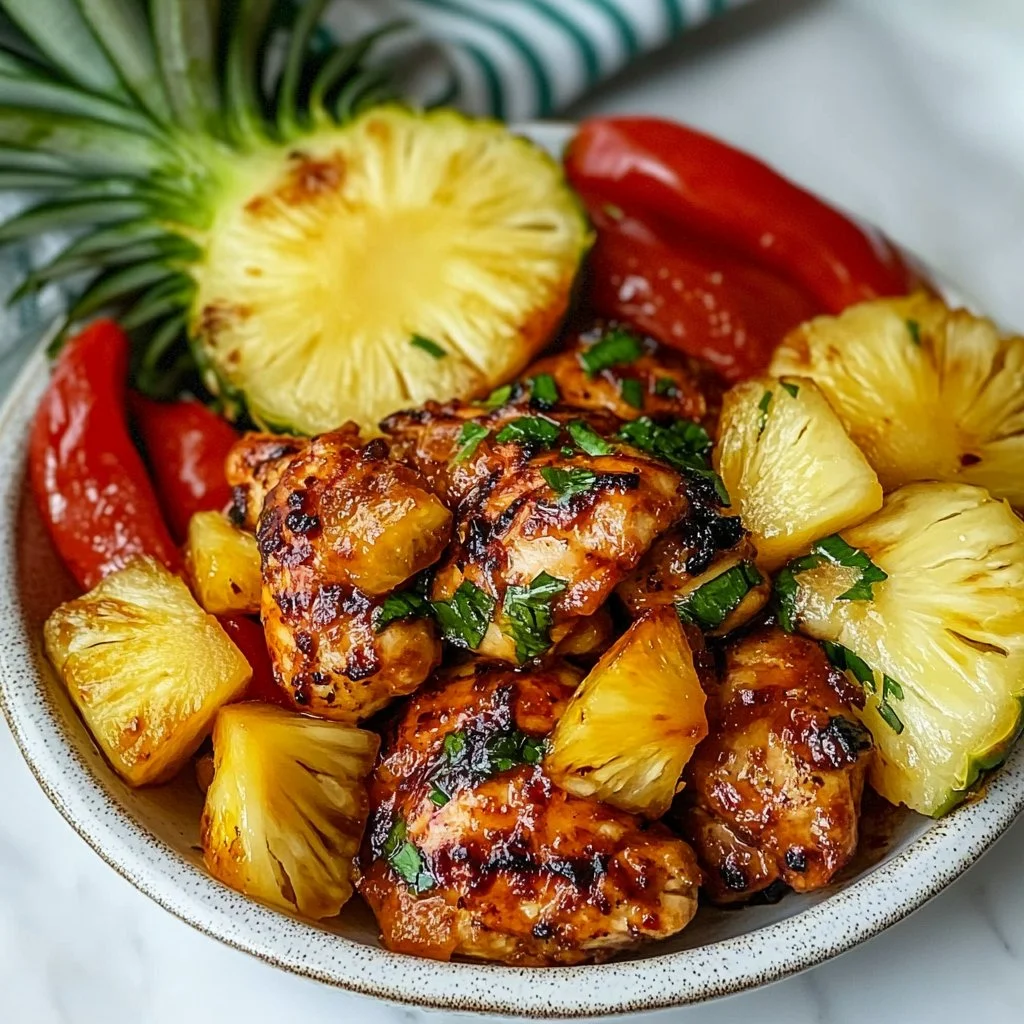
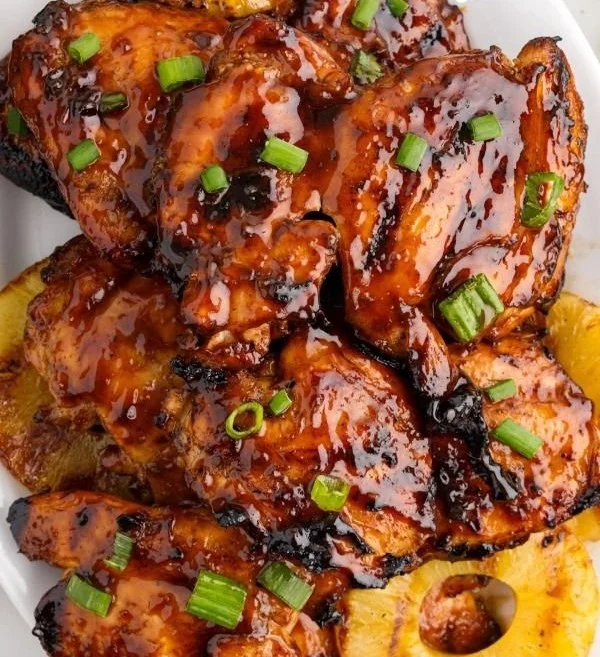
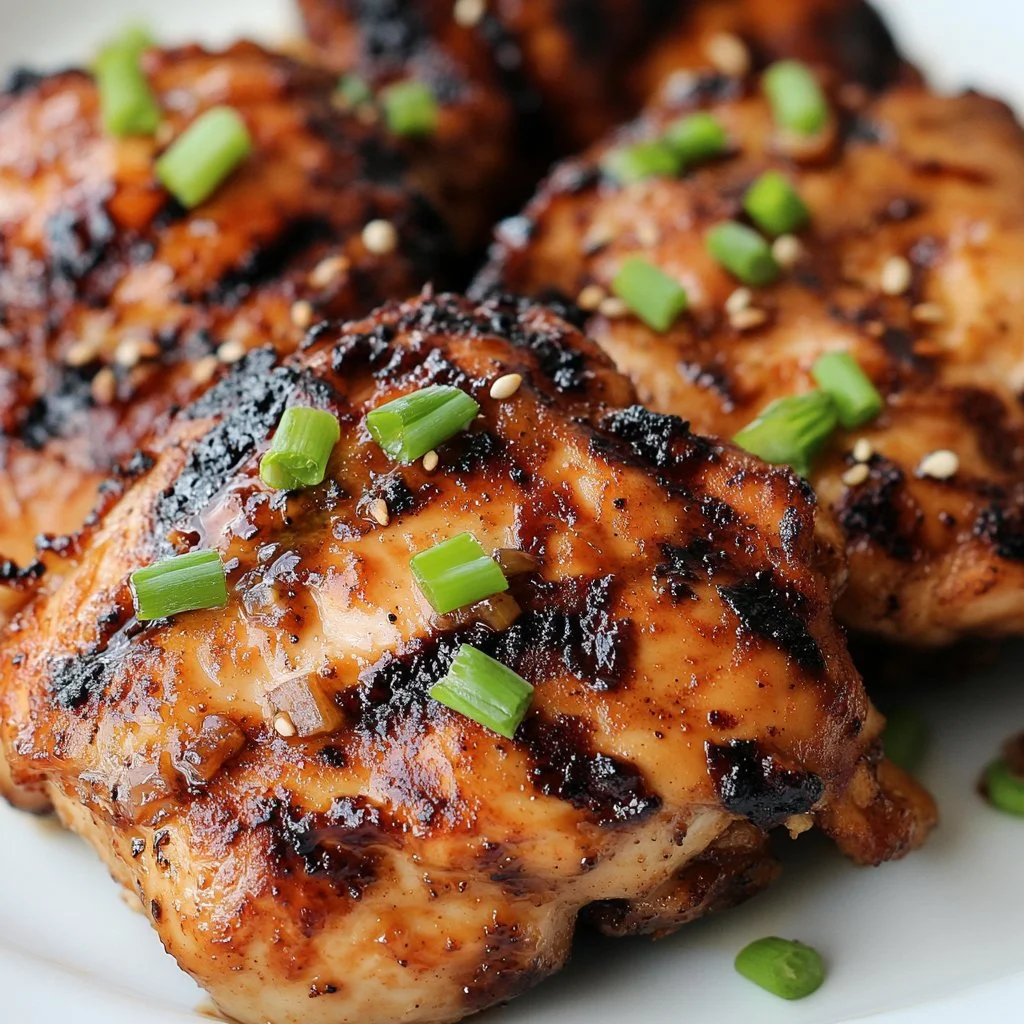
Serve this chicken family-style on a large platter so everyone can pick their portions. Sliced breasts look beautiful next to roasted vegetables, a green salad, and lemon wedges. For casual nights, shred leftovers for tacos or wraps.

If you want a heartier plate, roasted sweet potatoes are a favorite pairing. I often serve this with a tray of sweet potato wedges and sometimes use the chicken in bowls paired with grains and greens. For more ideas that combine sweet potatoes and chicken, try these chicken and sweet potato ideas.

For a family picnic, pack the sliced chicken with pita, hummus, and crunchy veggies. It travels well and keeps young eaters happy.

Storage

Refrigerator:

  • Store cooked chicken in an airtight container for up to 4 days.
  • Tip: Slice before storing for quick use in salads, sandwiches, or reheated dinners.

Freezer:

  • Freeze sliced or whole pieces in a freezer bag for up to 3 months.
  • Tip: Press out air and label with the date. Thaw overnight in the refrigerator before reheating.

Reheating:

  • Oven: Warm slices covered at 300°F for 10-12 minutes, or until 165°F.
  • Stove: Warm in a skillet with a splash of broth over medium heat until heated through.
  • Microwave: Use 50 to 70 percent power and heat in short intervals to avoid drying.

Food safety note: Always reheat to 165°F and do not refreeze previously thawed cooked chicken.

Kitchen Notes

  • Use a meat thermometer. It removes the guesswork and prevents overcooking.
  • If using thighs, cook time varies by thickness. Watch the internal temperature.
  • For grill marks, rotate the chicken 90 degrees halfway through each cooking side.
  • For smoky flavor without a charcoal grill, add a small tin of soaked wood chips to a gas grill smoker box.
  • Make the marinade in large batches and freeze portions in zip bags for a fast weeknight dinner.

These shortcuts help keep dinnertime calm and predictable, which is my goal as a mom and a cook.

Variations

  • For picky eaters: Use less garlic and paprika. Serve plain lemon and oil on the side so everyone can add their own.
  • Low-sodium: Reduce salt to ¾ teaspoon and use lemon zest for extra flavor.
  • Gluten-free: This recipe is naturally gluten-free. Just double-check any seasoning blends.
  • Keto or low-carb: Serve with cauliflower rice and sautéed greens.
  • Spicy twist: Add ¼ to ½ teaspoon cayenne to the marinade for extra heat. Start small if children are eating.

These tweaks make the recipe flexible for family needs, dietary restrictions, and personal taste.

FAQ

Q: Can I use bone-in chicken for this recipe?
A: Yes. Bone-in pieces take longer to cook. Grill until the internal temperature reaches 165°F near the bone. Plan for 10 to 15 additional minutes depending on size.

Q: How long can I marinate the chicken?
A: At least 30 minutes and up to 8 hours in the refrigerator. Acidic marinades can start to change the texture if left too long.

Q: Can I bake this instead of grilling?
A: Yes. Bake at 425°F for 18 to 22 minutes depending on thickness. Finish under the broiler for 1 to 2 minutes for color if needed.

Q: How do I prevent flare-ups on the grill?
A: Trim visible fat, keep a spray bottle of water nearby, and move pieces away from flames until they calm down. Use indirect heat if flare-ups persist.

Q: Is leftover grilled chicken safe to eat cold?
A: Yes, as long as it has been stored properly and eaten within 4 days. Keep it chilled during serving to stay safe.

Conclusion

I hope this grilled chicken becomes a go-to on your dinner rotation. It is simple, family-friendly, and forgiving, which makes weeknight cooking easier and more enjoyable.

If you want another tested take on grilled chicken, I like the step-by-step approach in Once Upon a Chef’s grilled chicken recipe for technique notes. For a slightly different flavor profile and tips, see Tatyana’s Everyday Food grilled chicken recipe.

Thanks for cooking with me. Share this with your family and make a memory around the table.

Grilled Lemon Garlic Chicken

Prep Time 30 minutes
Cook Time 15 minutes
Total Time 45 minutes
Servings 4 servings
Calories 300
This grilled chicken is marinated with lemon, garlic, olive oil, and Italian seasoning, resulting in a juicy, flavorful dish perfect for family meals.

Ingredients

Main Ingredients

  • 2 pounds boneless (skinless chicken breasts or thighs) (Choose even size for consistent cooking.)
  • Paper towels (For drying the chicken.)

Marinade

  • ¼ cup olive oil (Use a good fruity extra virgin for flavor.)
  • 2 tablespoons lemon juice (Adds brightness; do not over-marinate.)
  • 3 cloves garlic (minced) (Fresh garlic gives the best flavor.)
  • 1 teaspoon Italian seasoning (Use a blend suitable for your family.)
  • 1 teaspoon paprika (Adds color; smoked paprika is optional.)
  • 1 teaspoon salt (Adjust according to taste.)
  • ½ teaspoon black pepper (Use to taste.)

Optional

  • Fresh parsley (For garnish.)
  • Cooking oil (For grill grates.)

Instructions 

Prep the Chicken

  • Pat chicken dry with paper towels.
  • Pound chicken breasts to even thickness for even cooking.
  • Trim excess fat if using thighs.

Make the Marinade

  • In a bowl, whisk together olive oil, lemon juice, garlic, Italian seasoning, paprika, salt, and pepper.

Marinate

  • Place chicken in a zip-top bag or shallow dish.
  • Pour marinade over chicken and coat evenly.
  • Marinate at least 30 minutes (up to 8 hours in the refrigerator).
  • Remove from fridge 15-20 minutes before grilling.

Preheat Grill

  • Heat grill to 400-425°F (medium-high).
  • Lightly oil grill grates to prevent sticking.

Grill the Chicken

  • Place chicken on grill.
  • Close lid and cook for 5-7 minutes.
  • Flip and cook another 5-7 minutes until internal temperature reaches 165°F.

Rest & Serve

  • Remove from grill and let rest for 5-10 minutes.
  • Slice against the grain and garnish with fresh parsley if desired.

Notes

Store cooked chicken in an airtight container for up to 4 days. It can also be frozen for up to 3 months. Reheat to 165°F before serving.
Calories: 300kcal
Course: Dinner, Main Course
Cuisine: American, Grilled
Keyword: Easy Chicken Recipes, Family Dinner, Grilled Chicken, Lemon Garlic Chicken, Marinated Chicken

Blackstone Pineapple Chicken

The moment you walk into a kitchen filled with the scent of sizzling chicken and sweet pineapple, you know something wonderful is cooking. Hear that irresistible sizzle? It’s the sound of family dinners waiting to happen. Today, I want to share a delightful recipe that brings a touch of the tropics to your dinner table: Blackstone Pineapple Chicken. This dish is perfect for busy evenings when you want something quick, flavorful, and comforting for your family.

Why This Works

Blackstone Pineapple Chicken

Blackstone Pineapple Chicken is a special family favorite for so many reasons. First, it’s a one-pan wonder that saves time on cleanup. You can prepare it entirely on your Blackstone griddle, bringing out flavors in a fun and unique way that’s sure to impress everyone around the table.

This recipe also blends sweet and savory elements perfectly. The juicy pineapple complements the chicken and the crisp vegetables, making every bite a delight. Plus, it’s a fantastic way to encourage your family to eat more veggies without any fuss. With just a few ingredients, you can make this dish in under 30 minutes, so you’ll have more time to enjoy the meal together.

Process Overview

“This is where the magic happens—when the aroma fills the kitchen.”

Cooking Blackstone Pineapple Chicken is an enjoyable experience that can turn any weeknight into a special occasion. You start with fresh ingredients and watch them transform before your eyes. The key to great cooking is following step-by-step instructions. You’ll be amazed at how simple it is to create a restaurant-quality dish in the comfort of your own home.

Ingredients

For this flavorful dish, here’s what you’ll need:

  • 2 chicken breasts, diced: Opt for fresh chicken for the best flavor. You can also use chicken thighs if you prefer.
  • 1 cup pineapple chunks: Fresh pineapple works wonders, but canned will do in a pinch. Just make sure to drain it well.
  • 1 bell pepper, diced: Choose your favorite color—red, green, or yellow—each brings a unique flavor.
  • 1 onion, diced: A sweet onion adds a lovely flavor. If you’re sensitive to raw onion, resist the temptation to skip it here.
  • 2 tablespoons soy sauce: Use low-sodium soy sauce for a healthier option without losing flavor.
  • 1 tablespoon olive oil: A little oil helps to prevent sticking on your griddle and adds a nice richness.
  • Salt and pepper to taste: Freshly ground black pepper is a great way to elevate your dish.

Feel free to adjust these ingredients based on what your family likes. Cooking is all about personal touches!

Directions

  1. Preheat your Blackstone griddle over medium-high heat. This is an essential step. Ensuring your griddle is hot will give you that perfect sizzle.

  2. In a large bowl, combine the diced chicken, soy sauce, salt, and pepper. This is where the flavor begins. Make sure the chicken pieces are well-coated.

  3. Add olive oil to the griddle and when hot, add the chicken. Cook until the chicken is browned and cooked through, about 5-7 minutes. Stir occasionally to get an even color. This is where the magic happens.

  4. Add the diced onion, bell pepper, and pineapple chunks to the griddle. The vibrant colors make the dish visually appealing, and the aromas will make your family gather around the kitchen.

  5. Stir-fry together for an additional 5 minutes or until vegetables are slightly tender. You want some crunch to remain in the peppers for added texture.

  6. Serve warm and enjoy your delicious Blackstone Pineapple Chicken! The smiles on your family’s faces will be the best reward.

Serving

Blackstone Pineapple Chicken

To serve Blackstone Pineapple Chicken, I recommend plating it family-style. You can place the chicken mixture in the center of the table. Surround it with rice or noodles for a complete meal. This approach fosters conversation and connection, letting everyone share in the joy of the dish.

Consider providing a few toppings like crushed peanuts, scallions, or a sprinkle of sesame seeds to let family members customize their servings.

Storage

Store any leftovers in an airtight container in the fridge for up to 3 days. When reheating, do so on low heat to ensure the chicken remains tender. You can reheat it in a skillet on the stove or in the microwave. Adding a splash of water can help maintain moisture while reheating.

Kitchen Notes

  • Prep Ahead: You can dice the vegetables and chicken a day in advance. Just keep them in the fridge until you’re ready to cook.
  • Use Leftovers: This dish is perfect for using up any leftover vegetables you have on hand. Broccoli or snap peas can be great additions.
  • Non-Stick Spray: Consider using a non-stick cooking spray on your griddle for an even easier cleanup.
  • Double the Recipe: If you’re feeding a larger family or want meals for the week, this dish doubles easily.
  • Experiment: Feel free to experiment with different types of meat. Pork works well too!

Variations

Not everyone has the same taste, and that’s okay! Here are a few tweaks to consider:

  • For Picky Eaters: You can leave out the bell pepper or onion if those aren’t favorites. Add more pineapple instead for sweetness.
  • Vegetarian Version: Substitute the chicken for tofu. Make sure to press and cube the tofu before cooking to get rid of excess moisture.
  • Low-Carb Option: Serve the dish over steamed cauliflower rice instead of traditional rice for a low-carb meal.
  • Spicy Twist: Add sliced jalapeños for a kick. Enjoying a bit of heat can elevate the flavors even more.

FAQ

  1. Can I use frozen chicken?
    Yes, but make sure it’s fully thawed before dicing for even cooking.

  2. What can I serve with this dish?
    Rice, noodles, or even a simple salad pair well with Pineapple Chicken.

  3. Can I prepare this dish in advance?
    While the best results are with fresh ingredients, you can marinate the chicken in advance to develop flavor.

  4. How long can I store leftovers?
    Leftovers can be stored in an airtight container in the fridge for up to 3 days.

  5. Can I cook this dish on a regular stovetop?
    Absolutely! A large skillet or wok works perfectly for this recipe.

Conclusion

Cooking should be a joyful experience, and I hope Blackstone Pineapple Chicken brings warmth to your kitchen and smiles to your family’s faces. This easy, delicious recipe is not just about feeding everyone; it’s about creating memories together. So, gather your loved ones around the table, enjoy the flavors, and savor the moments. Happy cooking!

Blackstone Pineapple Chicken

Prep Time 10 minutes
Cook Time 15 minutes
Total Time 25 minutes
Servings 4 servings
Calories 350
A quick and flavorful one-pan dish that combines succulent chicken, sweet pineapple, and crisp vegetables, perfect for busy family dinners.

Ingredients

Main Ingredients

  • 2 pieces chicken breasts, diced (Opt for fresh chicken for the best flavor. Chicken thighs can also be used.)
  • 1 cup pineapple chunks (Fresh pineapple works wonders, but canned will do if drained well.)
  • 1 piece bell pepper, diced (Select your favorite color—red, green, or yellow.)
  • 1 piece onion, diced (A sweet onion adds a lovely flavor.)
  • 2 tablespoons soy sauce (Use low-sodium soy sauce for a healthier option.)
  • 1 tablespoon olive oil (Helps to prevent sticking and adds richness.)
  • to taste salt and pepper (Freshly ground black pepper is recommended.)

Instructions 

Cooking

  • Preheat your Blackstone griddle over medium-high heat.
  • In a large bowl, combine the diced chicken, soy sauce, salt, and pepper until the chicken is well-coated.
  • Add olive oil to the griddle and when hot, add the chicken. Cook until browned and cooked through, about 5-7 minutes, stirring occasionally.
  • Add the diced onion, bell pepper, and pineapple chunks to the griddle and stir-fry for an additional 5 minutes or until vegetables are slightly tender.
  • Serve warm and enjoy your delicious Blackstone Pineapple Chicken!

Notes

To serve, plate family-style and consider providing toppings like crushed peanuts, scallions, or sesame seeds. Store leftovers in an airtight container in the fridge for up to 3 days. Reheat on low heat to maintain tenderness.
Calories: 350kcal
Course: Dinner, Main Course
Cuisine: American, Tropical
Keyword: Blackstone Chicken, Family Recipe, One-Pan Meal, Pineapple Chicken, Quick Dinner

Grilled Huli Huli Chicken

I can already smell the sweet soy and brown sugar as the marinade warms on the counter. The kitchen hums with a happy kind of busy. Metal tongs clink against the grill pan and the whole house starts to feel like a small island feast.

I’m Lily, and I’ve cooked this Hawaiian-style grilled chicken for my family for years. If you enjoy bold marinades and easy weeknight grilling, my grilled chicken marinade guide will give you more ideas to keep dinner exciting.

Why this works

Grilled Huli Huli Chicken

Huli Huli chicken is all about balance. The sweet brown sugar, salty soy, and bright vinegar work together to create a sticky glaze that caramelizes on the grill. Kids love the sweet glaze, and adults appreciate the layered flavors.

This recipe is great for busy families because the hands-on time is short. You can toss the chicken into a bag to marinate before soccer practice, then cook it when everyone is ready. For another family-friendly grilled recipe that gets everyone to the table fast, try my easy grilled Asian chicken skewers.

Process Overview

“This is where the magic happens—when the aroma fills the kitchen.”

I keep this process simple so dinner feels doable. Marinate early, preheat the grill while you set the table, and watch the sauce caramelize. The steps are easy to follow and reliable, even for first-time grillers.

If you like flavors with a buttery finish, my grilled chicken skewers with cowboy butter show a different way to finish grilled poultry that is family approved.

Ingredients

  • 4 chicken thighs
    Lily’s tip: Use bone-in, skin-on thighs for the juiciest result. If you prefer boneless, add 2 to 3 minutes per side when grilling.

  • 1/2 cup soy sauce
    Lily’s tip: I use low-sodium soy to avoid an overly salty glaze. Taste the marinade before you refrigerate the chicken.

  • 1/2 cup brown sugar
    Lily’s tip: Pack the brown sugar into the measuring cup for accurate sweetness. Dark brown sugar adds a richer molasses note.

  • 1/4 cup ketchup
    Lily’s tip: Ketchup adds body and tang. If you want a smokier flavor, swap half the ketchup for tomato paste and add a pinch of smoked paprika.

  • 1/4 cup apple cider vinegar
    Lily’s tip: This adds brightness and helps balance the sugar. White vinegar is fine in a pinch, but apple cider vinegar has a softer flavor.

  • 2 cloves garlic, minced
    Lily’s tip: Fresh garlic makes a big difference. If you are in a hurry, 1/2 teaspoon garlic powder works.

  • 1 tsp ginger, minced
    Lily’s tip: Fresh ginger adds warmth. If you only have powdered ginger, use 1/4 teaspoon.

  • 1 tsp sesame oil
    Lily’s tip: Use toasted sesame oil for a nutty finish. A little goes a long way, so stick to the measurement.

  • 1/4 tsp black pepper
    Lily’s tip: Fresh cracked pepper adds brightness. Add more if your family likes peppery heat.

  • Green onions for garnish
    Lily’s tip: Slice on the diagonal for a prettier plate. Scatter them just before serving for a fresh pop of color.

For a tangier twist, mix in a tablespoon of pineapple juice. If you want a little heat, add 1/4 tsp crushed red pepper flakes to the marinade.

Directions

  1. In a bowl, mix soy sauce, brown sugar, ketchup, apple cider vinegar, garlic, ginger, sesame oil, and black pepper.
    Encouraging note: Stir until the sugar mostly dissolves and the mixture looks glossy. Take a moment to taste the marinade and adjust if needed.

  2. Place the chicken in a resealable bag and pour the marinade over the chicken. Seal and refrigerate for at least 2 hours, preferably overnight.
    Encouraging note: Let the chicken sit longer for deeper flavor. If you are short on time, even 30 minutes will help.

  3. Preheat the grill to medium-high heat.
    Encouraging note: Aim for about 375 to 400 °F on a gas grill. A steady heat gives a nice sear without burning the glaze.

  4. Remove chicken from the marinade and discard the marinade.
    Encouraging note: Pat the thighs lightly with paper towels if the marinade is very wet. This helps the skin crisp up.

  5. Grill the chicken for 5-7 minutes on each side, or until fully cooked and juices run clear.
    Encouraging note: Use a meat thermometer for confidence. Thighs are done at 165 °F internal temperature, but benefit from a little higher temperature for tender, pull-apart meat.

  6. Garnish with green onions before serving.
    Encouraging note: Let the chicken rest for 5 minutes after grilling so juices redistribute and the glaze sets.

If you want a slightly more tropical finish, brush a thin layer of pineapple juice mixed with a teaspoon of brown sugar during the last minute of grilling. For another grilled chicken variation with citrus flavors, see my Key West grilled chicken recipe for ideas.

Serving

Grilled Huli Huli Chicken

Serve this chicken family-style on a large platter. Arrange the thighs with a scattering of chopped green onions and place bowls of sides around the platter so everyone can help themselves.

Good side pairings are steamed rice, a simple cabbage slaw, grilled corn, or a plate of sliced cucumbers. For a homey weeknight dinner, add warmed tortillas and let everyone make their own tacos. If you want a zesty side, my grilled salsa verde pepper jack chicken post has ideas that pair well with spicy, citrusy flavors.

Storage

Refrigerate cooked Huli Huli chicken in an airtight container for up to 4 days. Store the chicken and any sides separately to keep textures fresh.

To reheat, preheat your oven to 350 °F. Place the chicken in a baking dish with a splash of chicken broth or water, cover with foil, and heat for 10 to 15 minutes until warmed through. You can also re-crisp the skin under a broiler for 2 to 3 minutes, watching closely.

For faster reheating, use a microwave on medium power and check every 30 seconds, but expect the skin to soften.

Kitchen Notes

  • Marinating time matters: Overnight gives the best flavor, but 2 hours is a good minimum.
  • Use a thermometer: It removes the guesswork and keeps poultry safe.
  • Watch the sugar: Brown sugar caramelizes fast, so move the chicken if flare-ups occur.
  • Try a cast iron grill pan: It creates a lovely sear when outdoor grilling is not an option.
  • Prep ahead: Make the marinade and store it in the fridge 24 hours before you plan to marinate.

These shortcuts save time and help you feel confident at the grill.

Variations

  • For picky eaters: Reduce the ginger and garlic, and use light brown sugar so the glaze is milder. Serve with plain rice and steamed carrots.
  • For low-sodium diets: Use low-sodium soy sauce and reduce to 1/3 cup. Add a tablespoon of low-sodium chicken broth if you need more volume.
  • For gluten-free: Use tamari or a certified gluten-free soy sauce instead of regular soy.
  • For a smoky flavor: Add 1/2 teaspoon smoked paprika to the marinade or use wood chips on your grill.
  • For a sweet-tangy glaze: Replace half the brown sugar with honey and add 1 tablespoon pineapple juice.

These small tweaks help this recipe adapt to different tastes and dietary needs.

FAQ

Q: Can I use chicken breasts instead of thighs?
A: Yes. Use bone-in breasts for juiciness or boneless for quicker cooking. Reduce grill time and watch closely to avoid drying out.

Q: Do I need to discard the marinade?
A: Yes. Do not use the used marinade as a sauce unless you boil it for several minutes to kill any raw chicken bacteria.

Q: Can I bake this instead of grilling?
A: Absolutely. Bake at 400 °F for 25 to 35 minutes until the internal temperature reaches 165 °F, then broil for a couple of minutes to caramelize the glaze.

Q: How do I prevent flare-ups from the sugar in the marinade?
A: Grill over medium heat and move the chicken to a cooler zone if flames get high. Keep a spray bottle of water nearby for small flare-ups.

Q: Is this recipe kid-friendly for school lunches?
A: Yes. Slice the cooled chicken and pack with rice or in a wrap. Keep dressings separate until lunchtime for best texture.

Conclusion

Thank you for spending time with me in the kitchen. I hope this Grilled Huli Huli Chicken becomes one of your go-to family meals. If you want a classic take from another home cook, I like the clear instructions in Grilled Huli Huli Chicken – The Recipe Critic. For a version with easy prep tips and crowd-pleasing glaze ideas, see Grilled Huli Huli Chicken – Life In The Lofthouse.

Happy grilling, and tell your family I said hello.

Grilled Huli Huli Chicken

Prep Time 10 minutes
Cook Time 15 minutes
Total Time 2 hours
Servings 4 servings
Calories 290
A flavorful Hawaiian-style grilled chicken marinated in a sticky glaze of soy sauce, brown sugar, and spices, perfect for weeknight dinners.

Ingredients

For the Marinade

  • 1/2 cup soy sauce (Use low-sodium soy to avoid an overly salty glaze.)
  • 1/2 cup brown sugar (Pack the brown sugar into the measuring cup for accurate sweetness.)
  • 1/4 cup ketchup (For a smokier flavor, swap half the ketchup for tomato paste and add a pinch of smoked paprika.)
  • 1/4 cup apple cider vinegar (This adds brightness; white vinegar is a substitute.)
  • 2 cloves garlic, minced (Fresh garlic makes a big difference.)
  • 1 tsp ginger, minced (Fresh ginger adds warmth; for convenience, use powdered ginger.)
  • 1 tsp sesame oil (Use toasted sesame oil for a nutty finish.)
  • 1/4 tsp black pepper (Fresh cracked pepper adds brightness.)

For the Chicken

  • 4 pieces chicken thighs (Bone-in, skin-on thighs for the juiciest result.)
  • Green onions for garnish (Slice on the diagonal for a prettier plate.)

Instructions 

Marinating the Chicken

  • In a bowl, mix soy sauce, brown sugar, ketchup, apple cider vinegar, garlic, ginger, sesame oil, and black pepper.
  • Stir until the sugar mostly dissolves and the mixture looks glossy. Taste the marinade and adjust if needed.
  • Place the chicken in a resealable bag and pour the marinade over the chicken. Seal and refrigerate for at least 2 hours, preferably overnight.

Grilling the Chicken

  • Preheat the grill to medium-high heat (about 375 to 400 °F).
  • Remove chicken from the marinade and discard the marinade.
  • Pat the thighs lightly with paper towels if the marinade is very wet.
  • Grill the chicken for 5-7 minutes on each side, or until fully cooked and juices run clear.
  • Garnish with green onions before serving.
  • Let the chicken rest for 5 minutes after grilling.

Notes

For a tangier twist, mix in a tablespoon of pineapple juice. For a smoky flavor, add 1/2 teaspoon smoked paprika to the marinade. If you want a slightly more tropical finish, brush a thin layer of pineapple juice mixed with a teaspoon of brown sugar during the last minute of grilling.
Calories: 290kcal
Course: Dinner, Main Course
Cuisine: Barbecue, Hawaiian
Keyword: Asian Marinade, easy grilling, Family Dinner, Grilled Chicken, Huli Huli Chicken