There’s a unique rhythm that fills our kitchen as the afternoon sun streams through the window. The sound of my kids setting the table blends with the joyous aromas wafting through the air, reminiscent of summertime adventures. Each scent tells a story, as if inviting us to share in a moment of warmth and connection. One of our favorite go-to recipes during these blissful gatherings is a Hawaiian Chicken Salad that effortlessly brings comfort and joy to our table, while also being gluten-free and perfect for our Whole Health Flexi-Plan.
Why This Hawaiian Chicken Salad: Gluten-Free & Whole Health Flexi-Plan Feels Like Home
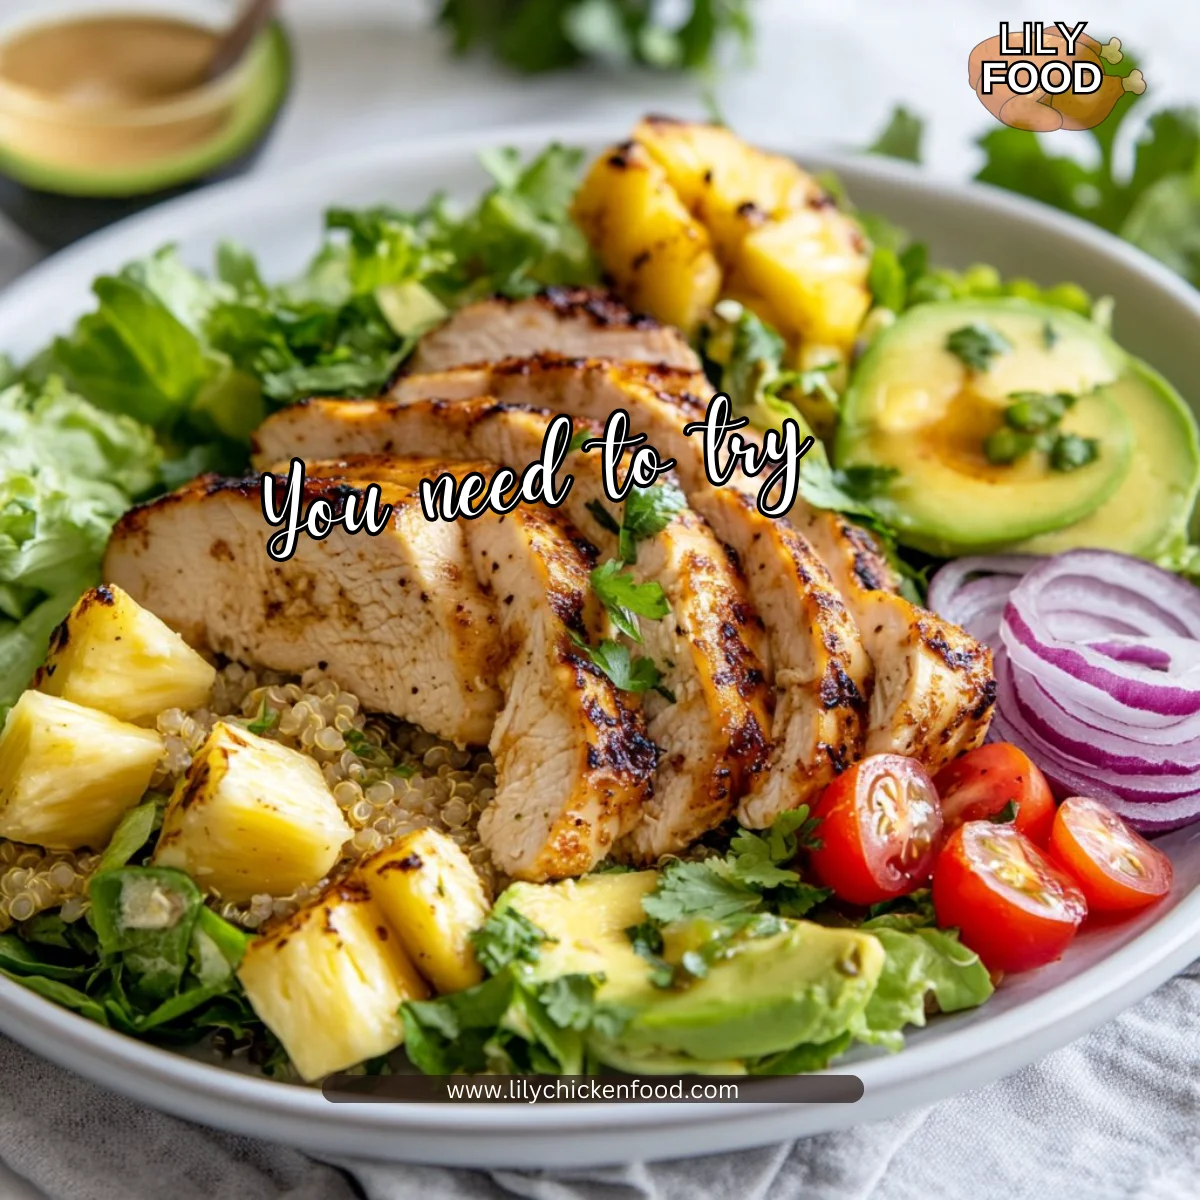
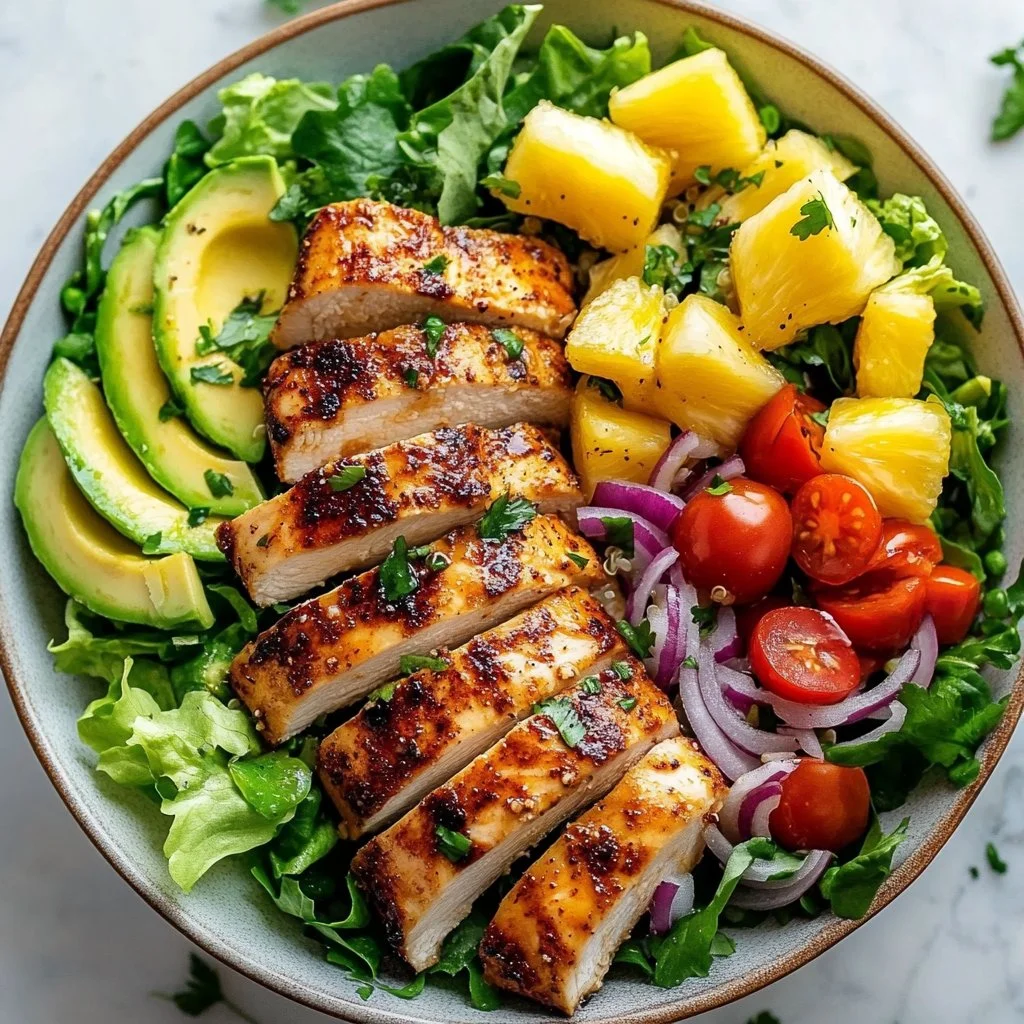
This dish doesn’t just taste good; it feels like home on a plate. The combination of juicy chicken, vibrant pineapple, and bright, fresh greens transports me back to sunny days spent in the backyard, surrounded by laughter and love. The Hawaiian Chicken Salad is not just a salad; it’s an experience, a comforting reminder of family gathering around the table to share stories and smiles.
One of the best parts about this recipe is its ability to come together quickly. In less than an hour, you can have a wholesome meal that feels special, even on the busiest of nights. It’s perfect for those evenings when you want to cook something delicious without spending all day in the kitchen.
Why Hawaiian Chicken Salad: Gluten-Free & Whole Health Flexi-Plan is Our New Family Favorite
Let’s talk about flavor. This salad bursts with freshness, combining sweet and savory elements that keep everyone coming back for more. The crunch of the romaine, the creaminess of the avocado, and the tropical sweetness from the pineapple create a symphony of textures and tastes.
Moreover, it’s adaptable. Whether you need a meal tailored to dietary restrictions or simply want to use what you have on hand, this Hawaiian Chicken Salad has you covered. It invites creativity, allowing you to play with the ingredients and make it your own. This recipe embodies the spirit of cooking with love and intention, and that’s exactly what makes it a favorite in our household.
The Simple Magic Behind Hawaiian Chicken Salad: Gluten-Free & Whole Health Flexi-Plan
Sometimes, the magic of cooking lies in the process—gathering ingredients, mixing flavors, and ultimately sharing the meal. The Hawaiian Chicken Salad shines in this respect. Each step is straightforward and rewarding. Plus, it’s a dish that allows little hands to help along the way. From marinating the chicken to tossing the salad, everyone can get involved, creating cherished memories together.
A hint of coconut milk in the marinade adds an unexpected layer of flavor, making the chicken tender and juicy. It’s the little details, like these, that elevate the dish, while still keeping the preparation simple enough not to feel overwhelming.
Why This Recipe Works for Our Busy, Joyful Nights
Life can get hectic, and dinner often becomes a race against the clock. That’s where this Hawaiian Chicken Salad shines. It combines deliciousness with a practical approach. You can marinate the chicken in advance, even the day before if you wish. This convenience allows the flavors to deepen and ensures that when the dinner bell rings, everything is ready to go.
The best part? There are minimal dishes to wash. You can prepare the salad in one bowl, marinate the chicken in another, and a quick wipe down leaves you with a clean kitchen. It’s meals like this that remind me that feeding our family doesn’t have to be a chore. Instead, it can be a delight.
How to Make Hawaiian Chicken Salad: Gluten-Free & Whole Health Flexi-Plan, The Heartwarming Way
Cooking this Hawaiian Chicken Salad is an experience you’ll enjoy. From handling fresh ingredients to the enticing aroma that fills the air, every step brings you closer to a satisfying meal. Let me give you a quick overview of the process to make it all feel achievable.
- First, you’ll need to marinate the chicken. The marinade suits both the meat and your taste buds, adding a depth of flavor that is simply irresistible.
- Next, prepare a vibrant salad base with fresh romaine, creamy avocado, and your choice of colorful veggies like cherry tomatoes and red onion.
- Finally, layer everything together and drizzle your homemade dressing for that perfect finish.
It’s such an enjoyable process, especially when you notice the vibrant colors and feel the textures come alive in front of you. Trust me, the joy of watching it come together is almost as good as eating it.
“This is where the magic happens—when the aroma fills the kitchen and my kids come running in, asking ‘Is it ready yet?’”
Ingredients You’ll Need
Gathering your ingredients is one of the exciting parts of cooking. Here’s what you will need for this delightful Hawaiian Chicken Salad:
- 1/3 cup light coconut milk
- 1/4 cup fresh pineapple juice
- 1 tbsp gluten-free tamari sauce
- Zest of 1 lime
- 2 garlic cloves, minced
- 1/4 tsp onion powder
- 1/4 tsp cumin
- 1/4 tsp paprika
- 1/4 tsp ginger powder
- 1/4 tsp salt
- 1/2 tbsp olive oil
- 1 large chicken breast
- 3/4 cup fresh pineapple pieces
- 6 cups chopped romaine lettuce
- 1/2 avocado, sliced
- 1/2 red onion, sliced
- 1/2 cup cherry tomatoes, halved
- 1 1/2 cups cooked quinoa
- 1 1/2 tbsp lime juice
- 2 1/2 tbsp olive oil
- 2 tbsp finely chopped cilantro
- 1/2 tsp honey
- 1/4 tsp salt
- Black pepper to taste
A quick tip: Don’t skip the fresh herbs; they’re the soul of the dish. And remember, this recipe is flexible. Use what you have in your fridge and let your creativity shine. Cooking is about expressing yourself, not just following a recipe.
Step-by-Step Directions
Making this Hawaiian Chicken Salad is straightforward and fun. Here’s how to do it step-by-step:
-
Marinate Chicken: In a bowl, combine coconut milk, pineapple juice, gluten-free tamari, lime zest, garlic, onion powder, cumin, paprika, ginger powder, salt, and olive oil. Add the chicken breast, ensuring it’s well-coated. Marinate for a minimum of 3 hours, preferably overnight for the best flavor.
-
Prepare Dressing: In a jar, shake together lime juice, olive oil, cilantro, honey, salt, and black pepper. Set aside for at least 15 minutes to let the flavors blend.
-
Cook Chicken: Heat a non-stick skillet over high heat and add a little olive oil. Once hot, add the marinated chicken. Cook for about 3 minutes on each side until golden. Remove the chicken from the pan and cover loosely with foil for about 5 minutes before slicing thickly.
-
Sear Pineapple: In the same skillet, add the pineapple pieces. Sear for about 1-2 minutes on each side until caramelized and golden. This step adds incredible depth of flavor.
-
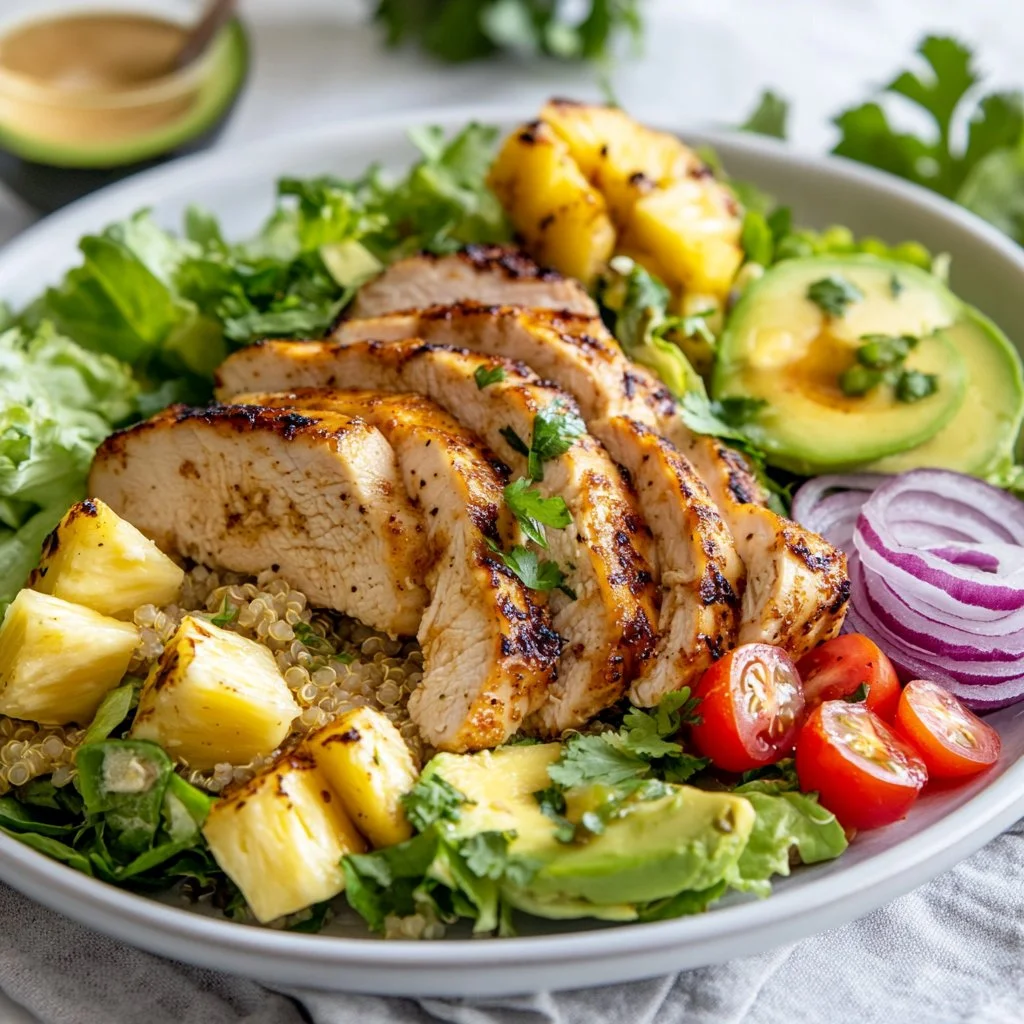
Assemble Salad: On a platter, arrange the chopped romaine, avocado slices, red onion, cherry tomatoes, and cooked quinoa. Top with the sliced chicken and seared pineapple or any fresh fruit of your choice.
-
Serve: Drizzle the dressing over the top and serve immediately, enjoying the colorful presentation and lovely aroma.
Each step is an opportunity to involve the family. Let the kids toss the salad together or drizzle the dressing; it’s a wonderful way to make the cooking process a team effort.
Serving Hawaiian Chicken Salad: Gluten-Free & Whole Health Flexi-Plan with Love
When it comes time to serve this delightful salad, I love putting it together family-style. By placing everything on the table, it creates an inviting atmosphere where everyone helps themselves. The beauty of sharing a meal, I believe, lies in the connections it forges.
We typically enjoy this salad alongside some warm gluten-free bread or rice cakes. The sweet, tangy flavor of the dressing beautifully complements the chicken and pineapple, making it an absolute hit at our table. My kids often choose to add extra avocado or pineapple, personalizing it in a way that makes each serving uniquely their own.
Storage & Reheat Tips
Storing the leftovers of this Hawaiian Chicken Salad is simple and keeps the flavors intact. Here are some tips to make sure you enjoy every last bite the next day:
- Storage: Keep any leftover salad in an airtight container in the refrigerator. The key is to store the dressing separately if you can, as it keeps the salad fresh and crisp.
- Reheat: The best way to reheat the chicken is in the oven. Just pop it in at 350 degrees Fahrenheit for about 10-15 minutes. This helps retain the chicken’s juiciness and texture. The microwave will work, but it lacks that just-cooked warmth.
Making sure you preserve the flavors and textures guarantees that this dish will taste just as wonderful the next day.
My Kitchen Notes & Shortcuts
Cooking this Hawaiian Chicken Salad has taught me a few valuable tricks over time. Here are some of my favorite kitchen notes that have made the process smoother and more enjoyable:
- Pre-marinate: Always marinate the chicken ahead of time. It can even be done in the morning for dinner later.
- Bulk cook quinoa: Make a larger batch of quinoa earlier in the week to use in various meals. It’s an easy way to save time.
- Get the kids involved: Let your children help in the kitchen. They love adding the toppings and mixing the salad. Plus, it’s a great opportunity for them to learn.
- Herb variations: Use different herbs based on your family’s taste. Mint or basil can provide a refreshing twist.
- Leftover makeover: If you have leftover salad, turn it into a wrap or a grain bowl for lunch the next day.
Each of these little insights reflects my journey in the kitchen, ensuring cooking feels both joyful and manageable.
Family-Friendly Variations
One of the best aspects of this Hawaiian Chicken Salad is its versatility. It’s an open invitation to get creative. Here are a few ways you can make it your own:
- Switch up the proteins: Feel free to use grilled shrimp or even tofu for a vegetarian option.
- Use mixed greens: While romaine is crunchy and refreshing, you can use any greens you prefer or even a mix for added flavor.
- Extra crunch: Consider adding nuts or seeds like slivered almonds or pumpkin seeds for an added texture.
- Spice it up: A dash of chili flakes in the dressing can add a zing that some family members might enjoy.
- Additional vegetables: Sliced cucumbers or bell peppers can easily be added for extra color and crunch.
Let your creativity guide you, and don’t be afraid to explore the flavors your family loves.
FAQs About Hawaiian Chicken Salad: Gluten-Free & Whole Health Flexi-Plan
Here are a few common questions about this recipe. It’s always helpful to have clarity before you begin cooking:
Can I make this ahead for a busy week?
Absolutely! In fact, letting it sit for an hour lets the flavors meld beautifully, enhancing the overall taste.
Is this recipe kid-friendly?
Definitely! The sweet pineapple and crunchy ingredients are usually a hit with kids. Plus, they can help assemble the salad, making it a fun activity.
What can I substitute for quinoa?
If quinoa isn’t your preference, brown rice or even farro works great too. Each grain brings its texture and flavor, making the dish versatile.
Can I use frozen pineapple?
Yes! Just thaw and drain any excess water before adding it to your salad. Frozen pineapple can still offer that sweet, fruity taste.
One Final Thought from My Kitchen
As I sit at my table with my family, laughter and stories flow just as freely as the flavors of our meals. I hope this Hawaiian Chicken Salad joins your family gathering, becoming another cherished recipe in your kitchen. Cooking is a gift we share, and through meals like this, we nurture our loved ones and create lasting memories.
Until next time, happy cooking! May your kitchen always be filled with love, laughter, and delicious meals that connect your family.
A refreshing and comforting Hawaiian Chicken Salad that combines juicy chicken, vibrant pineapple, and fresh greens, perfect for family gatherings and easy to prepare.
For the Marinade
- 1/3 cup light coconut milk (Adds creaminess and tropical flavor)
- 1/4 cup fresh pineapple juice (Enhances tropical taste)
- 1 tbsp gluten-free tamari sauce (Soy sauce alternative)
- 1 tbsp olive oil (For marinating the chicken)
- Zest of 1 lime (Adds brightness)
- 2 cloves garlic, minced (For flavor)
- 1/4 tsp onion powder
- 1/4 tsp cumin
- 1/4 tsp paprika
- 1/4 tsp ginger powder
- 1/4 tsp salt (Seasoning)
For the Salad
- 1 large chicken breast (Main protein)
- 3/4 cup fresh pineapple pieces (For sweetness)
- 6 cups chopped romaine lettuce
- 1/2 avocado, sliced (Adds creaminess)
- 1/2 medium red onion, sliced
- 1/2 cup cherry tomatoes, halved (For color)
- 1 1/2 cups cooked quinoa (For added texture)
- 1 1/2 tbsp lime juice (For dressing)
- 2 1/2 tbsp olive oil (For dressing)
- 2 tbsp finely chopped cilantro (For freshness)
- 1/2 tsp honey (Adds sweetness)
- 1/4 tsp salt
- to taste black pepper (For seasoning)
Preparation
In a bowl, combine coconut milk, pineapple juice, gluten-free tamari, lime zest, garlic, onion powder, cumin, paprika, ginger powder, salt, and olive oil. Add the chicken breast, ensuring it’s well-coated. Marinate for a minimum of 3 hours, preferably overnight.
In a jar, shake together lime juice, olive oil, cilantro, honey, salt, and black pepper. Set aside for at least 15 minutes.
Cooking
Heat a non-stick skillet over high heat and add a little olive oil. Cook the marinated chicken for about 3 minutes on each side until golden, then cover loosely with foil for about 5 minutes before slicing.
In the same skillet, sear pineapple pieces for about 1-2 minutes on each side until caramelized.
Assembly
On a platter, arrange chopped romaine, avocado slices, red onion, cherry tomatoes, and cooked quinoa. Top with sliced chicken and seared pineapple.
Drizzle the dressing over the top and serve immediately.
Serve alongside warm gluten-free bread or rice cakes. This salad is versatile; feel free to add any vegetables or substitute proteins as needed.