Tag

dessert recipes

Browsing

S'mores Rice Krispies Treats

I remember the low hum of the oven timer as my kids set the table the way they always do, lining up mismatched forks and whispering about who gets the biggest square. The kitchen smelled like toasted marshmallows and warm chocolate, the kind of smell that makes you want to sit down and slow your day. If you need a quick treat that makes everyone smile, this recipe is one of those that turns a regular night into a small celebration. If you like easy, comforting bites with big nostalgia, try pairing the mood with a savory dish like bang bang chicken crispy rice salad for a playful contrast of sweet and savory.

Why This S’mores Rice Krispies Treats Feels Like Home

S'mores Rice Krispies Treats

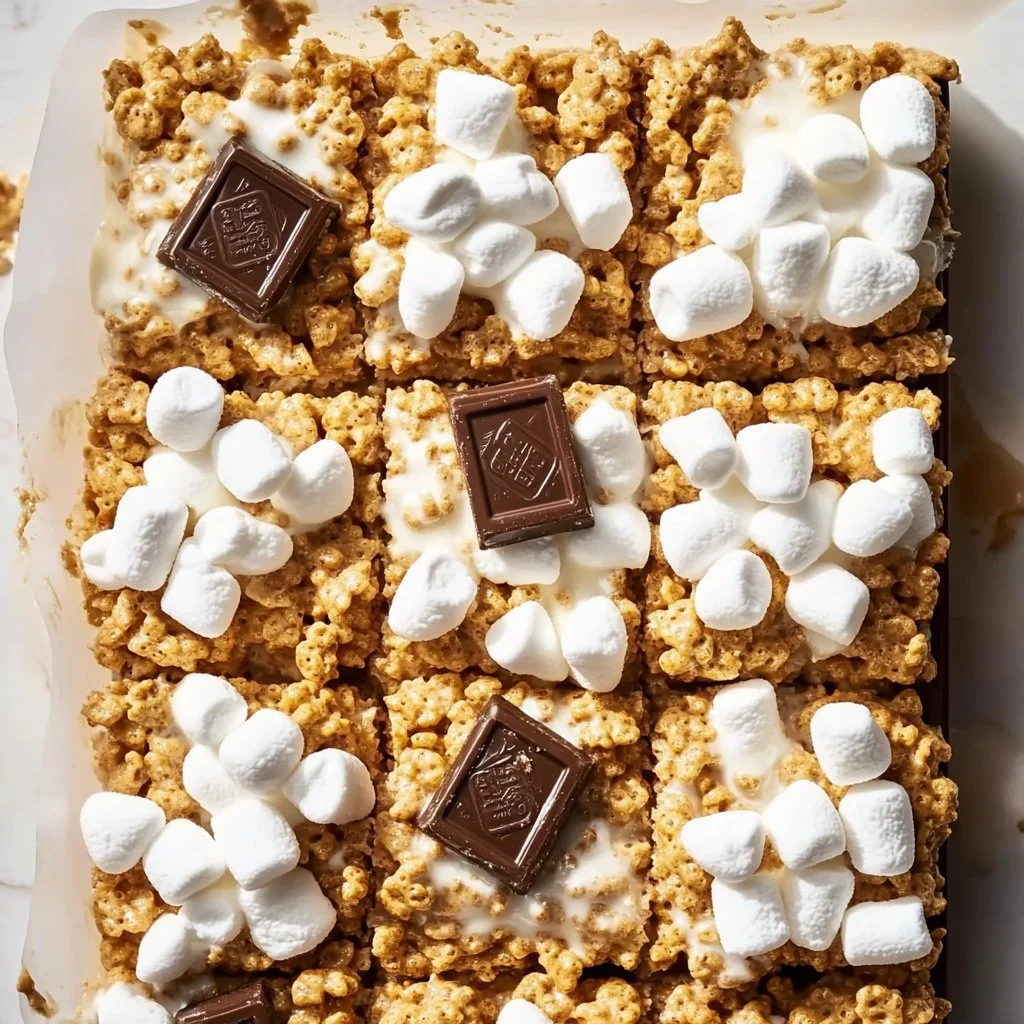
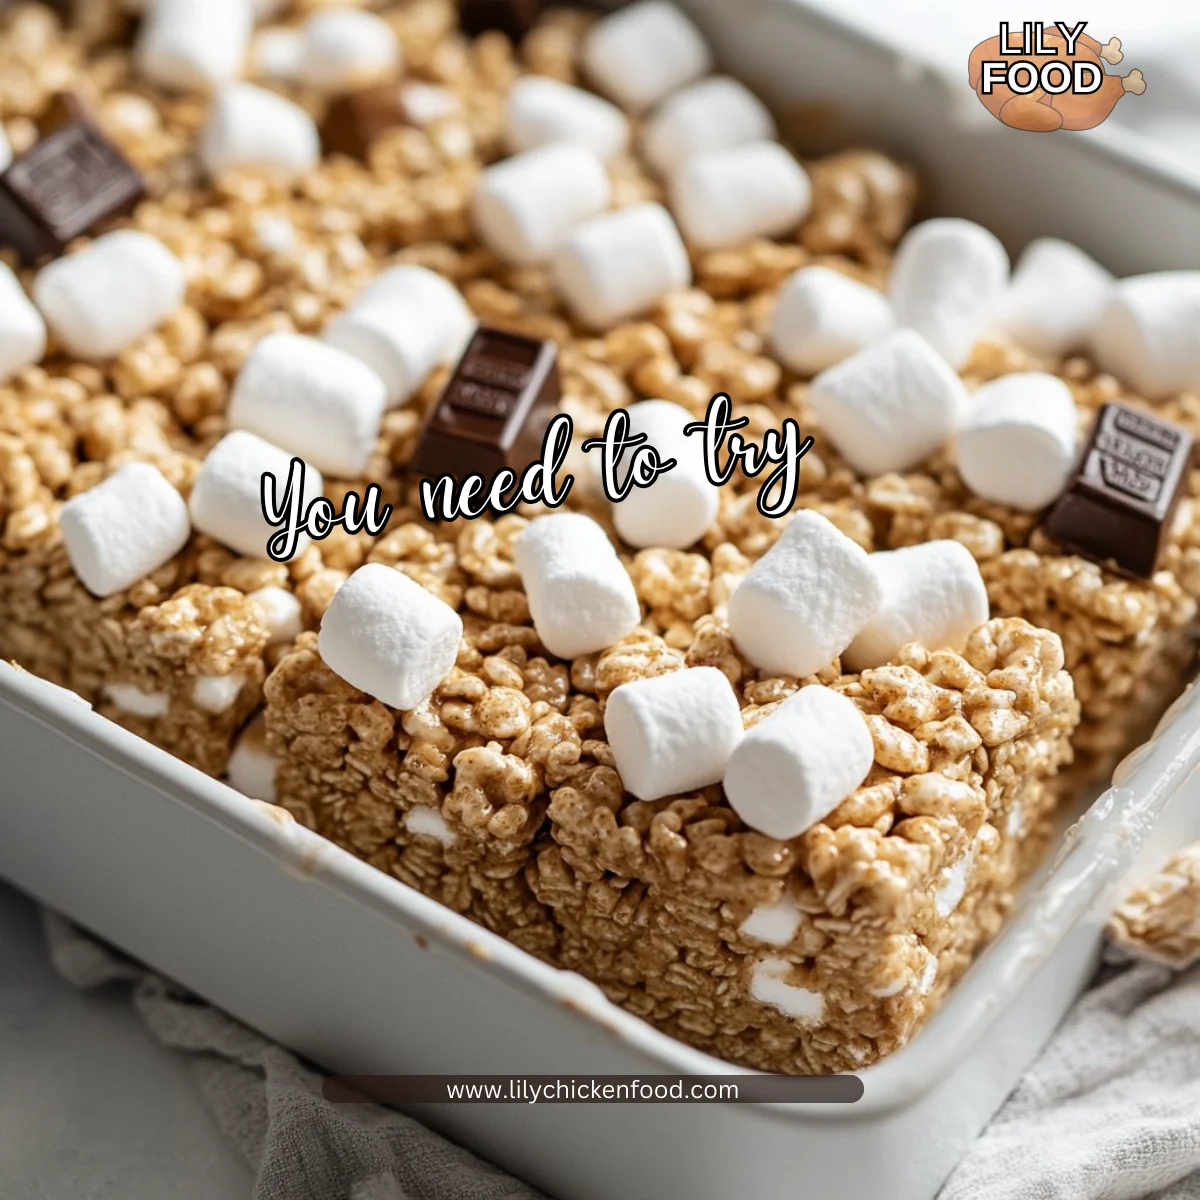
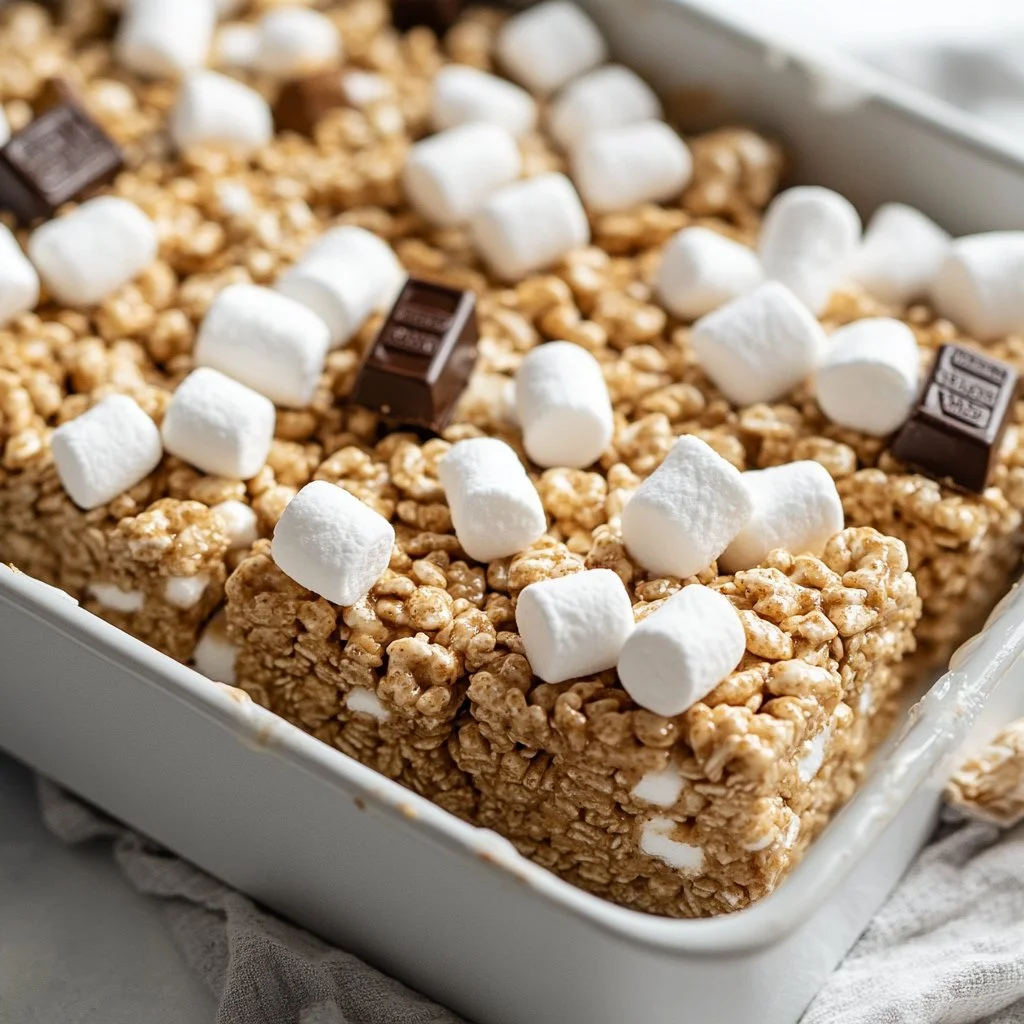
There is a simple joy in a dessert you can make with three pantry staples plus a few extras. These S’mores Rice Krispies Treats carry the campfire feel of toasted marshmallows and melty chocolate but come together on the stove in minutes.

They feel like home because they ask for little fuss and give a lot back. The texture is a playful mix of crisp cereal, gooey marshmallow, and soft, slightly melted chocolate. The color is warm and inviting: golden cereal with bright white marshmallow pockets and dark chocolate peeking through.

If you are juggling dinner and homework, you will love that you can make the base while the rest of the meal cooks. It’s comforting, quick, and a tiny bit indulgent—exactly the kind of thing I bring out to make an ordinary evening feel special. If you’re curious about other easy weeknight ideas, the bright flavors of a chicken sweet potato rice bowl pair well with these treats after a savory meal.

Why S’mores Rice Krispies Treats is Our New Family Favorite

These treats are a compromise between a childhood memory and grown-up speed. Kids love stirring the pot and pressing the cereal into the pan. Adults love that they do not need to make individual s’mores over a campfire. They keep for days, and you can make them ahead for school lunches or an impromptu neighborhood bake sale.

Because they are handheld, they are perfect for family-style sharing. You can cut them small for little hands or larger for a cozy movie night. It’s a simple recipe that becomes a family ritual: one person melts, another presses, someone else sprinkles the chocolate. It’s easier than it looks, and I promise you will enjoy both the process and the reward.

How to Make S’mores Rice Krispies Treats, The Heartwarming Way

“This is where the magic happens—when the aroma fills the kitchen and my kids come running in, asking ‘Is it ready yet?’”

Start by gathering everything and lining your pan. The real cues are texture and aroma: your marshmallow mixture should be glossy and smooth, and the cereal should look evenly coated but still airy. When you press the mixture, it should hold together without feeling dry. A light golden scent of toasted marshmallow is your green light.

Step-by-step, you will melt, stir, fold, and press. The treats set quickly, so move with pleasant speed. This process makes me think of sitting at my grandmother’s table watching her guide my hands through a simple recipe. Give it a try—you might surprise yourself with how comforting and easy it is.

Ingredients You’ll Need

6 Tablespoons salted butter
1 (12-ounce) bag jumbo marshmallows
1 teaspoon vanilla extract
4 cups Rice Krispies
2 cups Golden Grahams cereal
2 1/2 cups mini marshmallows (divided (about 1/2 of a 10-ounce bag))
4 Hershey bars (broken up into pieces)

Don’t worry if a specific cereal is missing from your pantry. Use what you have. These treats are about creativity and bringing everyone to the table. For a heartier dinner to go alongside, try something that balances sweetness with savory notes like my take on a French onion chicken rice bake.

A few friendly notes:

  • Use salted butter for a little savory contrast. It helps cut the sweetness.
  • Jumbo marshmallows melt down to create a silkier base. If you only have regular marshmallows, the recipe still works.
  • The Hershey pieces make for that classic s’mores bite. Feel free to swap to a bar you like.

Step-by-Step Directions

  1. Line a 9×9 baking dish with a parchment paper sling or butter for easier removal.
    Set aside. This makes lifting the whole slab simple and clean. A parchment sling is my go-to for easy serving.

  2. Melt butter in large saucepan over medium heat.
    Watch it closely so it doesn’t brown. You want warm, melted butter as the base.

  3. Add jumbo marshmallows to melted butter. Continue to stir and gently melt over medium heat until marshmallows are melted and smooth.
    Stir with a sturdy spatula and keep the heat steady. A few marshmallow bits are okay but aim for a silky texture.

  4. Remove from heat and stir in vanilla extract. Add Rice Krispies, Golden Grahams, and 1 1/2 cups of miniature marshmallows. Stir until cereal is evenly coated with melted marshmallow mixture.
    Work quickly so the mixture stays warm and easy to fold. If the cereal gets cold, the marshmallow will set and be harder to mix.

  5. Transfer half of the cereal mixture into the prepared pan, then sprinkle with half of the chopped Hershey’s bars and half of the remaining 1 cup of miniature marshmallows.
    Scatter the chocolate and marshmallows evenly so each bite gets a little of both. This middle layer is where the s’mores magic builds.

  6. Add remaining cereal mixture then press gently into the pan to compact slightly. Be careful not to compress the treats too much though or they will be dense and hard. Top with remaining Hershey’s bars and marshmallows.
    I press with a sheet of parchment and my hands to keep things even. A light touch keeps the treats airy and chewy.

  7. Cut into small squares to serve.
    Cut while warm for cleaner edges, or wait until fully set for neater squares. Either way, everyone will eat them fast.

Quick tips as you go:

  • Let the kids sprinkle the chocolate in step 5. It’s the fun part and they feel proud.
  • If the mixture sets too fast, warm it briefly in the pan on the cool burner, stirring gently.
  • A little browning at the edges adds flavor, just like grandma used to make.

S'mores Rice Krispies Treats

Serving S’mores Rice Krispies Treats with Love

S'mores Rice Krispies Treats

We serve these family-style, right in the center of the table on a big platter, and everyone helps themselves. Little hands love the small squares, and older kids like to stack three high for the ultimate s’mores bite. If you are creating a dessert board, add some fresh berries, a bowl of extra mini marshmallows, and a little pot of warmed caramel.

For a fuller family meal, pair the sweet treats with something bright and savory like Greek chicken and lemon rice. That balance of citrus and herb with sweet dessert feels like a well-rounded family dinner.

Sometimes we serve them after a picnic dinner, and sometimes as a special school-day treat. The ritual of cutting and passing around the pan is the point. It keeps the meal simple but memorable.

Storage & Reheat Tips (Keeping the Goodness)

If you have leftovers, store them in an airtight container at room temperature for up to three days. Put parchment between layers so the squares do not stick together. For longer storage, wrap individual squares in plastic and freeze up to two months.

To revive a slightly stale treat, heat briefly in the microwave for 6 to 10 seconds. Be careful not to overheat; the chocolate can burn. For a more even warmth, place the squares in a 300°F oven for 5 minutes, watching closely so the marshmallow does not melt away.

If you’d like meal ideas for next-day lunches, pair a square with a savory main like the healthy chicken sweet potato rice bowl for a kid-pleasing, energy-rich meal. That mix of savory and sweet keeps everyone happy.

My Kitchen Notes & Shortcuts

  • Use a silicone spatula to scrape the pot clean. It makes the marshmallow step easy and saves time on cleanup.
  • Prep your pan and the chocolate pieces while the butter melts. Little tasks before the hot stage make everything flow quicker.
  • Swap regular Rice Krispies for a gluten-free rice cereal if someone in your family needs that. The texture still sings.
  • Freeze leftover squares layered with parchment for quick grab-and-go treats. They thaw in minutes.
  • Let kids help with the pressing and topping. They love being part of the ritual and it teaches them kitchen confidence.

These are simple hacks I use when the week feels busy and I still want to make something special.

Family-Friendly Variations

  • Double Chocolate: Add cocoa powder to the melted marshmallow mixture for a deeper chocolate flavor, or fold in chocolate chips.
  • Peanut Butter Twist: Melt a few tablespoons of peanut butter with the butter for a nutty base. Press a few peanut butter cups into the top.
  • Fruit Sprinkle: Add dried cranberries or chopped dried apricots for a sweet-tart contrast. They add chew and bright flavor.
  • Salted Caramel Drizzle: Warm caramel sauce and drizzle over the finished squares for a glossy finish and extra sweetness balance.
  • Mini S’mores Bites: Press into a mini muffin tin for individual rounds. They make charming party bites and are easy to portion.

Try one as a family activity. Let everyone suggest a twist and vote on the favorite. It becomes a memory and a recipe.

FAQs About S’mores Rice Krispies Treats

S'mores Rice Krispies Treats

Can I make this ahead for a busy week?
Absolutely. Let the bars cool completely, wrap them tightly, and store at room temperature for up to three days, or freeze for longer. Making them ahead makes the evening feel planned and calm.

What can I use instead of Hershey bars?
Use any chocolate bar you love. Milk chocolate keeps the classic s’mores vibe, while dark chocolate adds richness. Chocolate chips work too; sprinkle them immediately so they melt slightly.

Why are my treats hard and dense?
You likely pressed them too firmly when packing into the pan or you melted the marshmallows too long until they were dry. Press gently so the treats stay airy and soft.

Can I make these without Golden Grahams?
Yes. Golden Grahams add a cinnamon-sweet note and texture. If you don’t have them, a similar toasted oat cereal or extra Rice Krispies works fine.

How to get clean cuts?
Chill the slab slightly, then cut with a sharp knife warmed under hot water and dried between cuts. This helps make neat edges.

One Final Thought from My Kitchen

I hope this recipe finds a little way into your family’s stories. Whether you make it for a weekday treat, a neighborhood potluck, or a rainy day activity, it’s a simple recipe that brings people together. Let the kids help, laugh at the sticky fingers, and savor the comfort of a dessert that tastes like a hug.

Conclusion

If you want another take on this classic with a similar homey feel, check out Two Peas & Their Pod’s S’mores Rice Krispie Treats for inspiration. For a chocolate-forward twist, I also enjoy Modern Honey’s S’mores Chocolate Marshmallow Rice Krispies Treats, which offers a rich variation you might like to try next time.

Until next time, happy cooking and warm moments at your table.

S'mores Rice Krispies Treats

Prep Time 10 minutes
Cook Time 10 minutes
Total Time 20 minutes
Servings 12 pieces
Calories 180
A quick and delightful treat combining toasted marshmallows, warm chocolate, and crispy cereal, perfect for family gatherings or a simple evening snack.

Ingredients

Base Ingredients

  • 6 Tablespoons salted butter (Use salted butter for a little savory contrast.)
  • 1 (12-ounce) bag jumbo marshmallows (Jumbo marshmallows melt down to create a silkier base.)
  • 1 teaspoon vanilla extract
  • 4 cups Rice Krispies (Can substitute with gluten-free rice cereal if needed.)
  • 2 cups Golden Grahams cereal (Optional; can replace with another toasted oat cereal.)
  • 2 1/2 cups mini marshmallows (divided) (About 1/2 of a 10-ounce bag.)
  • 4 Hershey bars (broken up into pieces) (Feel free to substitute with any chocolate bar you prefer.)

Instructions 

Preparation

  • Line a 9×9 baking dish with parchment paper or butter for easy removal.
  • Melt the butter in a large saucepan over medium heat, ensuring it does not brown.
  • Add jumbo marshmallows to the melted butter and stir until melted and smooth.
  • Remove from heat and stir in vanilla extract. Add Rice Krispies, Golden Grahams, and 1 1/2 cups of miniature marshmallows. Mix until evenly coated.
  • Transfer half of the cereal mixture into the prepared pan, then sprinkle with half of the chopped Hershey's bars and half of the remaining mini marshmallows.
  • Add the remaining cereal mixture and press gently into the pan. Top with remaining Hershey's bars and mini marshmallows.
  • Cut into squares to serve.

Notes

Store leftovers in an airtight container at room temperature for up to three days. Use parchment between layers to prevent sticking. For longer storage, freeze individual squares. Revive stale treats by microwaving for a few seconds.
Calories: 180kcal
Course: Dessert, Snack
Cuisine: American
Keyword: Comfort Food, Easy Dessert, Family Treat, Rice Krispies Treats, S'mores

Best Ever Strawberry Cake

I remember the afternoon the whole house smelled like strawberries and butter: my youngest dragging a chair to the counter, humming while she stirred, and my father peeking in to ask if there would be any left for his coffee. That warm, slightly sweet smell carried me straight back to a summer at my grandmother’s, when fruit seemed more like a memory than an ingredient. Today that same scent fills my kitchen with a promise — Best Ever Strawberry Cake, soft, pink, and kind of magic. If you have a spare hour, a few simple tools, and someone to slice with, give this one a try. For a quick dinner to pair with dessert night, I sometimes reach for a few easy weeknight chicken recipes that keep things simple and cheerful around here: weeknight chicken recipes.

Why This Best Ever Strawberry Cake Feels Like Home

There’s a gentle hush that comes when a cake is almost done, like everyone in the house suddenly remembers to speak softer. This Best Ever Strawberry Cake does that. It is the kind of cake that reminds you of family milestones — birthdays, slow Sunday afternoons, or rainy days when you bake to chase away the gloom.

Best Ever Strawberry Cake
The cake’s crumb is tender and moist because we balance butter, oil, and buttermilk. That combination keeps the cake cozy and soft without being heavy. The fresh strawberry puree folds in for real fruit flavor and a delicate pink hue that feels special without fuss.

I love how it comes together with tools most of us already own: mixing bowls, an electric mixer, and two 9-inch pans. It is forgiving, which is perfect when the kids want to help. And if you need to keep dinner simple before dessert, these easy chicken dinner recipes are my go-to for quick, happy plates that free me up for baking.

The Simple Magic Behind Best Ever Strawberry Cake

This cake is a lesson in flavor logic. Butter and sugar creamed together trap air that makes a light crumb. Adding oil keeps the cake moist the next day. Buttermilk adds a gentle tang that marries with strawberry sweetness. The baking powder and baking soda team up to give an even rise, while a touch of salt rounds everything out.

Texture cues to watch for: a springy top that bounces back when gently pressed, and edges that pull away slightly from the pan. Aroma clues are equally helpful — when the kitchen smells like warm strawberries and vanilla, you are nearly there.

“This is where the magic happens, when the aroma fills the kitchen and my kids come running in, asking ‘Is it ready yet?’”

How to Make Best Ever Strawberry Cake, The Heartwarming Way

Here’s a quick map before we start: we make the batter, bake two layers, whip up a strawberry buttercream, and assemble. The cake layers should be pale pink and tender. The frosting should be light, fluffy, and not too thin — you want it to hold soft peaks and smooth easily across the cake.

Step-by-step feel: mix dry, cream fat and sugar, add wet, fold in puree, bake until a toothpick comes out clean. See the little browning on the top? That’s flavor building, not a problem. Let the kids help with stirring or decorating; it’s the fun bit that becomes a memory.

Step-by-Step Directions

  1. Preheat your oven to 350°F (175°C).
    Grease and flour two 9-inch round cake pans, then line the bottoms with parchment paper.
    Make sure the pans are evenly greased so the cakes release easily.

  2. Prepare the Cake Batter:
    In a large mixing bowl, whisk together the flour, baking powder, baking soda, and salt. Set aside.
    This dry mix is your base — get it evenly combined for a consistent rise.

  3. In another large mixing bowl, use an electric mixer to cream the butter and sugar together until light and fluffy.
    Scrape the bowl as you go so nothing sits unseen at the bottom.
    A few extra beats makes a lighter cake.

  4. Add the vegetable oil and beat until combined.
    Oil keeps the cake tender for the next day.
    It’s a simple trick for staying soft without overworking the batter.

  5. Add the eggs one at a time, beating well after each addition.
    This builds structure and helps incorporate air for lift.
    Keep the mixer speed moderate so the eggs blend in smoothly.

  6. Mix in the vanilla extract and strawberry extract (if using).
    These little flavors sharpen the fruit character.
    Taste the smell — it should be fragrant and promising.

  7. Gradually add the dry ingredients to the wet ingredients, alternating with the buttermilk, beginning and ending with the dry ingredients. Mix until just combined.
    Overmixing makes a dense cake, so stop when streaks of flour disappear.
    The batter should be thick but pourable.

  8. Gently fold in the strawberry puree.
    Fold with a spatula until streaks disappear.
    The puree adds moisture and that beautiful pink color.

  9. Bake the Cakes:
    Divide the batter evenly between the prepared cake pans.
    Smooth tops lightly with a spatula for even baking.

  10. Bake in the preheated oven for 25-30 minutes, or until a toothpick inserted into the center comes out clean.
    Rotate pans halfway if your oven has hot spots.
    Avoid opening the oven too early so the cakes keep their lift.

  11. Allow the cakes to cool in the pans for 10 minutes, then turn them out onto a cooling rack to cool completely.
    The brief rest lets them set so they keep shape on the rack.
    Once cooled, they are ready for frosting.

  12. Prepare the Strawberry Frosting:
    In a large mixing bowl, use an electric mixer to beat the butter until smooth and creamy.
    Soft butter whips up light, which makes the frosting airy.

  13. Gradually add the powdered sugar, 1 cup at a time, beating well after each addition.
    This keeps the sugar from clouding the bowl and helps texture.
    Start slow so sugar blends in without a powder plume.

  14. Add the vanilla extract and salt, and beat until combined.
    Salt is a small hero here — it balances sweetness.
    Taste as you go to reach the sweetness you like.

  15. Gradually add the strawberry puree, beating until the frosting is light and fluffy.
    Add little by little to avoid making the frosting too thin.
    If it gets soft, chill for a few minutes and whip again.

  16. Assemble the Cake:
    Place one cake layer on a serving plate.
    Spread a generous layer of strawberry frosting on top.
    Press gently so frosting settles into the crumb slightly, which keeps crumbs minimal.

  17. Place the second cake layer on top and frost the top and sides of the cake with the remaining frosting.
    Smooth with a spatula or create soft swirls for a homemade look.
    Decorate with fresh strawberries, if desired.

  18. Decorate with fresh strawberries, if desired.
    I like to slice a few and fan them on top for a simple, elegant finish.
    Serve at room temperature for the best texture.

  19. Enjoy this Best Ever Strawberry Cake for any special occasion or simply as a delightful treat!
    Share with a warm cup of tea or a cool glass of milk.
    Watch the smiles — this cake has that effect.

Best Ever Strawberry Cake

Ingredients You’ll Need

1 cup fresh strawberries (pureed)
2 1/2 cups all-purpose flour
2 1/2 teaspoons baking powder
1/2 teaspoon baking soda
1/2 teaspoon salt
1/2 cup unsalted butter (softened)
1 1/2 cups granulated sugar
1/2 cup vegetable oil
4 large eggs
1 teaspoon vanilla extract
1/2 teaspoon strawberry extract (optional)
1 cup buttermilk (room temperature)

For the Strawberry Frosting:
1 cup fresh strawberries (pureed)
1 cup unsalted butter (softened)
4 cups powdered sugar
1 teaspoon vanilla extract
1/4 teaspoon salt

Friendly note: use ripe strawberries for the fullest flavor. If berries are out of season, frozen will work — thaw and strain to remove extra water. Don’t skip the buttermilk; it is the soul of the tender crumb. And if you want a lighter sugar level, try 1 1/4 cups sugar; the cake stays moist and flavorful.

Preparing Best Ever Strawberry Cake Without the Stress

My advice is to prep smart. Puree your strawberries the day before and keep them chilled. Measure dry ingredients into a container the night before and store in the pantry. When baking time comes, you’ll move quickly and with less mess.

Tools that make this easier: an electric mixer for the creaming, a silicone spatula for folding, and parchment for clean release. If your kids want to help, give them the frosting bag to decorate with. It’s the simple parts they remember.

Serving Best Ever Strawberry Cake with Love

Best Ever Strawberry Cake
We serve this cake family-style in the center of the table, on a simple platter, letting everyone cut slices as they please. Sometimes I set out extra berries, a bowl of whipped cream, and a small jug of warm chocolate for dipping. For a thinner slice on a busy weeknight, a sliver of this cake is a sweet finish.

For a picnic or outdoor meal, pair the cake with lighter dishes and salads. One of my favorite combos is a chilled salad alongside dessert; for variety I sometimes reach for a recipe from these chicken salad ideas when planning the full menu. It’s a lovely way to balance the sweetness and keep dinner balanced without extra fuss.

Storage & Reheat Tips (Keeping the Goodness)

Leftovers are a joy. Store the cake in an airtight cake carrier or container at room temperature for up to 2 days. If your kitchen is warm, keep it in the fridge for up to 4 days. Bring to room temperature before serving so the frosting softens and flavors bloom.

If you want to refresh a slice, the microwave is fine for a quick fix: 10 to 15 seconds on low works wonders. For a cakeside that tastes nearly fresh-baked, pop slices in a 325°F oven for 6-8 minutes wrapped in foil. That gentle heat brings back a bit of the original texture.

For longer storage, freeze individual slices in airtight containers for up to 2 months. Thaw overnight in the fridge and then bring to room temperature before serving.

My Kitchen Notes & Shortcuts

  • Prep the puree ahead. I often puree strawberries and freeze portions in ice cube trays. Thaw the number of cubes you need the night before.
  • Swap half the butter for oil if you want an extra moist crumb. I do this when I need an ultra-soft cake for a party.
  • Powdered sugar adjustment. If your strawberry puree is watery, add powdered sugar gradually to the frosting until it firms up.
  • Kid-friendly jobs. Give children the job of placing strawberries on top or stirring the dry ingredients. It’s safe and fun.
  • One-pan hack. Short on time? Make cupcakes with the same batter — time drops to 18-20 minutes.

Also, when I plan a meal around this cake, I sometimes lean on easy weeknight mains for simplicity. For more ideas on pairing desserts with simple dinners, try these chicken and sweet potato combos that keep the main course cozy and stress-free.

Family-Friendly Variations

  • Light version: Use 1 cup sugar and swap half the butter for 1/4 cup applesauce. The cake stays moist and kids still love it.
  • Double berry: Fold 1/2 cup chopped blueberries into the batter for a mixed fruit cake.
  • Shortcake style: Skip the frosting. Slice the cake into squares, top with whipped cream and fresh strawberries for a summer shortcake feeling.
  • Mini layers: Bake in smaller pans and stack three thin layers with strawberry jam between them for a dainty celebration cake.

These tweaks keep the heart of the recipe intact while letting you make it your family’s own.

FAQs About Best Ever Strawberry Cake

Can I make this ahead for a busy week?
Absolutely. In fact, letting it sit for an hour lets the flavors get to know each other, just like an old family recipe. For longer make-ahead, freeze the layers and frost the day you plan to serve.

How do I make the strawberry puree less watery?
Puree and then strain the puree through a fine mesh to remove excess liquid. If your puree is still thin, reduce it in a saucepan over medium heat for a few minutes until it thickens slightly.

What if I do not have buttermilk?
Mix 1 cup milk with 1 tablespoon lemon juice or vinegar and let sit for 5 minutes. It will mimic buttermilk and give that tender crumb.

Can I use powdered freeze-dried strawberries in the frosting?
Yes. Powdered freeze-dried strawberries add intense flavor without extra liquid. Start with 2 tablespoons and add more to taste.

Is this cake child-friendly for decorations?
Very much so. Kids can add sliced strawberries, sprinkles, or simple chocolate drizzle. It’s a safe and fun activity that ends with a delicious prize.

One Final Thought from My Kitchen

Thank you for spending these minutes in a little strawberry-scented corner of my kitchen. Baking this cake has been a small ritual for my family — a way to celebrate small wins and soften tough days. If you make it, I hope it fills your home with that same warmth and easy joy.

Conclusion

If you want another take on a strawberry cake idea with detailed tips and alternatives, I like the clear guidance in Sally’s Baking Addiction strawberry cake recipe. For a no-gelatin, fresh strawberry buttercream angle that’s perfect for spring, take a look at this fresh recipe for inspiration at Fresh April Flours Fresh Strawberry Cake recipe.

Best Ever Strawberry Cake

Prep Time 30 minutes
Cook Time 30 minutes
Total Time 1 hour
Servings 12 servings
Calories 350
This tender and moist strawberry cake, combined with light and creamy frosting, is perfect for any special occasion or simply as a delightful treat to enjoy with family.

Ingredients

Cake Ingredients

  • 2 1/2 cups all-purpose flour
  • 2 1/2 teaspoons baking powder
  • 1/2 teaspoon baking soda
  • 1/2 teaspoon salt
  • 1/2 cup unsalted butter (softened)
  • 1 1/2 cups granulated sugar
  • 1/2 cup vegetable oil
  • 4 large eggs
  • 1 teaspoon vanilla extract
  • 1/2 teaspoon strawberry extract (optional)
  • 1 cup buttermilk (room temperature)
  • 1 cup fresh strawberries (pureed) (For the cake.)

Frosting Ingredients

  • 1 cup unsalted butter (softened)
  • 4 cups powdered sugar
  • 1 teaspoon vanilla extract
  • 1/4 teaspoon salt
  • 1 cup fresh strawberries (pureed) (For the frosting.)

Instructions 

Preparation

  • Preheat your oven to 350°F (175°C).
  • Grease and flour two 9-inch round cake pans, then line the bottoms with parchment paper.

Make the Cake Batter

  • In a large mixing bowl, whisk together the flour, baking powder, baking soda, and salt. Set aside.
  • In another large mixing bowl, cream the butter and sugar together until light and fluffy using an electric mixer.
  • Add the vegetable oil and beat until combined.
  • Add the eggs one at a time, beating well after each addition.
  • Mix in the vanilla extract and strawberry extract (if using).
  • Gradually add the dry ingredients to the wet ingredients, alternating with the buttermilk, beginning and ending with dry ingredients. Mix until just combined.
  • Gently fold in the strawberry puree.

Bake the Cakes

  • Divide the batter evenly between the prepared cake pans and smooth the tops lightly.
  • Bake for 25-30 minutes, or until a toothpick comes out clean.
  • Allow the cakes to cool in the pans for 10 minutes, then turn them out onto a cooling rack to cool completely.

Prepare the Strawberry Frosting

  • In a large mixing bowl, beat the butter until smooth and creamy.
  • Gradually add the powdered sugar, beating well after each addition.
  • Add the vanilla extract and salt, and beat until combined.
  • Gradually add the strawberry puree, beating until the frosting is light and fluffy.

Assemble the Cake

  • Place one cake layer on a serving plate and spread a generous layer of strawberry frosting on top.
  • Place the second cake layer on top and frost the top and sides of the cake with the remaining frosting.
  • Decorate with fresh strawberries, if desired.

Notes

Store leftovers in an airtight container at room temperature for up to 2 days, or in the fridge for up to 4 days.
Calories: 350kcal
Course: Cake, Dessert
Cuisine: American
Keyword: Baking, Best Ever Cake, Family Recipe, Homemade Dessert, Strawberry Cake